DONATION DRIVE - SUPPORT MSW - DO YOUR PART TO KEEP THIS GREAT FORUM GOING!
×


omarcs
-
Posts
108 -
Joined
-
Last visited
Content Type
Profiles
Forums
Gallery
Events
Everything posted by omarcs
-
 working on new stem. I am using 3 ply plywood. I had not noticed the shape of original was so wrong. I need to do some more shape correction. I worked on ship and stem to make a good glue surface. put on a coat of paint. knighthead and bowsprit seem to be working together as I dry fit with stem. was not as hard as I thought it might be. used computer to get plans same size as old part, then traced correct shape to paper, transferred to plywood, etc. did a lot of looking at build logs. no one actually records adding stem, it seems. in one set of pictures there is no stem, then it is there and something else is being built. Magic happens. I decided since there were no pictures it could not be that hard. Omar
 -
Cutty Sark by NenadM
omarcs replied to NenadM's topic in - Build logs for subjects built 1851 - 1900
I am so sorry to hear of your losses. Through your posts we know your family and grieve with you. Omar- 4,152 replies
-
- 4
-

-
- cutty sark
- tehnodidakta
- (and 1 more)
-
The lack of strength was a concern. As you say, an opportunity to make strong enough replacements. I now know why model ships have so little balsa - it has very little strength. Every day is an adventure Thanks for the comments and references. Omar
-
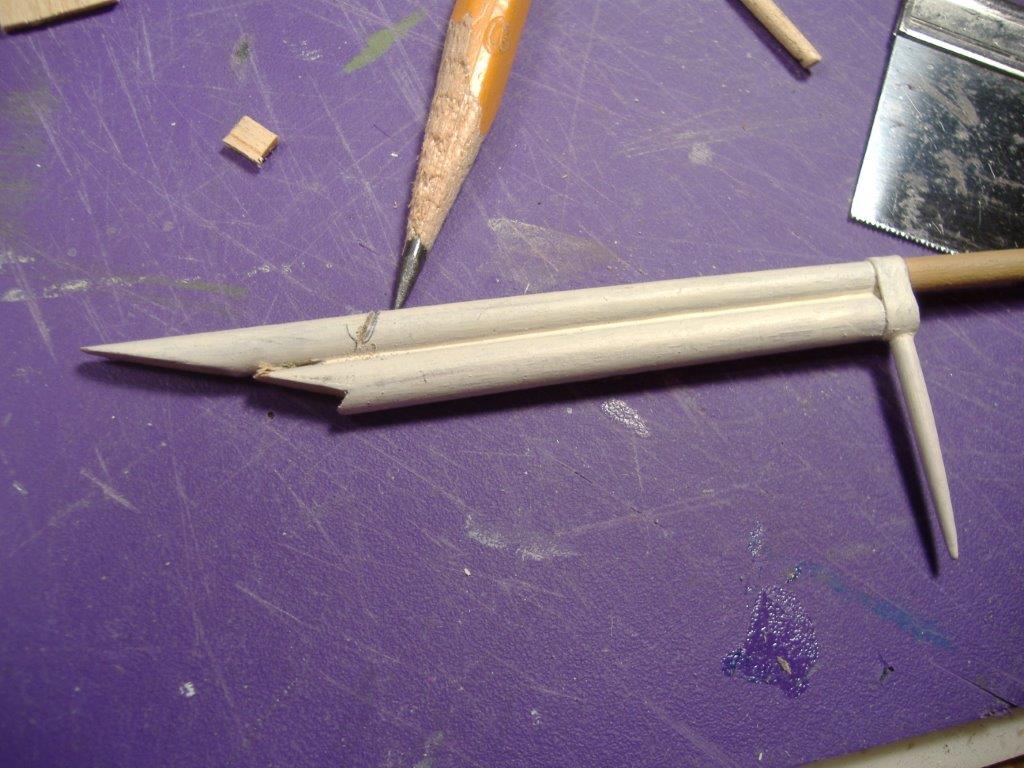
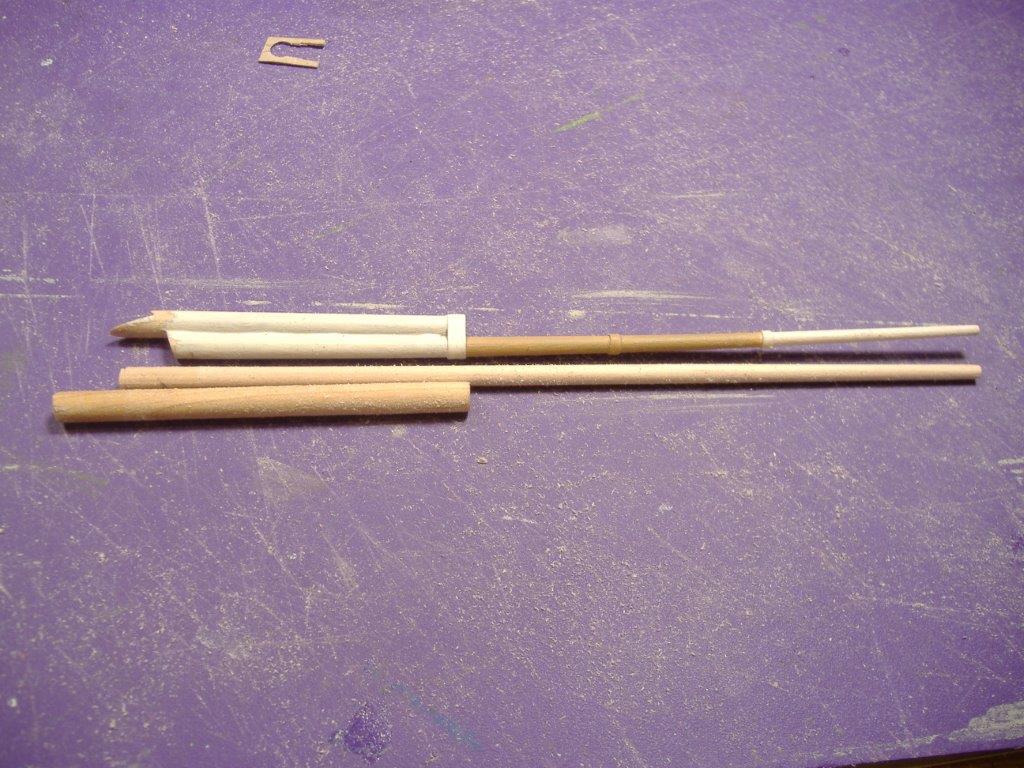
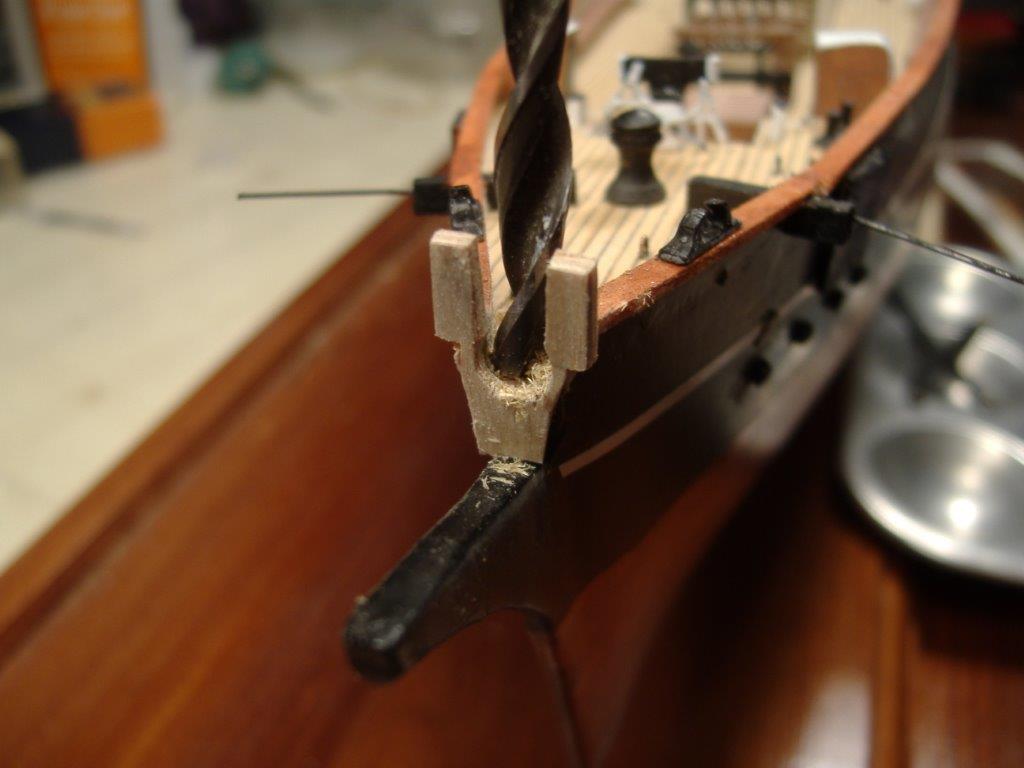
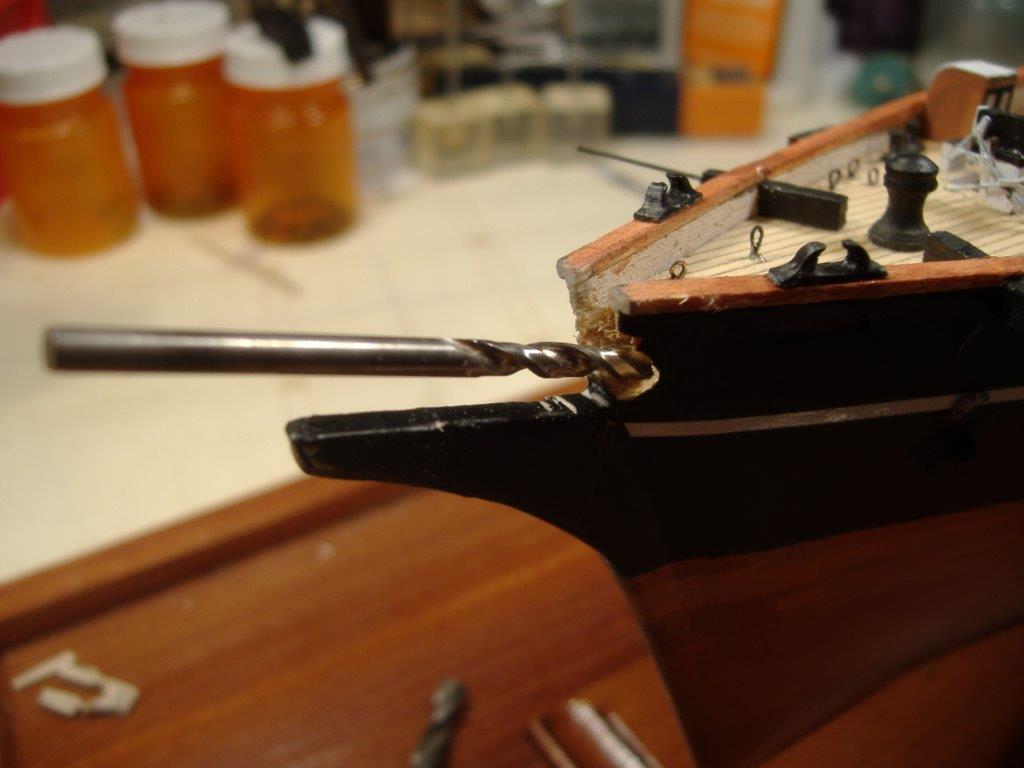
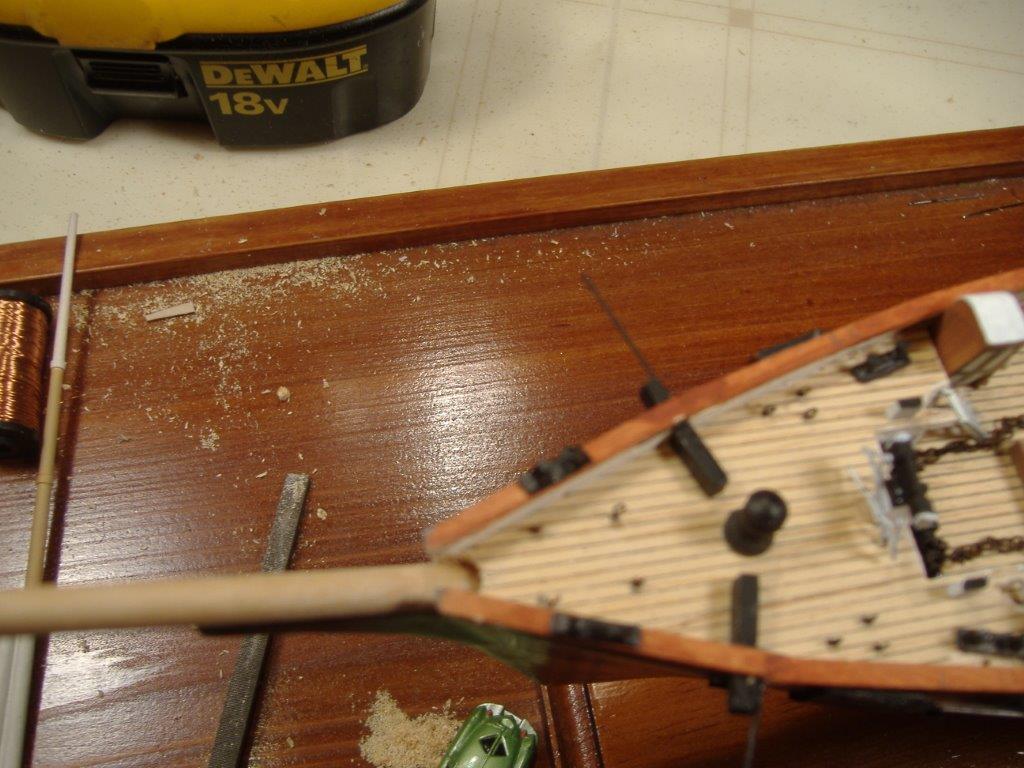
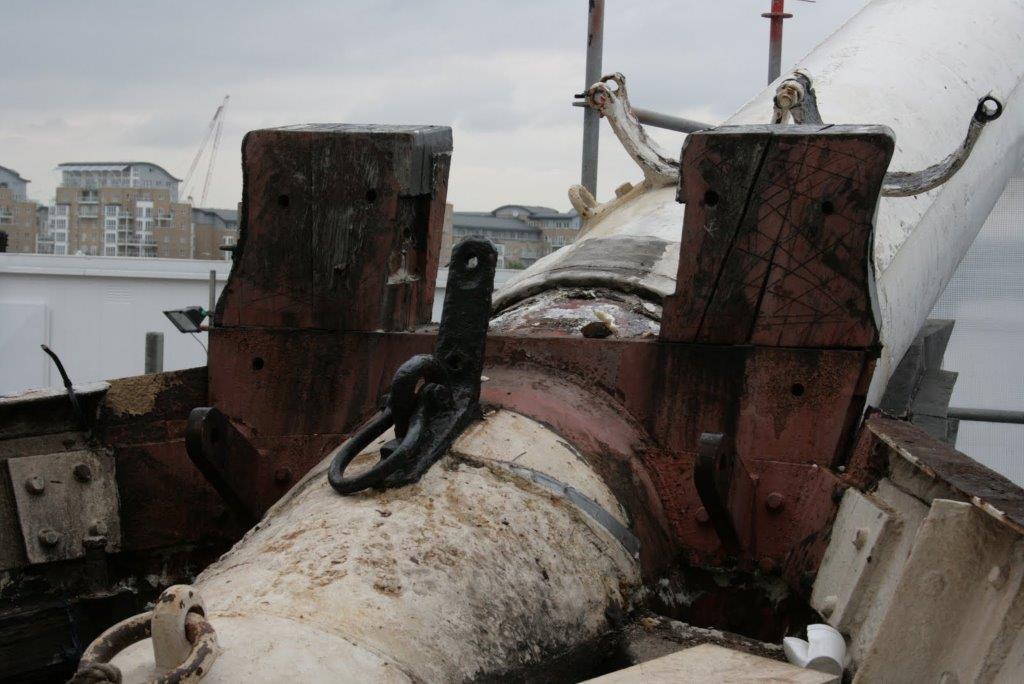
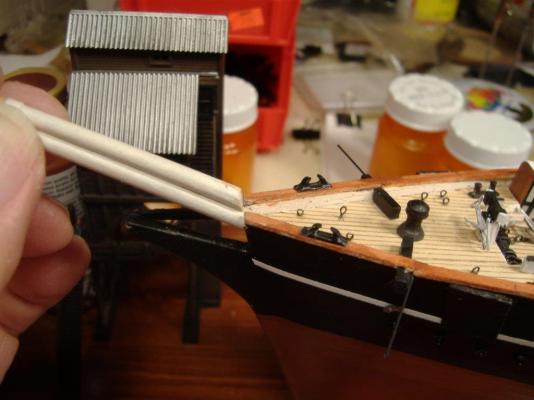
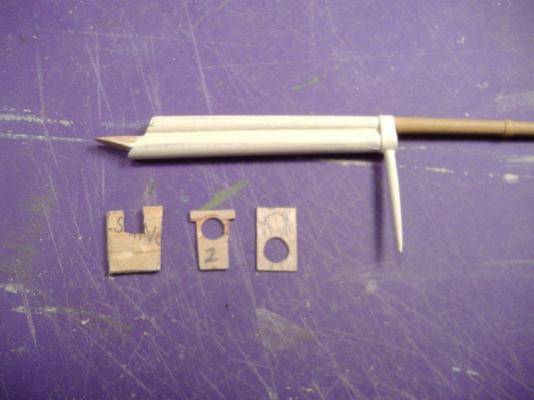
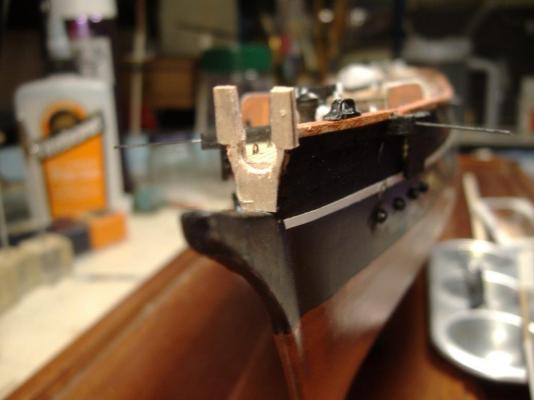
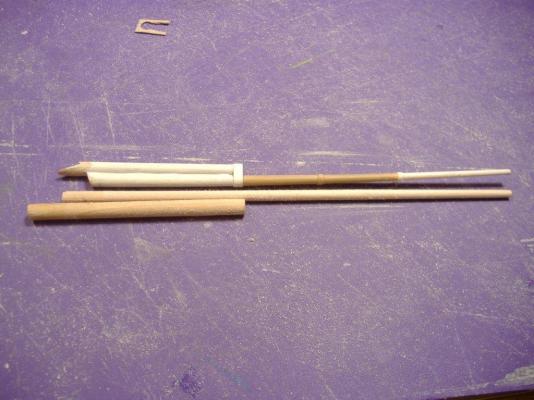
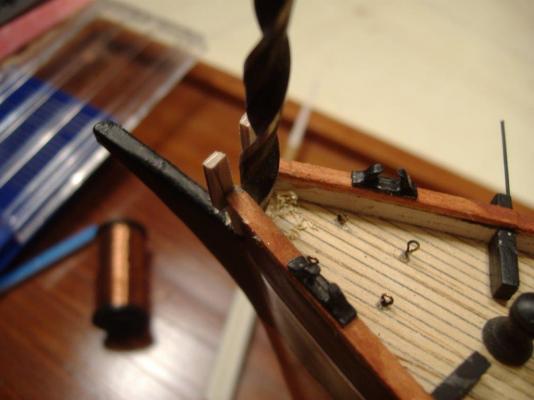
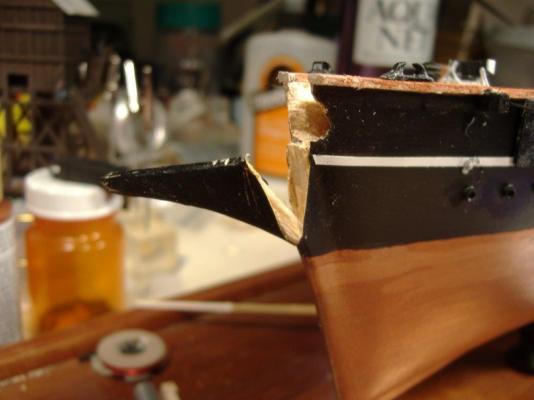
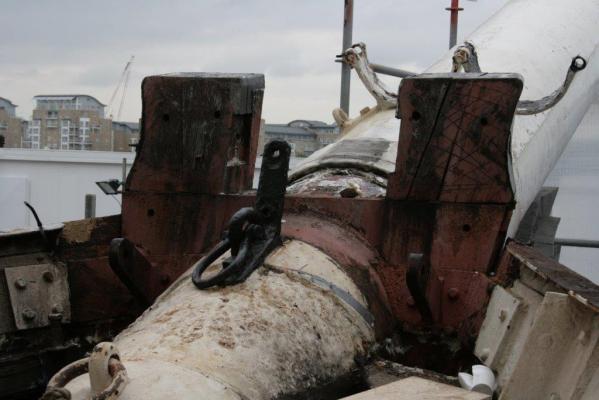
Photos The incorrect bowsprit. Trial versions of knightshead. New versions of bowsprit. Drilling for new bowsprit. looks like bowsprit will work. Knighthead is going to take new thinking. I found a photo that shows lots of metal. Perhaps that is what I should use too. I do have some very thin aluminum.


-
If we learn from our mistakes, I must be pretty smart now.
omarcs replied to skipper1947's topic in Wood ship model kits
hopefully I can make my ship look as good as yours. Omar -
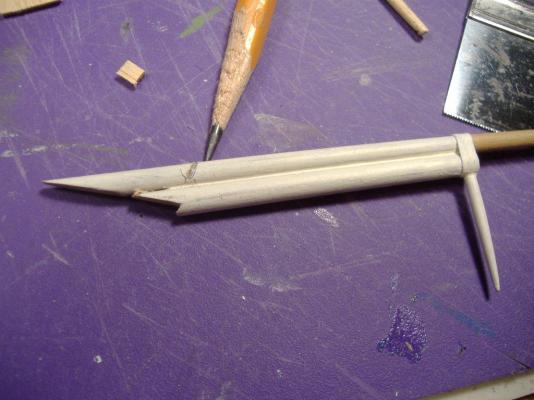
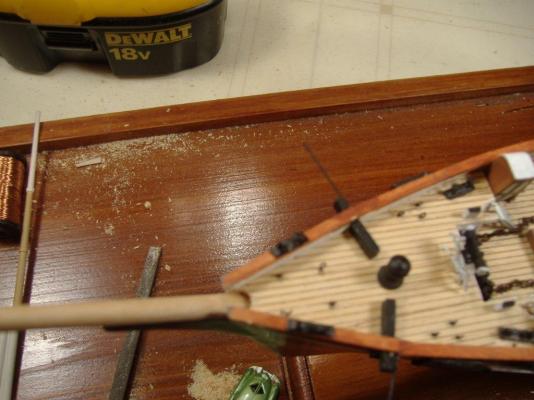
so much for the grate for the present. I decided to add the knightshead, which is coming along okay. But in the process I discovered that my bowsprit was wrong. I did a little cutting to get it better, but I have decided I would never be able to make it secure enough. Now I have a dowel chucked in my trusty drill. But with several grades of sandpaper the dowel is tapering nicely. Now I will be able to add chains around bowsprit, and make all the little pieces to hold the jib boom plus insert the dowel into the hull securely. Pictures are being taken and will be posted. Omar
-
Cutty Sark by NenadM
omarcs replied to NenadM's topic in - Build logs for subjects built 1851 - 1900
I am glad to read that the ladies in your life are getting much better. Hard to focus when our loved ones are not well. I have seen model railroaders make very small chain by using small wire and then using pliers to make regular groves that look like chain links. Traincat model sales has 52 links to inch, and 72 links per inch Bluejacket ship crafters has chain too- 4,152 replies
-
- 3
-
-
- cutty sark
- tehnodidakta
- (and 1 more)
-
I was not aware ships were built without making mistakes. Every build I have read has references to mistakes made and corrected. Seems to be the universal method of getting better. Look at Nenad's first postings to what he is doing now. He has a beautiful ship with many parts redone several times. Each correction moves us closer to the modeler we want to be. Press on!!! Omar
- 79 replies
-
- 6
-
-
- cutty sark
- airfix
- (and 1 more)
-
Galleon by tuciship
omarcs replied to tuciship's topic in - Build logs for subjects built 1501 - 1750
Excellent modeling. I had to stop and go back to the beginning to grasp you had made the hull from blocks of wood. A very nice ship. -
Waay too early to abandon ship! Looking forward to your build. Each individual's journey helps all of us move forward. Welcome to the league of Cutty Sark builders! omar
- 79 replies
-
- 1
-
-
- cutty sark
- airfix
- (and 1 more)
-
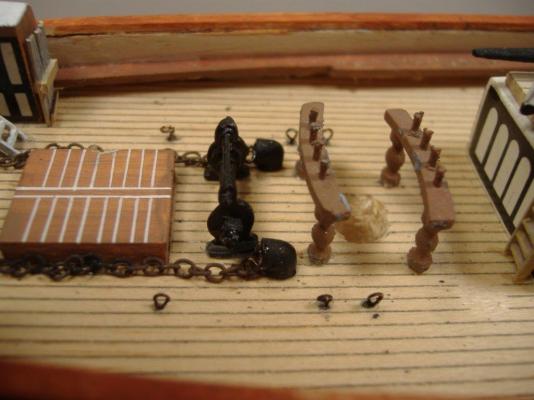
found photos of hatch and grating. Grating should be interesting at 1:150. An observation, not whining. I used up my time I had set aside this evening for the knightshead looking for information on the bowsprit. I have discovered the Scientific plans had me build a bowsprit jiboom that are maybe 90% accurate. But, this is not bad since it will allow me to securely anchor the assembly. and I still have some time for the knightshead. Omar
-
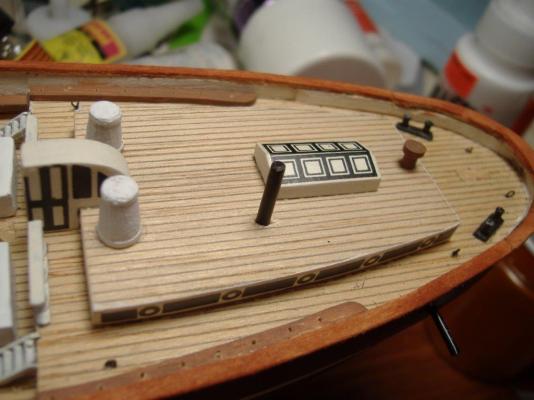
I have decided to install the grate by the wheel housing next. The kit comes with an oversize decal, which just won't do. I cannot tell from the plans if the grate is flush with the deck. Guess I will need to go hunting examples. Also, Campbell shows a hatch on the starboard side which I can find no where else. I think it will be harder to figure out, folks don't take many photos of the deck. Omar
-
Cutty Sark by NenadM
omarcs replied to NenadM's topic in - Build logs for subjects built 1851 - 1900
Aw, the sweet smell of "do over". Nenad, you are working on the same areas that I need to work. All the comments are rapidly changing the sequence in which I will do work. I think I should redo part of the bowsprit as built according to the kit. It is only glued to the deck. I wonder whether to drill a hole into the deck for the bowsprit, or glue with tiny screw through bowsprit into deck. As always, your comments and continuous search for a better way to create an item provoke me to better things. Omar- 4,152 replies
-
- 1
-
-
- cutty sark
- tehnodidakta
- (and 1 more)
-
Looks very interesting!
-
Cutty Sark by NenadM
omarcs replied to NenadM's topic in - Build logs for subjects built 1851 - 1900
You come up with great ideas. I really like using them!! I have yet to do bow and stern numbers. Your painting jig looks perfect. I have been wondering how to do this, and now the solution. Omar- 4,152 replies
-
- 4
-
-
- cutty sark
- tehnodidakta
- (and 1 more)
-
then I found my second list and now I have 35. I have decided to do stern pin rails next.
-
I examined the Campbell plans and made a list of things that need to be done to finish deck. Only 18 line items.
-
photos of eyebolts installed. I had not considered that the eye bolts would not get any bigger when I went to install them. One pointy tweezers to pick them up and a flat one to hold while inserting in hole. Certainly more likely to hold than glue to top of deck.

-
I needed to paint my eyebolts before installing them. I decided to count them since I had to handle each one - I have 113. Guess that should hold me for a while. Next is to install the deck ones. I am using the Revell plans for location. The other plans I have been using were not clear enough to use. No two agreed. Oh, wait, that is expected, isn't it.
-
Cutty Sark by Keith B
omarcs replied to Keith B's topic in - Build logs for subjects built 1851 - 1900
That tape idea looks simple enough for me to consider it. All I have to do is take my ship off it's display base and do it. Now is the time, I guess, since the masts are not in. Sigh. A year ago I thought the masts were my next step. Silly me. Omar -
Not much work lately. More eye bolts - too easy to do, so many to make. I did get the billboard and port holes on starboard side. Also pulled cat whiskers and cut new ones from steel rod rather that pins that plans suggested in plans. One of the things seldom mentioned is the sequence of putting items on the hull. That aspect stalls me - what to work on now, what can I attach and not have to remove to attach something that is blocked. sigh . Also been working on my 1967 Plymouth Barracuda. It too has parts to replace because they are broken or too rusted to salvage, Things to take apart, repair, reassemble, and stuff to buy to move forward. Working on the Cutty Sark has encouraged me in working on my other hobbies, Barracuda and model trains. If I can make a part for CS I certainly make parts for car and trains.
-
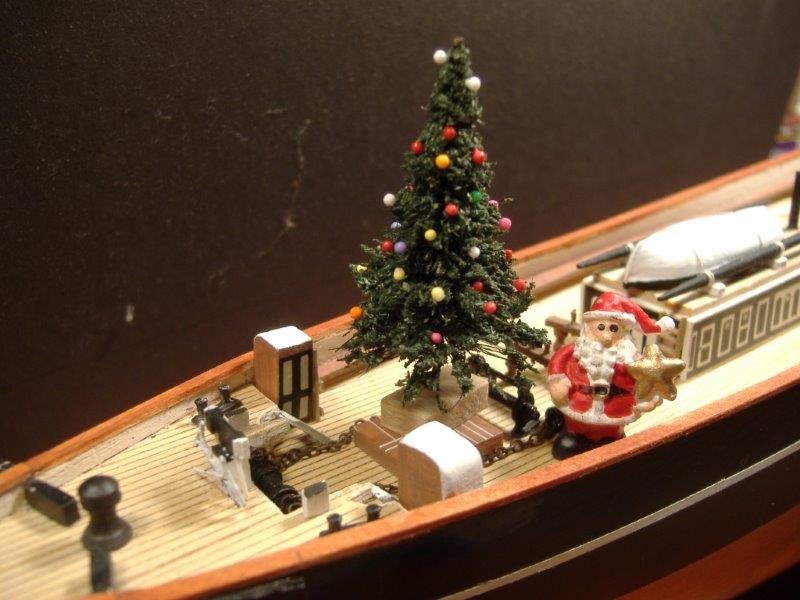
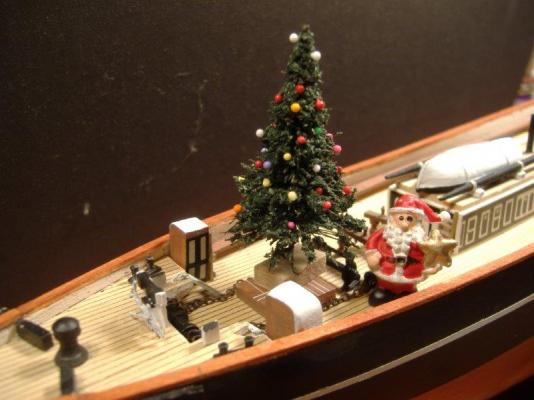
Merry Christmas! I want to thank all of you for a year of learning and encouragement. My ship is better because of your willingness to share your successes and your road to success. Seeing what it takes to make a really good model encouraged me to step up and attempt and succeed in making a model that is much better than I thought I was capable. Omar
-
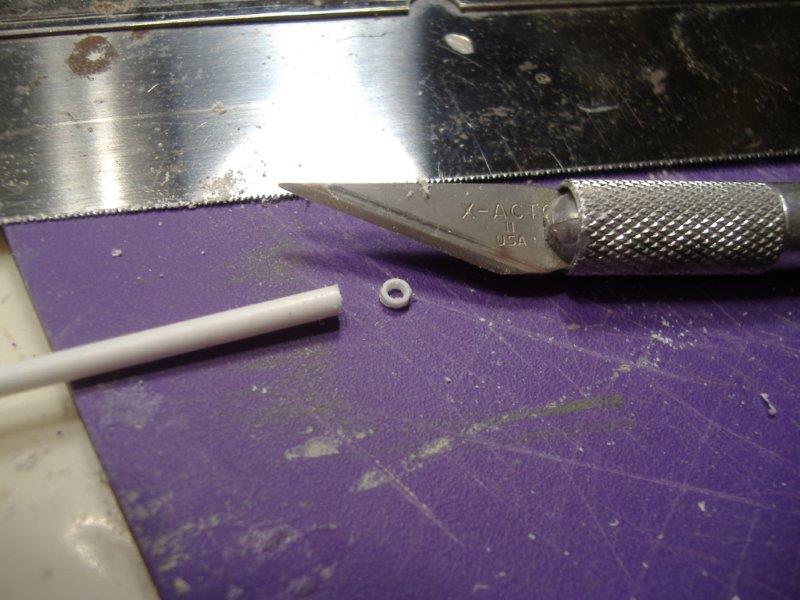
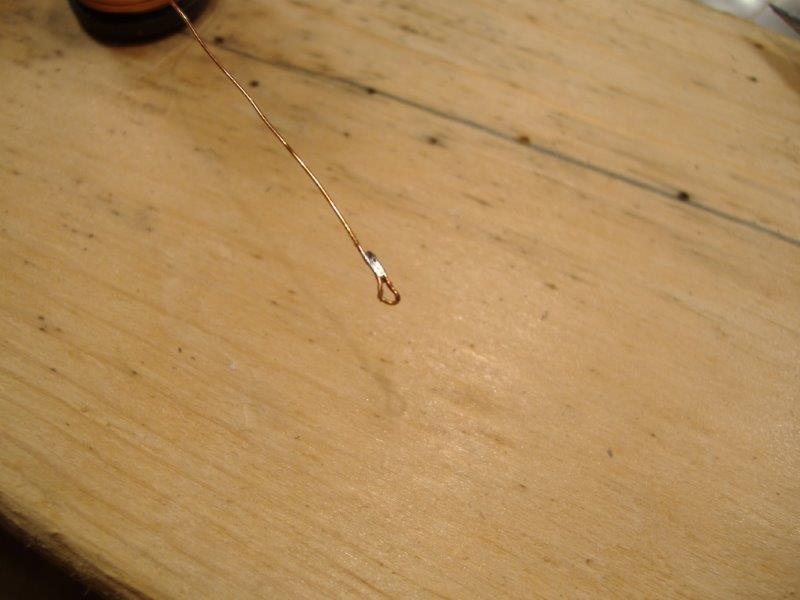
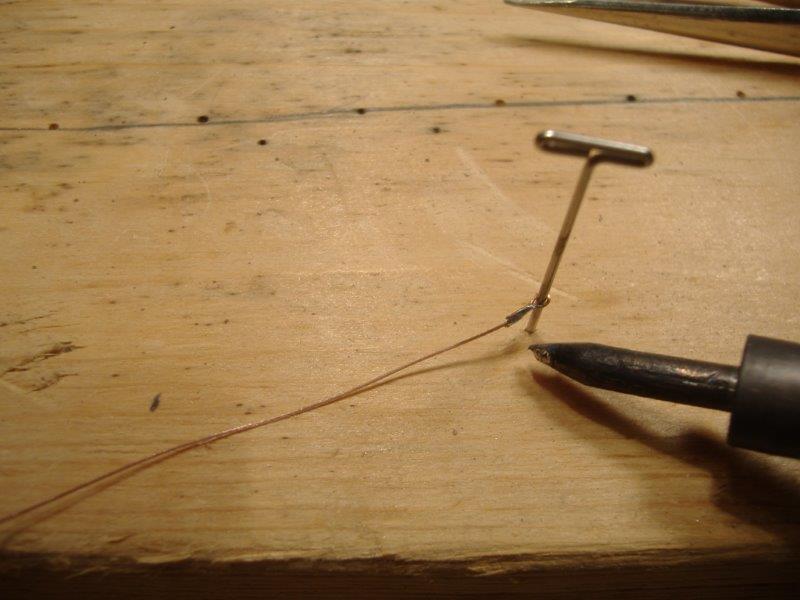
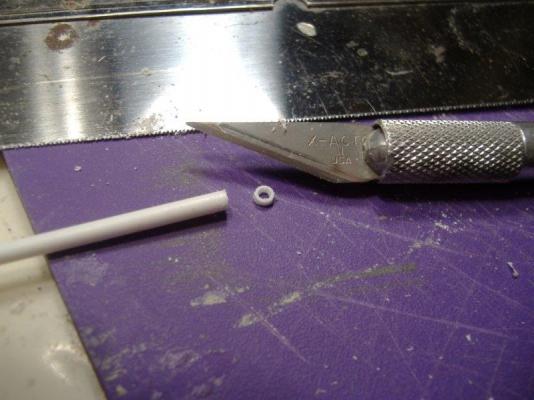
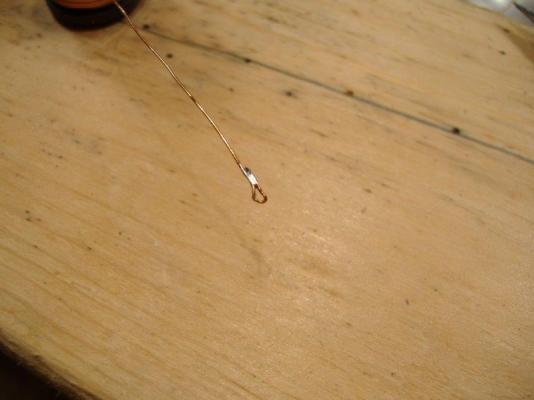
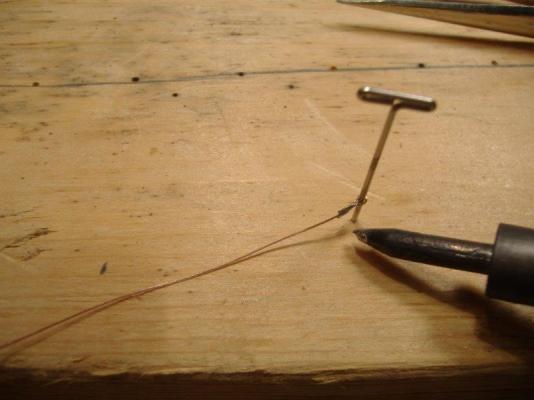
Some pictures of port hole cut from styrene and making eyebolts from bell wire. I made 40 some eyebolts for deck. I will need to make more for masts.
-
I am really enjoying seeing your methodology and the various tools you are using. The how you are going about the construction helps me realize that I too should be able to make items for my ship. And occasionally you make a piece like I have done which is a big deal to me. Thanks for sharing! Omar
-
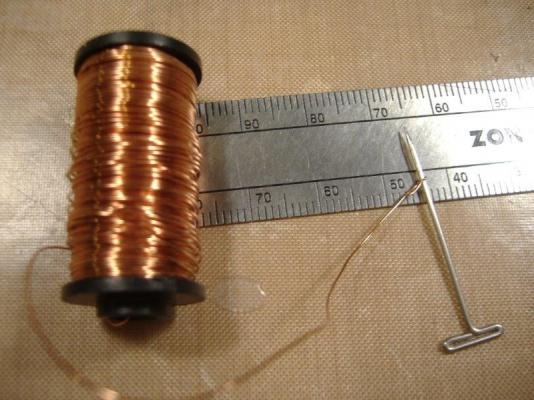
No pictures yet, but I have added 4 portholes, and 1 anchor billboard to port side. Also made a bunch of 1mm eyebolts using Nenad's method. I found my T pins are 1 mm and the wire I used for the deadeyes bends very easily around the t-pin. A little solder - woo hoo. I also sat down with the Scientific plans and a download of the Revell 1:96 CS plans and marked all the eye bolt locations on the hull. I will go back later and do the same for masts. I tried doing the eyebolt locations with Campbell's, Artesian, Sergal, and Billings with out much luck. Because Revell has all the parts to glue in, I just had to look for the eyebolts numbers.