MORE HANDBOOKS ARE ON THEIR WAY! We will let you know when they get here.
×


mar3kl
-
Posts
178 -
Joined
-
Last visited
Content Type
Profiles
Forums
Gallery
Events
Everything posted by mar3kl
-
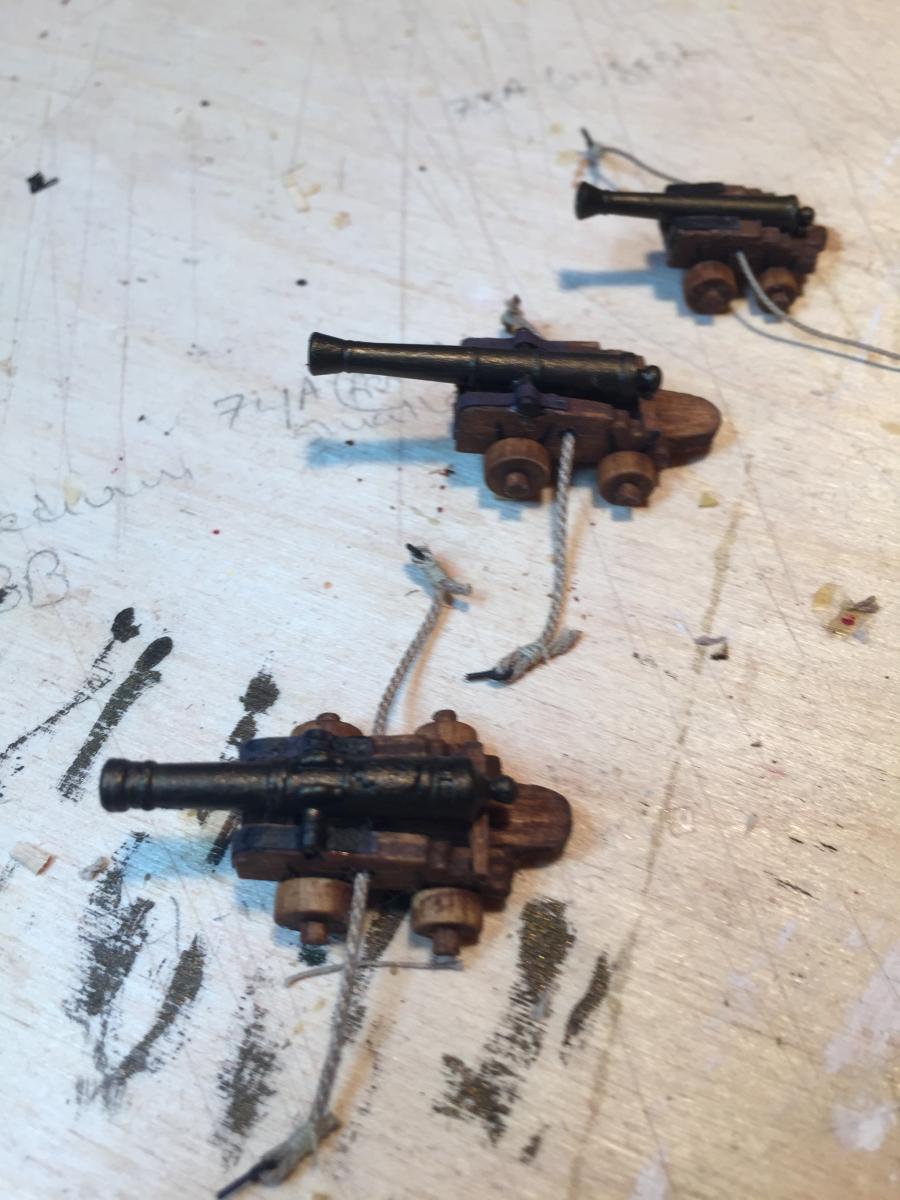
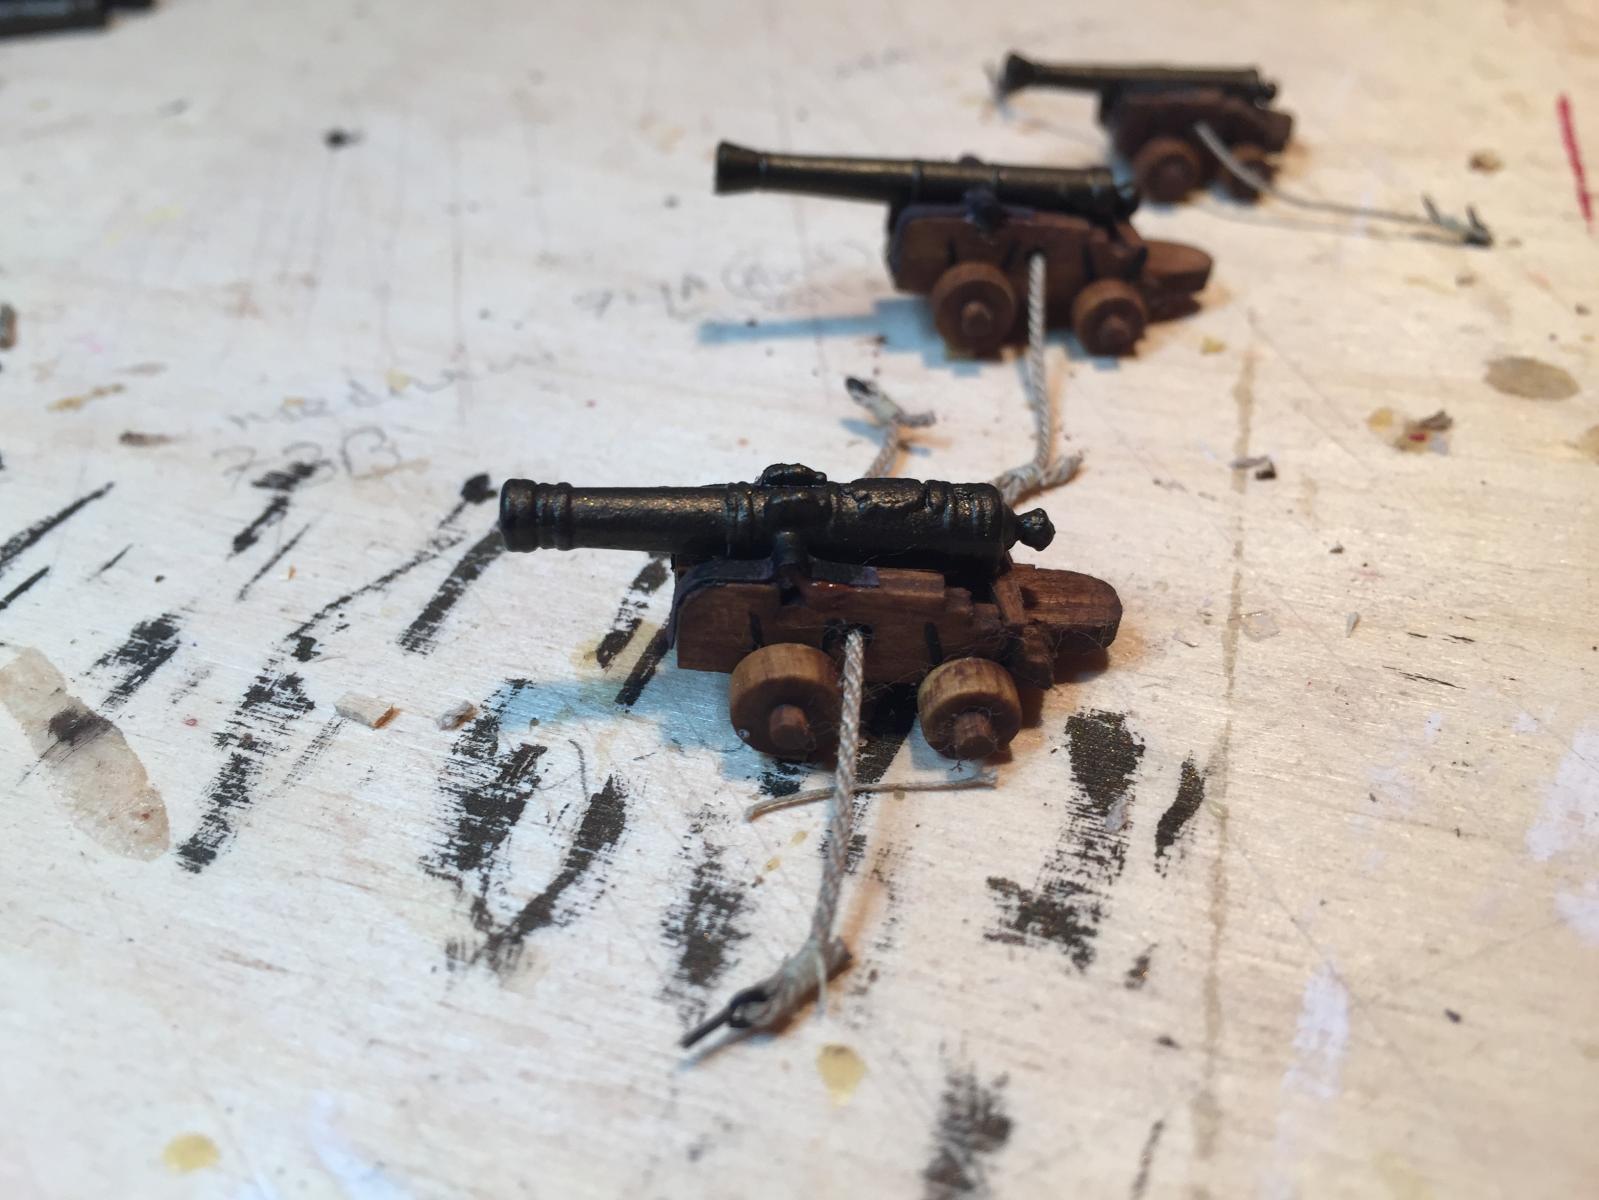
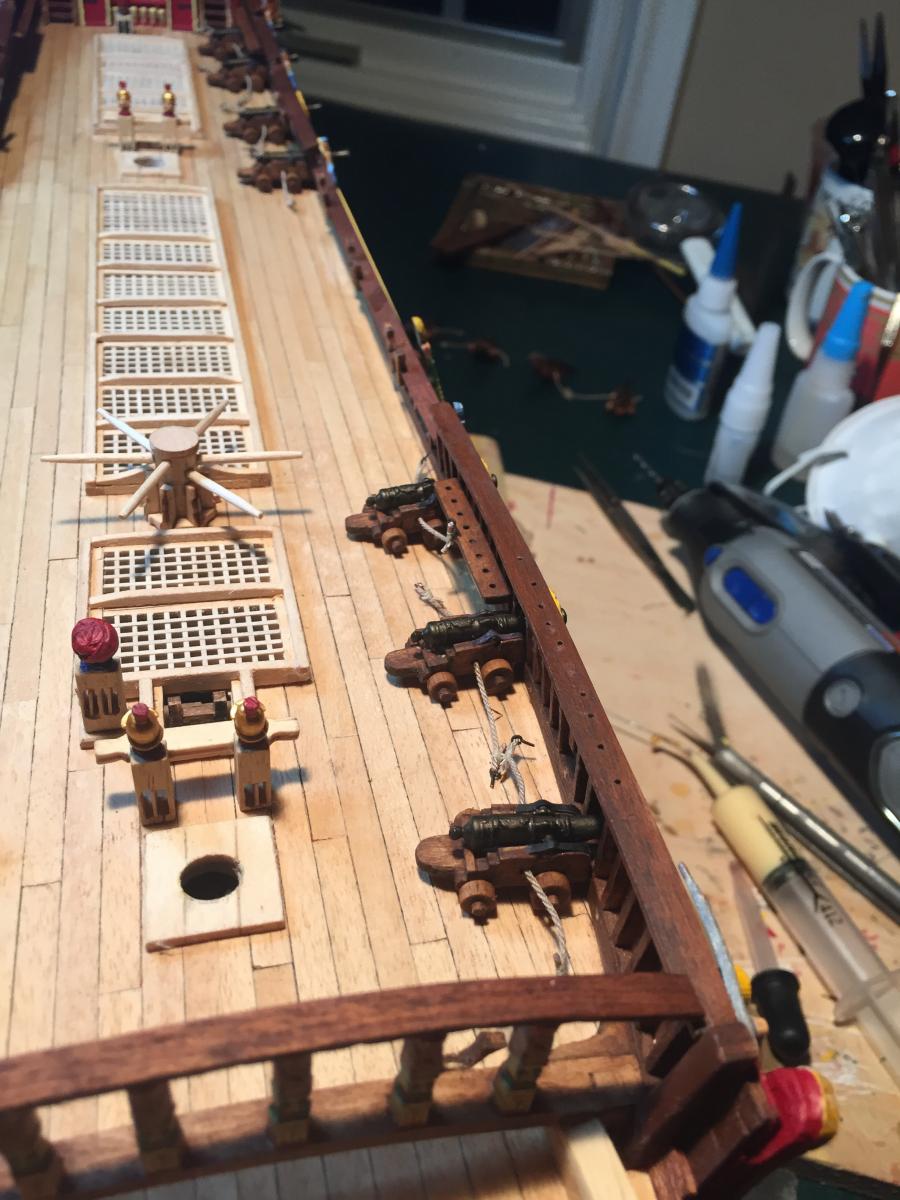
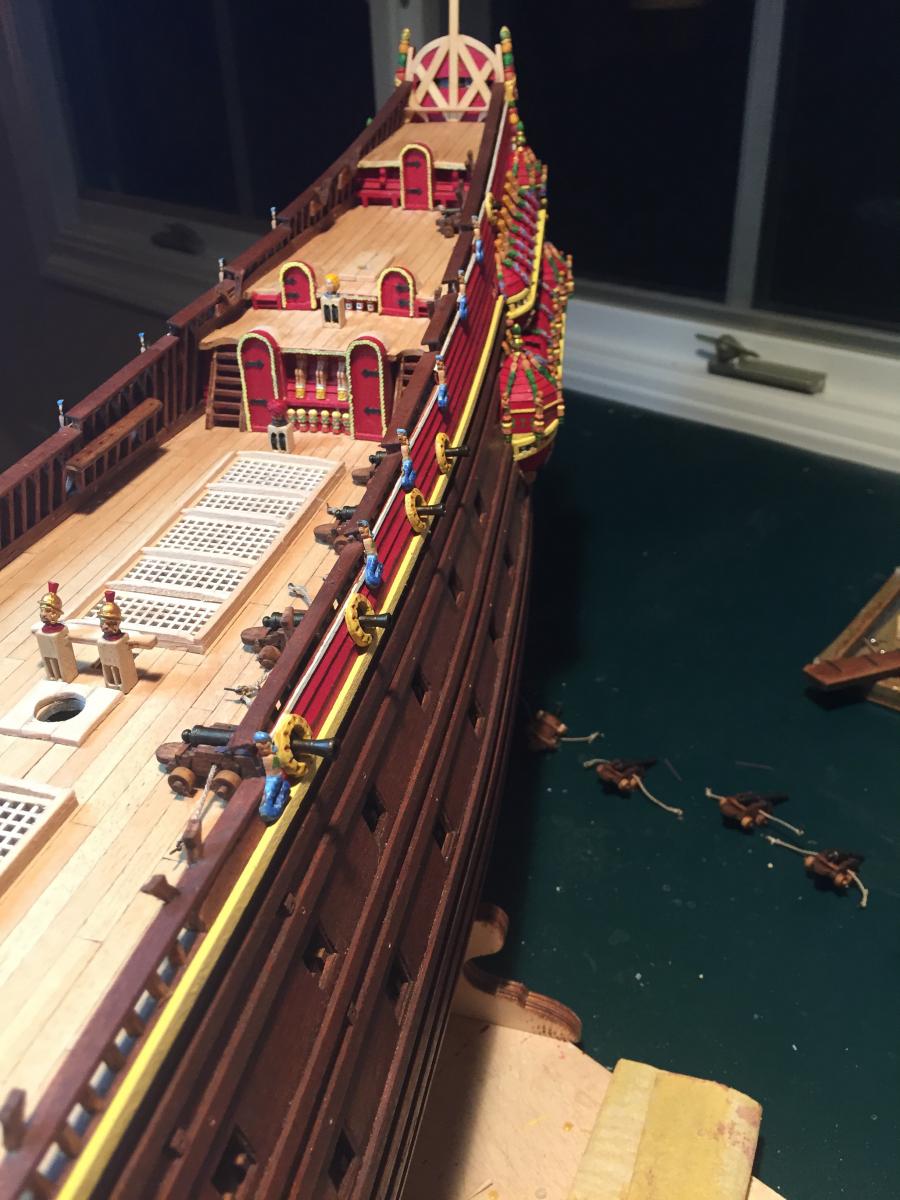
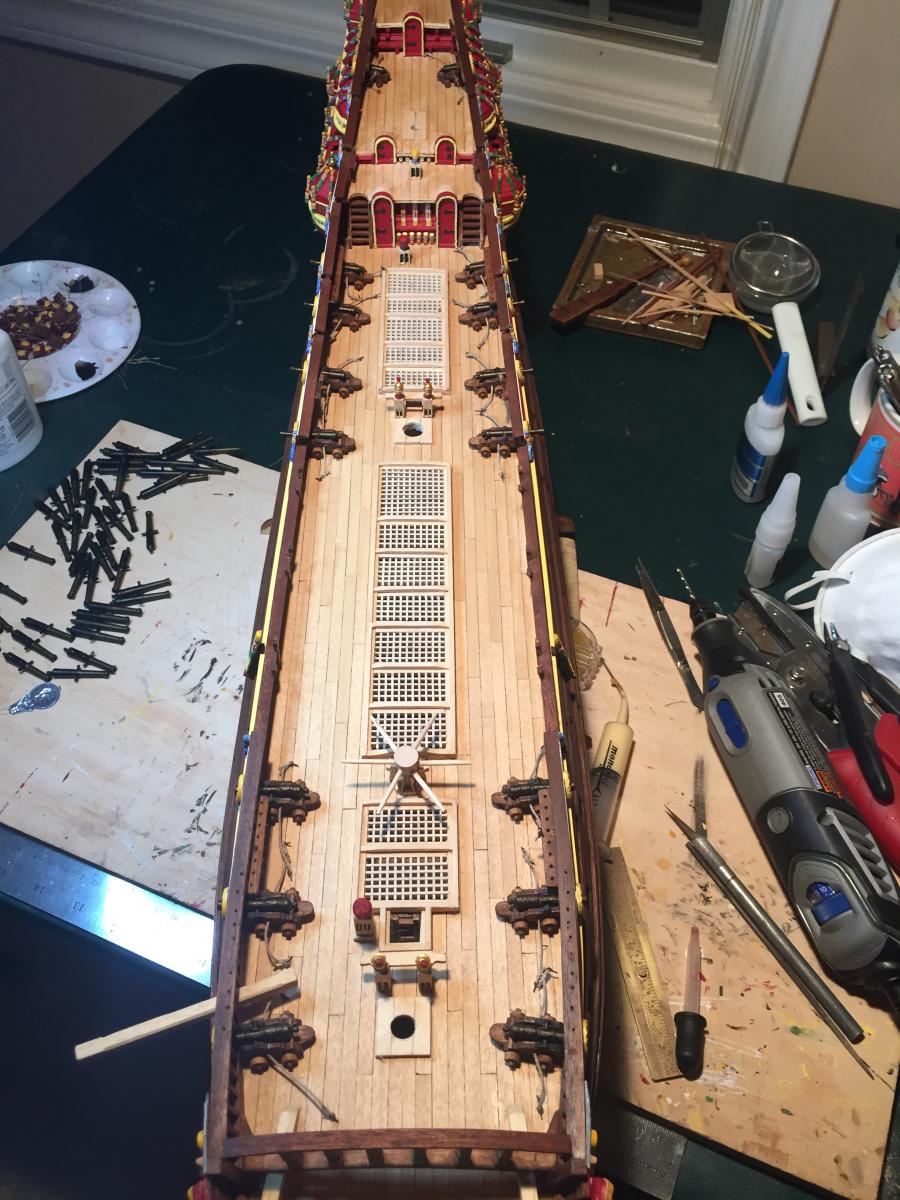
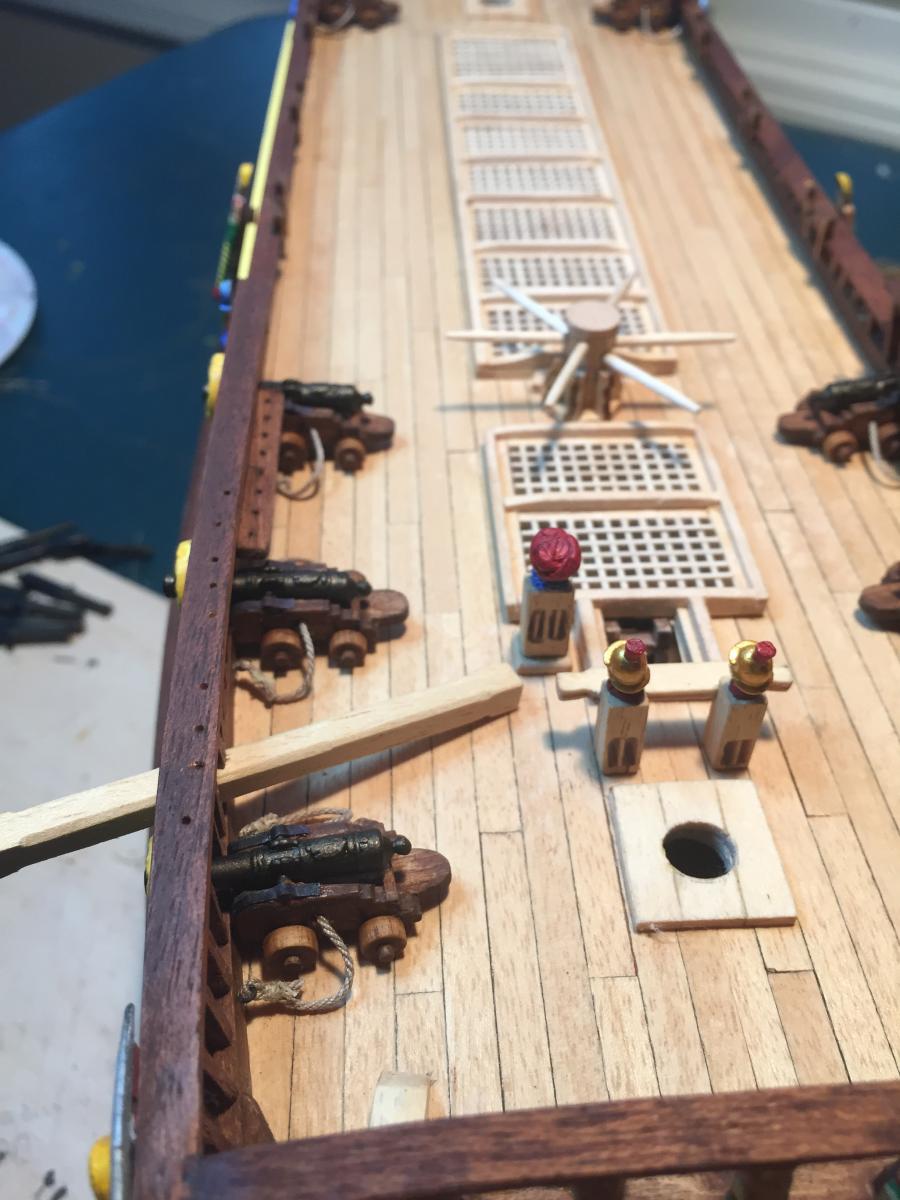
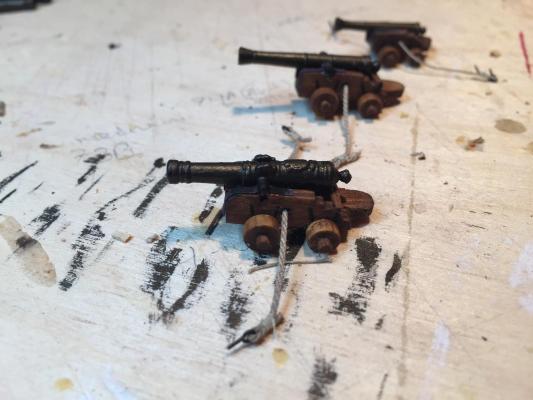
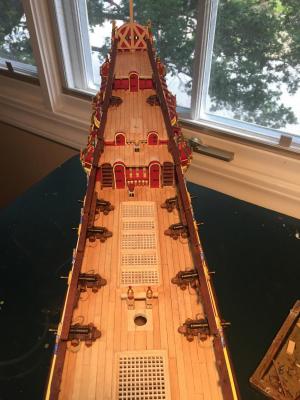
Here the carriages have been stained. I ended up painting black lines in place of using wood or black paper to simulate the iron straps securing the truck axles. Even the smallest veneer was too thick, and split badly, and it was hard to cut paper that thinly. Cannon mounted to their carriages, breeching ropes seized to ring bolts. You can see the three sizes of gun here. The ones to the rear are the 1lb falconets, on scratched carriages. I've also trimmed the axles down to size. The cannon mounted on the deck, with breech rope ring bolts still to be attached. Most of them fit perfectly, the cannon in the exact center of the round port. A couple needed slight shimming under the trucks to get them to the right height. Then I drilled small holes in the waterways to hold the ring bolts. I didn't dare drill into the false ribs along the bulwarks because I thought they might split. Finally I clipped the ring bolt ends fairly short and stuffed them into their holes. Here are several views of the result. Came out pretty well, I think.


- 249 replies
-
- 4
-

-
- billing boats
- vasa
- (and 1 more)
-
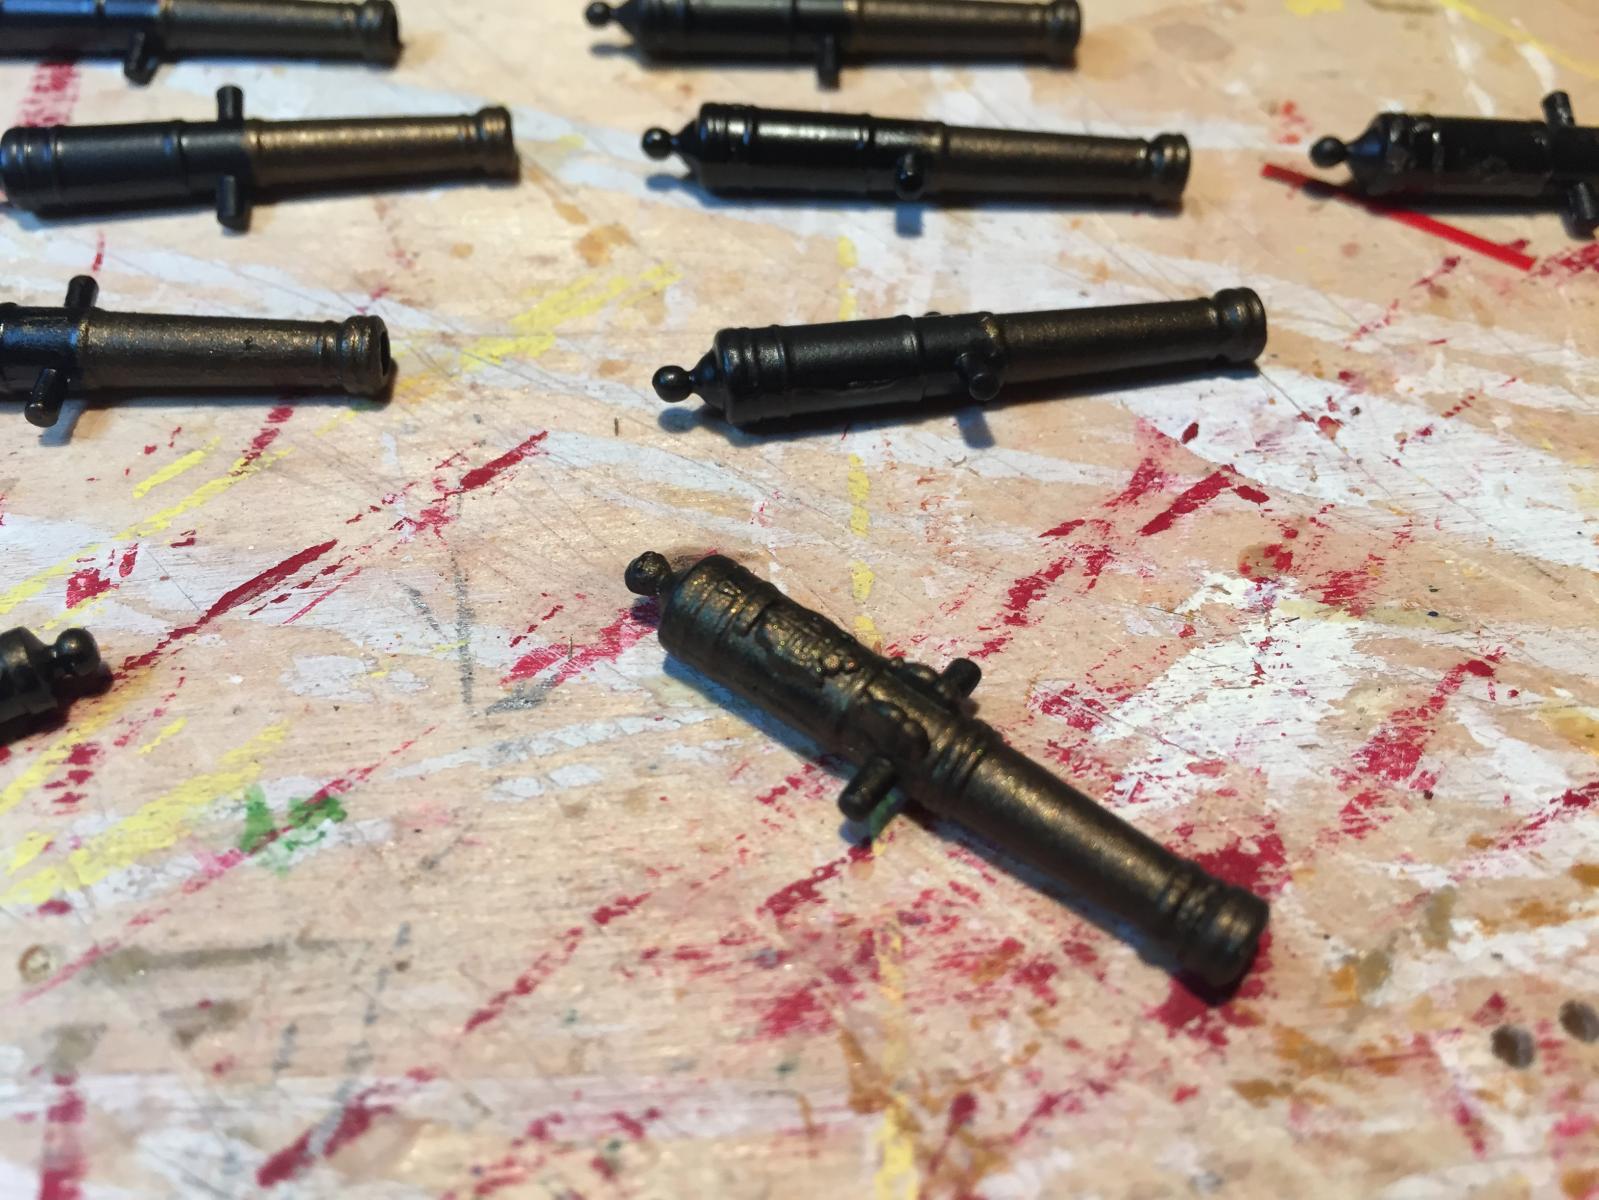
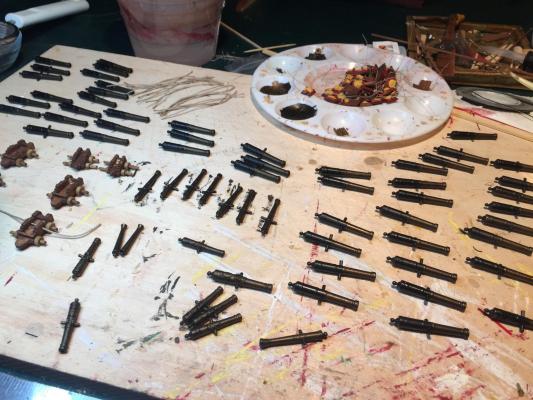
The kit comes with four kinds of cannon. Two are false cannon designed for use with the kit's badly flawed gunport design. The third kind is a large full size cannon for the weather deck; the fourth is a smaller full size cannon for the 2 quarterdeck falconets. The original ship had a number of different kinds of weather deck cannon - falconets, culverins, howitzers of different sorts. There's no way to procure these different guns in the right shape, and I don't have the skills to 3d model and print them, or carve masters and make molds from them for casting. What I'd really like is if the Vasamuseet provided 3d scans of the guns so hobbyists like us could 3d print them, but that's another story. In any case, I used a single size of Amati full size cannon for the gun deck guns - I'll slide them through the ports and drop them onto the false cannon I made. For the weather deck guns, I used the two small kit cannon and 8 of the remaining 14 larger kit cannon, since they didn't look too bad as culverins. For the remaining six large-bore guns I found some Amati cannon with nice decoration on them. I figured three different kinds was enough and left it there. The kit cannon are brass, and the Amati cannon are finished in copper. I sprayed all of them flat black and then mixed up some bronze paint to finish them with. Results below:

- 249 replies
-
- 3
-
-
- billing boats
- vasa
- (and 1 more)
-
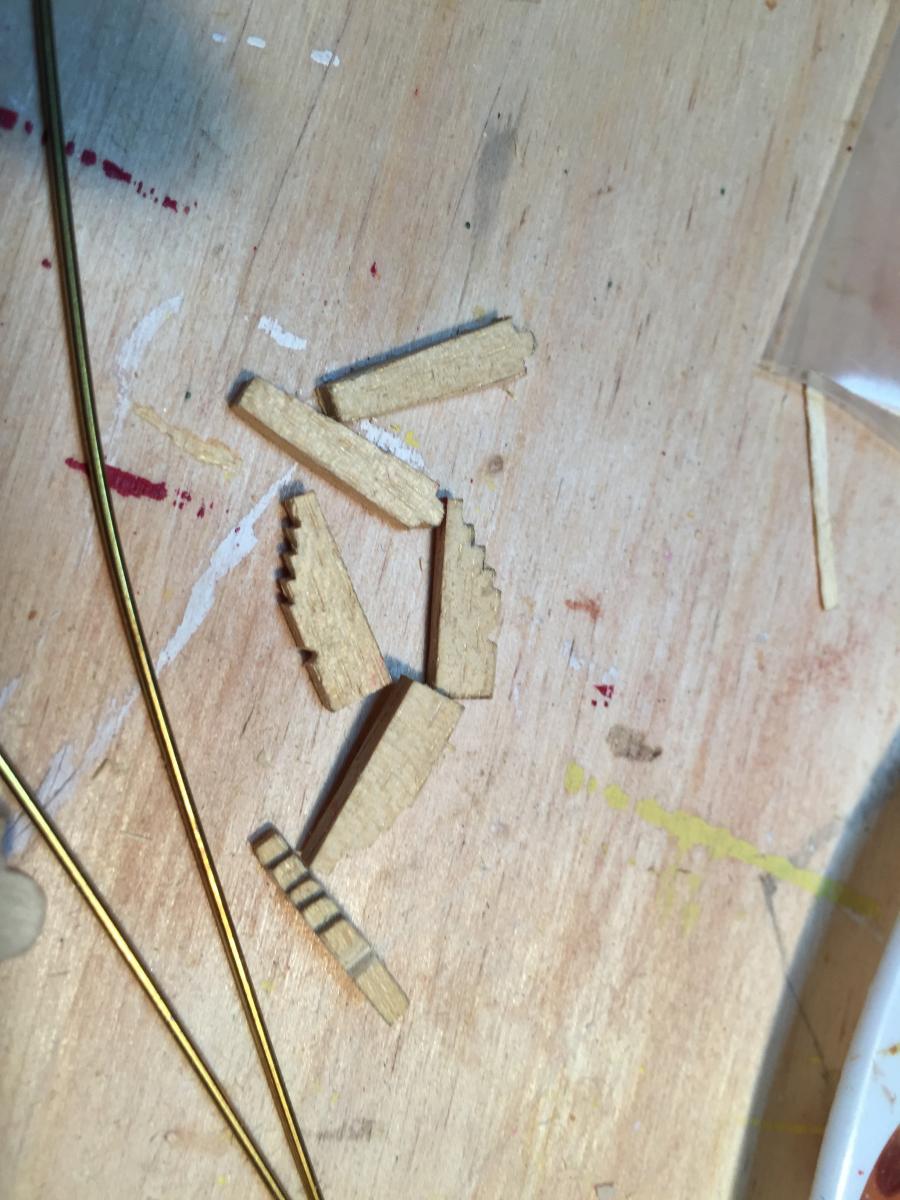
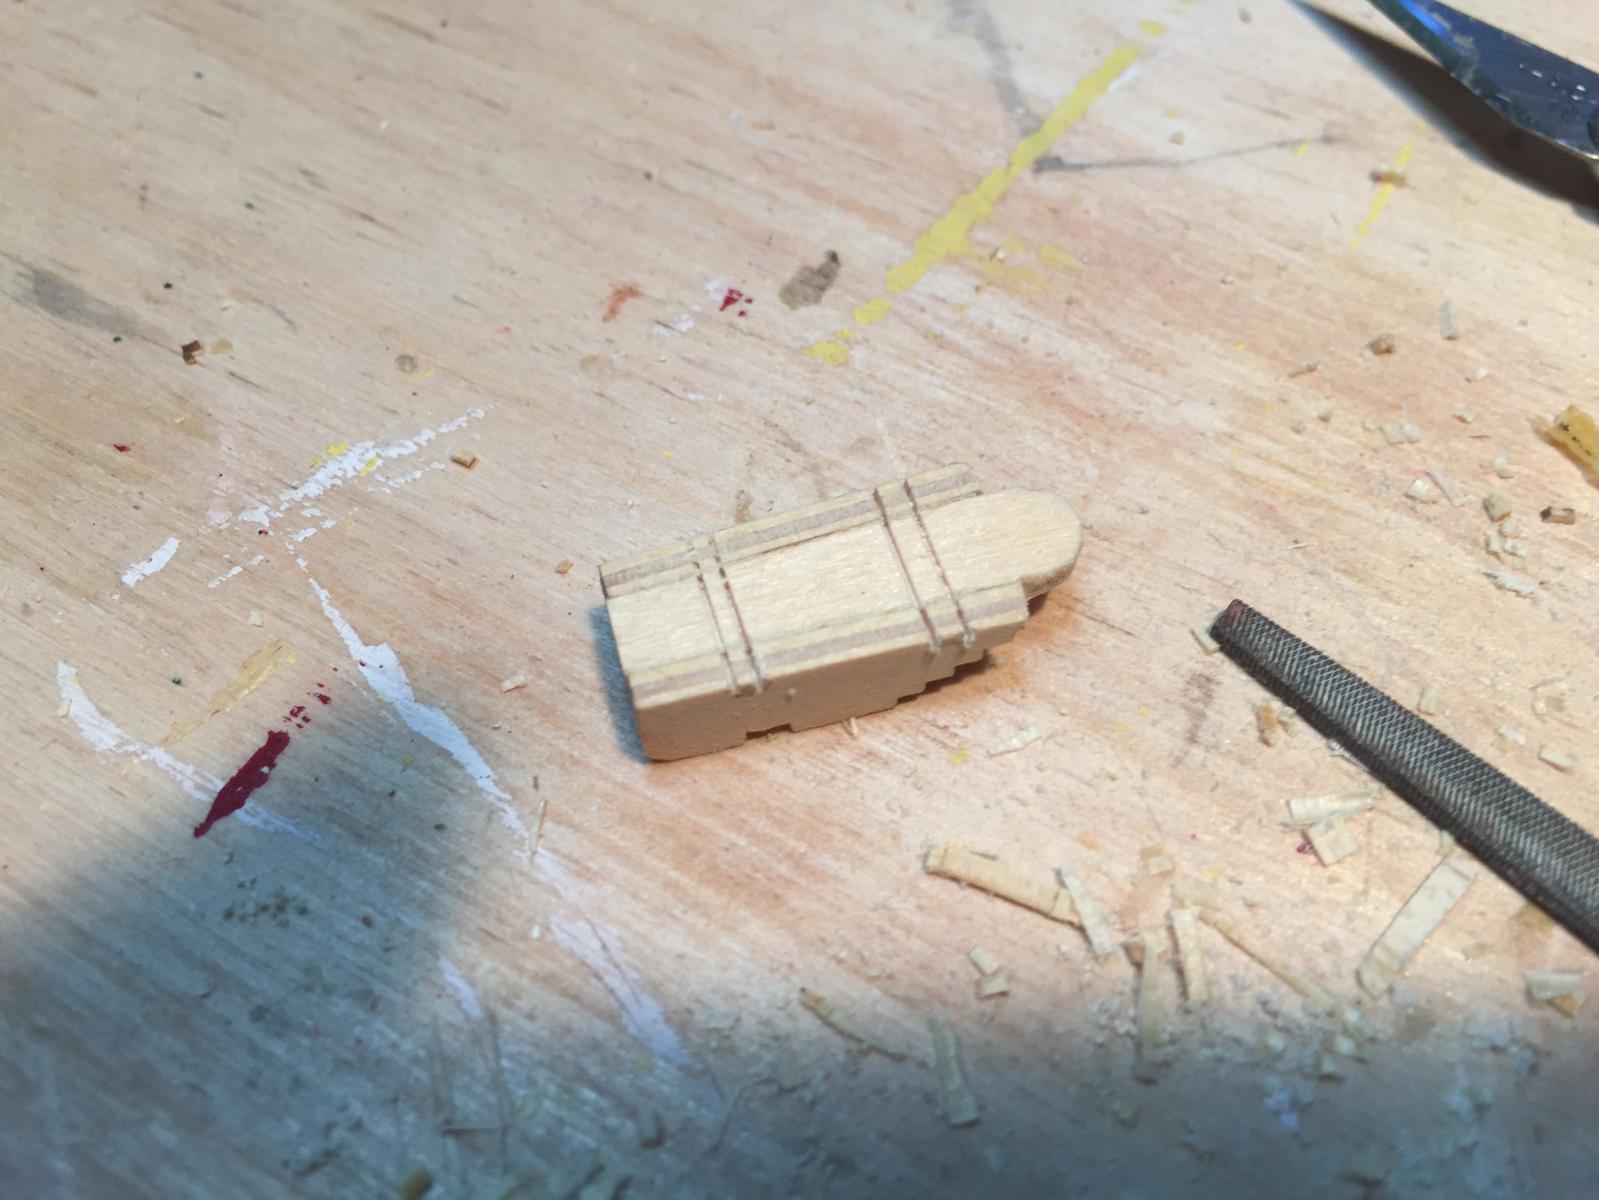
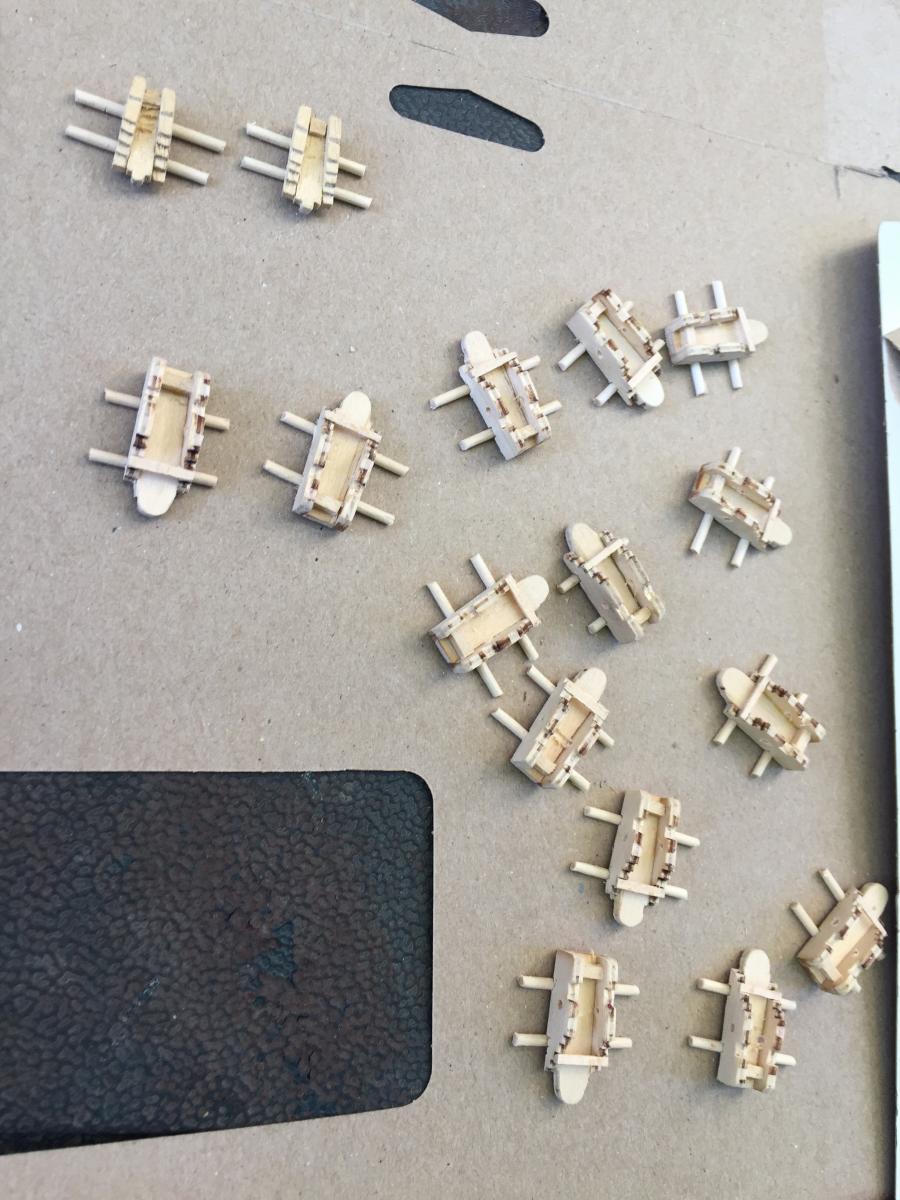
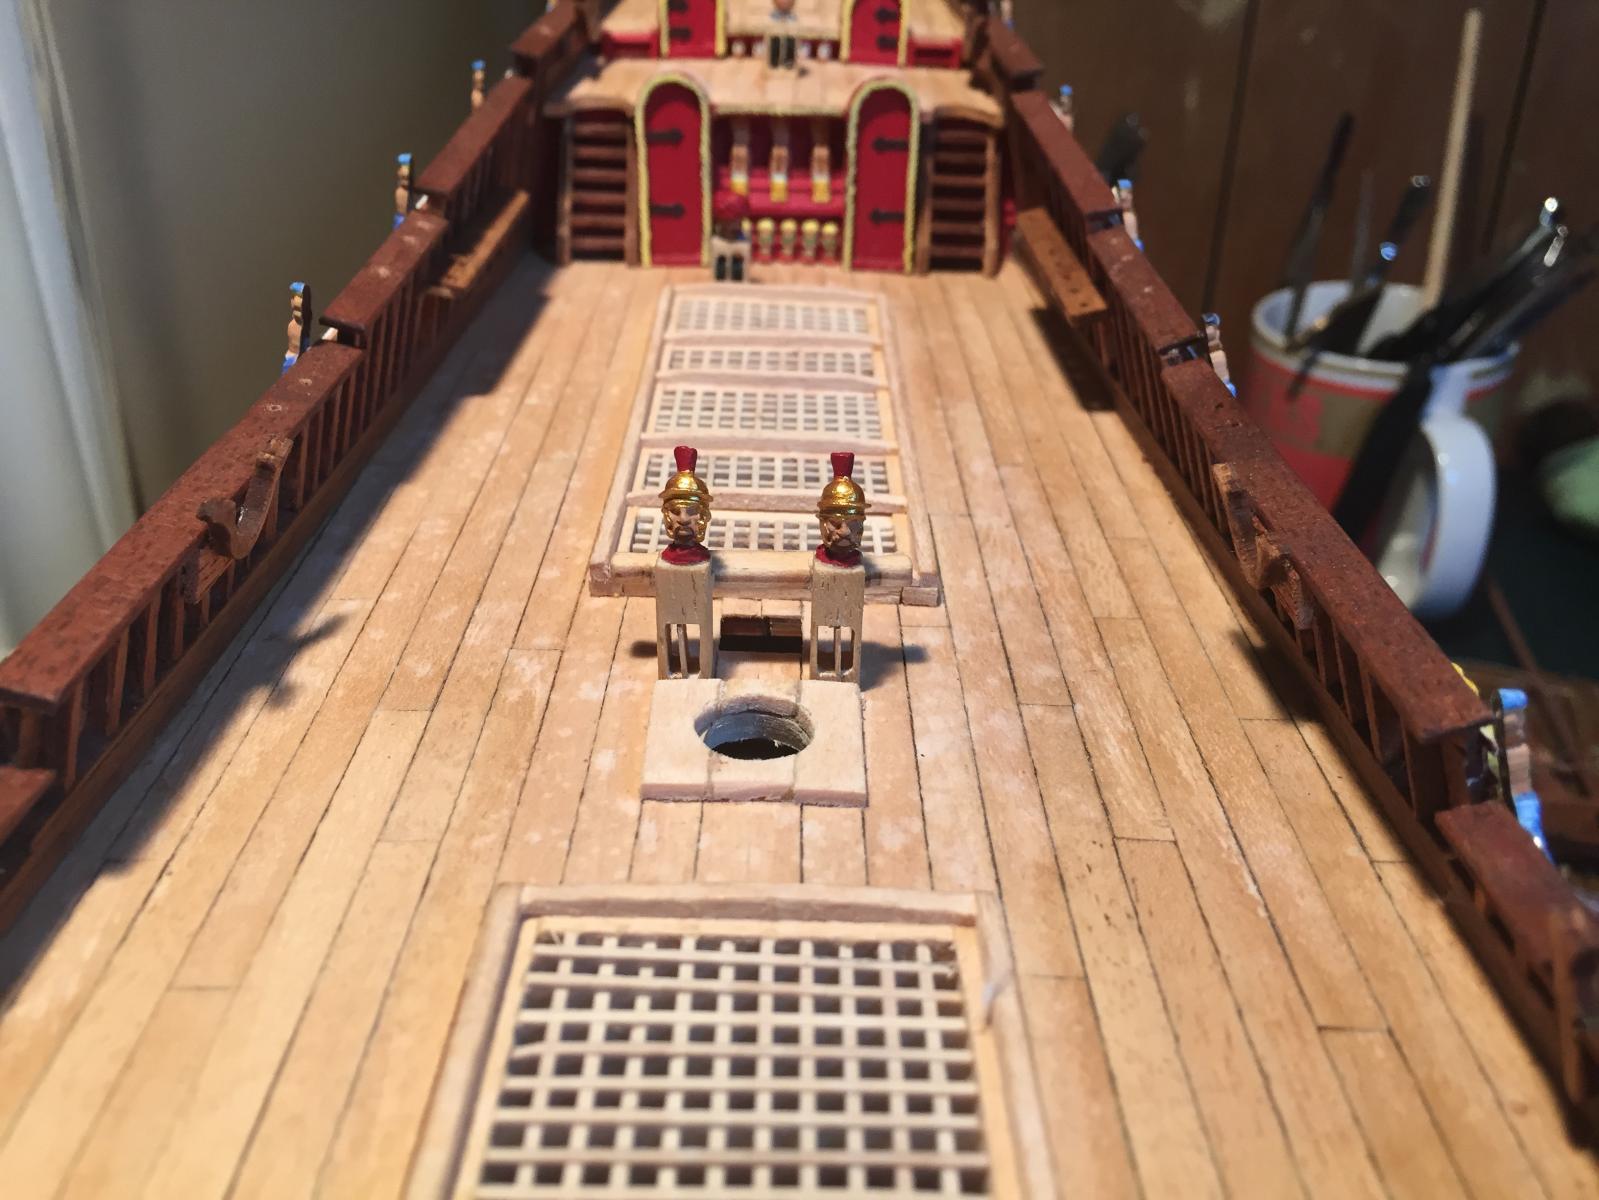
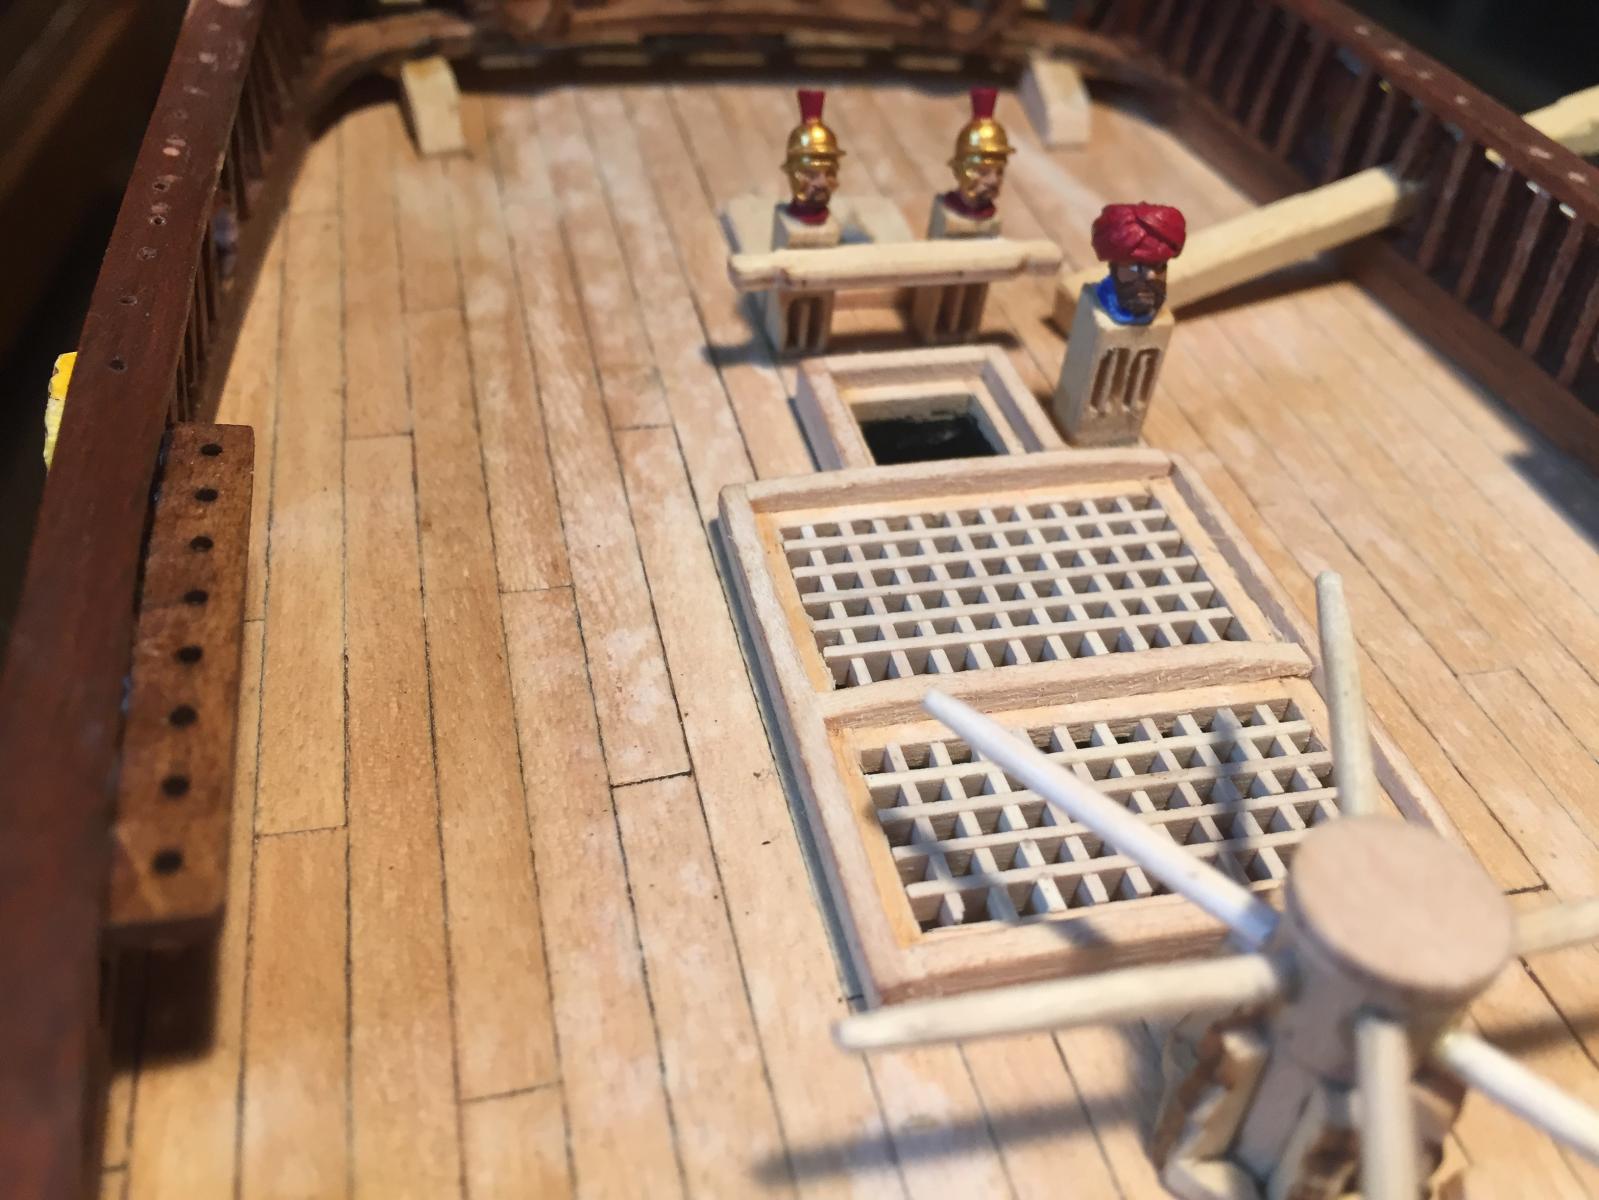
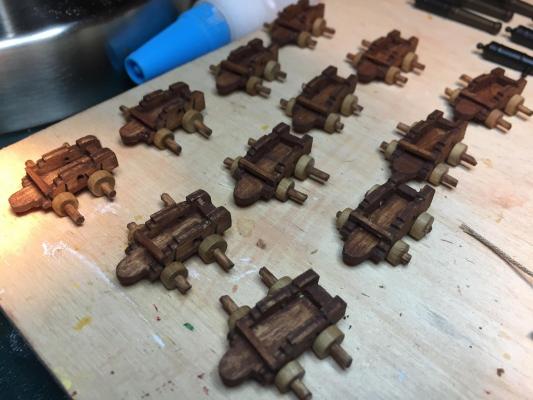
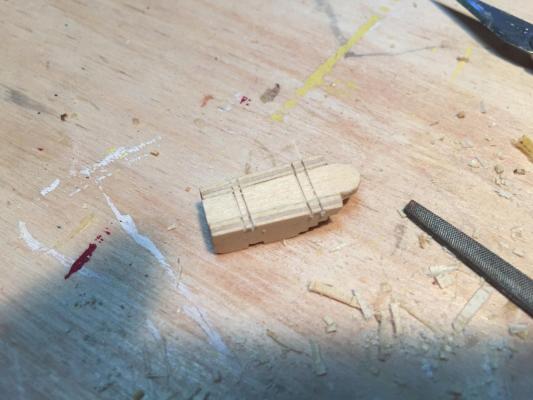
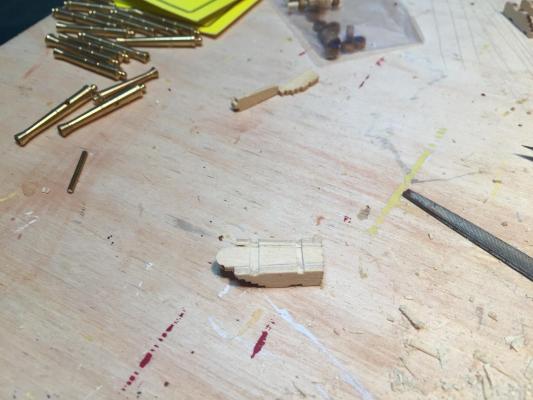
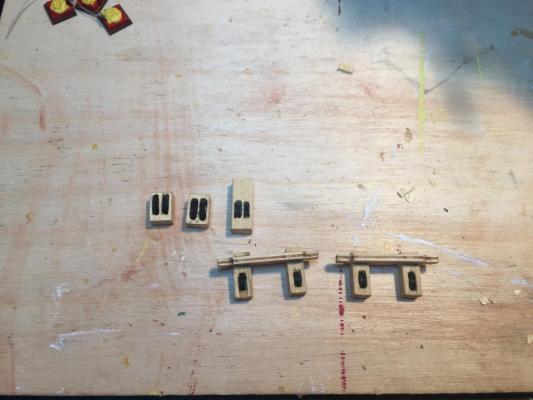
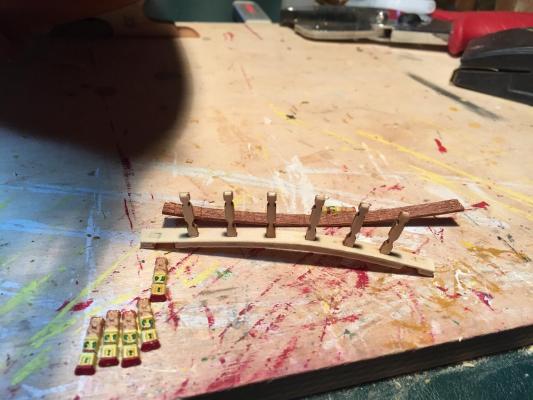
The figures for the knightheads are 28mm scale. Most are from Essex Miniatures in the UK - Roman and Turkish soldiers. The noblewoman is from Dark Sword miniatures in the USA. They are cast from white metal, which contains lead, so be careful removing the heads - wear gloves and a mask, sweep up and dispose of any filings very carefully, and wash your hands afterwards. On to the gun carriages. These were surprisingly painful to get right. The carriages have three main pieces from laser cut wood - the two sides and the base. The sides come in two different heights, although the difference is small and not noted anywhere in the instructions. The first problem was that the instructions show the side pieces attached to the sides of the base, whereas the actual carriages have the sides attached to the surface of the base. The difference is significant - one way the carriage is low and too wide; the other way it's tall and too narrow for the cannon to rest correctly. The next problem was that even in its low/wide configuration, even the smaller of the two carriage heights was slightly (1/2mm) too high for the cannon to fit through the gun port. That might has something to do with my custom bulwarks, or just might be the kit parts not being sized correctly. The kit has two-wheel artillery carriages for the two small falconets on the poop deck, which aren't correct. I ended up making my own small carriages instead. Then the kit supplies brass rod for the axles, and brass trucks, both of which would require painting and wouldn't look right even then. I substituted with wood dowels for the axles, and wood carriage trucks from Amati. Unfortunately the holes of the wood trucks are wider than the kit wheel holes, which makes the carriage slightly higher. And finally a small point - the pivot slots for the cannon trunnions aren't far enough forward. The results, for those still interested, are that I needed to: (1) make the side pieces slightly lower by cutting off 1/2mm or so at the base. No idea why they provided two sizes, since even the small one is too big. (2) make the base narrower, (3) cut slots in the bottom piece for the wider wood axles, (4) move the pivot points forward, and (5) attach the side pieces to the side of the base, not the top. All in all way more work than I thought it would be. My strong recommendation is to make a single carriage, test it against all the ports, and be prepared to get creative getting it to fit properly. Here are some photos of the small carriages I made for the falconets: Slots being cut for the carriage axles: And the axles attached. Once the trucks are on, I'll cut the axles uniformly, letting them extend a millimeter or so past the truck. In this photo you can also see the front of the carriage and the rear elevation bar. Neither of these were described in the kit plans, although the kit photographs show them in place and they are required not only to look right but for the cannon to fit properly in its carriage. Next up: picking cannon and painting them properly.


- 249 replies
-
- 5
-
-
- billing boats
- vasa
- (and 1 more)
-
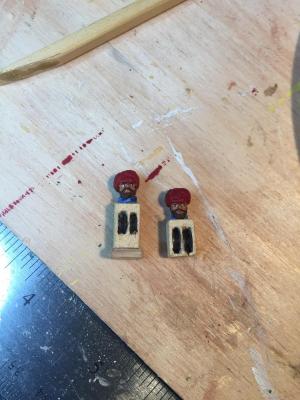
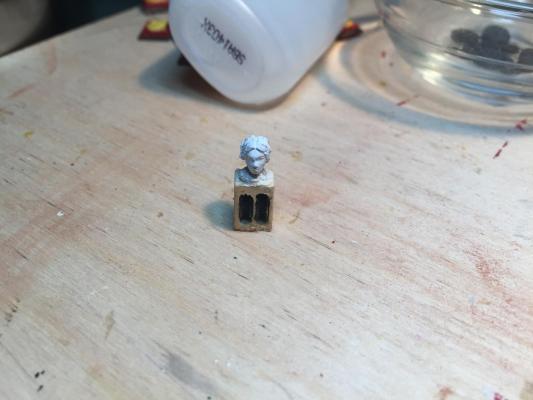
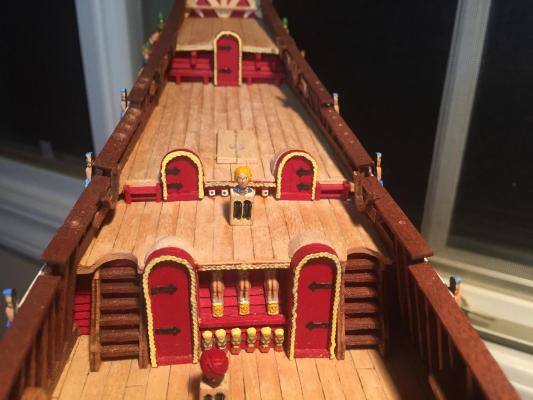
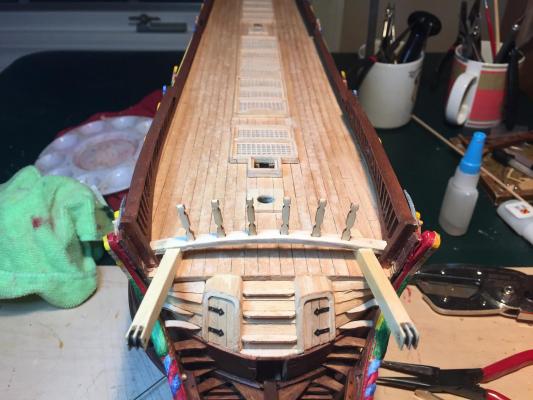
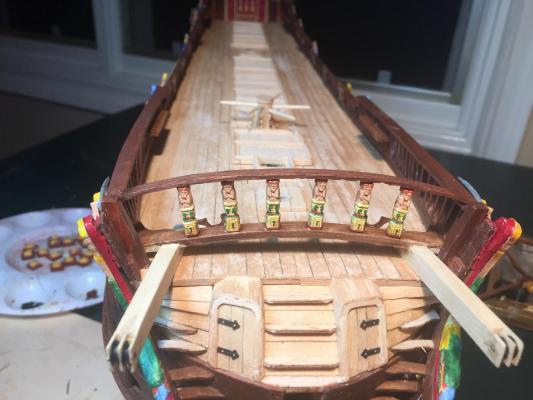
The knightheads were fun. There are seven of them, four in pairs and three singles. They all have sculpted heads - the pairs are roman soldiers, two of the singles are moors, and one is a noblewoman. The kit doesn't say much about what to do here, other than to show some drawings of the knightheads with blobs on the tops. I don't have carving skills, so I decided to look for some miniatures with heads that might fit the bill. Turns out 28mm scale figures work perfectly, so I bought a few on the internet, chopped their heads off, and attached them to the wood pieces. The kit plans are also somewhat incorrect about the pulleys in the knightheads. They show single pulleys for the pairs, and doubles for the rest. They should be doubles for the pairs and two of the individual knightheads, and a quadruple for the large one on the foredeck. I didn't realize this at the time so I had to go back and fix it later. The result was fragile enough that I didn't want to jam the kit brass pulleys into the slots, so I left them empty. Here is the first attempt at making the pulley slots, with the pulleys inside. Two pairs and three singles, one of them larger than the other two: Two of the knightheads, with moorish heads attached: And the heads painted: And mounted on the deck. Upon reflection, the foredeck knighthead isn't as fat as on the real ship, but I don't want to redo it - getting the moorish head mounted was a little tricky. The noblewoman ready to be painted. Took some searching to find something suitable on the internet - most of the choices were elvish princesses; this is a little closer to the real thing: Painted and mounted: The roman soldiers painted and mounted. I've also switched the pulley openings to be double instead of single. I still need to tweak the divider a bit and get it even. And the foredeck Romans and moor, also widened for the correct number of pulleys: Now it's on to the gun carriages...


- 249 replies
-
- 5
-
-
- billing boats
- vasa
- (and 1 more)
-
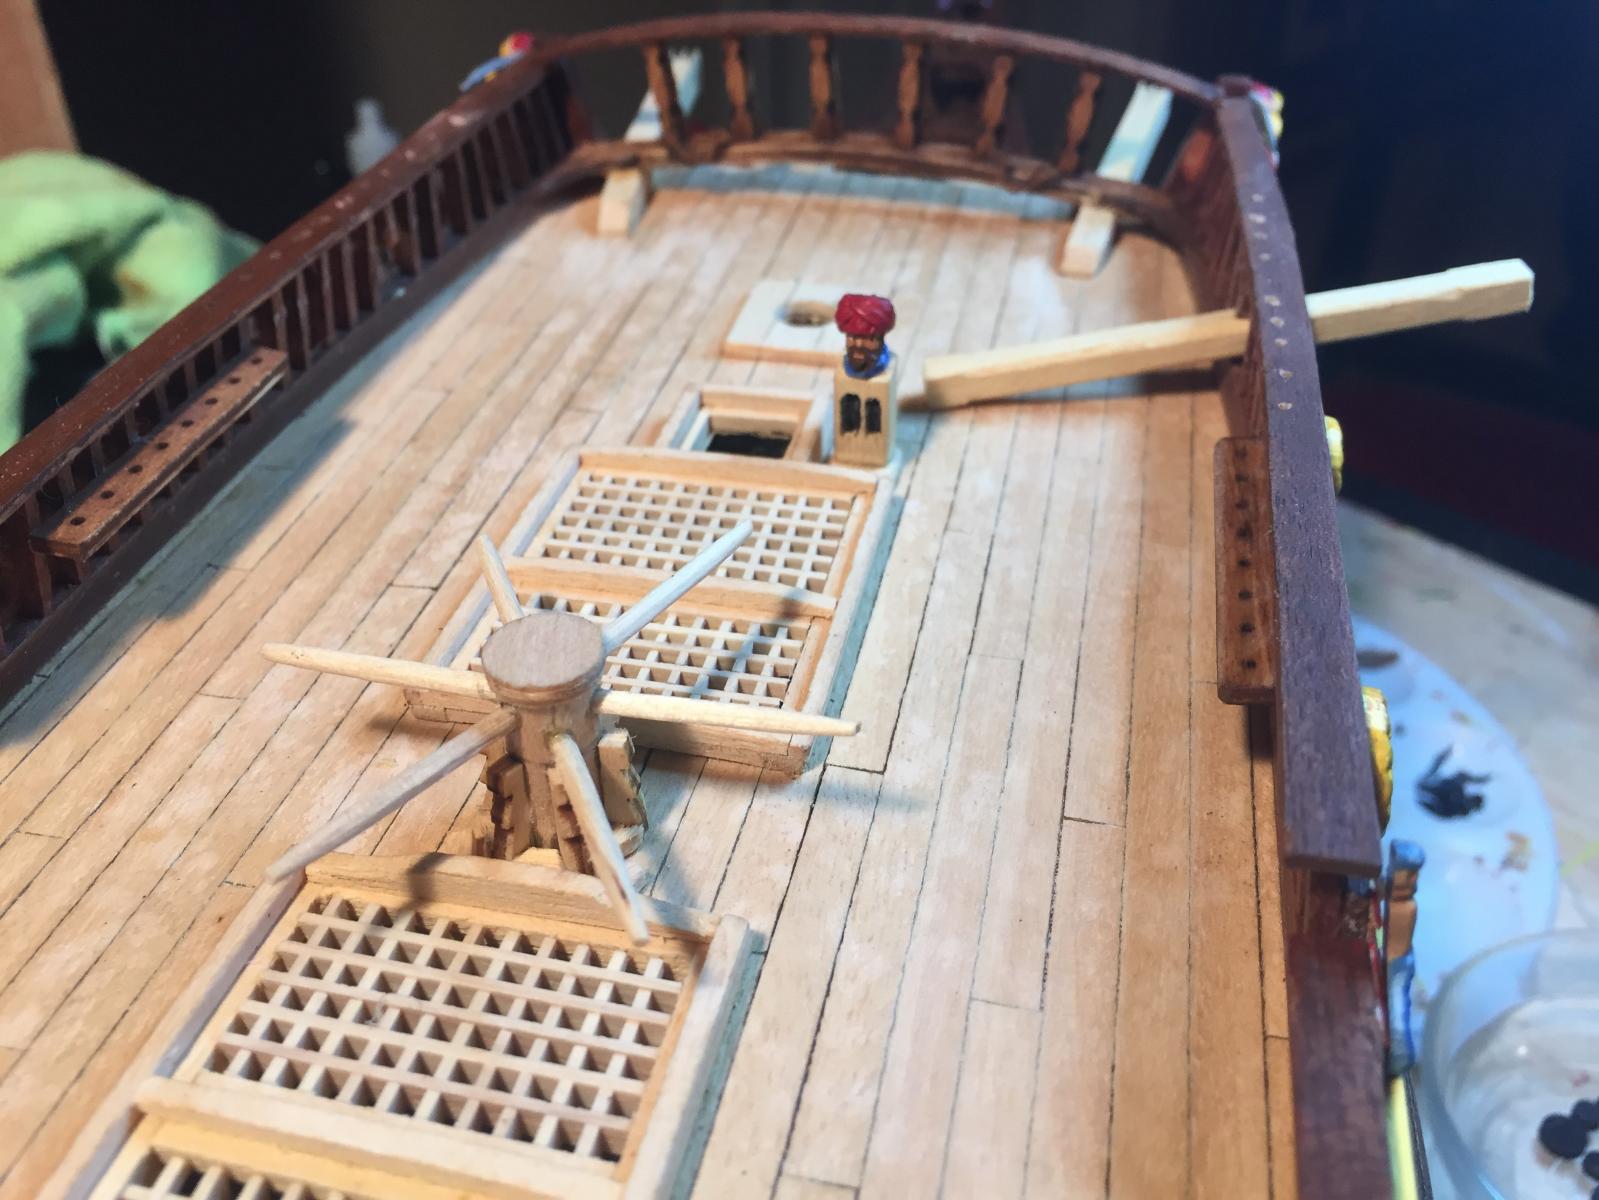
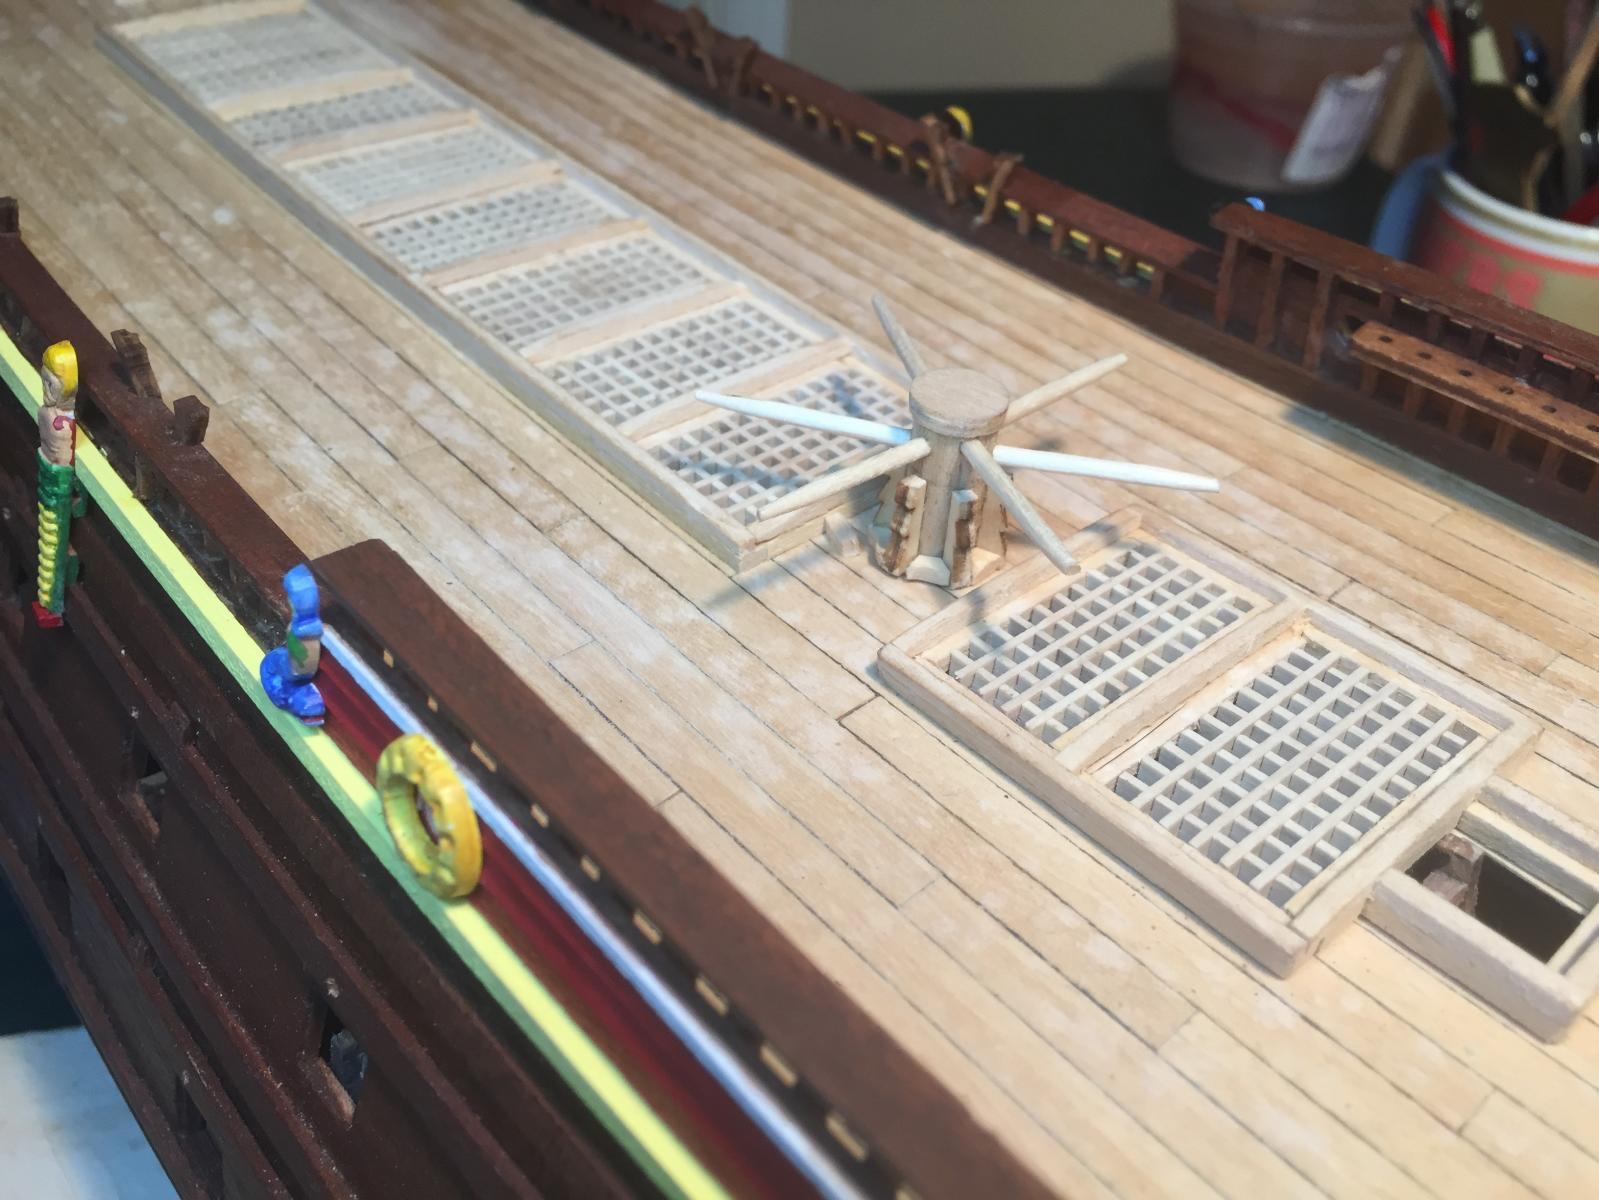
Next on the deck furniture list was the capstan. The kit version is more simplistic than the real thing - no bars and no base pieces, so I scratched those. And here are some photos with the kevels added: Next up are the knightheads...

- 249 replies
-
- 4
-
-
- billing boats
- vasa
- (and 1 more)
-
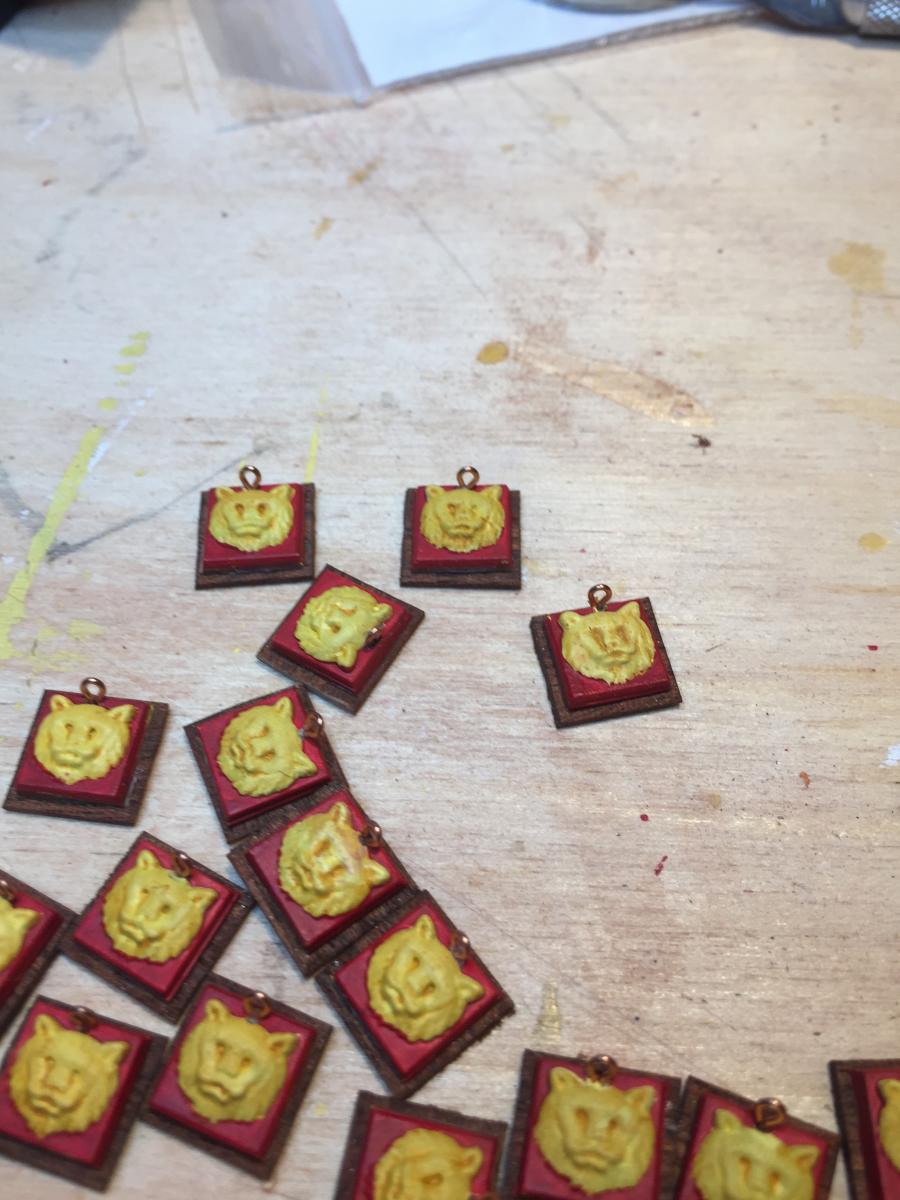
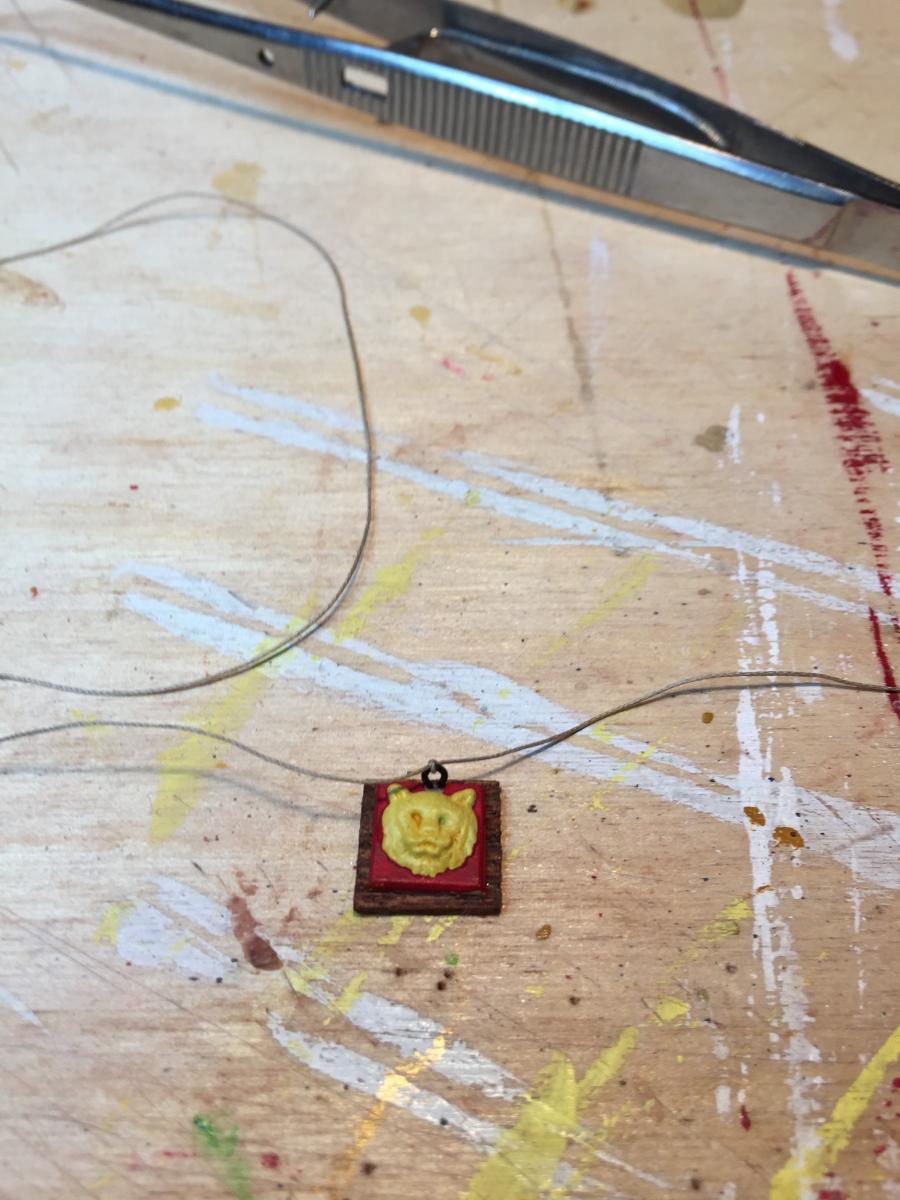
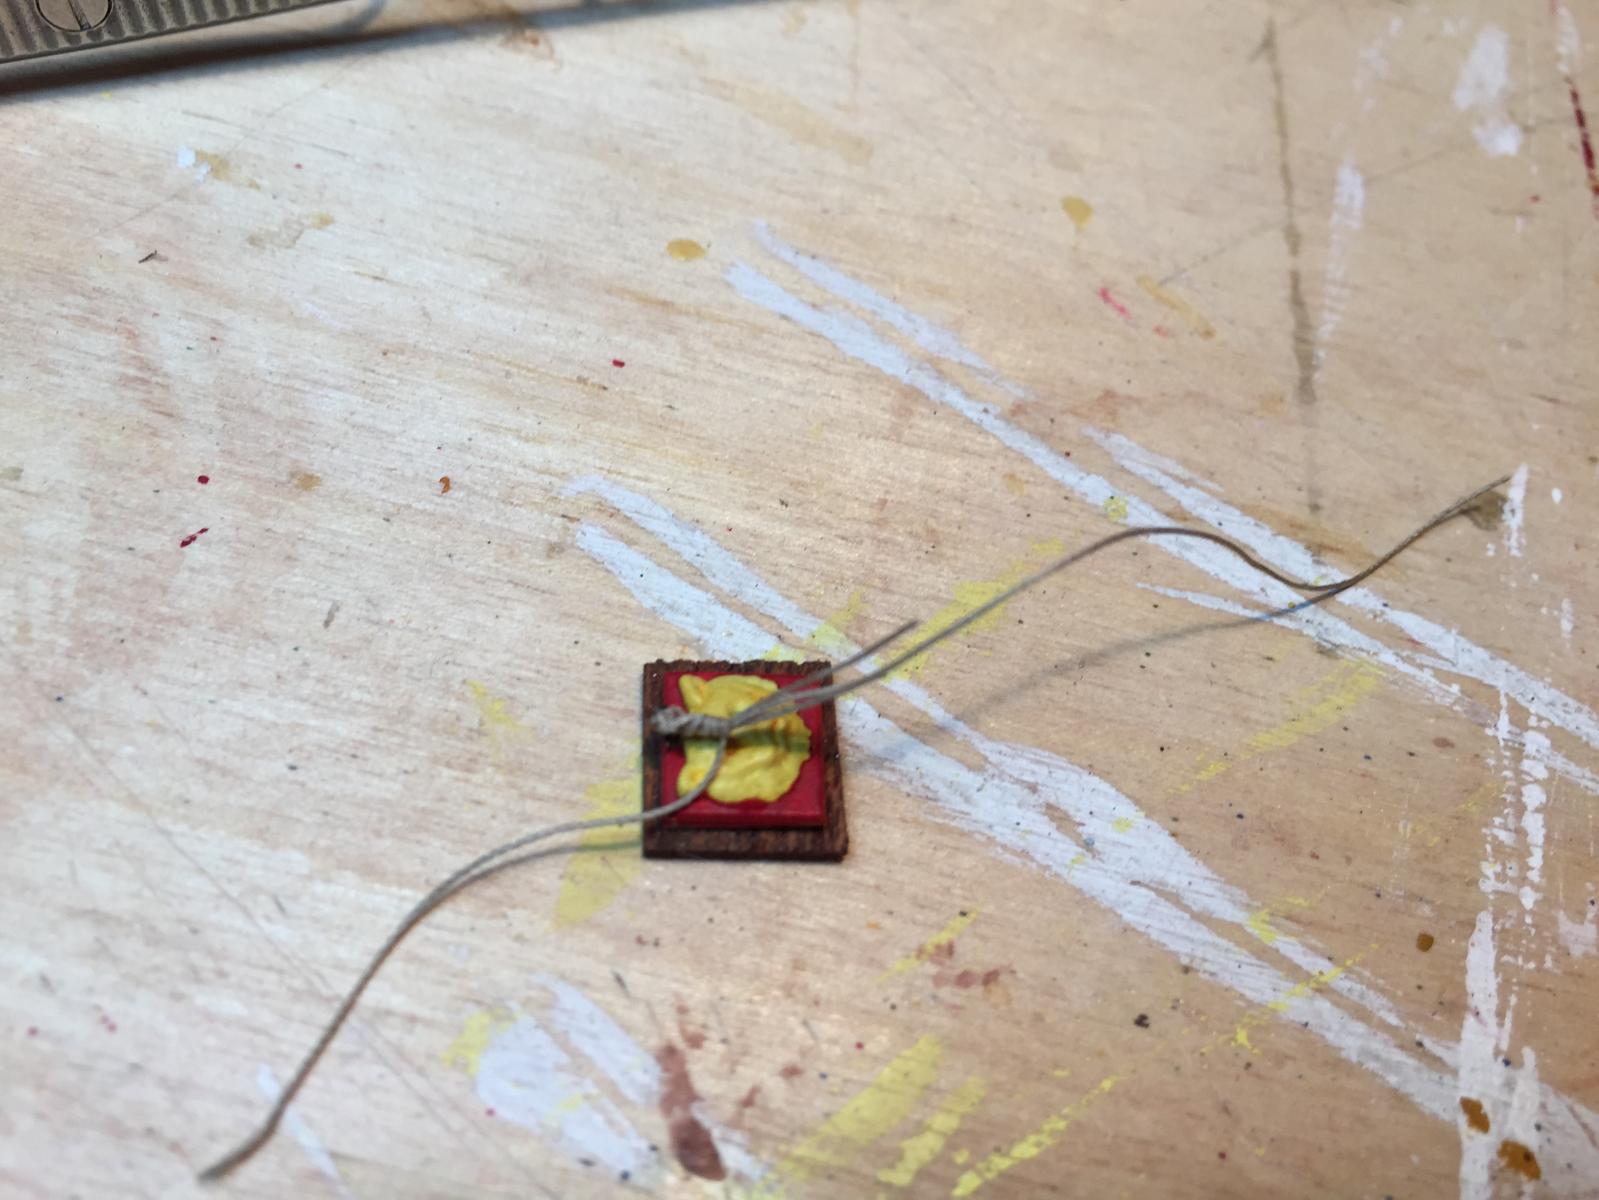
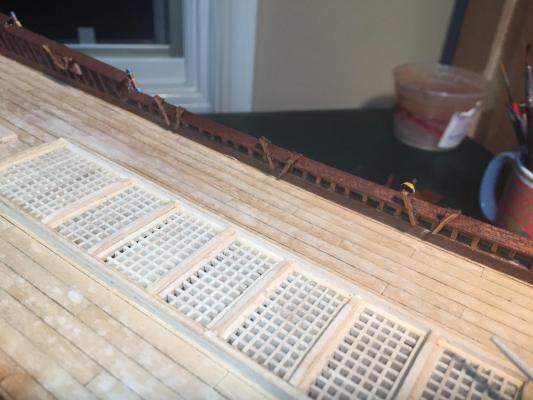
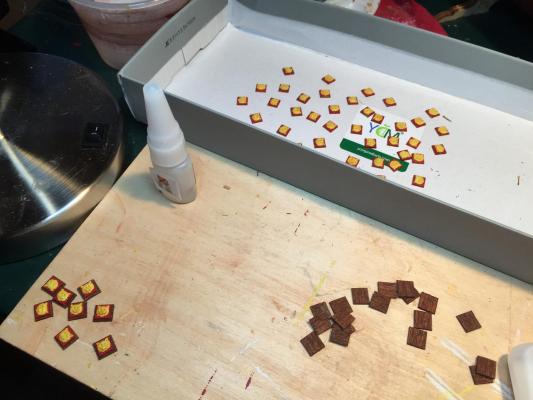
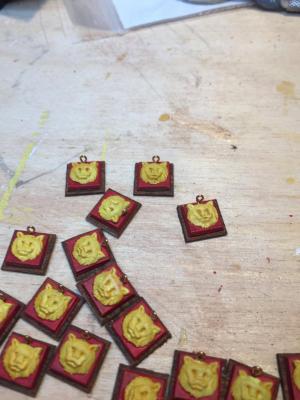
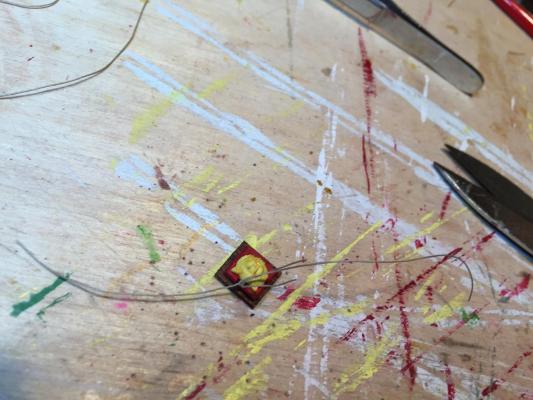
The kit provides plastic gun port lids. Each consists of a square with a raised center section. The center is painted, but the edges are meant to simulate wood, which they do rather badly. Since I already scratched my gun ports and made them the correct size (bottom row slightly larger than top row), I needed to scratch the lids as well. I ended up trimming the edges off the plastic lids, leaving only the center section. I then made up a bunch of correctly-sized wood lids and glued the center sections to the lids. Finally I added ring bolts and seized lines for closing the lids. There were 52 lids, so this was a lot of very tedious, repetitive work. At least it's mentally preparing me for ratlines later in the build. First step was to prime the lids, which I did with flat yellow spray paint, so as not to obscure the details. I then used a darker wash to bring out the details of the lion heads, and finally added the red background. I also made 52 square lids of the correct size and stained them: Here are some photos of the finished lids, with ring bolts added but not yet painted: Time to add the closing ropes. I had forgotten how to seize lines in the many years since building my last ship, so the first few were a bit of a learning experience. For those interested, I used tan scale rope from Syren and was very pleased with it. The most important thing for me was to wax the line first. It made the line much easier to work with. Start by tying a half hitch around the ring bolt. This will be the length of line used to close the port lid: Cut that line, and tie another line at the base of ring bolt, around the two ends of the first line. This second line will be the seizing: Bend the short ends of both lines down and lay them against the long end of the first line: The remaining end of the second line gets wound round and round, about 4 turns, and pulled through to finish. Wash the whole thing with a dilute mixture of white glue and water when done: Clip the short ends of each line close (the glue mixture will make the line stiff and easy to cut), plus the end of the seizing, and your're done. Now repeat 51 more times...


- 249 replies
-
- 8
-
-
- billing boats
- vasa
- (and 1 more)
-
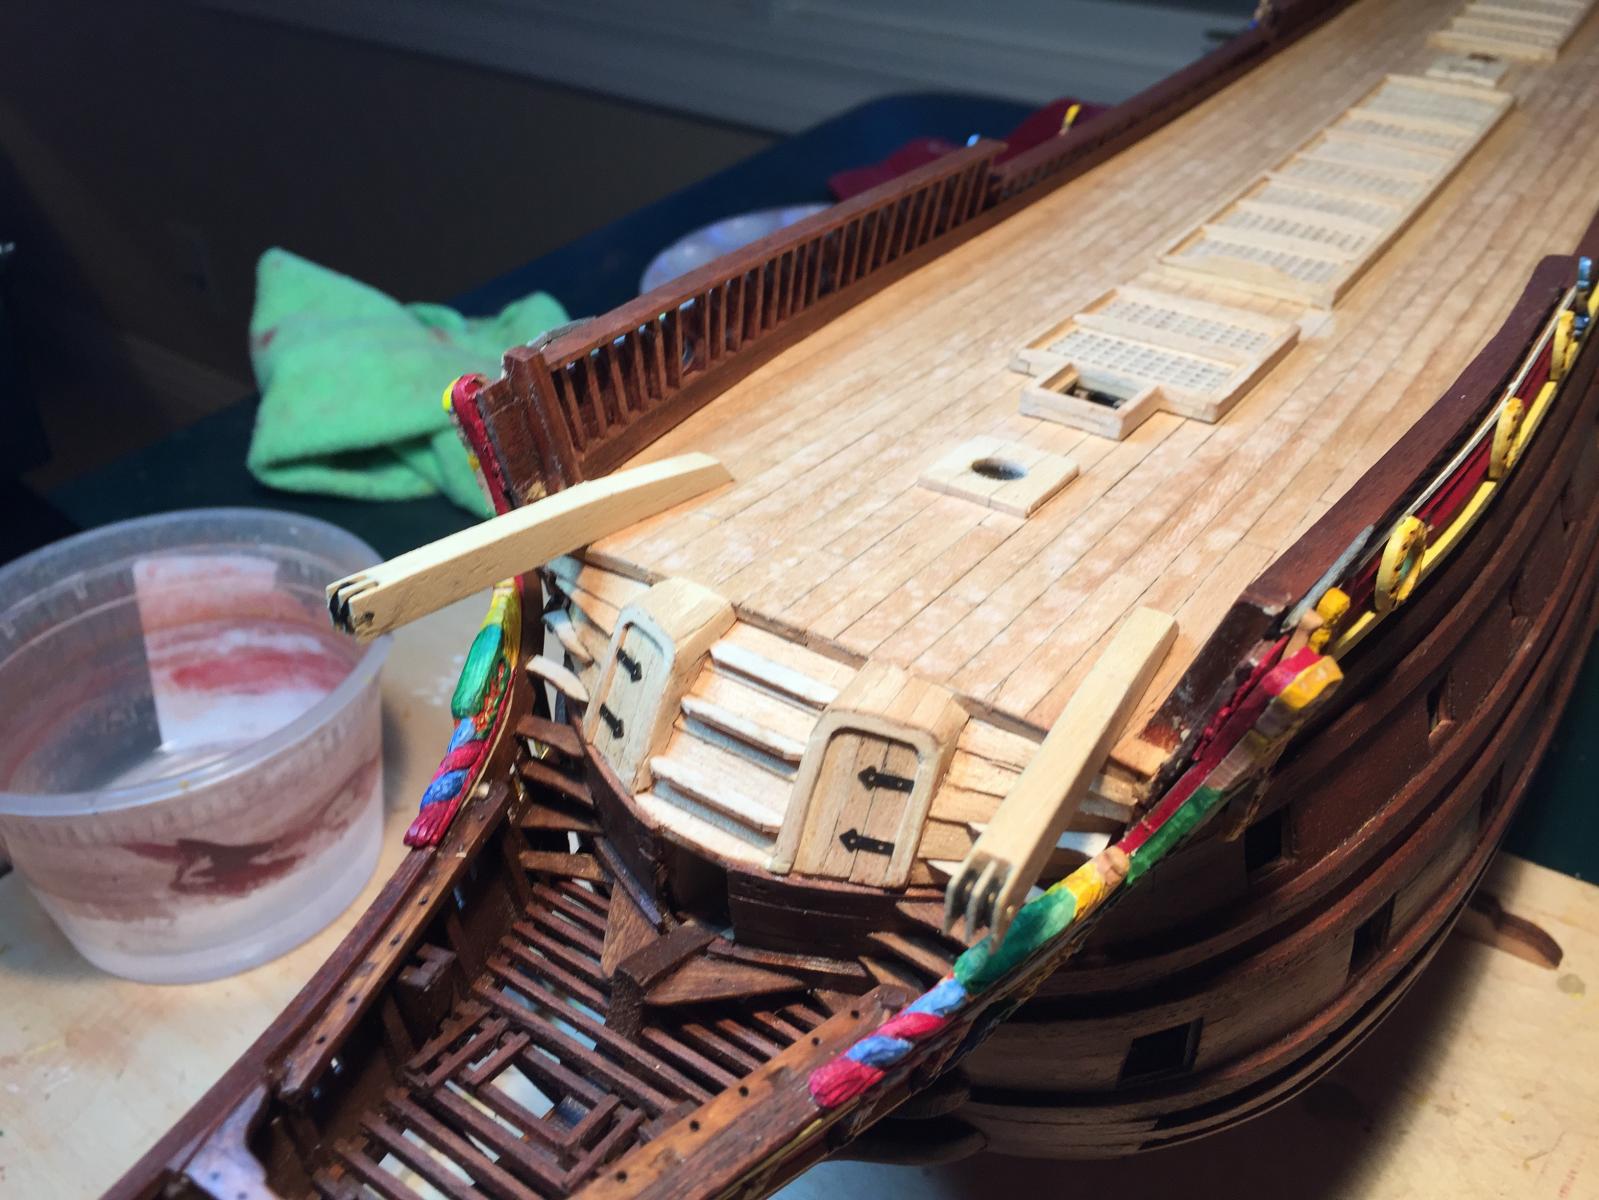
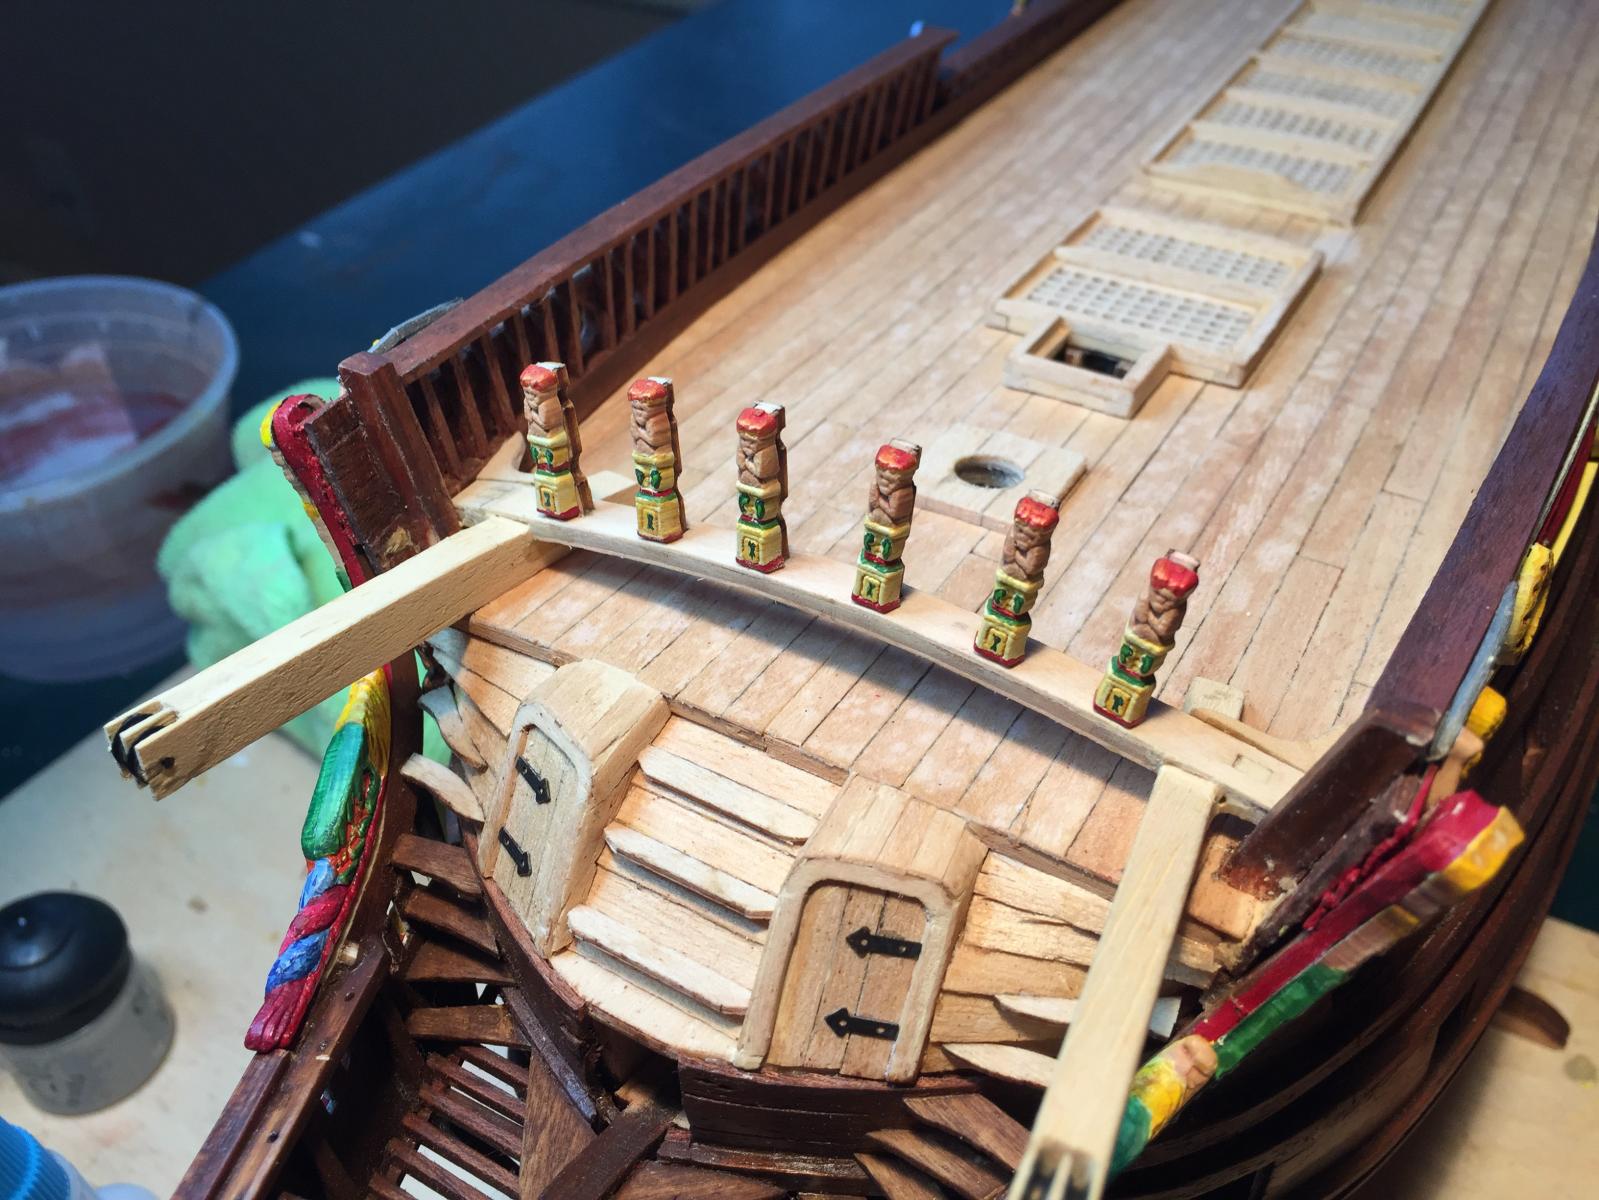
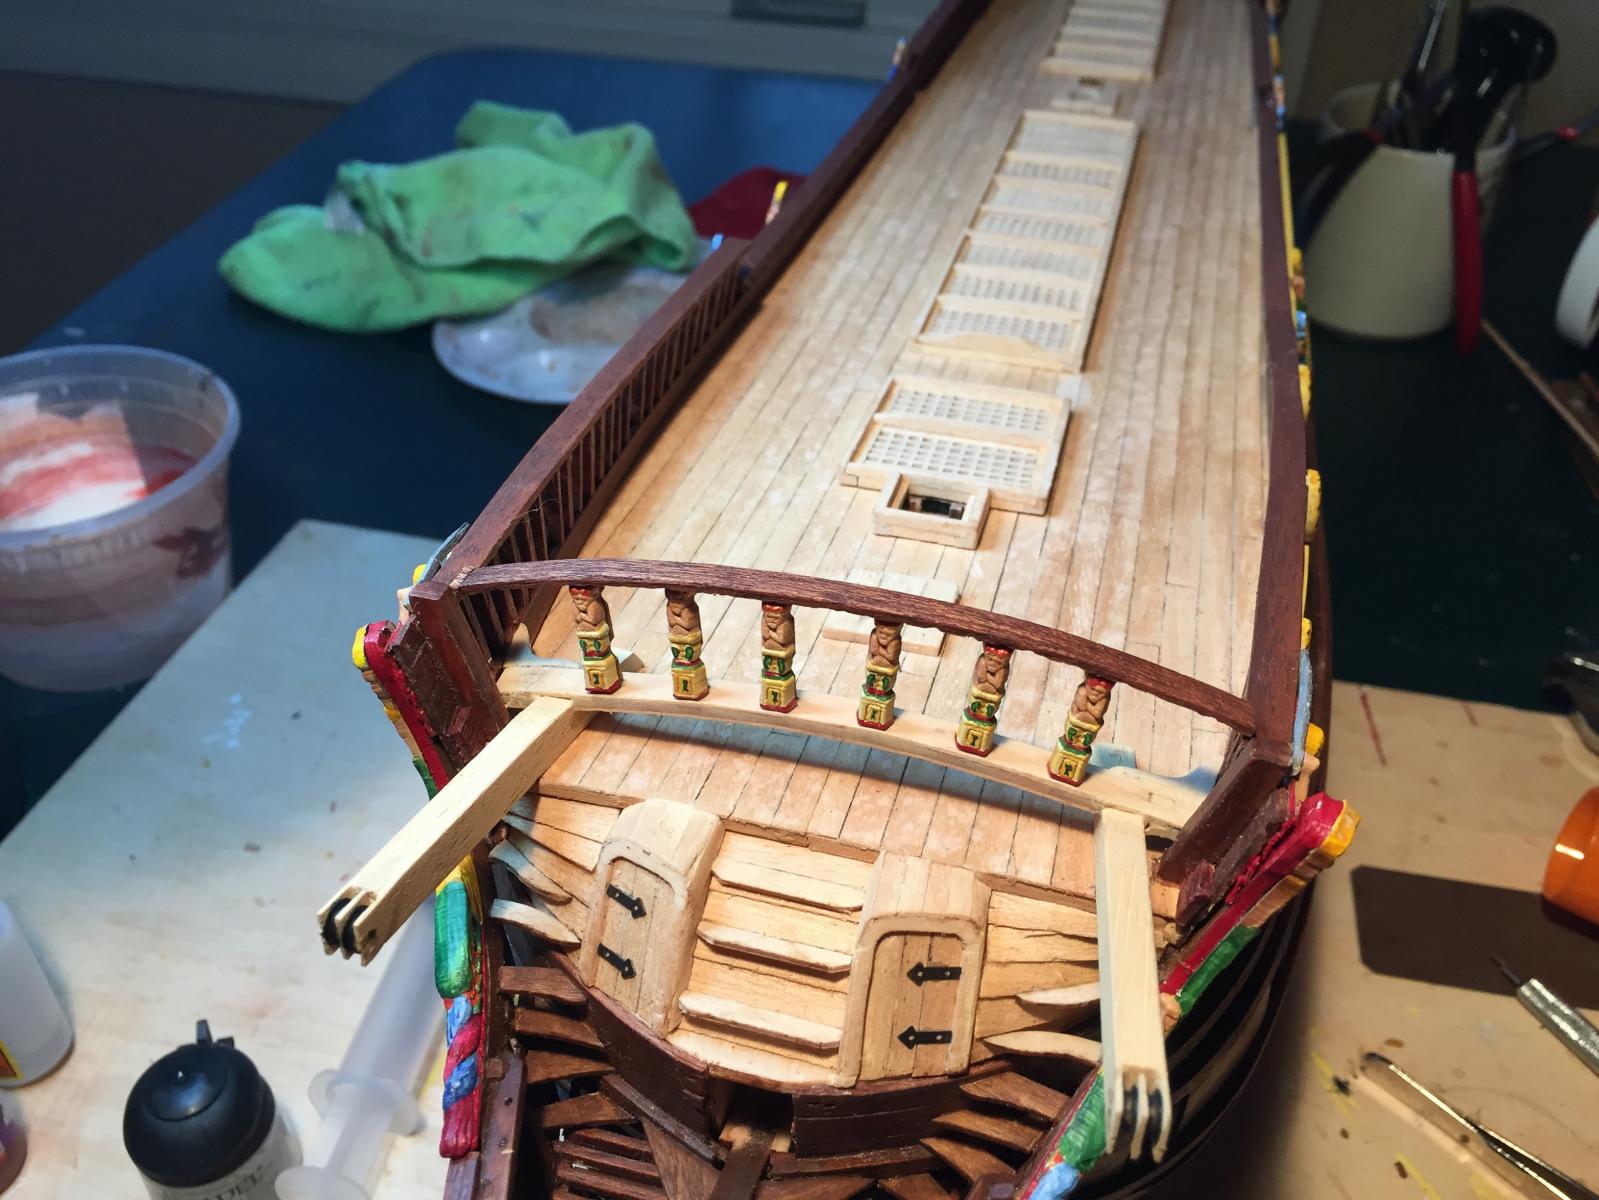
Some progress on the ship. It took about three months to finish painting and installing all the sculptures on the other side of the ship, but now they are all done! Now it's time to do the catheads. Each cathead needed slots carefully cut into the front to hold metal pulleys. This was quite difficult for me - the slots were big, leaving almost no wood on the edges. On to the front railing. The kit's plans are incorrect here; I'm following the actual ship as best I can, where the rails are curved and there are six sculptures, no shield in the center, and gaps at each end, presumably for the sailors to slip through on their way to the beak. The bottom rail was pre-cut, with little slots for the sculpture backings to fit into. I needed to fill in the ones on each end since no sculptures were installed there. The railings installed, with the sculpture backings. Note that slots need to be cut into bottom railing piece to make space for the catheads. Again not a lot of wood left once the slots were cut, so it was a bit tricky. The sculptures installed in front of the backing. The backing shape and the sculpture shape were somewhat different. All done. I originally wanted all the wood but the top rail to be a light color to tie in with the deck and the beakhead doors below. I decided this looked odd, so I stained the entire thing to match the hull and the bulkeads. Next up was a truly thankless task - building 50 gunport lids and their rigging.


- 249 replies
-
- 6
-
-
- billing boats
- vasa
- (and 1 more)
-
The Billings kit is the most accurate out there, but has some problems you will need to work around, all well documented by various people. I'm in the middle of a bunch of tedious work with gunport lids, so haven't posted in a while. I hope to get some pictures on line soon though.
- 249 replies
-
- 1
-
-
- billing boats
- vasa
- (and 1 more)
-
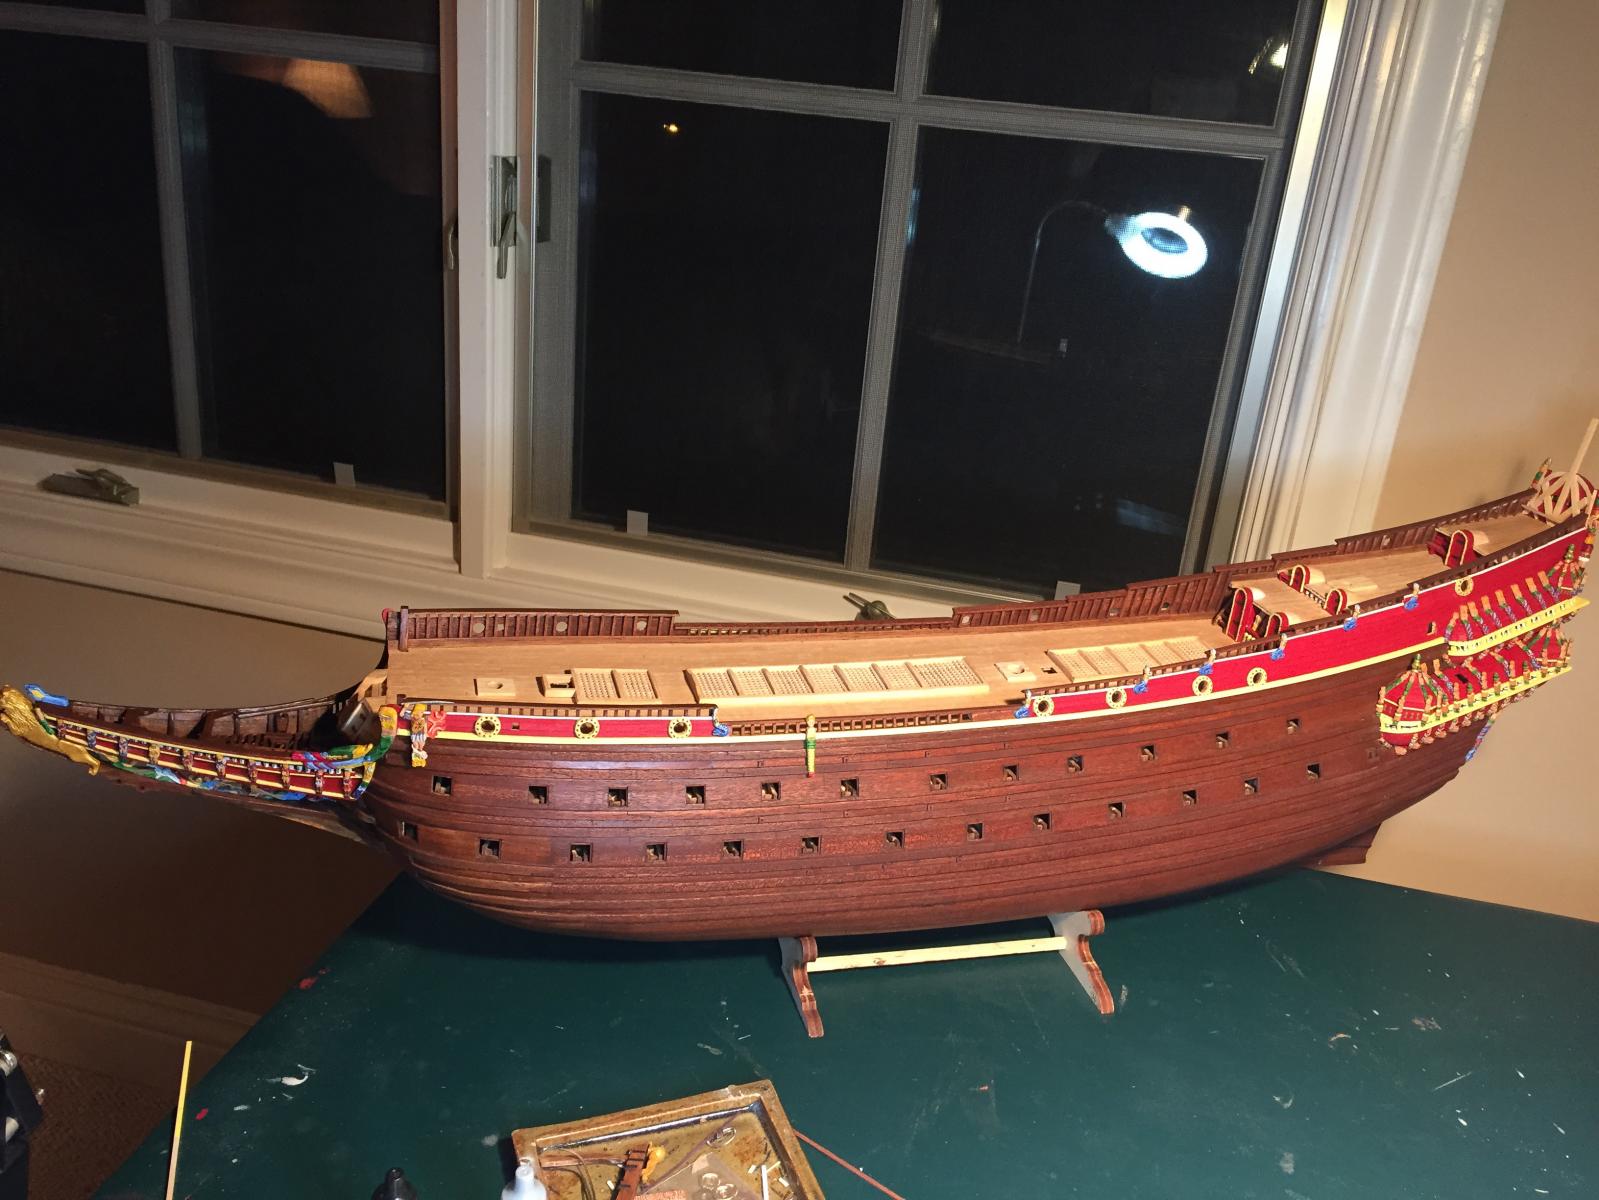
And finally, after several months the sculptures on one side of the ship is completely finished. Here is a view of the unfinished starboard side: And by contrast the finished port side. Lots and lots of sculptures there! Now I have to repeat the entire exercise on the starboard side, which will take a while. I don't think I will post the progress since it's exactly like what you've been seeing. So I should pop up in a couple of months ready to start on deck furniture and cannons.

- 249 replies
-
- 10
-
-
- billing boats
- vasa
- (and 1 more)
-
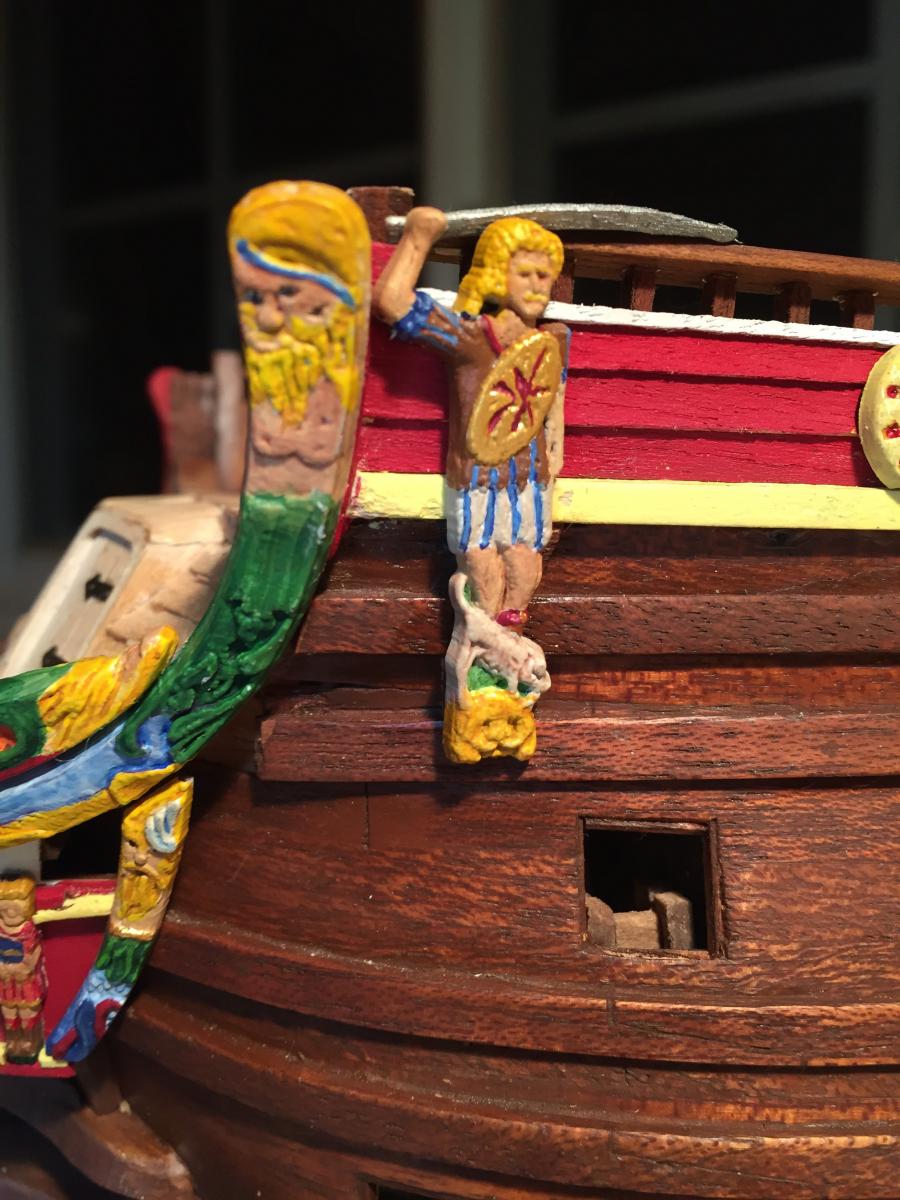
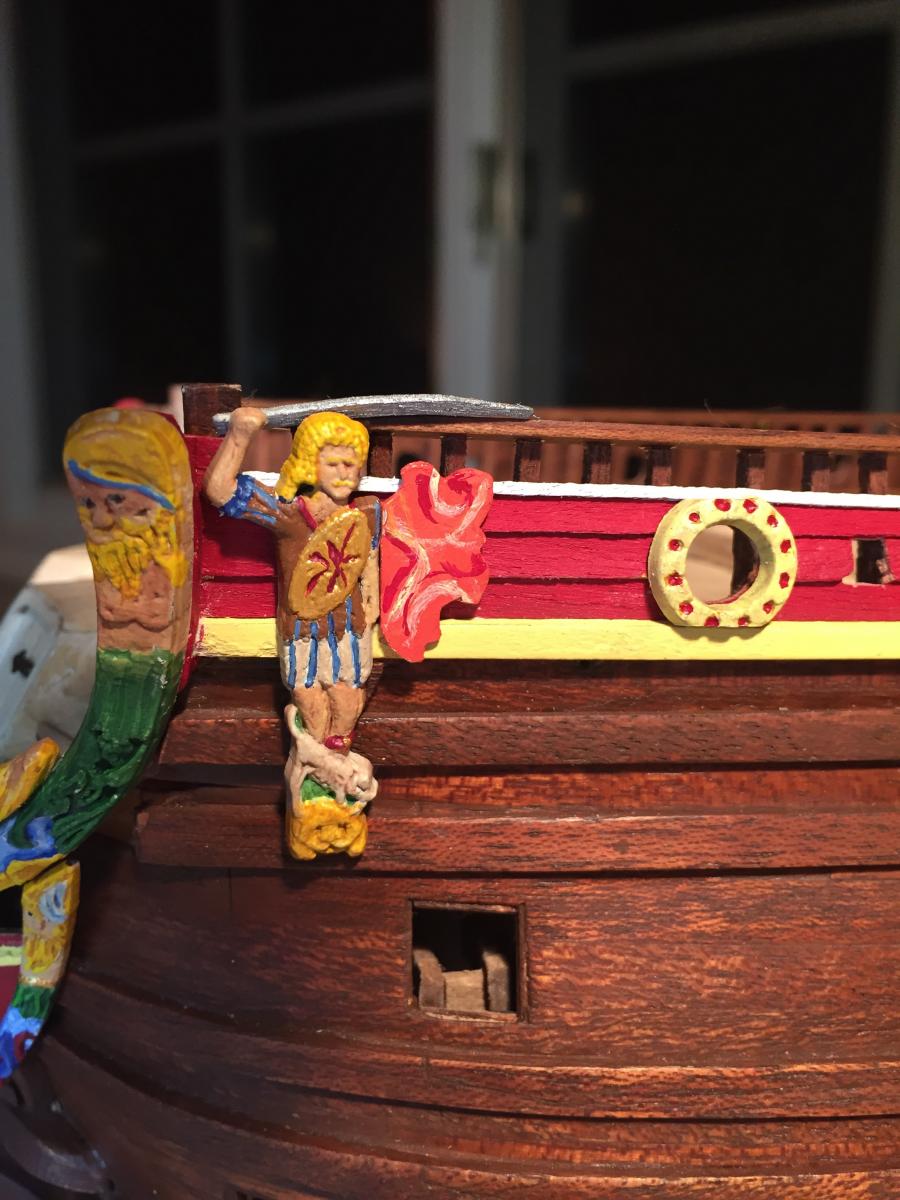
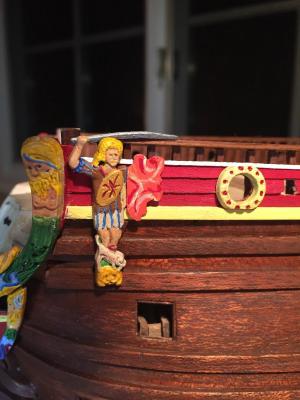
The large warrior sculpture has some nice detail, but is missing its sword and cloak. I scratched a sword by thinning down and then curving a toothpick. The cloak is a thin, flat piece of wood cut to shape. I'm not happy with the paint details, so I'll probably end up re-doing them.

- 249 replies
-
- 3
-
-
- billing boats
- vasa
- (and 1 more)
-
I've been busy with things other than ship-building lately, but I've managed to make some progress. Here is a photo of the sculpture group above the figurehead. The kit provides a two-part sculpture that you glue together for a 3D effect. It appears to be some sort of lion-maned dolphin. The 1:10 model shows two more sculptures, one on either side, plus a mask of some sort on the back of the dolphin. The two additional sculptures aren't in the kit and appear to be sea serpents of some sort, purple with yellow wings. Finally, the 1:10 has two long tritons following the curve of the front of the beak, also not provided by the kit. I didn't want to deal with the mask on the back of the dolphin, so I left it off. I reshaped two extra triton sculptures to look at least a little bit like sea serpents, and then used two more extra triton sculptures at the front of the beak. Now on to the last sculpture on this side of the ship - the large warrior at the back of the beak.

- 249 replies
-
- 3
-
-
- billing boats
- vasa
- (and 1 more)
-
Thanks for the compliments! Here's a photo of the triton that lies above the large curved triton. This is another cool sculpture effort - I needed to stare at it a bit to figure out what it was supposed to be, then I "saw" it and could paint it properly. It's not exactly like the 1:10 model, but close. And despite all the curves and angles, the two sculptures fit together quite well. The kit did a pretty good job here.
- 249 replies
-
- 6
-
-
- billing boats
- vasa
- (and 1 more)
-
Here's a photo of the curved triton where the beak meets the hull. They did a nice job on this one - it's got some good detail on it. I like the shell/fan on his head, for example. And here's the base for the large triton on the top edge of the beak. You can see where I needed to section it to get it to match the curve of the sculpture properly. After dry-fitting the sculpture to the base again, it still didn't fit quite properly, so I needed to remove some wood from the front and add some to the back for a better fit. And the finished result. This was another nicely done sculpture, and I'm quite pleased with how the paint came out on it because it's so prominent. The curve of the triton below matches well too. All in all this part of the beak, with all its different curves and angles, came out nicely.


- 249 replies
-
- 6
-
-
- billing boats
- vasa
- (and 1 more)
-
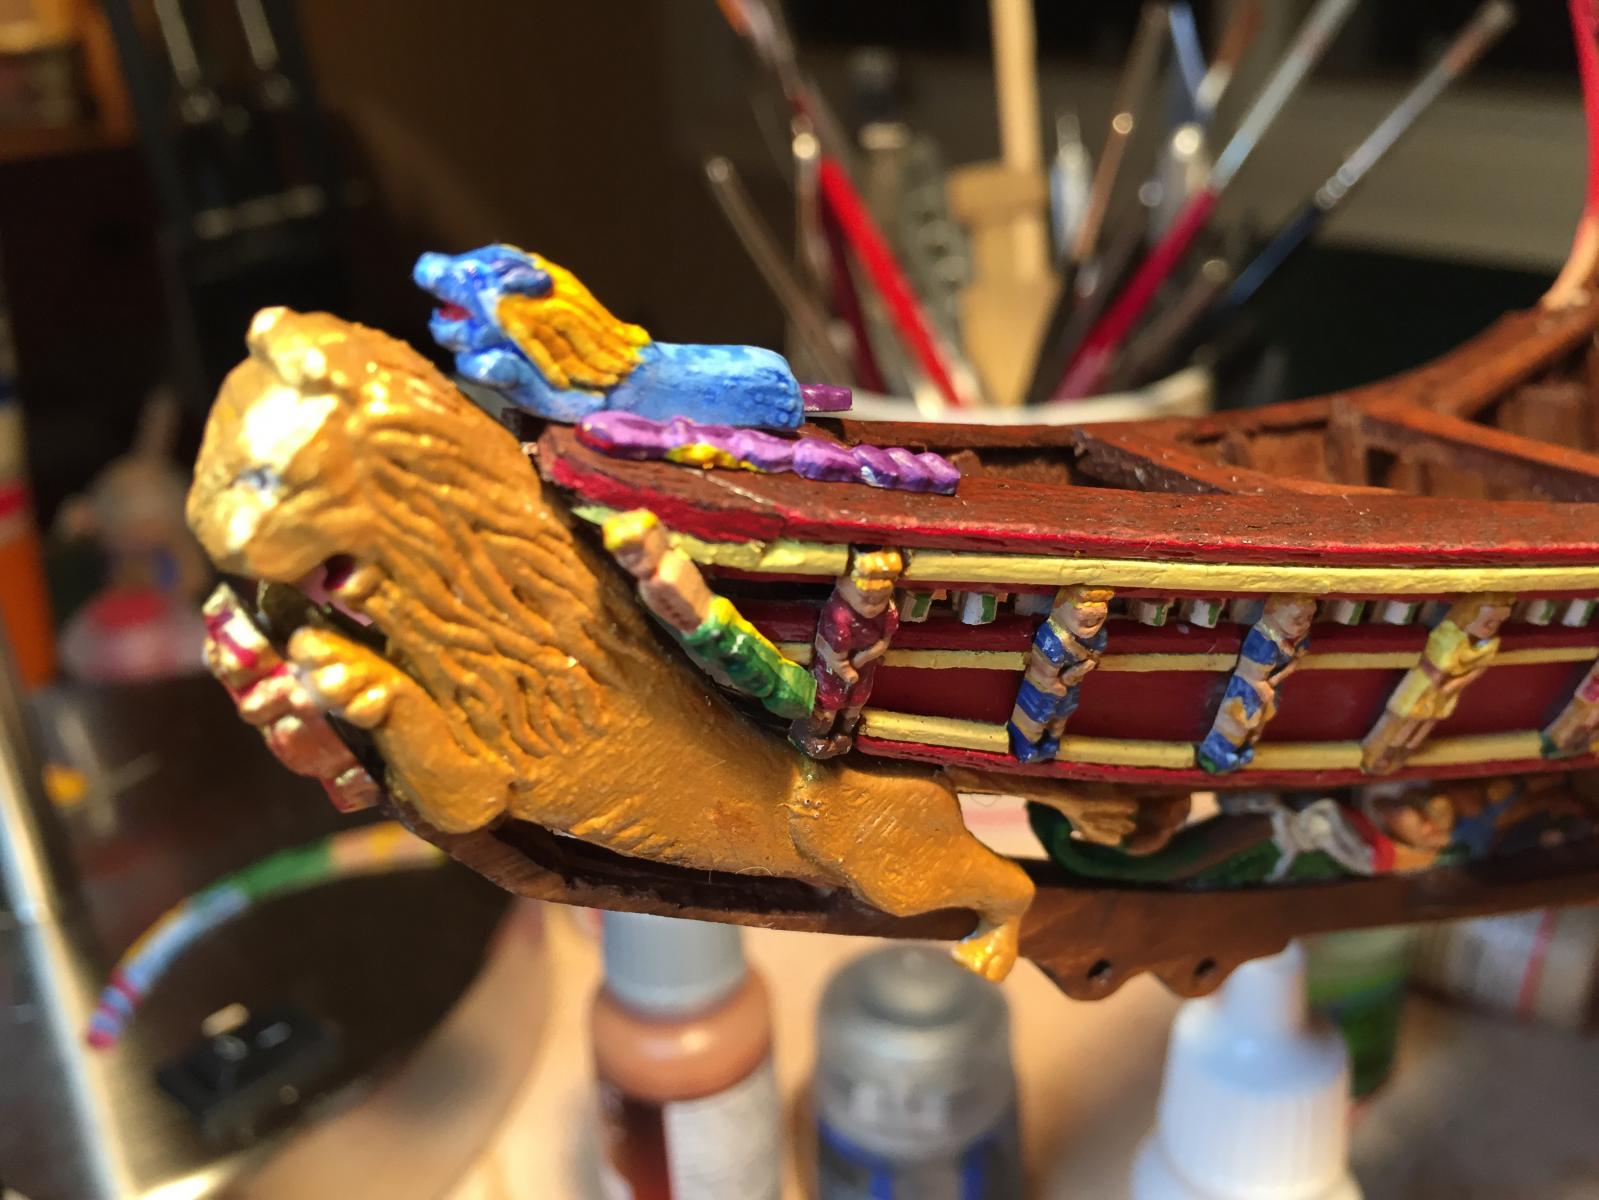
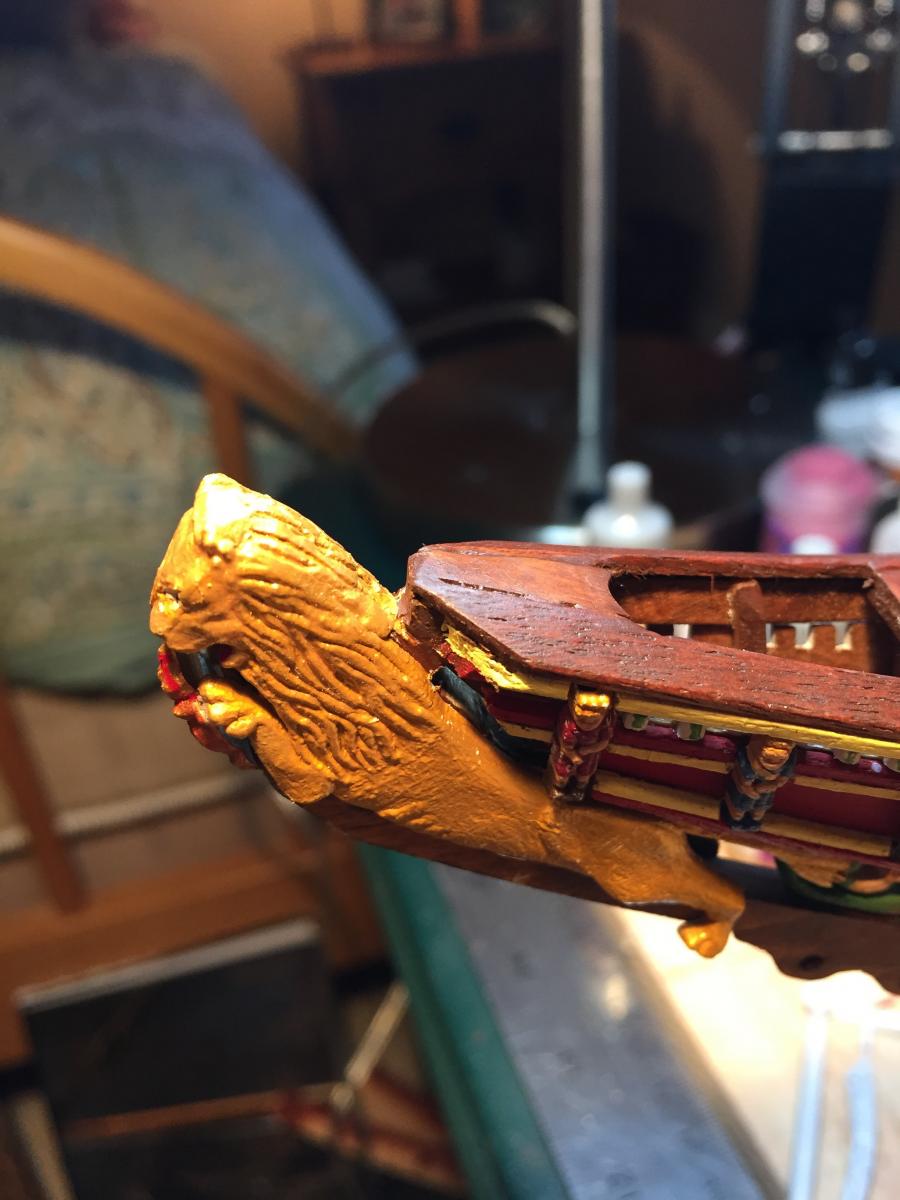
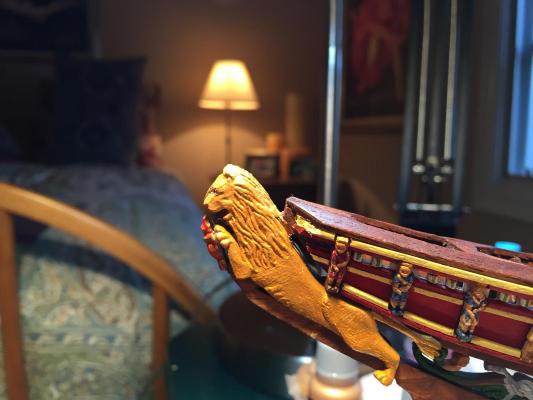
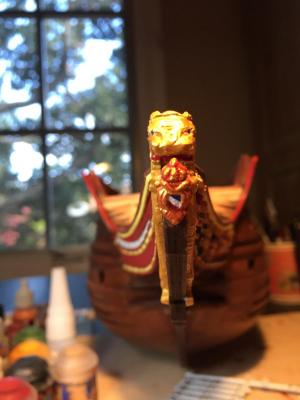
Here are some photos of the figurehead. It's composed of two flat plastic pieces that sandwich the wooden laser-cut prow. The plastic pieces matched the contours of the wood pretty well - some gaps needed building up with filler. For reasons that escape me, the port side piece has no tail, but the starboard side piece does. So I needed to trace the tail I had onto some scrap wood and try to shape it as best I could. You can see the result below. The main problem was that the wooden prow is flat across its thickness, and it needs to be rounded so it looks like a 3D lion. Also there's no texture of the lion's mane. And in the front, again with the wood being flat there isn't any realistic facial detail. I dealt with that by building up layers of wood filler and gently carving it into shape, blending it with the plastic on the sides. Here you can see the back of the lion's head, which looks pretty good now. The face was much more challenging. I know nothing about carving/sculpting, so I just needed to try my best to make something vaguely face-like. It doesn't look too bad, I think. Here you can also see the Vasa coat of arms clutched in the lion's paws.

- 249 replies
-
- 6
-
-
- billing boats
- vasa
- (and 1 more)
-
I'm a big fan of the plastic sculptures. They are easy to bend, thin, etc, and as you say take paint very well. I wish they had more detail, but that costs money and these kits are built to a price point. Maybe the Vasamuseet could produce 3d printed sculptures scanned from the real thing, and at various scales, hint hint :-)
-
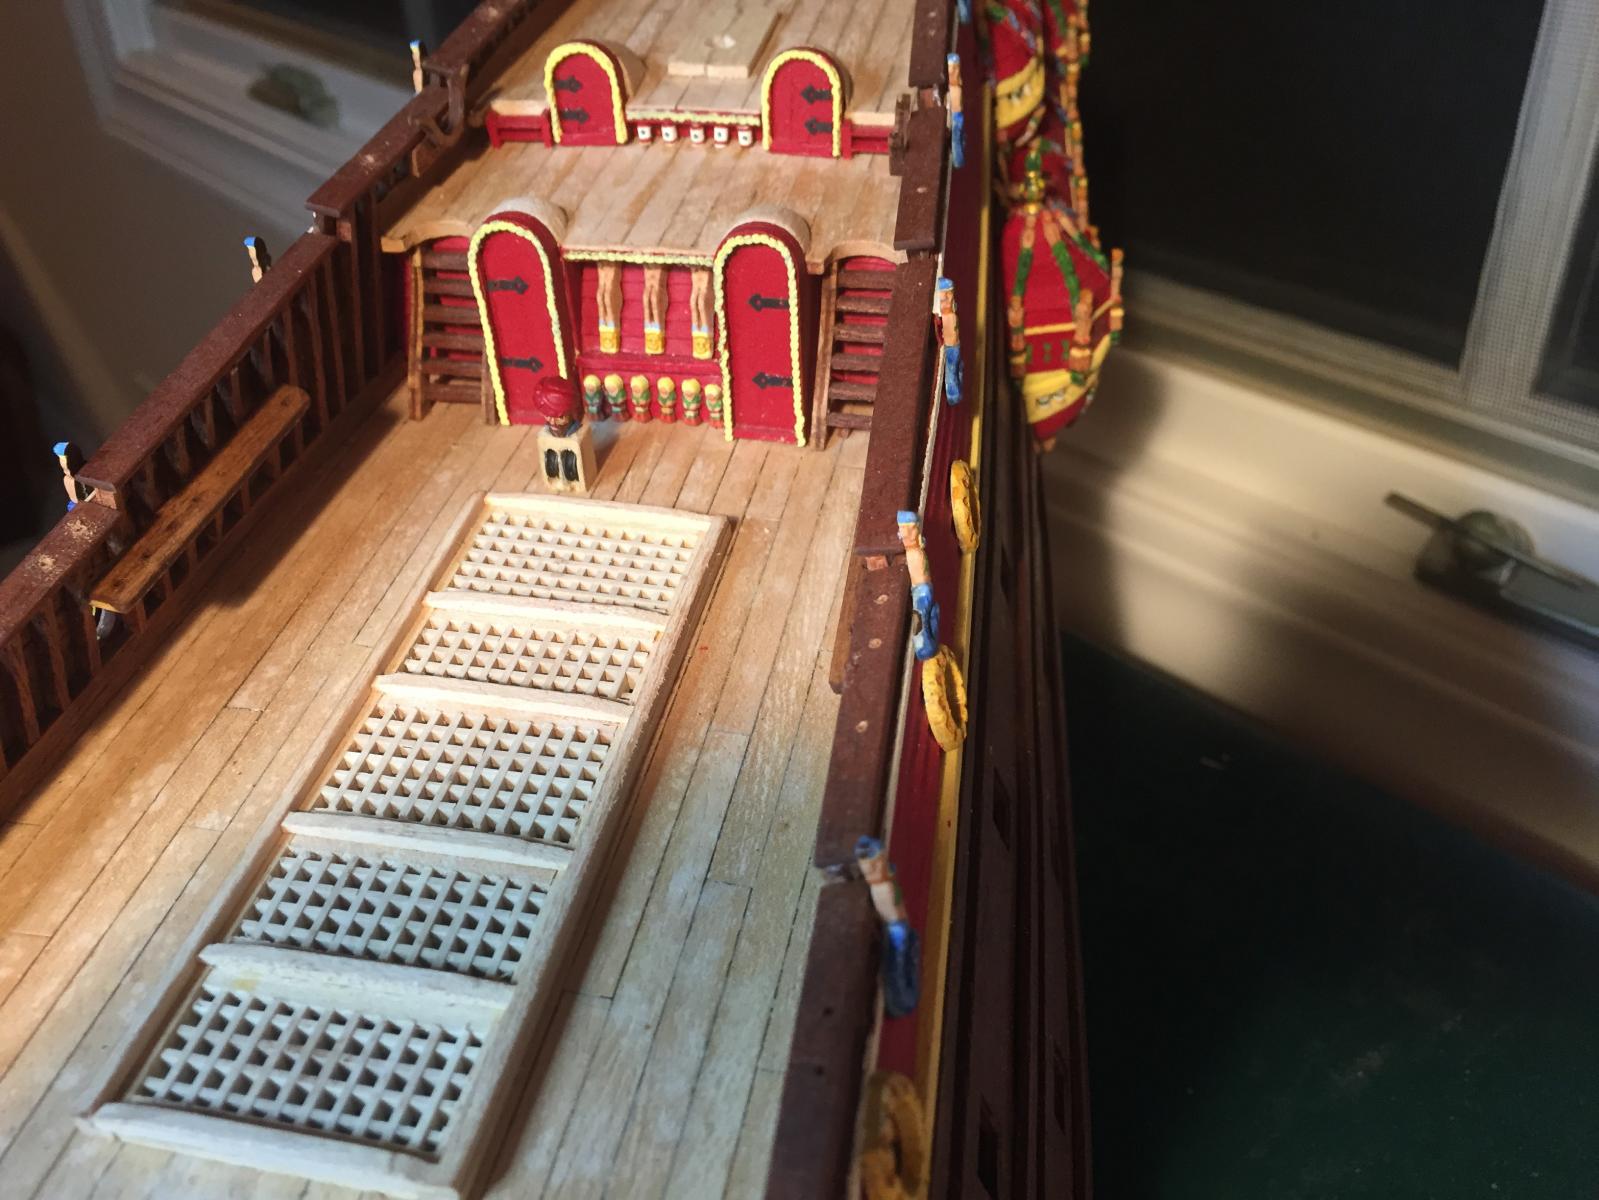
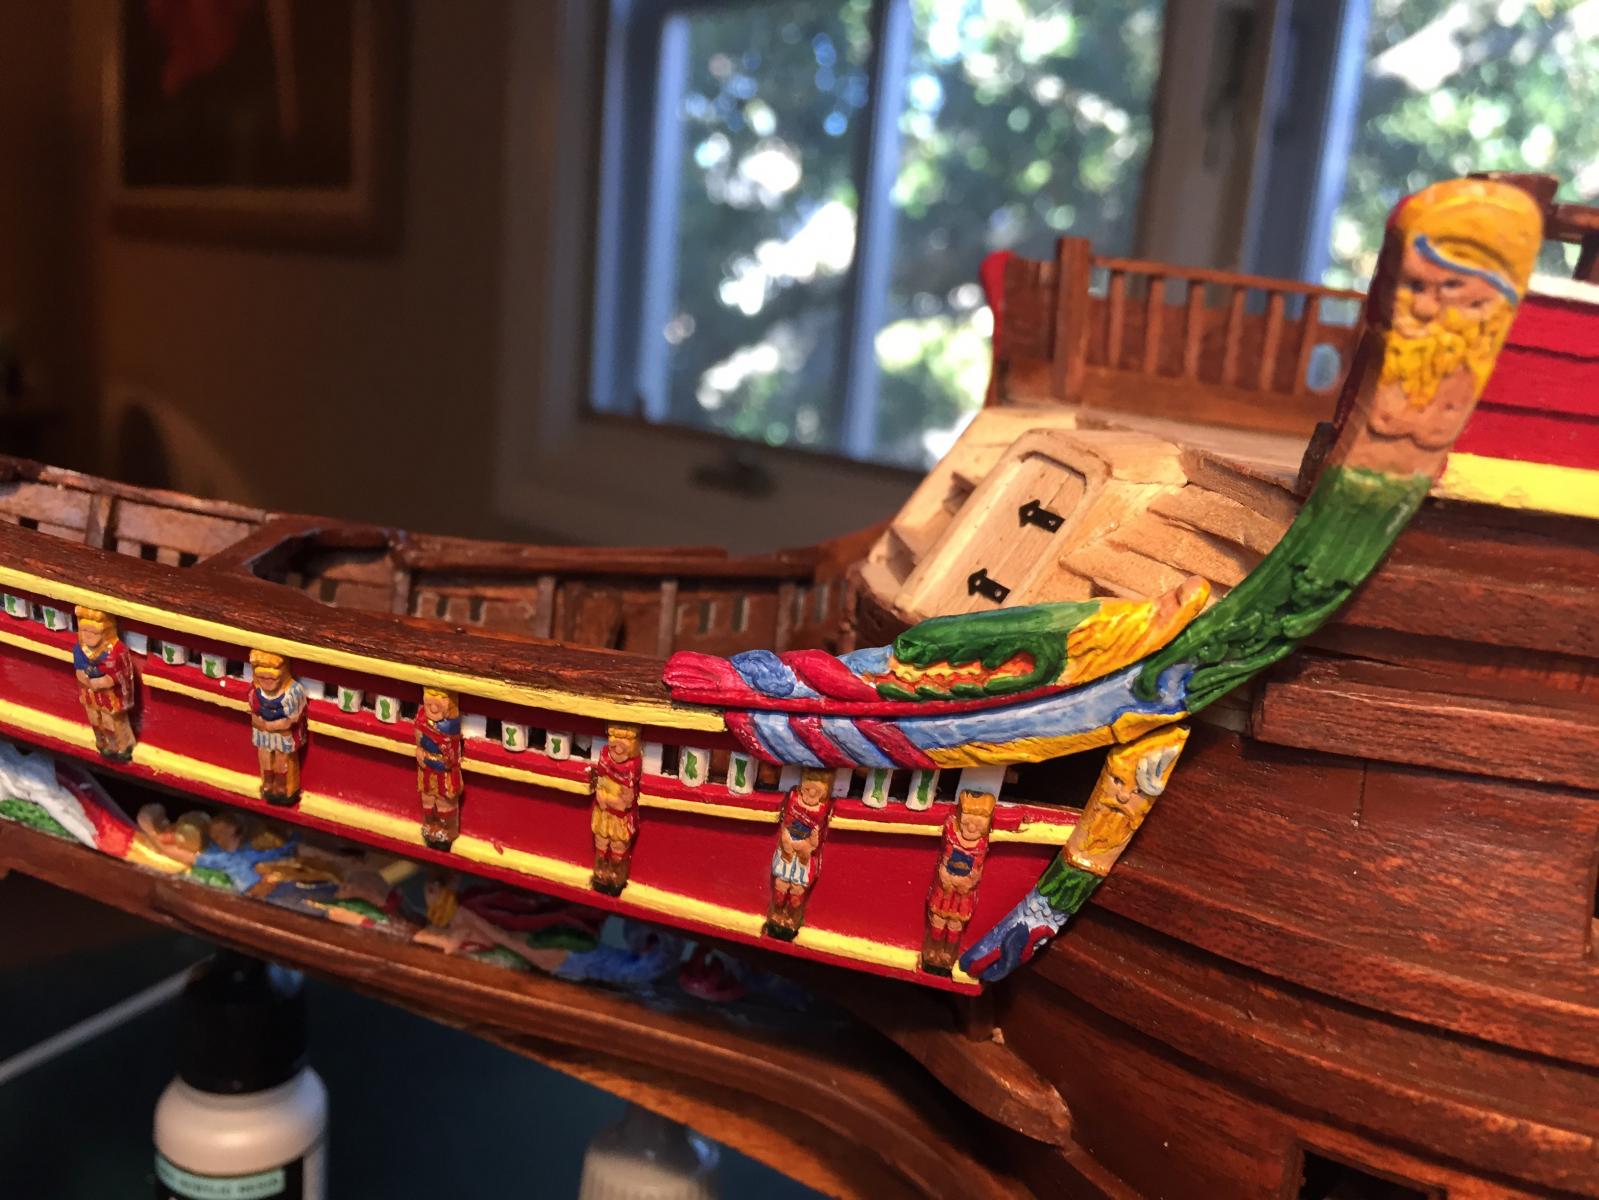
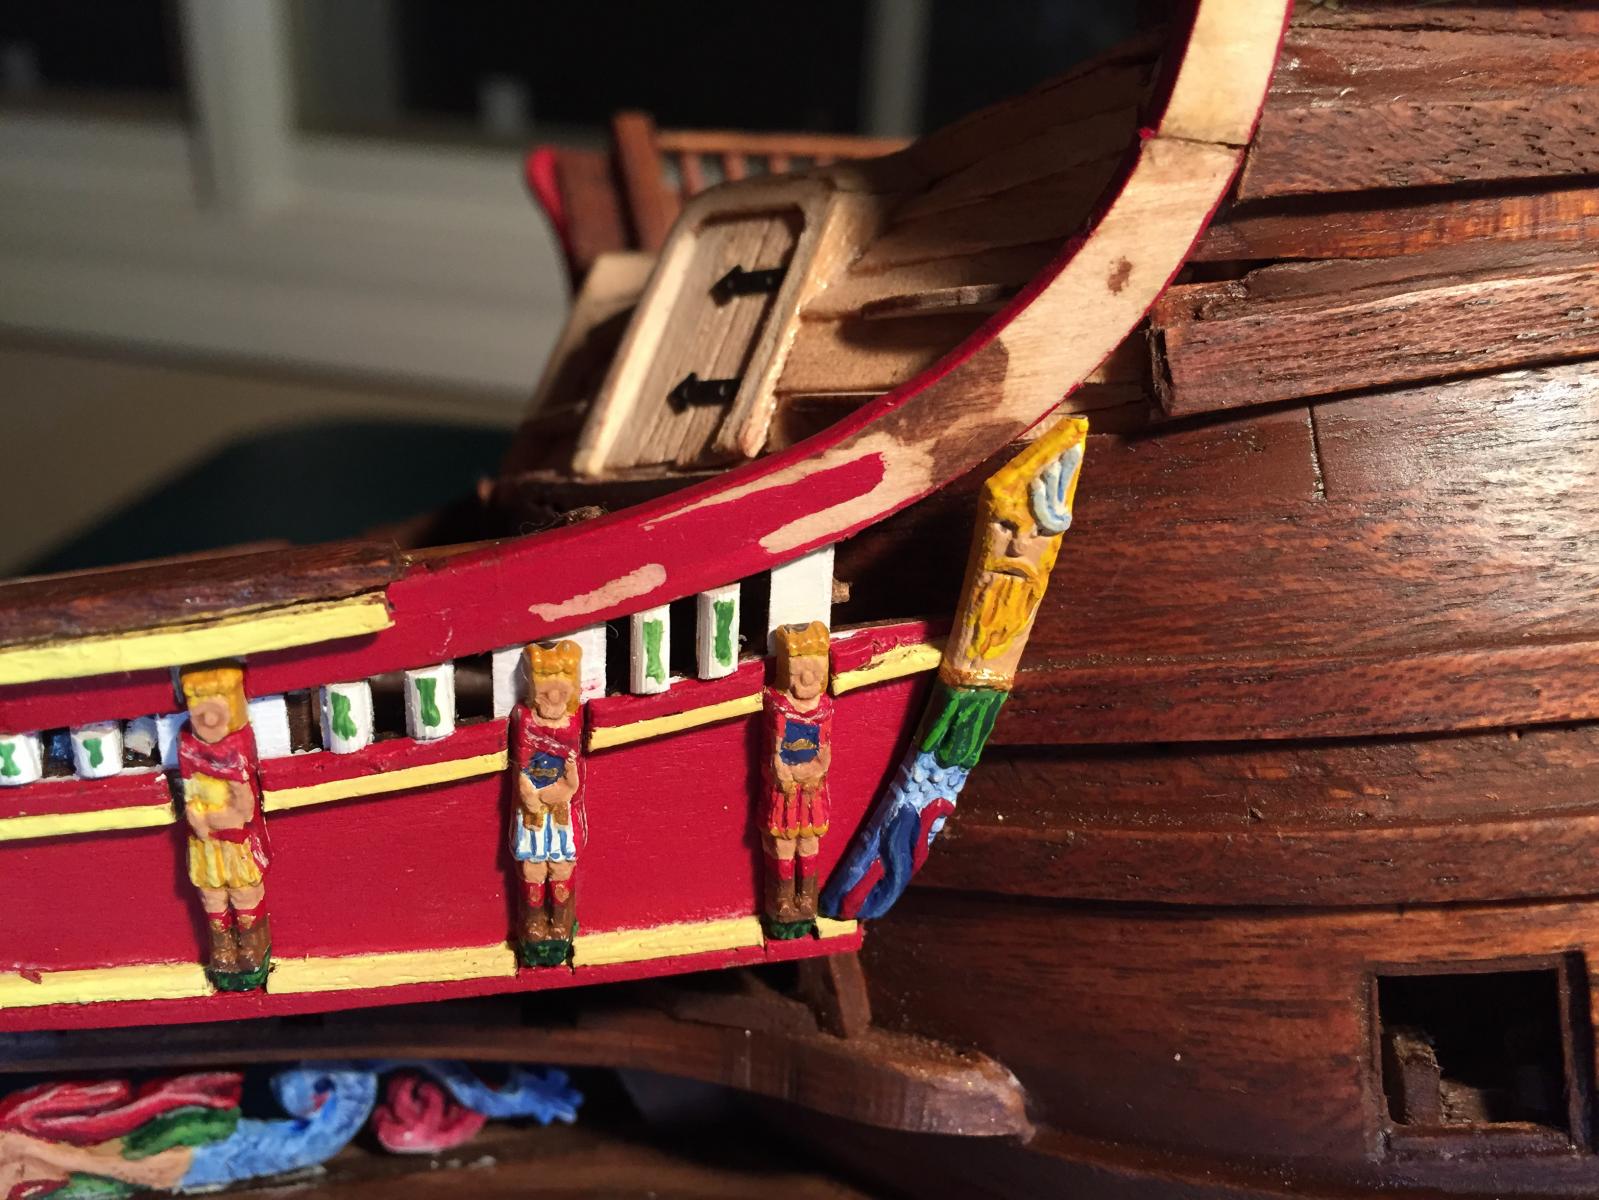
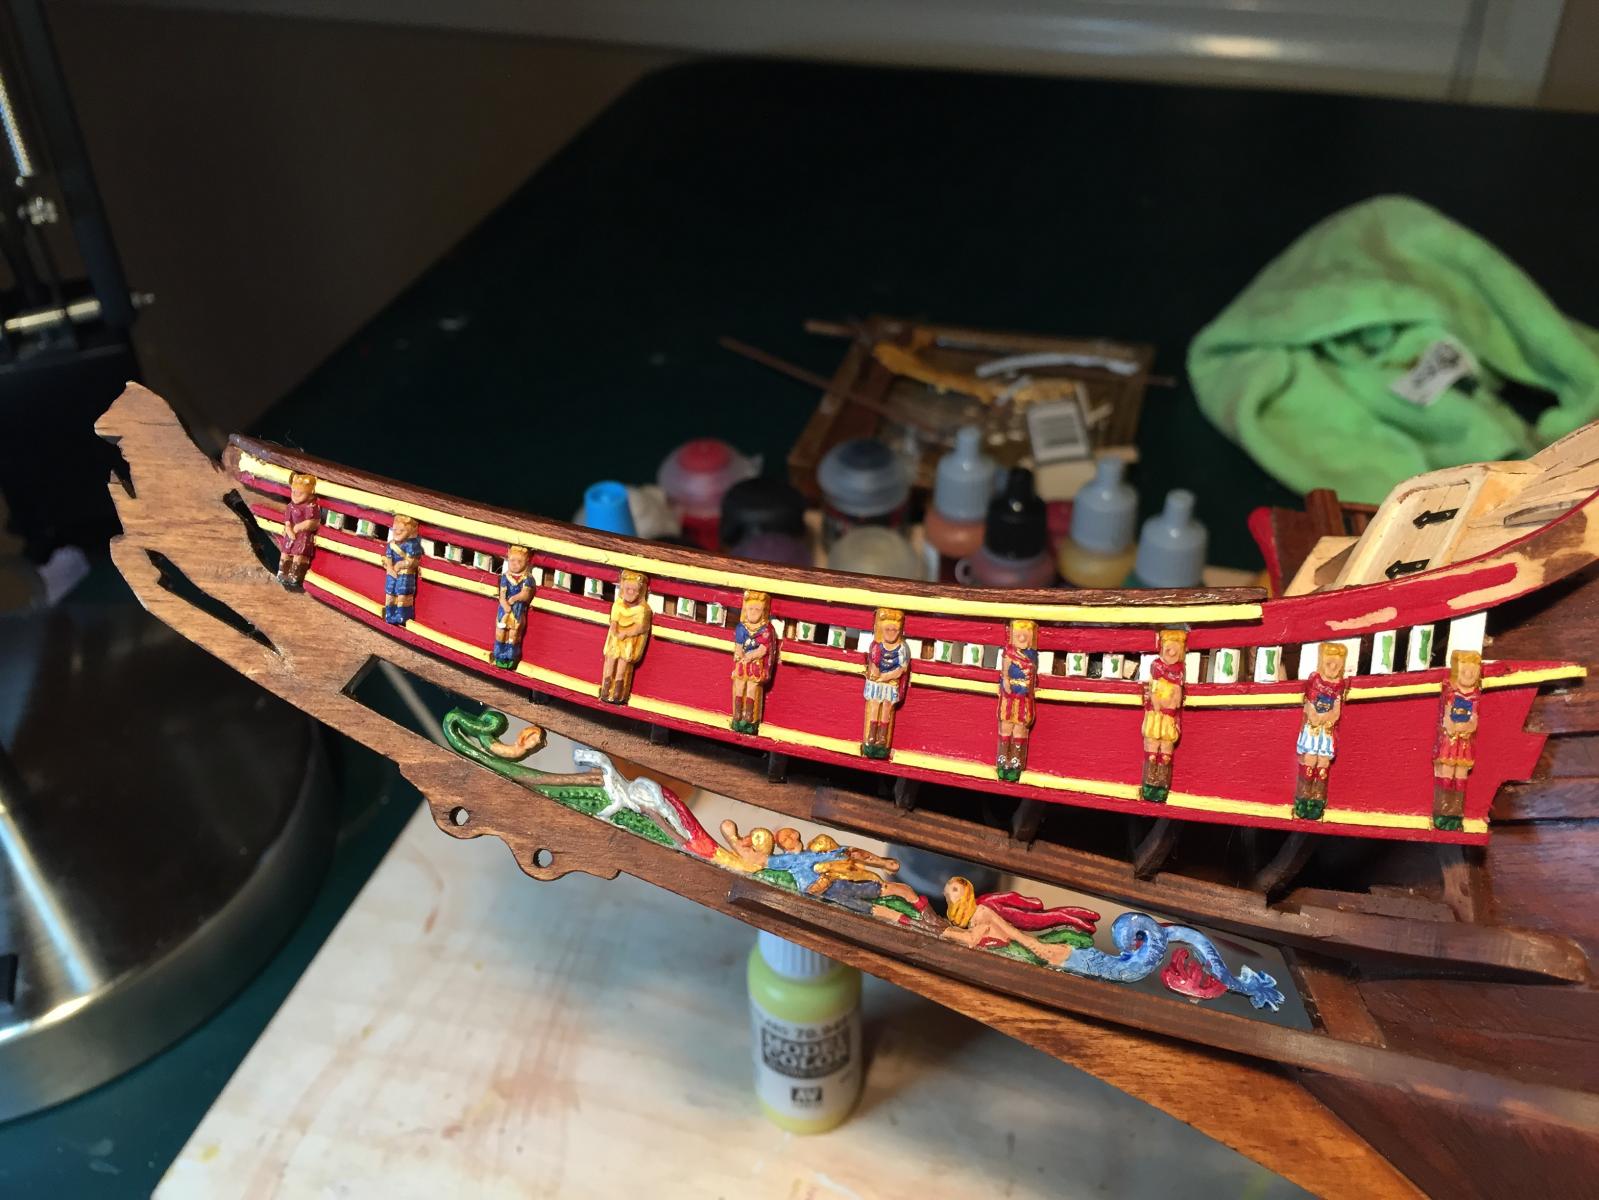
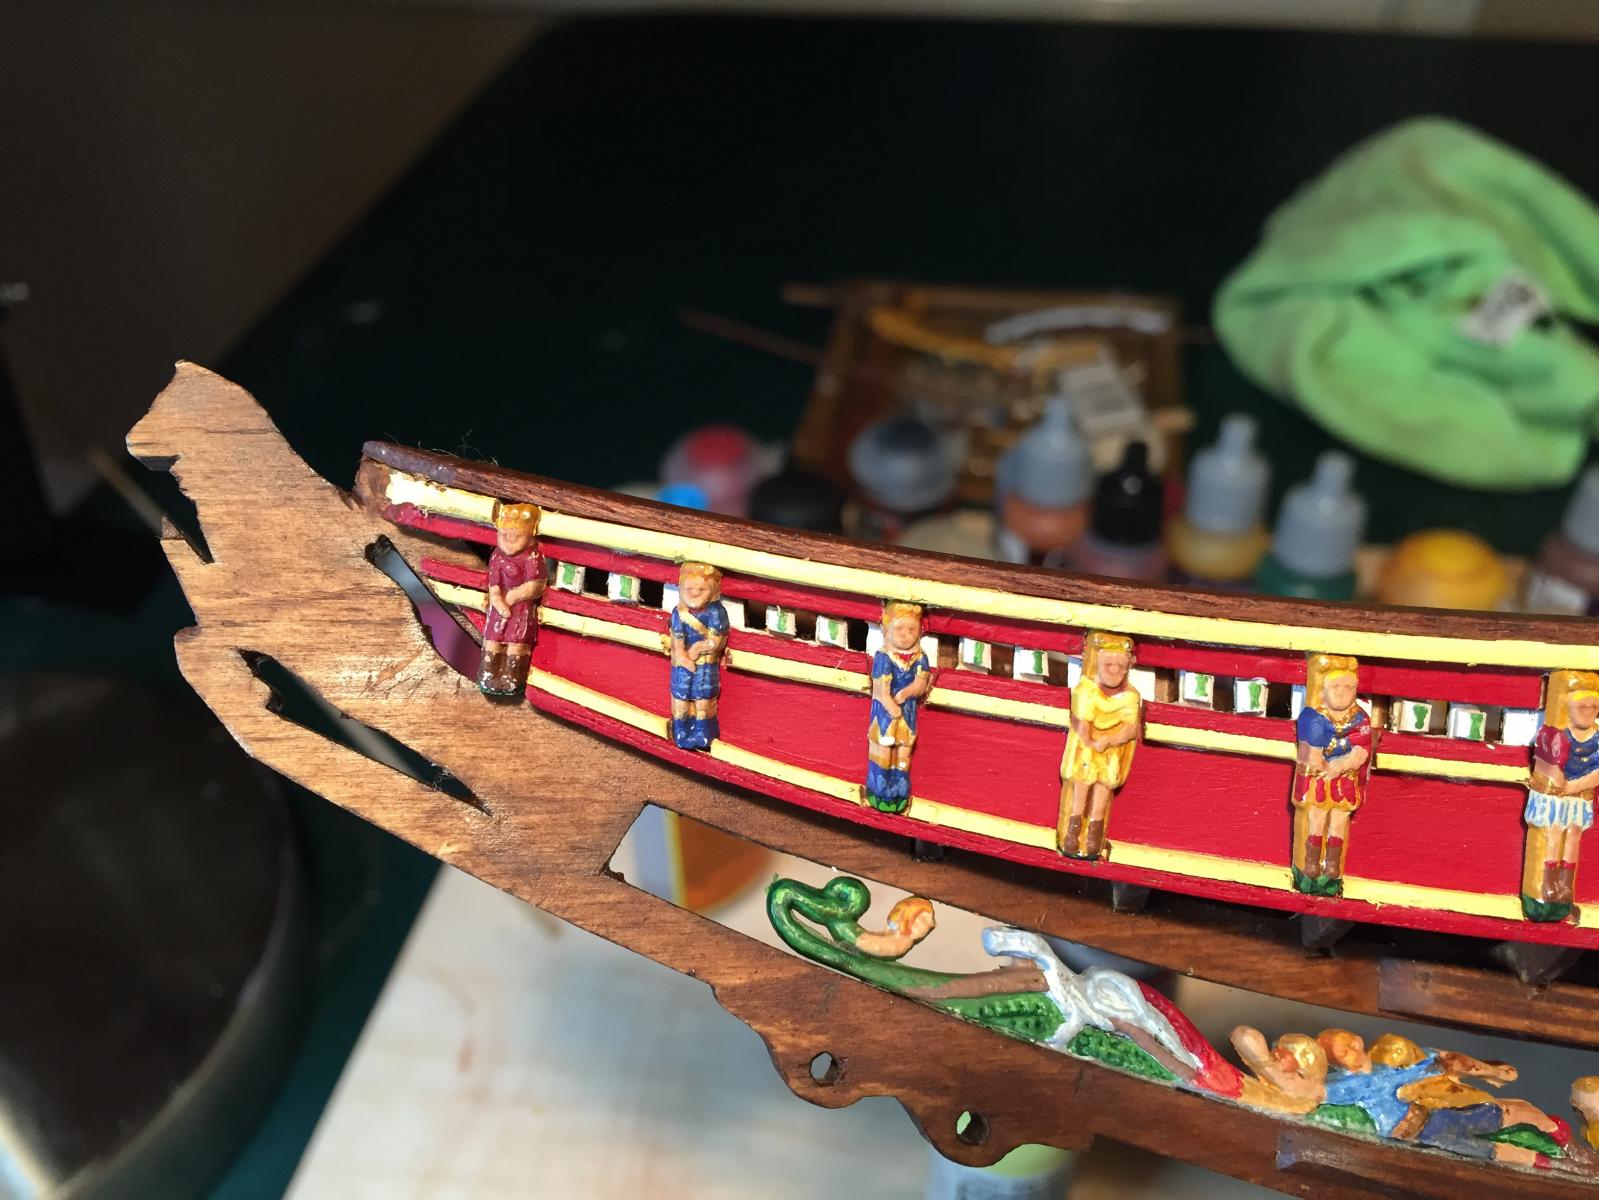
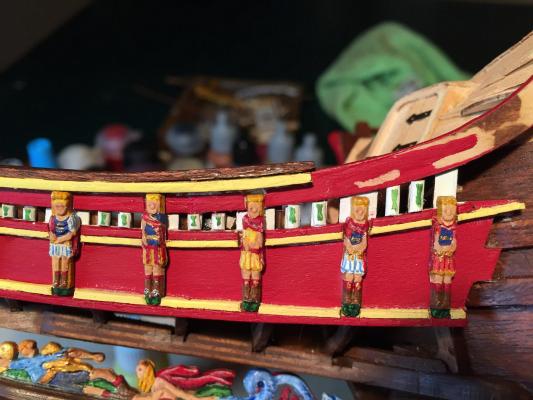
I haven't had a lot of time for the project over the past couple of weeks, but I have managed to get some of the beakhead sculptures painted and installed. I started with the large sculpture at the bottom of the beakhead. It depicts a conflict between Thetis (a sea goddess) and Peleus (a hero). Zeus and Poseidon tell Thetis she has to marry Peleus, and she refuses. Peleus, on the advice of Proteus (another sea god), attempts to force her to marry him by binding her while she is asleep, but she wakes and is understandable somewhat annoyed. She then fights with him, shifting form, becoming among other things a lioness, a serpent, flame, an eagle, and water. Peleus manages to survive, so she agrees to marry him. Their son is Achilles of Trojan War fame. Understanding the myth helps make sense of the rather complicated sculpture. The detail's not great on the moldings, but it's good enough to see the hapless Peleus, plus Thetis as a mermaid, a lion, an eagle, and flame. The 1:10 has a serpent, but I couldn't find it in the kit sculpture. Here are some close-up photos of the ten Roman emperors at the top of the beak. The kit provides three sizes of sculpture, and they don't all fit properly, some being too long. Luckily Karl is a genius and talks in his build about using a clothes iron to shrink the sculptures as needed. The process worked like magic, and shrunk the sculptures in most cases enough to fit. Some needed their plinths chopped off because I got nervous at the thought of increasing the heat and getting more shrinking. More emperors. The front emperor Augustus had to be carefully fitted to avoid running into the lion figurehead. You can also see the balusters between the emperors - on the kit they are part of the beak side, and flat. I cut toothpicks into a semi-circular cross-section and glued them to the flat parts, making more of a 3D look. I wanted more detail on them, but they are just too small.


- 249 replies
-
- 4
-
-
- billing boats
- vasa
- (and 1 more)
-
Beautiful work. Are you going to wait for publication of Vasa II before proceeding further, or finish the rigging according to the plans? mark
-
Beautiful work. I guess if I'm going to do the same sails I will need to find a sewing machine and learn to use it.
-
And now the large triton at the waist. The kit sculpture was a little odd - it looked sort of like a sarcophagus - so I reshaped it a bit. The sculpture lies across three of the wales, so I needed to add little blocks to fill the gaps. Also, there is a rope line of some sort that passes through the sculpture, so one of the filler blocks has a transverse hole cut in it that will allow the line to pass through. With that, it's time to move up to the group of sculptures at the beak, starting with the complicated scenery under the beak deck.
- 249 replies
-
- 5
-
-
- billing boats
- vasa
- (and 1 more)
-
Next up were the herms along the side of the hull. Again the sculptures were pretty good, but where the ship has two kinds, the kit provides only one. I painted them all the same, trying to get at least some fish scale detail on them. Here's a close-up: And a view of the entire row:


- 249 replies
-
- 5
-
-
- billing boats
- vasa
- (and 1 more)
-
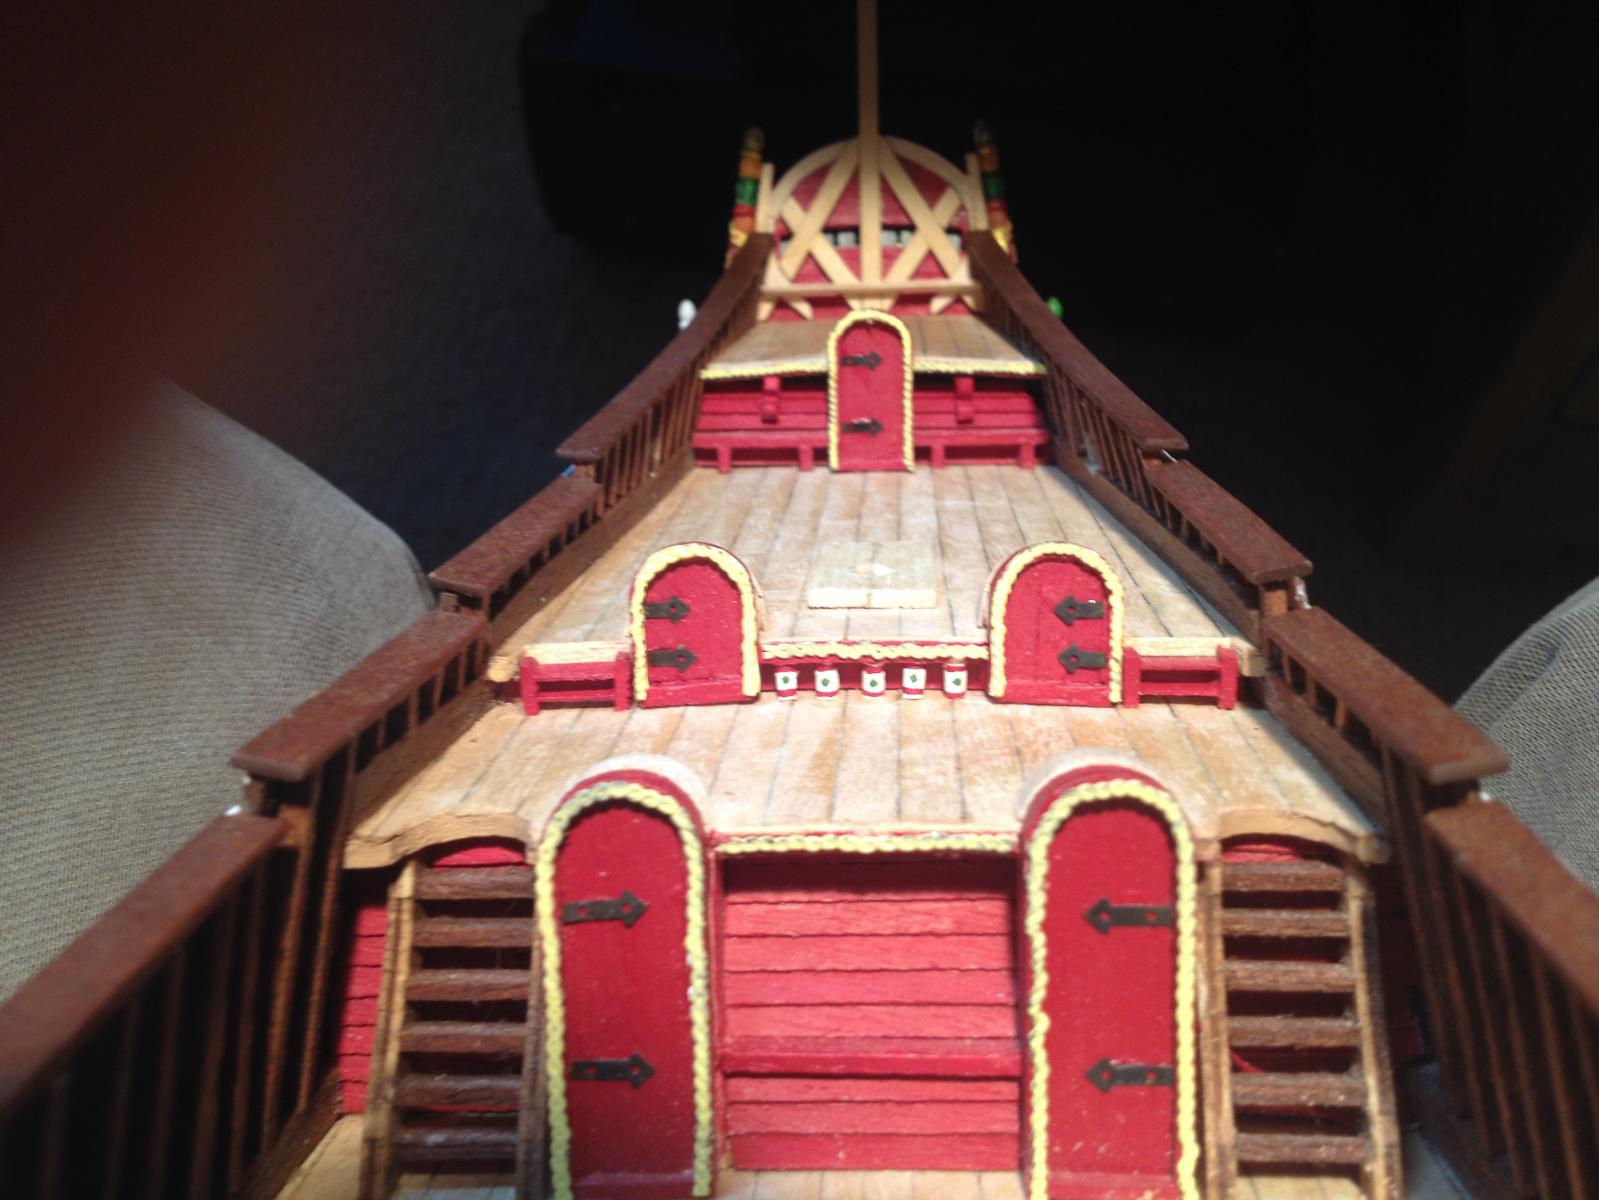
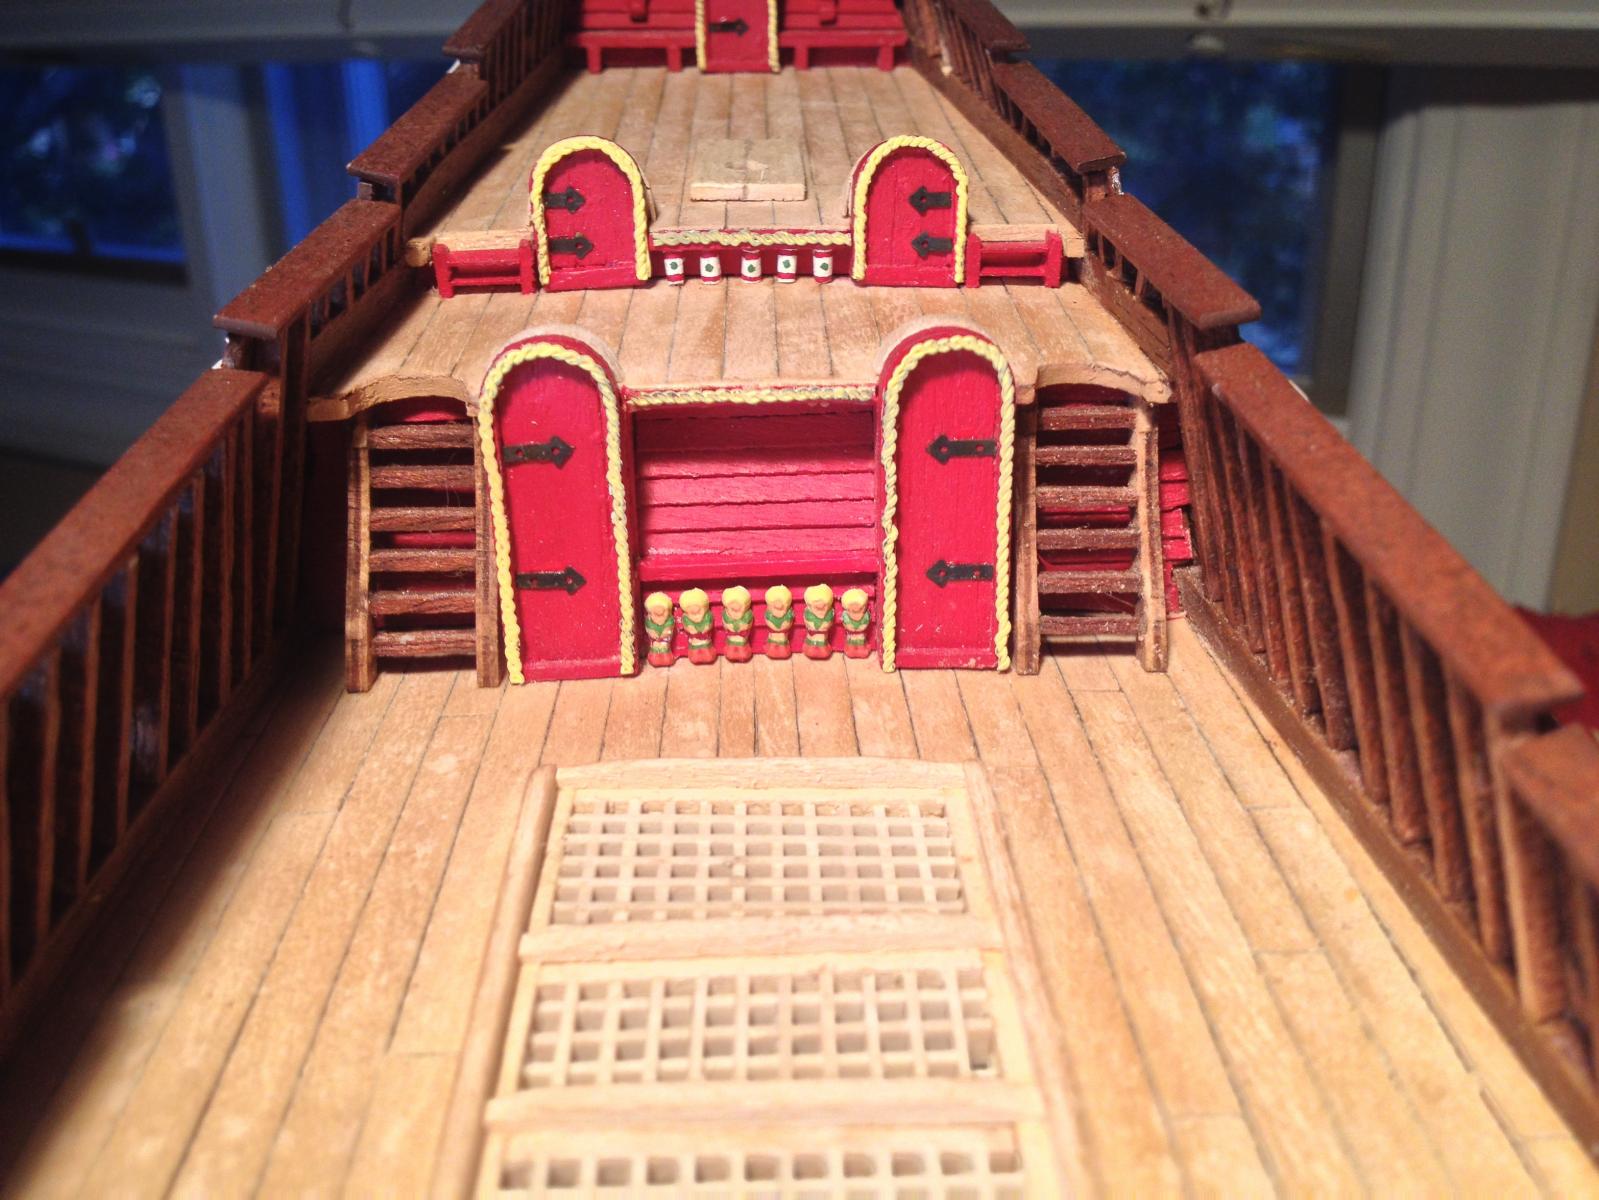
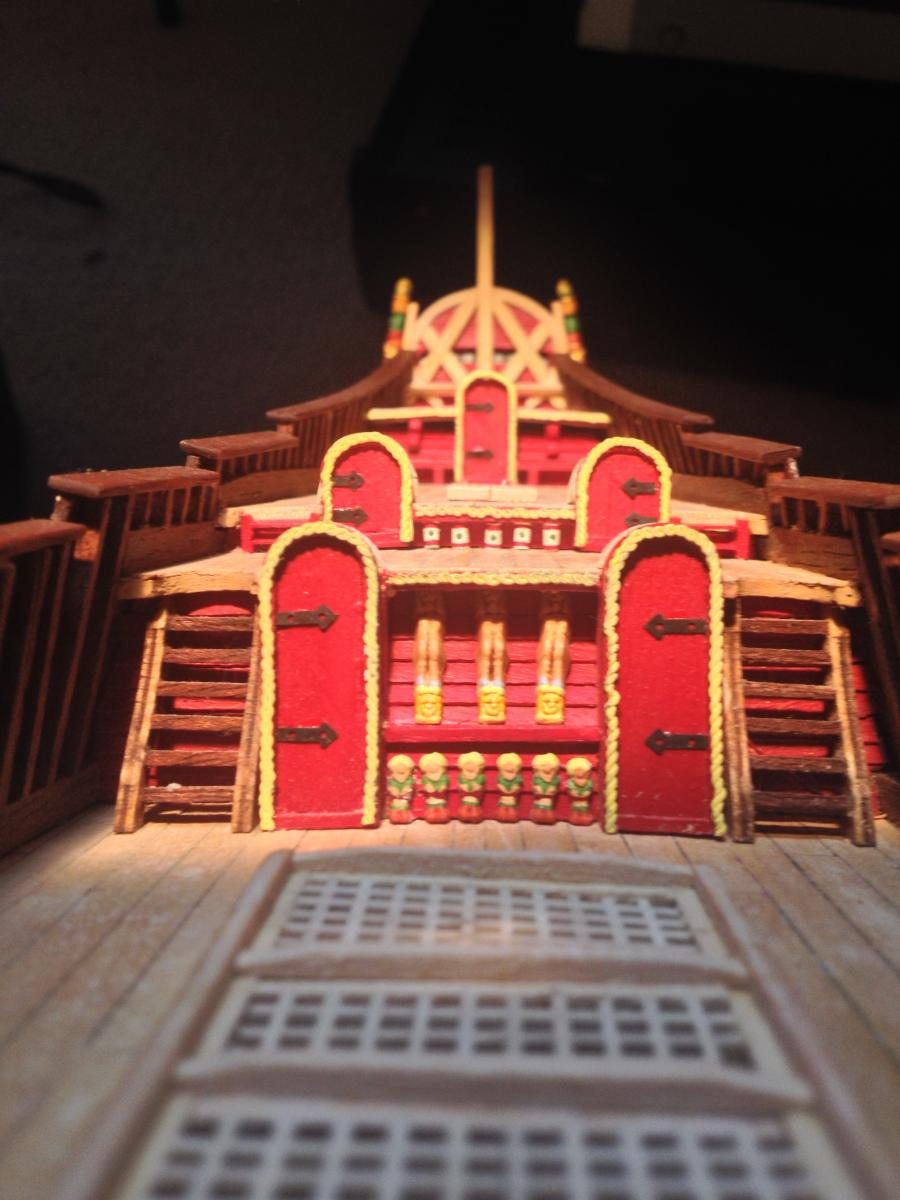
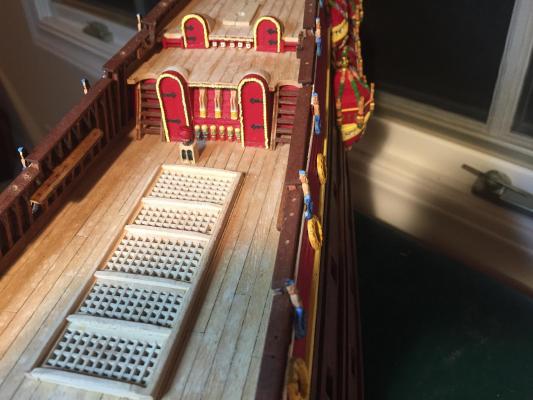
Thanks for the kind words, much appreciated. With the structural hull stuff basically done, it's back to painting. The kit supplies small sculptures to go between the middle pair of doors. Unfortunately the difference between the deck heights won't fit the sculptures. I went back to the plans and I don't see any way the deck height difference could have been increased, so no idea how they expected this to work. I used small sections of toothpick instead. The kit provides the same small sculptures to use at the bottom of the space between the two doors to the helmsman's cabin. This time they fit nicely. The sculptures are quite small and very low on detail. Above the small sculptures are a set of creatures - fauns? Devils? They seem to follow the real ship sculptures quite nicely. The ship has three whole ones and two halves - one at each end - but the kit only provides the three whole ones. Rather than go back to the starboard side quarter gallery sculptures, I'm going to proceed down the port side painting sculptures all the way to the figurehead, and then work my way back down the starboard side. That way I get some variety with the painting.


- 249 replies
-
- 3
-
-
- billing boats
- vasa
- (and 1 more)
-
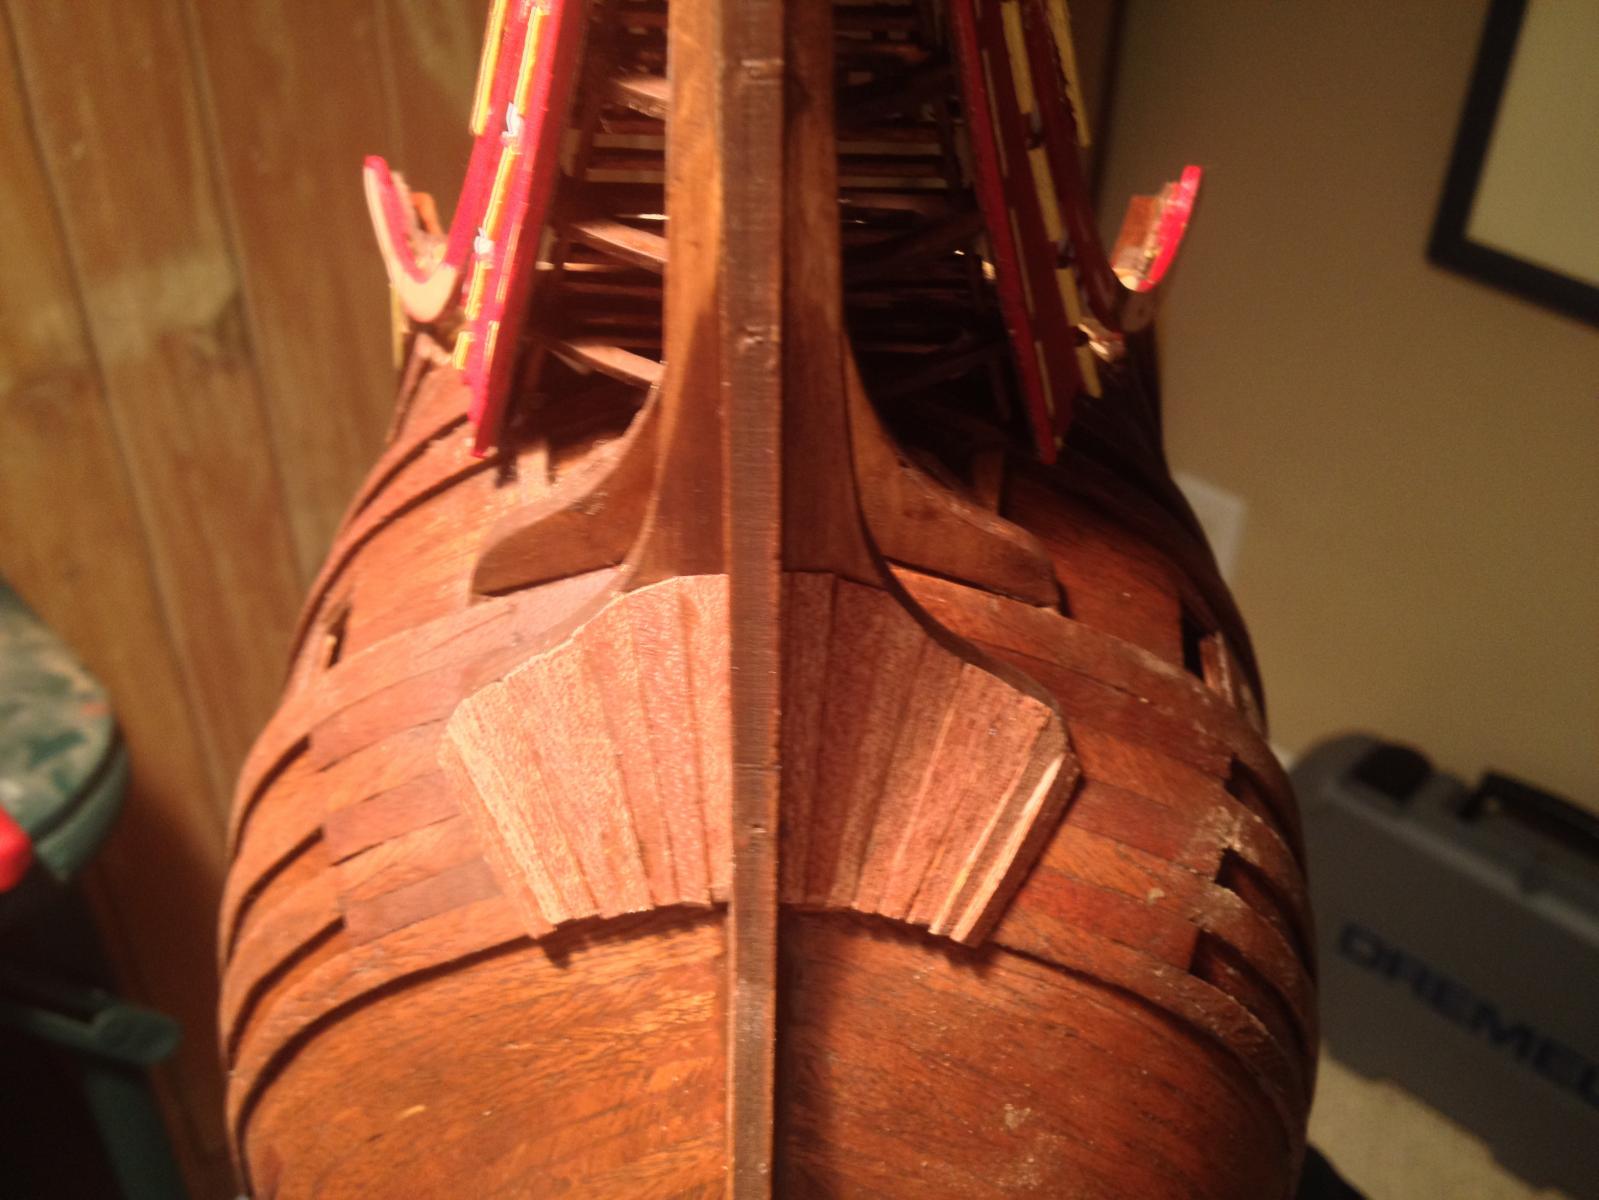
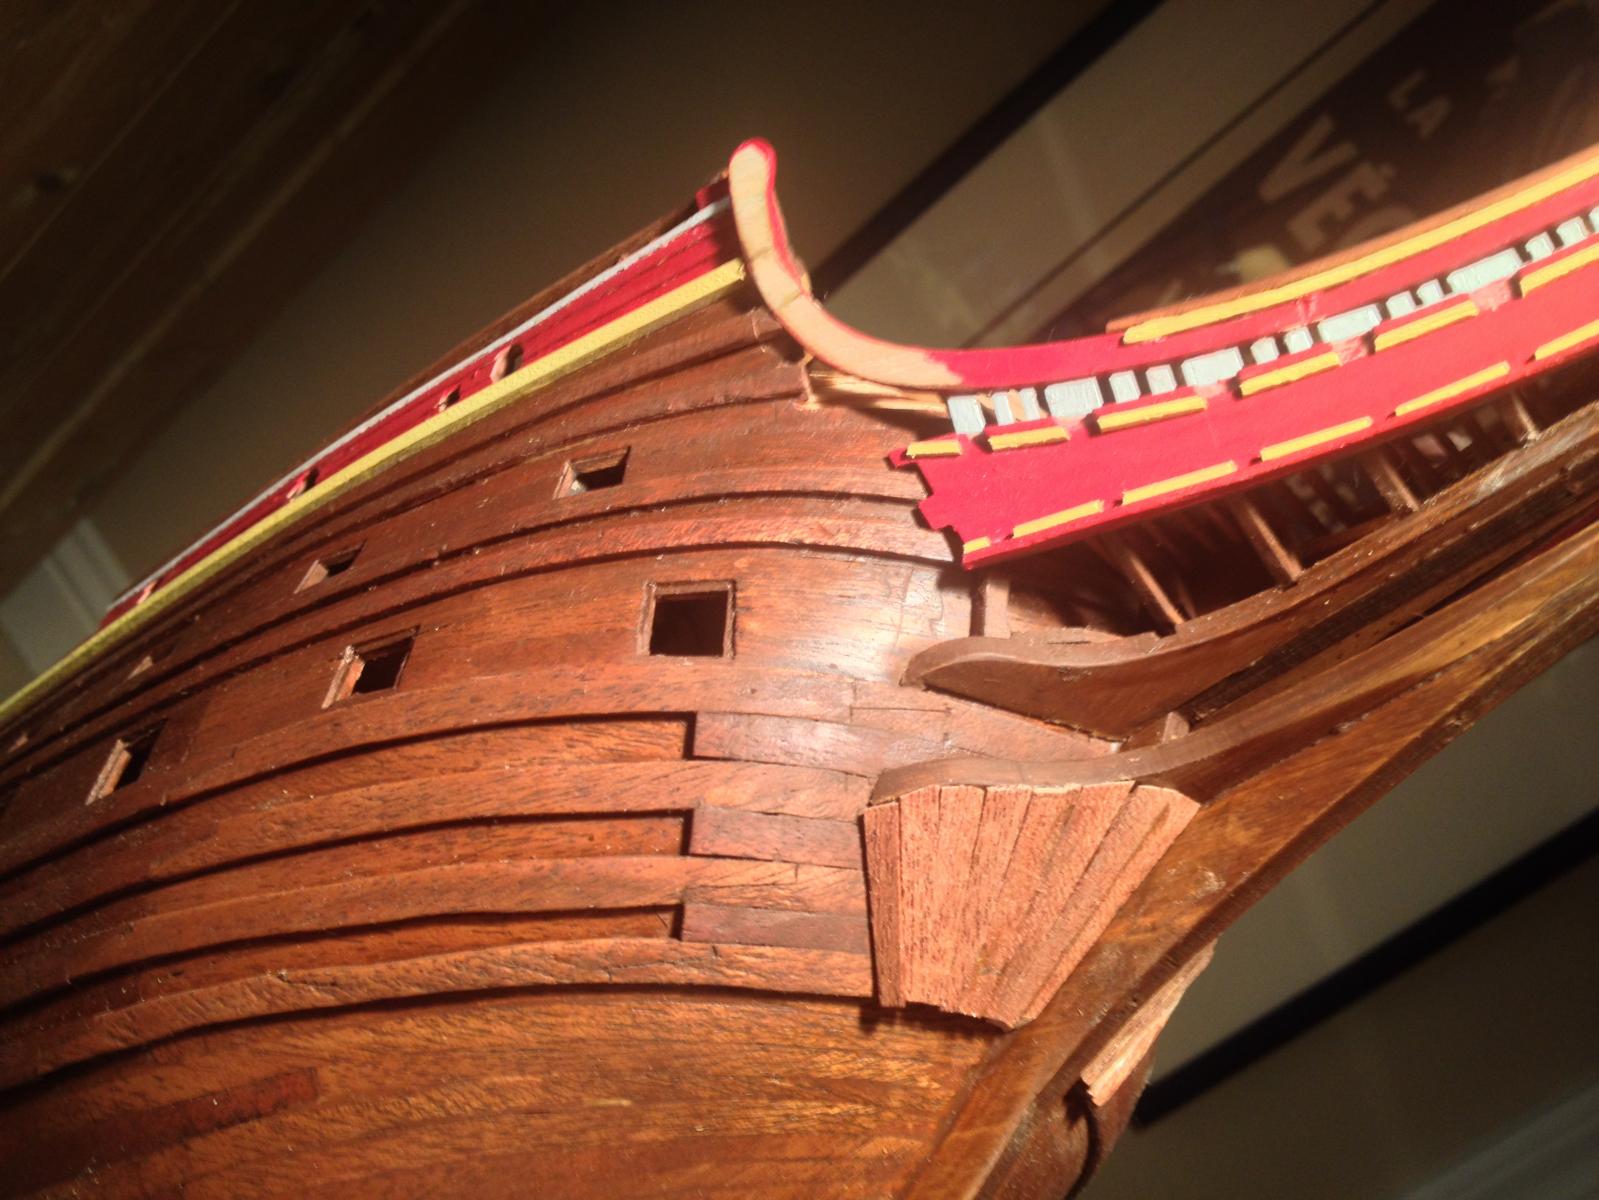
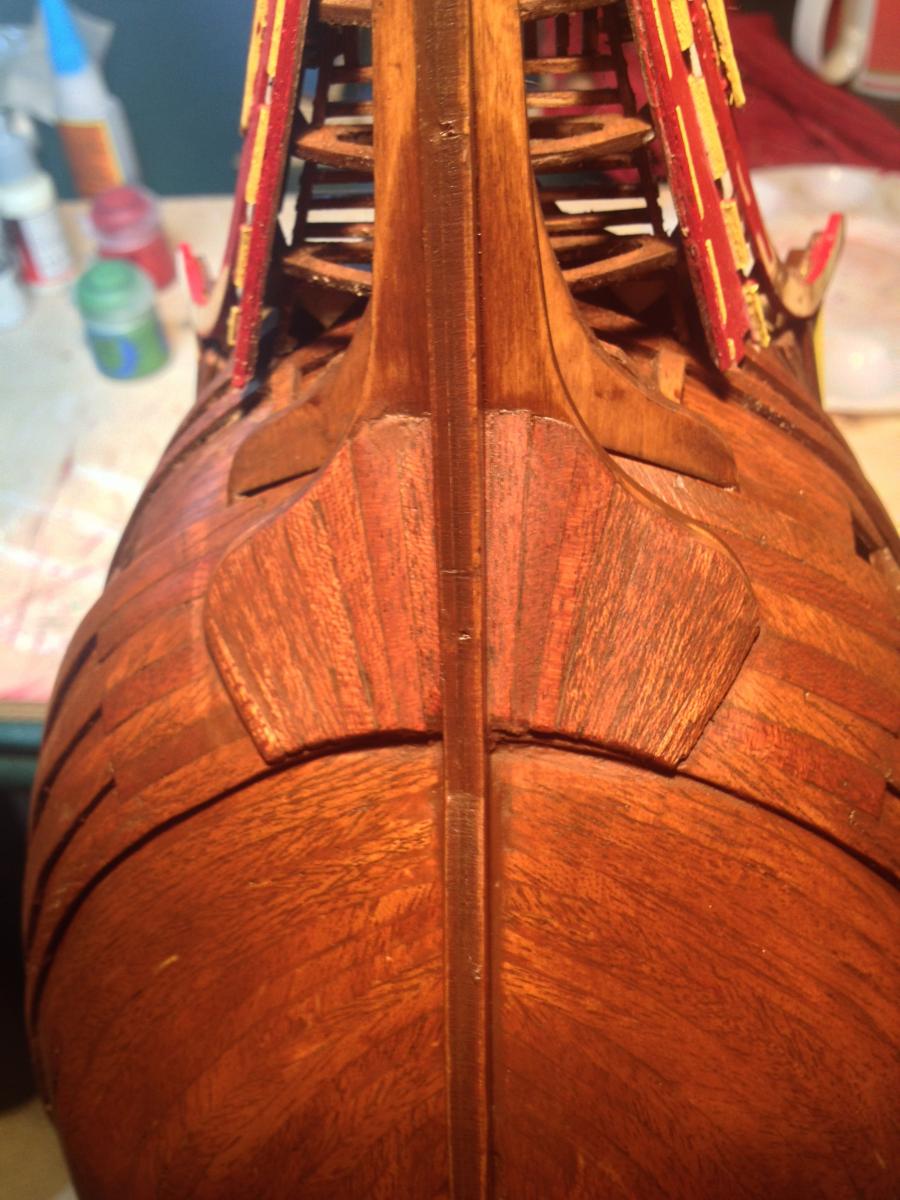
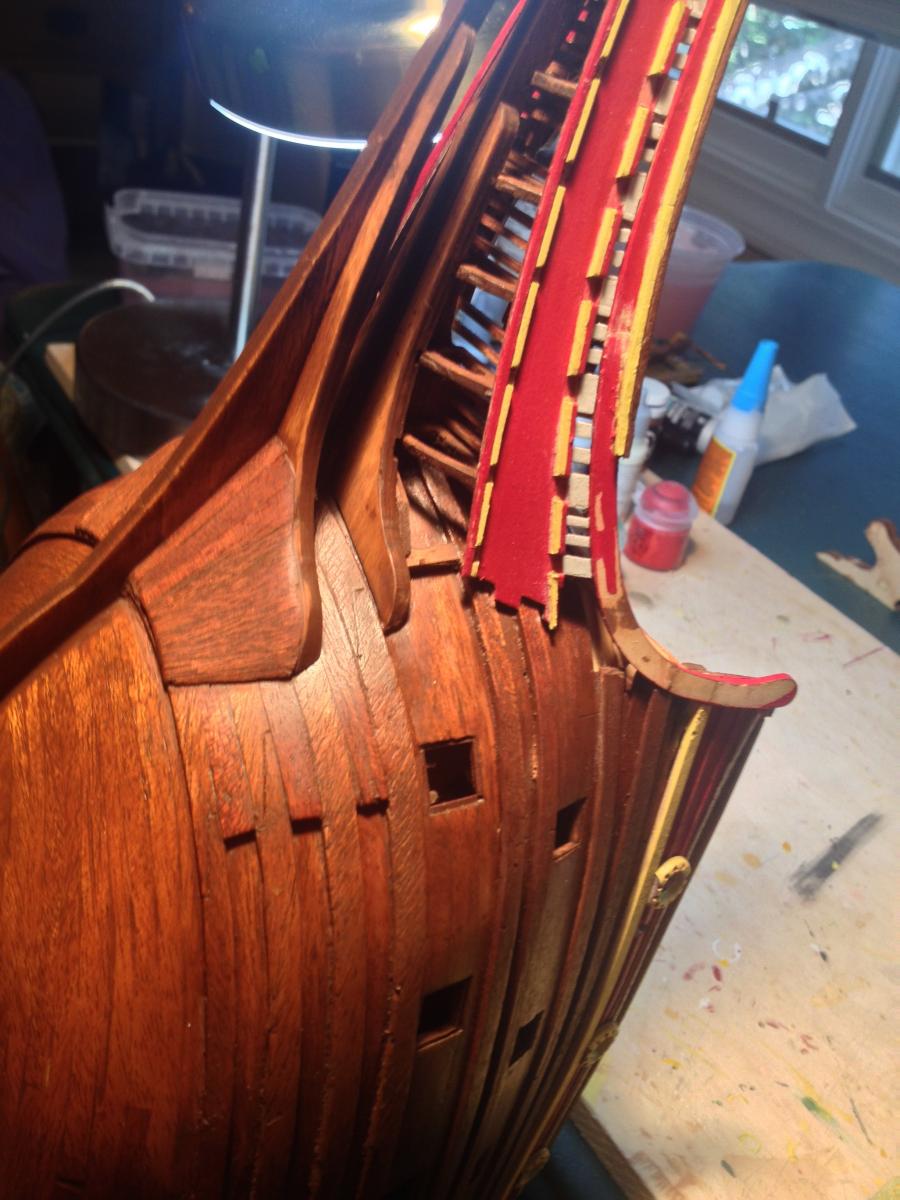
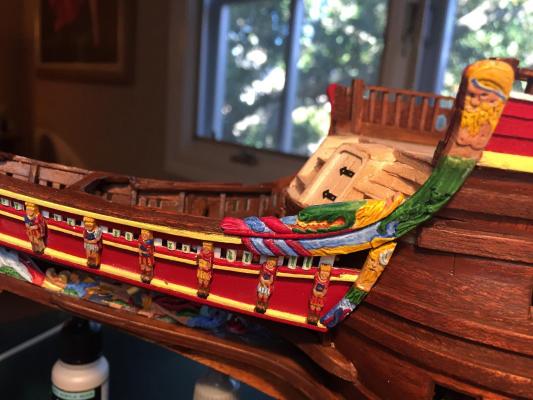
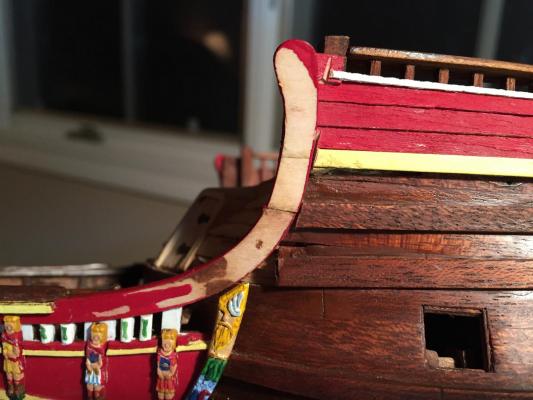
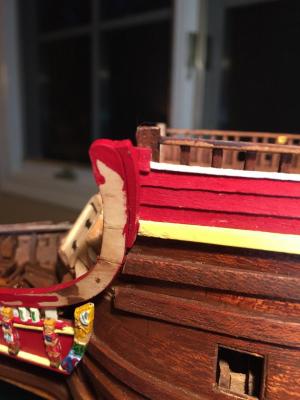
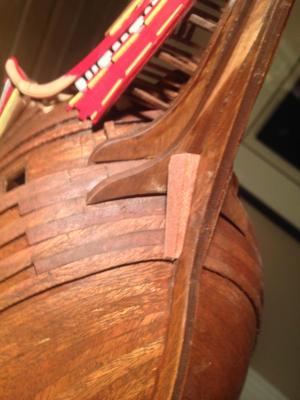
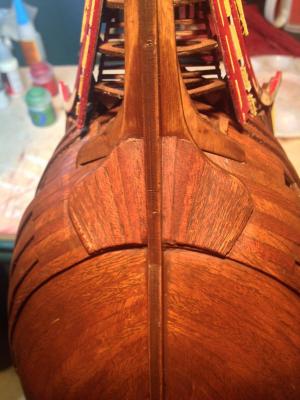
Thanks for the compliments! Here's another project - the last on the hull before I go back to painting. The ship has an interesting fairing at the bottom beak support, I assume for improved hydrodynamics. The kit plans don't show much about it and I only found a couple of photos showing it on the real ship, so I needed to guess what it looks like. I wanted a fan shape with the top running from the center of the beak to the outer point of the lower beak support, so I measured the top and bottom total length to figure out the taper of each plank. Here you can see the planking beginning from the center, and the taper of each plank: And an idea of the angle of the fairing: Now the planking is done. You can see where, even with beveling the sides the outermost planks sit too high. That will be fixed with sanding. And after a bunch of sanding, and a few passes through the guest bedroom with a vacuum cleaner: And the finished product, after more sanding, some modest filling, and staining: Another view. I think it turned out nicely. Now time to move back to painting things!


- 249 replies
-
- 6
-
-
- billing boats
- vasa
- (and 1 more)
-
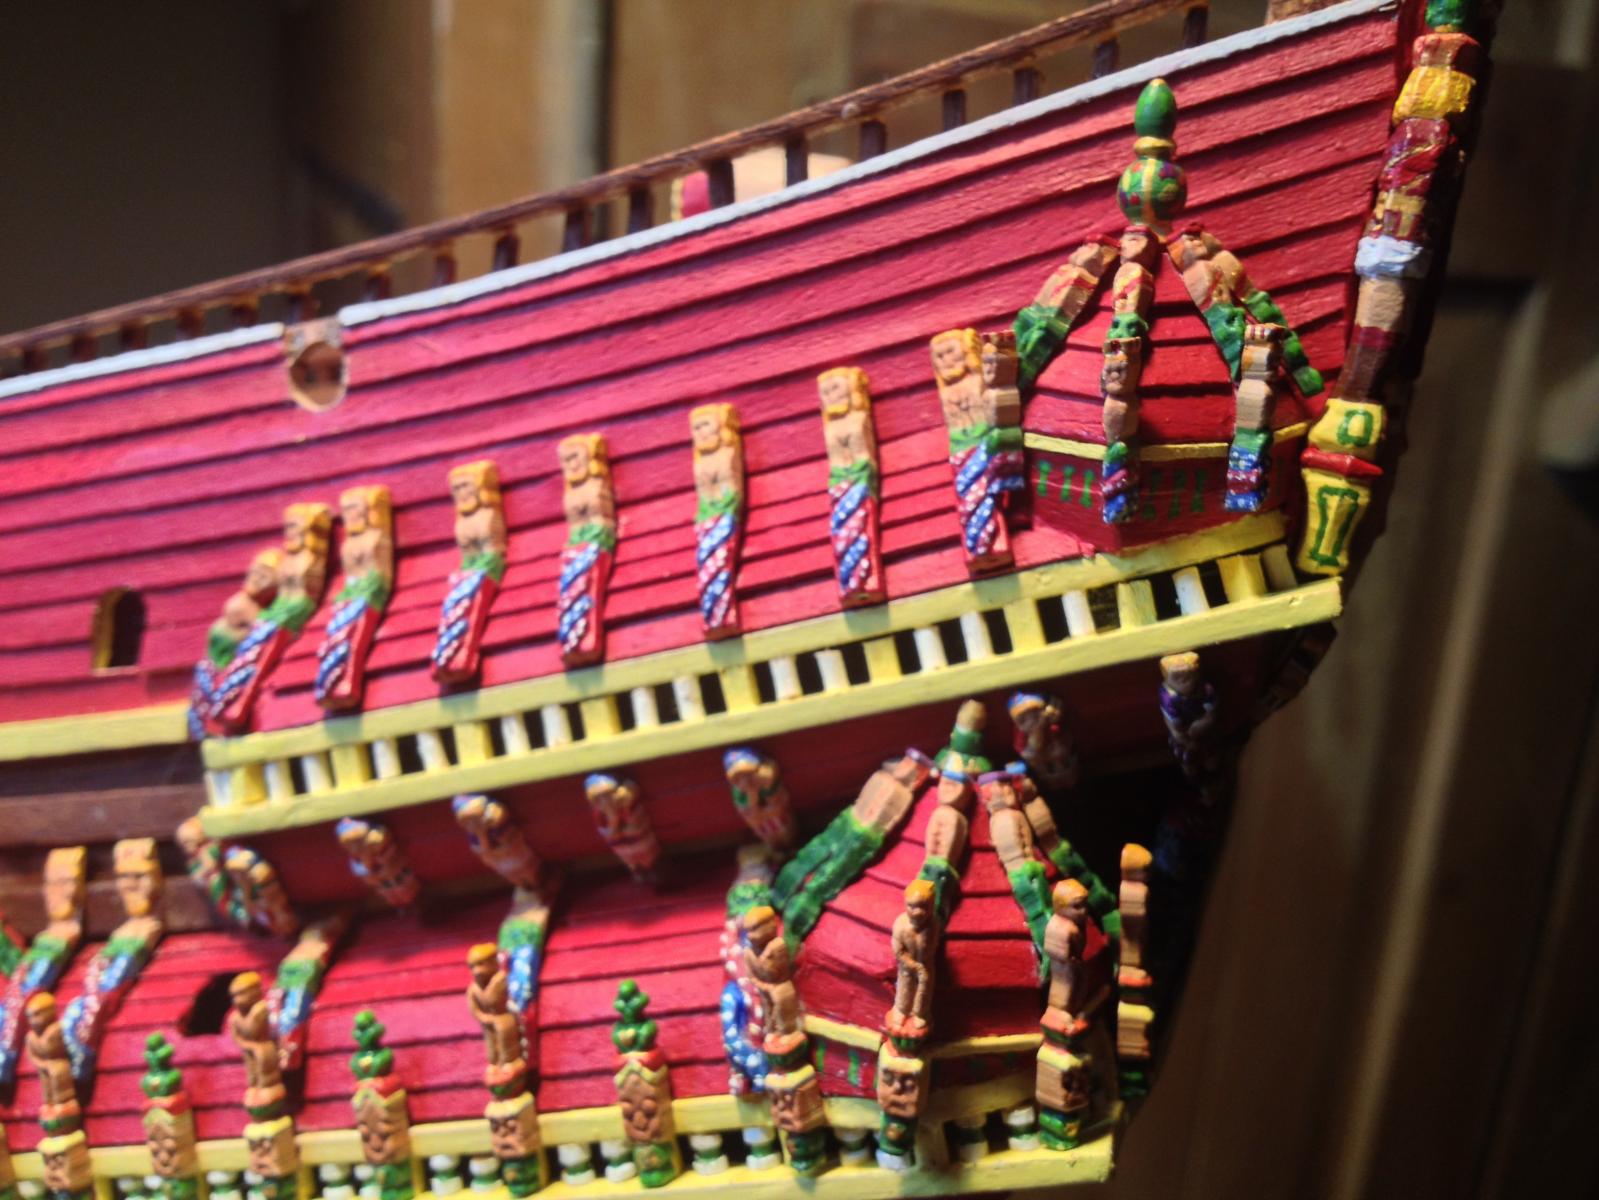
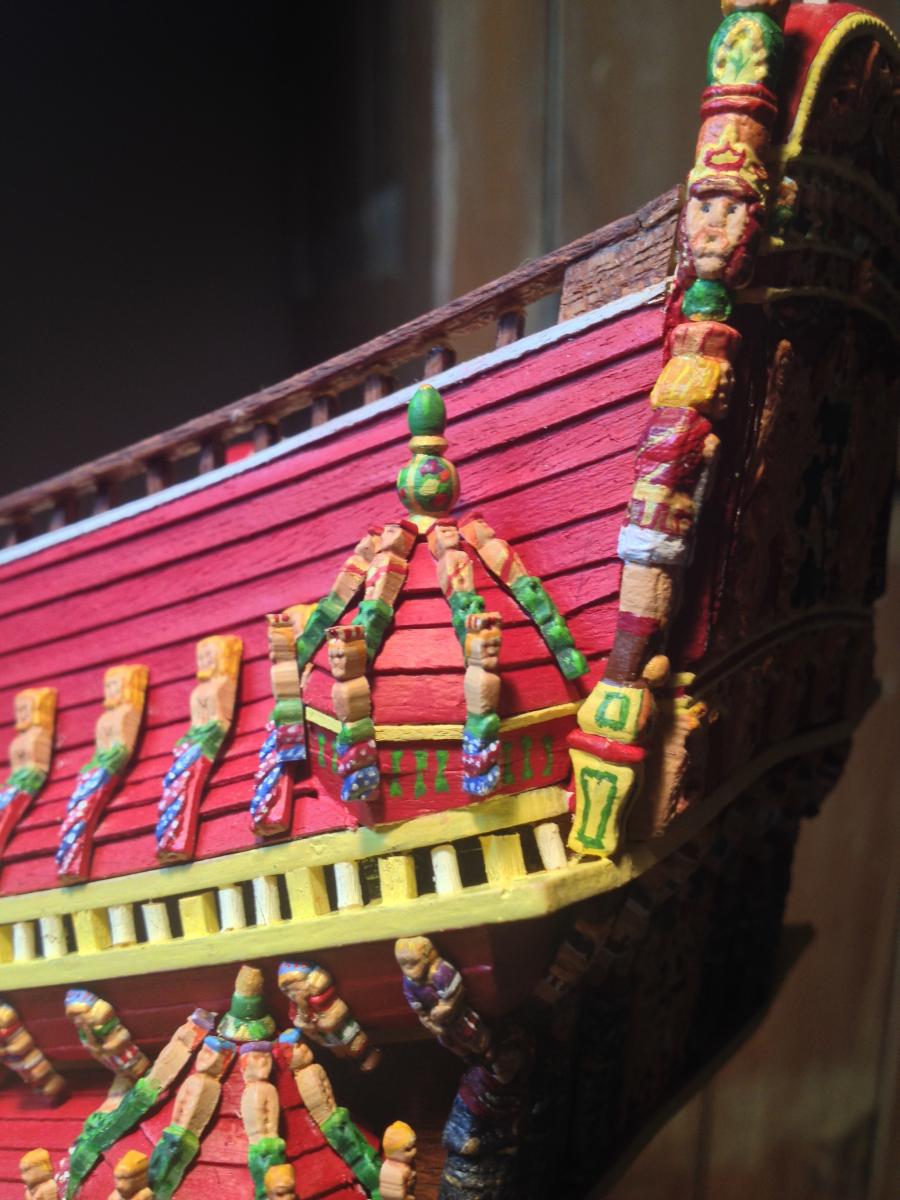
My drawplate arrived so I was able to create thinner balusters for the upper gallery. Another angle, which also shows some changes I made to the rear tower sculptures. The kit sculpture is a short triton standing on the head of another triton. I think it's meant to simulate what on the 1:10 model is actually two sculptures, one along the roof of the tower and one standing perpendicular to the tower at the base. The kit also provides enough of these sculptures to do eight per tower, and I only used five. That meant I had enough left over that I could cut the extras in two and use the bottom ones separately, standing up as they do on the 1:10 model. A complicated explanation, but here's the result: The balusters are small enough that I couldn't add much detail, but every little bit helps: And now the port side galleries are actually finished!


- 249 replies
-
- 6
-
-
- billing boats
- vasa
- (and 1 more)
-
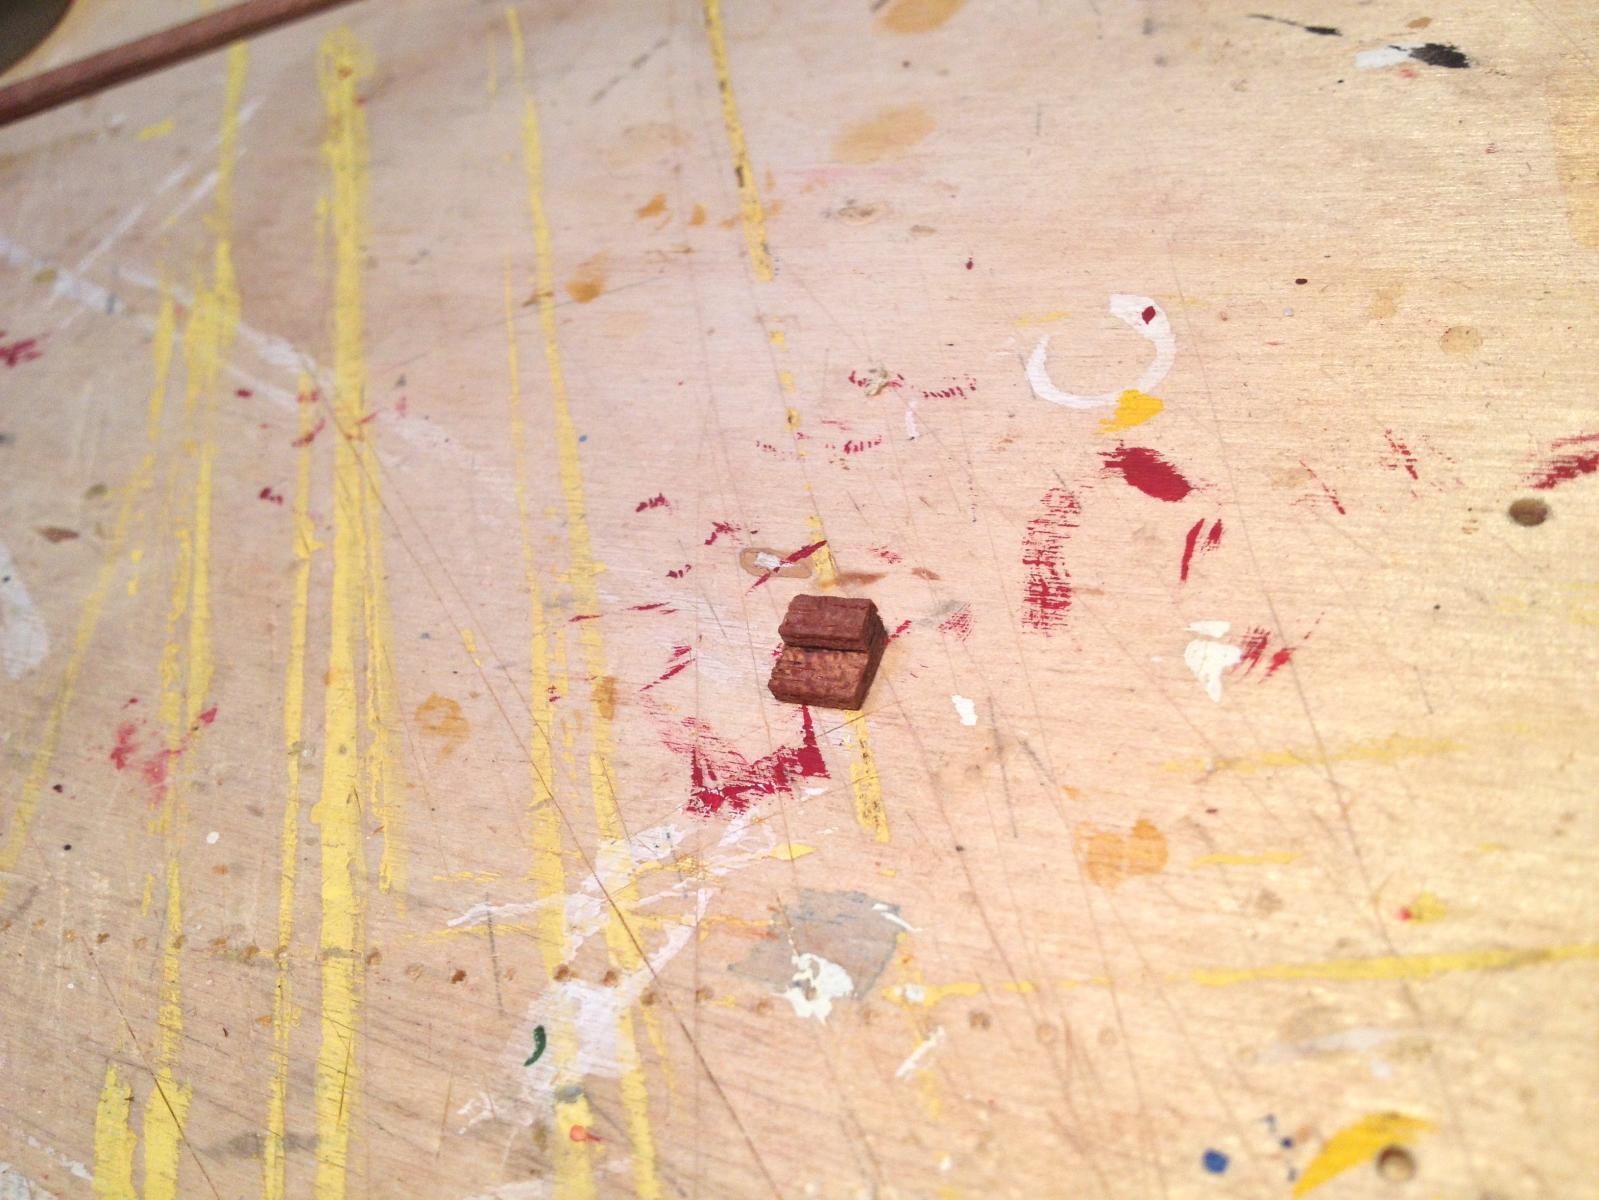
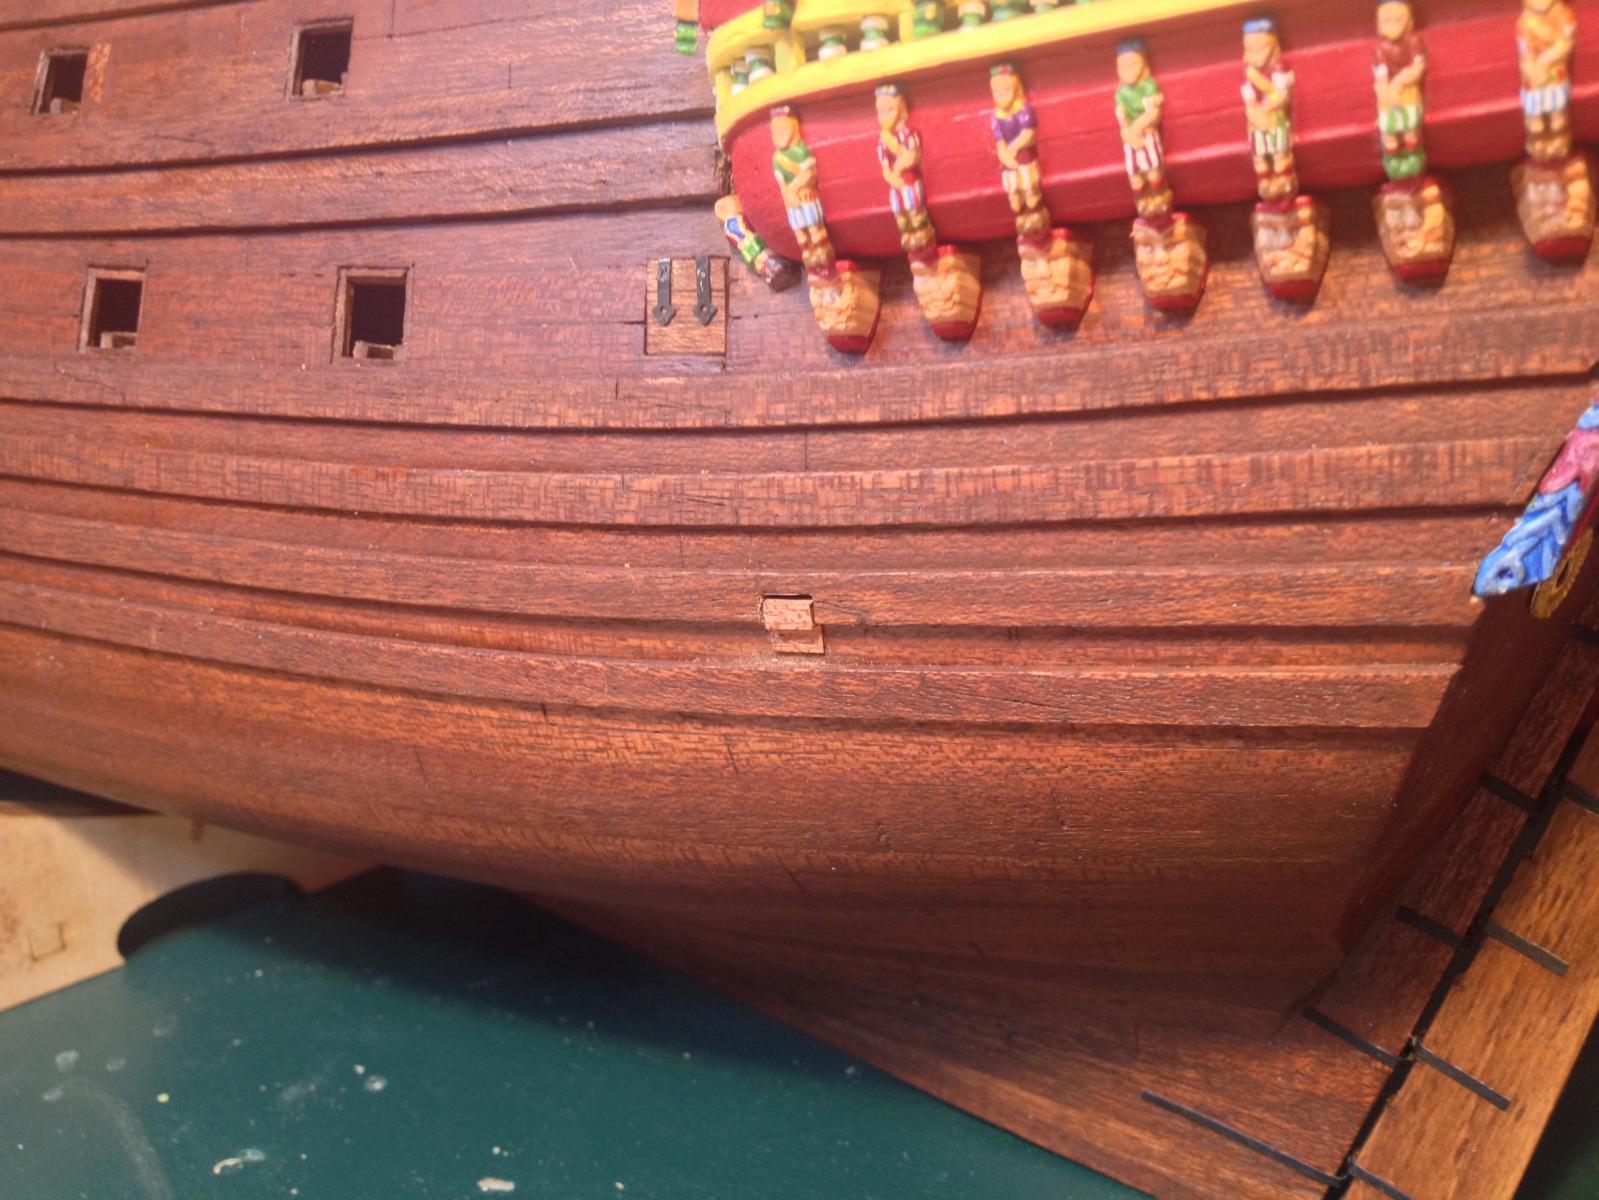
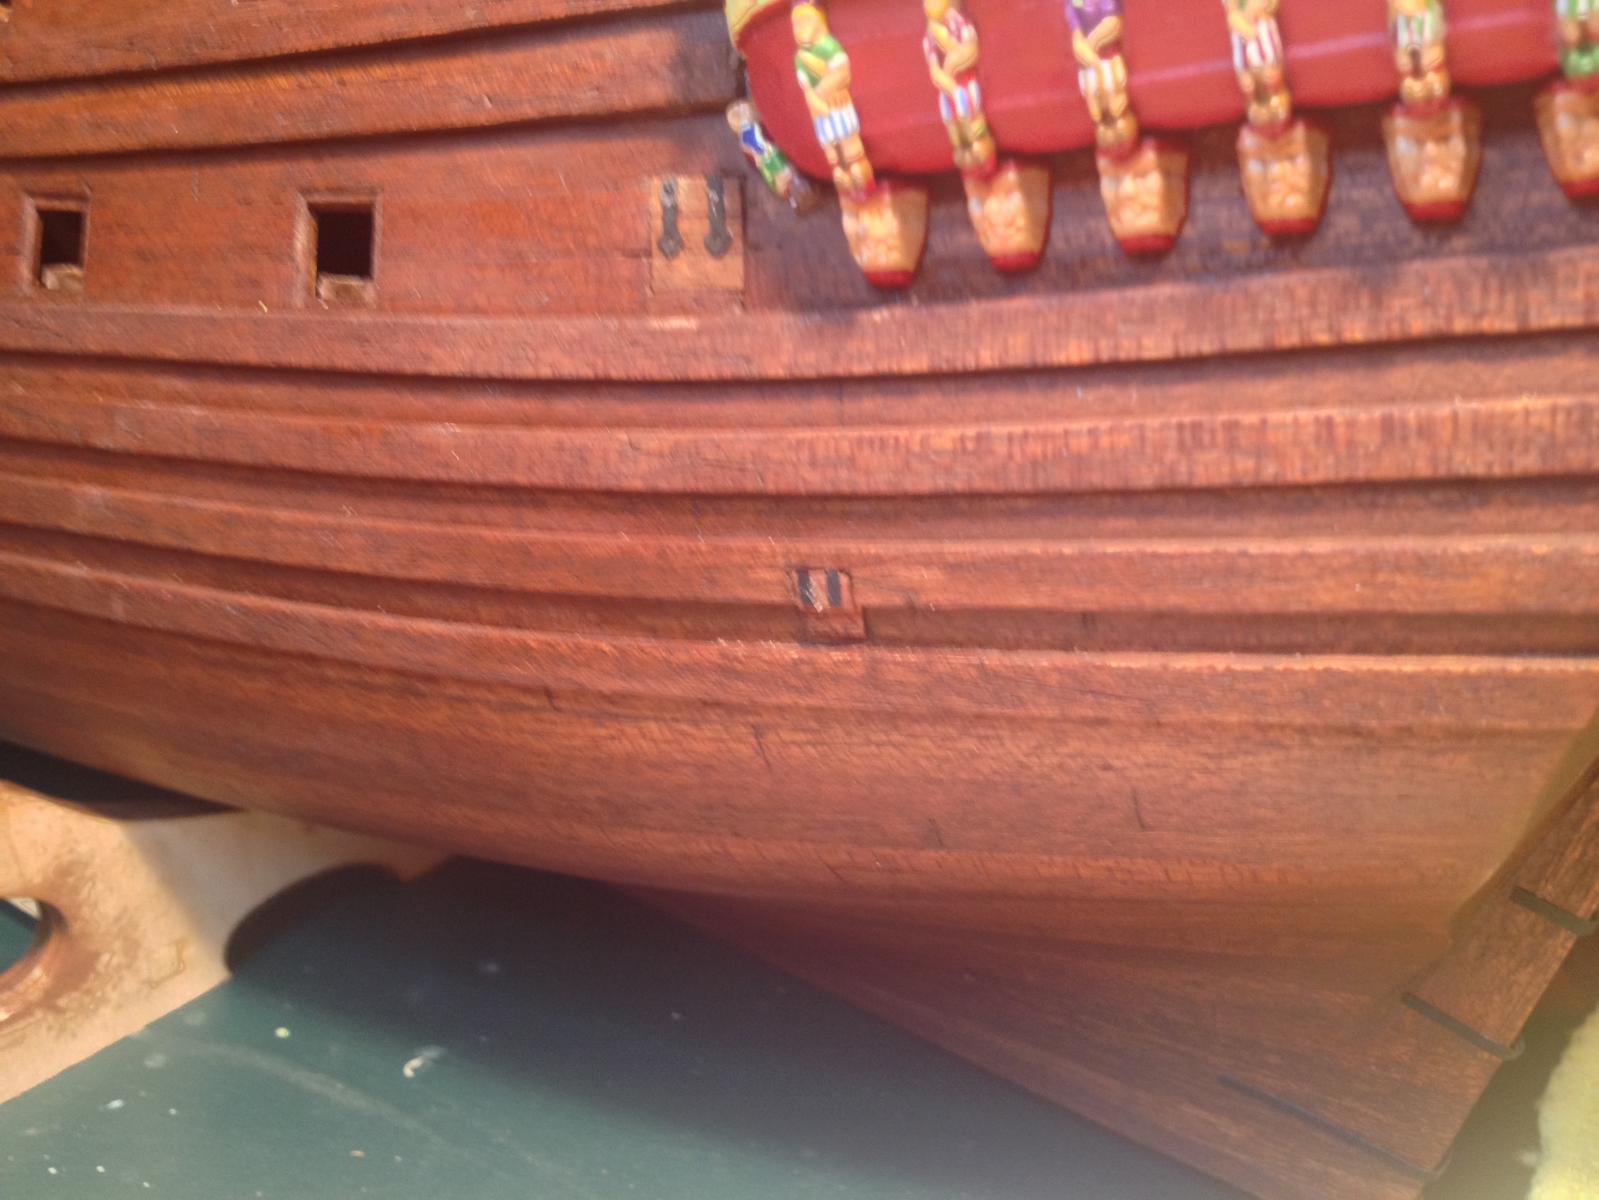
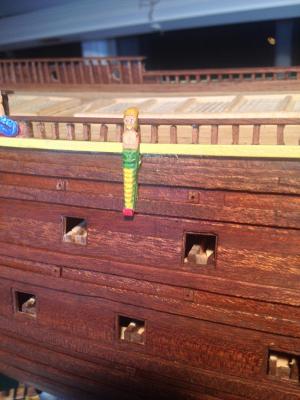
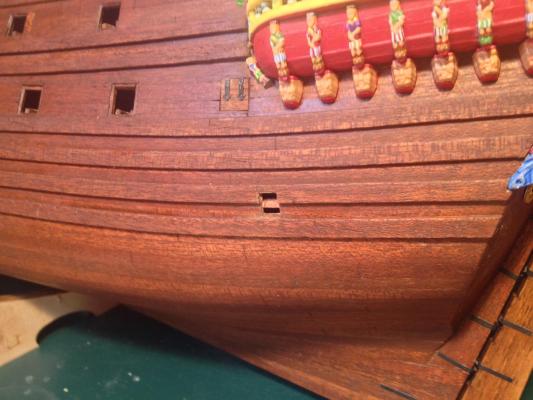
My original attempt at the message port was simply to scribe a square and add some hinges. I didn't like the result so I decided to create a port and put a small lid in it. First I cut out the port, by drilling some holes in the corners, cutting them together, and cleaning up the result with files. Then I needed a support for the lid. That involved a small strip of wood maneuvered through the hole and then rotated. There are now several such small strips of wood rattling around that part of the hull :-) The port lid itself is very small and has an extra thickness at the top where the wale runs: The port lid in place... And stained with hinges added. The result is in my opinion much nicer than scribed lines, although the size of the port made the project a little tricky. Again, the rope used to raise the lid will be added at the very end of the build.


- 249 replies
-
- 6
-
-
- billing boats
- vasa
- (and 1 more)
-
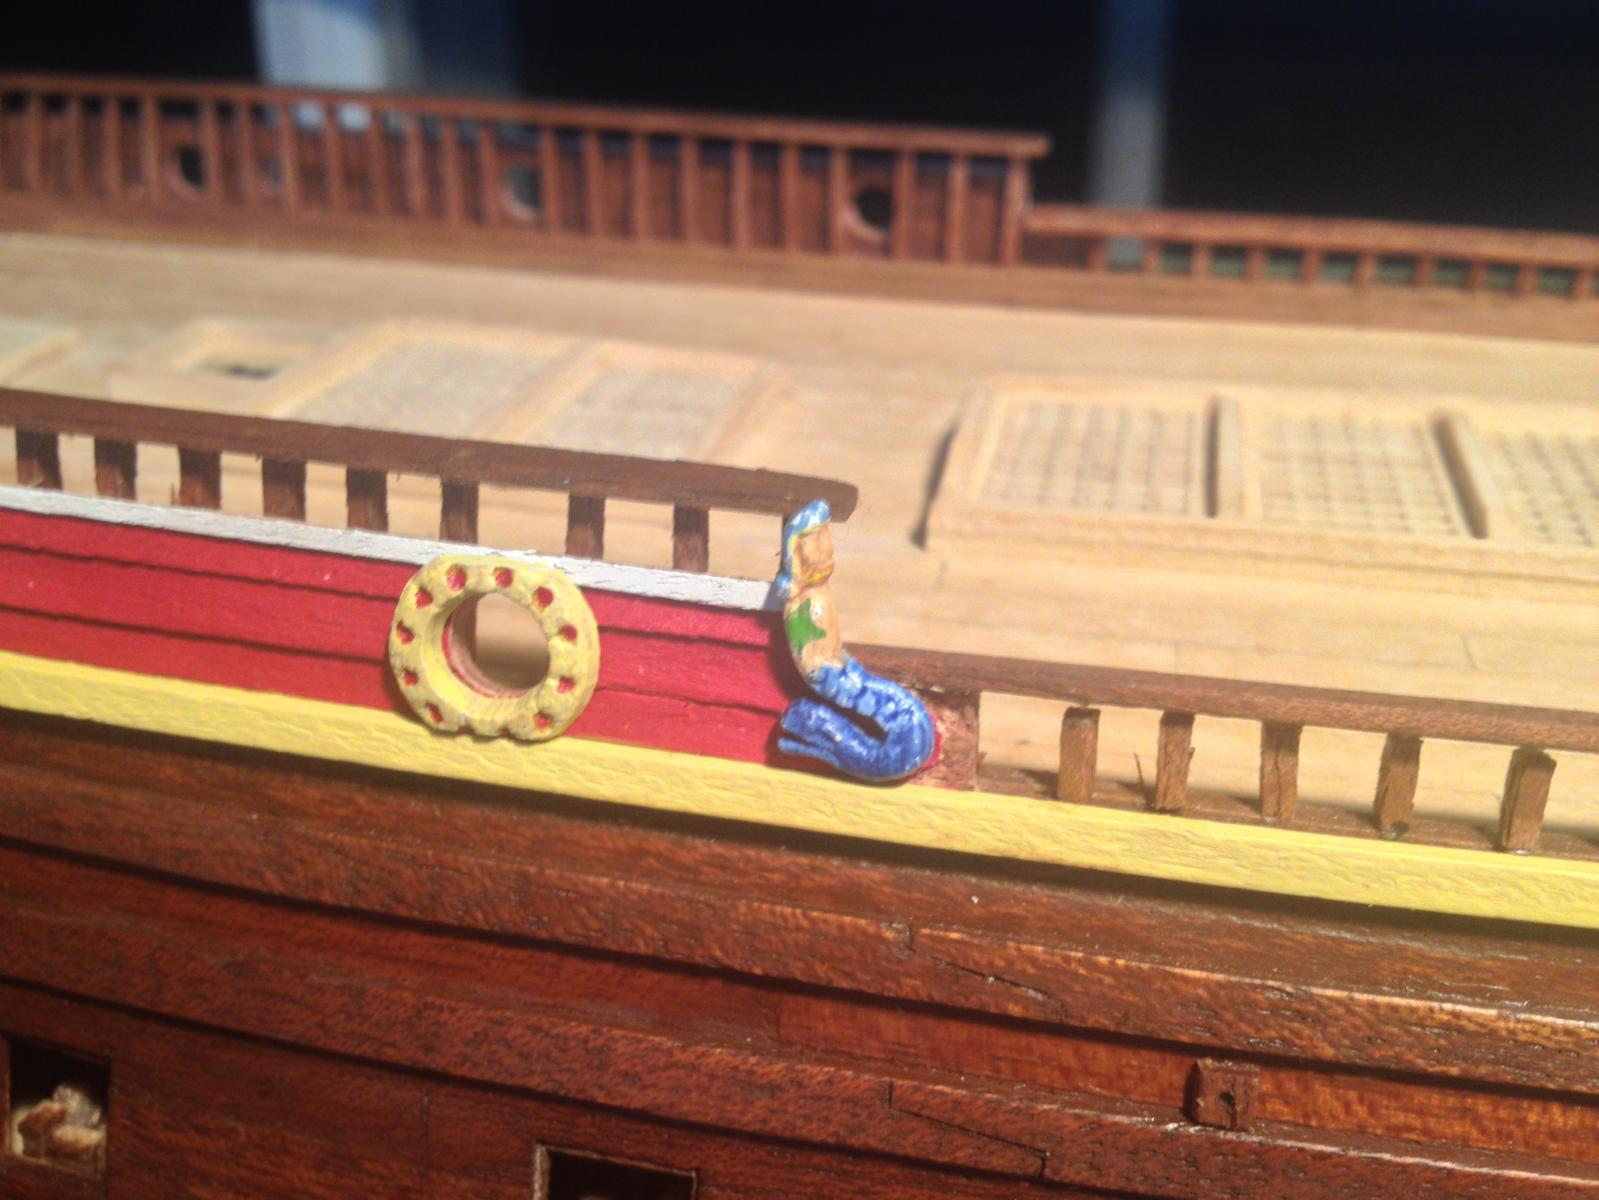
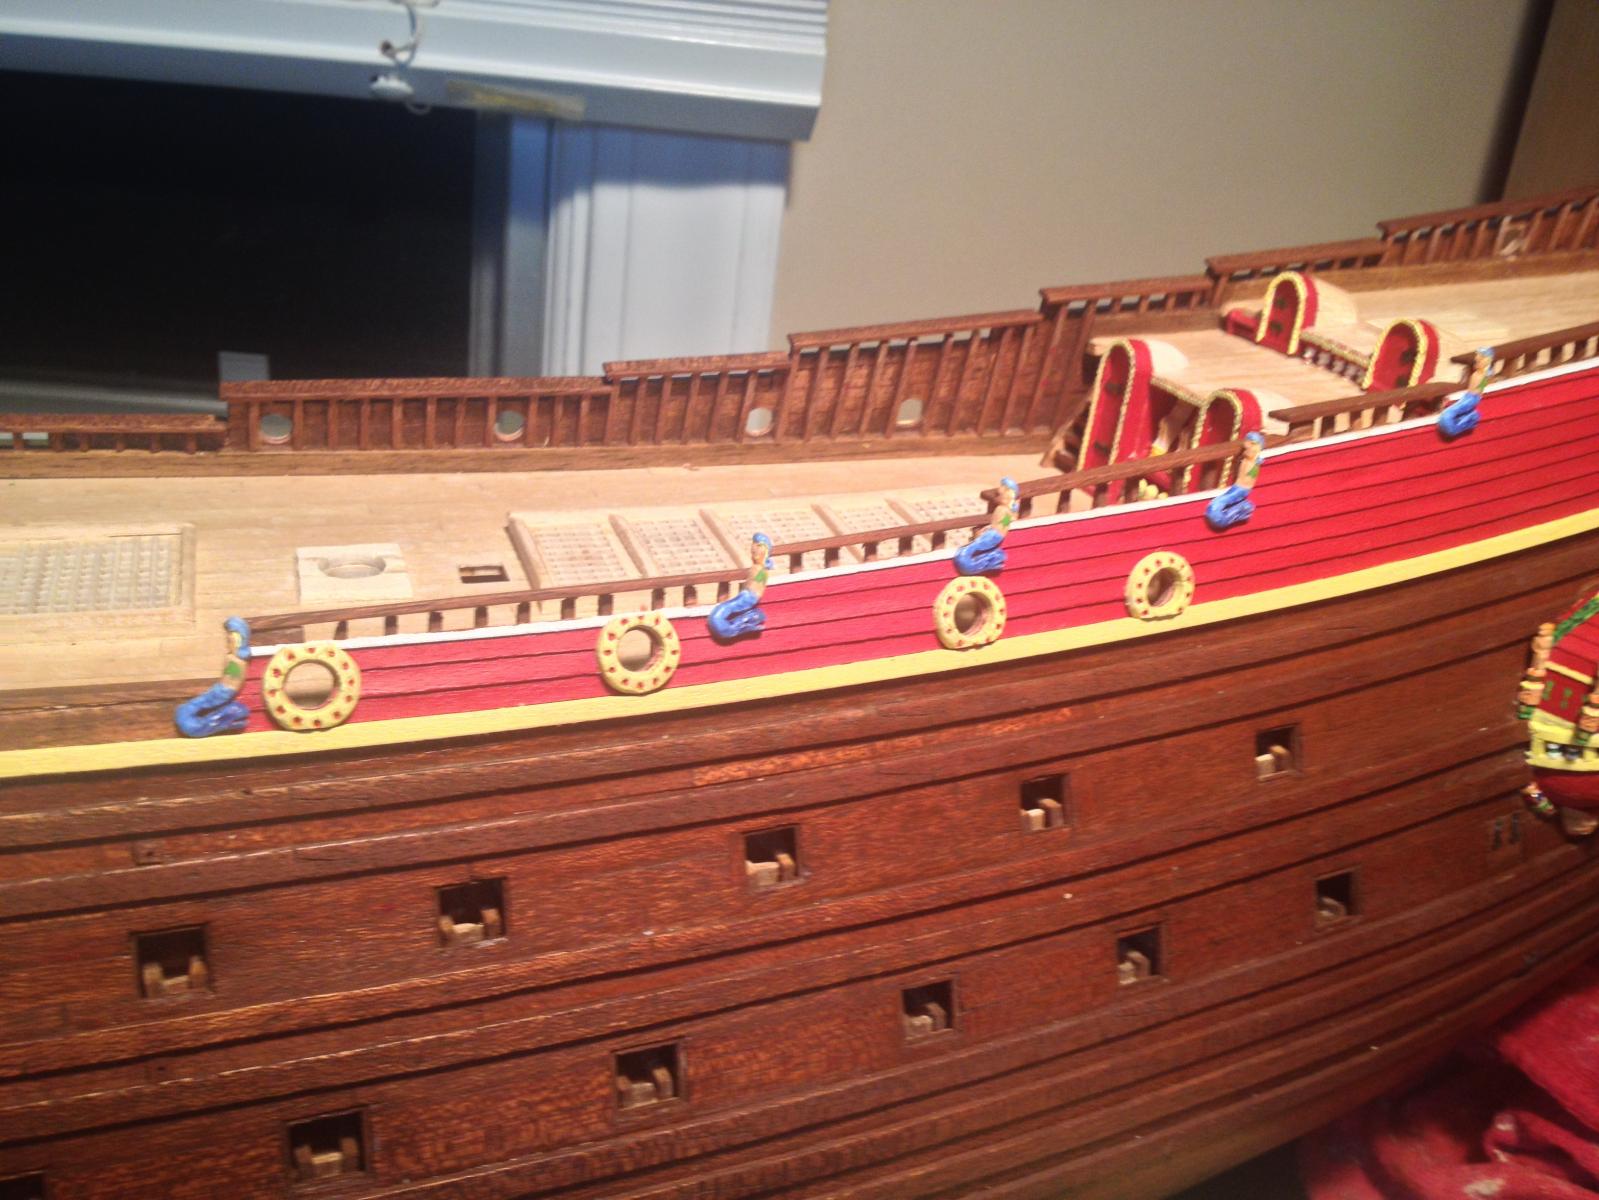
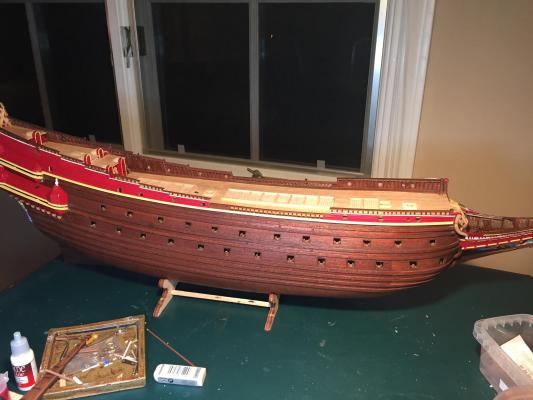
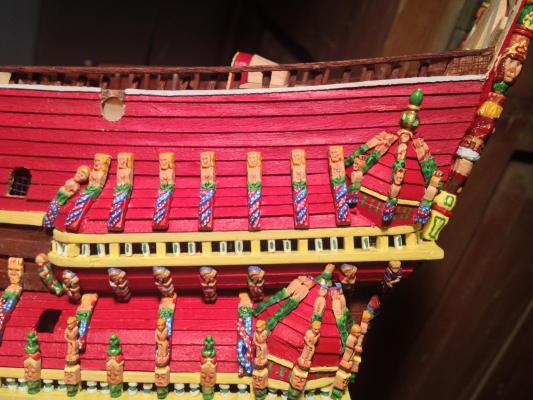
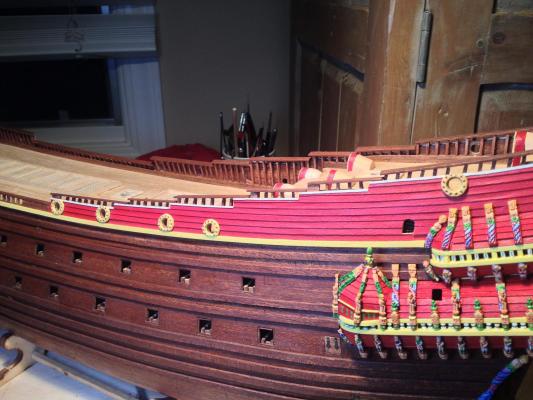
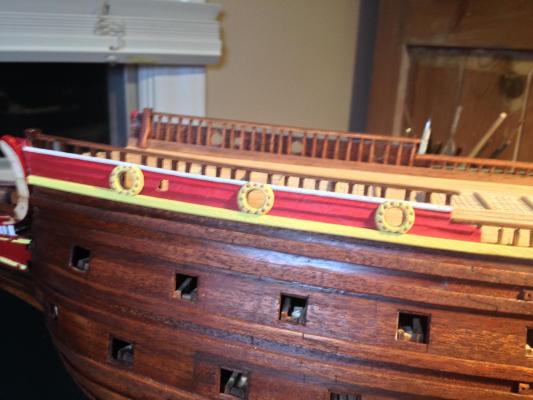
And now the round gun port decorations. They don't look much like those on the real ship, unfortunately not a lot of detail. But putting them on the model gives the upper part of the hull a nice finished look. And I like the lower location of the rearmost port.
- 249 replies
-
- 7
-
-
- billing boats
- vasa
- (and 1 more)