MORE HANDBOOKS ARE ON THEIR WAY! We will let you know when they get here.
×


mar3kl
-
Posts
178 -
Joined
-
Last visited
Content Type
Profiles
Forums
Gallery
Events
Everything posted by mar3kl
-
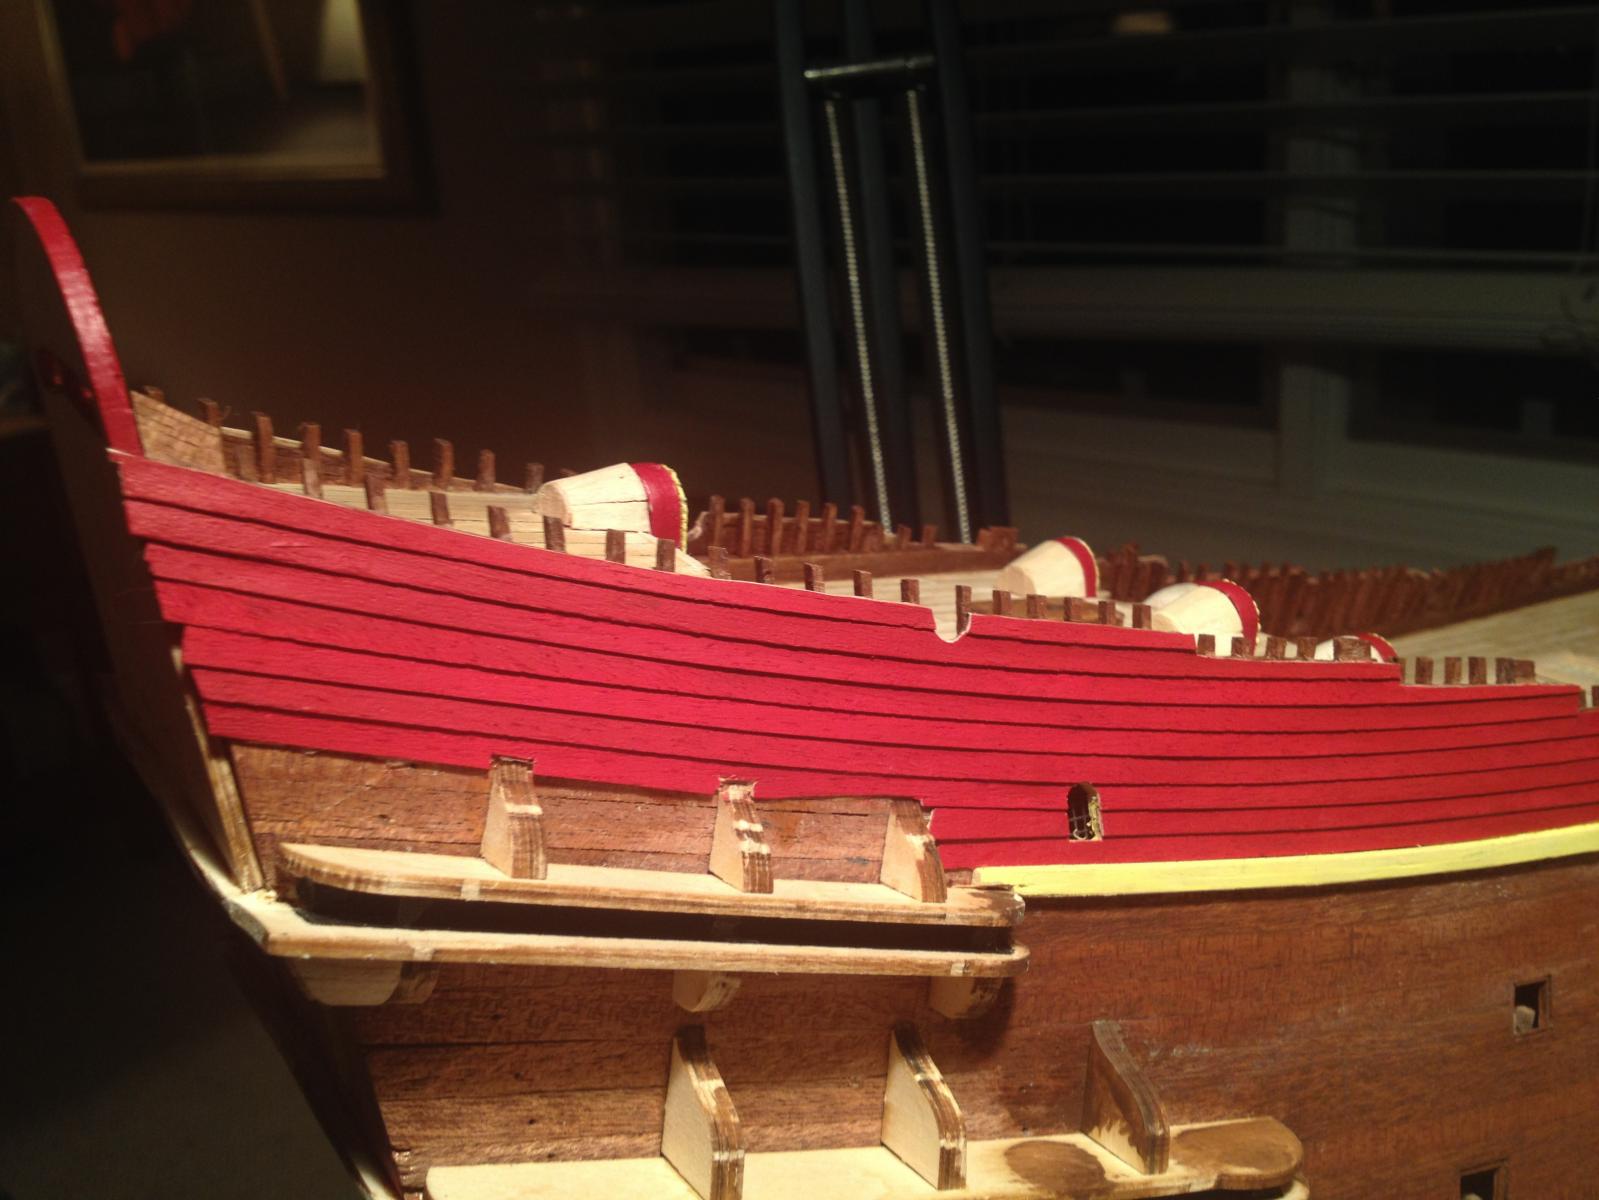
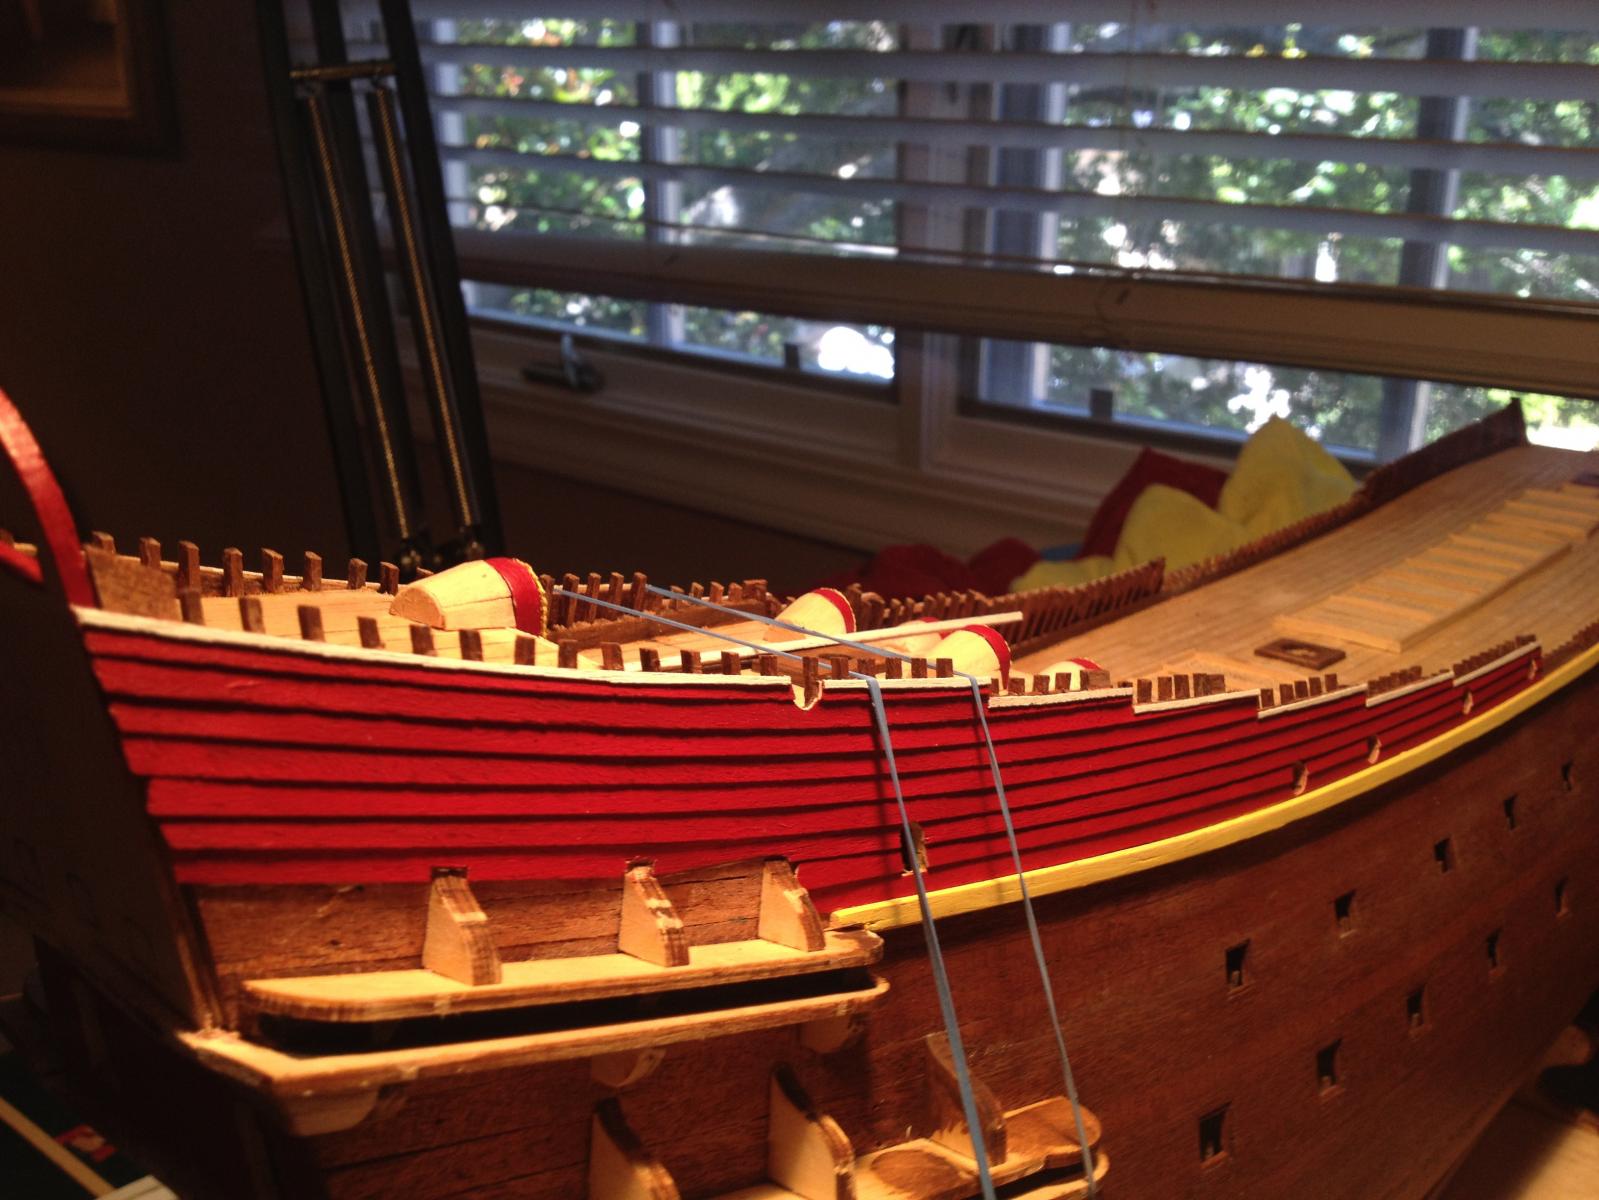
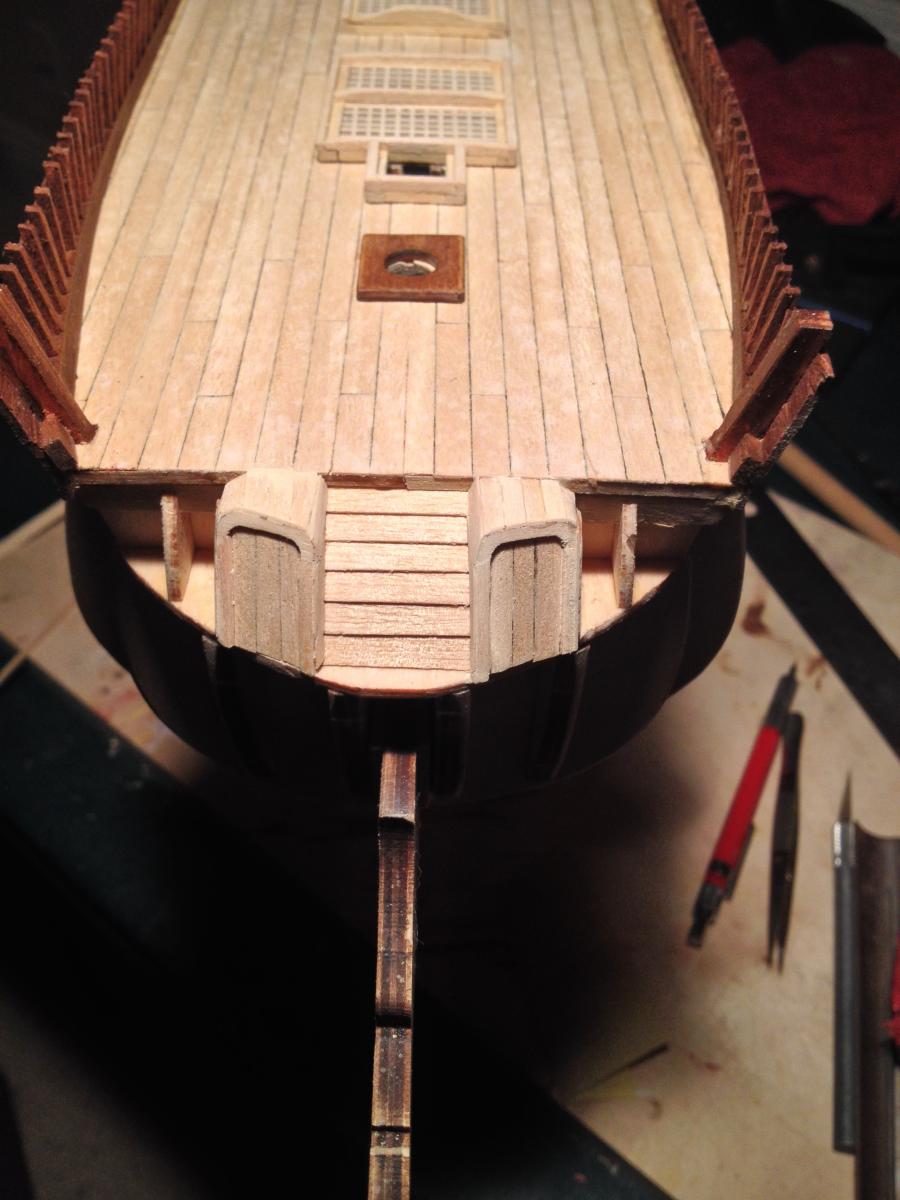
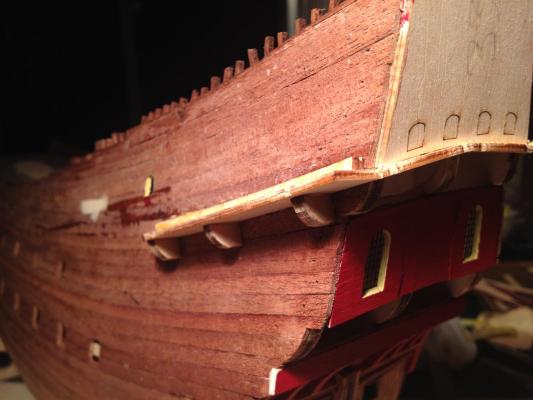
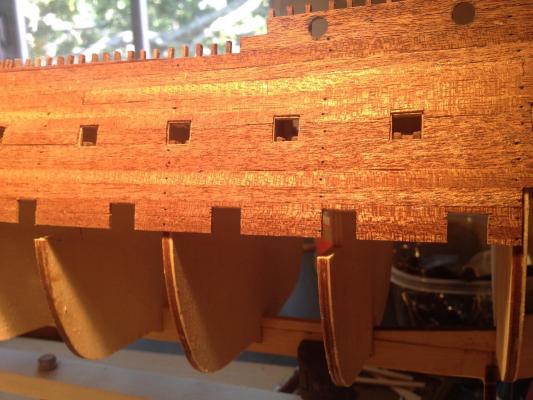
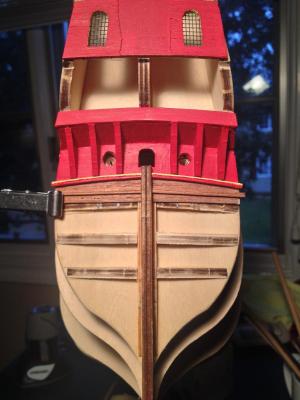
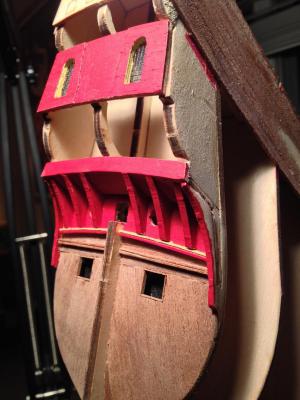
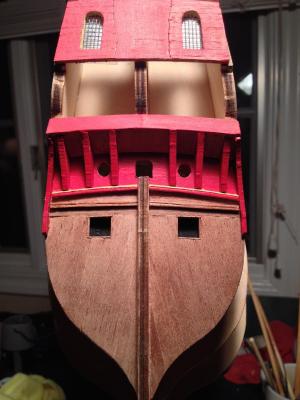
Thanks Karl - I like how it came out. Here are some pictures of the clinker-style planking above the main deck line. Fairly easy to do once you have the top wale in place. The wale was easy to install because my scratched bulwarks followed the deck line, so the hull planking did as well, and to install the wale I just followed the hull planking. Everything following everything else :-). I did have to replace the wale because I made it too wide and the spacing for the wales below it wasn't quite right. The only real issue was being very careful about opening the round gun ports because the veneer had a bad tendency to split. I added scratched pieces of very narrow (1mm) veneer painted white at the top. Note the rearmost gun port - it is a half-port and I think I'm going to mess with it some and make it fully round, but lower. The kit supplies an odd looking carriage for that gun - looks like an artillery carriage. Since I want to replace it with something correct, I can make sure at the same time that the gun is in line with the port at its new location.


- 249 replies
-
- 8
-

-
- billing boats
- vasa
- (and 1 more)
-
Beautiful rigging. I'm trying not to think about that part of my project. Sincerely hoping Vasa II comes out before I start. mark
-
Beautiful work. I too had issues with the back lower turret in the Billings kit. Lots of reshaping required. It's interesting to see how two manufacturers (Billings and Corel) interpret the same ship differently - I wonder what the design process was like. What I'd love to see is 3D scans of the original ship used to create something really accurate, but I'm sure cost would be prohibitive. mark
-
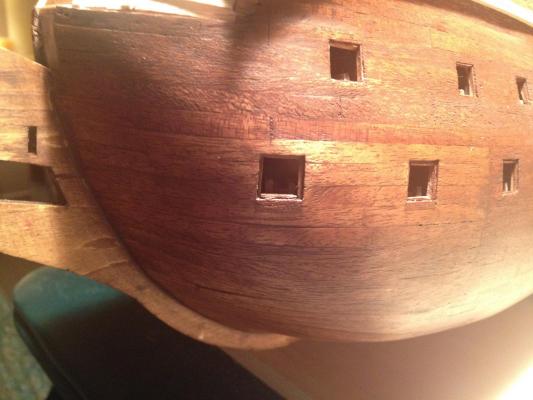
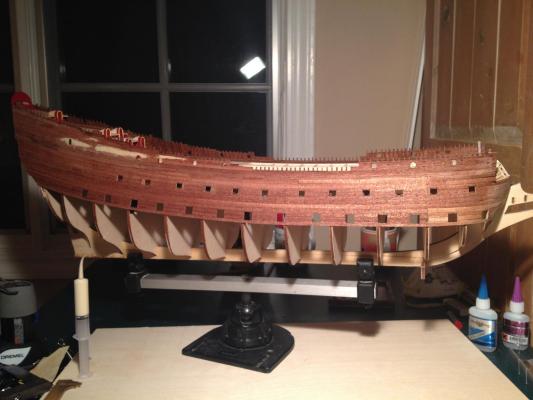
Thanks Matti! I'm pleased with how the hull came out - the single planking design felt a bit like a tightrope without a net - any mistakes would be very visible. Here are a couple of pictures of the hull after it was sanded, filled, and stained. I had to use a darker mahogany stain to cover the different shades of wood I used - the strip stock and the wide stock for spiled planks. I ended up scribing a butt pattern on the strip wood. It matches with the actual butts between the spiled and strip planks. Just use an X-acto knife once or twice to make a cut, then use the back of it to enlarge the cut slightly. Do it before staining, and the stain fills the scribed mark with a slightly darker cast. The effect is pretty good. I realize the real ship used scarf joints for all the hull planks and didn't really have a pattern to them, but I wanted a pattern and I didn't want to make hundreds of scarf joints. Here you can see the area where the spiled planks meet the strip planks. The two shades are pretty well merged; another coat or two of stain on the front and it should be fine. Much of the area just below the lower row of gun ports will be covered with the four wales, so the planks in that area didn't need to be shifted like the ones below the lowest wale.
- 249 replies
-
- 3
-
-
- billing boats
- vasa
- (and 1 more)
-
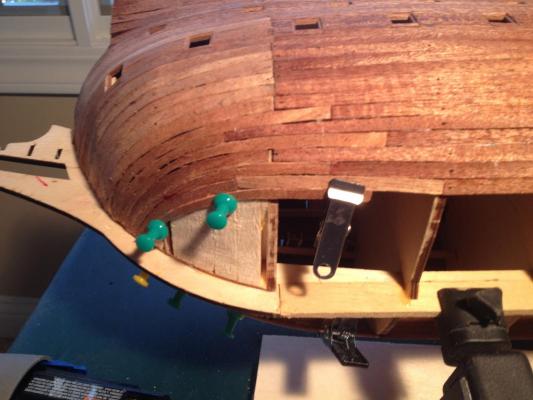
With the quarter gallery supports in, it was time to go back to the hull and sand and fill it. This was a tedious, long process of using gradually finer grades of sandpaper until everything was flush and smooth. It generated epic amounts of wood dust, and since my "workshop" is the guest bedroom, I needed to vacuum a lot so that the guests in question could sleep without coughing all night. I tried to be careful during planking not to have any depressions - gaps are easy to fill with small amounts of color-coordinated filler, but depressions need more filler and are more visible. Luckily I didn't need much filler at all, except with the spiled planks at the front. Those were all hand curved and didn't match each other perfectly. Here you can see the area where the spiled planks begin. Here you can see filler that's been applied but not yet sanded down. It's a nice water-based filler whose color matched the wood fairly closely. Next up was staining the hull and scribing plank butts...


- 249 replies
-
- 8
-
-
- billing boats
- vasa
- (and 1 more)
-
With the hull finally planked, I wanted to do something different, so I started the quarter gallery supports. They were fairly straightforward except for the double curves at the rear. To get those to look right I needed to break the pieces and reassemble them with the right curve, cleaning up the joints with filler. Each gallery has an upper and a lower part, separated by a spacer. Eventually the gap gets filled with small balusters - the kit provides 2x2mm wood for them, but I think I'm going to do something slightly more ornate. And finally the view from the stern, showing the reverse curves.

- 249 replies
-
- 5
-
-
- billing boats
- vasa
- (and 1 more)
-
Hola Karl, y gracias!
-
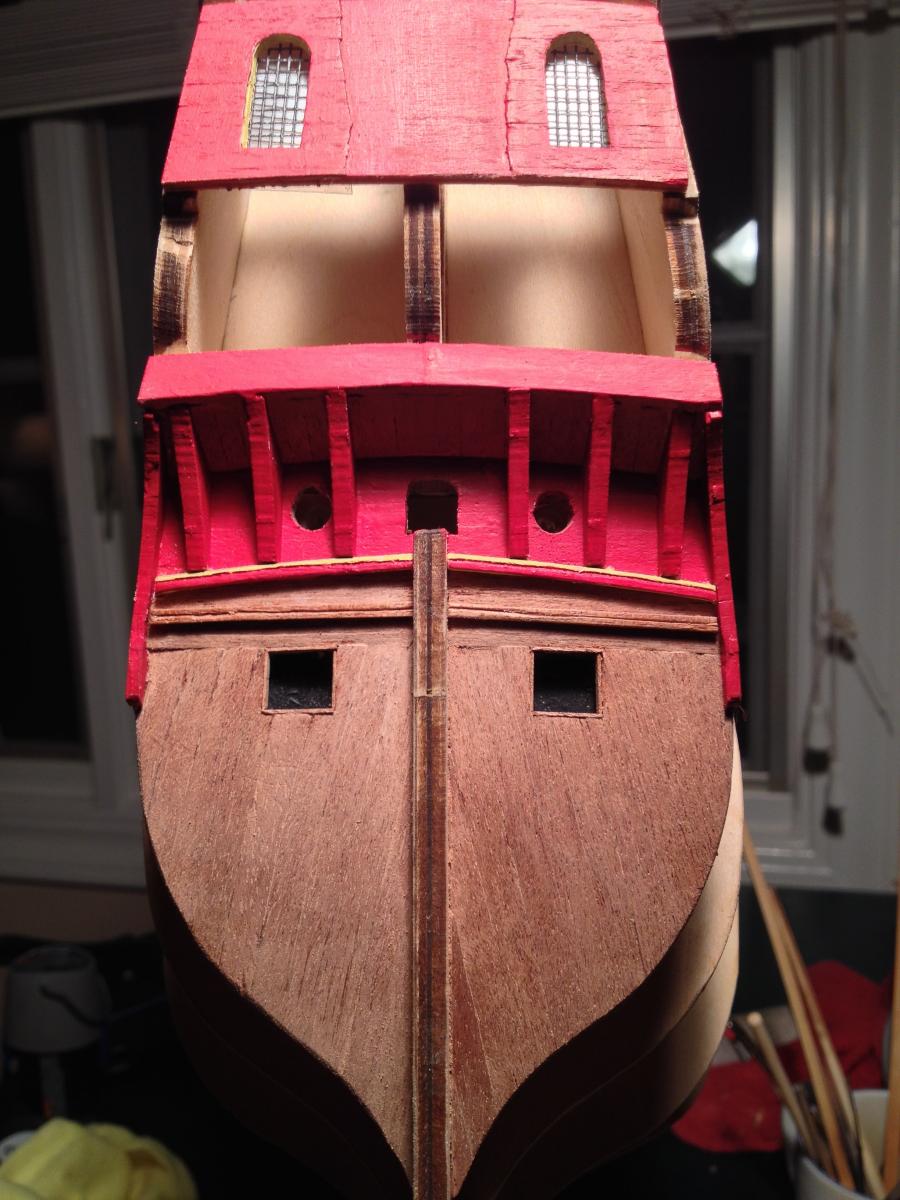
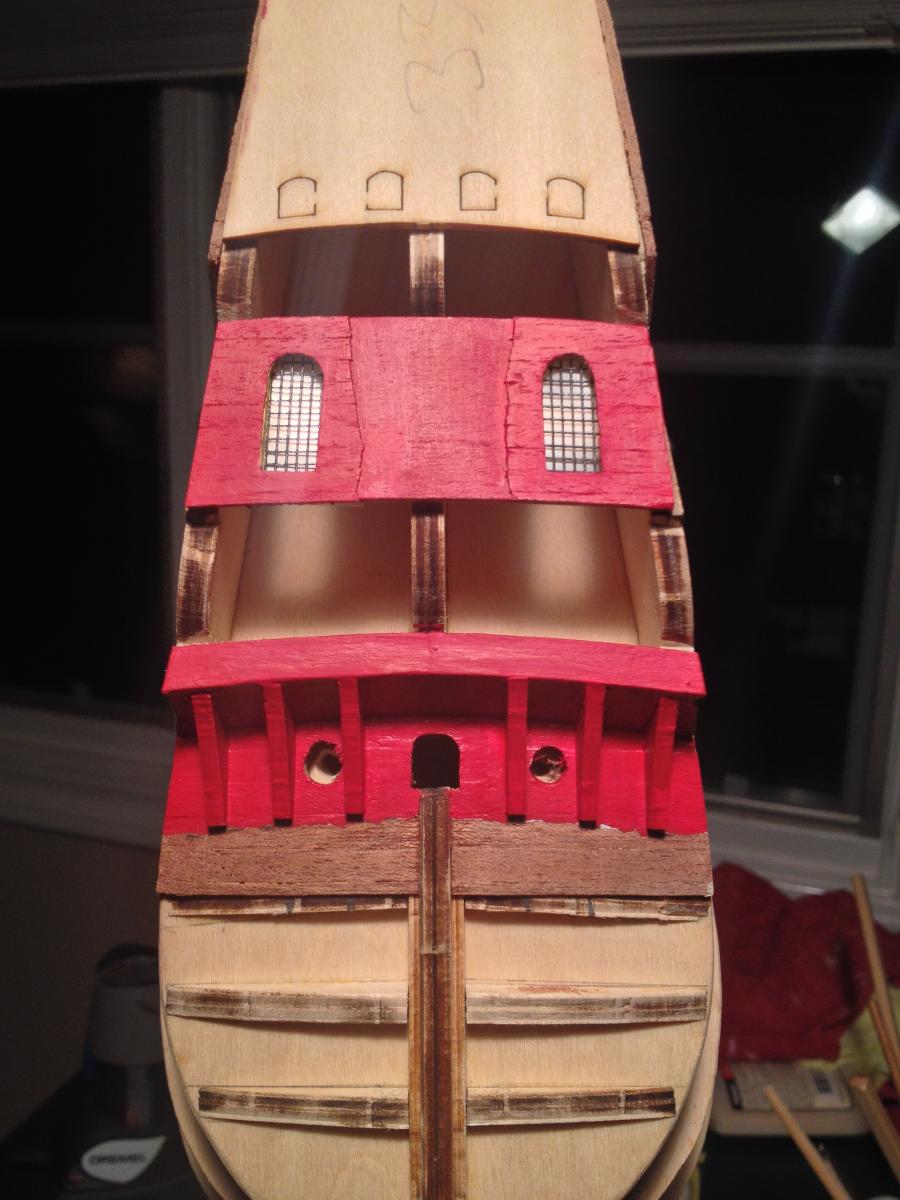
When I originally assembled the buttresses on the transom, I curved them to match the curve below the windows. I decided I didn't like that effect as much as I thought I would, and it seems to be much less pronounced on the real ship. So I ripped that section out and redid it. Here it's been redone so the buttresses are in a straight line. In retrospect I think it wasn't all that much difference and probably not worth the effort.


- 249 replies
-
- 2
-
-
- billing boats
- vasa
- (and 1 more)
-
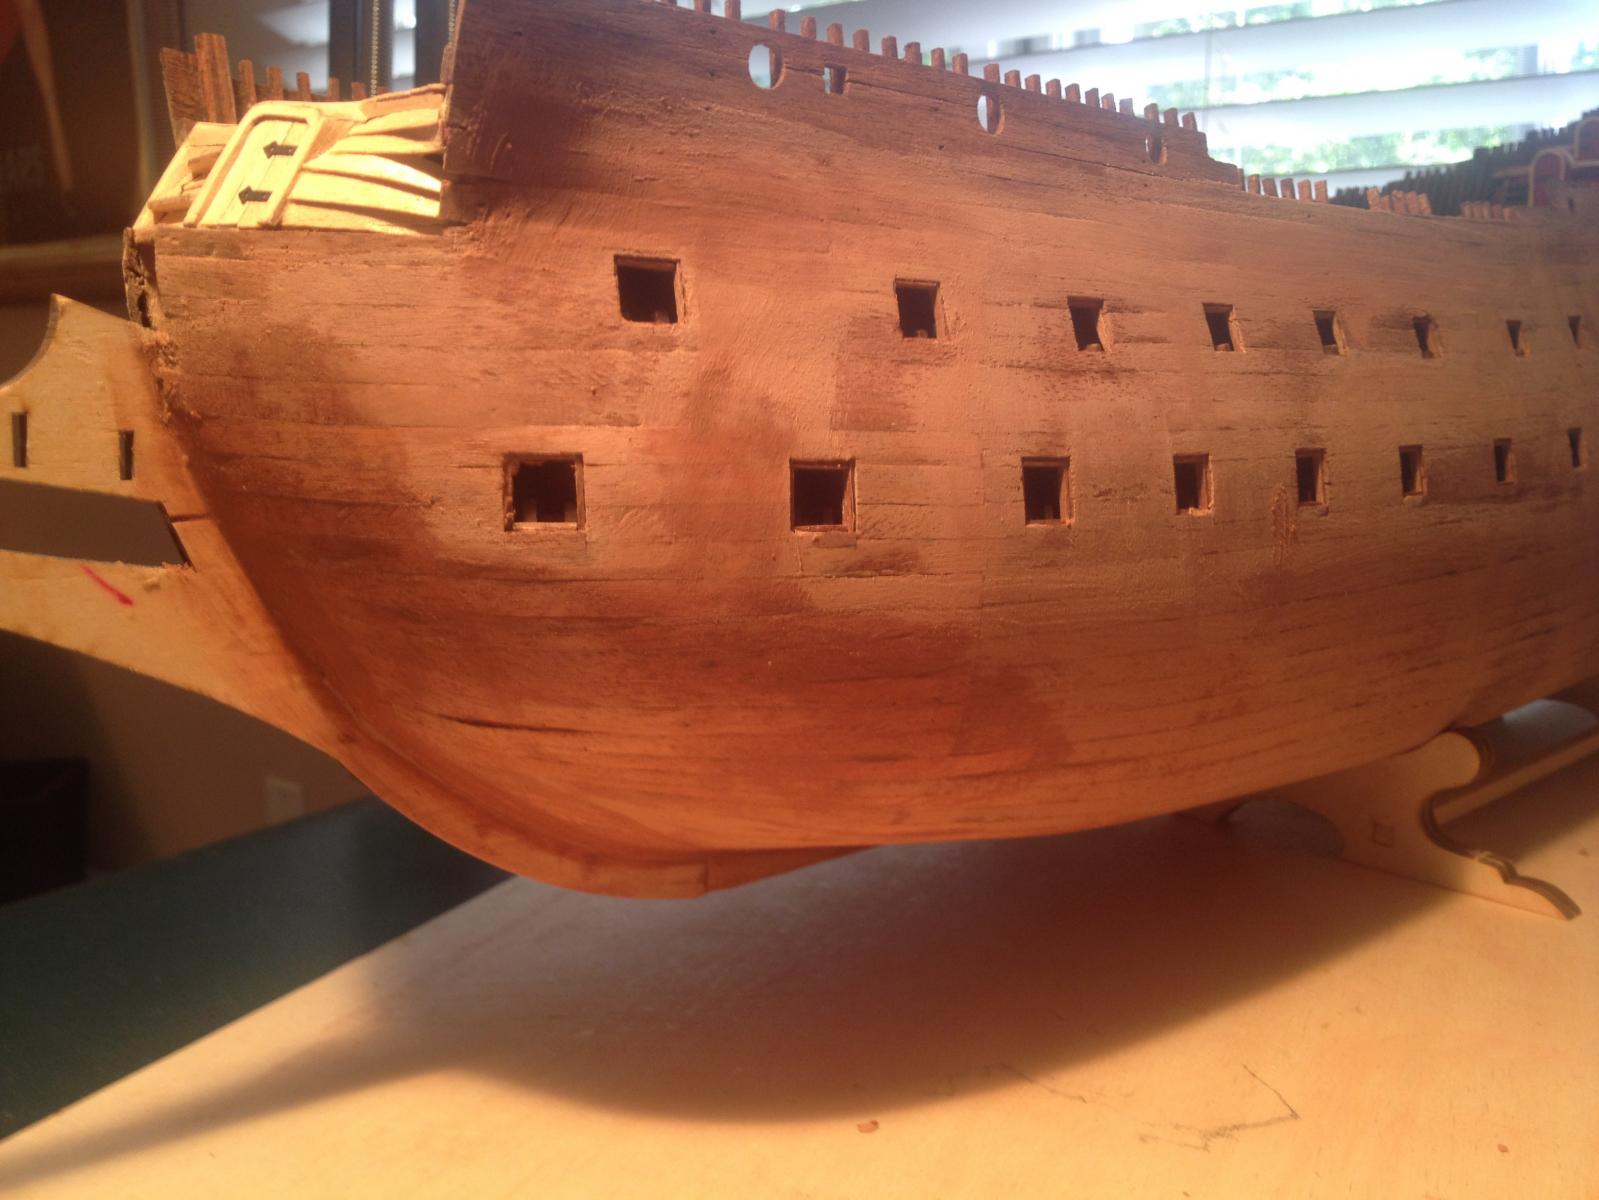
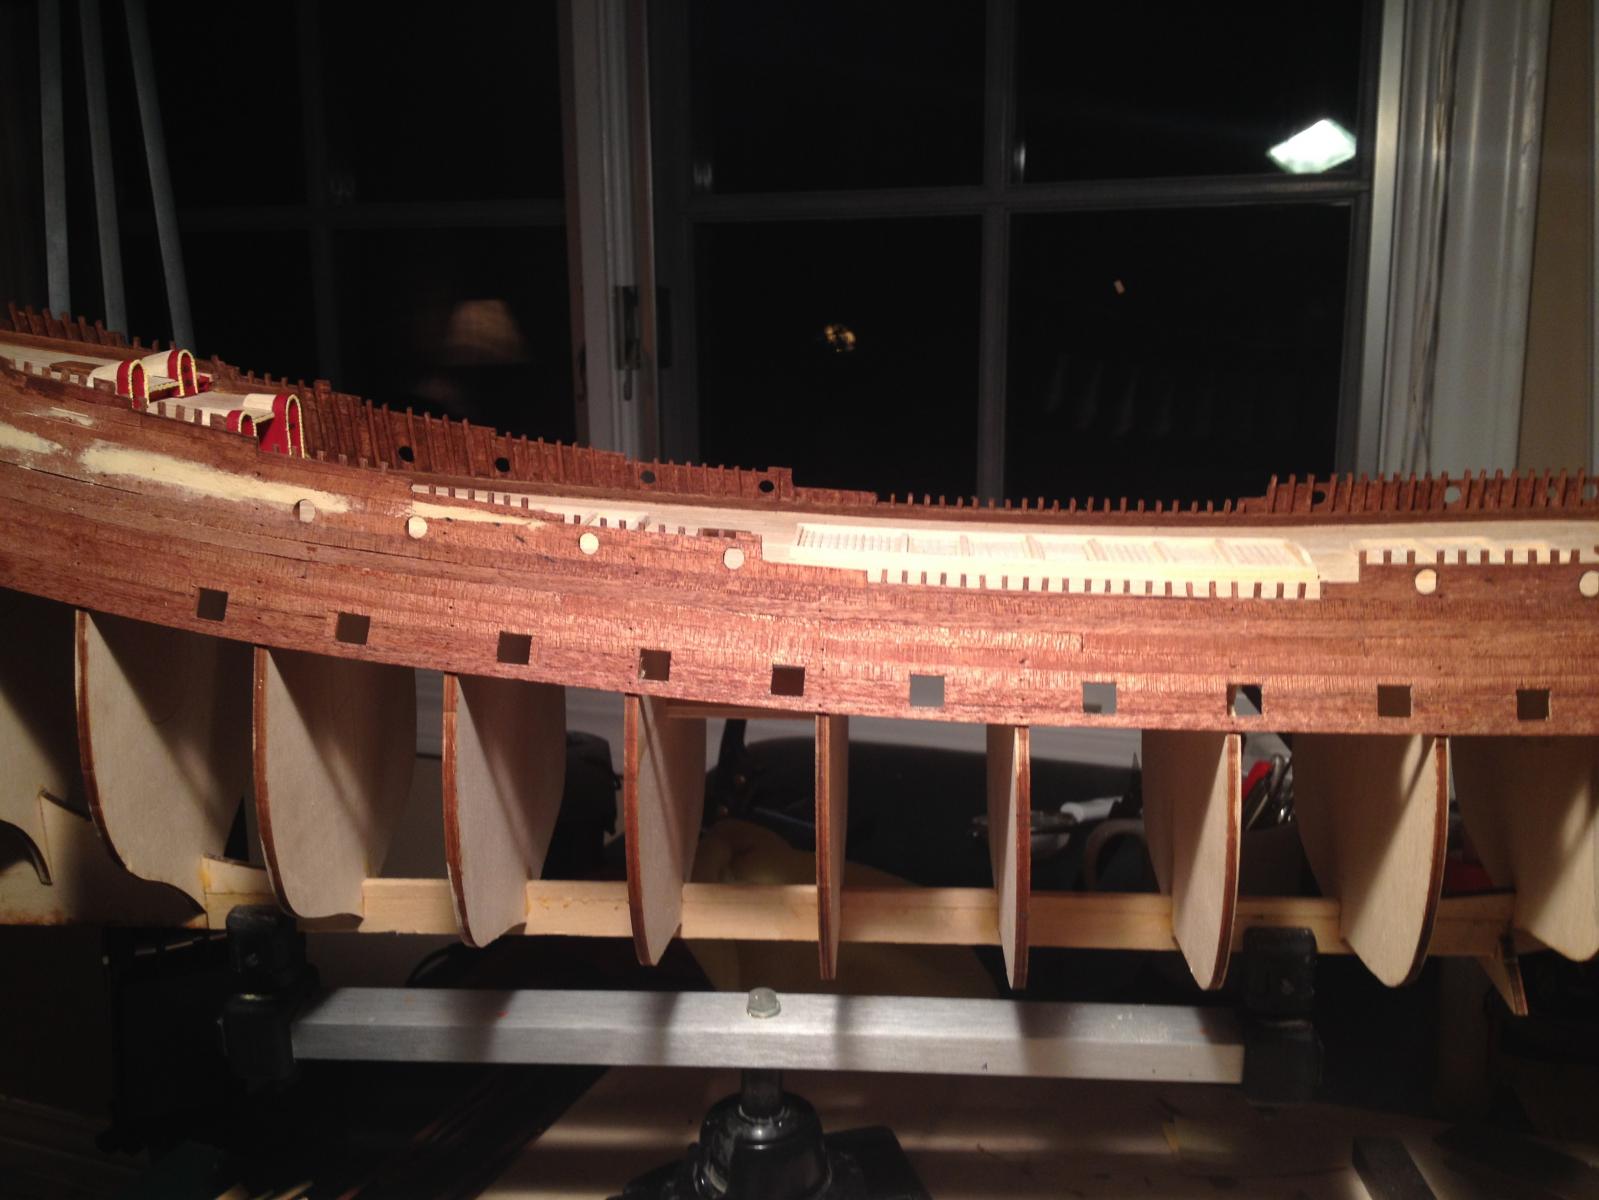
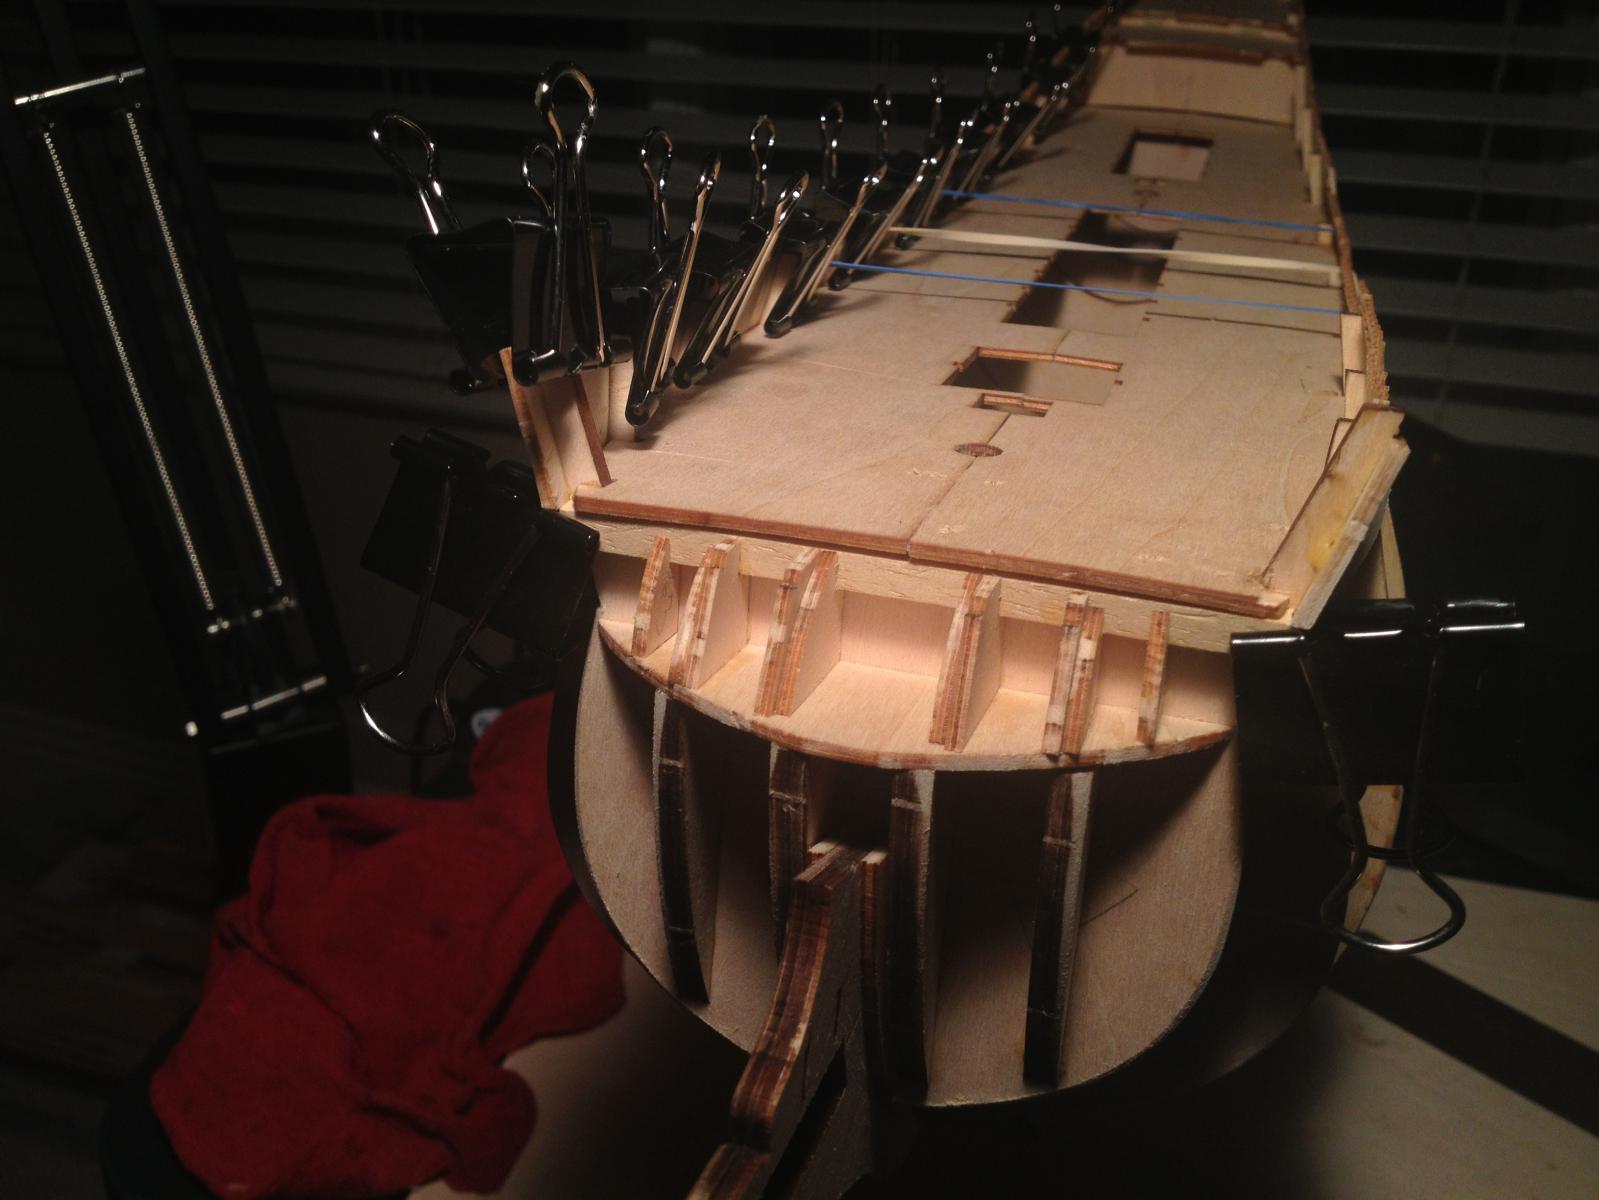
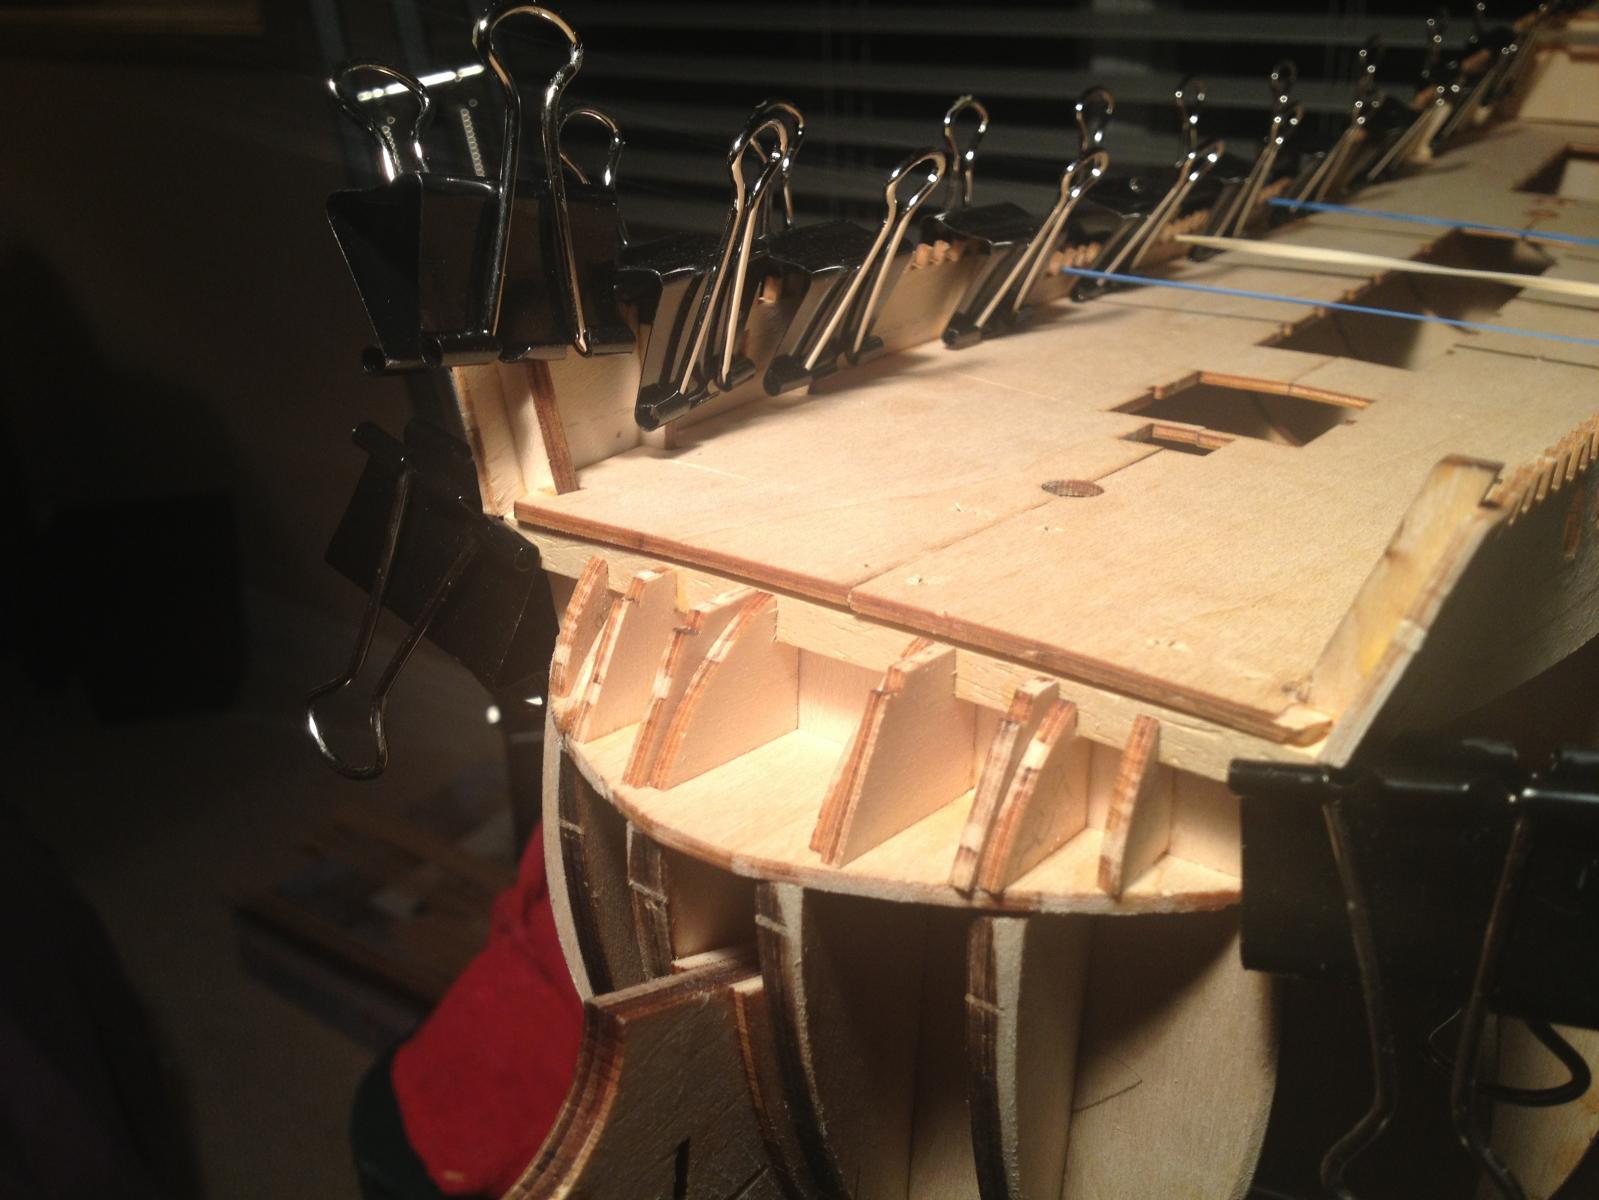
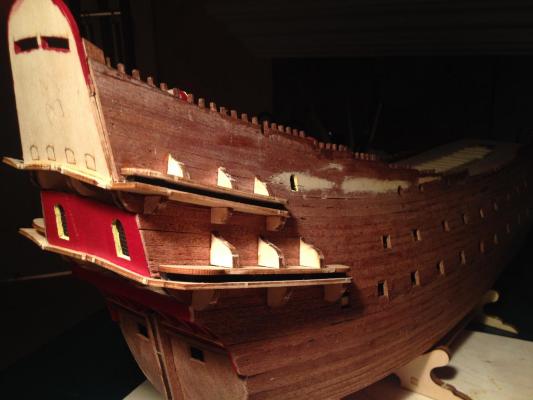
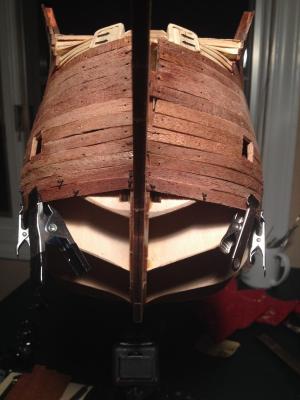
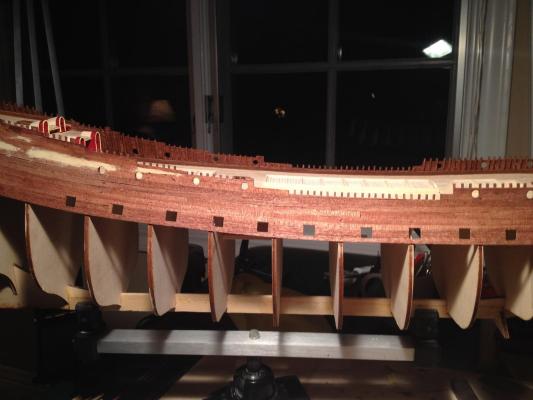
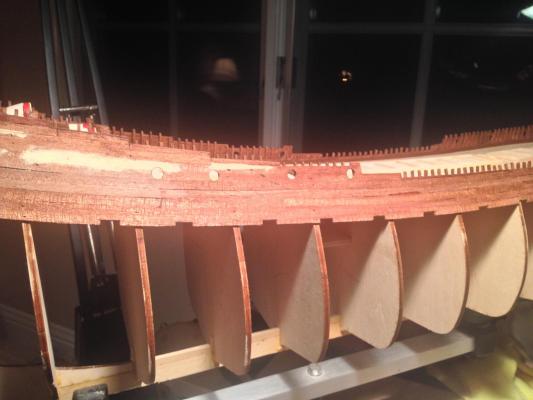
Now the second row of gun ports is finished and all the false gun carriages have been installed, and endless strakes need to continue to the bottom. Because there is only one layer, I needed to use clamps at every strake to hold it flush to the previous strake. Beveling the edges is also important as the hull starts to curve here and each strake needs to sit flush to the bulkhead and make a smooth curve. Small alignment mistakes can be cleaned up with sanding and filler, but the wood is only so thick. The main thing to avoid is low spots since they would require a lot of filler to fix, and be very visible. Planking the stern area. Once you hit the turn of the bilge, the strakes switch from needing edge bending to bending naturally, which is a relief. Some views of the spiling at the front. This is more or less the last strake that is full width. After that they need to taper to the maximum 50% at the front. I didn't want to hassle with drop strakes even though the real ship used lots of them. I didn't think my skills were up to that given the lack of support underneath. I finally needed to fill the front with balsa blocks - it was just getting too difficult to get the tapered planks to sit flush with one another - no space to put a clamp, and lots of compound curving at the front. Also now that we're below the lowest of the wales, I couldn't just make the spiled planks all start on the same bulkhead- they needed to follow a staggering pattern to look right. That turned out to be surprisingly tricky, since the strip forming the main part of the strake and the short spiled plank forming the rest now sometimes met with no bulkhead behind them, requiring little pieces of wood behind to support them. All in all my least favorite part of the build so far. But we're almost done! Here you can see how each strake tapers toward the front. No more room for clamps to make each strake sit flush with the previous one, so I used scrap wood braced against the keel to keep everything forced together nicely.
- 249 replies
-
- 3
-
-
- billing boats
- vasa
- (and 1 more)
-
And a photo from earlier in the build that I forgot to post: here's a view of the finished doors at the rear of the ship. You can see the molding around the doors created from twisted wire, hammered flat. You can also see the scratched bulwarks from the inside.
- 249 replies
-
- 4
-
-
- billing boats
- vasa
- (and 1 more)
-
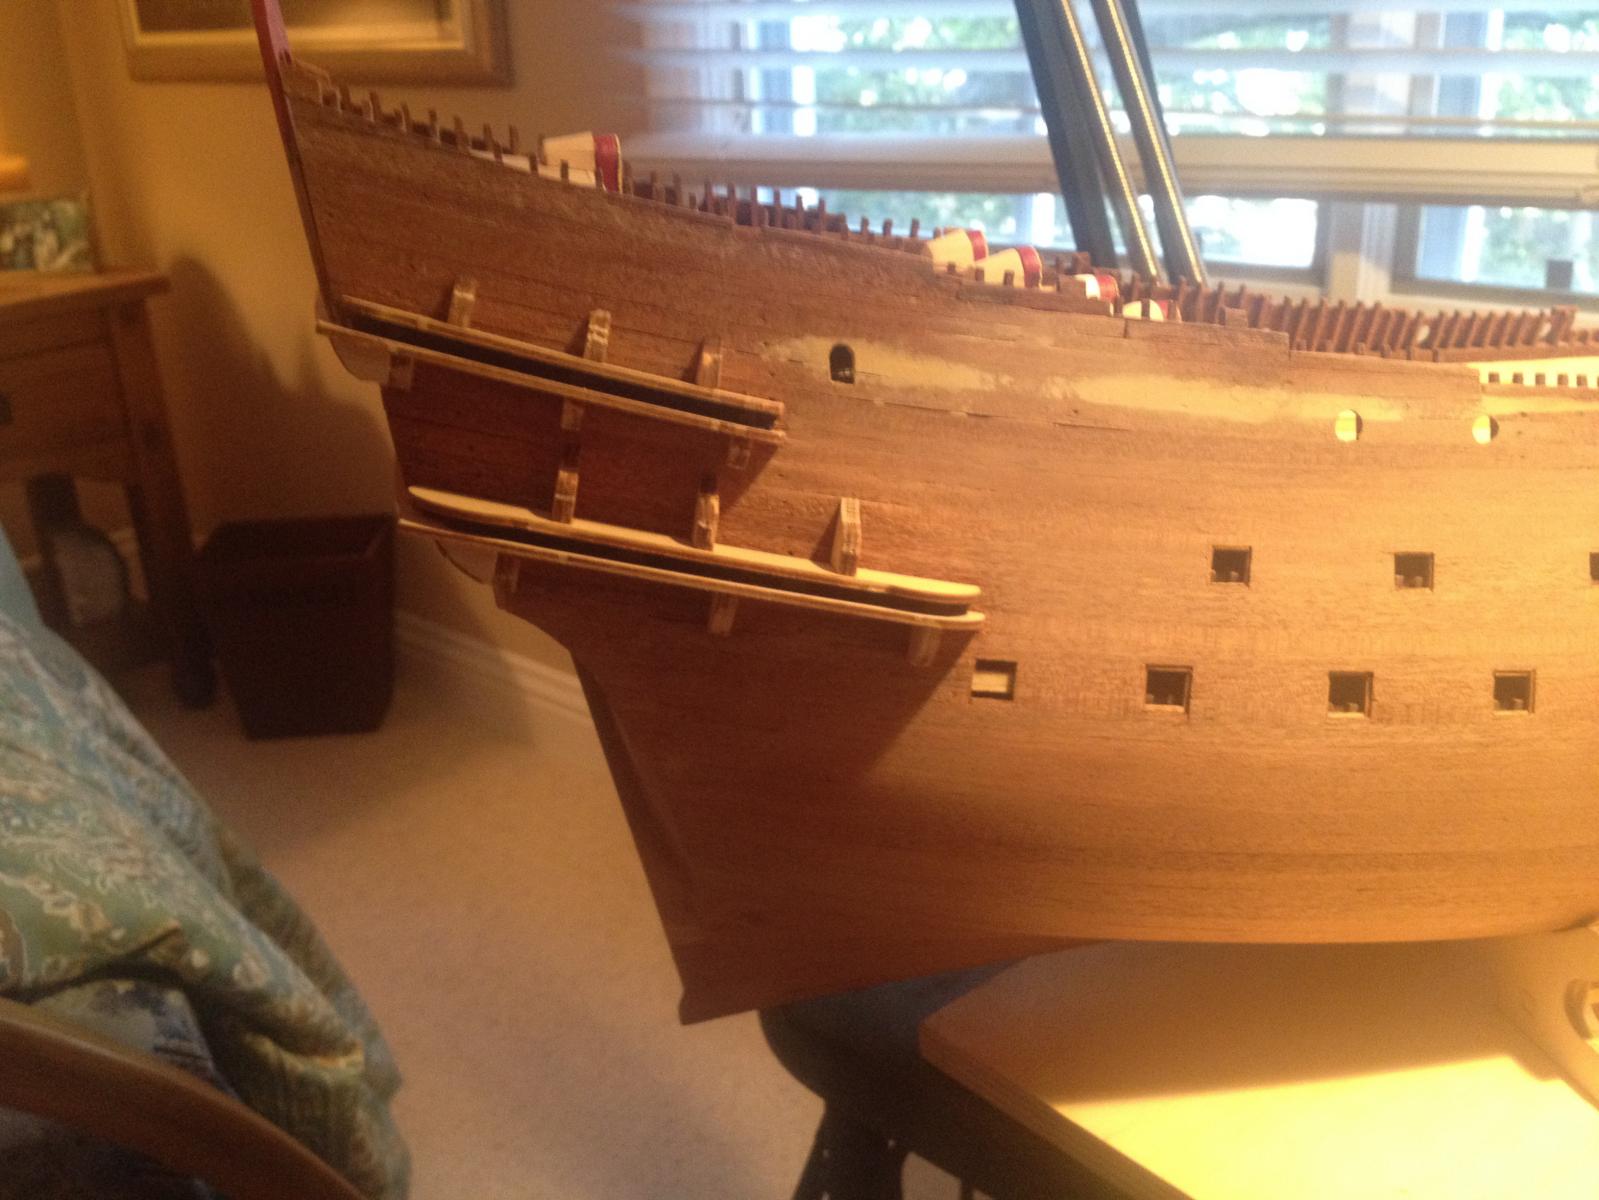
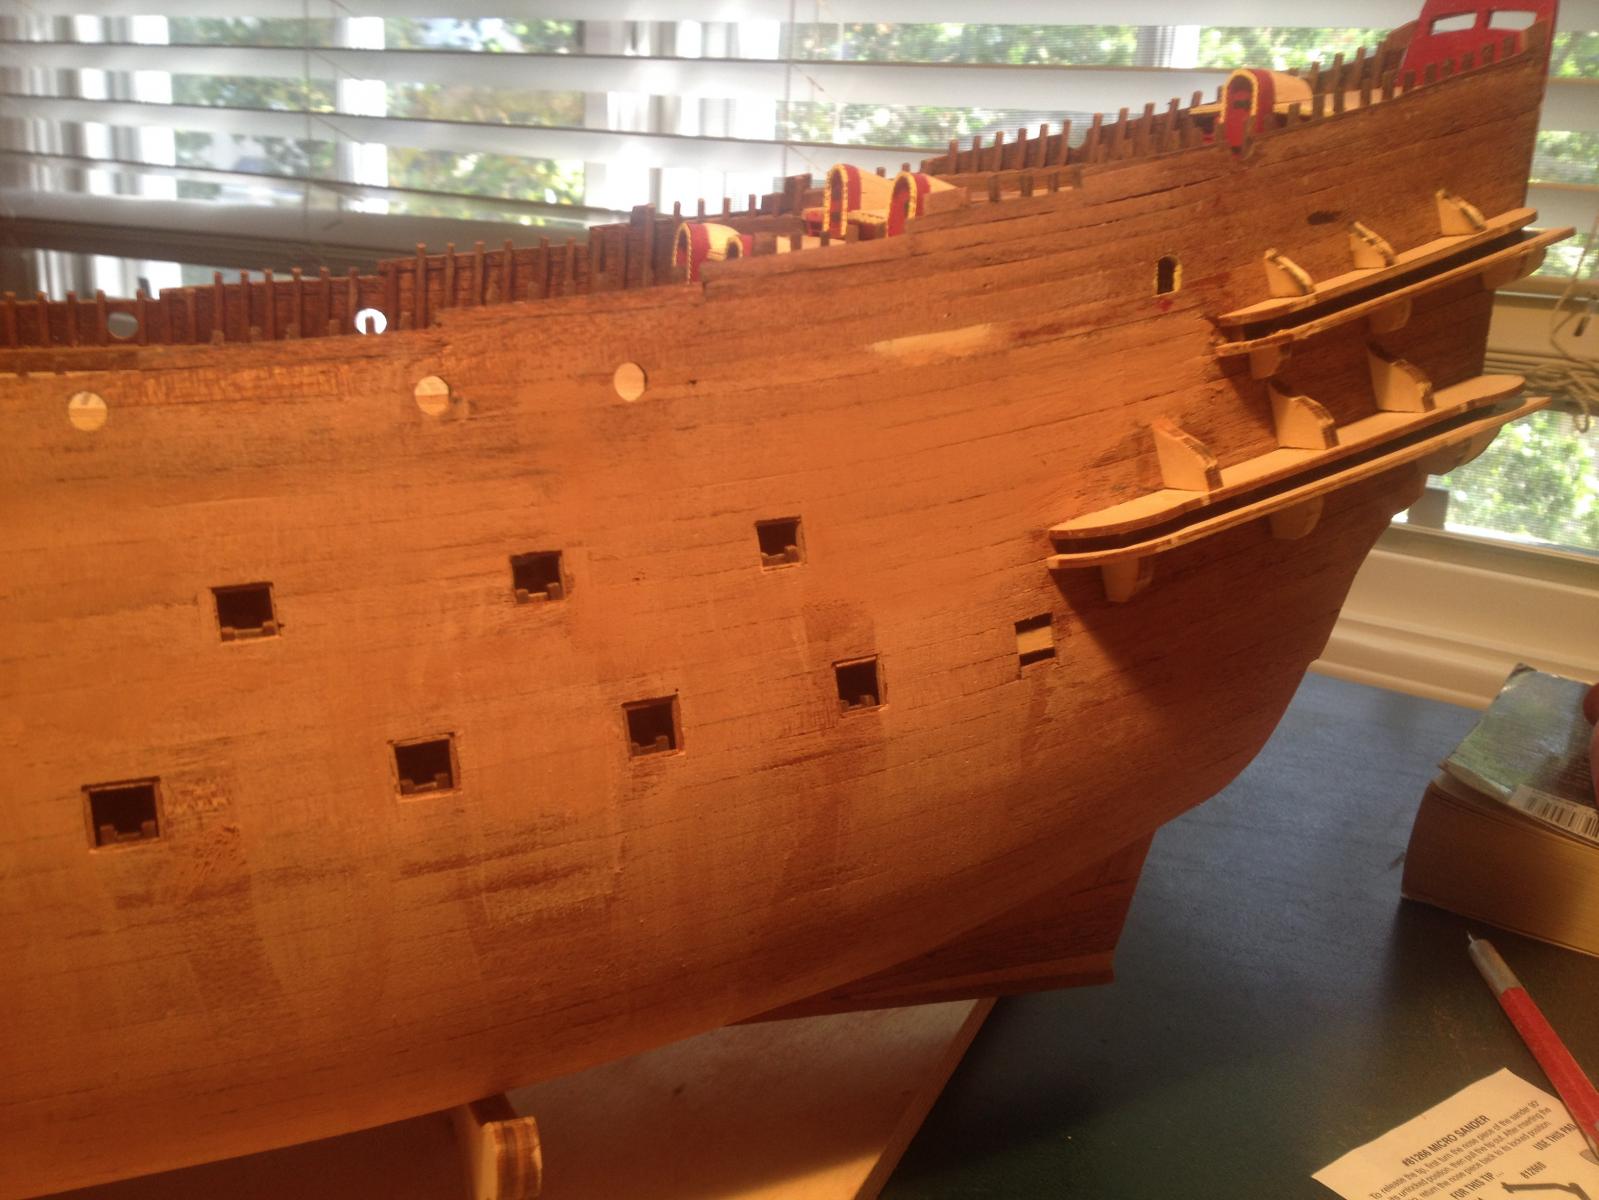
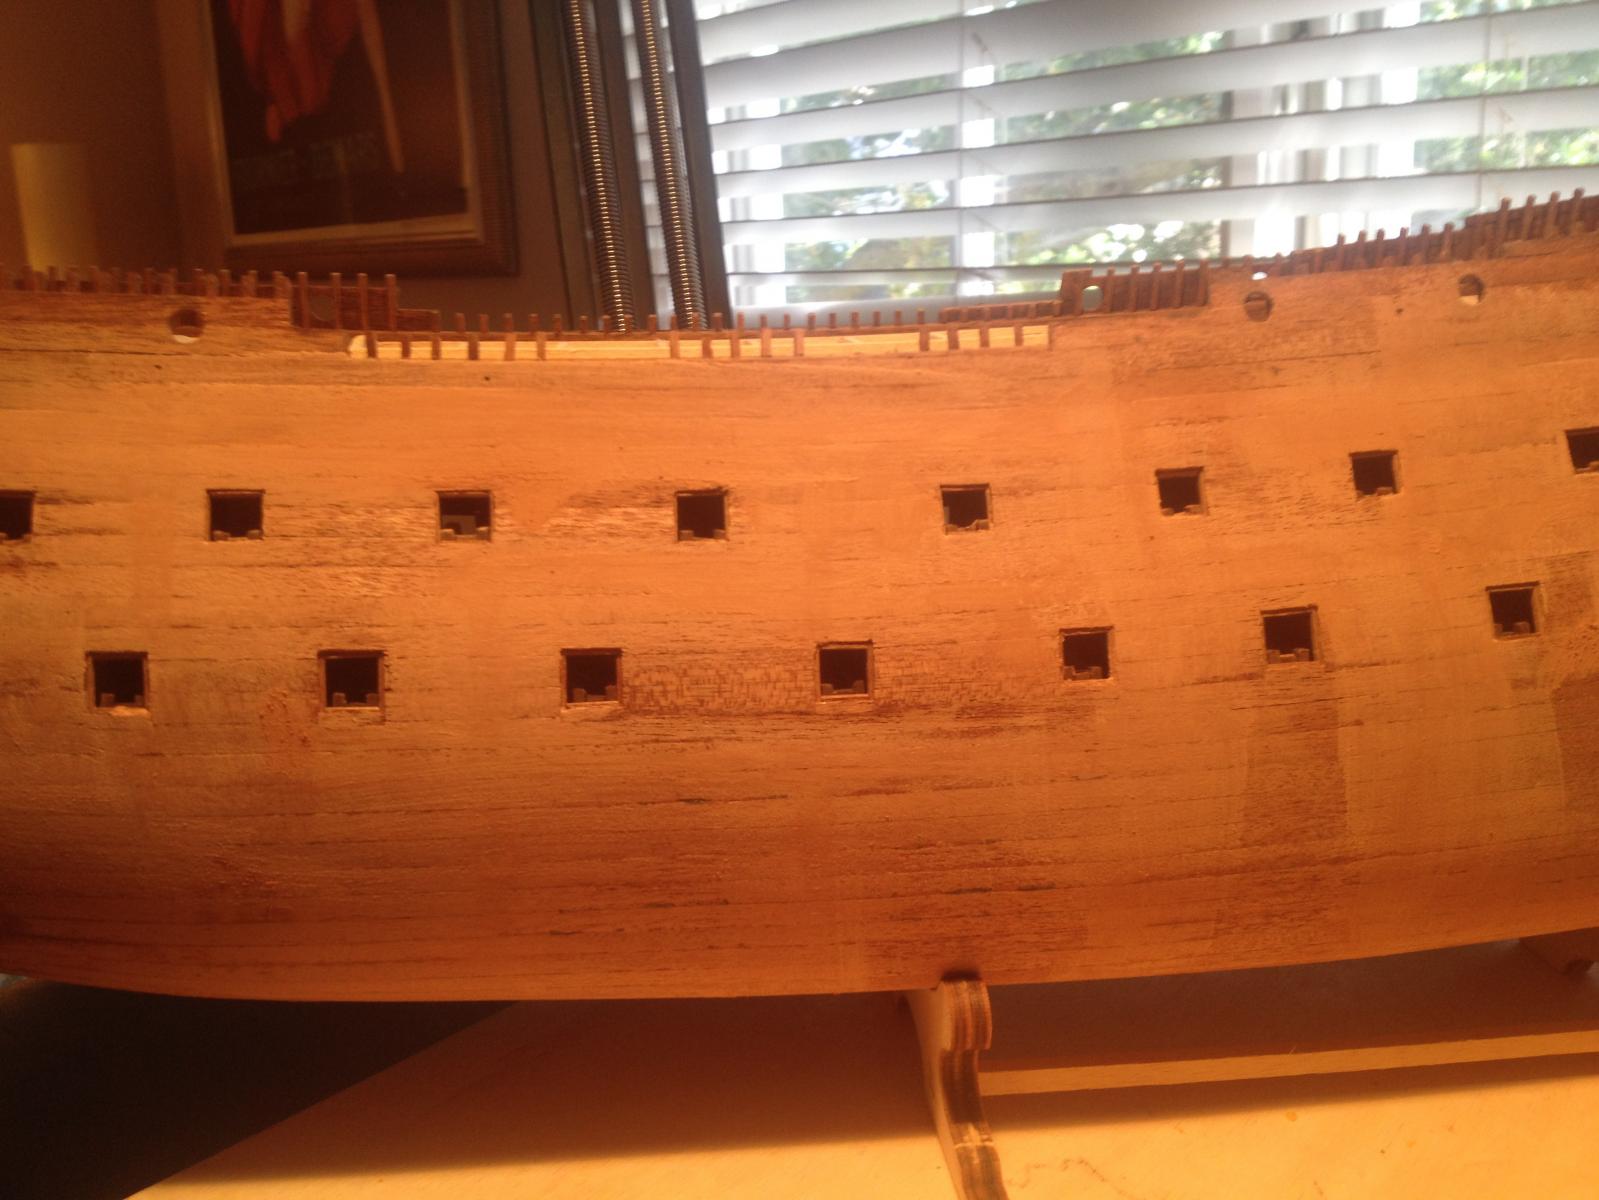
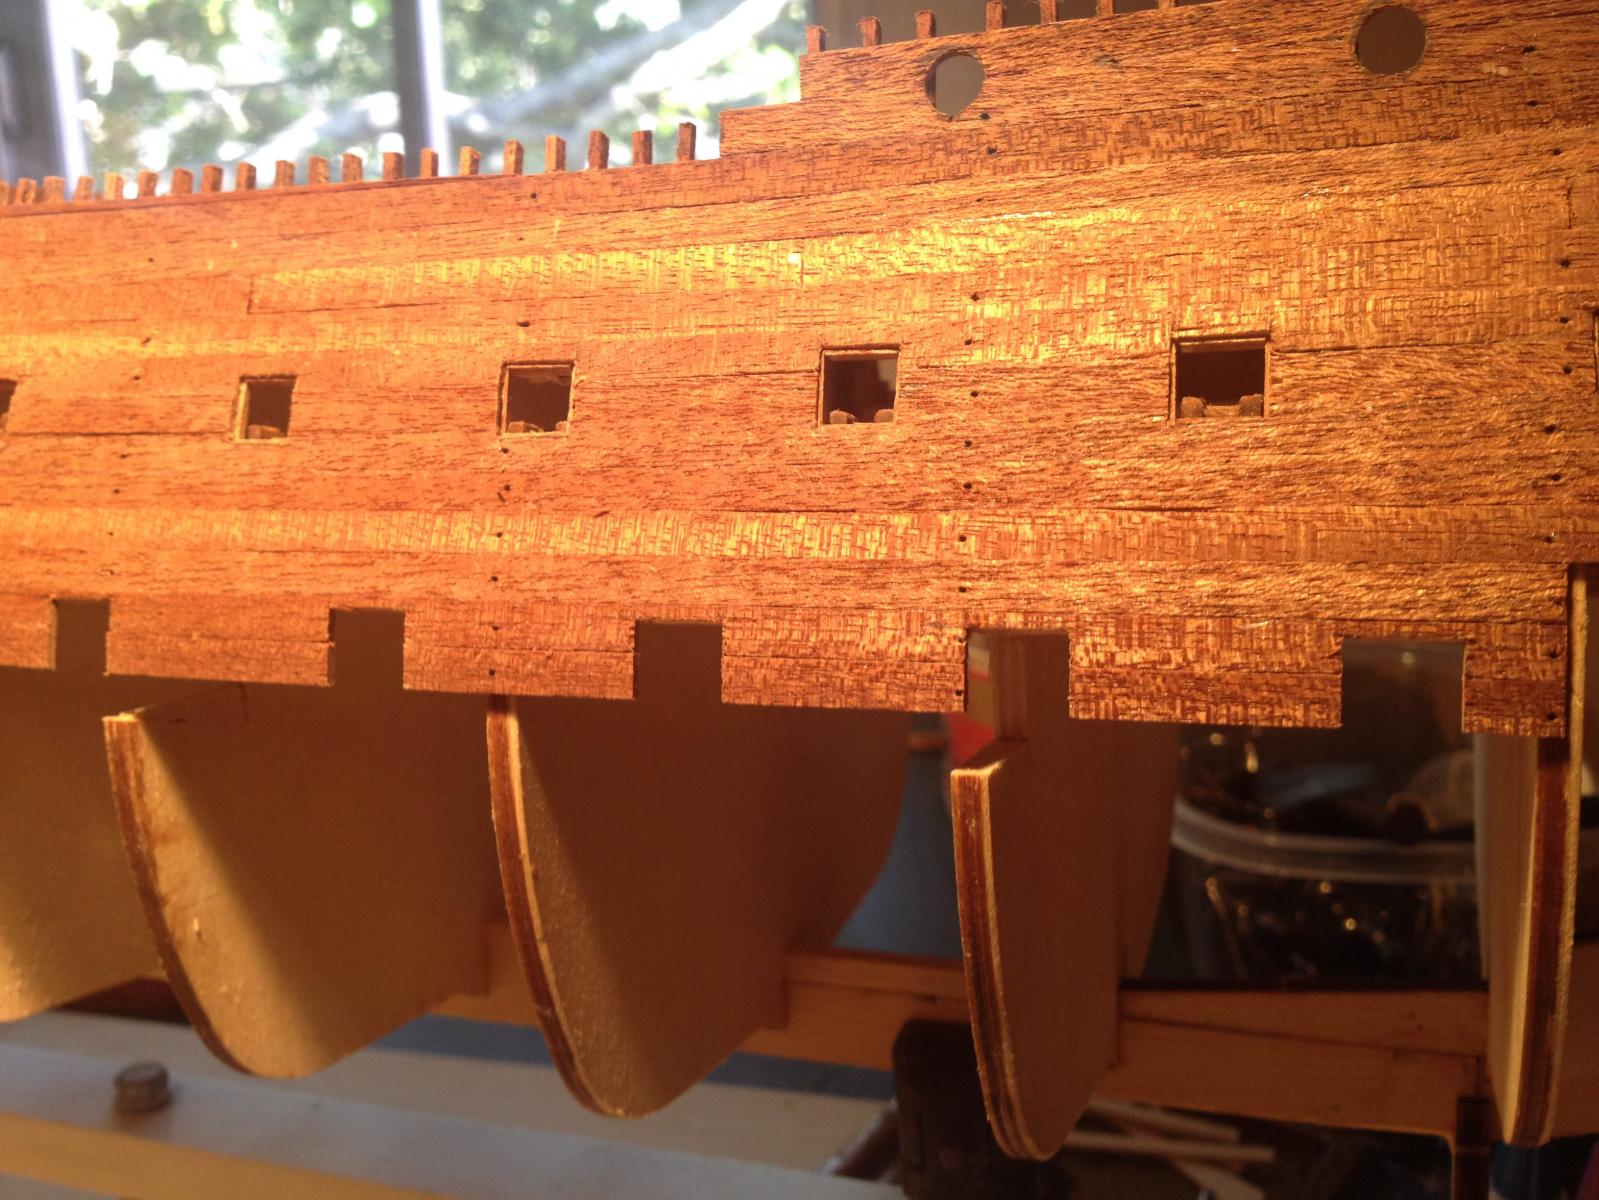
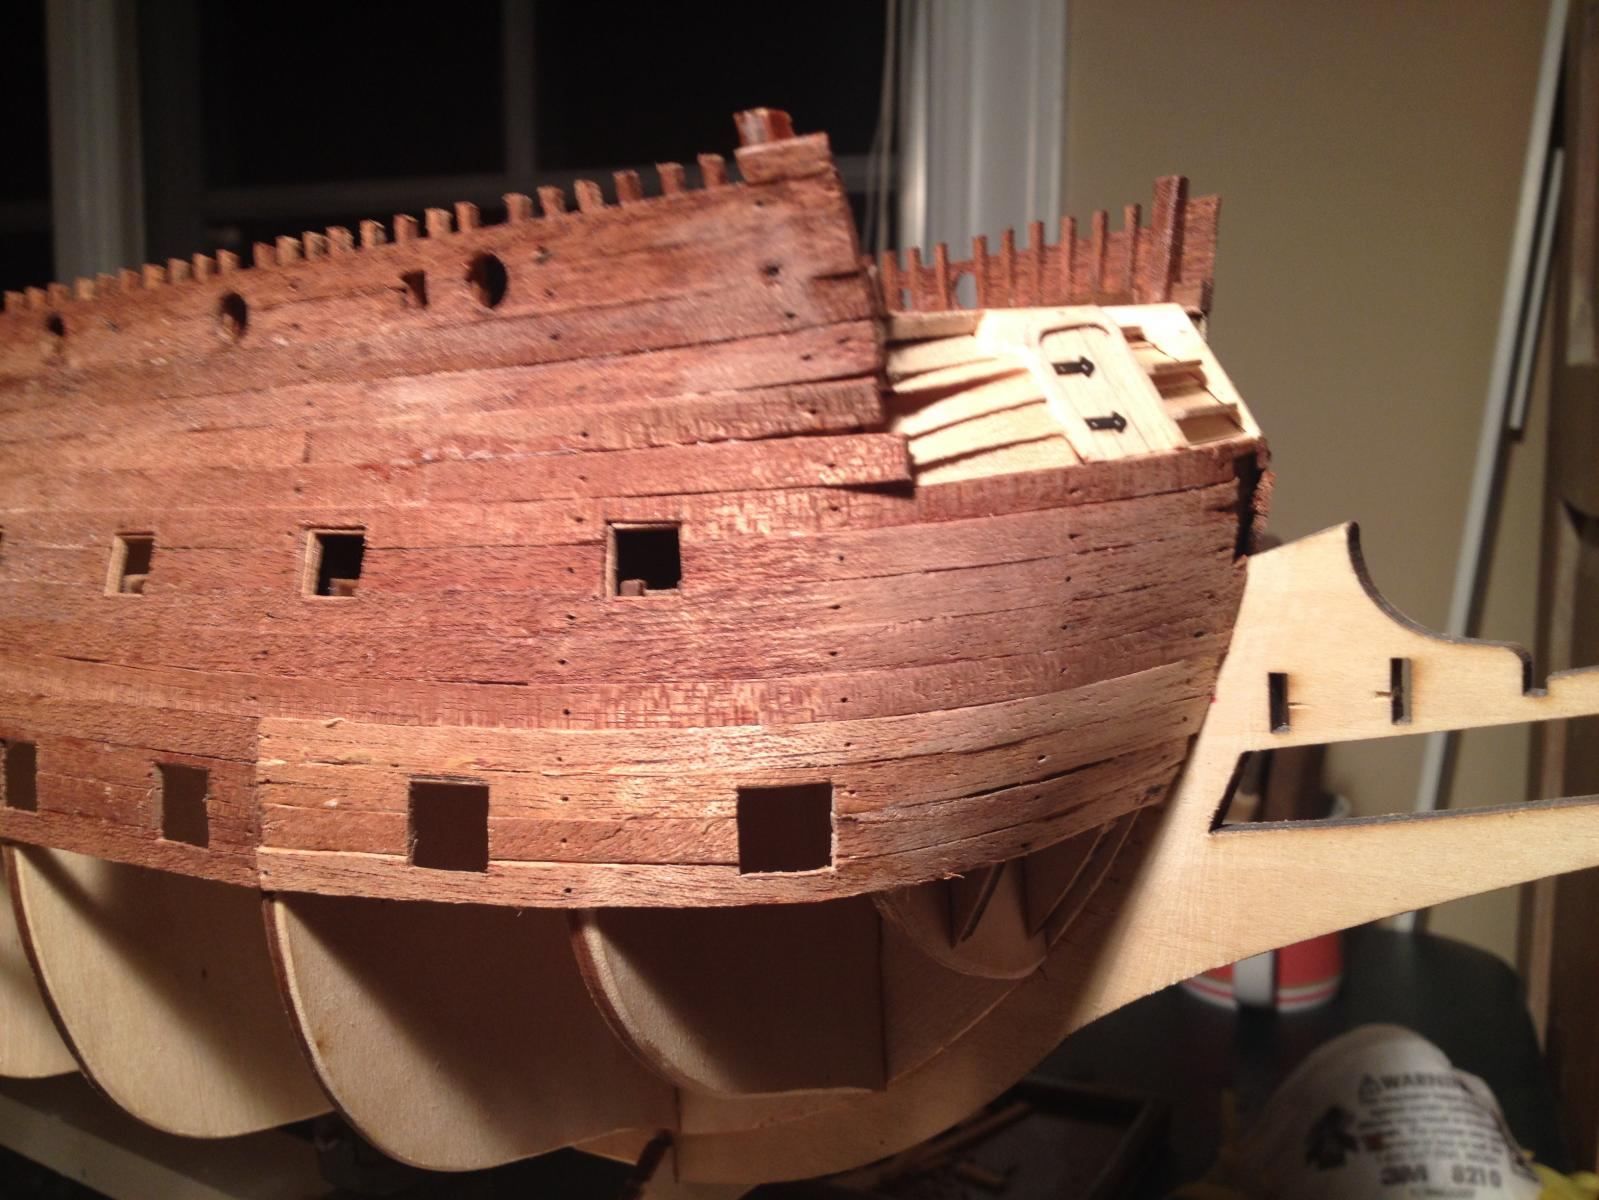
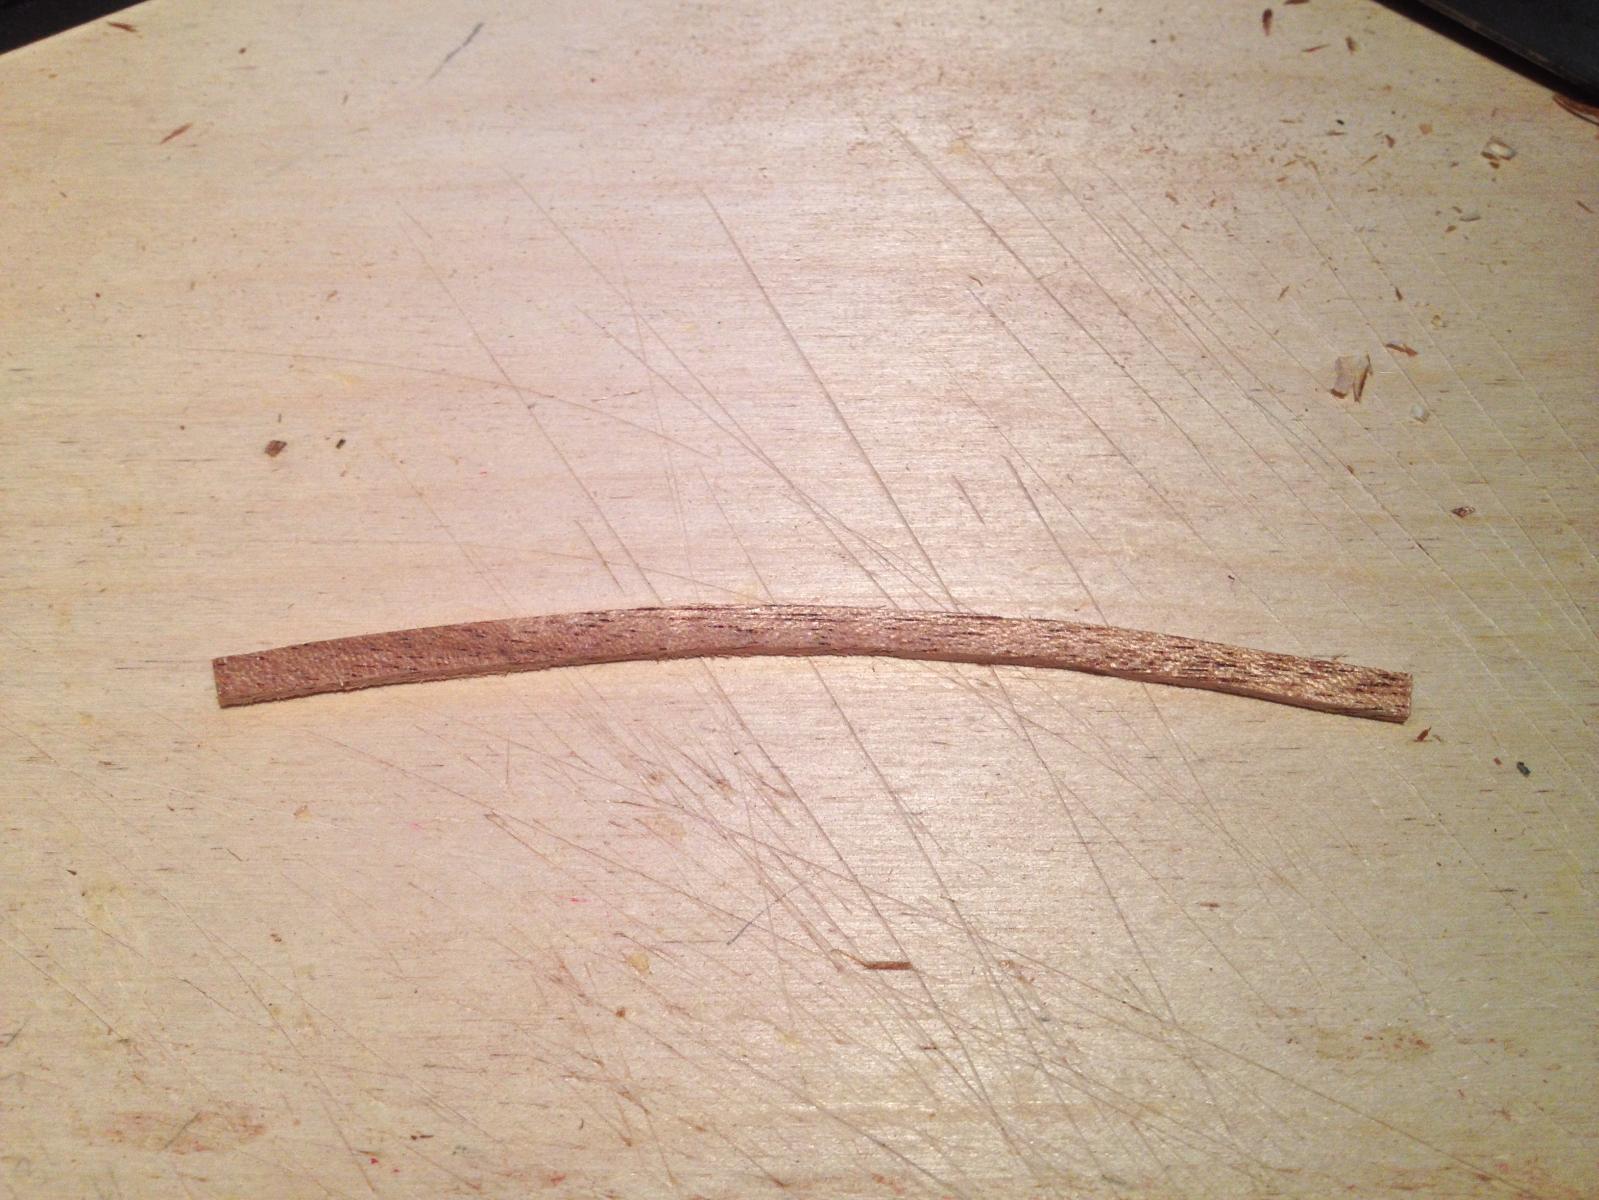
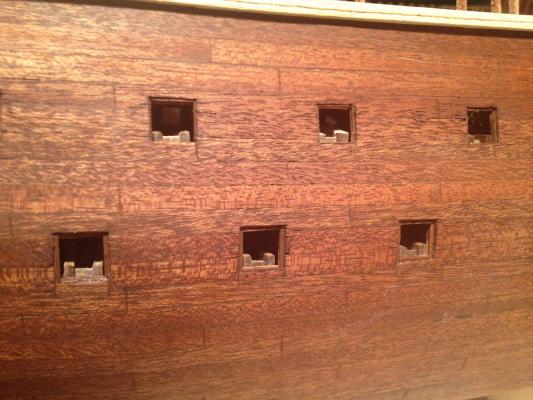
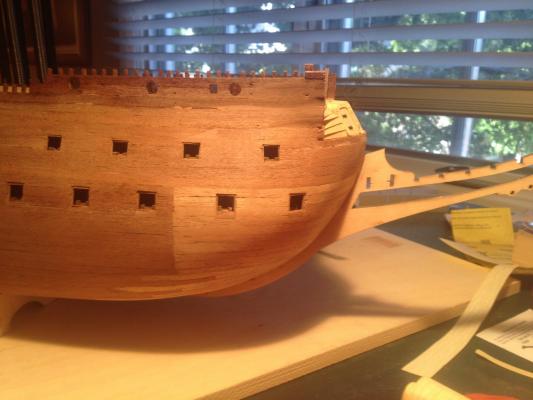
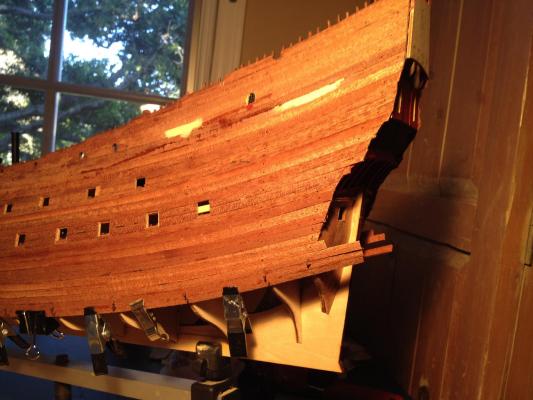
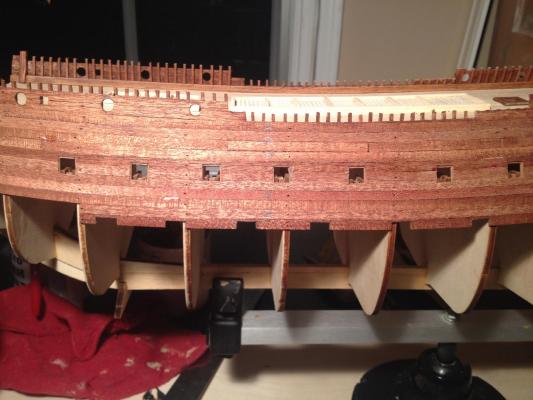
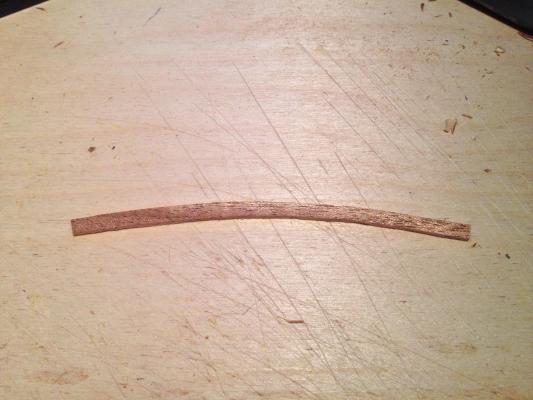
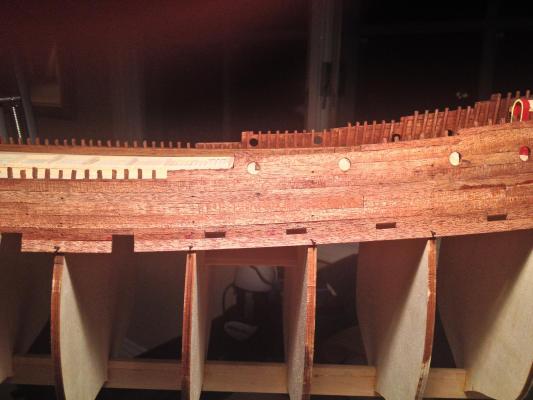
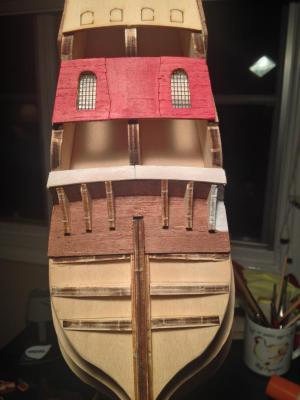
First row of gun ports finished. I tried to match the uneven spacing of the ports as best I could. Now the second row begins. These ports are slightly bigger than the top ones. You can see that the planking doesn't go all the way to the front of the hull. That's where the spiled planks begin, because the compound curves up there don't allow straight strips to lie against the hull properly. A close-up view of the spiled planks at the front. Unfortunately the mahogany is a little different shade, but a darker stain over the entire hull should match it up reasonably well. At this point high up the hull, the planks are full width all the way to the front. They don't start tapering until below the lowest wale, at which point the real ship uses lots of drop strakes. The real ship's hull doesn't look this consistent - lots of planks of different thicknesses. But at the time I did the hull, I didn't have a planking layout from the original ship. Here's a single spiled plank. You can see that it's curved, so that when it's bent around the compound curves at the front of the hull, it'll lie straight without edge bending. Lots of good tutorials on this site about spiling, and they do a much better job describing the process than I could. And finally the second row of gun ports finished. I then repeated the false decking and carriages for the second row of gun ports.

- 249 replies
-
- 4
-
-
- billing boats
- vasa
- (and 1 more)
-
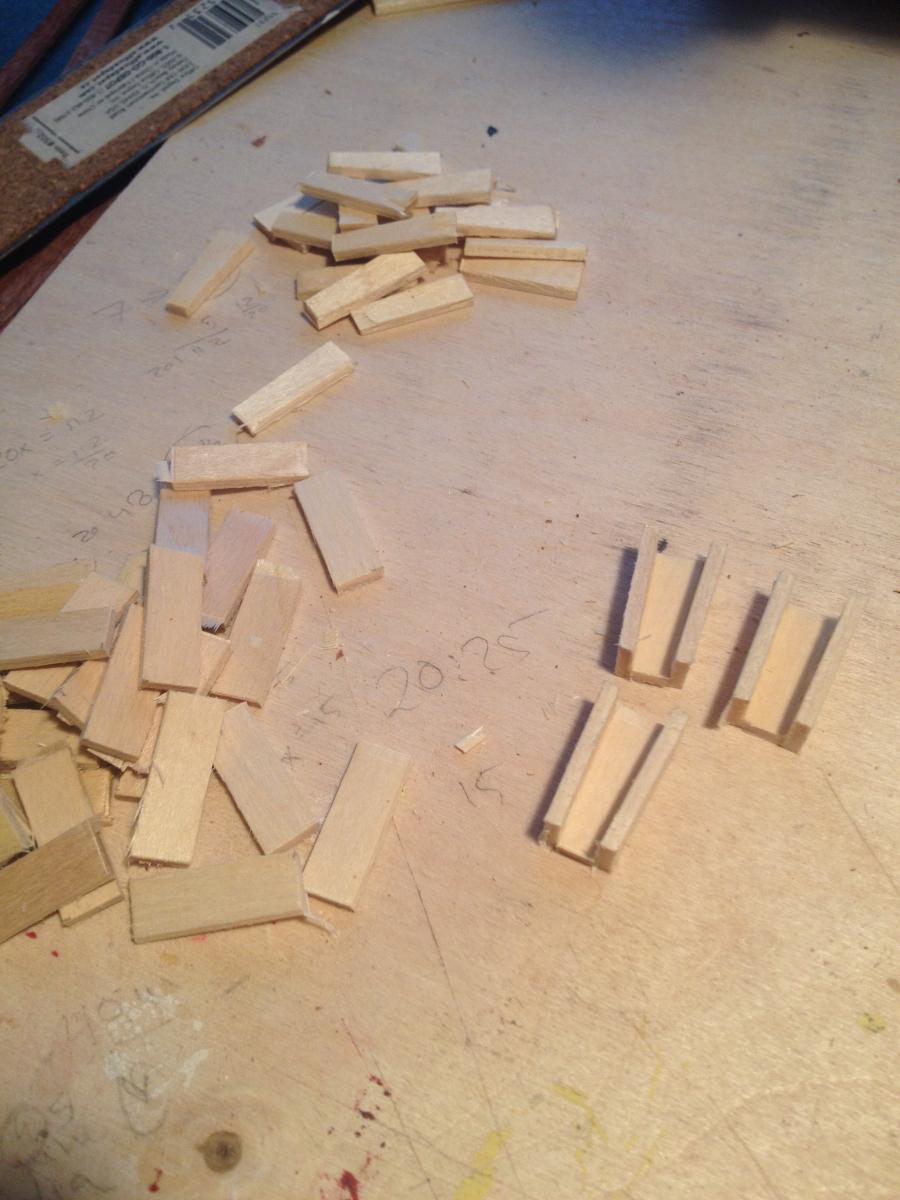
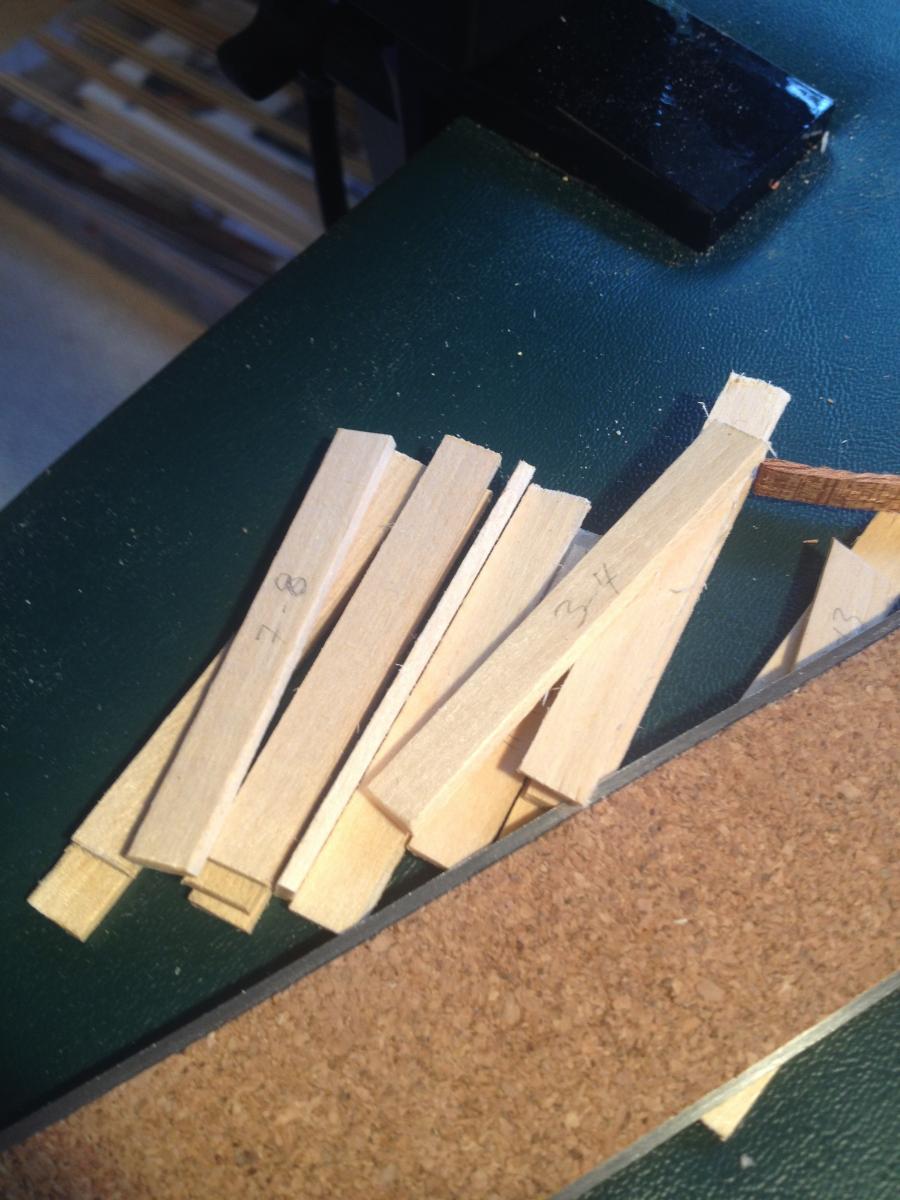
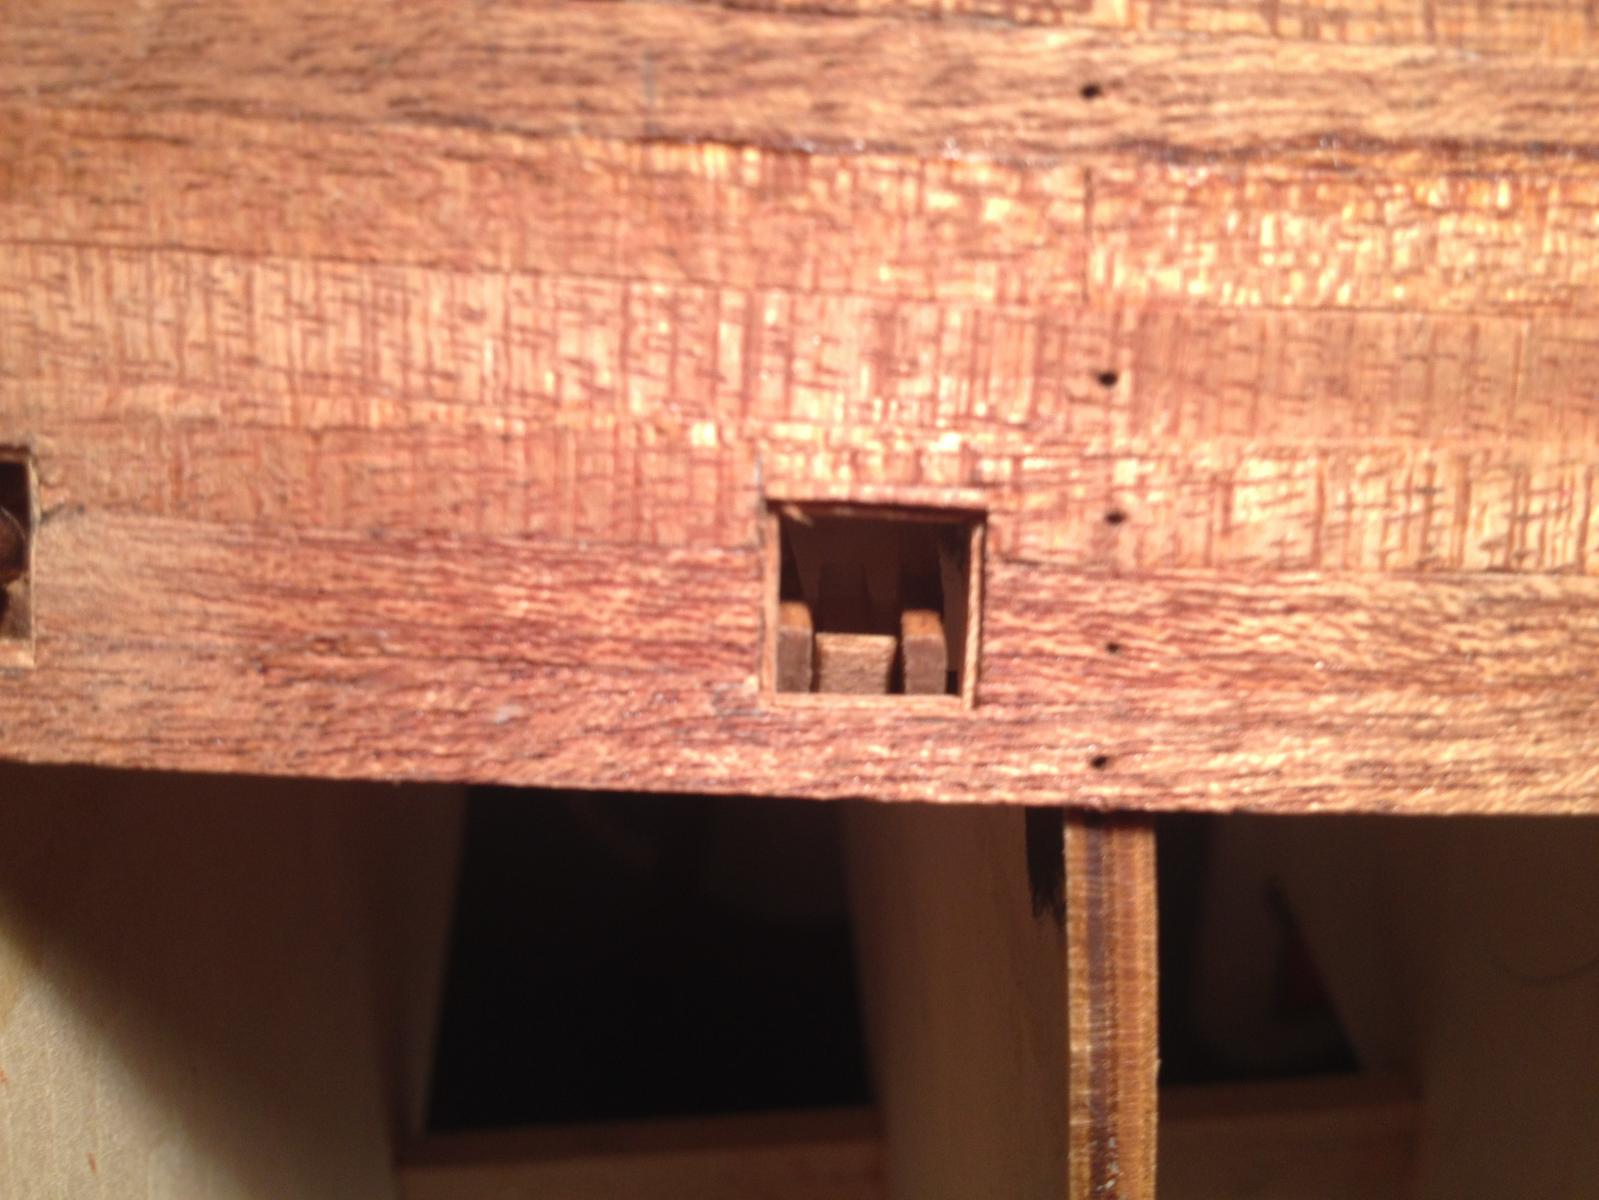
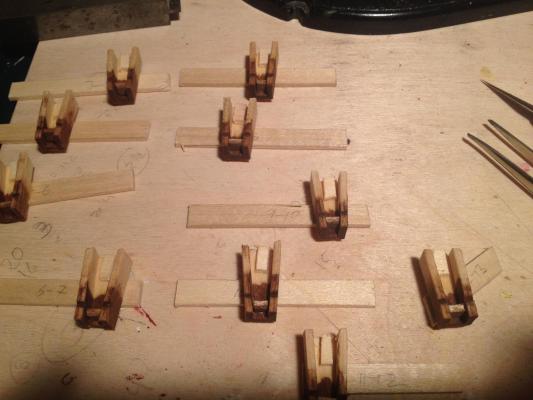
Here's a photo of a finished gun port, lined with thin veneer. Fred Hocker kindly gave me average dimensions for the upper and lower ports so I was able to get them more or less the correct size. The gun port lids will be an interesting exercise too. The kit provides plastic lids. Each lid has a raised square center section with its lion head in the center. The lion head detail looks pretty good, and because the whole center section is painted, you won't know it's plastic. You get the benefits of nice detail and workability without it looking ugly. The outer edges are supposed to be wood though, and it's hard to paint plastic to look like wood. I think I will cut the edges off the lids, leaving only the raised square center section. Then I can grind down the back until it's fairly thin, and simply mount each section on a wooden lid. Seems like it'll work, but I'm going to do the lids very near the end of the project since they will be fragile. Once I had decided to fix the kit's gun port design, I needed a solution for mounting the cannon. I decided to make a set of false gun carriages, very low on detail since only the front will be seen. Those would then be mounted on strips of false decking attached at the ends to the bulkheads. Here are pictures of the pieces of false decking and the assembly of the false carriages: And the carriages mounted to the decking... And the decking mounted at the ends to the bulkheads. And finally a couple of pictures test-fitting cannon on the carriages. The cannon supplied with the kit are not very detailed and seem out of scale to me, so I bought some Amati cannon that I thought looked better. I'll paint them black and then add bronze highlights.


- 249 replies
-
- 6
-
-
- billing boats
- vasa
- (and 1 more)
-
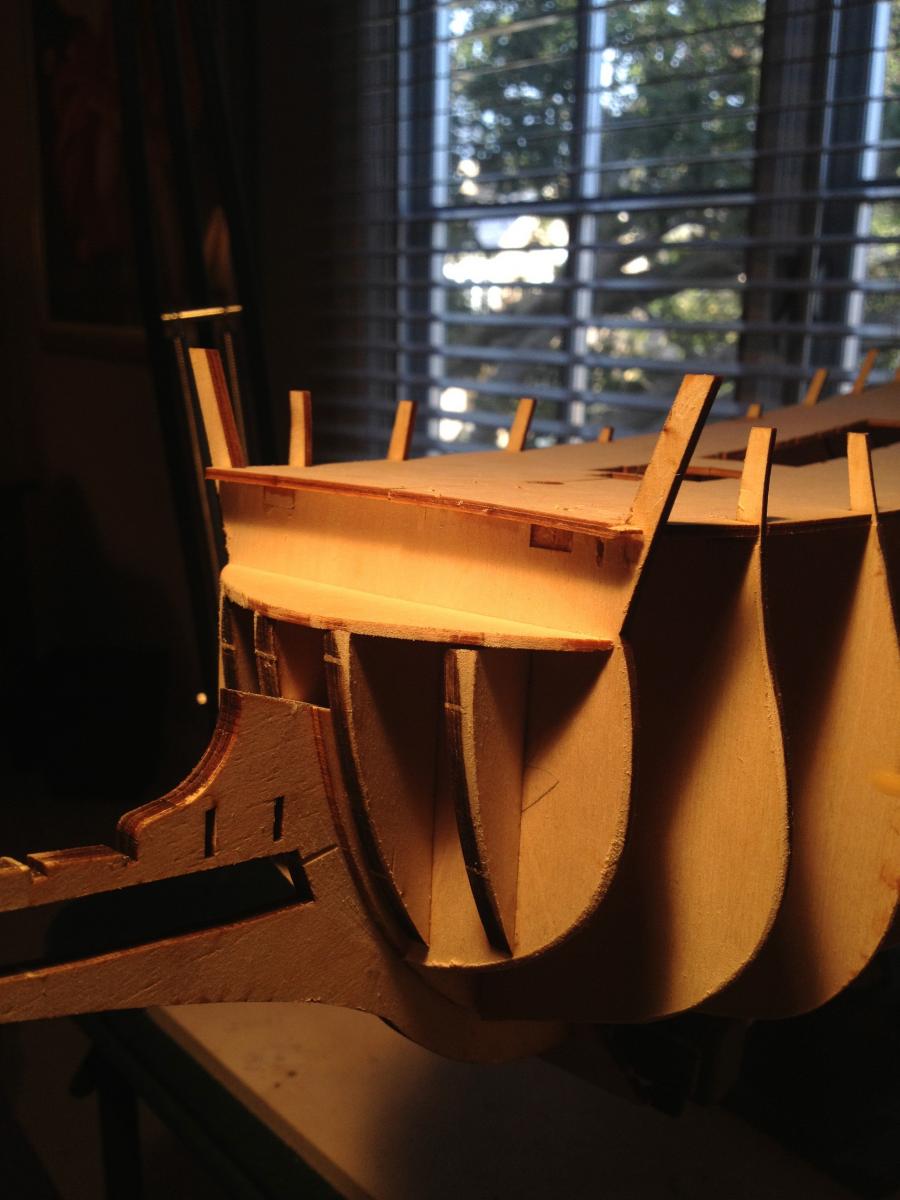
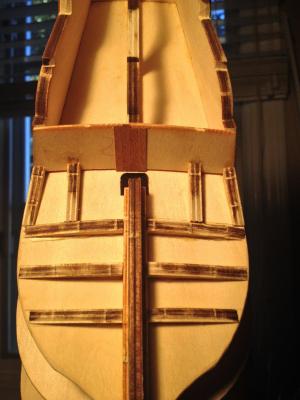
I thought about adding more frames or even completely filling the spaces between bulkheads with balsa, effectively doing a solid hull. I decided not to for a few reasons - first, the amount of wood dust created by fairing all the balsa blocks would have been on an epic scale. Second, it would have made a solution for the gun ports more difficult, and finally it would have been a ton of work and planking the hull was my least favorite task on my first model. So I just took a lot of care fairing the bulkheads and setting battens up to make sure the lines looked OK. I did put balsa blocks up at the front because the extreme plank curves and the lack of attachment points didn't look like a good combination. I think the hull ended up looking quite good - I'll upload more pictures tonight or tomorrow.
- 249 replies
-
- 1
-
-
- billing boats
- vasa
- (and 1 more)
-
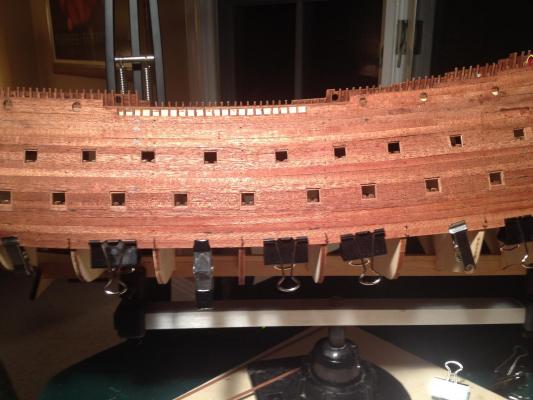
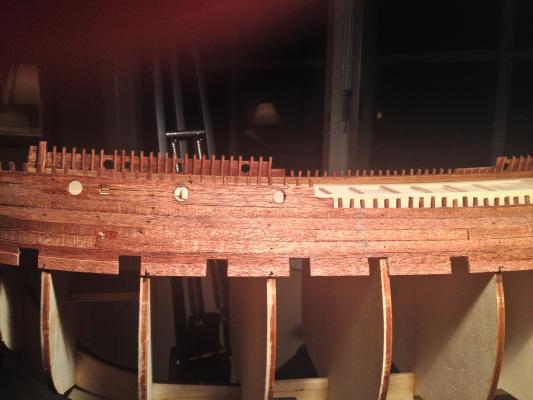
And now the hull planking began in earnest. The kit is designed for a single planking layer. If there were lots of frames along the length of the hull this would be fine - lots of attachment points, and nice gradual curving. Unfortunately there are only a few (relatively speaking) bulkheads, so not a lot of places to attach your planks and you need to be very careful about fairing the bulkheads to avoid any unsightly bends in the planks. In a double-layer design like my first ship model, anything unsightly gets sanded or filled to produce a smooth surface for the final planking; no such luck here. There's a second-order problem with the single-layer design, which is if you want to use individual scale-sized planks rather than long strips, you have the problem that the planks butt against one another in places where there is no underlying support. Add to that problem that the planks in question are usually curved, and getting it to look nice is difficult. Finally, even if you use long strips, getting them to sit flush against one another without underlying support is tricky. All in all a challenging task. I tried one strip of planking as individual planks with small pieces of wood behind the joints, but it was tedious work, and the result didn't look all that great. I decided instead to use long strips and scribe the butts afterward. I realize that the real ship didn't have a pattern for shifting the butts (insert juvenile humor here as needed), but I liked the look so I used a pattern. Also, the real ship used scarf joints, which I didn't want to deal with in large quantity, so I decided to scribe scarf joints for the wales only. The hull is fairly bluff-bowed, and the compound curving of the hull didn't start until quite far forward. In practical terms that meant I could use strip wood for almost the entire hull, with only a small amount of tapering required. Near the front I needed to spile planks from wide planking stock. Unfortunately for me the wide stock and the strip stock, though both mahogany, didn't match perfectly, requiring a darker stain on top to blend together. The rear of the hull is another slightly tricky area. There is a pronounced sweep upward toward the rear, requiring some edge-bending of the planking. Now that I think of it, maybe that was why the bottom of the pre-built bulwarks didn't follow the curve of the top - by keeping the line below fairly straight, no bending is required. The narrower strip stock I used was fine with the edge-bending required, so luckily no problems there. The second design issue I had to deal with was gun ports. The kit provides brown plastic frames and you are supposed to paint black squares on the hull and then glue a frame over them. I found this a dubious idea at best and decided to make real gun ports. More on this later, but in the following photos you can see them take shape. Locating them on the hull was difficult since they are not evenly spaced and the placement on the kit plans is wrong. I ended up looking at the real ship and the 1:10 model and eyeballing the placement as best I could. I was pretty happy with the result. Scratching my own bulwarks and having them follow the curve of the decks was a big win here because the gun ports follow the same curve. All I needed to do was make vertical cuts. Luckily for me, the first band of planks requires no tapering and no spiling, so I could practice getting a nice result. I steamed the planks for a bit, then nailed them to the bulkheads, all with no drama. I did need to use clamps to keep the rows sitting flush with one another, and I needed some temporary bracing at the bottom of the current row to make the planks sit tightly against one another.
- 249 replies
-
- 6
-
-
- billing boats
- vasa
- (and 1 more)
-
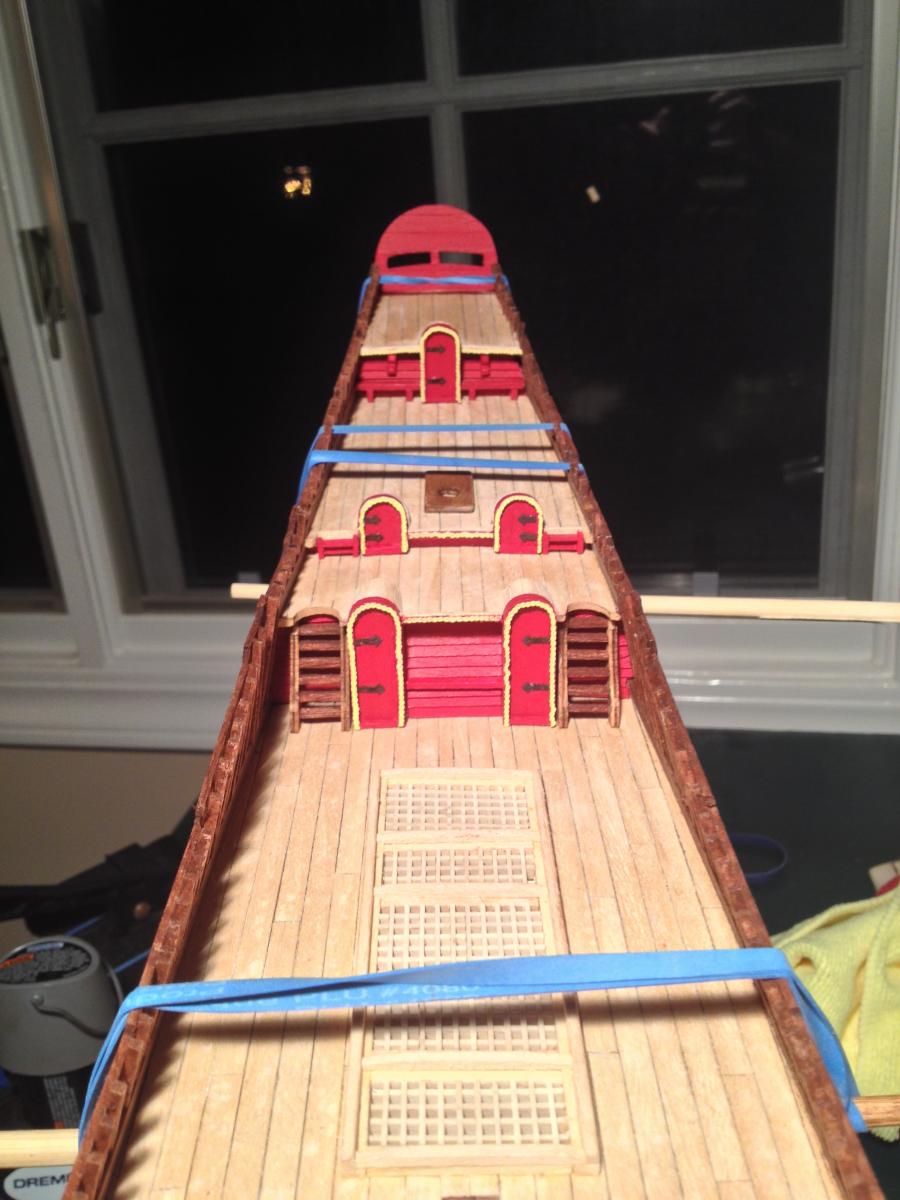
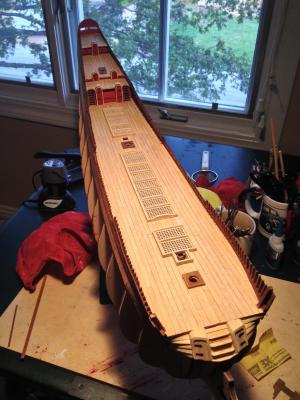
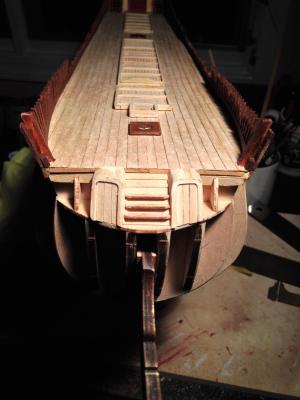
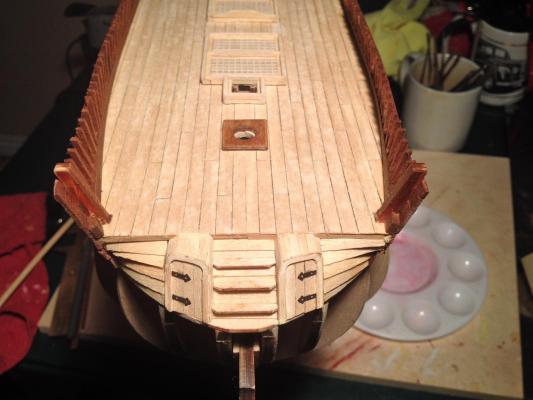
Two views of the upper hull, with the decks, gratings, and doors finished and painted. The rubber bands are providing tension for some braces that are holding planking tightly together. More on that next...

- 249 replies
-
- 2
-
-
- billing boats
- vasa
- (and 1 more)
-
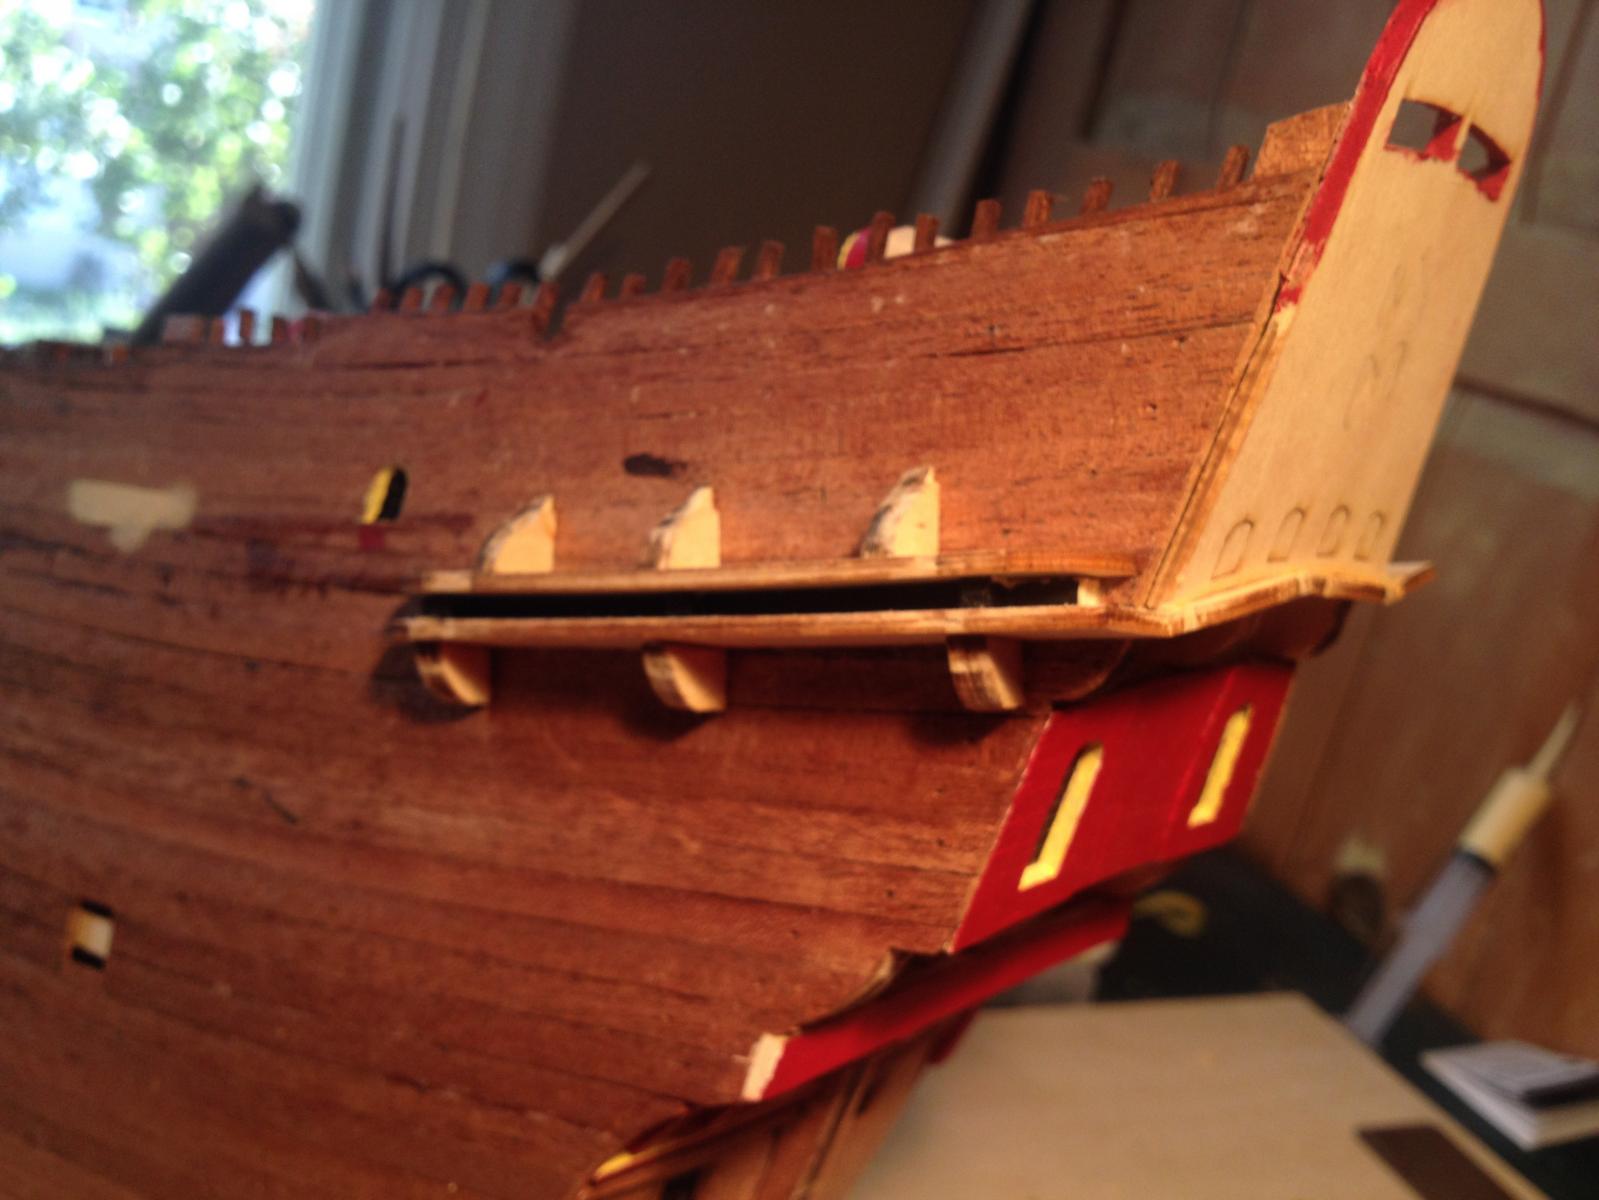
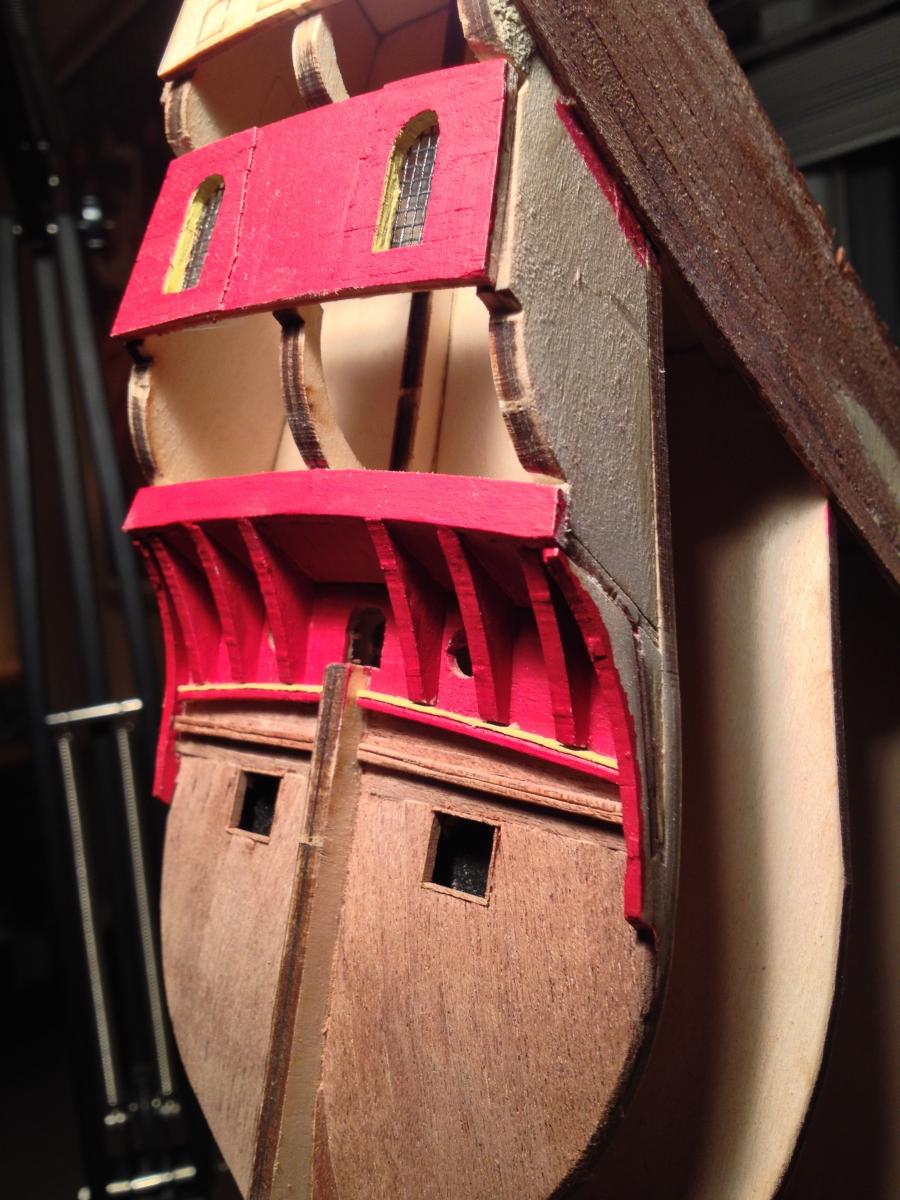
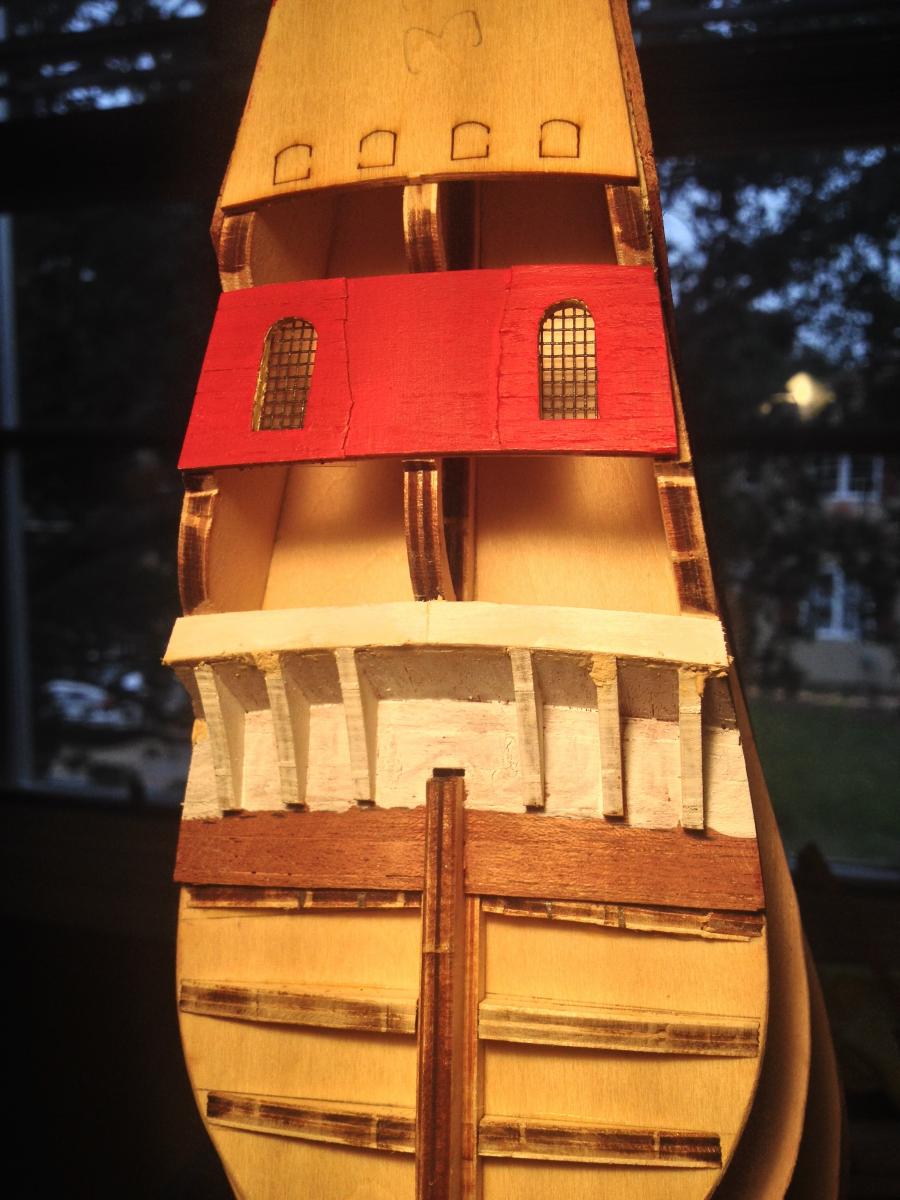
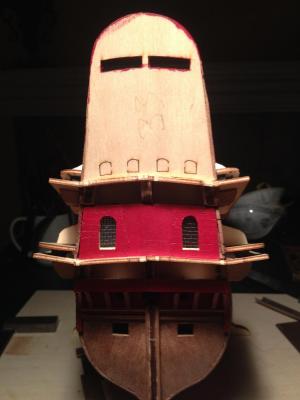
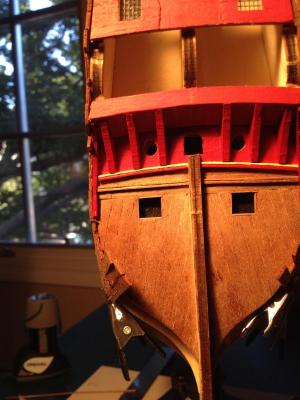
Here are some photos of the diagonal transom planking. The 5mm width wood feels more in scale to me. More by luck than anything else I managed to match the number of planks with the real ship. Note the colored molding at the base of the buttresses. Because I had the buttresses curve, the molding curves as well. The actual ship and the 1:10 model don't show such a pronounced curve, so I ended up redoing that area. Not sure it made much difference in the end. The kit plans don't call for open rear gunports. I think you're supposed to paint a black square and put a plastic frame around it. I made "real" gunports, although they are very shallow because of the bulkhead behind them. Rather than opening up that bulkhead and having to deal with false decking and false carriages for the guns, I decided to leave the depth shallow and use false cannon that screw into the bulkhead. The only parts of the transom still to do are the curved areas that meet the quarter galleries. I wanted to wait on them until I did the quarter galleries, since the area where the transom meets the quarter galleries is a bunch of complex compound curves and needed a lot of care all at the same time.
- 249 replies
-
- 5
-
-
- billing boats
- vasa
- (and 1 more)
-
If by "tar" you mean will the hull be dark, or lighter like the 1:10 model, then it is darker. Not so much for accuracy but because I had some issues evening out the color between two samples of mahogany that didn't match. Also I like it a little darker :-)
-
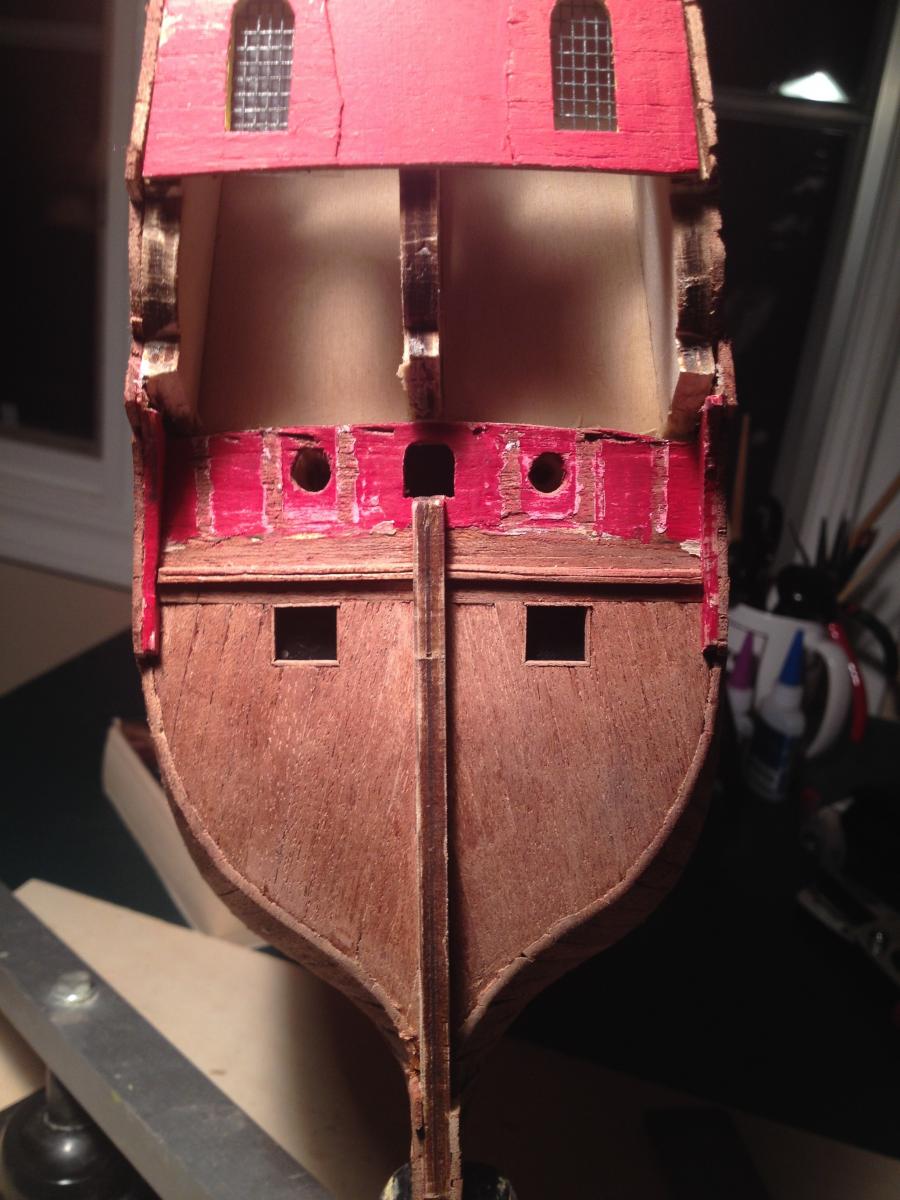
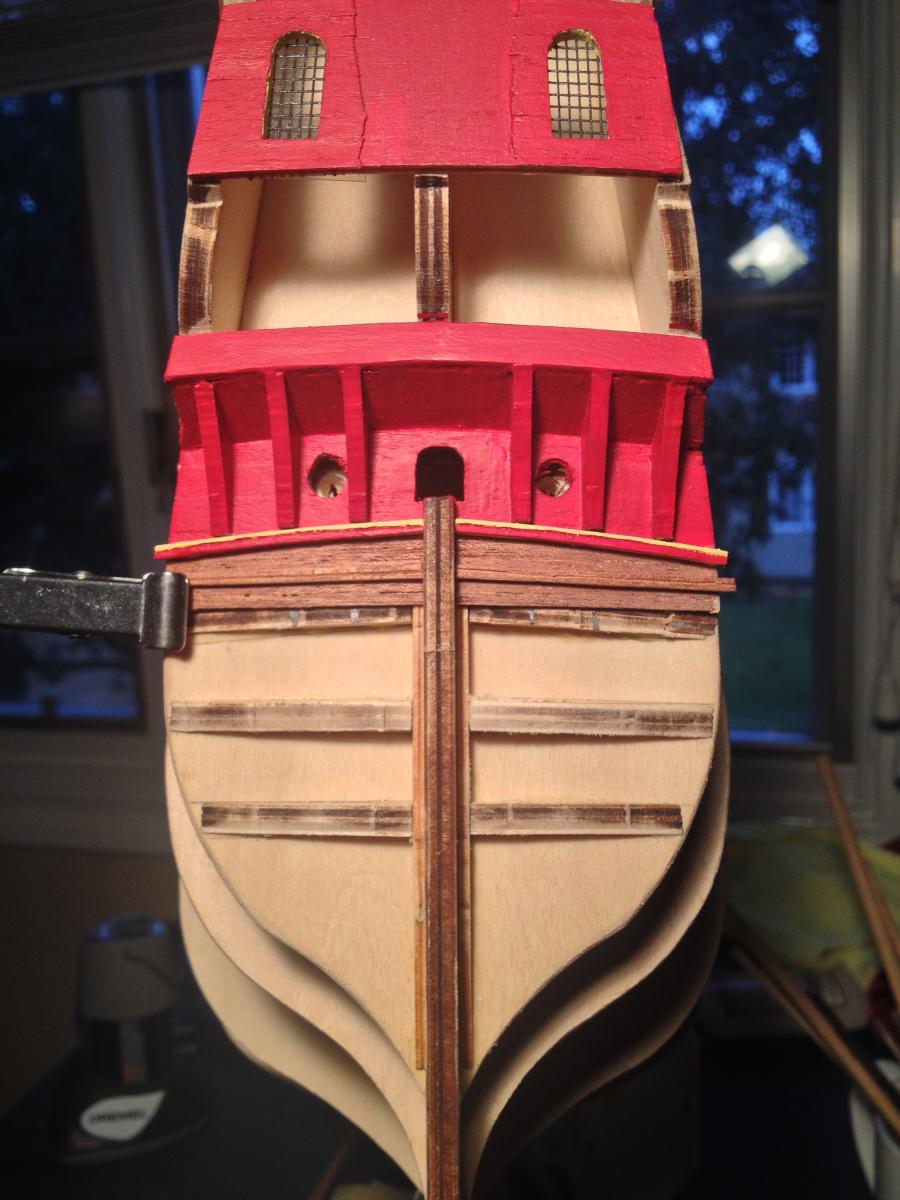
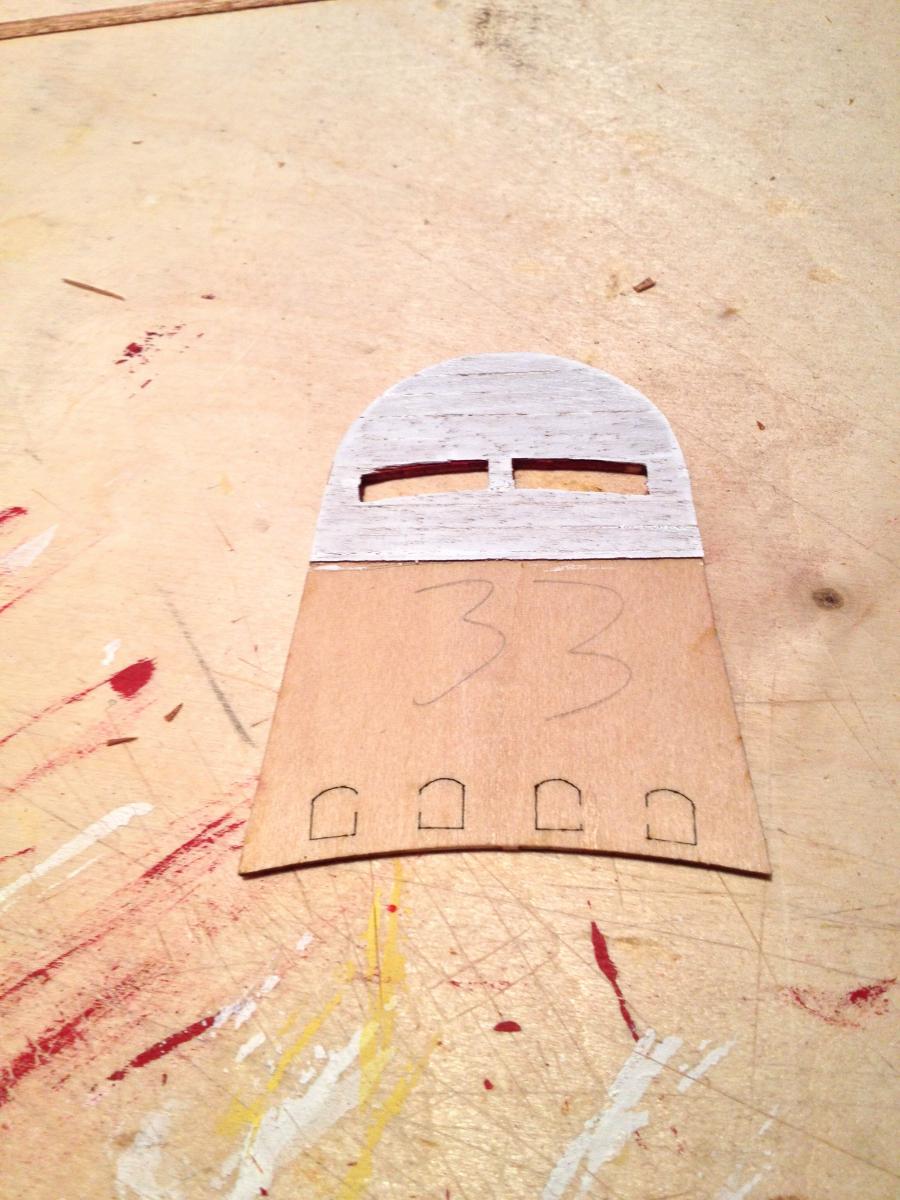
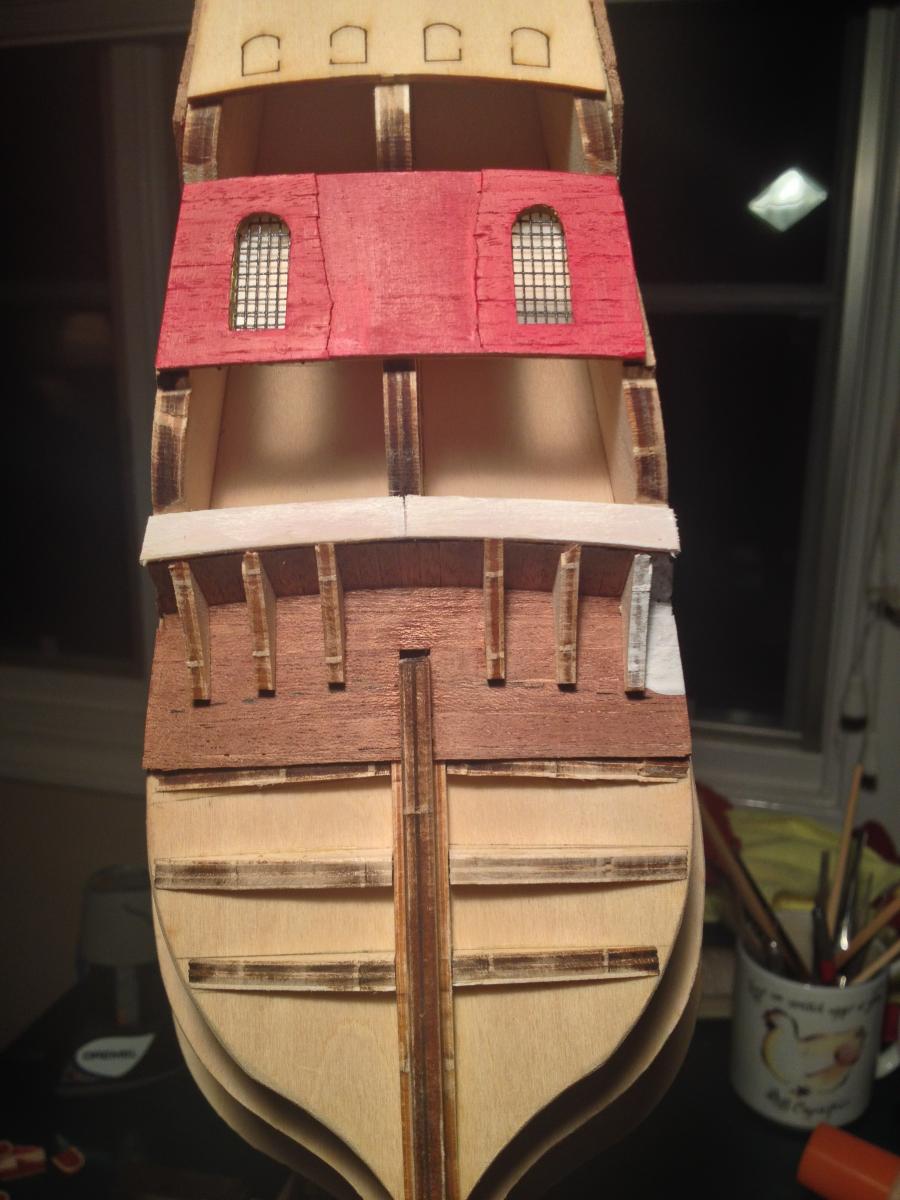
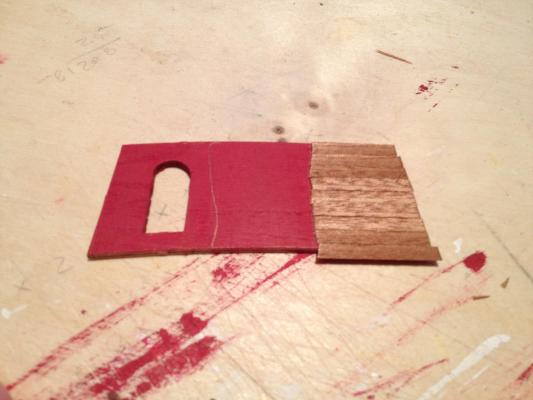
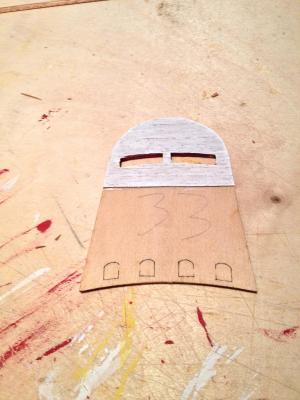
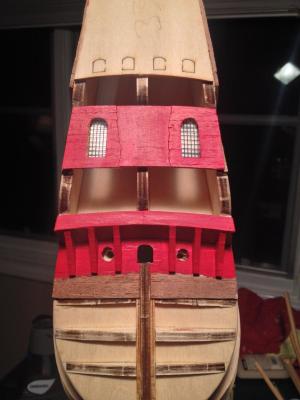
Now some photos of the transom area being built up. For this piece I planked the part that is not to be covered by the two cherubs holding the Vasa arms. Even though most of the planked part will be covered by the six armored knights, parts will be visible and I wanted to see some detail behind them. I am planking this part of the transom because it's visible on the deck side. I'll paint it red, although I don't think it's red on the 1:10 model. Just like the way it looks. Planking the ceiling of this piece. I'm using 3mm veneer for this and the detailing in the photos above; it seems to have a nice scale to it. Here and in the next set of photos you see the ribbing that will form the supports for the hull planking at the rear of the ship. Here are the buttresses surrounding the two round gunports. The kit seems to want you to simply paint two black round circles here. I didn't like that idea, so I've made holes. Also, it's not clear to me looking at either the actual ship or the 1:10 model whether the buttresses and their ceiling should be curved the way I've done. I decided to leave it for a bit and see how I liked it. The kit supposedly provides false "glass" for the two gallery windows, but mine doesn't have it. I found some plastic window screening at the hardware store and used it instead. For what it's worth, it looks like the number of panes is almost exactly what's on the 1:10 model. Odd coincidence. I like the way it looks - not too thick. Finally some hull planking, although just a small part. It's horizontal, and the planking below it will be diagonal, as I'll show in some upcoming pictures. The wood is 5mm wide by 1.2mm thick mahogany. That works out to a scale width of maybe 14 inches or so, which seems reasonable. The kit provides 7mm wide planking which looks too coarse for my liking. The red color doesn't reproduce well in the photos - too much of a pinkish cast. In natural light it looks better - quite close to the museum model, which I like.

- 249 replies
-
- 4
-
-
- billing boats
- vasa
- (and 1 more)
-
You need to get working on the rigging so I know what to do when I reach that point :-)
-
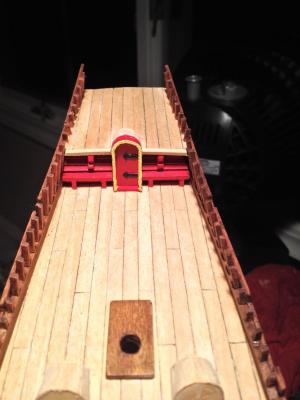
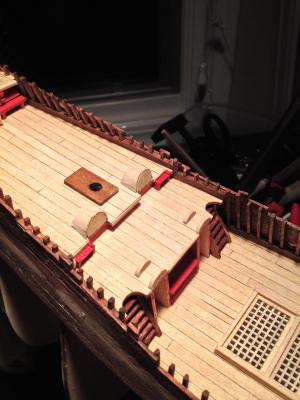
Here are some photos of the assembly of the front doors. The kit provided some framing pieces which needed a fair amount of thinning down to look right. The plywood tended to disintegrate at that point but all turned out all right. I planked the doors and again added blackened hinges. You also get more view of the deck and gratings. The mast supports are dark brown here - I'm still not sure why I did that, and I ended up removing them and scratching a set, leaving them the same color as the deck. You can also see I kept the large bulkhead extensions at the front - they look like they appear in similar form on the ship.


- 249 replies
-
- 4
-
-
- billing boats
- vasa
- (and 1 more)
-
Luckily no plastic deadeyes or blocks for me. I think my kit is a bit of a transition. The gratings/hatches were plastic but the instructions showed part numbers for wooden gratings along with references to the plastic ones. There is no false "glass" stock for making the stern windows or lantern. The sculptures are brown plastic rather than gilded (doesn't matter since I've primed them white anyway) although the instruction photos show gilded. Matti, your build has been a great source of inspiration and insight. Excellent photos and commentary all around. I'm painting sculptures now and will be probably for the next few months. As soon as I get caught up with posting photos, I'll show what I've done. You've chosen a real-world, weathered effect; I'm going more for the "new car" look - how the ship looked when it sailed on its first voyage. I'm trying to copy the look of the 1:10 model sculptures as much as possible - there are lots of great photos of the sculptures, but the kit versions are frequently different looking (or missing entirely), requiring some creativity. So far the sculpture painting has been my favorite part - I grew up painting fantasy miniatures and really enjoy it. I'm thinking of substituting an orc or daemon here and there on the ship just to see if anyone will notice :-)
-
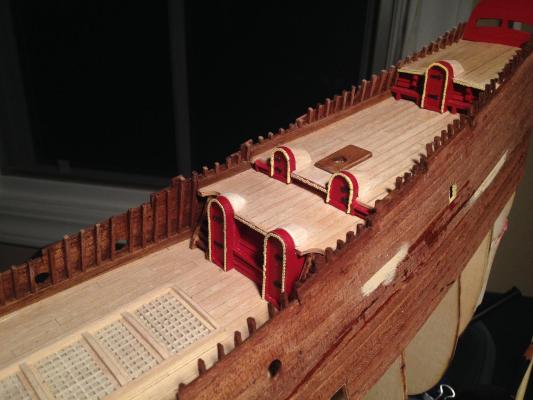
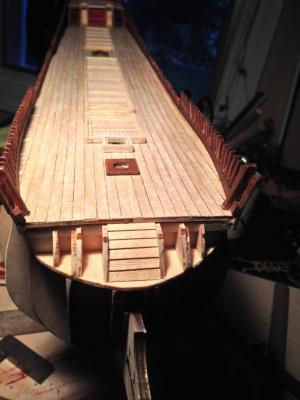
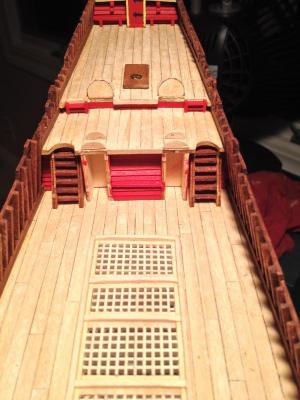
I like the fact that they are plastic - good, crisp detail, and easy to thin down or bend. The accuracy is probably as good as your going to get without carving the sculptures yourself. Here are a few more photos, these of the deck planking and the hutches for the doors on the after decks. The deck planking in the kit was scaled correctly; all I did was rub a lead pencil along one side to simulate caulking, and stagger the butts using a pattern that is no doubt incorrect for the baroque era, but which looked OK on the Bellona I did 15 years ago. The hutches marked the first phase of painting things. I use various kinds of paint, all matte finish acrylic and designed for models, so they have finely ground pigment that flows well in small amounts. The red and pale yellow were a pretty close match to the 1:10 scale model of the Vasa in the museum in Stockholm. I wish that model had been there when I visited, but that was back when they were still spraying it constantly and you had to look at the ship while wearing rain gear. The kit had a fun way of emulating the carved moldings around the doors - you take thin copper wire, twist it together, and hammer it flat, then shape it to the exterior. I planked the doors and added blackened hinges. In these photos you can also see the scratched bulwarks and false ribs in more detail, as well as the hatches. The hatches provided by the kit were plastic (!?), so I used Amati pre-cut gratings instead, and I think they look much better. Apparently later versions of the Billing kit have wooden gratings, and my instructions made oblique references to them, but they were nowhere to be found in the kit.
- 249 replies
-
- 4
-
-
- billing boats
- vasa
- (and 1 more)
-
Indeed. And the instructions are so minimal that there's not much to deviate from :-). In any case, there's such a wealth of information on the ship that it's fairly easy to figure out how to change something that's wrong. The only area I've found so far where that's really difficult is the sculptures. They are reasonably accurate, but Billings re-used the same sculptures in various different places, in a reasonable bid to save money I'm sure, and they also have sculptures that are just wrong, or missing. I'm not going to be able to fix those sorts of problems unless I take an interesting but time consuming detour through learning 3D modeling and printing.
- 249 replies
-
- 1
-
-
- billing boats
- vasa
- (and 1 more)
-
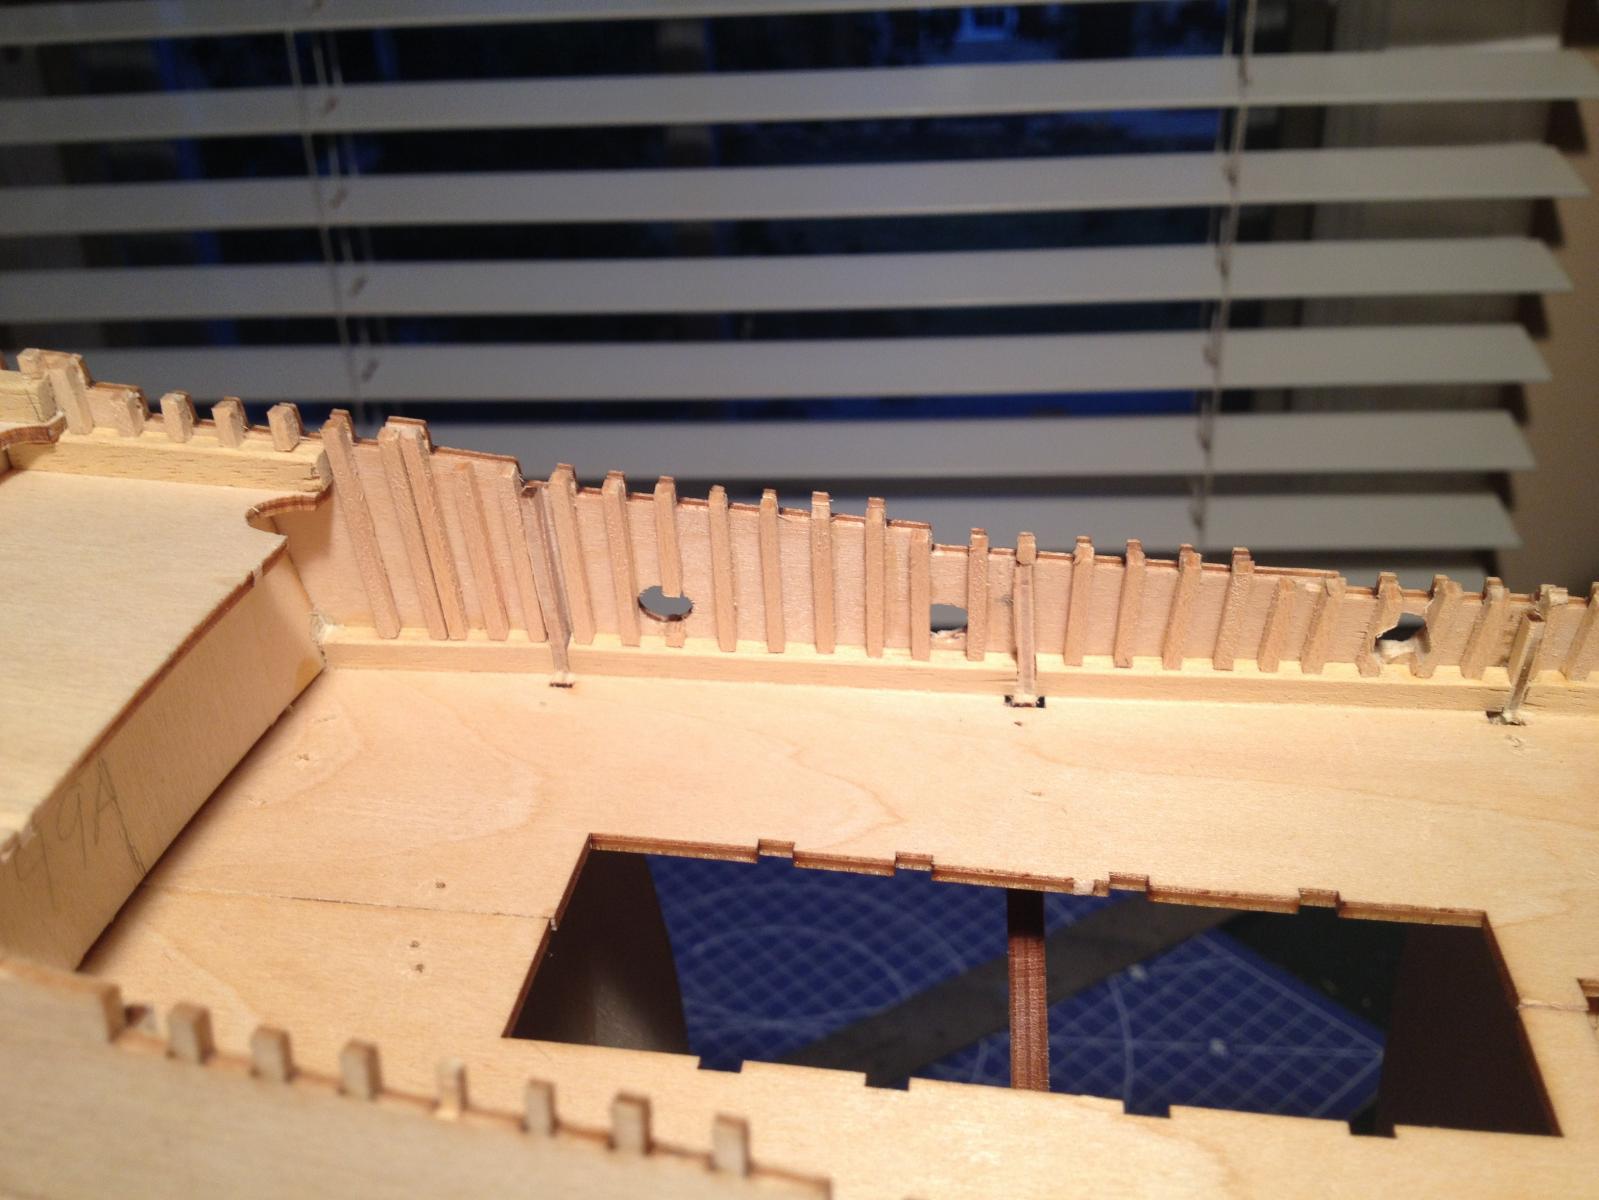
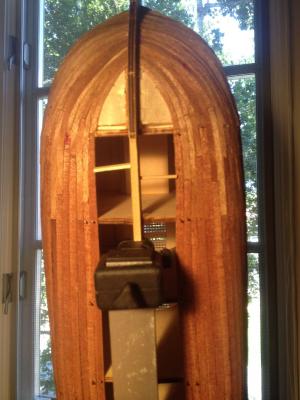
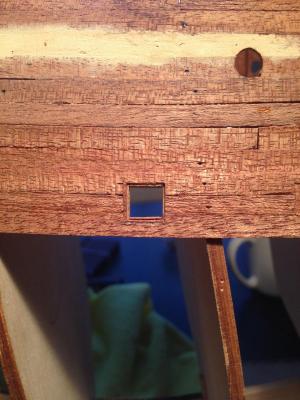
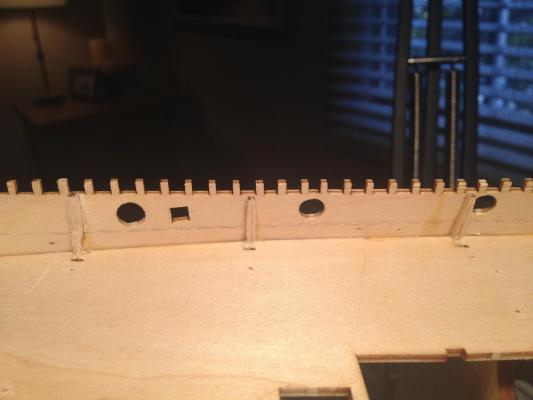
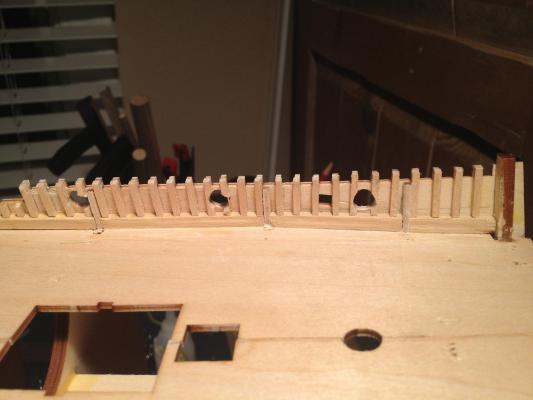
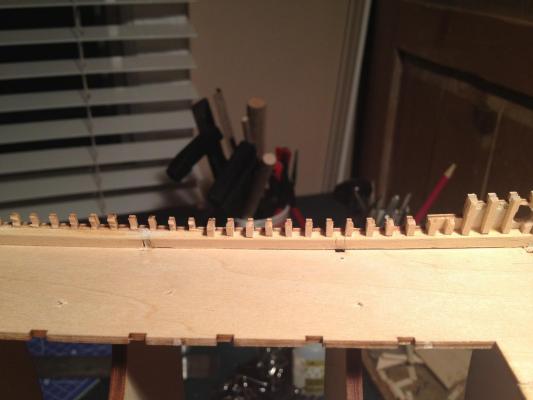
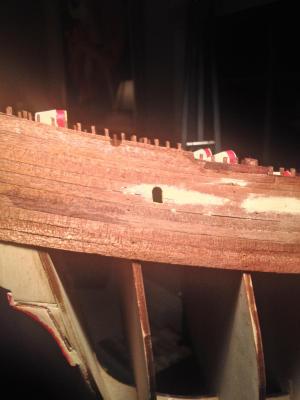
And back to the bulwarks. The instructions call for thinning down the part of the bulkheads that rises above the deck, so their thickness matches the thickness of the false rib crenellations. I dutifully thinned down, then added the false ribs and the waterways: After looking at the result for a while, I didn't like it. First, the bulkhead extensions looked odd mixed in with the false ribs. Second, the crenellations on the bulwarks serving as guides for placing the false ribs were not well aligned with the gunports, meaning some ribs were cut in two, or had odd curves in them. Finally, the inside of the bulwarks was a solid expanse of wood rather than a stack of planks, which just didn't look right to me. I ended up removing the bulwarks and false ribs and planking my own bulwarks. I removed the bulkhead extensions and fabricated temporary support pieces to hold the planks as they were stacked up. I used the original bulwark pieces as templates to get the proper staggered height of the bulwarks as they rose up the stern castle, as well as the location of the round gunports and approximate placement of the false ribs. The result looked much better to me. No more bulkhead extensions messing up the look of the false ribs, and the ribs were spaced correctly such that they weren't located in the middle of a gunport. During this process I decided to use mahogany strip wood for the bulwarks and the rest of the hull, in a slightly narrower width than the kit supplied strip wood for the hull, so the plank width was more in scale with the actual ship. I don't have photos of the bulwark construction process, but here is one of the result. Note the window cut into the side of the hull.

- 249 replies
-
- 6
-
-
- billing boats
- vasa
- (and 1 more)