HOLIDAY DONATION DRIVE - SUPPORT MSW - DO YOUR PART TO KEEP THIS GREAT FORUM GOING! (Only 27 donations so far out of 49,000 members - C'mon guys!)
×

Diver
-
Posts
402 -
Joined
-
Last visited
Content Type
Profiles
Forums
Gallery
Events
Everything posted by Diver
-
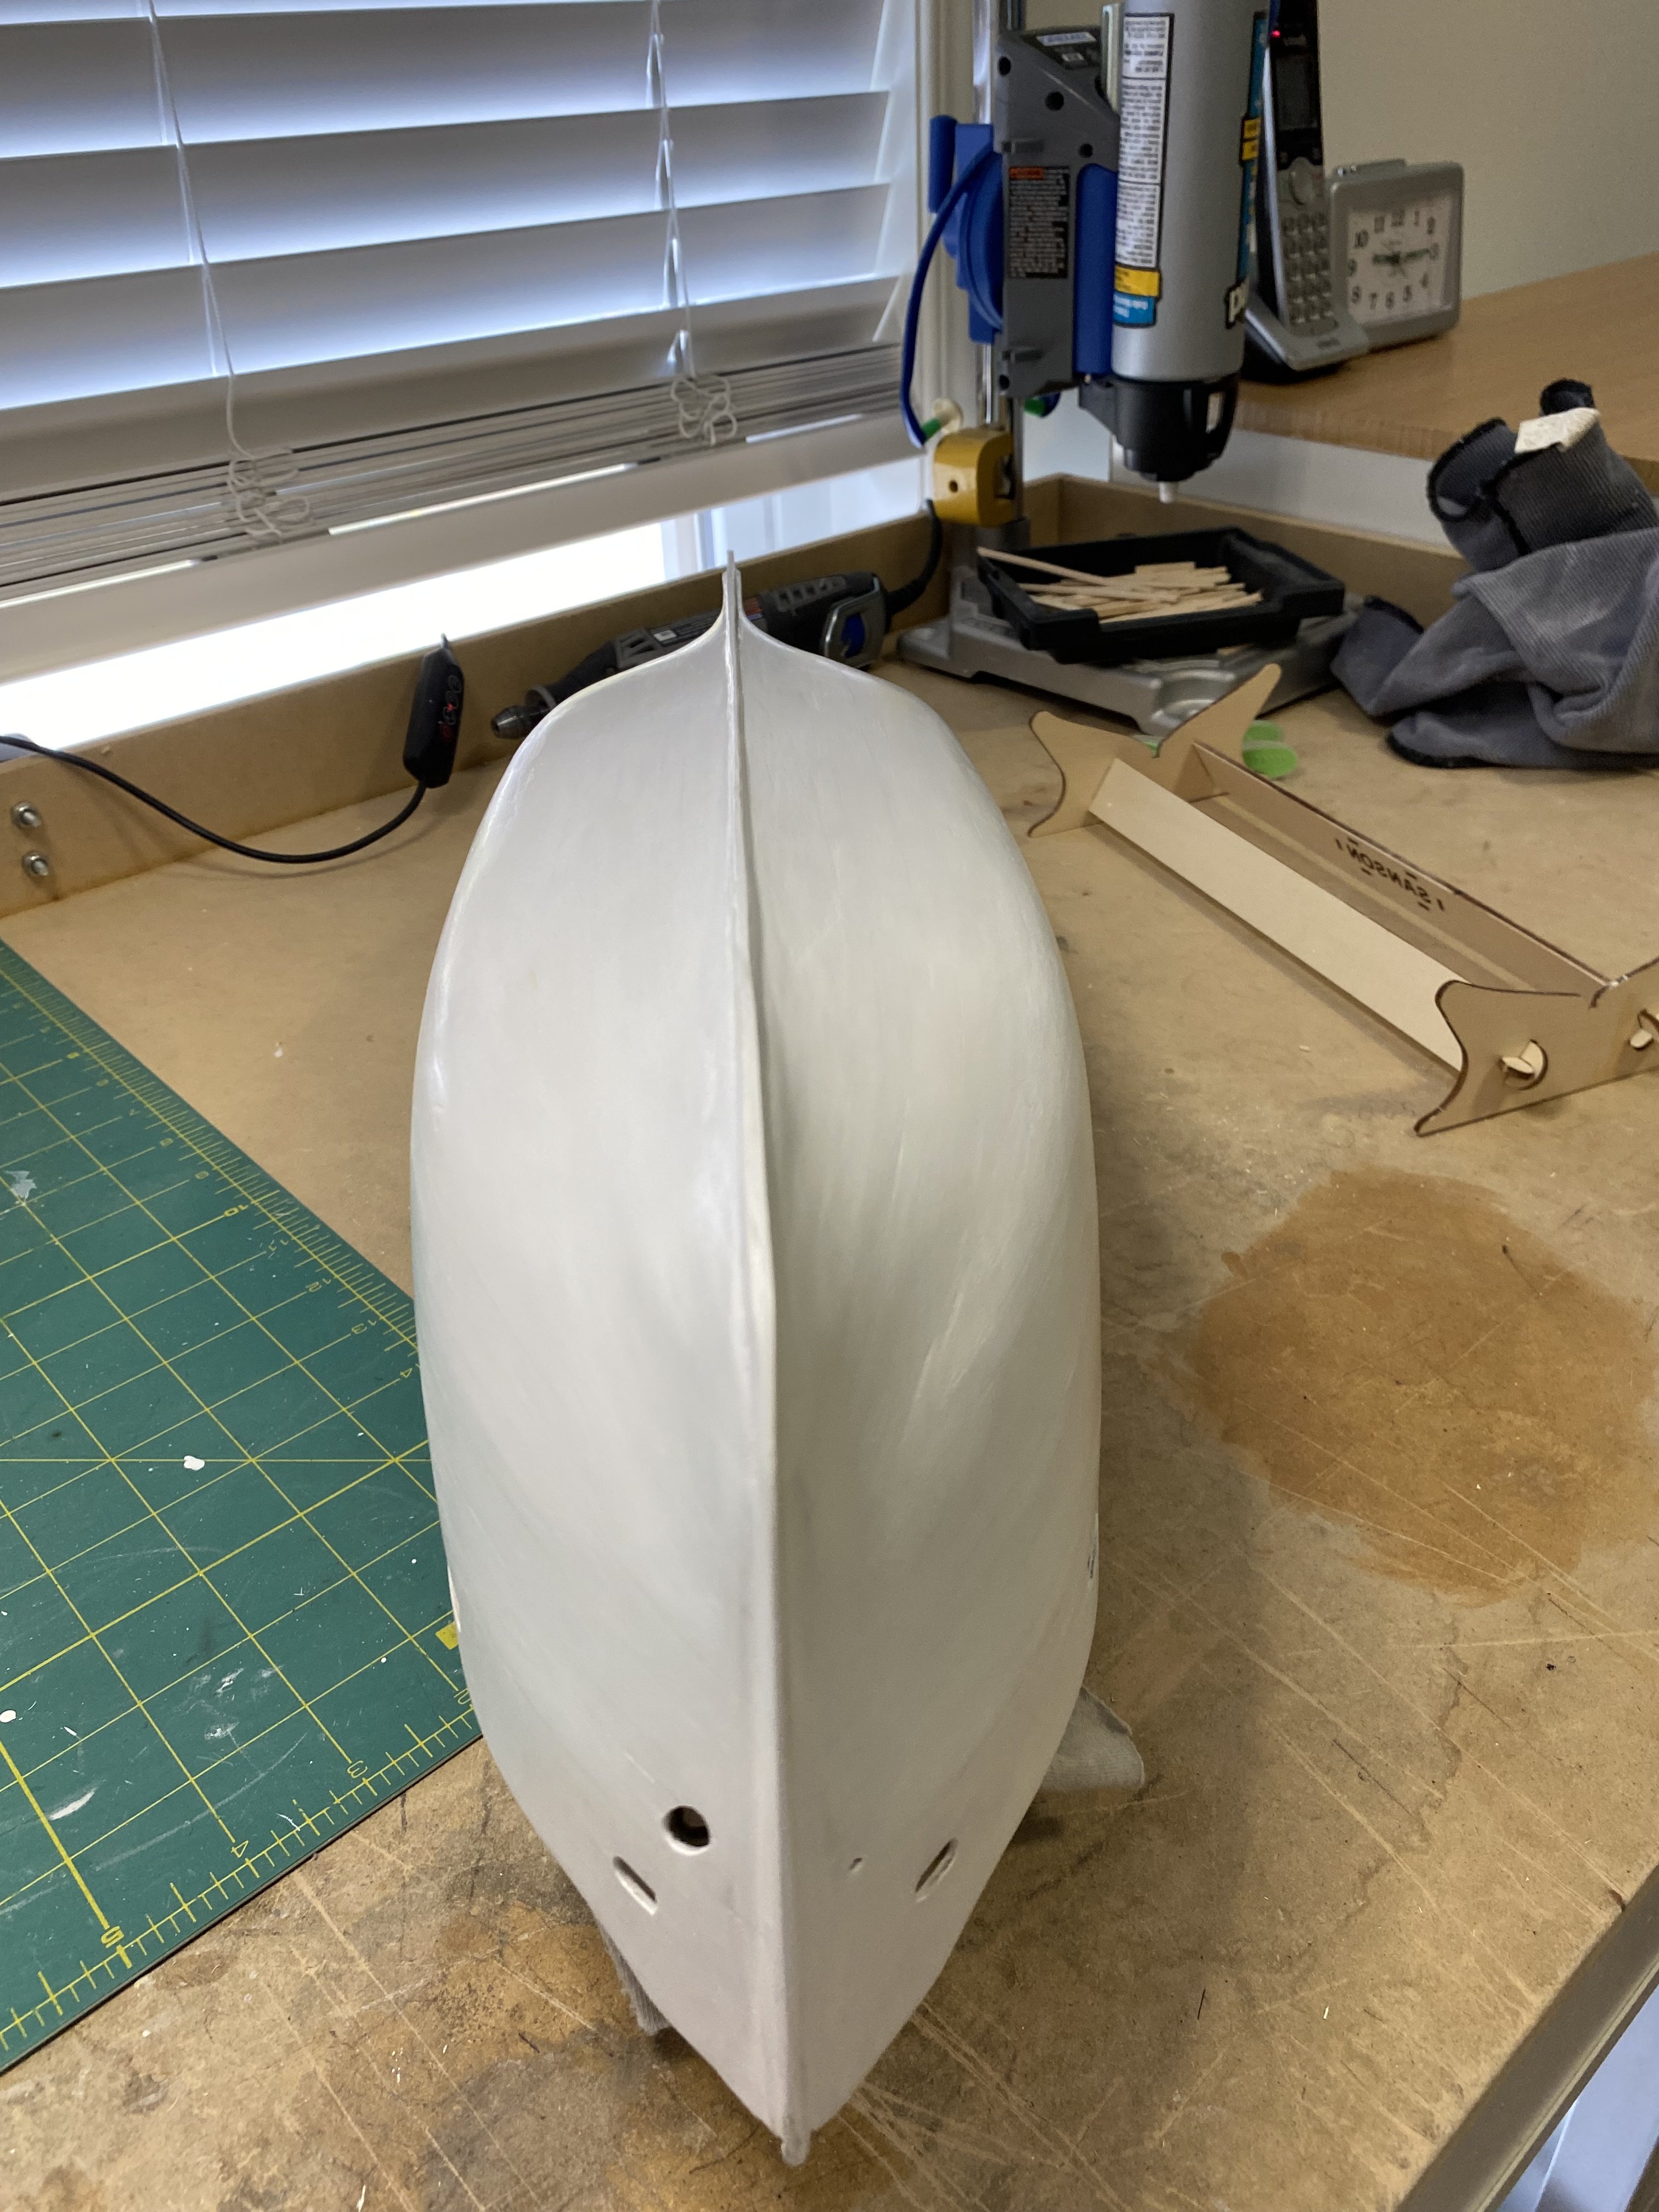
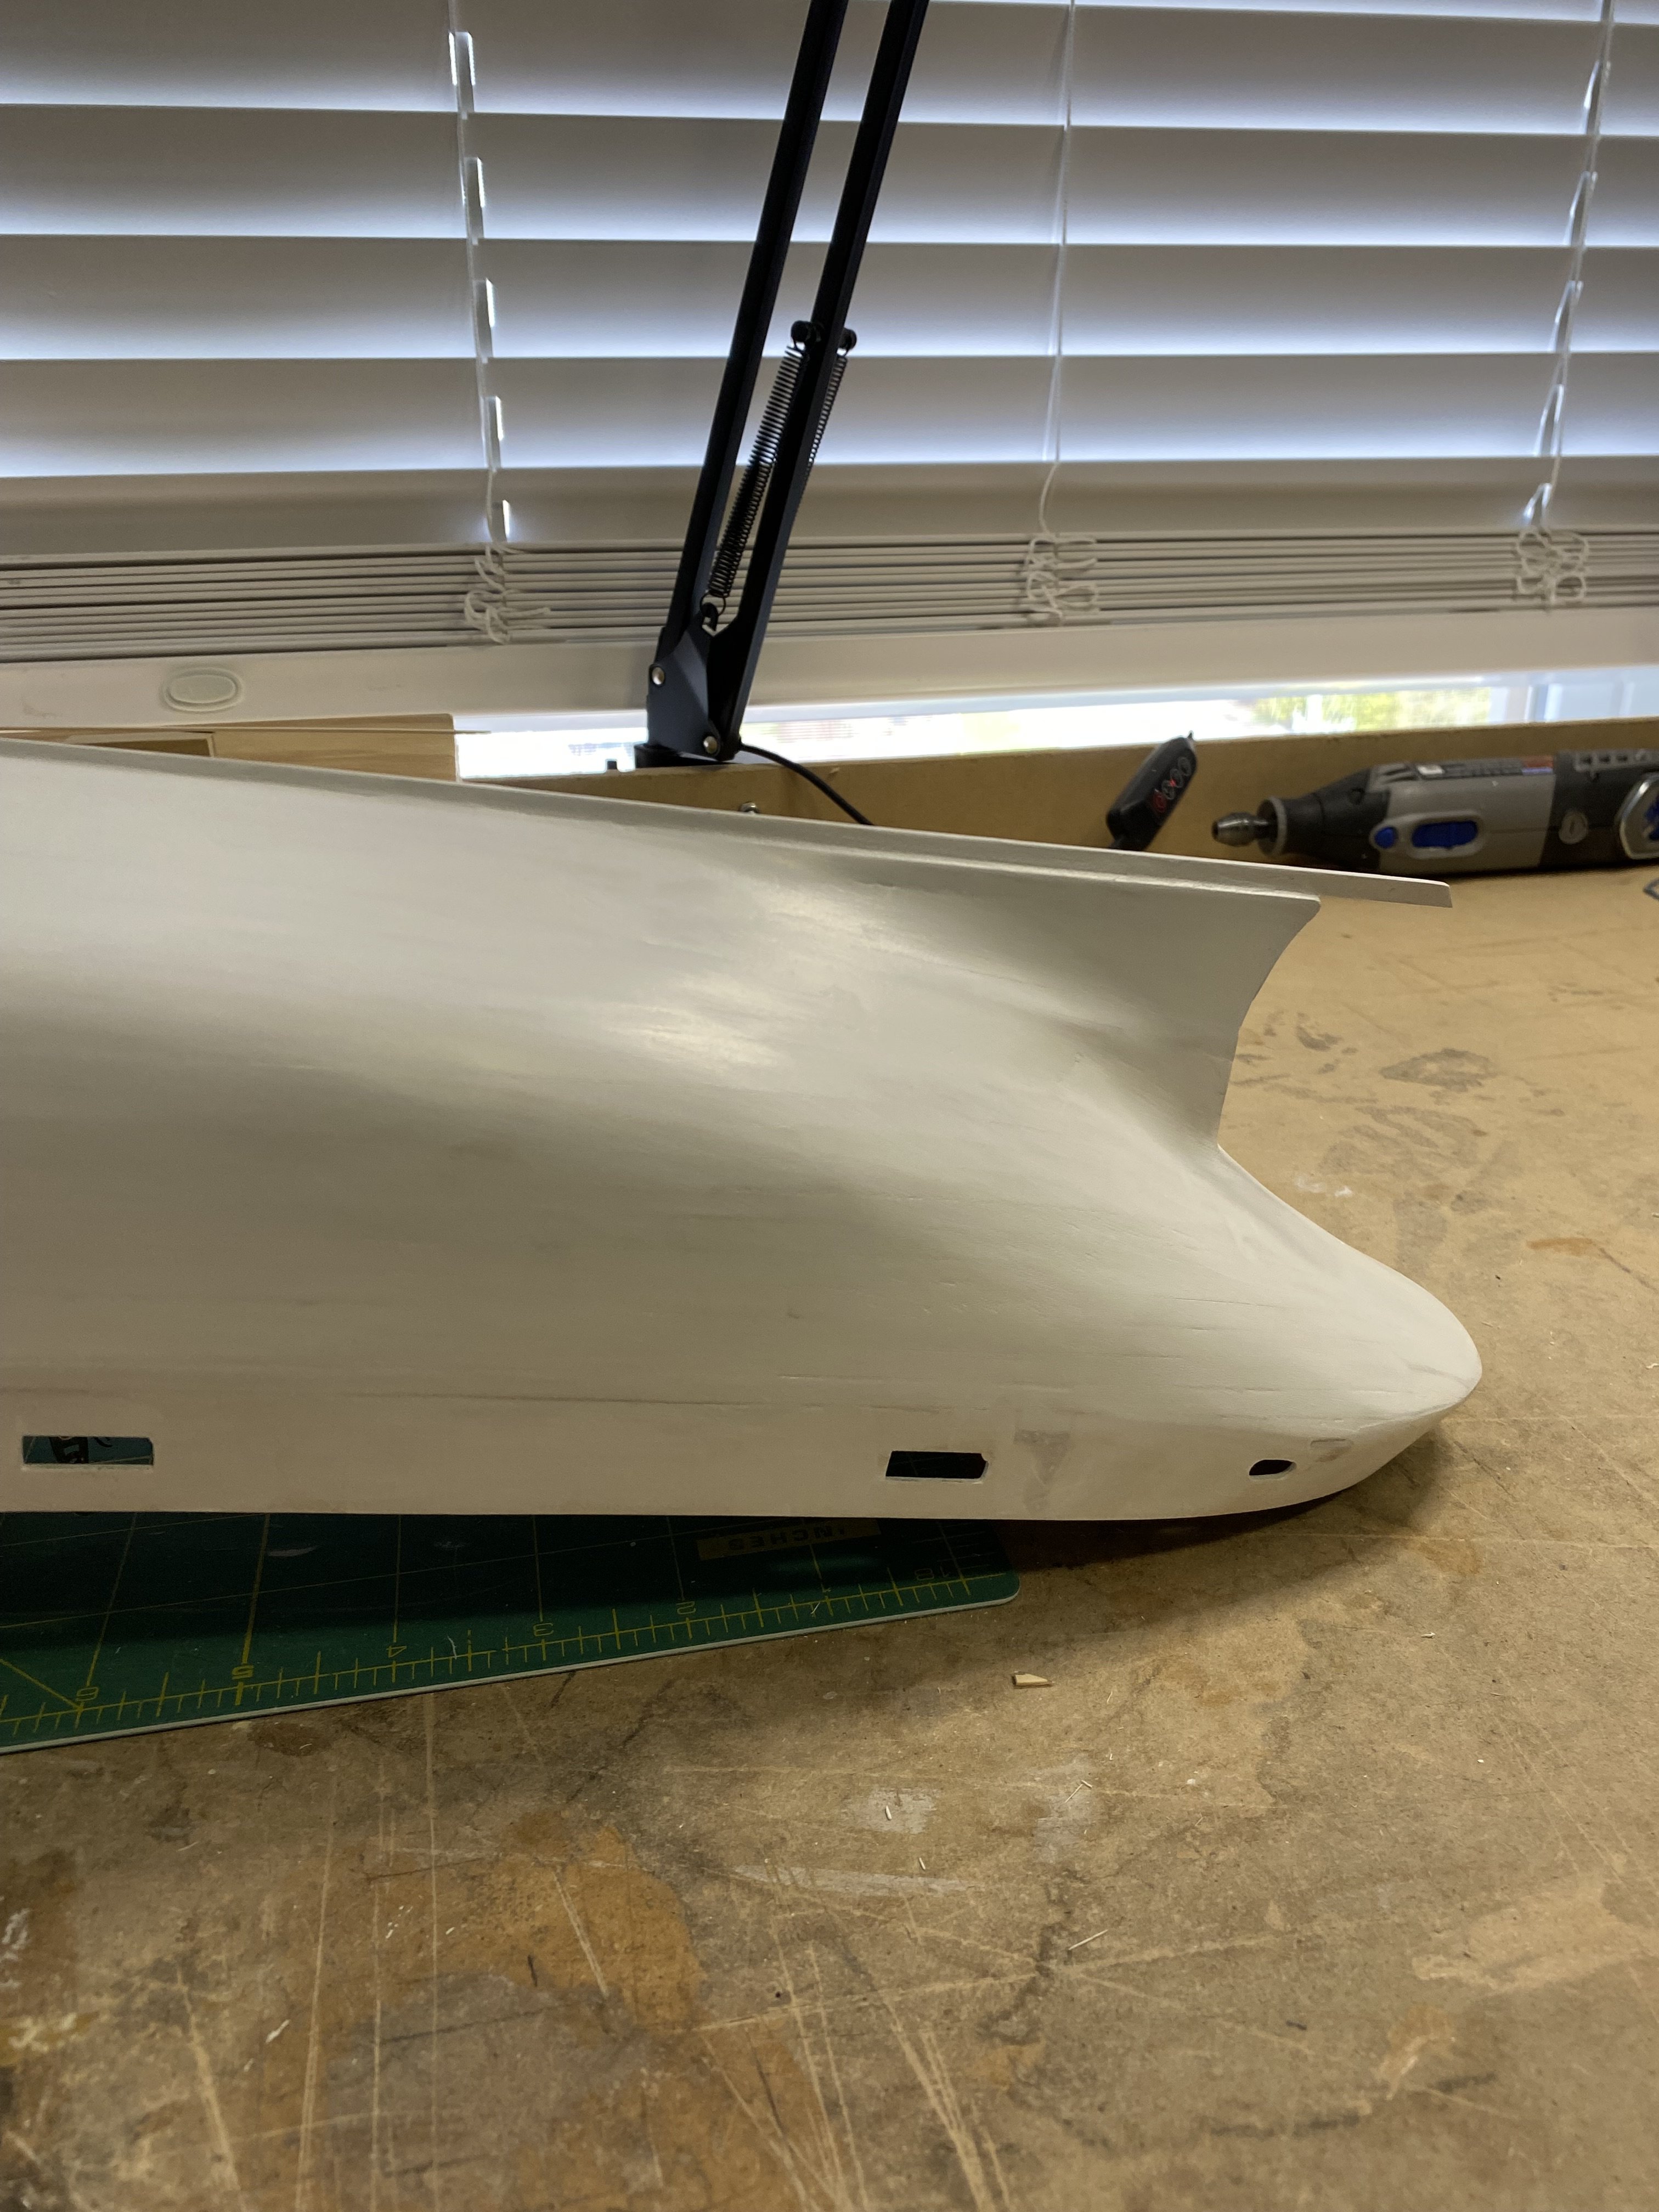
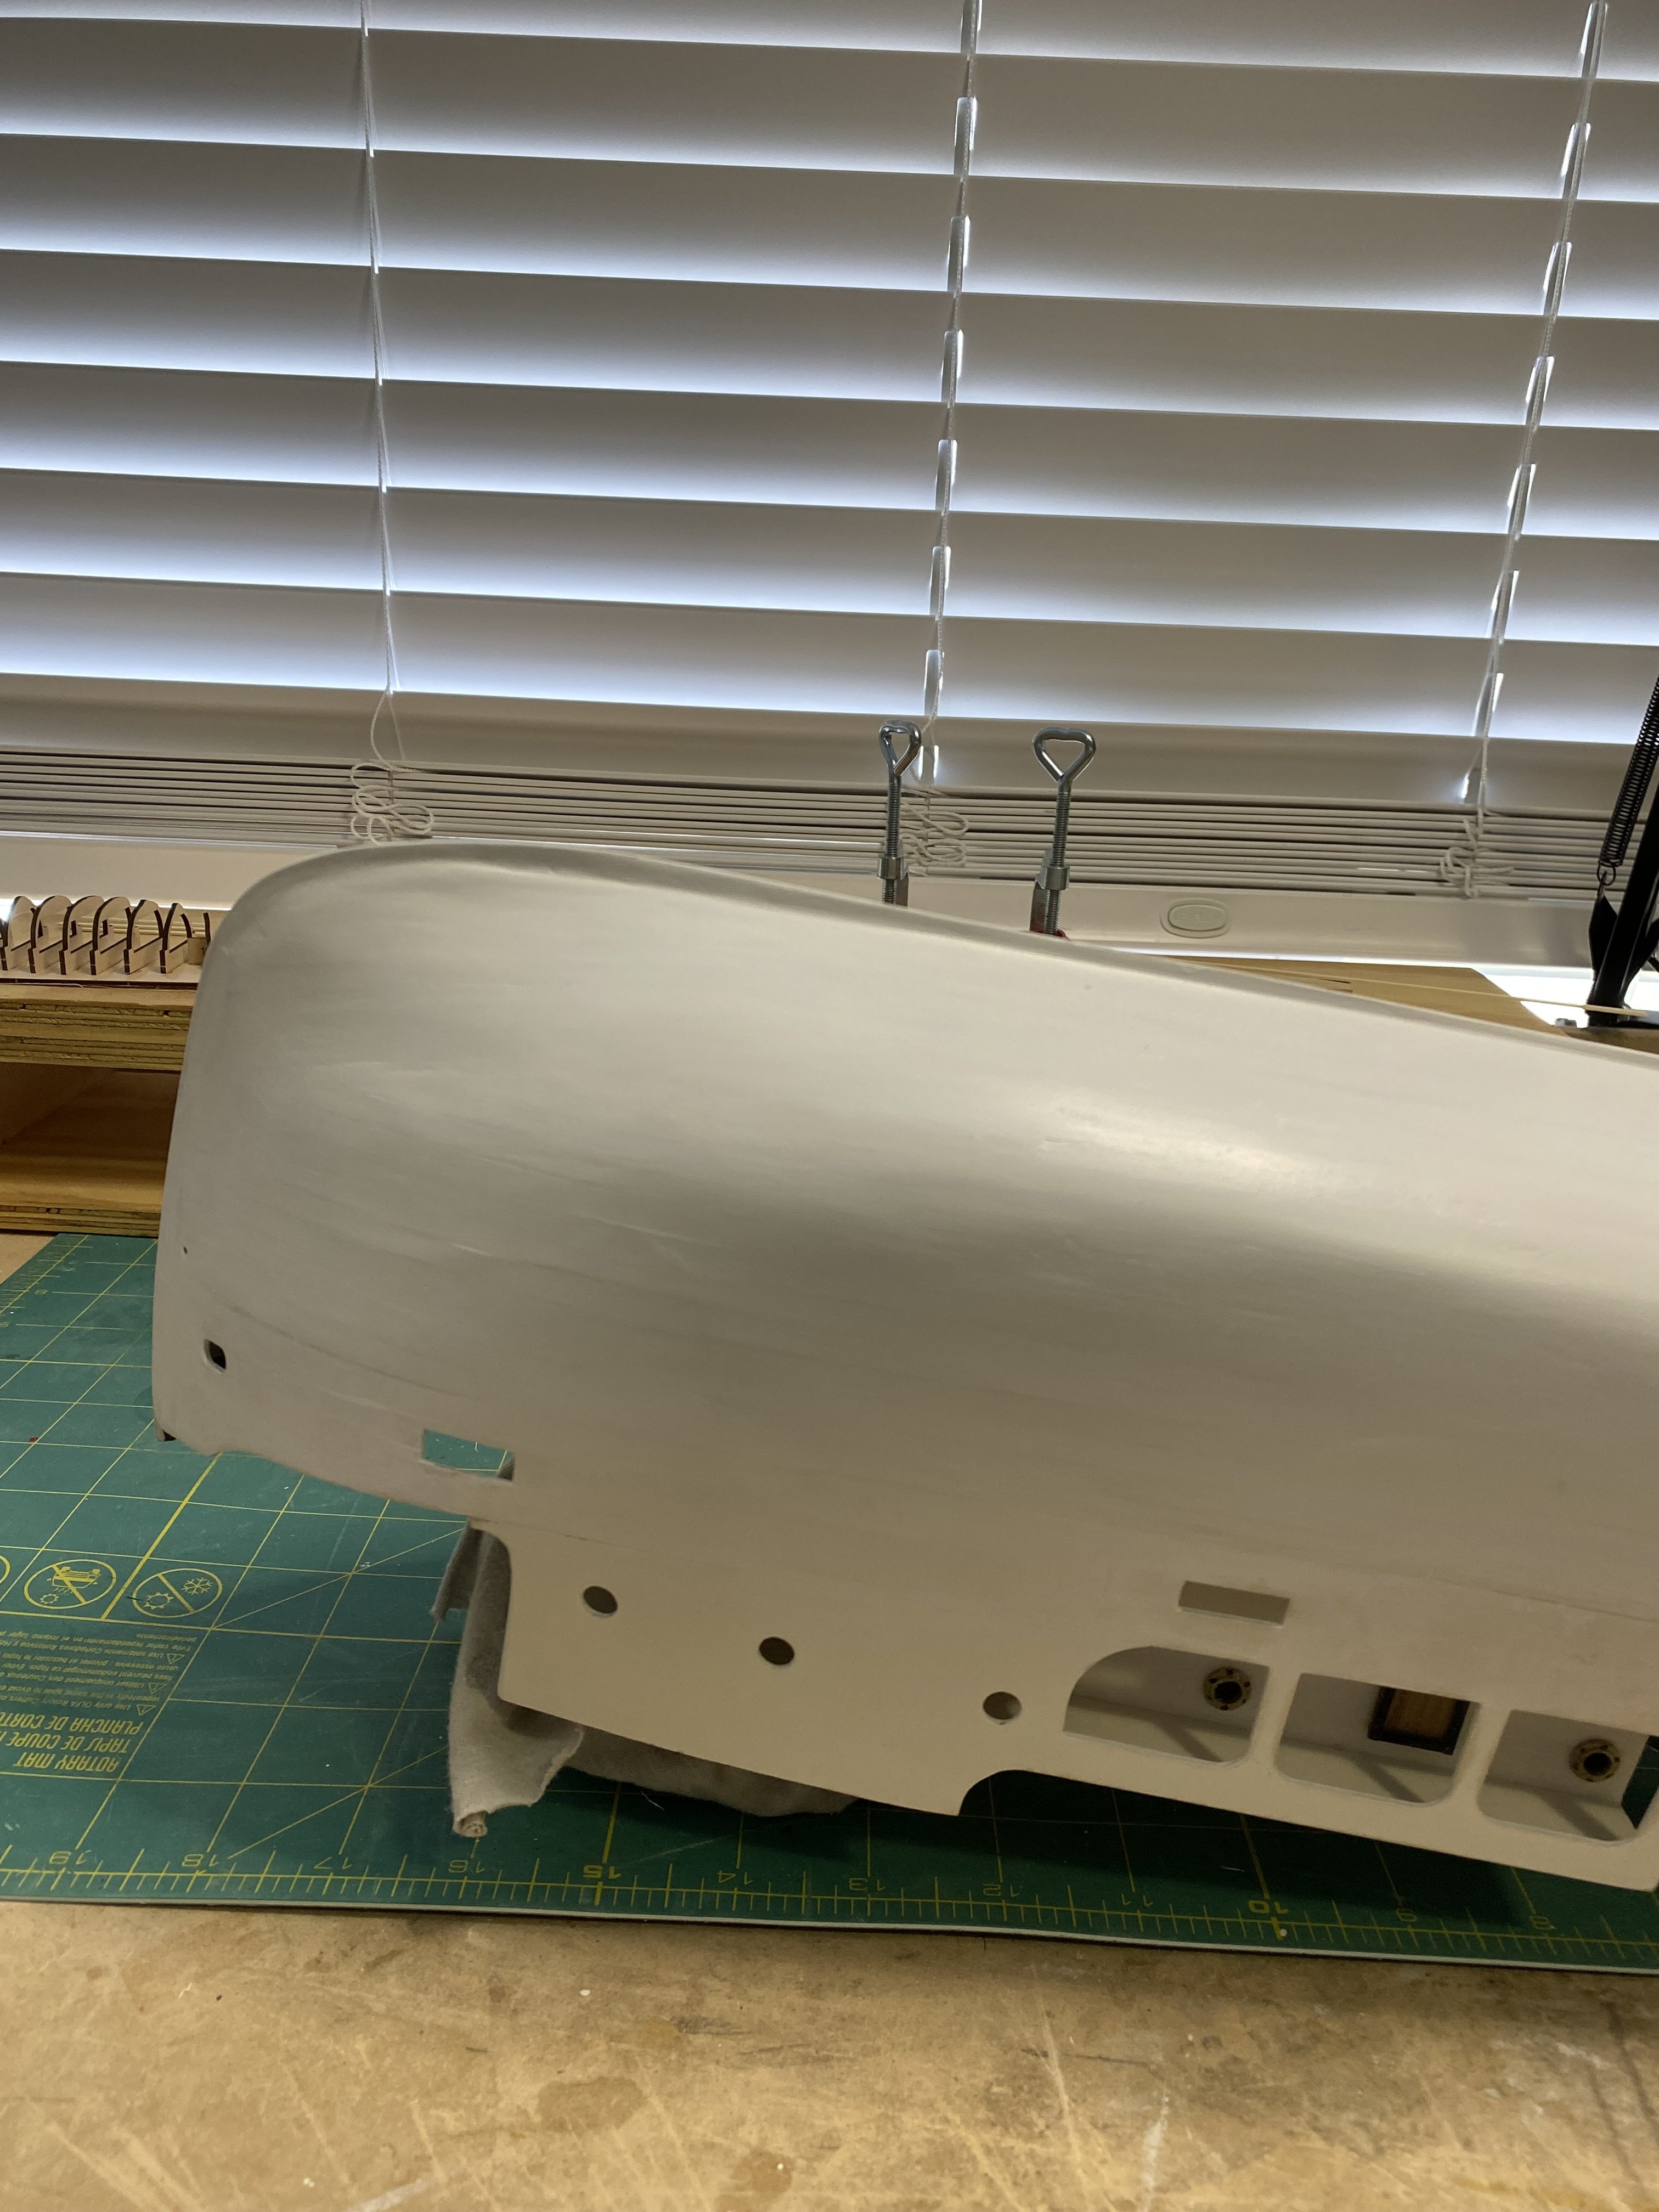
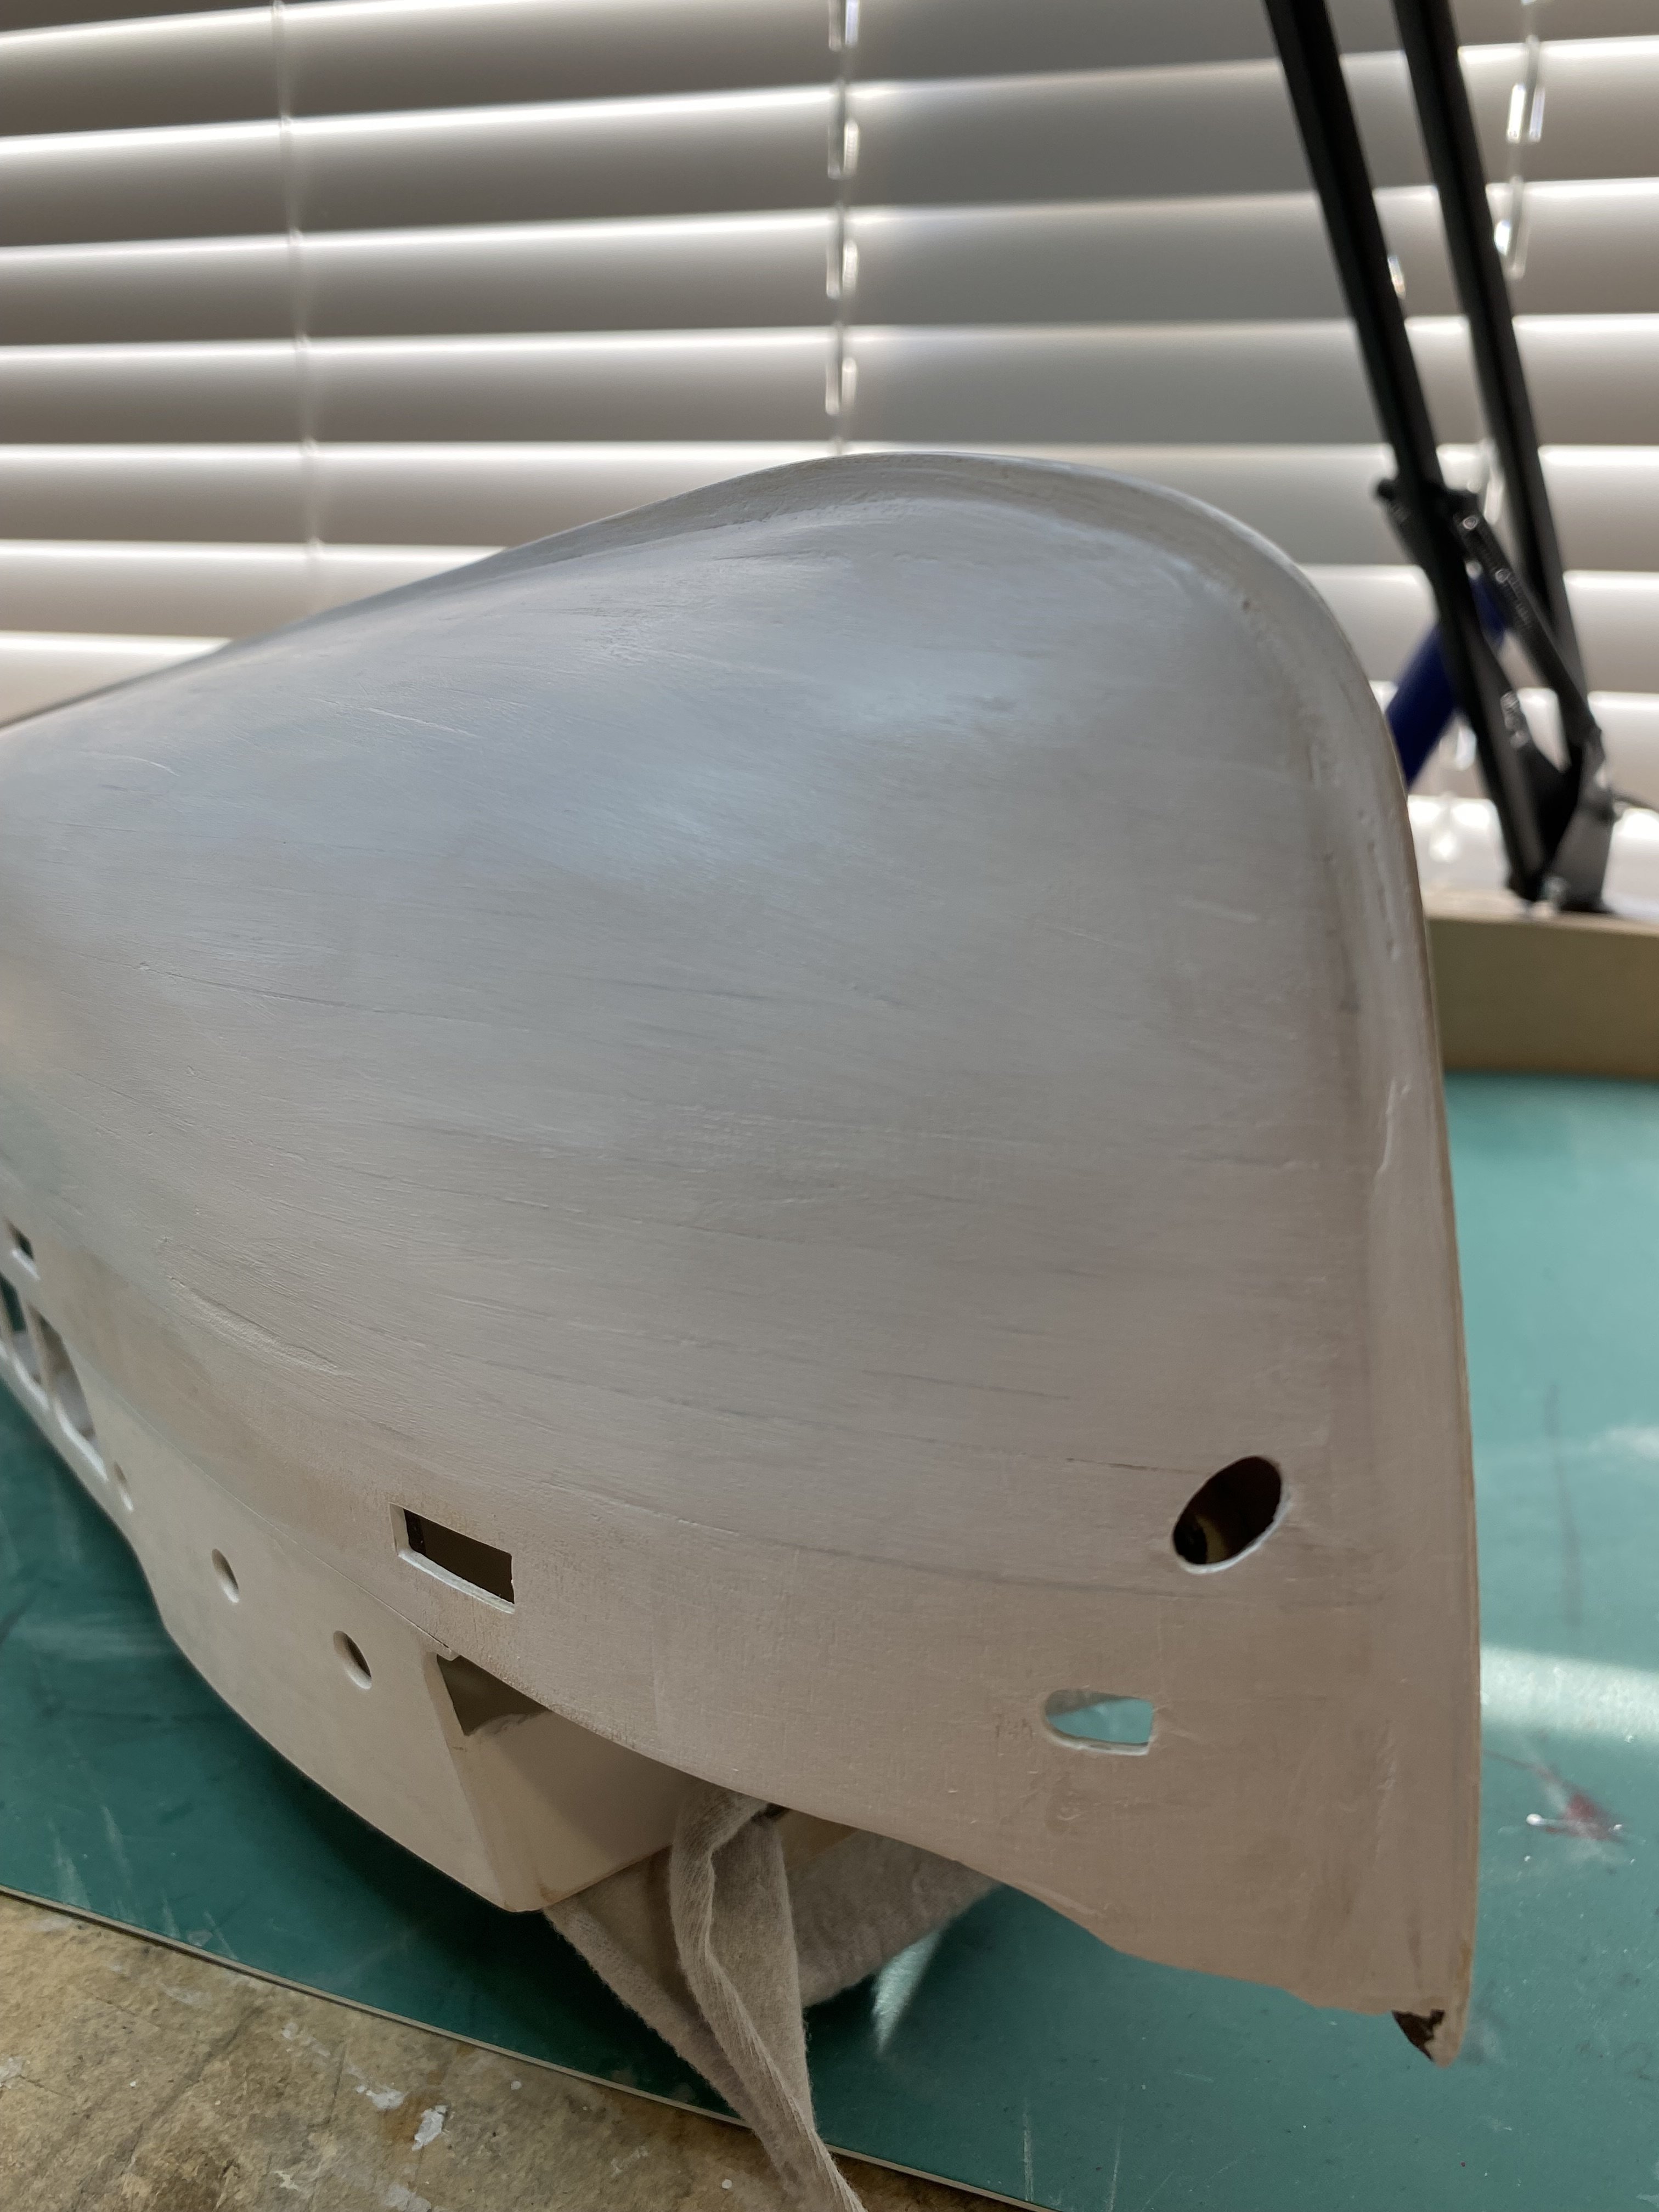
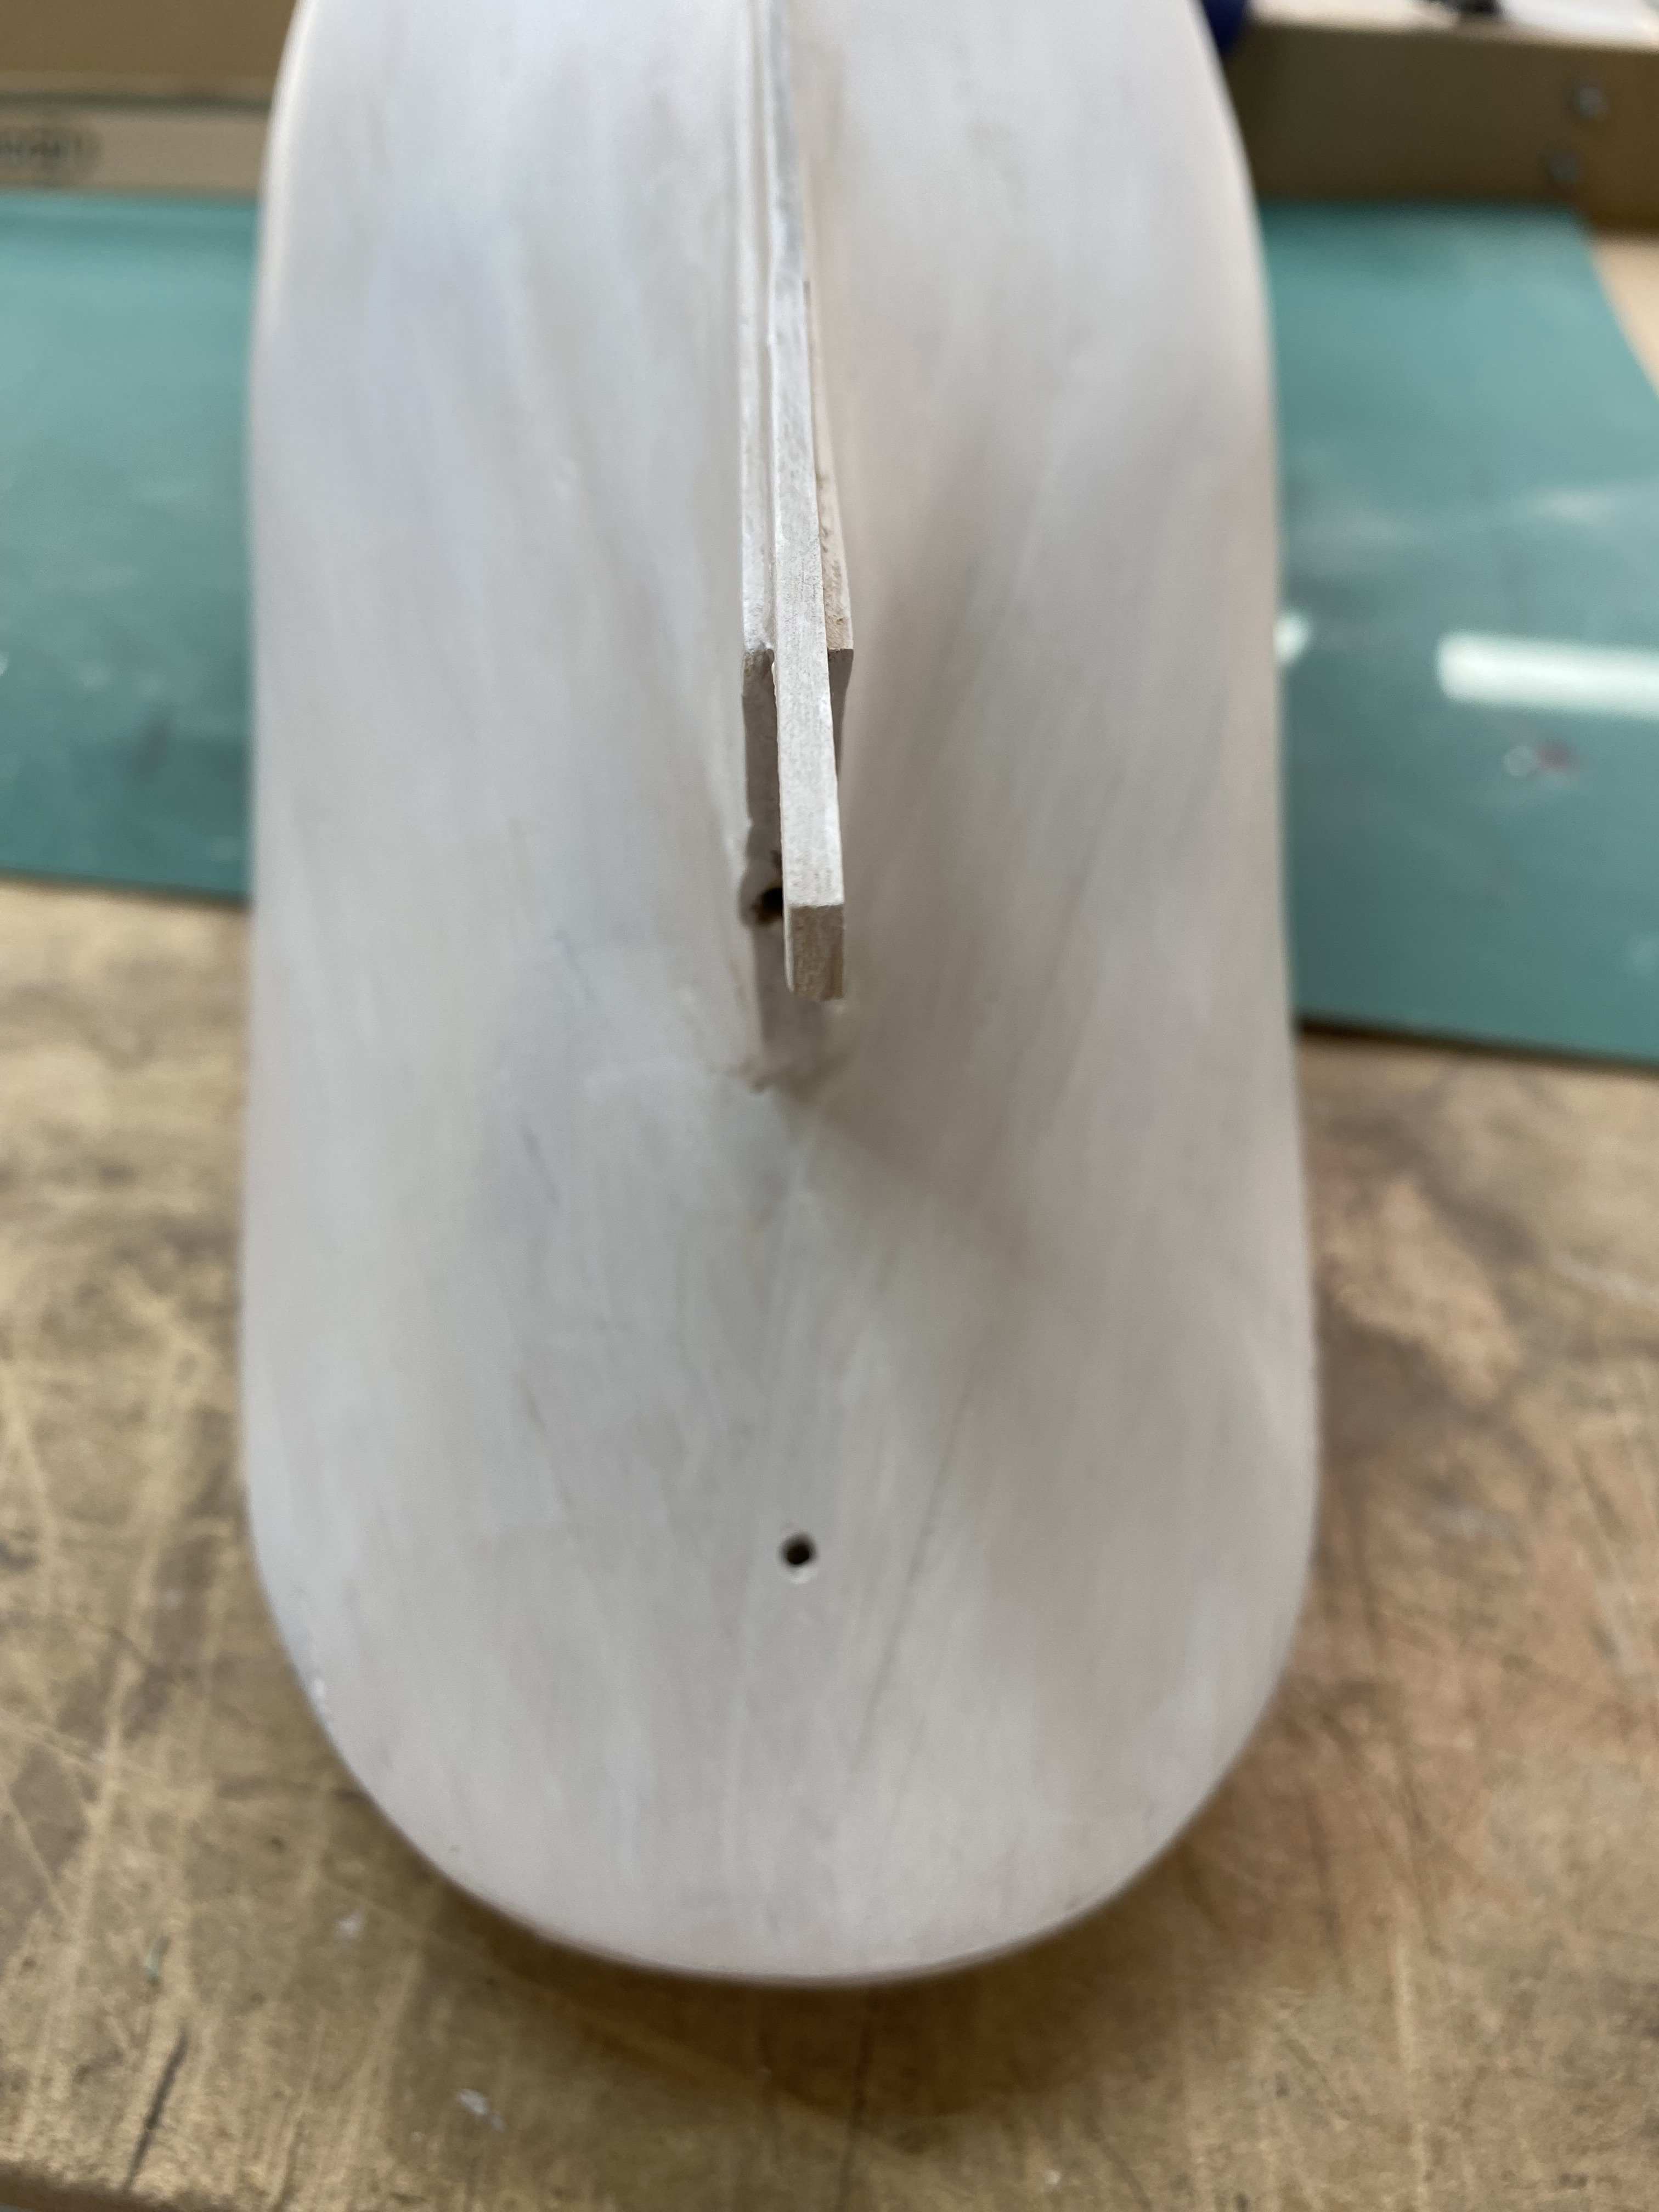
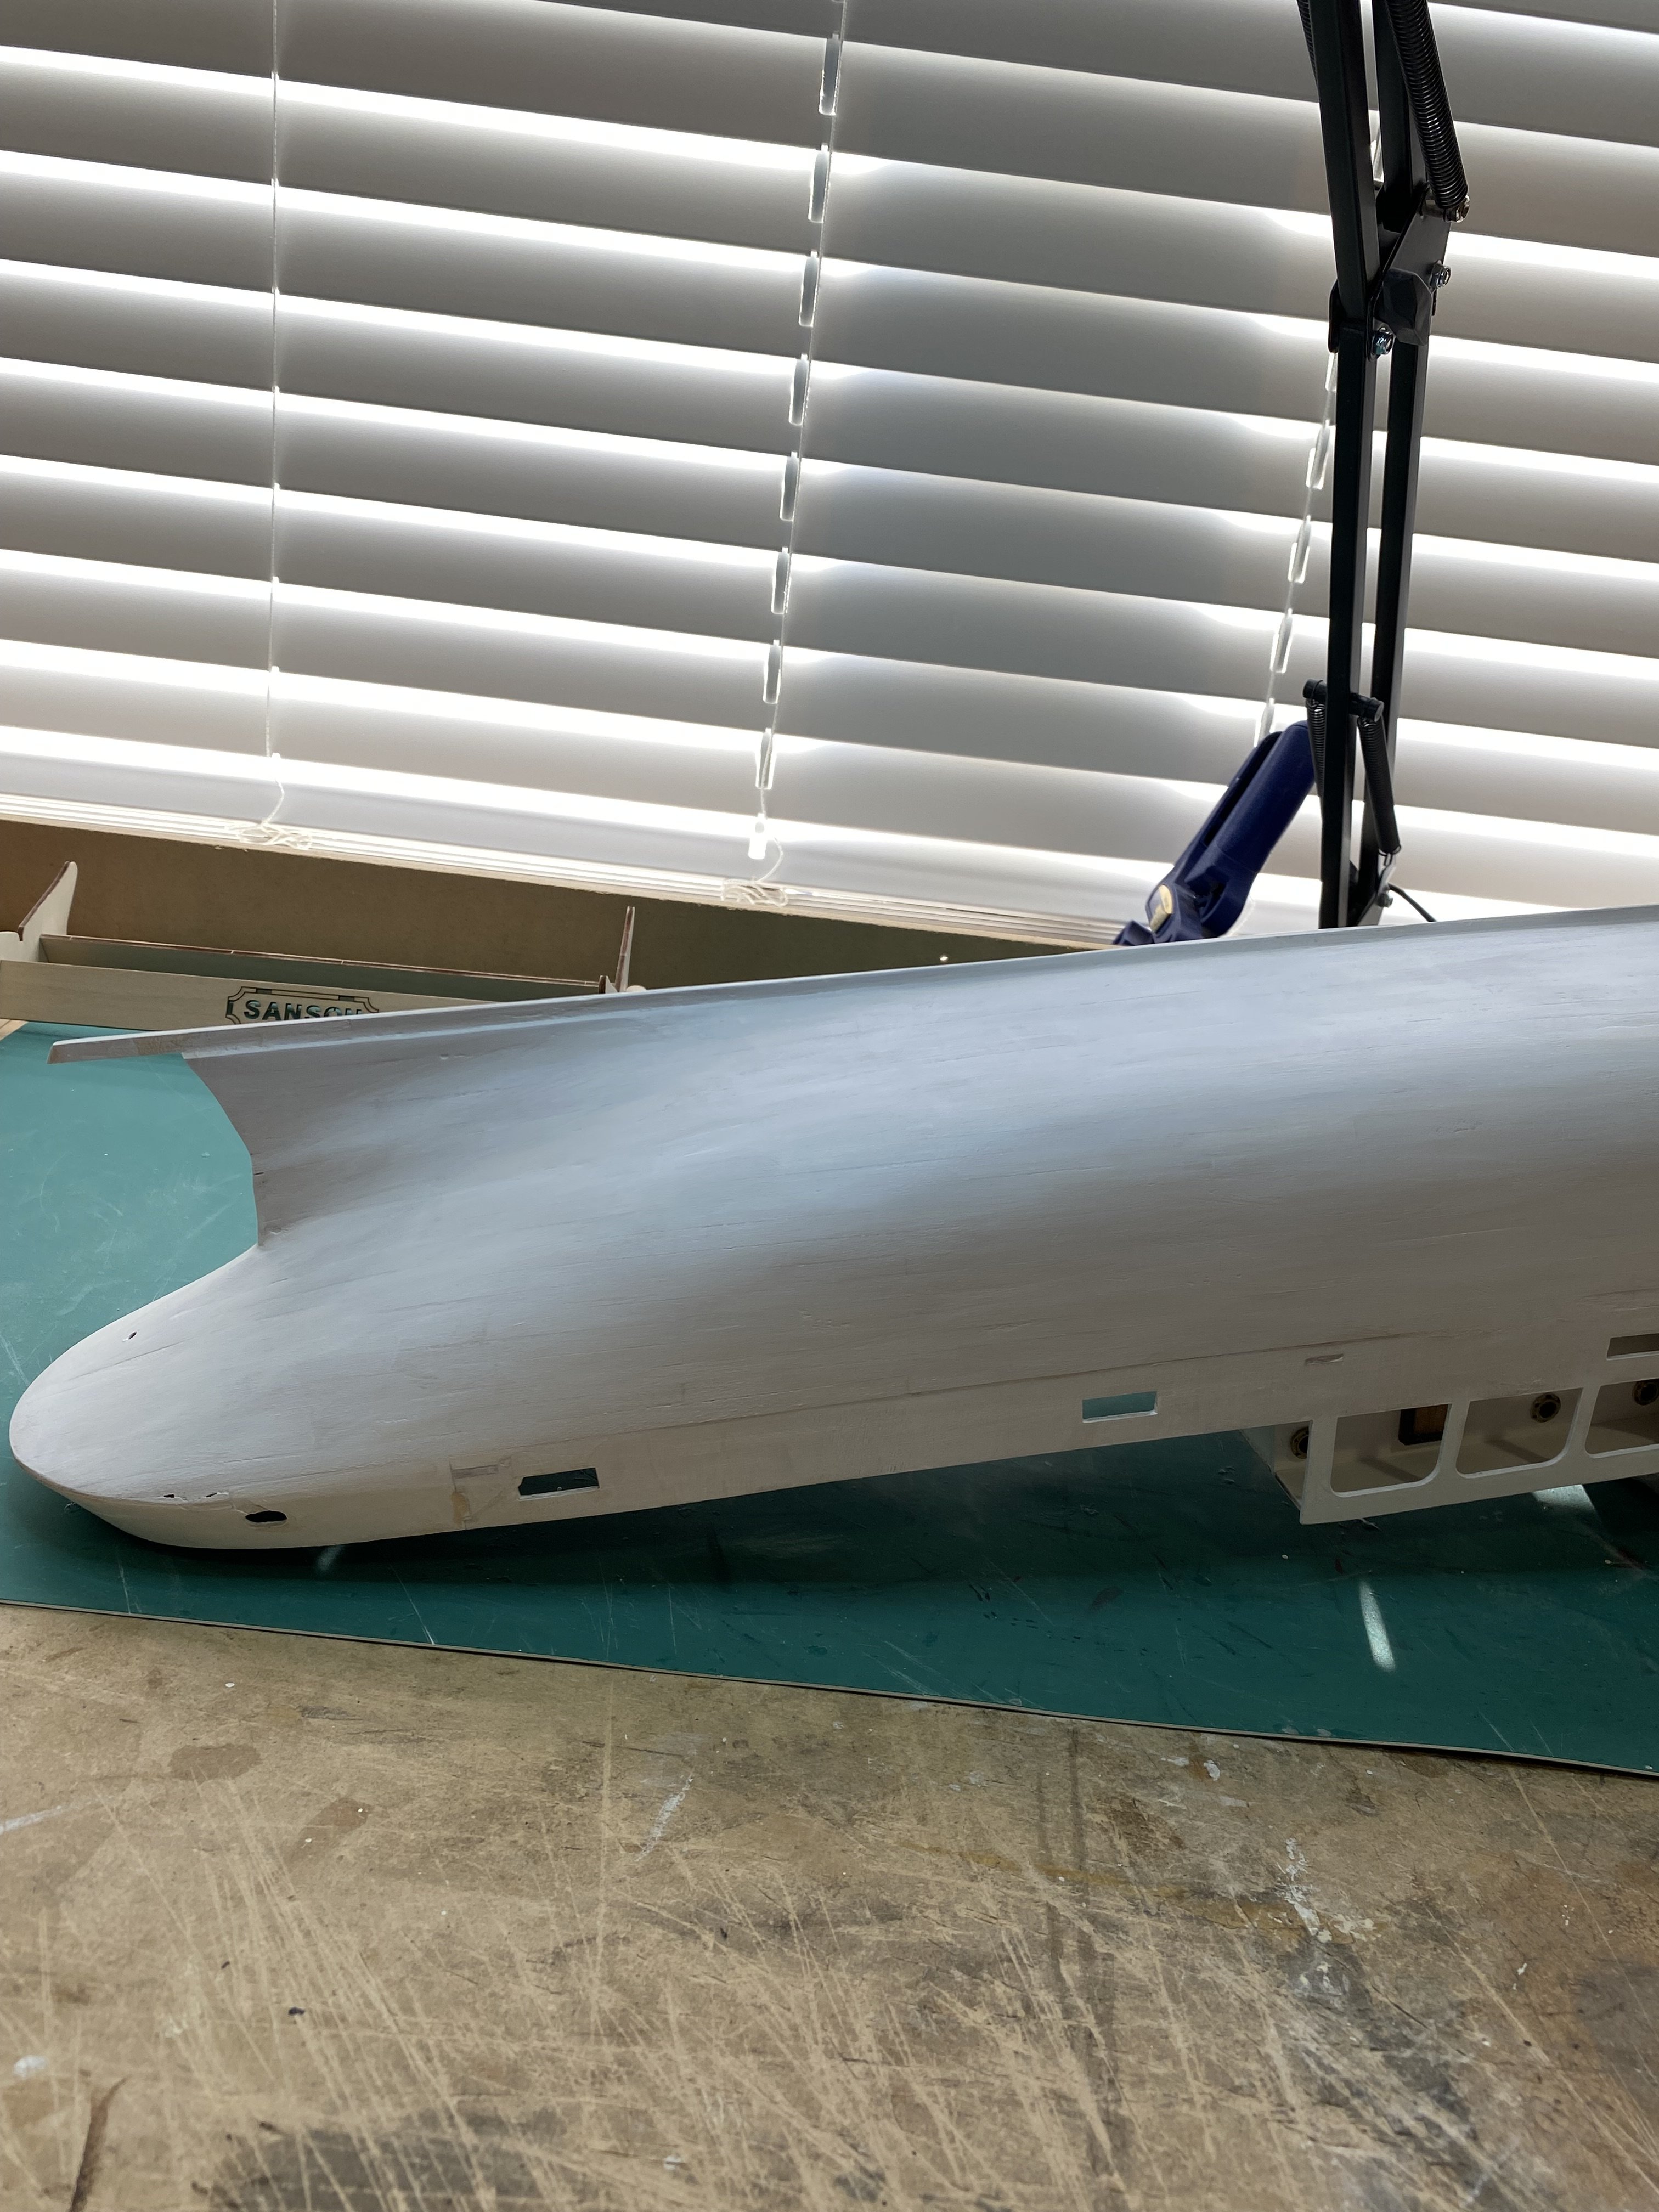
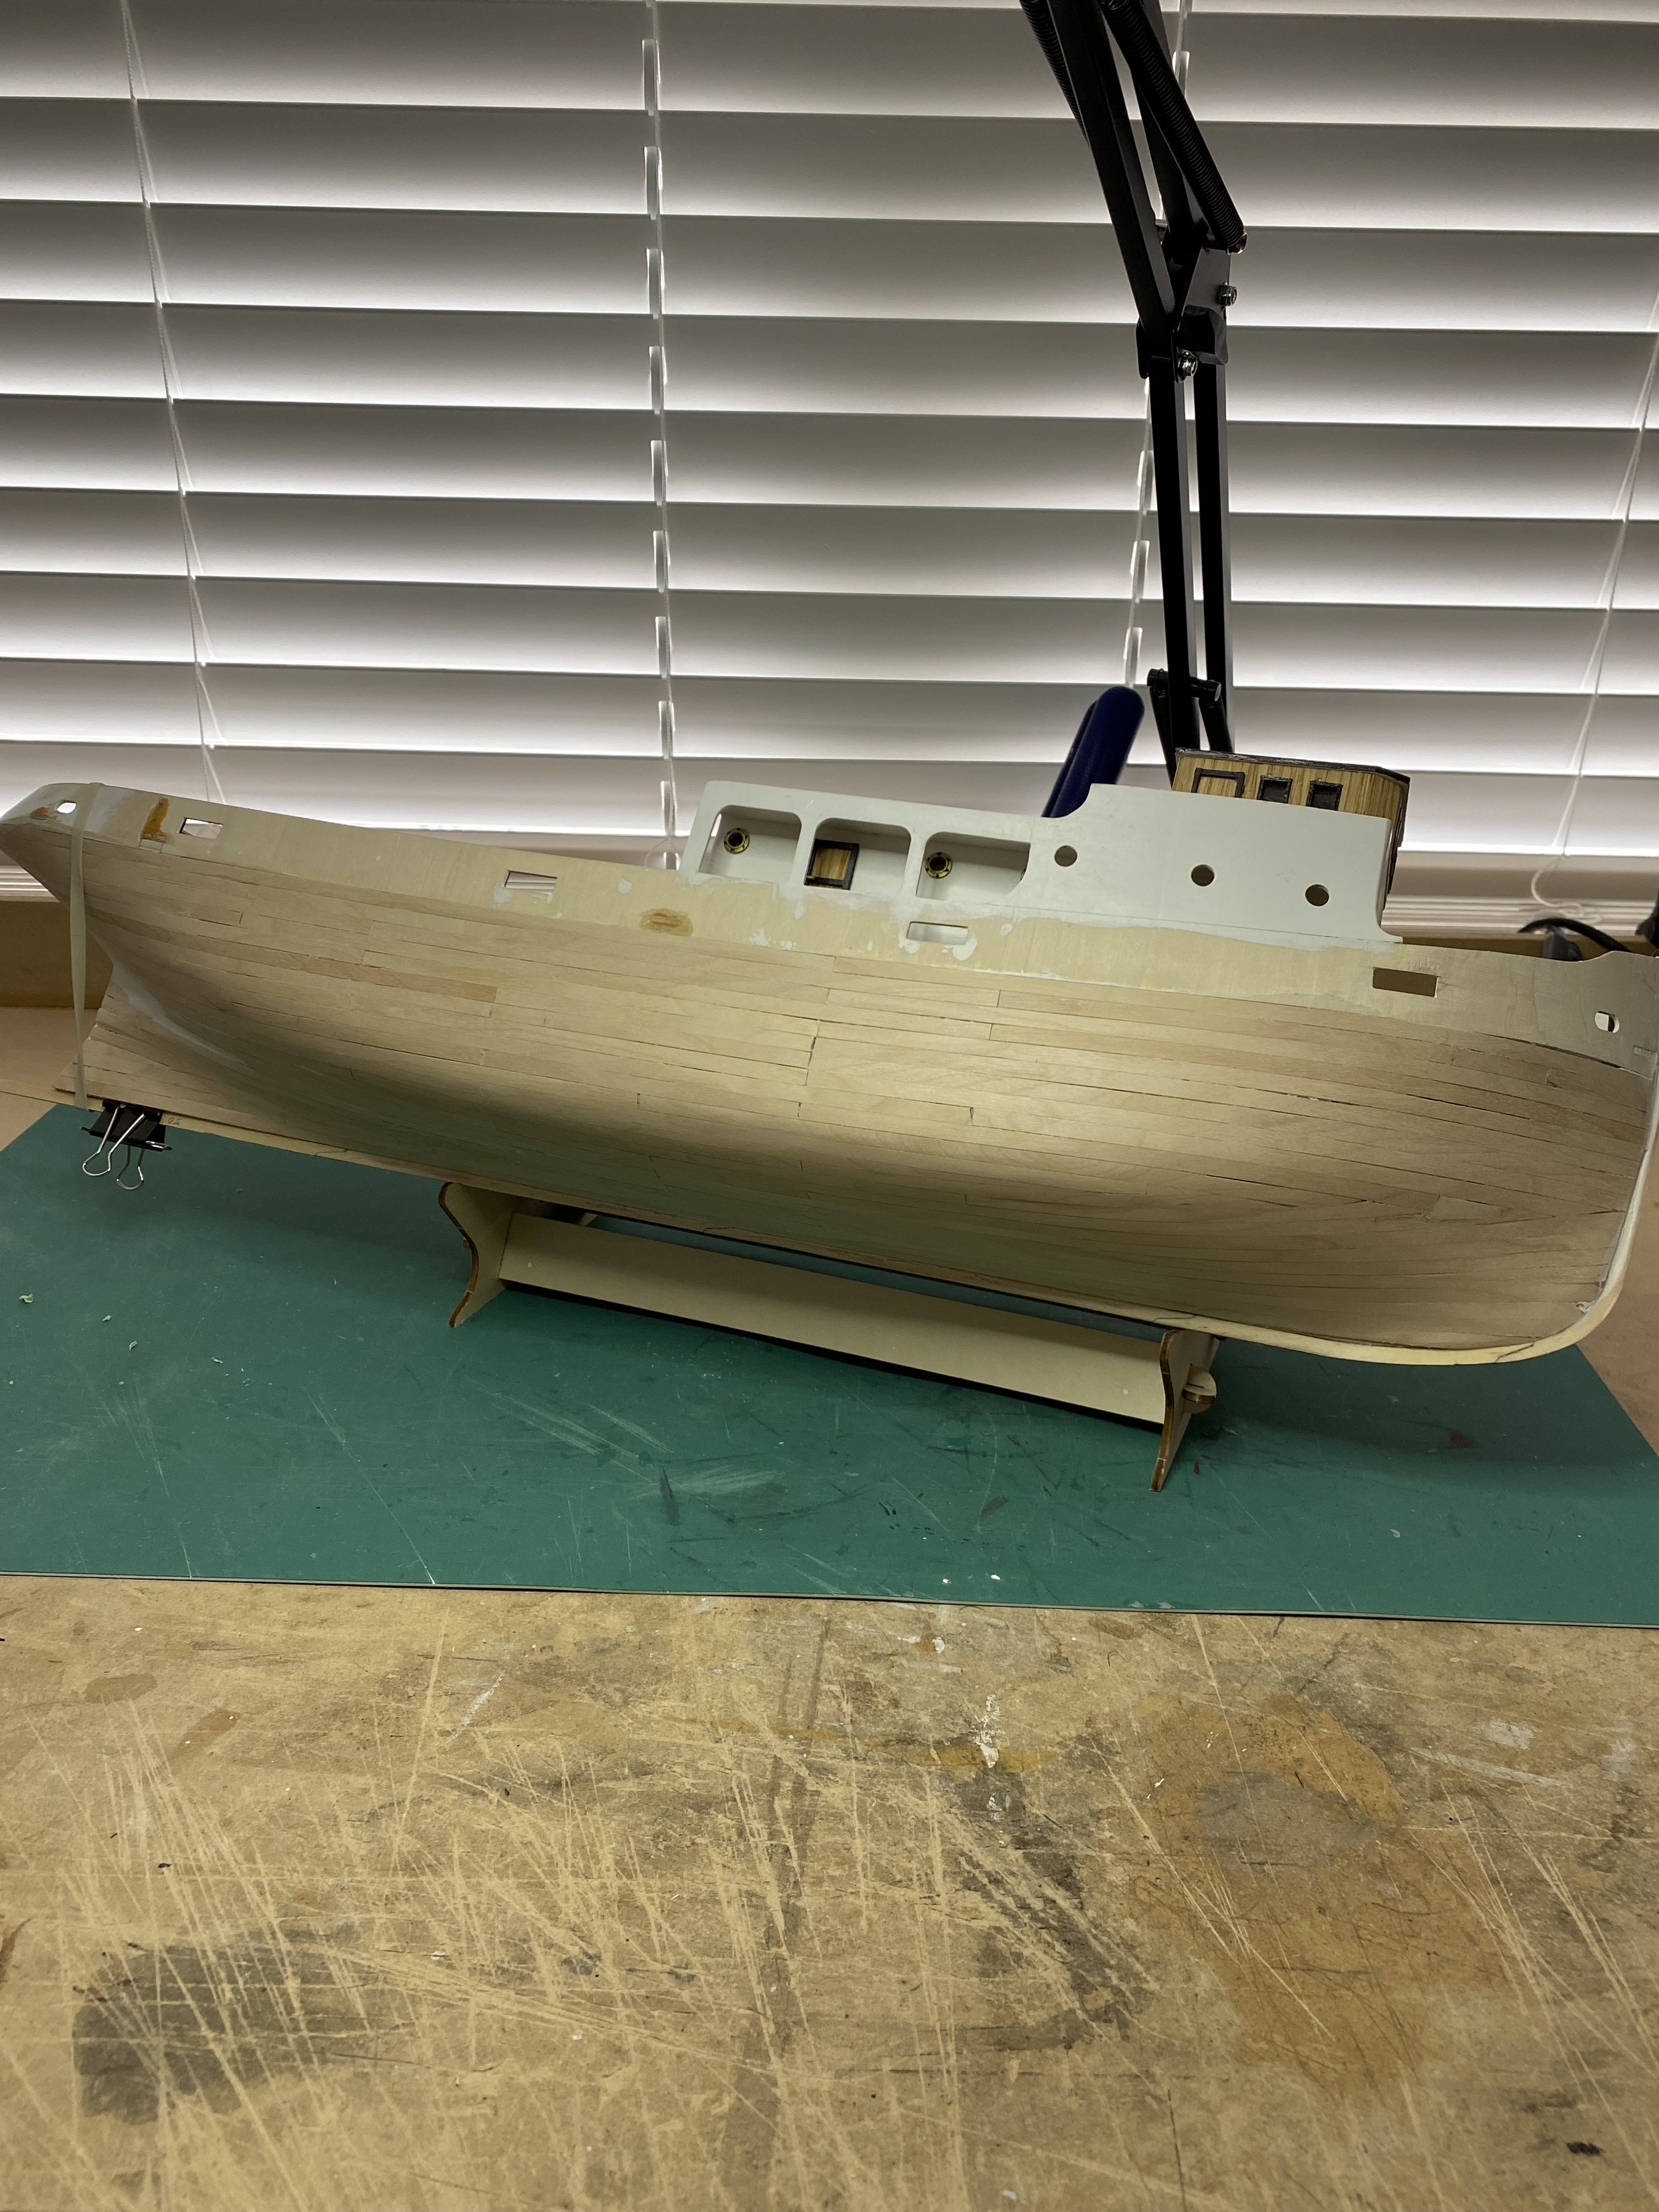
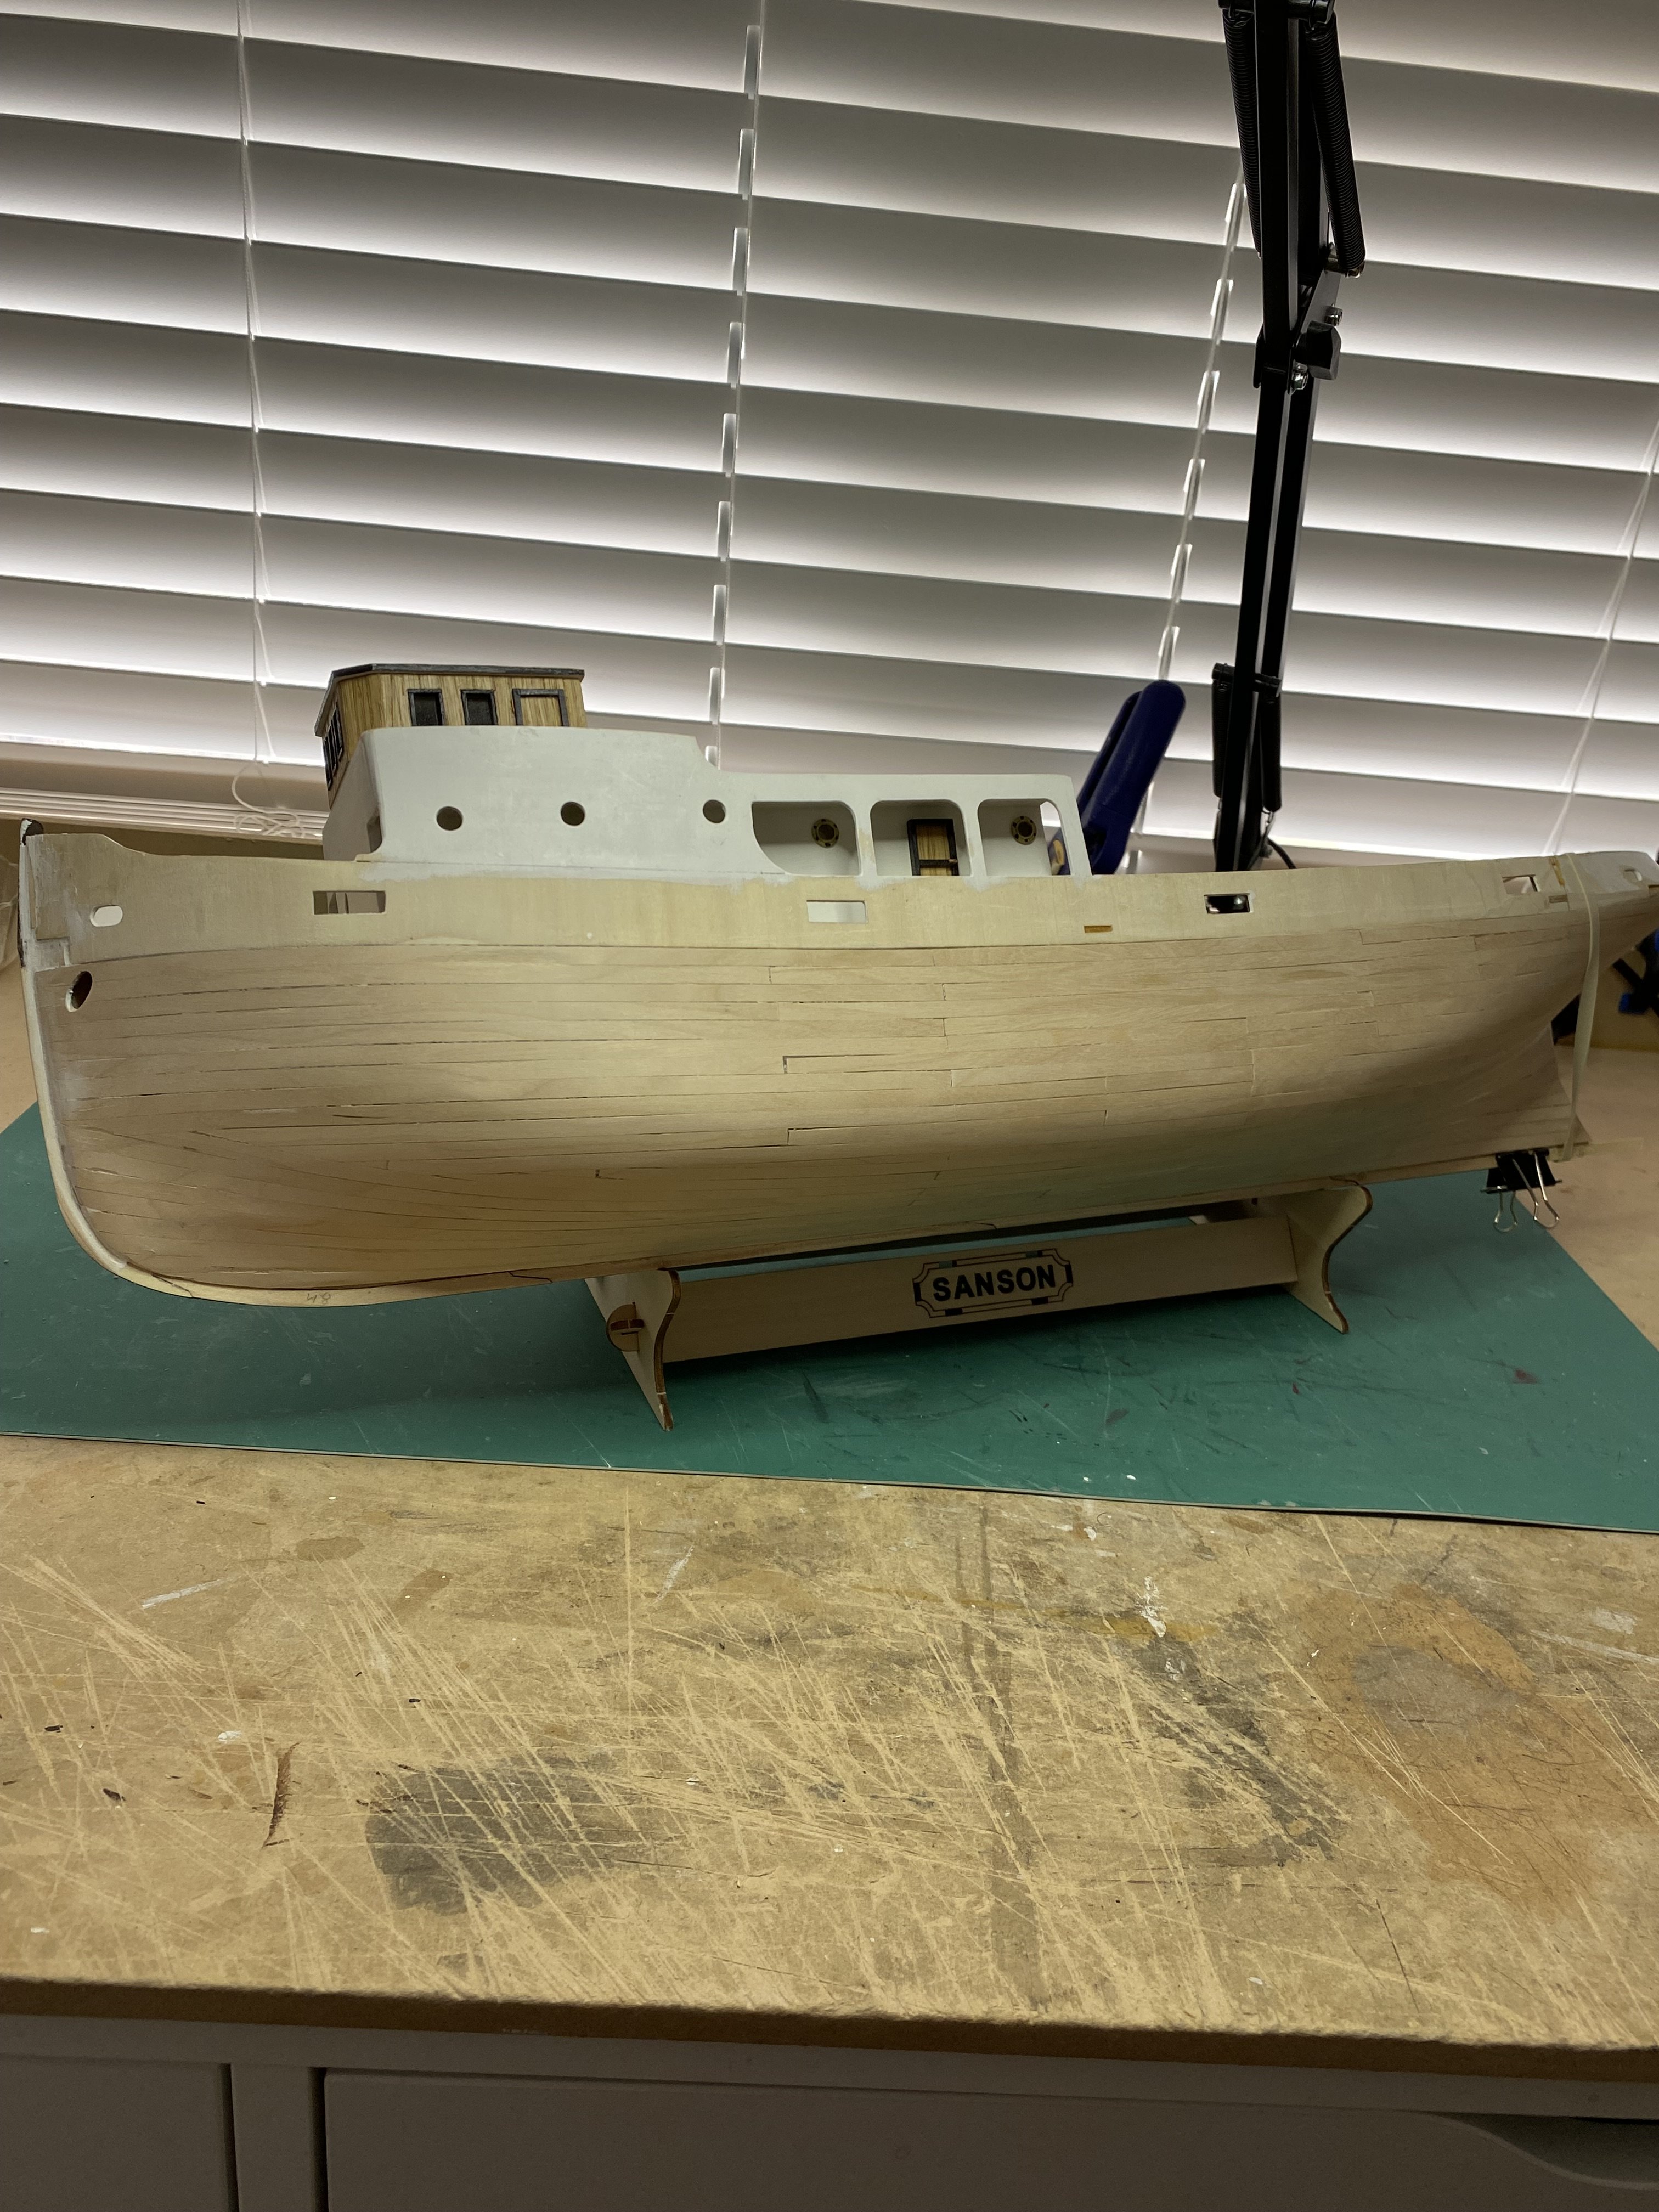
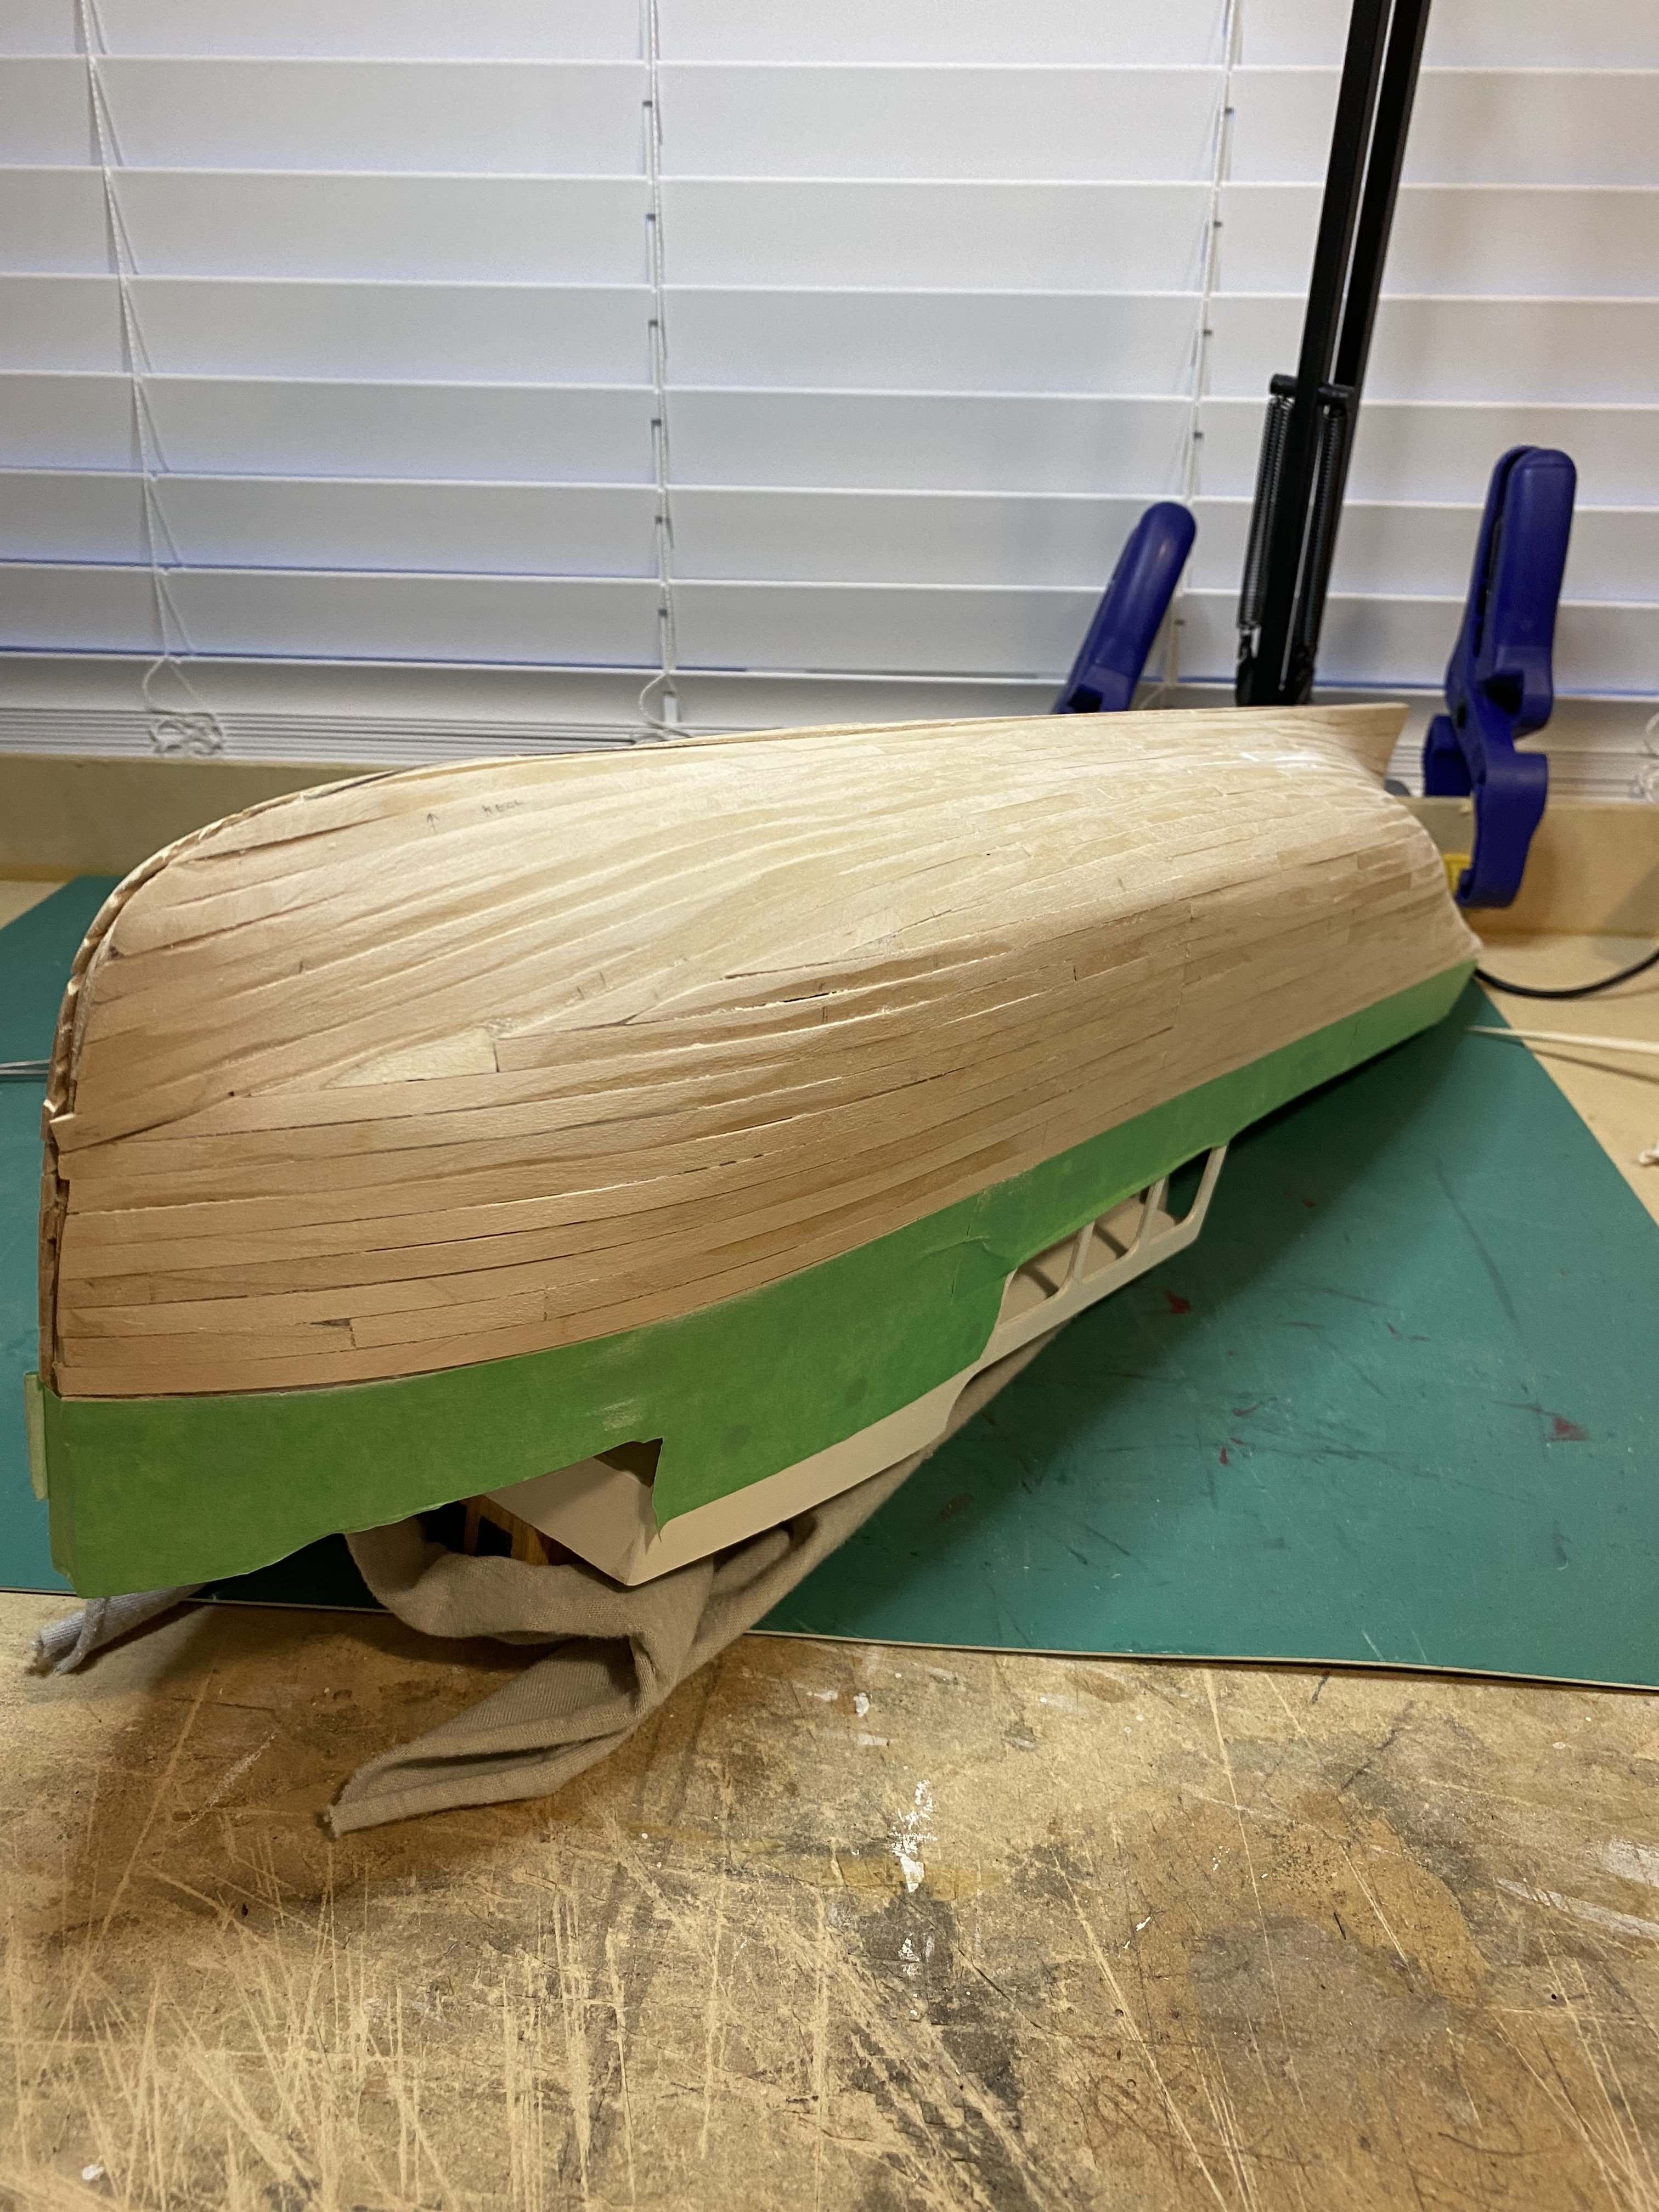
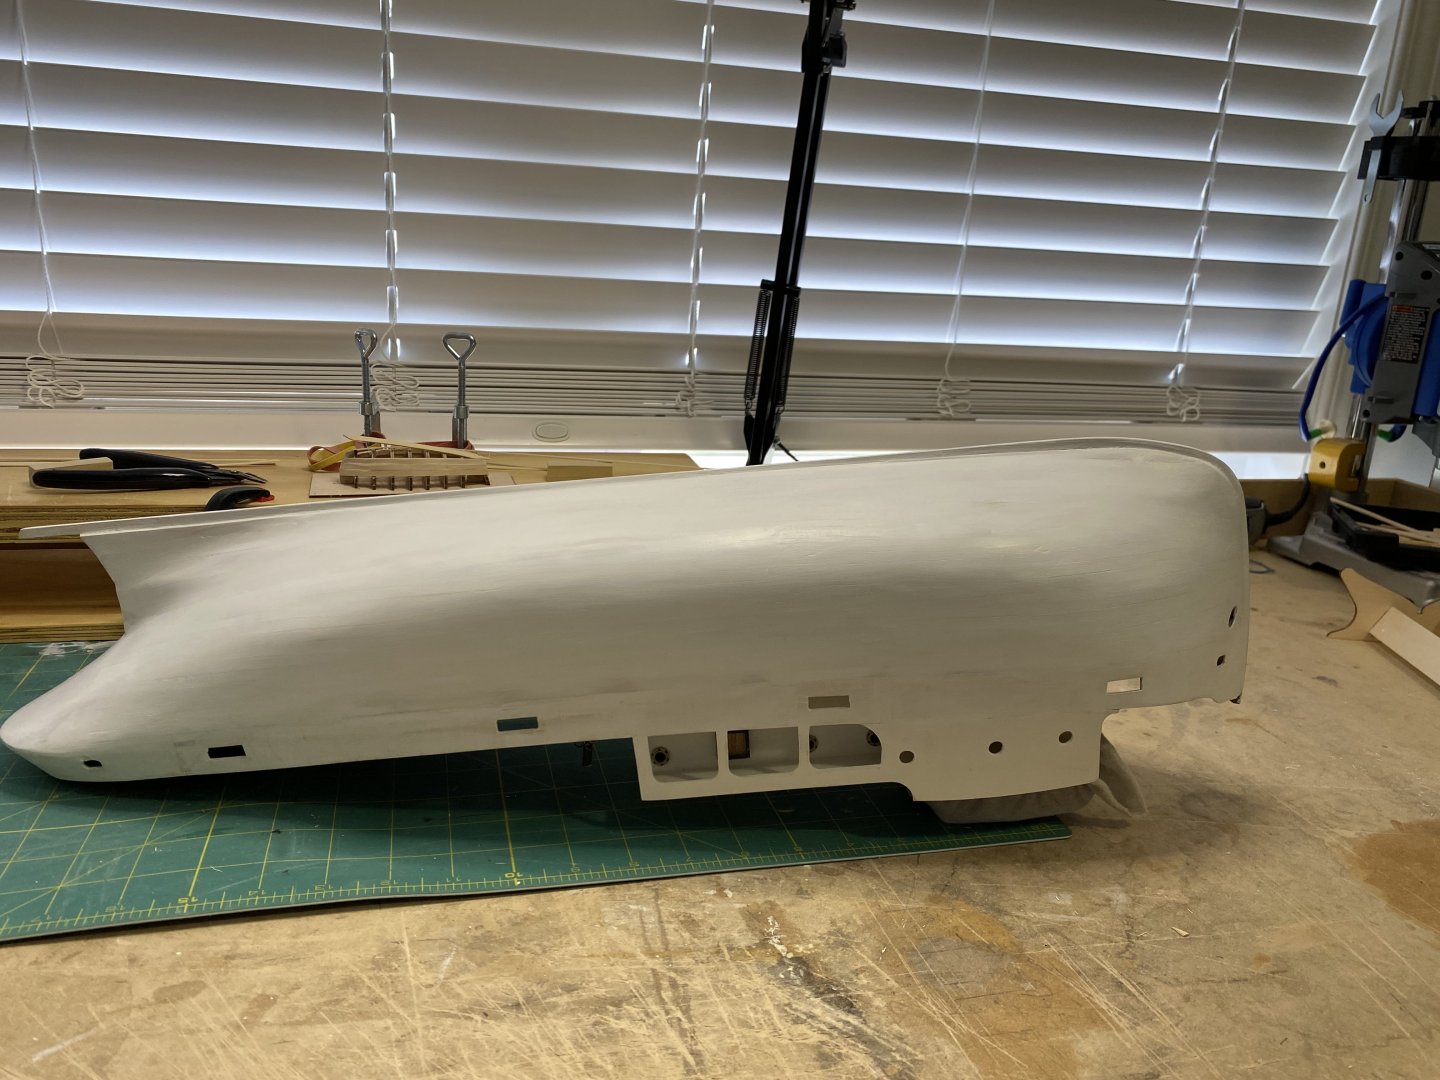
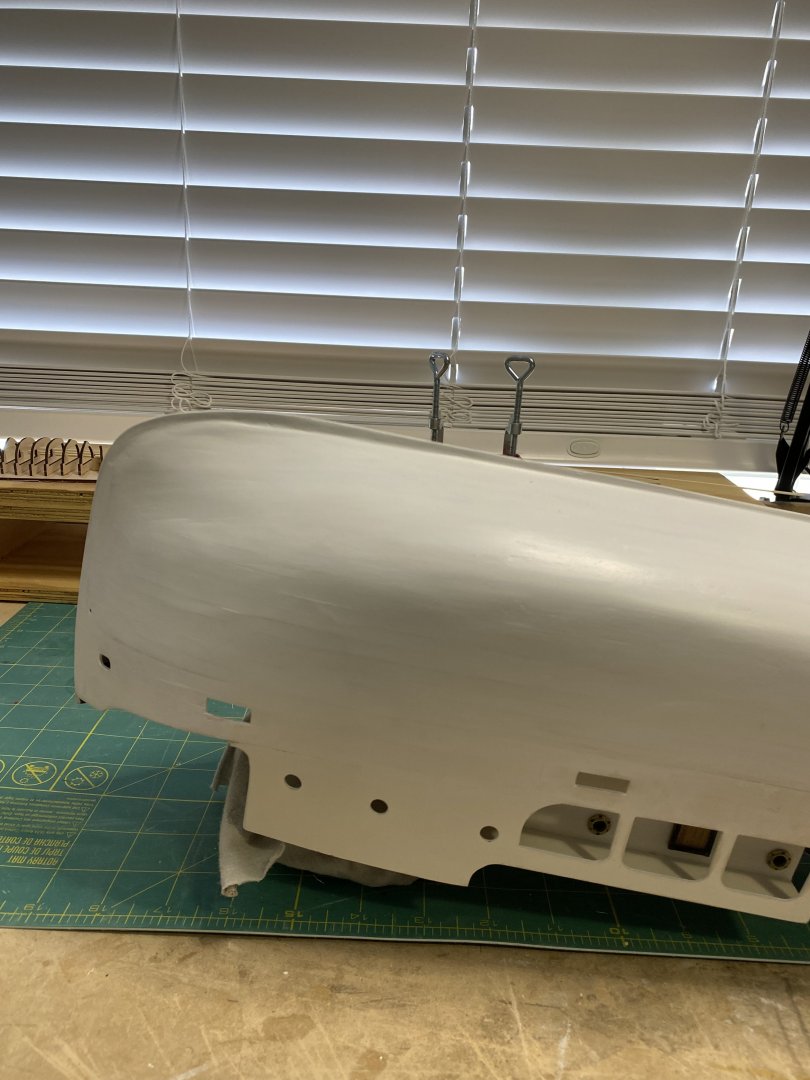
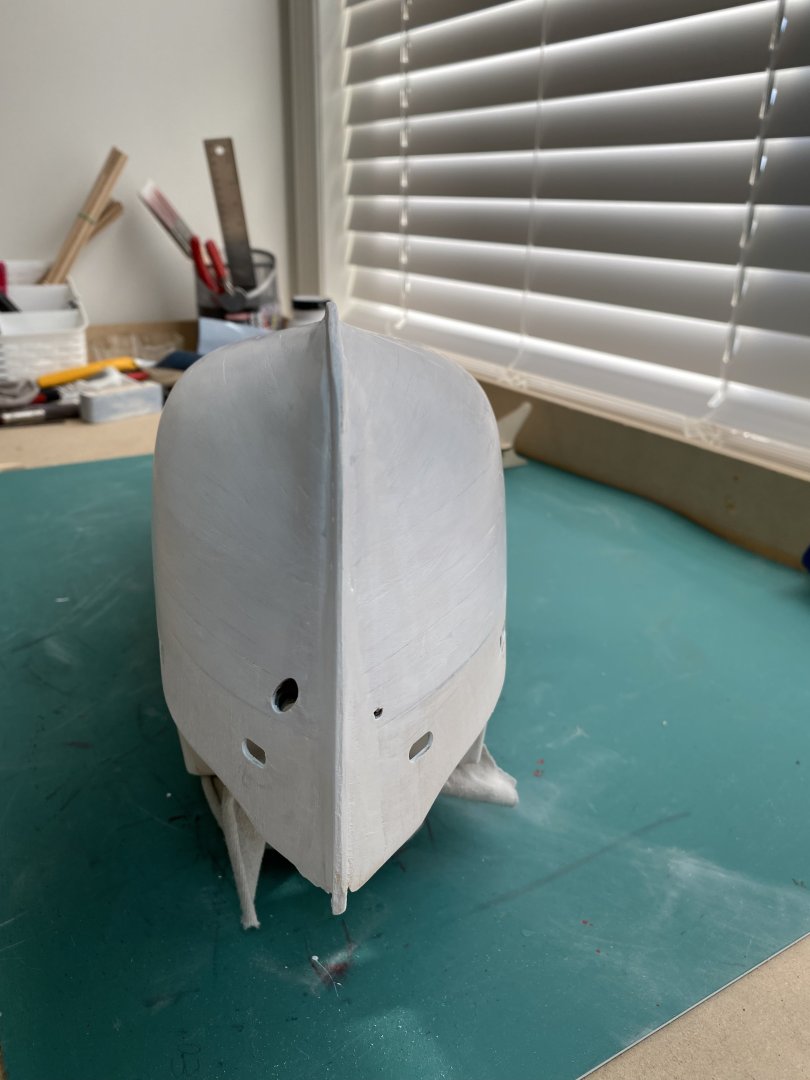
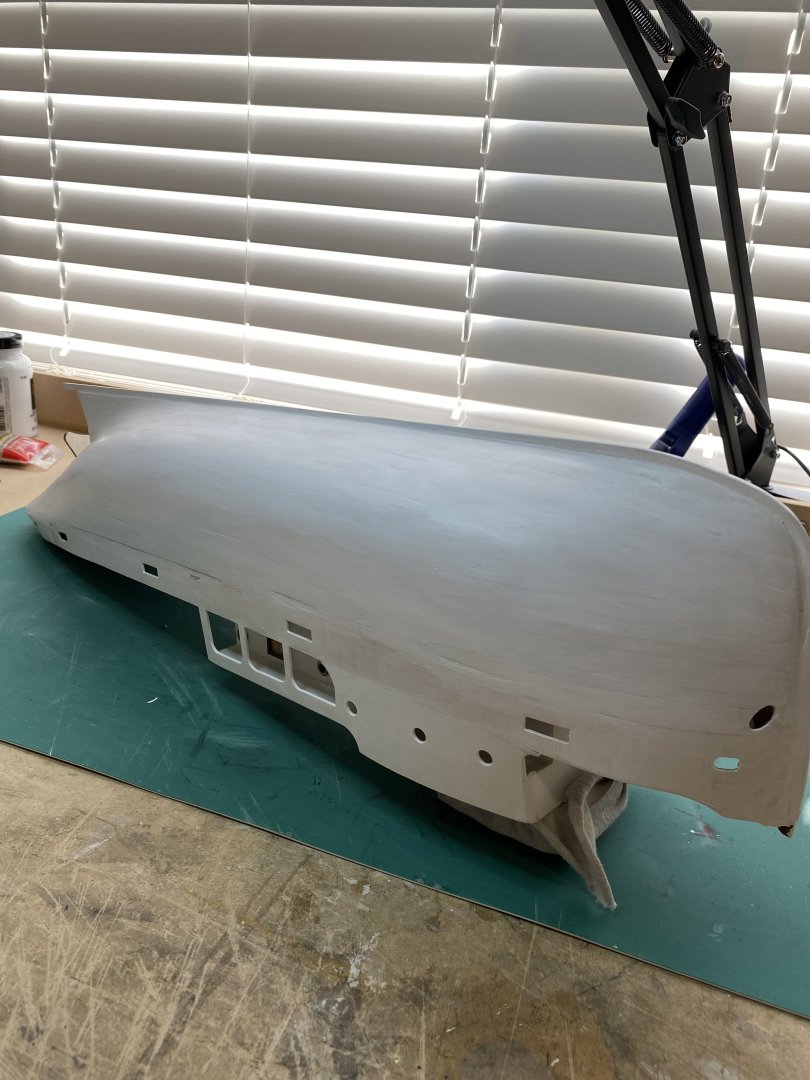
I have done another coat of filler and primer and another sanding session. There are still a couple of areas that need attention but I have to remind myself that this is a Tug , not a racing yacht. Still not an excuse to make it as good as possible. Next step will be adding colour coats.


- 68 replies
-
- 6
-

-
- Sanson
- Artesania Latina
- (and 2 more)
-
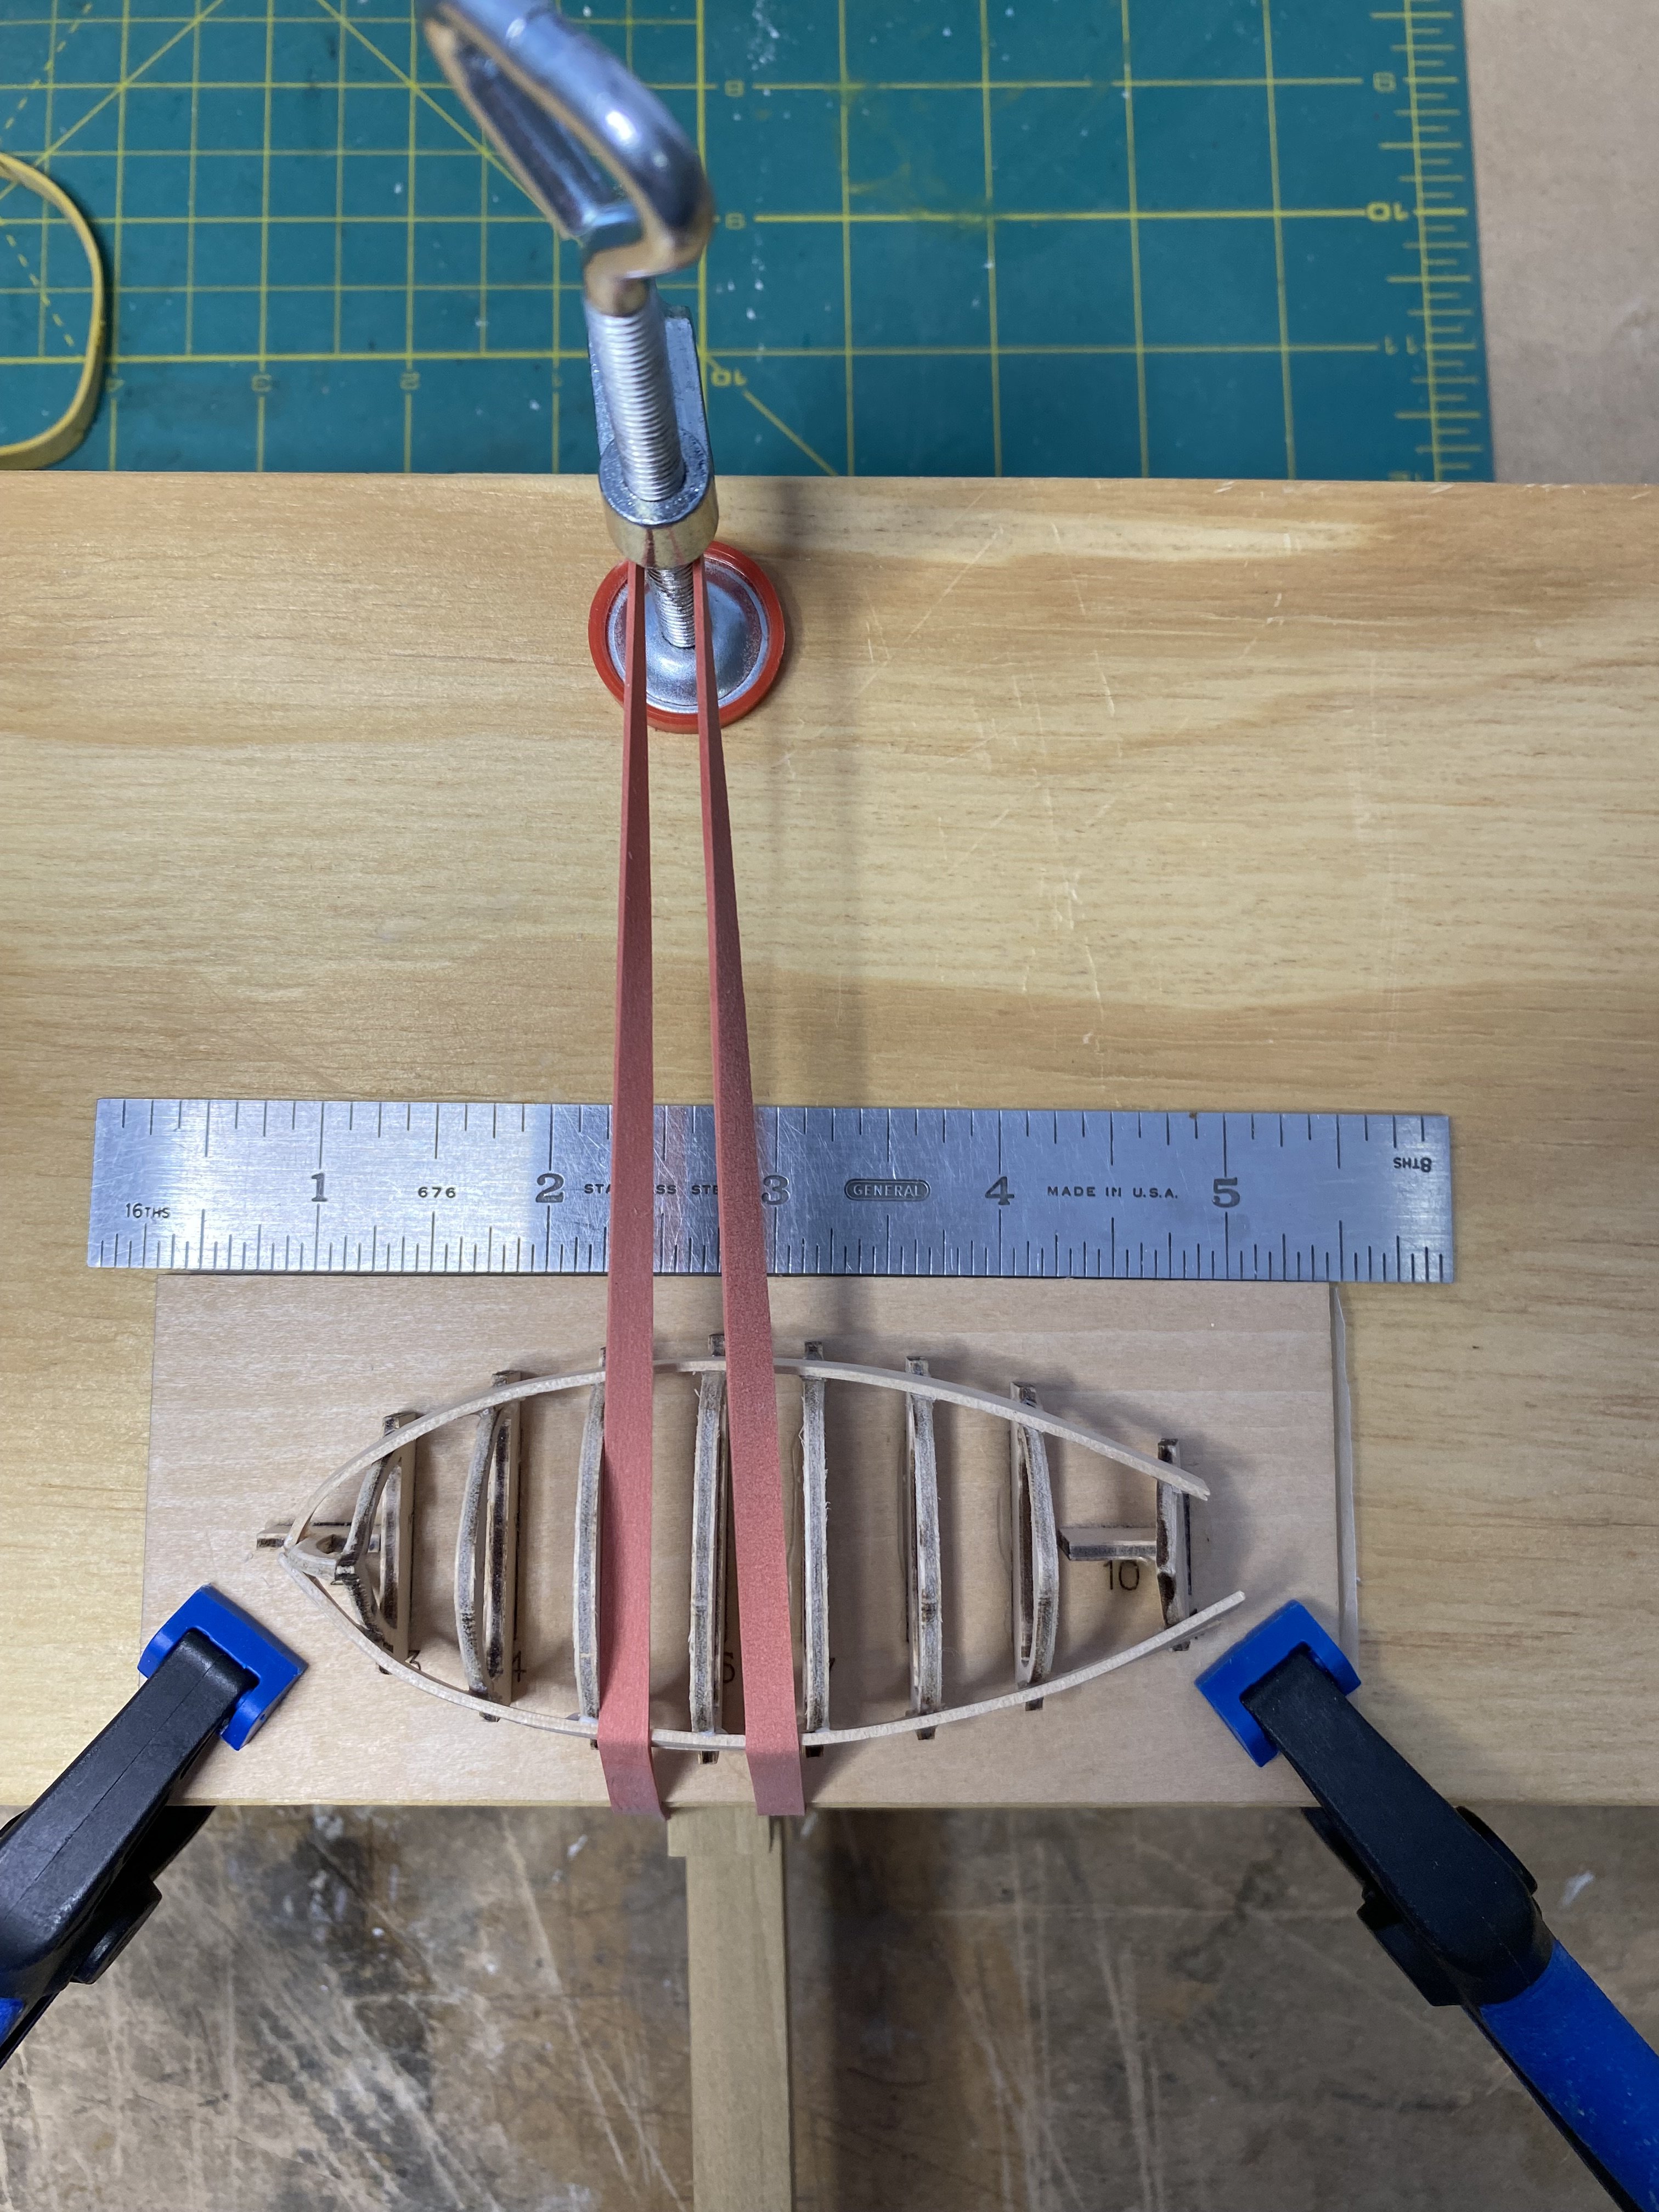
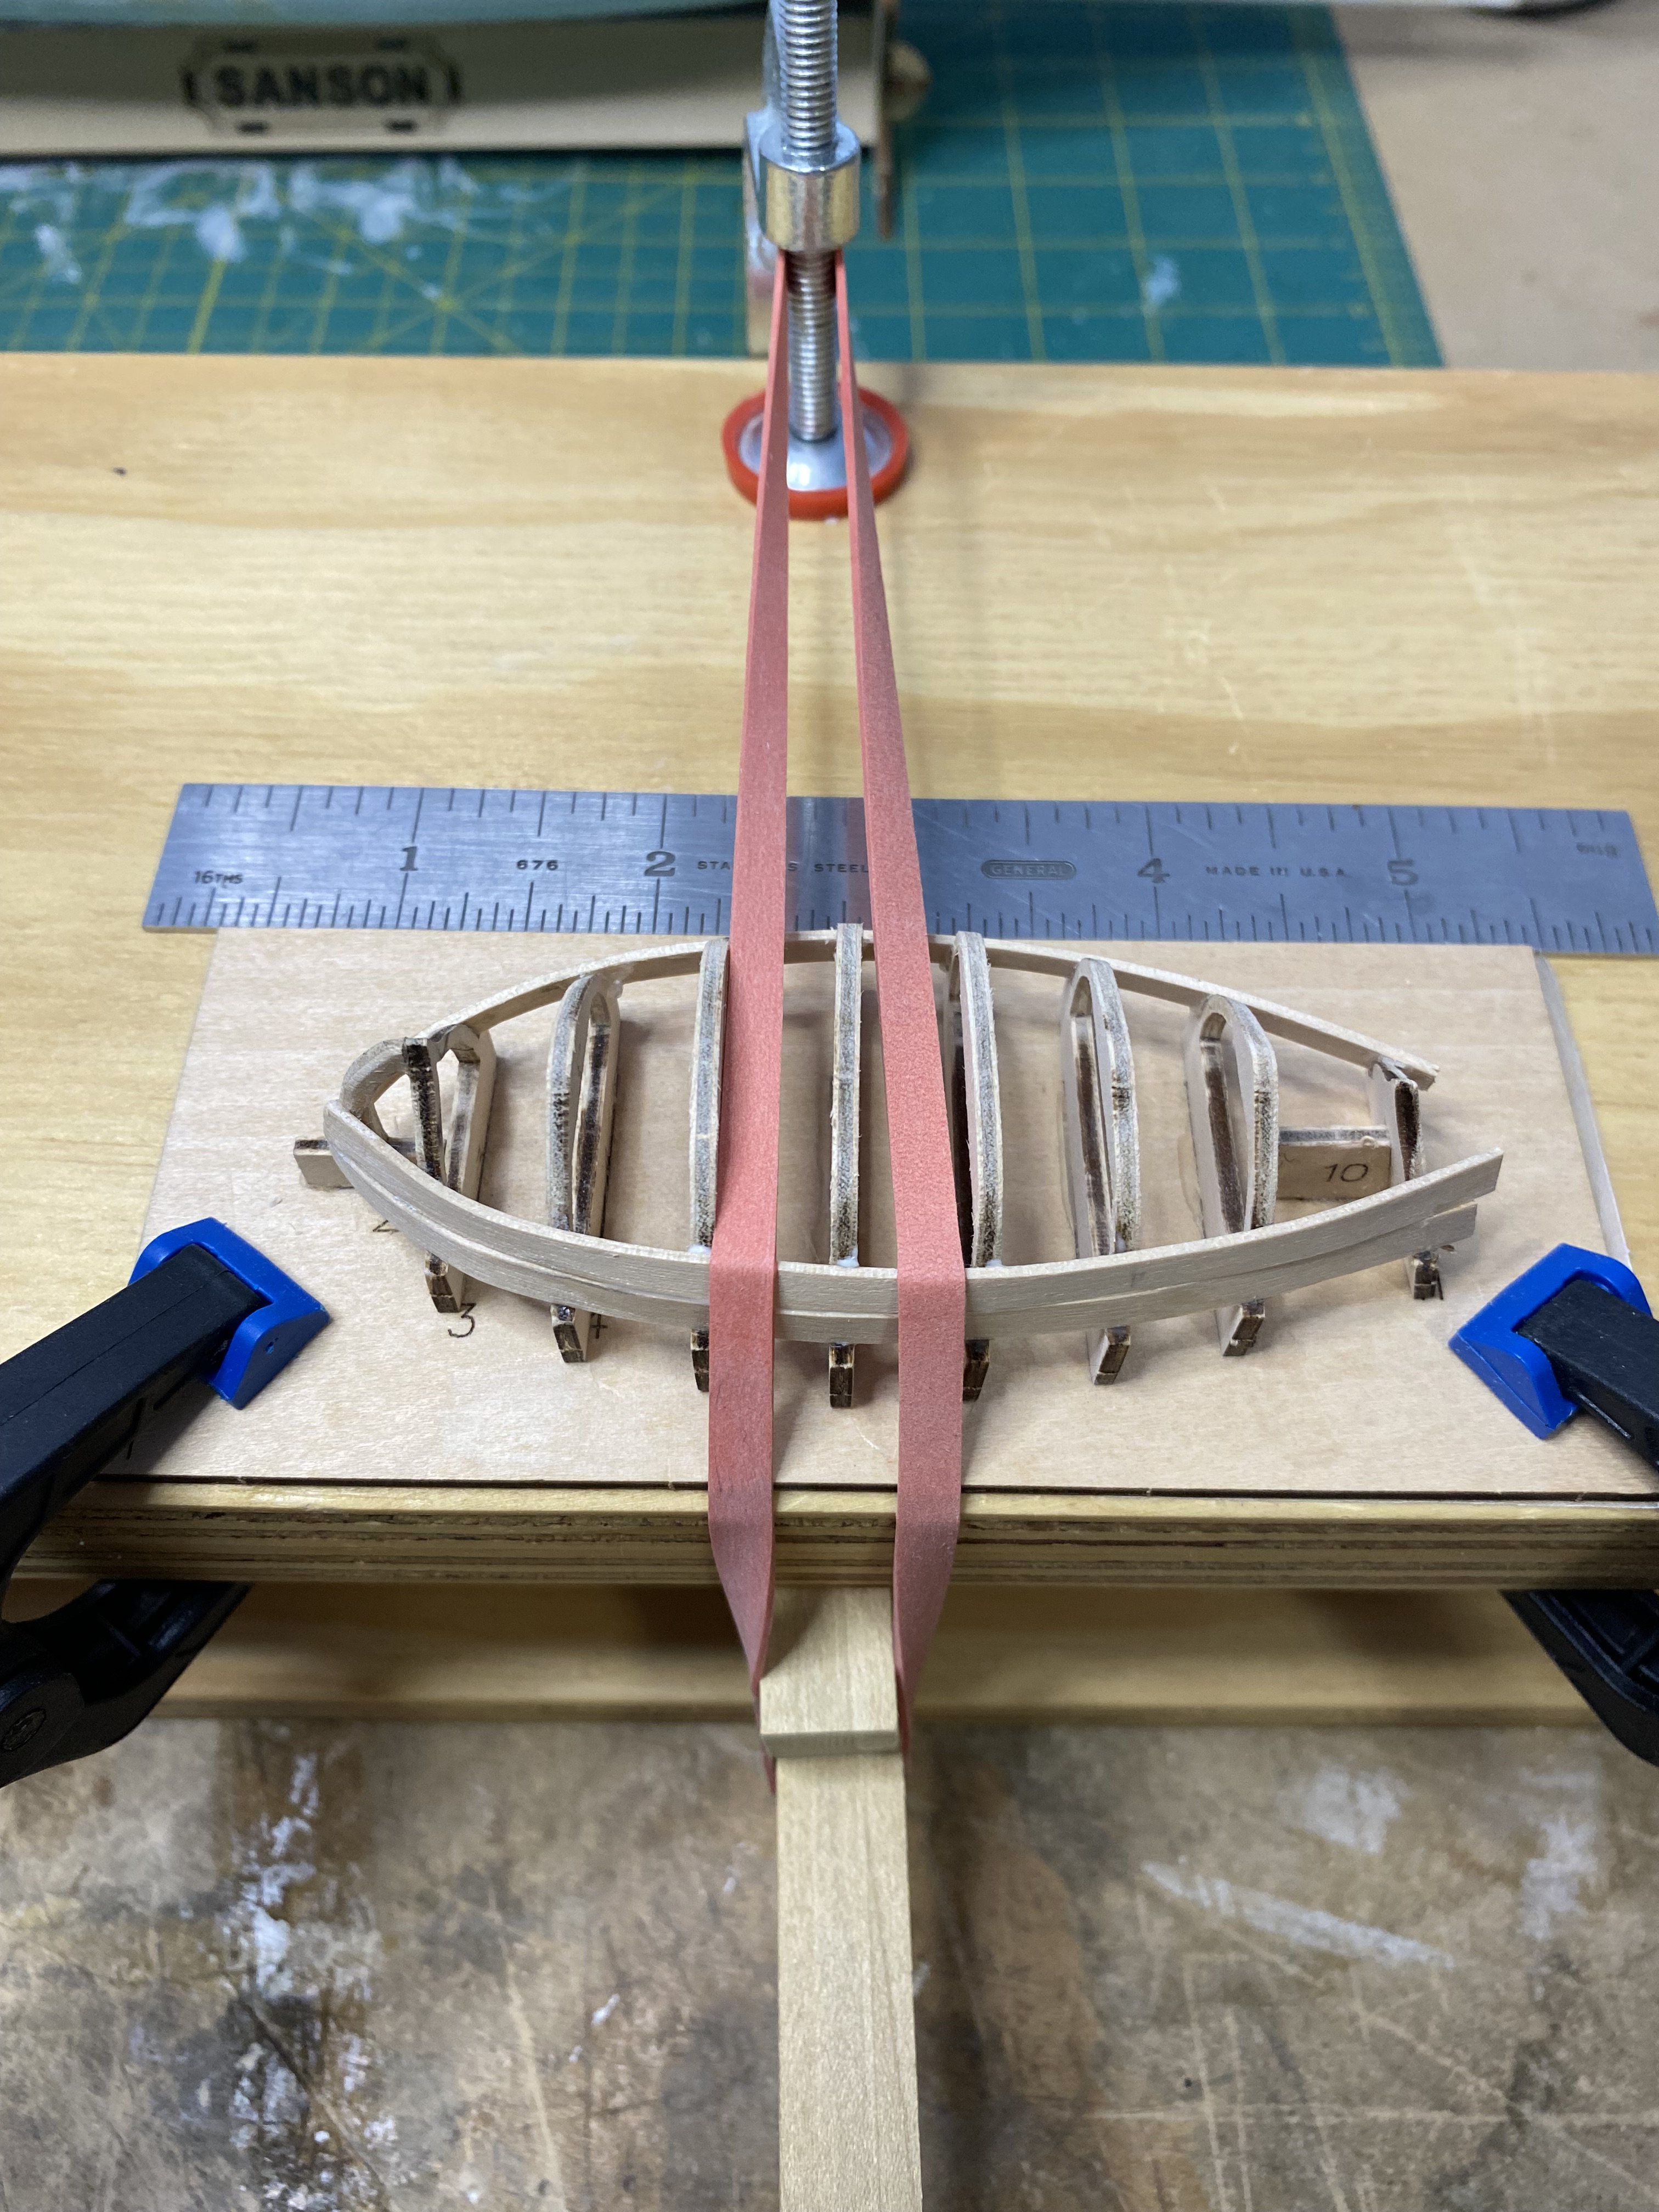
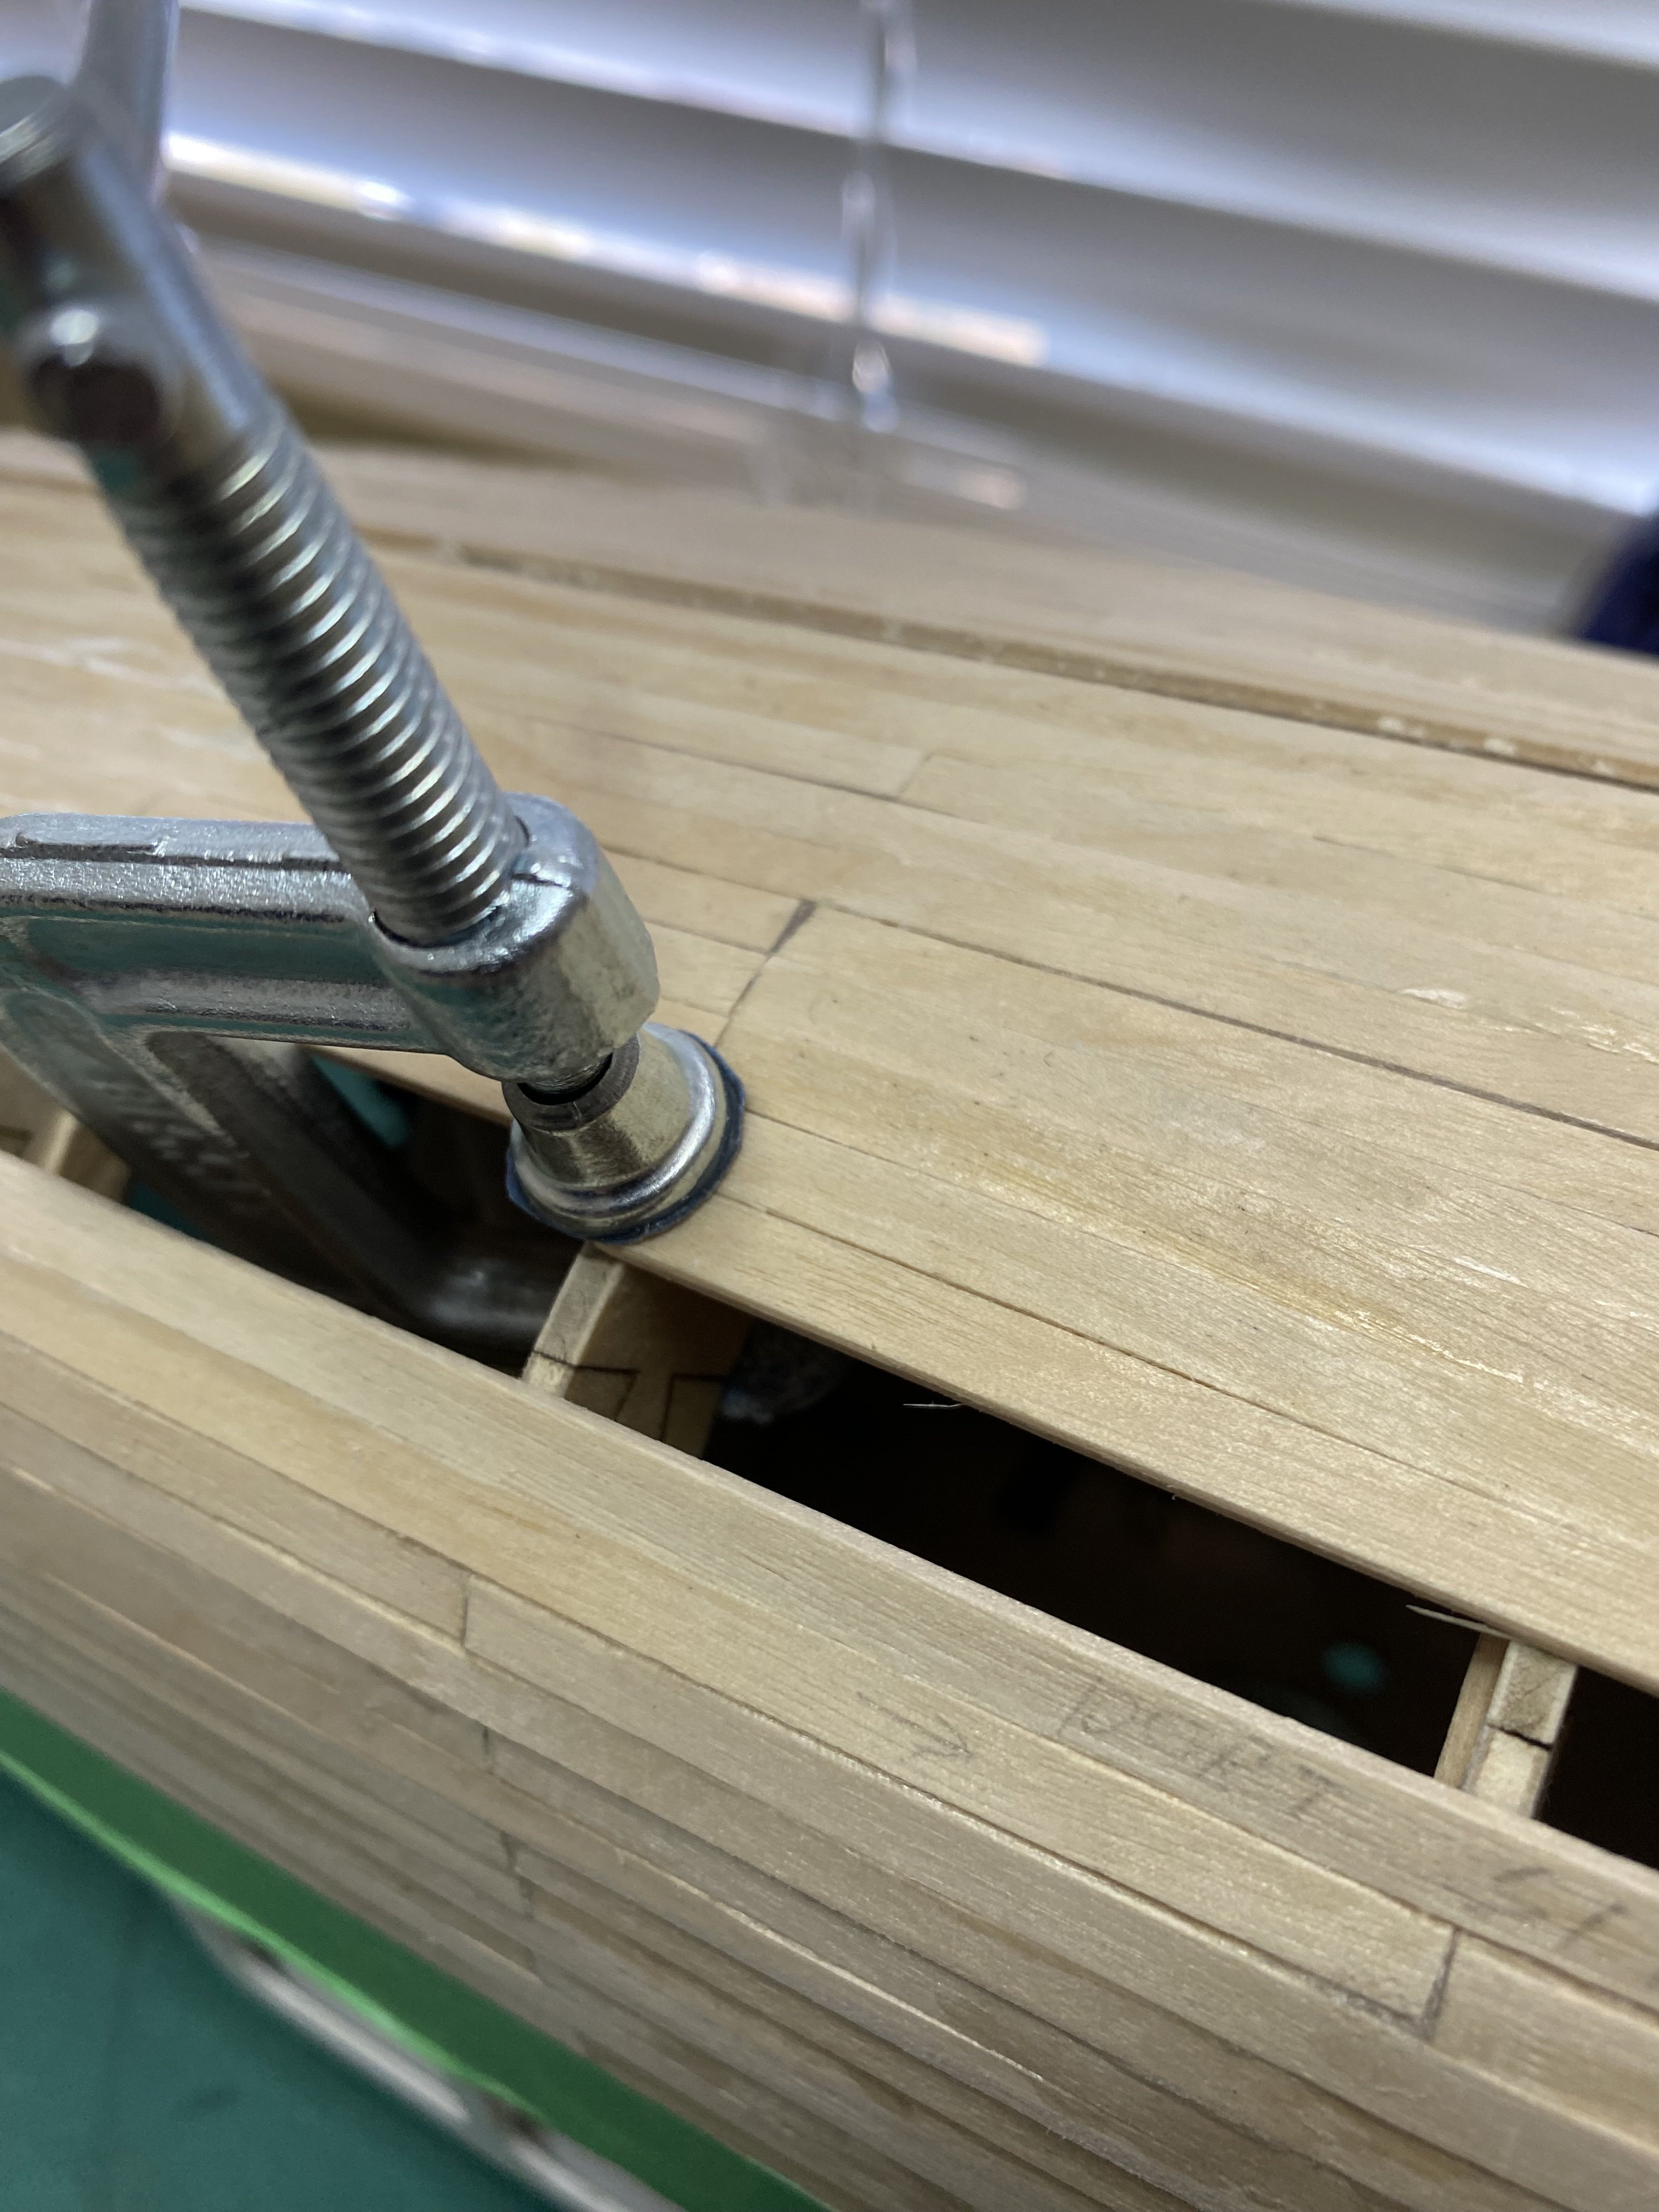
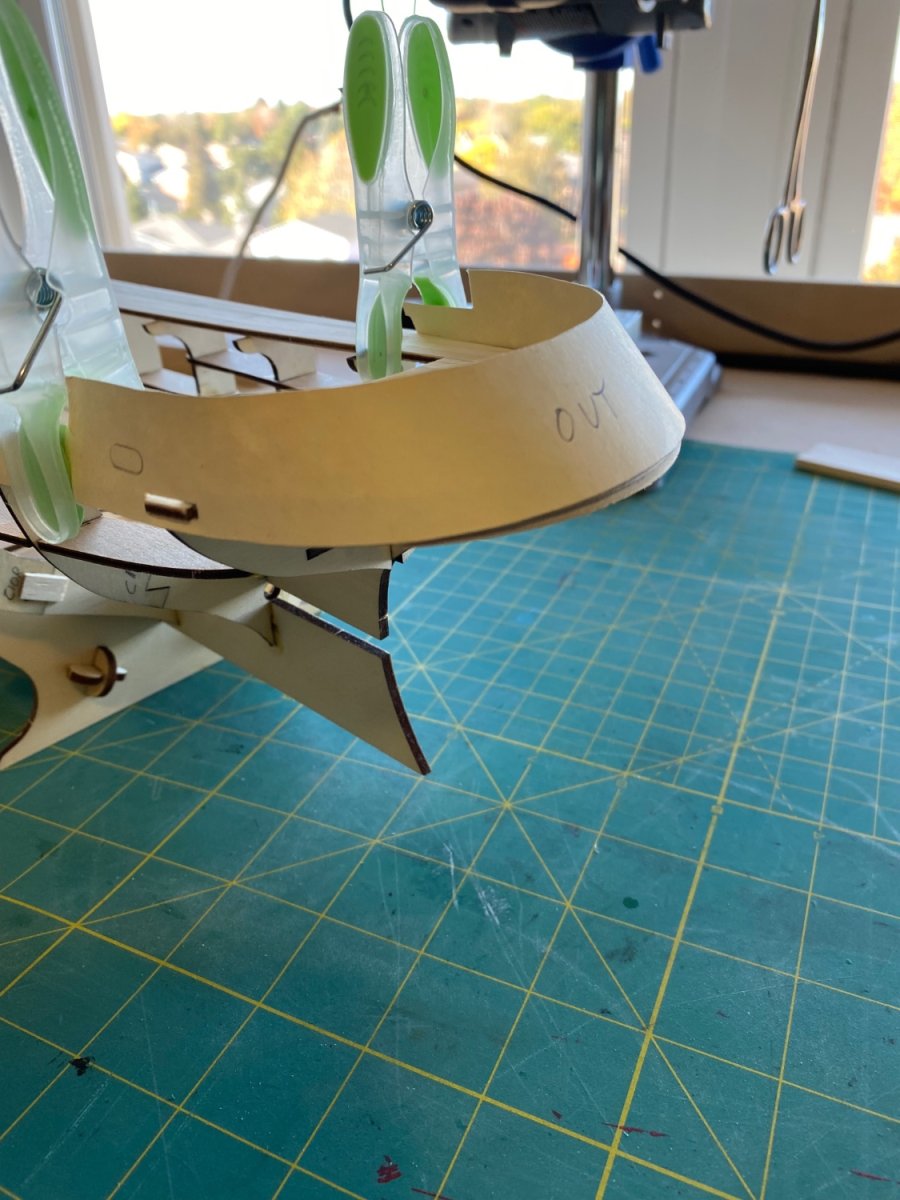
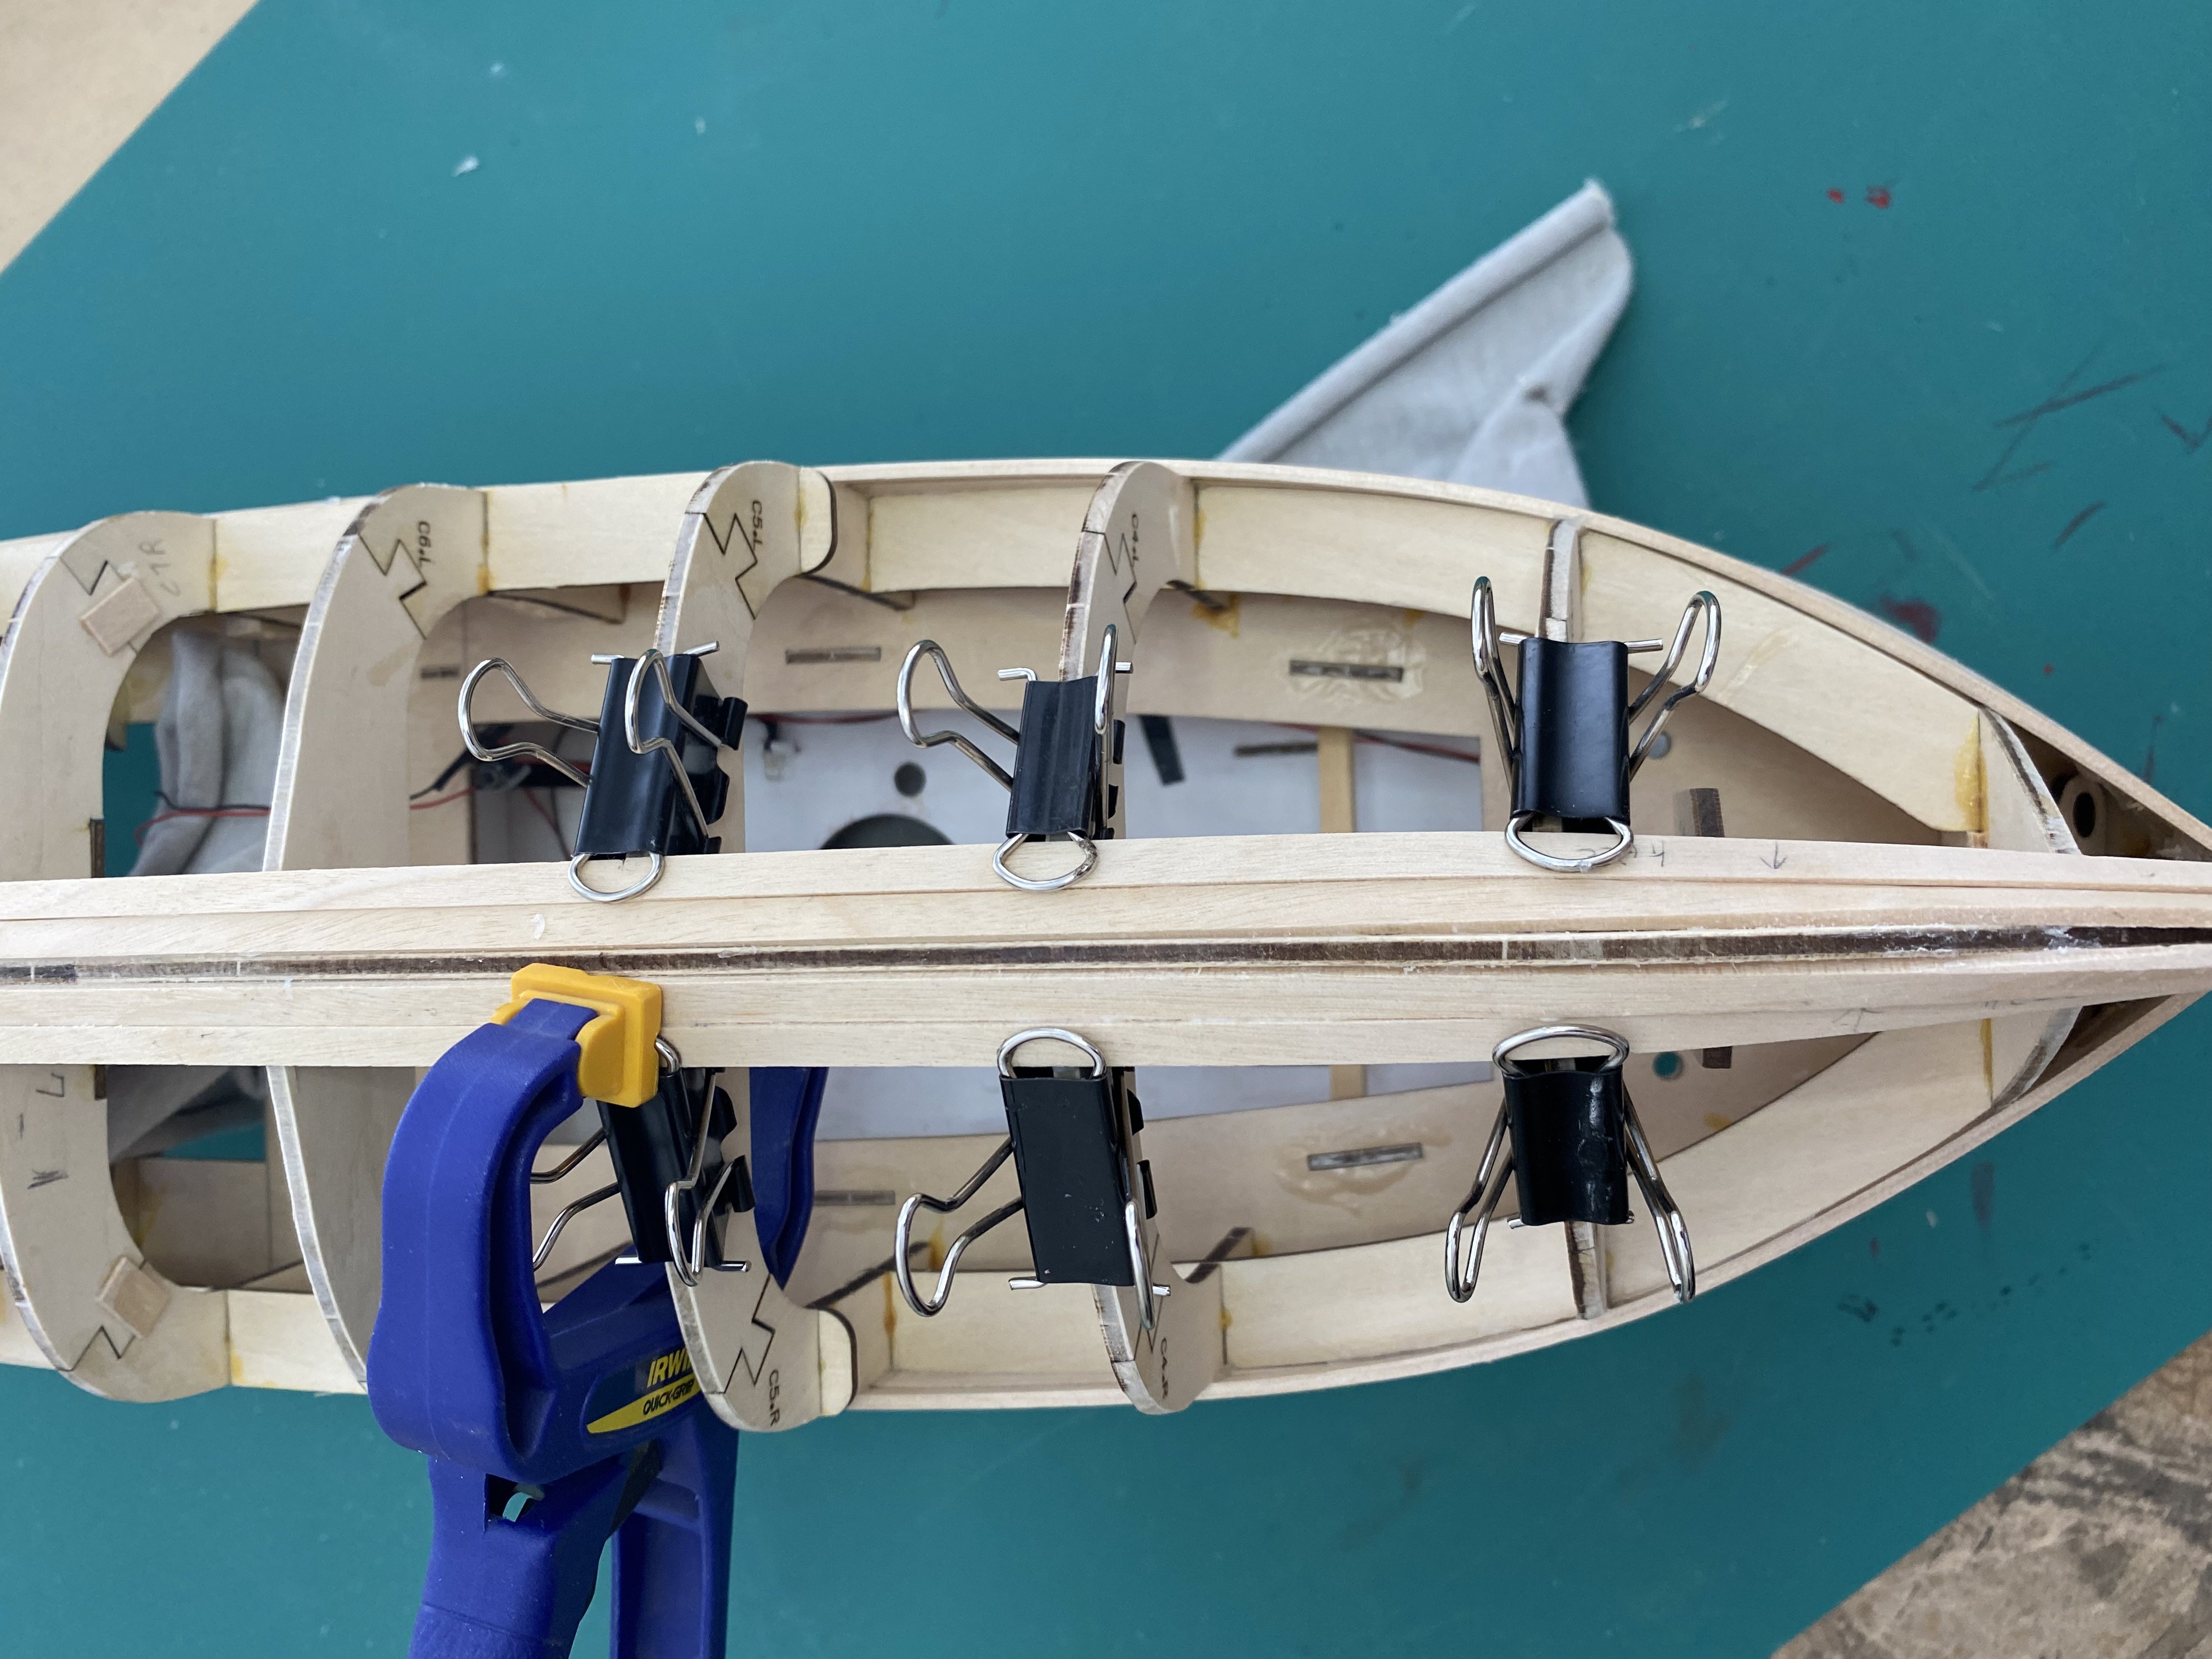
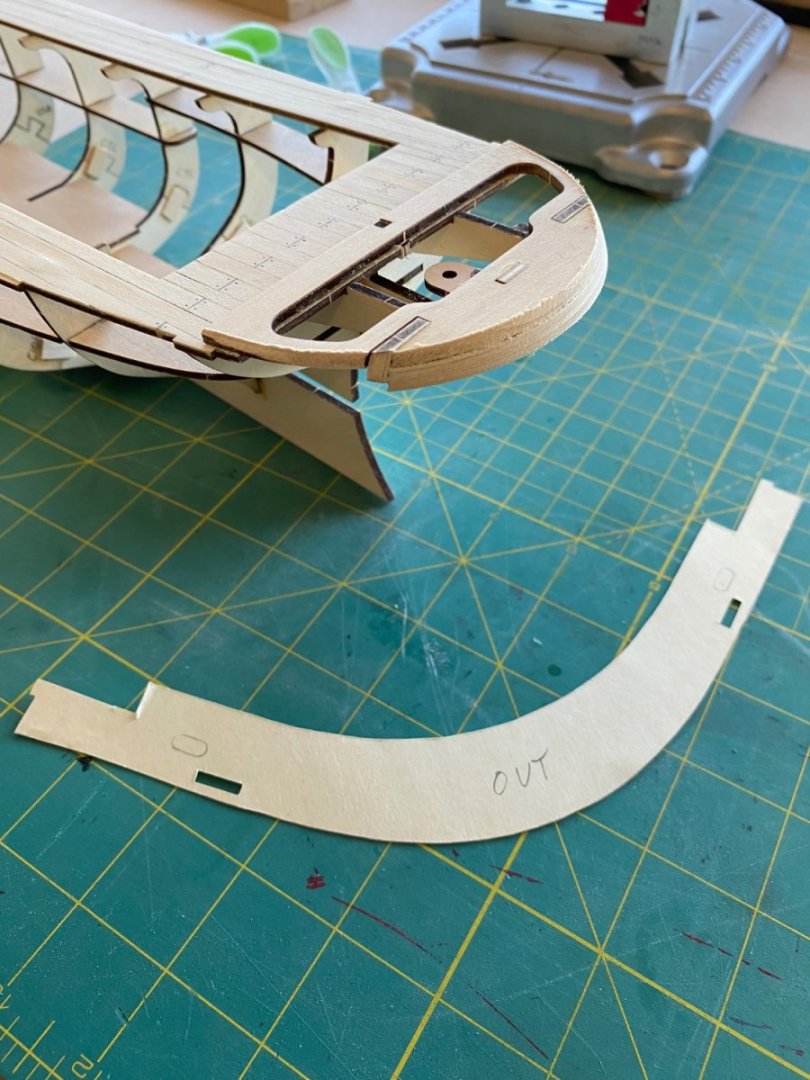
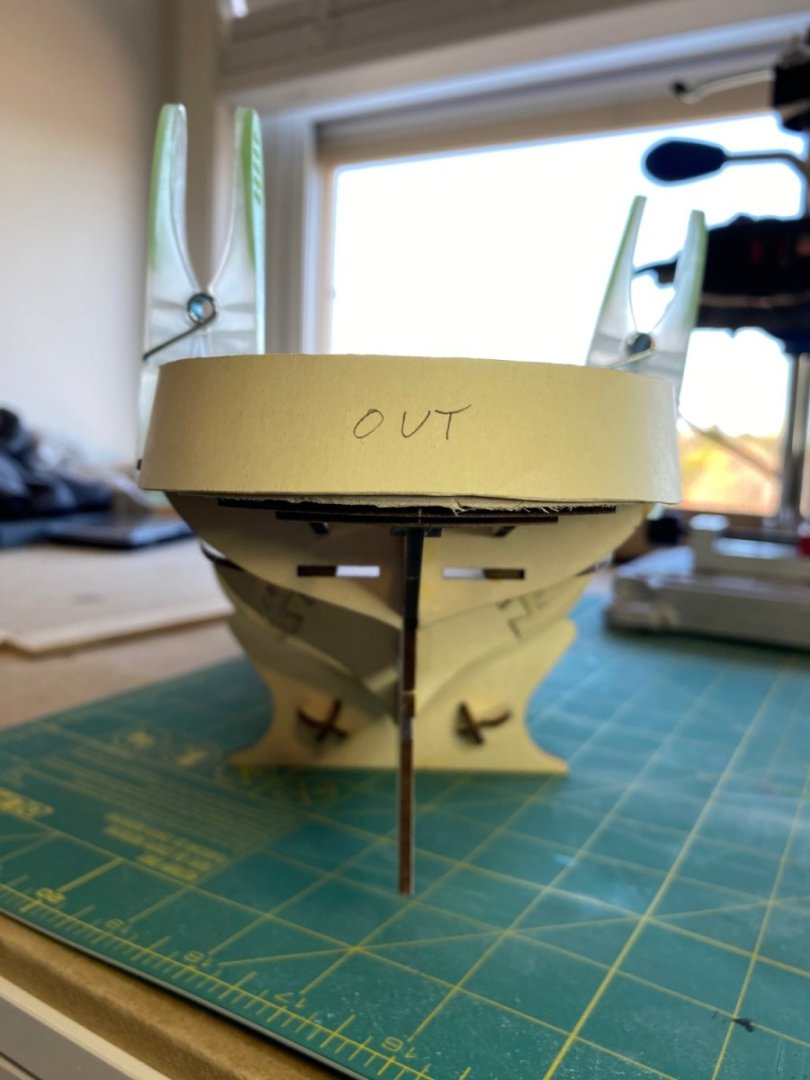
I have done another coat of filler and while it drys I started on one of the small boats that come with this kit. The instructions show this as a Clinker build, but starting at the gunwales and going to the keel would have the overlap in the wrong direction. I have decided to build it as a Carvel. Hope this is the right term. A couple of pics to show my clamping solution for this small build. The instructions show the small boats covered and lashed to the deck. I might try and leave the covers off and have them swung out on the Davits ready to be lowered. Any thoughts on this appreciated


-
I purchased my pin vise from Lee Valley tools along with a set of micro drill bits. They have worked well for me so far. The Pin Vise also has a tube of drill bits stored in the Main body. I think I paid around $50.00 Canadian for both.
-
So the ugly duckling got a coat of wood filler and then was sanded with 220 and 400 grit. One coat of primer/sealer has been brushed on. There are some areas that need attention, more filler, more sanding and more primer. The hull has turned out better than expected


- 68 replies
-
- 2
-
-
- Sanson
- Artesania Latina
- (and 2 more)
-
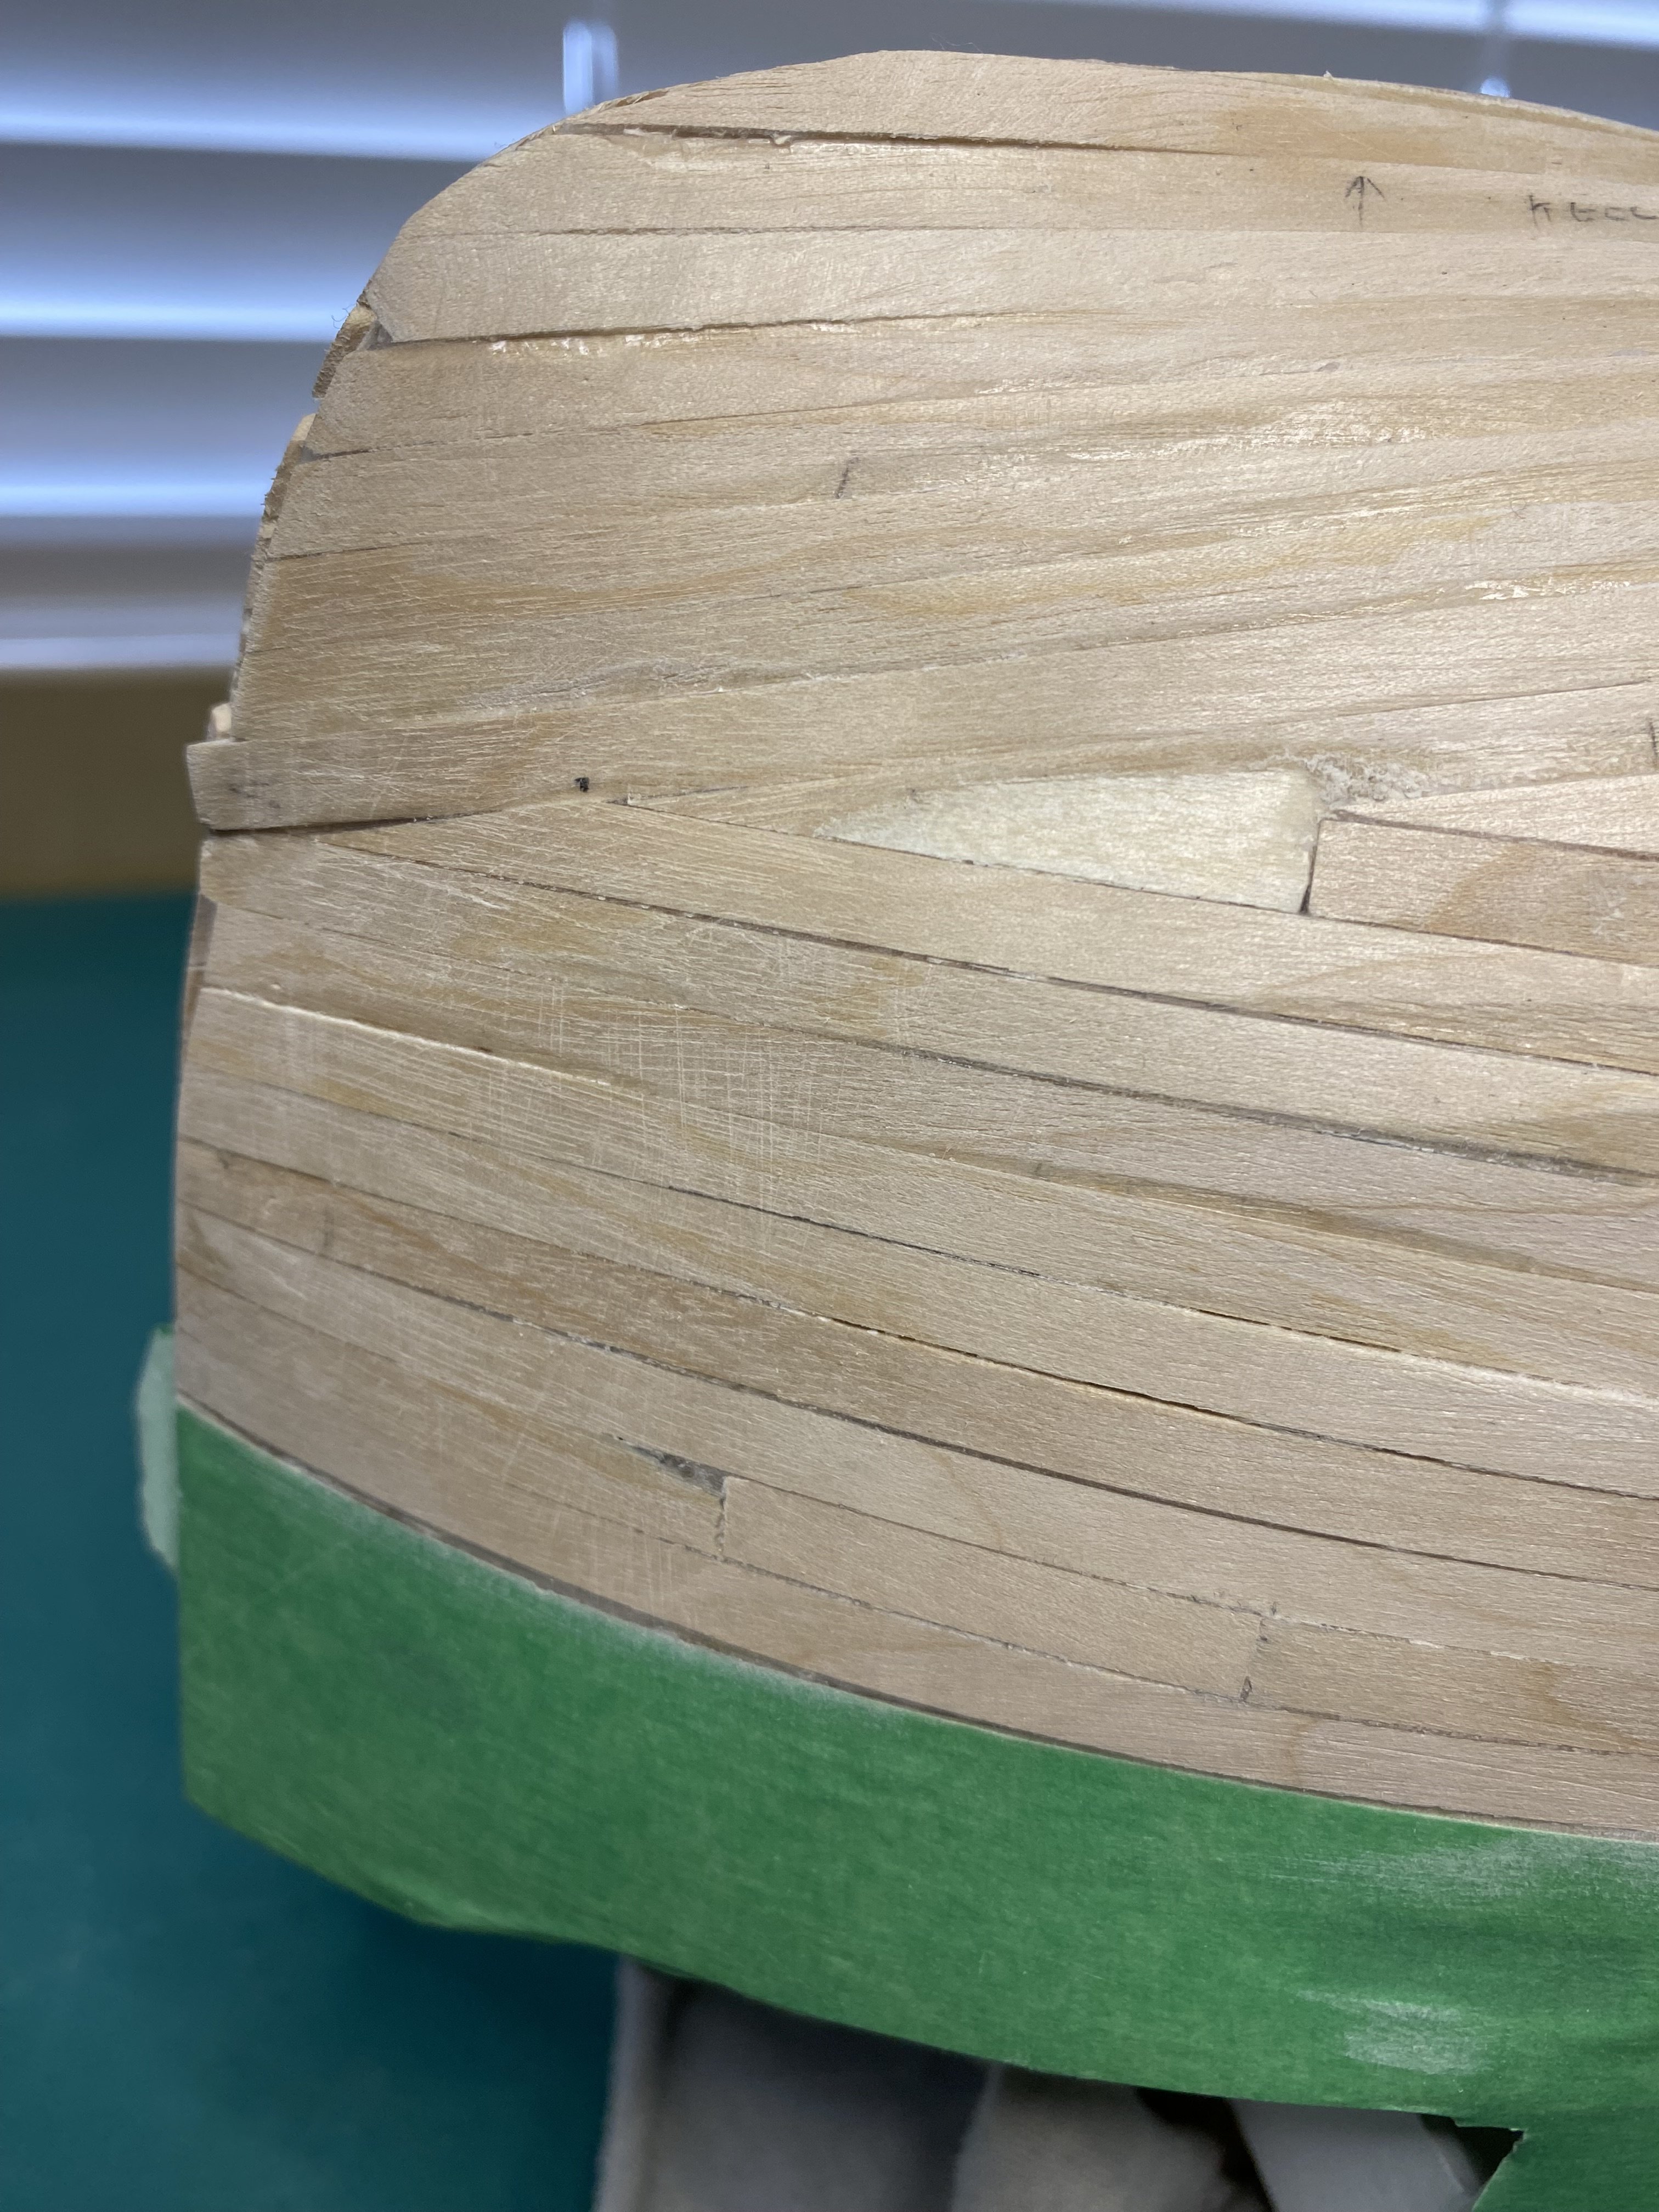
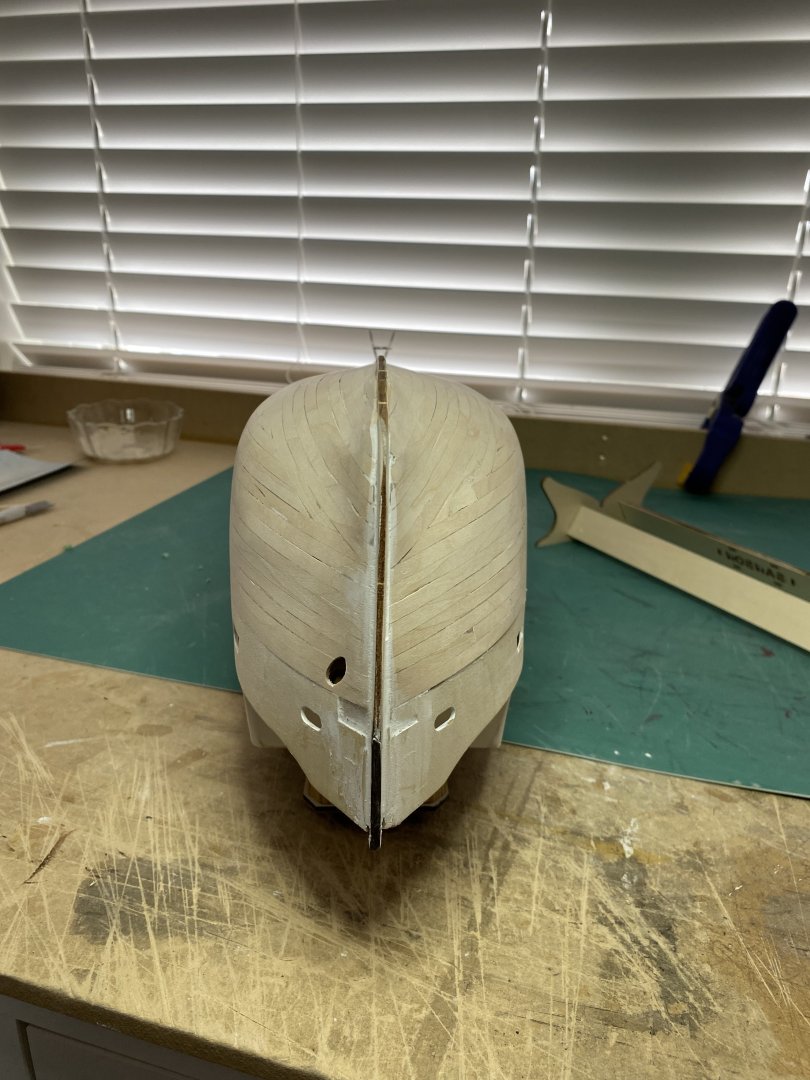
I have done the first heavy sanding with 120 grit, 180 grit and a final with 220 grit. There are some areas that will need filler and more sanding. I did manage to snap off a piece of the keel where the rudder post will mount. Used a piece of scrap from the kit and made a new one. I have said before and will say again, this kit should have an instruction book and the build sequence should be modified. I have still not heard back from AL with my concerns about this model

- 68 replies
-
- 5
-
-
- Sanson
- Artesania Latina
- (and 2 more)
-
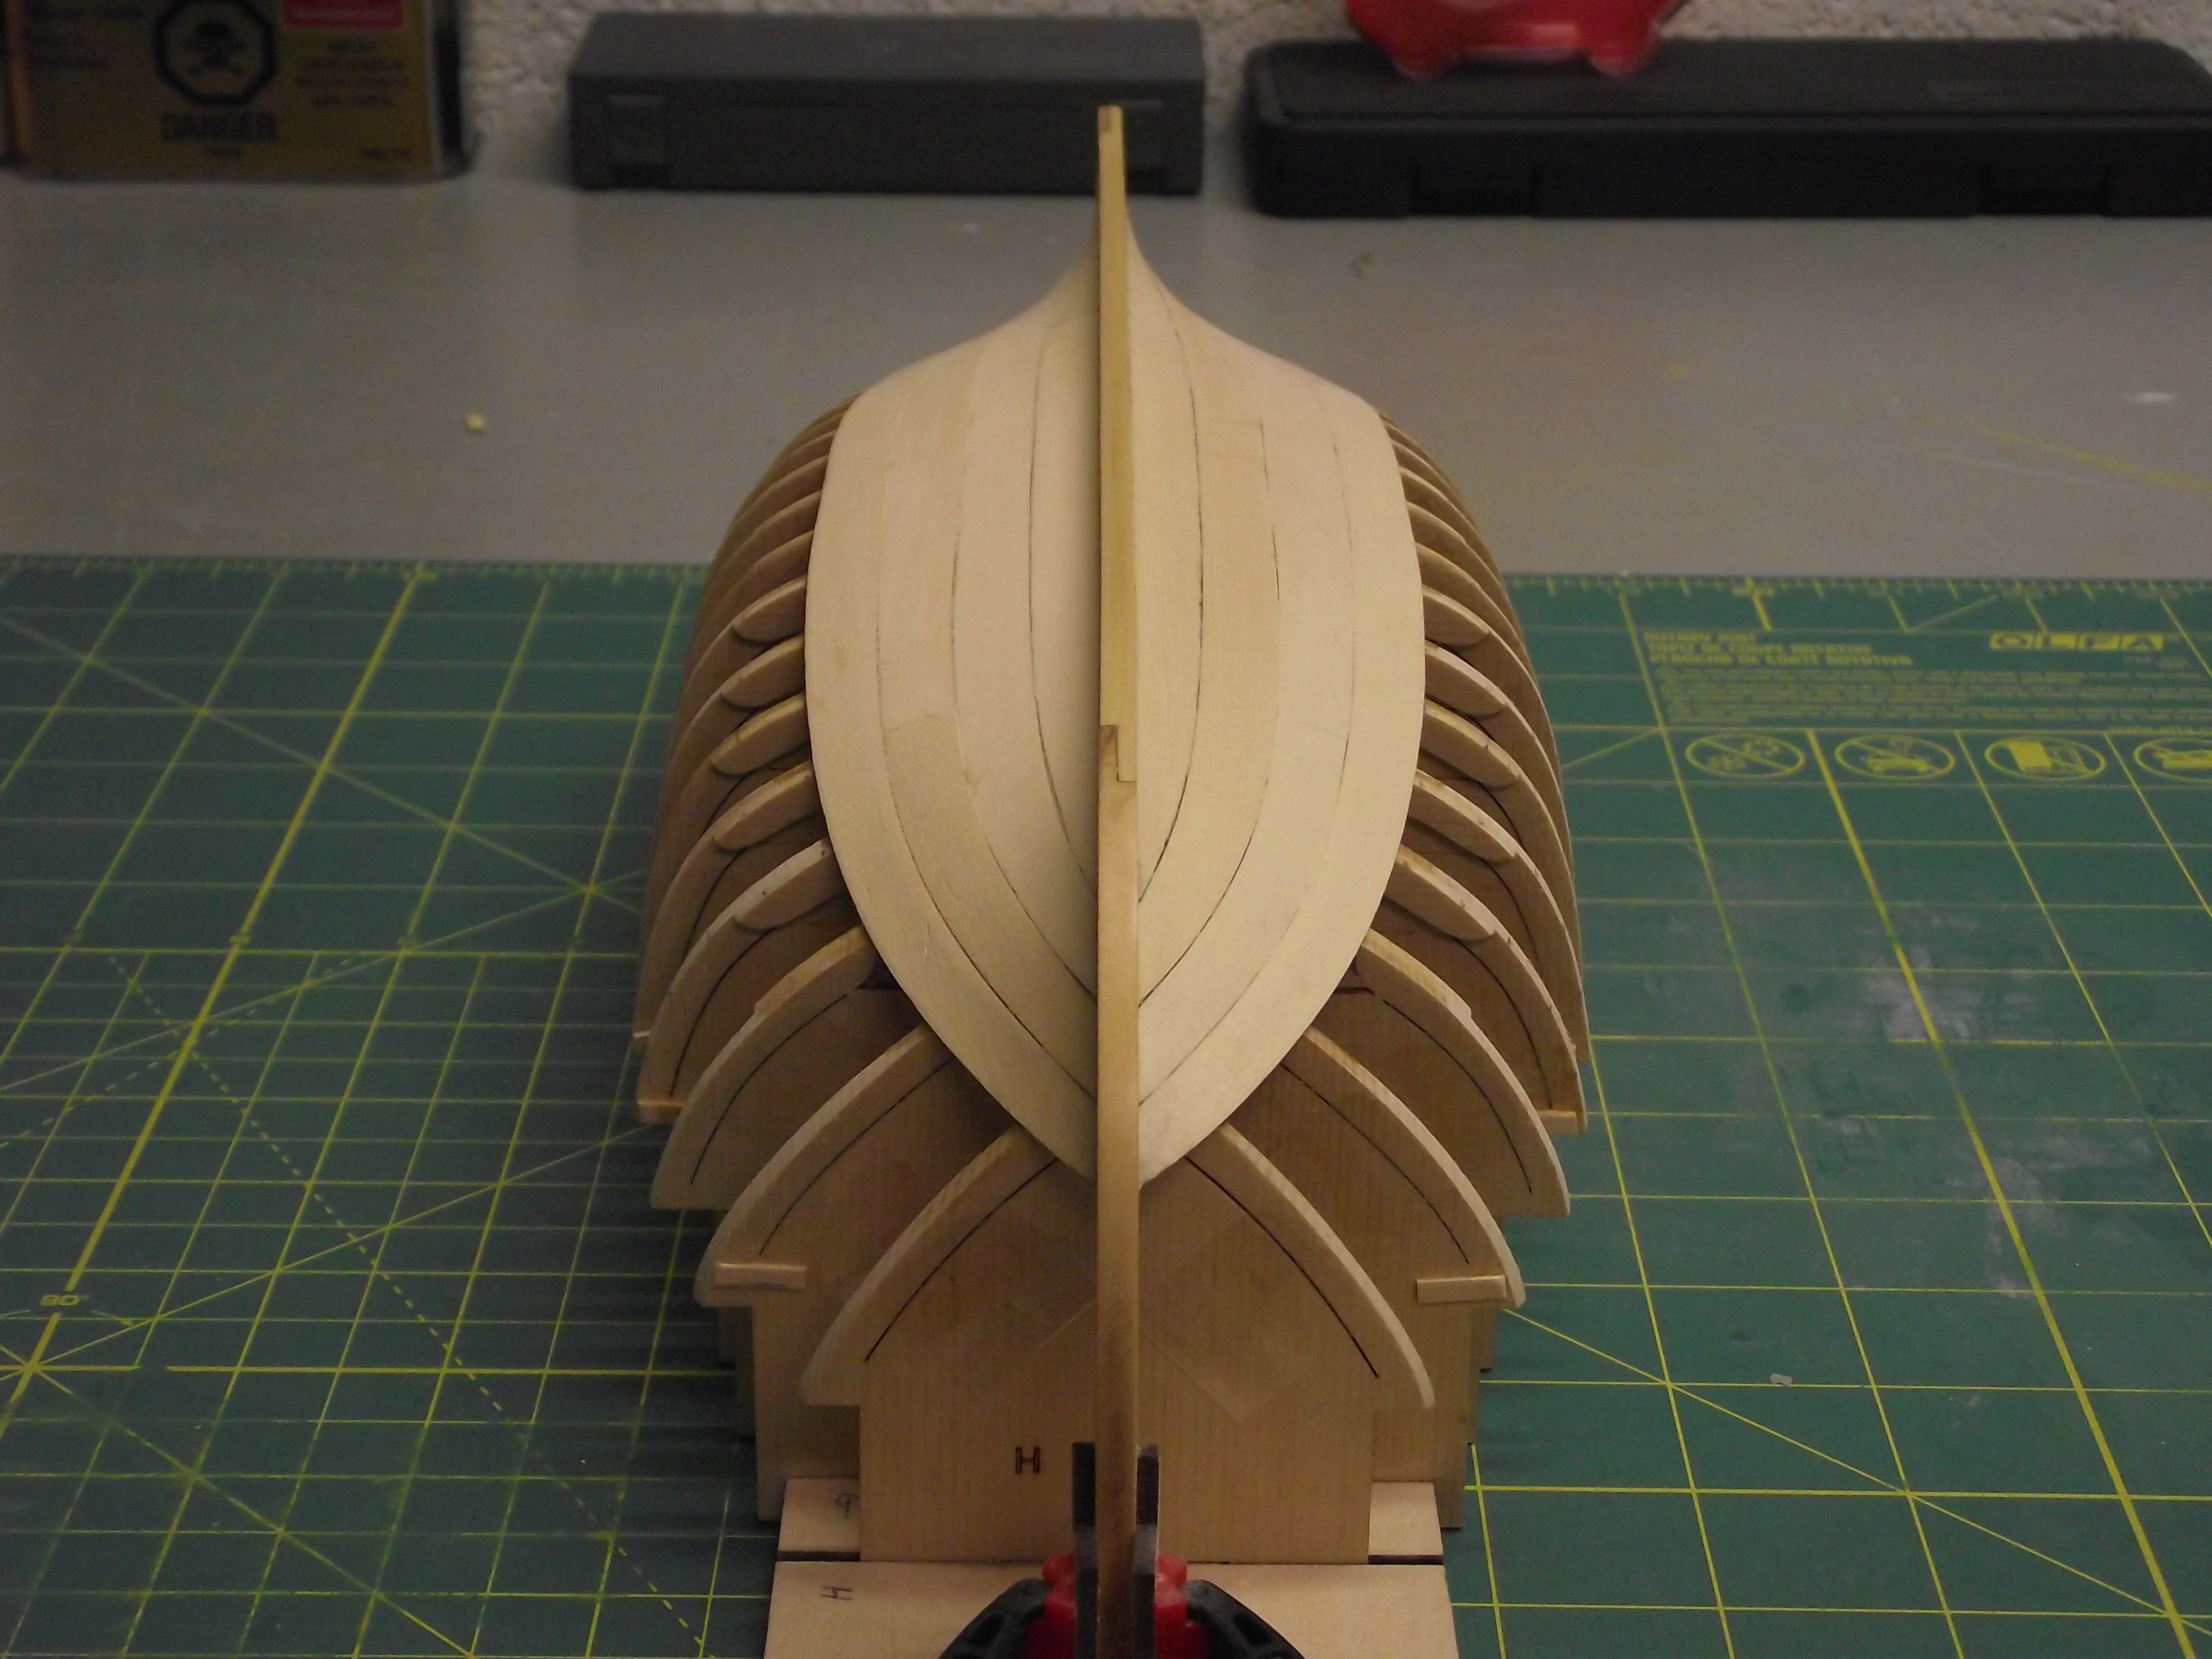
And then there was one. Tonight I finished the planking on this project. It came with a lot of frustration and cuss words. The sanding and filling and more sanding will begin tomorrow . It looks rough but the ugly duckling may turn out to be a swan.


- 68 replies
-
- 5
-
-
- Sanson
- Artesania Latina
- (and 2 more)
-
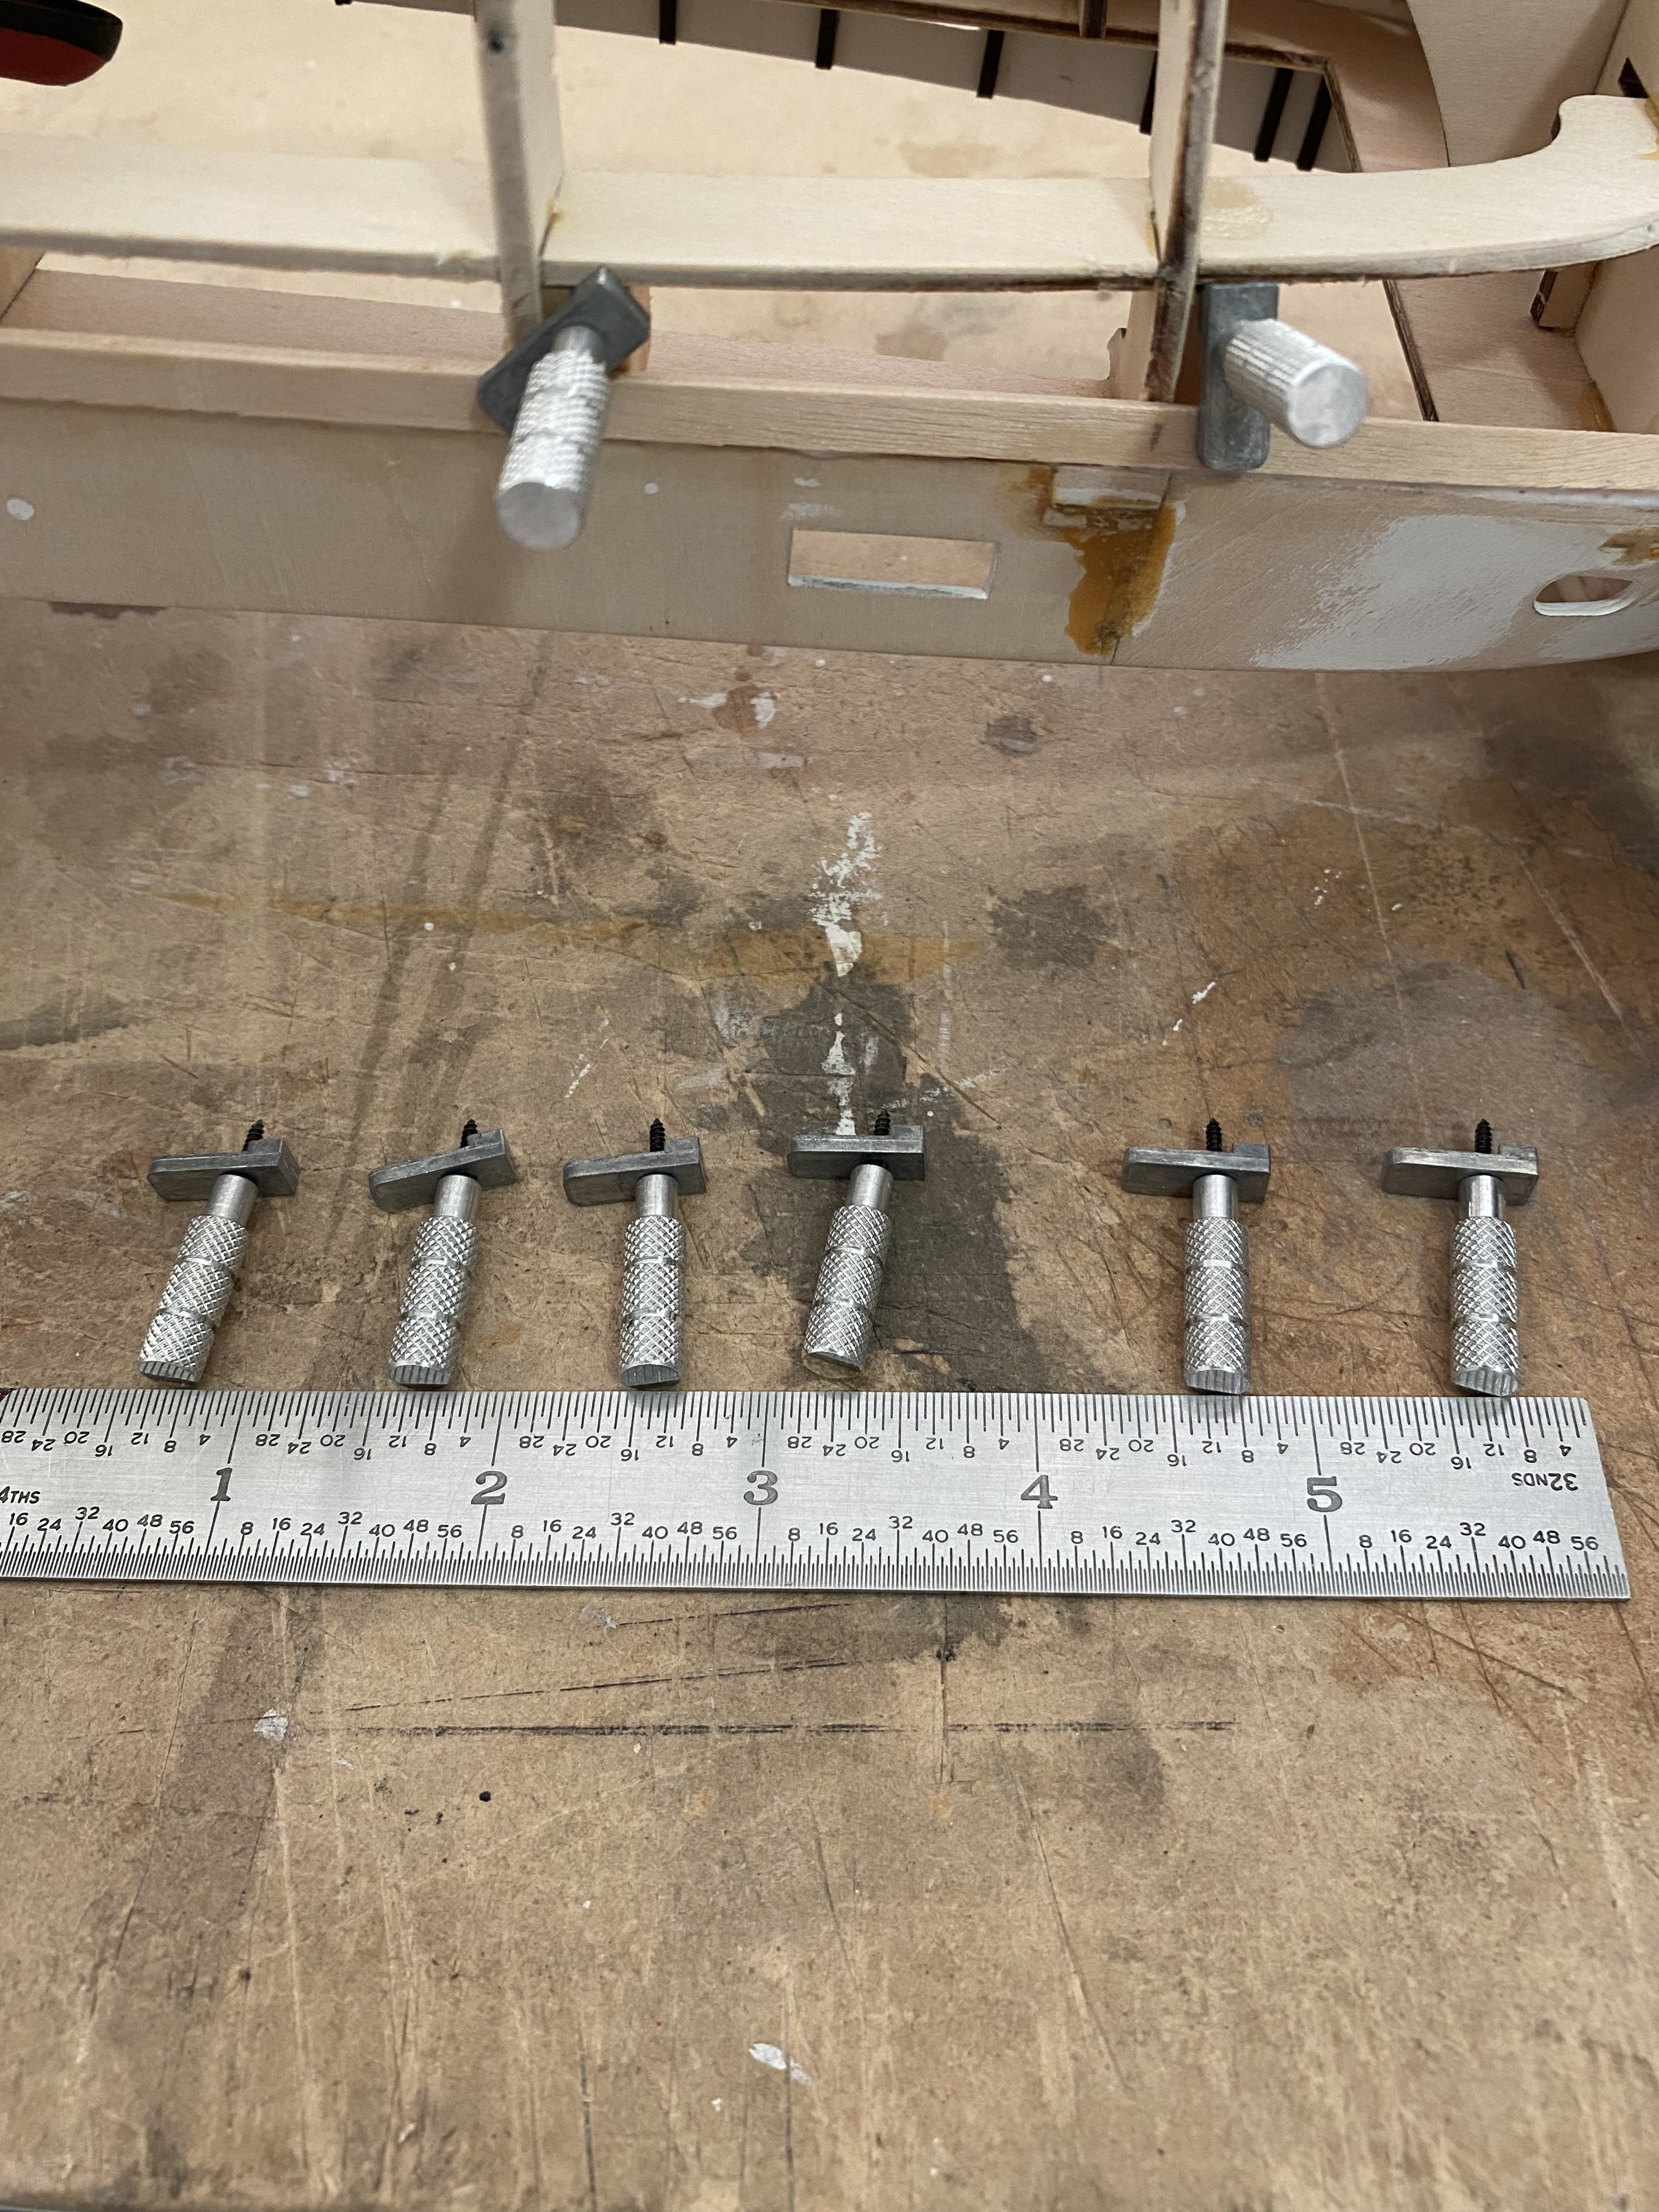
Interesting clamps. Are they still available, I could not find them on the Wolfcraft web site.
-
Help and suggestions needed
Diver replied to Diver's topic in Building, Framing, Planking and plating a ships hull and deck
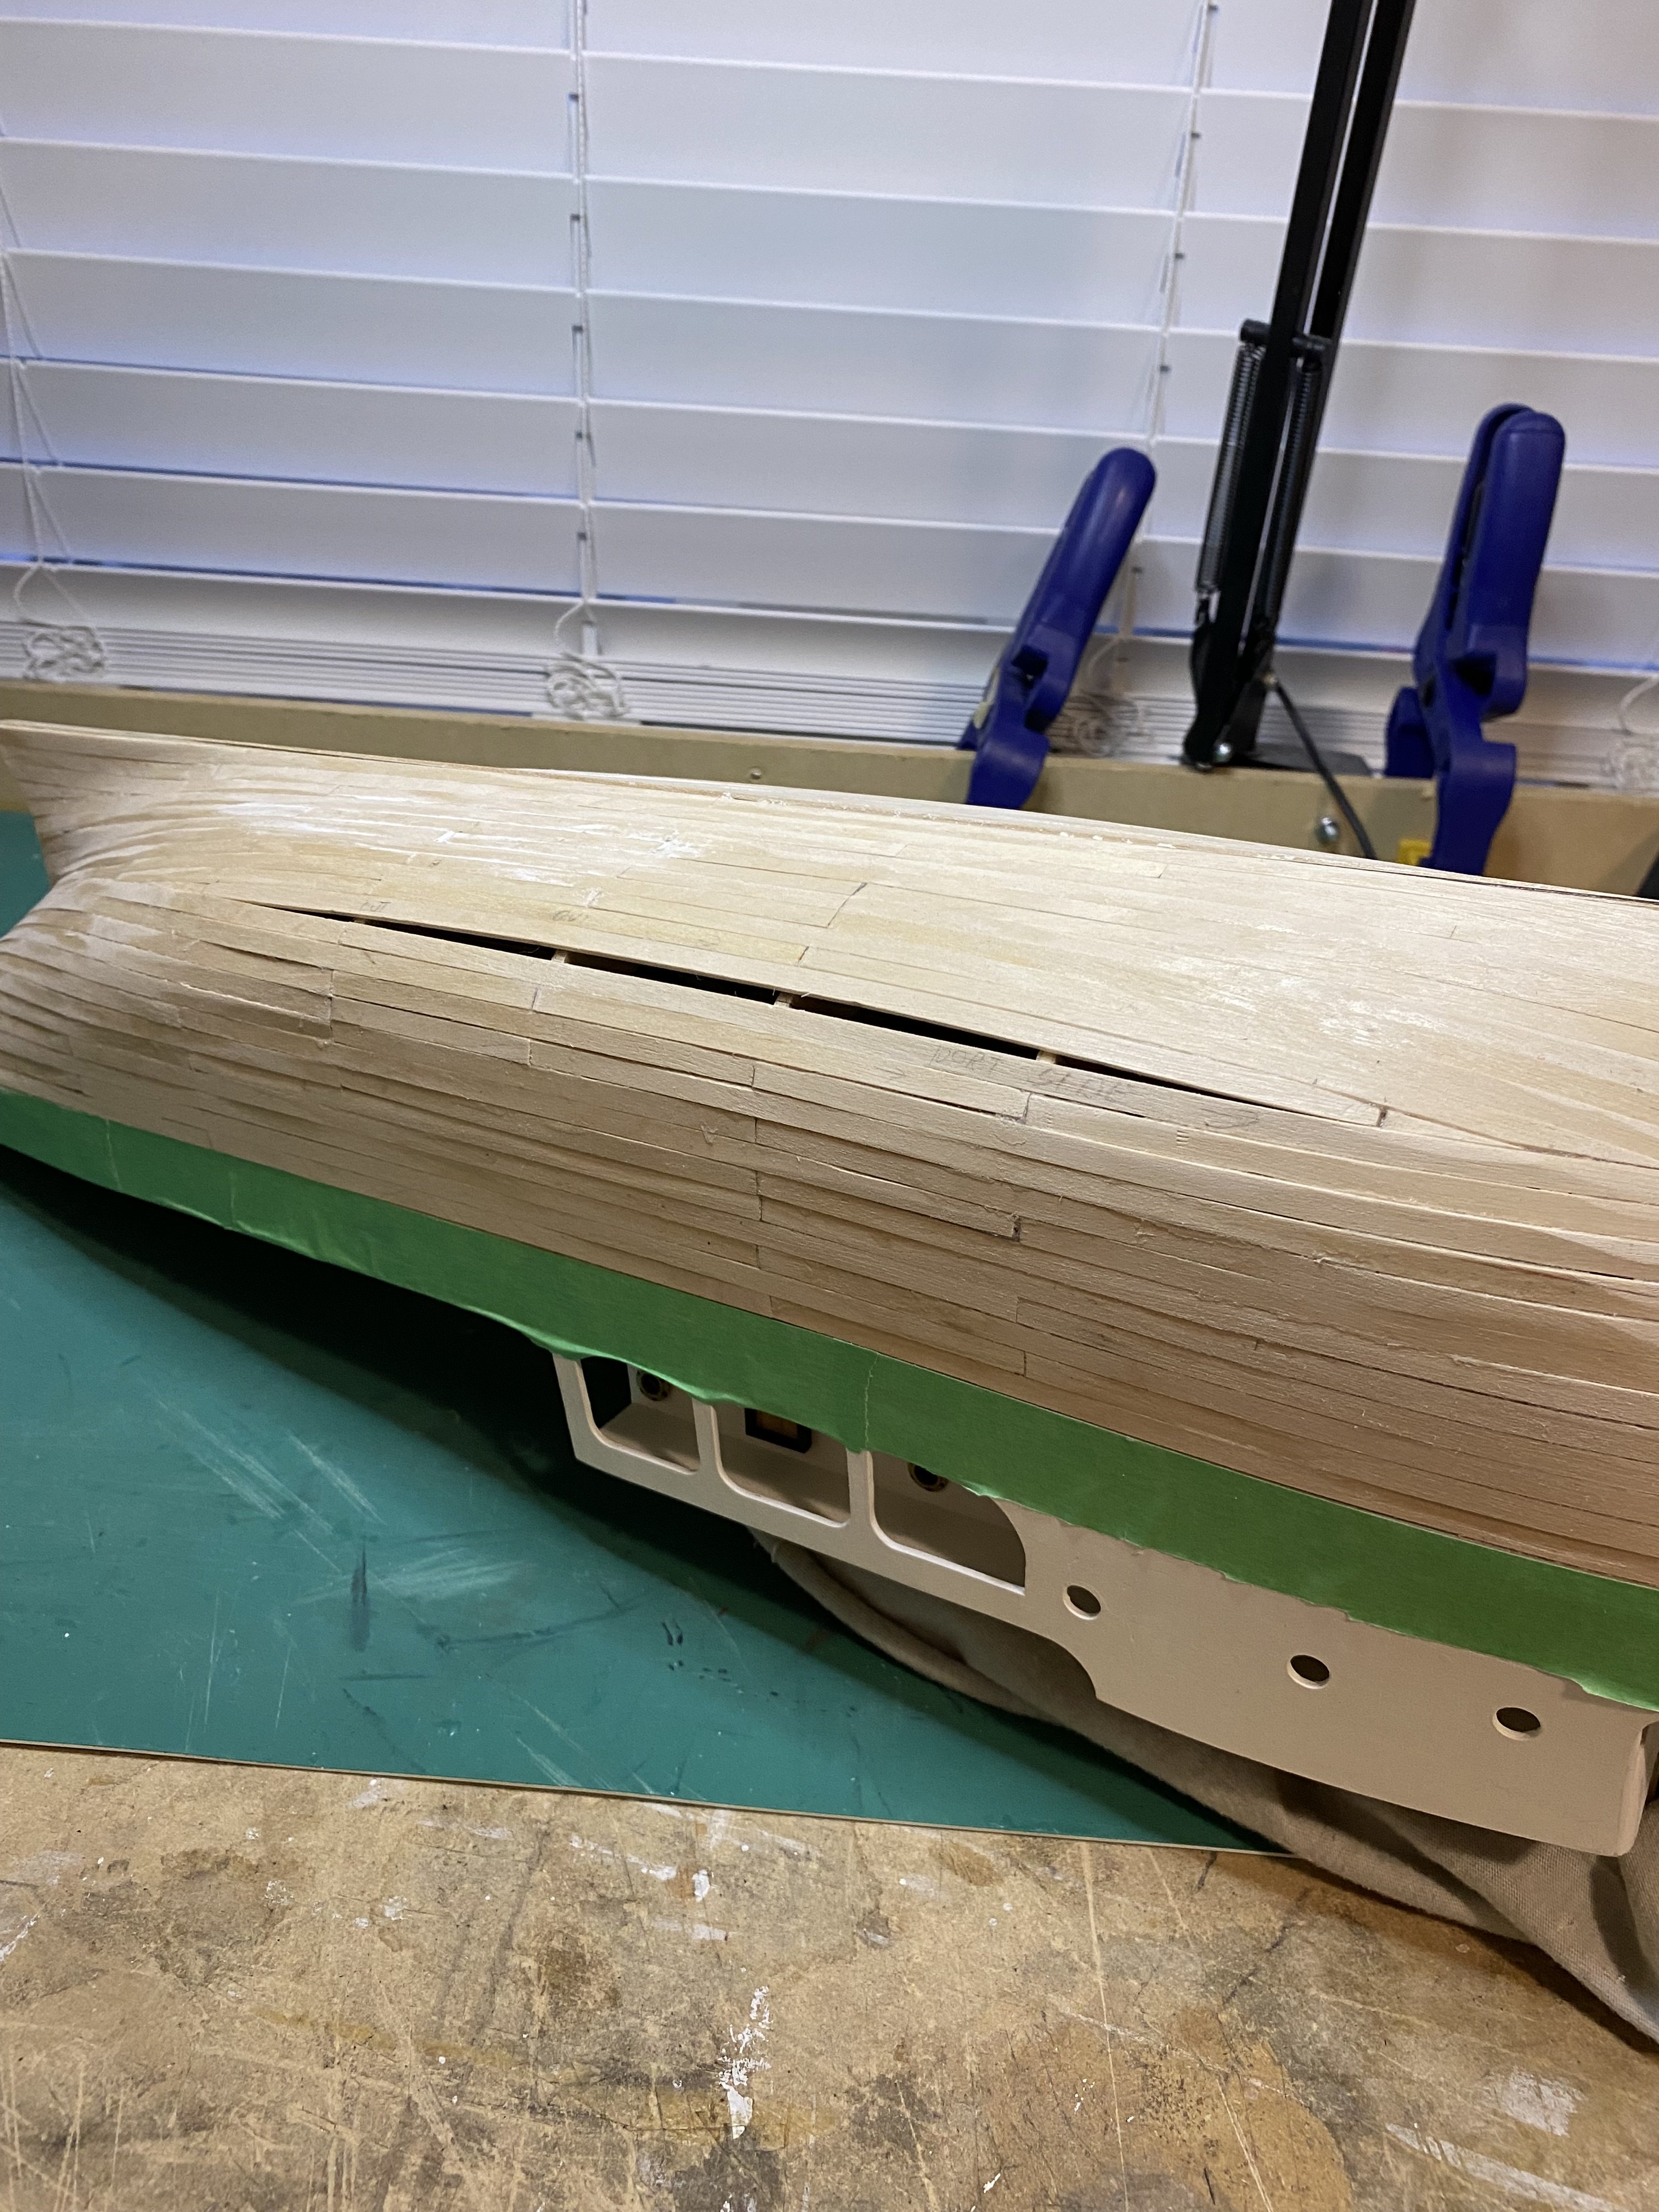
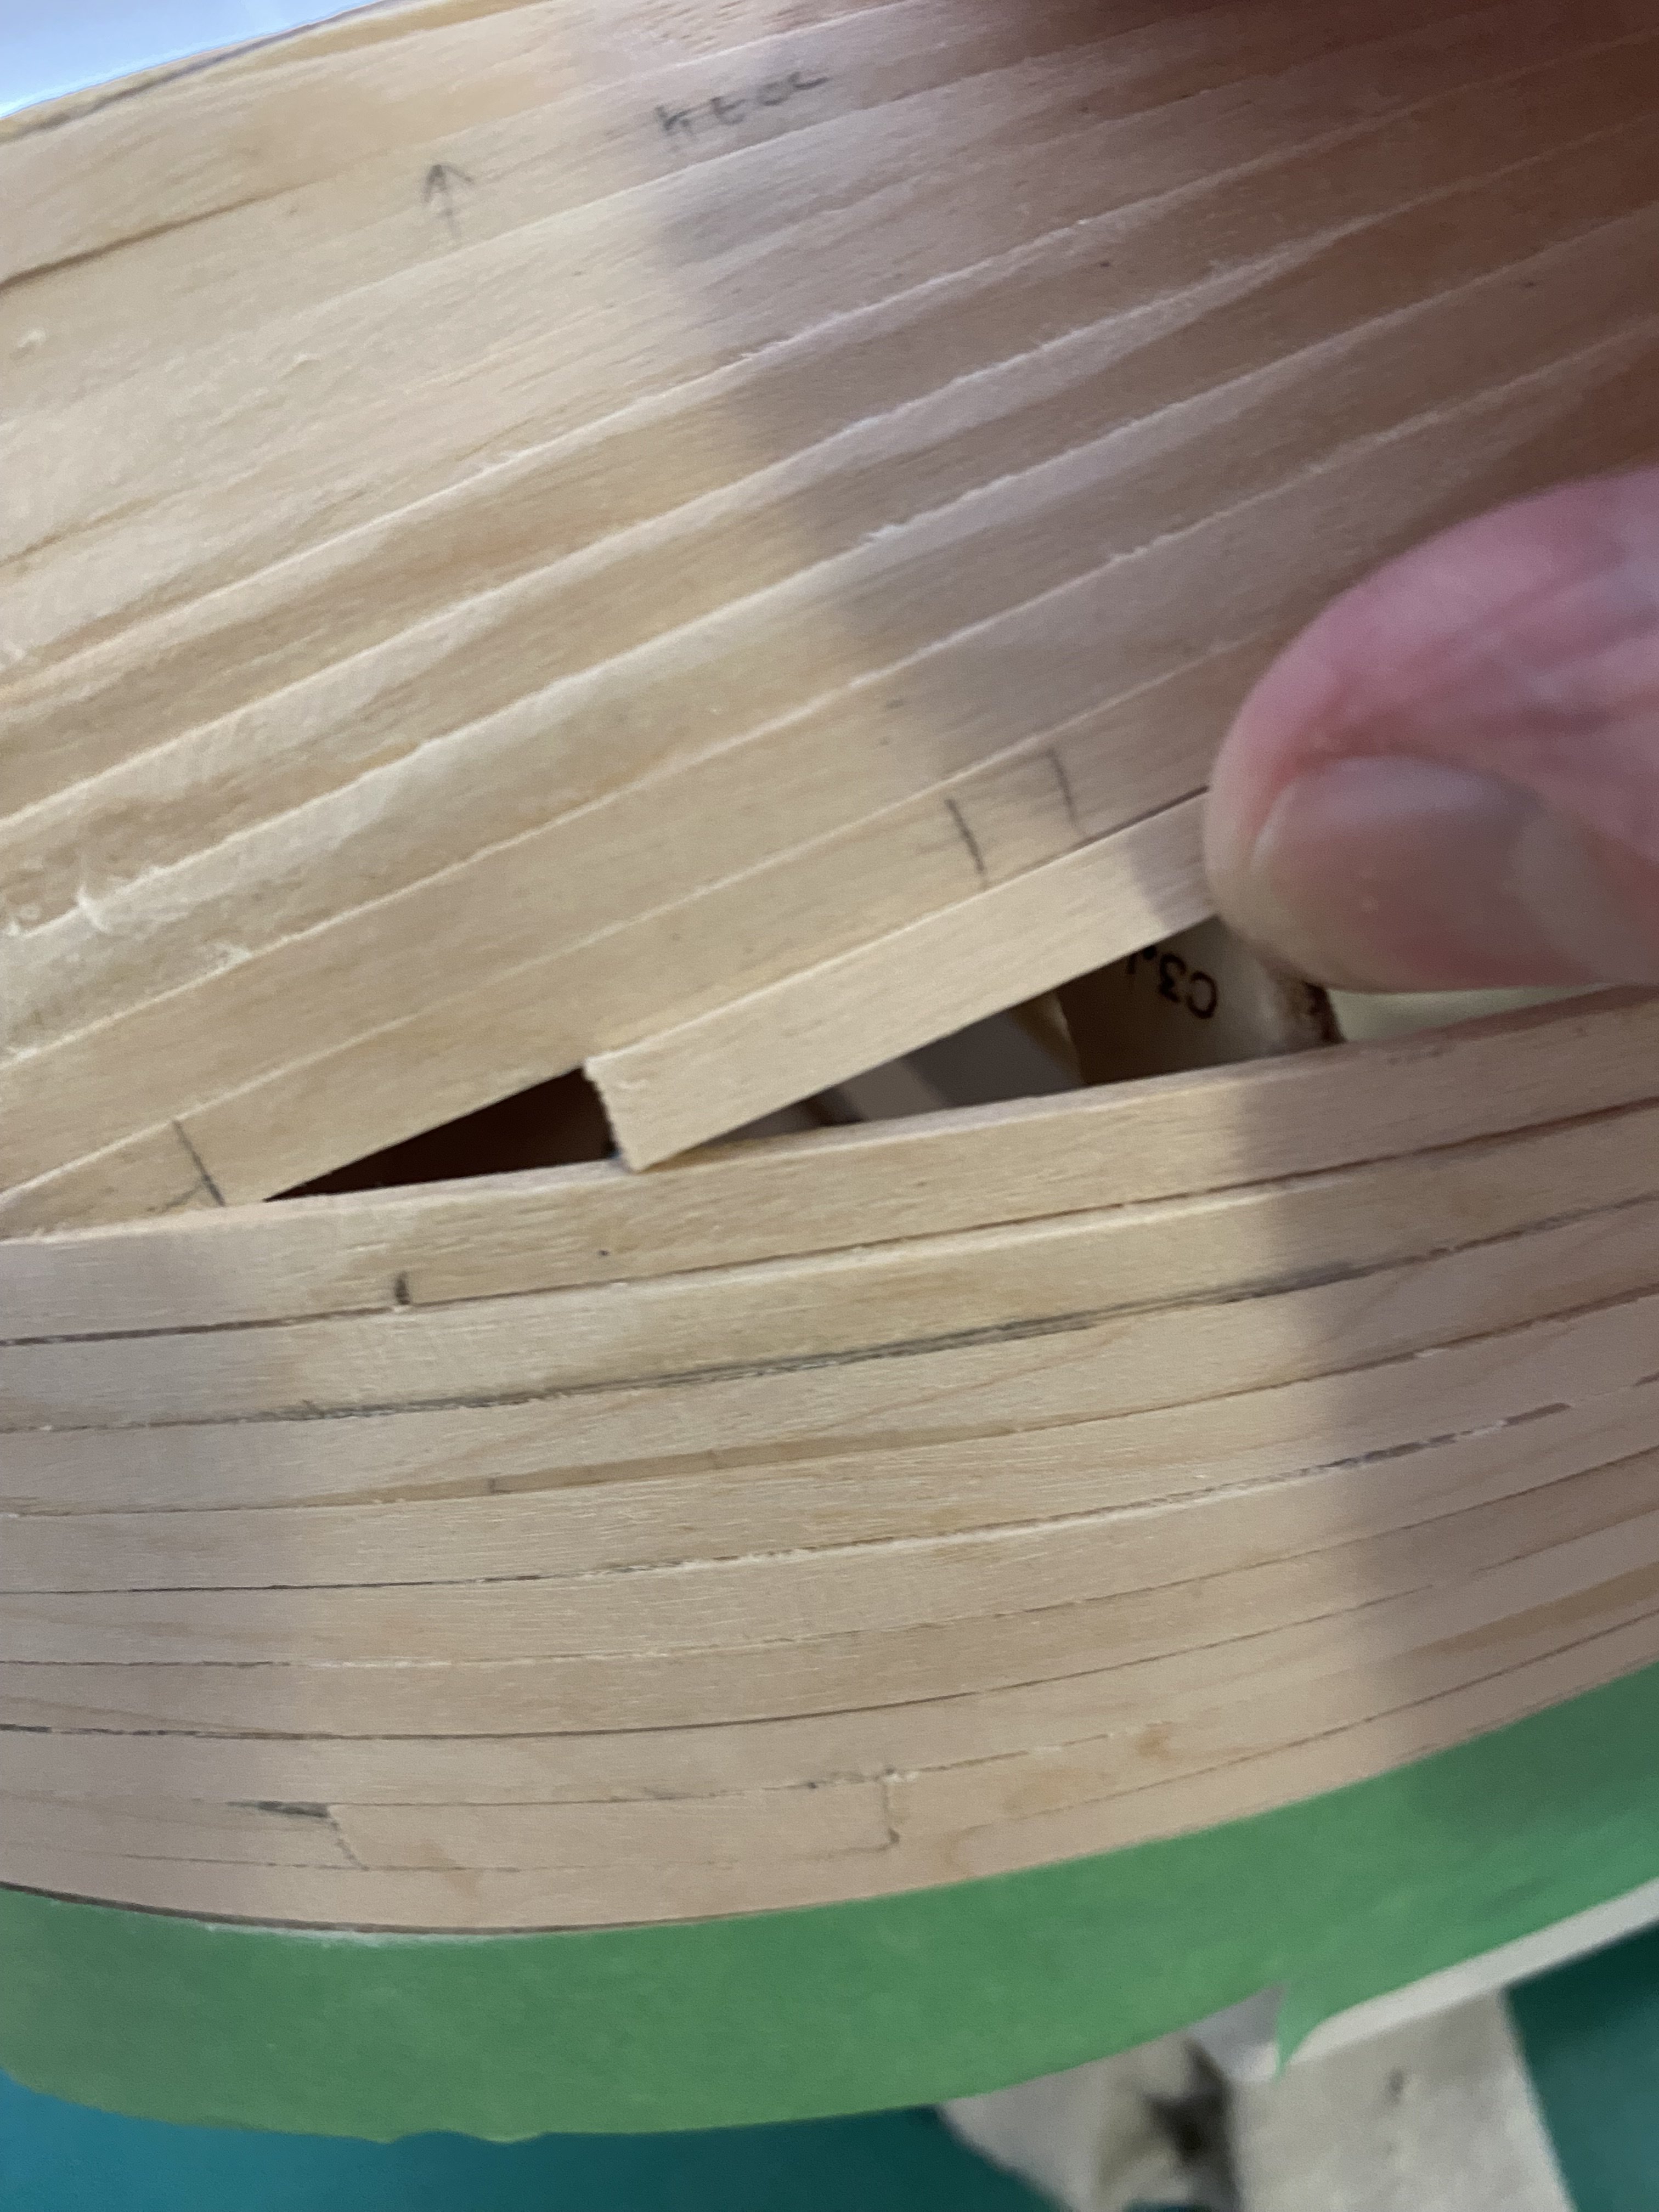
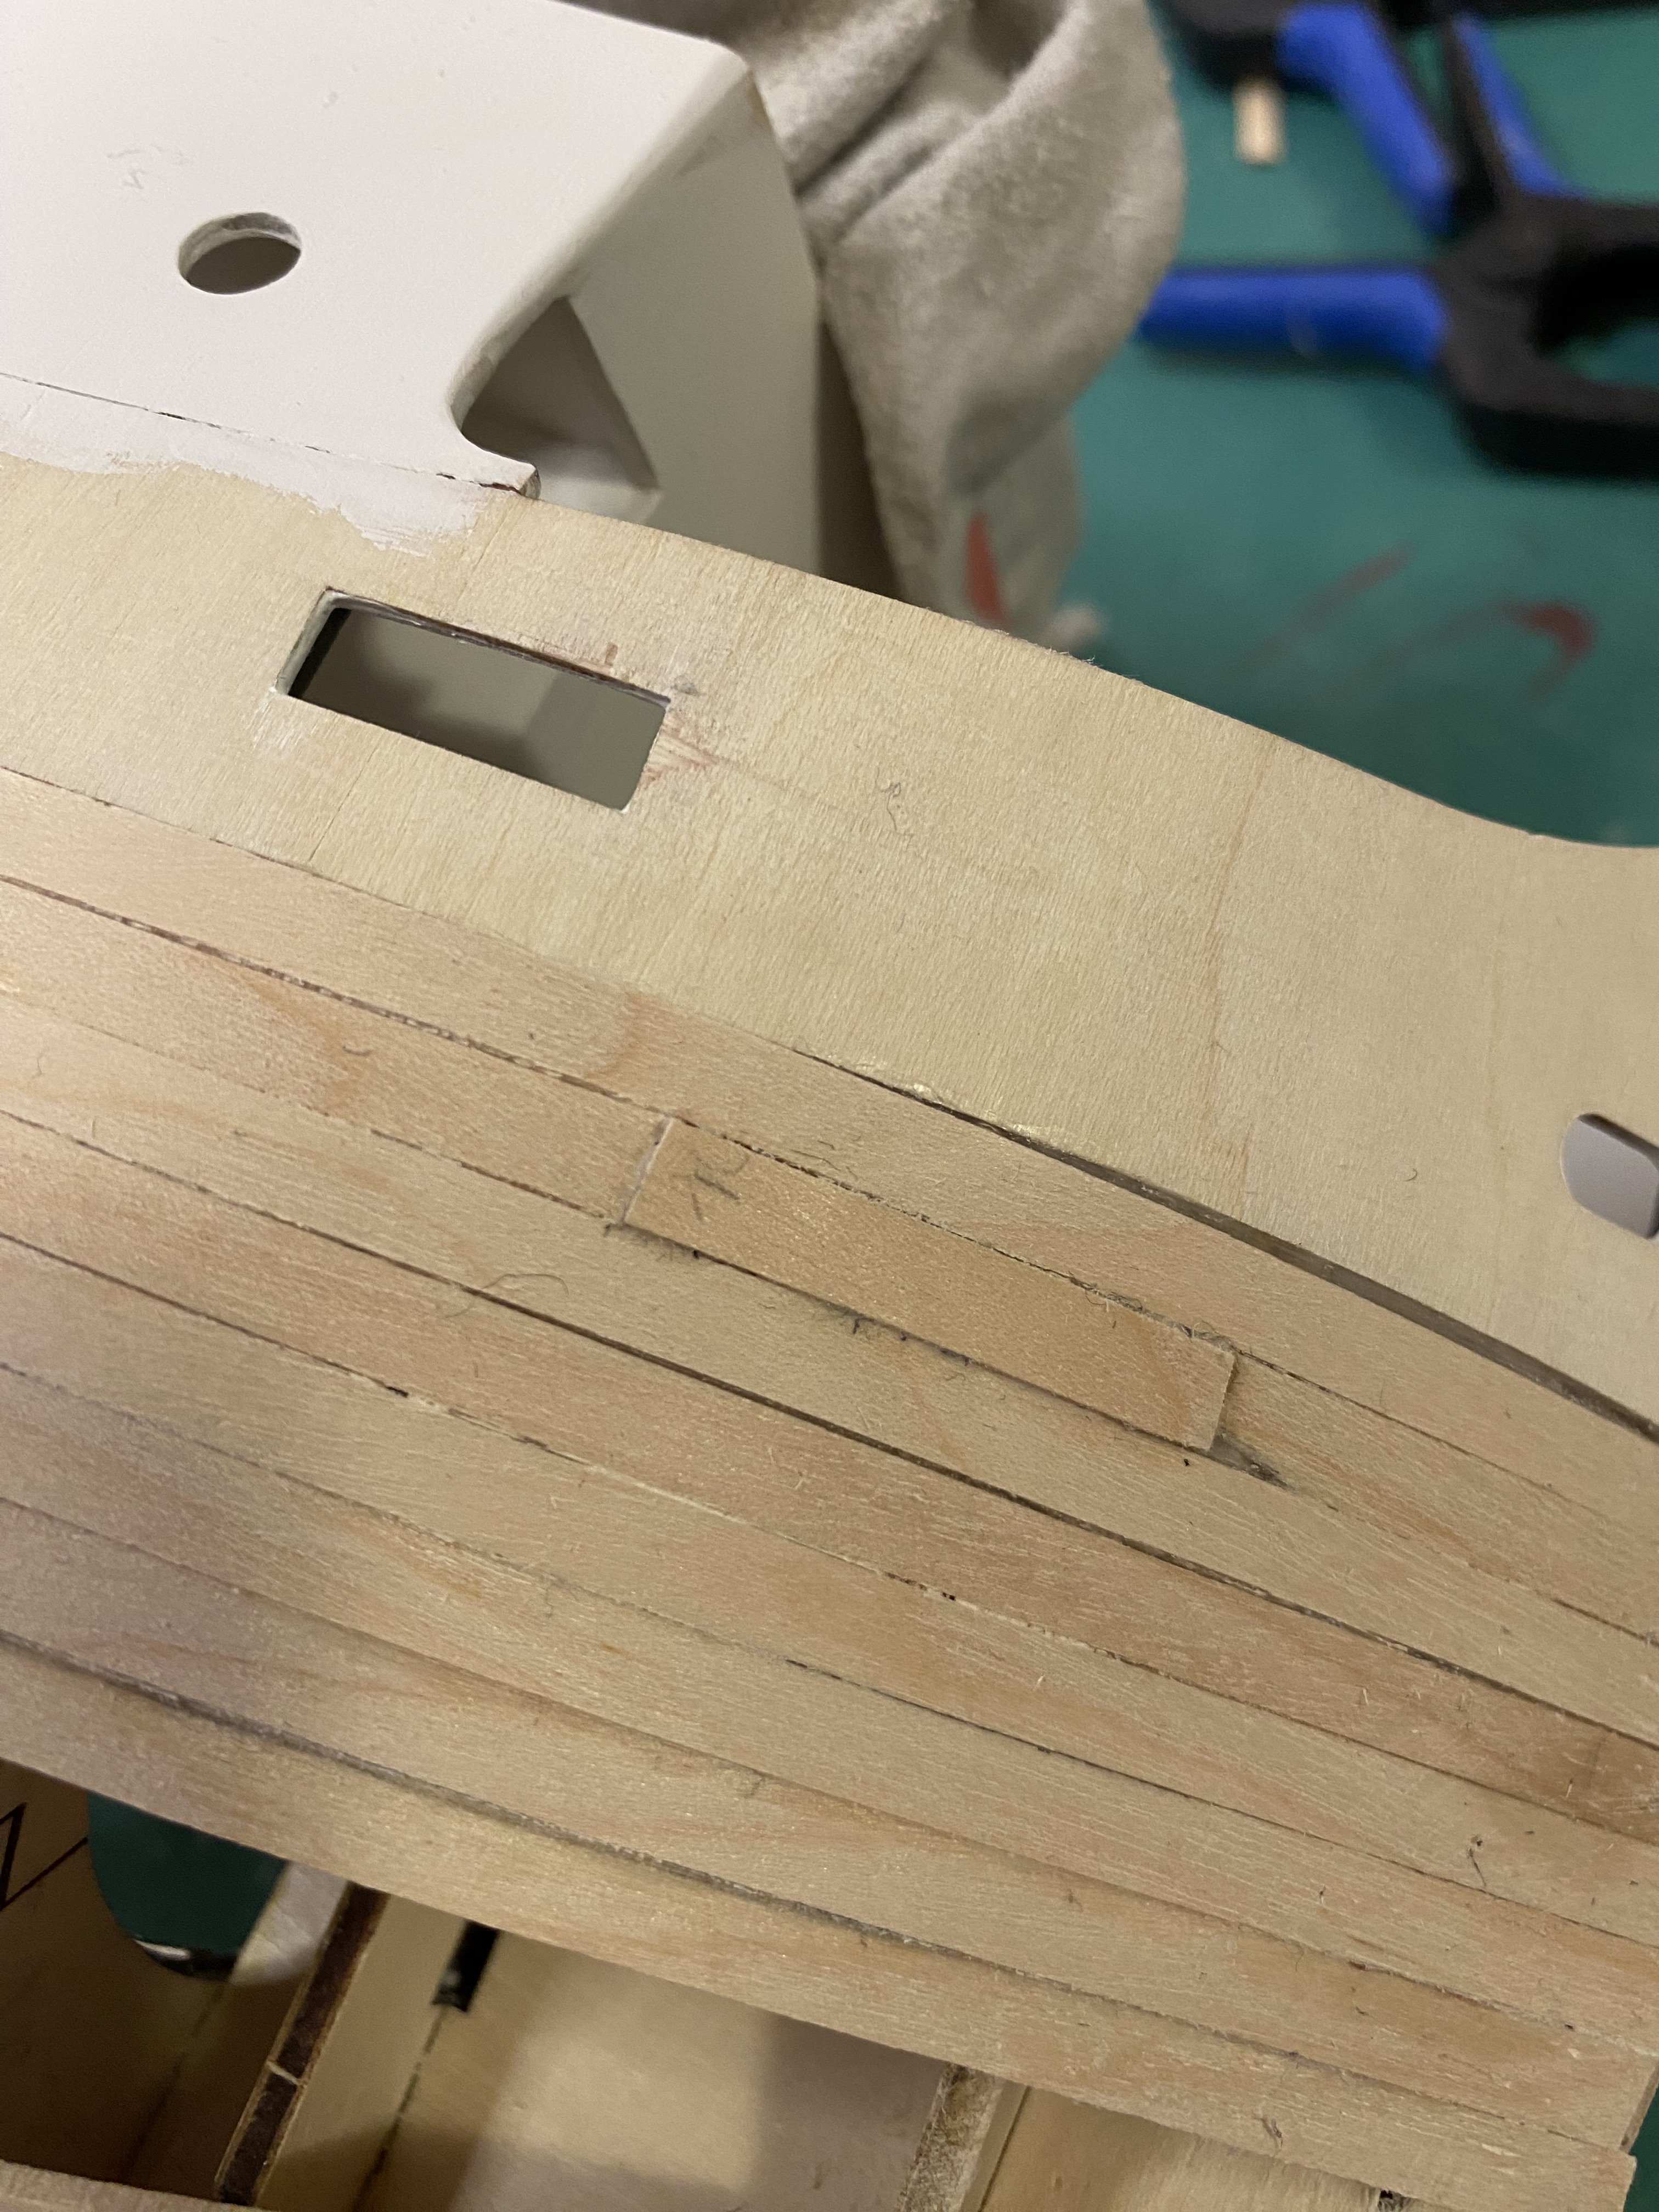
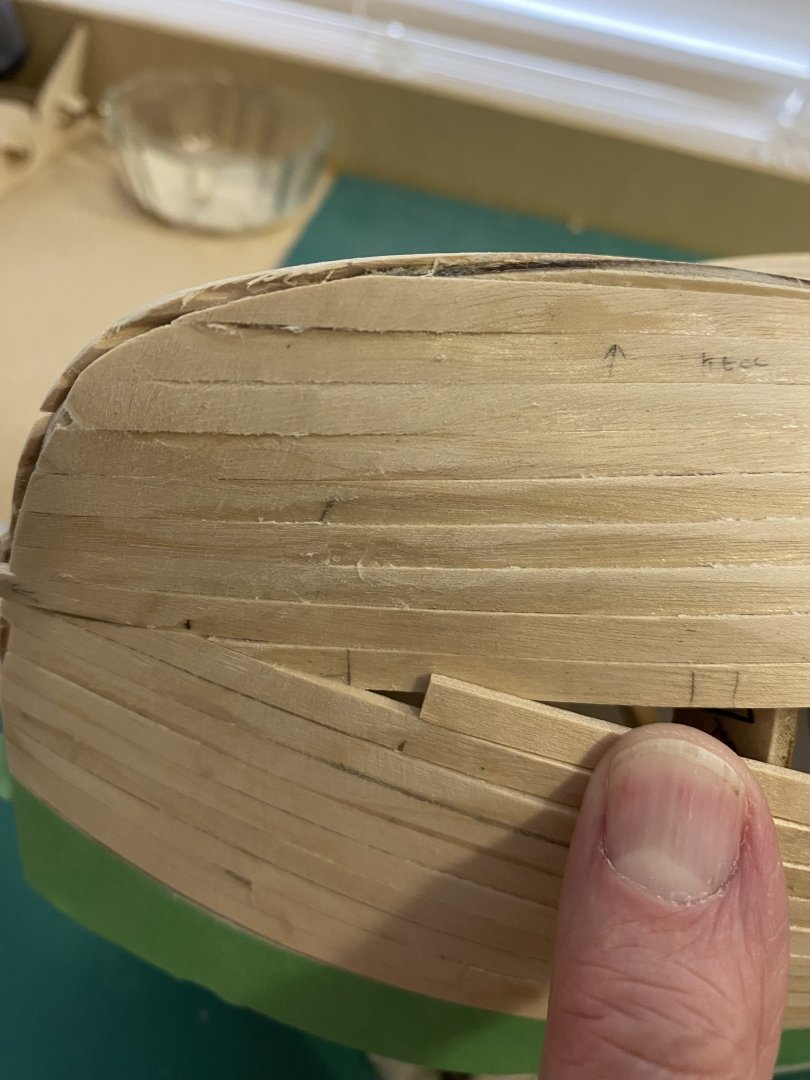
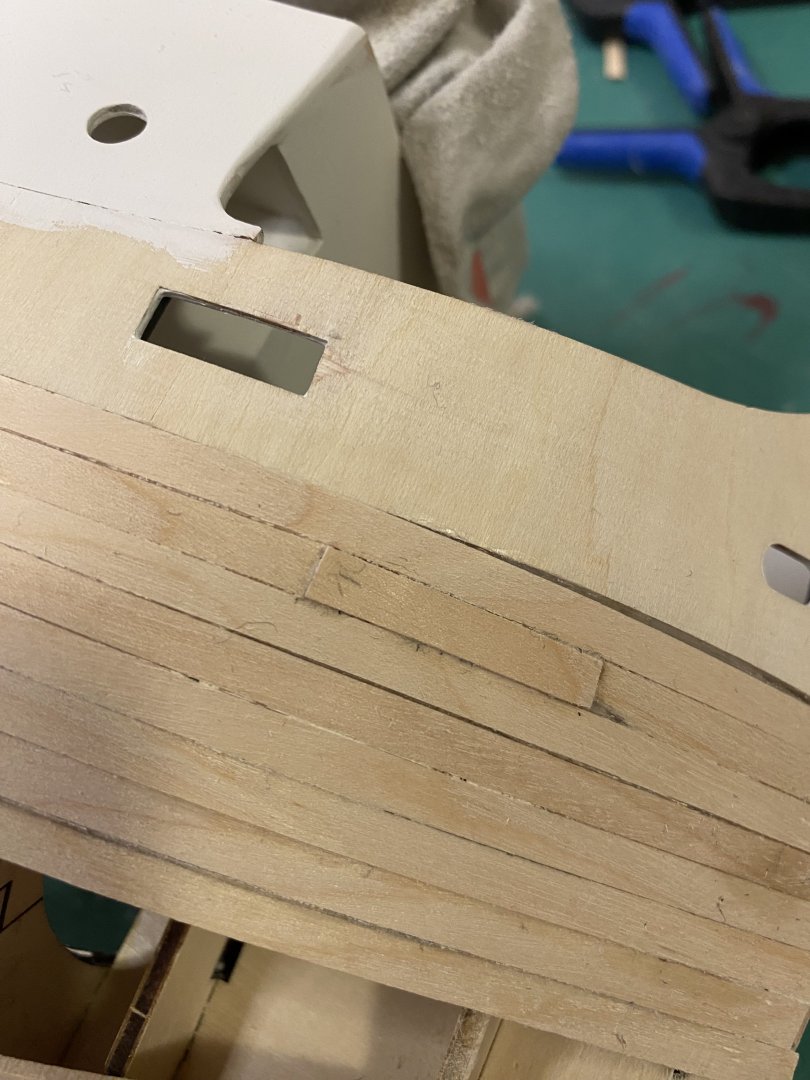
Thanks all for the suggestions and comments. In the end I put a piece of backing behind the mis aligned planks and added a filler made from a wider plank, (popsicles stick). Some sanding was done to get them fare and once filler and final sanding are complete I think it will be OK. Paint should cover any small imperfections.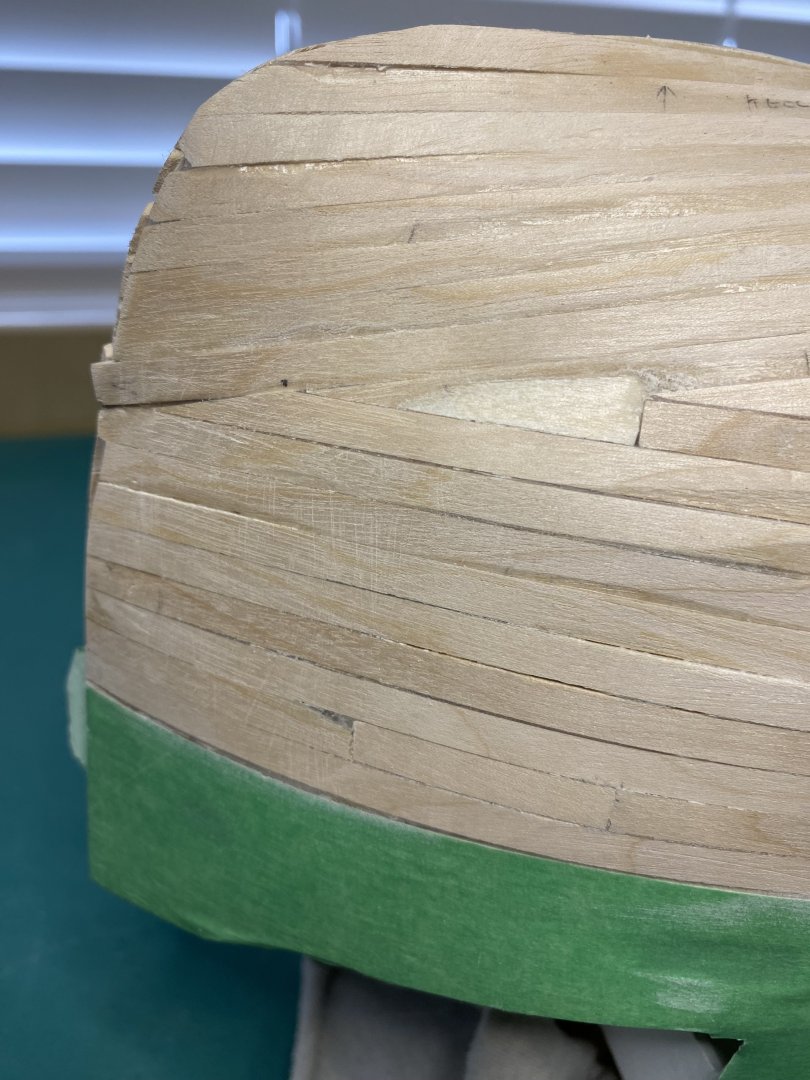
-
Help and suggestions needed
Diver replied to Diver's topic in Building, Framing, Planking and plating a ships hull and deck
I did not spile any of the planks on this hull. I followed the AL instructions which in hind sight was a mistake. They do not even mention to put a bevel on one side of the planks, which I did. I would not have installed the deckhouse and gunwales and would have only temporary installed the deck. Planking this hull has been a test of patience. -
Help and suggestions needed
Diver replied to Diver's topic in Building, Framing, Planking and plating a ships hull and deck
This kit is single planked. I strongly believe that it should have been double planked. -
Help and suggestions needed
Diver replied to Diver's topic in Building, Framing, Planking and plating a ships hull and deck
Thanks for that. I have used Chucks planking fan and tick marks on the Syren Medway. In hind sight, I would not have followed the AL instructions, I would have done it Chucks way. I do not want to totally strip this planking, thinking of adding a filler and try to blend it all together. -
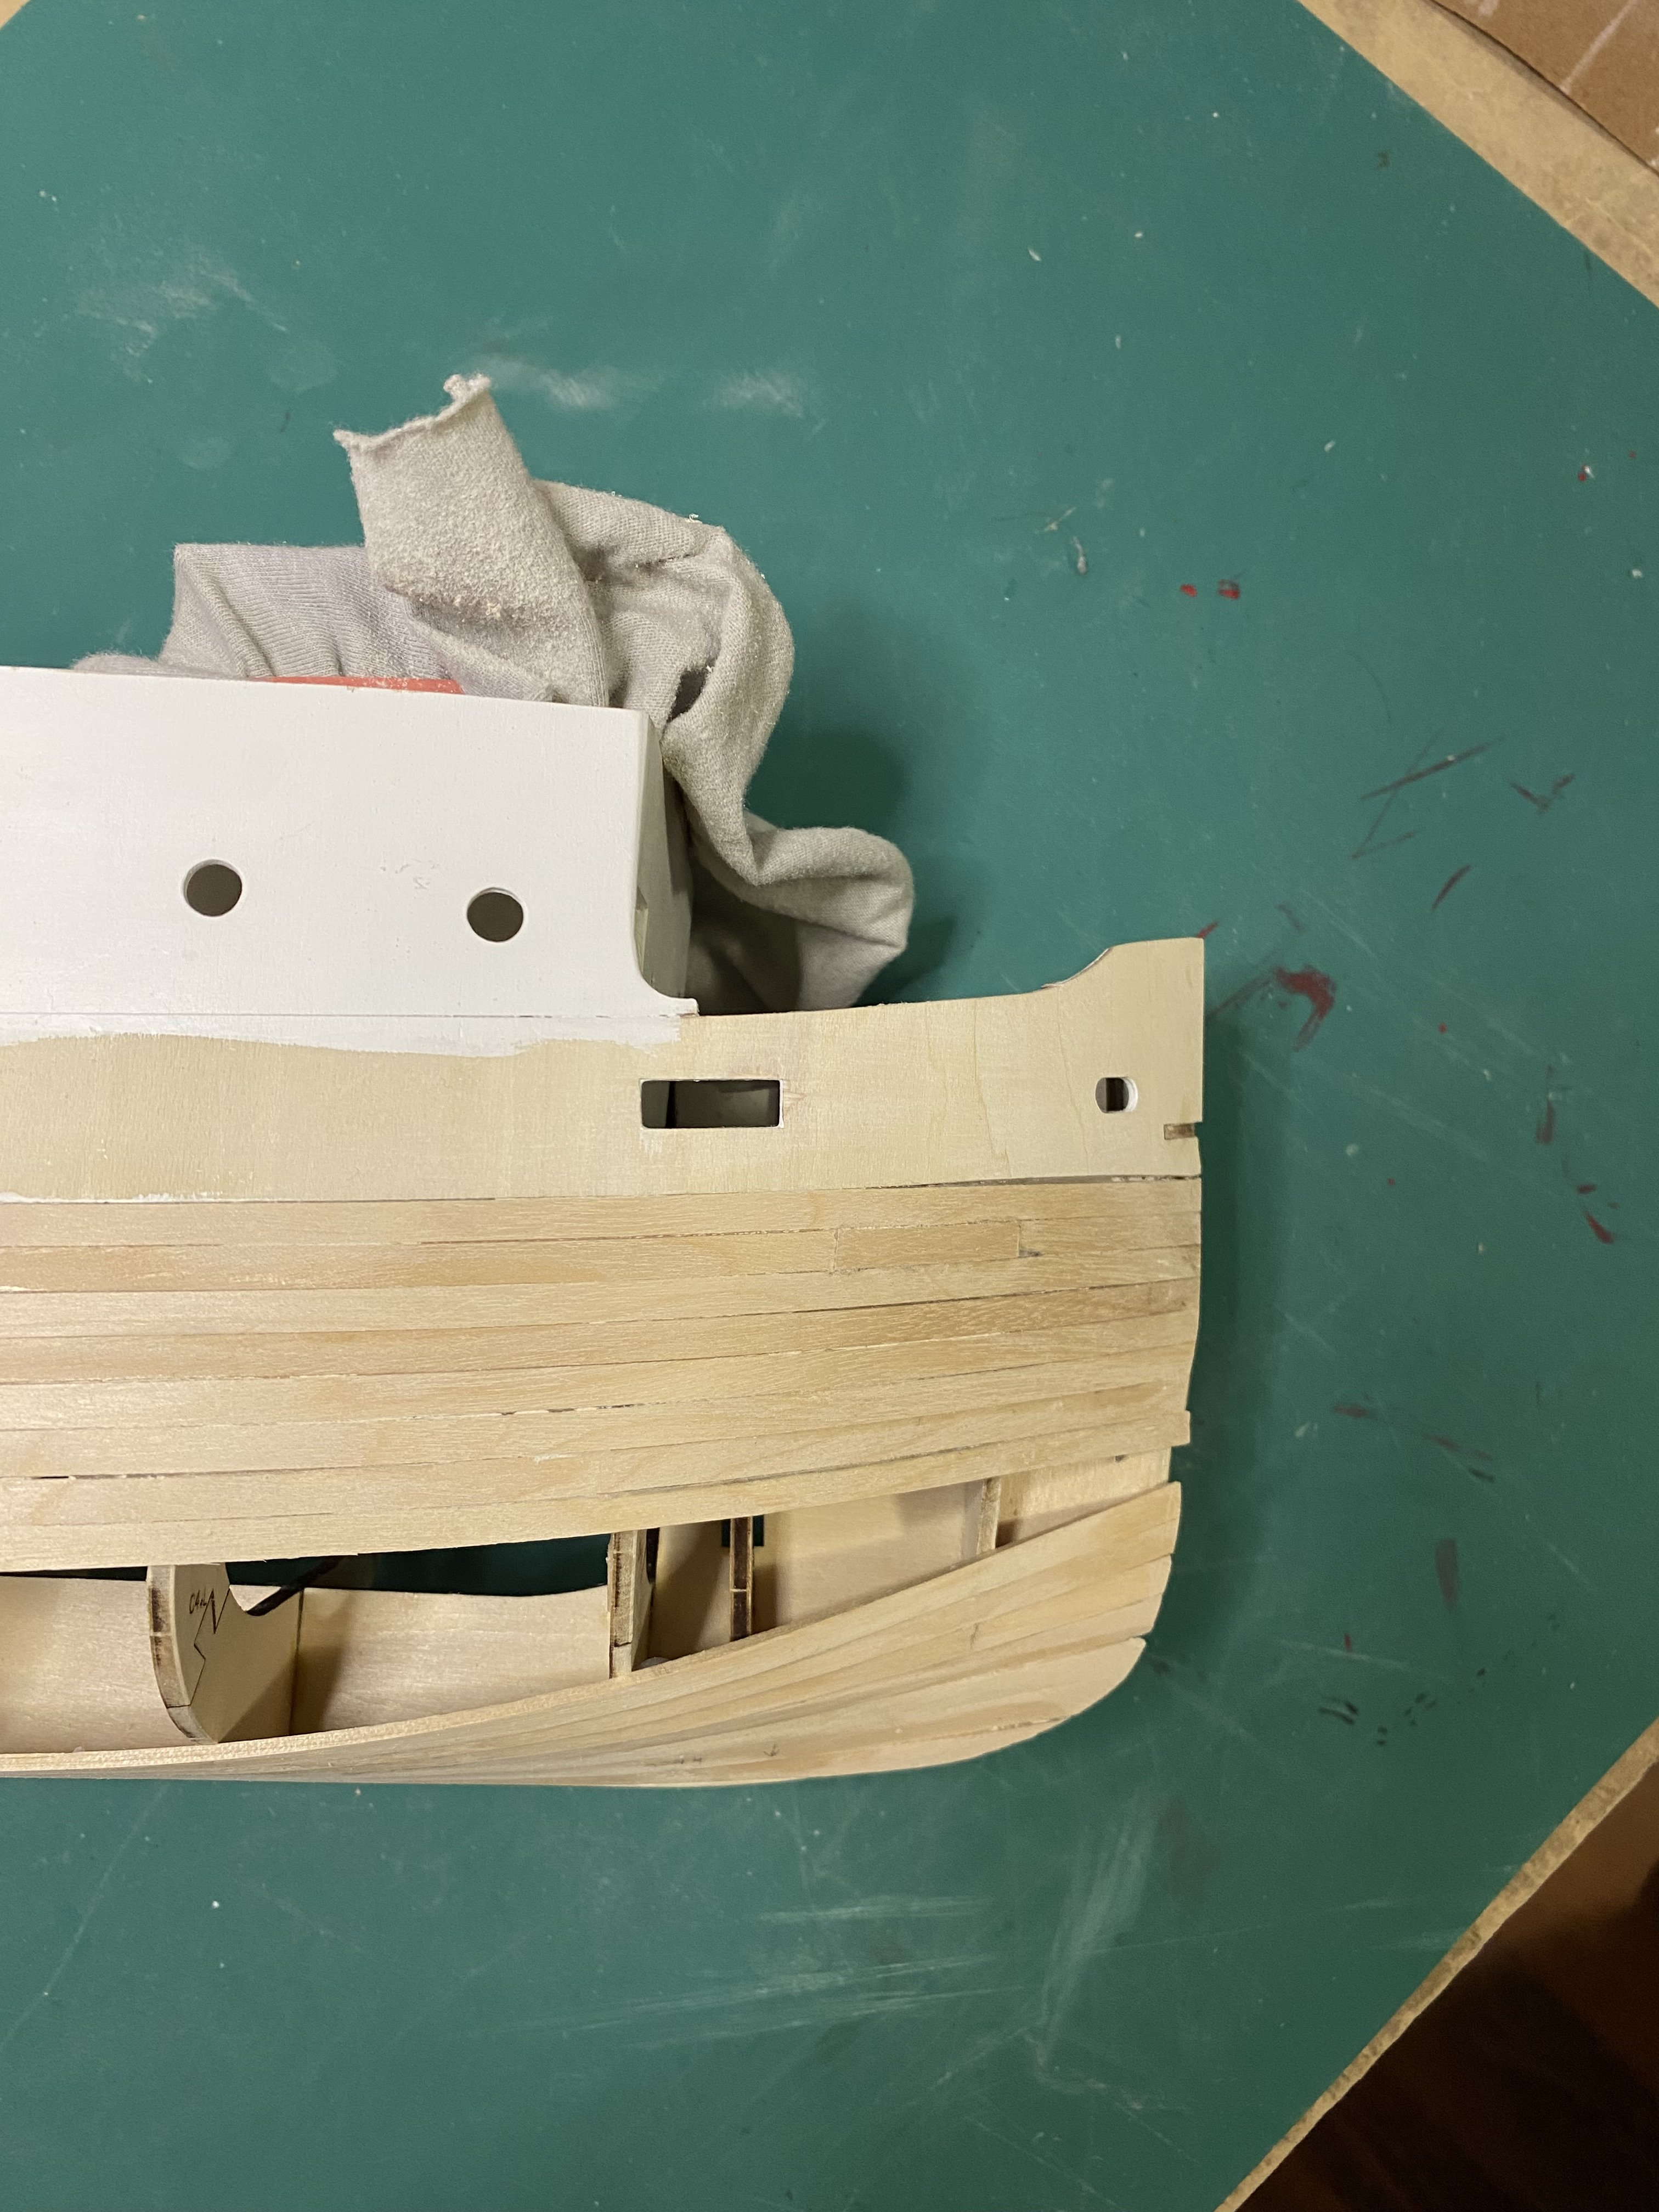
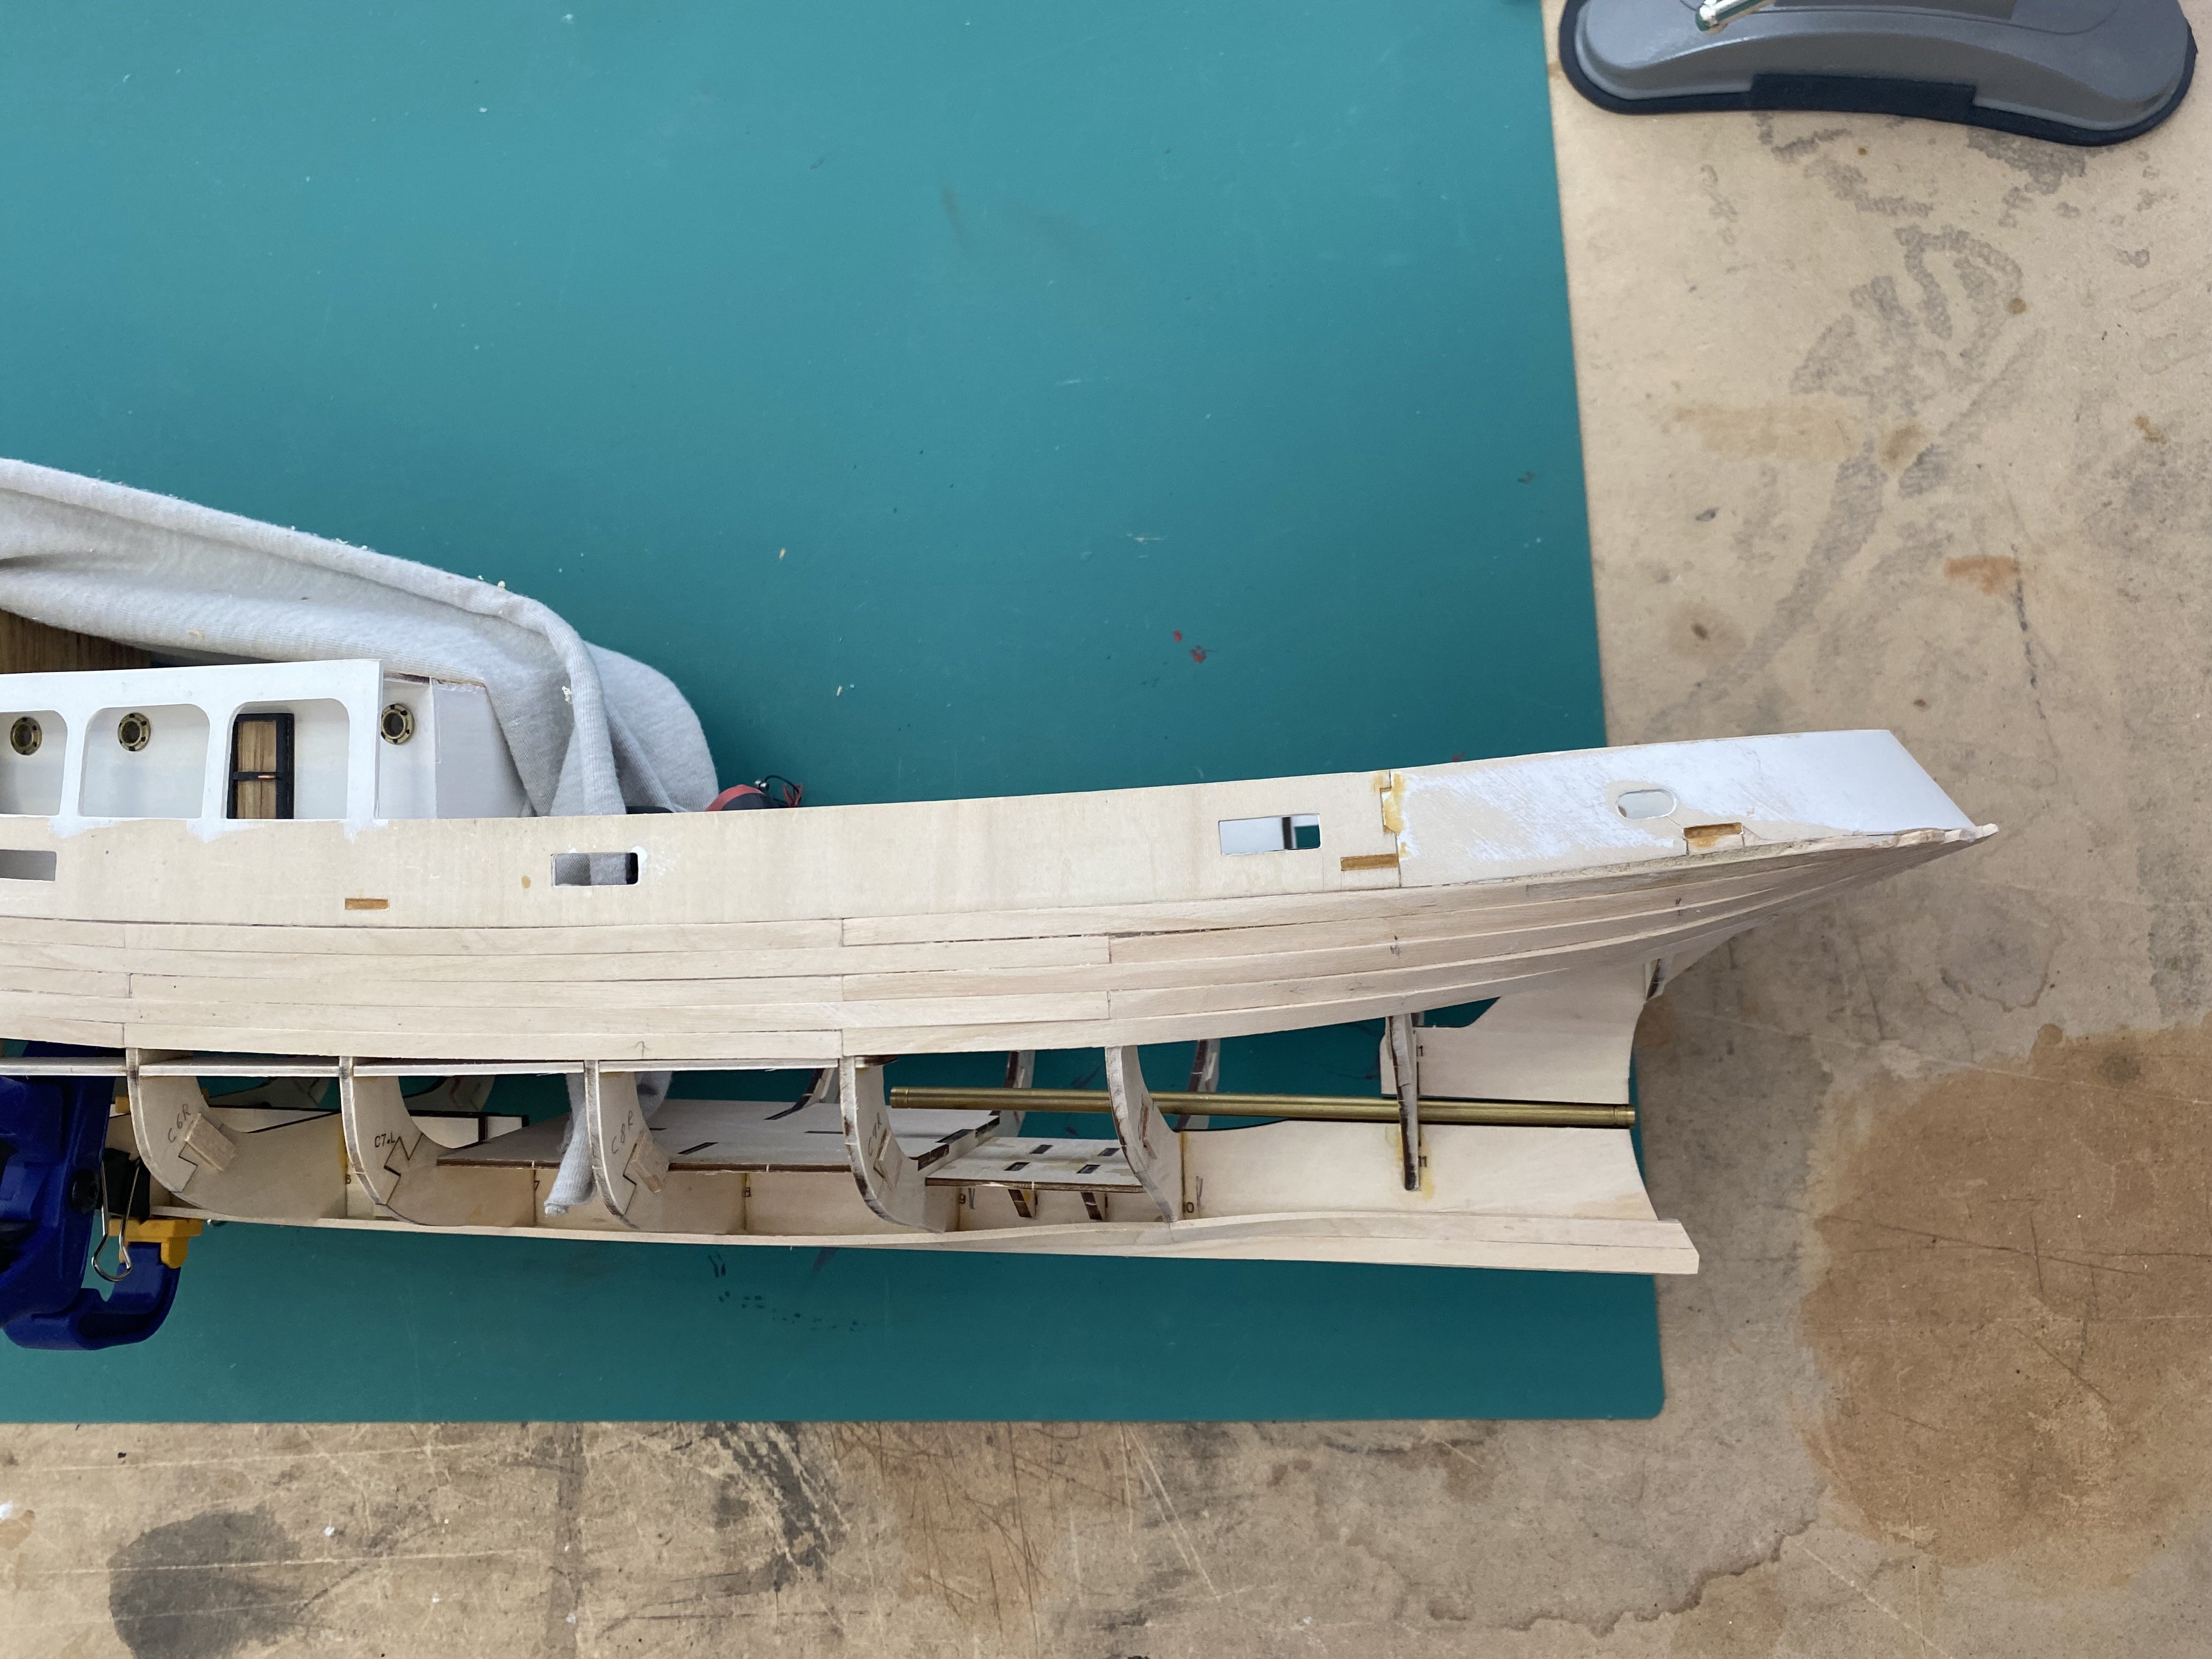
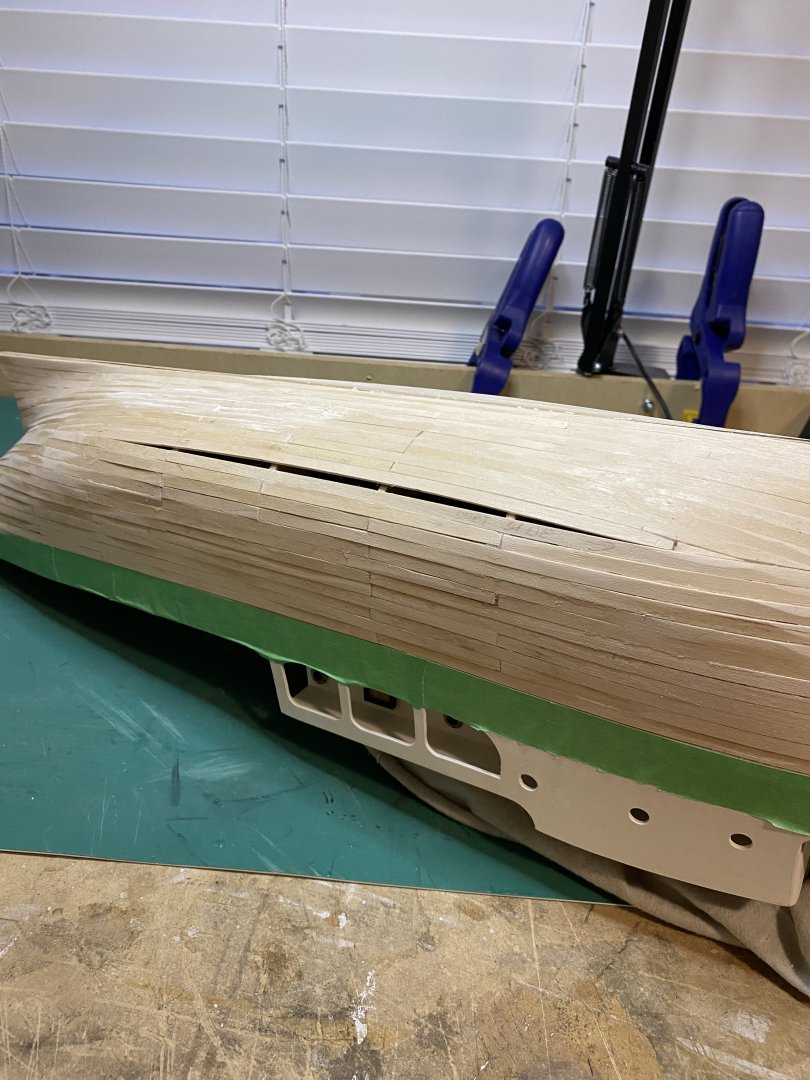
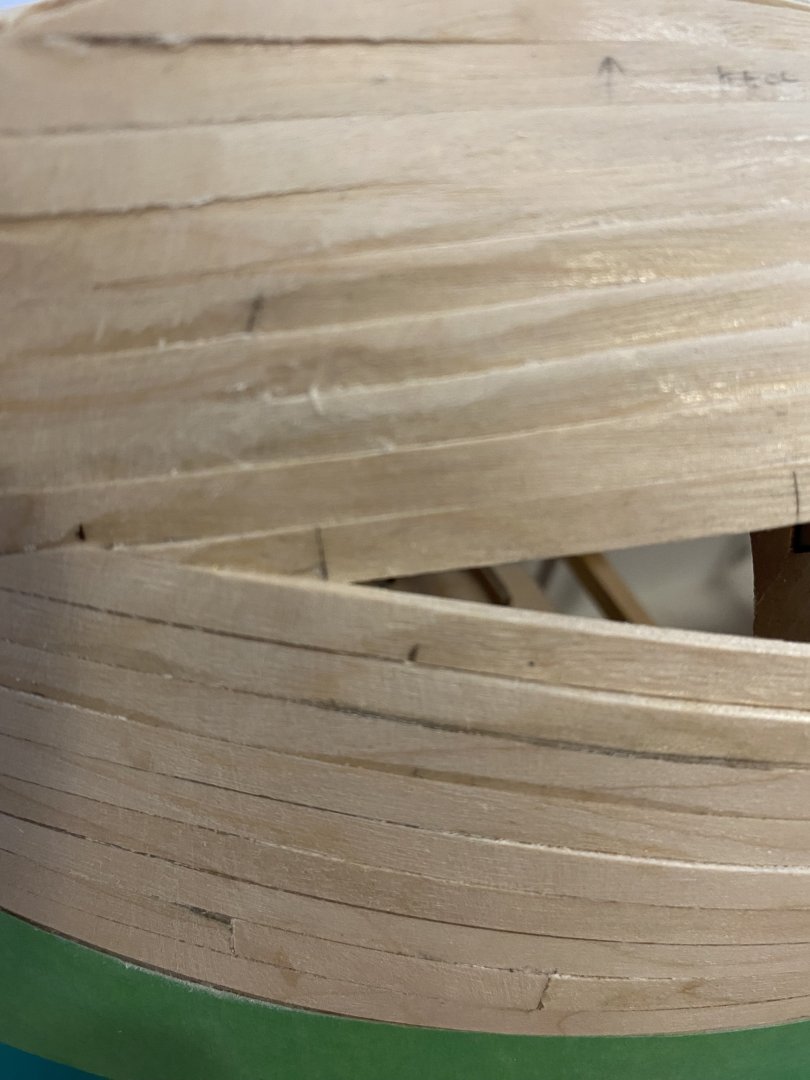
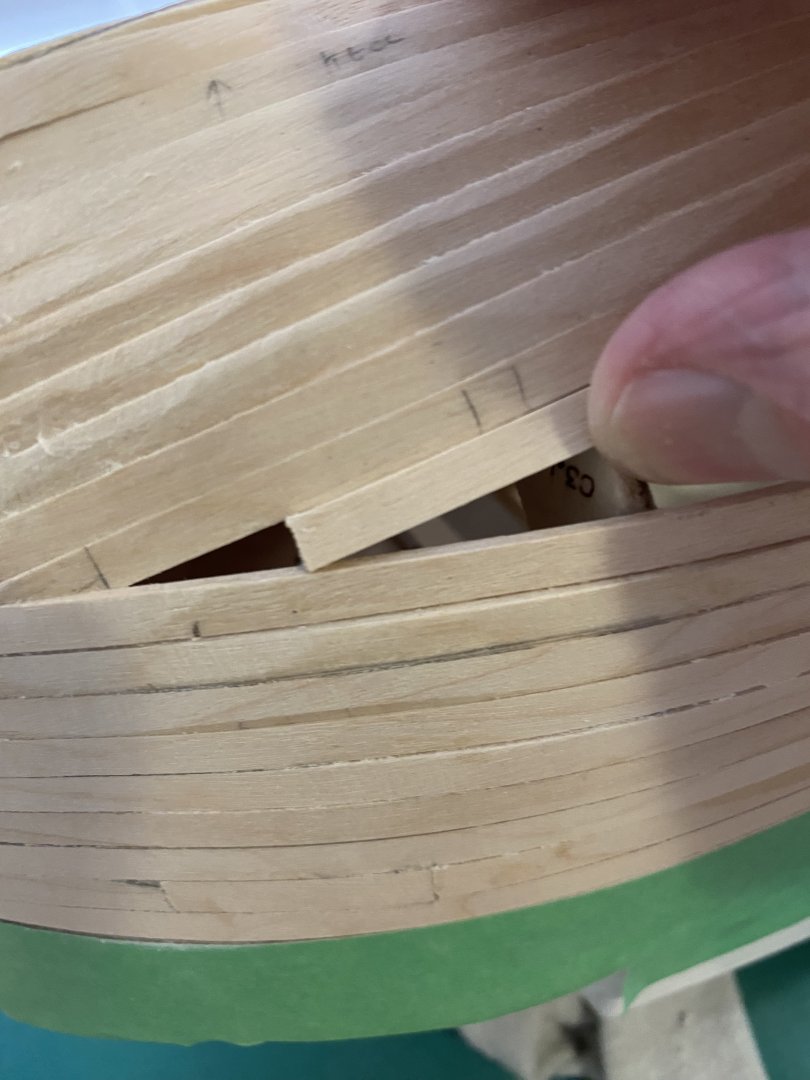
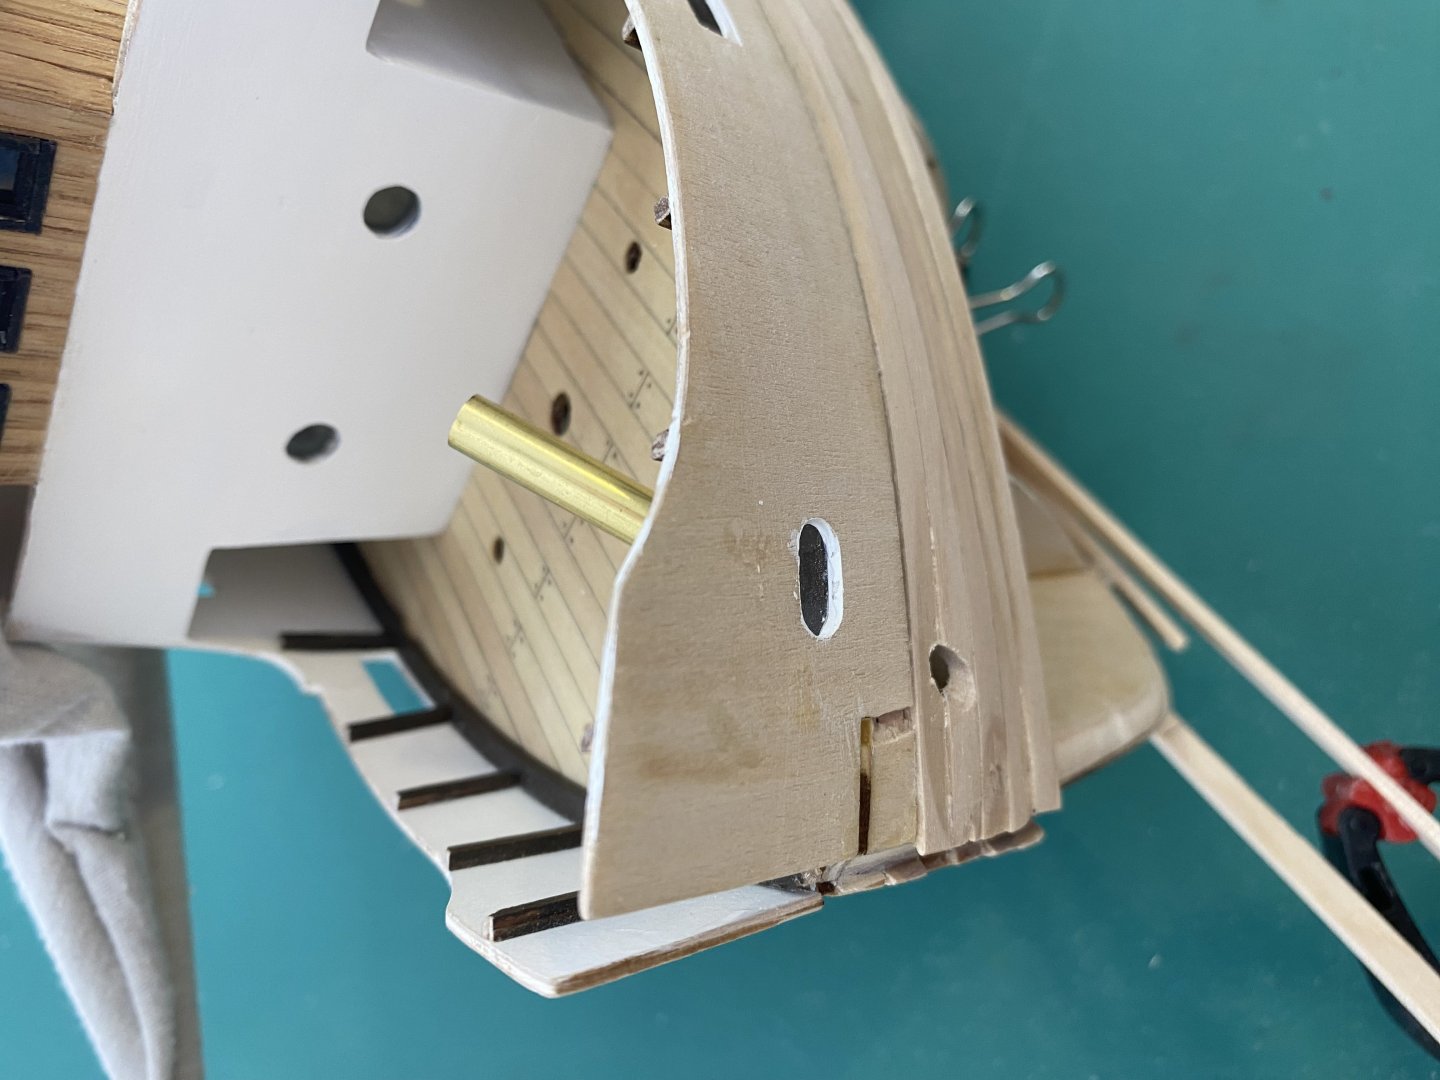
I have run into a problem with the planking on my AL Sanson tug. The video instructions on this kit have you planking from the deck down, and the from the keel up. As can be seen from the photos there is a problem where they meet. All planks are flat on the frames and I thought my faring was good. If I were to sand where these planks meet there will be no plank left. Any suggestions greatly appreciated.
-
I have been doing some spot sanding on the hull from Hades and got to aggressive around the stem. The bad area was carved out and a patch made and installed. When the planking is finished there will be a lot of sanding and filler and more sanding to get the hull ready for paint. I will say again, this kit should be double planked. I sent a message to AL with my concerns but heard nothing back.


- 68 replies
-
- 4
-
-
- Sanson
- Artesania Latina
- (and 2 more)
-
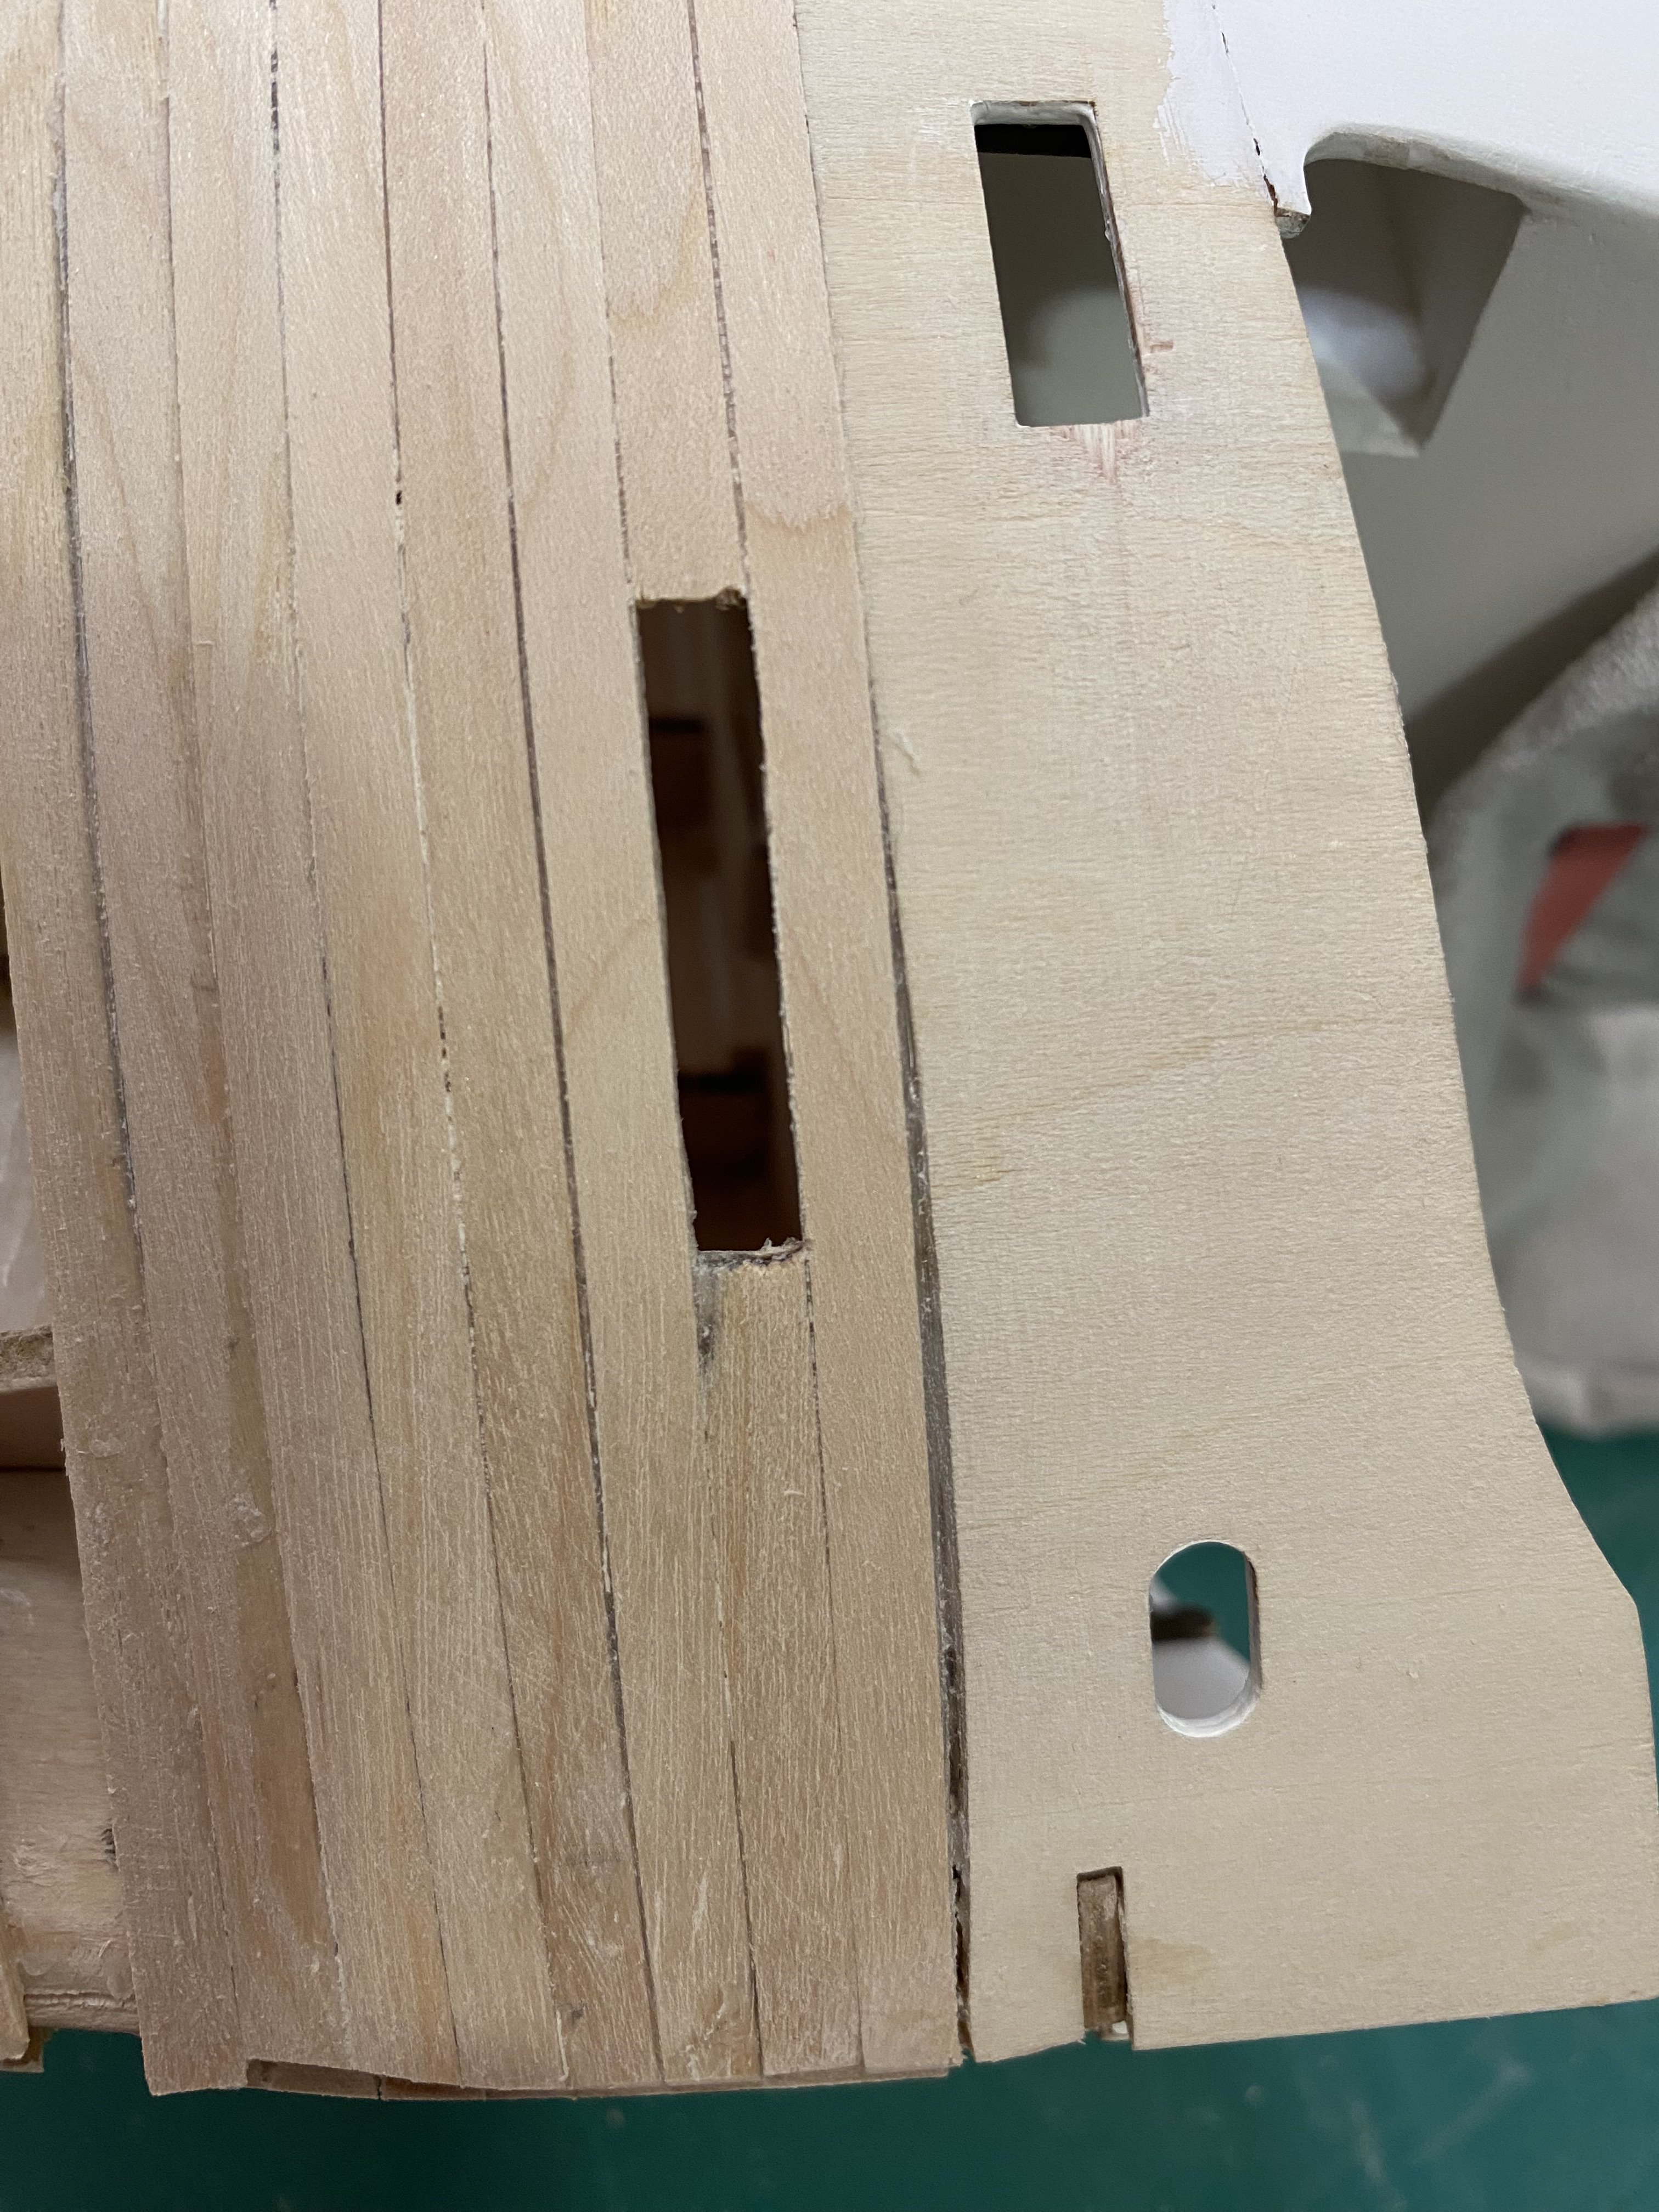
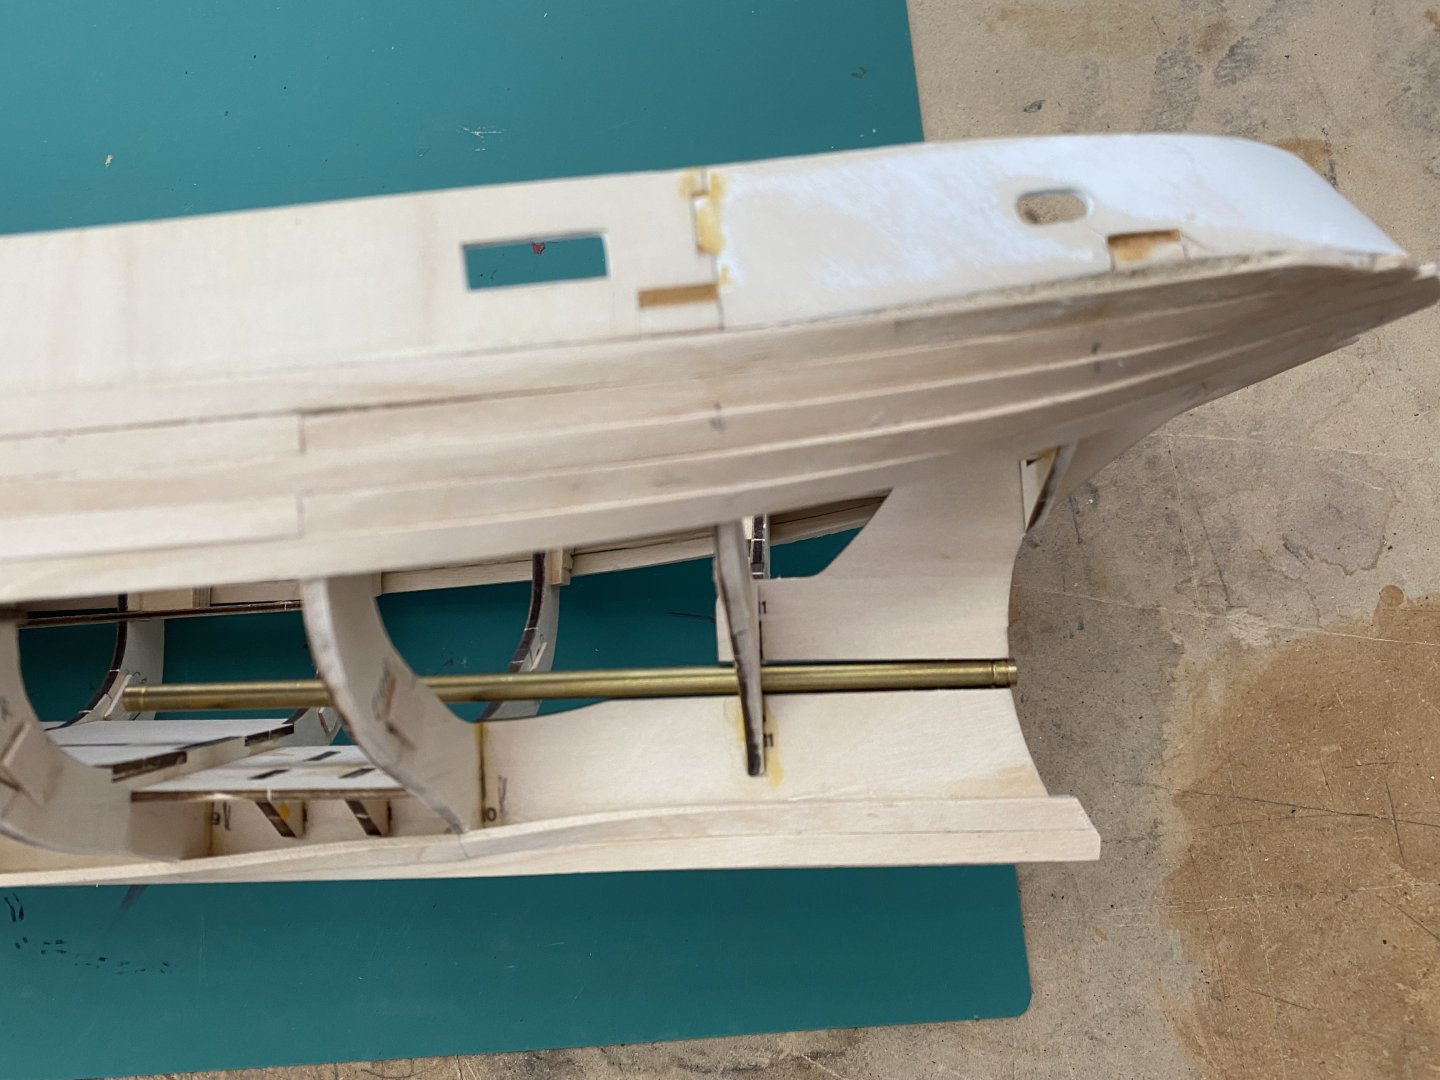
A note to any one thinking of doing this build. " I would not install the Bulwarks " until after the hull is planked.

- 68 replies
-
- 1
-
-
- Sanson
- Artesania Latina
- (and 2 more)
-
Well done. Thats a fine looking model.
-
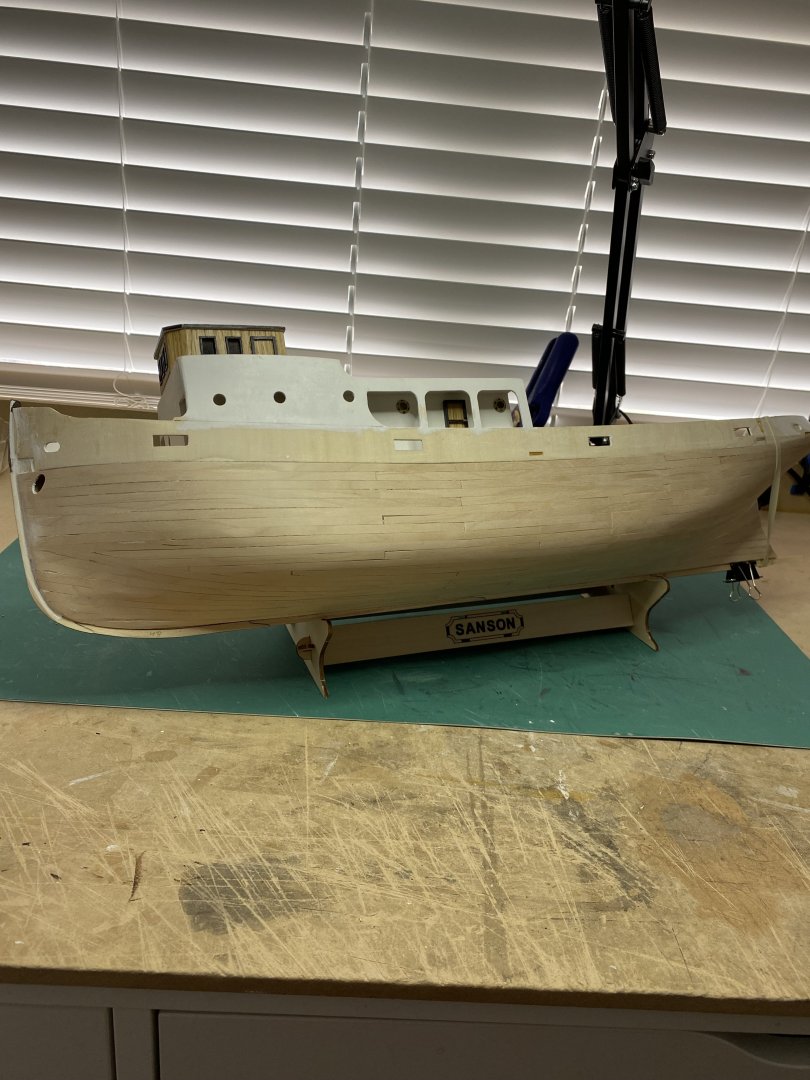
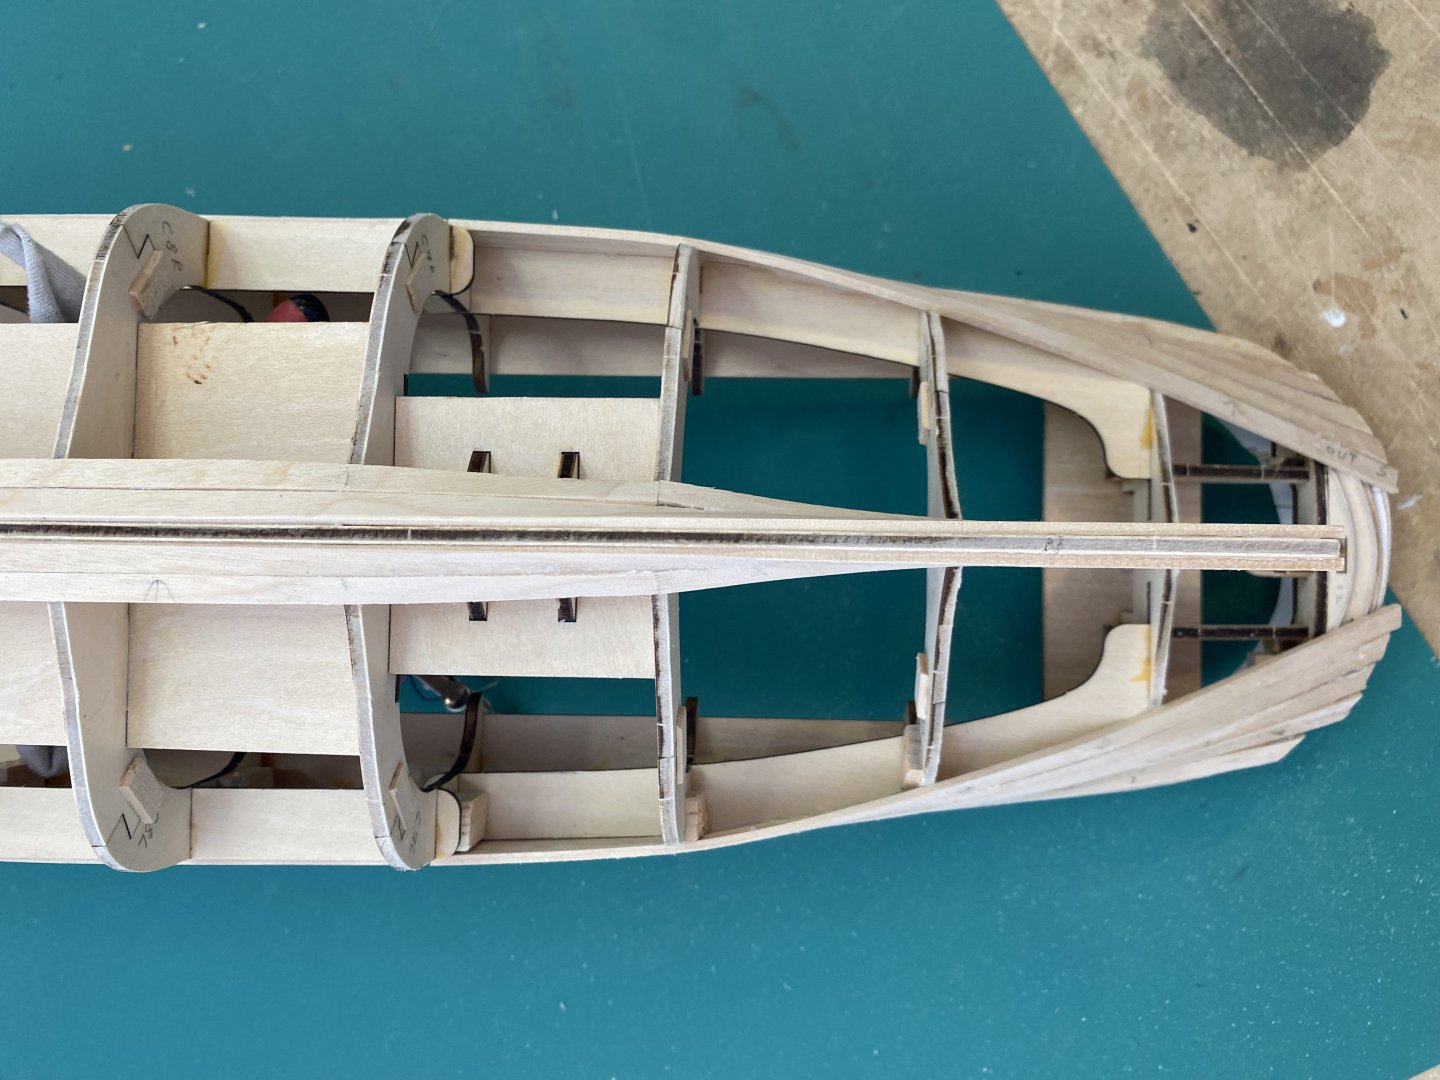
So I am back at the Sanson tug. I have installed the first six rows of planking from the deck down towards the keel, and the first two rows up from the keel. They were easier than anticipated . I have been pre bending all the boards before installing. Where severe bends are required at the stem and stern I glue the pre-bent plank where it lays true and once set I heat the end and give it a twist. Seems to work well so far. If I was doing this project again I would not have installed the bulwarks and deck house. The bulwarks are very fragile. Another bone of contention is the hawse pipe. By following the instructions it can be seen that to get a drill or file in to enlarge the holes the pilot house is in the way. I will finish this build because I like the look of the tug. I doubt that I will ever do another AL kit. I am not fond of the video instructions, much prefer Chucks and Chris instructions. One more thing, the planks are 2mm thick so I am putting a good bevel on them to ensure a tight fit.


- 68 replies
-
- 4
-
-
- Sanson
- Artesania Latina
- (and 2 more)
-
Excellent photo. On first glance it looks like smoke coming out of the funnel.
- 128 replies
-
- 4
-
-
- zulu
- sternwheeler
- (and 1 more)
-
If you purchase this sander please give a review. I am thinking of purchasing this in the near future
-
I am struggling with the planking on my Sanson tug. I had no real issues planking my Syren Medway long boat but I think this project will be on my to do list. I believe it is an excellent tutorial.
-
My vert first build was the Syren Medway longboat. With the quality of the kit, well written instuctions and the support of people on this site I managed to build an acceptable model that I am proud to display in my home.
-
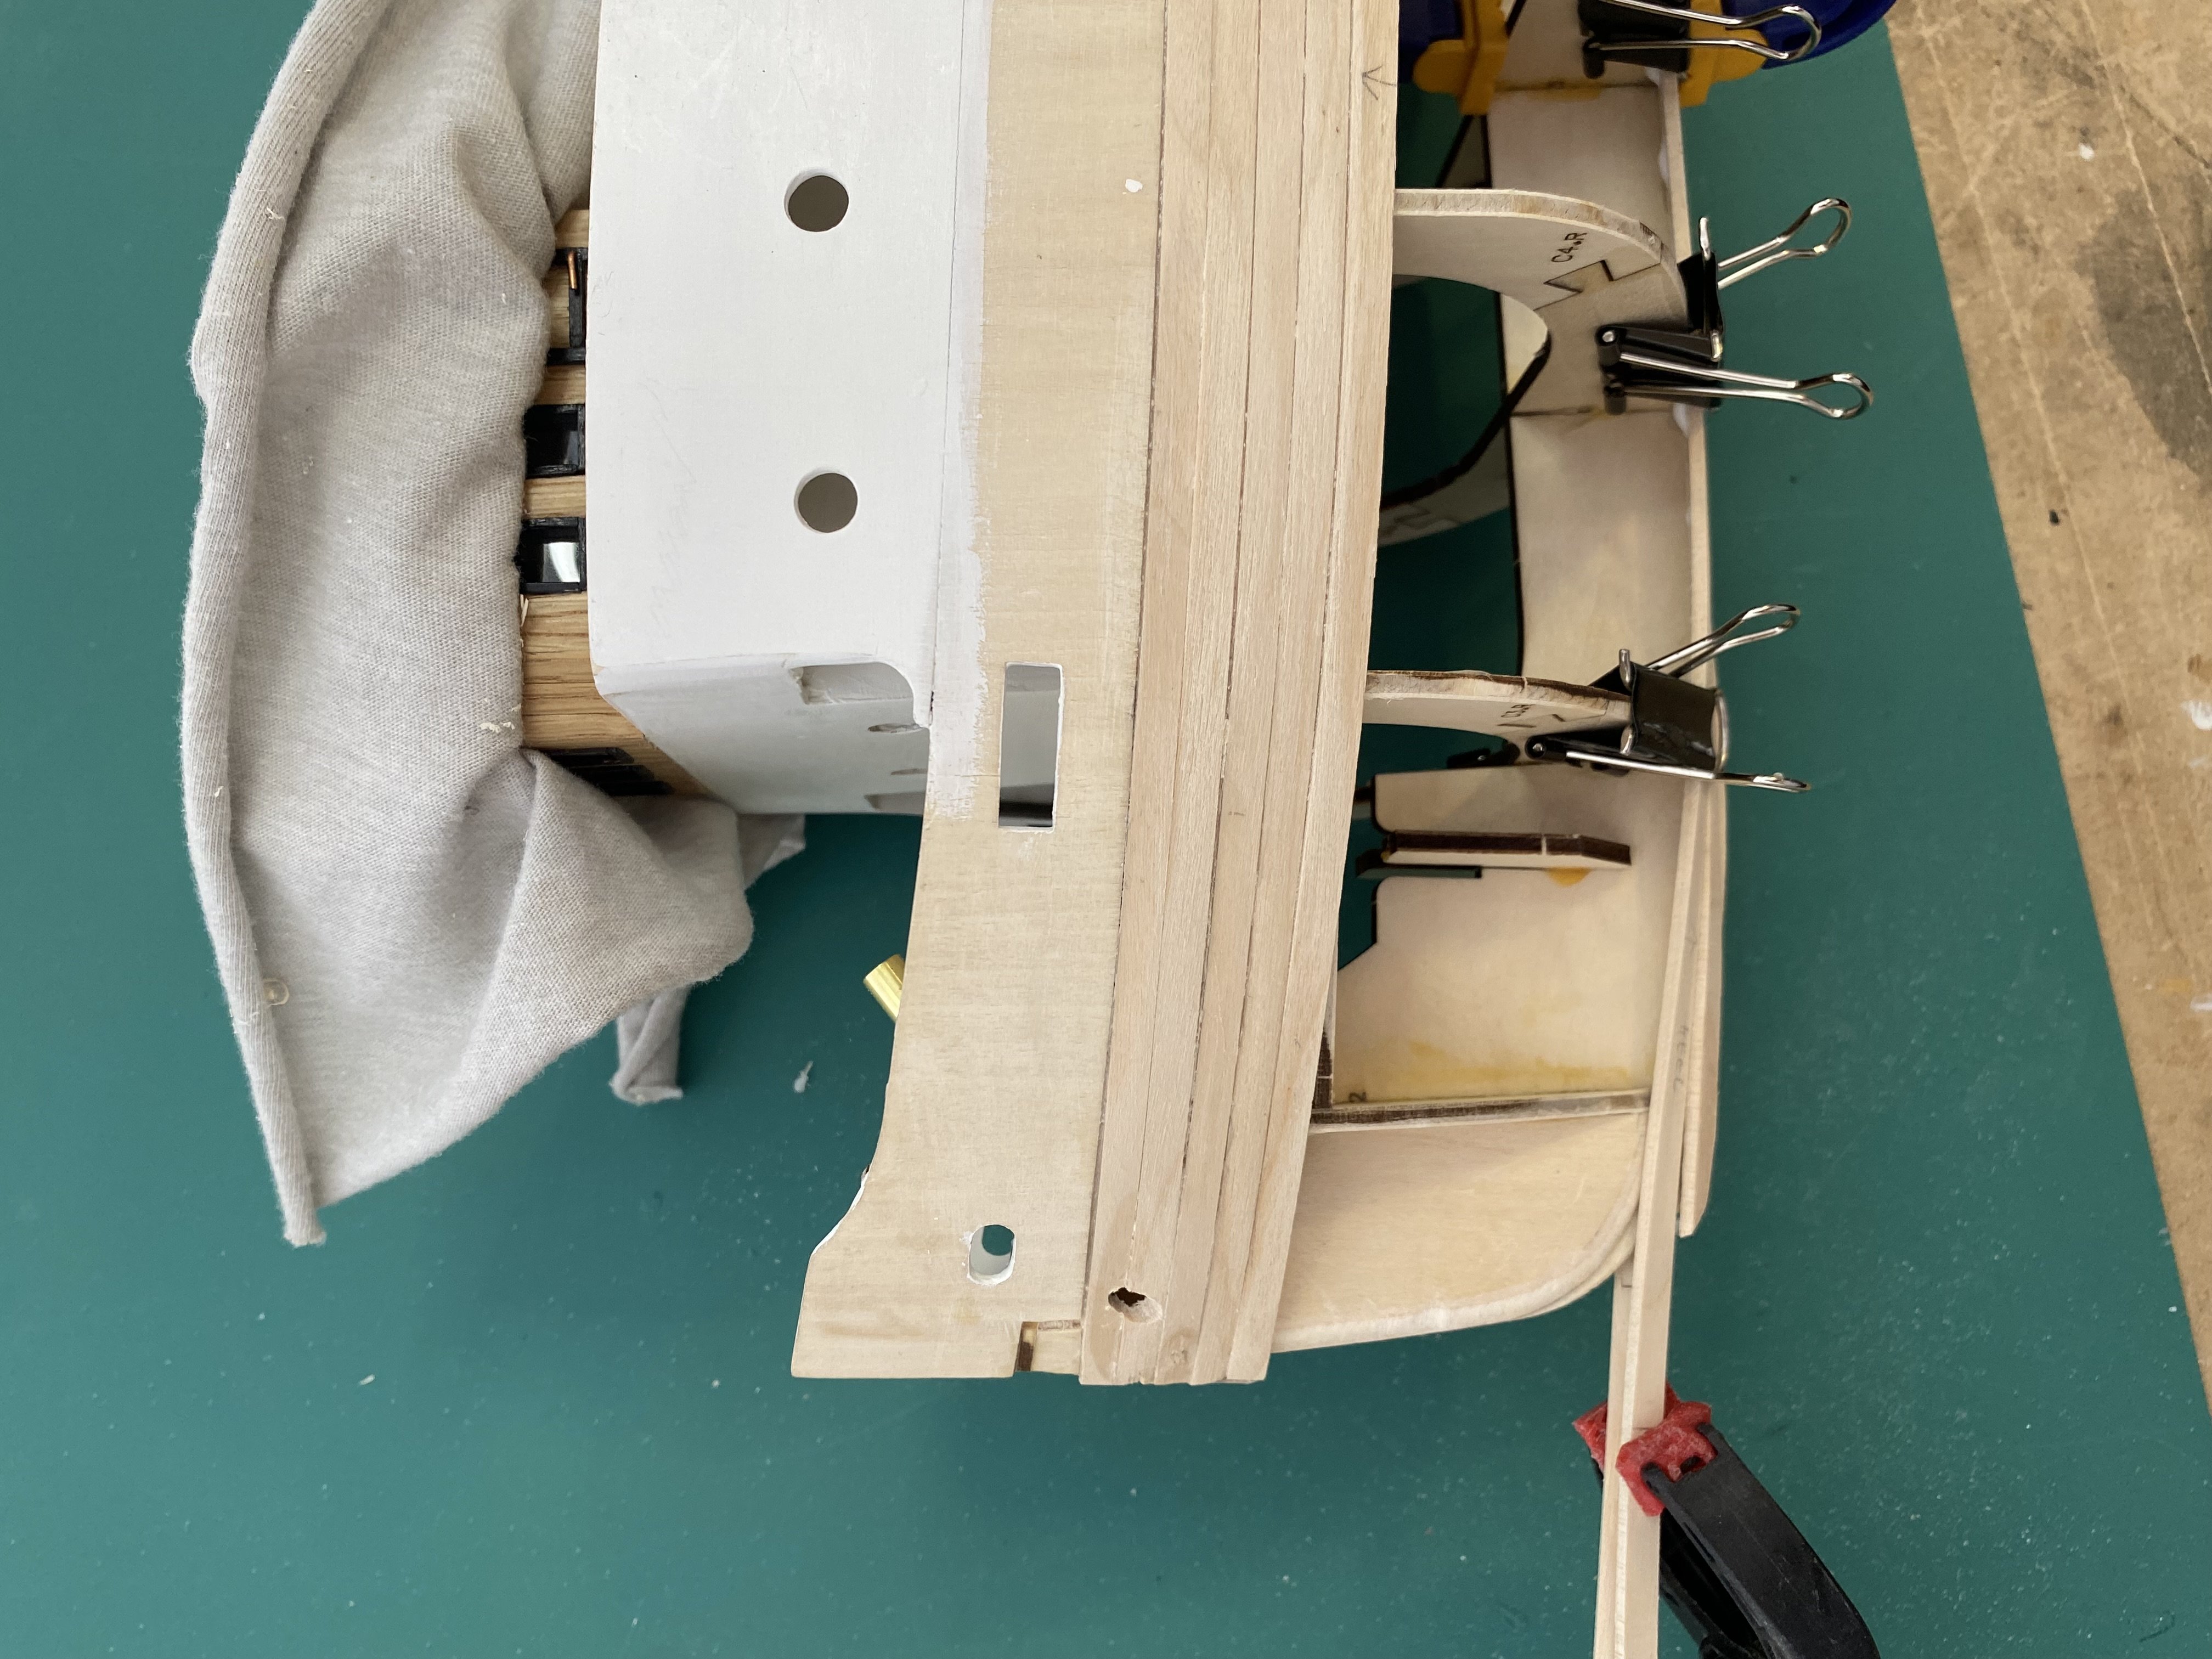
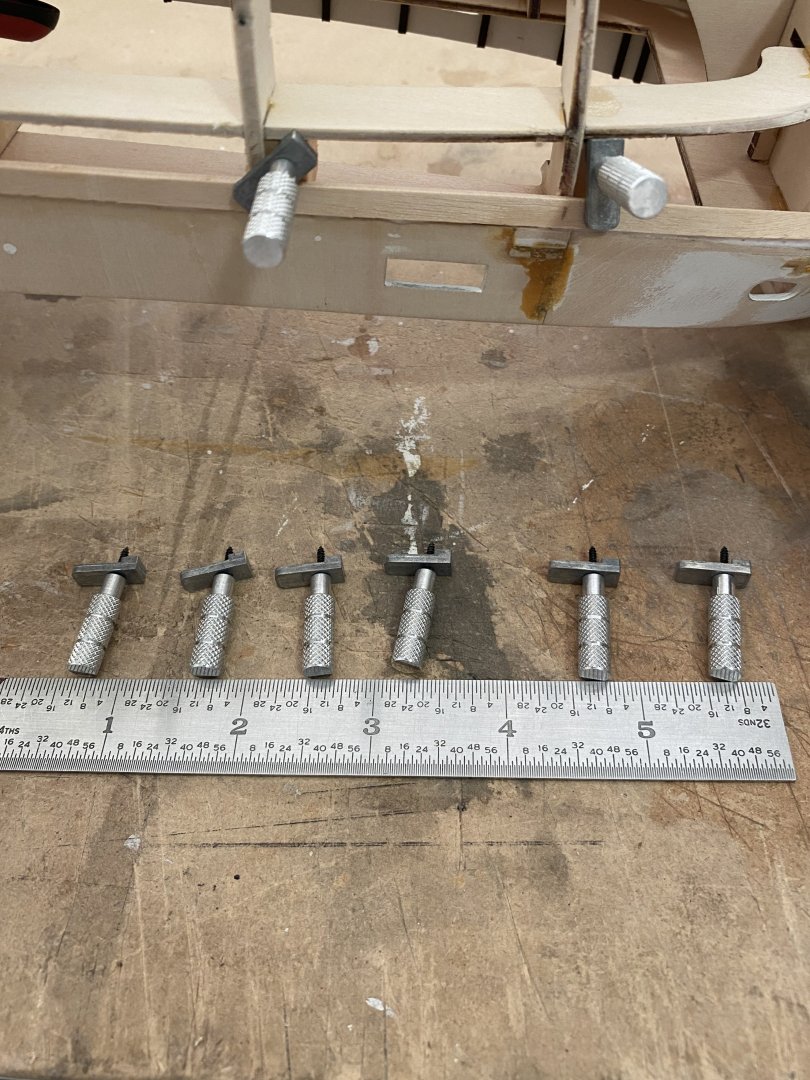
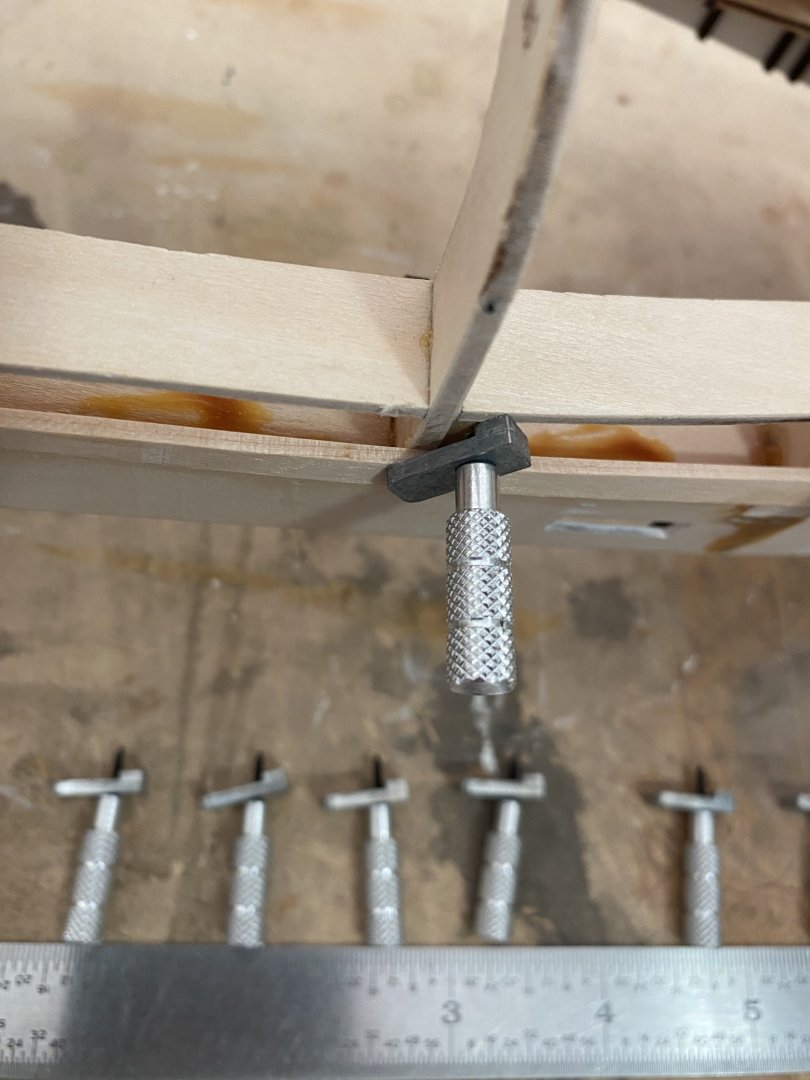
This build tested my patience and I was going to give up but that is not in my nature. I removed the first four rows of planking on the Stbd side. They just were not sitting right. The old story, first plank wrong, remainder get worse. This is a difficult frame to clamp to so I purchased these clamps from Micro-Mart. Some small blocks have been glued to the frames to screw these clamps into. I tested them on a scrap piece of frame plywood, and it just split. I have shaped the plank with heat and have clamped it in place, hopefully it will be a better attempt. The 2MM Bass wood does not bend easily
- 68 replies
-
- 4
-
-
- Sanson
- Artesania Latina
- (and 2 more)
-
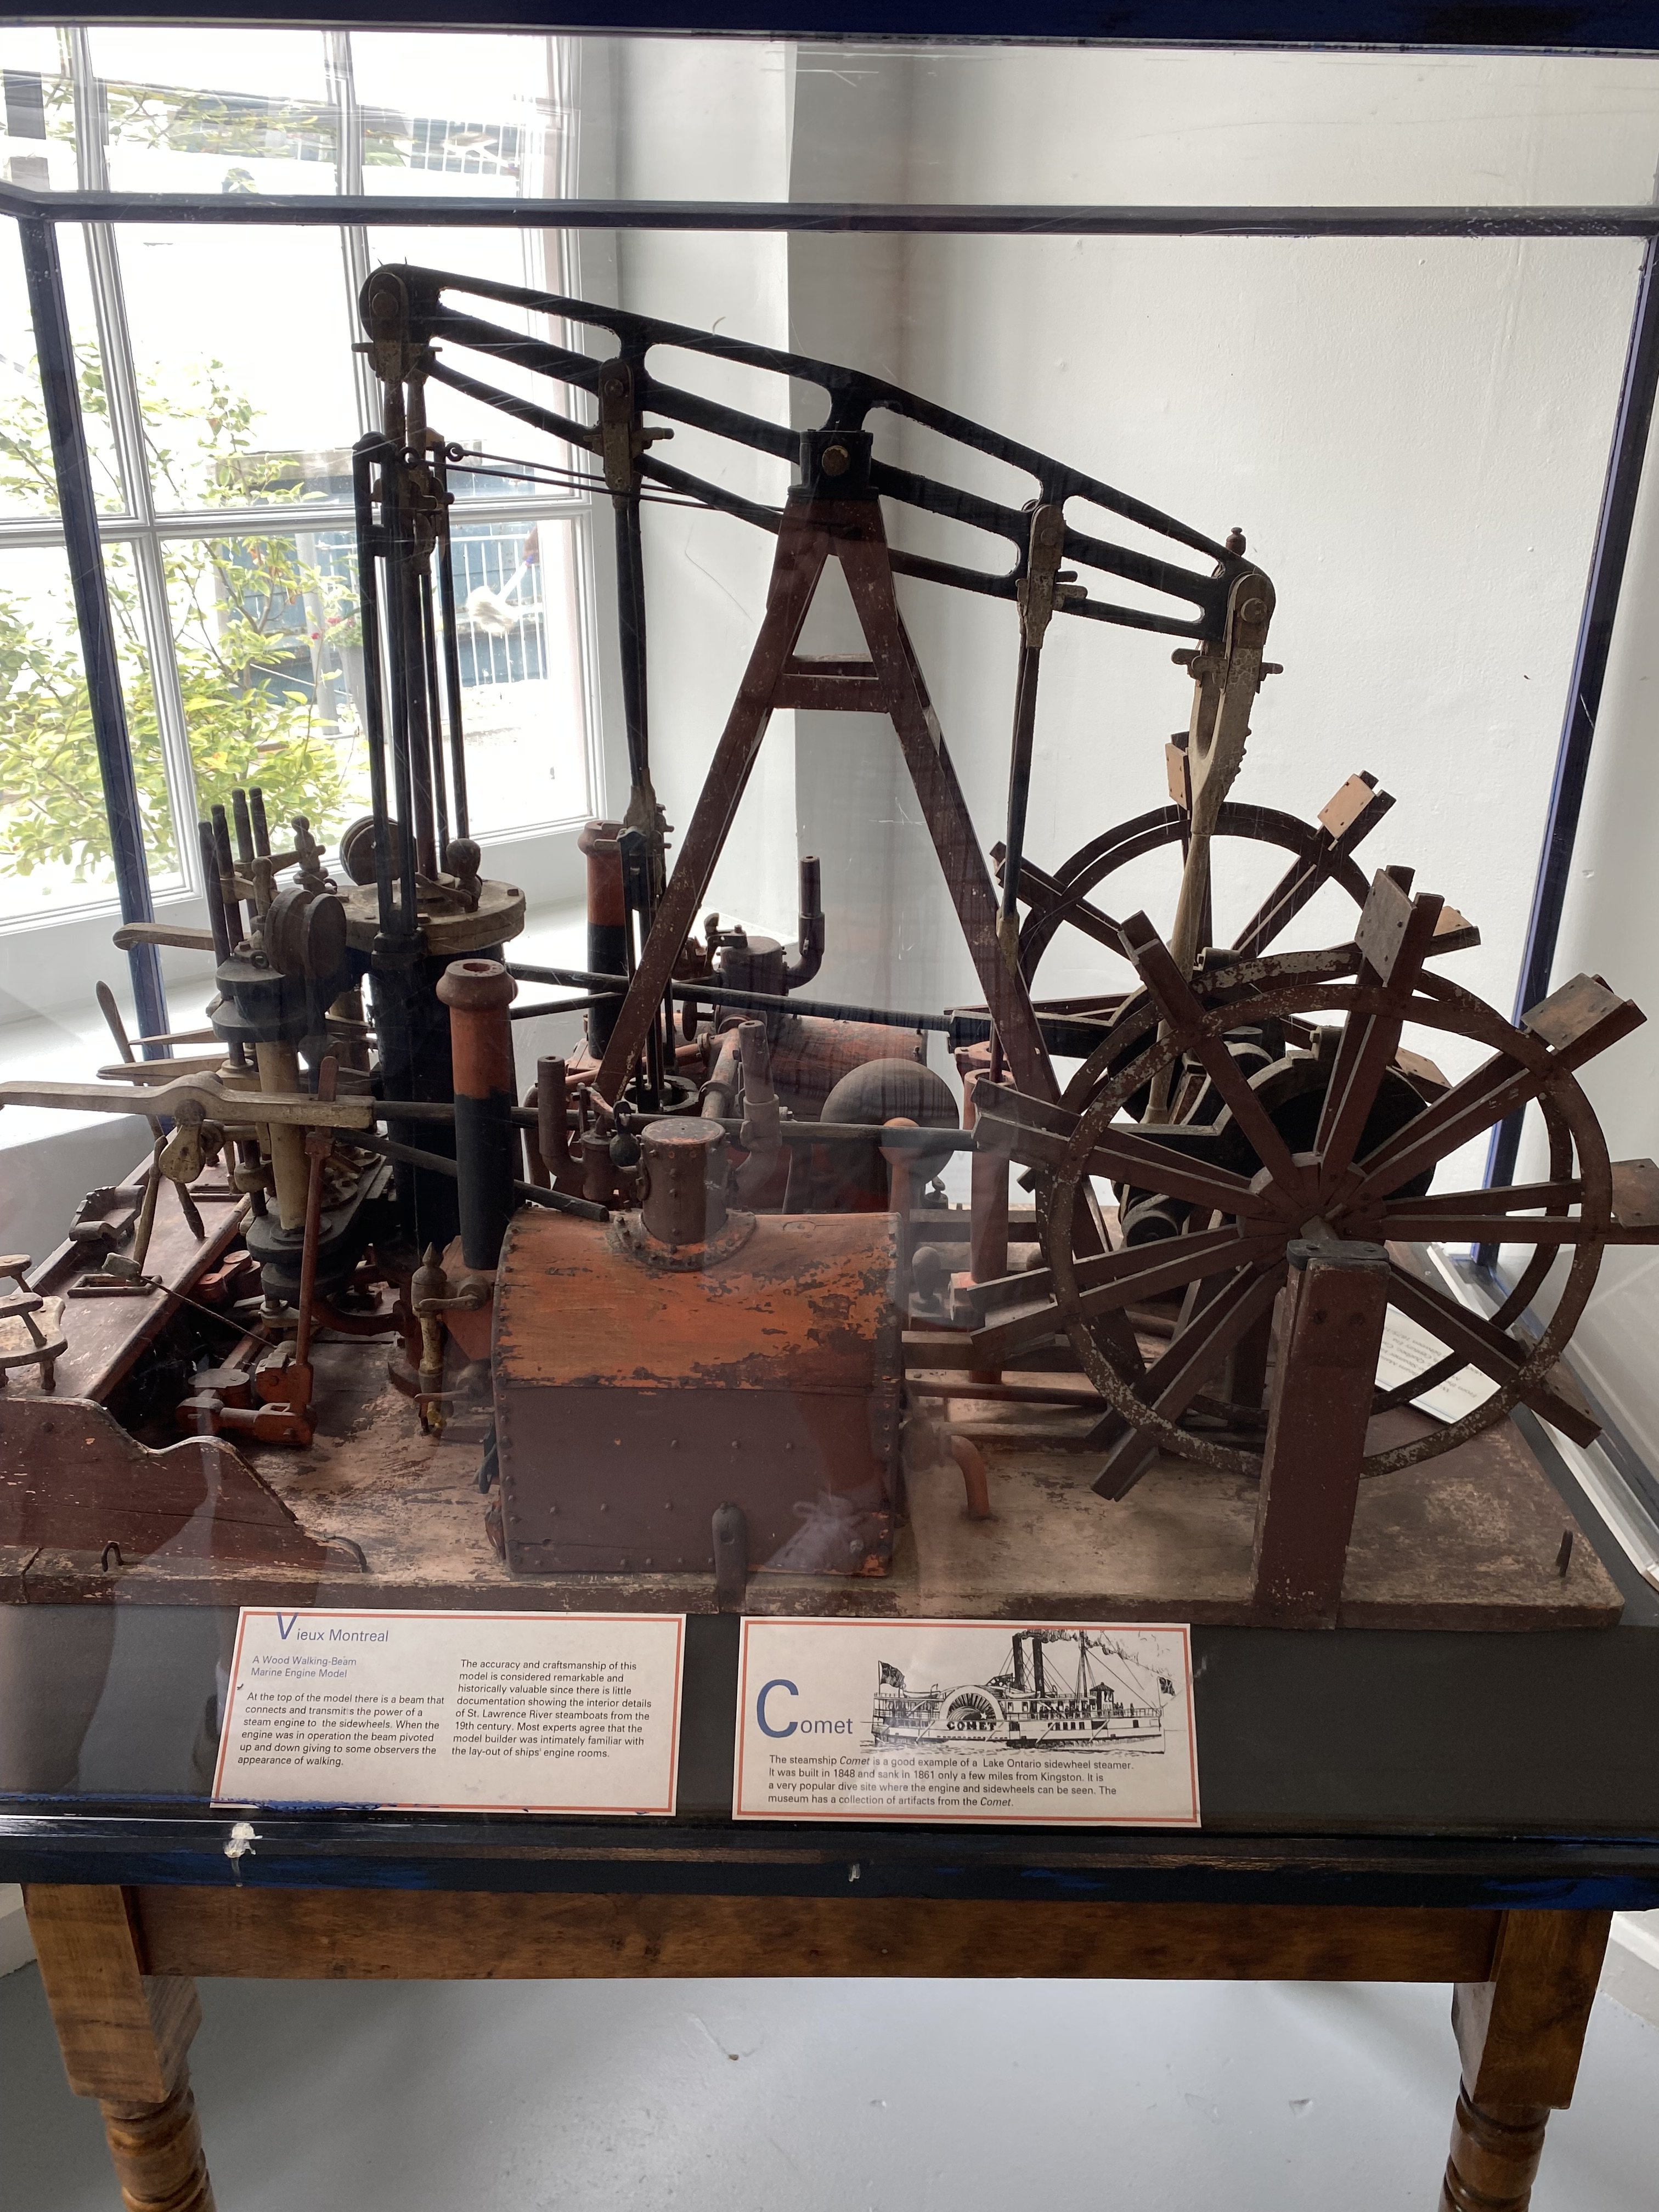
Marine Museum of the Great Lakes (Kingston Ontario)
Diver replied to Diver's topic in Nautical/Naval History
My next visit will be in the Engine and Machinery rooms. -
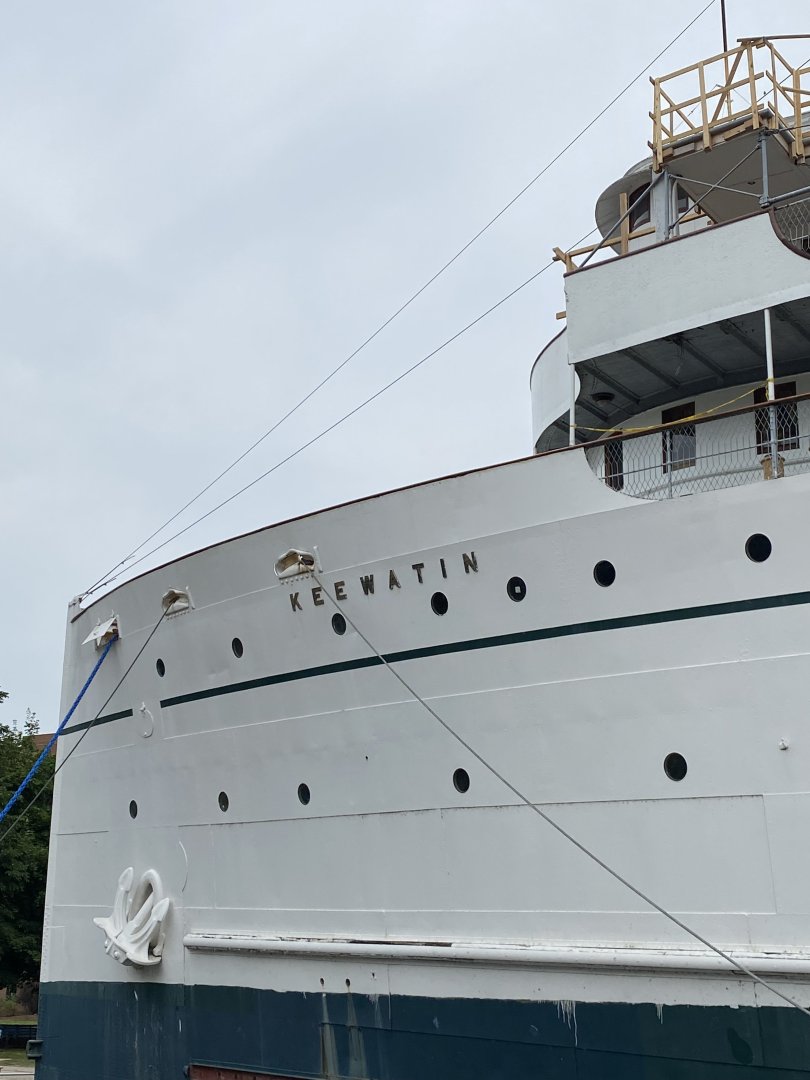
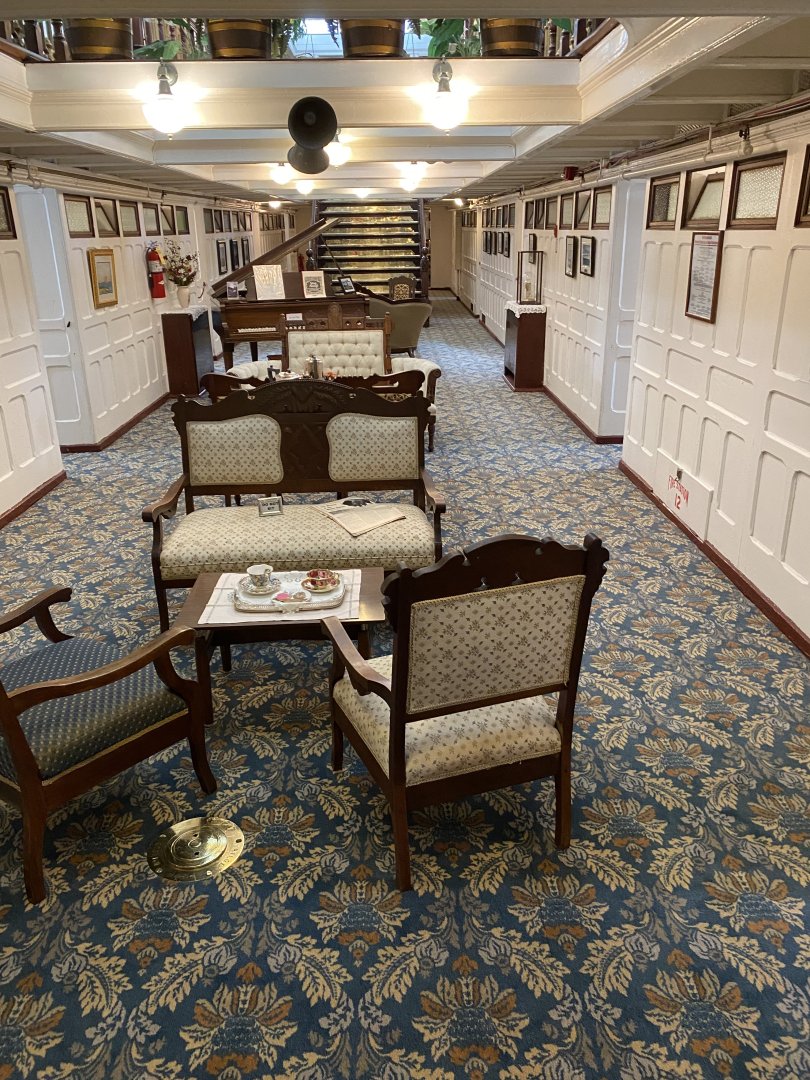
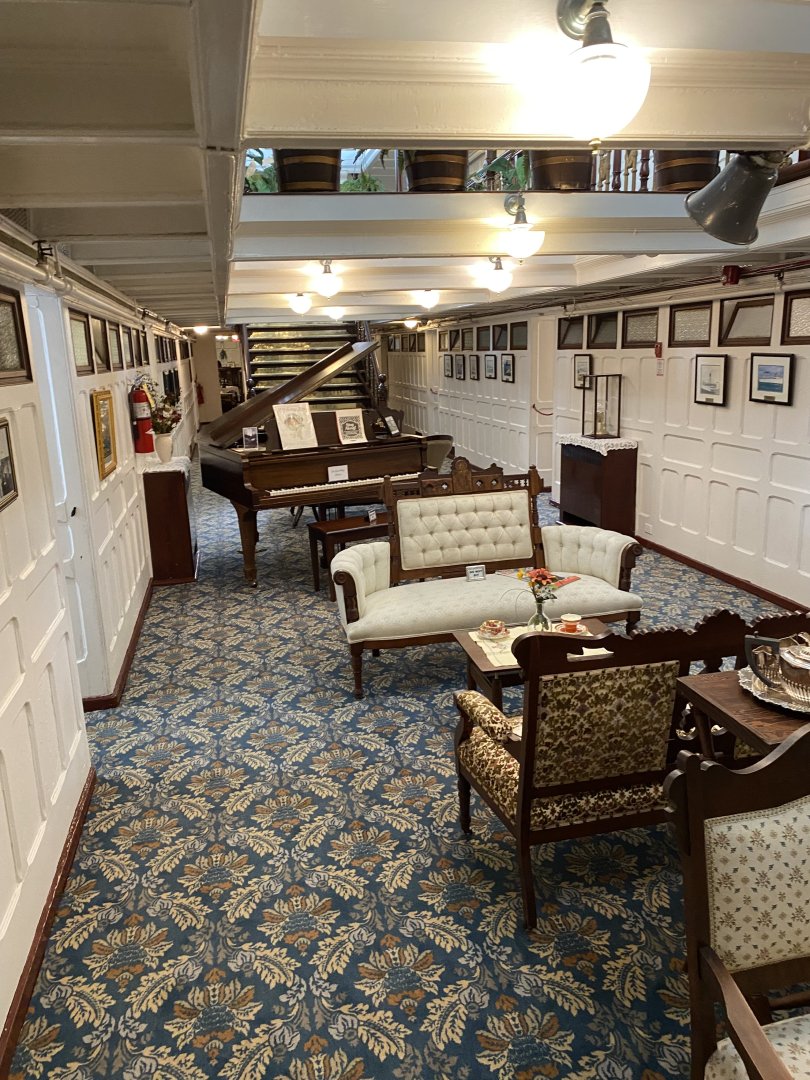
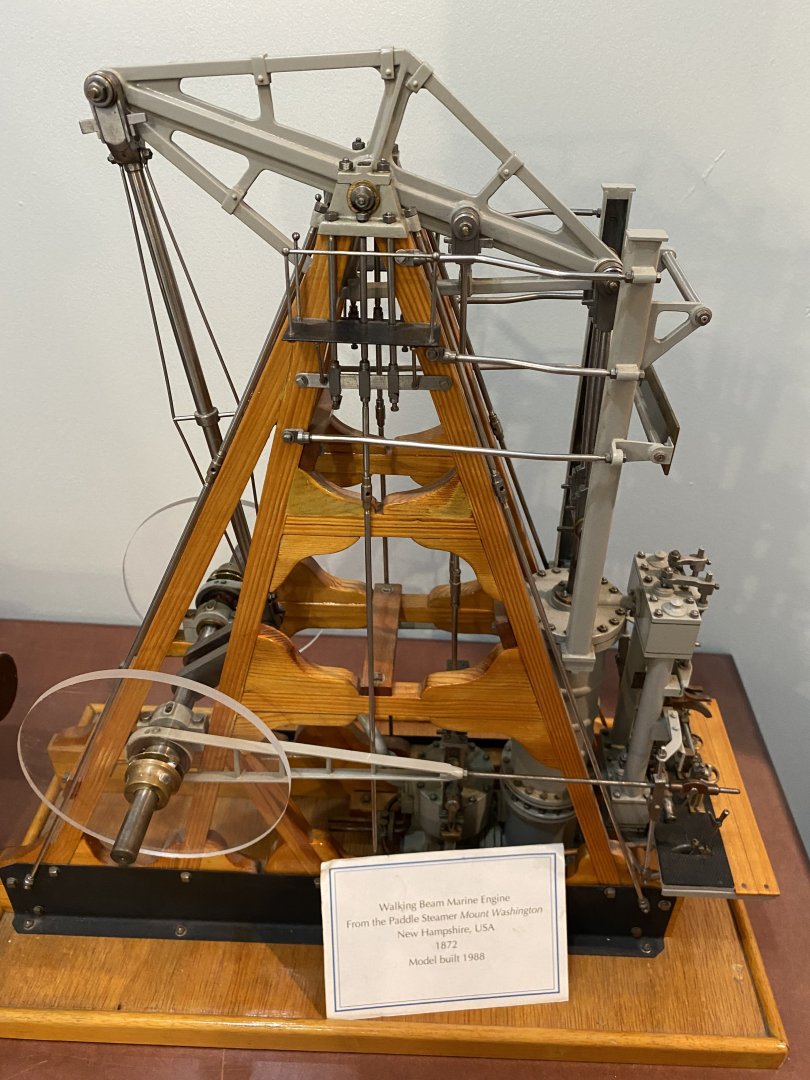
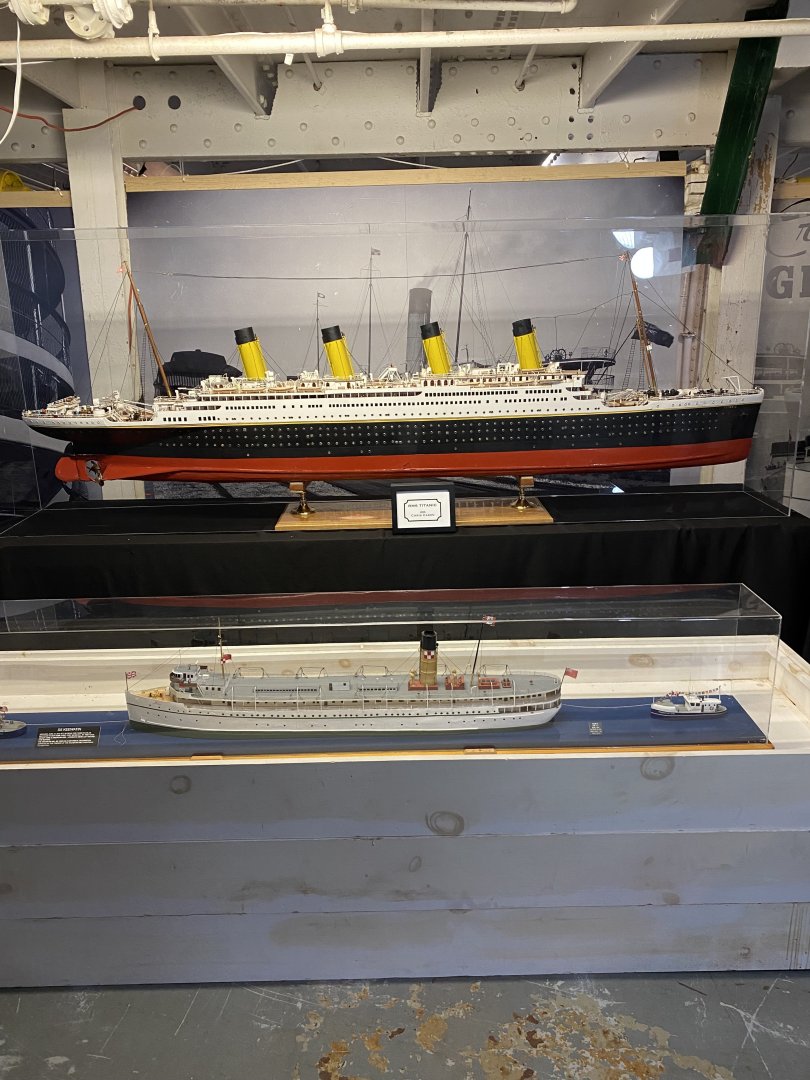
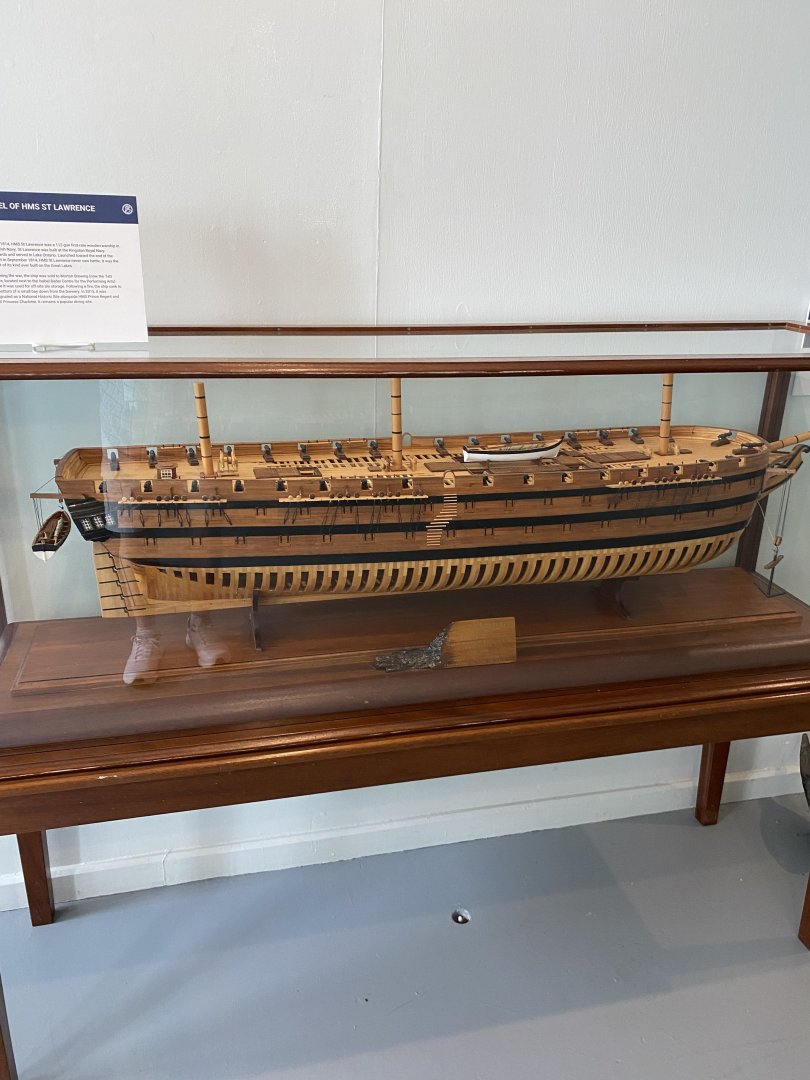
The Museum has taken ownership of the SS Keewatin, an Edwardian passenger ship. If you are in the Kingston area she is well worth the visit. The tours are guided an last amount 70 minutes. As well as the ship herself, the museum has many models and other displays.


- 4 replies
-
- 12
-
-

-
Looks very good. I seem to remember I tried 4 or 5 times to get a front Platform that I was happy with
- 131 replies
-
- 1
-
-
- Medway Longboat
- Syren Ship Model Company
- (and 1 more)
-
Looking good and am following along. I found the planking challenging ,but very rewarding. I did manage to destroy some of the supplied planks and had to make new ones from the extra wood Chuck supplies. A learning experience but fun.