HOLIDAY DONATION DRIVE - SUPPORT MSW - DO YOUR PART TO KEEP THIS GREAT FORUM GOING! (Only 24 donations so far out of 49,000 members - C'mon guys!)
×

Diver
-
Posts
402 -
Joined
-
Last visited
Content Type
Profiles
Forums
Gallery
Events
Everything posted by Diver
-
Thanks for the advise. I purchased a small bottle of lock de-icer (isopropyl) and it worked fine. I have removed the piece and have a new one installed. The very small bottle of lock de-icer worked well due its very small nozzle. It was easy to control. Thanks again
- 217 replies
-
- 2
-

-
- medway longboat
- Syren Ship Model Company
- (and 1 more)
-
Hello folks. I made a mistake and did not get the block on the transom low enough. What is the best solvent to unstick Titebond? Thanks in advance.
-
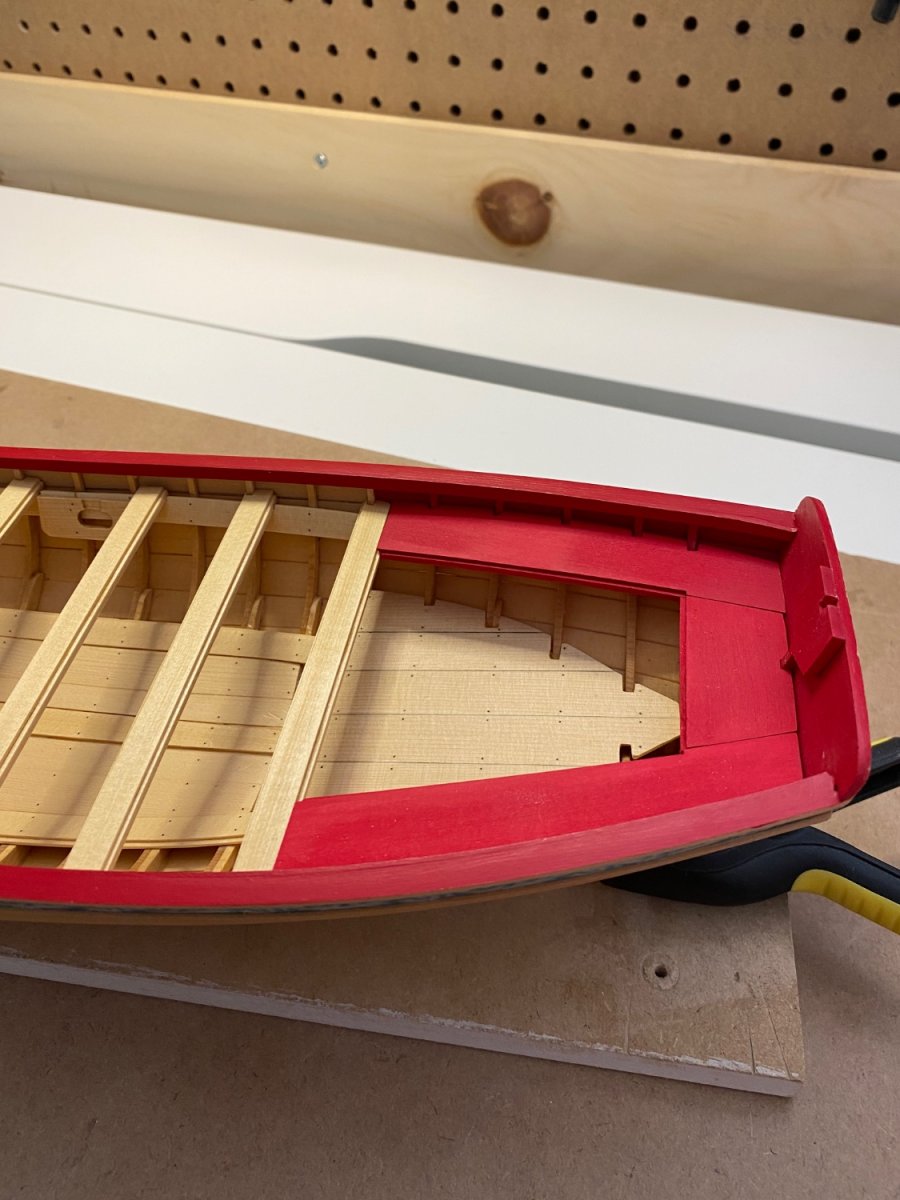
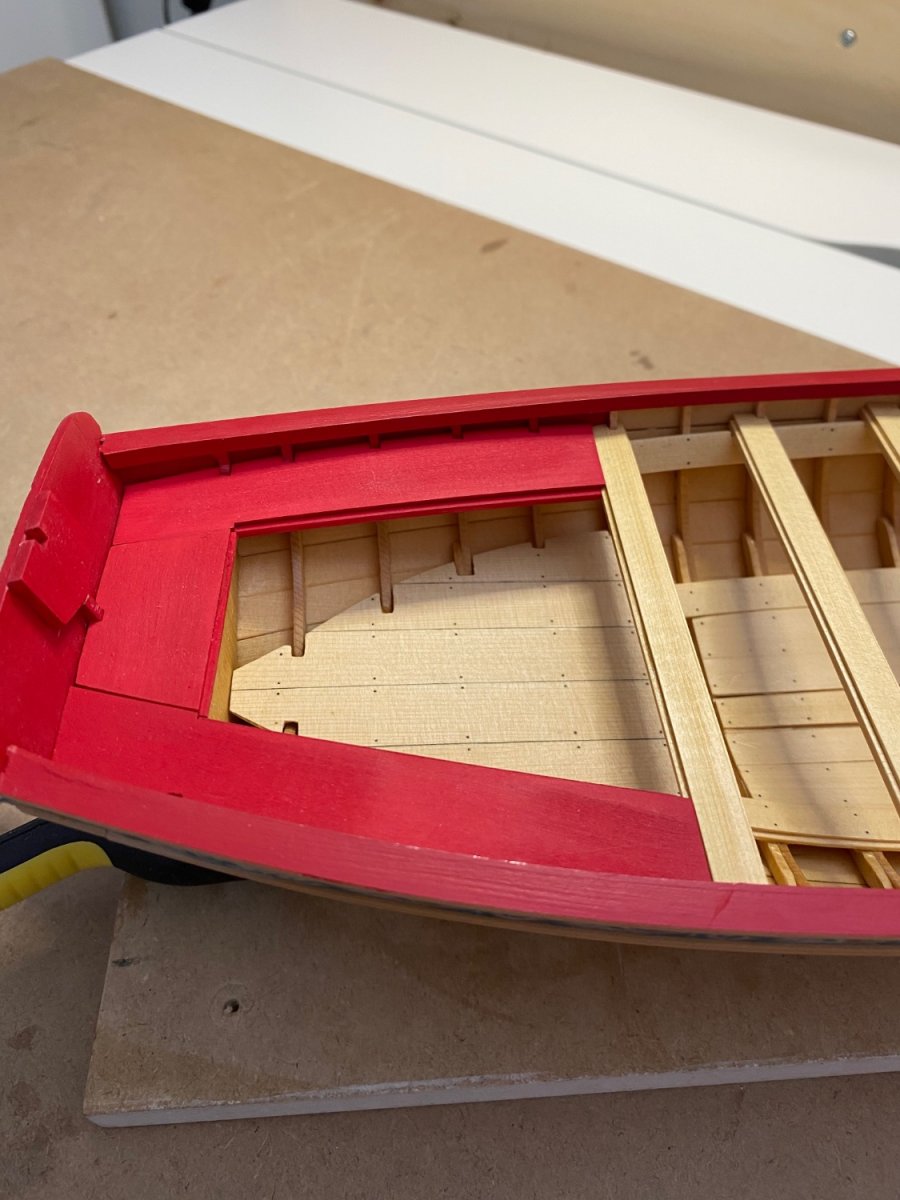
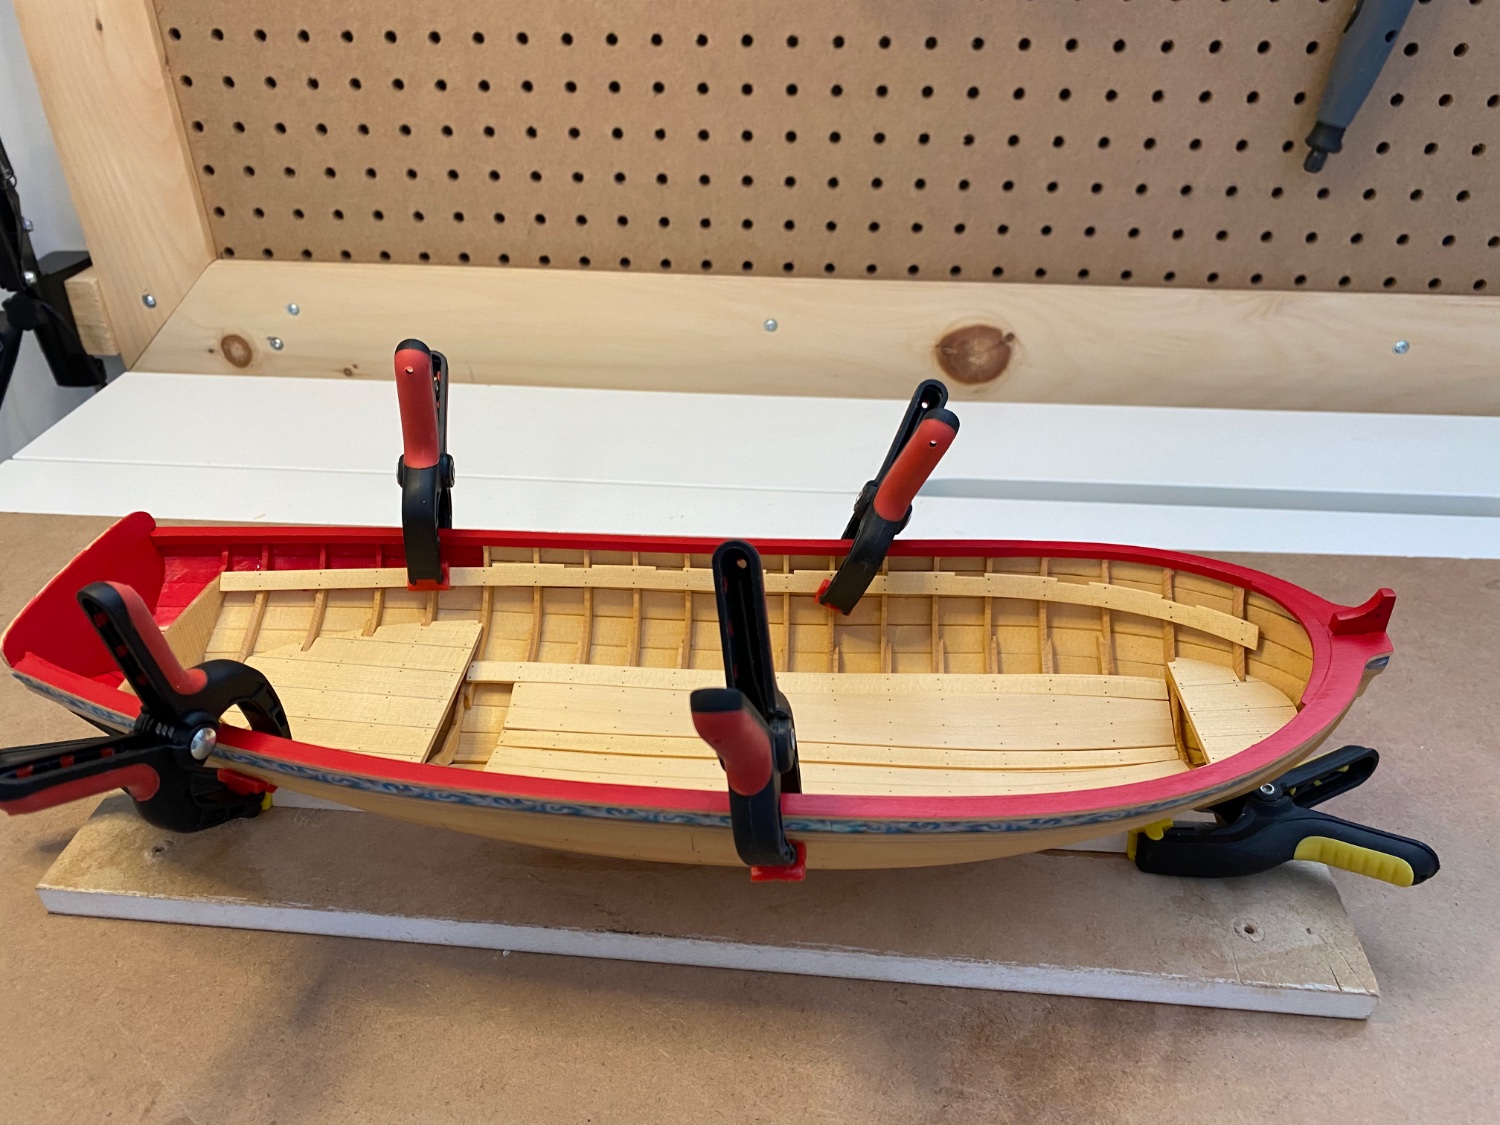
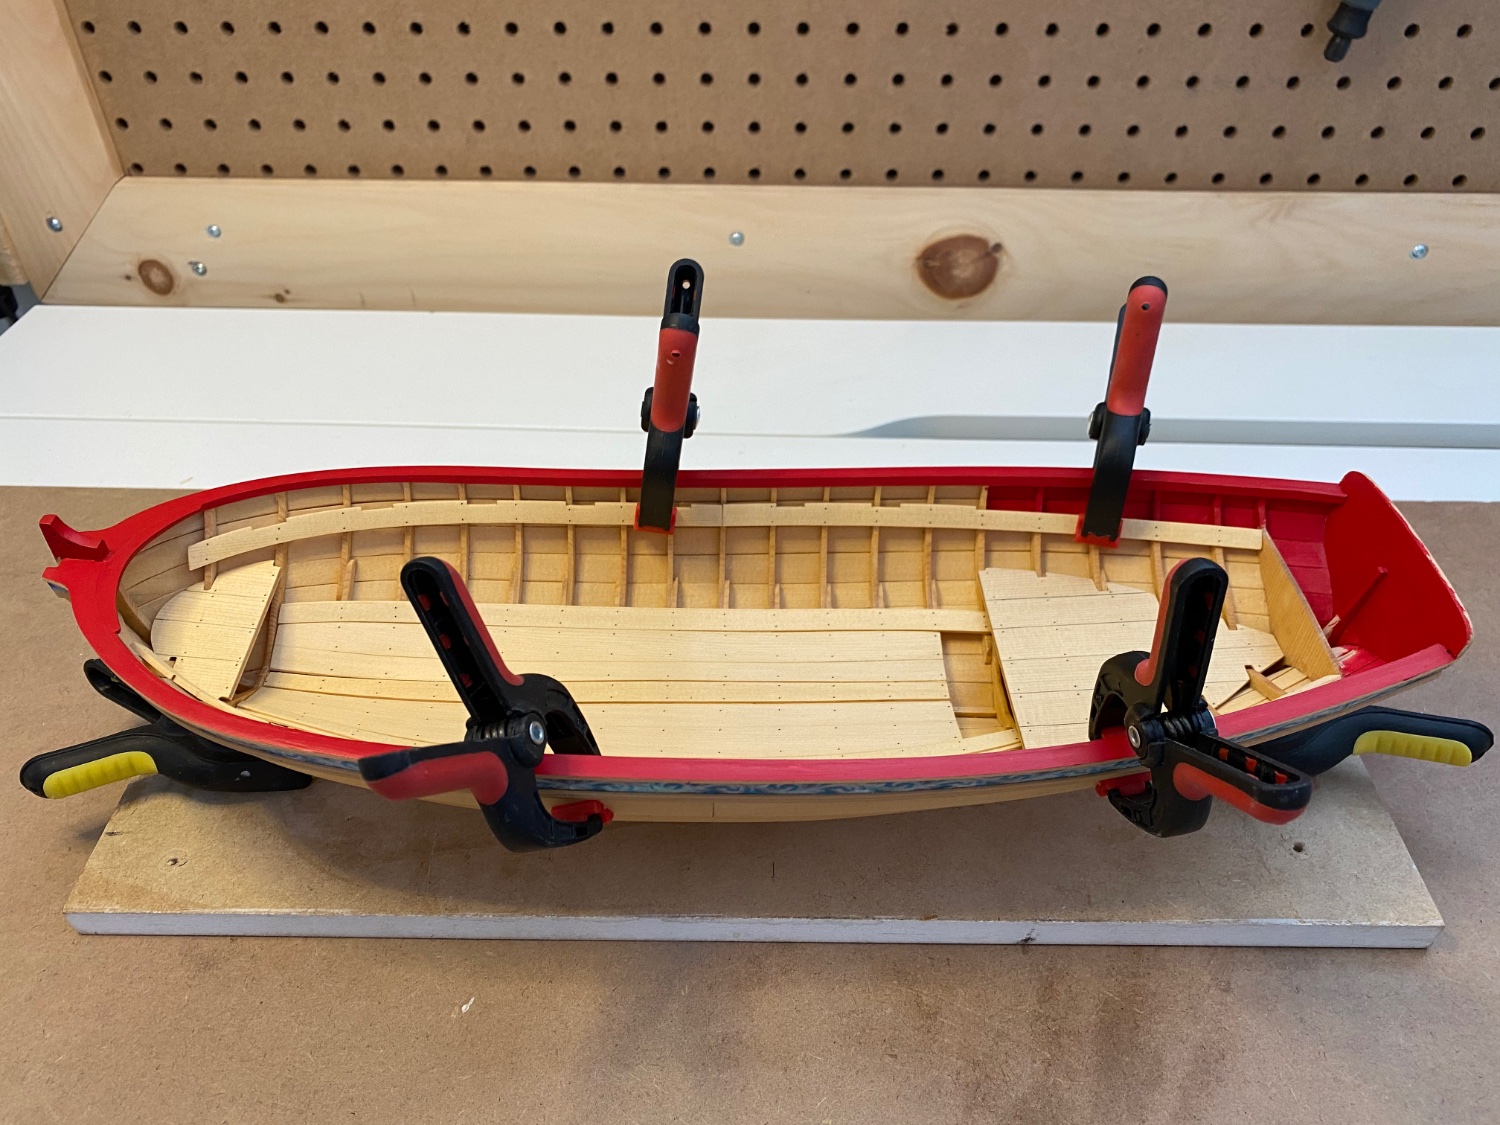
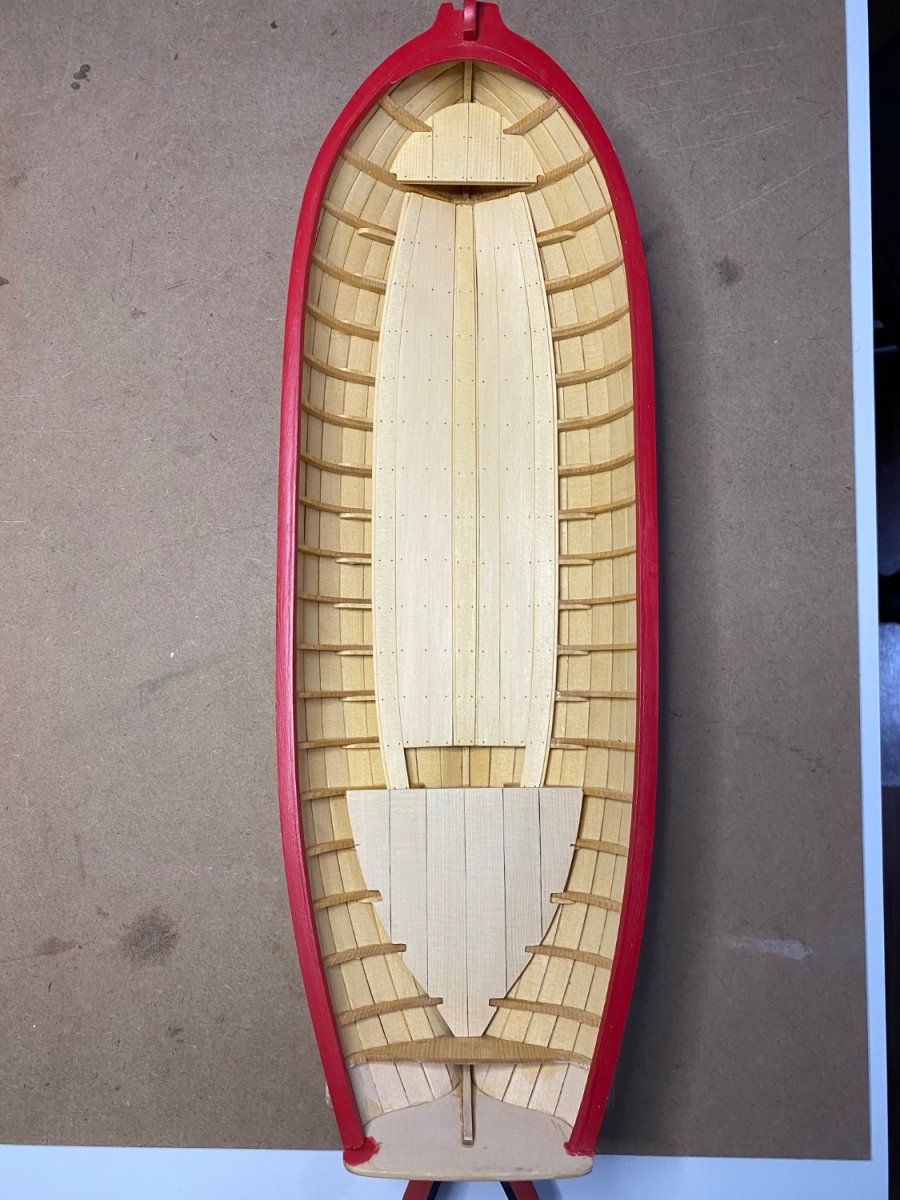
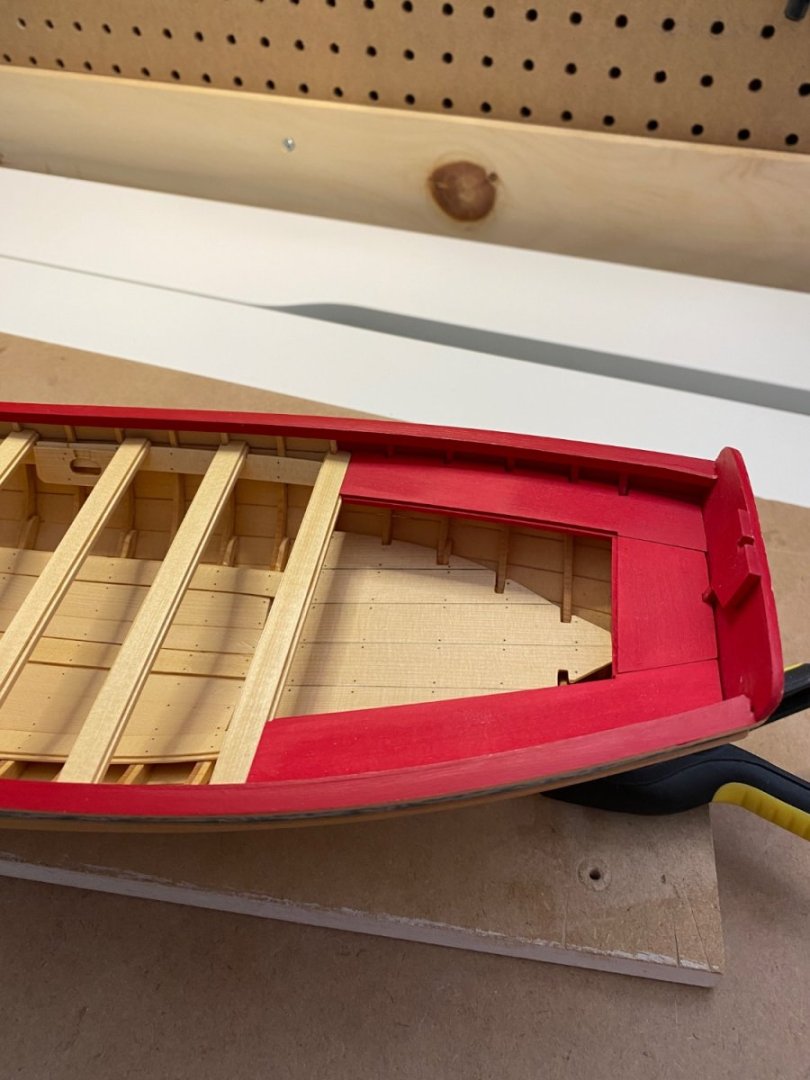
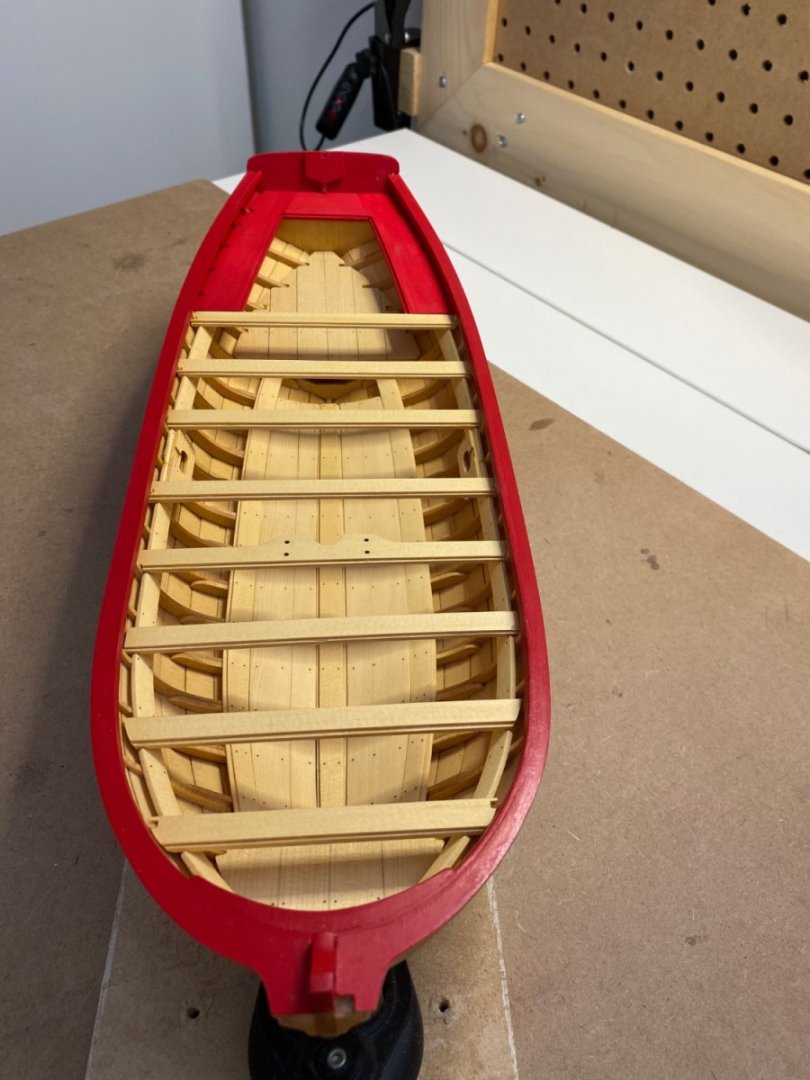
Have all the thwarts and rear platform fitted and a couple of coats of paint done. Still have to tweak the platform before gluing. Also have the cap stain brackets in.


- 217 replies
-
- 8
-
-
- medway longboat
- Syren Ship Model Company
- (and 1 more)
-
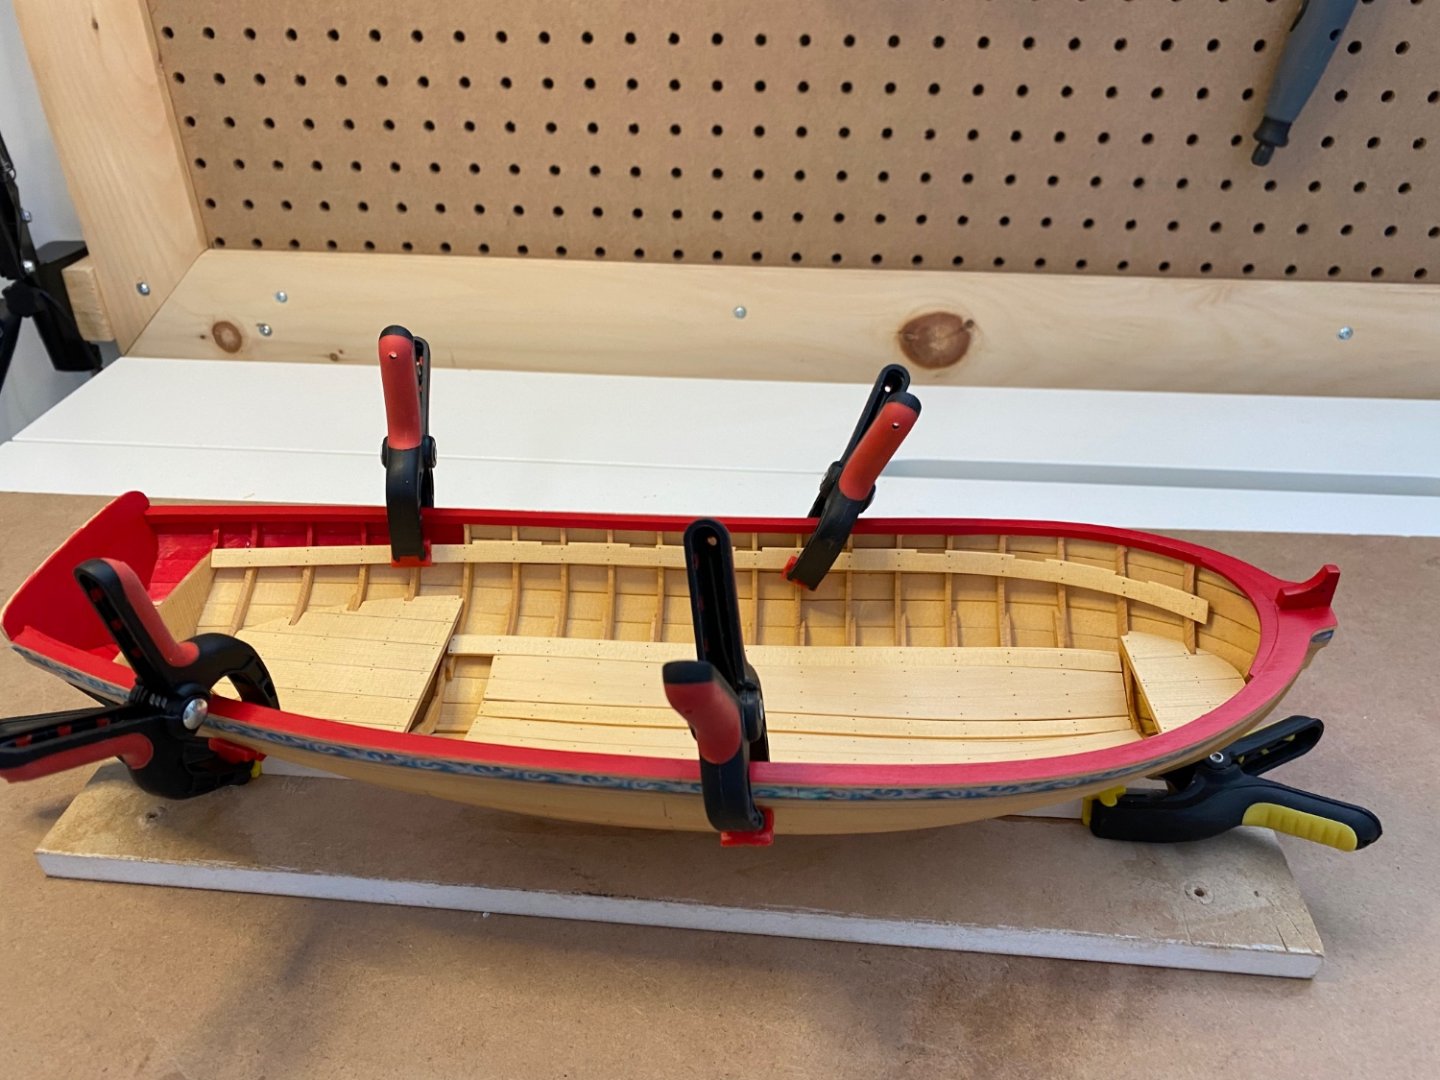
How have other builders tied the rear side seats into the last thwart? Darn, I looked at some build logs and have figured it out.
- 217 replies
-
- 1
-
-
- medway longboat
- Syren Ship Model Company
- (and 1 more)
-
Beautifull work. Can I ask where the board cutter was purchased. Thanks
- 840 replies
-
- 2
-
-
- winchelsea
- Syren Ship Model Company
- (and 1 more)
-
Watching and learning
-
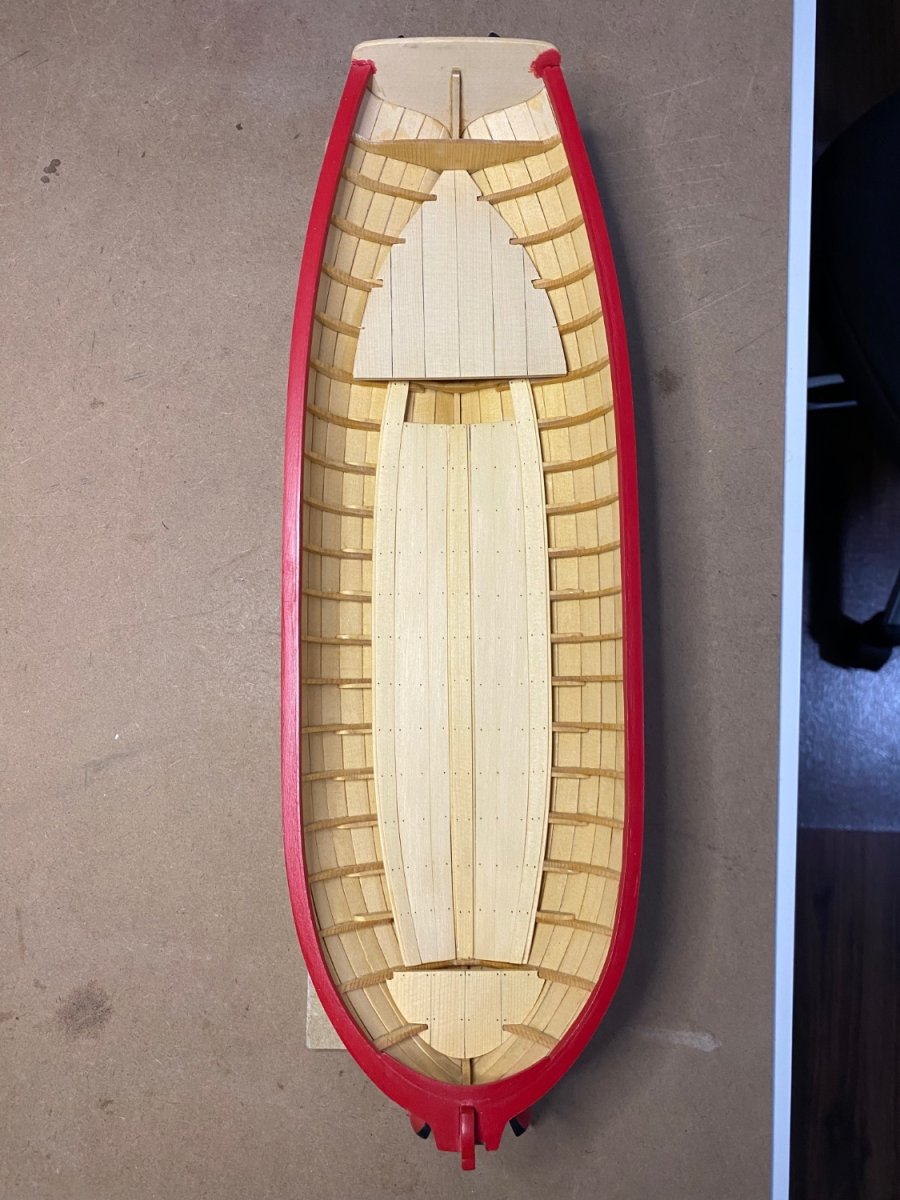
Test fitting of the risers. The shaping and fitting of boards is becoming easier. Still have to lower the forward platform a bit. I put a couple of coats of paint on before I glue the pieces in.

- 217 replies
-
- 5
-
-
- medway longboat
- Syren Ship Model Company
- (and 1 more)
-
Nice tip. I am almost at that stage and will do the same thing.
- 155 replies
-
- 2
-
-
- Medway Longboat
- Syren Ship Model Company
- (and 1 more)
-
What a fine collection of vessels. I am in the process of building the Medway longboat by Syren. When complete I have decided to try my hand at the Lady Elanor.
- 46 replies
-
- 1
-
-
- vanguard models
- Erycina
- (and 3 more)
-
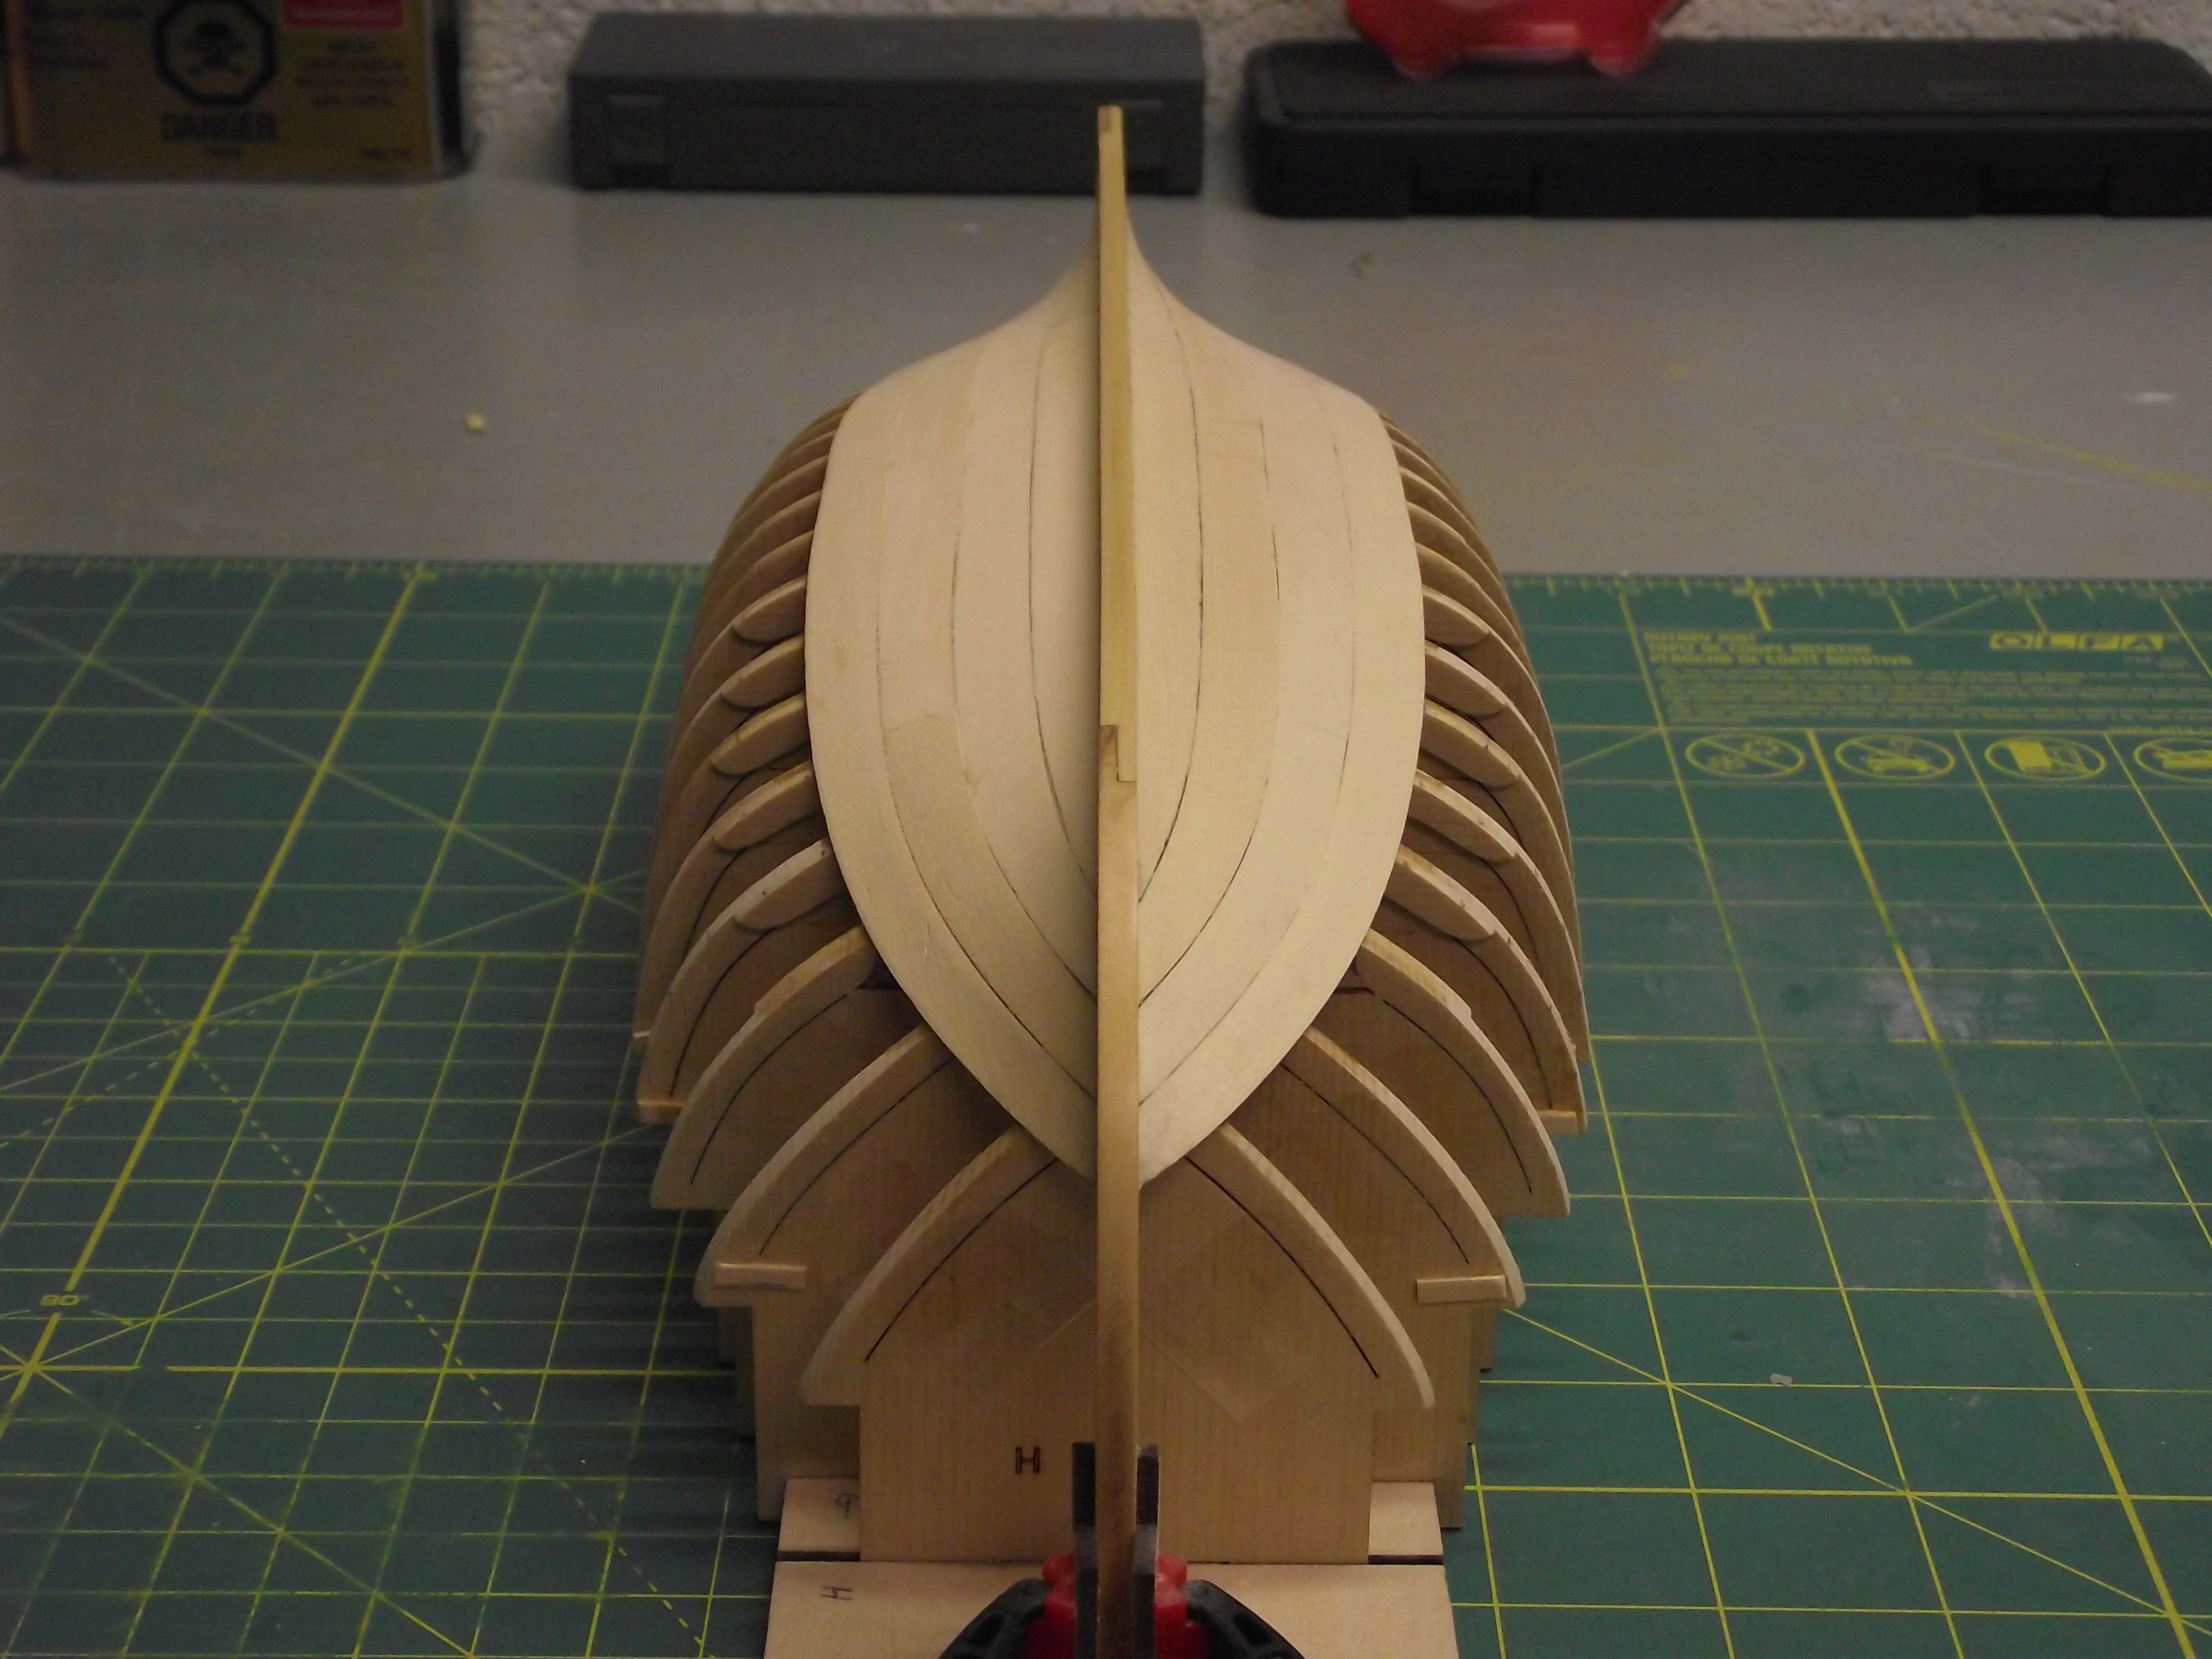
I have been working on the boat lately. Definition of insanity, doing the same task over and over, expecting a different result. Six attempts at the forward platform and finally changed my approach. Am happy with the fit so far although I must get it to good a little lower. The rear platform is a little easier but still has to go a little lower.


- 217 replies
-
- 7
-
-
- medway longboat
- Syren Ship Model Company
- (and 1 more)
-
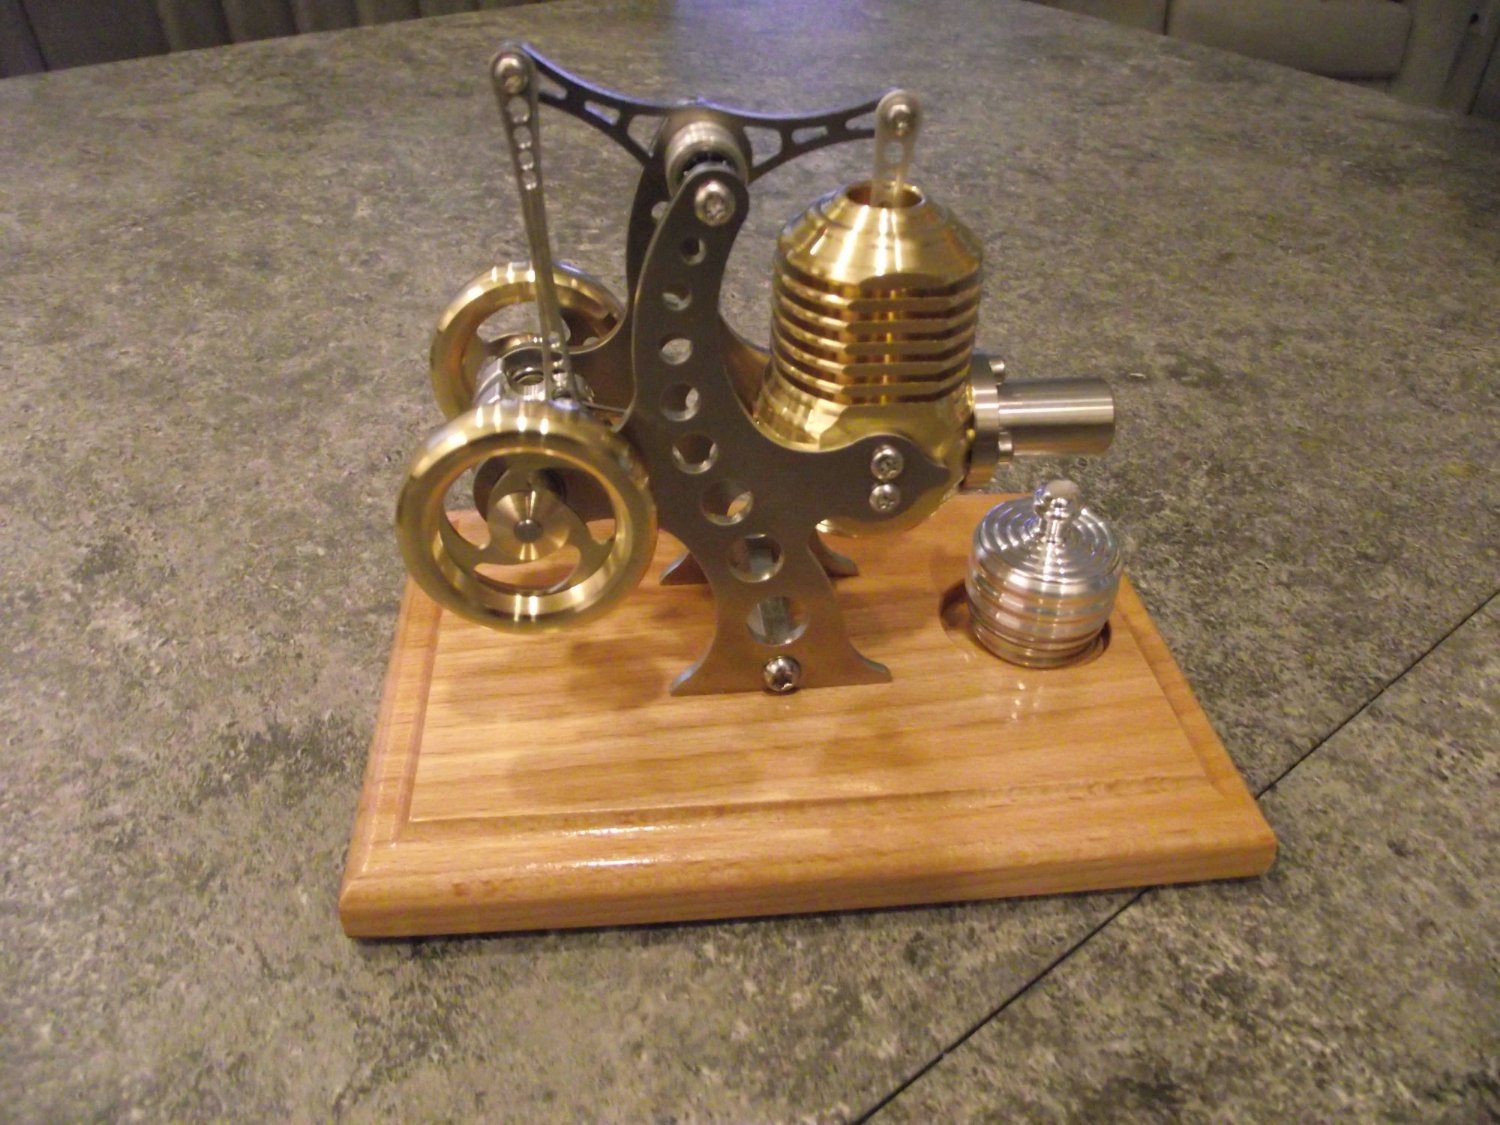
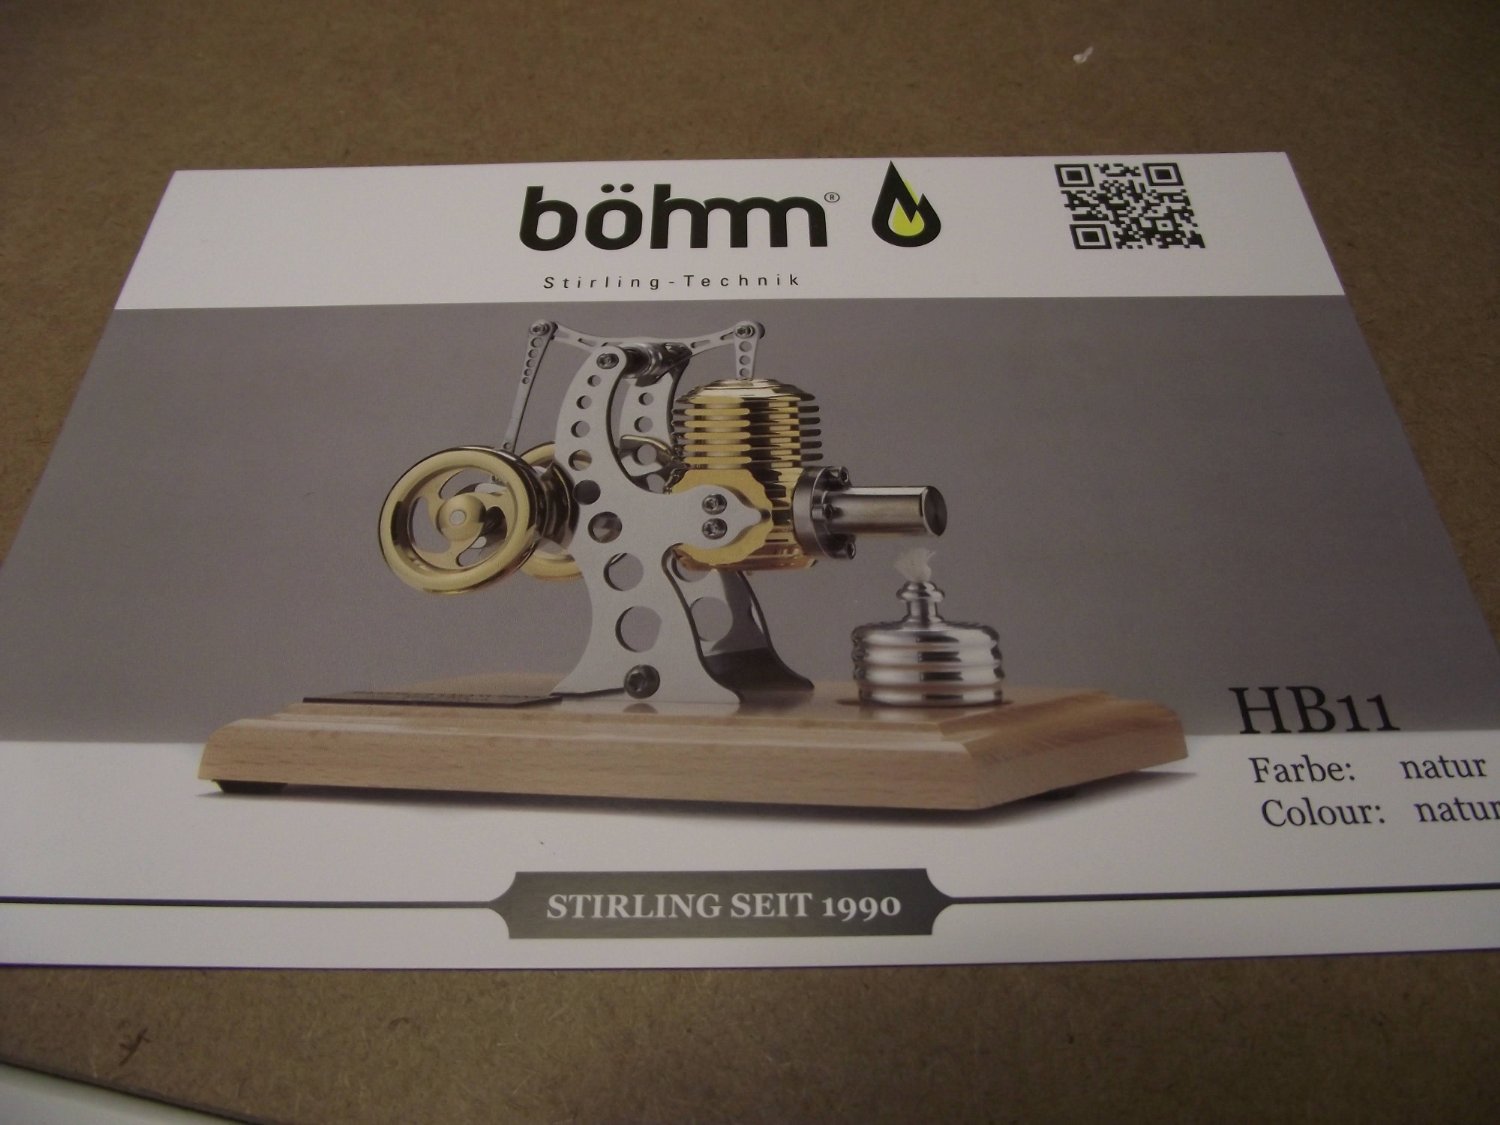
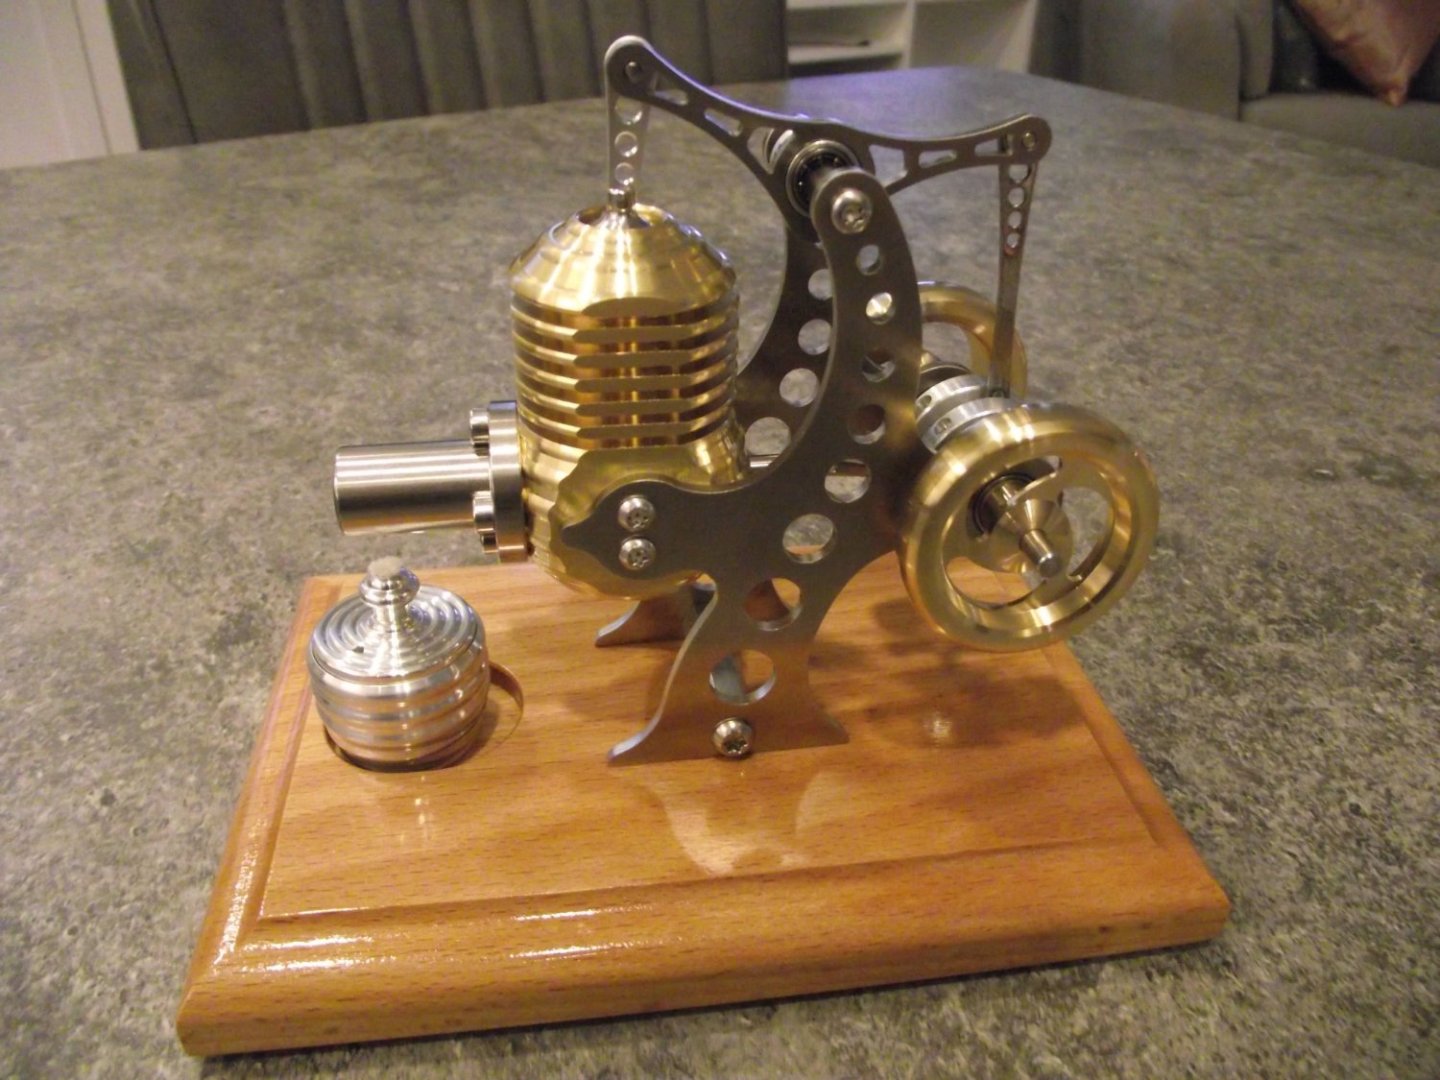
HB11 Stirling Hot Air Engine by Diver - Böhm
Diver replied to Diver's topic in Non-ship/categorised builds
The video is not the best. It was done on my iPhone. The engine runs smoothly for 10 minutes on a fill. This was an enjoyable build. Now back to the platforms on my Medway long boat IMG_0428.MOV -
HB11 Stirling Hot Air Engine by Diver - Böhm
Diver replied to Diver's topic in Non-ship/categorised builds
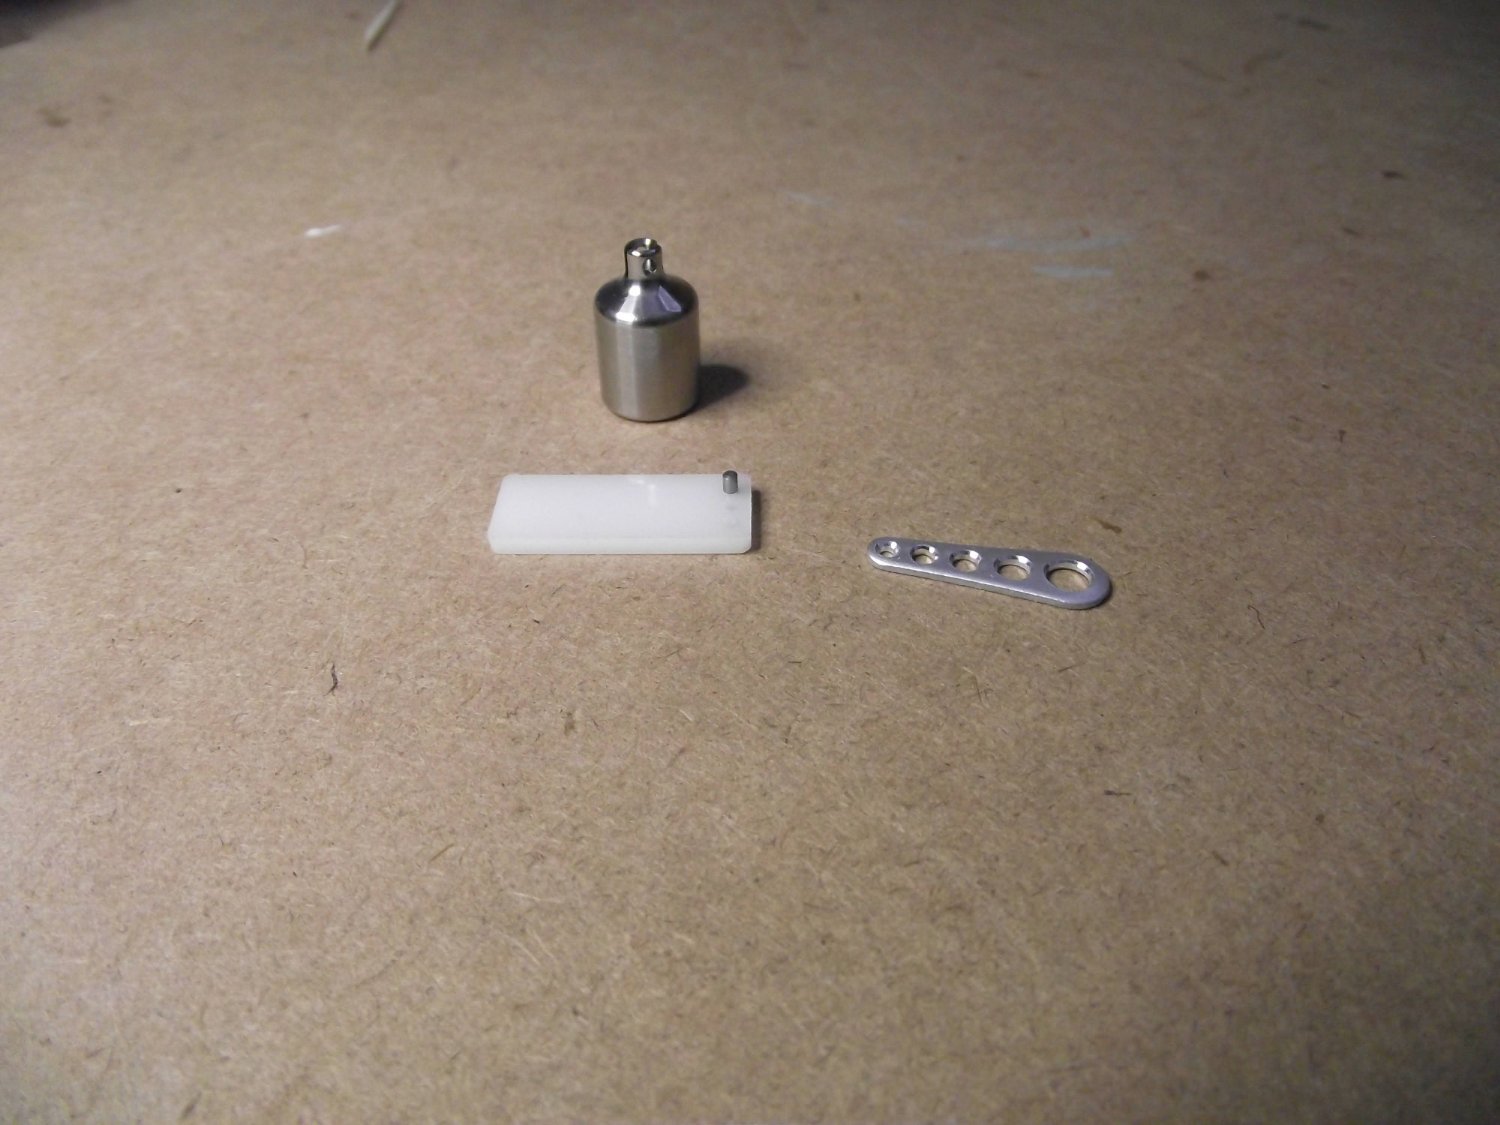
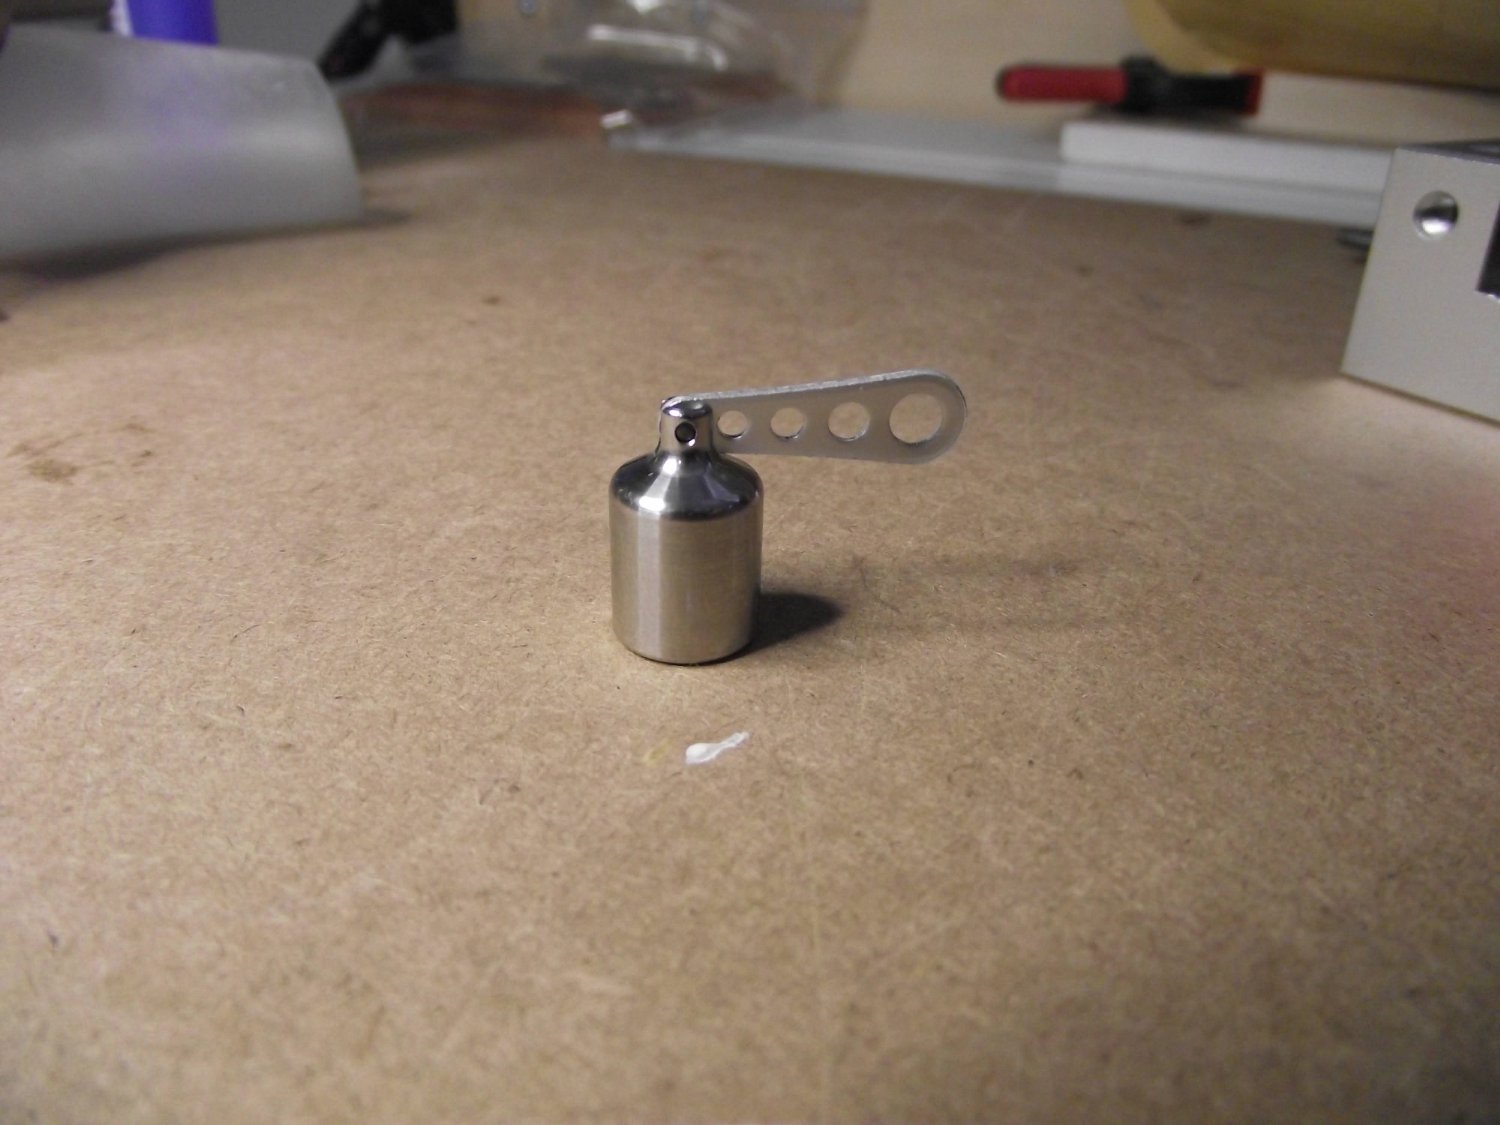
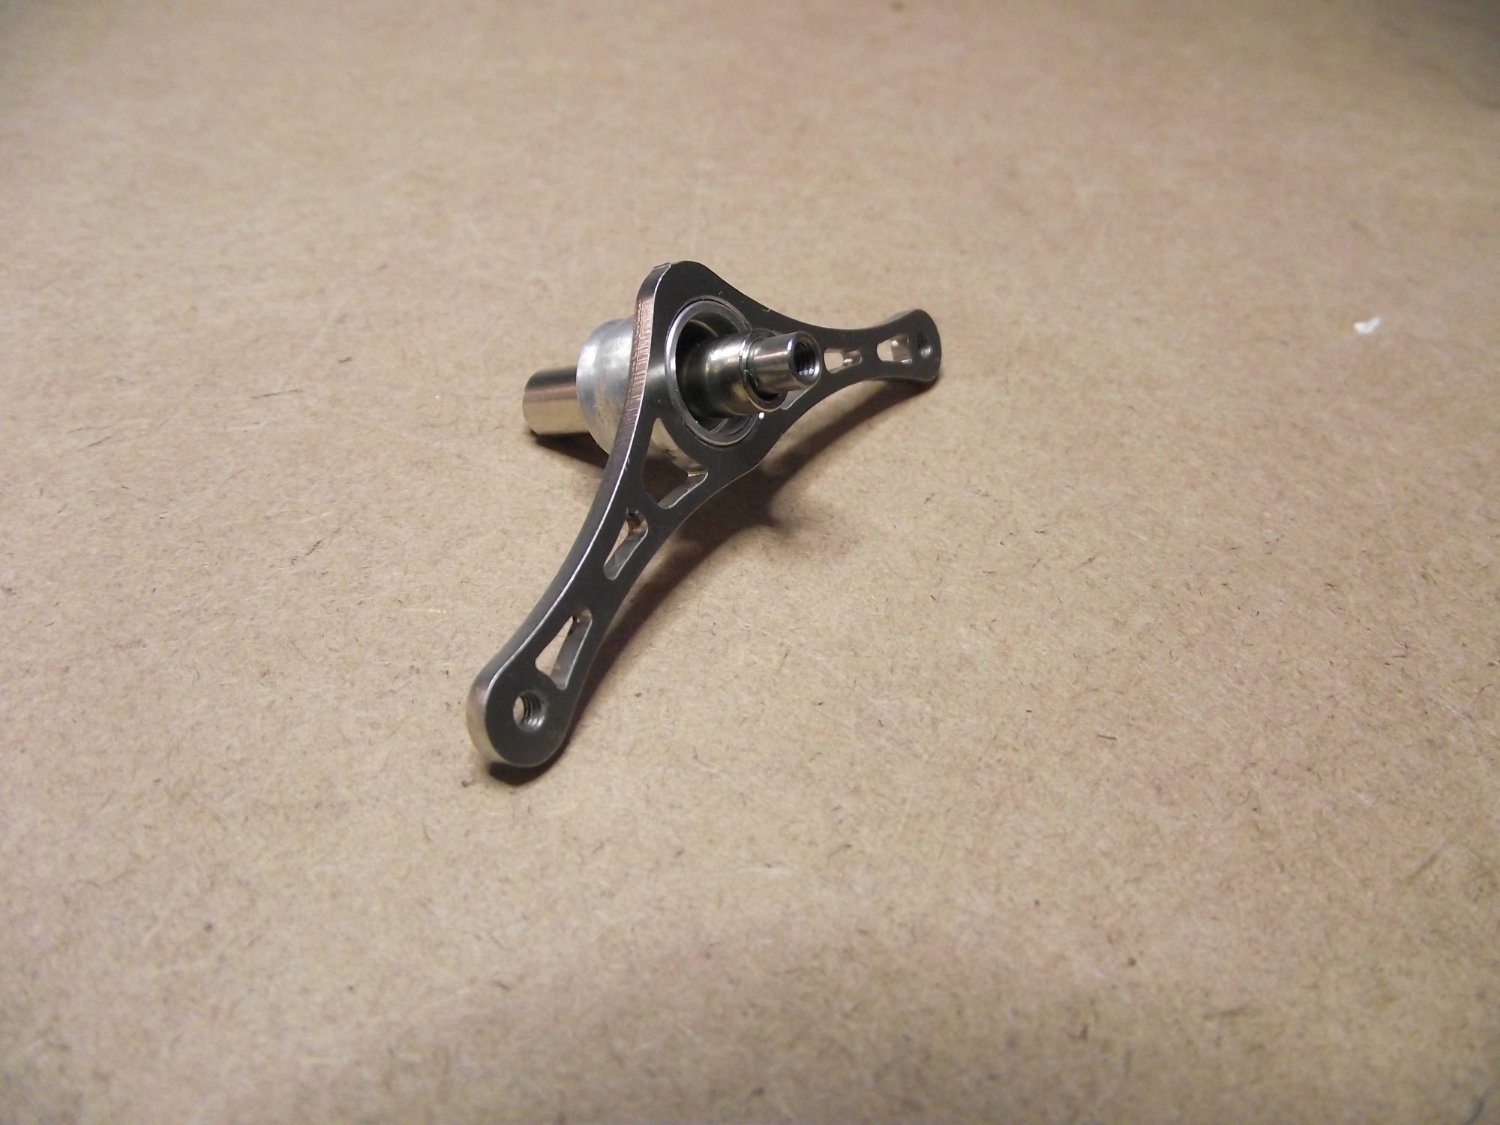
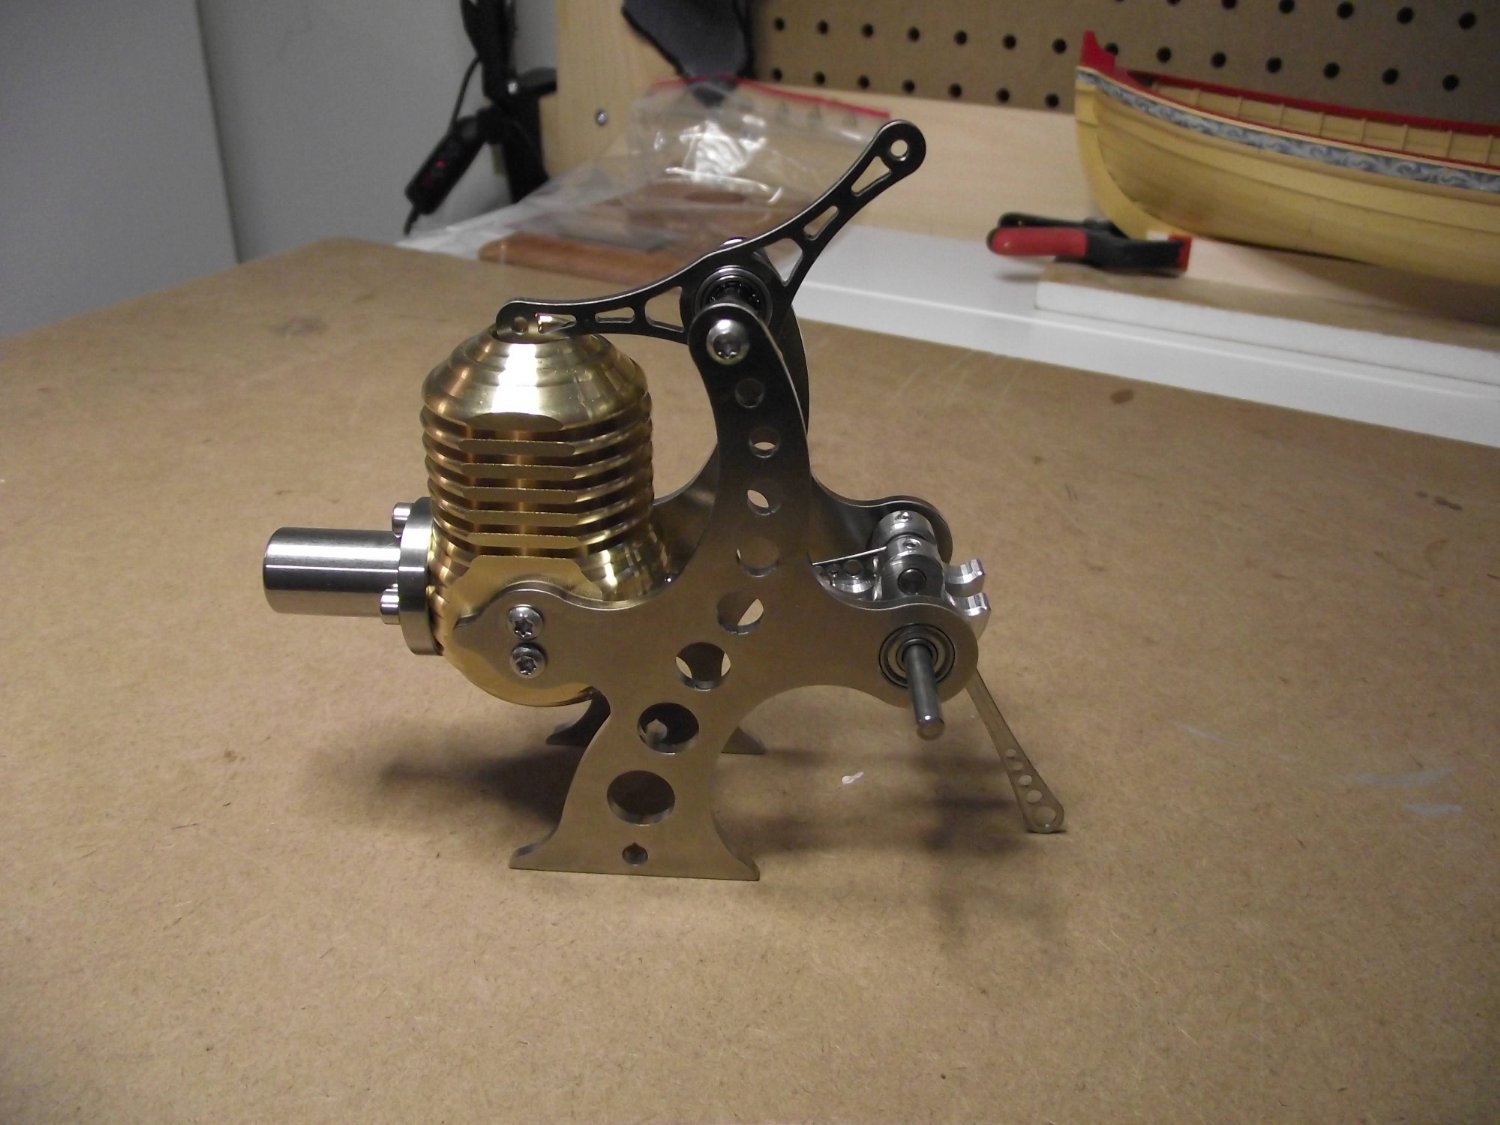
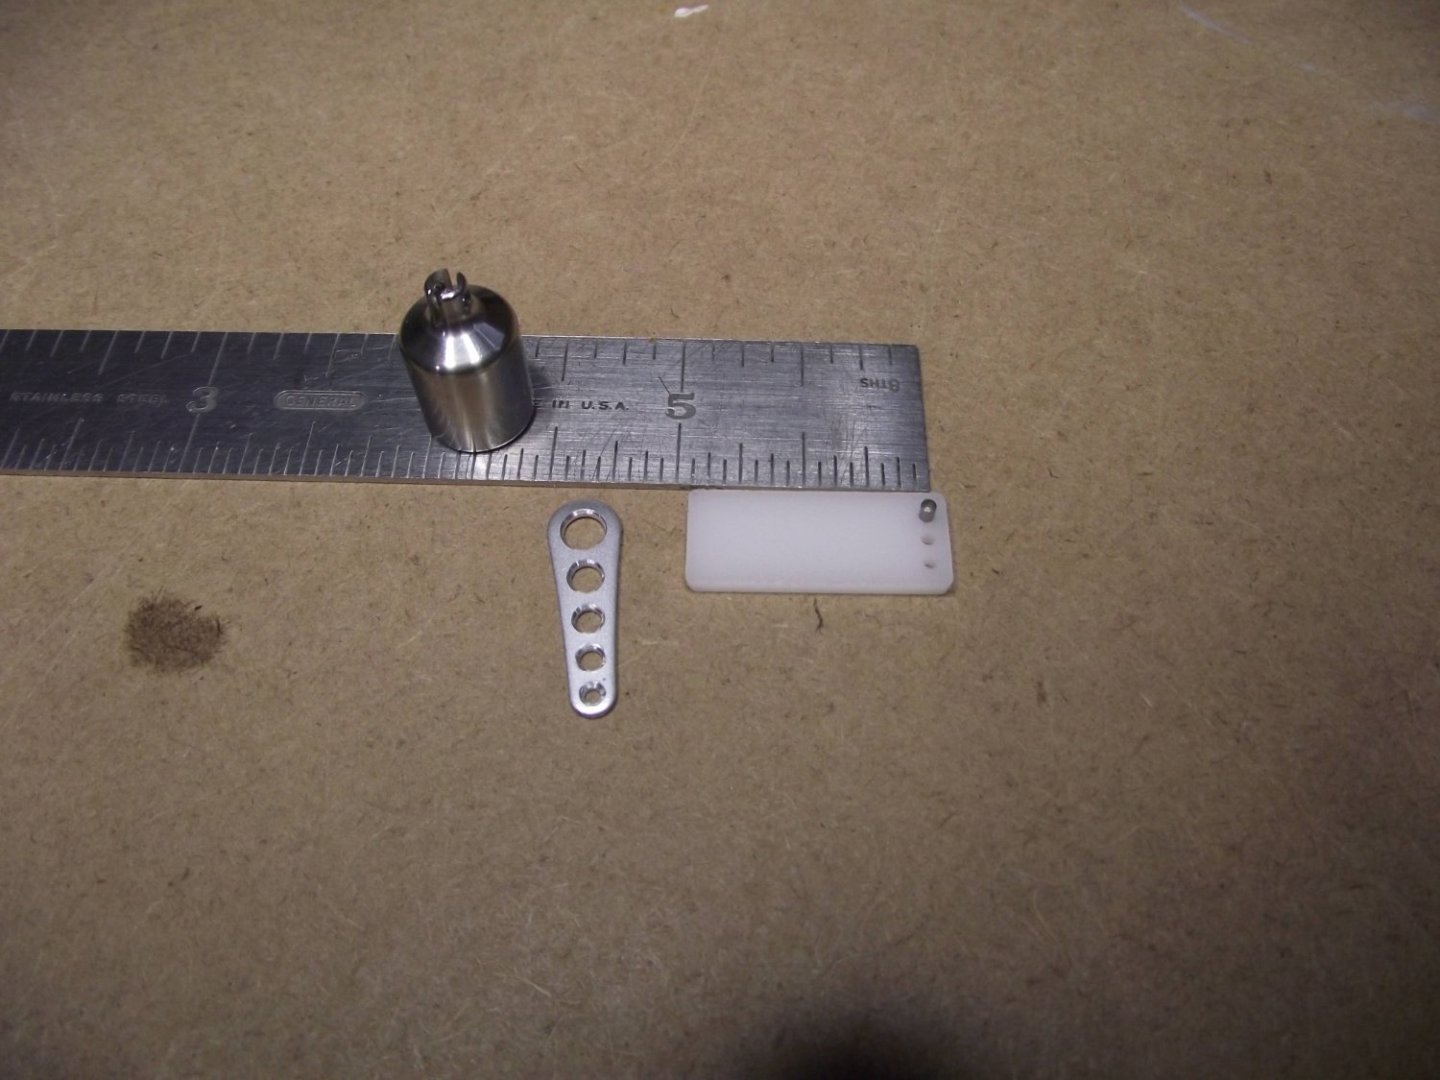
The first photo is the Working piston,short connecting rod, and the installation jig with the pin in it. The pin is chamfered on one end, as is the connecting rod. After this was complete it was Just a matter of installing brass bushings in the connecting rods and screwing them to the rocker arm. It was then secured to the provided base. Off to the drug store later to get some alcohol so a test run can be done. After the first rest run is complete, the working piston is removed and a very thin layer of white ceramic grease applied.


- 5 replies
-
- 14
-
-

-
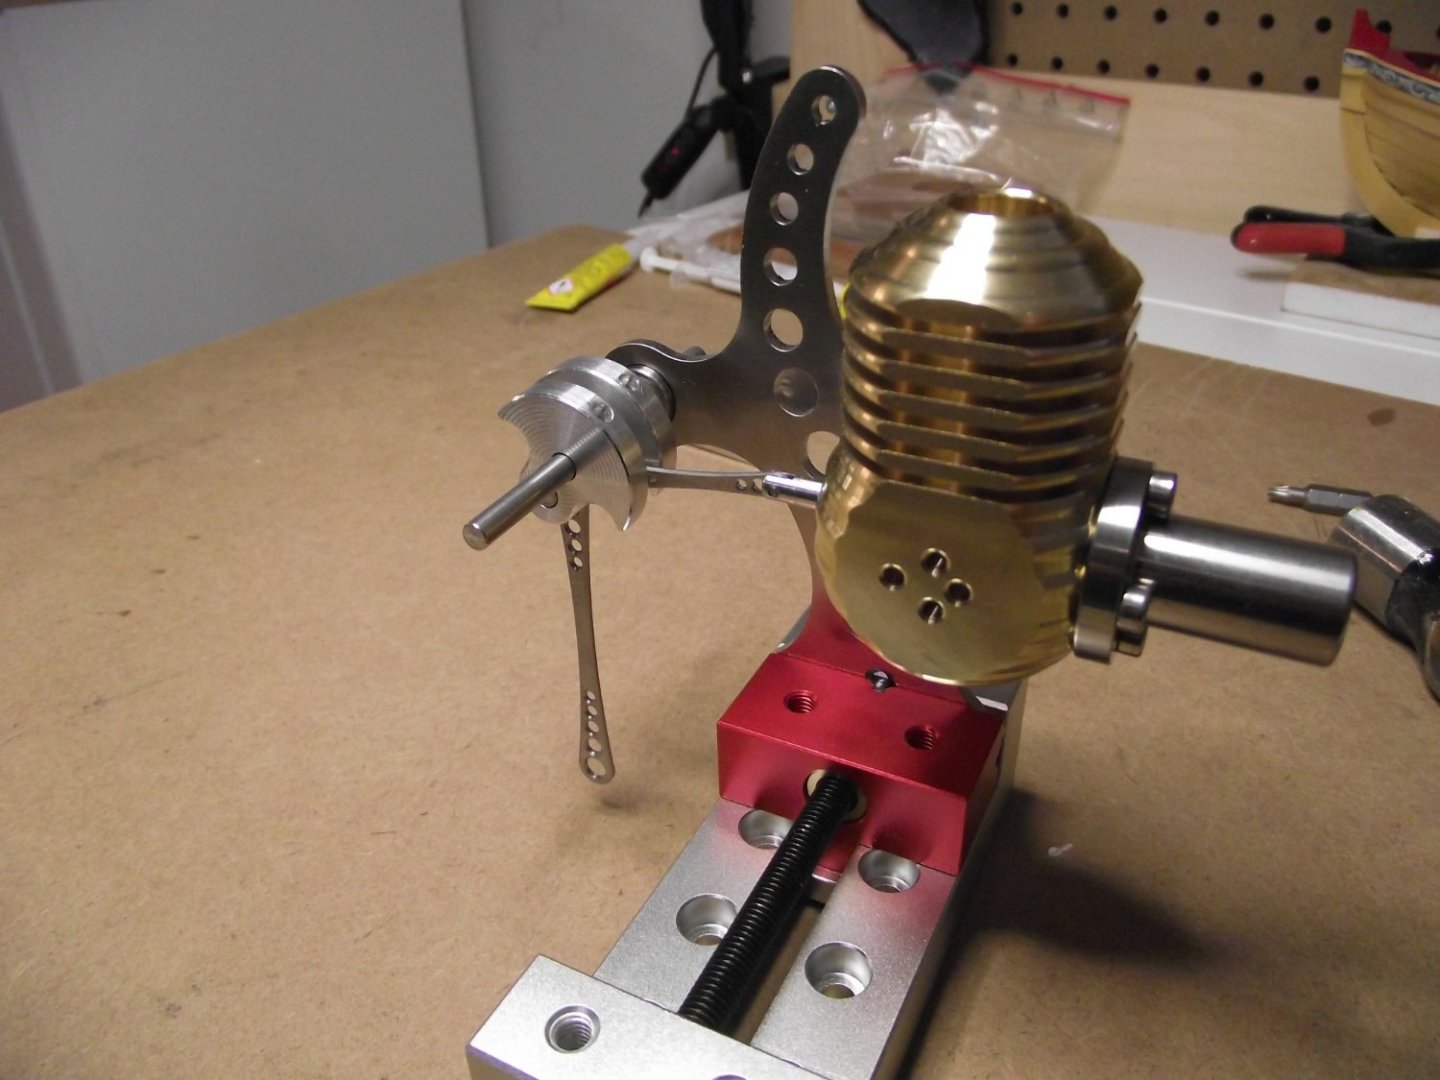
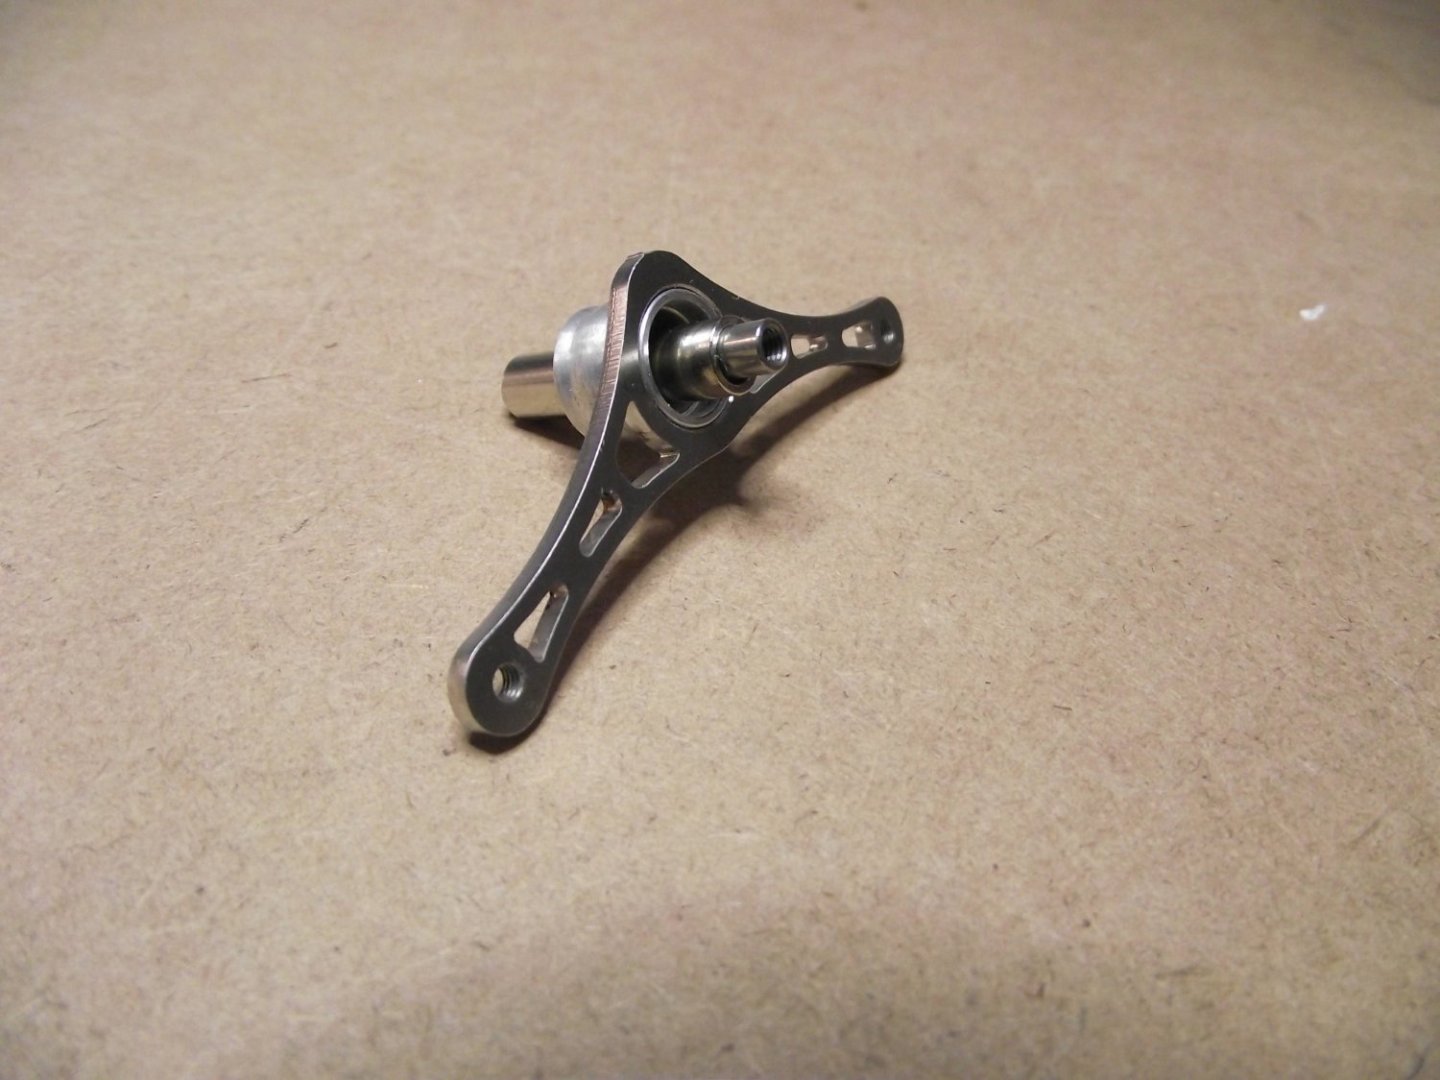
This kit was a Christmas gift from my wife. Very unexpected. It is a simple build but accuracy and gentle touch are required. I first cleaned up the main frames, lubricated and installed the bearing. Next was onto the displacement piston and rod. The 2 parts thread together and I had to clean up the mail thread for a good connection. These were then installed in the in the Cooling head. Next the crank shaft was dealt with. It came assembled with the drive wheel installed, would not have been possible to slide that through the bearing. I took the crank apart and at the same time installed the short connecting rod to the displacement connecting rod. The kit comes with a jig to install the pin,it is very small. Next, the rocker arm bearings, shaft and spacers were put together and installed on the mainframe (right side) along with the cooling cylinder. Then the left frame was installed. At this point everything is moving freely, very important on a small engine like this. This is a very well built kit


- 5 replies
-
- 13
-
-
-
Just going over you entire build. I hit a mental block trying to get a good fit on the forward platform. Have made 2 or 3 failed attempts. I just came up from the shop and am working on a template from a piece of sheet lumber. When I am happy with the template I will transfer to the built up piece, and work very slowly at getting it installed. My planking is not perfect, port and stbd new not end up perfectly level 4 planks down
- 155 replies
-
- 1
-
-
- Medway Longboat
- Syren Ship Model Company
- (and 1 more)
-
Just viewed your build. Very impressive. I have been away from my build for to long, time to get motivated
-
Thanks all for the well wishes.. This virus has now taken down the Admiral. I do not know if it is our age, but this really knocks us down. I have had a healthy life for the most part but this takes every bit of energy out of us and ever joint aches, no appetite, and fever that could heat a house. I urge all people to follow all COVID protocalls and stop the spread of this virus.
- 217 replies
-
- 3
-
-
- medway longboat
- Syren Ship Model Company
- (and 1 more)
-
Nothing to report on the build at this time. In March we decided to sell our house and down size. We listed the house and it was sold in four days, way over asking. I have set up a shop in our new digs, but it is considerably smaller, but big enough. I started to feel unwell on monday, and was down and out by tuesday morning. Did the Covid test and am positive. I am triple vaxxed and still managed to catch this horrible virus. Hope to be better soon.
- 217 replies
-
- 5
-
-

-
- medway longboat
- Syren Ship Model Company
- (and 1 more)
-
Renault RE20 by kpnuts - Italari - 1/12 - PLASTIC
Diver replied to kpnuts's topic in Completed non-ship models
What a job. Wow. Thats when F1 was interesting -
My metal ruler was wrong.
Diver replied to modeller_masa's topic in Modeling tools and Workshop Equipment
When I went to high school and took shop classes, we were always told that Rulers run countries, and Rules are used for measuring. I like my Starrett rule.- 34 replies
-
- 10
-
-

-
I am closely watching you build. I am sure my next project after my Medway longboat will be a Vanguard kit. I like the Yellow cloth you are resting your build on. It looks like a Kiwi shoe polish cloth we used to use in the military back in the day to Spit Polish foot wear.
- 562 replies
-
- 1
-
-
- vanguard models
- alert
- (and 2 more)
-
Just a quick question about card modells. Do they come colored or do you have to paint the pieces?
-
Hello Phil. I am really enjoying your build of Alert. I am at present muddling my way through the Medway longboat by Syren. I have decided that when it is finished my next project will be a Vanguard kit. Your build is inspirationel. The Medway is my first ever build and it is teaching me patience and skills.
-
My first ever build is the Medway longboat from Syren. It is challenging but the kit is excellent and the instructions are easy to follow. There is also the Group Project covering this build and lots of help from the people in the group, and Chuck.
-
I will attempt to do the belaying pins with this method, to Chucks dimensions. The one I did with the hardwood dowel was an excuse to try out the Dremel drill stand as a lathe.
- 217 replies
-
- 5
-
-
- medway longboat
- Syren Ship Model Company
- (and 1 more)