HOLIDAY DONATION DRIVE - SUPPORT MSW - DO YOUR PART TO KEEP THIS GREAT FORUM GOING! (Only 13 donations so far - C'mon guys!)
×


Captain Al
-
Posts
613 -
Joined
-
Last visited
Content Type
Profiles
Forums
Gallery
Events
Everything posted by Captain Al
-
Great work LA -- and in such a short period of time. I think you've caught up to me and I've been on this build for almost 2 years. I've got a couple questions for you. First, you mention building the two life boats (in fact I think they were both working boats and only one turned into a life boat and that wasn't by design). The upper one, the jolly boat, was built up in layers. Now you say "don't lay the bottom til you've almost finished shaping the hull. Here's my question -- my bottom piece was a flat piece of ply, about six inches long and two wide. It was labeled as a pre-cut part, meaning it was to be used as is. So I shaped the bottom donut just enough and into the same shape as this bottom piece. I assumed the boat had a flat bottom (maybe used in very shallow water). Now I see that your's has a much more V bottomto it and that it is much narrower at the keel. Can you explain how you shaped the bottom donut into this shape -- if I had done that there would have been nothing left of the donut. Second question -- your cannon look great. Did A.L. provide the brackets like they should have? Mine came without those 10 brass parts and I had to make them. Not hard, but surely not as nice as your's. So on to the masts....as you plan on how to build them take a look at the parts lists closely. Here's what I found -- (I've just started building them myself) -- there are 3 parts to each mast and there are 6 caps which are precut and used to join two parts together. These caps have holes and squares to insert the tops and bottoms of the mast. I have found that in two cases the diameter of the dowel which A.L. indicates to use is too small to fit snugly into the hole. For example, the top mizzen mast is supposed to join with the lower mast in cap 594. The caps square (for the bottom part of the mast) is about 7mm, while the dowel they recommend is 6mm (before any tapering). This seems to be a part or joint that has to be nicely snug. So I've used another dowel that was larger than the 7mm and shaped it to fit right. But I wonder if I'm missing something here. When you've had some time to look it all over (I would suggest a lot of time), please post your conclusions. My thought is that the size of the holes in the caps is what must determine the size of the dowel.
-
Thanks jb for your insights. A lot of good nautical history. I noted elsewhere to tlambo that the belaying to the foremast could just as easily and strongly be done around the mast rather than through a ring on the mast. Was I correct? It would seem like it would be easier to pull a bolt or pin out of the wood than it would be to snap the 4" rode if the right knot was tied.
-
Thanks everyone for the answers. I'd never even heard of an orlop deck. I thought it was a typo. Now I have something further to research. But it all makes sense. I think I'll reroute my model's cable and lay it on the platform. 85 fathoms would be around 500 feet, correct? That and the 4 inch cable are both out of scale in this model. They suggest 1.5mm thread which is more like 2.8 inches at 1:48, and they give us enough of that to make 2 1000mm rodes, each of them scaling to only 150 feet of rode. Hope they don't need to anchor in a storm. thanks again all.
-
I am building HMS Bounty and have followed the instructions for leading the anchor rode down into the hold. It seems from the build that the rode is actually sitting in the bilge between two frames. This had gotten me thinking... does the kit have it wrong and the rode should really end up elsewhere? Or, in reality, where was the rode stowed, as it would not seem to be a good idea to have manila rope sitting in bilge water for months. In addition to this question, can anyone tell me how much rode Bounty would have carried?
-
Lots of soaking gentlemen....get those basswood and walnut planks plenty saturated (I often had mine in the soaking tube for 12-18 hours) before attempting that long bow curve. I never found that there was such a thing as oversoaking, so I figured the more the better. There are plenty of other tips on bending here and elsewhere, but I'll just throw in one more that worked well for me. Anchor one end of the plank with a clamp and work your way around to the other end of the plank (generally I had 3 planks for the length of the hull after the 3rd plank). If, while making the bend, the wood seems a bit stiff and possibly might snap, put a little piece of terry cloth rag on it and hold a soldering iron over the rag or even on it. It will immediately steam up and the wood will give in. What I'm describing here is the first step in planking where I would take the wet wood and put it on the frames to dry. If done well when they're dry, they'll maintain the shape you need to lay them down nicely with glue and minor clamping.
-
Appropriate thread for rigging
Captain Al replied to Captain Al's topic in Masting, rigging and sails
Thanks for the references Duffer. Yeah, .25 wire works pretty well on blocks. -
Appropriate thread for rigging
Captain Al replied to Captain Al's topic in Masting, rigging and sails
I will keep that in mind. The only time really I've thought that even .15mm was way too small was in tying in blocks. -
I'm about to order more rigging line (thread as my kit calls it) and I can't actually duplicate the .15mm diameter thread that the kit supplied (too little of). Would I be better off going with .13mm or .20mm? My inclination is the larger size. My kit also says its supplied thread is cotton. I don't see cotton on various web sites. Is it implied unless specified otherwise? I see polyester but don't care for poly much. Also manila (hemp). Which would most look real? For an 18th century period ship I'd guess manila. What say you folks?
-
Looking for a Bench Top Drill Press
Captain Al replied to FlounderFillet5's topic in Modeling tools and Workshop Equipment
Many thanks FF5 and Kurt.- 31 replies
-
- 1
-

-
- Drill Press
- Microlux
- (and 1 more)
-
Very nice work LA. Good to see you making steady progress.
-
Bryan, as one who struggled for 4 months on this same planking, I know all the trials and tribulations you've gone through. You should be commended for persisting in the task and getting it done. Good job. If I can chime in with a couple observations (lessons I learned along the way as well) perhaps you'll have an easier time with your next build. The first thing I notice from your pix is that your frames (particularly on the port side) do not appear to have had much fairing and beveling to match the curvature of the hull. It may be only the photo illusion. Without a lot of painstaking sanding of each frame to a proper angle, it would be hard if not impossible to get the planks to lay flat and there will be precious little gluing surface under each one. The other issue I found to be so extremely important on mine is the tapering of each plank and the position of the garboard plank. You may have waited too long to start tapering; I did and ended with a few unwanted pointy planks. Overall looks good and like you said, ready for filling and lots of sanding with that 3000. You'll soon be moving to more fun stuff, so hang in there and wear a face mask.
-
Looking for a Bench Top Drill Press
Captain Al replied to FlounderFillet5's topic in Modeling tools and Workshop Equipment
I haven't seen any on the internet that small. Half inch is the smallest I've found so far.- 31 replies
-
- 1
-
-
- Drill Press
- Microlux
- (and 1 more)
-
Looking for a Bench Top Drill Press
Captain Al replied to FlounderFillet5's topic in Modeling tools and Workshop Equipment
Just to clarify the use of a machinist pin vise in a table top drill press... You simply put the shank of the pin vise into the chuck just as you would a drill bit? Wouldn't this mean that whatever chuck you're using it would have to handle a bit (or pin vise shank) of 1/2" to 3/4"? My standup full size Delta drill press can do that, but can these table models handle bit's that large?- 31 replies
-
- 2
-
-
- Drill Press
- Microlux
- (and 1 more)
-
Cutting recesses?
Captain Al replied to Redshirt's topic in Building, Framing, Planking and plating a ships hull and deck
I use this technique. I cut the sides of the mortise with a razor saw, holding the keel in a vise. Make sure to cut equally on both sides and just up to the depth you want (mark it). Then I put the point of an exacto blade (in the holder) in between the two cuts and a sharp tap with a mini hammer knocks the mortise out. I don't know how well this will work with plywood. It works best with solid wood and you must be cross cutting with the saw and knocking out the mortise with the grain. -
Gluing 101
Captain Al replied to CPT_D's topic in Building, Framing, Planking and plating a ships hull and deck
I've used a sewing needle with the eye cut in half -- cut into a 2 pronged fork. Then I put a couple drops of CA into a plastic teaspoon (which can be bought at a Dollar store for, of course $1 for 50) and I put the fork into the drop of glue and then transfer it to the wood joint. This works well with very thin CA, not well with gel. -
Bryan, have you glued in your bilge tubes? Reason I ask is this: When you build your pumps you will place them over the tubes and you'll want a bit of tube protruding up above deck level; maybe a quarter inch. I left enough so that the tube inserted pretty far into the pump. This way the pump, though glued down, will never break off. What this meant for my build is that the bottom of the tube does not actually sit on the mast step or frame as your's appears to, but sits with about 1/4 inch of space between it and the mast step. Now I don't know for certain if I did it right, so this is only food for thought. But part of my reasoning was that if the tubes actually sit on the floor boards, they would not be able to draw water, particularly if there was a lot of fouling gunk in the water. As I said, food for thought. If you're already glued in I would probably leave it as is and probably just glue the pumps in place over the flush top of the tubes.
-
Good Morning Bryan and welcome to the world of my masts don't go into their holes. I don't know how extensively I covered this problem in my build log -- maybe not at all -- but I had the exact problem. Masts were perfect when I dry fit the deck. Then two of the three didn't hit the holes correctly. Boyd may have just referenced my solution which was (in part) to take off a bit of the mast at the foot. I also got down in there with a long round file and worked the hole. Now I can also recall that my problem was not so much getting through the round holes of the lower deck, but actually fitting into the mast step itself. These steps are rectangular and the mast is obviously round. Before going down into them they had to be tennoned. So the process of getting them to sit well was really just an extension or exaggeration of what had to be done anyway. Once you create a rectangular shaped tenon at the mast foot you'll have to always orient the mast the same way -- ie there will be a front and back and port and starboard side to the mast. My last comment on this is that I learned while doing it that one of the masts, I believe the mizzen, is supposed to have a slight rake to it. I think its like 7 or 10 degrees. In my case, just by sheer luck, that's about how well the mast sits after all the fiddling. I think I spent around 20 hours on these adjustments. Otherwise, I wanted to say that your interior looks great and the deck looks fine as well. Oh, one more thing -- I had to enlarge the mast opening on the top deck to allow the mast to slide in at the right angle. Not to worry; the rings (provided) are large enough to cover the slight gap. At one point I considered really making these holes large and using shims around the mast. This is actually the way it was done I believe.
-
Orvis makes a fly tying scissor for $7. Its great. You can nip off the ends of loose line right up to the knot or place you want to end a wrap.
-
Problem for me too. I'd like to hear from more experience builders, but here's how I tackled it. Holding the excess line sort of taut -- at least straight out on the deck-- I put the eraser of a brand new pencil next to the thread and began twirling the pencil around. The eraser head is porous enough to grab the thread and after one or two twirls it holds on itself. So I wrap up the line and then I carefully push the coil to the bottom of the eraser and off the pencil entirely. Now, have some watered down PVA glue ready at hand and apply a liberal amount with a artists paintbrush to the coil. The wetness will hold the coil in place, and when it dries, the PVA will be unseen -- use white pva and it won't alter the color of the thread at all. Hope this helps. Like I said, I'm new to this and I just keep trying different techniques til something works.
-
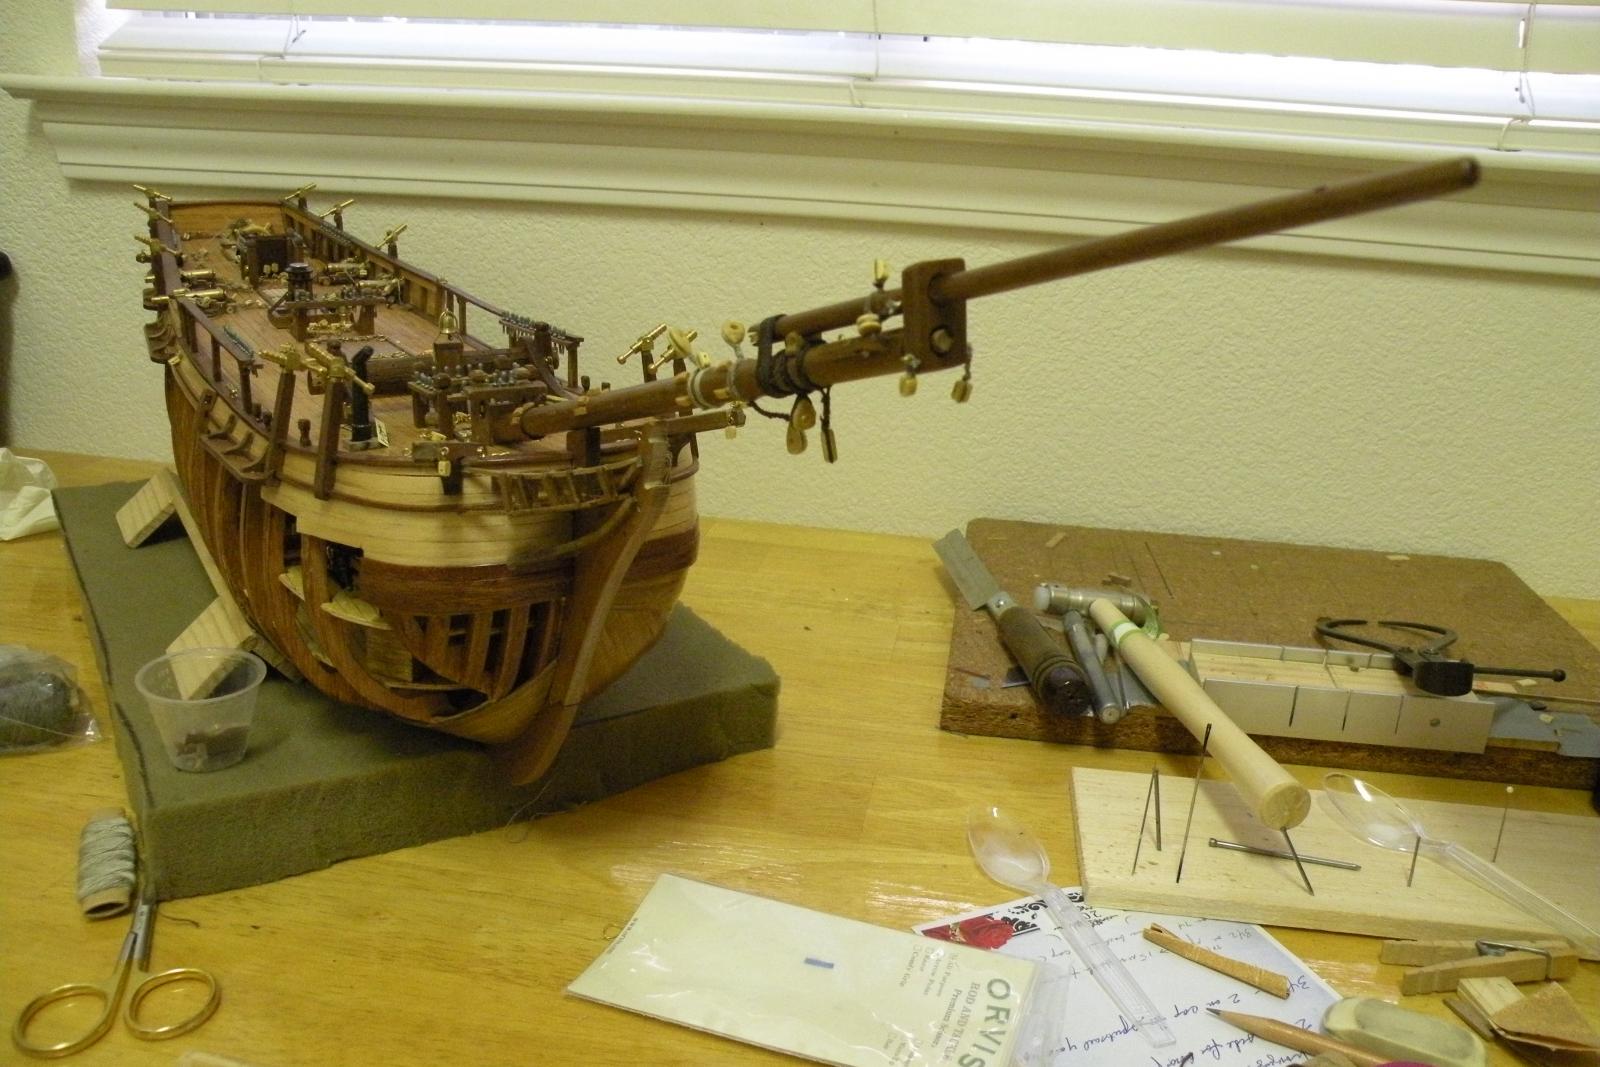
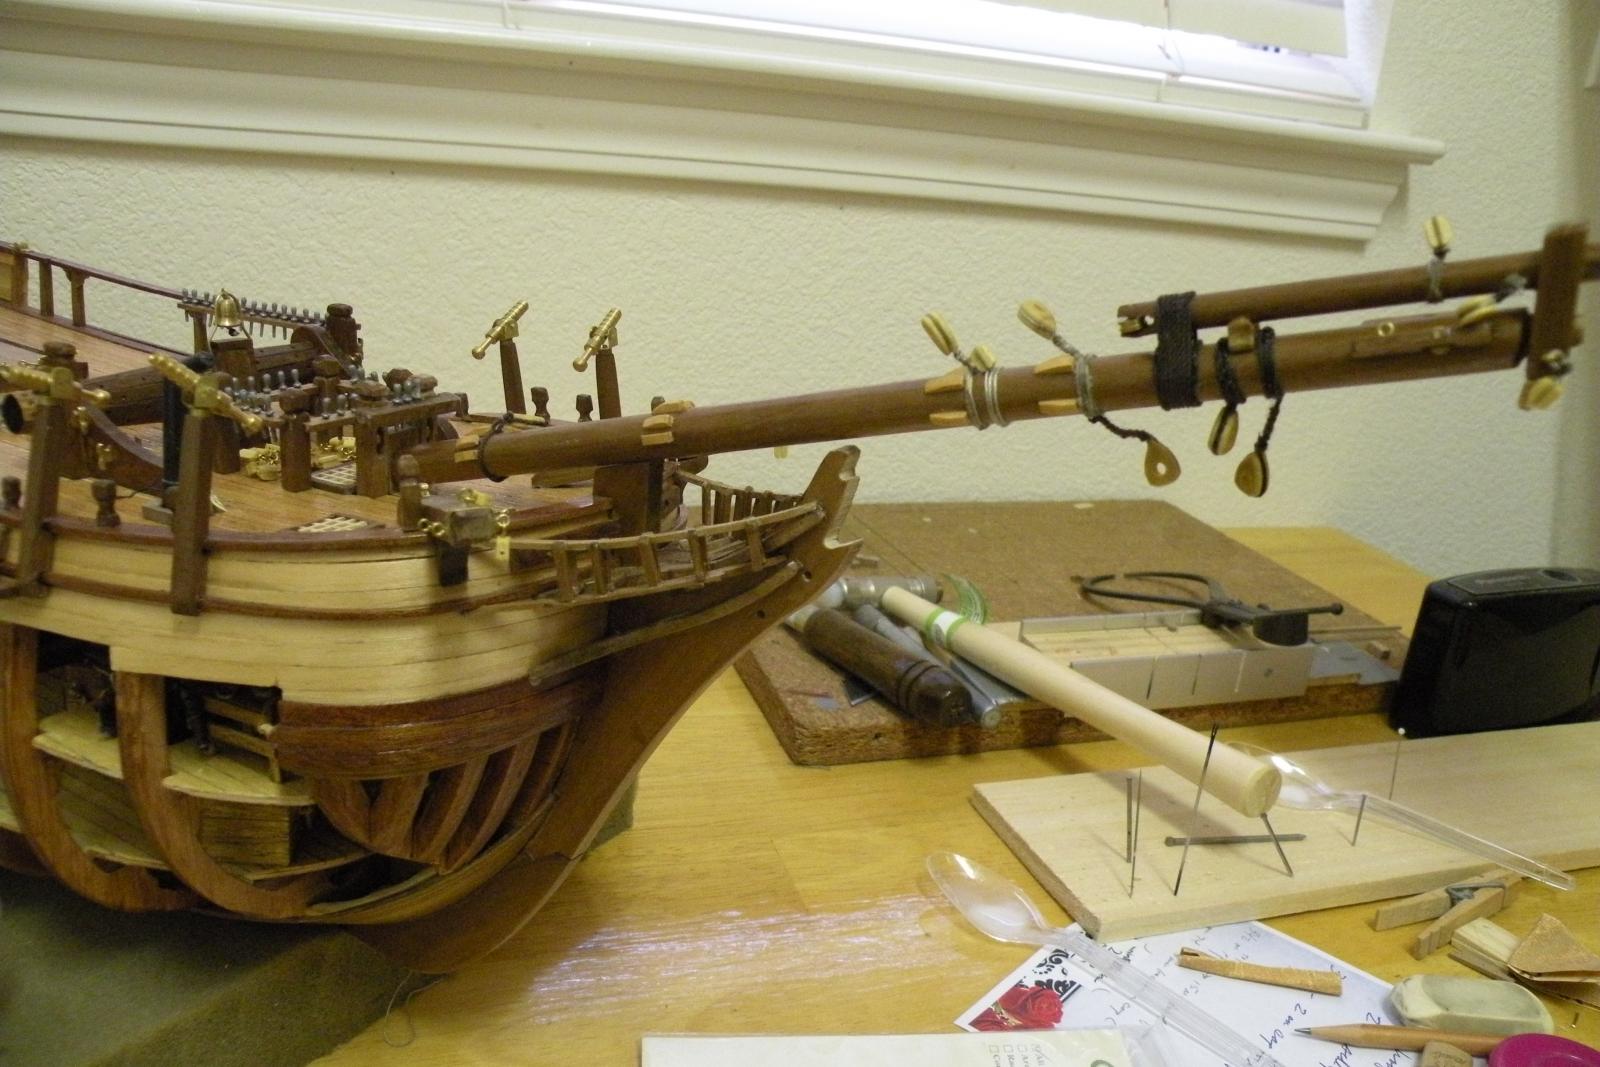
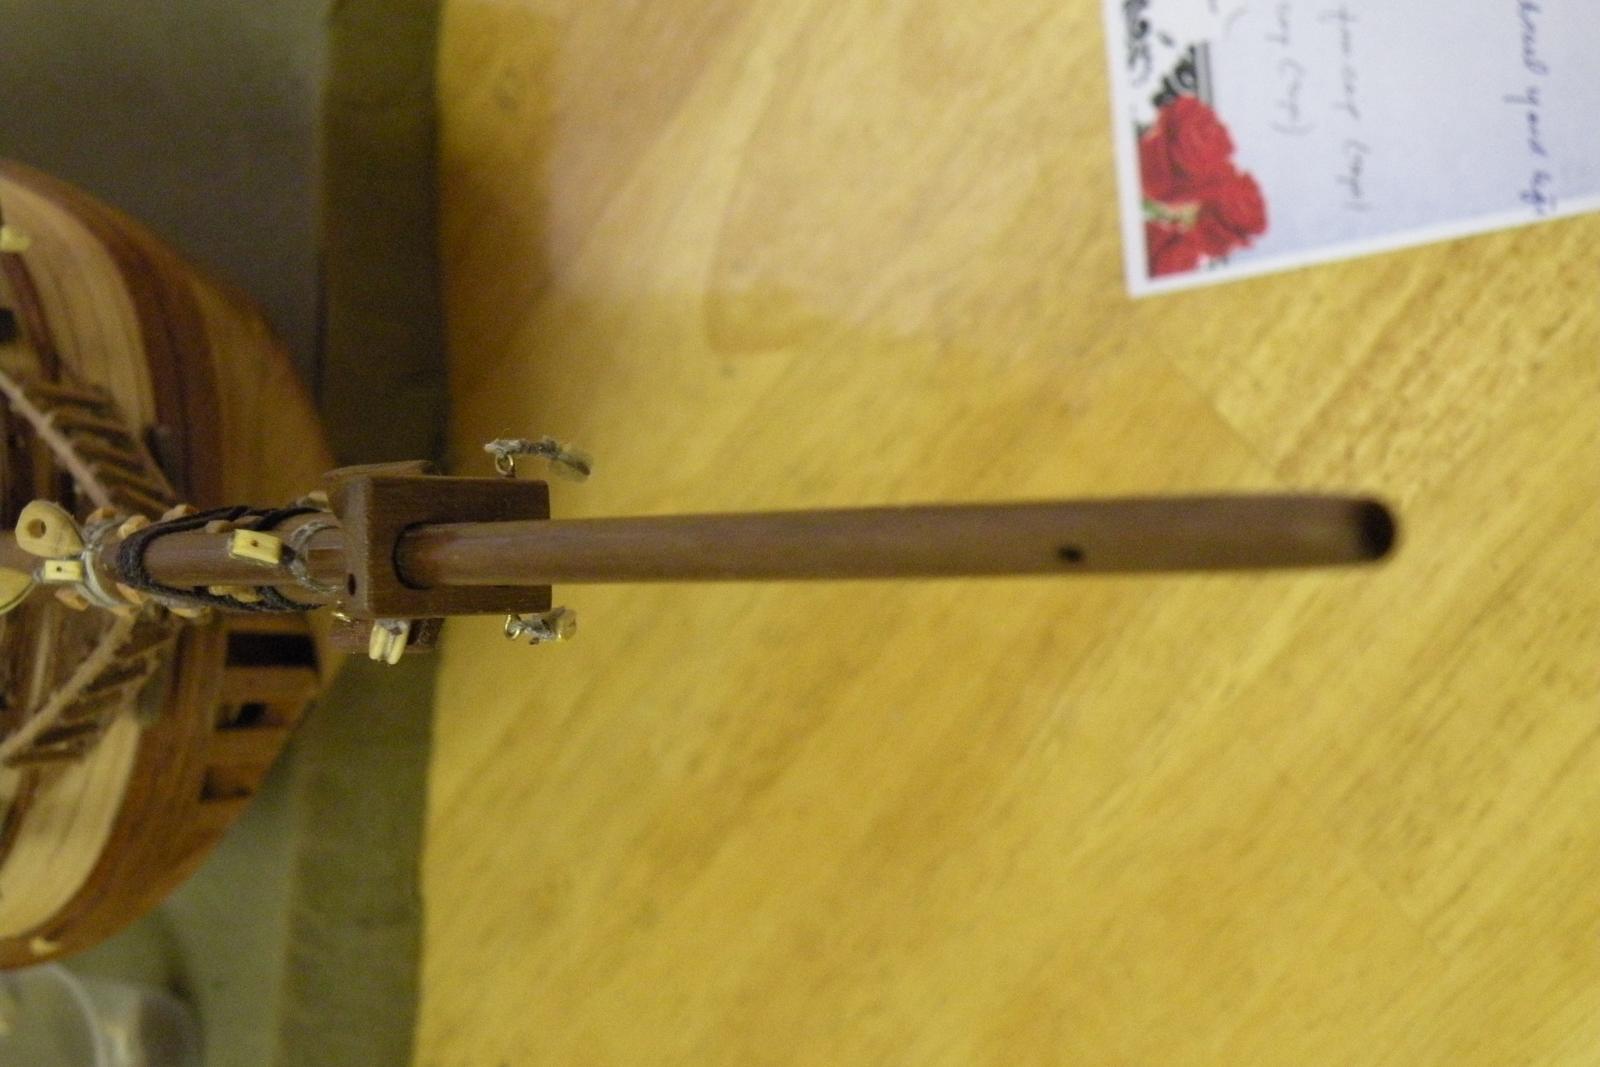
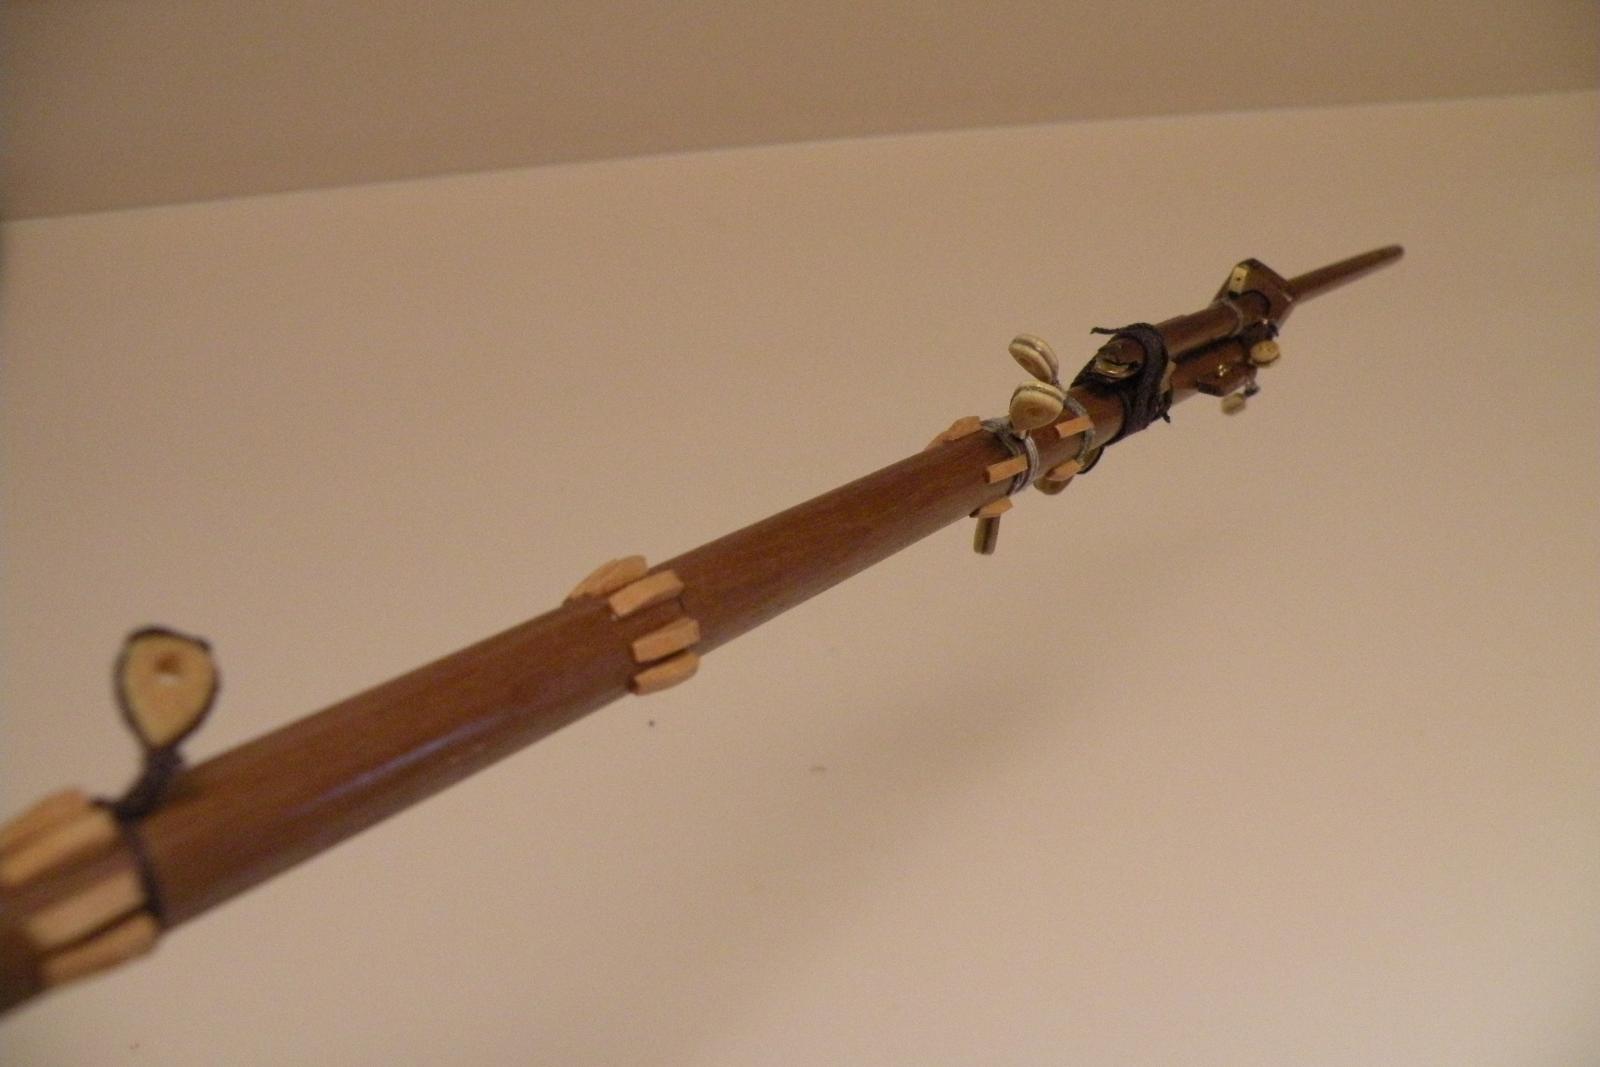
Got all the pieces to the bowsprit glued together and the gammoning wrapped on tight. This is how it looks on the ship although like I said before, I am going to wait til its time to permanently attach it. I wasn't sure how I'd glue the three parts (bowsprit steeve, sprit and cap) of the structure together but when I was fiddling with it and thought I had it all aligned perfectly (blocks to the top and bottom, bees sticking out to the sides like wings, and the cap sitting upright), I decided that I would use CA glue in the joints. So that's what I did -- holding the whole thing in place with one hand I just dripped some CA into the holes in the cap and in the joint of the saddle and the sprit. The saddle had already been glued to the steeve. I was pretty pleased until I realized my alignment was slightly off and the little hole at the tip of the sprit was not sitting right at zero degrees but was twisted a bit. Nothing I could do about it it. I'm not one for taking things apart, so I'll wait and see if that misalignment screws up the placement of those additional parts at the tip and then the rigging that runs through them. I have a feeling I can get away with this -- other than visually.


- 265 replies
-
- 2
-
-
- finished
- artesania latina
- (and 1 more)
-
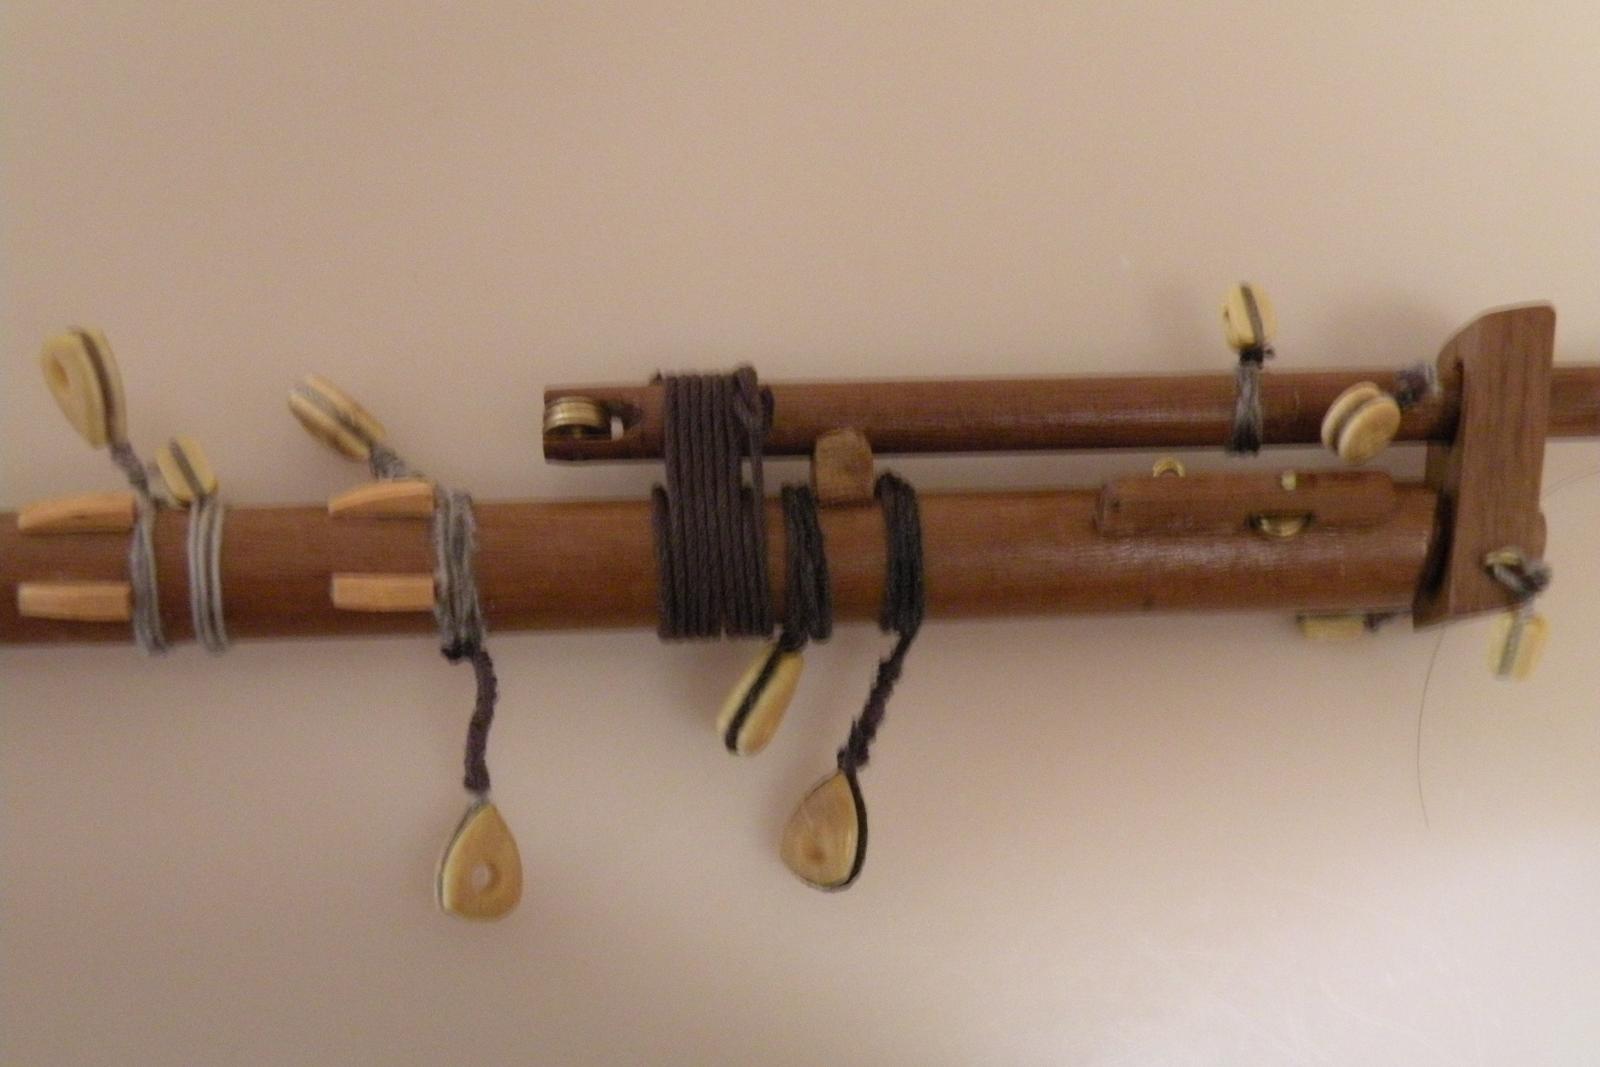
Well, I made the choice to use the hearts instead of the deadeyes and I pretty much completed the bowsprit this weekend. Except for the blocks and sheaves at the far forward tip of the sprit. I'm OK with my work but can't say it is my best effort. I still struggle with tying on beckets to blocks. You could say this build has been one of experimenting with one technique after another and still not finding one that comes up to the standards of more accomplished modelers. But its working. I also am never sure I'm using the right size or color thread for the size or type of block being installed. This bowsprit is a good example of using whatever size and color thread I happen to have in front of me and which I can work with. Take a look at the pix. You'll probably agree its a pot pouri of everything that came in the kit's supplies. Next build I plan to purchase the right sizes and colors independent of what a kit supplies -- especially if its an A.L. kit. Note on the pix that the gammoning is still loose and not trimmed. My plan is to wrap it tightly and then paint it with watered down PVA glue. Learned that from Danny (among other things). Once complete I am going to shelve the whole bowsprit until such time that I can't proceed without it installed. I don't want the additional overhang getting in my way when I need to turn the ship on the bench.
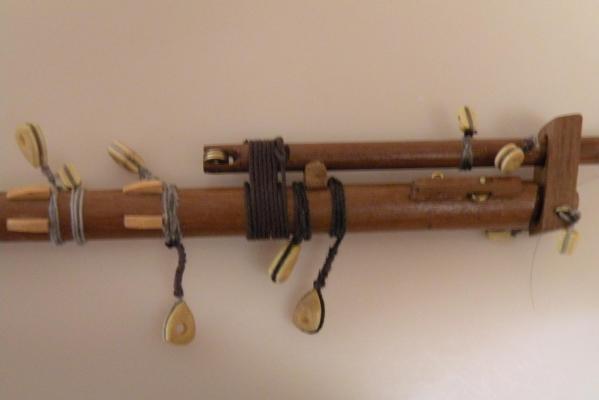
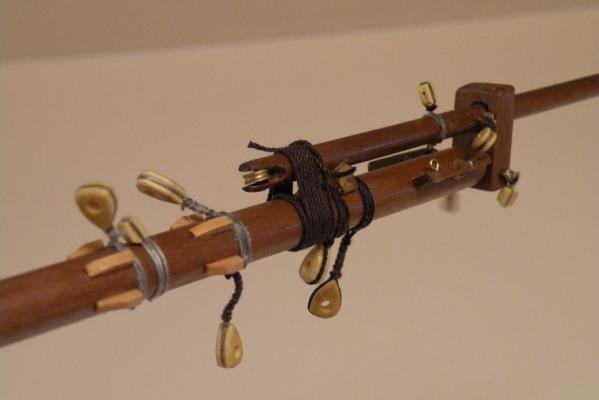
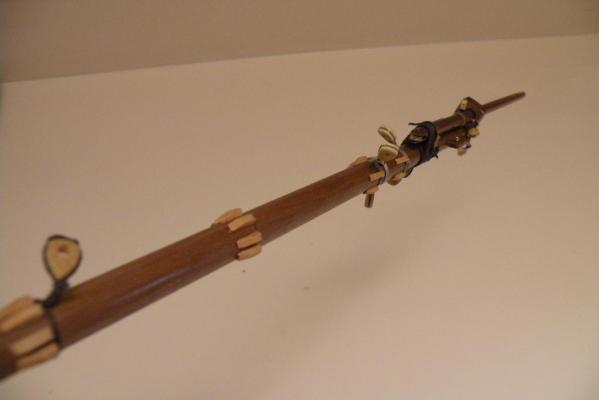
- 265 replies
-
- 2
-
-
- finished
- artesania latina
- (and 1 more)
-
Bryan, good recovery and perserverence. I don't know if I'd have had the determination to do that. I've made lots of mistakes along the way and just as many work arounds to avoid removing pieces. Now as for those beams not fitting really well...of course mine didn't fit well either and I attribute that to the frame positions or maybe even the cut of the frames. The beams themselves were probably not at fault. Anyway, not to be a downer but you may very well encounter issues when you lay that top deck. You can refer to the early pages of my log to see what I went through. I had to shim up the beams in a lot of places to remove the spongy effect, and shim and/or file down the frame notches. You'll find a way to make that darn thing sit well and a liberal amount of glue on the beams and underside of the false deck will hold it down well. When you are ready to lay the false deck down, mark the edges where it will lay across the beams and then draw a line across the width of the deck at that point. Then you can apply a line of glue across the line so it matches up with the beam. I always like to glue two surfaces if possible. I have to laugh when I think of how I weighted down the deck as it was drying. I'd also advise not to put too much furniture and stuff down below until all is well with the infrastructure. You never know where and how you are going to have to cut or file or maneuver something and stuff on the second deck can get in the way. I noticed you've put in the stove already and you're considering coal bins (I used dried redwood twigs to whittle up some "logs" and put them in wood bins next to the stove). I would wait on all that stuff. Just my opinion for what its worth.
-
Sorry about those beams Bryan but glad you could find the thumb plane. I'll take it step further and note how I actually did it. I had 1.5 x 5 mm walnut strips to work with -- as I assume you do as well. After doing a bit of math and measureing to determine how much to taper (I tried to keep the taper to 2.5mm or less but failed in that a lot and had to taper much more), I used a metal ruler to draw the line from one end of the strip to the other. Note that after the first six planks of basswood which I did with full 630mm planks, I started cutting my planks or strakes into thirds (mostly). So sometimes, depending on where the taper would begin, the line of taper on a plank would not necessarily be from a full 5mm down to say 3mm. The start of the plank would of course have to match the end of the previously laid plank so the taper line might go from say 4mm down to 3. Working with the smaller planks made many things easier. I doubt I could have done much with longer ones. Anyway, once the line was drawn I clamped the plank in between two wooden rulers (available btw for free at Home Depot as yard sticks and which make excellent wood for lots of things), with the scribe line parallel to the rulers. The rulers are of course to stiffen the plank as you plane it. Then I clamped the whole thing into a vise and started planing. I got where I could taper a plank nicely in 10 minutes including all steps. Compared to half hour when I was trying to cut the taper with an Exacto blade held stiff up against the metal ruler. ' Practice doing drop planks on the ends of scrap planks. Its fun after you get the hang of it and you'll need them. I used both a saw and snips to get my angles cut but the saw made more accurate cuts.
-
CP, if I read Dan correctly I think he's in agreement with your changes to hearts v. deadeyes 100%. I'm probably going to go that route as well.
-
Well as the saying goes, a picture says a 1000 words. Can't thank you enough Dan. I sure wish AL could have just included a couple close up pix of the bowsprit. I don't know for sure which way I'll go yet but I will make that decision in the morning. I lean toward the closed hearts. Is the idea behind either that it was a way to tighten up (tune) the rigging? I couldn't understand what the purpose of the deadeyes would be until I see your picture and see that each deadeye on the sprit will be paired with a deadeye on end of the line. Same for the hearts. Is this more or less the 18th century version of turnbuckles? Thanks again Dan for your continued interest.
- 265 replies
-
- 1
-
-
- finished
- artesania latina
- (and 1 more)