
HOLIDAY DONATION DRIVE - SUPPORT MSW - DO YOUR PART TO KEEP THIS GREAT FORUM GOING! (Only 13 donations so far - C'mon guys!)
×


Captain Al
-
Posts
613 -
Joined
-
Last visited
Content Type
Profiles
Forums
Gallery
Events
Everything posted by Captain Al
-
I will start a build log today, and I apologize for usurping Richie's. I was thinking the same thing yesterday that it was becoming my log and it was tough to sort out one build from the other. My apologies Richie.
-
Thanks for all this info. I agree with it all. I tend to be a bit cautious when it comes to distorting or breaking parts. On my first (and only other) build I didn't take enough precaution and wound up making tooooo many corrections. Most of them were to do with framing. That was plank on frame and believe me its a whole lot different and probably much less forgiving. I got the rabbet on and the glue is dry now. I'll take off the rubber bands (thanks for reminding me of that use of them) and clamps and do that tapering this morning. Can you confirm that you do not taper to the back edge (where the stern post will fit) but just to the underside of the former/rabbet. In doing a practice run on scrap I tapered the back as well and I'm glad I looked at it with a critical and forward looking eye. Then I will get started gluing in the bulkheads. I may not be able to get back on the computer til later tonight cause we're having the carpets cleaned. In fact I'm having to clear out of this room soon. BTW, what time zone are you in? I'm obviously west coast, pst.
-
Pretty much my thinking. I don't think there's really a better way to square both against the former.
-
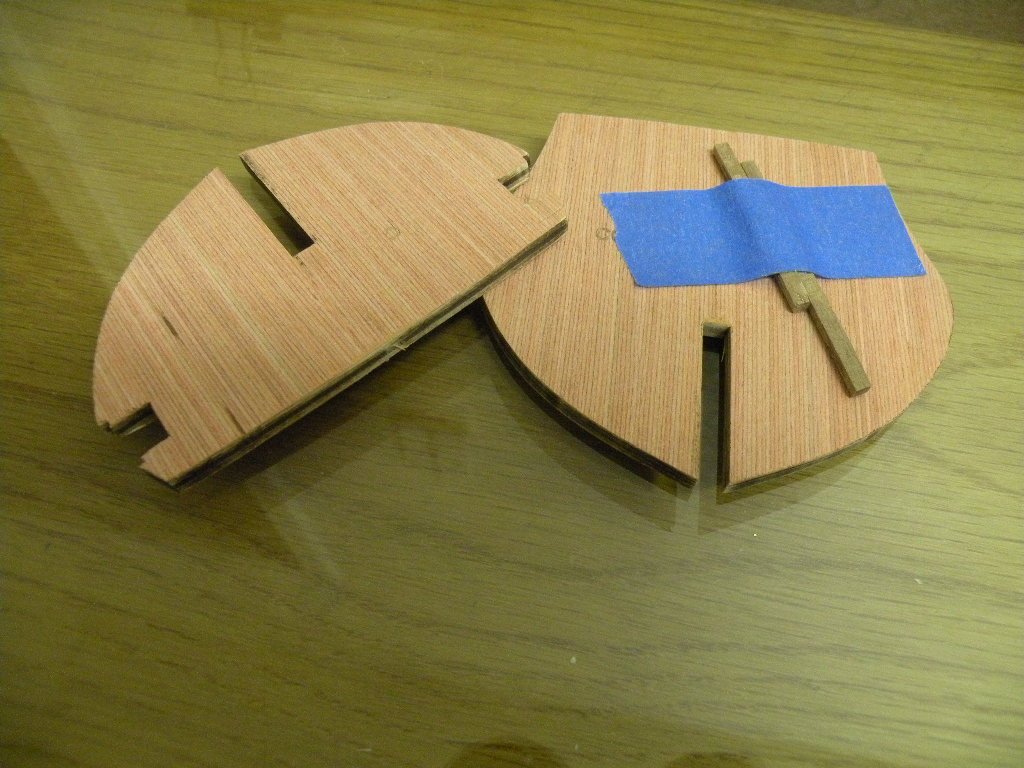
I guess my thinking is (was) that I didn't want to put a wet strip onto the former. Its probably irrational but I thought of warping it or delaminating or anything like that. But really you're probably right; so little water would wick from the wet strip onto the ply former to be negligible. I do like working with a scroll saw though and especially in balsa wood. All my household chores done I'm about to go glue down that rabbet piece. Before I go I'll ask a few rather obvious questions: 1. When you insert the bulkheads into the slots of the former, I assume you make sure to get them to "bottom out" as in they can go no further. You do this regardless of where it leaves the top edge of the bulkhead in relation to the top edge of the former. It seems like sometimes the notch should be just a bit deeper cause the two edges don't end up flush to each other. It seems like this will affect the lay of the deck over it. But still, I have to assume that the two notches must make contact and if there is any adjustment to be made later it will be to sand down the top edge of the bulkhead. This also goes for the way bottom slivers of the bulkhead that wrap around the former. It would be nice if after slotting the bulkhead into the former that the bottom of the bulkhead met the bottom of the former perfectly. But sometimes it doesn't. Sometimes there's a bit of an overhang. Again I assume the best practice is to bottom out the notches and sand off the tips of the bulkheads if there is a wee bit of overhang. Do you agree that all of the above is correct? Insert the slots completely and worry about any adjustments afterward. 2. I had not gone far enough into the instructions to realize that on p 15 we would be adding another keel strip. This doesn't make it any clearer to me how the whole underside ends up looking and how the garboard plank will butt up against the keel. (as an aside, you noted that this bulkhead former does not exist in real ships. I've always looked at it somewhat differently. On a real ship the keel has an internal section and the external part. It is not bolted to the underside of the hull (well it is on modern fiberglass yachts). The frames are bolted to the sides of the keel on the internal upper part of the keel and knees are put in there. Then a floor is put down over the keel. So I've always looked at this bulkhead former on models as the full keel even though usually another strip is added to the underside.) But I digress -- my point is that I have no mental picture now of how the rabbet sits on the bulkhead former and then the keel on top of that (actually all being under each other not on top). And then adding in how the hull planking is laid on, makes it even more confusing. I'm going to go back and re-read a couple tutorials on how to lay the garboard plank and how to put in a real rabbet. Maybe that will clear it up. My confusion is mostly on how this added rabbet strip serves as a crotch for the garboard to sit in, which is (I've always thought) the one and only purpose to cutting a rabbet into the keel (or bulkhead former). 3. In dry fitting my bulkheads on Sat. I noted that bulkheads C and CC sit about 3mm (sorry, I'm thinking metric -- about 1/8th inch) apart from each other. Its my purpose of course to make sure that each one is glued in exactly at 90 degrees to the former. Even so, with any small amount of warp to the bulkheads or wiggle to the part of the bulkhead above the notched area, that 3mm of separation could get compromised. Now I don't know if that would make any difference to anything further down the line -- no moreso I would think than having either one of them slightly off true perpendicular to the former and therefore not perfectly parallel to each other -- but I've cut two little 3mmx3mm strips that I'm thinking of gluing inside the two bulkheads (like the baloney between the bread) so maintain that perfect 3mm separation. Again, probably overkill in precautionary steps, but what the hay. I'm noting this cause you might find there is a fair amount of wiggle at the top of these bulkheads that you may also not feel comfortable with. Here's a pic of this. On the right are the strips cut. On the left they sit between the two bulkheads maintaining the 3mm separation.

-
Today, after breakfast, I was intending to glue the rabbet strip on in two pieces (as noted above). I just took the curved piece off the jig and it fits nicely around the bow section. Except that I made the mistake of not extending the curve more than half inch over the edge. I should have made it at least 2 inches over. With the amount of "spring back" in the wood, its going to be hard to get the last quarter inch to sit flat on the bulkhead former. More overhang would have allowed me to bend it inward and given me more material to clamp/tie/tape/band it tight while the glue dries. I'm thinking of doing it over but I'm loath to waste even this small amount of material without knowing if the pieces in the kit are exactly what's needed to finish the build or if Modelshipways allows for some breakage etc. when stocking the kit. In further thinking, I'm going to go ahead and glue on the piece and do the best I can to snug it up tight to the former. Any little gap can be filled with putty and the rabbet strip sanded back a tad bit. Note that I'm finding it harder not easier to deal in fractions instead of metrics, especially with this small scale. Its alot more accurate to talk about millimeters than it is small fractions (like for example 1/64th inch versus .4 mm). Or maybe its just what I grew used to over the past 3+ years.
-
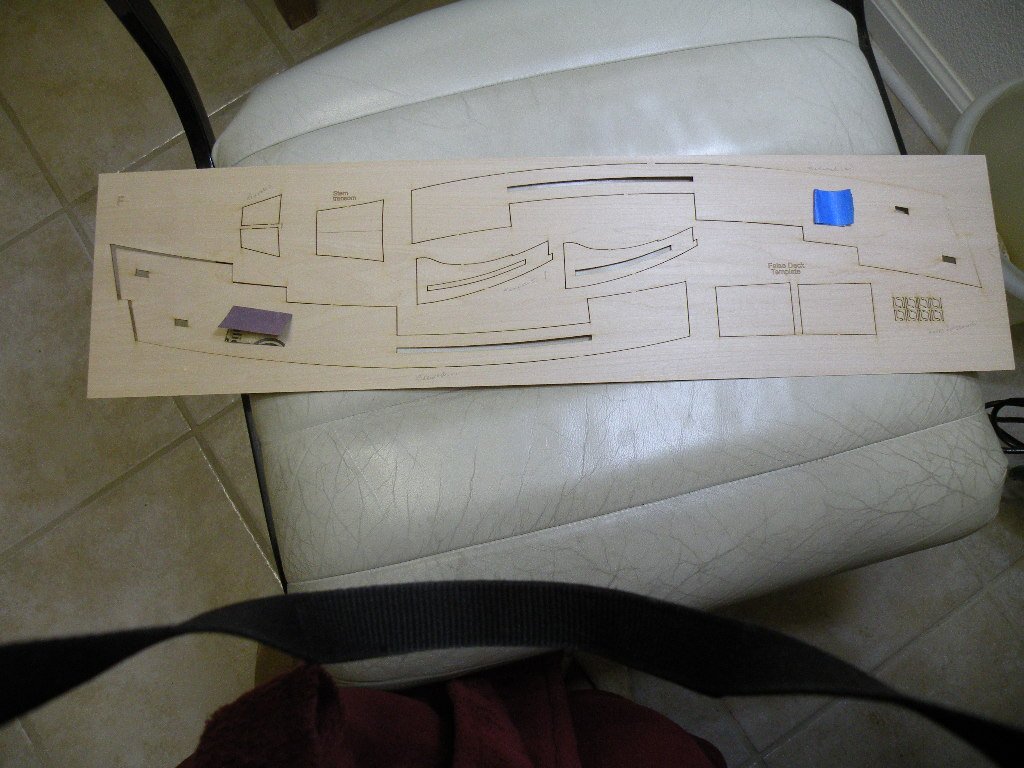
OK, I'm back. Here is a pic of the template with both bulwarks on it, marked by a bit of sandpaper and tape. Also a pic of the jig and rabbet strip drying. Note that I decided to do the rabbet strip in two pieces of about 8 and 7 inches. I may change that if I decide today to add the tapered piece separately. But the piece that goes around the bow stem will remain as a 7" piece.

-
Richie, I'm going into my work room now to check on that bulwark piece. I'm 99% sure both are on the template. I did a full inventory on Sat. and found (to my utter surprise) that every single part is there and in the exact quantities they say (as for example 80 strips of wood). I recall not finding the second bulwark piece for some time and then it became clear. I will get back to you in a few minutes. I also have some comments on the bulkhead former - rabbet - keel discussion. So as I don't forget one of the remarks is that I found it impossible to bend the rabbet strip around the bow so I soaked it for an hour and put it on a jig I made up. It should be dry this morning and fit on perfectly. I can't imagine how you got your's around the curve with pre bending. I'll include a picture of that and my jig as well. Back in a minute or so.
-
OK, now I understand how its used. My solution so far has been a regular old fan that blows the air and fumes away. I realize that there is no filter to catch any of it so I try to blow it out through an open garage door. I'm thinking now that maybe just set up some filters (in a frame or not) and try to catch the wind as it passes. My fan would probably blow the filters over. So, I keep on trying; and coughing.
-
So what do you actually do with this contraption? Do you set it up behind the work and pull the air away from you? Do you actually have your work on top of this uneven surface as you sand, drill, glue or whatever? It looks good and I'm definitely in the market for some kind of air filtration system (been coughing for 4 months now and may have to give up the hobby entirely), but I can't get a handle on how this system works.
-
I can tell that I have much more studying to do and probably more hands on experimenting before i truly understand this rabbet stuff. Now I know why magicians use rabbits. If I am not mistaken, this kit with the glued on rabbet strip is providing a shortcut way of making a rabbet for the garboard strake to fit into. In most of the kits and tutorials I've seen this rabbet needs to be carved into the false keel at ever increasing angles from the center to the stern. Since I'm a total dunce at understanding drawings and diagrams, I'm going to have to make some mock ups from scrap wood to see what it is I'm trying to accomplish.
-
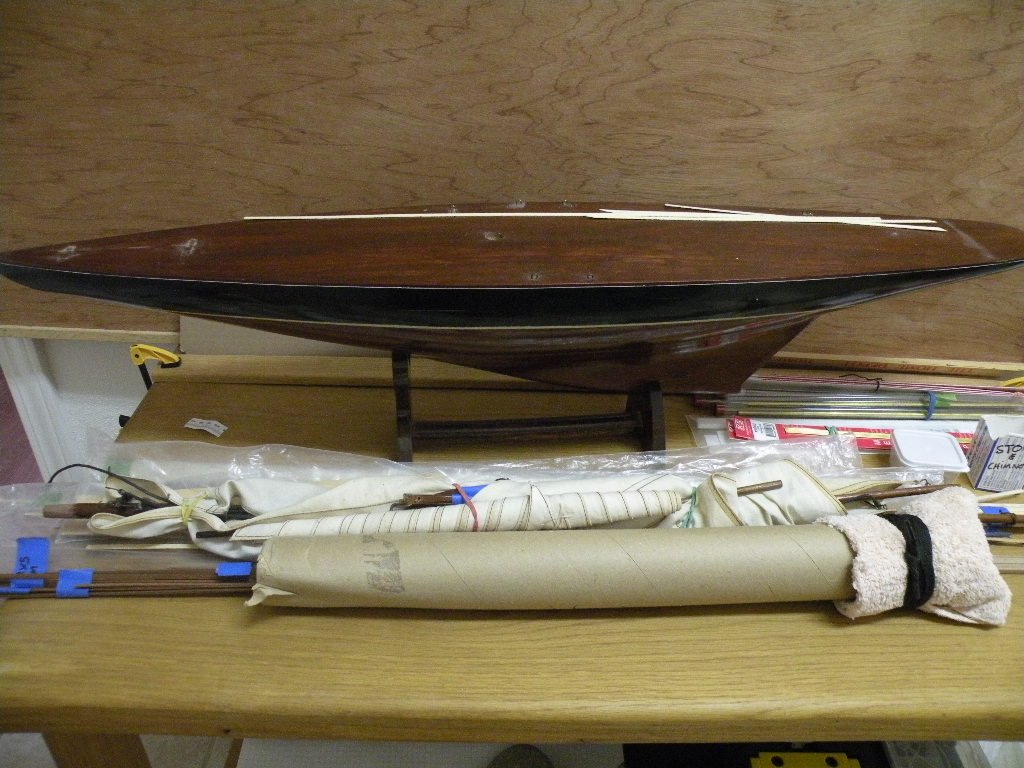
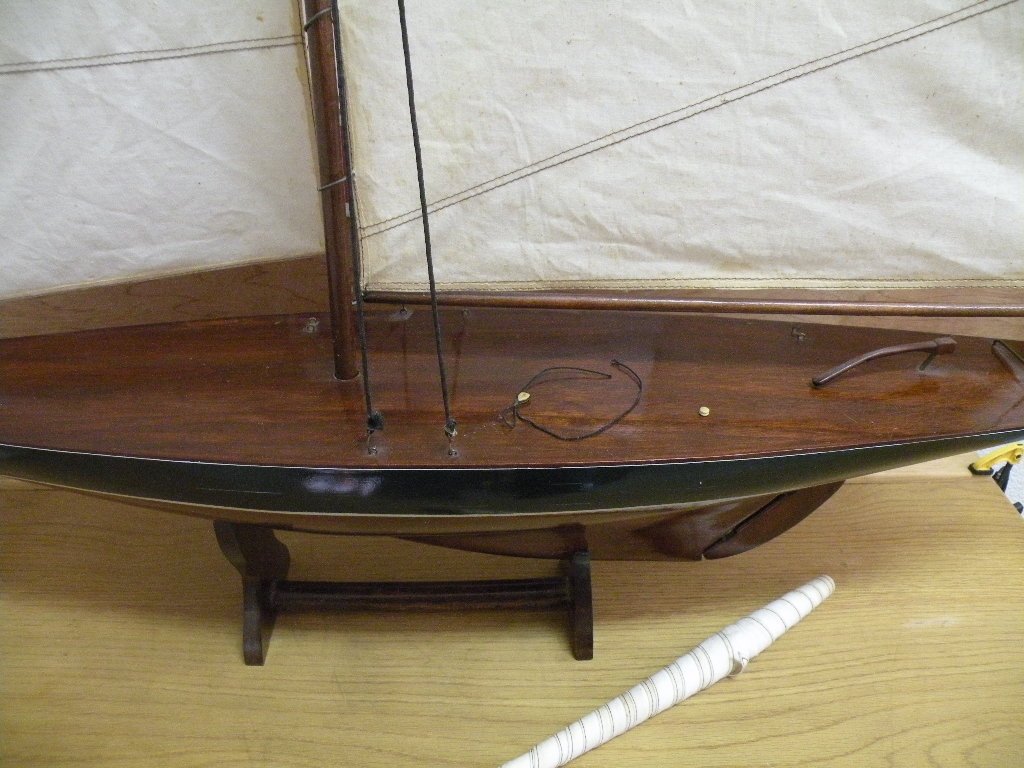
I apologize to all for not replying to your replies. I've been hung up with other projects. So thank you for the valuable insights. I've never heard of pond yachts. Maybe I didn't get taken after all. Given this information I will probably do just as suggested -- make some changes to the little bits of hardware that are needed, refinish the deck and put it back on the shelf. It always has attracted nice comments from visitors. Thanks again all for steering me onto the right course. Not to mention the good points re. my original question. Yes, there are times and places for different techniques. No right or wrong ways.
-
I've gotten all my bulkheads cut out and sanded down (leaving plenty of char for fairing). I will be test fitting and doing a bit of sanding today and then tomorrow I am going to put the rabbet strip on. So I want to be sure I'm understanding what you were saying above about that. If I understood it you had a problem cause when you tapered the keel you tapered all the way into the rabbet. I'm wondering why this was a problem since Chuck's instructions specifically say that the tapering to 3/32 means you will reduce the thickness of the rabbet as well. And that makes sense since the rabbet starts out being 1/8 or 4/32. So 1/32 will come off the rabbet (1/64th " from each side of it hopefully). I don't see any harm in doing it the alternative way you mention, but you are then going to be dealing with a sliver of wood 3/32". Do you have such a piece already or is your plan to glue on the 1/8th inch piece and sand off the overlap? That seems like getting right back to where you started. And if you have the 1/8th rabbet already on when you do the tapering, it gives you a reference to get both sides even and then just a bit more off the rabbet. I've practiced a bit on tapering a corner of one of the used templates from the bulkheads and while its not really a hard thing to do it is easy to take too much off one side or the other ending up with the right size but looking unbalanced. I'm going to see if I can make a little V shaped sanding tool to make sure I do the sanding evenly on both sides. I'll cut a V (with a flat bottom) into a little sanding block with the same width at the top and bottom as the keel needs to end up. Then I'll glue sandpaper to the inside of the notch and place it over the keel. As I stroke back and forth it should take just the right amount off as it pushes deeper into the keel. Maybe. Maybe not. I'll let you know if it works. Probably just easier to do a bit at a time turning the keel over and over as you go.
-
All this talk about fairing is putting me in a bad mood. I'm going to have a drink. Just kidding. Good pointers which I will keep in mind. My first inclination is to follow Chuck's procedures to the letter because this was one of the main reasons I had for chosing this kit. Even at this most early stage its such a pleasure to have his booklet as opposed to the picture book which A.L. provided. Also having most of the parts laser labeled with reference lines etched in makes things go a whole lot quicker and smoother.
-
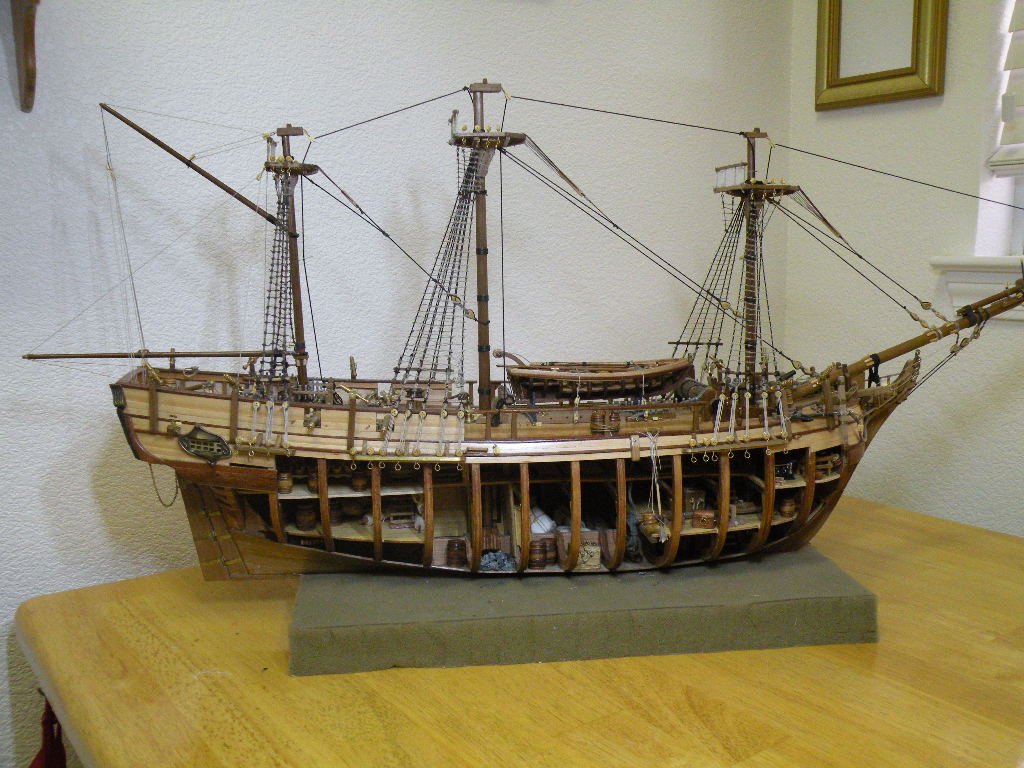
Well first thing Richie, thanks for the compliment on Bounty. It did come out alot better than I expected when I started 4 years ago. Trial and error; fix things as mistakes are made; don't obsess over things that the ordinary person would have no clue about; and do it for fun. These are my take aways from this build. I have alot to learn and some of the best tips and ideas I've had (in many different endeavors) have come from the least experienced. Maybe another lesson learned is that there is no one way to do things so the simplest and least likely may end being the best. OK, here's what I learned today. I'll pass things on to you (til you tell me to stop) even if they would seem kind of simple and intuitive. I unpacked my kit and laid out all the pieces and parts. I'm quite happy with the lack of warp in the keel former even though its possible to see the slightest bit of movement when it lies flat and pressure is put with a finger on one place. With plywood 3/16" thick I'm going to proceed thinking it doesn't get any better. If I think back on Bounty's keel and how warped it was and how (with much effort and adjustments elsewhere) I was still able to end up with a solid and symetrical hull, I know this amount of warp is not going to be critical. But what I wasn't expecting was the amount of laser burn. I mean the edges of all the laser cut pieces look like they came out out the London Fire. There is even char on the flat surfaces. But still, the pieces are flat and sound. So I began to sand off the char. Then I began to think about what I was doing and what really needs to be done. How much discoloration needs to be removed? If I were to sand to unburnt wood I would be changing the dimension of the pieces. Especially on the insides of the slots where you want the fit to be snug. My thinking is that since these edges are not seen and all you are trying to do is make for a good gluing surface, the most you need to do is take the shine off where there is some. If the edge is porous at all it will hold glue well enough. Dark discoloration does not matter. Do you agree? In the process of getting these bulkheads off their template and removing the last bit of tab, I had a revelation that is critical. Maybe simple but on my first build I probably wouldn't have thought of it. Be very careful when sanding off the tab and getting the laser char off the top edge of the bulkhead that you do not take the slight concave shape off the top. I was about to sand it flat til I remembered that this shape is what creates the shape of the deck and that's needed for water to run to the scuppers (holes in the bulwarks). And my last discovery which has nothing to do with laser cuts and sanding etc. is this.... you may have already figured it out.... on the plans you'll find alot of little squares with bolded numbers inside. At first I couldn't figure what the numbers referred to. Now I believe that they indicate belaying points and each number represents either the belaying pin or cleat as well as the loose end of a piece of running rigging. So you should find the same squared number on two different plan sheets and you should be able to link the two. It will be months before this becomes relevant and useful; just thought I'd throw it in since its on my mind today. Have a great evening. Probably be back tomorrow.
-
And here it is now ready for rebuilding.
-
It wasn't meant as a joke, but I guess it was on me. I truly thought today was April 1. I didn't do my little ditty of "30 days hath Sept. etc. etc" until I had sent the comment. I'm not planning on any build stand either. Only trying to be prepared for when its needed to display. Thanks for the link....these are just what I have left from Bounty. They may work well for Mayflower, but I was (and still am) very skeptical that they'd hold the Bounty model very securely. Way too top heavy and not much keel in those slots. Before I decided to embark on Mayflower I was designing a sort of diaramma (sp) where I was going to sit the Bounty on foam rubber (covered with a nice blue felt) and moor it to some dowels put into a base to look like piers. Two fore and two aft and ship would go nowhere. But alas I am settling for a quick and cheap cradle type thing. BTW, the two inch foam rubber with wedges on both sides of the hull worked perfectly well for 4 years as a build stand.
-
I'm embarking on a do over of a 20 year model of Bluenose II which I purchased at a wooden boat show. I didn't realize it at the time but the model is less than basic. I've taken everything off the hull (mast, fittings, bowsprit, rudder and tiller --- like I said, it was pretty basic and took all of 20 minutes to strip the deck clean), and plan now to start building it back up using pictures I have of Bluenose, scratch building or buying the various pieces I need. My question right off the bat is whether to plank the deck completely and then place items like grates, houses, mast steps, you name it, over the planks -- or is it better to glue down all these things on the plywood deck and then plank around them. I will put down some bulwarks and waterways before I start planking, but I'm not sure of the other stuff. On my only other build (Bounty) the deck planks went down first and other things were glued onto them. Or (for like grates) the planking was cut away. I plan to sand the varnish off the deck before planking it for better glue adhesion. Here's a pic of the model before I stripped it clean.
-
You could be a surgeon...now you have the knives and syringes and probably the creativity. Much of what we do is cosmetic surgery on wood, so its all fitting. I like what you're doing on this little boat. I haven't really taken stock of how small it is but at 1:78 scale all these pieces must be quite small. So I rec'd my kit late yesterday afternoon!! I was expecting 7-10 days delivery but it came in 2. I haven't had much time to unpack each item in turn and do any inventory check, but it looks like its all there and in good shape. I did lay out the sheets with the false keel (I think Chuck calls this the 'keel former') and the bulkheads and they appear to be flat and non warped. But maybe the warpage, if any, shows up after the keel has been popped out. So today (April fools) will mark the start of my second build. Its funny cause a week ago I had nothing to do and now I have 3 projects going at once. I'm in the process of building a stand for my Bounty. I have stripped down a model of Bluenose II to just a bare hull and am starting to think about how to build it up to a real model. I bought this thing 20 years ago and its a joke. But the hull is OK so I thought I have nothing to lose but time and some left over materials, so I might as well give it a go. And now third project, but highest in priority, is the Mayflower. Speaking of stands for the model. This kit does not include one. I learned on Bounty that whether its included or needs to be scratch built, some accomodation for it needs to be done long before much build up makes it hard to turn the ship upside down. At the very least I will use the bulkheads as a template to draw the outline of two cradles which could hold the boat. I also have some pedistal brackets from Bounty (left over cause I didn't prep the keel for them in time) that maybe I can use. Might have to add a bit of wood to the keel at those two spots so it fits snug into the brackets. Have you thought of what you'll do for a stand? BTW, have your new keel and bulkheads arrived yet? Have they given you an e t a ?
-
Thanks RG. You've pretty much confirmed that if I've been doing anything wrong its been trying to get through the cut in too few passes and maybe with an old "dull" blade. They never seem dull to the touch. Like you I have #11s cause they are the most common and I keep them in the holder til I can pick my teeth with them safely. I just saw them for sale on Micro Mark.com 100 for $21. For this next build I'm going to invest in these and leave no doubt that my blades are sharp.
-
What type of blade (for exacto type knife) do you think is best for getting laser cut parts off of their sheets? For me this is the most trying of exercises. Maybe my blades haven't been sharp enough? Its really frustrating to break one of those tiny pieces that seem to have more tab left on them then they are in size.
-
Well no harm no foul as they say. Way back when I was making Bounty's launch I experimented with making some fast and simple oar locks..... I snipped off the end of a Starbucks wooden stirrer which is a half round, and used a round file to file the inside of the half circle into a horseshoe shape. I stopped short of figuring out how to get this oarlock on to the boat's gunwales. Instead I filed notches into the bulwarks. But the half rounds looked good albeit probably way out of scale.
-
Quick comment on oar locks. Some possibilties are: 1. notches filed into the bulwarks, 2. eyebolts, 3. (better -- eyebolts with the tops snipped off. You can get more sophisticated especially if you want to solder. These must be pretty tiny. Were they brass (bronze?) on the real thing? Are you a medical professional RG? I've wanted to get a hold of a real syringe for some time but can't find one. They do come in handy here and there.
-
Thanks guys for the kudos. I was really a learning process from start to "finish." Often times I just went on the theory that if there's a will there's a way. Planking the hull as a good example.
- 265 replies
-
- 3
-

-
- finished
- artesania latina
- (and 1 more)
-
Have you considered just a finish to the natural wood? I like a couple coats of lacquer when all I want to do is bring out the natural color of whatever wood I'm using. BTW, on a more theoretical or hypothetical question....when you are building a model, are you envisioning the ship as it would really be (for example, out at sea doing its thing) or is it more an artist's rendition of the ship as it was designed? I like to think of models as working models not as museum pieces in absolute pristine condition. This may be my rationalization for not always cleaning things up and leaving "salt deposits" on the deck. But sometimes those little defects can be quite life like. There was a model of the longboat from Old Man and the Sea that really captured the feel of the skiff after the beating it had taken. I guess this topic then takes us to the various techniques of aging wood and metal to obtain that desired worn in look. I didn't do any of that on my last build but on Mayflower I don't want shiny brass fittings so I'm intending to start working on this aspect. Have you found a technique you like for darkening brass?
-
Building the Bounty launch and jolly boat were definitely unique projects each with their own unique wants and needs. I did them while other pieces and parts were drying. I'm looking forward to this little one as well. Regarding CA glue... yeah there are definitely some good uses for it but I agree that its best avoided. I found that the best use (and from here on possibly the only use) was to put a tiny drop on a knot when it was imperative that tension remained and there was no time for white glue to dry. I see where Chuck P. (easier than trying to remember how not to spell it; ) suggests the same use in this Mayflower practicum. But I also learned from Danny Vadas that a mess of diluted white glue is much better for securing coils and such. It dries totally clear no matter how much you apply and leaves the "ropes" looking very nautical and nice. And like Johnny Bench says, "it won't make you stink." Quick note on technique for dropping a wee tiny bit of CA where you need it. I use a sawed off sewing needle (saw through the eye to make a two prong hayfork) and I put a drop of the CA onto a piece of aluminium foil. The I touch the fork to the drop and touch the wet fork to the part or knot.