HOLIDAY DONATION DRIVE - SUPPORT MSW - DO YOUR PART TO KEEP THIS GREAT FORUM GOING! (89 donations so far out of 49,000 members - C'mon guys!)
×


Captain Al
-
Posts
613 -
Joined
-
Last visited
Content Type
Profiles
Forums
Gallery
Events
Everything posted by Captain Al
-
Thanks Richie. You've answered all my Qs for the time being. I do have a scroll saw and do pretty good work on it so maybe (if necessary) I will go that route. Let's see how your replacements come and how long it takes. I've not dealt with Model Shipways except for ordering small stuff on-line so its new to me. My first and only kit was Artisiana Latina in Spain and forget any customer service from them. I agree that the bottom of the rowboat is pretty flat. Its just like the one I did on Bounty. I was just curious seeing as I had rec'd some commentary to the contrary. My chocks on the Bounty launch also matched the flat bottom so that's all the proof i need. Now, as far as going slow and me getting ahead of you....that's not going to happen. My Bounty build took 3 1/2 years to "complete" and I didn't really finish it properly. Alot of the issues I had with that build at the start were caused by my impatience to get things done. I wasn't aware enough of how a mm here and there can affect things downstream. And I totally made due with tools I'd collected over the years. So this time around my plan is to go really slow and do it right and not have to do alot of fixing and adjusting. But we will be close and it should be alot of fun. I have several other Mayflower build logs to look over before my kit arrives. I've also read the Chuck Pissaro instructions on-line already. Other than cleaning out my work space and storing excess Bounty materials, I'm ready to go.
-
Two further questions I forgot to include in my last post.... Would it be very difficult to cut new pieces on a scroll saw rather than rely on replacement parts to be good? Second question relates to building up the small boat from lifts. This is the same process I used on my Bounty's launch. When it came down to the lowest lift, the keel basically, the bottom was completely flat except for the edges that were faired into the upper hull or lifts. Some people on this site when they saw it thought it was wrong to be a flat bottomed boat. I couldn't think of any way around that. I added a keel strip and that's how it remains to this day. Is that how you envision the Mayflower launch? As a flat bottom? Or do you have a way to sand/curve the bottom into a more U or V shape bottom? That last lift would have to be pretty thick to do that and if I'm not mistaken (from what I see above) its no thicker than all the other lifts.
-
Hi Richie, this is Capt. Al calling....I just bought the Mayflower MS2020 kit from Model Expo. It should arrive soon as John said it would be shipped out today. I'm praying that I don't have all those warped pieces of ply that you did, but just in case may I ask if the email you wrote to (jgarcia etc etc) is John who I talked to on the phone this morning? Are the people at Model Expo the same as those at Model Shipworld who I believe are the actual manufacturers of this kit. You haven't specifically mentioned using the instructions written by Chuck Pissaro. Did your kit come with those? This was a big reason I went with this kit as I've seen the "practicum" on line and its alot more complete and understandable than any instructions I've seen. So I wonder if you have those and plan to follow along with them pretty closely. I'll be following your build closely. So far it appears your doing a great job.
-
I think I labeled the build (in the Gallery at least) as 3/4 complete. Never said it was complete. No offense taken by any commentary.
- 265 replies
-
- 2
-

-
- finished
- artesania latina
- (and 1 more)
-
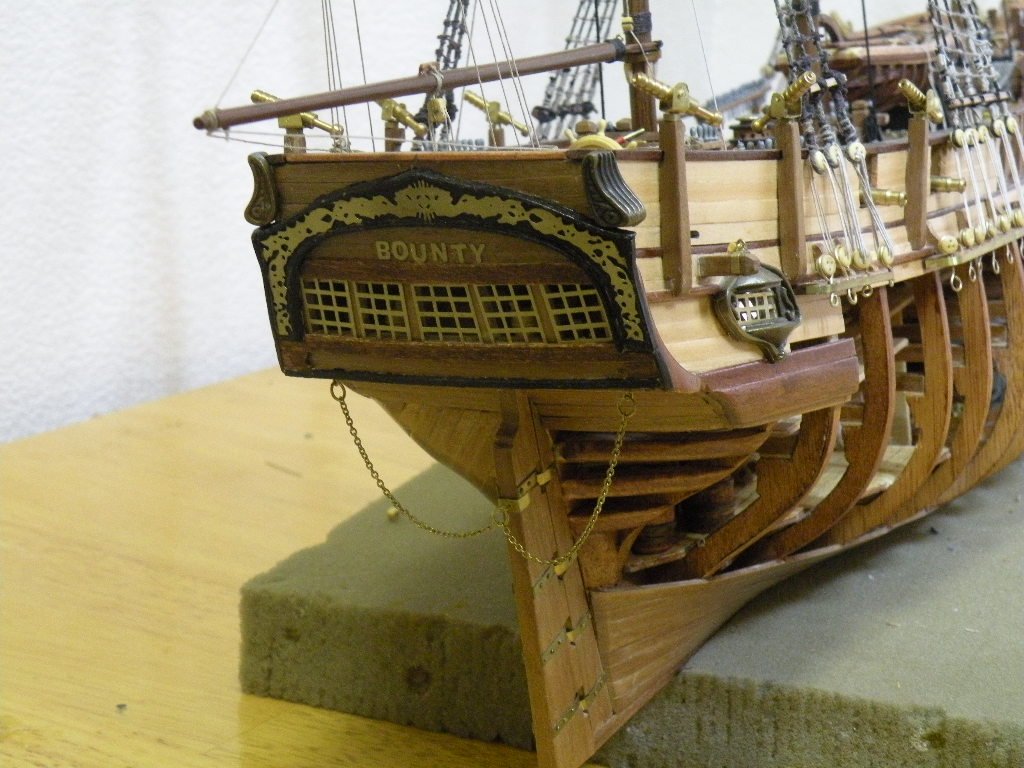
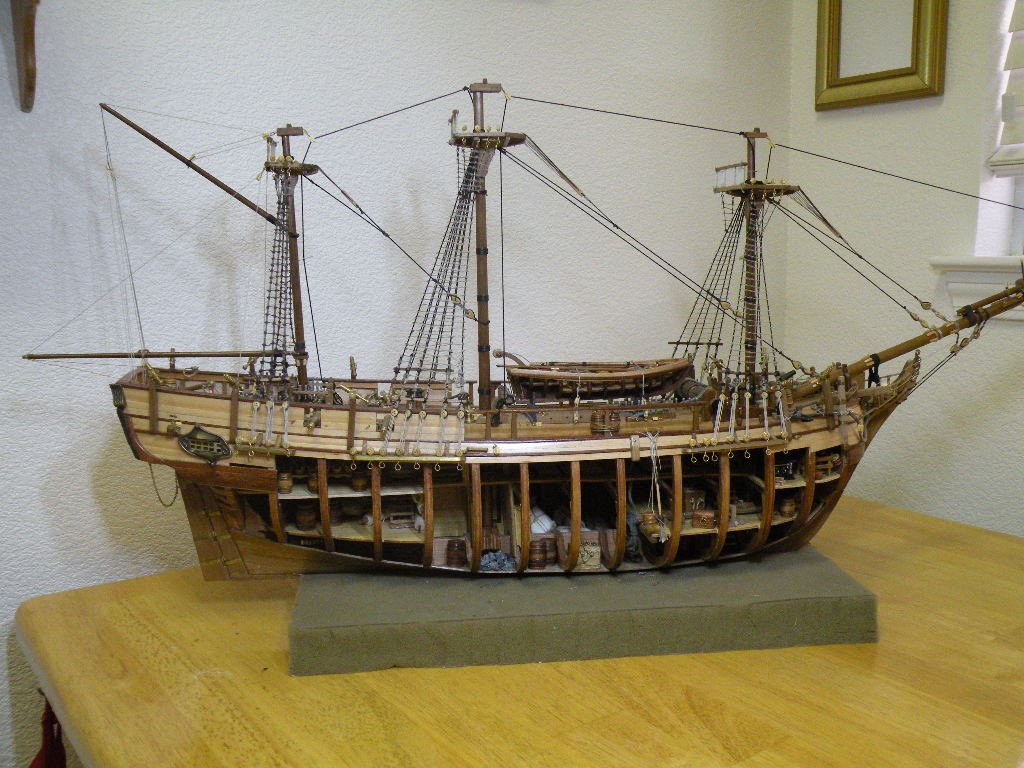
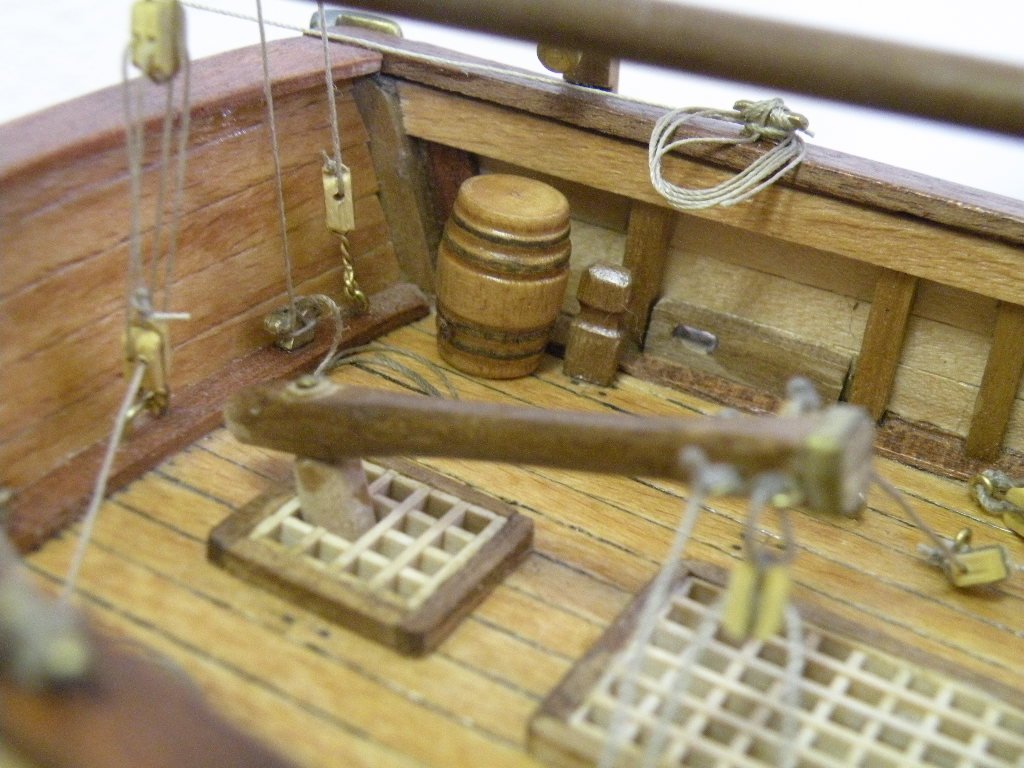
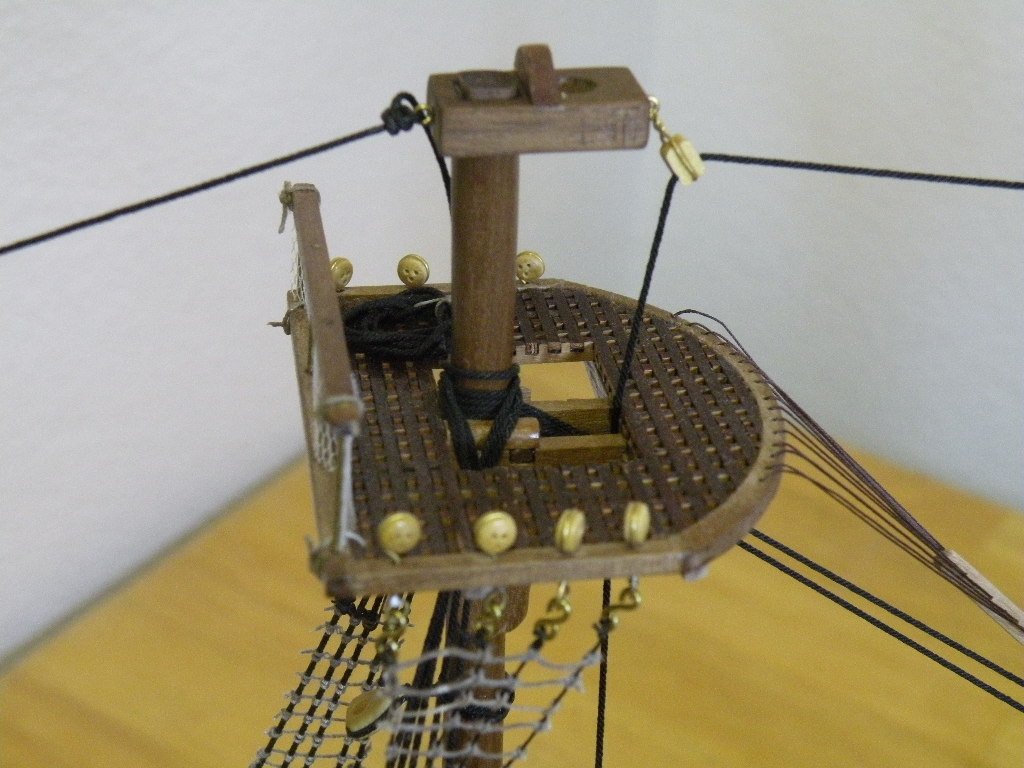
So here I am almost 4 years into this project and 2 1/2 since I posted last. Lots of water under the keel so to speak, including long dry spells (working on the model) during which time I was either not inspired, very confused or doing chemotherapy. To be honest, the chemo was the least of my hurdles in so far as progress on the model was concerned. I reached the masting and rigging point and found that I was spending much more time doing research and looking at pictures in books and on the net. It was then that I learned two things: (1) when it comes to masting and rigging it pays to know what you're doing before you start. By this I mean you should be thoroughly grounded in the terminology and be able to read the rigging plans so that you know when you strop on a block what line its for and where it will start and end. Clearly on a ship like Bounty that would take alot of experience and reading and that wasn't what I signed up for. (2) For the first time I really understood what some people meant when they said this kit was too advanced for a first time builder. I had muddled through everything up to this point, making adjustments and masking over mistakes in the woodworking phases. I really enjoyed doing that and worried little about mistakes. Even the hull planking, which some others dred, came out pretty well, albeit with tons of time and lots of glue and clamps. Anyway, to make a long story short, when I realized I was in over my head with the masts and rigging I decided to build just far enough that the model would look nautical (though not precisely so) and (to the inexperienced eye) kind of complicated. I was looking for ways do more by doing less. I didn't want to leave it with just bare poles sticking up from the finished deck. So I've done all the lower shrouds, ratlines, platforms etc. Then I did most of the standing rigging. But I found of course that without upper masts there was no place for some of the stays to start or to end. So I began really to improvise. As I progressed I used my own sailing knowledge for some of the lines. In the end I accomplished what I set out to -- I finished the masts and rigging to a point where it looks visually like masts and rigging that are in process. I never did expect to put sails on so that's as far as I needed to go to feel I had finished the job. I've spent the last month working on details and here's where the fun comes. I used up most of the stuff A.L. provided (barrels, cotton bales, etc.) but there was still lots of room down below. So I began to sort of paint a picture of what would be going on down there. I added ballast rock, wood and chain bins, rolled hammocks, a ship's wright compartment with a yard being prepared for install, along with a set of trestle and cross trees and a mast cap that the carpenter would have been fitting out (or repairing). A sea chest for tools and a bench rounded out that cabin. Above deck I did alot of little things that hopefully give life and authenticity to the build. Coiled ropes, water barrels (lashed to stanchions), a hanging bucket and mop. Fun things; many of which were just done spontaneously and simply. Nothing left but to build a stand for it. The pedestal type fittings that came in the kit need to be prepped for when the hull can be turned upside down. At this stage in my build that isn't going to happen (I hope). So I'll probably build a cradle type stand. Then a plexiglass case (I can't believe the cost of plexiglass -- another reason that this will be the last of this size I build and another reason why not finishing the masts etc. was probably a good thing). Tip to all the A.L. Bounty builders: make sure you have some where to put the darn thing when its done. Here's a couple sample pictures to end this build log. A full set of pix can be found in the Gallery section.
- 265 replies
-
- 5
-
-
- finished
- artesania latina
- (and 1 more)
-
I just posted my pix under Gallery. Much easier than posting under a build log. I never have learned how to caption a photo in the build log. As for tips on planking, I'll be happy to help but it will be coming from a strict amateur. For real technique see thomaslambo's work. I'm not sure if he's posted pix of his planking work yet but it is exquisite and done the right way.
-
Great work Grendel. I'm amazed at how smoothly things are going for you. Unless of course you've not mentioned the tons of "adjustments" that were made. I will assume that the precision in which you are planning and working things out in advance is responsible for this smooth going. I wish i had paid more attention to things like frame leveling before I ran into the problems I did. Anyway, I wanted to say congratulations; the hard part is done and the fun (planking and rigging) are ahead. Take this with a grain of salt. I just "finished" my build and will post some photos in my log soon. I will explain the quote marks at that time. LOL.
-
Earlier you mused about having oars and sails at the same time and thought that it should be one or the other. You may be right but I can't help but think that the Vikings might have used both at the same time -- the sails being used as "auxiliary power" so to speak. I know today sailors often use the diesel along with sails. The sails not only provide a bit more propulsion but work to stabilize the ship. My 2 1/2 cents.
-
Crowsfeet and euphroe block
Captain Al replied to simon porter's topic in Masting, rigging and sails
Yup. That would have been the really correct way of doing it. I wanted to skip the authenticity on this particular part (I will already have too many blocks on the model that probably won't get used) so I went with the glued knot on the mizzen. Maybe I'll put the blocks on the main and fore. Thanks for the tip. -
Crowsfeet and euphroe block
Captain Al replied to simon porter's topic in Masting, rigging and sails
Hope someone tunes back into this thread. I have completed the crowsfeet and euphore. I will be gluing down the platform today or tomorrow (I hope) and I am contemplating how the pigtail that comes off the euphore is tied to the stay. I used a rolling hitch on the first mast/platform/euphore I did (mizzen mast on HMS Bounty) which enabled me to tie it on without tension and then slide it down the stay until tension was achieved and it won't slide back up the stay. (I love this knot for that simple function (learned it on real boats). I'm wondering if anyone has any better ideas or would validate the way I'm doing it. I have a sneaking feeling that in reality a rolling hitch was not used. -
I too just discovered this forum topic and can't get enough of it. Thank you so much T for posting this fantastic naval history. It gives such wonderful context to all the "ship building" we do ourselves. Its an inspiration as well to start visiting some of the museums and ship yards that house all this material. Thanks again.
-
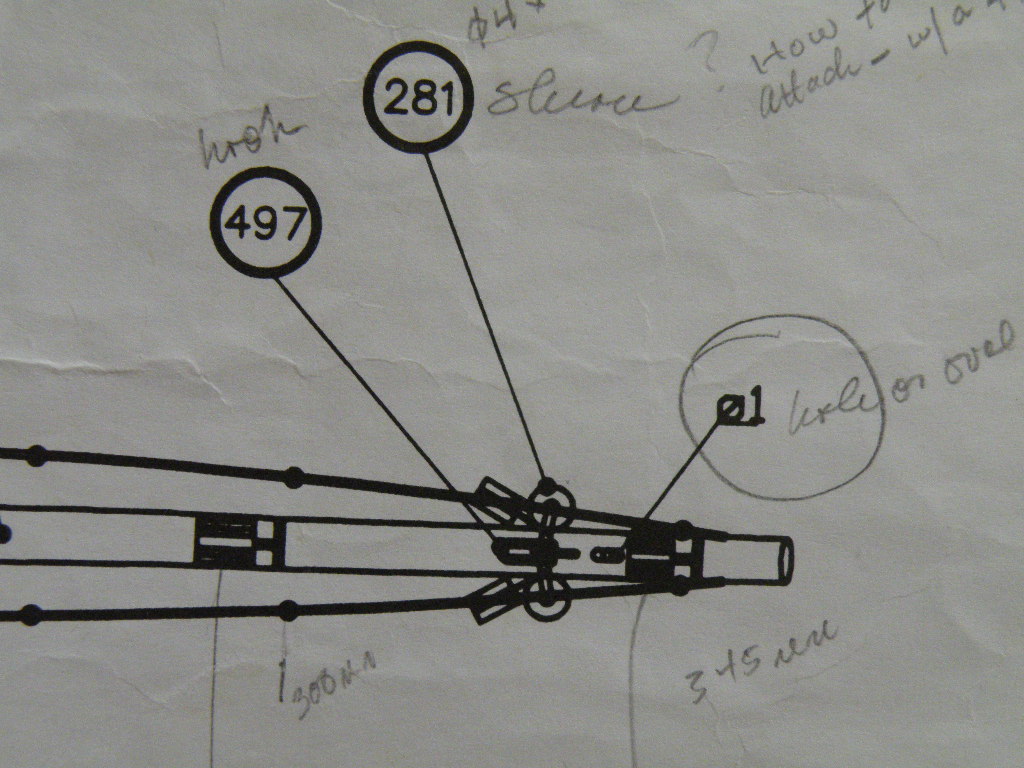
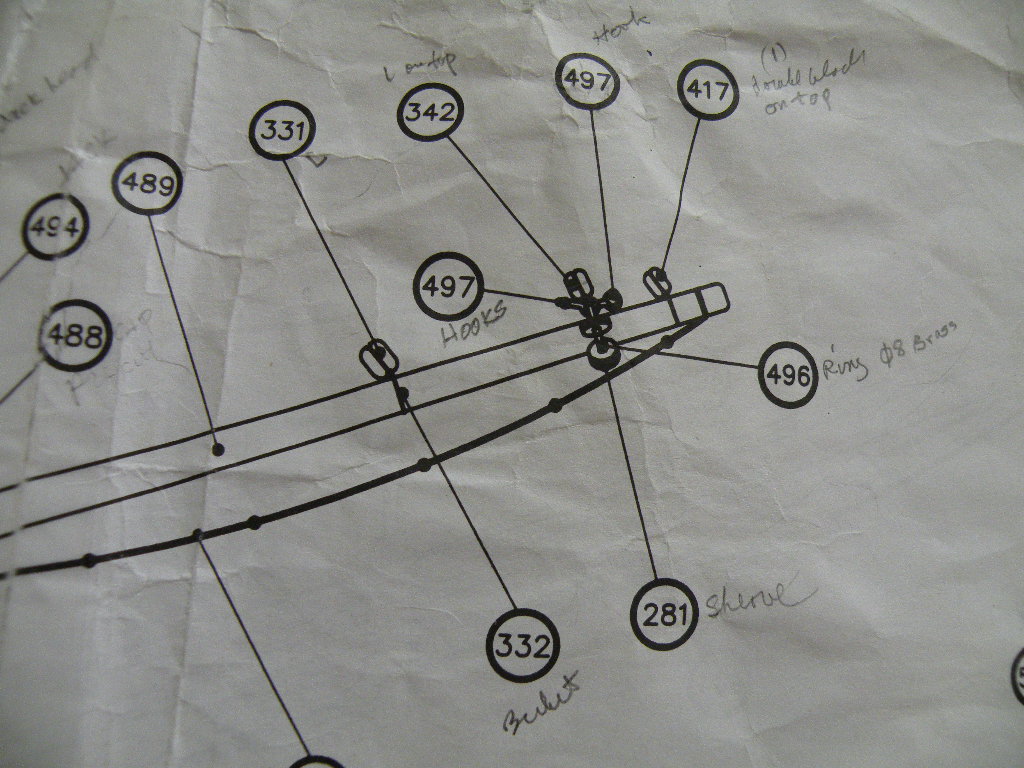
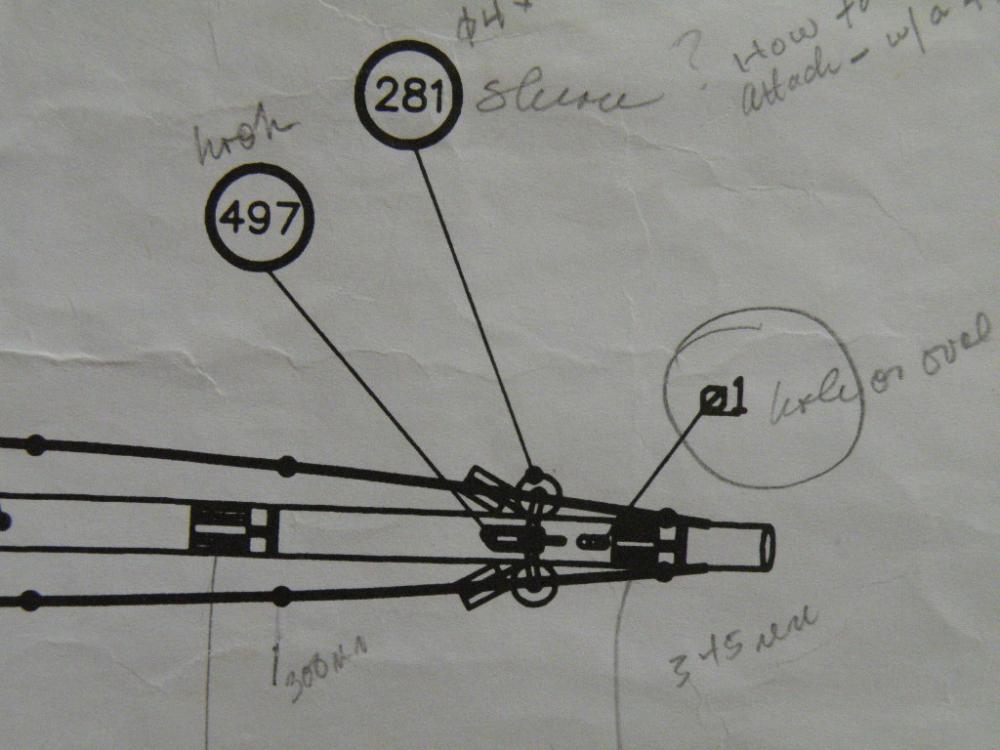
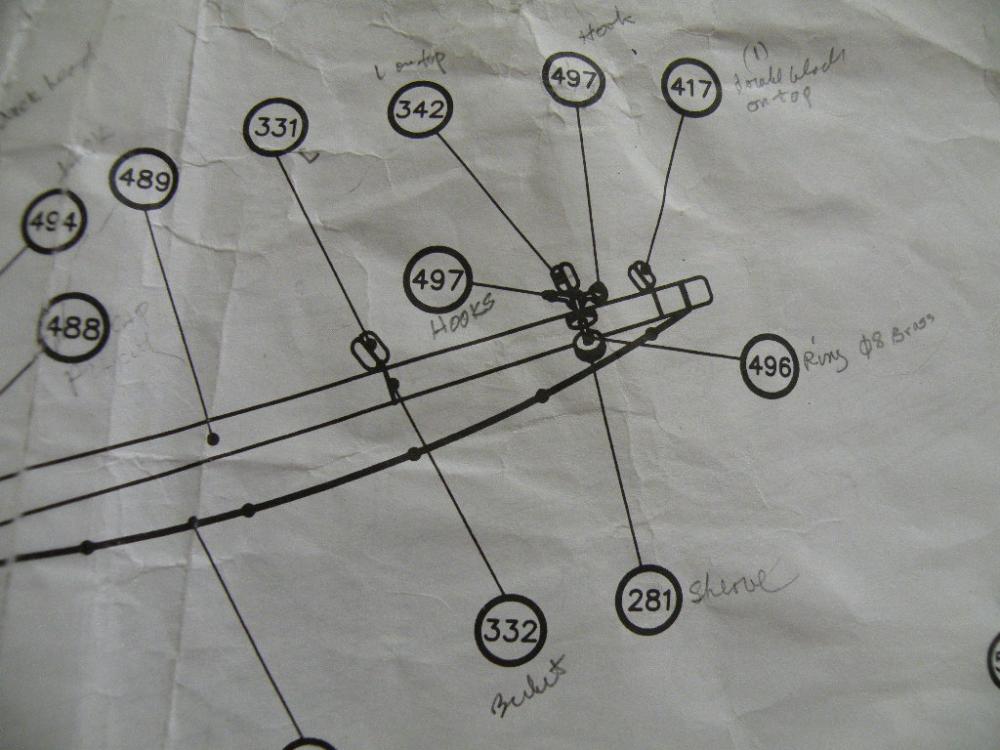
Druxey, thanks for the tip and the info. What then do you make of AL's plans above that include these two 281 sheaves?
-
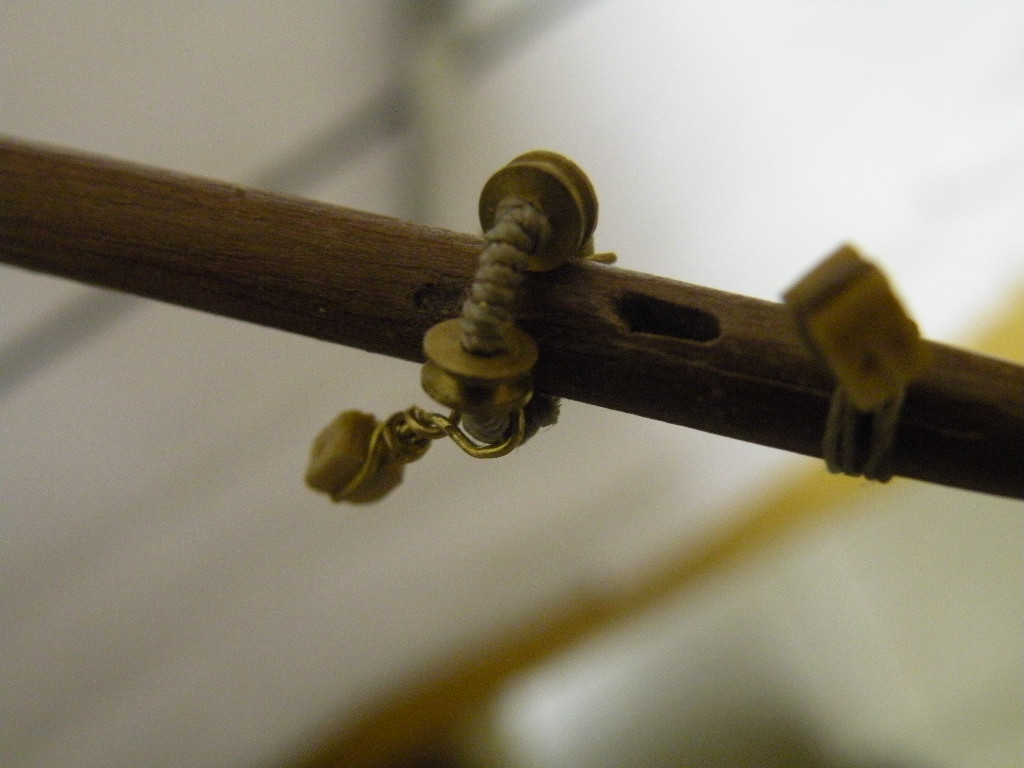
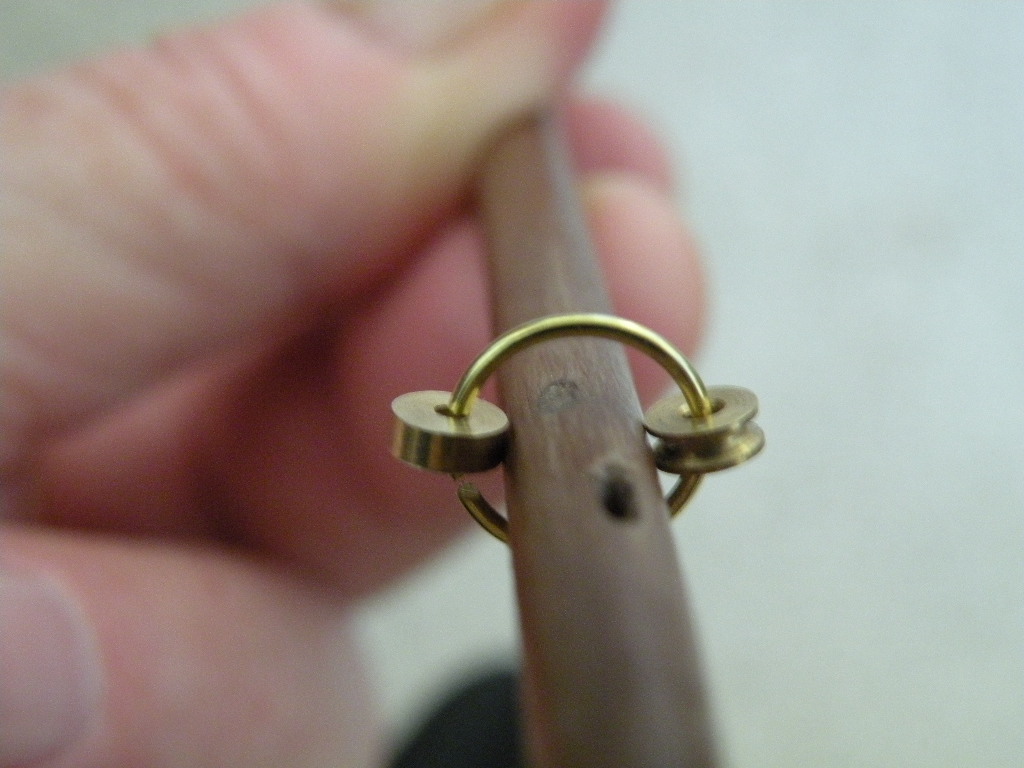
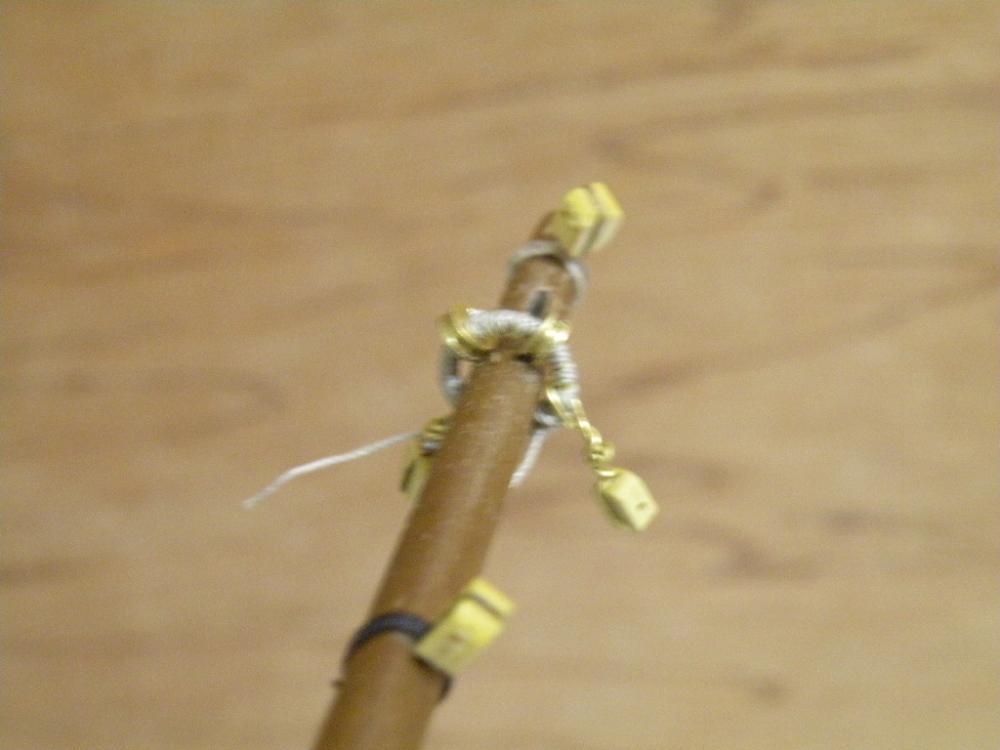
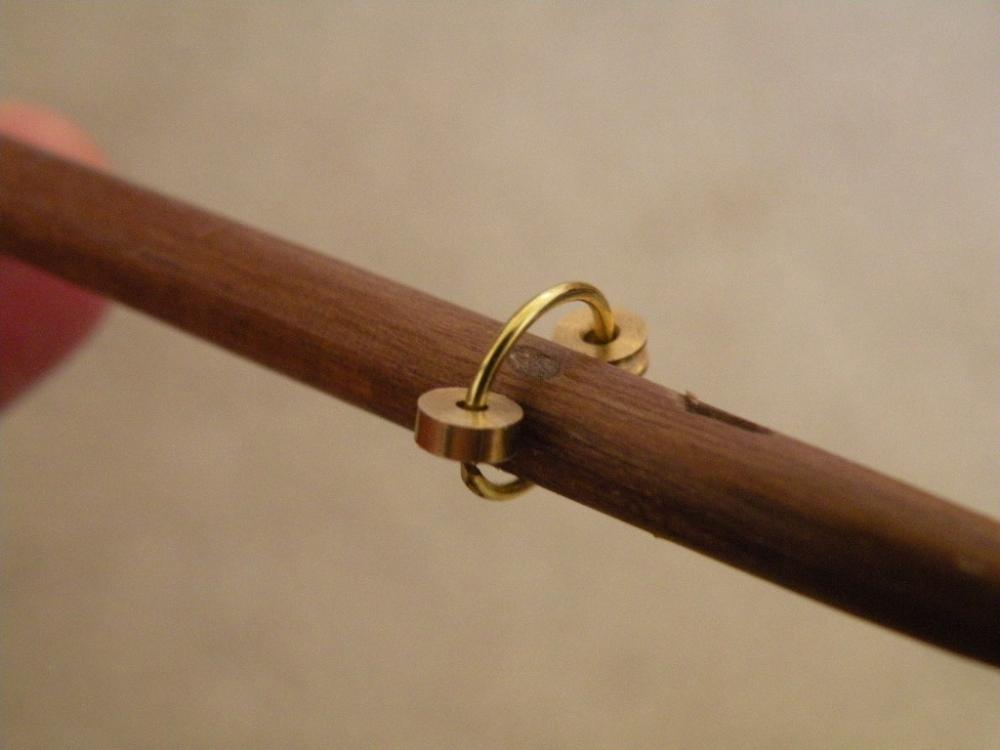
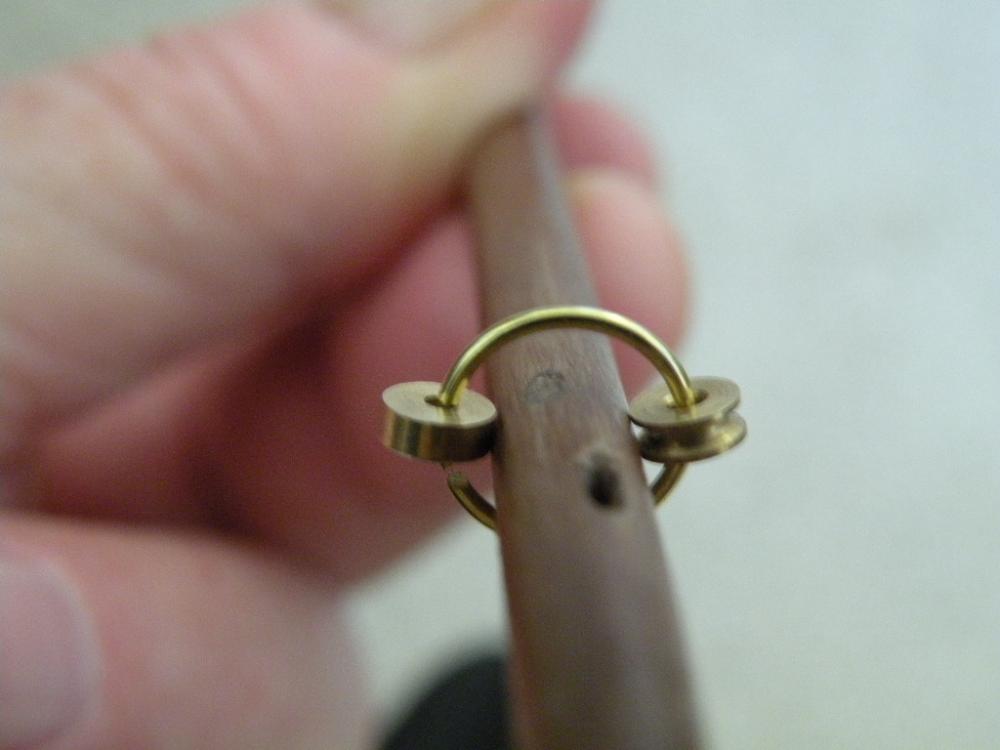
Added the blocks and wrapped the brass ring as its supposed to be in real life. What's that called? I forgot to put the hooks on and now am wondering if I'll have sufficient space between the ring and the sprit. I may need to just seize or lash the hooks to the ring with .15mm thread. Or just do it all over again and make the ring a bit larger.


-
Yup.
-
Interesting takes on this. Thanks. I will add some more of my two sense in a bit (the Admiral wants to go swimming). From my recent views of the rigging plans I seem to recall seeing (or I think I saw -- with these plans its not easy for me to be sure what line is what) two lines that hook to this traveller ring, the top one runs back to the foremast (possibly through a block on the forestay, and the bottom one run forward and then down through the hole (which in reality had a sheave in it) and then back somewhere. So this traveller could be pulled fore and aft and secured in position by belaying each of these lines.
-
Yes, this is much like what I am about to put on my model. To me it looks like a complete ring around the sprit rather than a horseshoe. A ring would keep it on the sprit. A horsehoe would come off. But overall, are you in agreement that mine is pretty much correct and just needs the hook on top to connect it and control its movement fore and aft? Thanks for your interest and help. Much appreciated.
-
Don't think so SpyGlass but thanks for trying. What you've linked to is mostly related to a main boom preventer to prevent accidental gybes. This gizzmo is more akin to a traveller on a main boom which is used to reduce the angle of the sail to the wind (on modern fore and aft mainsail yachts) and allow the boat to point a bit more upwind. I think that is the purpose as well of this "bowsprit ring" or (also) traveller as Peterson calls it.
-
Note that one of the sheaves I have on there temporarily is not a sheave at all. Somehow a wheel got into the sheave cubby hole. And as can be seen in the photo (but not so much in person) I had to redo the hole so it sat at high noon and not at ten o'clock.
-
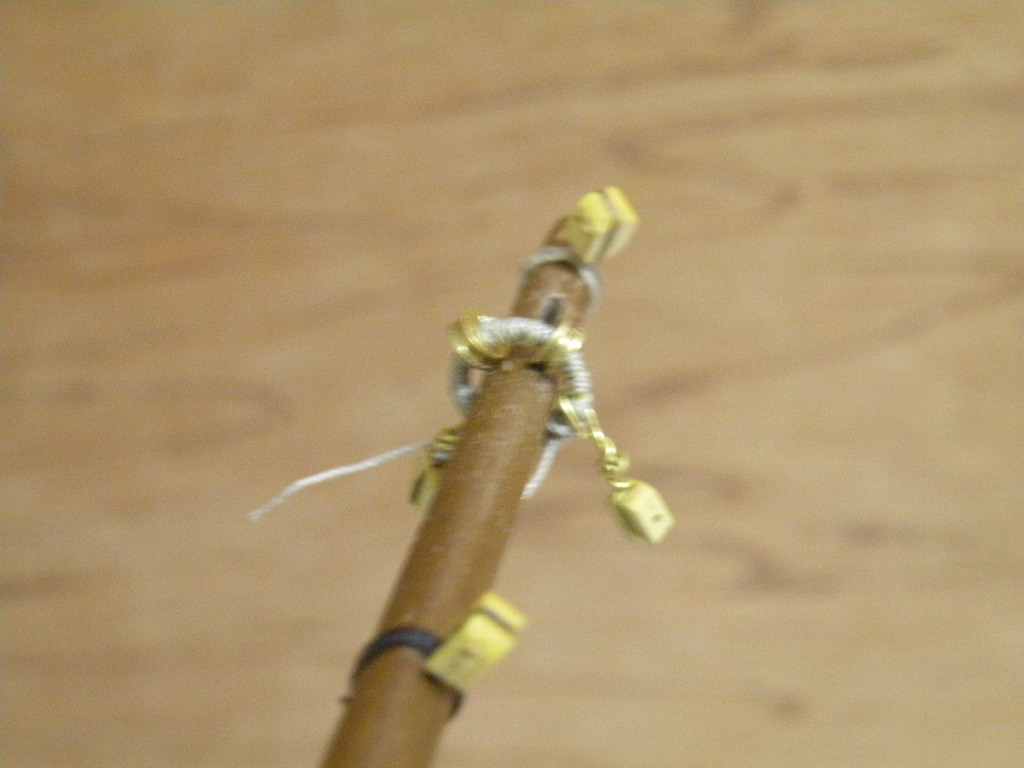
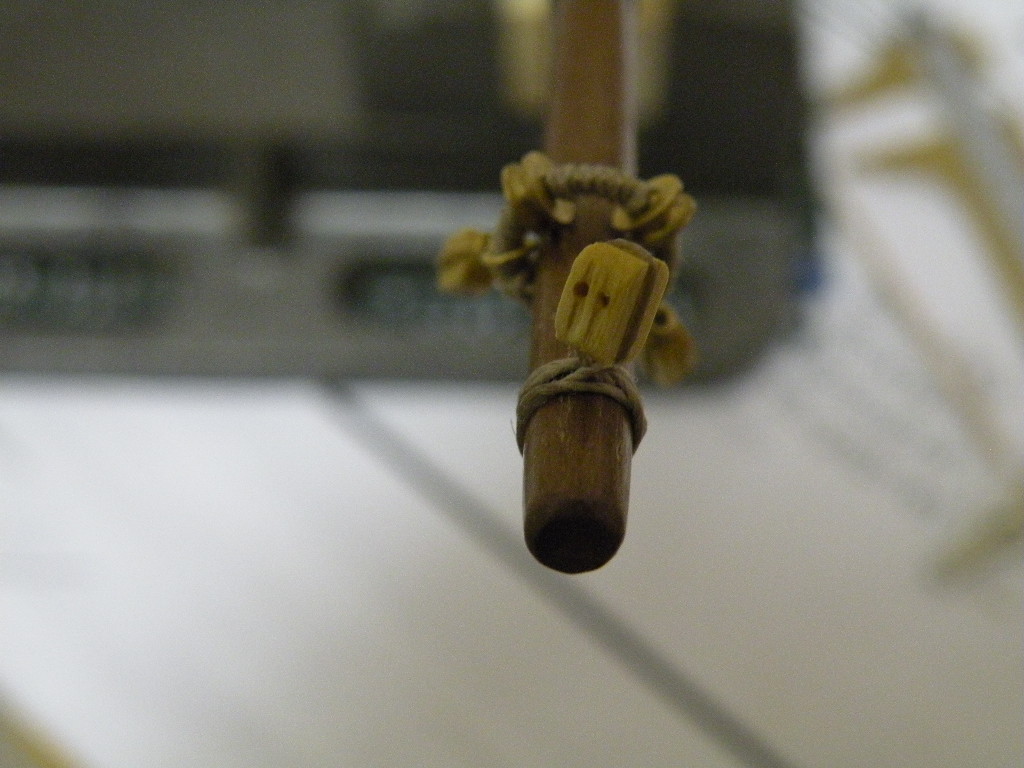
I can use some advice and insight as to whether or not I have followed the plans correctly in fabricating the bowsprit traveller for my Bounty. I am attaching 2 photos that show the plans with parts 281 (sheaves) and 496 (bowsprit ring or traveller). Also attached are 2 more pics that show what I've done. Question is: is that how its supposed to be? The ring with the sheaves on it will be hooked to a line that runs through the hole in the sprit and there is enough play in the ring (+ sheaves) around the sprit to allow it to be moved fore and aft (in reality... as a model, I may afix this hardware in a stationery position with a spot of glue). I haven't followed the running rigging plans far enough yet but I suppose there will be another set of lines that run through the sheaves that tension the sail itself. So with that said, can anyone tell me if I'm going about this correctly or if I've got it all wrong? Or partly wrong? Thanks.
-
As is my wont to do, I agree with everyone. This subject is too complicated and full of unknown factors (life's little interventions) to think that anyone has the right way of doing it. Almost 3 years ago i was gifted the A.L. Bounty kit by a gentleman who had bought it for his son (thinking it would help get him off the juice) who had never even opened it. I, on the other hand, had a life long desire to build models but had never gotten around to it. So I began what is now closing in on a 3 year project and if I decide to finish it completely, it'll be another year minimum. I discovered this site and started a log. Over time the log became harder to maintain than the model did to build. My photography is not great and I'm a dunce when it comes to computers in general. So my log fell off the table (am I one whose been counted as "given up"?). But I have persevered through some trying personal times including a recent six month chemo therapy course. I've learned a heck of alot about model building (its cost being one of the lessons learned), ship's construction, history and maybe most importantly, alot about myself. I recently remarked to a friend that I've always been a dilettante and never got passionate about anything to stick with it long enough to really master it. This is still true at age 70, and pertains to ship modeling in particular at this point in time. But it doesn't mean i don't enjoy various aspects of the hobby and find reward and relaxation in it. The trick going forward for me will be to identify those aspects of it that I don't enjoy (reading plans is one of them for sure) and take on projects that minimize them. Or, forget ship modeling, having been there and done it, and start making boxes.
-
Ah. Makes sense.
-
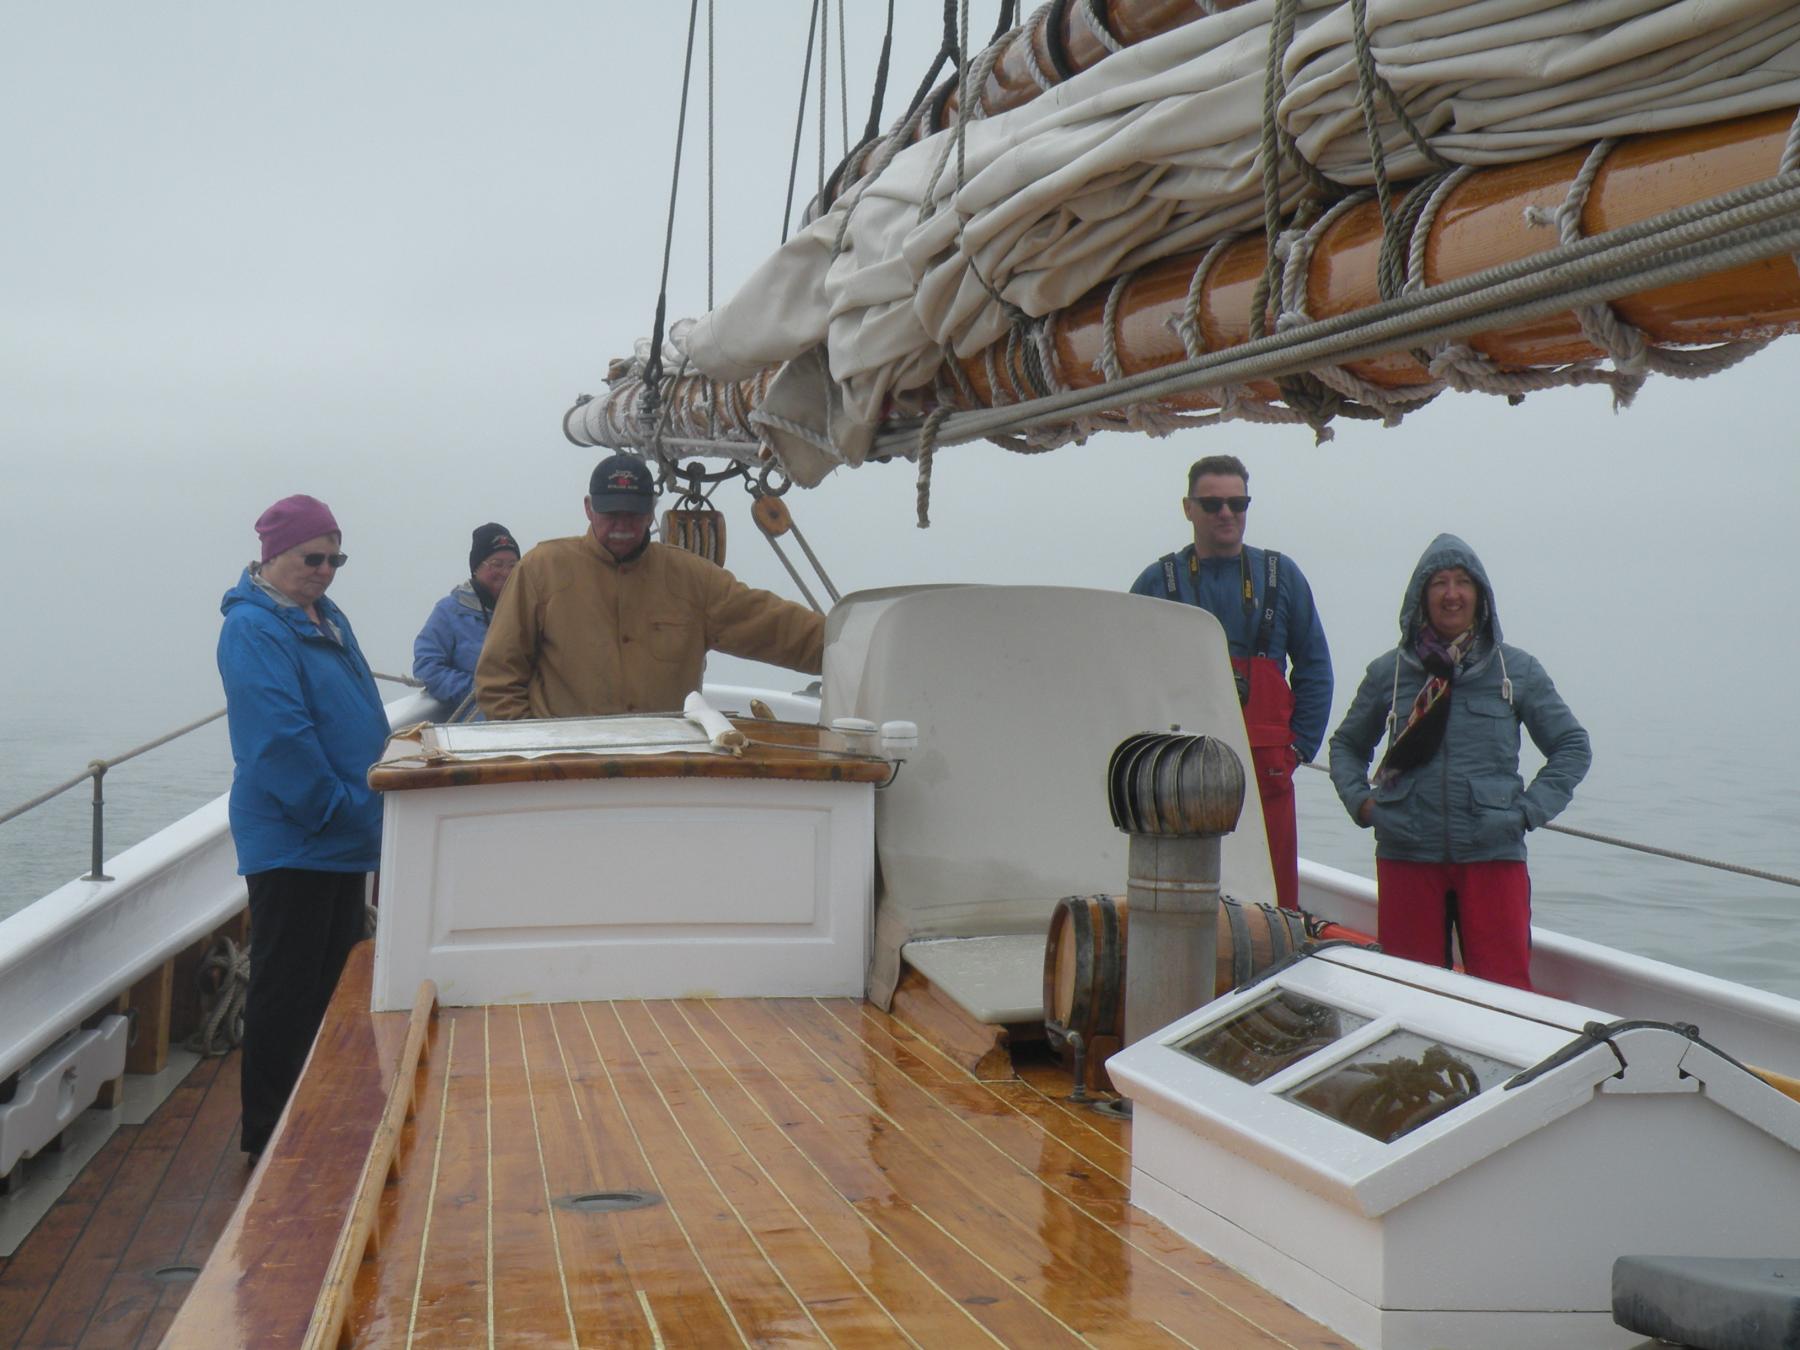
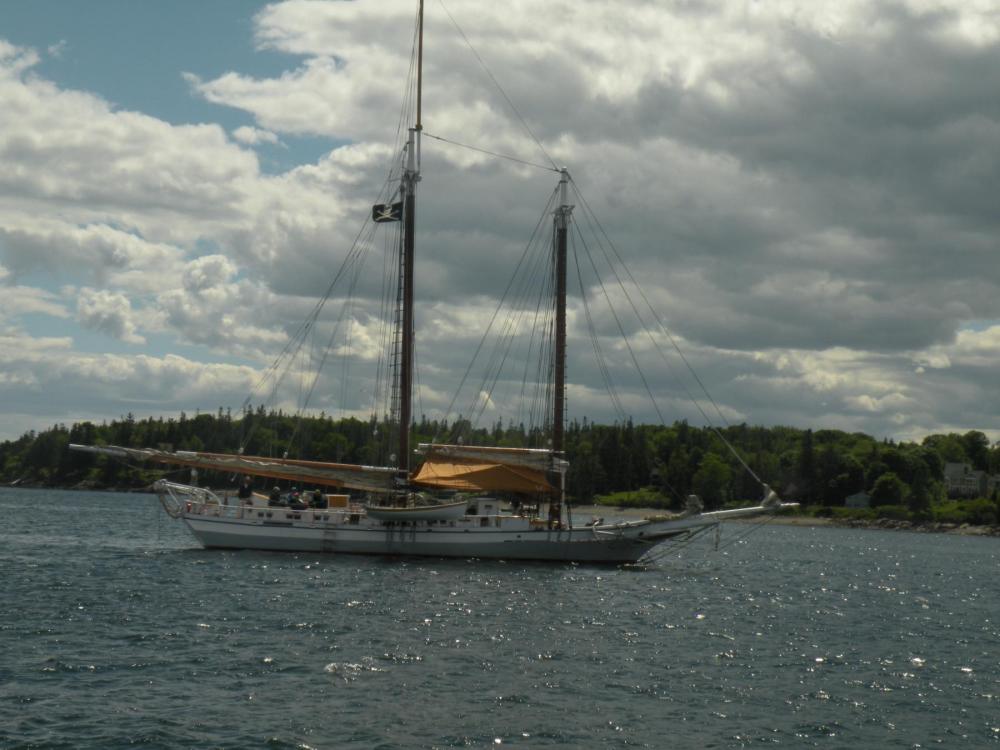
Thought I'd throw in a couple pix that I took on the American Eagle out of Rocklin, Maine. Though these are not mizzen masts the issue is the same: how to keep it from falling into the cockpit when the sail is down. These two pix employ the topping lift solution.

-
Yes, both the explanation and photo are of great help. I've seen lots of pix of the sail brailed but thought there might be an alternative. There always is on a sail boat. I learned that from experience. The idea of a crutch also crossed my mind. Of course there is no mention or pic of one on Bounty. The dimension (length) of the lower boom (which is which? spanker or driver above?) given by the A.L. plans puts the boom way over the taffrail and is far longer than the real Bounty's (32' v. 22'). So A.L. could have included a crutch atop the flag locker -- if they'd provided space for a flag locker which they don't. So with no flag locker, I can't use a crutch. Moreover, with Bligh's boom only 22' it fits within the space between the mizzen and the flag locker, so Bounty did not employ a crutch. Best thought is what you guys have suggested -- brail the sail mates and keep the boom aloft. Thanks for your interest and replies.
-
I'm rigging up the driver and spanker gaffs on my Bounty and I'm thinking that I want the sail to be furled with the gaff lowered. I can't see anything in the plans that would hold the boom (gaff) up. I've been looking for a 'topping lift' but don't see one. Would the 'peak halyard' be enough to hold the boom in the lowered position and in conjunction with the vangs and sheets hold it stationery?
-
Thanks Avi. I think I get the picture. What you're saying is that the groove resulted from removing the thin strips and it now serves no real purpose but it is not in the way of anything and not visible. So no need to fill it or make new block frames. Just one of those curiosities that you put in so you'd get more replies. I get it.