HOLIDAY DONATION DRIVE - SUPPORT MSW - DO YOUR PART TO KEEP THIS GREAT FORUM GOING! (83 donations so far out of 49,000 members - C'mon guys!)
×


Captain Al
-
Posts
613 -
Joined
-
Last visited
Content Type
Profiles
Forums
Gallery
Events
Everything posted by Captain Al
-
GG, Boyd asked me to chime in on this so here goes... to the best of my knowledge (from building the same kit and finishing the mizzen mast), this part 567 is a 'cheek stiffener' and it goes UNDER the part 568 (which I believe is called the chocks). In real life these give strength to the mast. I found that I could not lay the stiffener and the (curved) chock smoothly together on the mast, so I eliminated the stiffener. I simply put the chock up against the mast after I filed the face of the mast on each side flat so the chock wouldn't roll around and would have a flat glue surface. I don't think much is lost by not putting the stiffener under the chock, but I do admit it was a lazy move on my part. You will see these same parts on the mizzen and foremast, only with different part numbers. I think on the mizzen they are parts 590 and 591. I have only built the mizzen so far and perhaps when (if) I get to the main and foremasts I will put these stiffeners on. But perhaps not. No harm no foul as they say.
-
Jim Byrnes Model Machines
Captain Al replied to Mahuna's topic in Modeling tools and Workshop Equipment
Could be worse. At least you don't have to ship via Clipper Ship. -
Boyd, I wish I could join the others in praise of your work, but alas I feel its not up to par. Under careful scrutiny and intense magnification I have noticed that one of the trenails on the 5th plank to port is about .25mm out of alignment. I'm not suggesting you rip out the plank, but just that in the future you take a bit more care. Its a shame that such an otherwise masterful job should be spoiled by careless inattention to detail. I'm looking forward to better things to come and I know you will rise to the occasion. For those who haven't gotten it yet, my tongue is still stuck in my cheek. Boyd, my buddy, as I noted in private, you've taken your rightful place among the masters. I can't wait to watch you plank the hull. You'll undoubtedly make drop planks and spoilers into works of art.
-
Regarding bales... the wadding material is a good idea but in fact when they made up bales of cotton back then they were so tightly compacted to get as much cotton into as small a bale as possible that the bale was probably not very spongy at all. That said, I had the stick of wood AL provided but I chose to use a stick of balsa instead, cut into the sizes I needed. I haven't fixed them into the ship yet and won't decided on that til I'm putting finishing touches to the model. Like Boyd noted, I can't figure out what bales of cotton would have been doing on the Bounty anyway. The space may be much more useful for some other ornaments like spare spars or ropes or tools. Oh, I used an old Tshirt as well. Don't think it was even a clean one.
-
On close inspection I see these catharpins clearly. It looks to me though that they are all aft of the mast itself, which would mean that all the shrouds actually run aft of the mast and the channels/deadeyes down below would have to be aft of the mast. I have not noticed that on my model Bounty and I am sure I've placed the channels right where the plans call for them. Funny how little things like this can be overlooked.' I also looked at McKay's Anatomy of Bounty and in the rigging chart the only mention of catharpins (he lists them as 'catherpin ends') is in relation to the foremast. I'm thinking then that ships of the day may or may not have had these on all the masts.
-
Thanks Stockholm. I found a few definitions here and there but nothing as complete and useful as your's. I recall the term futtock stave and it seems like they would be applicable to the catharpins. What I can't visualize or see in Shihawks pix is whether they are on both the fore and aft side of the mast.
-
I personally think that a model can often look better with less detail. Its like the old adage, addition by subtraction. Sometimes all the stuff that goes on to make the model authentic gets in the way of even seeing other things. I just think your Victory is fantastic as it is. The point you make about the shrouds getting so narrow that ratlines are simply superfluous is spot on. They can be tied on, but end up just being a little tangle of thread when the shrouds resume their position. I'm going to go only as high as the ratline can be clearly distinguished as a step. As for going as high as the catharpins, I might do that if I knew what a catharpin was. LOL. Gotta look that one up.
-
Wow. Boyd you've done a fantastic job on a really difficult ship. I haven't seen your log in over a year, maybe more. I was searching for an answer to a Q I have on ratlines, and your log came up first. I am almost to the top of the mizzen mast in tying on ratlines and I don't know how far up the shrouds to go. Or should I say, where to stop the ratlines. The plans look like they stop about the level of the bottom of the cheeks. A lot of pictures I've seen seem to stop them where the futtock shrouds begin. Once the futtock shrouds and their ratlines are on, its difficult to see through them to tell which are the ratlines from the lower shrouds. My thinking though is that they would go almost right up to the mast so a sailor could climb onto the platform. If they were much lower, it would be nigh on impossible -- unless they transferred to the futtock ratlines which I would think would be a bit hazardous. But just being on one of those ships itself was a bit hazardous, so who knows to what extent they had to put themselves out there. Or maybe they just went from the outside of the ratlines to the inside of the futtock ratlines and completed the journey to the platform half upside down. Anyway, how far up the shrouds did you stop your ratlines. I want to also say that I'm very intrigued by you plan to stop the build at the lower masts. I've had that thought for almost a year in regard to my Bounty. For lots of different reasons including the ability to put the model on a shelf. Mainly though to avoid a lot of rigging which I'm not yet capable of doing well. So I applaud your guts in doing this in the face of what must be a lot of scowls. As for your yards.... I agree with what Mike, Neptune and Glackie have said; go with full length yards. By now you may have already completed them, but I just thought I'd toss that in. Keep up the great build. It must be a great feeling to know you're nearing the end.
-
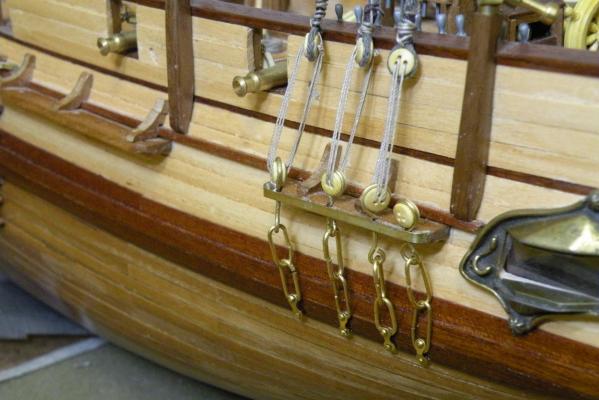
Thanks LA. I sort of figured that's how you did it. And not being critical cause I've tried several different methods, I agree there is probably better ways. We just have to figure them out. I would like to be able to take a .8mm or 1.0 mm wire (or rod) and use it for the stropping, leaving an inch or so "needle" to extend down through the hole. Then with the needle nose pliers (or better yet, round nose pliers) form an eye out of this needle. But I can't really do this well, at least when the piece is already mounted on the boat. Maybe a good technique is to look ahead a few steps and mount these deadeyes on their pieces (like channels and platforms) before mounting the piece. That way you could work with the pliers with the piece in a vise and from any angle you want. Just thinking aloud.
-
I was also going to comment on the staggered butt joints, but Ulises beat me to it. I would also start to think about starting to taper your planks at the bow. Don't want to wait too long or you'll eventually run out of space for your planks.
-
Keep up the great work cobr. I'm paying close attention.
-
Hey LA, its been awhile since I've checked out your build log (due to my own health distractions) but I want to tell you how great a job you're doing! Its actually inspiring me to get back to the work bench as soon as I can. I also want to thank you for posting some great detailed pictures. They are going to help me with my own masts and rigging tremendously. I've purposely let you catch up and get ahead of me so I can just follow the leader; makes things much simpler. I have one question from looking at your deadeyes up top (the ones that go on the platforms. What technique are you using for the stroppings that go down through the holes? It looks like some sort of twisted wire? How have you been able to get the eyes through the holes? Or have you made the eyes after the wire was in the holes? I find that hard to do but I also can't figure out how to make the eye first and get it down into a 1mm or less hole?
-
No doubt. But it does look like you are approaching things in a very well considered way. I haven't been too active in either my building or my log due to some medical issues, but I hope to get along with it shortly. Hope my pix and problems are helpful.
-
Great start cobr. Wish I had known enough to do something like your slip way. I'll be watching you.
-
I gotta say that I've really enjoyed the comments on this seemingly mundane subject. Thanks everyone.
-
Thank you so much Stockholm for definitively settling the question of cotton or no cotton. For all the reasons you stated it made no sense to me but I had no real documentation. As to why England wanted breadfruit in the first place, maybe you can recall. I believe it had something to do with thinking they could make a staple out of it and feed the peasants. More like to feed the pheasants.
-
Hell, maybe Bligh actually did have to trade cotton for breadfruit. I always thought they would have just taken what they wanted.
-
I like your thinking. The 'bales' are not really supplied by AL, they just tell you to cut up some pieces of wood and cover them with the material provided (which in my case was not provided). I'm not really hung up on this and haven't decided on what I'll do with the space. Its just one of those quirky things that come around on occasion. When we were growing up there was this game that went: "what's wrong with this picture?" and there would be one little obscure detail that just did not make sense. Such is cotton bales on Bounty. And you're right; England was an importer of cotton and that's why they were Confederate sympathizers in the great War of Northern Aggression (as southerners like to still call it). Judging by your name, you may be among them. And as Seinfeld would say, "not that there's anything wrong with that."
-
Well yes, the breadfruit plants were the primary, maybe even the sole reason for the voyage that ended in mutiny. The A.L. kit provides ample space for those plants and yes, they took up so much space in the 'garden' that even the Captains quarters were located amidships. I am one of the few builders of Bounty who chose not to put green plants in my pots. My rationale was that these plants were only on board Bounty for a short period of time -- from when they were obtained in Tahiti to when they were tossed overboard by F. Christian and his men. The long voyage from England to Tahiti had no breadfruit plants. So my model represents Bounty on its outbound leg. This all does not answer the question though about cotton bales. Were they put into the kit by A.L. just to fill space down below or was there some historic context to it?
-
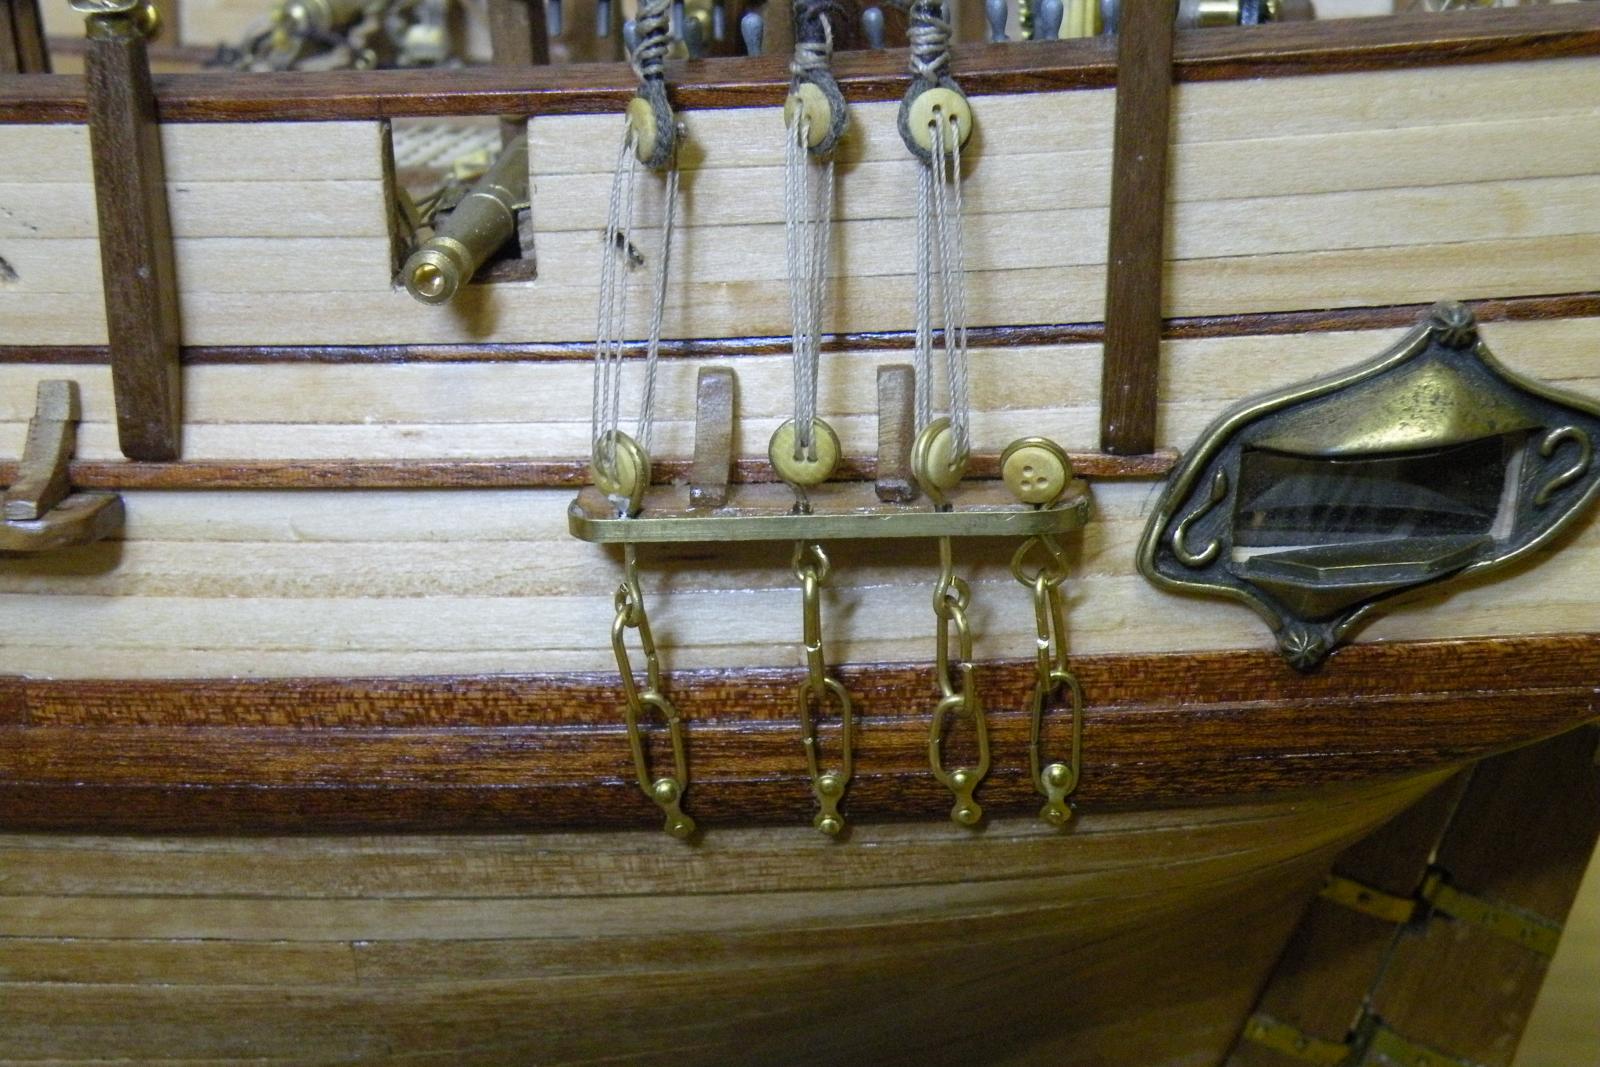
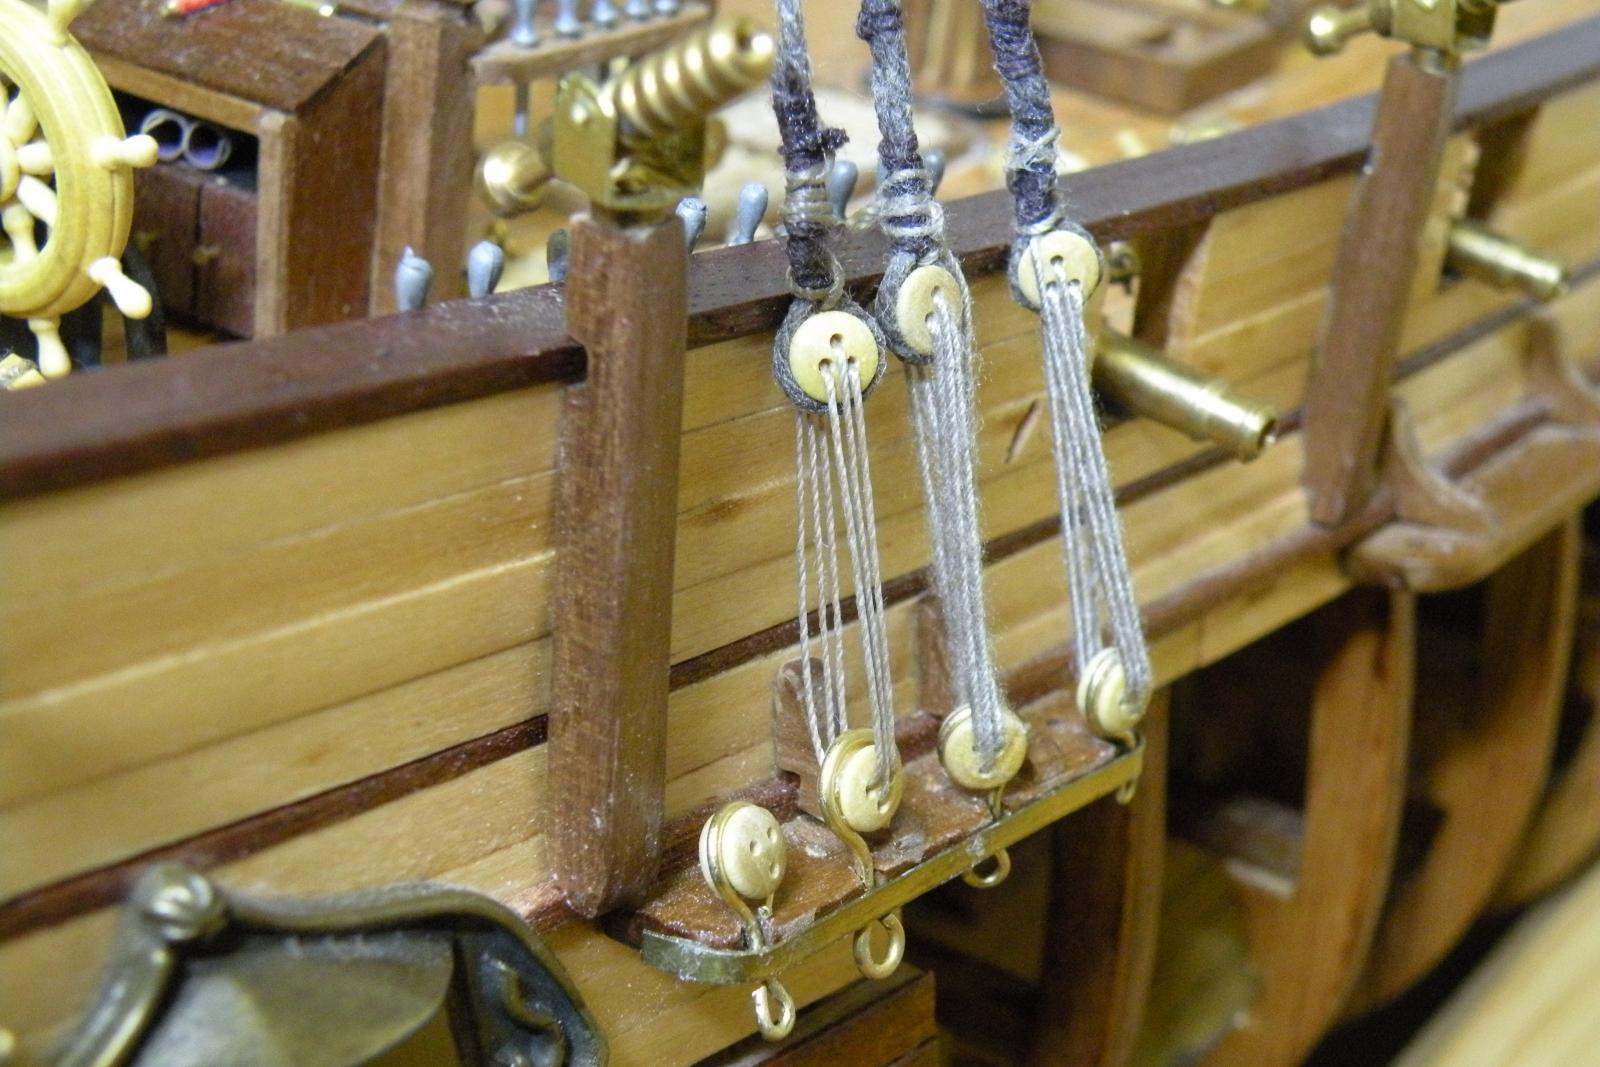
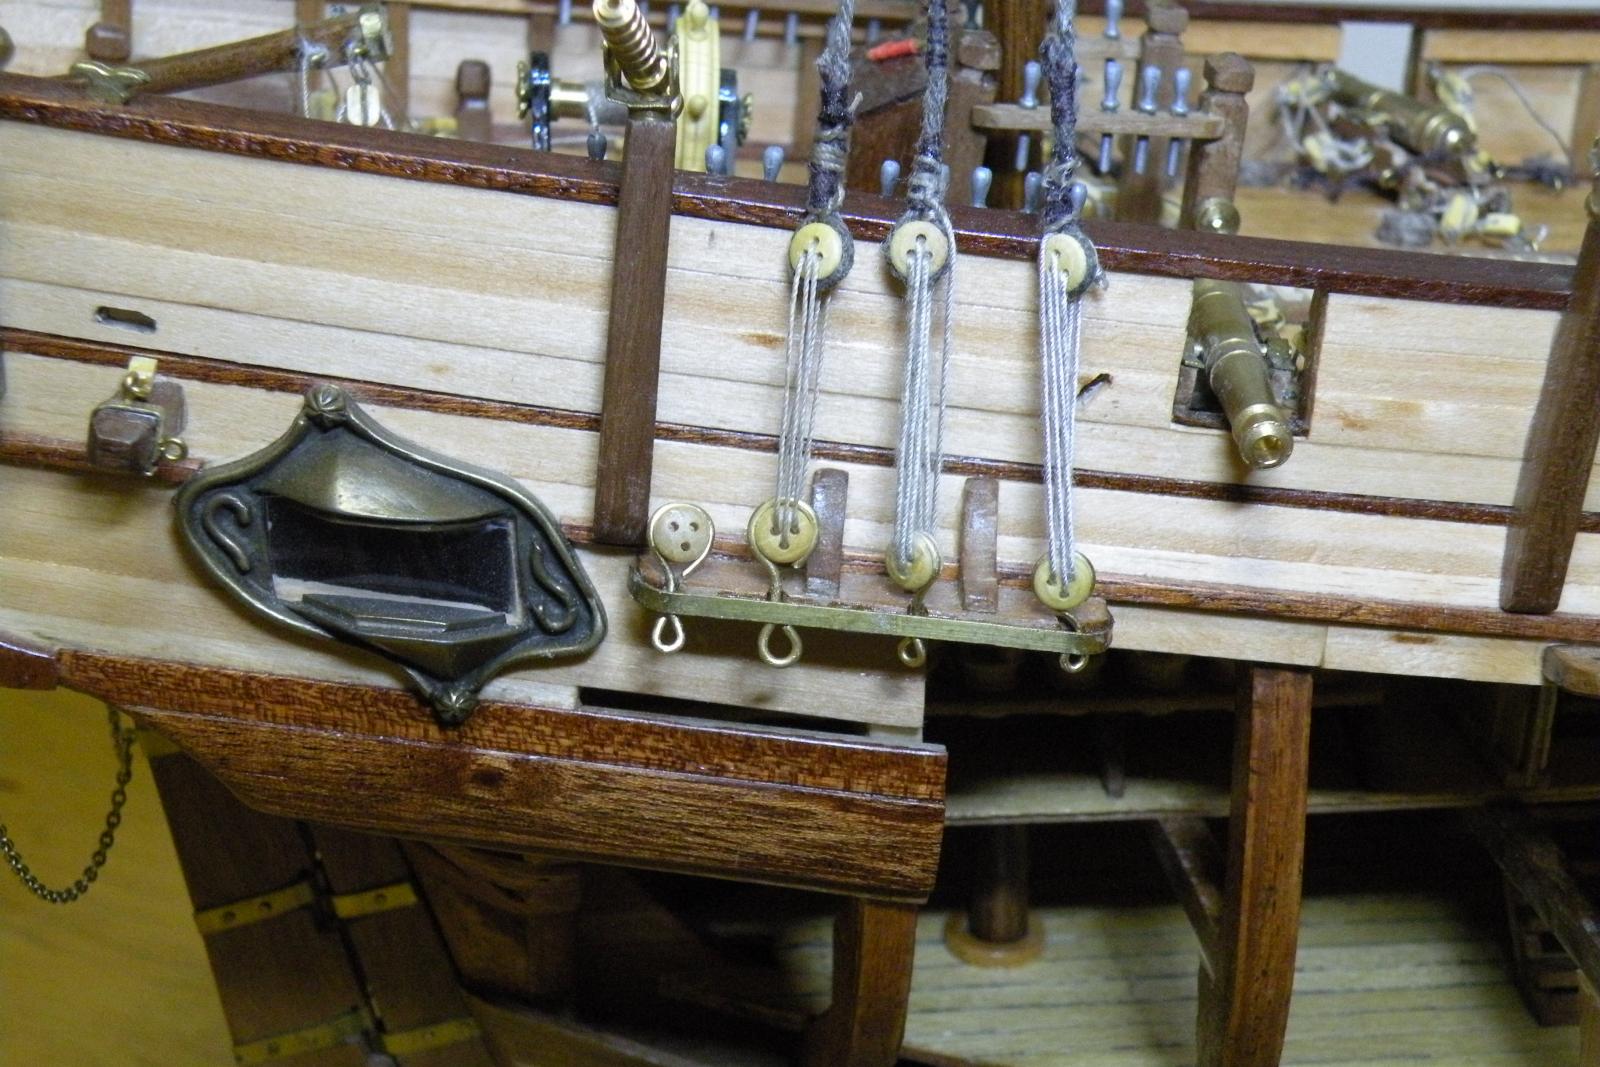
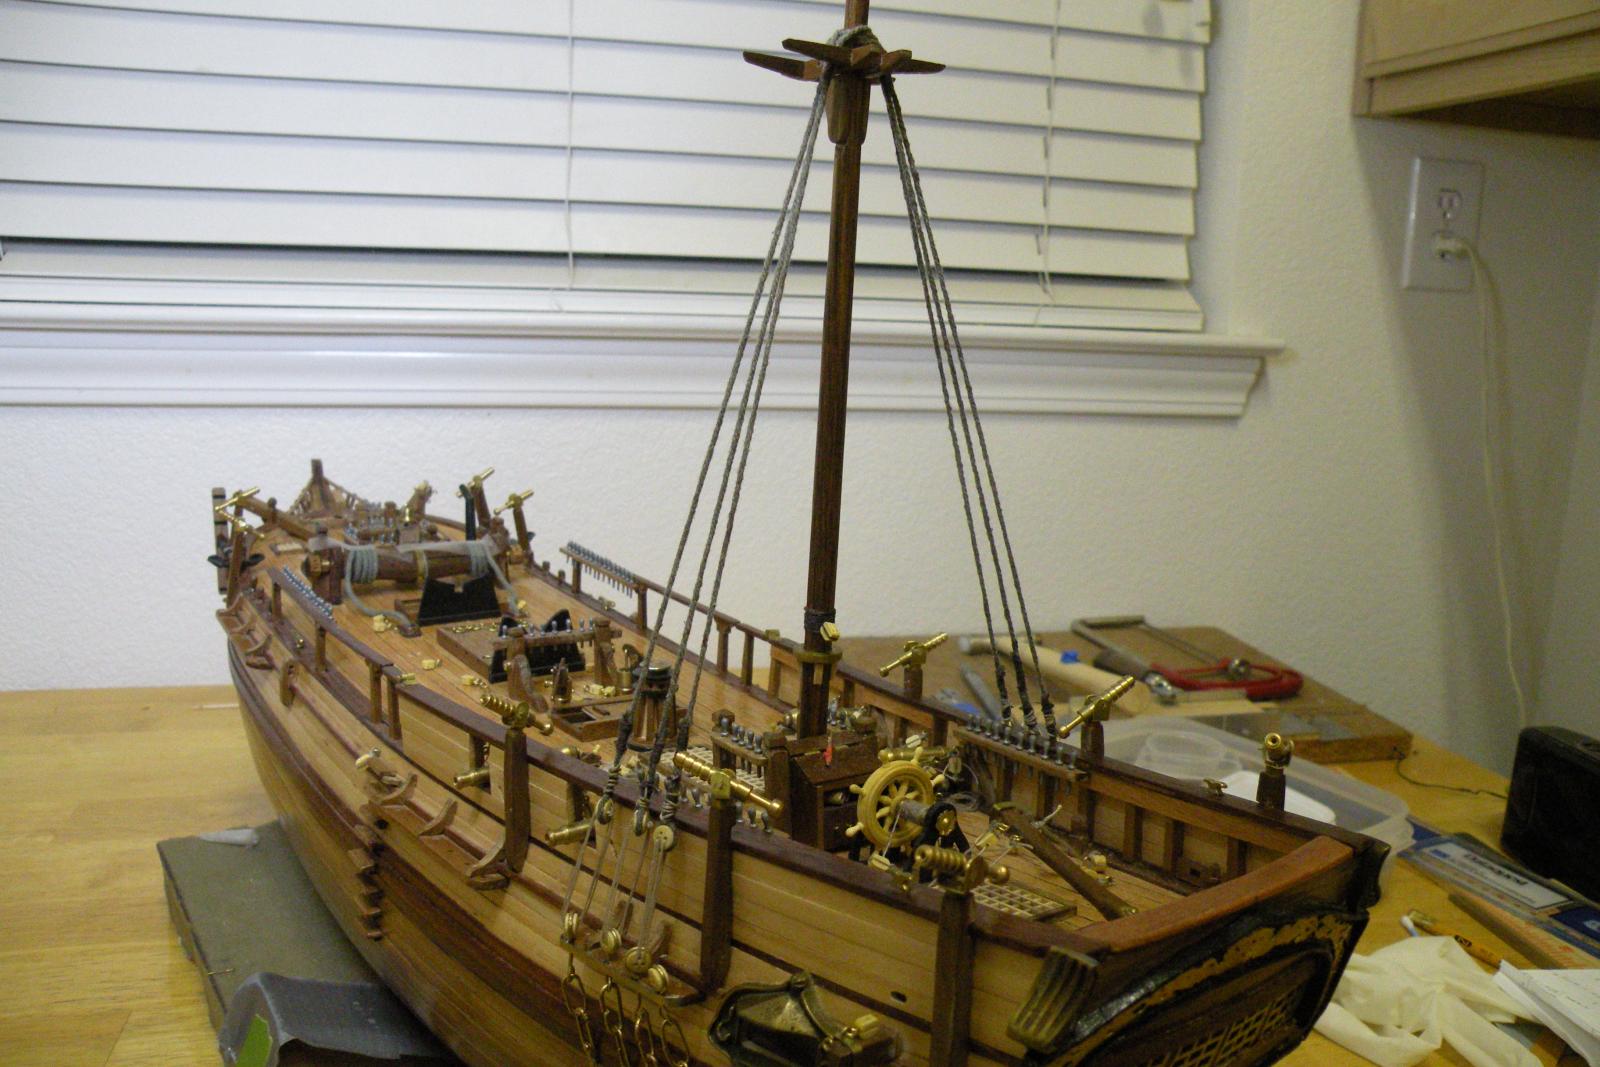
How to avoid twisted lanyards
Captain Al replied to Captain Al's topic in Masting, rigging and sails
My pleasure Bob. I often rely on the good graces and generosity of fellow modelers to bail me out. And they usually come through with flying colors. Glad to hear this thread helped you as well. -
Nice surprise to see you've completed another build and done a smashing good job of it. Yes, your rigging looks superb. I particularly checked out the deadeyes and chain plates as those are the parts I've been working on lately. Very nice. Looks like you've learned your lessons well. Lots of good interior detail in there which I know you love. So its back to stage coaches now? I think you're quite smart to mix up the builds when you get the urge.
-
How to avoid twisted lanyards
Captain Al replied to Captain Al's topic in Masting, rigging and sails
Well thanks to so many contributors I think I have gotten it right finally. There are several different things to consider in order to make it perfect (such as to swivel the deadeyes or not, and certainly how to increase the tension more) but the reeving itself I think is now correct and most important, its now presentable and satisfactory to me as a first build. So thanks again to everyone who added a comment and suggestion.


-
How to avoid twisted lanyards
Captain Al replied to Captain Al's topic in Masting, rigging and sails
Tad, is that the same stuff as some call "dope"? You thin it with lacquer thinner I would think. What proportion? -
How to avoid twisted lanyards
Captain Al replied to Captain Al's topic in Masting, rigging and sails
I will take a look at it. It seems we all eventually come to the conclusion that building a ship model is a lot like playing chess. You gotta be looking several steps ahead. Unfortunately I was never good at chess. My skill at modeling is more on a level of checkers. -
How to avoid twisted lanyards
Captain Al replied to Captain Al's topic in Masting, rigging and sails
Thanks again Gunther (or is it Brian?). Just in time to stop me from doing it wrong again. I wasn't actually tying knots, I was looping 'underneath itself' as you say to do. I just see that as a sort of half knot. Anyway, your's look great even with the slight mistake. I've been using a sewing needle to get the lanyard through. Otherwise, no way. I put a needle through even before I string the shroud up so to create the hole for when I do it with thread on the needle. Easier to push the needle through on the bench than hanging from the mast.