fmodajr
-
Posts
869 -
Joined
-
Last visited
Content Type
Profiles
Forums
Gallery
Events
Everything posted by fmodajr
-
 Hello Michael, Happy New Year! Great looking model. Congrats!! Frank
 -
Michael, As always, beautiful workmanship. So much fun to follow your work. Frank
- 326 replies
-
- 2
-

-

-
- Sovereign of the Seas
- Airfix
- (and 1 more)
-
Hi Michael, I believe Ian said it all a couple of posts back (Saturday). Amazing work at this scale. beautiful! Frank
- 326 replies
-
- 1
-
-
- Sovereign of the Seas
- Airfix
- (and 1 more)
-
Hi Michael, Thanks for the reply. I finished the Reale De France about a year ago (Log is on this site) and then proceeded to take a fall and fracture my shoulder, putting me out of commission for a while! Almost at full strength now and I purchased the plans for the Confederacy and am now in the process of buying the wood needed, thanks, Frank
- 326 replies
-
- 2
-
-
- Sovereign of the Seas
- Airfix
- (and 1 more)
-
Happy New Year Michael! Glad to see you resume your terrific work on this model! Frank
- 326 replies
-
- 2
-
-
-
- Sovereign of the Seas
- Airfix
- (and 1 more)
-
Hi Michael, Beautiful work. Nice to see you back at work on the model! Best, Frank
-
Nicely done Michael!! I hope all is well. Frank
-
Very Nice Michael! Frank
-
Hi Michael, I hope all is well. Wow! Loads of detail on those cannon. Well done! Frank
-
Hello Michael, Finally able to catch up with your new project here. It will be fun to watch your progress!! Frank
- 326 replies
-
- 3
-
-
-
- Sovereign of the Seas
- Airfix
- (and 1 more)
-
thank you Chris! and thanks for checking out the log! Frank
-
Thanks for all the help Michael and for giving me great ideas from your Reale log! Frank
-
Michael, good to hear from you!! Yes, I'm sure I'll be in touch with you before making final decisions on my next build. Lol! My wife is complaining that she is running out of room with these big models! My guild is wanting me to bring the model in for the show in February , but it is too tall to fit in my cars! I'll have to find someone with a Suburban to help me out. Wife says my next model needs to be a ship in a bottle. She is going to be disappointed !! thanks, Frank
-
Bruce, Peter, and Marc (Hubac Historian), Thank you all for your kind thoughts and for taking the time with this log. Appreciated! Frank
- 510 replies
-
- 3
-
-
- reale de france
- corel
- (and 1 more)
-
thank you Kirill! So my thoughts are to spend the winter months cleaning out my work room before starting my next project. Not sure what that will be yet. I will be doing lots of research. One type of model I haven't attempted yet is some type of clipper ship or a ship that was built during the transition from sail to steam engine and have elements of both. We will see!! thanks, Frank
- 510 replies
-
- 1
-
-
- reale de france
- corel
- (and 1 more)
-
Thank you Tim! Thanks for taking the time to follow the log and for your thoughts. Let's talk more at the November meeting! Best, Frank
- 510 replies
-
- 1
-
-
- reale de france
- corel
- (and 1 more)
-
Thank you! Appreciated!
-
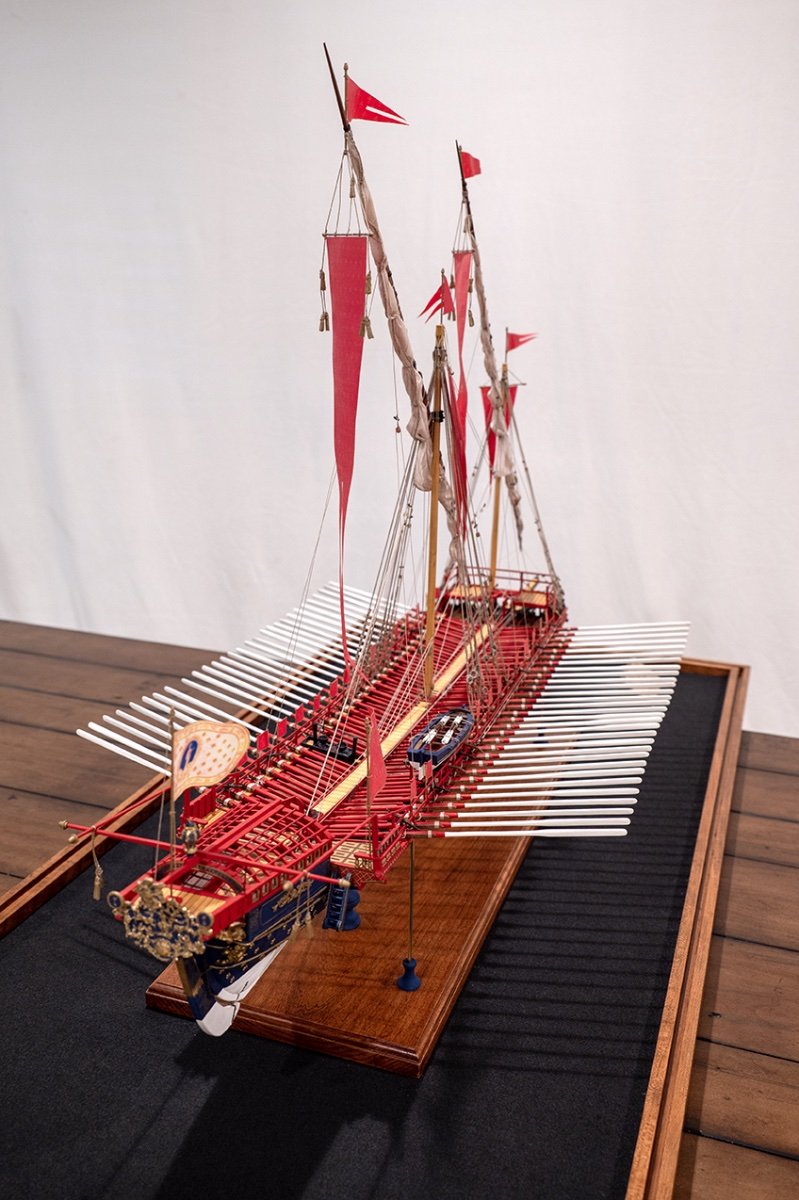
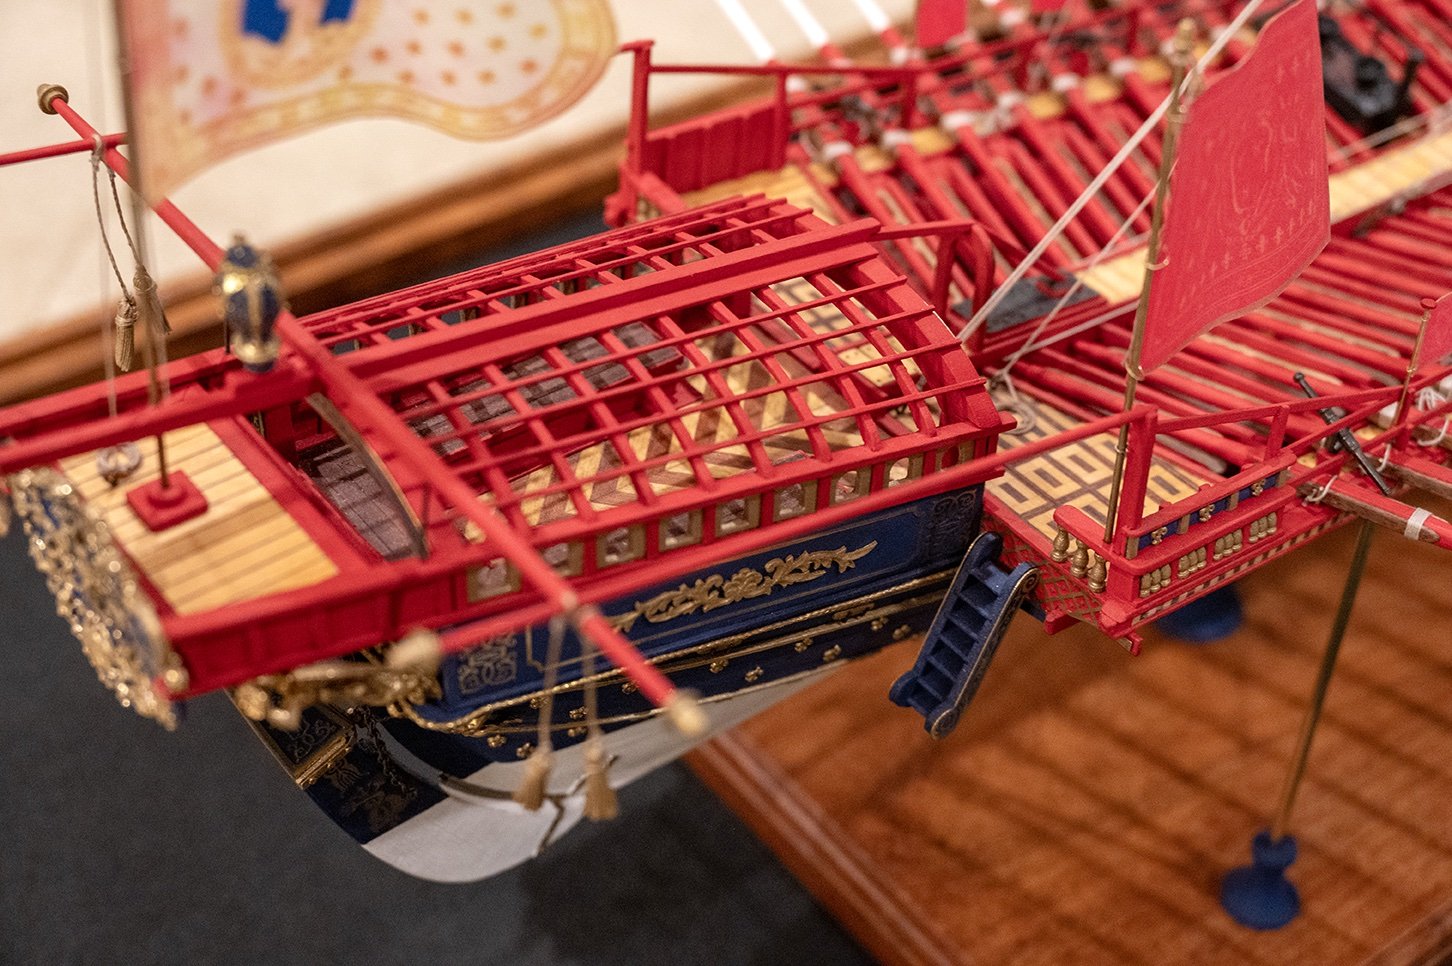
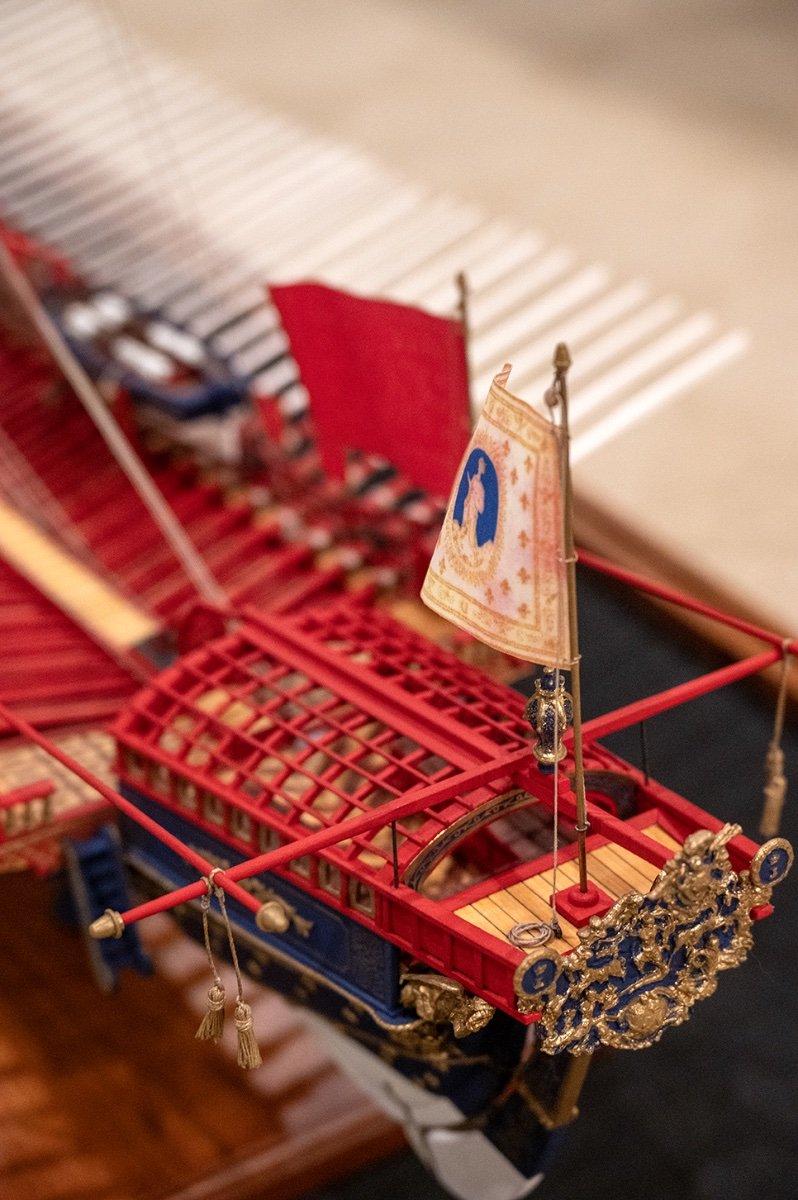
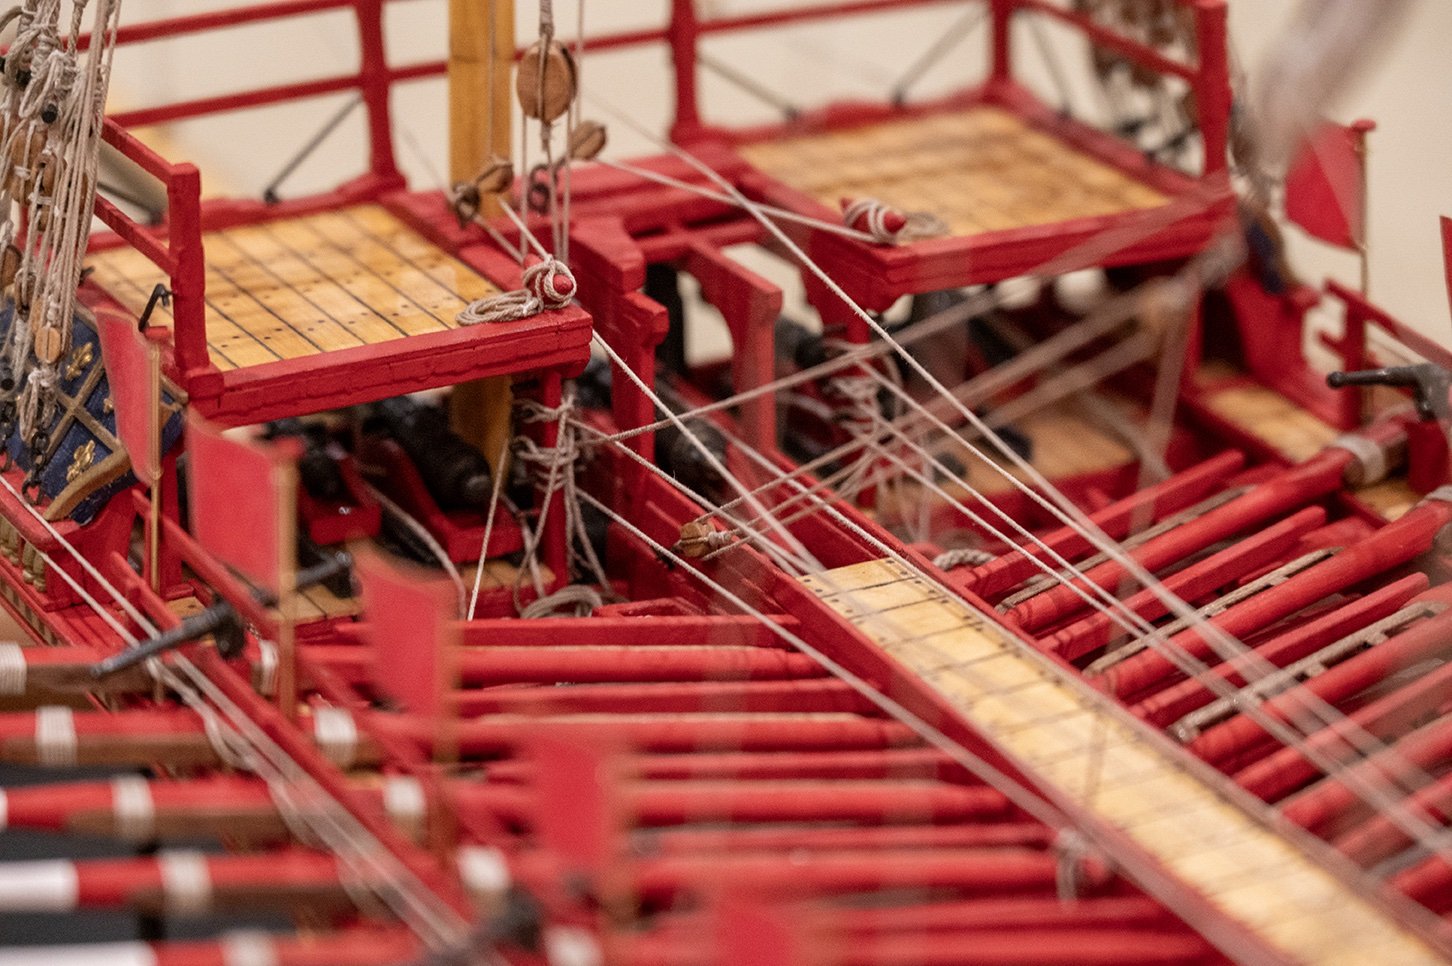
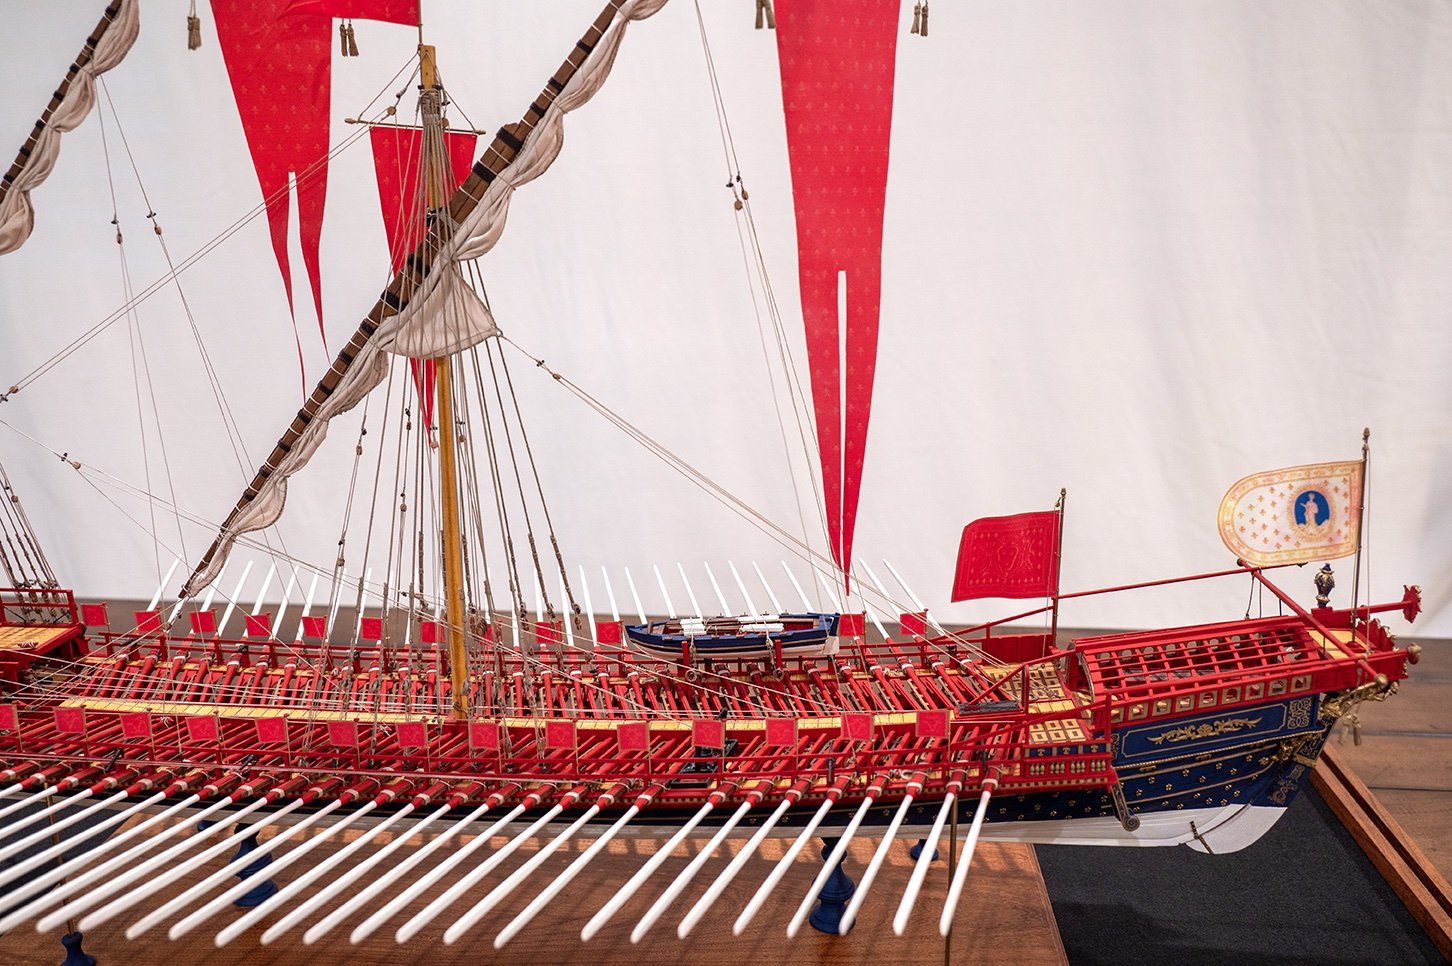
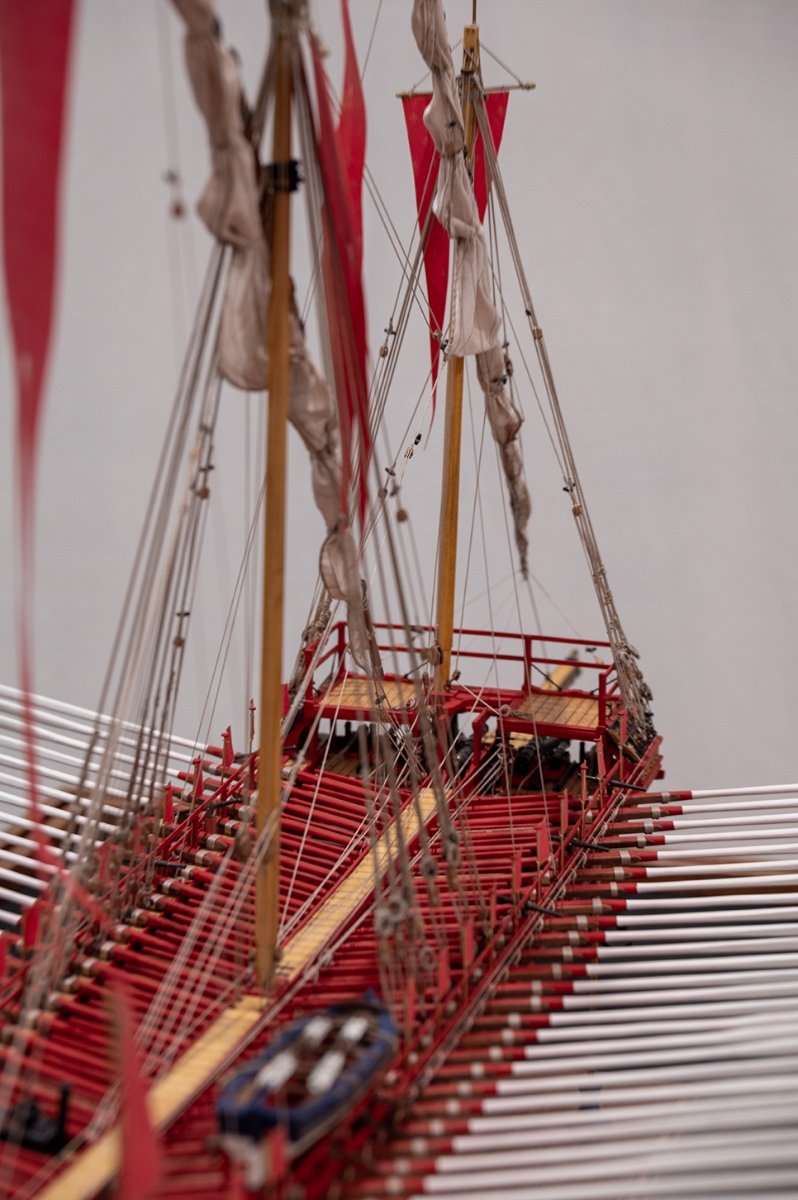
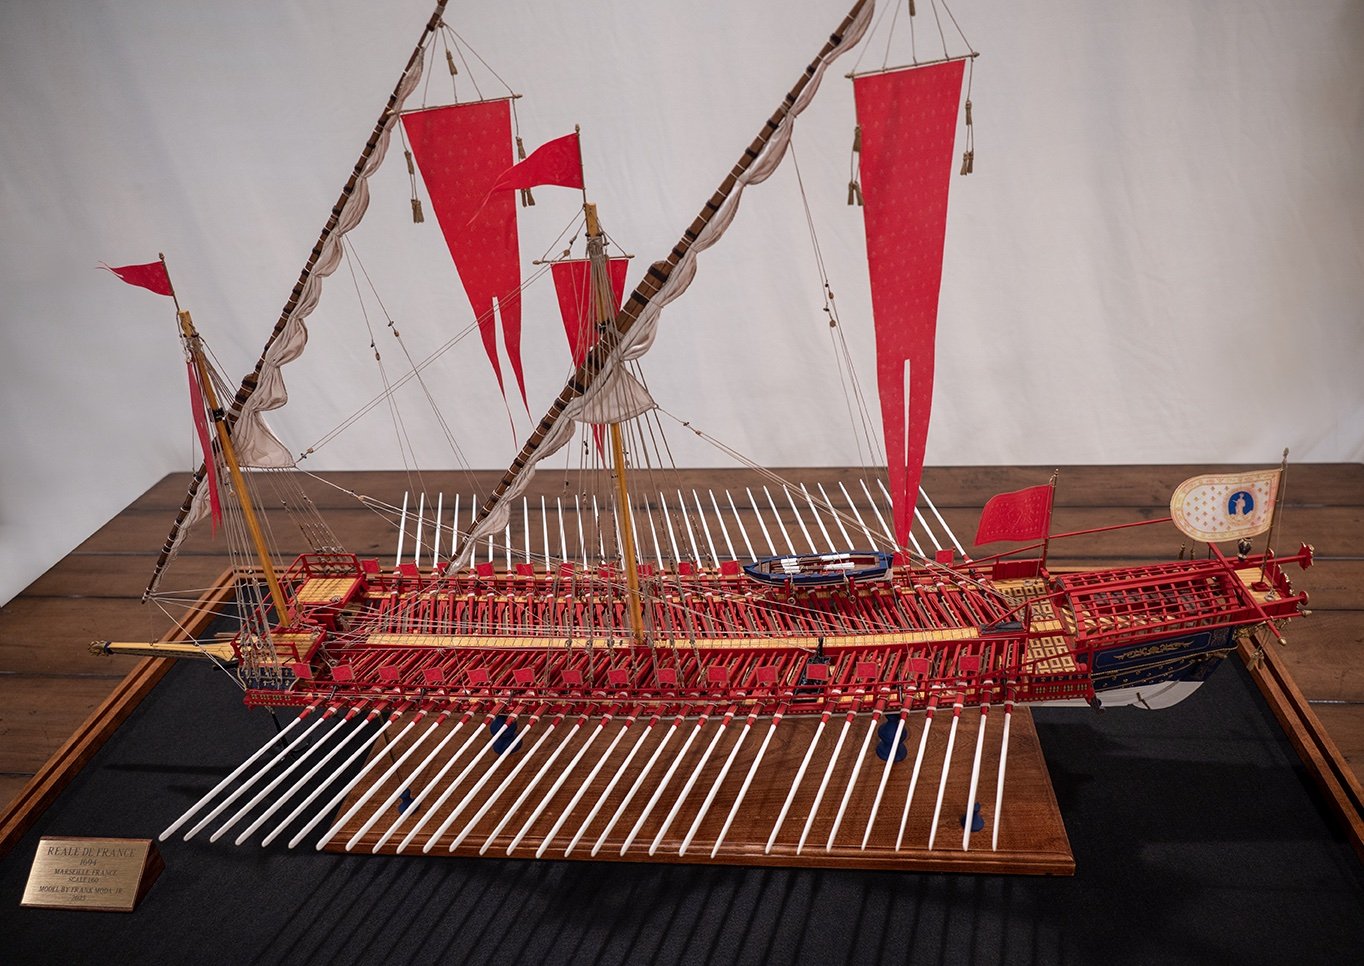
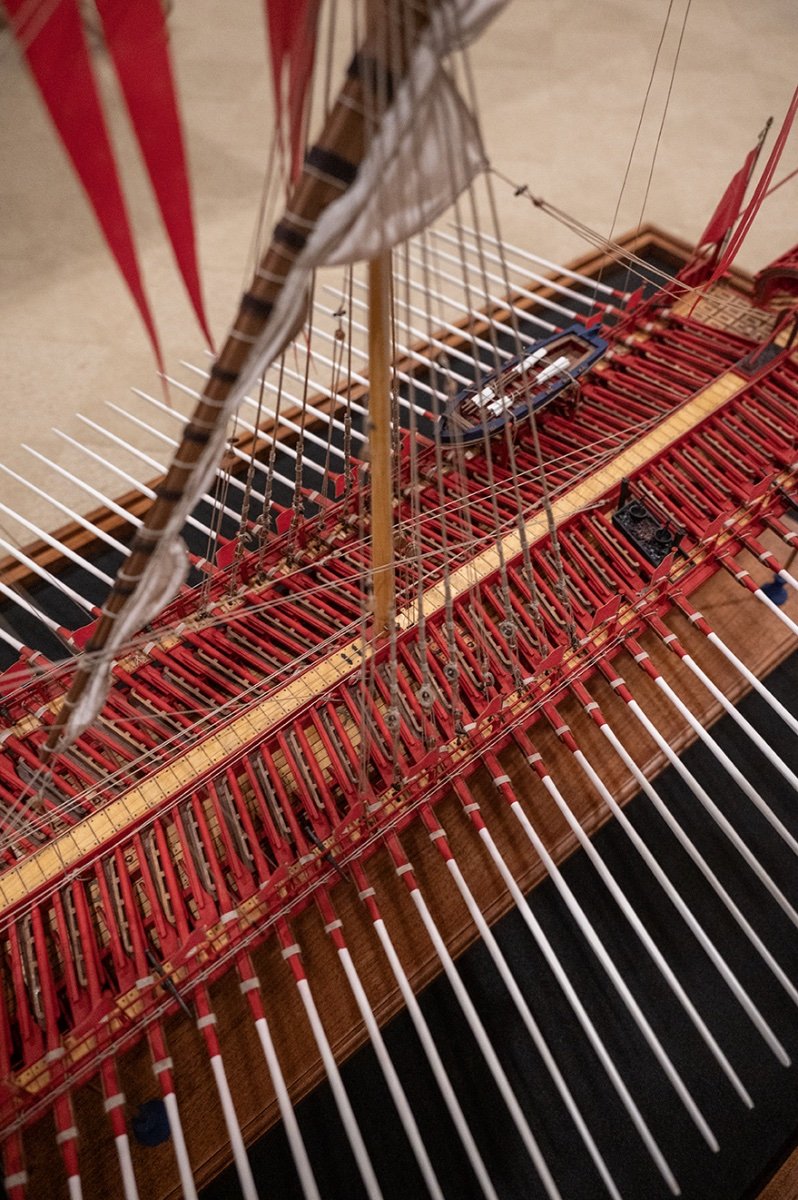
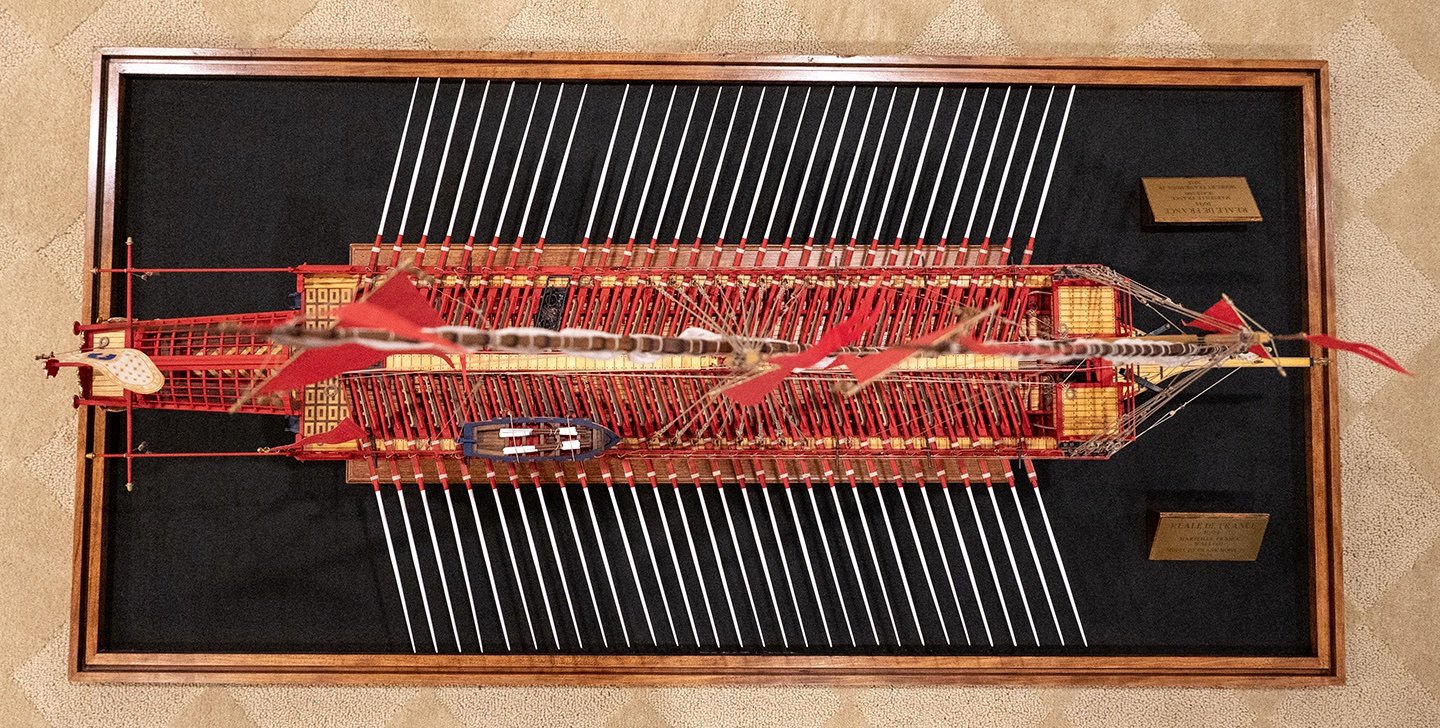
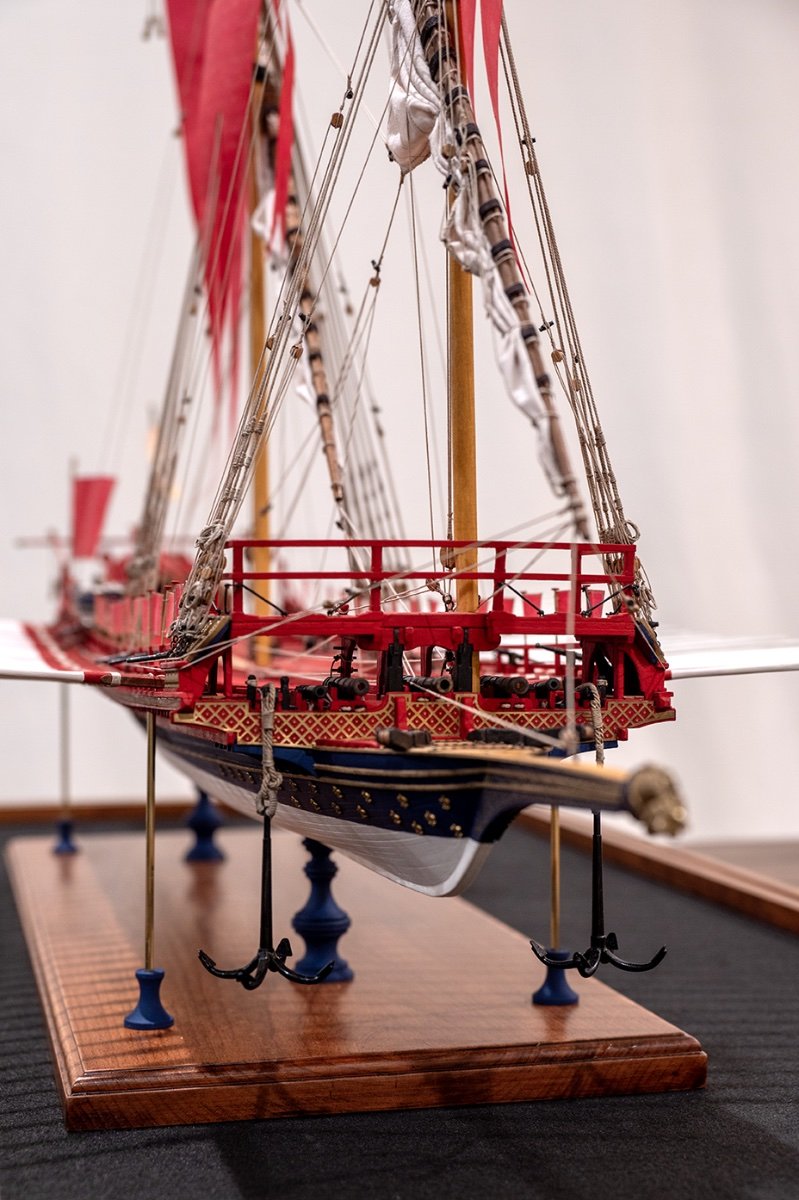
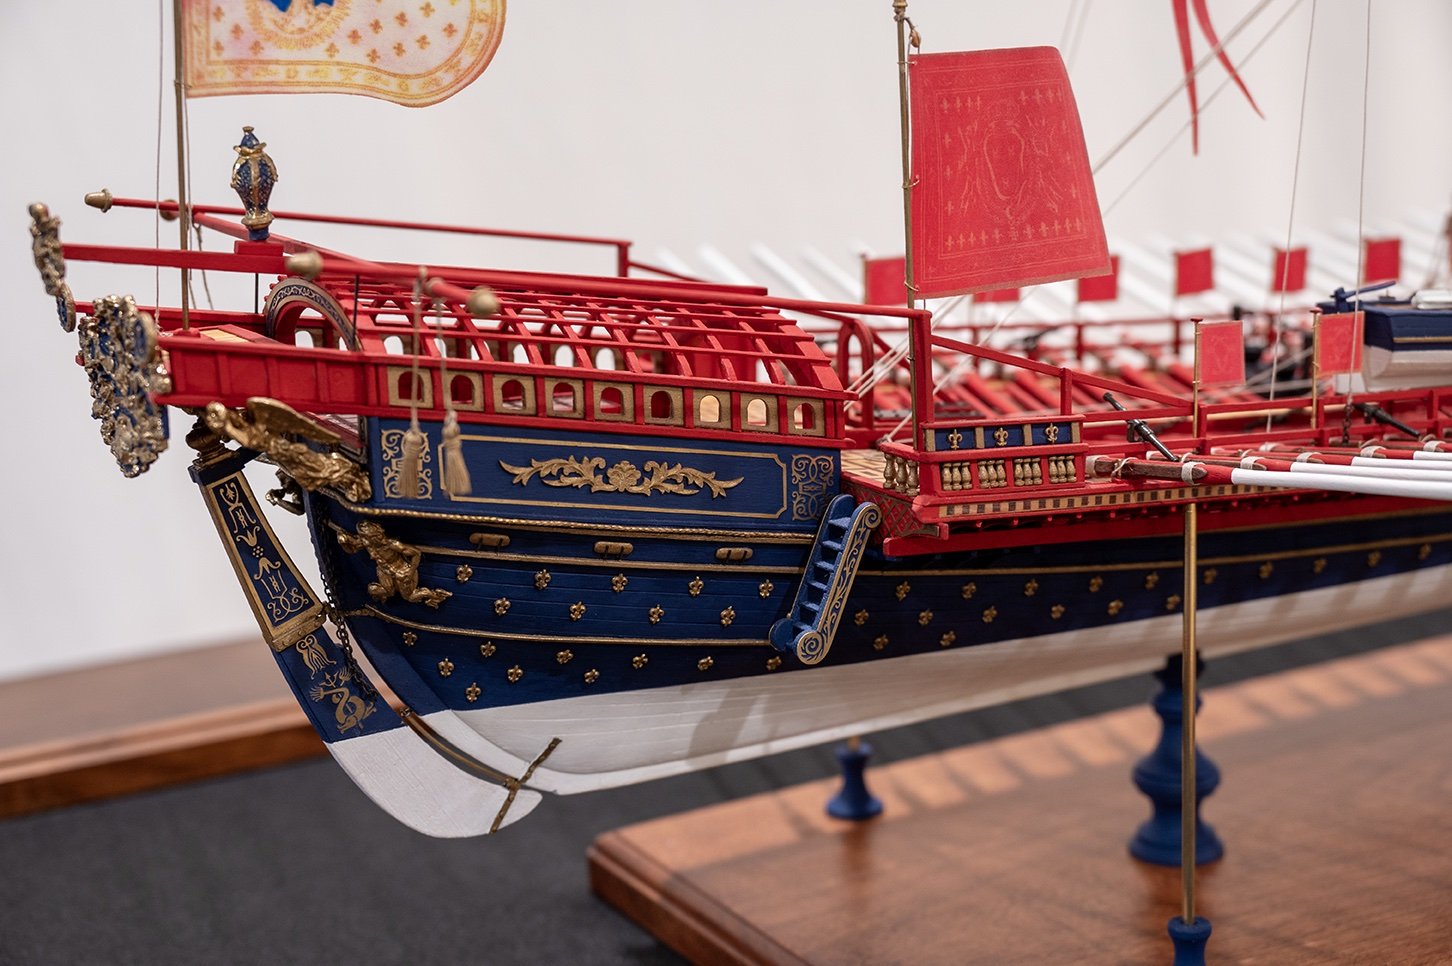
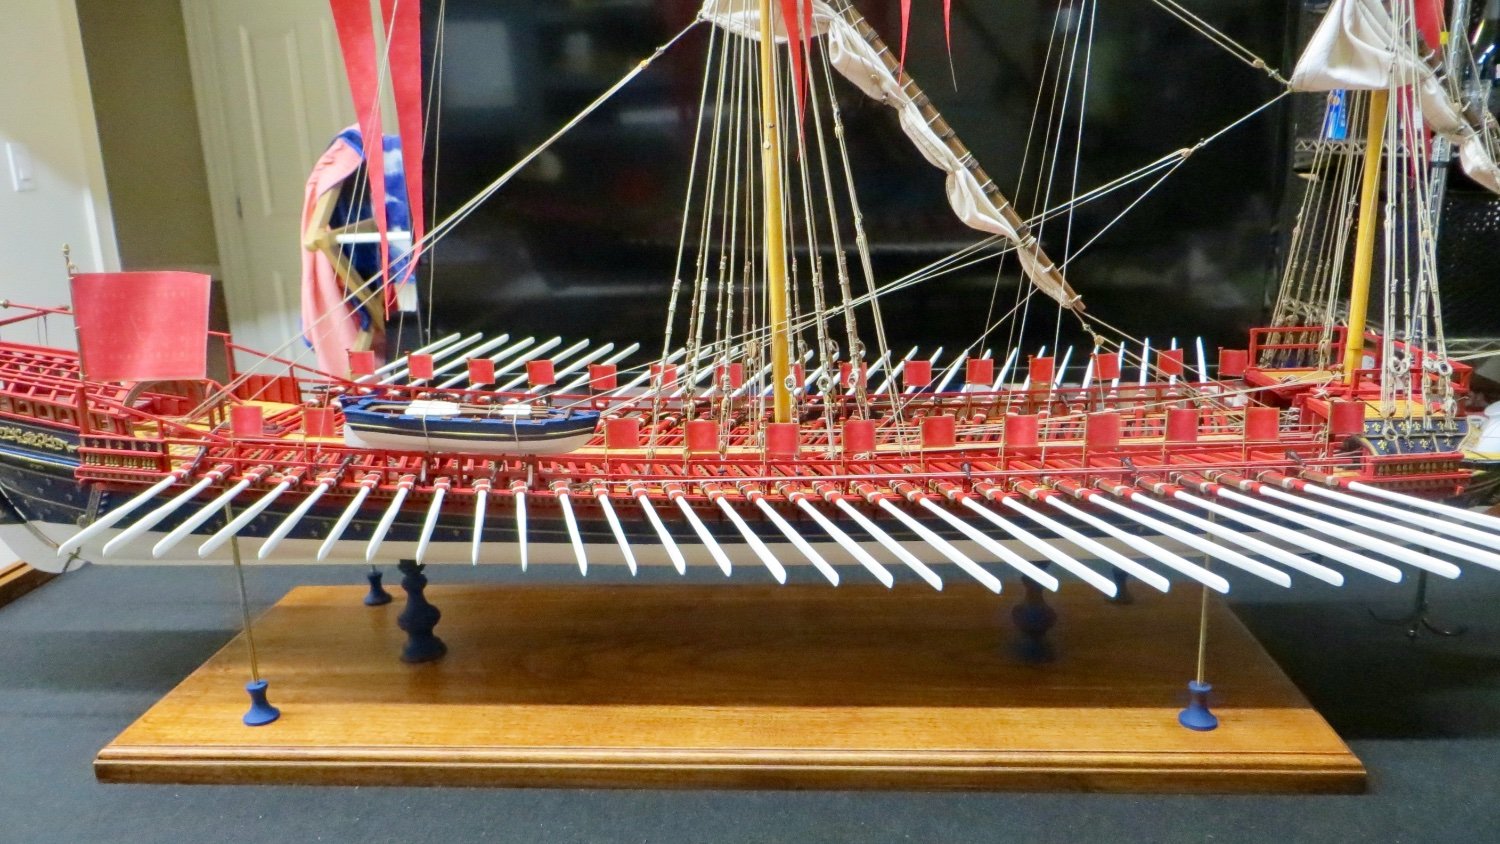
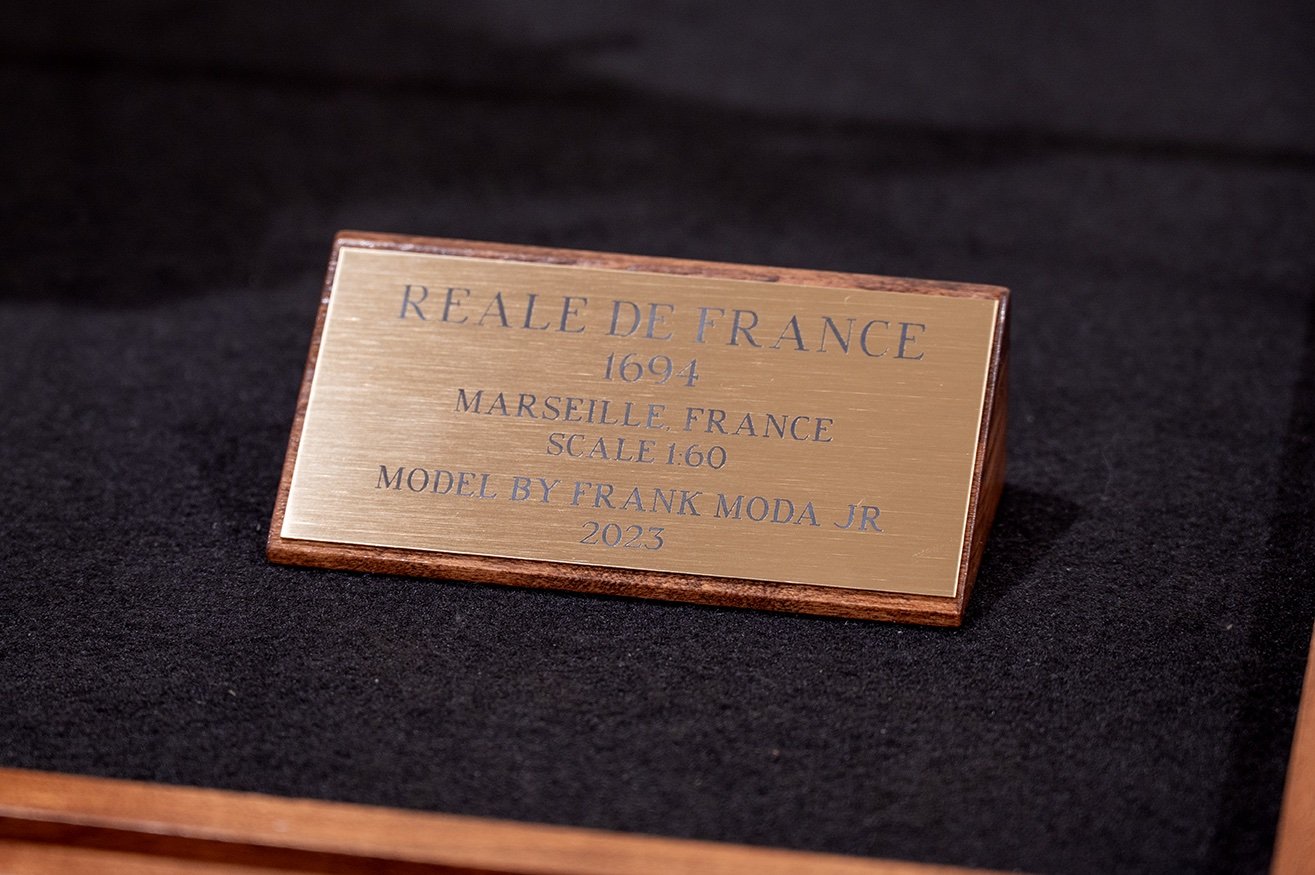
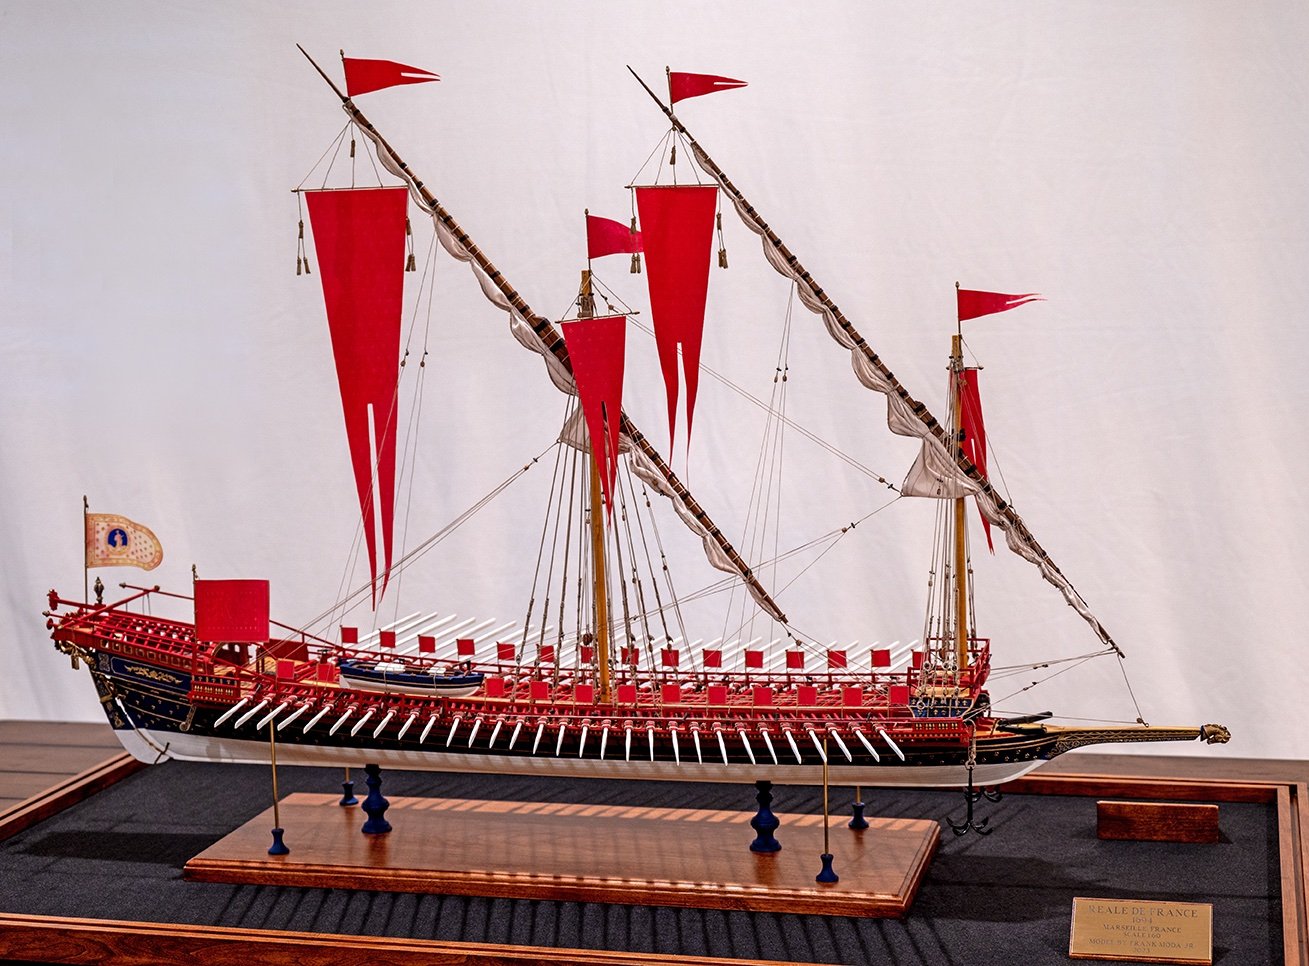
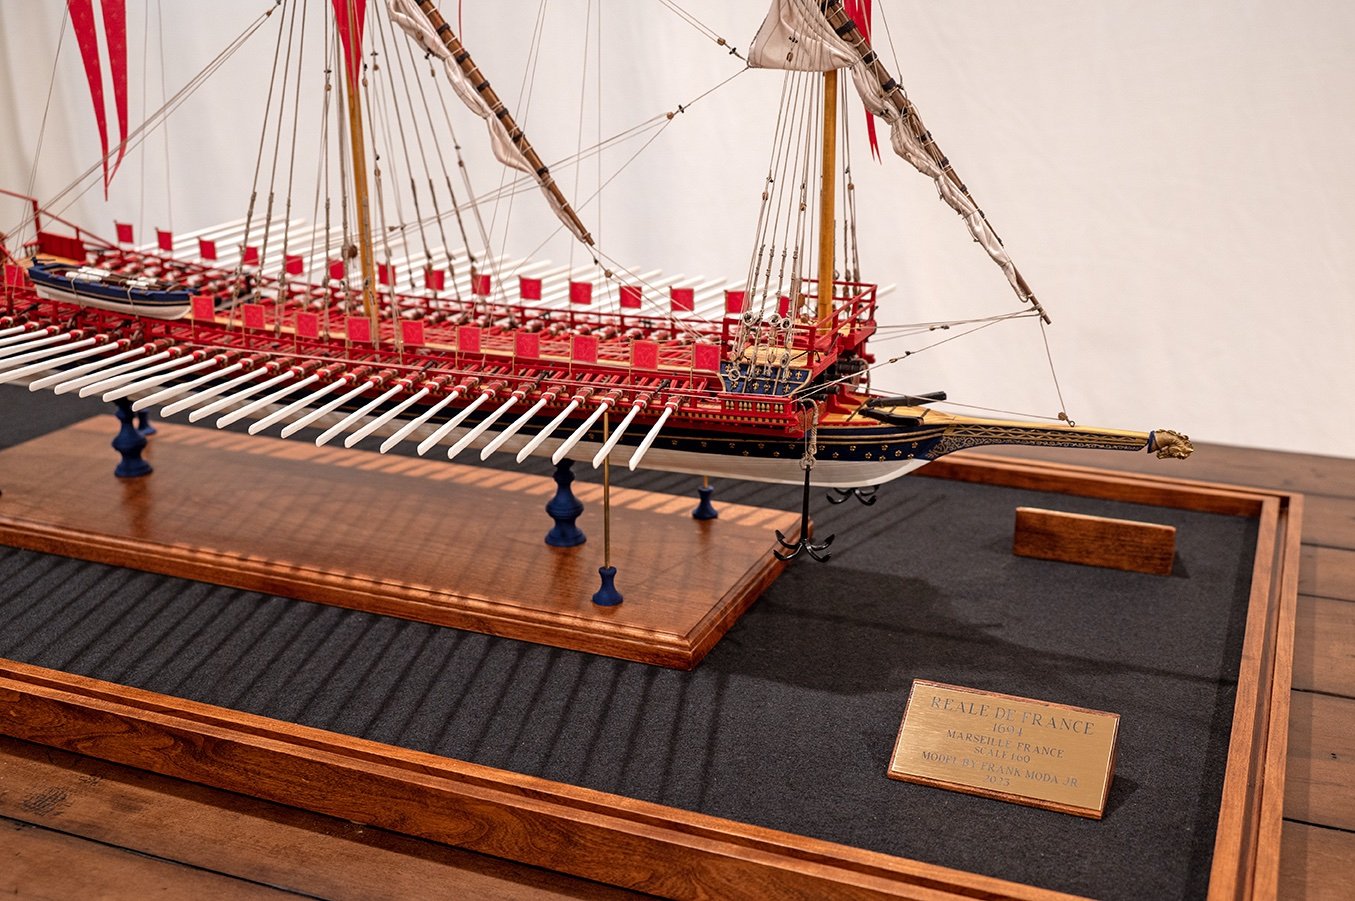
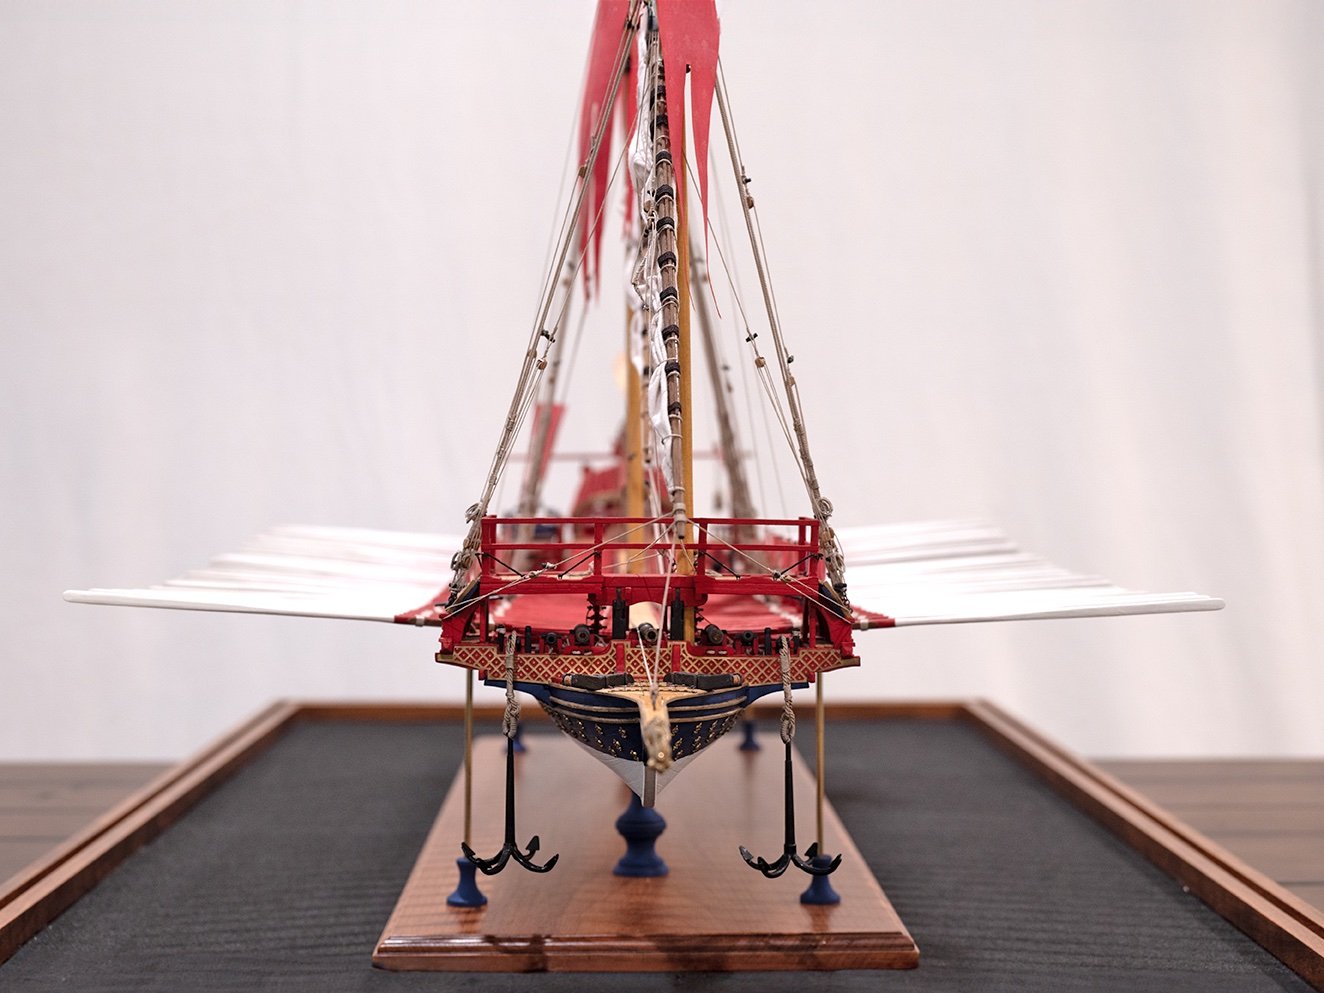
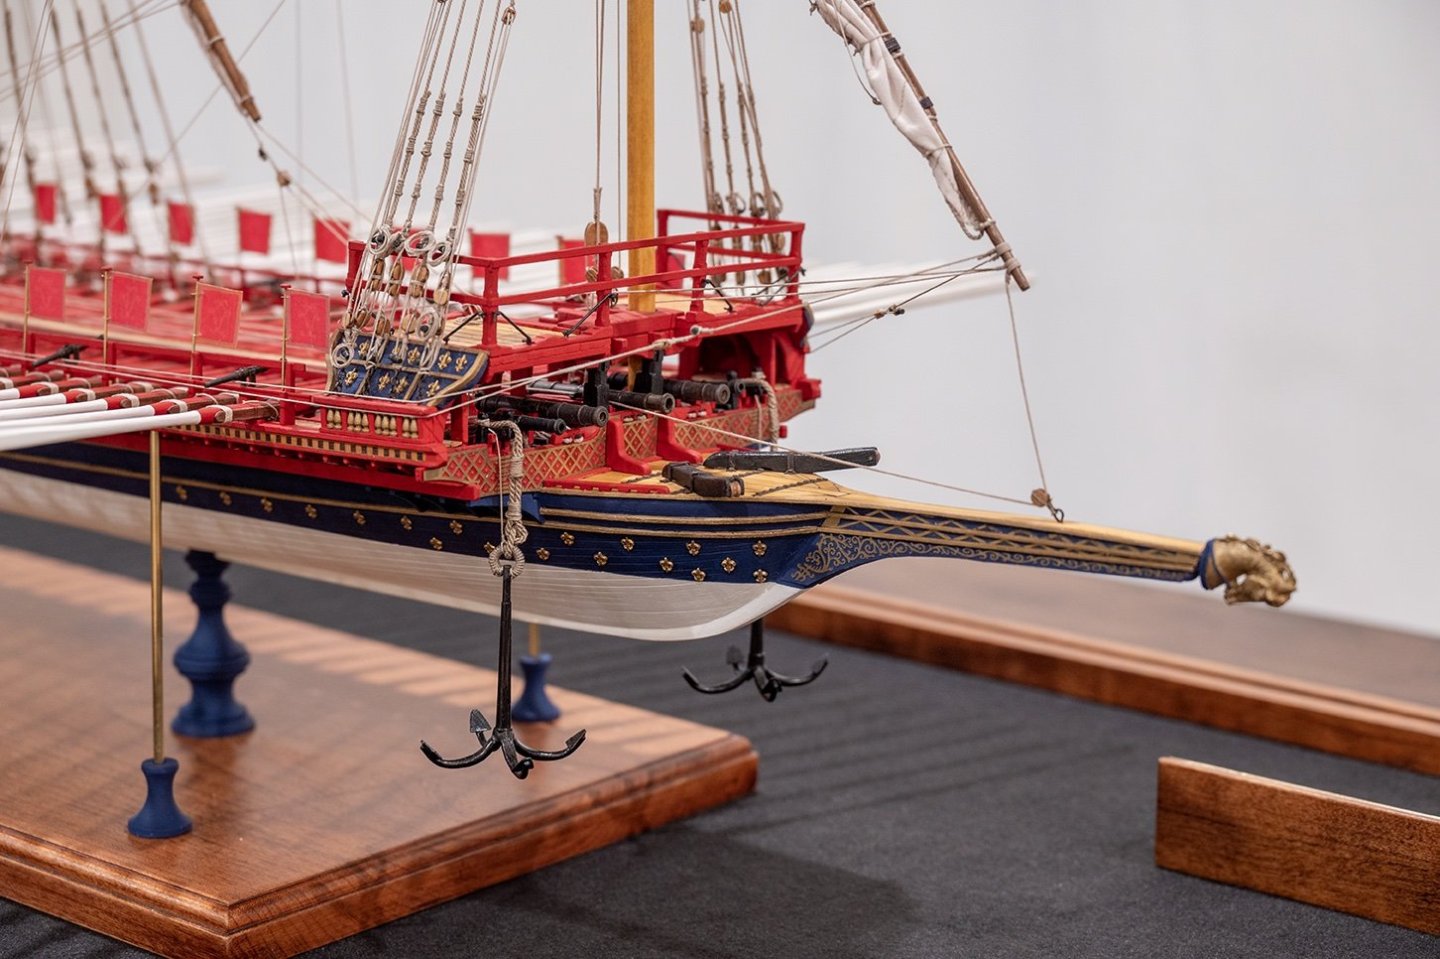
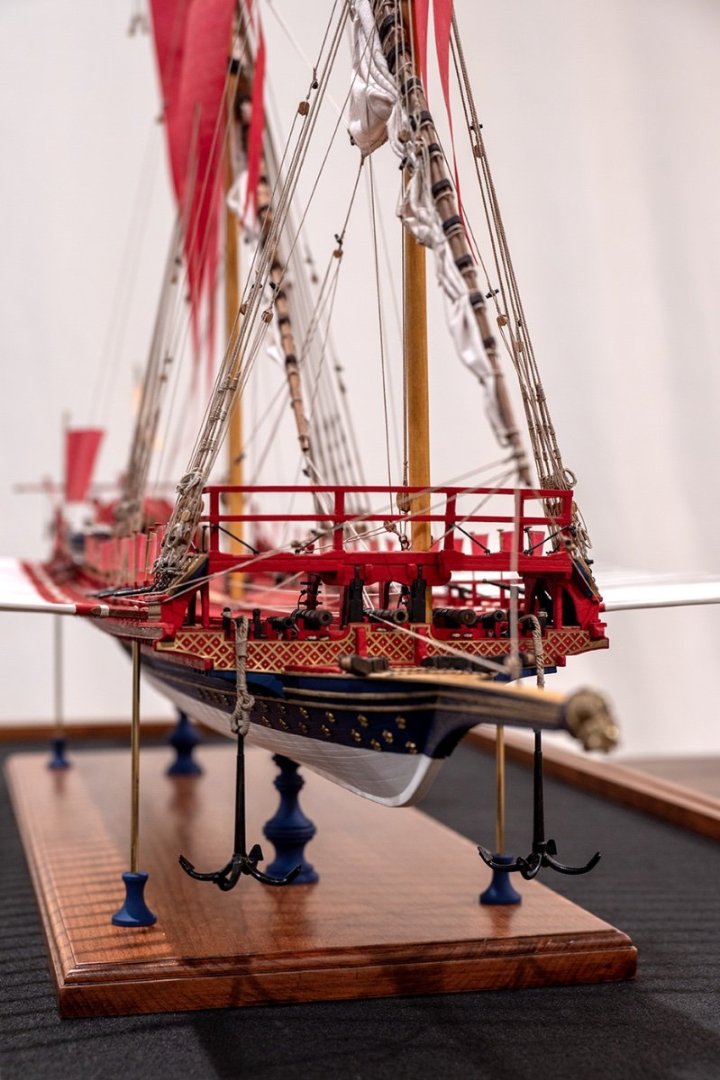
Hello, Thanks to those that visit this log, your likes and comments are appreciated. My model is completed. It took me a while to take the final photos due the the illness and passing of my father in law recently. Anyway here are the final photos, broken into two posts. When I have a chance, I will figure out how to move the log into the Finished category!!

- 510 replies
-
- 9
-
-

-
-
- reale de france
- corel
- (and 1 more)
-
Amazing and beautiful work Michael!! Frank
-
Thanks Michael, Yes, the fabric was thin enough, but when adding the transfer paper to both sides, it became too bulky. Wife really disliked the look and she has a good eye for these things. Thanks for stopping by, Frank
- 510 replies
-
- 1
-
-
- reale de france
- corel
- (and 1 more)
-
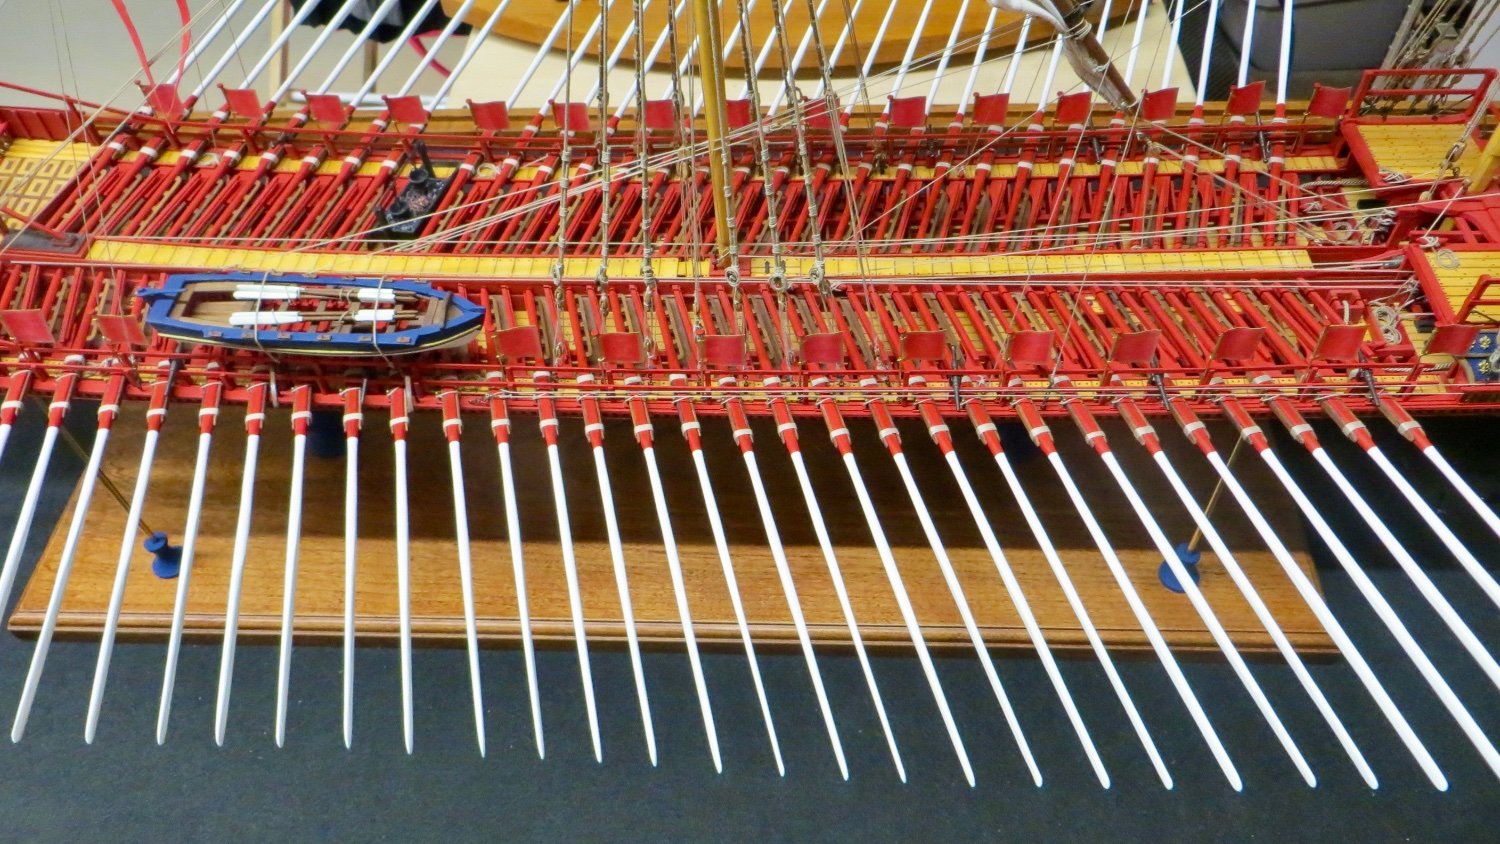
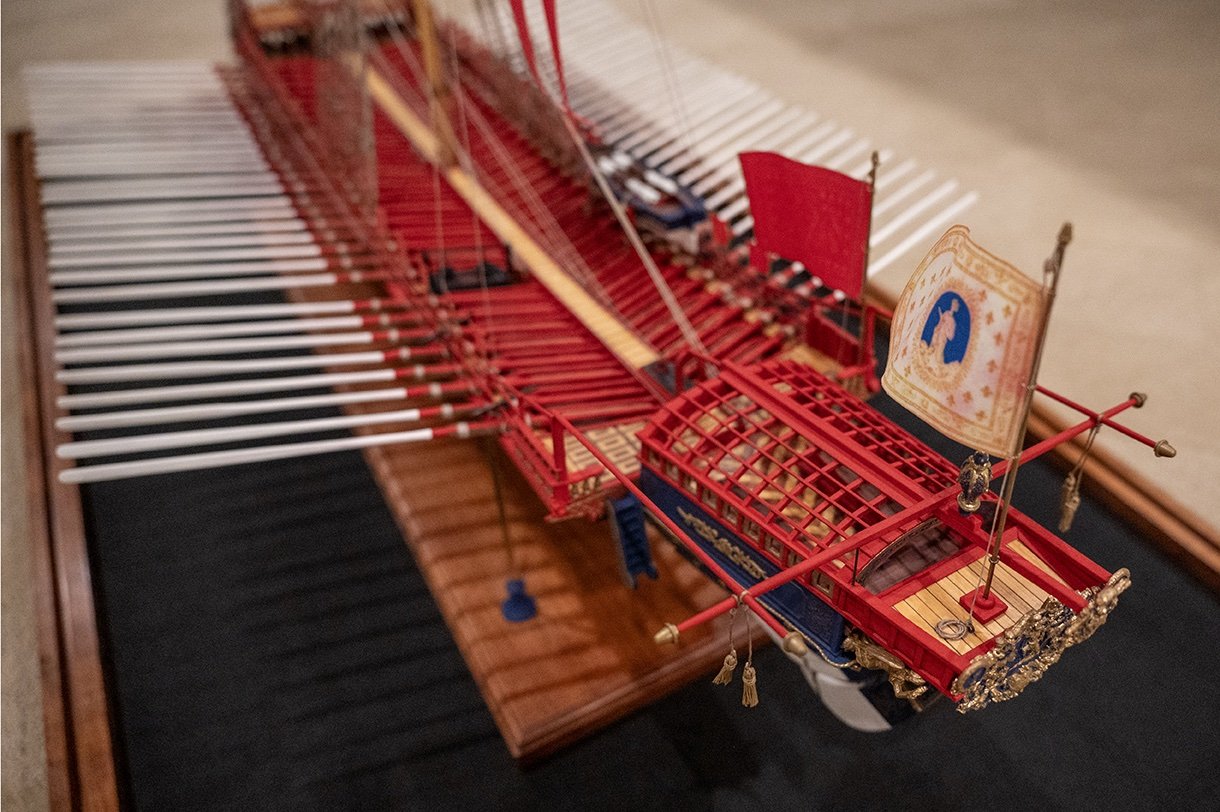
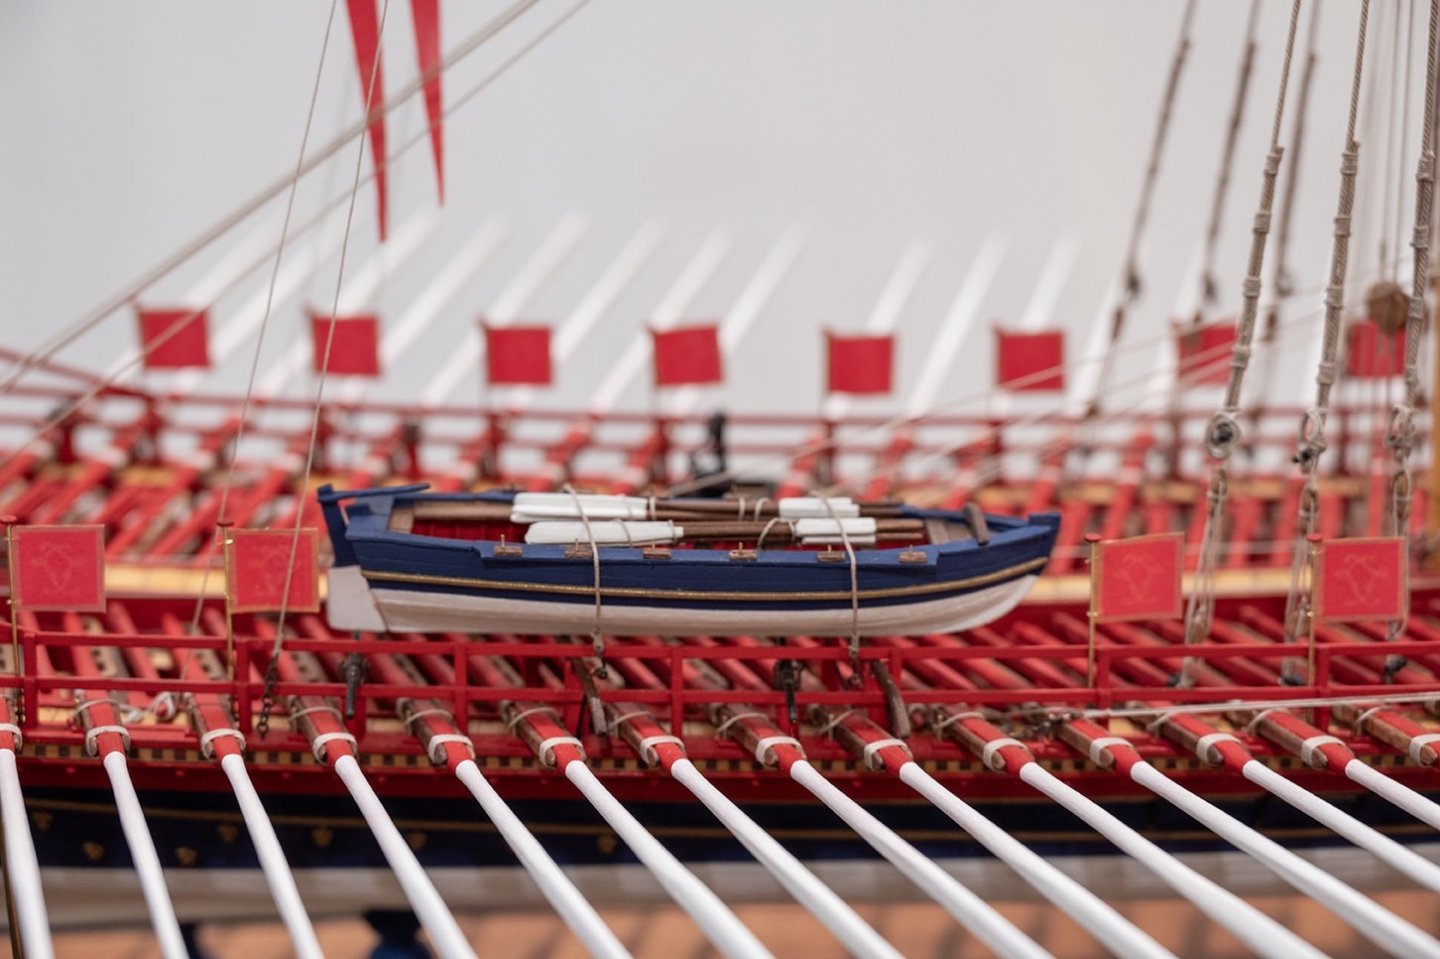
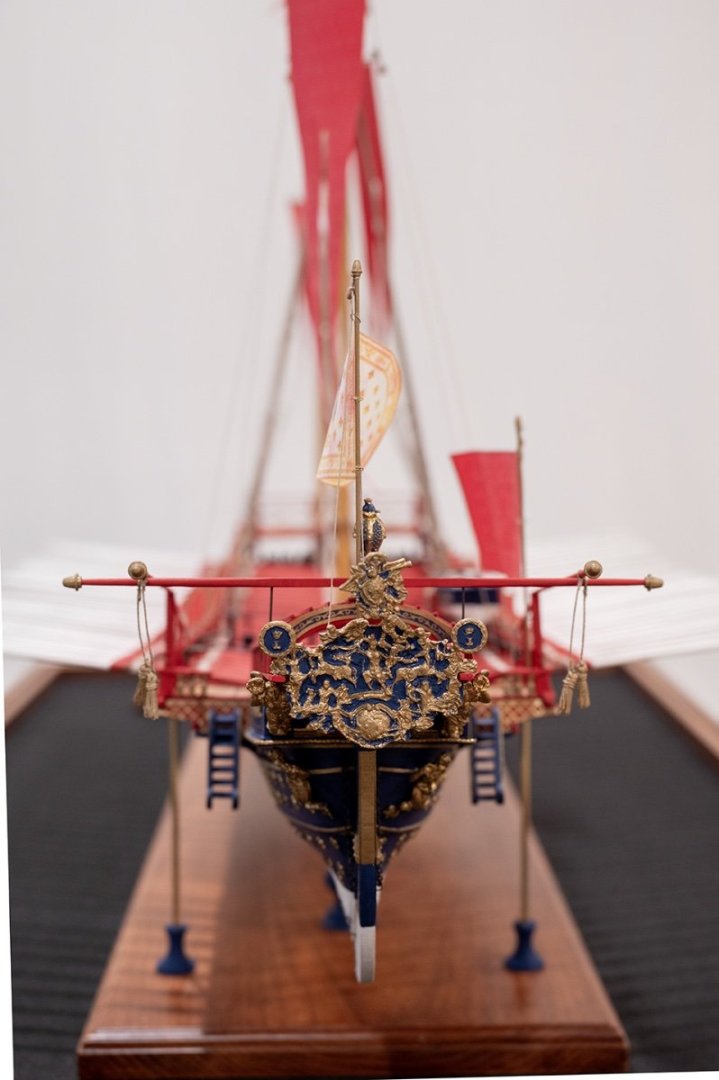
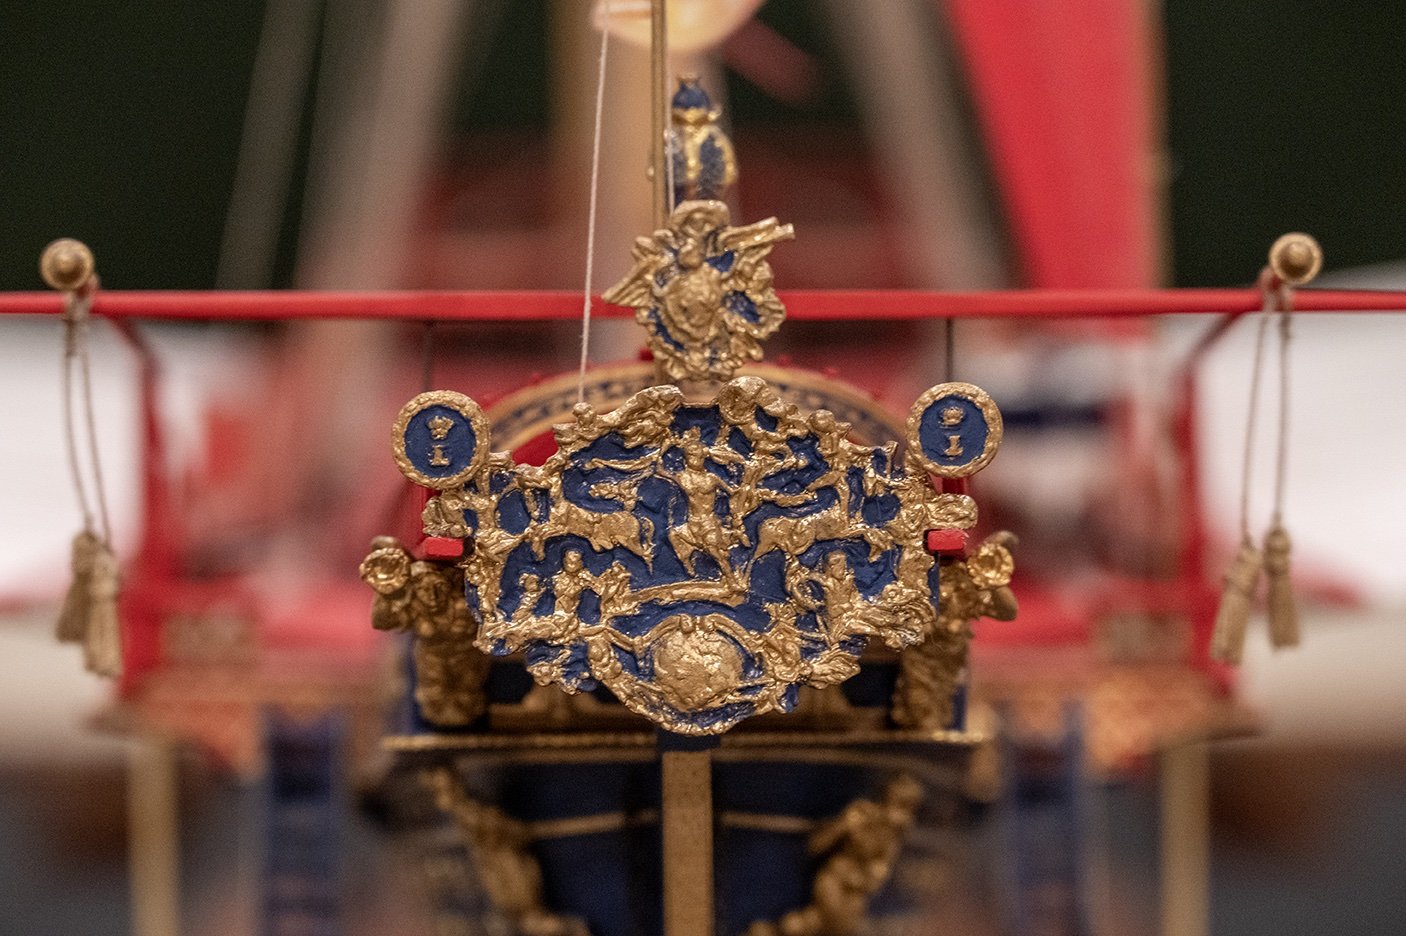
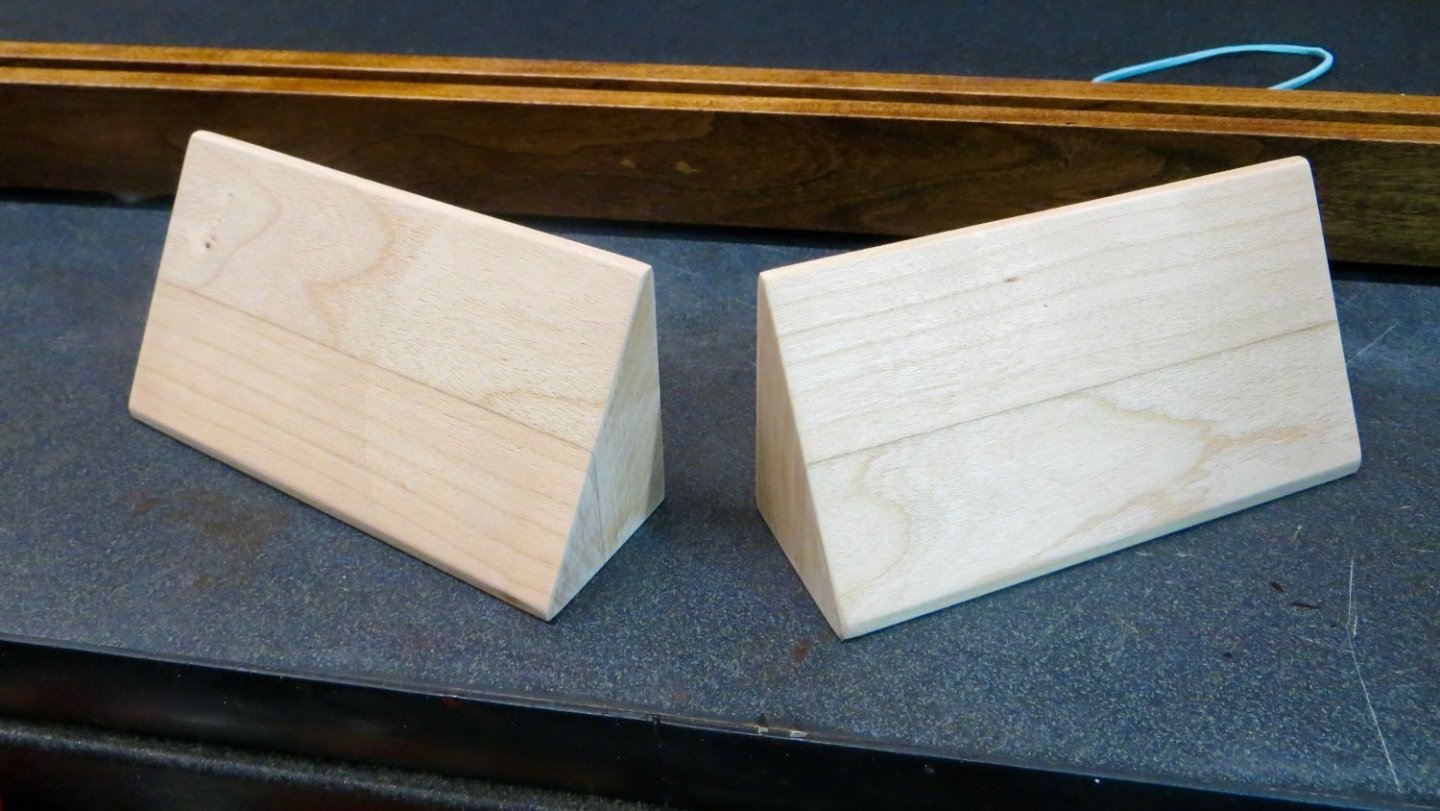
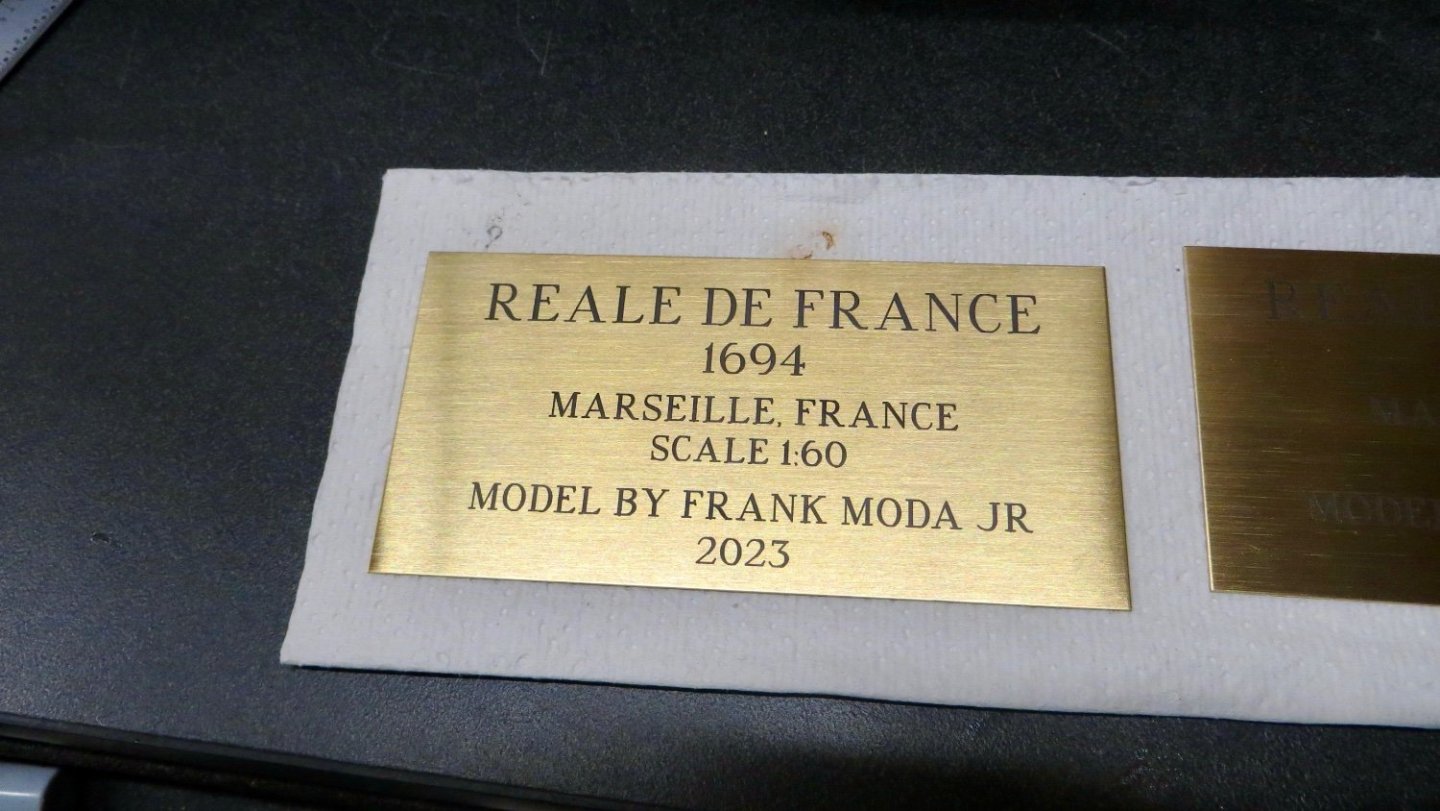
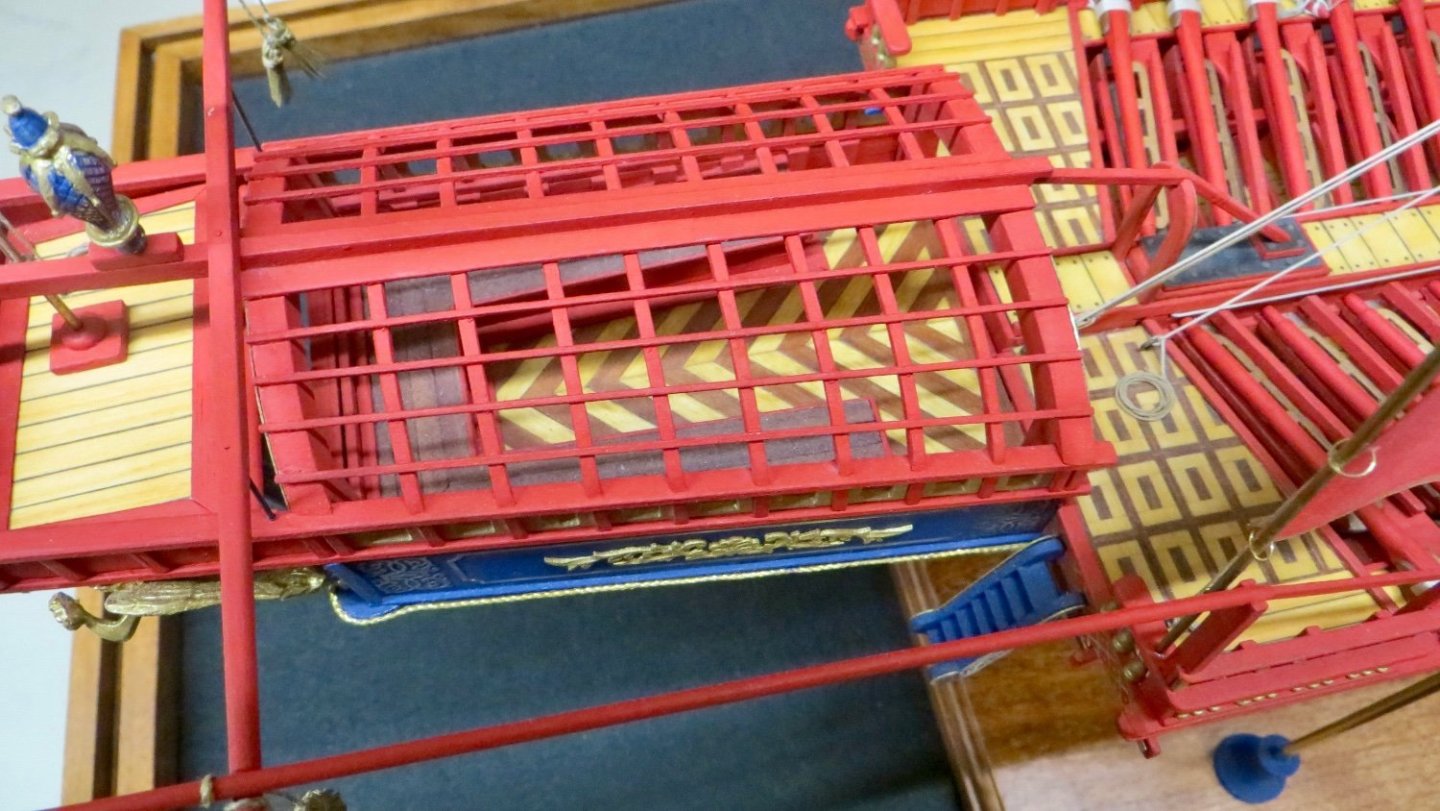
Hello, Finished up the small flags on the starboard side of the model. Model is about finished. I fixed the bow cannon that I had knocked out of position, along with fixing the rudder (which I had also knocked out of position earlier in the build.) Next, experimented some with the stern canopy. First I tried removing about 2/3's of the canopy ( had made duplicates) and rolling it up towards the stern. This came out too bulky still and the transfer process made the furling not look natural. Second attempt, suggested to me by friends, was to cut the canopy in half and show only 1/2 of the canopy (from the center line to the edge) and leave the other side open. Still did not look pleasing to the eye, so decided to leave the canopy off and show the stern as is. Started work on making the stands for the model's plaque, using the same cherry wood as the base and case base. Stands before staining and sealing. (Will be placed under the bow area facing both sides). Plaques made by my local trophy shop. Final steps remaining: 1. Finish plaque stands and mount 2. Complete light dusting of all areas 3. Look for any areas needing touch up paint or adjustments 4. Final photos Almost at the end. Thanks, Frank


- 510 replies
-
- 6
-
-
-
- reale de france
- corel
- (and 1 more)