HOLIDAY DONATION DRIVE - SUPPORT MSW - DO YOUR PART TO KEEP THIS GREAT FORUM GOING!
×


fmodajr
-
Posts
868 -
Joined
-
Last visited
Content Type
Profiles
Forums
Gallery
Events
Everything posted by fmodajr
-
 Thank you Michael! great to hear from you. did it stop raining where you are yet? Lol!! Best Frank
- 510 replies
-
- 1
-

-
- reale de france
- corel
- (and 1 more)
-
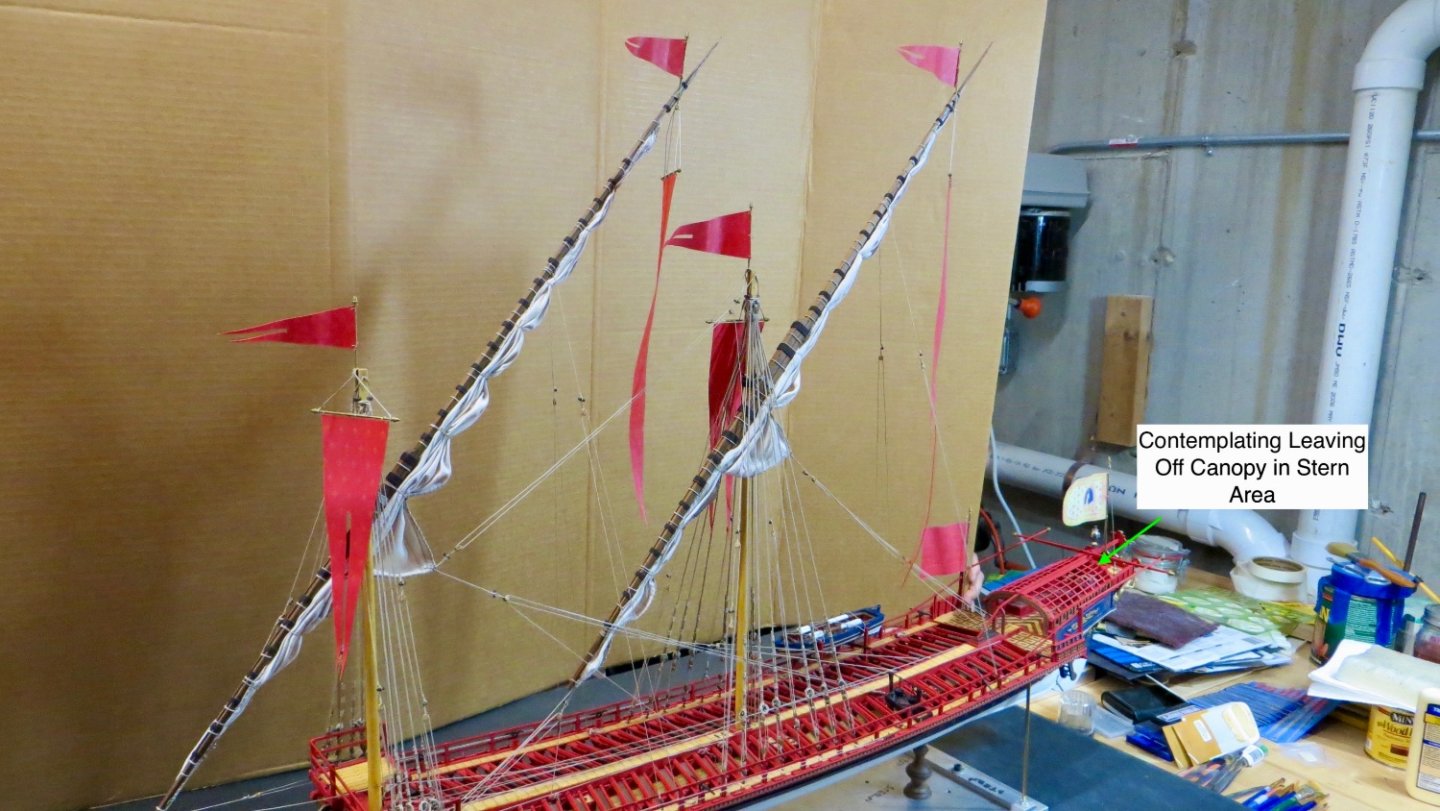
Thank you Marc and Michael. And for your opinions! Appreciated! Near the end of the build, I will see if I can accomplish a rolled back canopy that would look nice. If not, I will leave it off!! thanks for stopping by, Frank
-
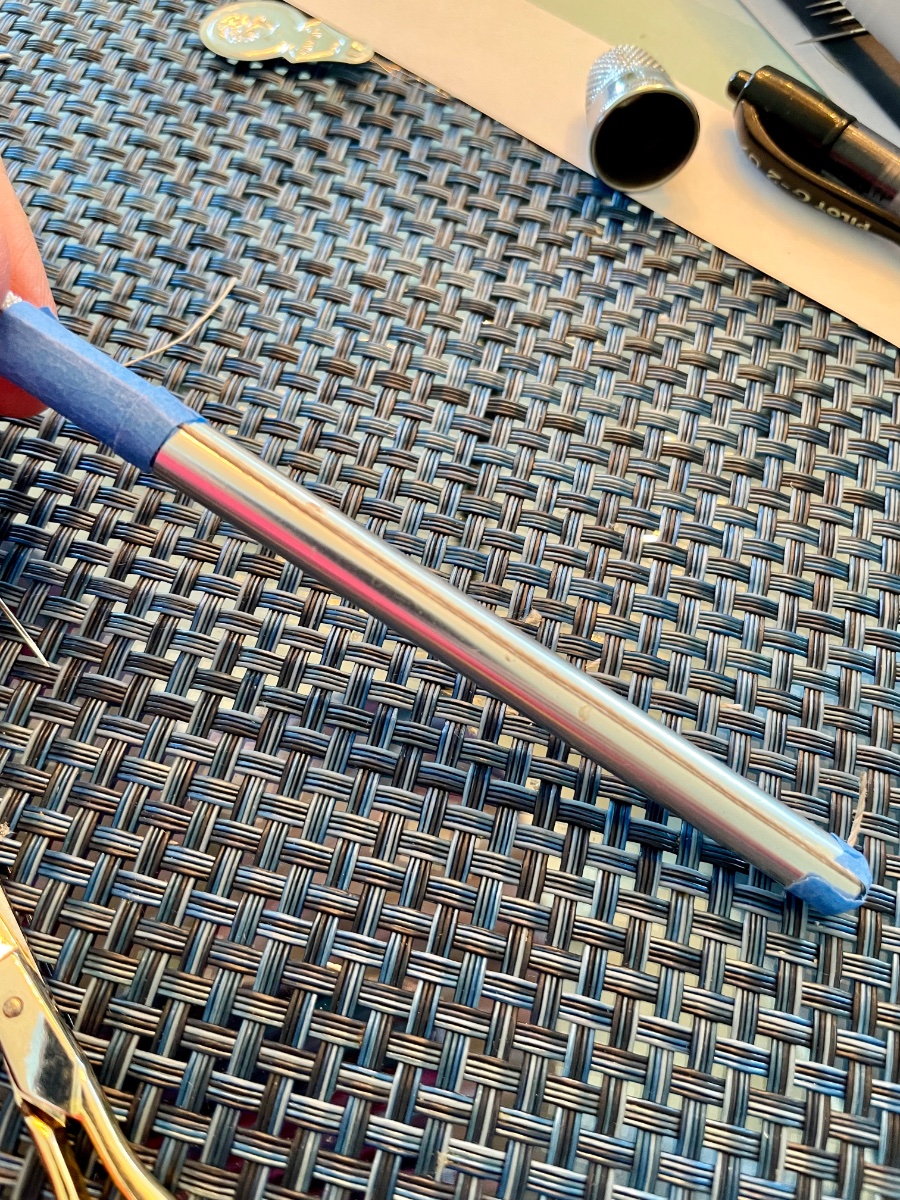
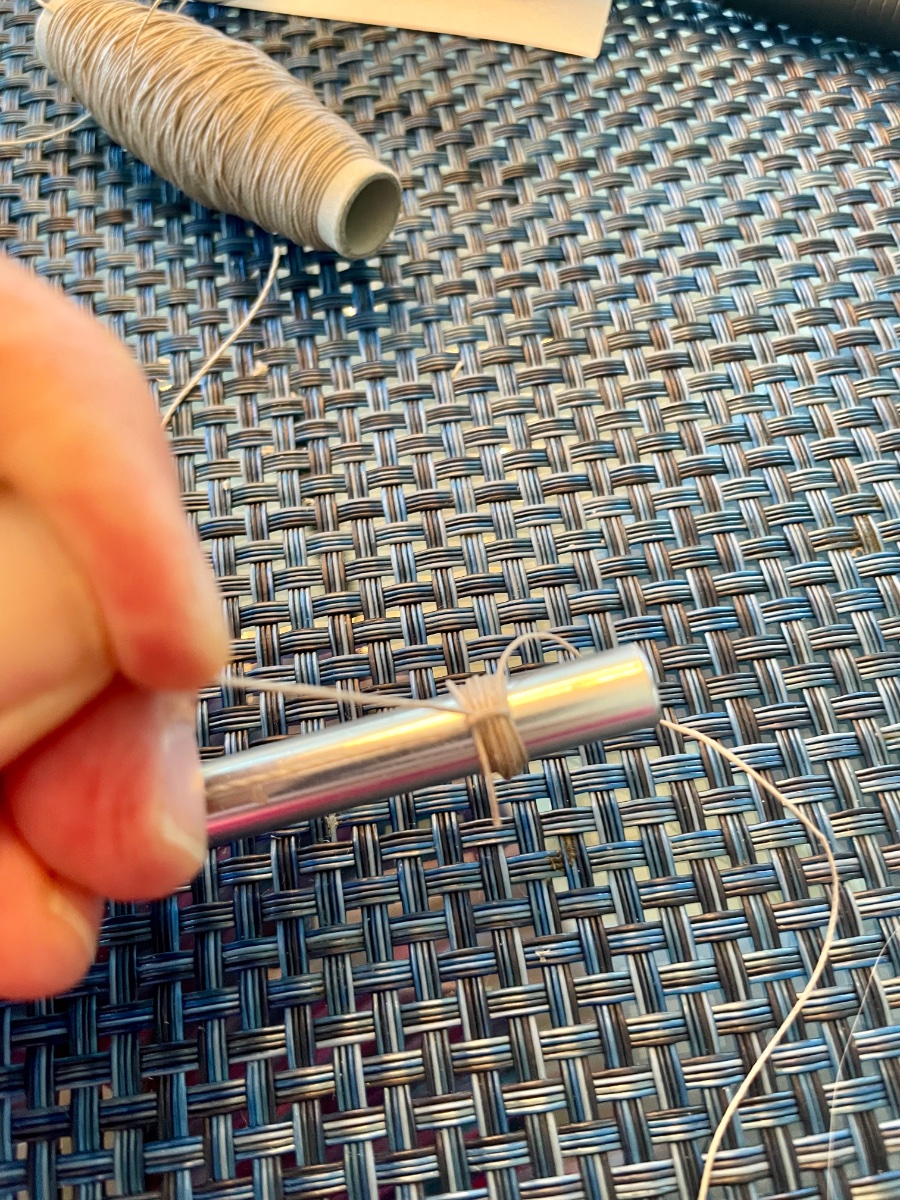
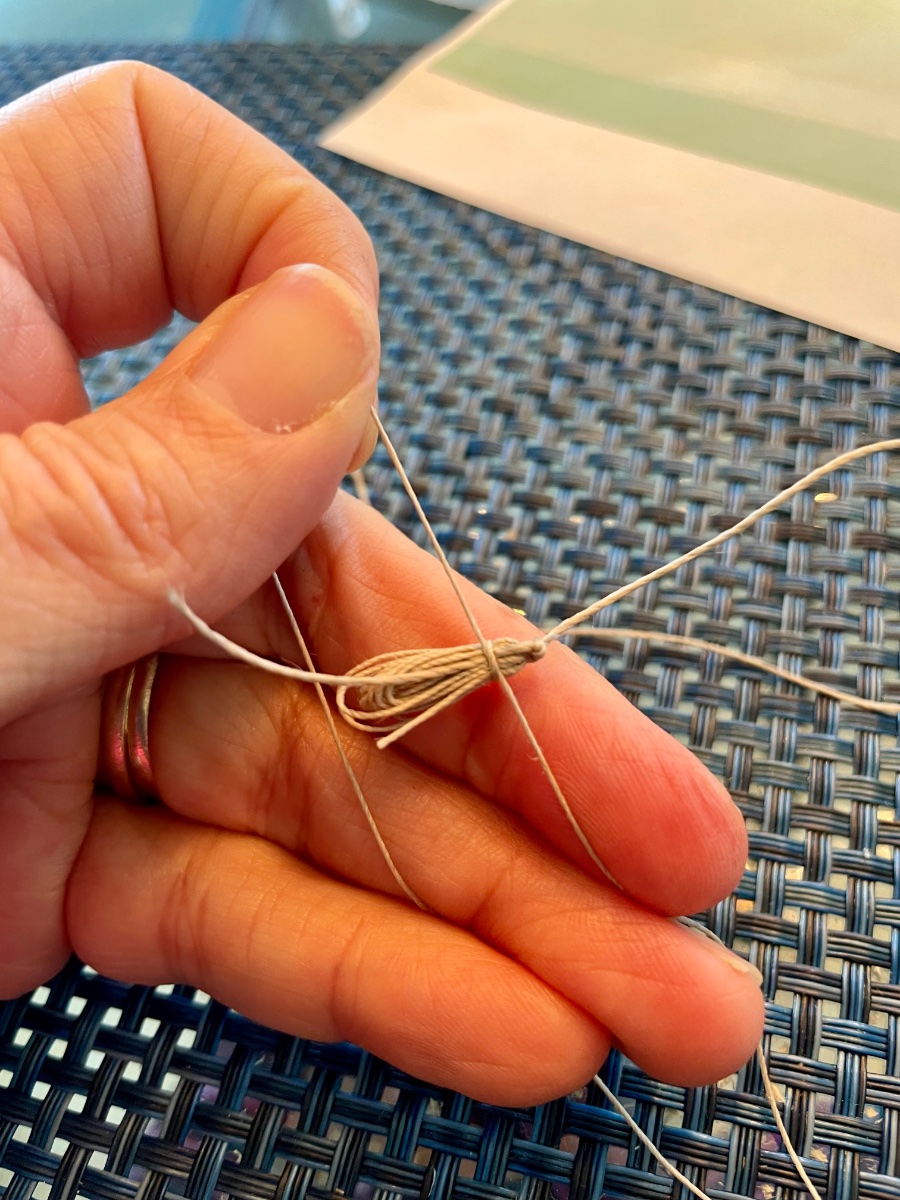
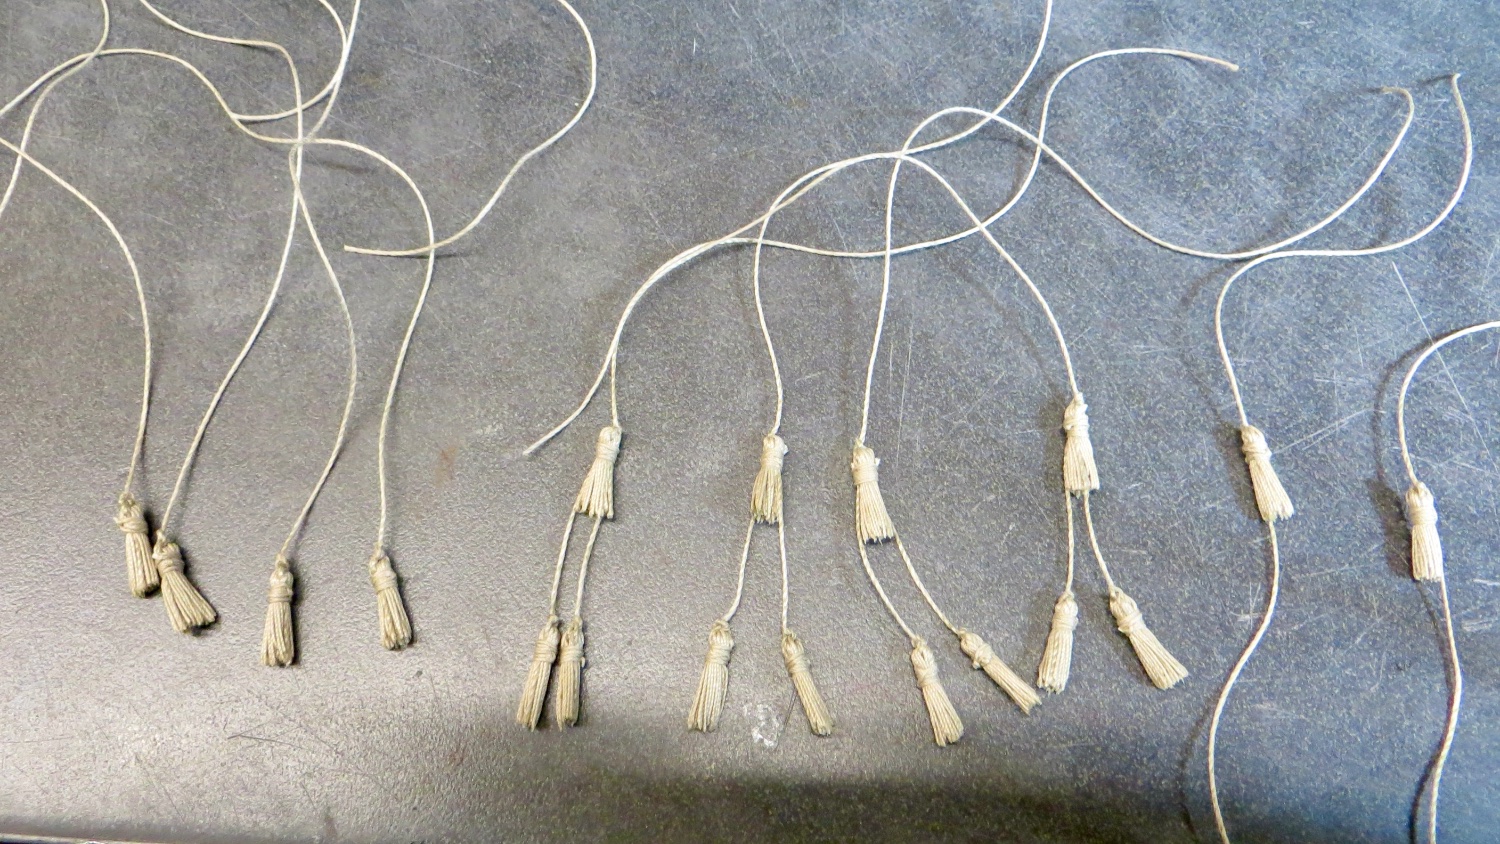
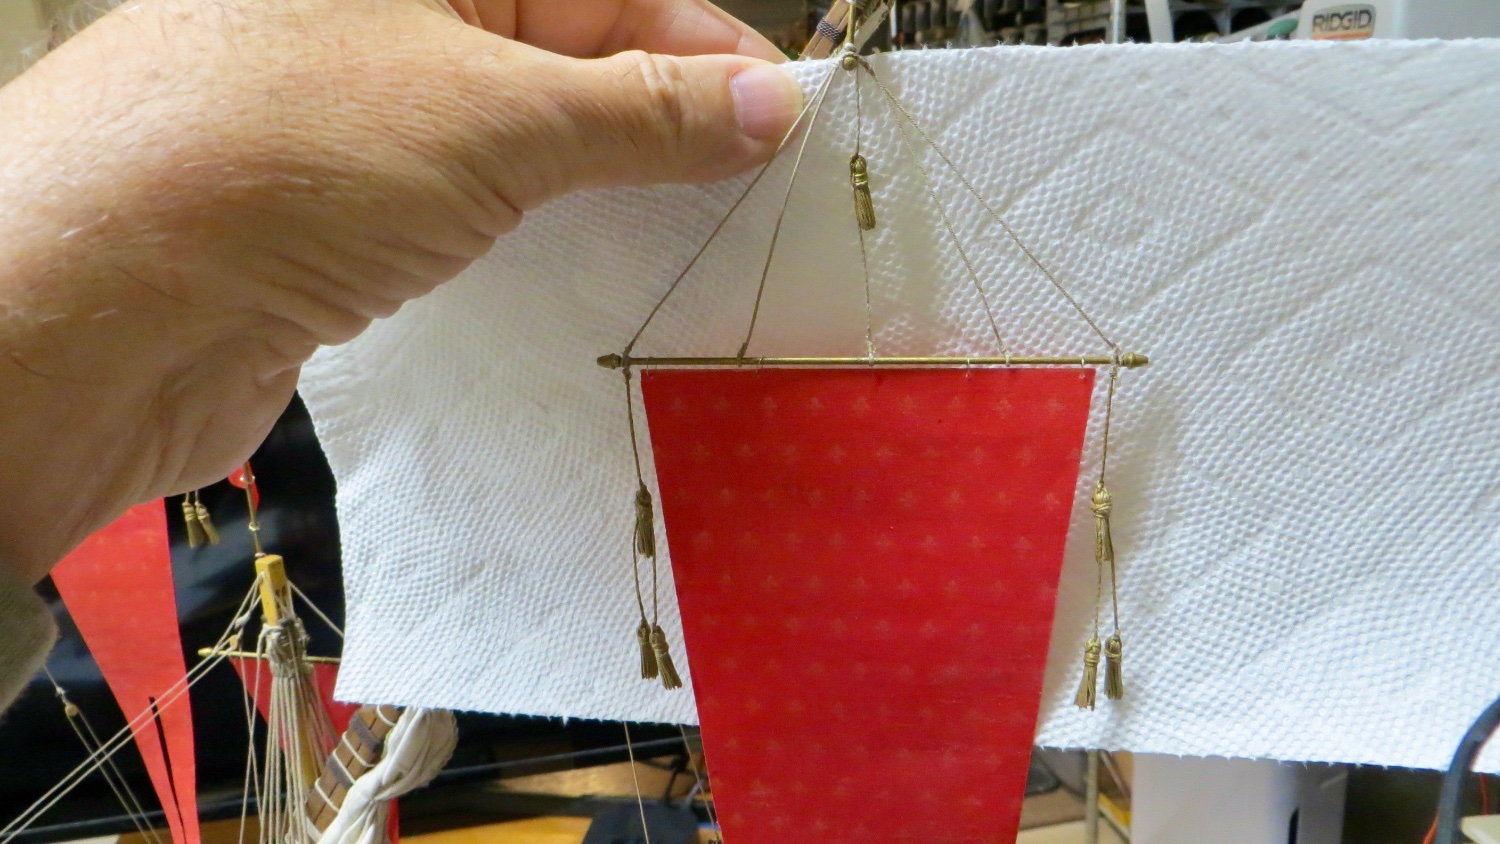
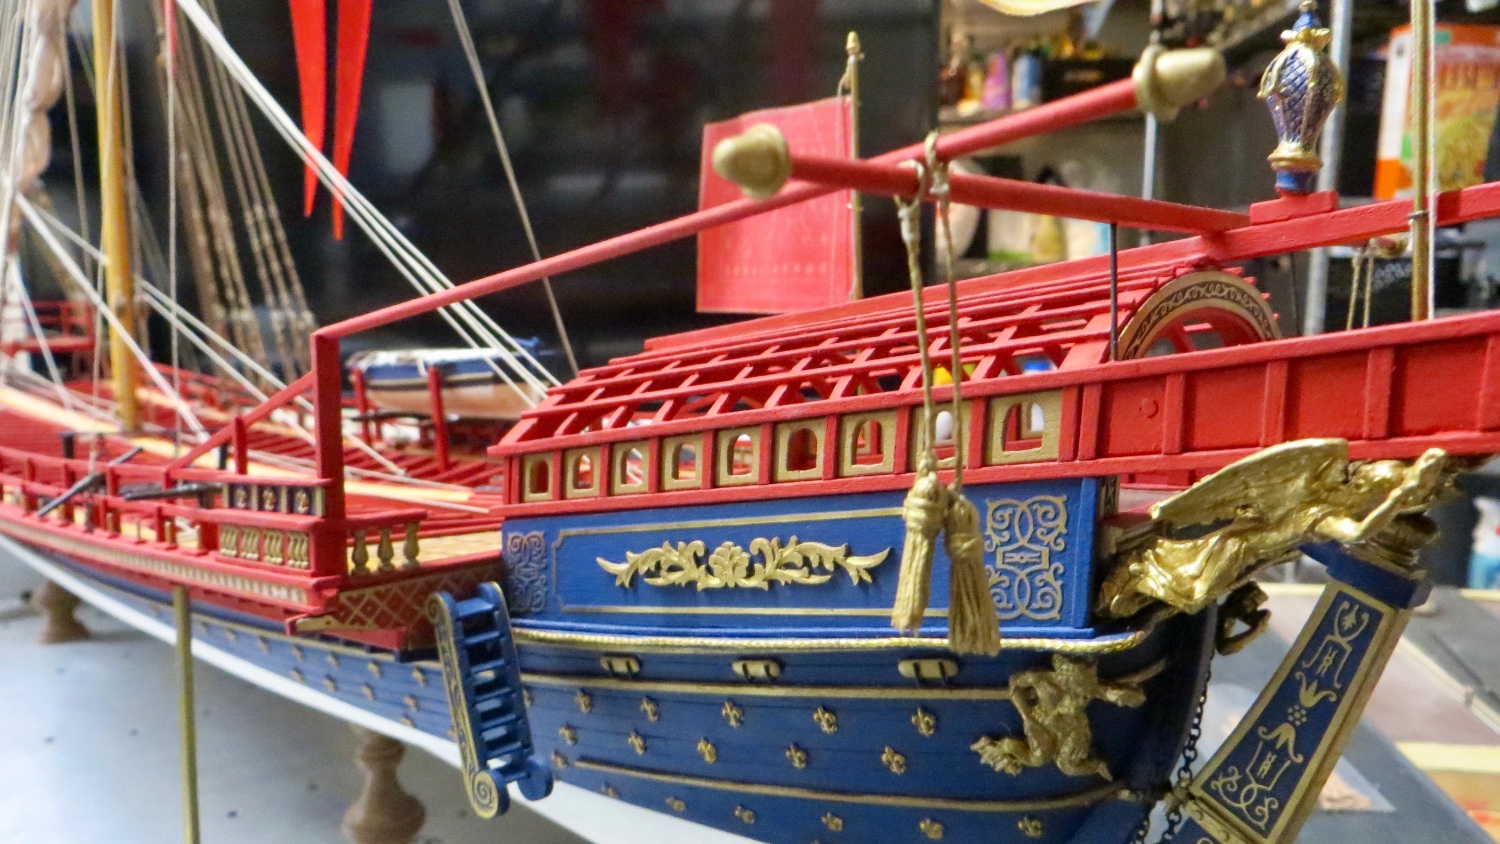
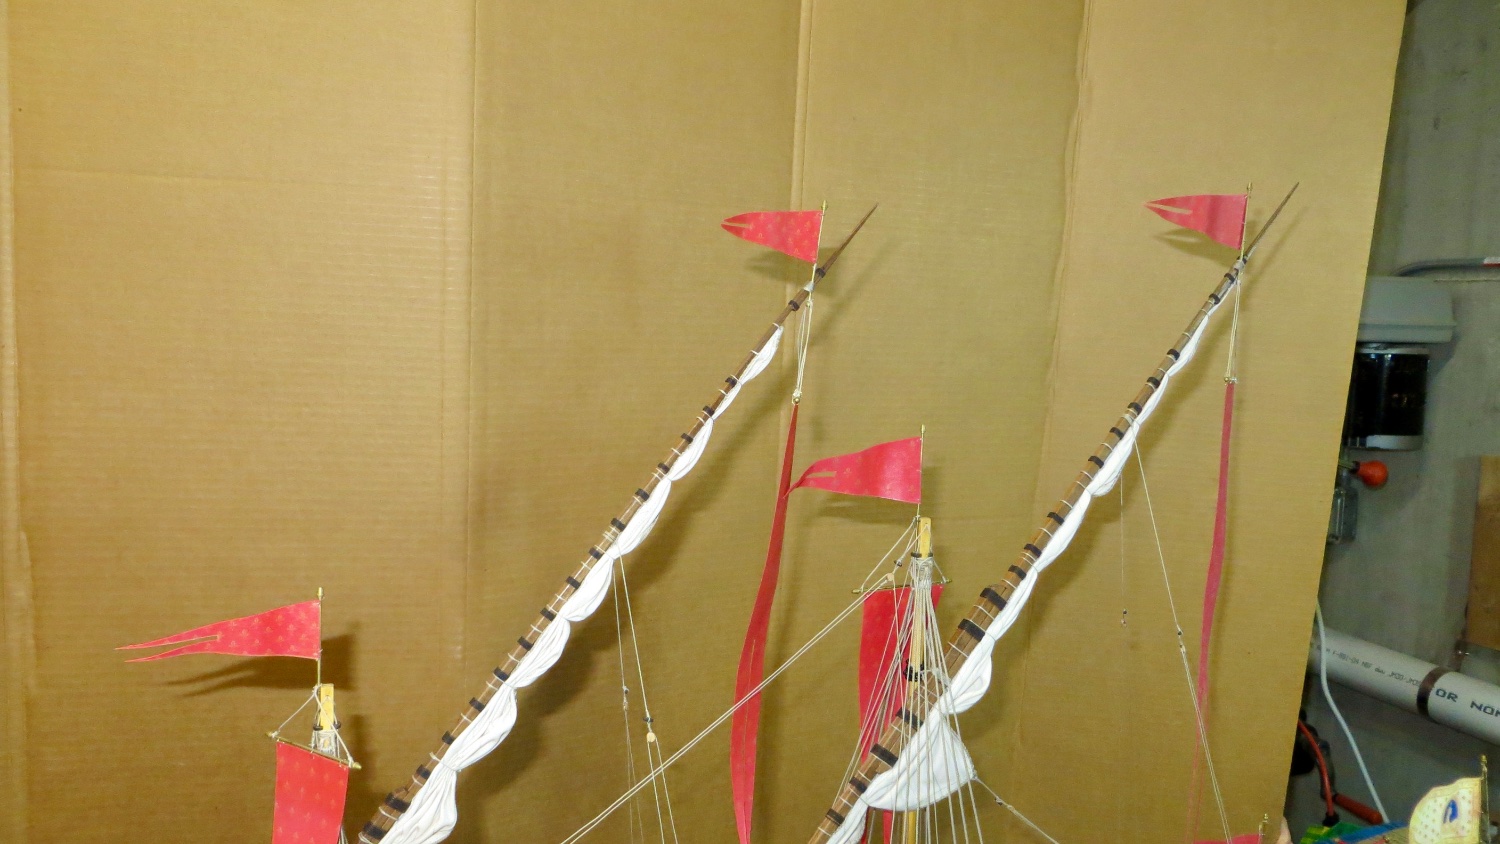
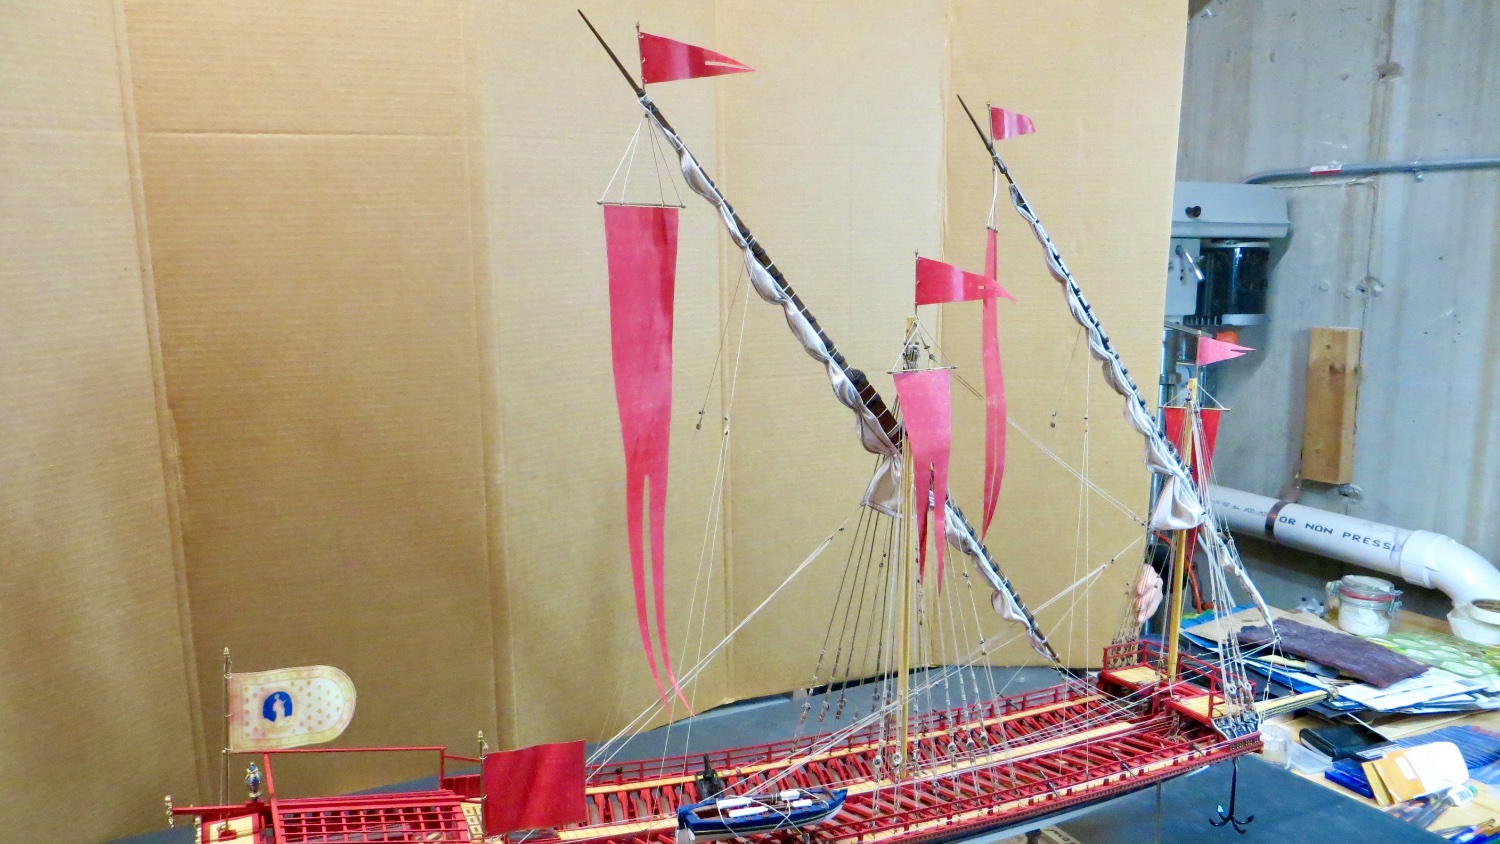
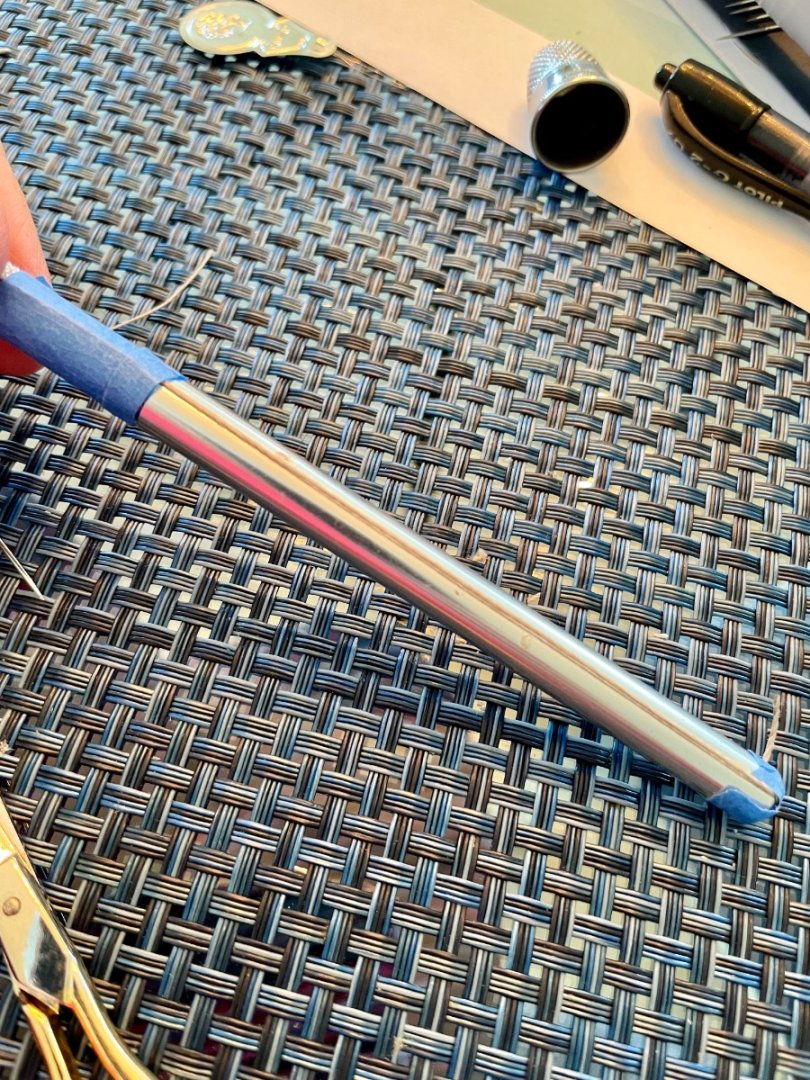
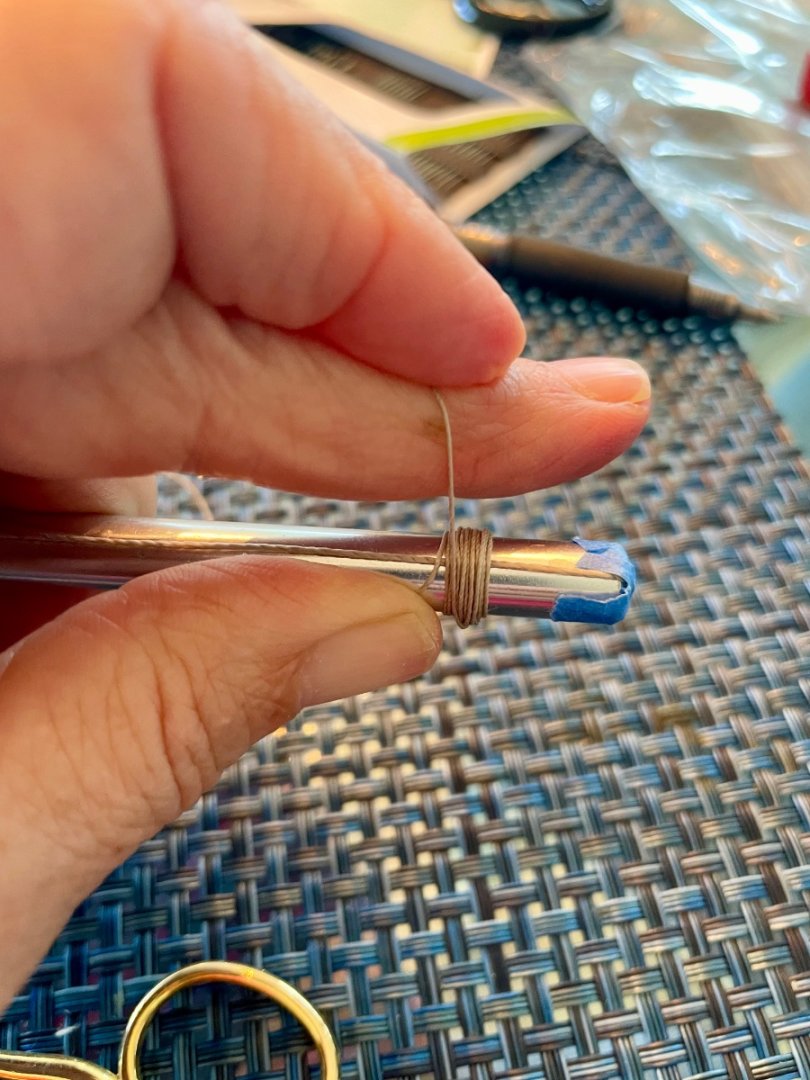
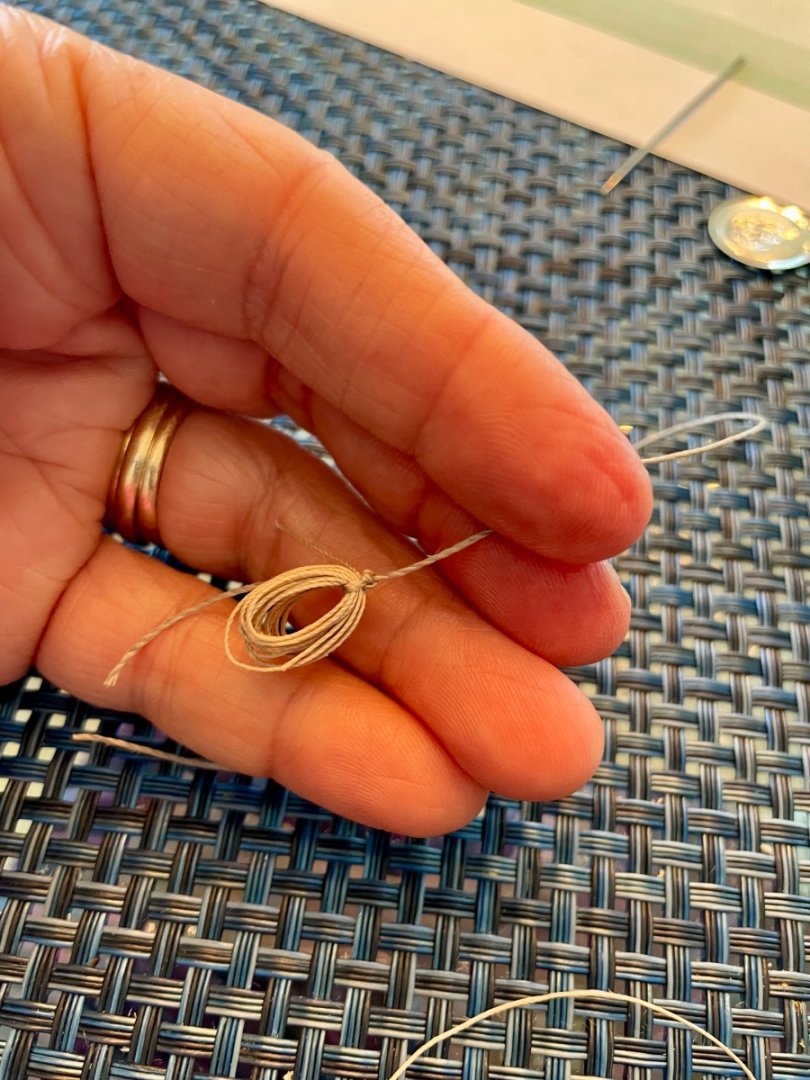
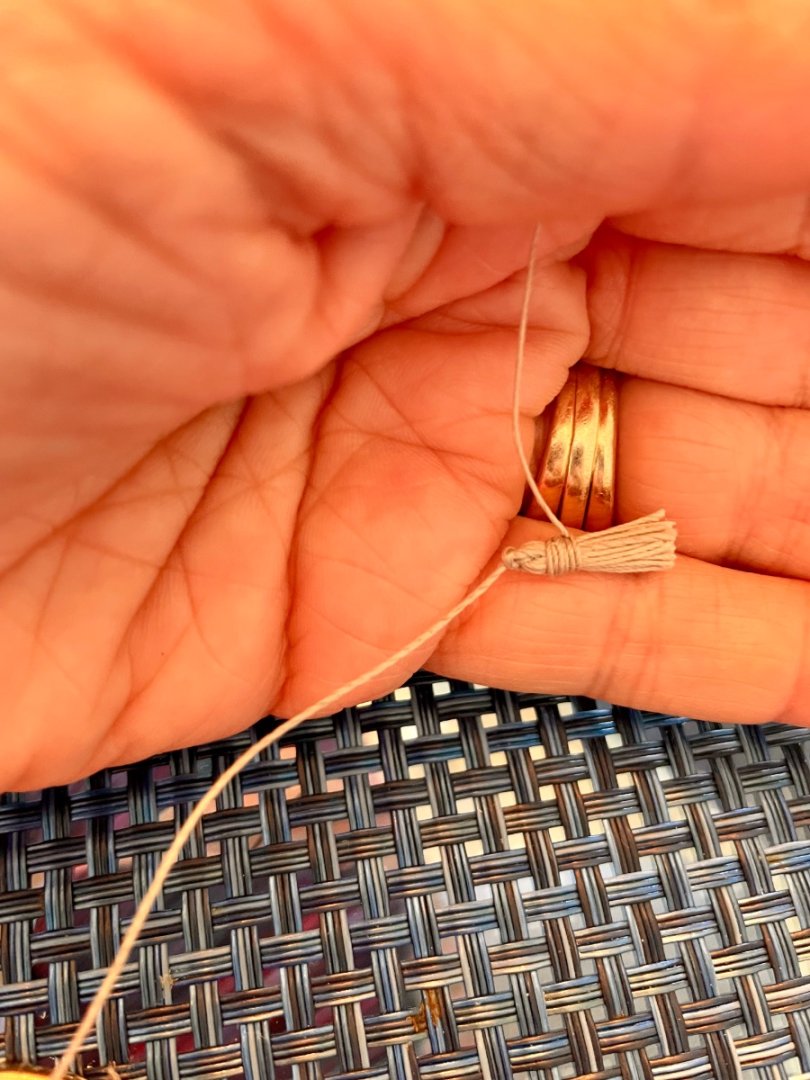
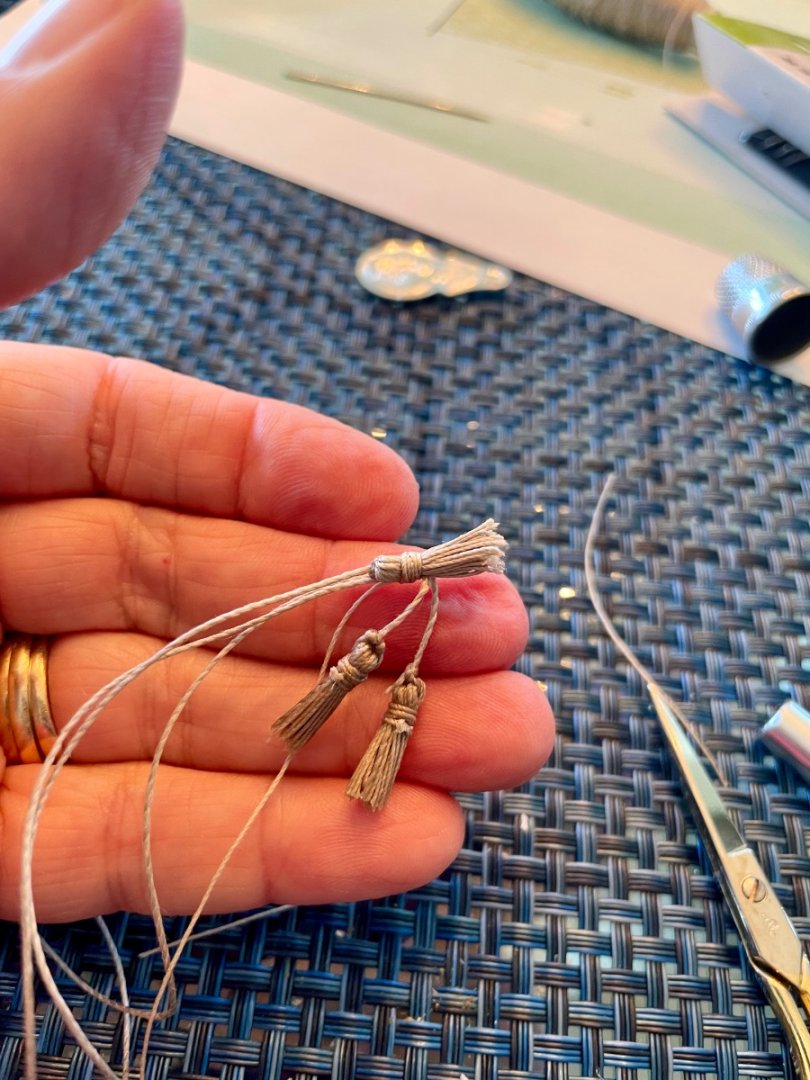
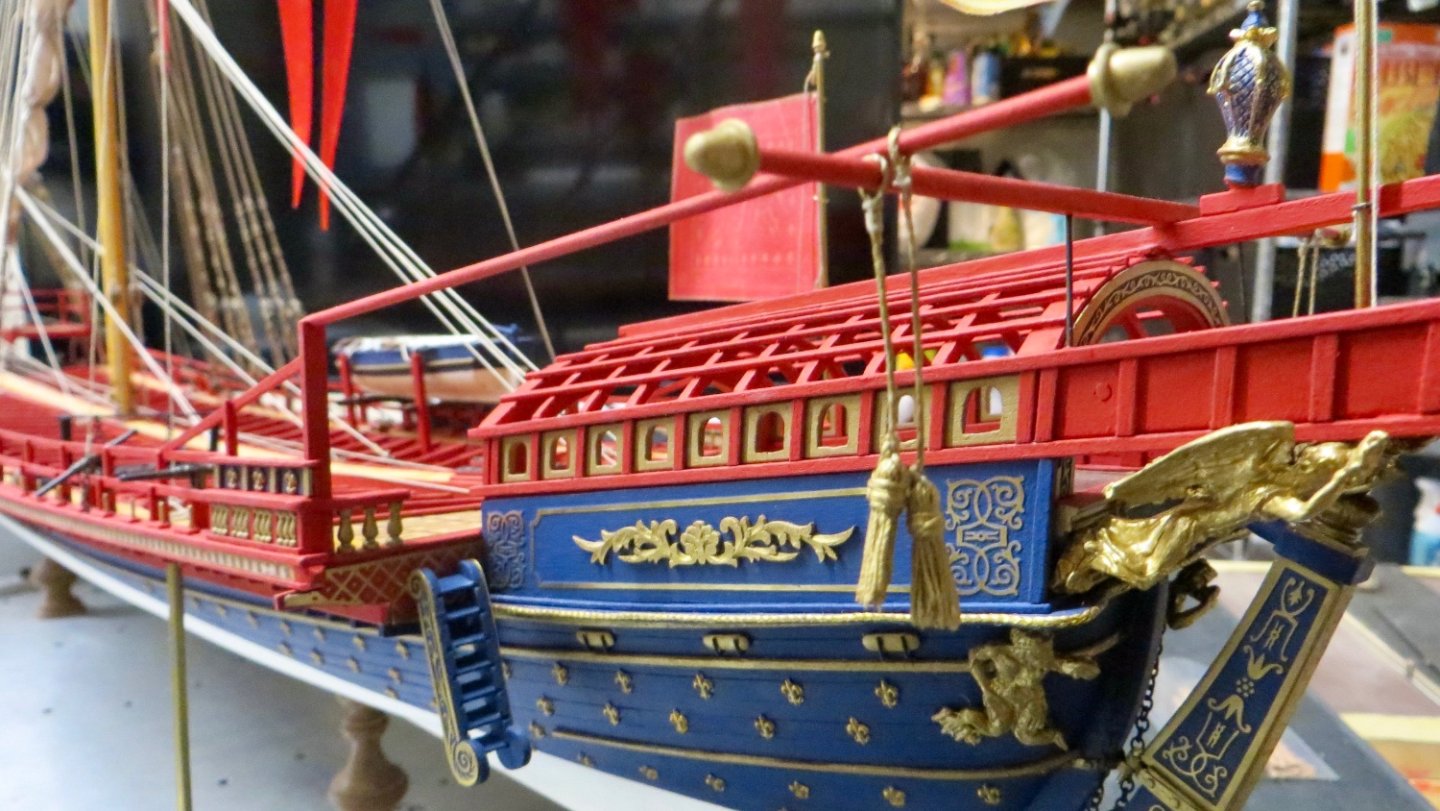
Hello, Finished and installed the Tassels. Many thanks to Michael (72Nova) (Take a look at his awesome Vasa build if you have a chance!) Michael gave me some instructions on making tassels and my wife also lent me a third hand in making these. Turned out not quite as nice as Michael's, but they'll do! First step tape down .5 mm line along the length of blade handle Using .25 mm line, wrapped around the handle multiple times Knotted the .5 mm line around the .25mm line Removed from handle Started seizing around the bundle Cut the loops at the bottom Repeated for multiple Tassels Installed around both hanging flags on foremast and mainmast, and finished line in middle. (Also painted the Tassels the antique gold I have been using) Added a couple on the ends of the canopy frames Now to start making the 59 oars needed. As other logs noted, the oars supplied by the kit leave lots to be desired, so I will make them from scratch. Thanks for the likes, comments, and for visiting also. Frank


- 510 replies
-
- 7
-
-

-

-
- reale de france
- corel
- (and 1 more)
-
Tim: Thank you and thanks for taking a look! Michael, Thanks for your input. I tend to agree (along with, most importantly , the wife) lol! I will see if I can create a partially rolled back look that will be convincing. If not, I'll probably leave the canopy off. thanks, Frank
-
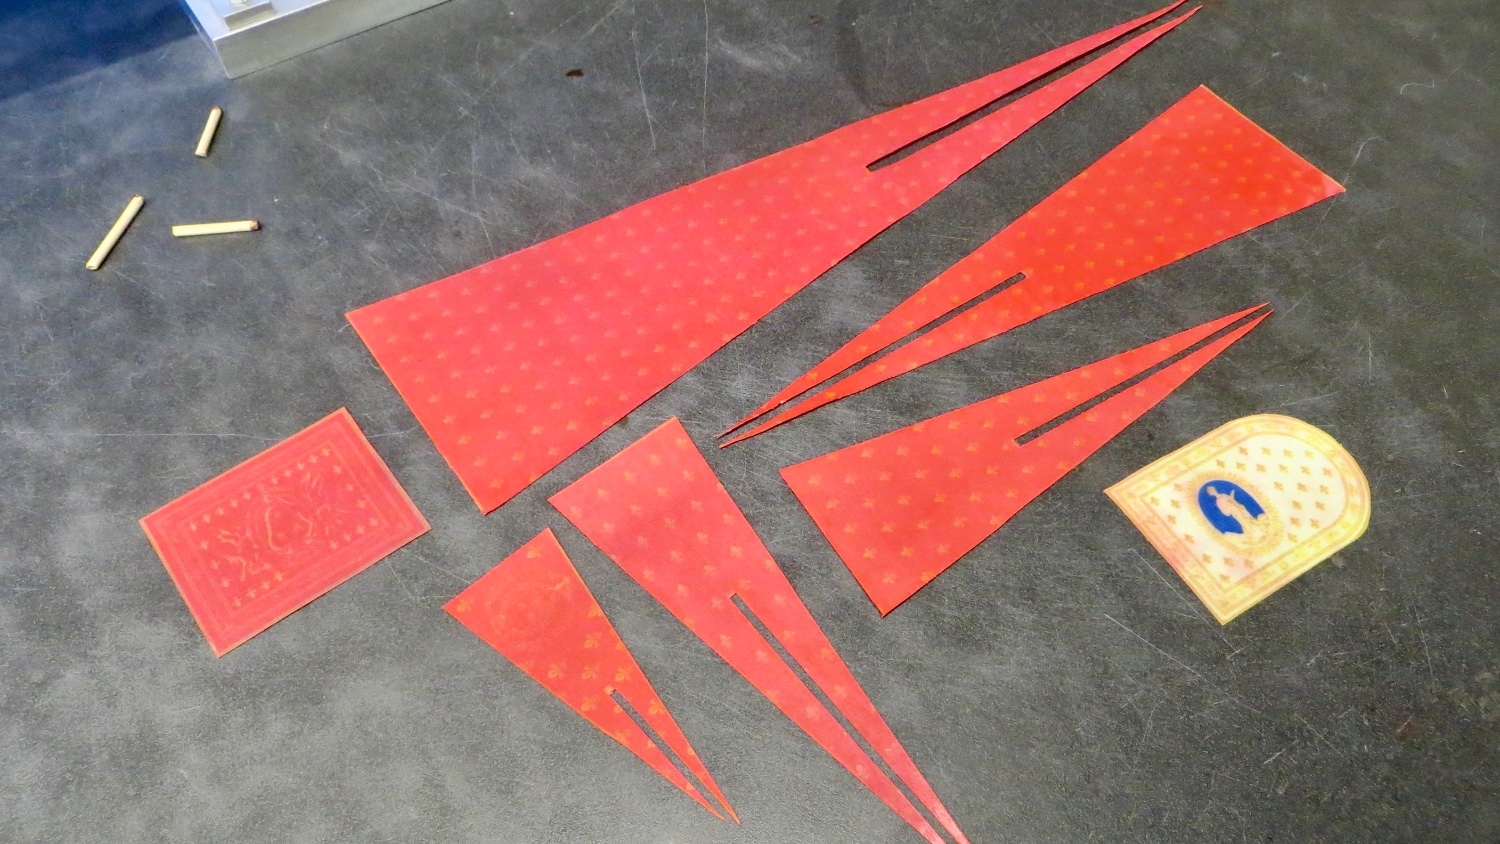
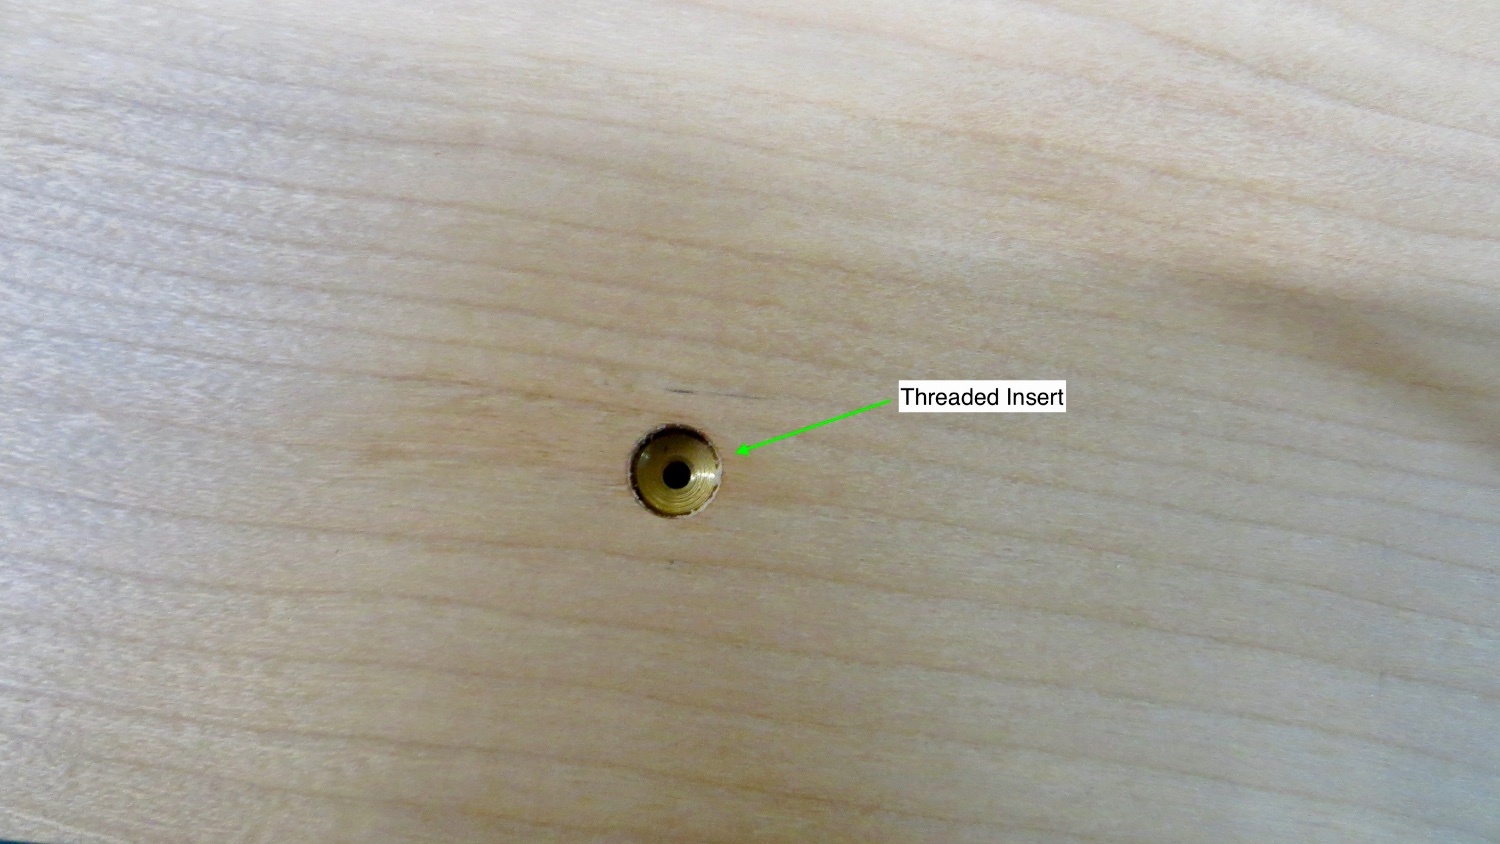
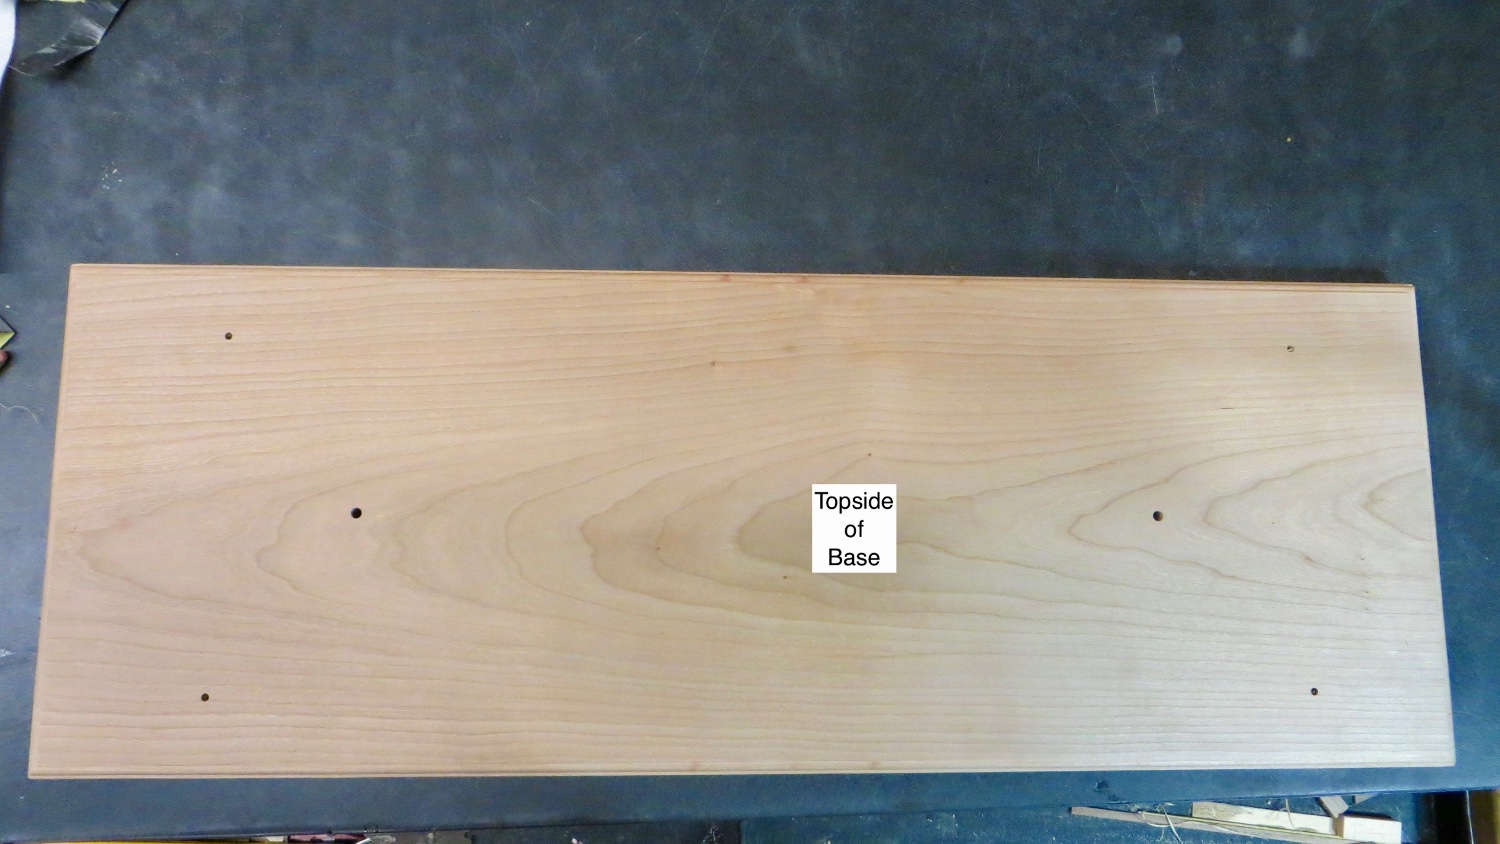
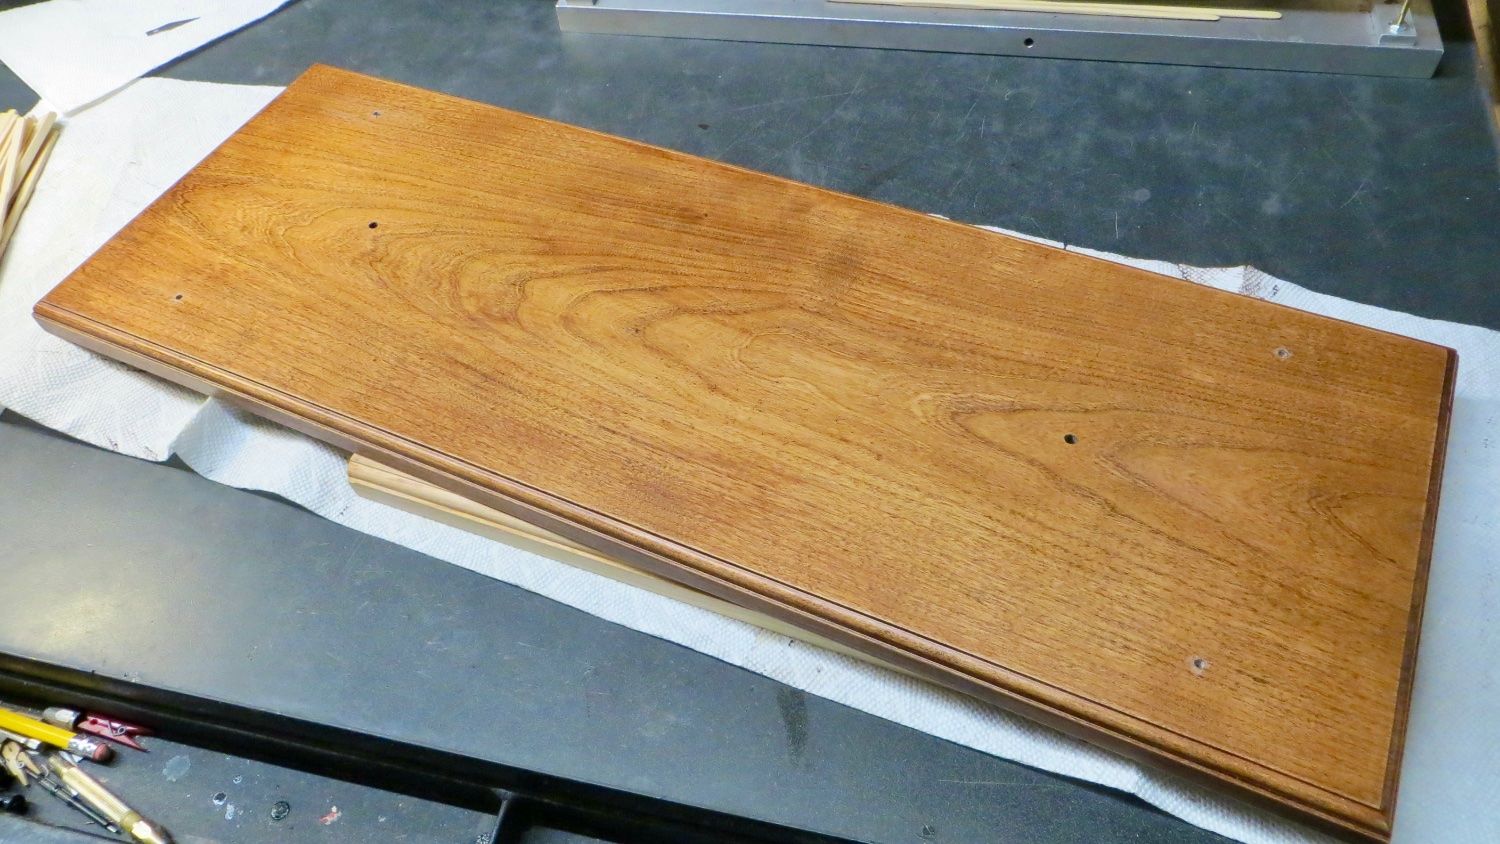
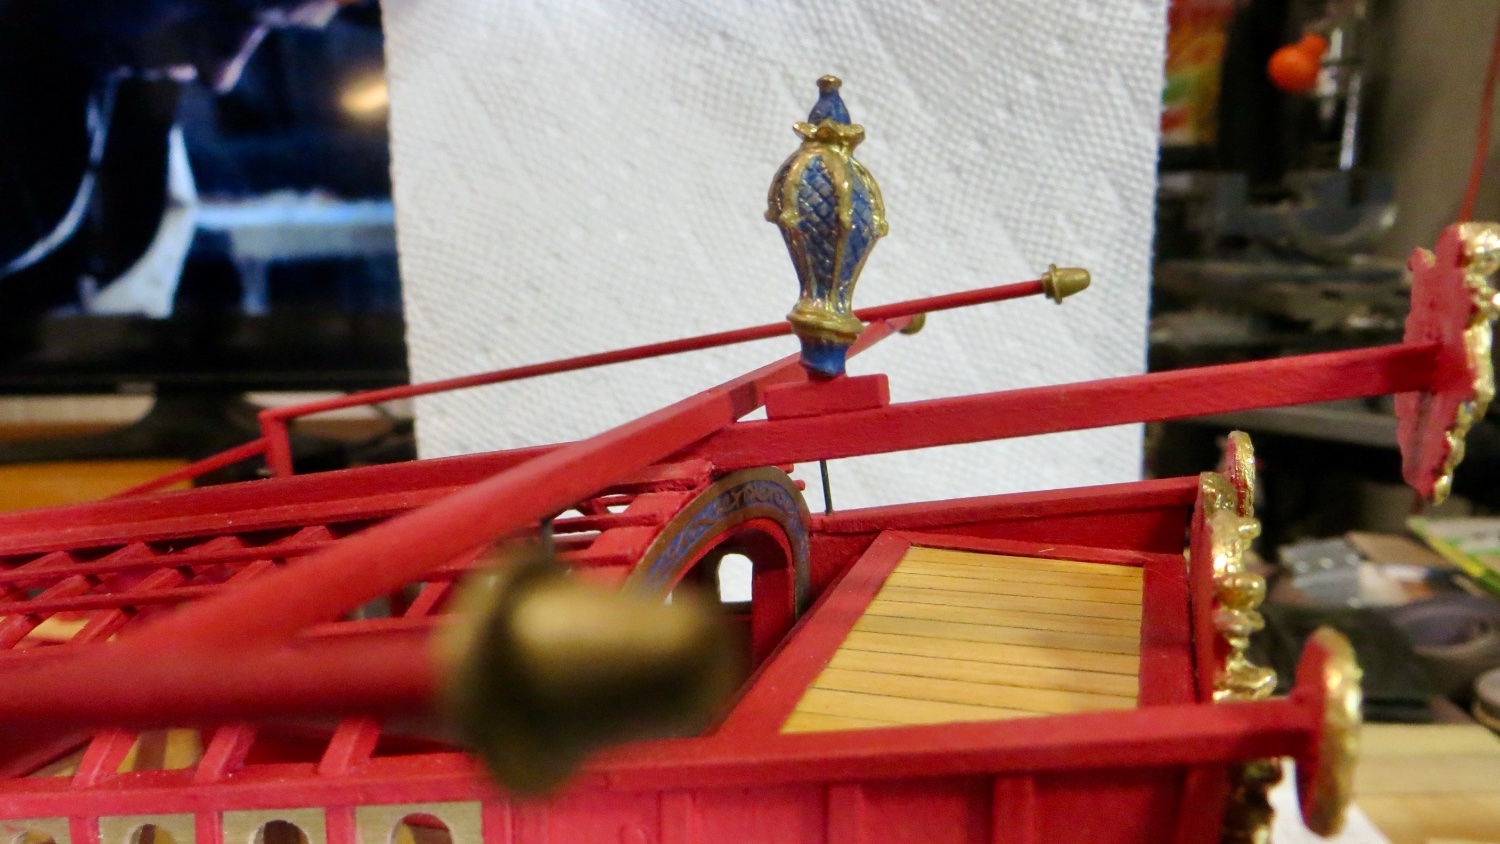
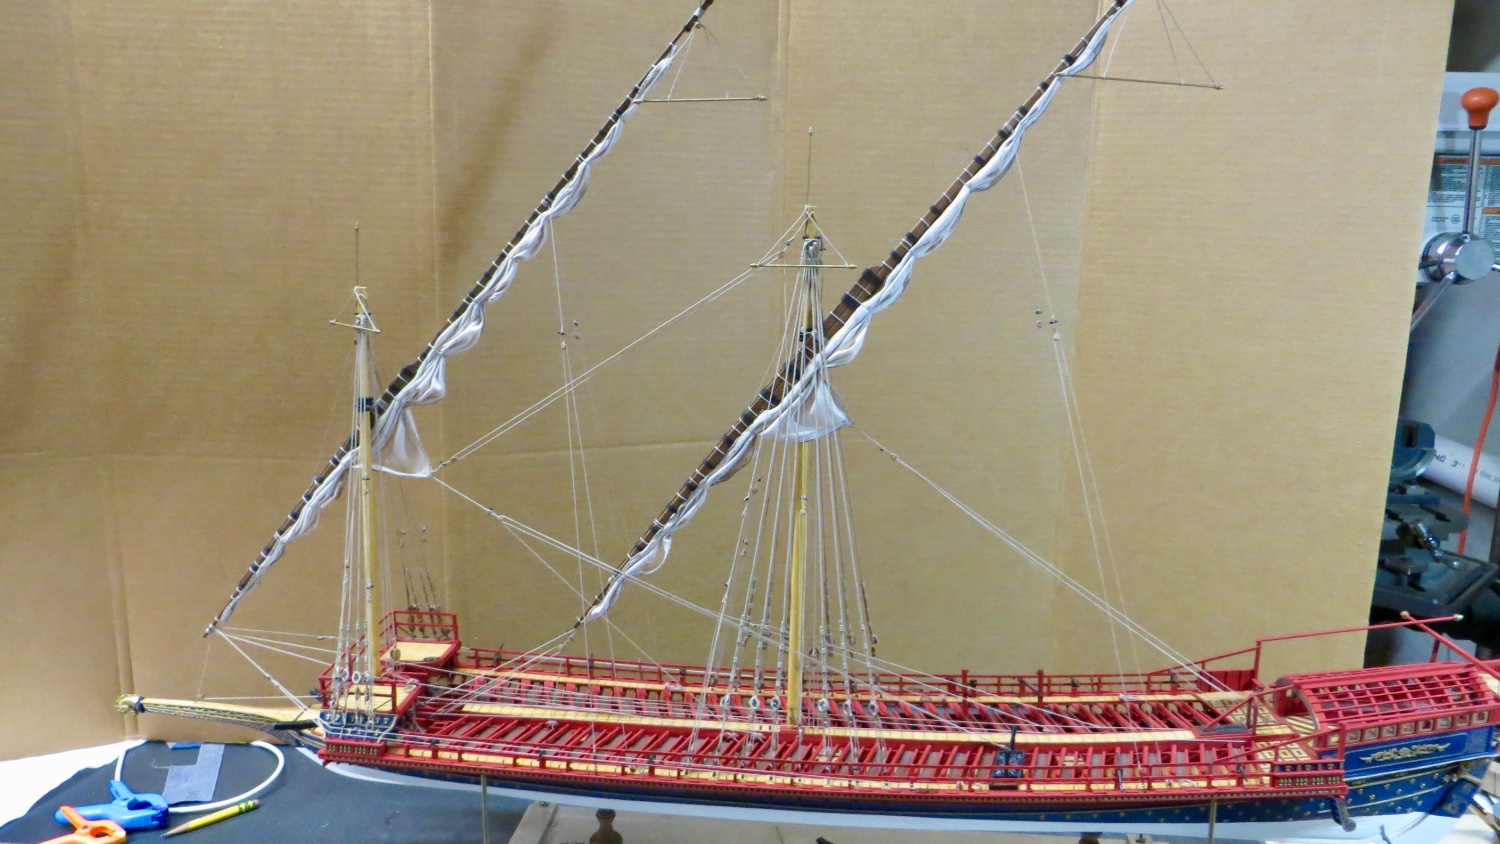
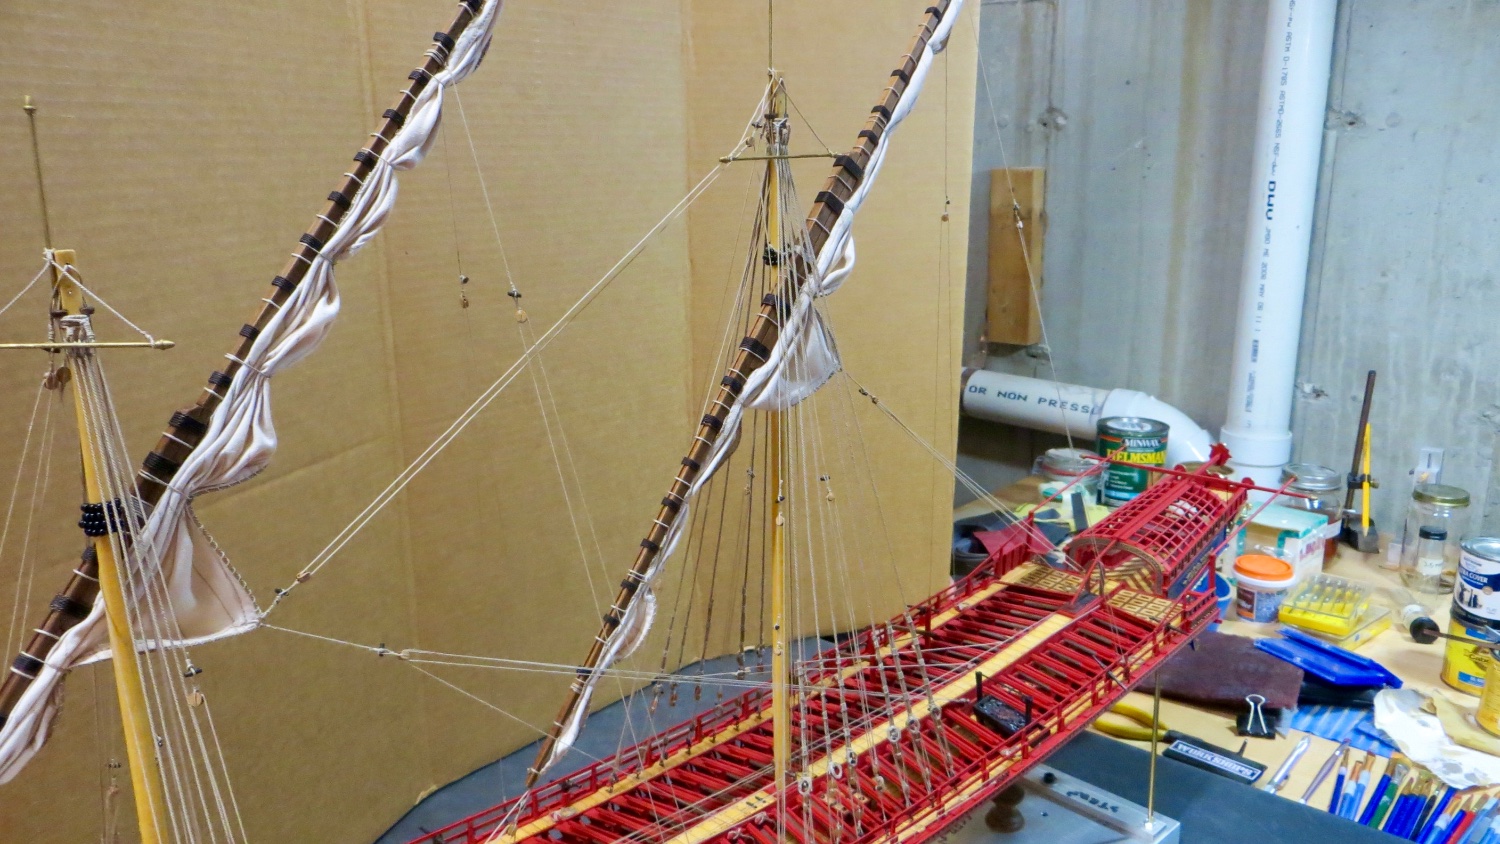
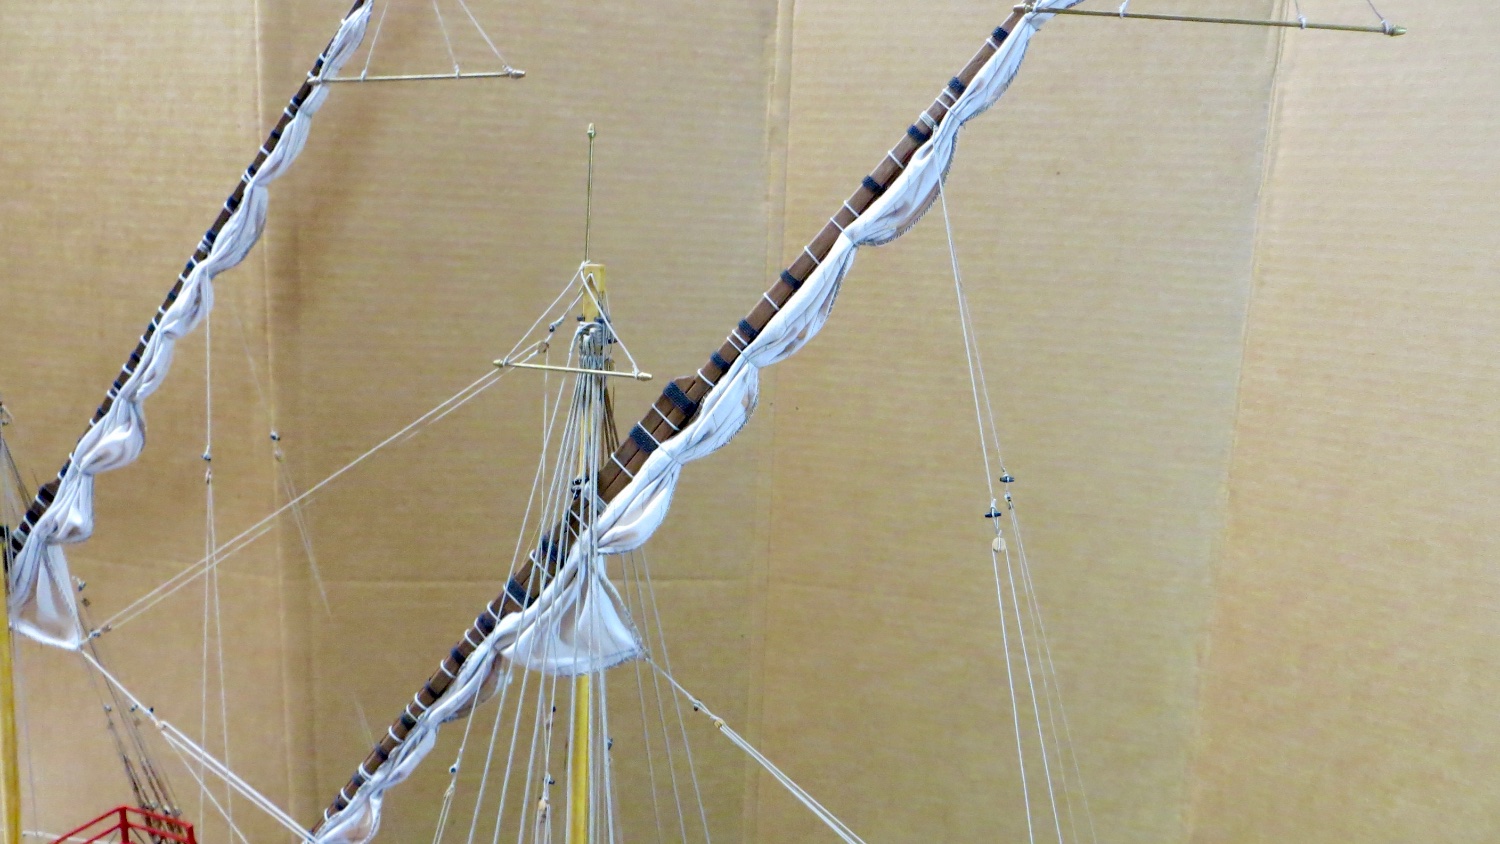
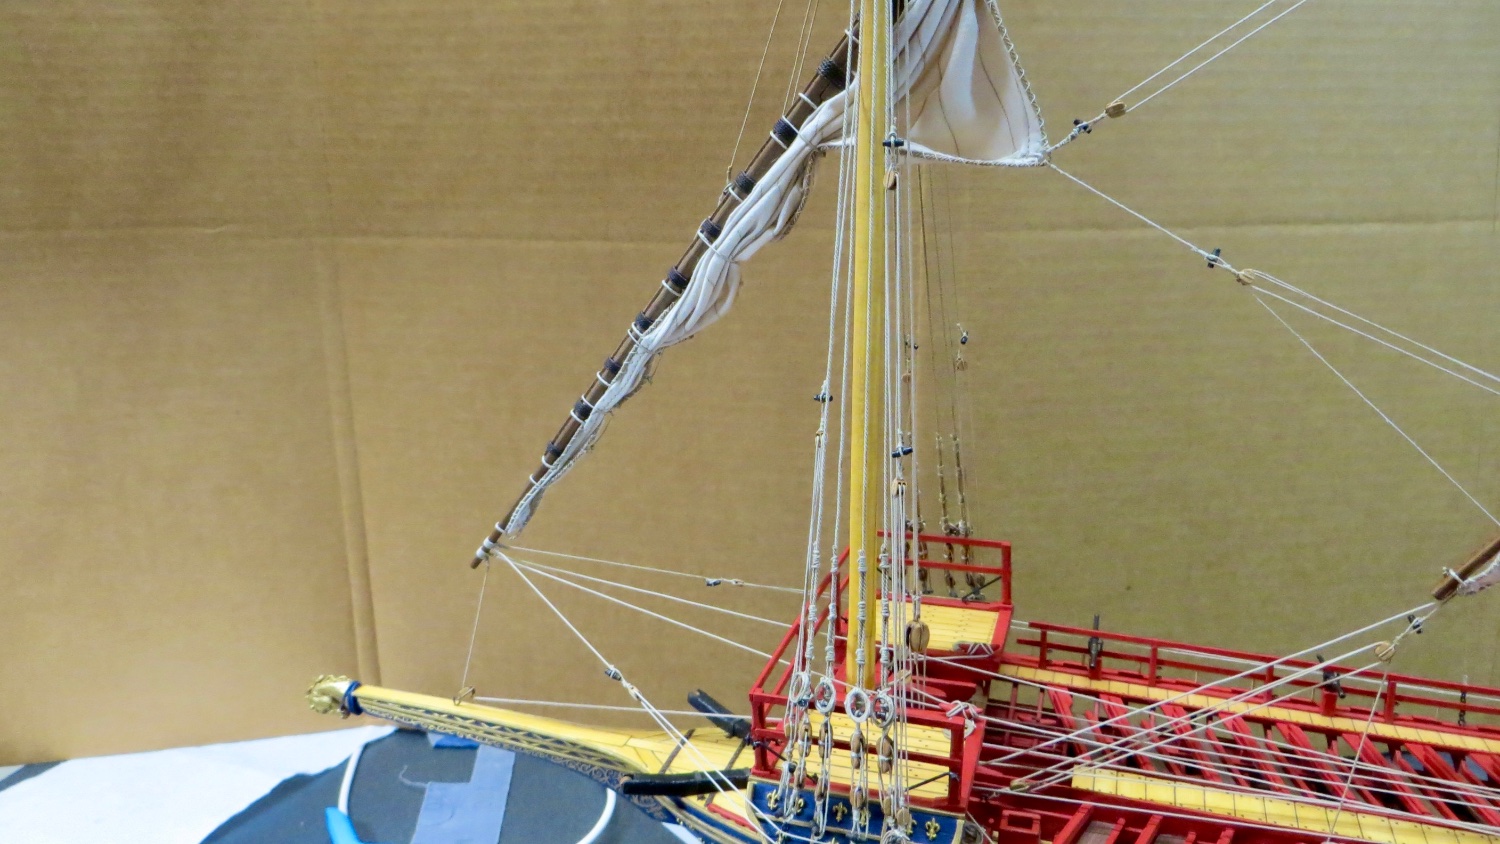
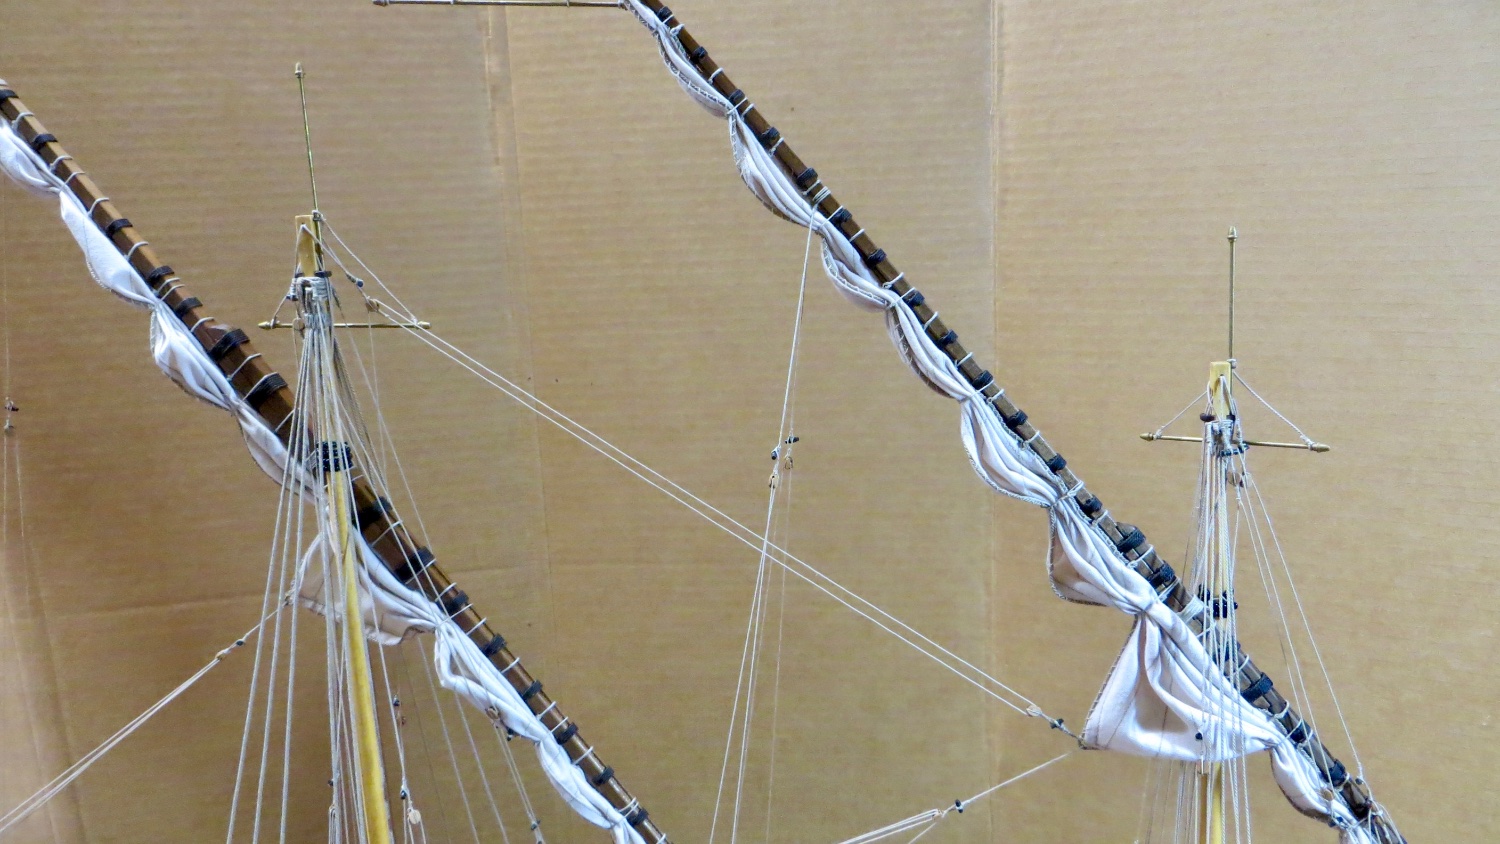
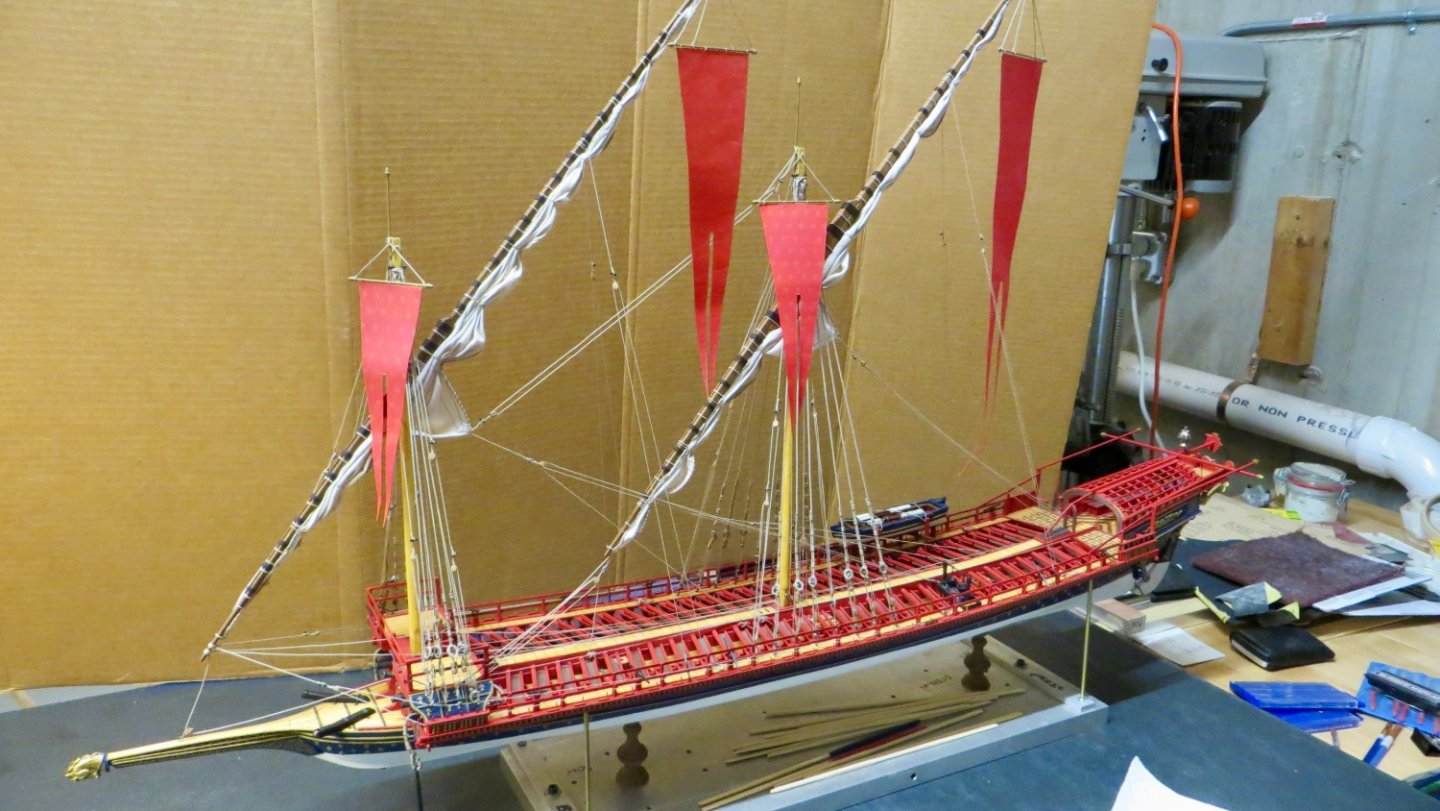
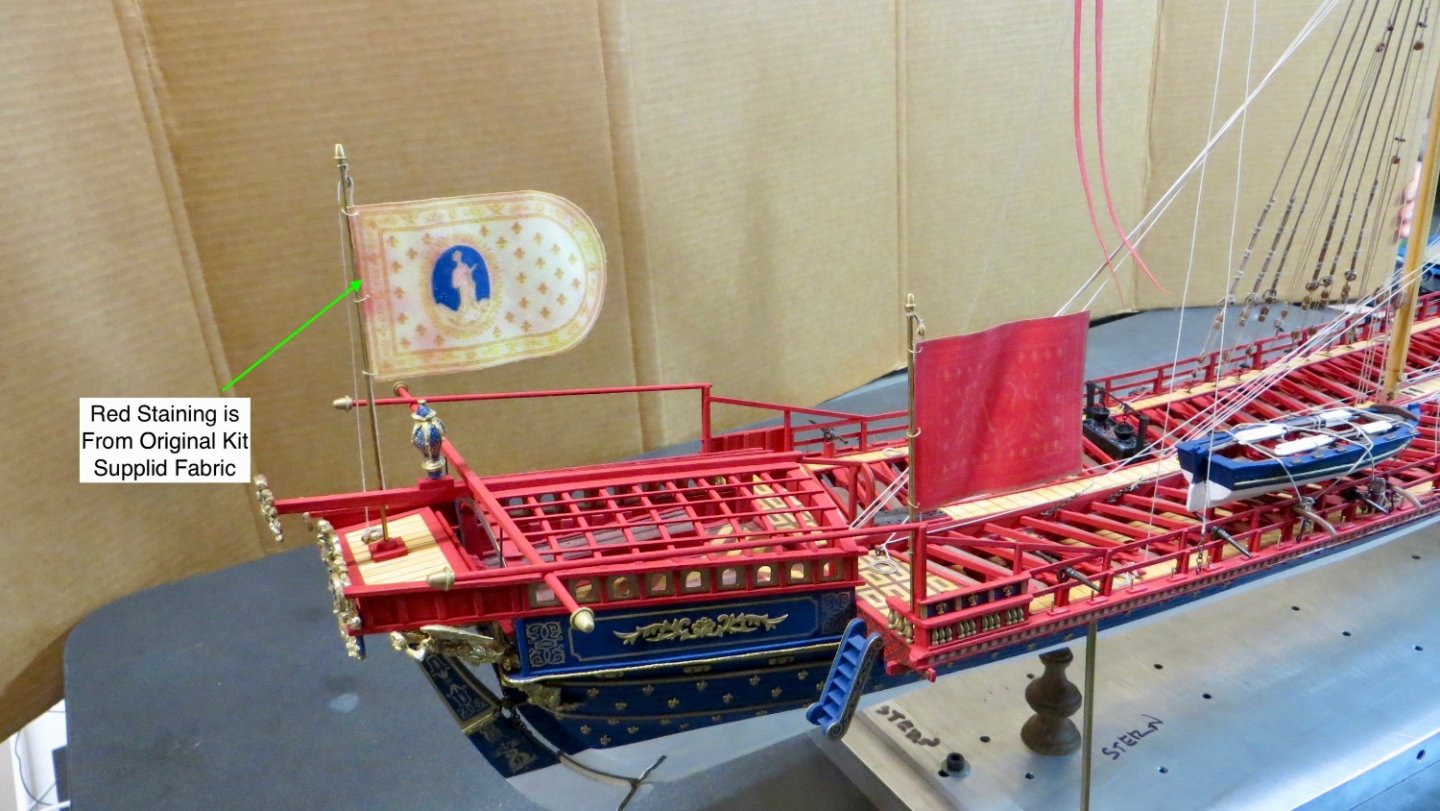
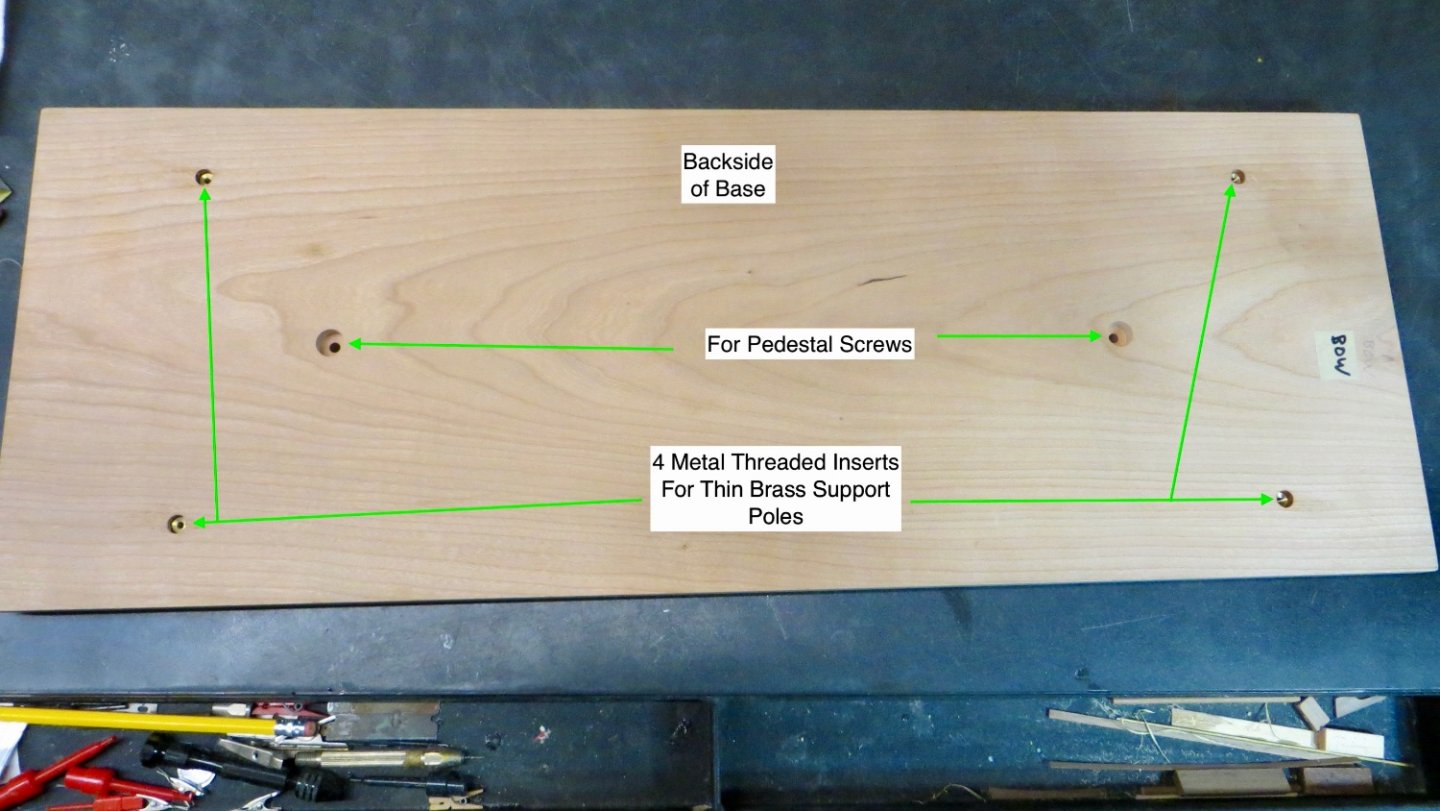
Hello, A thank you to those who are following and for the "likes" as always. Continuing on with the sails Cut the sail shapes from the cloth and, using some matching watercoloring pencils, touched up the white edges of the cloth flags. Mounted the large hanging flags first Then mounted the upper flags Made a small base for the stern flag pole and mounted the light colored flag. It was disappointing to receive this flag from the kit set with red smudging. When I used the transfer process described above, the smudging transferred onto the cloth. Oh well. Side pendant flag mounted Overview of installed flags. A couple of thoughts: 1. I will hold off installing all the small flags on both sides of the railings until the oars are installed. (Hopefully this will make the oar installation easier.) 2. I am contemplating leaving off the large stern canopy, or try having it rolled up towards the stern? I keep looking at all the work involved with the stern seating area (flooring, seating, and framing). This area of work would be all covered up if the canopy is installed. As a side project, purchased a nice piece of cherry at the local lumberyard for replacing the metal base I have been using during construction. Cut, sanded, and drilled for the screws for the pedestals in the center and drilled and inserted 4 treaded metal inserts. I decided to use 4 thin polished brass supports to keep the ship stabilized if ship is moved. Hopefully it will look attractive. Underside of Base Topside Topside of Base with 2 coats of stain and 5 coats of polyurethane. Next week I will start making the tassels to hang on the sides of the flags. Left to do: 1. Install Tassels 2. Transfer ship onto finished wood base with pedestals 3. Manufacture the base of the outer case 4. Have the plexiglass cover for the case made 5. Mount the ship and ship's base onto the case base 6. Manufacture, paint, and install the oars 7. Add the small railing flags Nearing the end of the build. Thanks for stopping by, Happy New Year, Frank


- 510 replies
-
- 3
-
-
-
- reale de france
- corel
- (and 1 more)
-
Thanks Michael! Yes, I started to rough out the oars in order to get an idea of the size of the case so I can order material from the lumber yard..Yikes! Pretty wide. Lol! Thanks, Frank
-
Nice to see you back working on this beautiful ship model! Frank
-
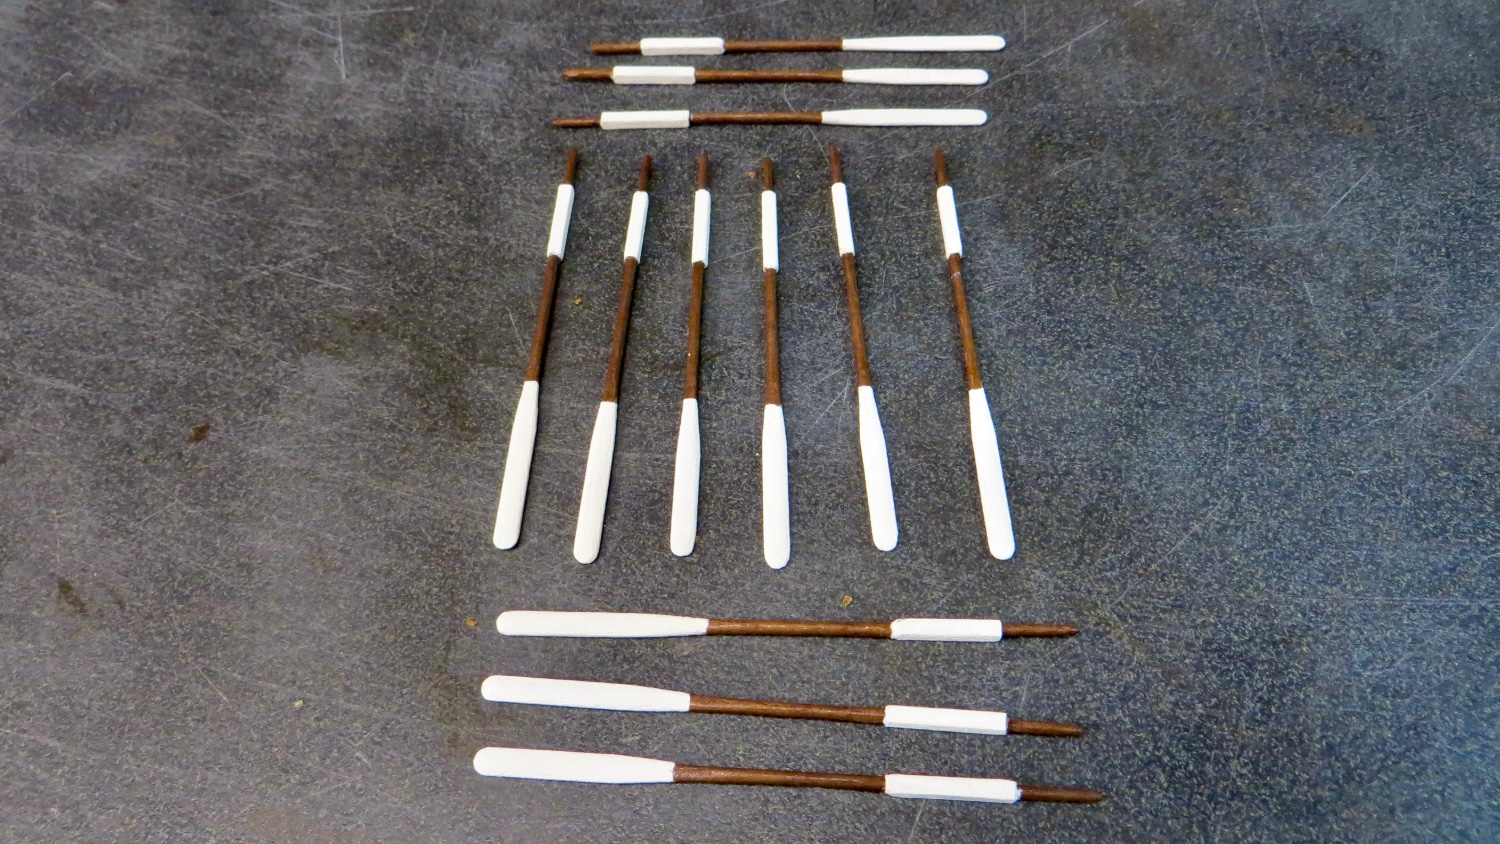
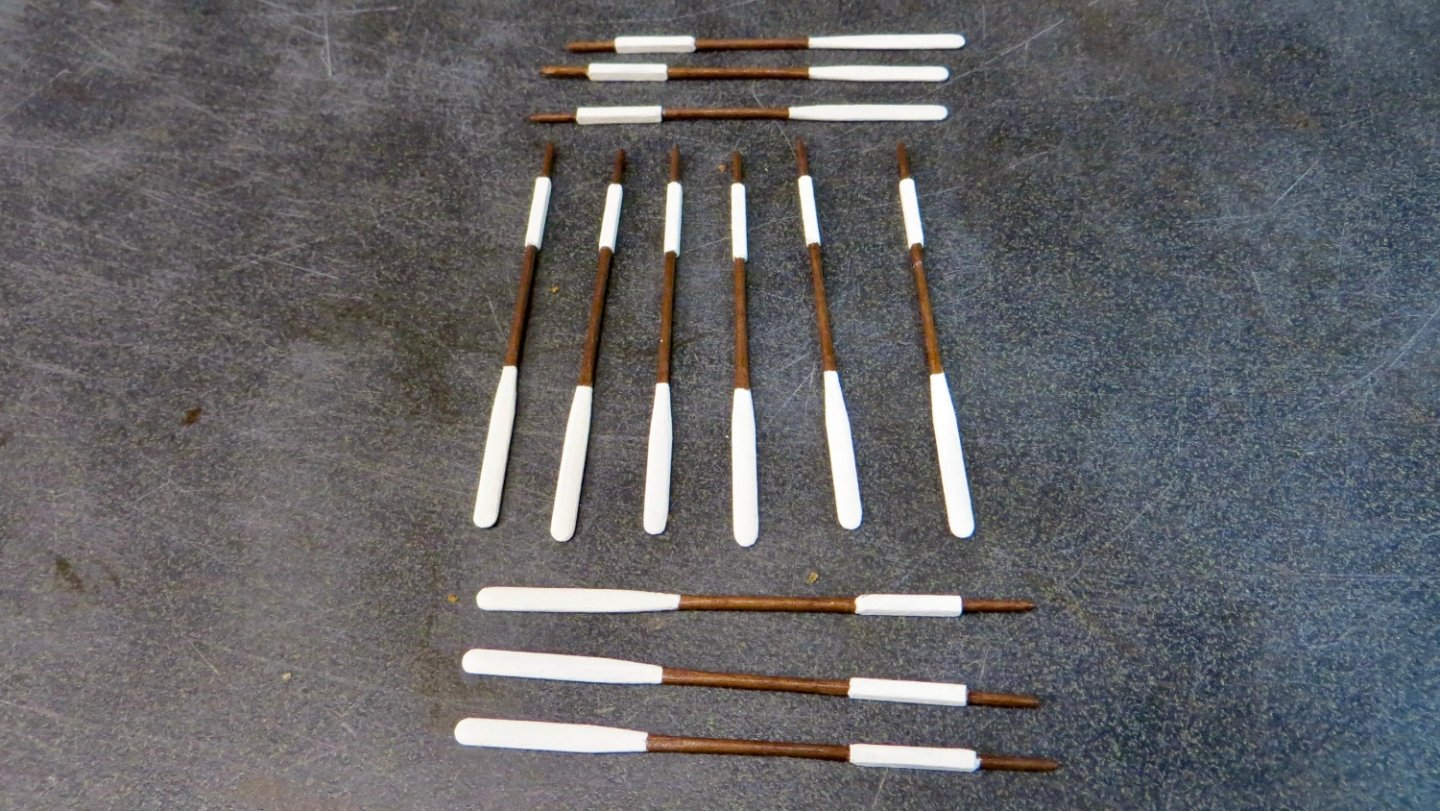
Thanks for chiming in Tim! Appreciated! I am disappointed with the quality of my last 2 photos. I am traveling now, but when I return home I will re-take them. As far as this years show, unfortunately, I will not make it in time. I am currently working, as a side project, on the ship's base. Time to remove the steel base with a nice wood one. Then I have to start working on the case. The case has to take into account the oars, so the size will be what it will be. Lol! I will have it all done for the 2024 show for sure. On the home stretch now. After the flags and tassels, the most time consuming item will be the 59 oars I have to make. Not looking forward to that!! Happy Holidays Tim. I will not make the December meeting. Going to Florida to bring my 83 year old mom back up North for the holidays! Thanks, Frank
-
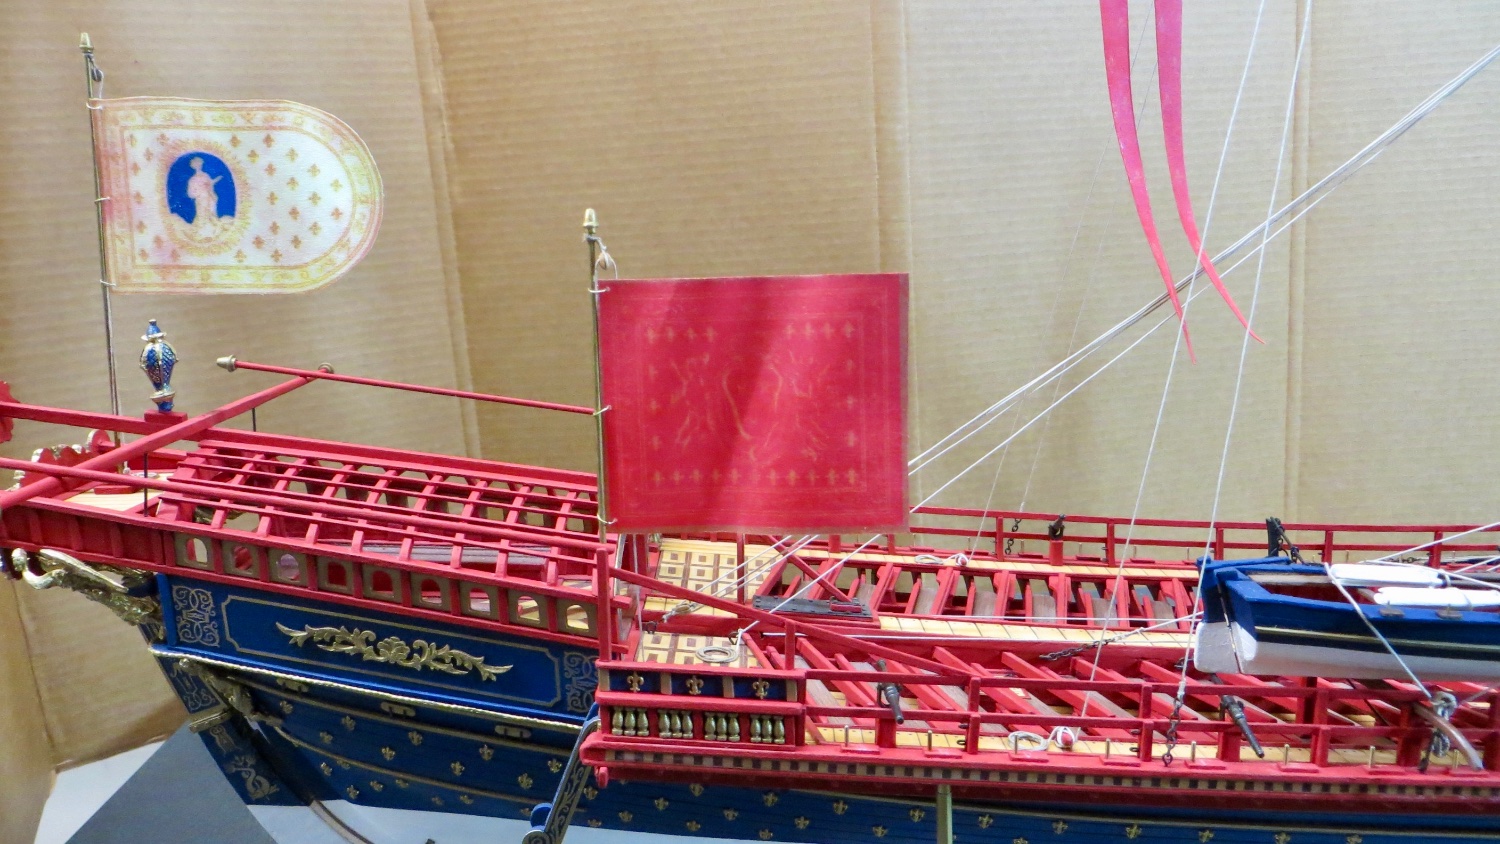
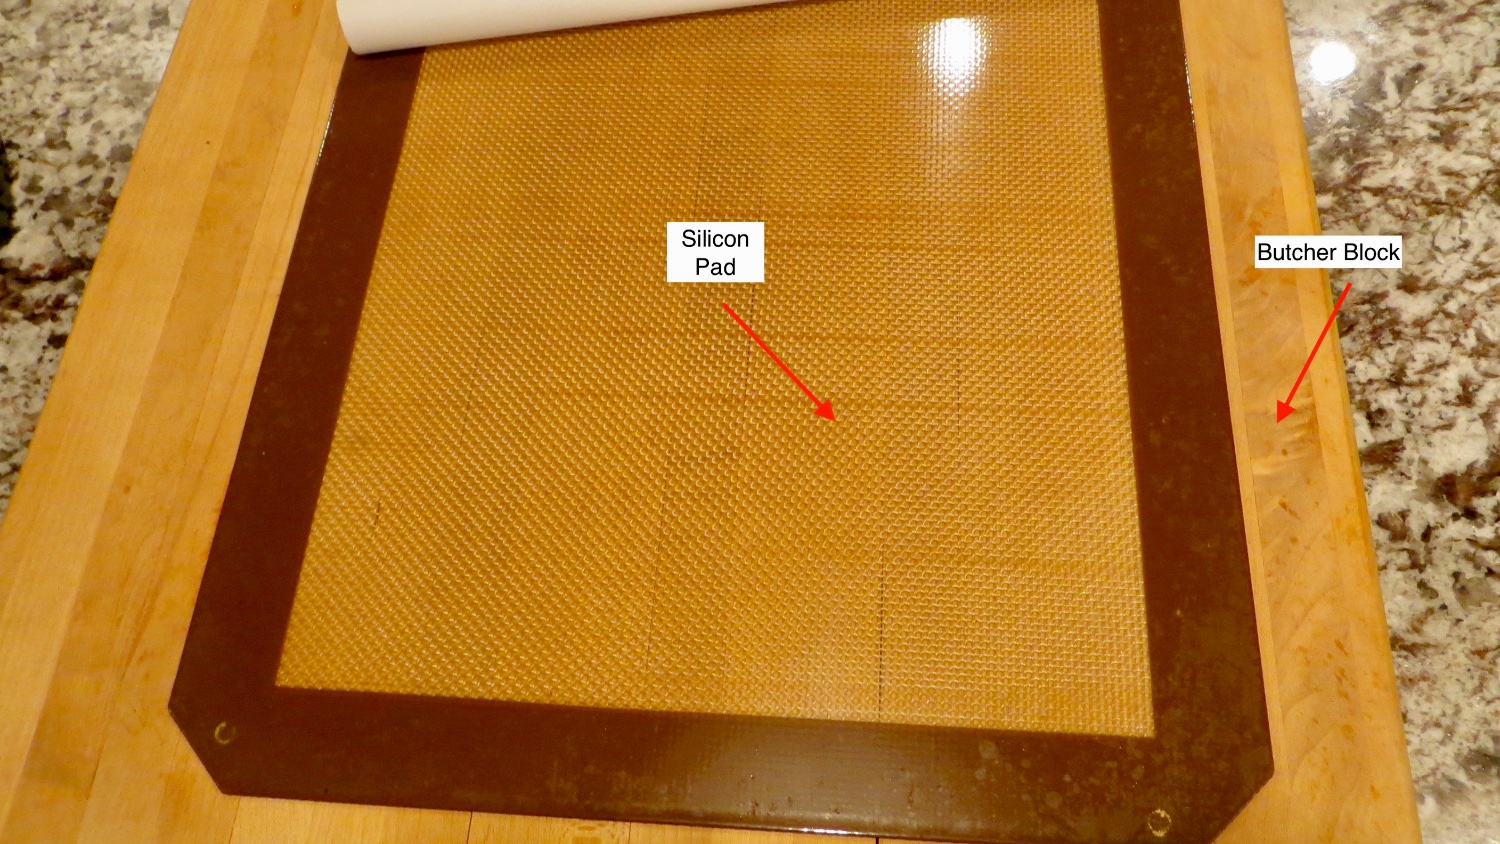
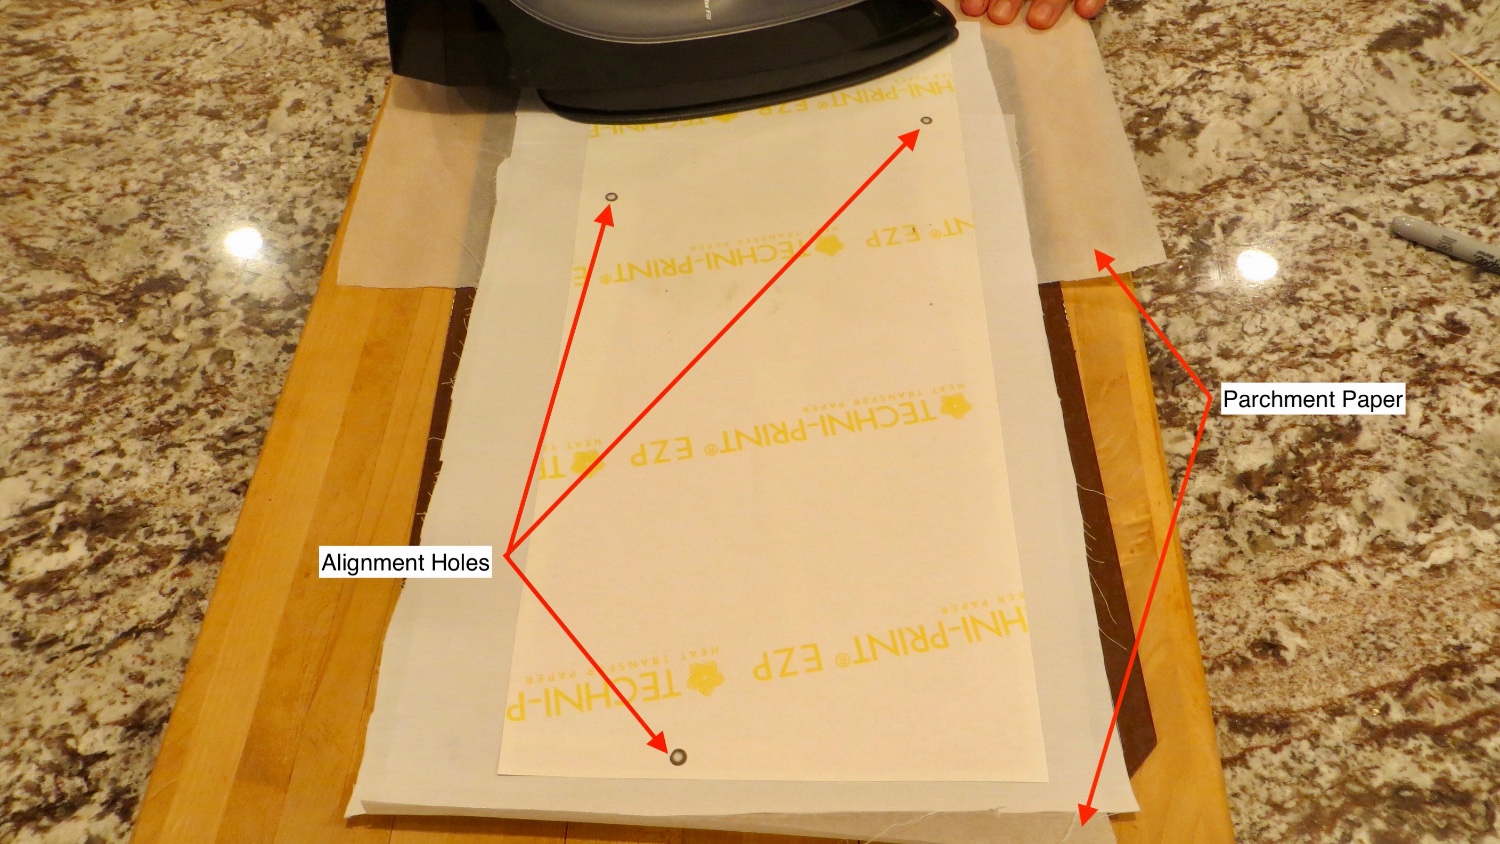
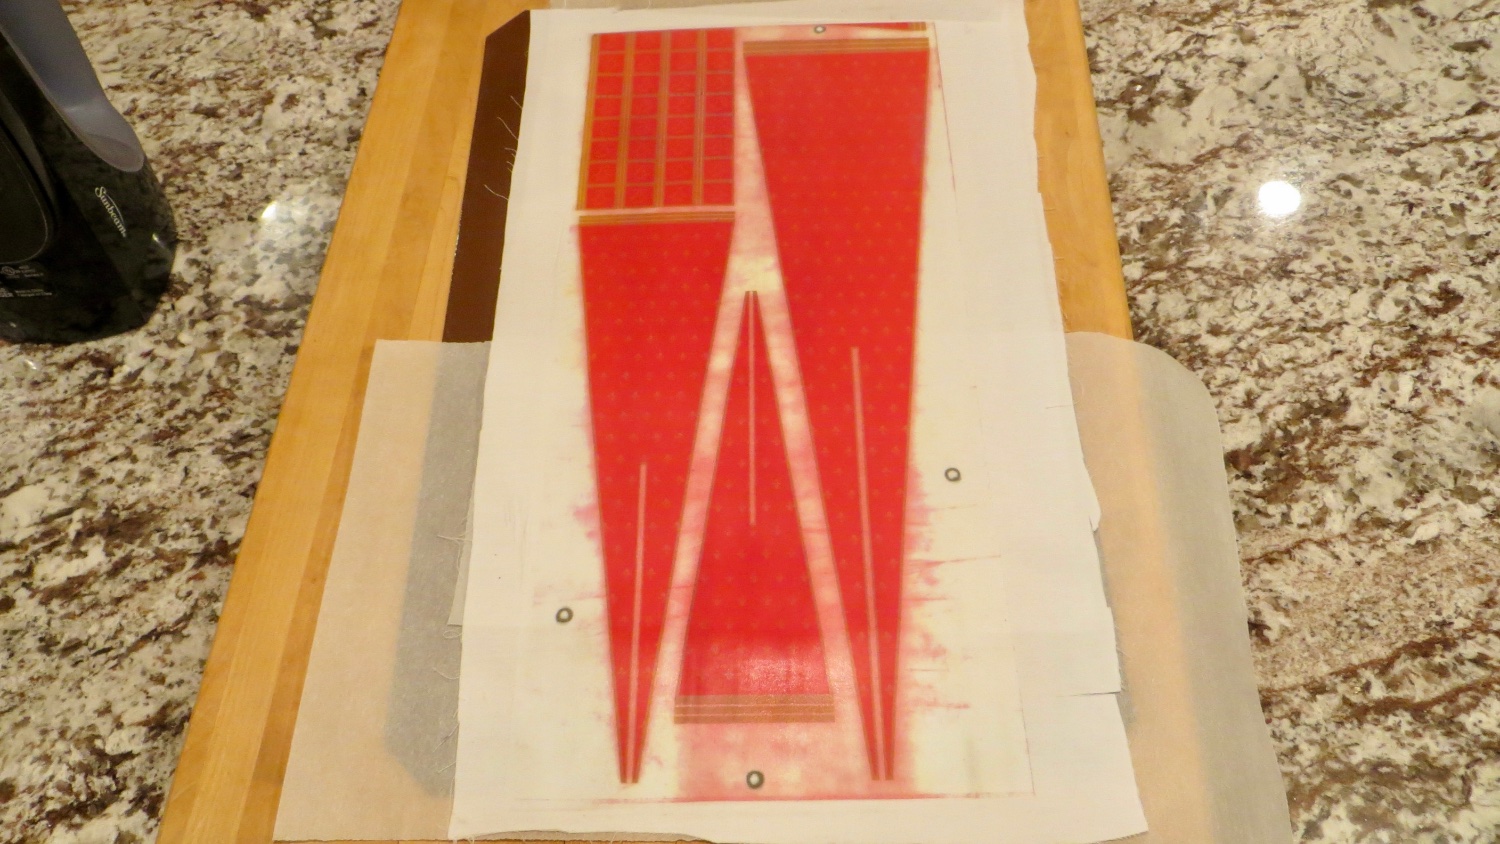
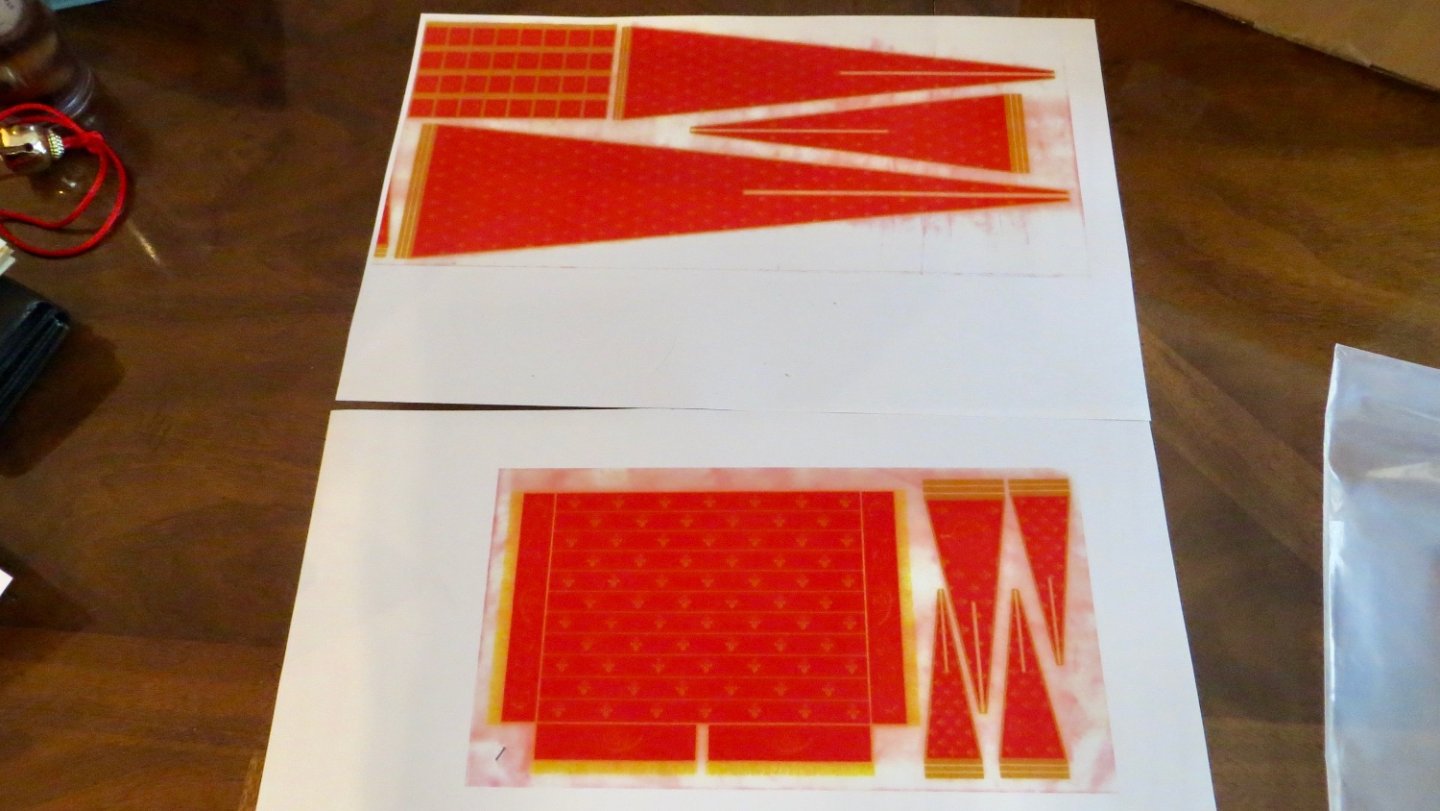
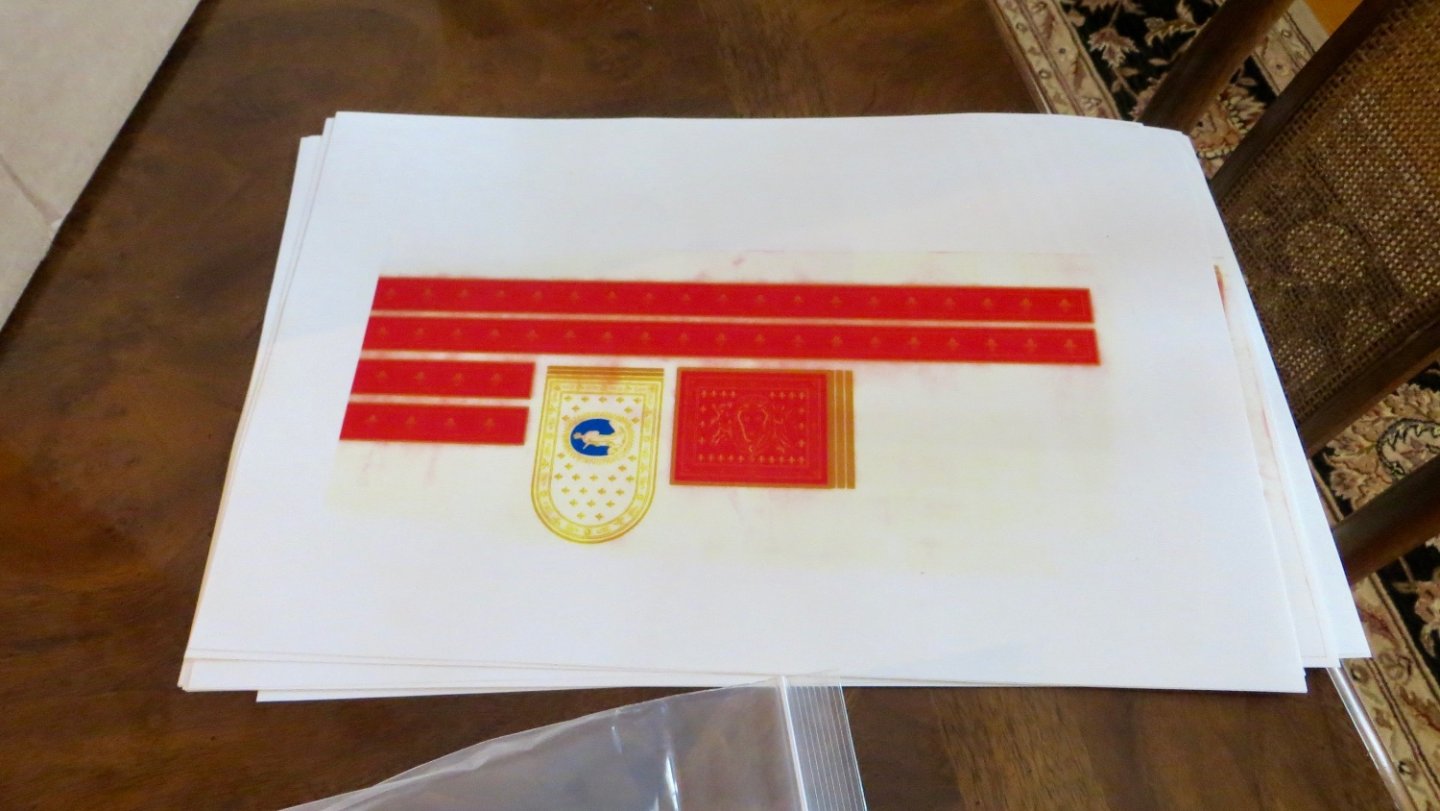
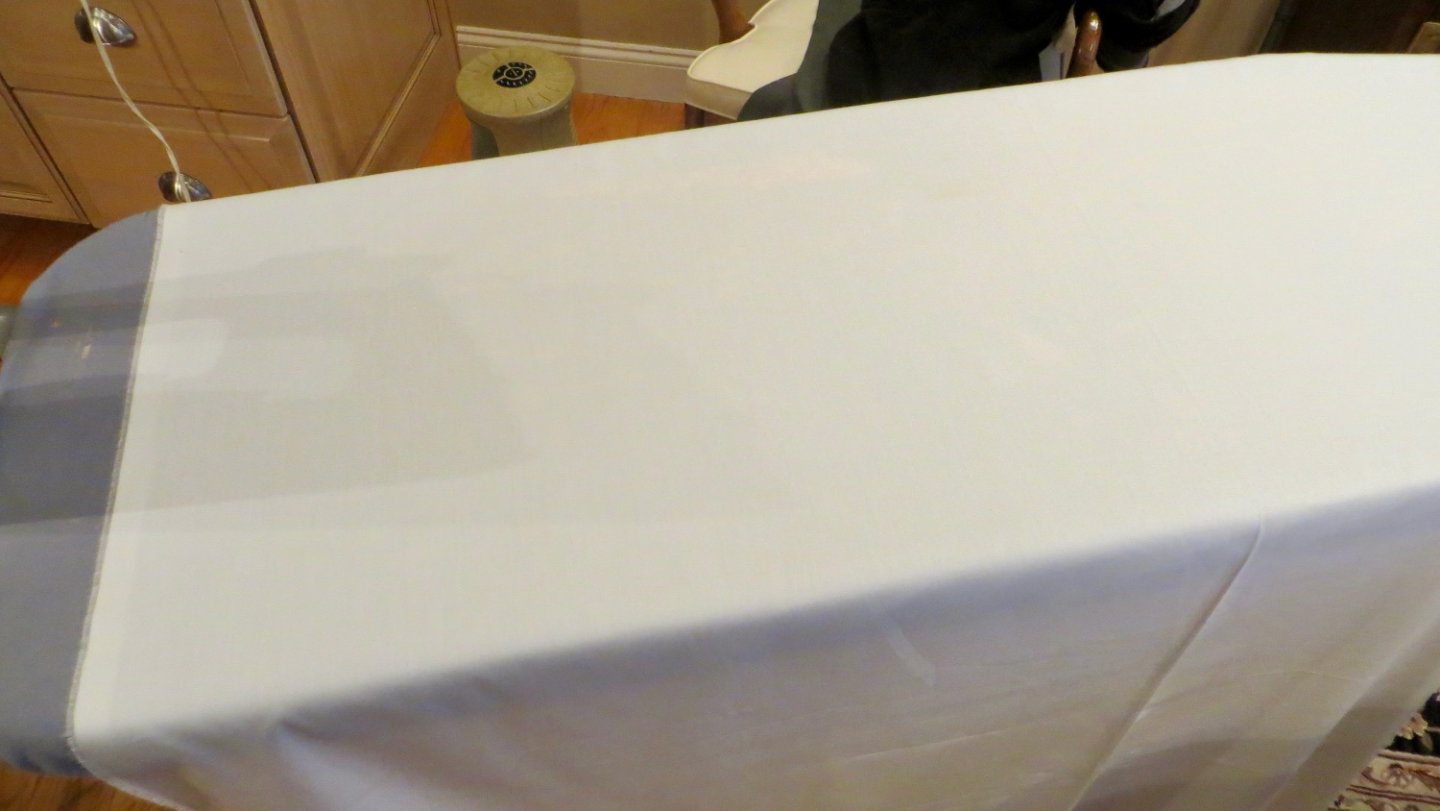
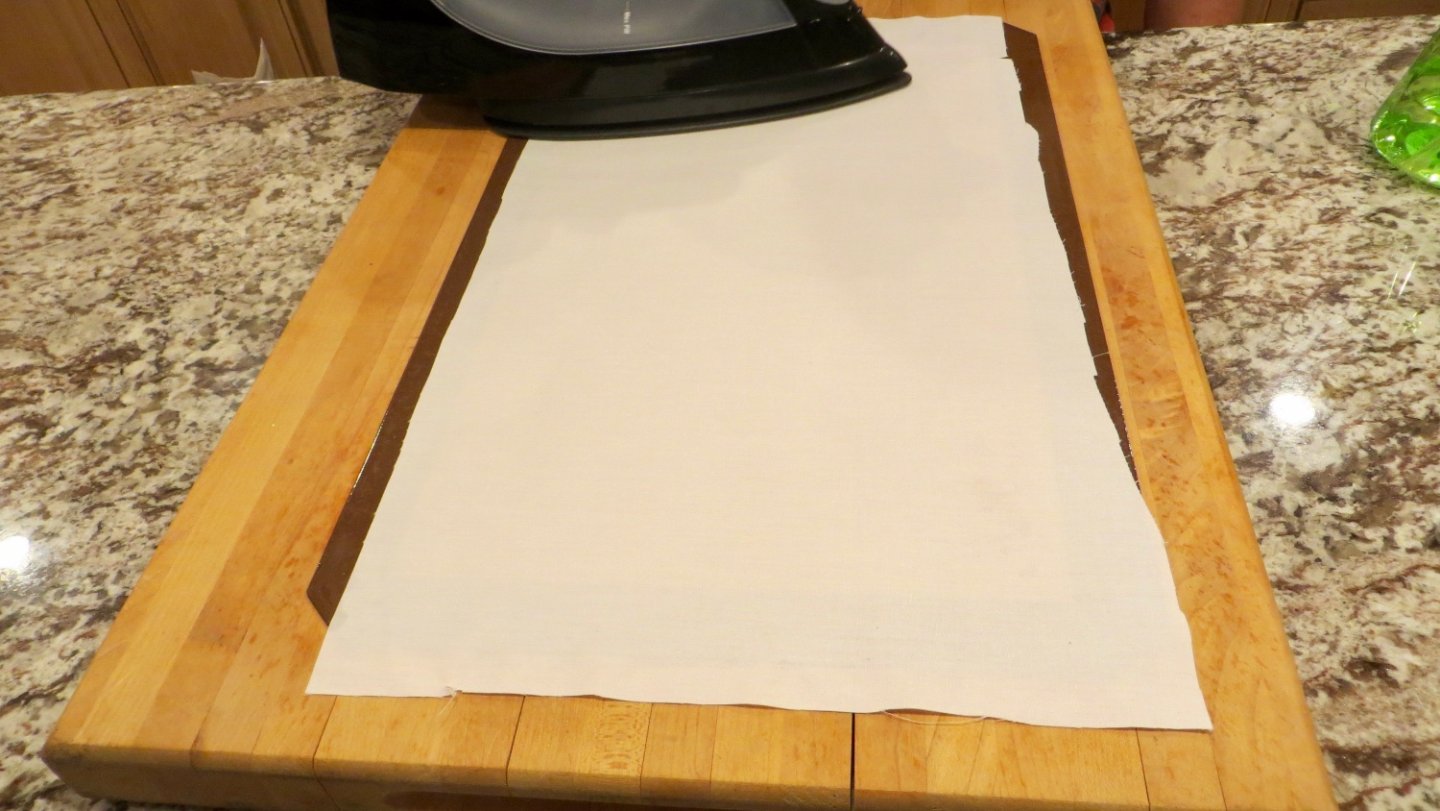
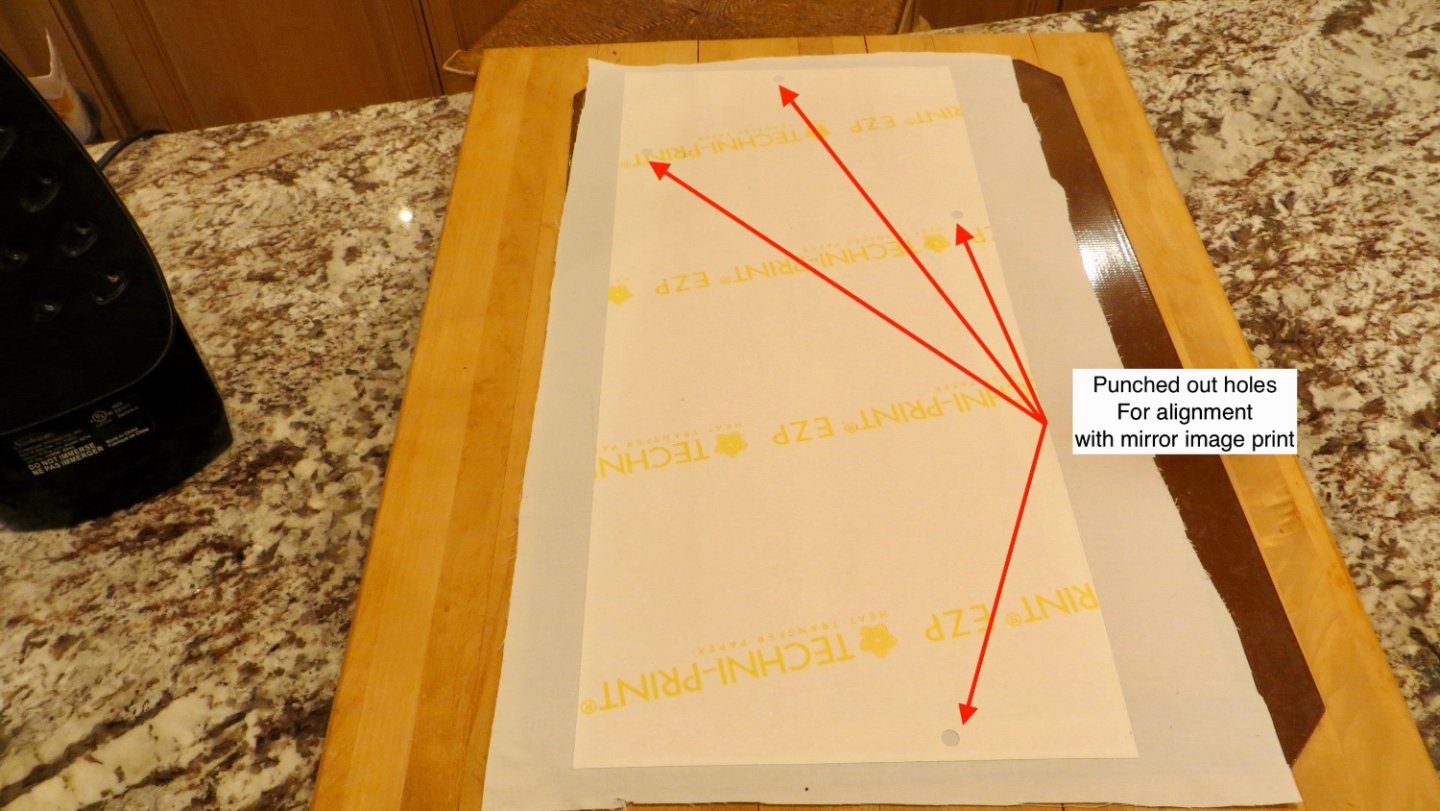
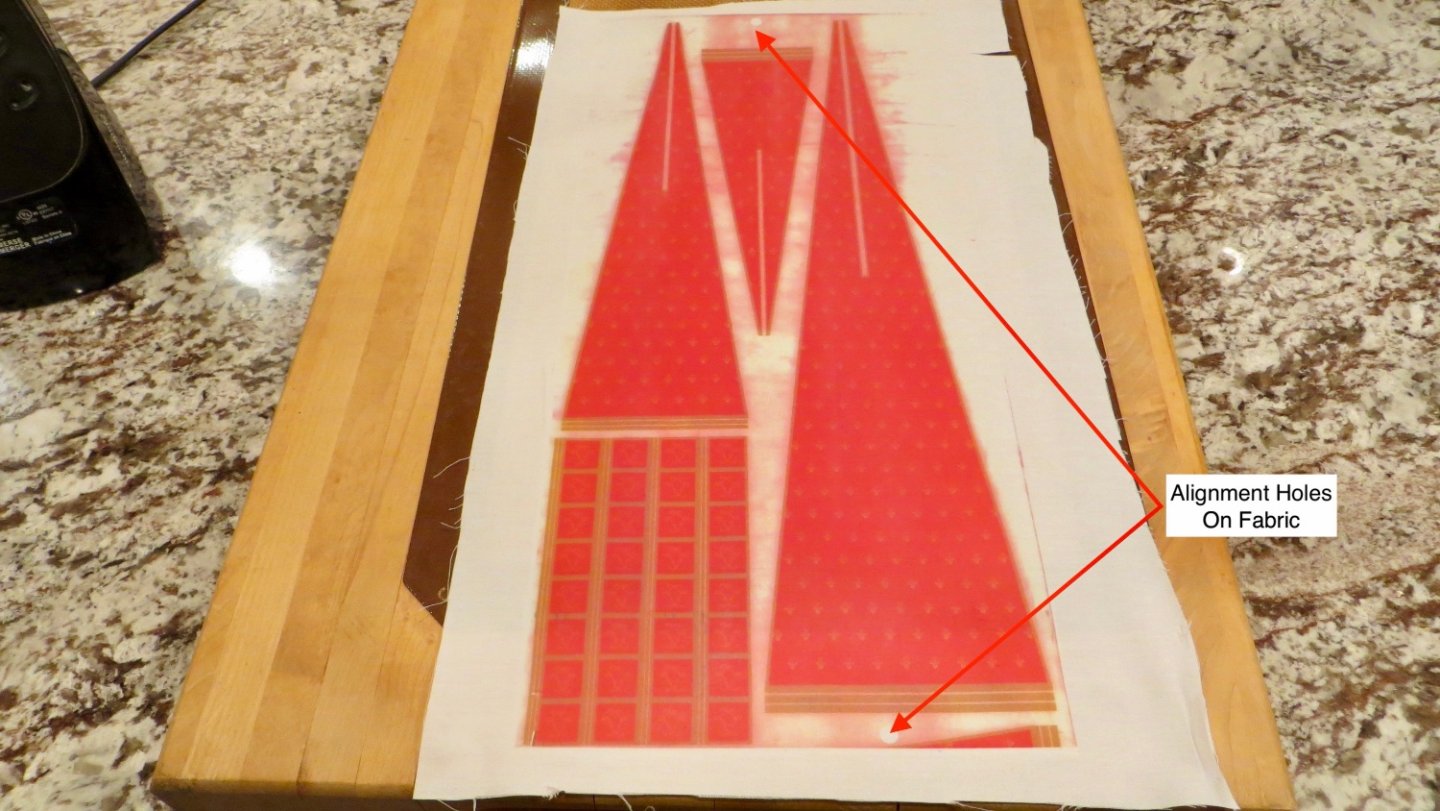
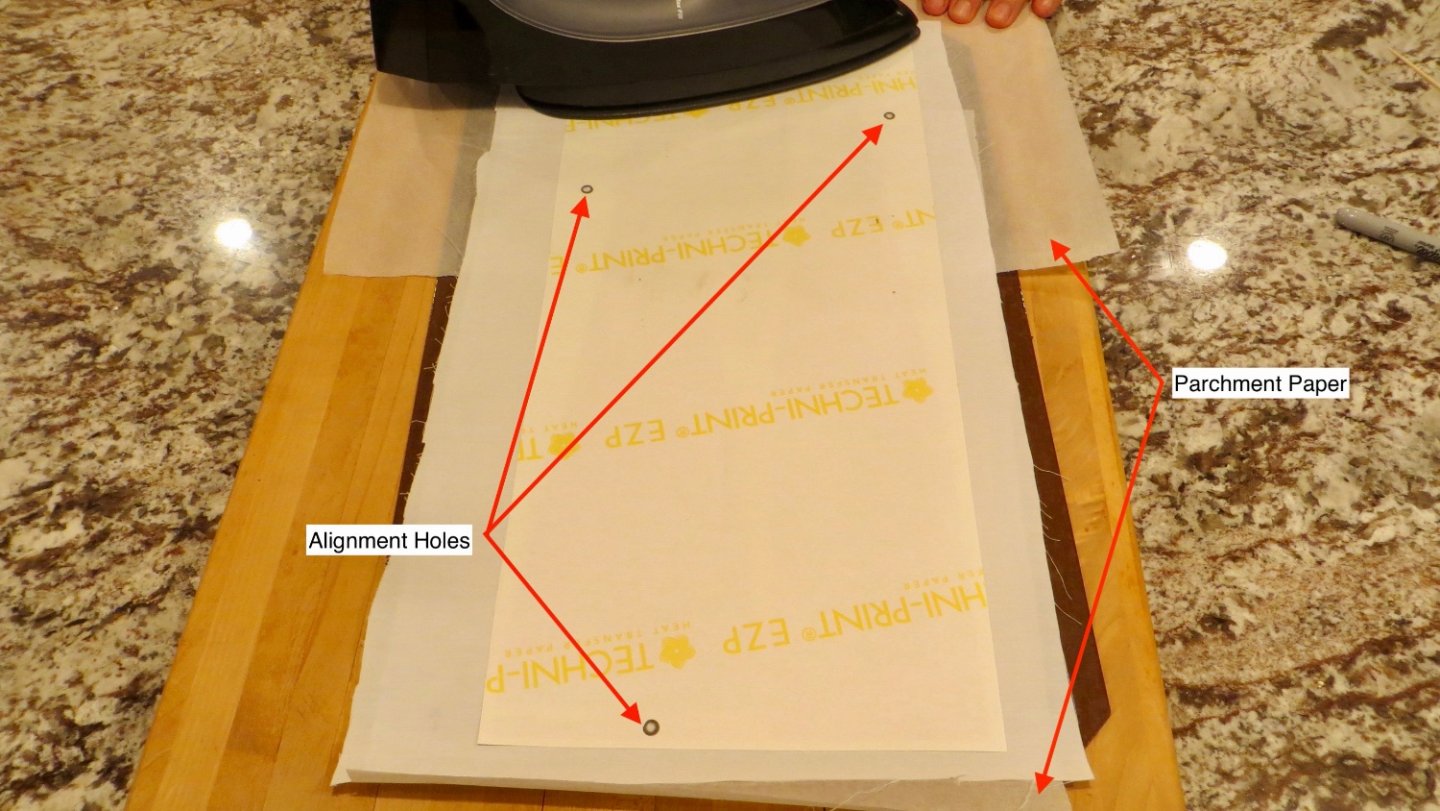
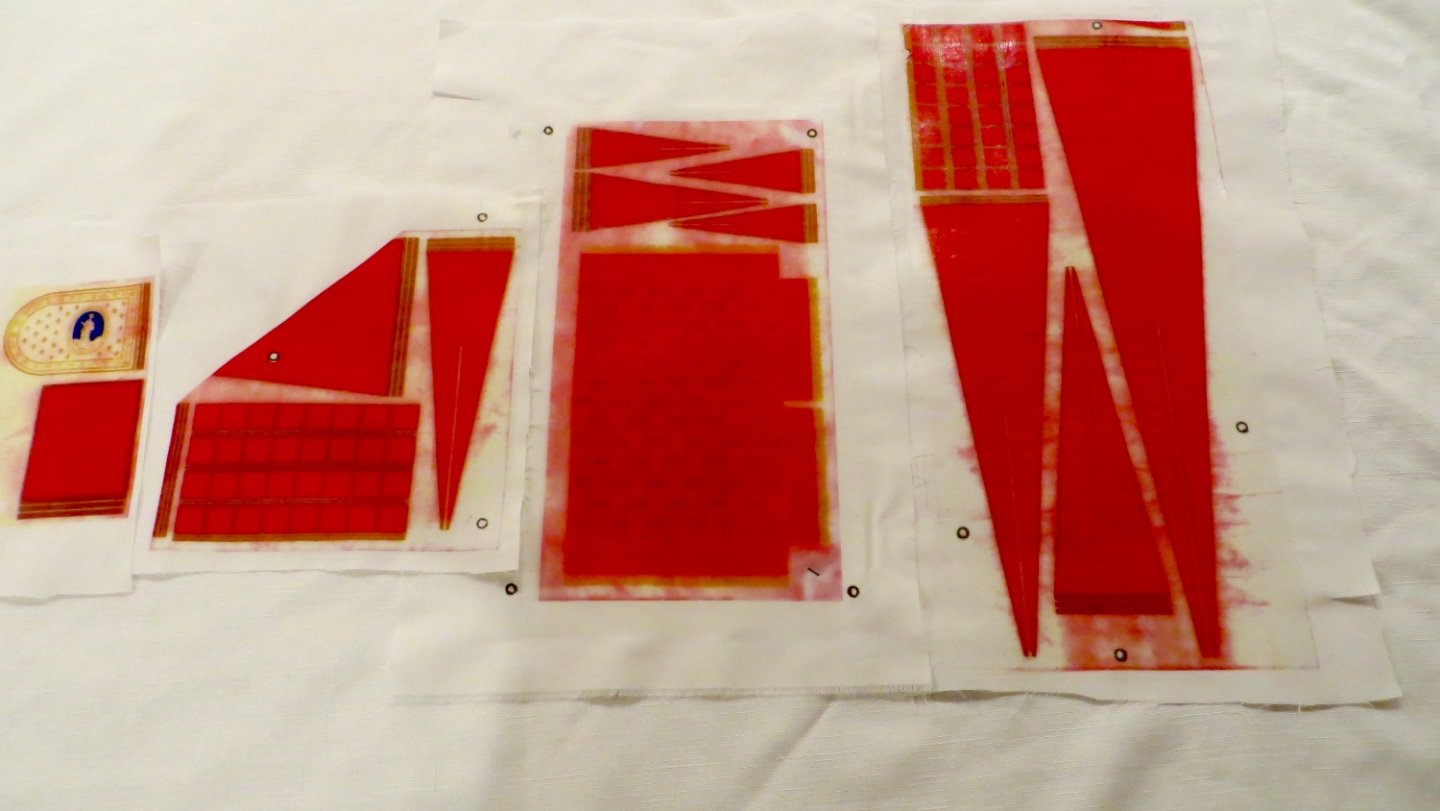
Hello, As stated above, I did not like the flag material supplied with the kit. With the help of other ship model logs on this site and also investigating on the Internet, I decided to make new flags using the transfer paper method. First step was to scan the flags that came with the kit into my computer as a pdf file. Unfortunately, my printer was not big enough to scan the large flags. So I took a trip down to my local Staples and they were able to do the job. Next step was to buy 11 x 17 Transfer Paper, which I was able to do on the internet. I tried printing the pdf files onto the transfer paper using my printer, but after a few trials, I gave up. I was not able to match the colors correctly. My printer kept making the red too dark. So I took my pdf files and transfer paper to my local MinuteMan Press store and they were able to print it correctly. I made 4 sheets of the normal (top) side and 4 sheets of the mirror image for the bottom side. (I was able to create a mirror image pdf file on my computer). Photo of some printed flags on the transfer paper. (The smudging around the flags was from the original fabric supplied by the kit) At Joann Fabric Store, I bought some thin muslin cloth for the job and ironed it flat Per instructions from the Transfer paper company, I laid a heat resistant silicon pad on top of a butcher block. Then placed a piece of the cloth on top and ironed again Before starting the transfer, I lined up the normal (top) and mirror image sides of the image and punched out some holes with a paper punch so that when I did the transfer on the back side, things would line up. Laying down the normal print side, I set my iron to the hottest setting and ironed the top of the paper (image side facing the cloth). I found out that for the ink to transfer, I really had to press down hard on the paper while moving the iron around. I was instructed to iron for 60 seconds, but I had to do it for a couple of minutes to get it right. Photo of top side transferred onto the cloth. The photo shows the alignment circles on the cloth Next step was to place a piece of parchment paper on top of the silicon pad and flip the cloth over (Top side down). The reason for the parchment paper is so the side facing down will not bleed out the ink onto the pad. With the top side flipped down, I took the mirror image transfer paper and aligned the holes and repeated the ironing process. Success! Photos of some completed flags. The small tiny gold "Fleur de Lis" symbols came out perfect. (Hard to see in the photos). And both sides lined up perfectly. Sorry about the poor quality of the photos! Next steps are to cutout the flags and mount on the model. Thanks again for the "likes" and for visiting. Frank


- 510 replies
-
- 6
-
-
- reale de france
- corel
- (and 1 more)
-
Bob Garcia, Thank you for your kind comments. Love your caption "Measure once, Cuss twice" Lol! Nothing can be more true! Tim, Thank you also, and yes, the transfer paper worked out well. I will shortly post the photos! Michael D. As always, when I am in trouble or confused, the first place I go to is your log of the Reale! That is where I first heard about transfer paper! Also, I have been practicing your method of making tassels! Thanks for stopping by! Frank
- 510 replies
-
- 1
-
-
- reale de france
- corel
- (and 1 more)
-
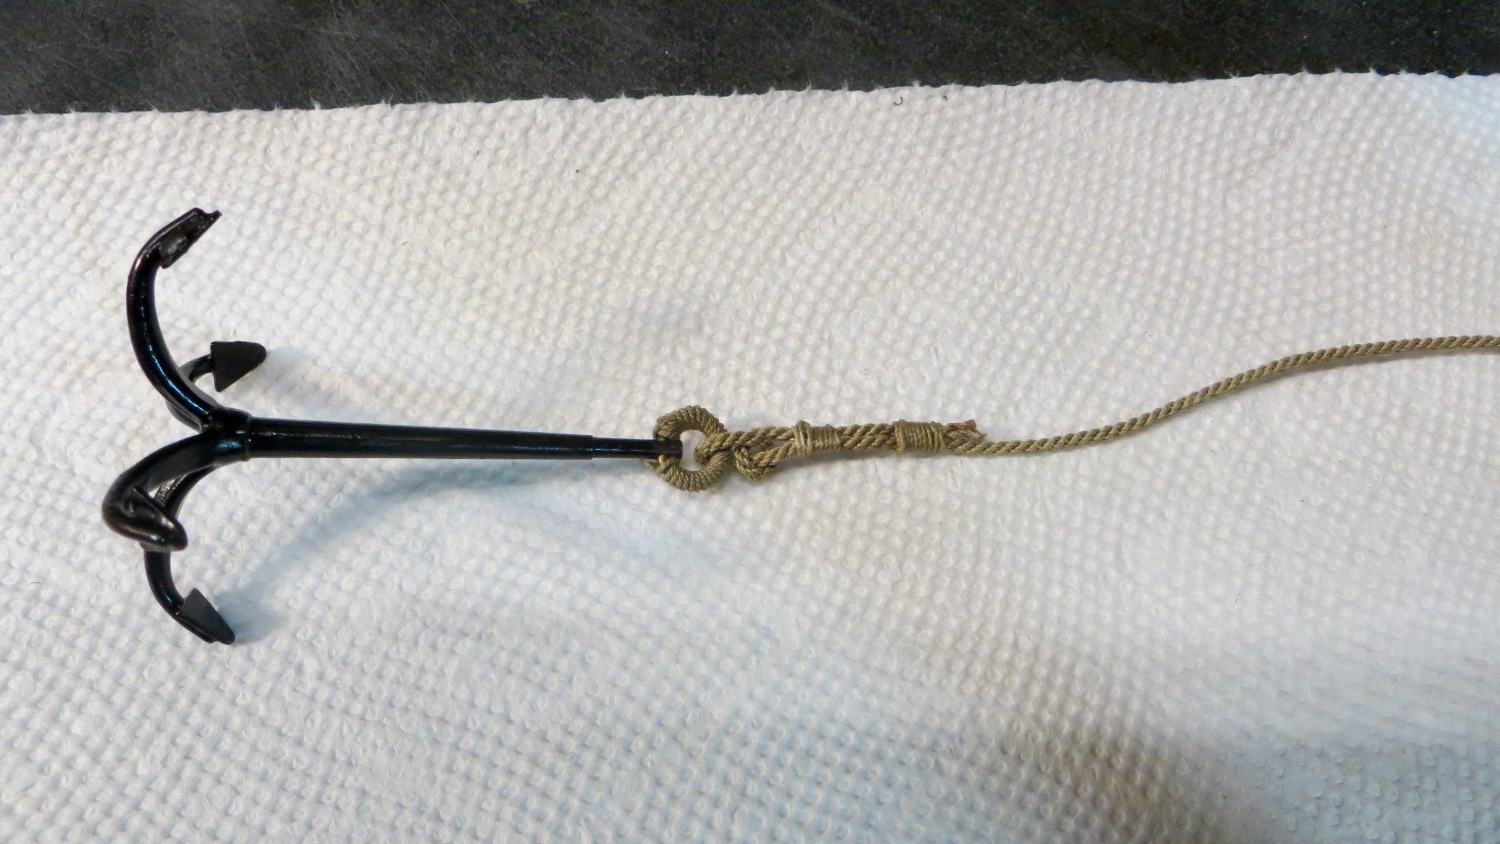
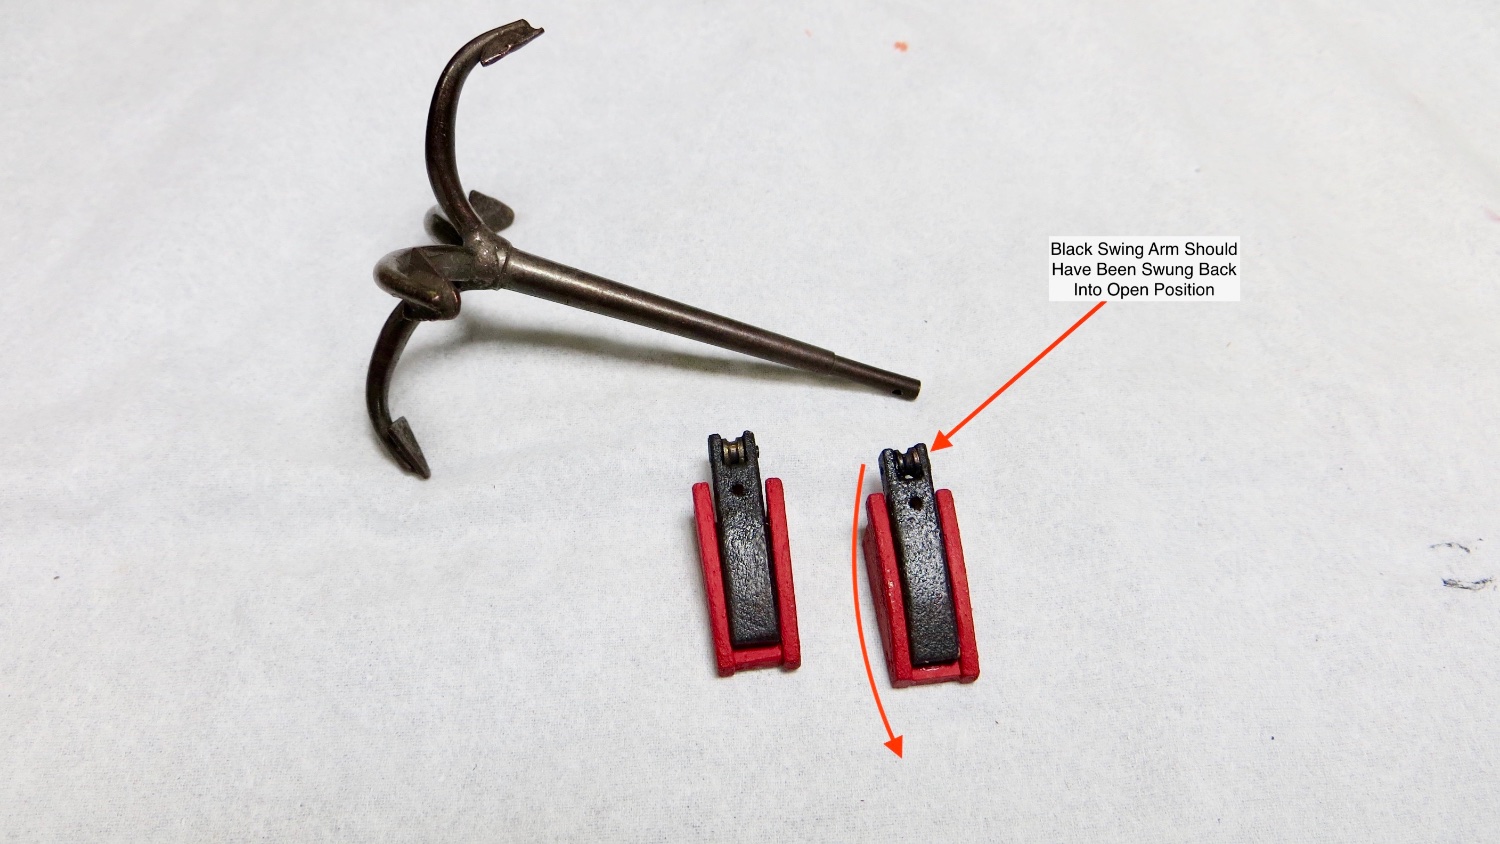
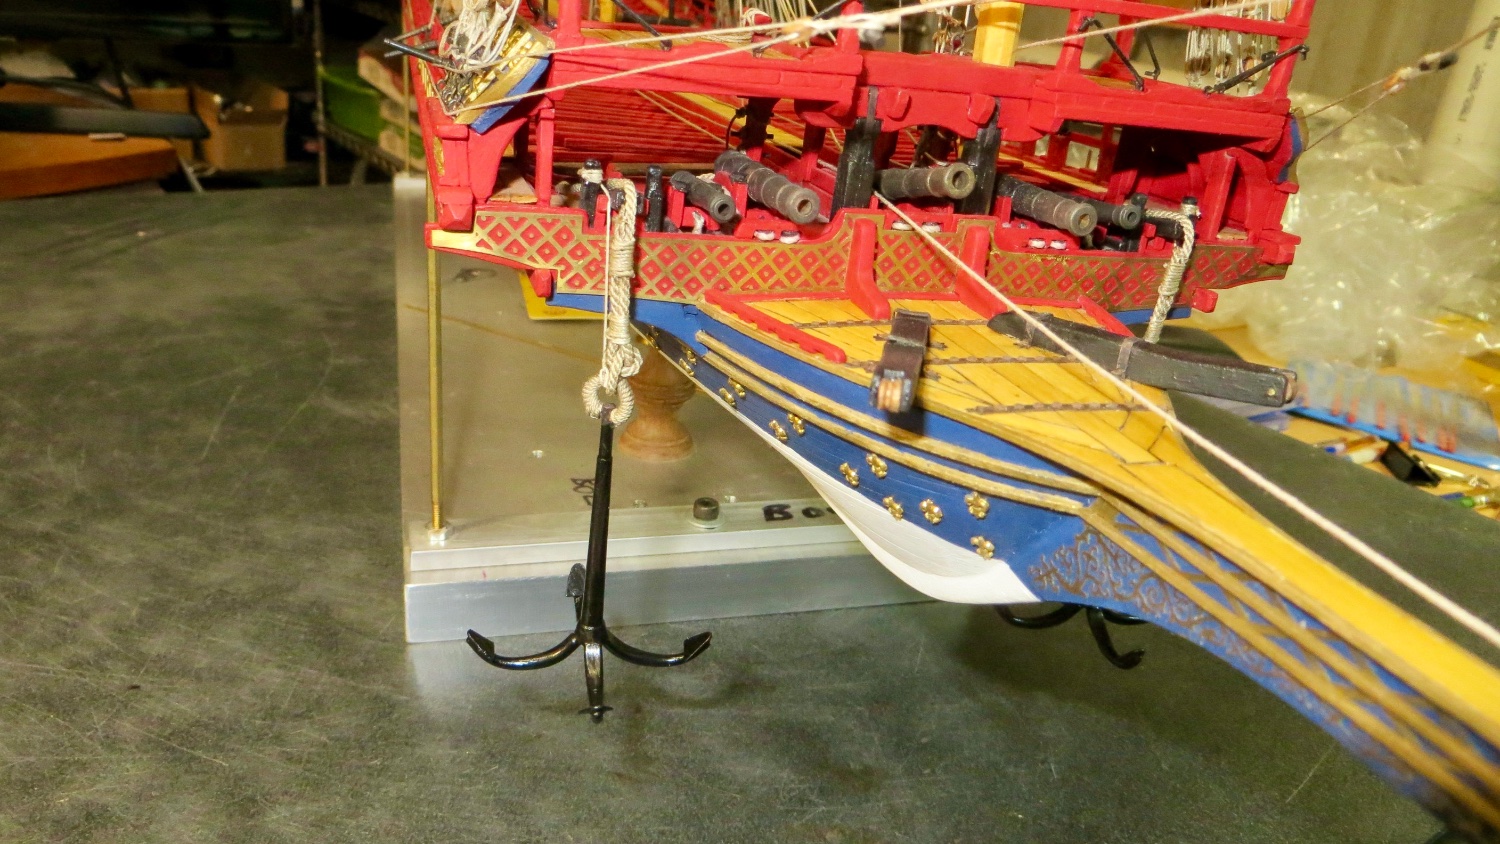
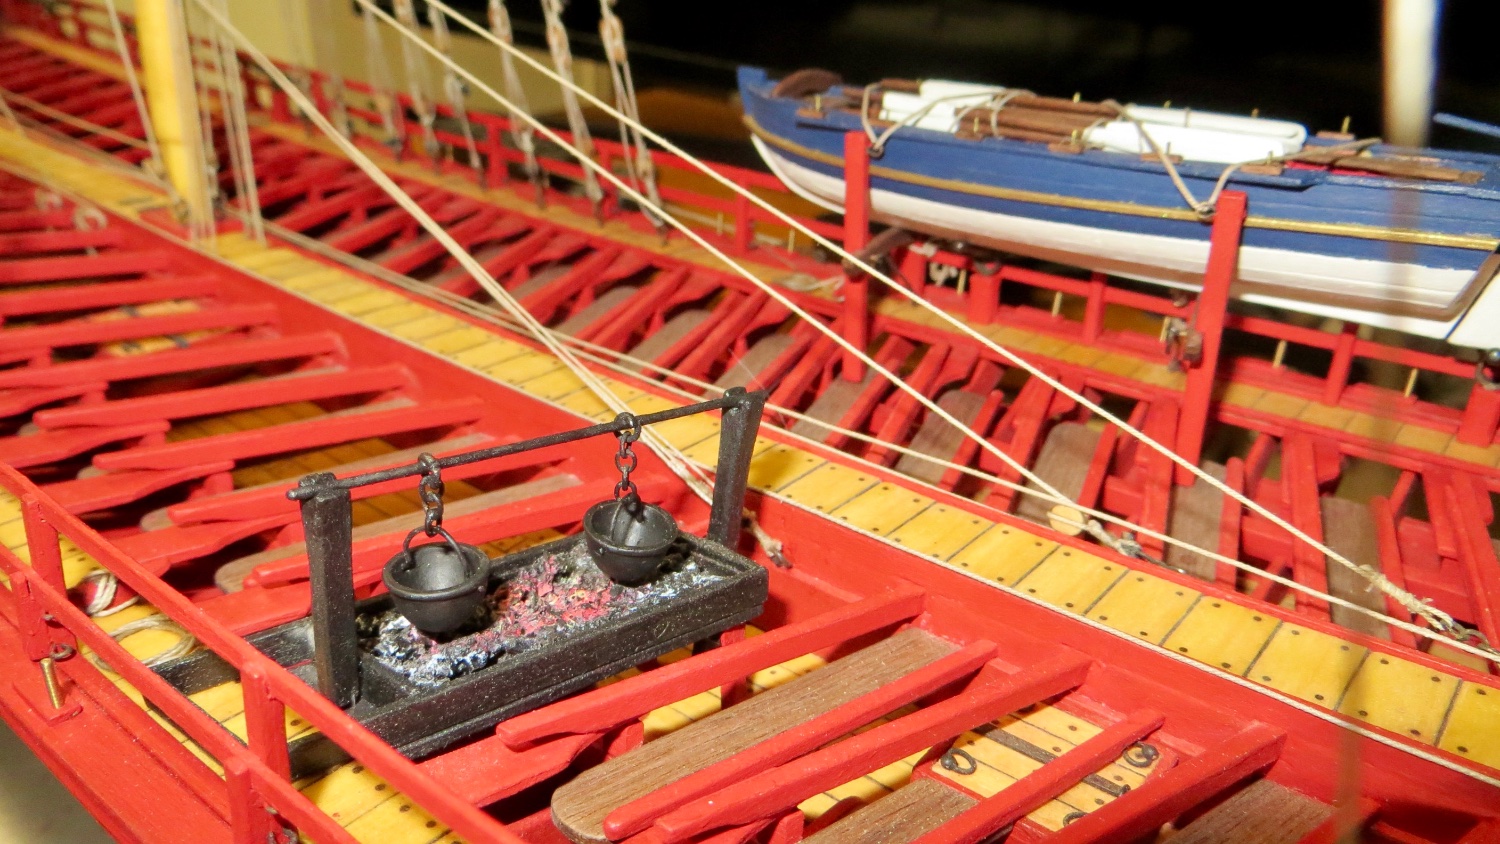
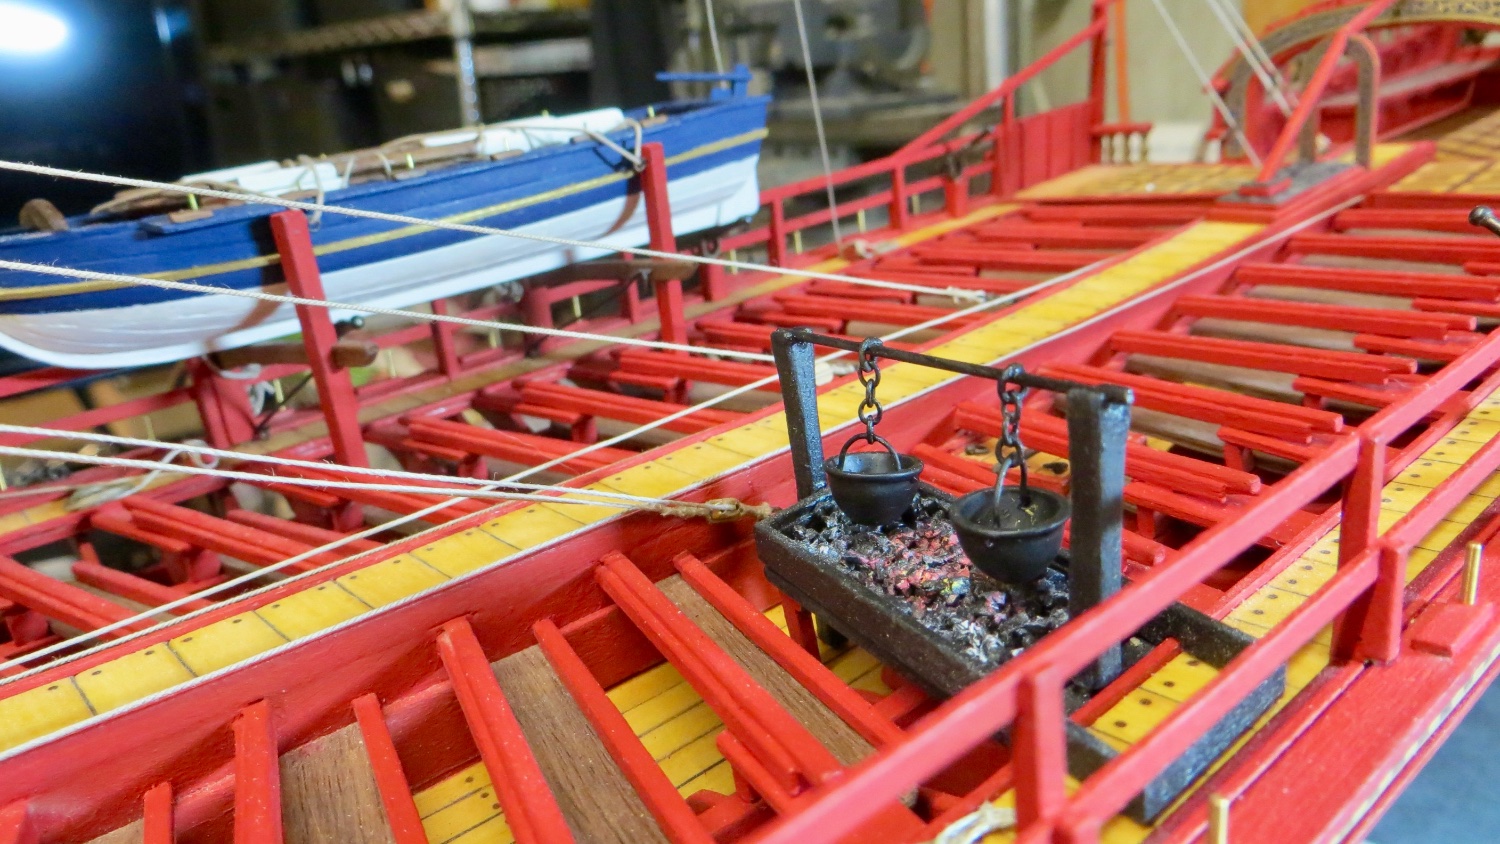
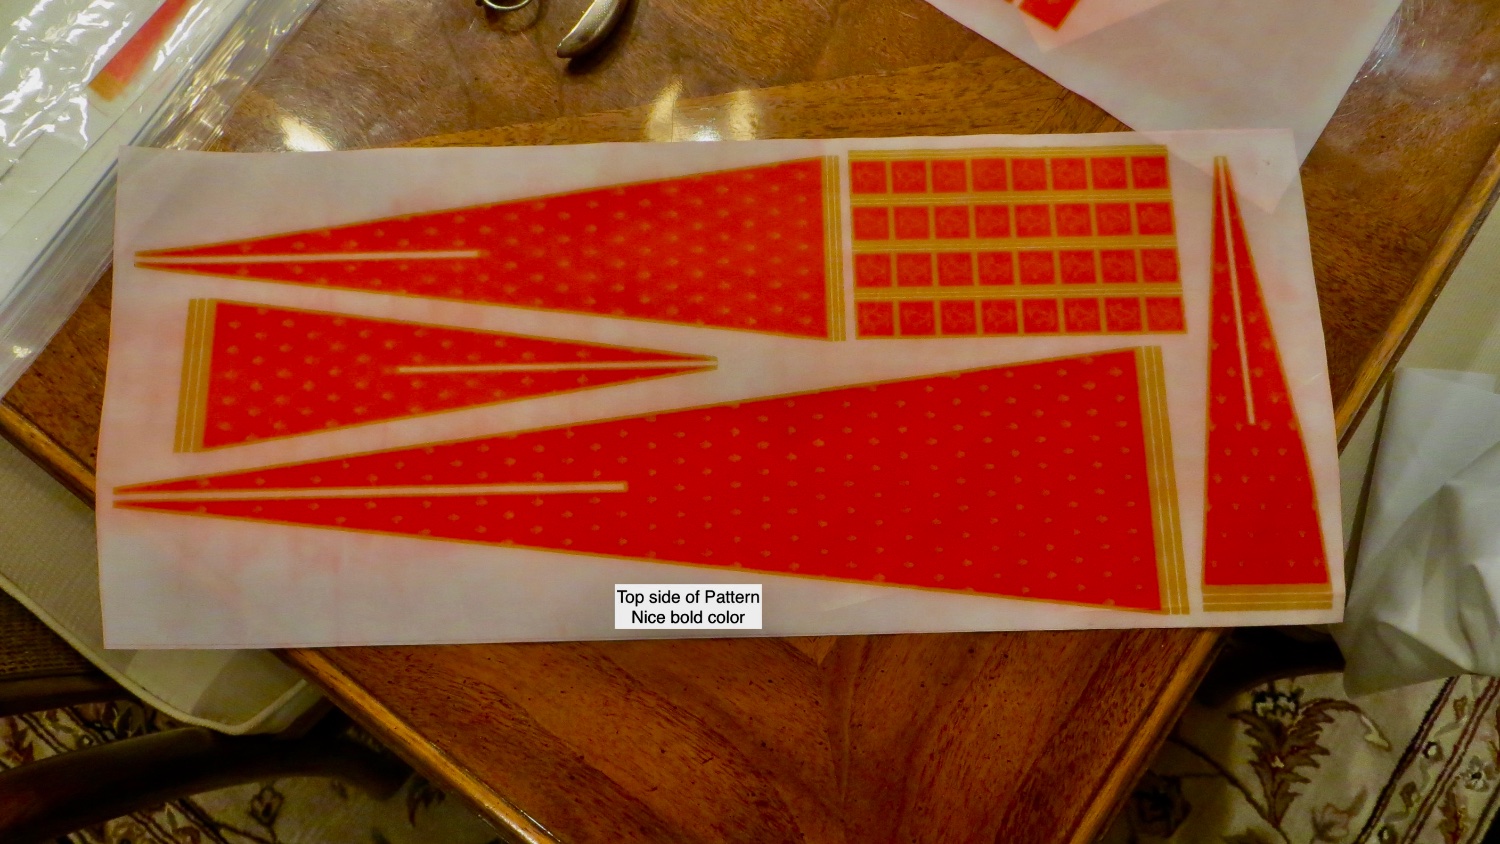
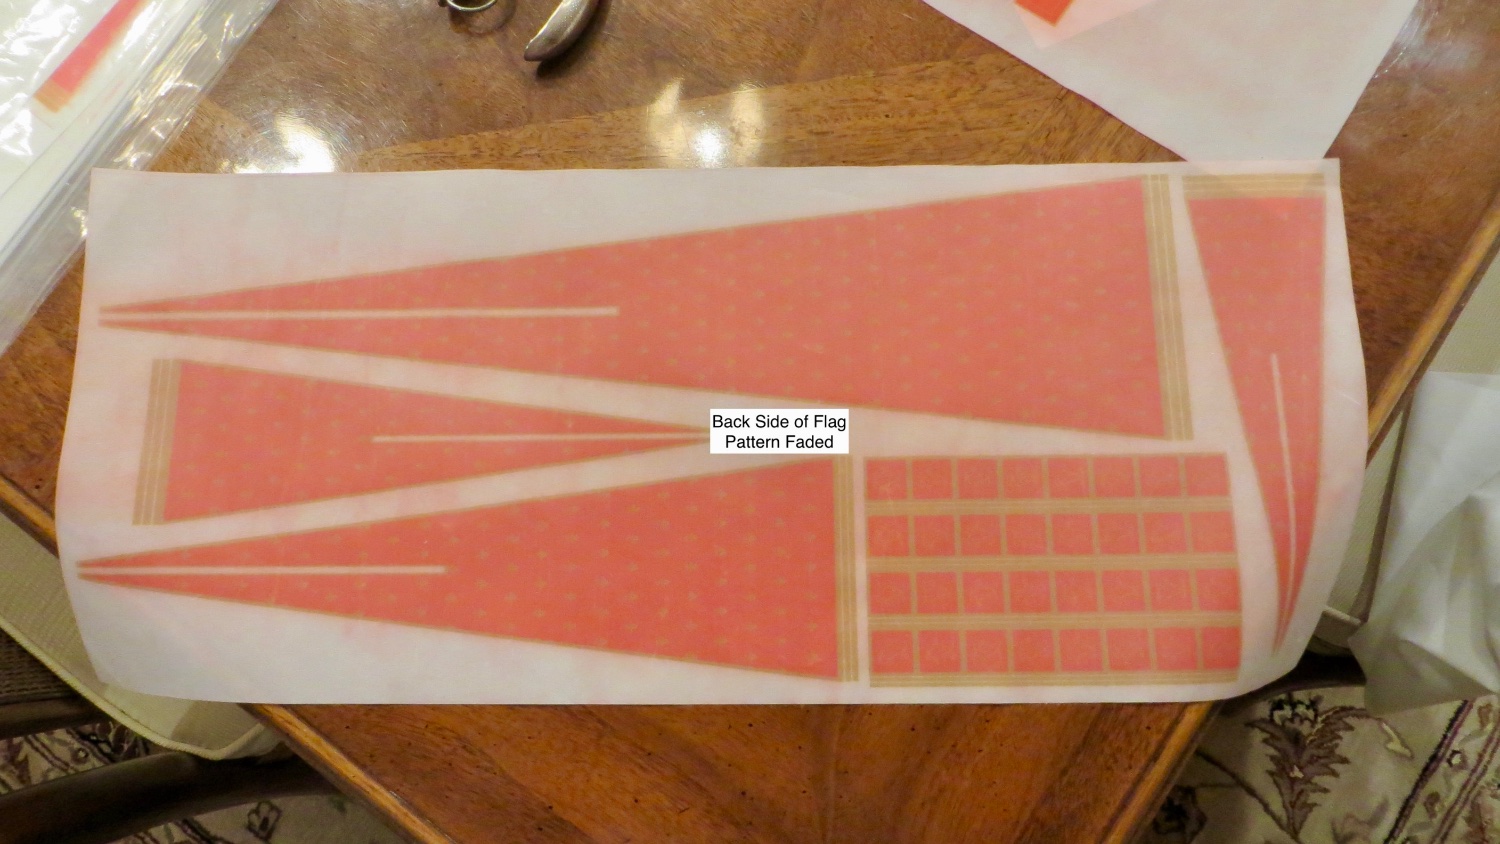
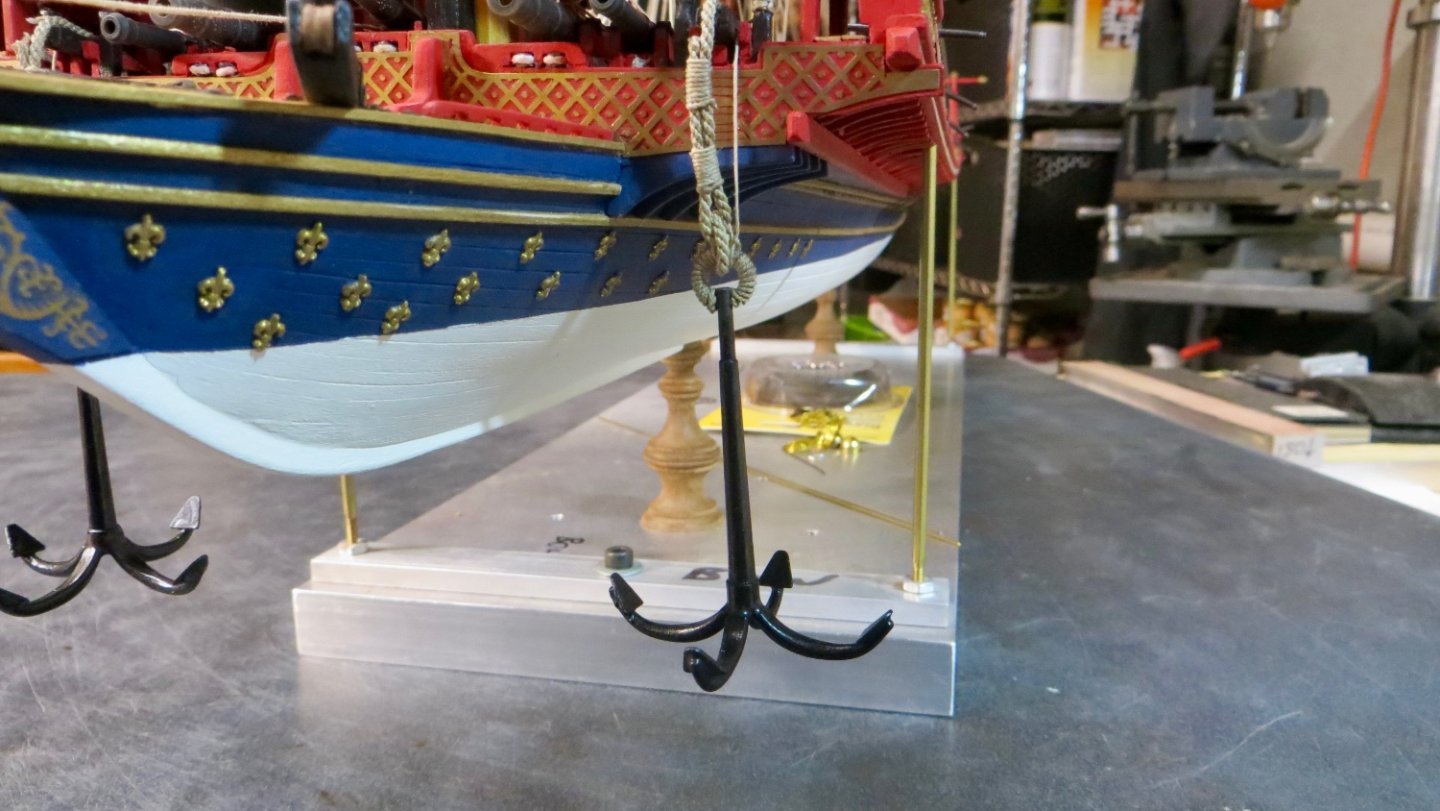
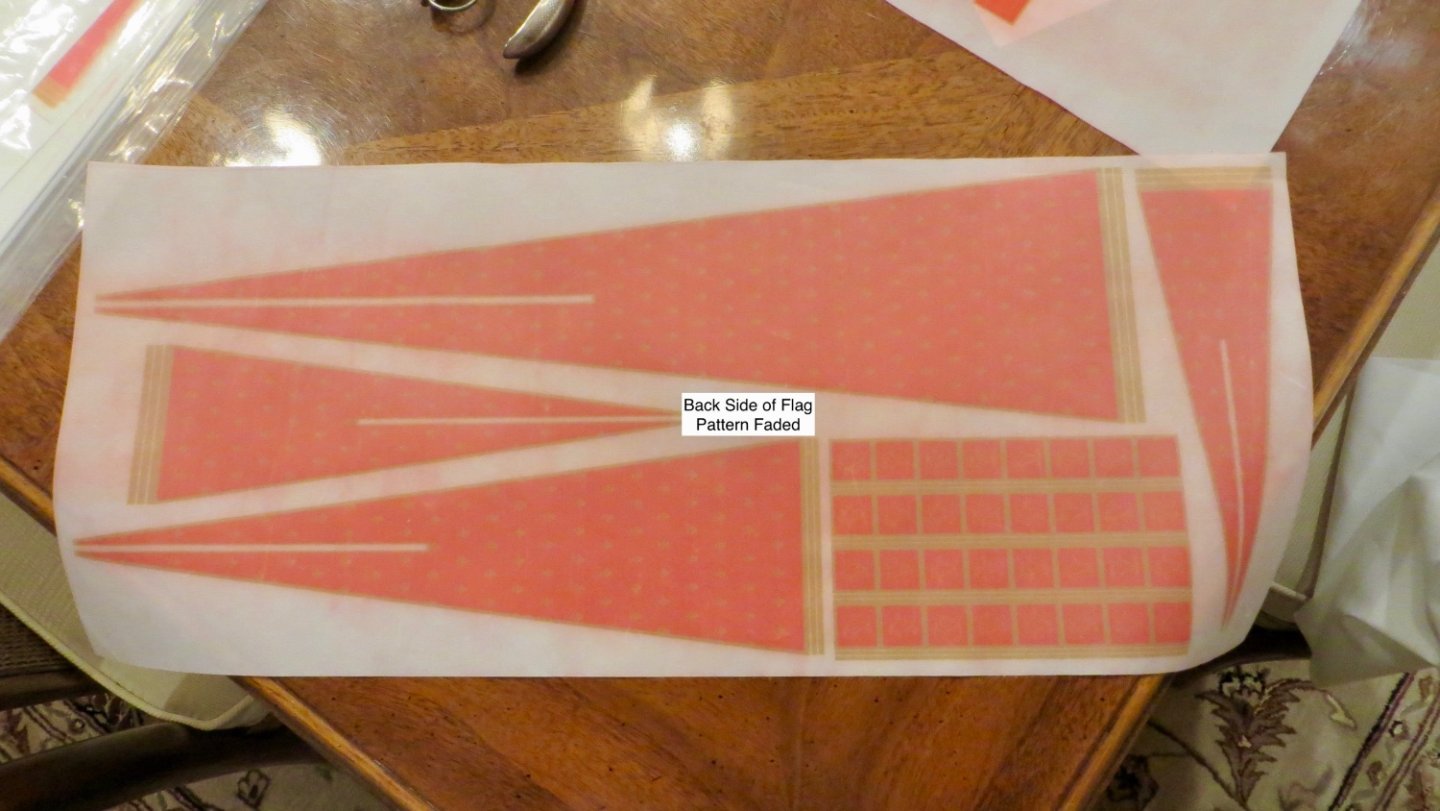
Hello, I am behind on my postings, so catching up to where I am currently. Painted and rigged up the two anchors for the ship Installing the port side anchor My thinking was to have one anchor hanging and the other shown in the stowed position. However, I messed up earlier in the build. I had glued the swing arm (shown in photo below) in the position shown. For the anchor to be stowed, the swing are should be swung back towards the stern and then have the anchor stock sitting in the open space. I tried to pry off the swing arm, but gave up before I caused any damage. As it is I have to re-align the cannon, which I knocked up a little. So I settled for both anchors hanging off the sides. Have to re-align the cannon!! Painted and installed the stern lantern Assembled, painted and installed the cooking pots My next step is to install the flags and tassels To me, the flags supplied by the kit are not that great. The top side looks good with vibrant coloring, but the back side is all faded and washed out. Top Side: Back side: So I researched other methods of making flags, utilizing the methods used by other modelers on this website and with the help of the internet. I believe, after a lot of trial and error, I was successful in using the transfer paper method and reproducing the flags to look better. In a couple of days, I will sort out the photos and post the method I used. Thanks as always for stopping by. Frank


- 510 replies
-
- 7
-
-
-
- reale de france
- corel
- (and 1 more)
-
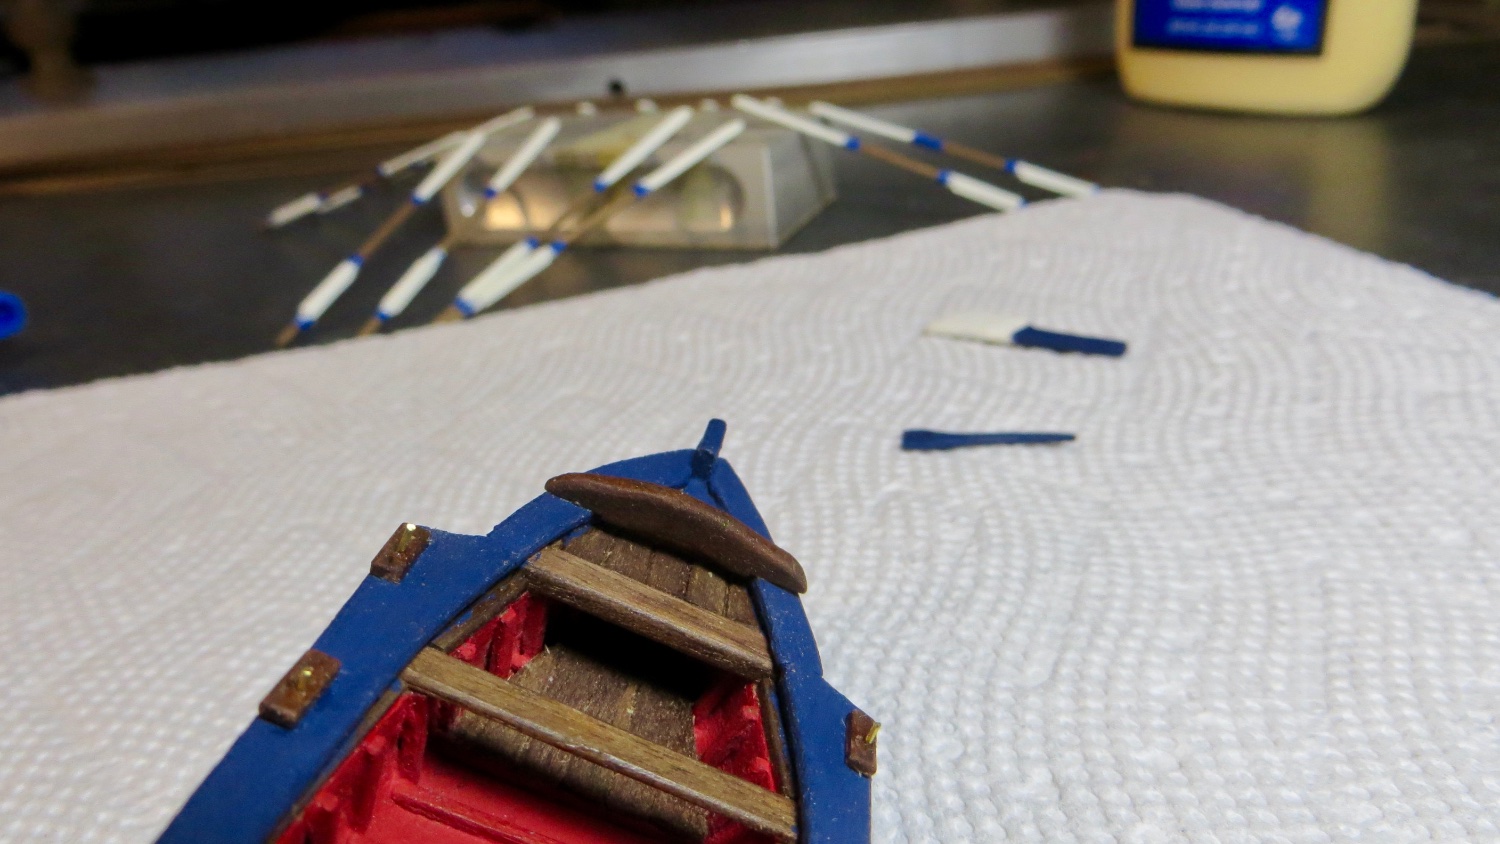
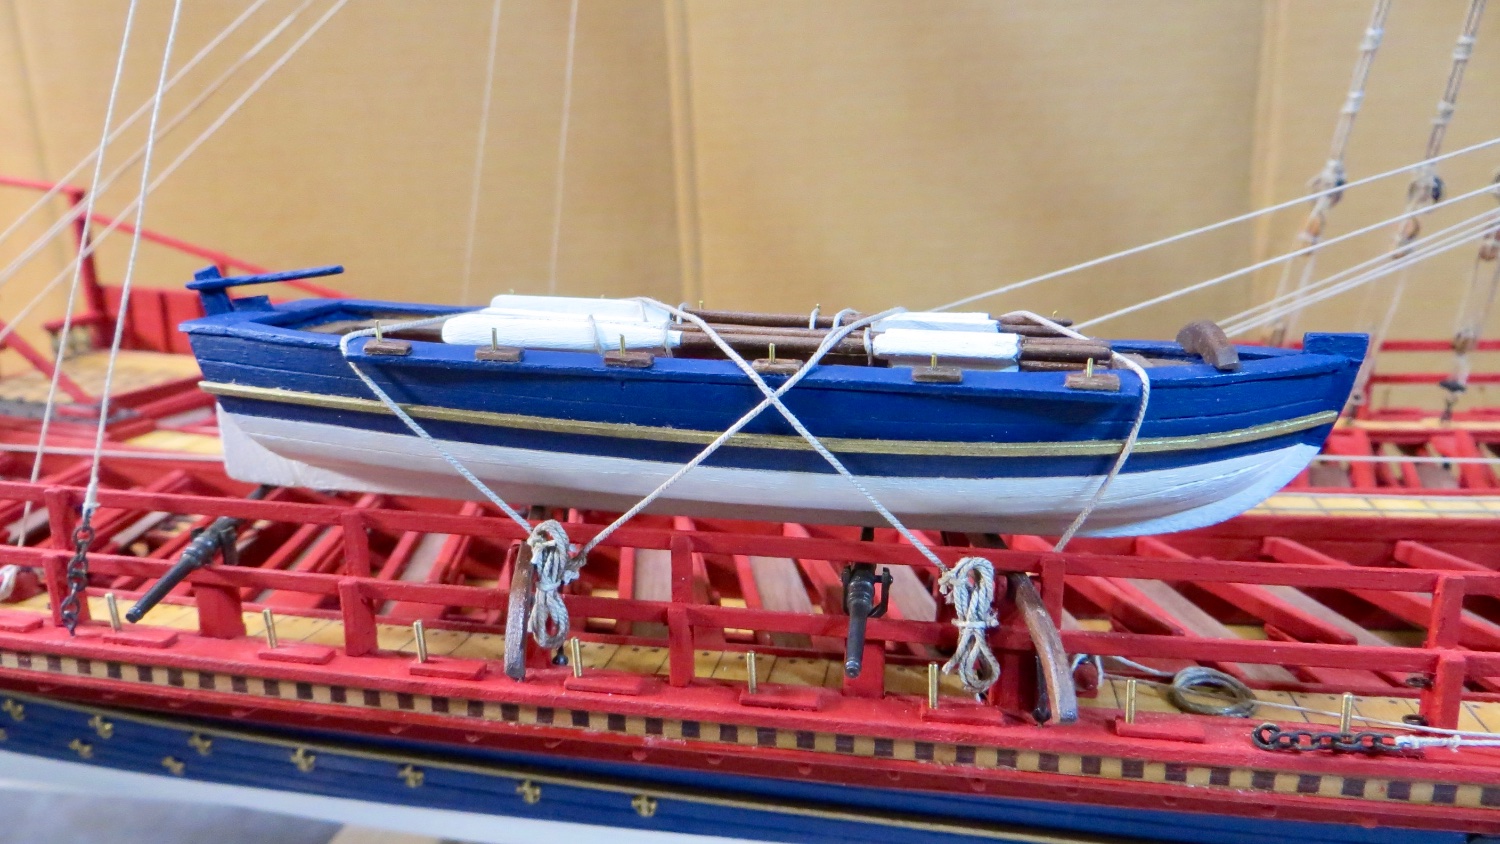
Thanks Michael and Tim! Appreciated! The launch is not glued to the davits, but just held on by the lashing ropes. (Just in case I have to remove the launch temporarily to install the oars!) Yes, not too far from the end!! Frank
-
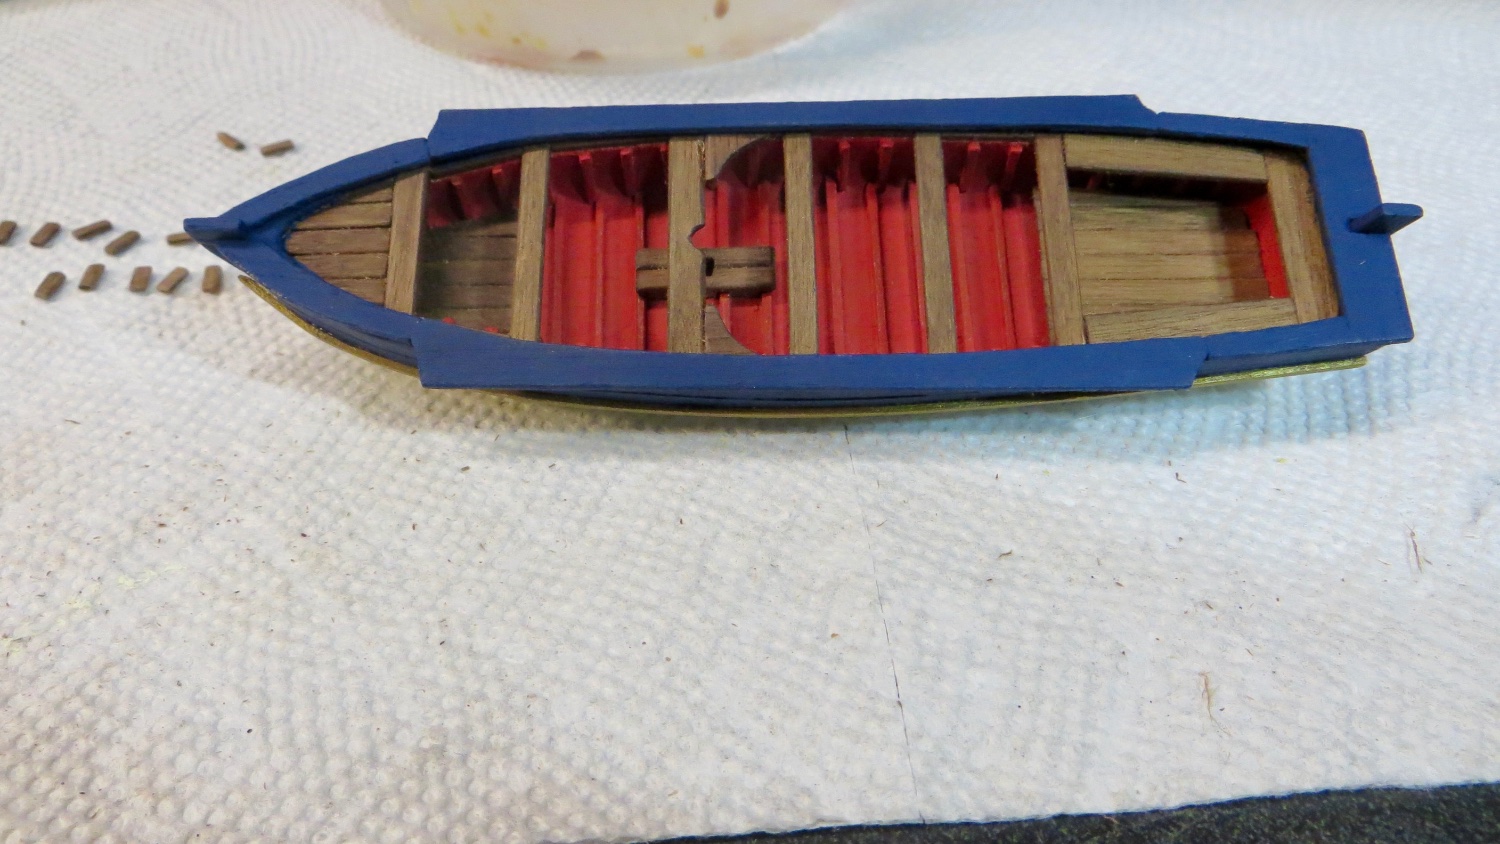
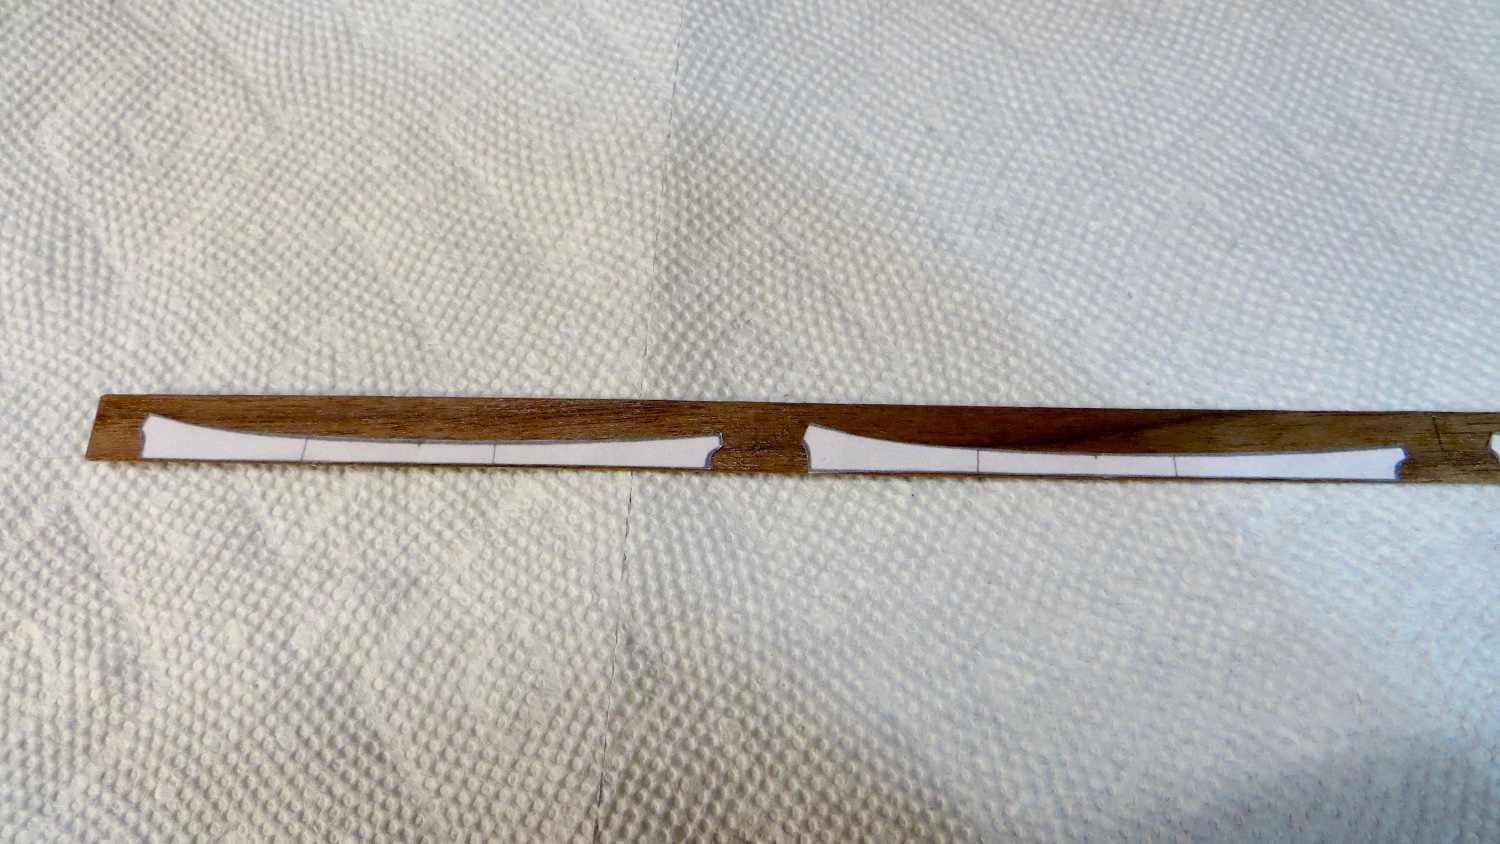
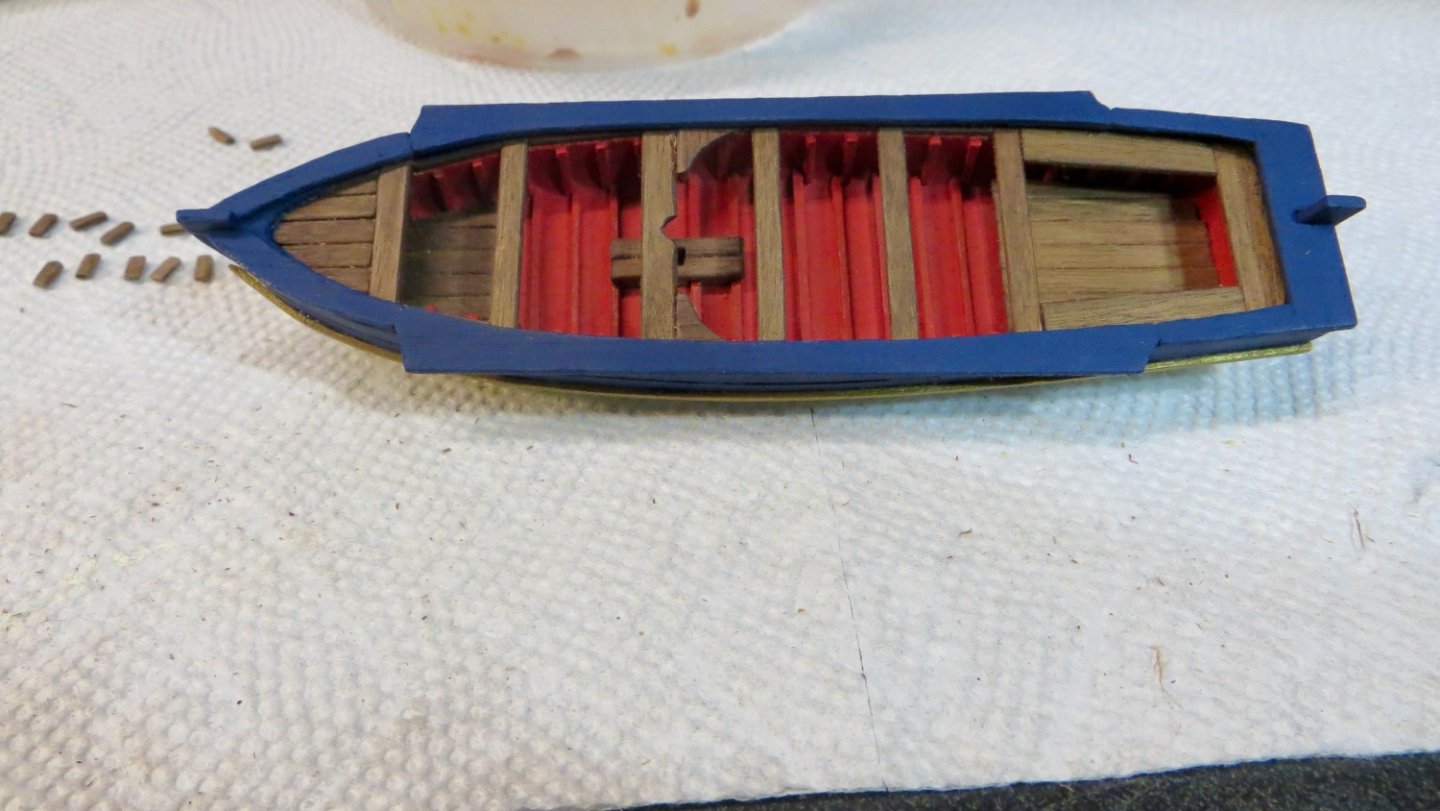
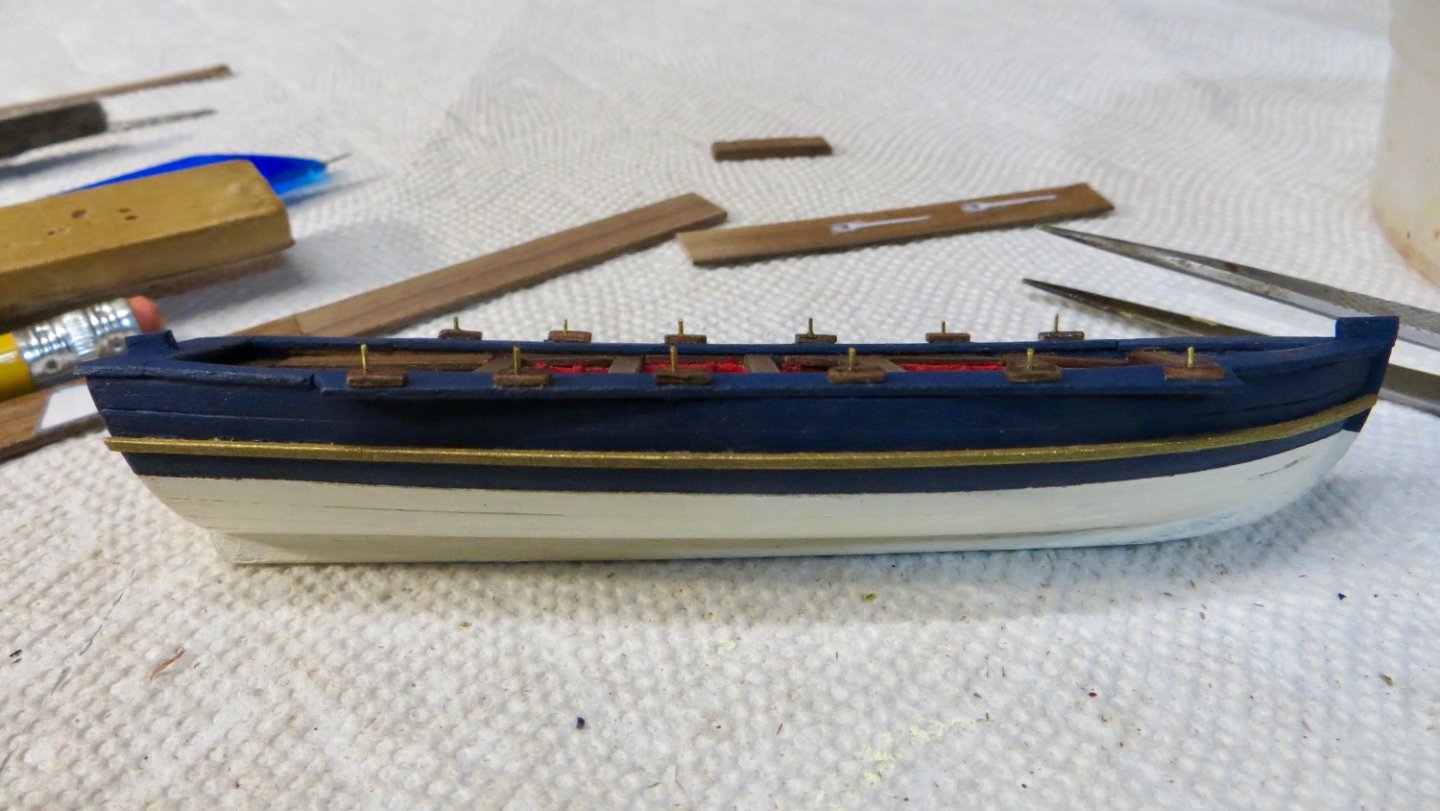
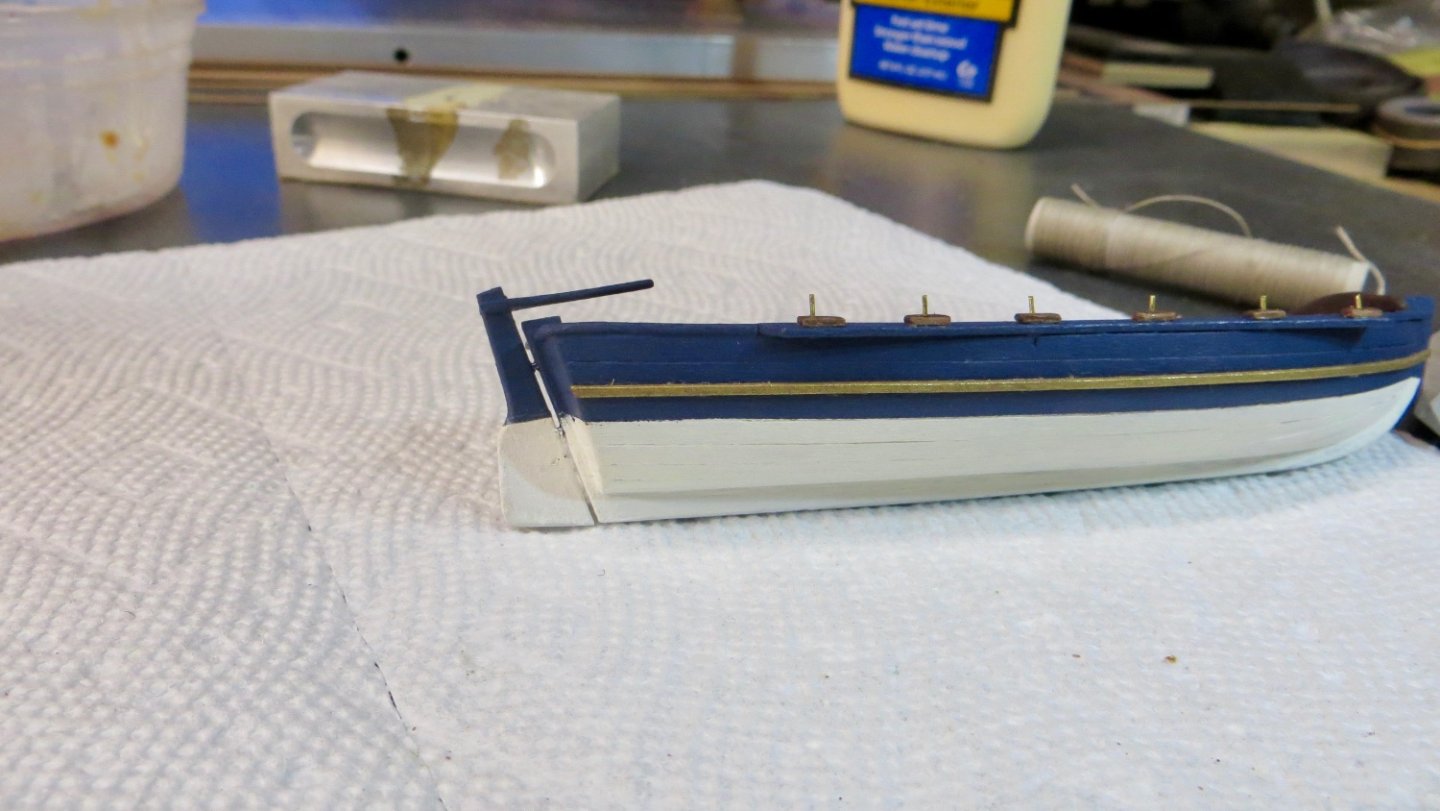
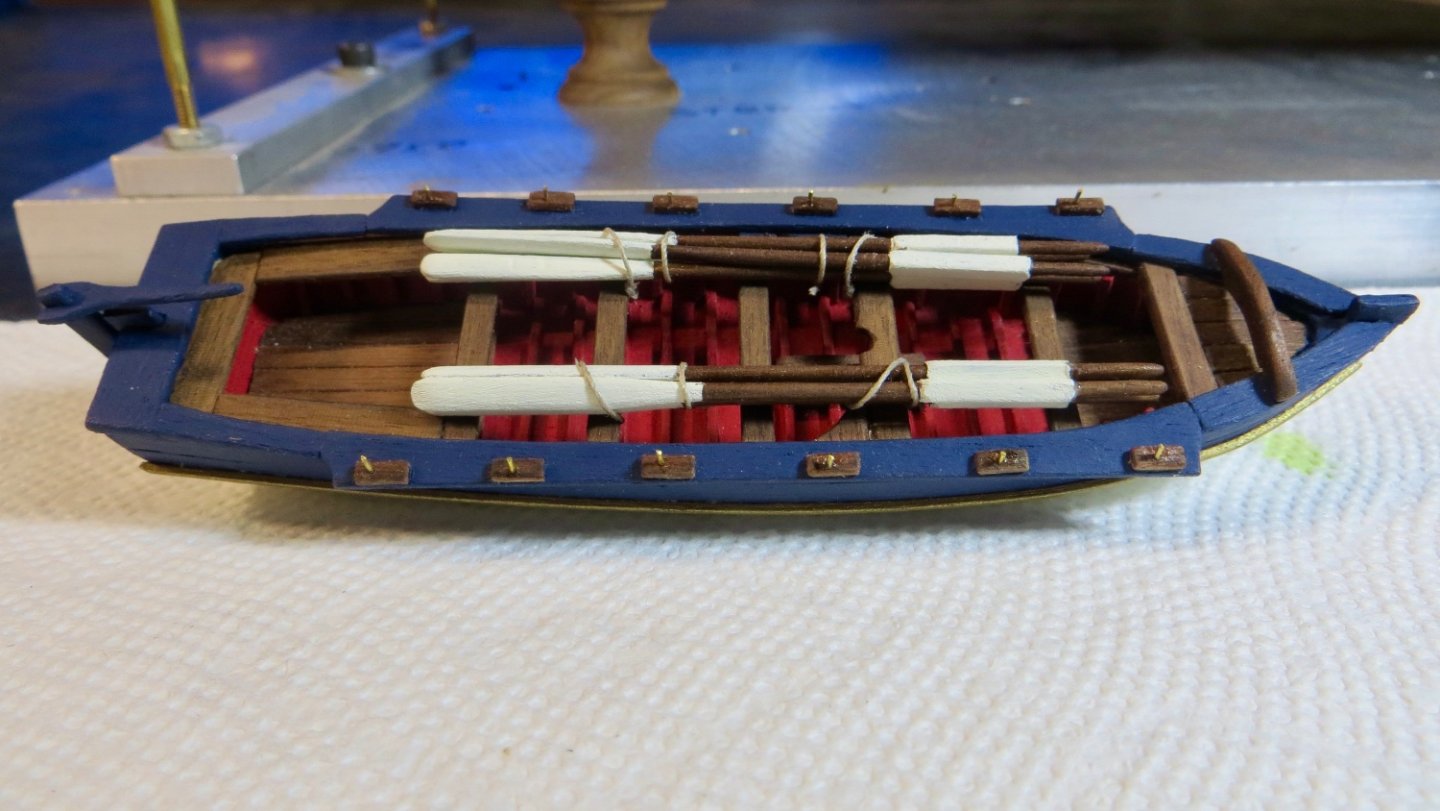
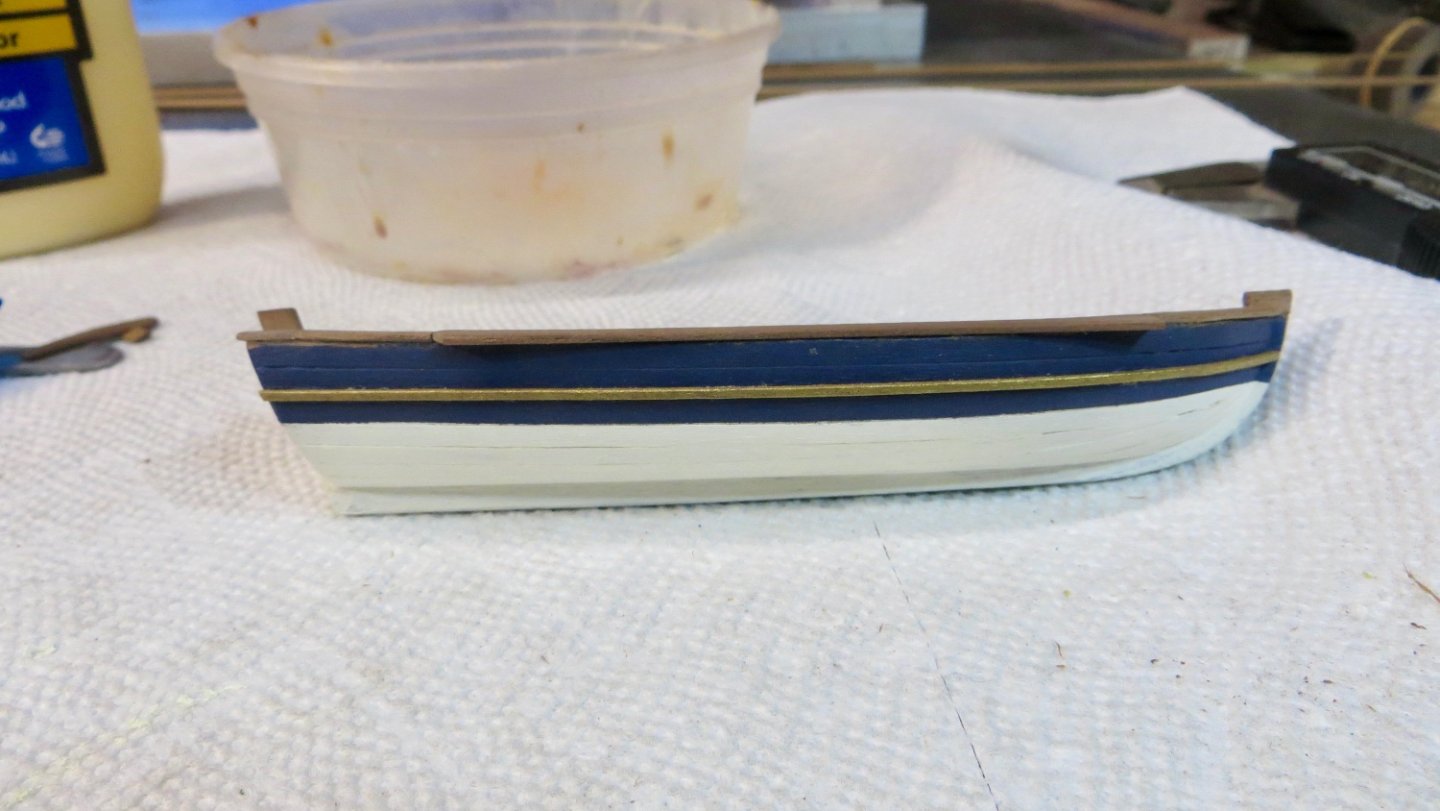
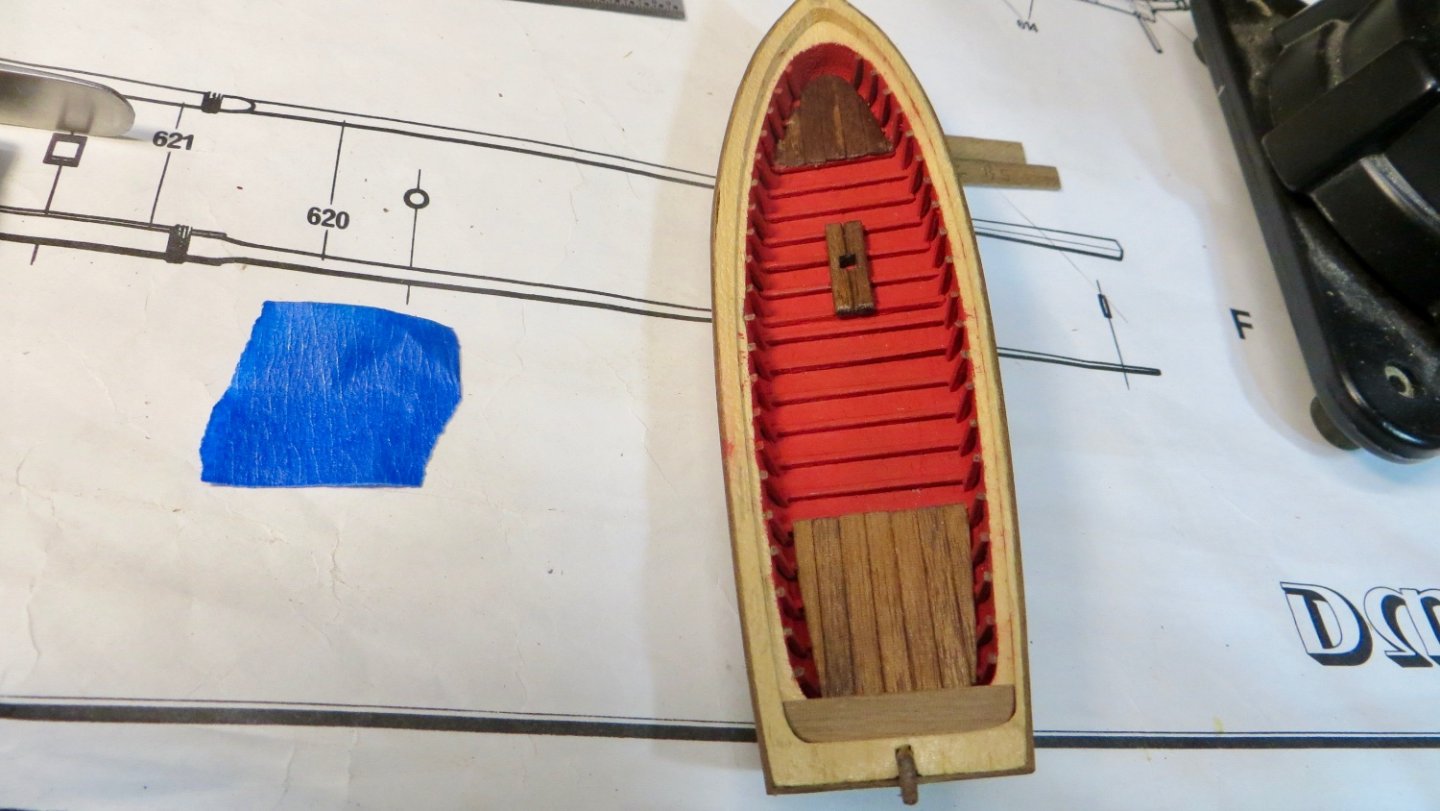
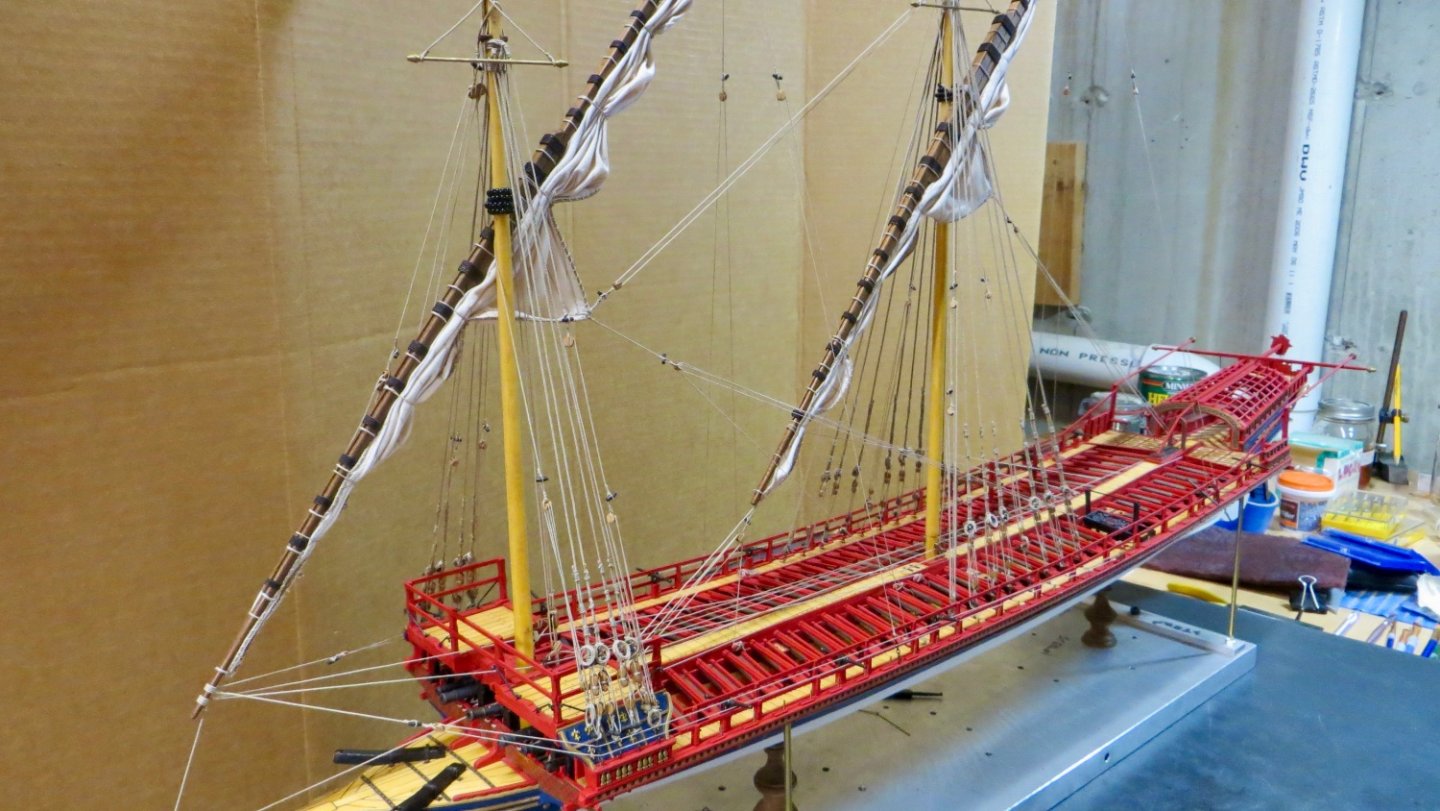
Hello, Finished up work on the boat launch. Painted upper section Ship's blue Top platform made from walnut and painted the ship's blue Oar pins and bow anchor block added I made the 12 oars from the plan sketch. Rudder and Handle added Mounted and tied to ship model Next step is to finish the cooking pots and install the anchors at the bow. Thanks for stopping by! Frank


- 510 replies
-
- 9
-
-
-
- reale de france
- corel
- (and 1 more)
-
Thanks Michael! Building the launch is a nice little diversion! I will be re-visiting your log soon to try and learn about making the tassels. Best, Frank
- 510 replies
-
- 1
-
-
- reale de france
- corel
- (and 1 more)
-
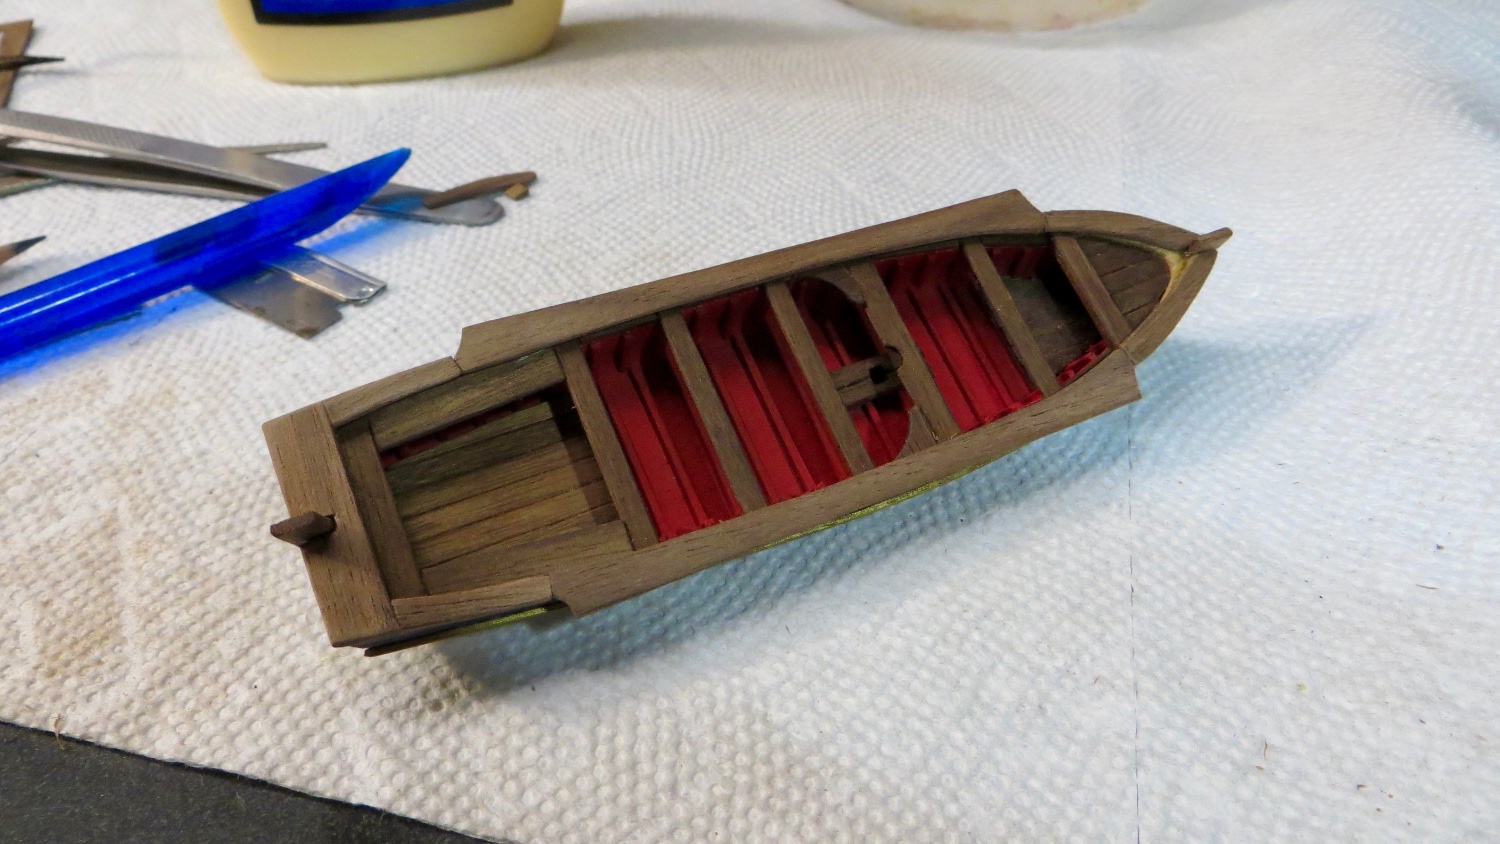
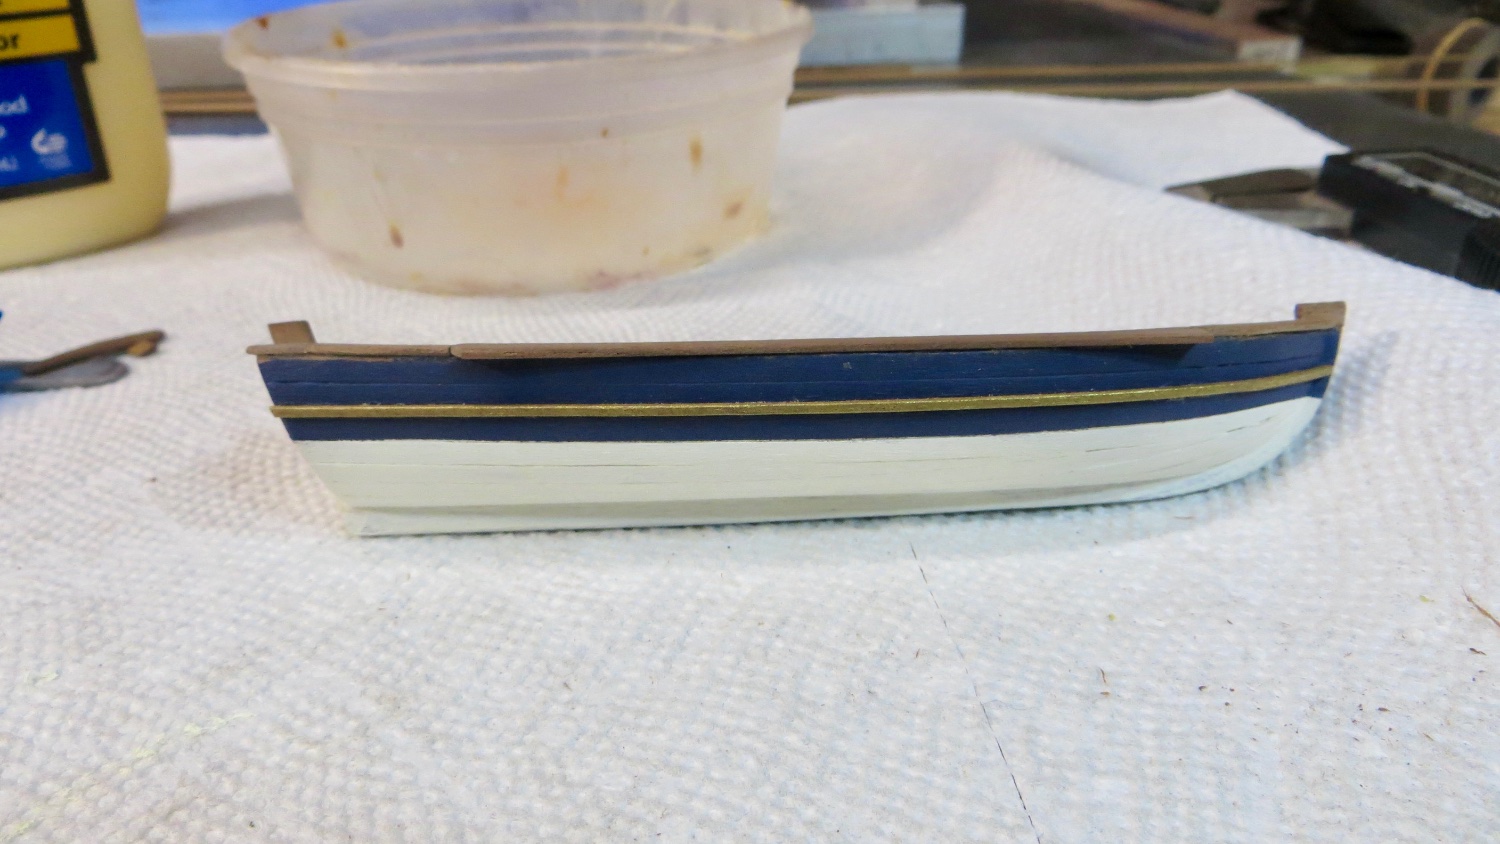
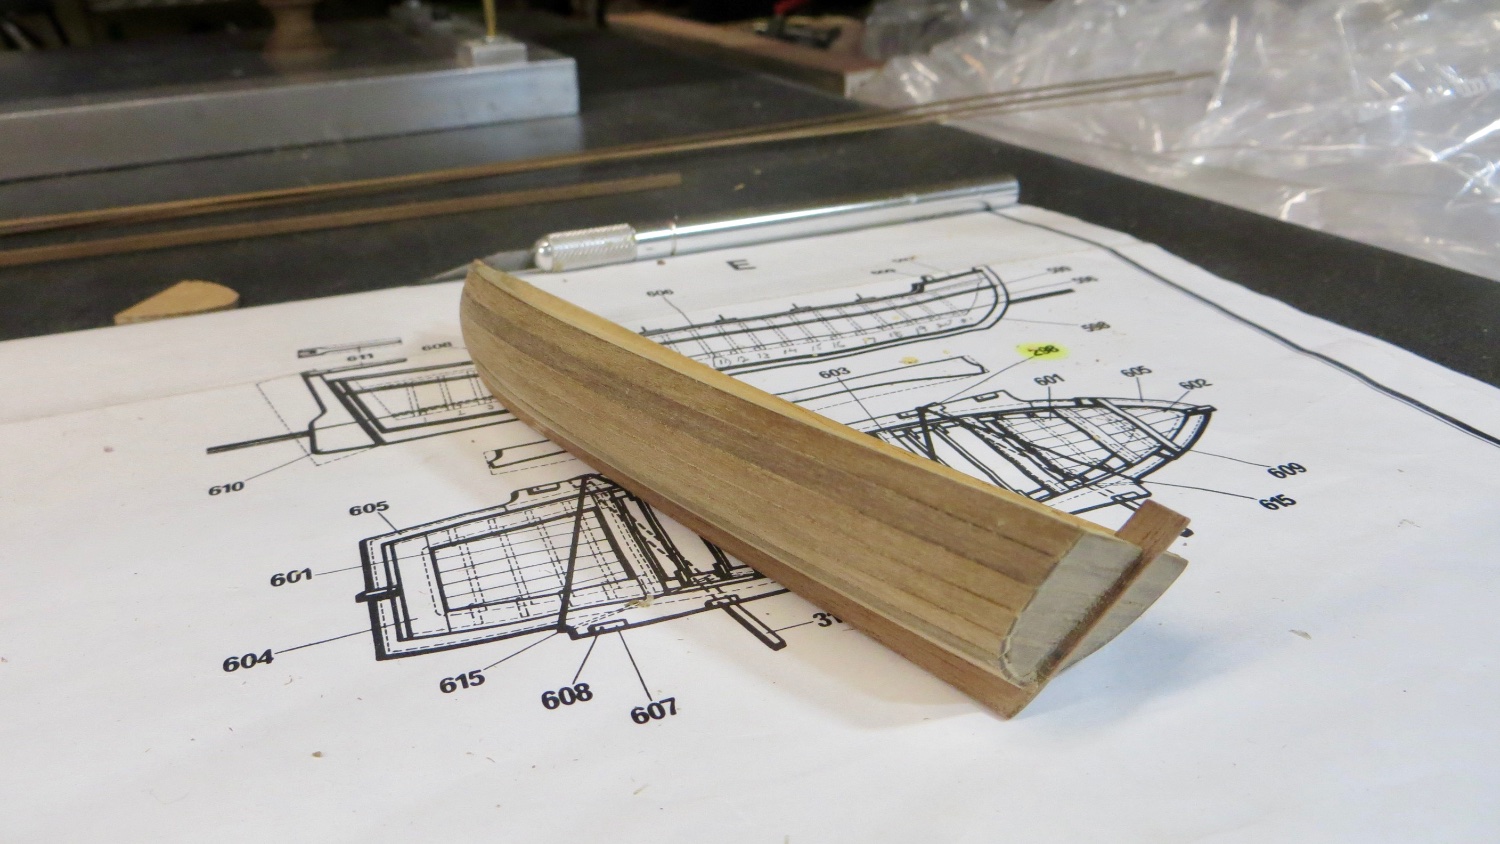
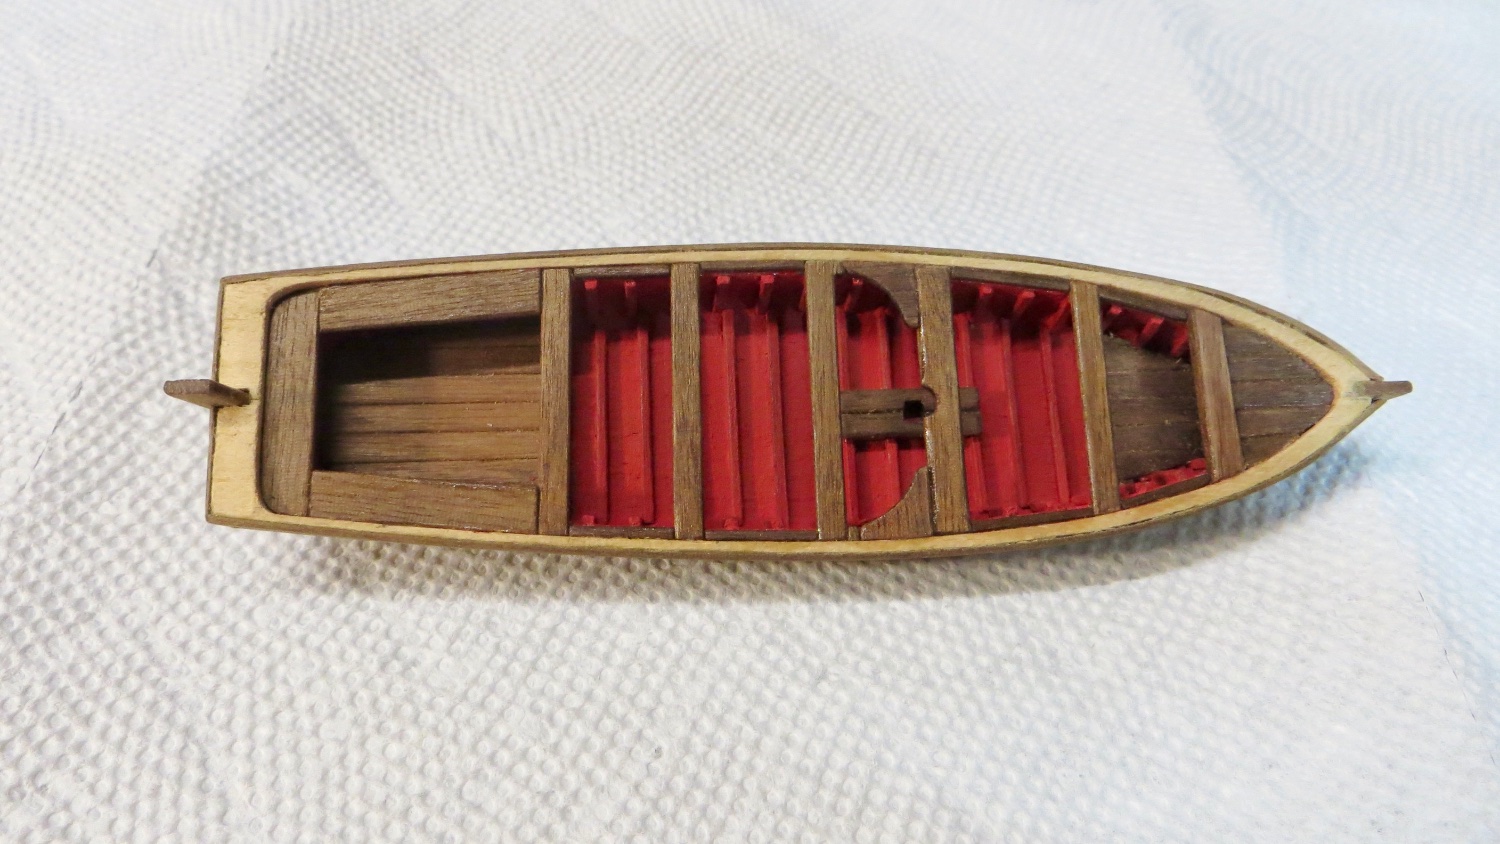
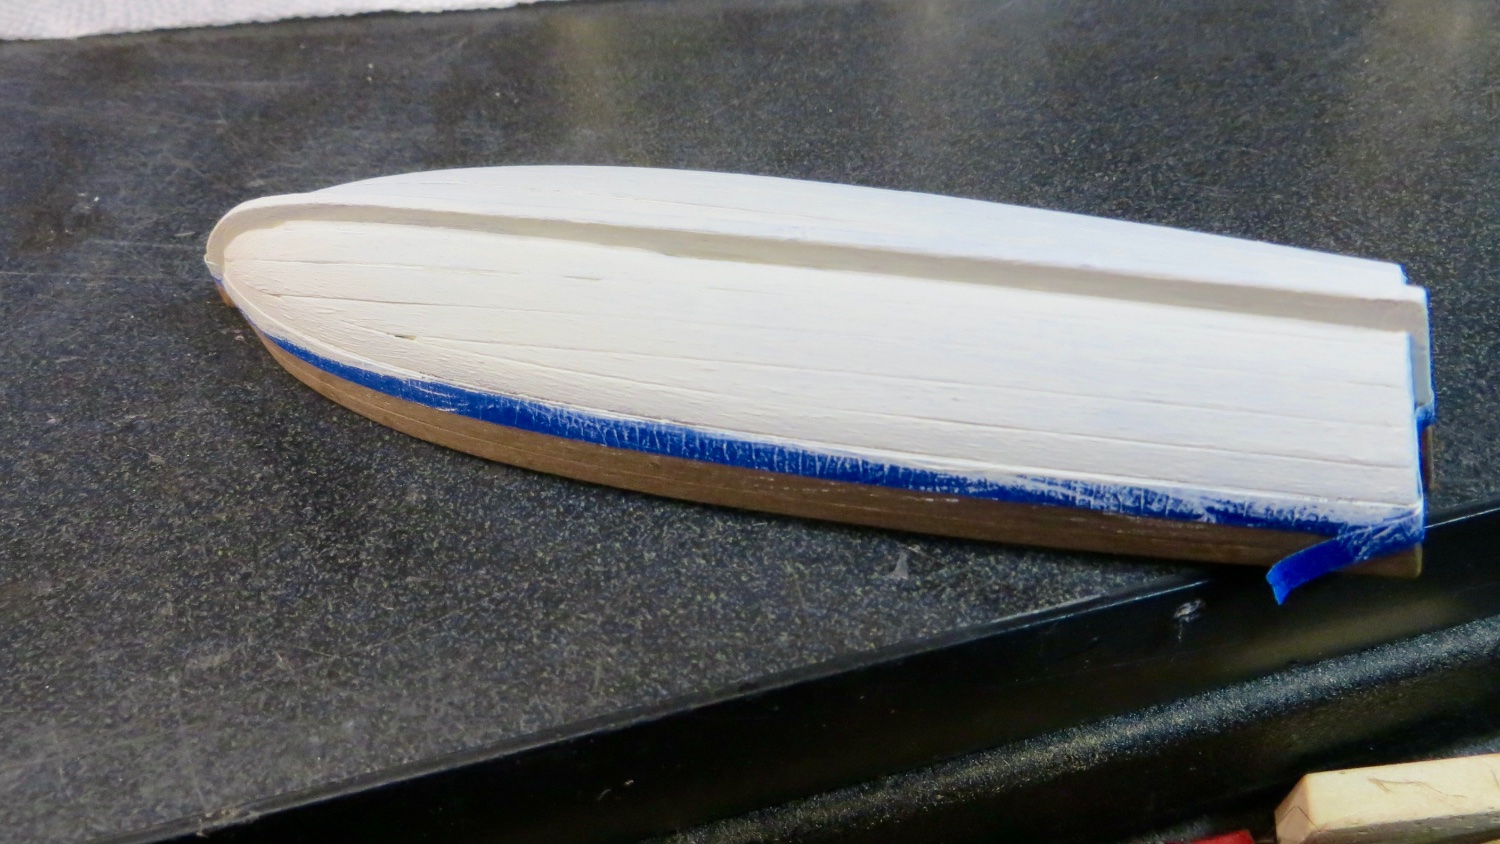
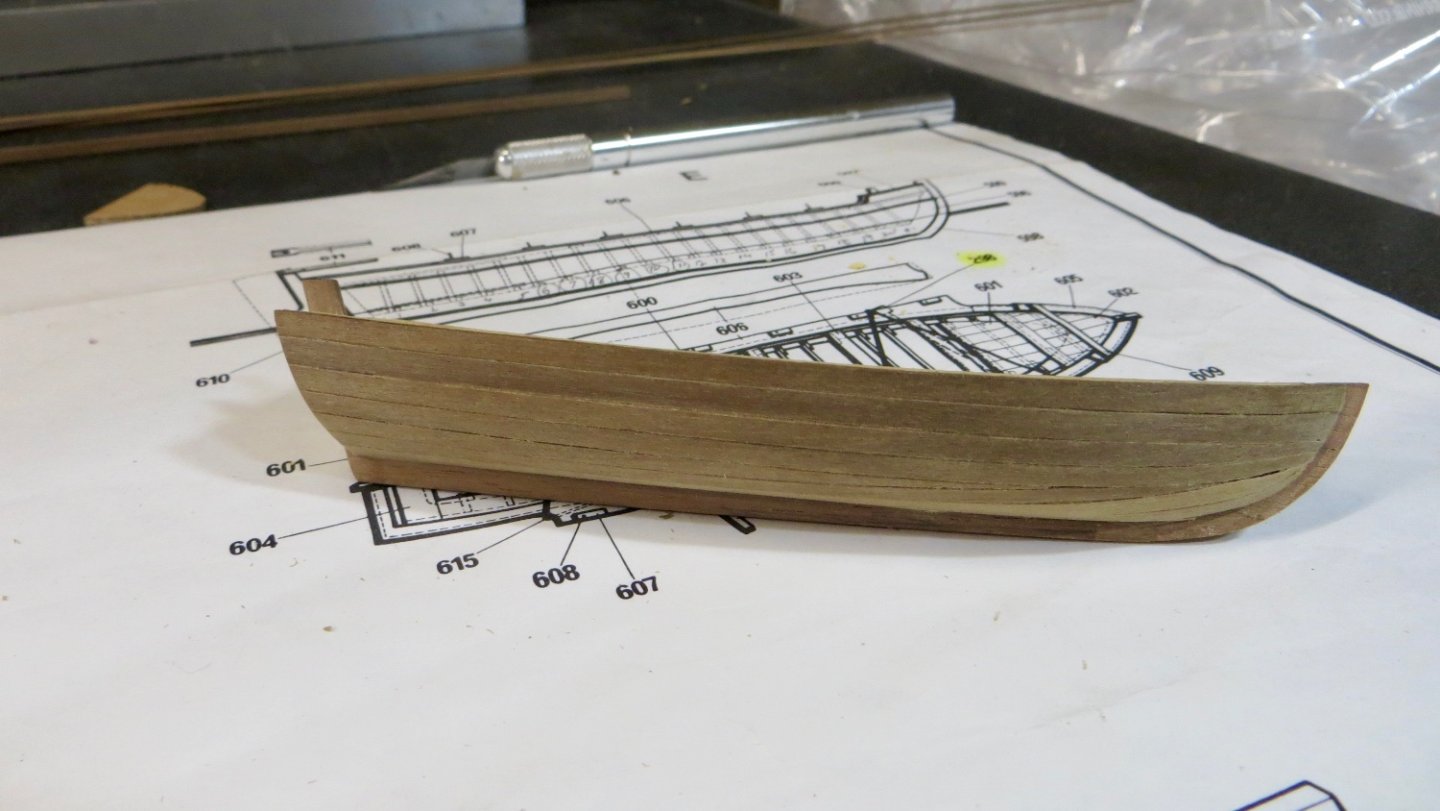
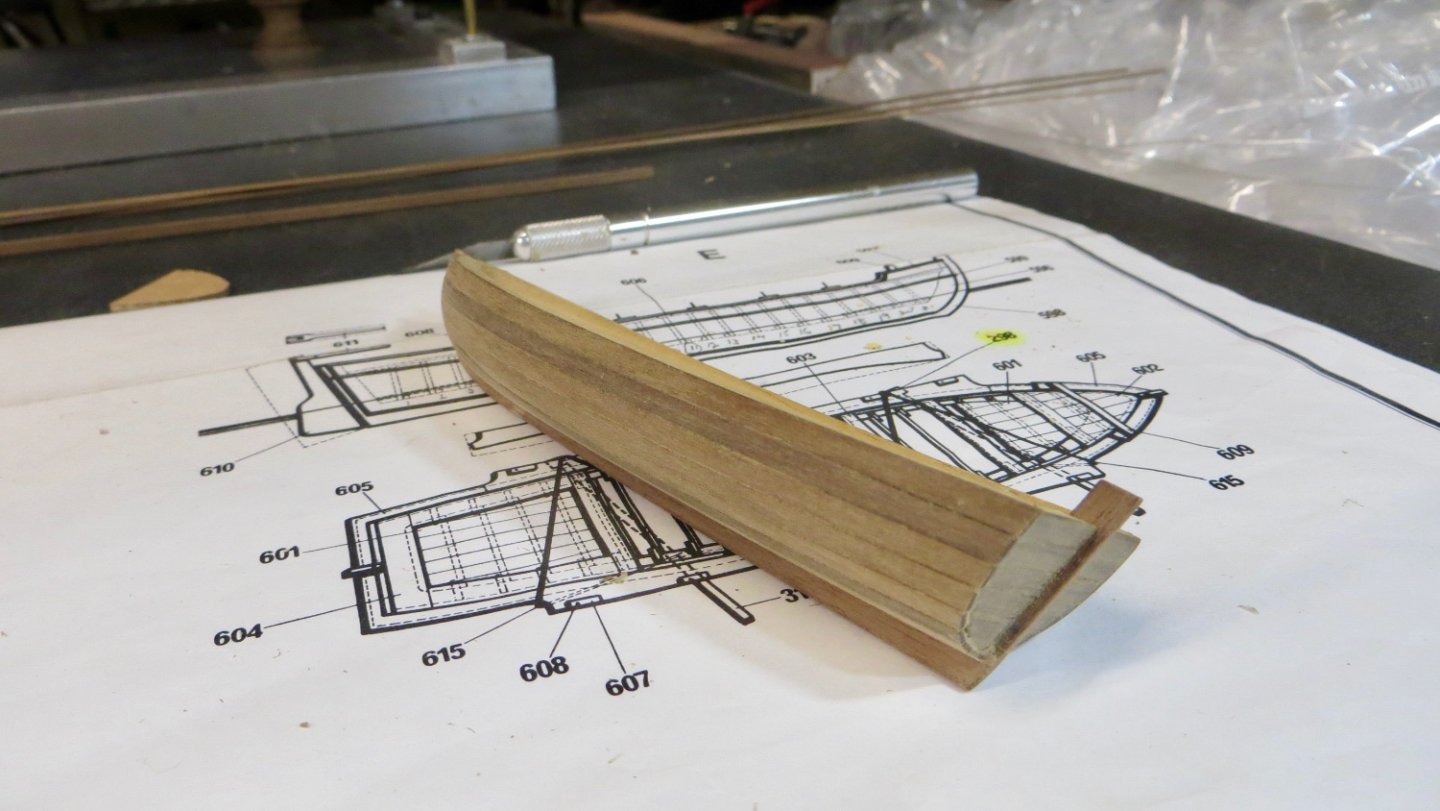
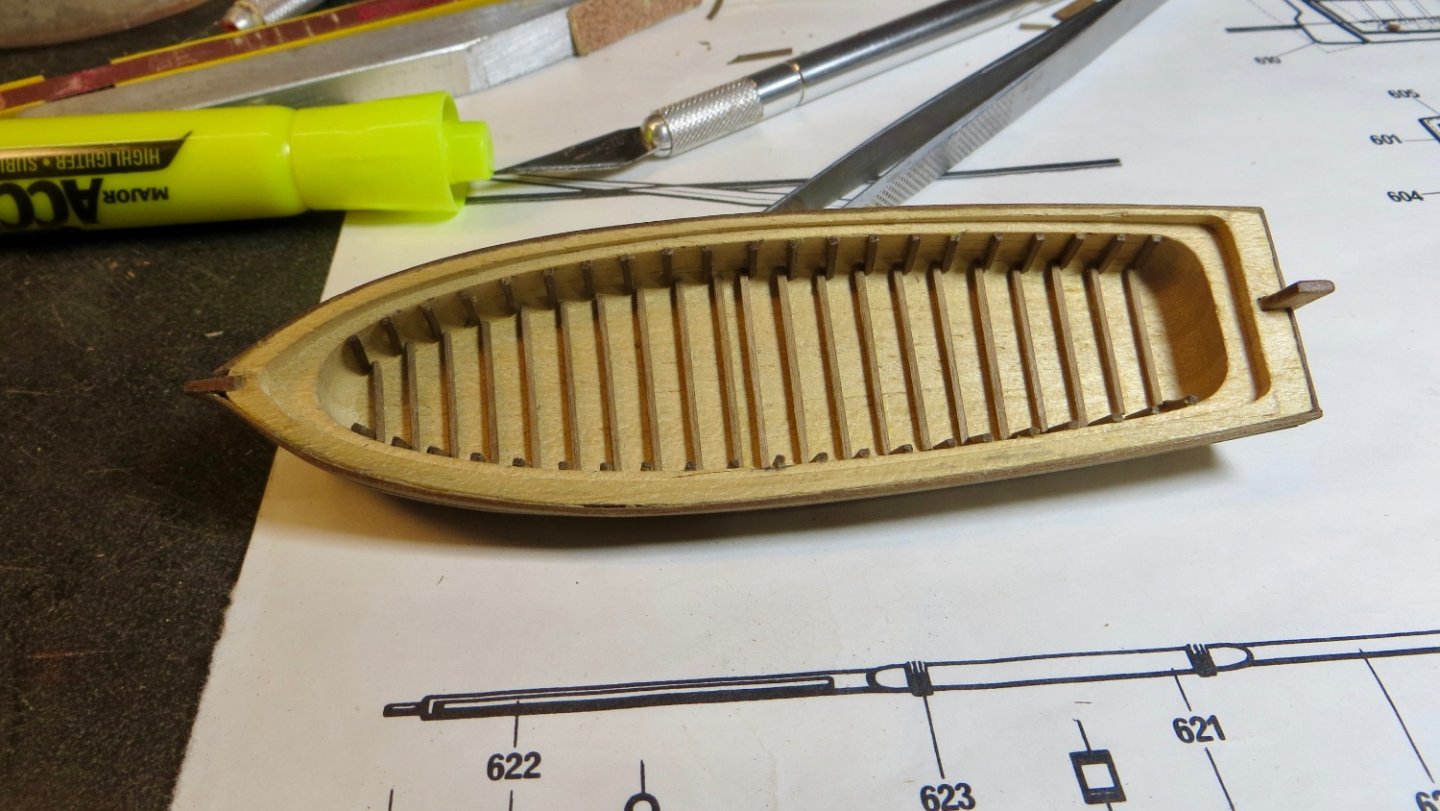
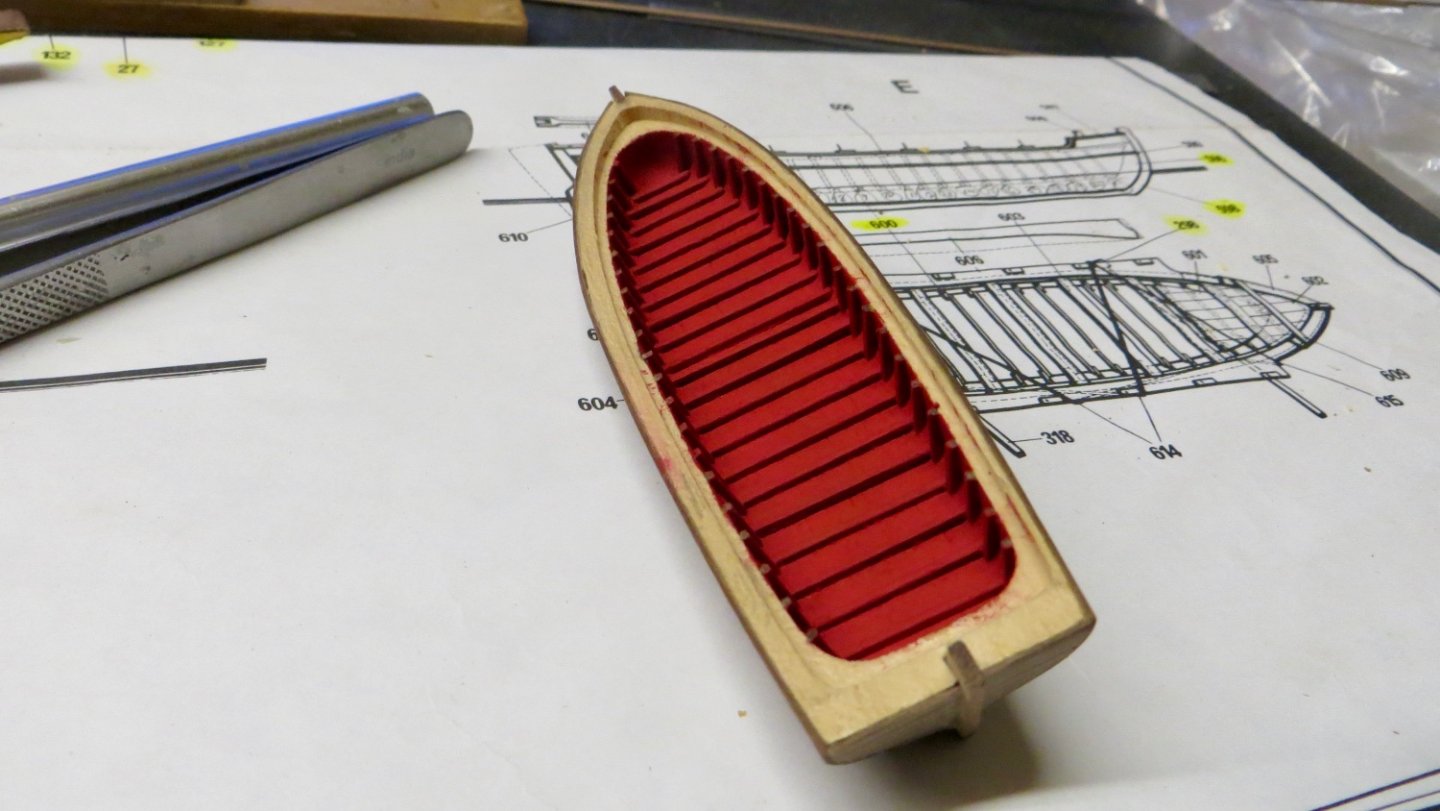
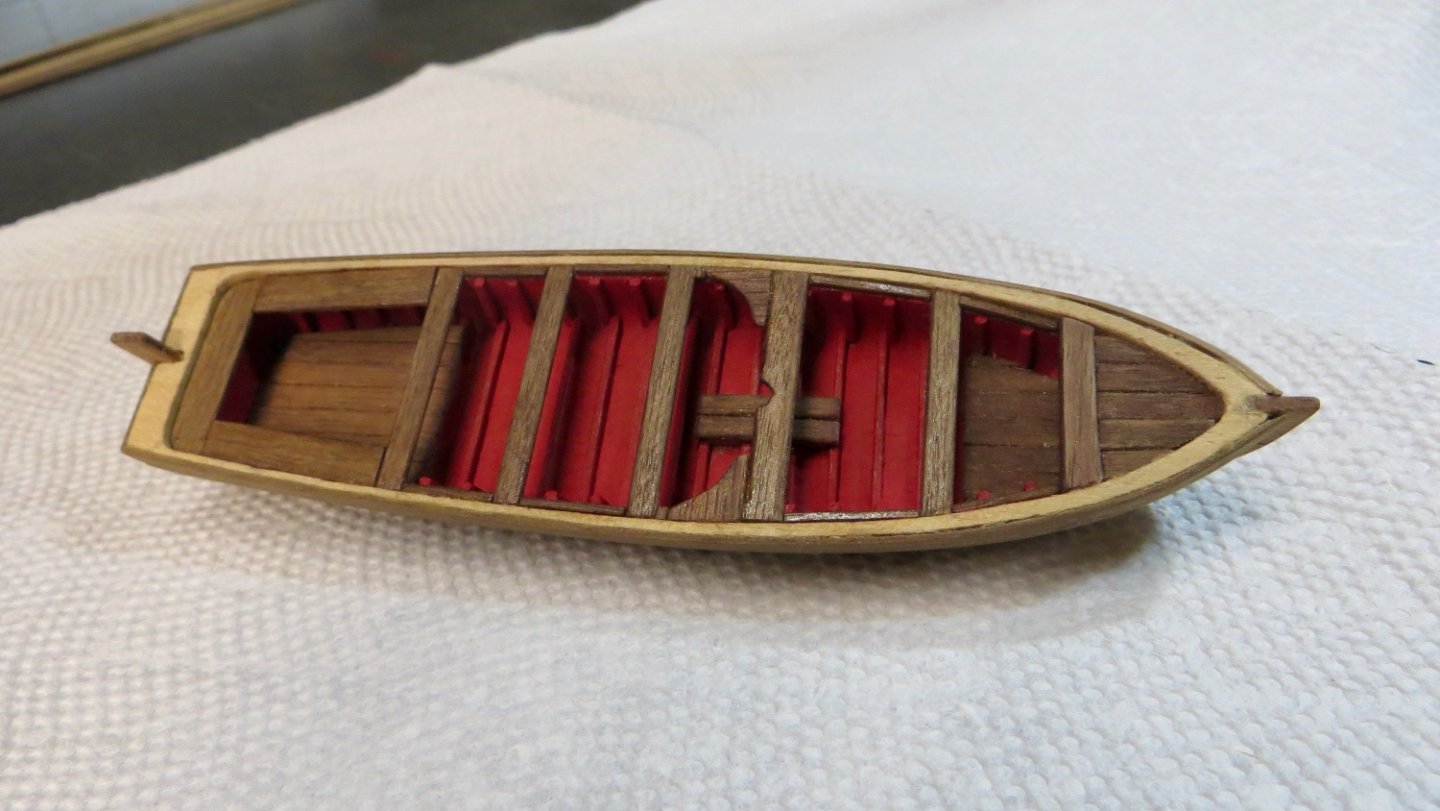
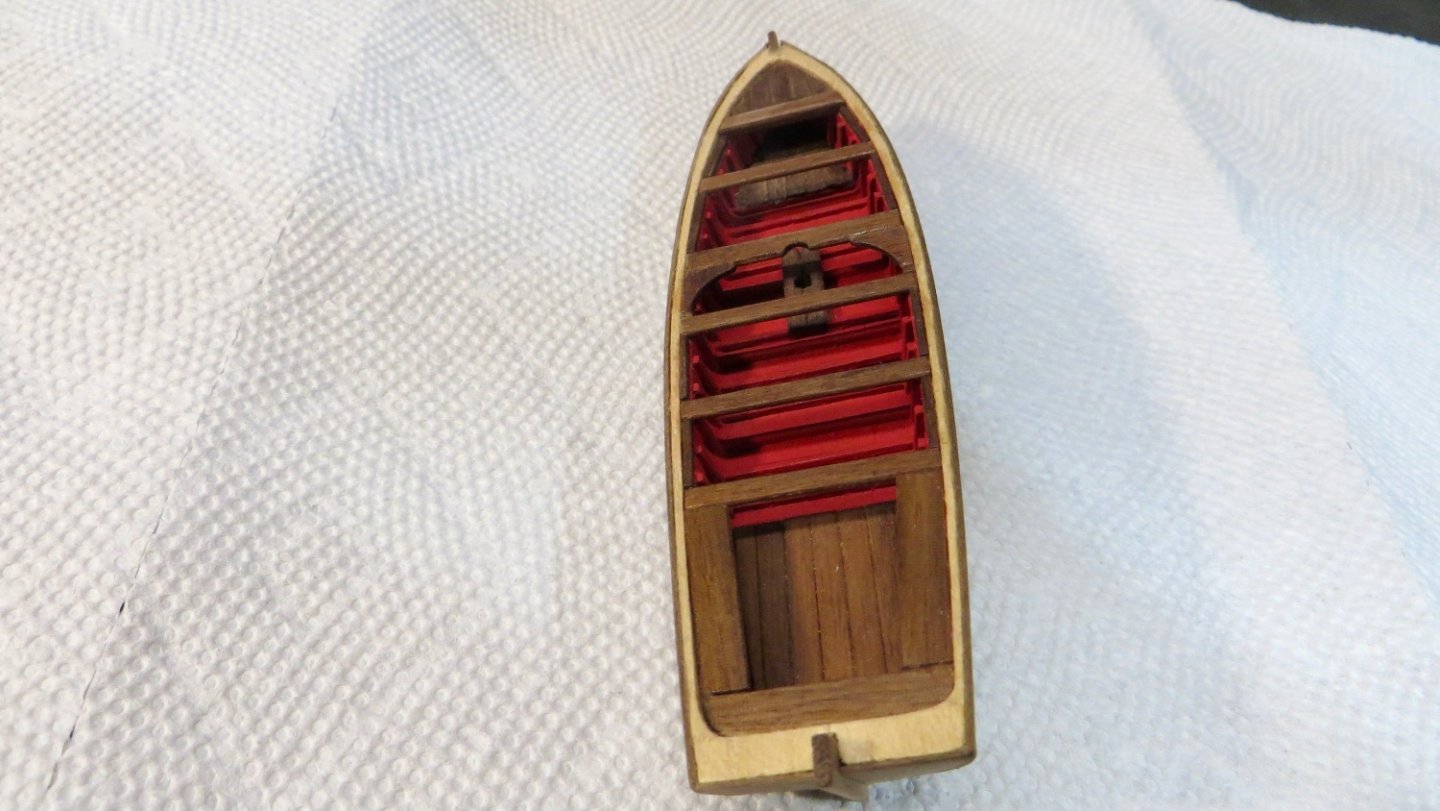
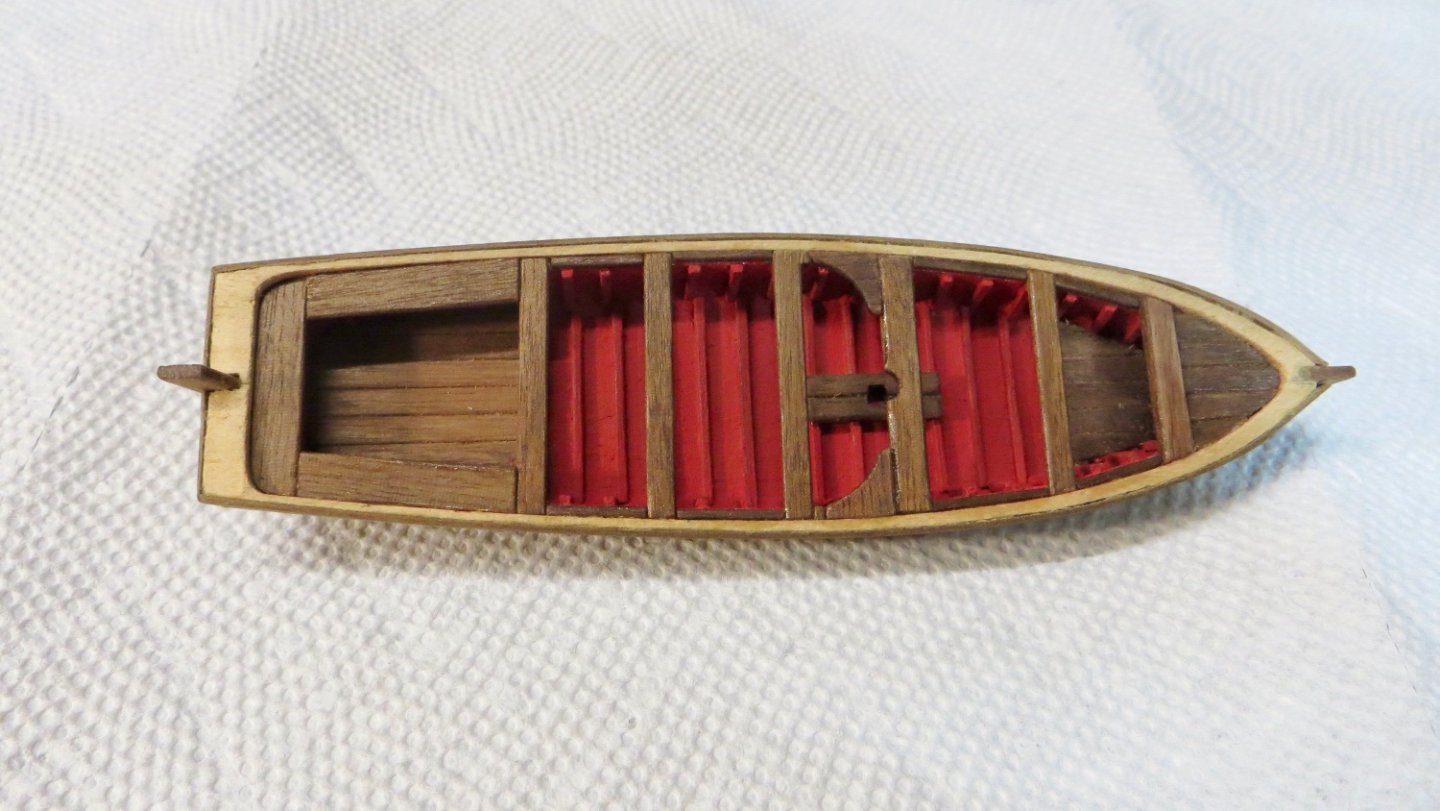
Hello, Started work on the boat launch for the ship. I am about half way done. I was able to build around the milled core shape supplied by the kit, after some rework. Made and inserted the keel and planked the outer side of the core. Installed the ribs on the inside of the core and painted the inside the ship's red. Planked the lower parts in the stern and bow and installed the mast step in the center. Planked the upper bow area, installed the benches etc. The light wood that is visible still from the core, will all be covered up and hidden when the top planks are installed soon. Started to paint the hull the same ship's white and will paint the upper part the ship's blue that I have been using. The next steps are to fabricate the upper top planking for the oar locks and finish the trim. Shape for the oar locks base planking glued onto the walnut wood ready to be cut. I hope to be finished with the boat launch in the next couple of weeks. Have to decide how many items, like the oars etc to place in the launch. Thanks for stopping by, Frank


- 510 replies
-
- 7
-
-
-
- reale de france
- corel
- (and 1 more)
-
Michael, Echoing Marc's comments, beautiful work! Please tell me you are building a case to protect that model!!!! Frank
-
Beautiful! What a difference in how the bowsprit area looks. Much more authentic! Nice rework! Frank
-
Thank you very much Allan for your kind thoughts. Yes, Gerard D put a lot of hard work into his research and drawings i'm sure. I've been trying hard to incorporate some of his research into my model, when I can (due to my skill level), but am not always successful. I always appreciate his comments and also others when it is constructive. Lol, it seems that when I look at every model i've built previously, I am always wishing I did some aspect of the model differently!! Thanks again for stopping by! Frank
- 510 replies
-
- 2
-
-
- reale de france
- corel
- (and 1 more)
-
Lol!! thanks Michael. Yes, wife is already complaining about buying another piece of furniture to put the model on. She is hoping I start doing ships in a bottle! Been keeping up to date with the water shortages and weather on the west coast. Hoping things work out for you. We are in a severe drought here in Massachusetts also. Hopefully we'll get some rain soon. Best, Frank
- 510 replies
-
- 2
-
-

-
- reale de france
- corel
- (and 1 more)
-
Thanks for your kind comments and for stopping by! If I can accomplish half of what I see you do on your log, it would be a success !! Thanks, Frank
- 510 replies
-
- 1
-
-
- reale de france
- corel
- (and 1 more)
-
Thanks for your nice comments Tim! Appreciated! Slowly getting into the home stretch! Talk soon, Frank
- 510 replies
-
- 1
-
-
- reale de france
- corel
- (and 1 more)
-
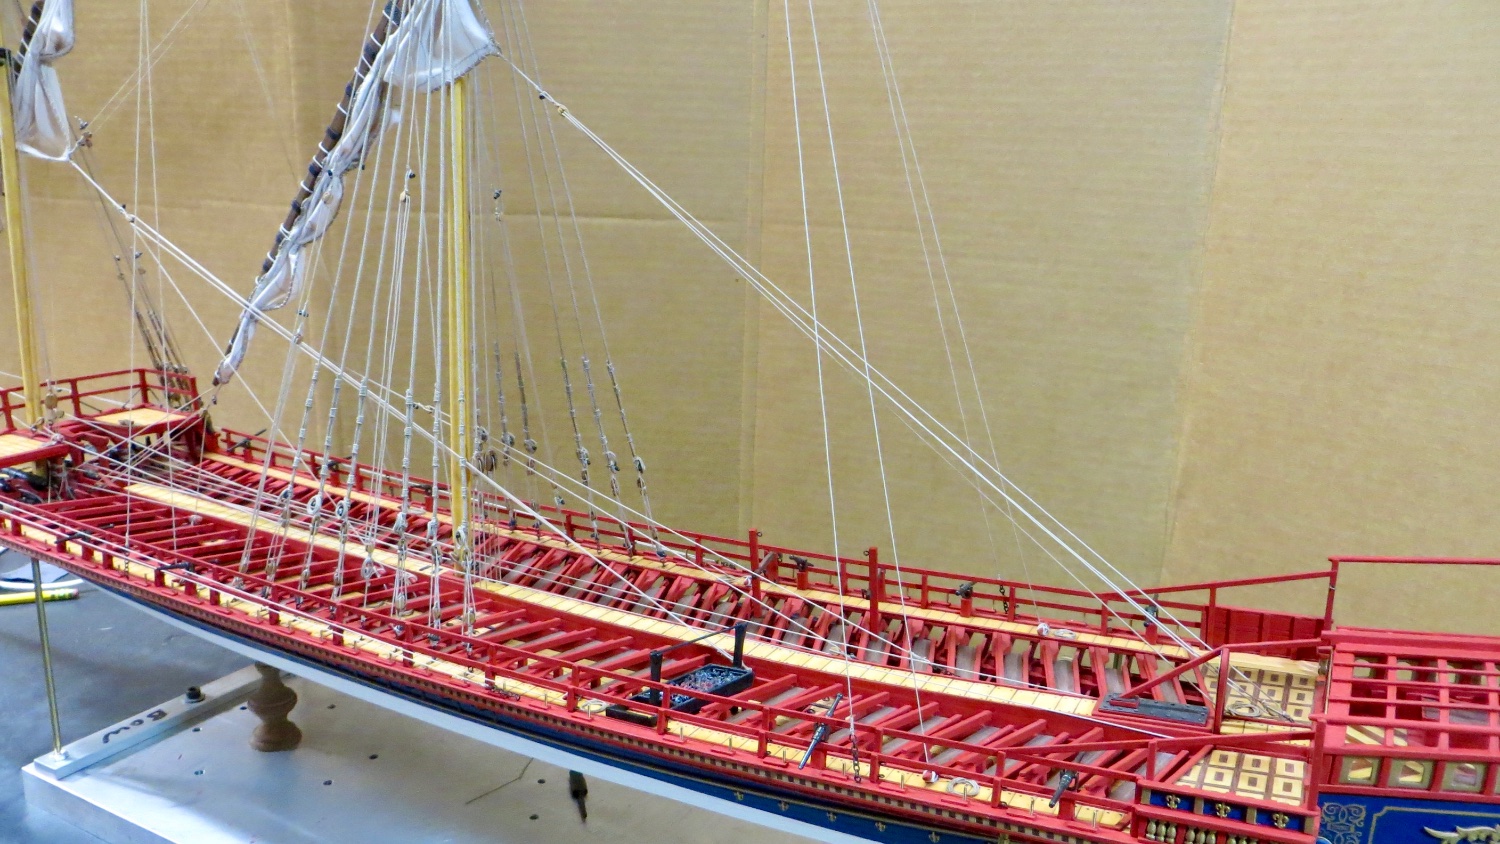
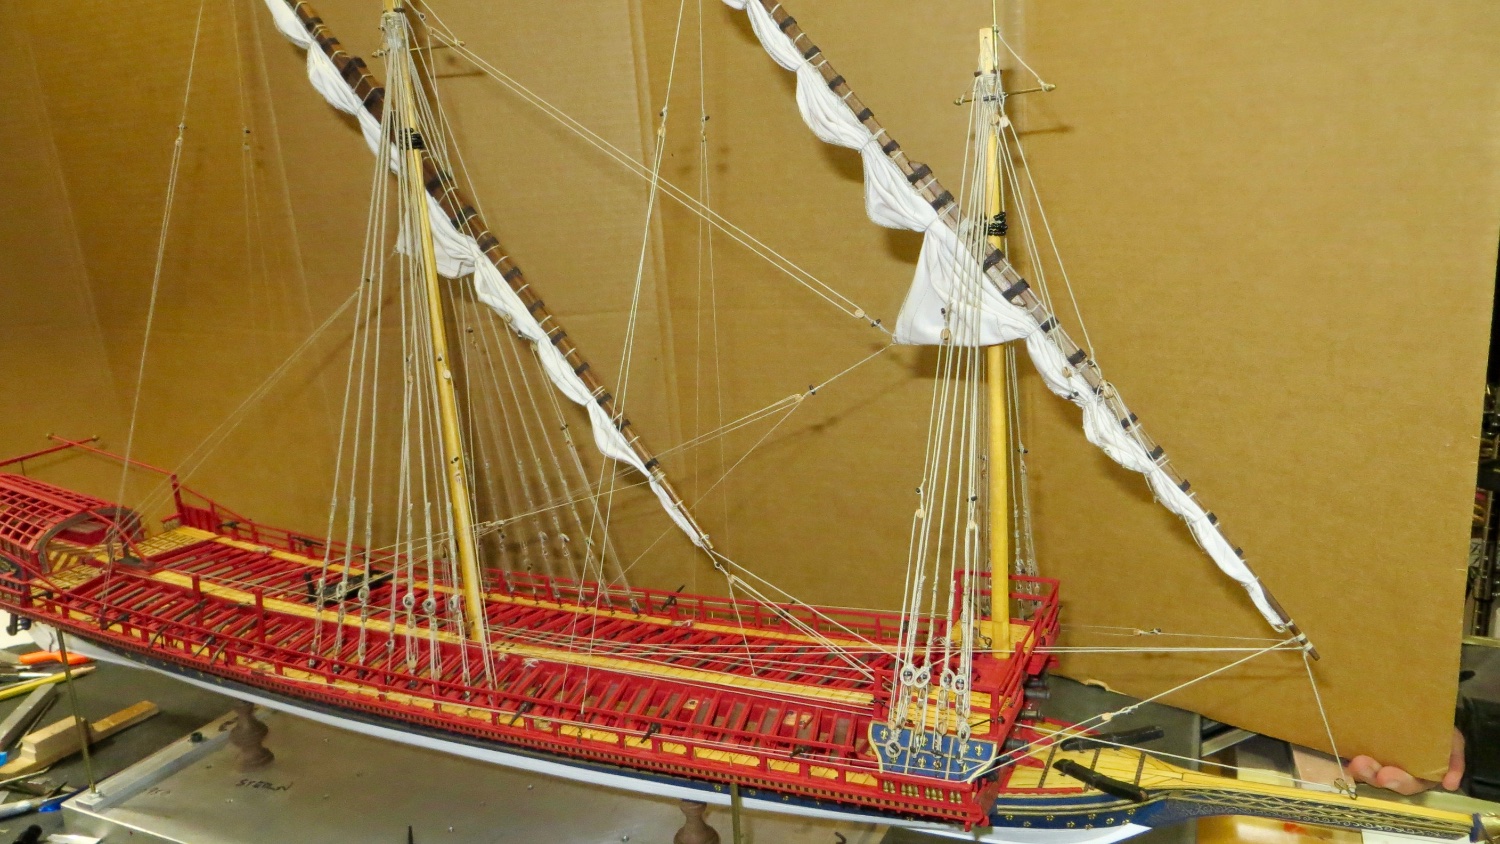
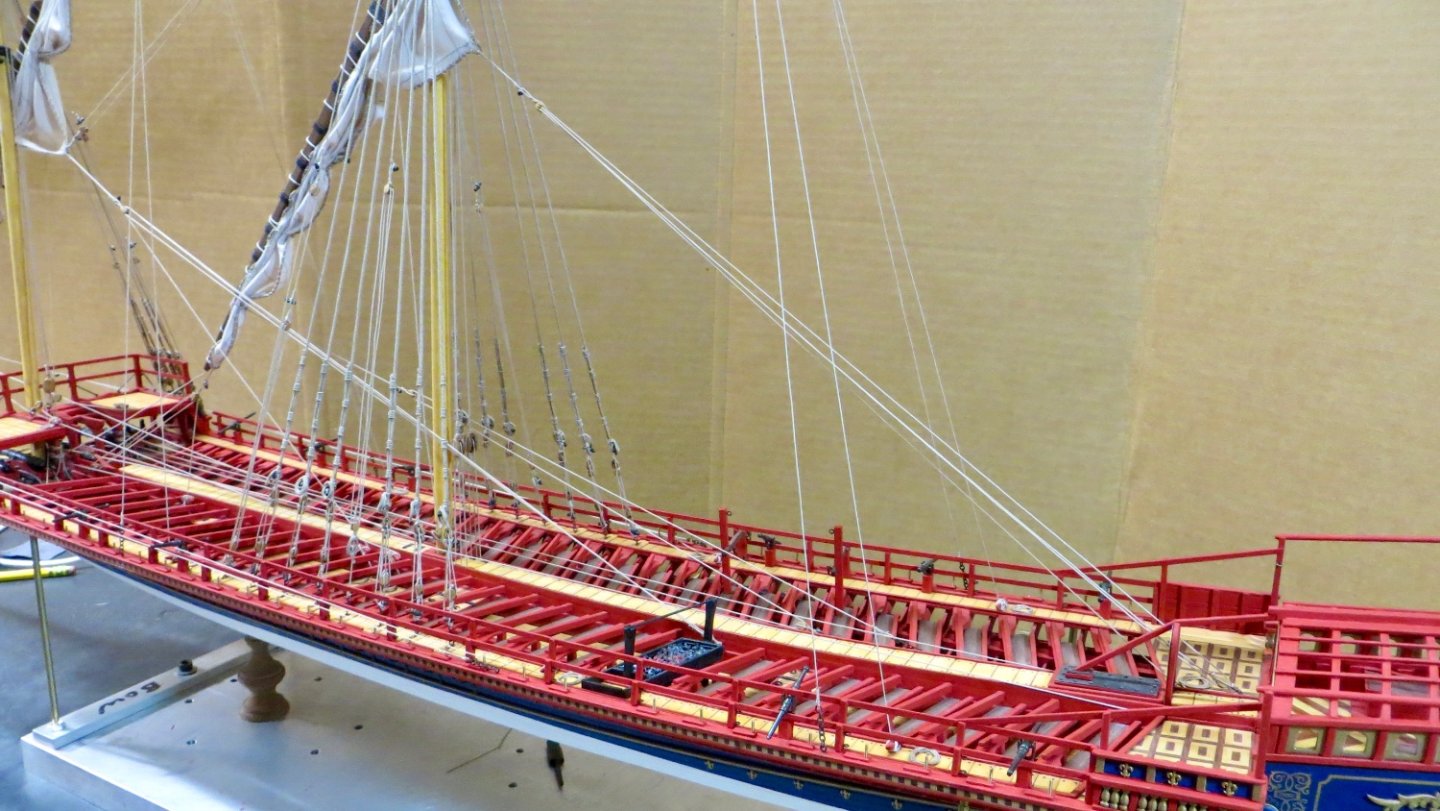
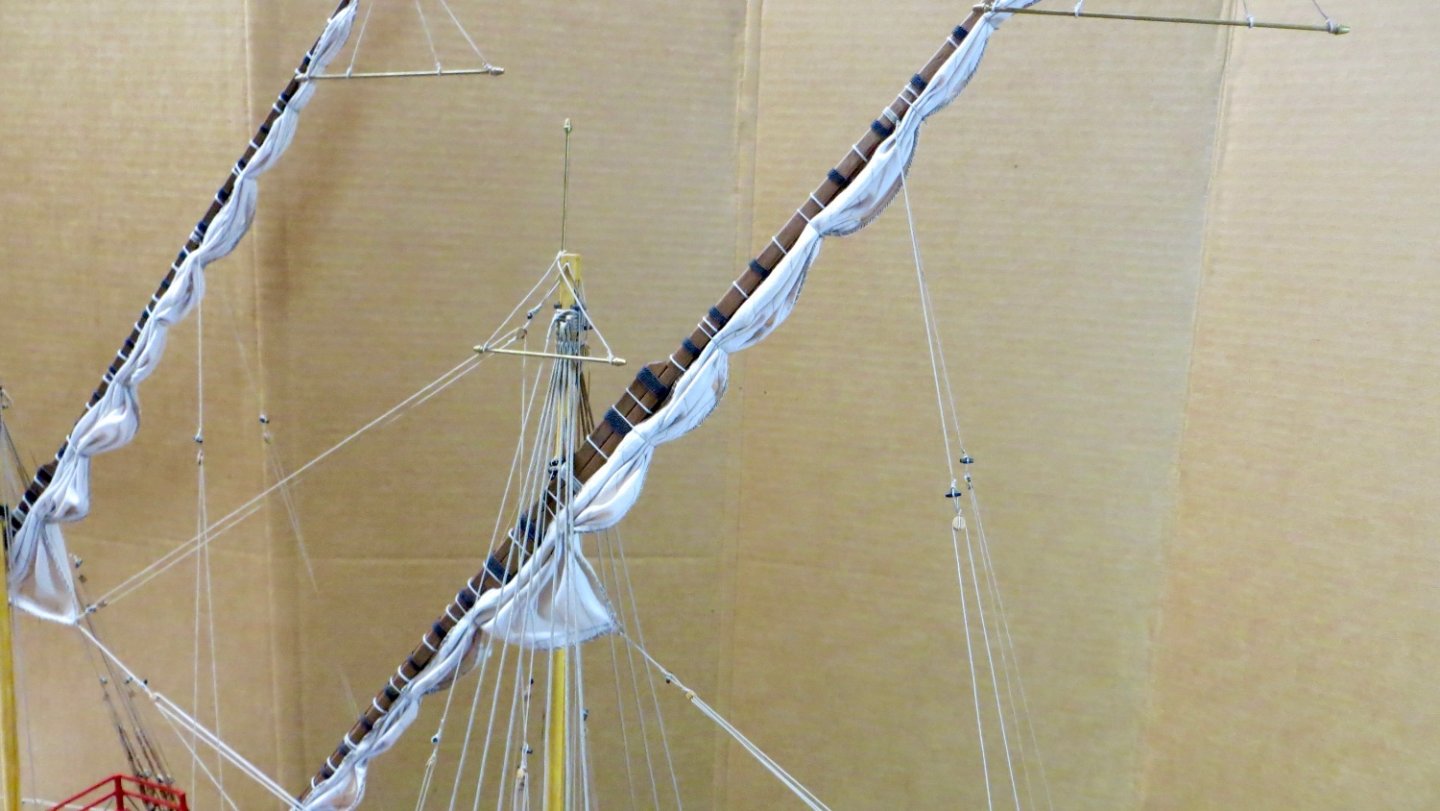
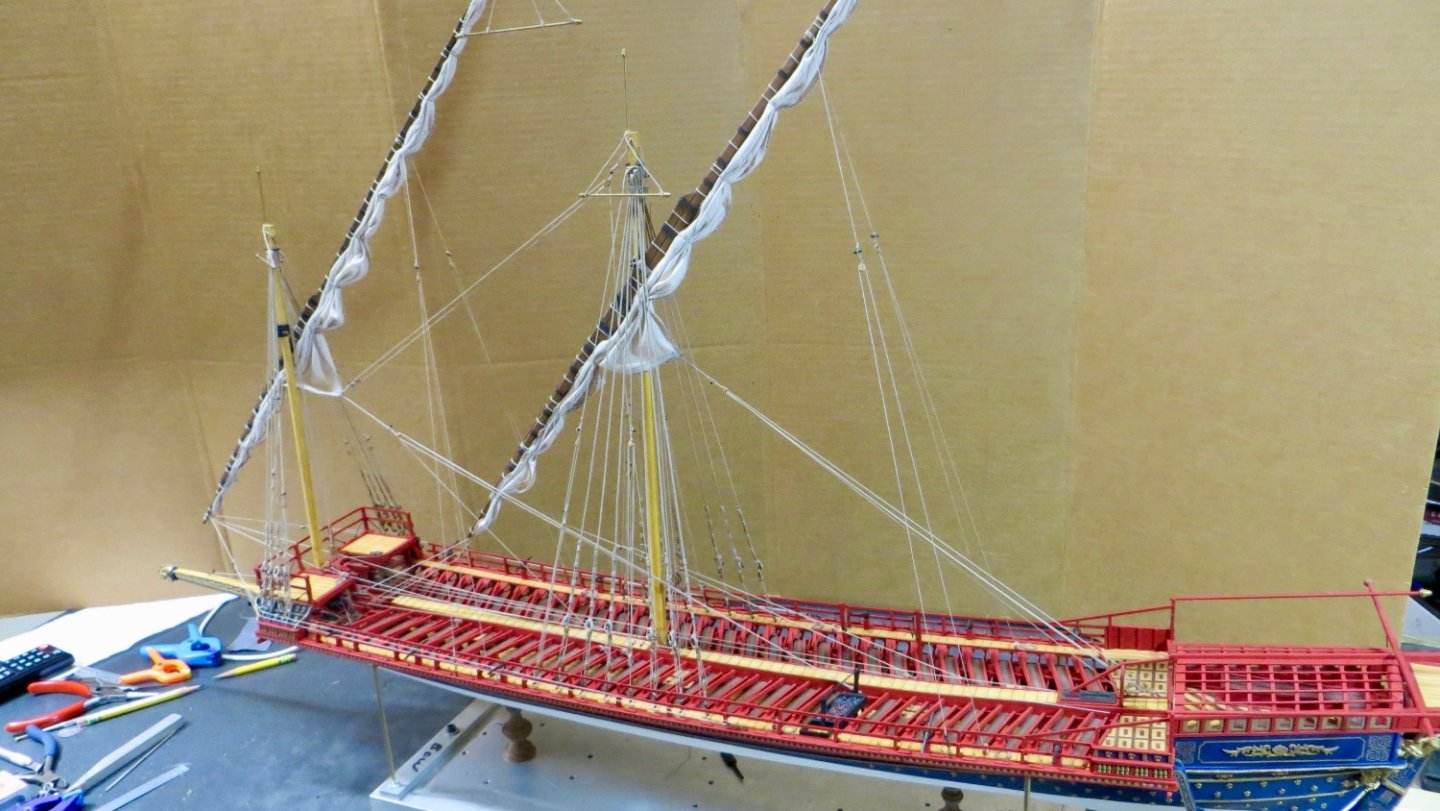
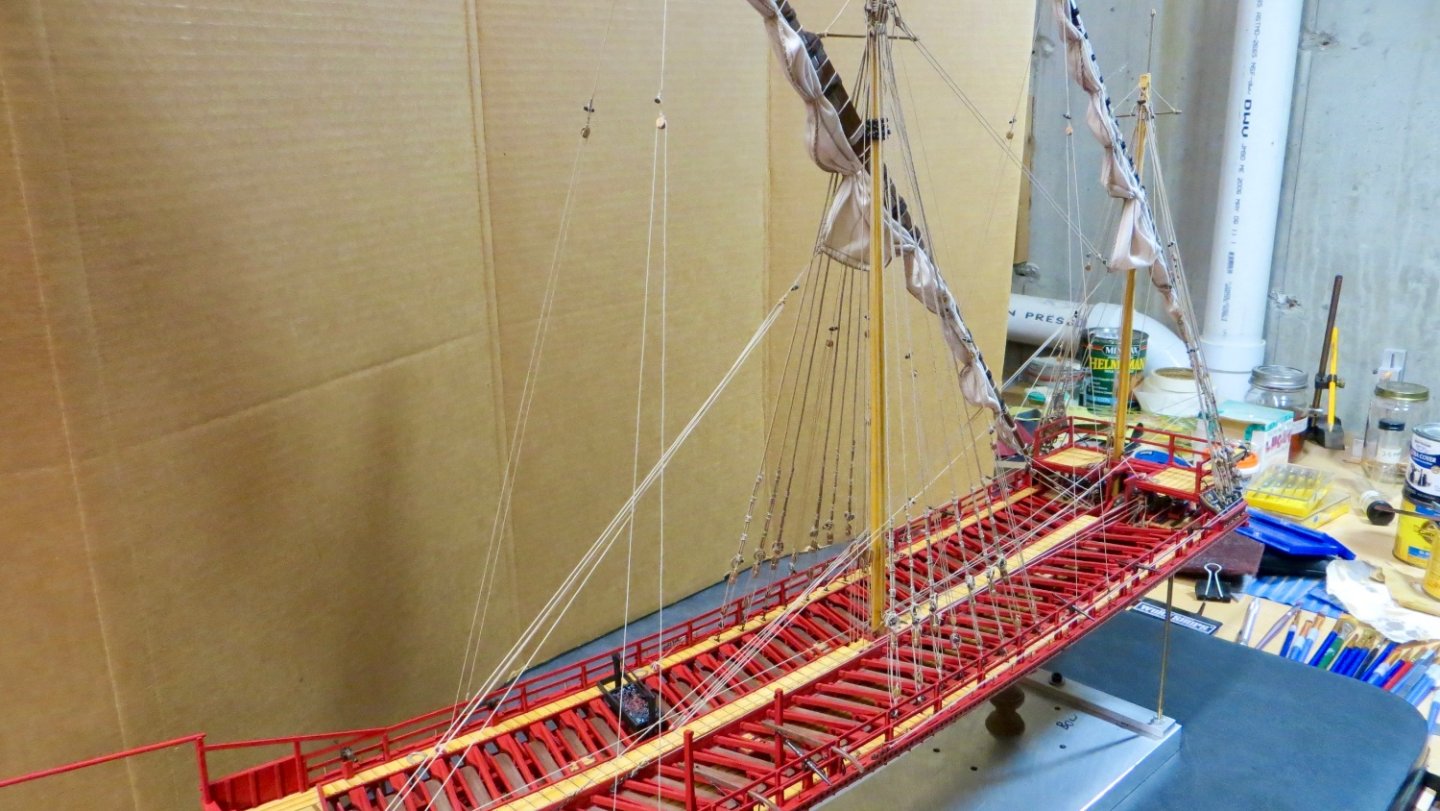
Hello, Just about finished up on most all of the rigging for the Reale. I took some photos of the finished rigging. Was going to post photos of each step, but thought that would be repetitive, so I tried to take photos of the ship from different angles at the finished stage. So I've tried to lay out the steps needed to finish this project in the order I would like to do them. 1. Build and install the long boat 2. Finish the cooking platform area 3. Rig and install the anchors 4. Work on how to install the canopy over the rear royal seating area, while not obscuring the detail of the royal area. Maybe furling the canopy towards the back? Will have to think about this. 5. Learn how to make and install the tassels. 6. Install all the flag poles and flags 7. Finish the stern lantern 8. build and replace the steel base with a nice wooden base and mount the ship to the wood base (before installing the oars). 9. Build the bottom of the overall case enclosure 10. And finally finish and install the oars. As always, thanks for stopping by for a look. Frank


- 510 replies
-
- 6
-
-
-
- reale de france
- corel
- (and 1 more)
-
Gratings much improved Michael! Very intricate stern assembly. Nice job fIguring everything out! I hope all is well. Frank