HOLIDAY DONATION DRIVE - SUPPORT MSW - DO YOUR PART TO KEEP THIS GREAT FORUM GOING!
×


fmodajr
-
Posts
868 -
Joined
-
Last visited
Content Type
Profiles
Forums
Gallery
Events
Everything posted by fmodajr
-
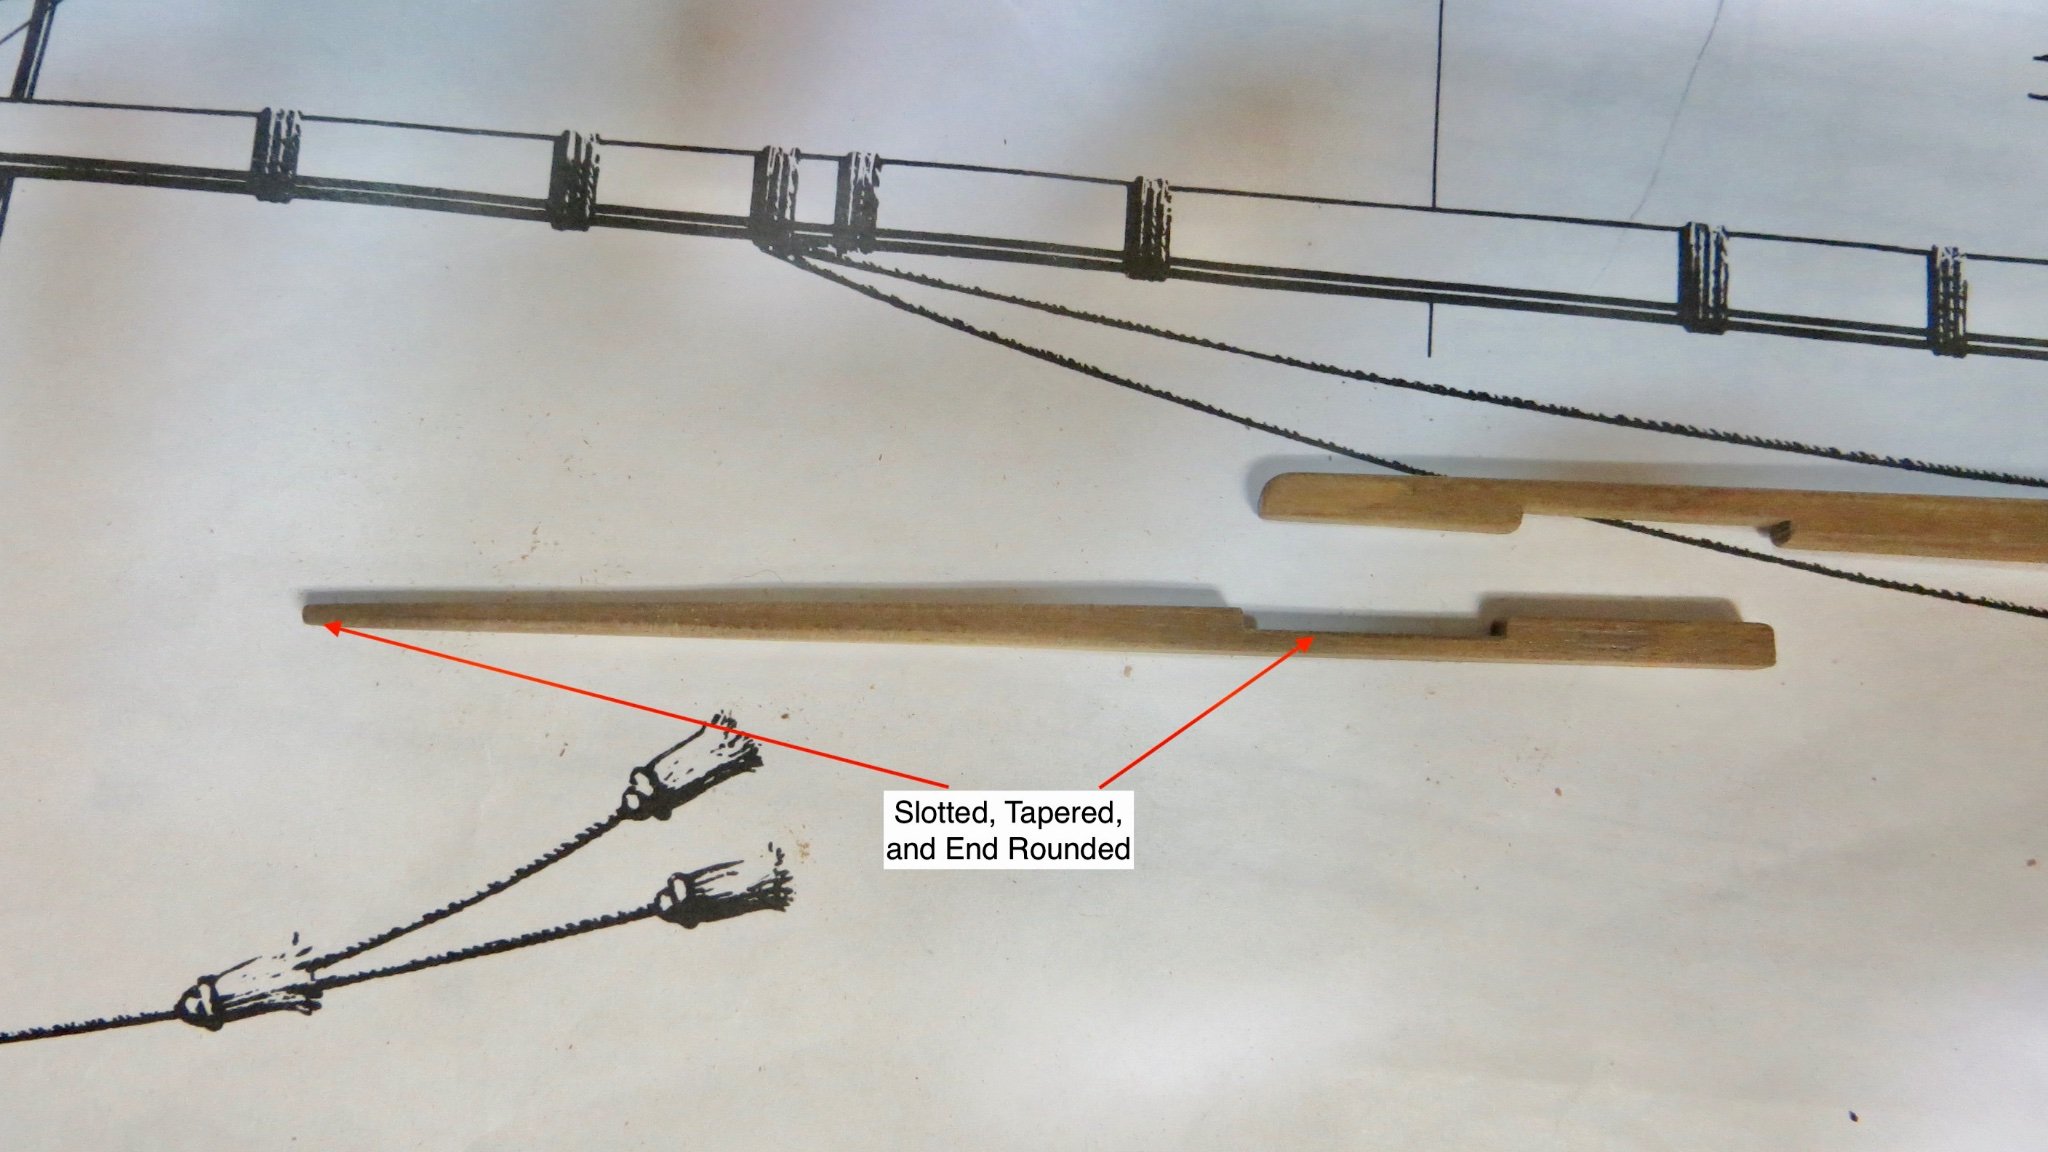
 Gerard, Great to have you visit and thank you for your comments. When I read your post, I ran downstairs and pulled out your plans. Sure enough, on your plan page 23, you show the yards being round with flats milled for the pieces to meet. I don't know how I missed this a few months ago! I also went and looked at my Italian Sciabecco that I made, back in 2007, and sure enough, the yards were round with flats milled at the meeting spots. Oh well! I have the sails all furled and attached at this point, so I will not go back and and tear everything apart. The Corel rigging plan also seems to have some weird end points to the rigging lines, so I will try to pay more attention to your rigging sheet. Thanks again for pointing the error out to me. Appreciated! Frank
- 510 replies
-
- 2
-

-
- reale de france
- corel
- (and 1 more)
-
Bob and Tim: Bob, thanks for the kind comments! Appreciated! Tim, Thank you also. I spoke to Dave Morton a couple of months ago and sent him some photos and write up. He made the decision to wait until I am finished with the model and then present it in the Broadside. So we both decided to wait. Also, lol, he doesn't like my camera skills and wants me to get the model to a professional photographer here in town for final photos. Discouraging that the club can't start meeting in person again. The model is starting to get tougher and tougher to transport. Would have loved to bring it in to the club before the Masting and installation of the yards. Oh well!!
-
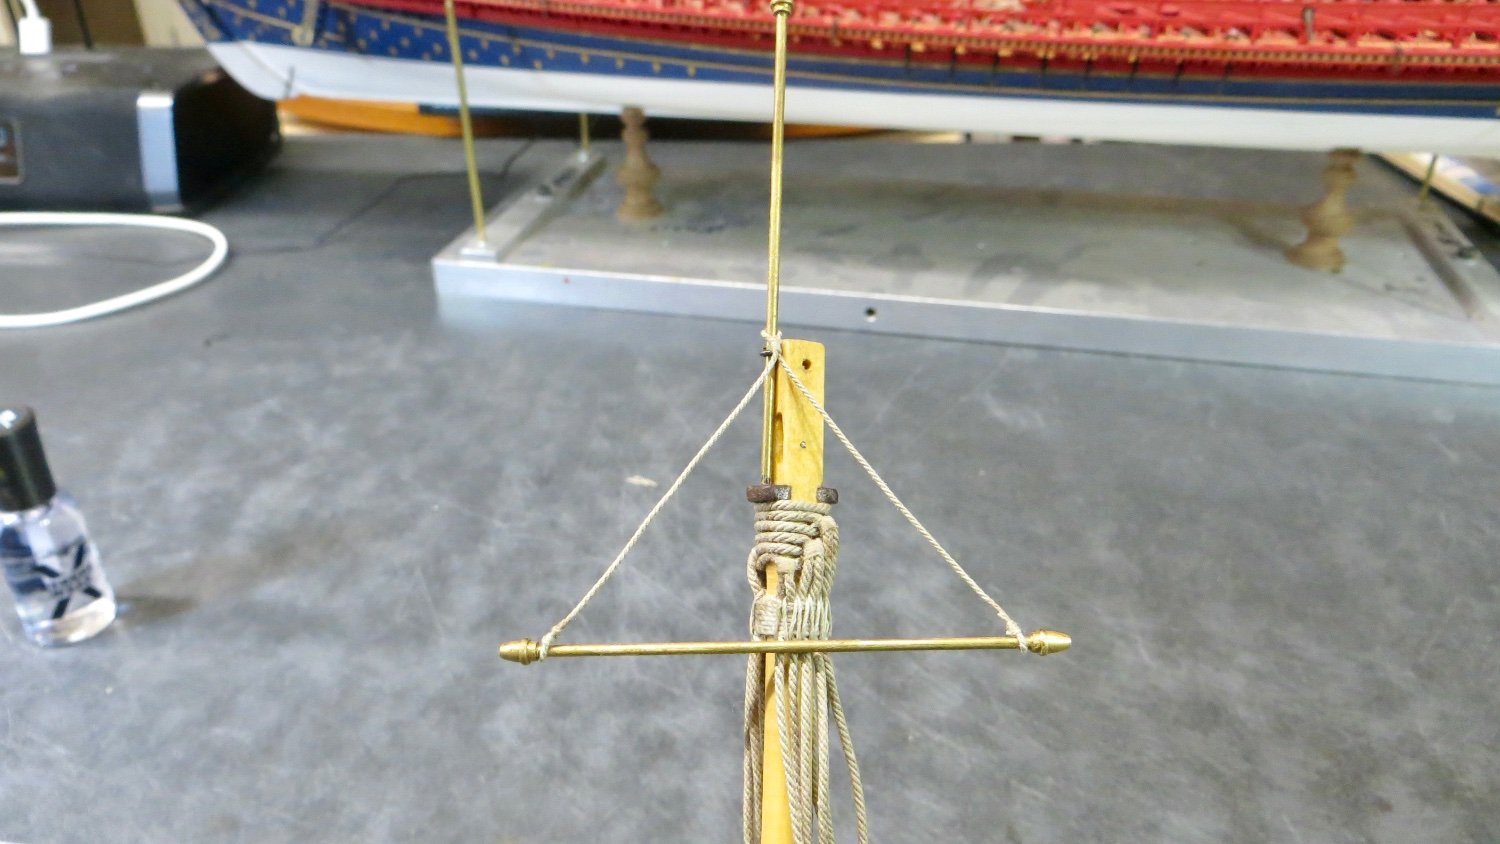
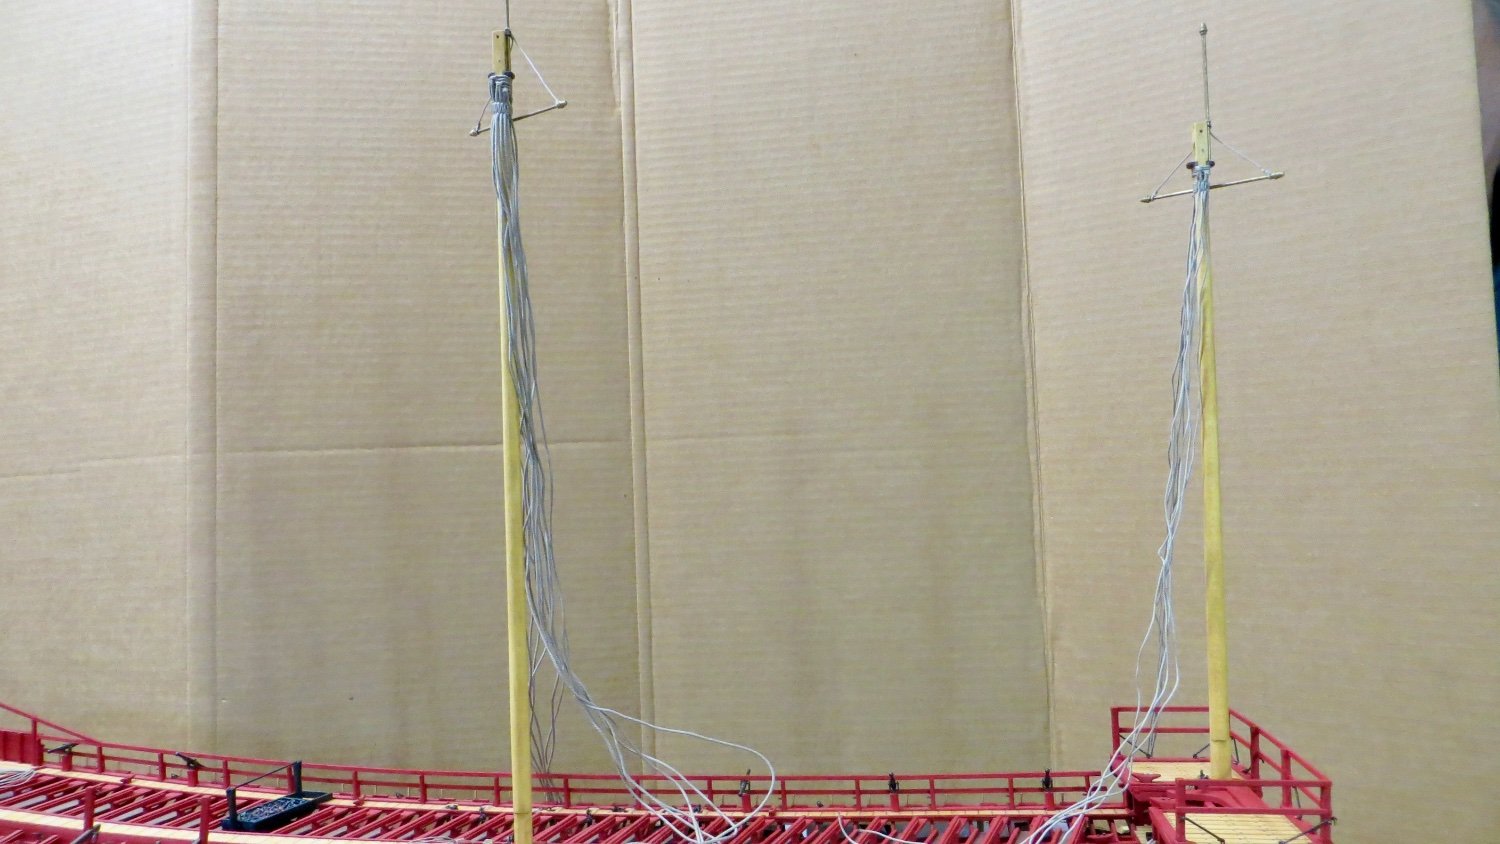
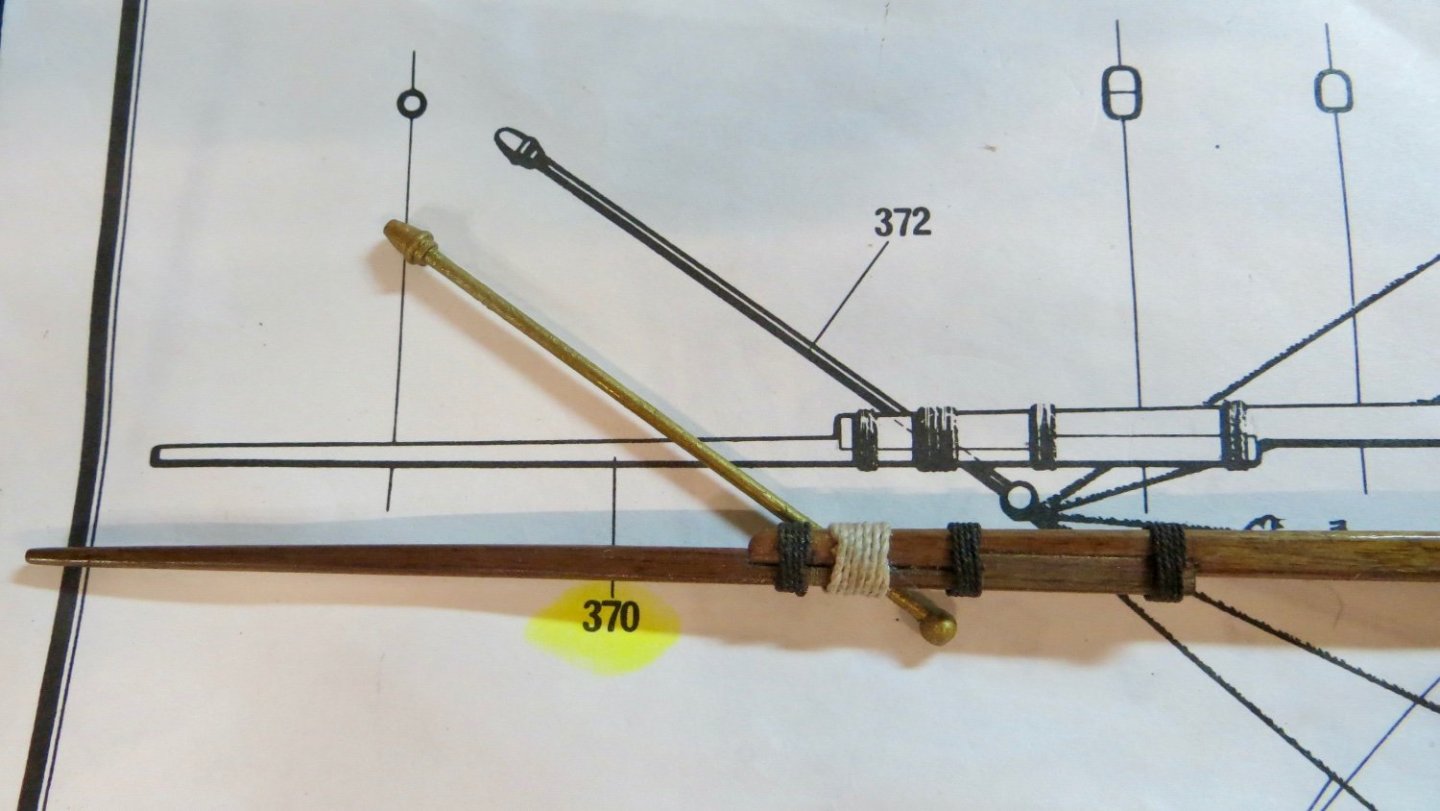
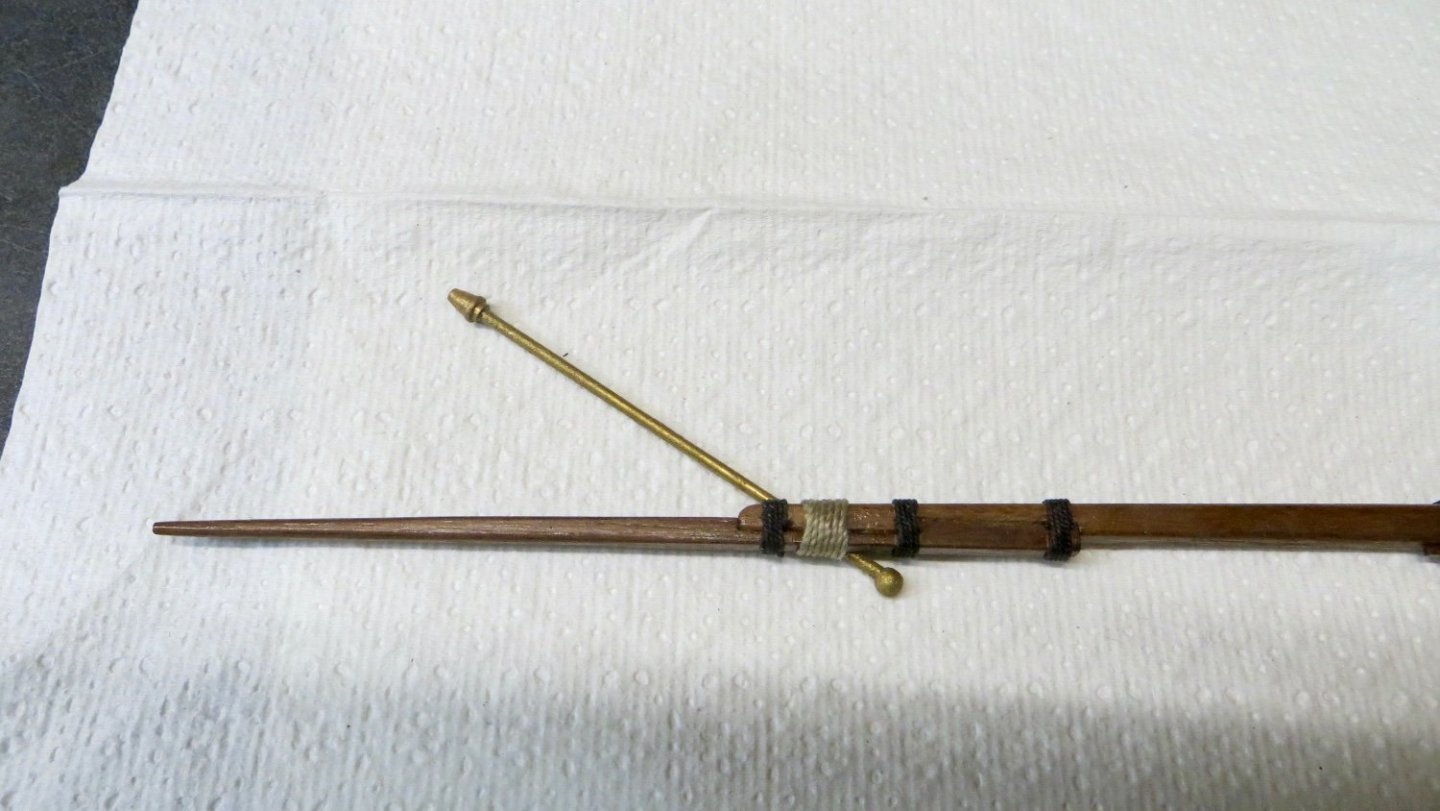
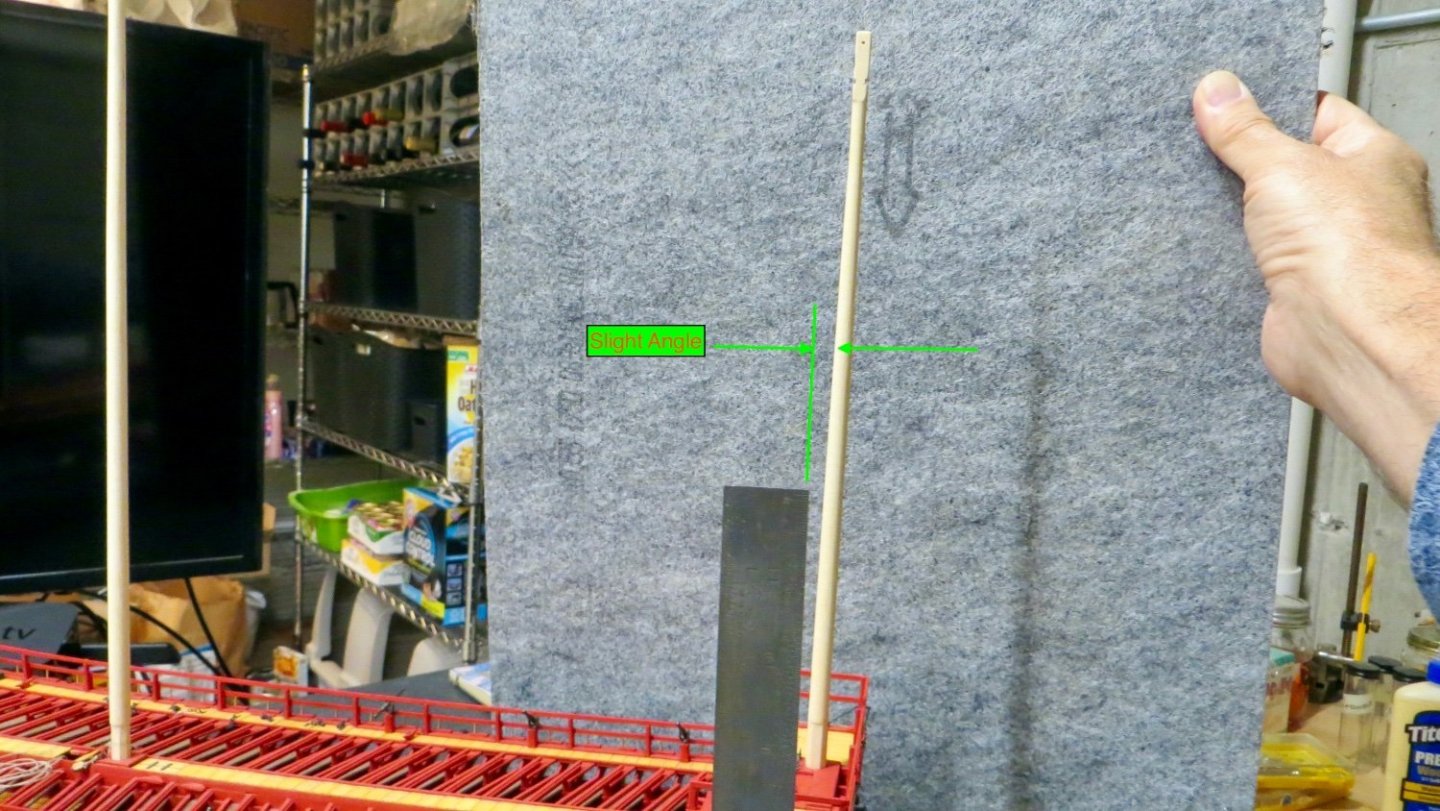
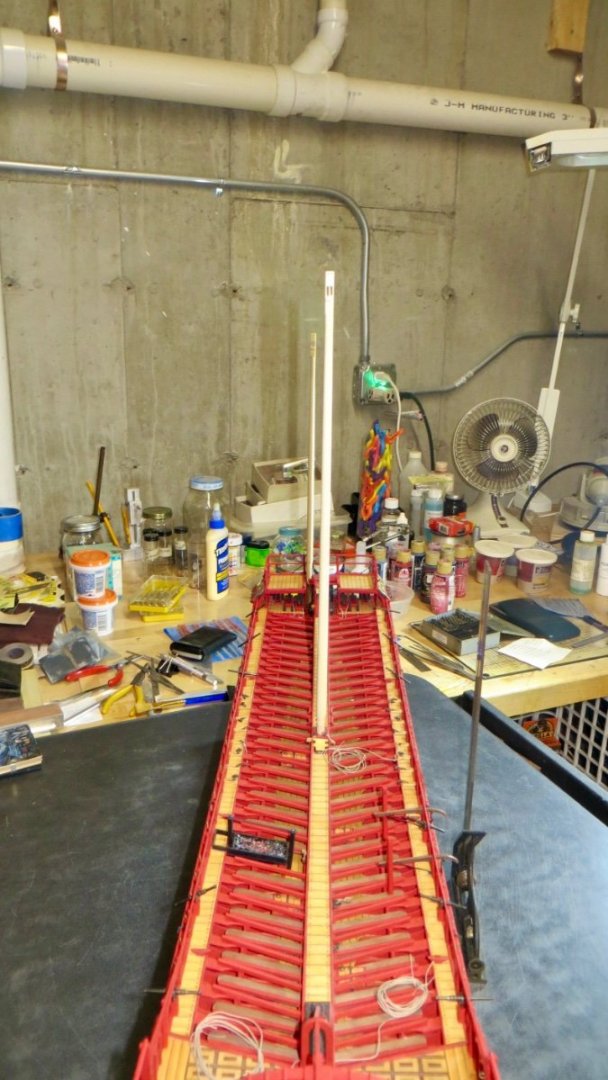
Hello, Having been making some more progress on the model. Attached the flag pendent to the foremast and Mainmast. Hanging Loosely now. Will add some white glue to the lines and add some weight to stiffen the lines at a later point. Finally glued the Foremast and Mainmast to the Ship. As mentioned before, the foremast is tipped forward at a slight angle. Foremast and Mainmast attached As mentioned in the previous post, I decided to make some new sails and have them furled to the yards. Before attaching the sails, I added some of the lines that are to be fixed to the yards at this point. Figured it would be easier now instead of after the sails are installed. Halyard lines added here Lines with Toggles attached on lower end of main yard Lines added to lower end of Fore yard Flag pendents added to tops of Fore yard and Main yard Picked up some more of the same dyes I used for my Vasa build a while back. I will use these for dyeing my sail cloth I have finished dyeing the sails and making them. I took plenty of photos of my process and will start to post them soon. Thanks again for stopping by! Frank


- 510 replies
-
- 5
-

-
-
- reale de france
- corel
- (and 1 more)
-
Michael, Beautiful work on a massive build! You are putting a lot of thought and innovation into this build. Congrats! I hope all is well, Frank
-
Thank you Michael! I keep going back to your Reale log for hints and assistance! I will have to google "72 Nova" to see what you're working on! Thanks, Frank
-
Thanks Kirill. Appreciated! Thanks for stopping by for a look! Frank
-
Hi Tim, Good to hear from you! I hope all is well. The model will not be ready for this years show, but should be for next year. Too many other things going on. I.E. a few planned fishing trips, wedding on the West Coast etc. Lol! I am hoping to have the model done by fall, then have to build the stand and case. Hopefully we can all have are meetings in person again this year, so I can bring the model in to the club. Best, Frank
-
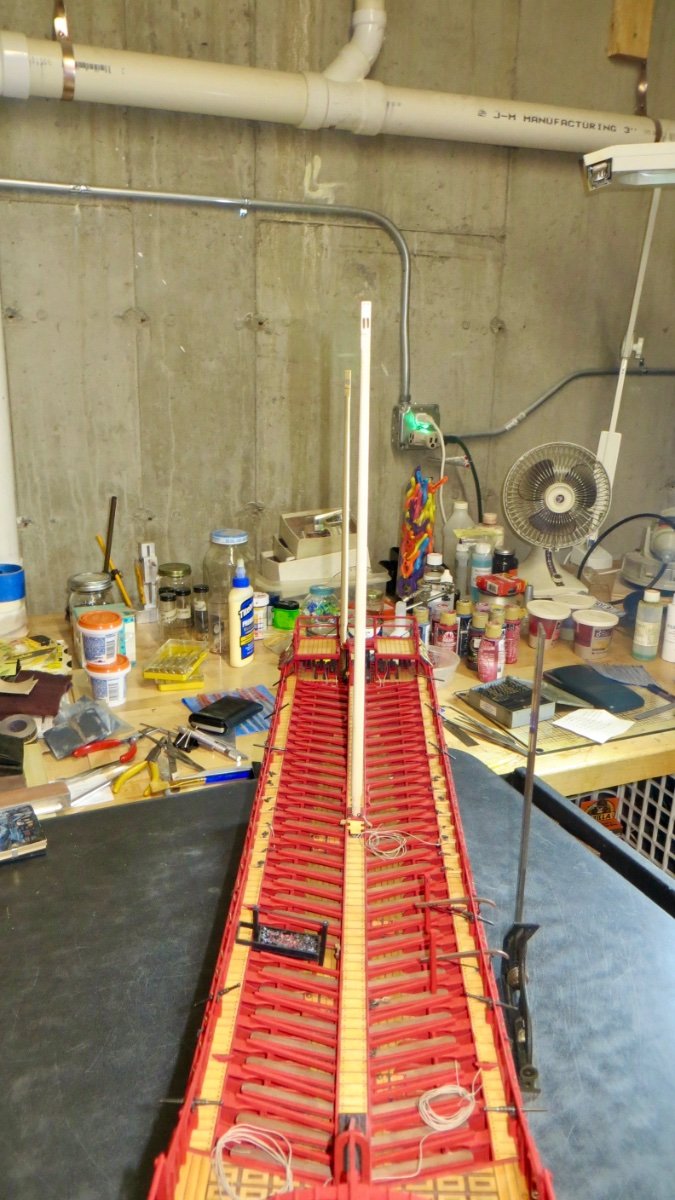
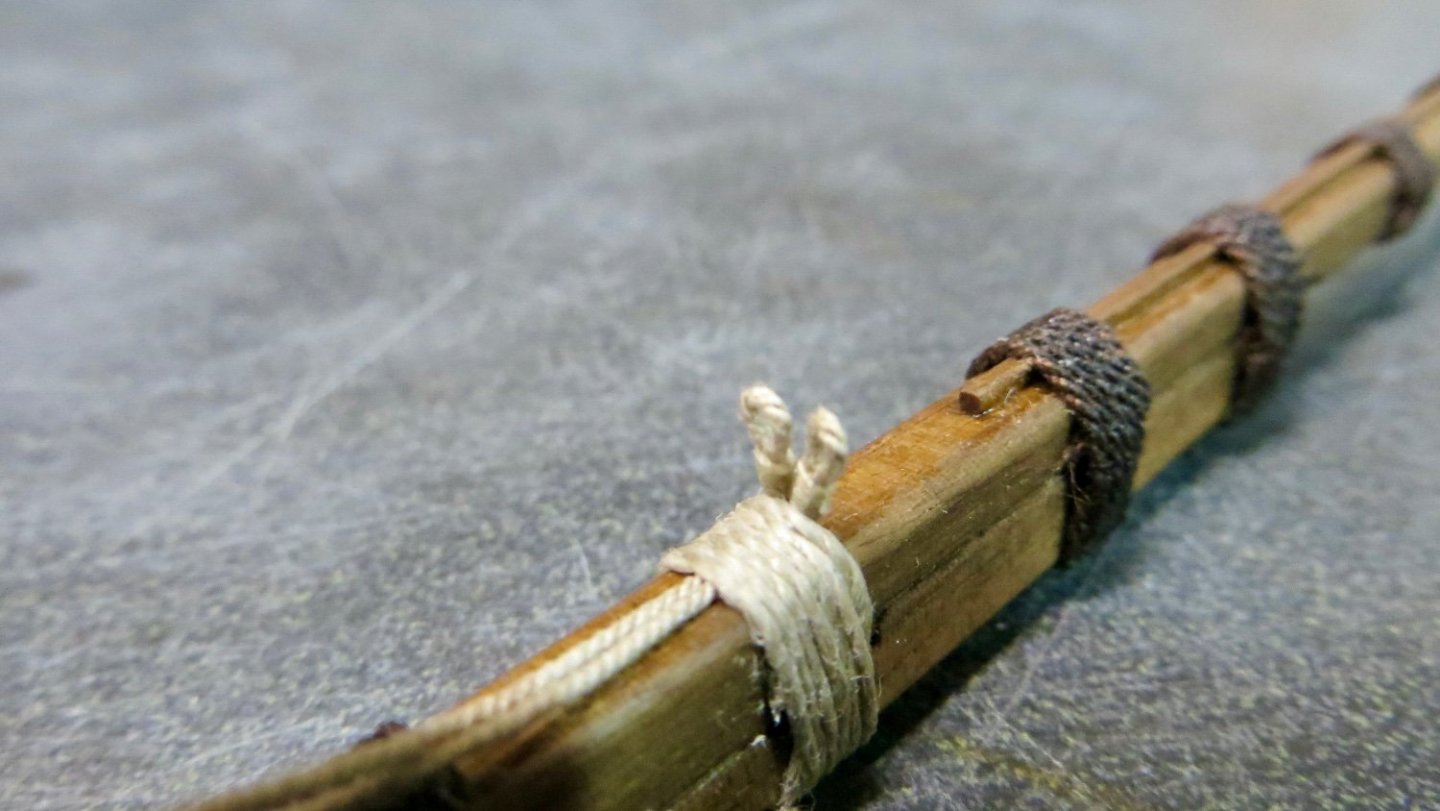
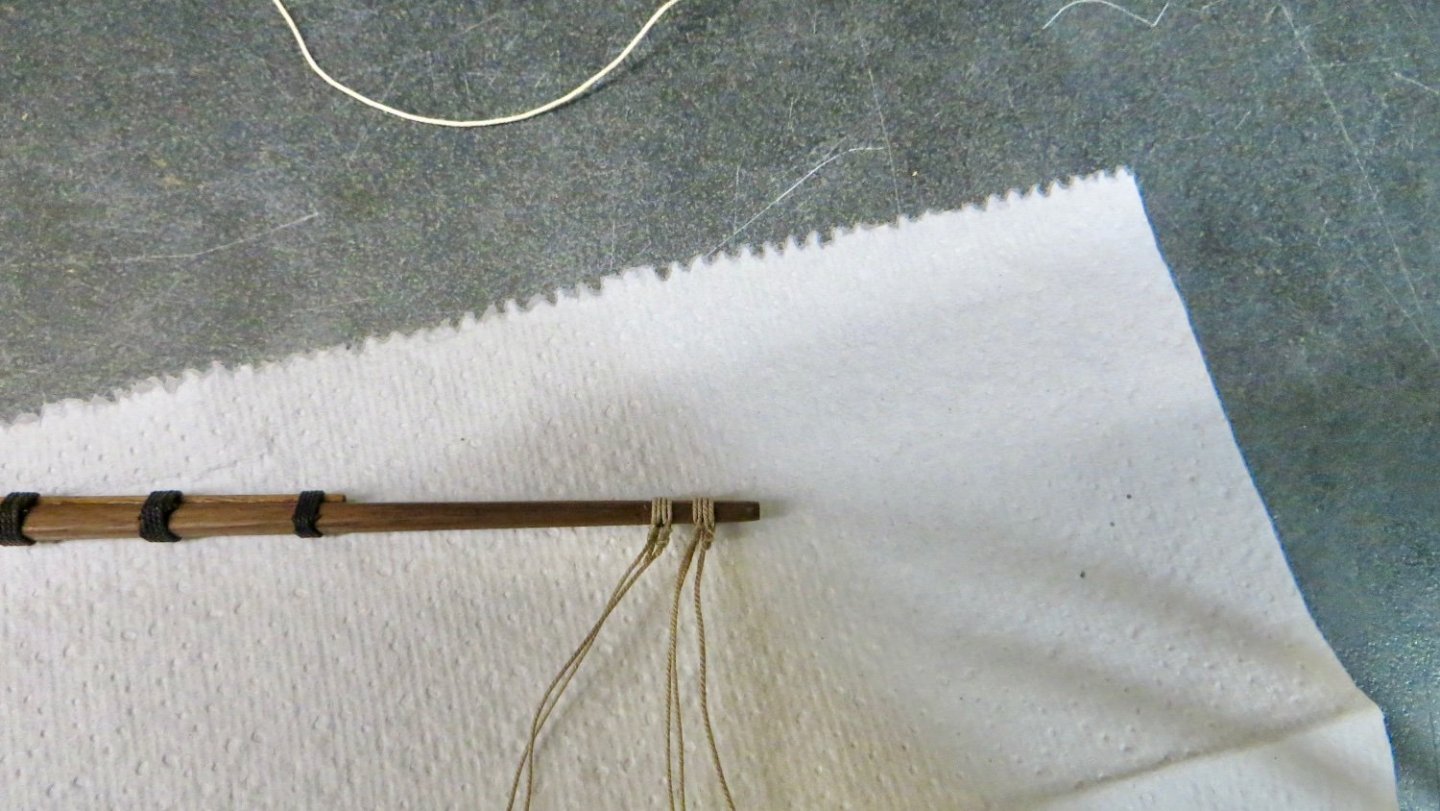
Hello, Happy New Year! Continuing work on the main and Fore Mast. I did a trial fit or the masts on the ship. The foremast is pitched forward a small amount (about 4 to 5 deg.) from the vertical, while the mainmast is perpendicular to the waterline. Also did a test fit from aft to bow. The Foremast is to the left of the mainmast, but parallel to each other. Milled out the slots for the sheaves near the mast tops Stained the masts, using the same light oak I have been using on the deck planks. I purposely used the same Eastern White Pine for making the masts as I did for the deck planks, so that the staining would match. Inserted the sheaves Made the Kevel bits out of walnut and fastened to the masts Pre-rigging the Foremast Shrouds. Did the same for the Main Mast Lashing of the Shrouds A while back, while visiting the excellent log of the Reale de France by Safemaster, Michael D. was kind enough to show me how he attached the zig zag garland to the lashing. Mine did not come out as nice as his!! Mainmast shown. Attaching the Flag Staffs to both masts. I will keep working on the masts and start to pre-rig the yards. I have decided to make the sails and have them furled to the yards, before attaching everything to the masts. Thanks for stopping by, Frank


- 510 replies
-
- 7
-
-
- reale de france
- corel
- (and 1 more)
-
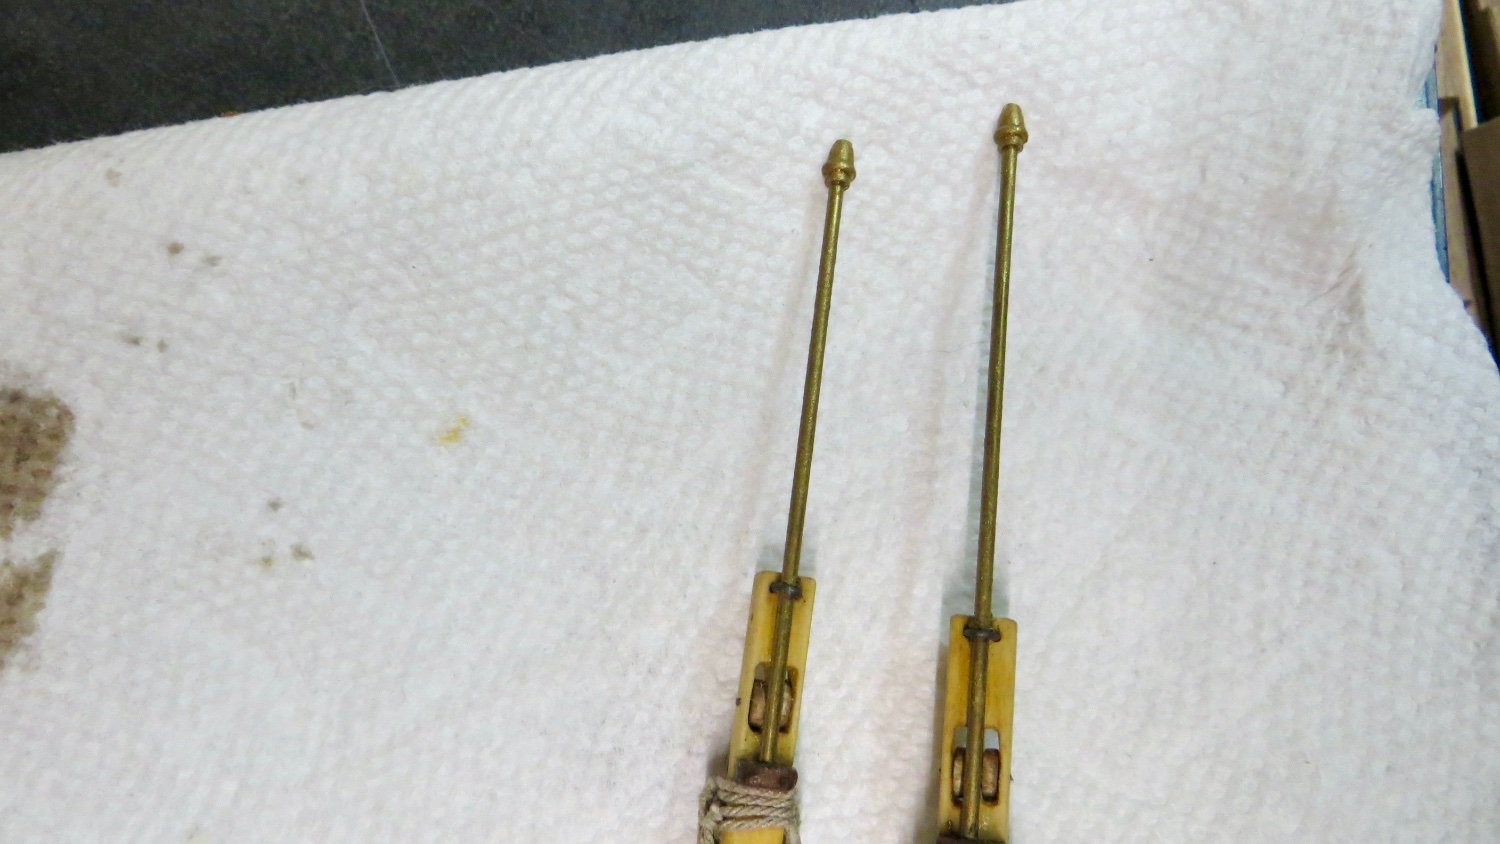
Very nice Clark! congratulations ! Sorry to hear about the quality of the oars. I took a quick peek at mine and they look really nice. Frank
- 112 replies
-
- 1
-
-
- corel
- reale de france
- (and 1 more)
-
Tim, Hubac and Michael, Thanks you all for your welcome comments. Go figure, I finally get back into my model and immediately proceed to catch a severe flu, which has kept me in bed all week! Starting to recover slowly though. Lol!! Thanks again, Frank
- 510 replies
-
- 1
-
-
- reale de france
- corel
- (and 1 more)
-
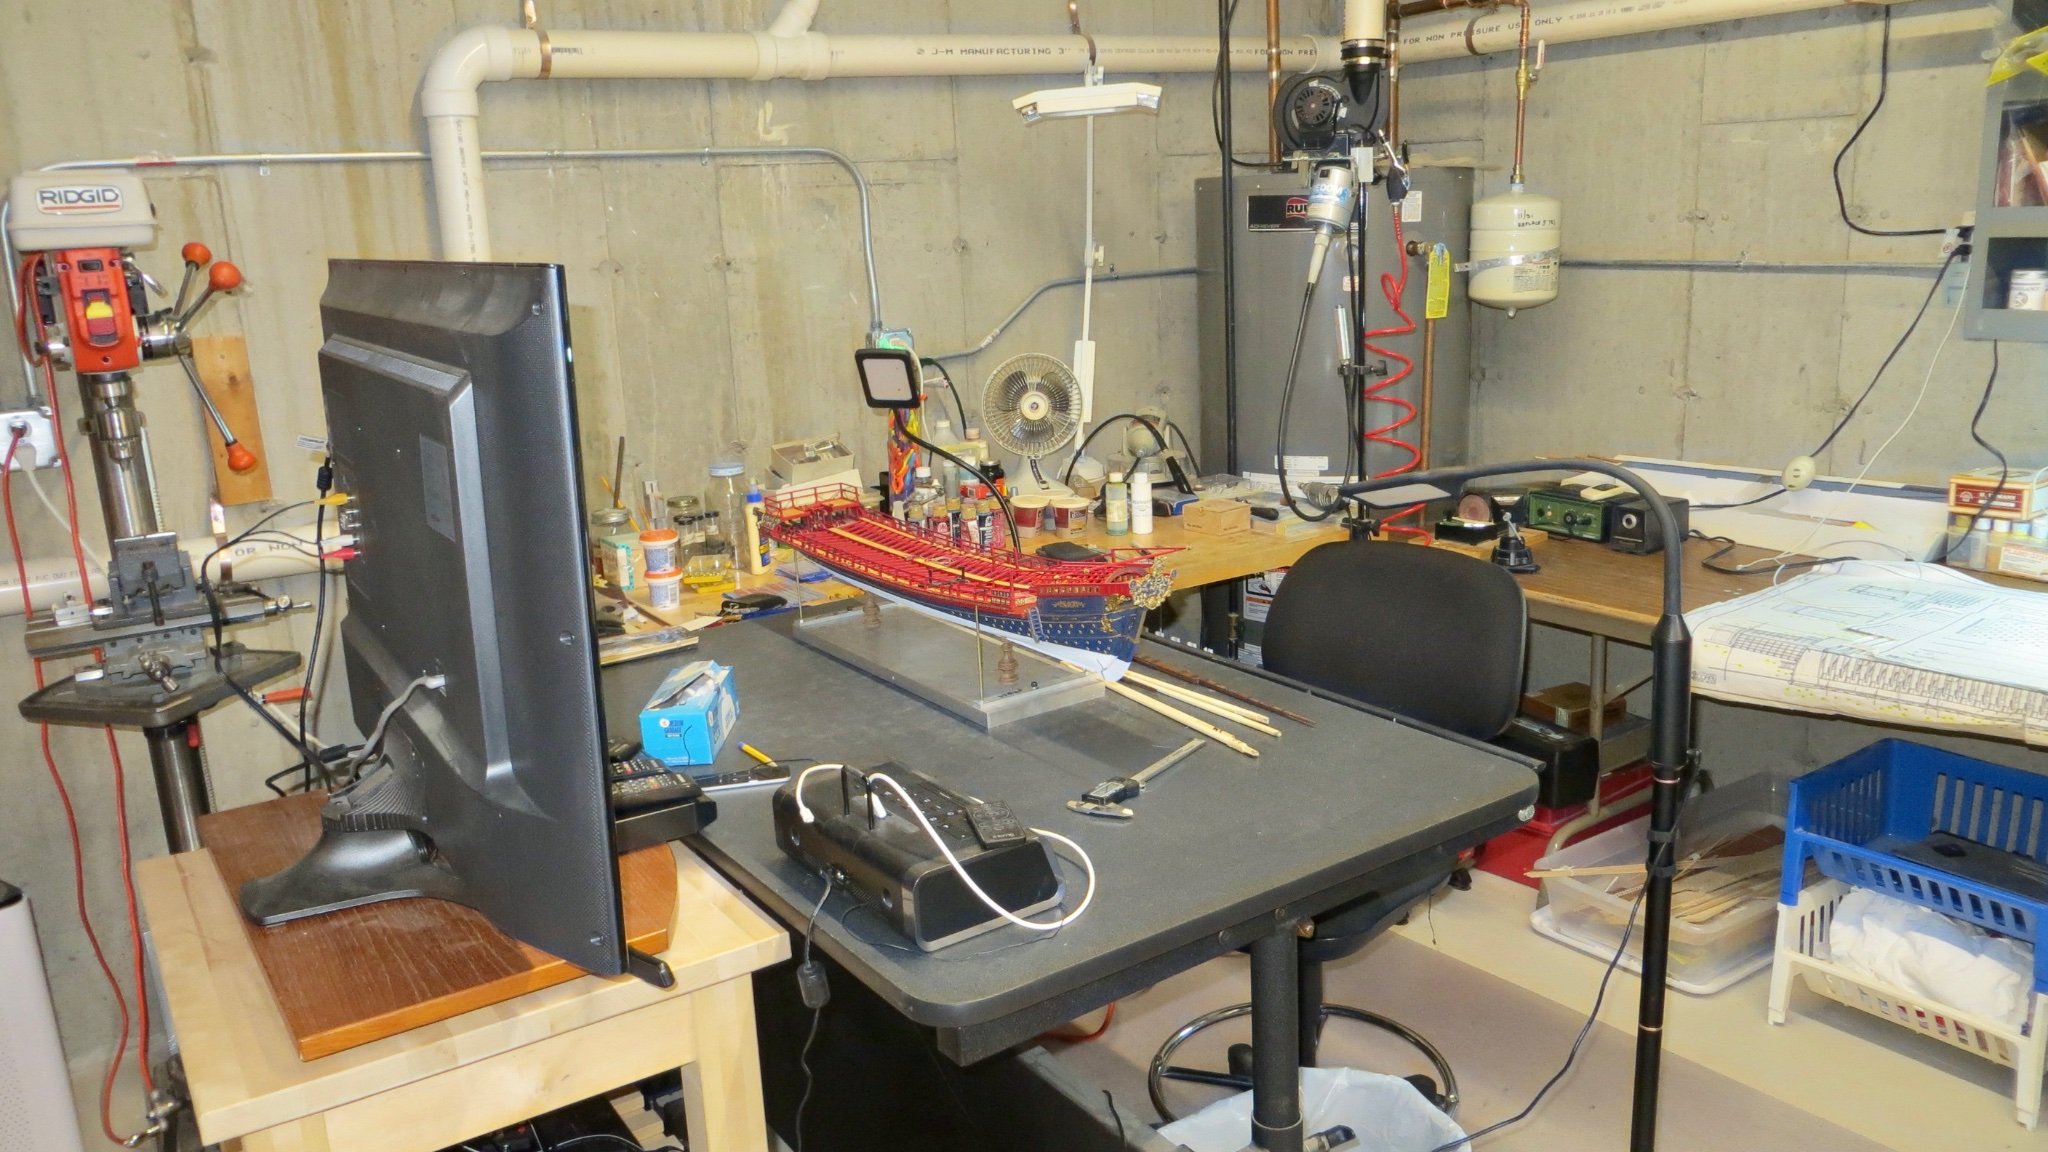
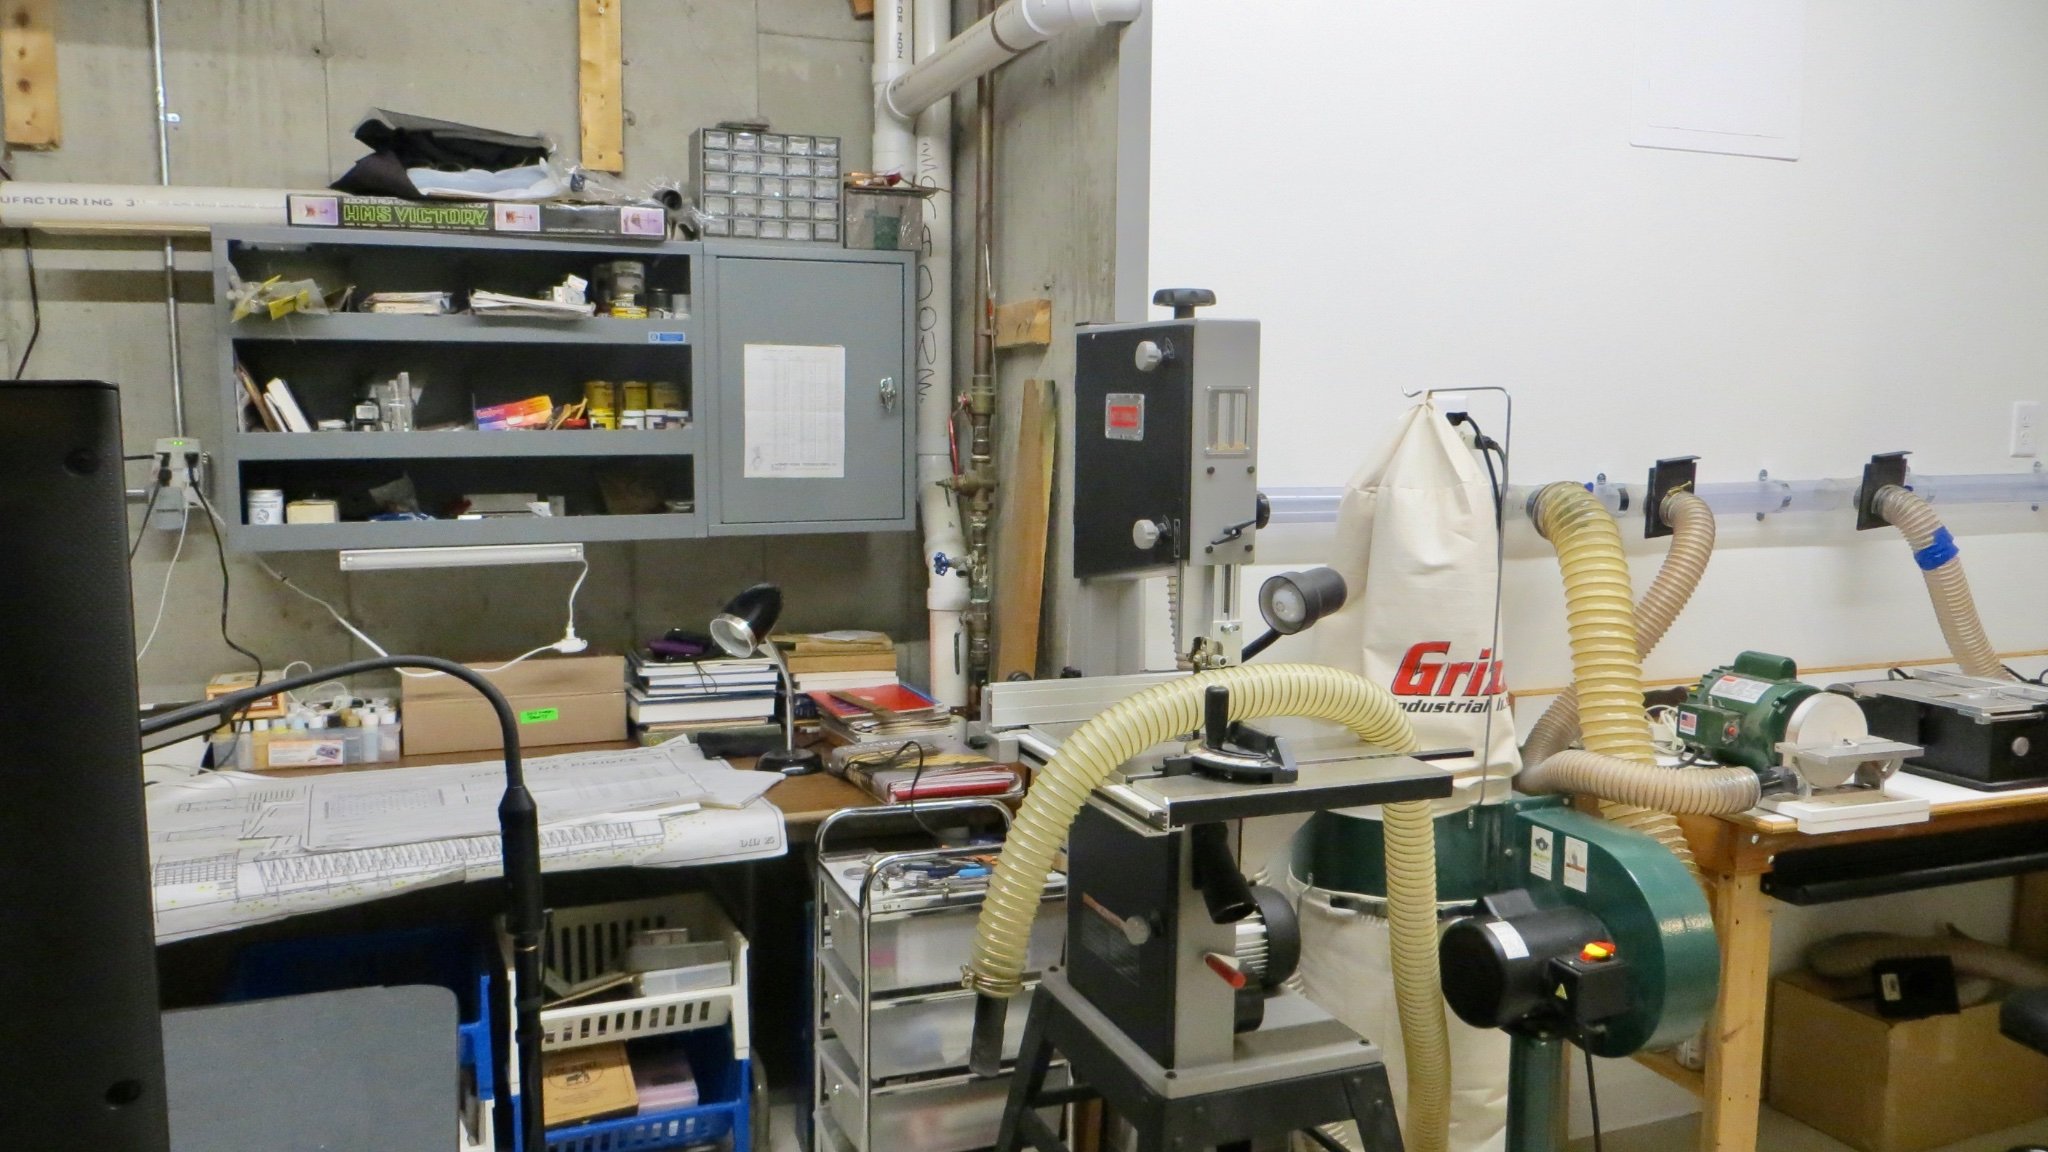
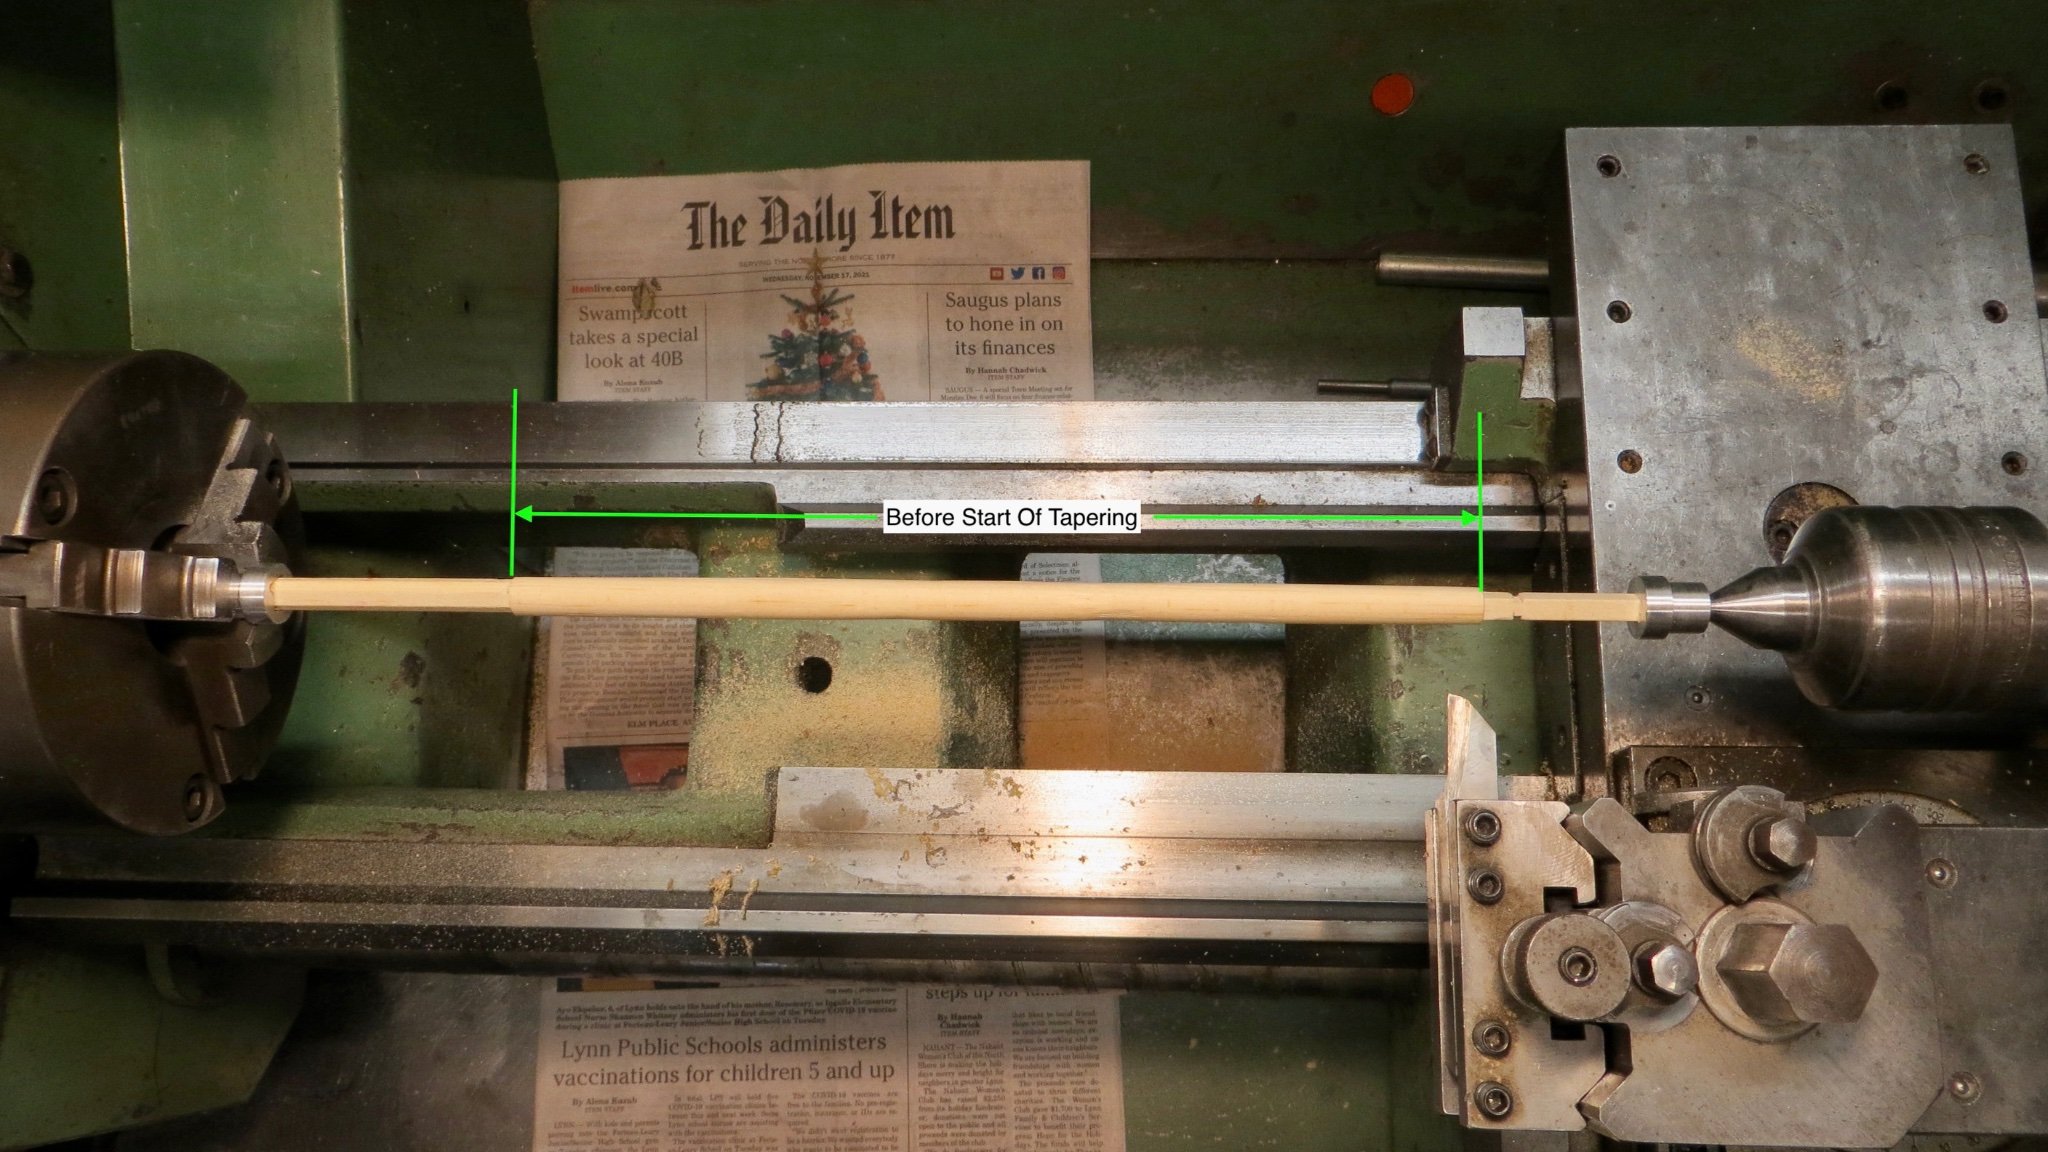
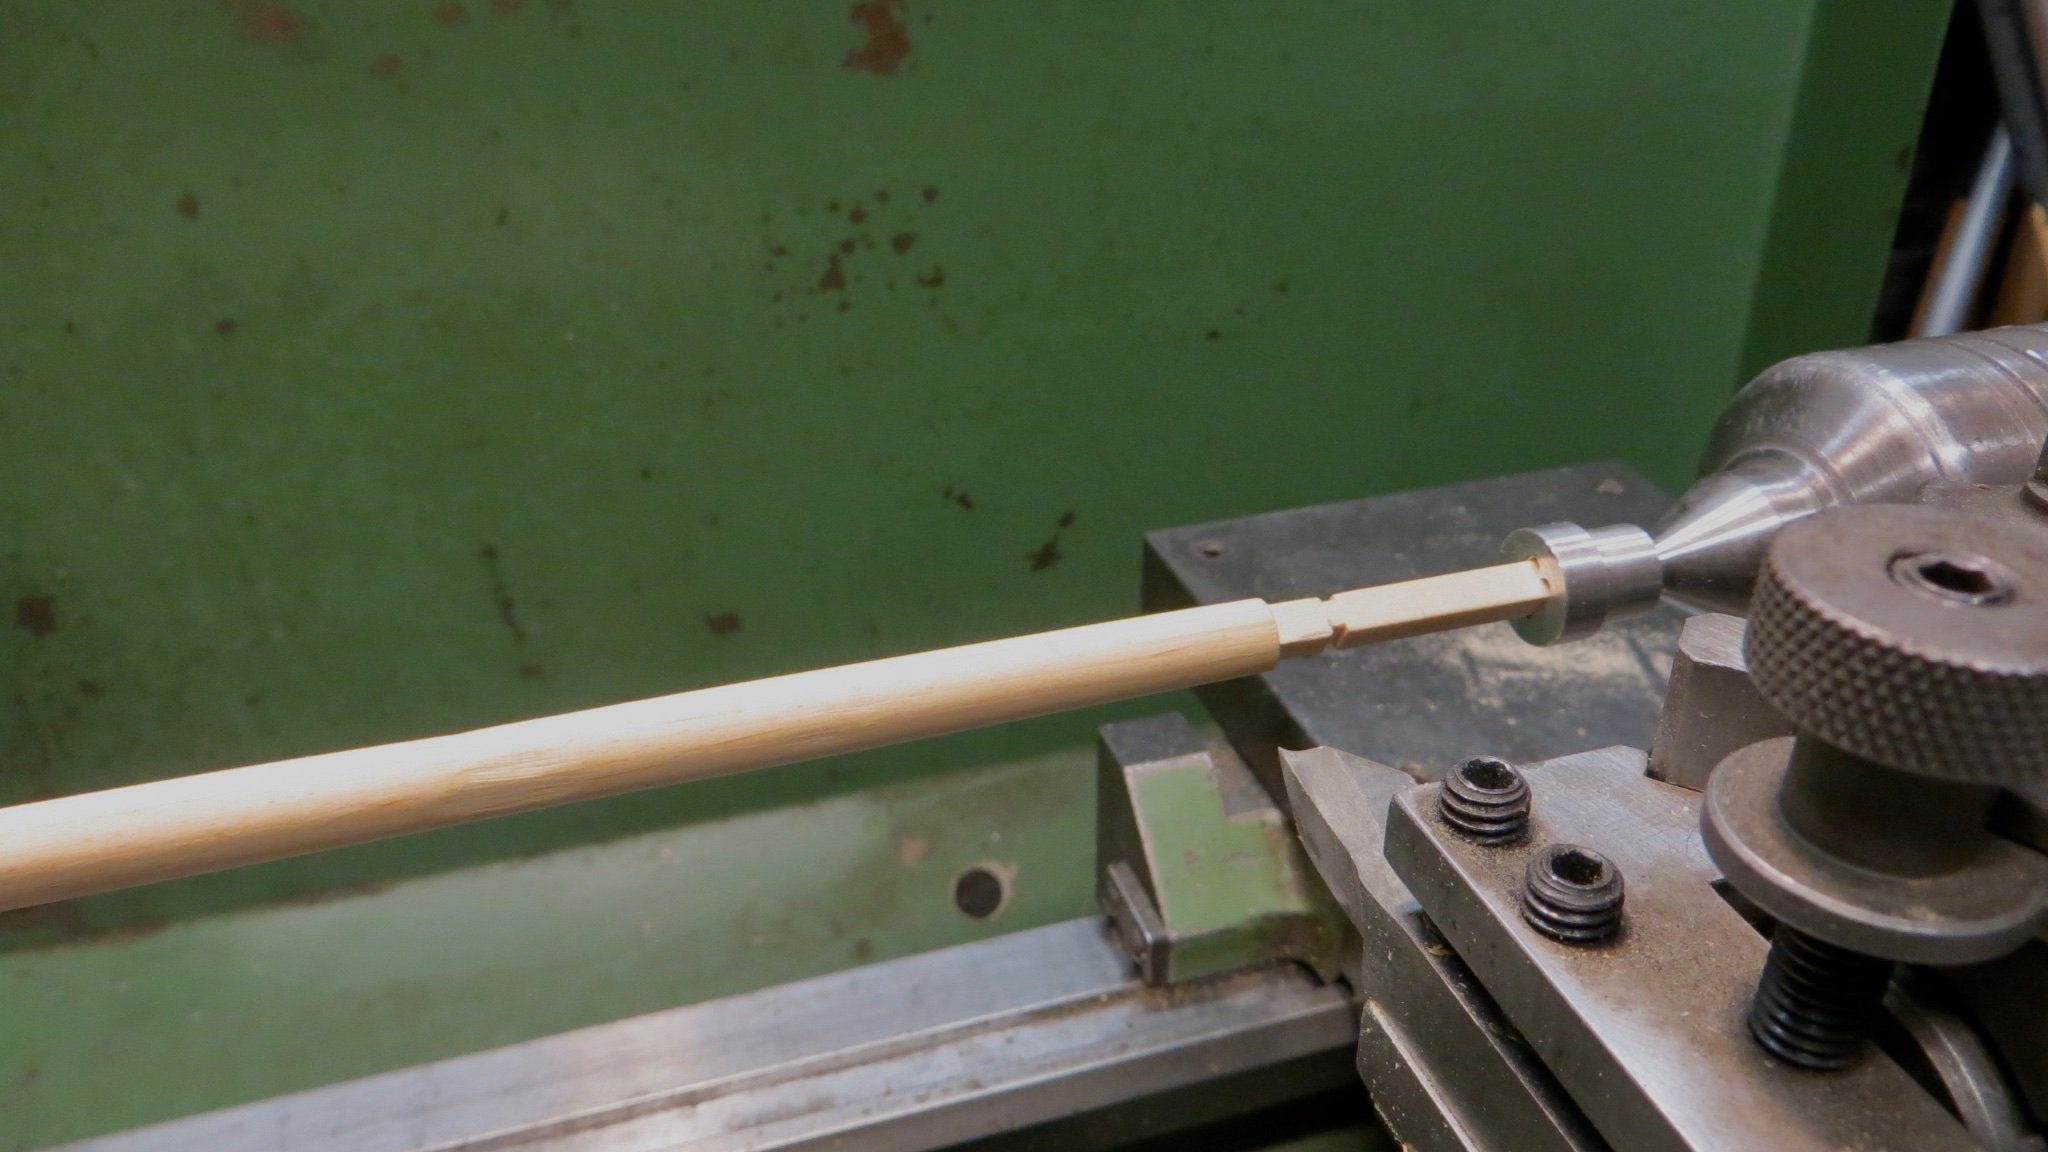
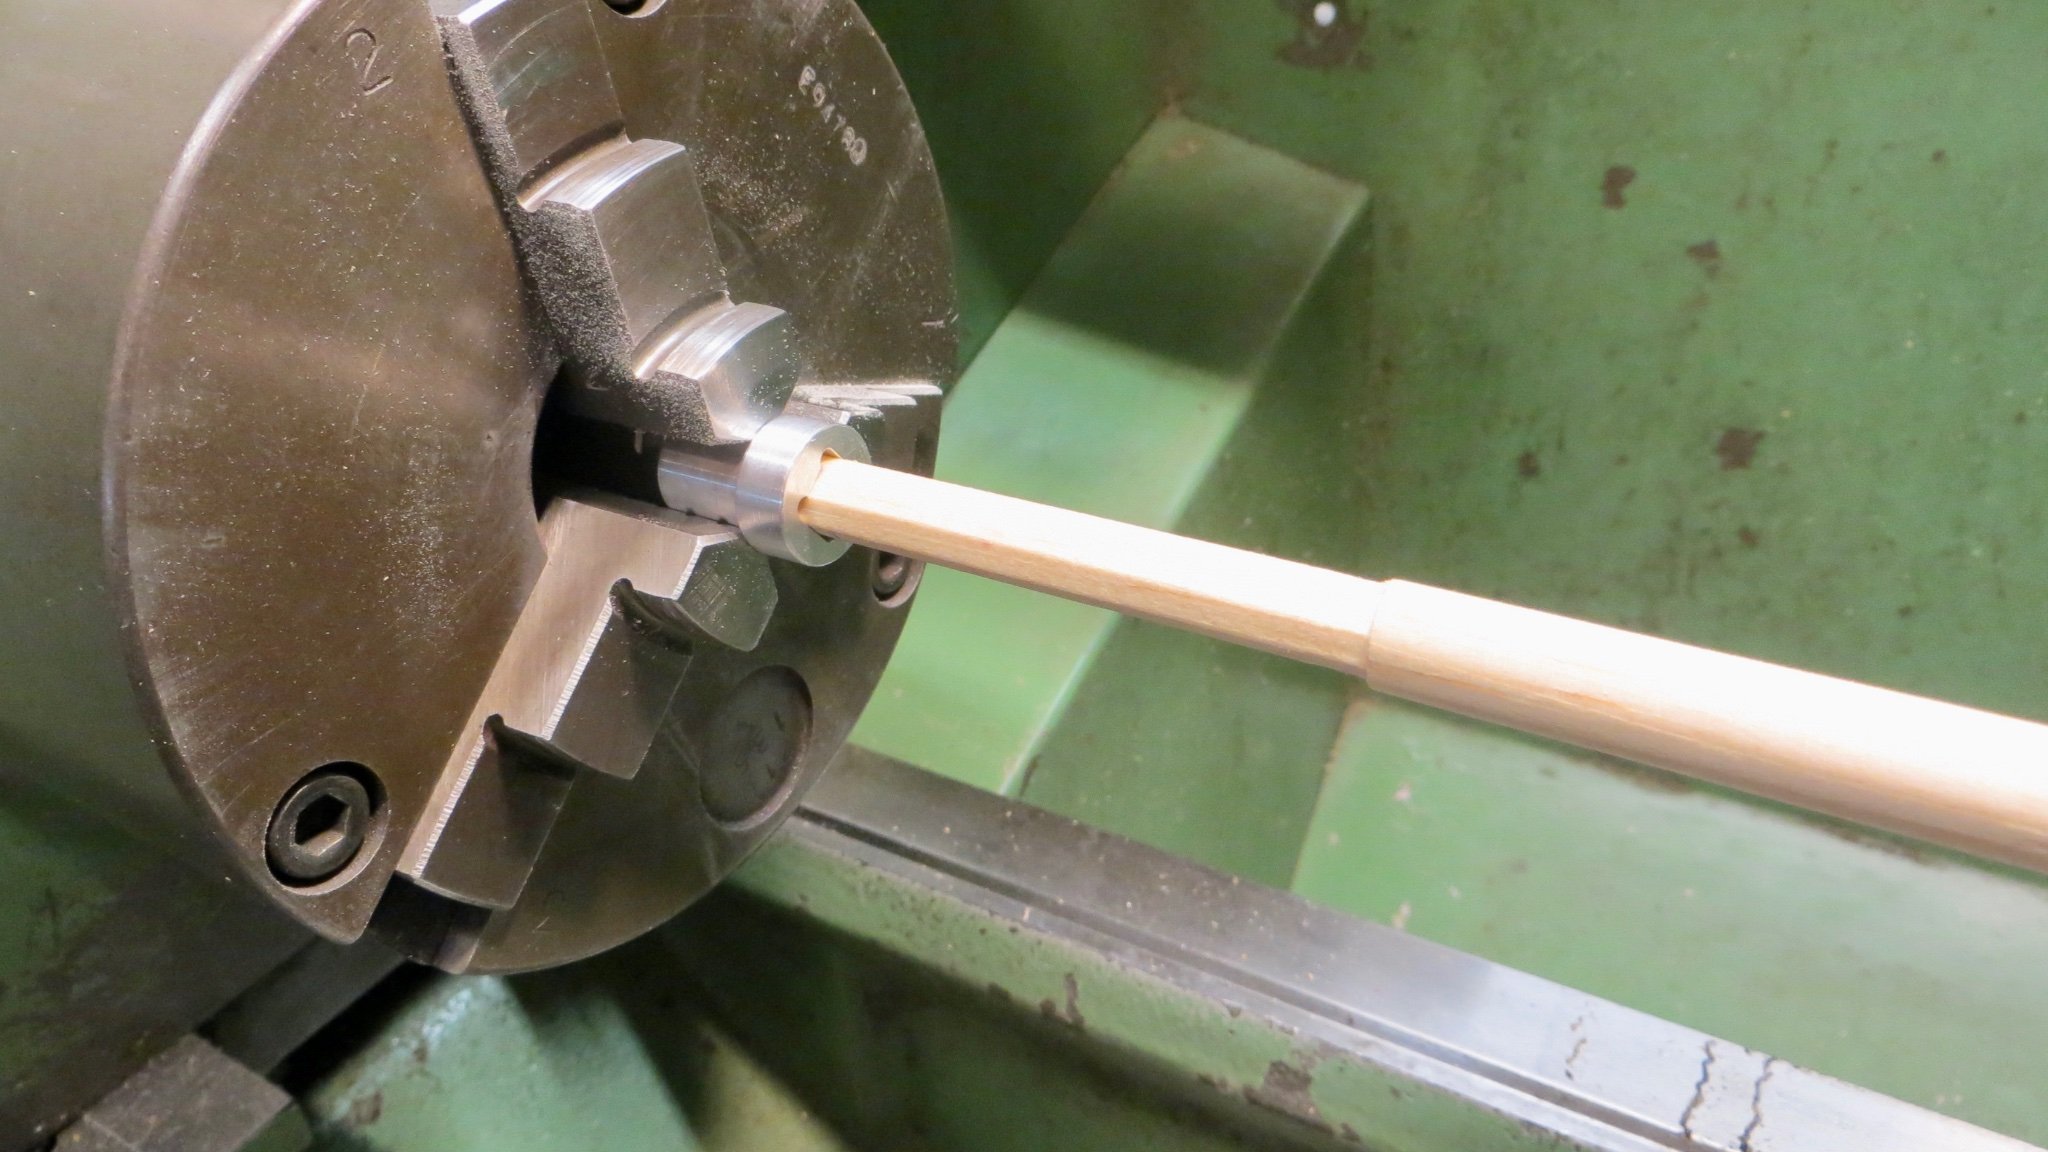
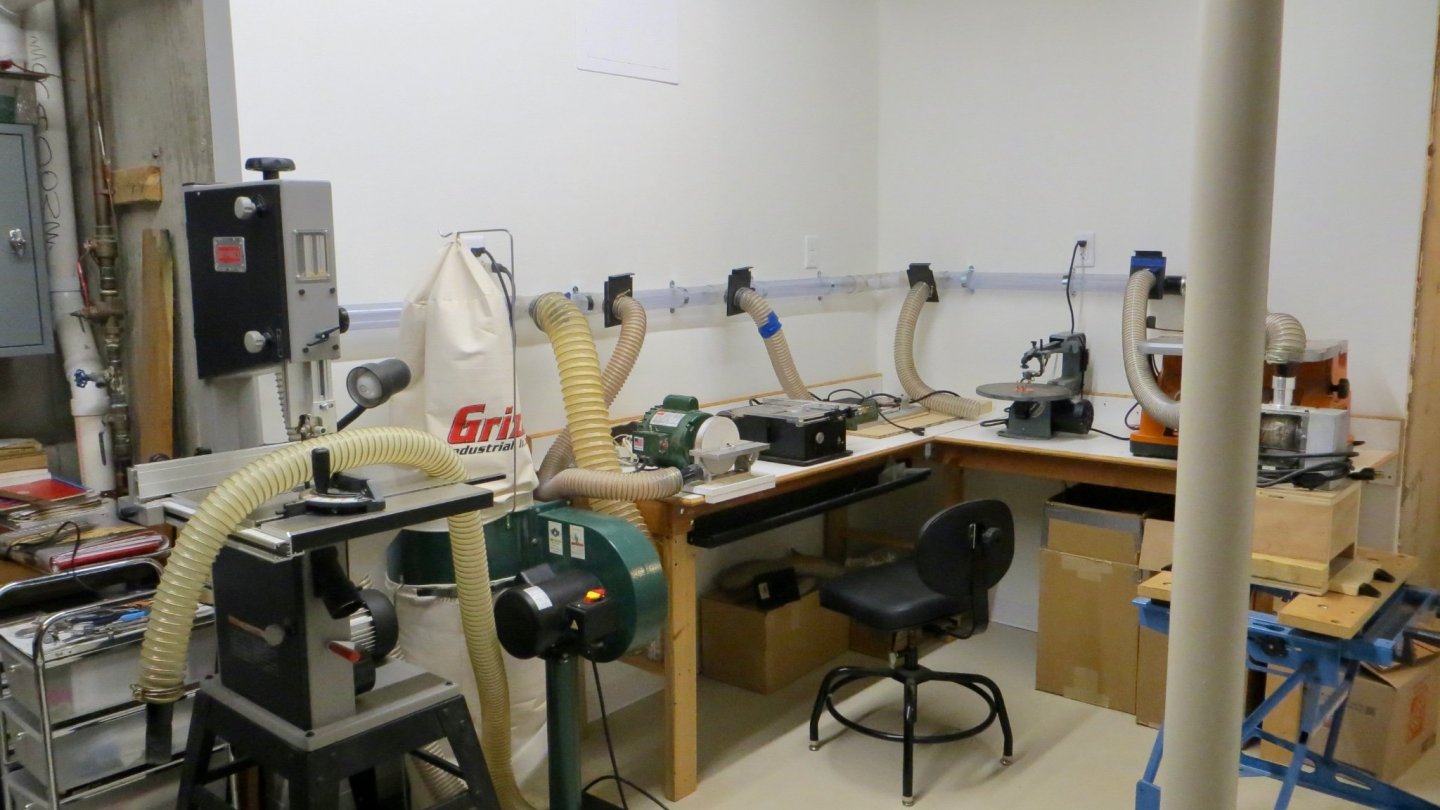
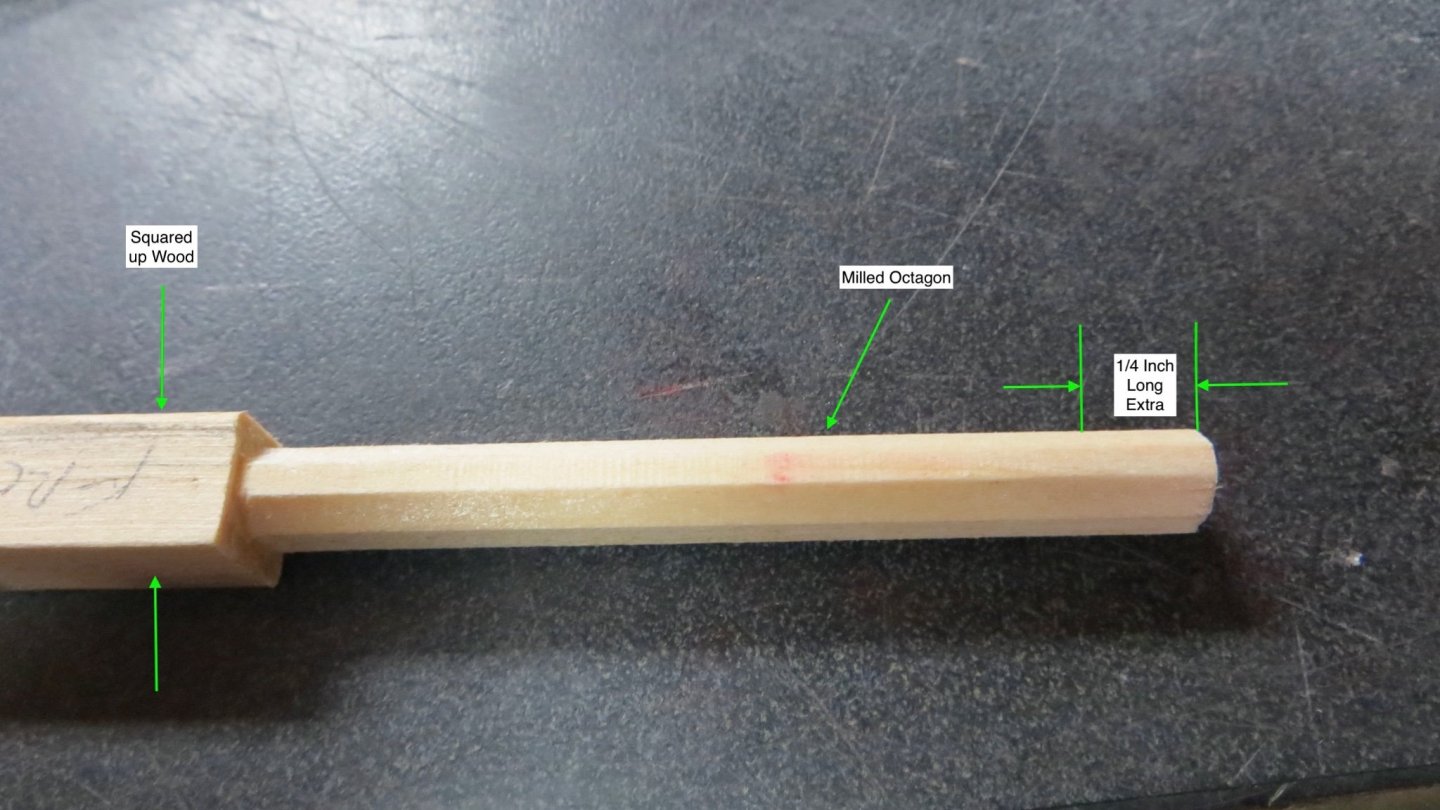
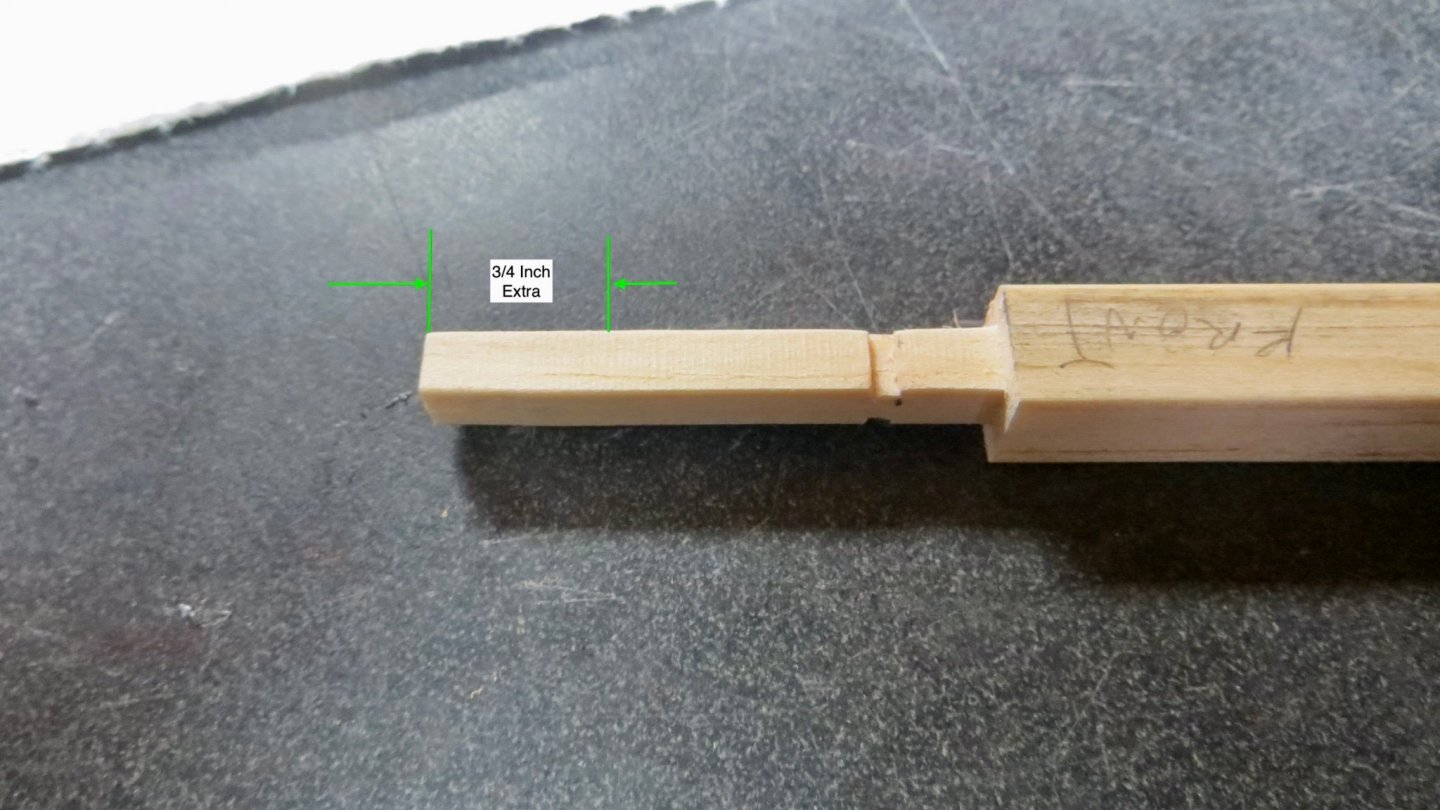
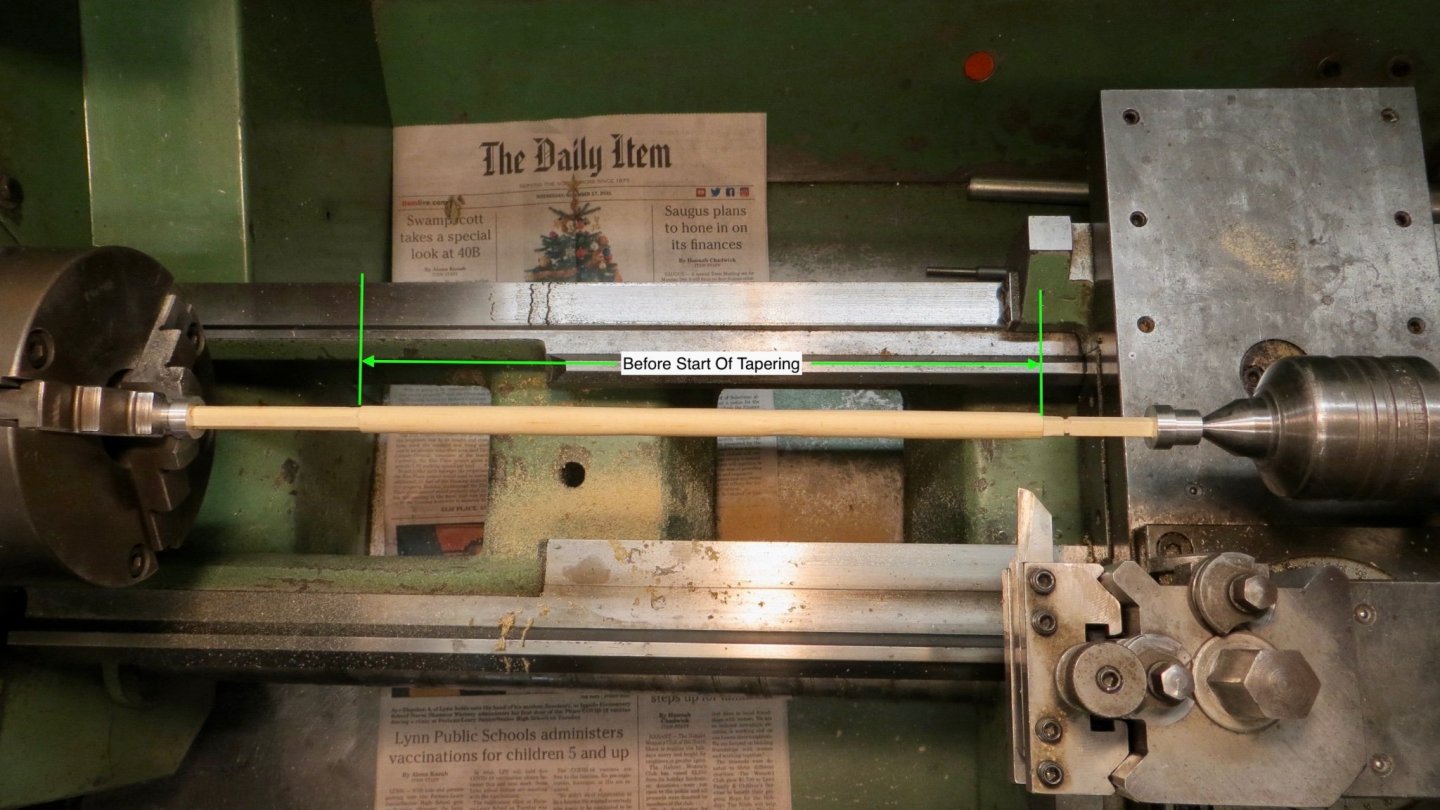
Hello, Finally starting work on the model again. As mentioned in previous posts, my wife and I decided to "downsize" from a large house to a smaller townhouse. While searching for a townhouse that my wife would be happy with, the only demand that I had was a space for my workshop. After passing papers in early October, I had to finish sheetrock some of the new workspace and bring in electrical outlets and new lighting. Then after our old home sold, all the equipment had to be broken down and re-assembled. The work area is a little smaller than my old one, but I am happy with the way it turned out. Sitting area around the hot water heater! Dust collector and bandsaw Equipment in opposite corner My last post showed the work on the yards. Now Turning my attention to the masts. The Corel plans call for using some of their nice supplied round dowels and then creating an octagon on one end and a square on the other end. Since I didn't have a rotary table to accomplish this and keeping both ends in alignment, I took a different tack. I squared up 2 pieces of wood oversize, using the table saw and thickness sander. Then I was easily able to create the octagon shape on the lower ends of the masts, leaving a 1/4 inch extra stock for additional work The top end of each mast was milled to a square with slots on 2 sides. I left this end and extra 3/4 inch long for lathe work. Then after roughly taking the edges off the middle section, I brought the masts over to my friends workshop and I was able to borrow his larger lathe. A taper had to be formed in the middle section. Made a fixture to hold the square top end onto the tailstock Another larger fixture to hold the bottom end onto the chuck Both masts turned with a taper with the smaller diameter near the tailstock Both masts Turned and ready for some more finishing work. Thanks for stopping by. Frank


- 510 replies
-
- 10
-
-
- reale de france
- corel
- (and 1 more)
-
Michael, Shaping up to be a beautiful build! Happy Thanksgiving, Frank
-
Mark, Very, very sad to hear the devastating news. You have been a big help to me on this site and I am keeping you in my thoughts and prayers. Frank
-
Thanks for stopping by Michael and for your comments!
-
Hi Michael, Welcome back! Beautiful work and such fine detail. Especially love the ship's bell enclosure! Congrats, Best, Frank
-
Hi Clark, thanks for the reply. Meeting with electrician today to plan out new workroom. Need to install electrical outlets then sheetrock room. After that things should proceed quickly. I can probably restart the project by working on making sails for the ship. (Could probably do that easily without a workroom!! ) thanks and i'll keep "Krick" in mind if my anchors are in bad shape Frank
- 112 replies
-
- 1
-
-
- corel
- reale de france
- (and 1 more)
-
Hi Clark, Wow, those anchors are in bad shape. Can you heat them and bend them back? Or will you make new ones? I'll have to check my set to see how they look! Looks like you're nearing the finish line! thanks, Frank
-
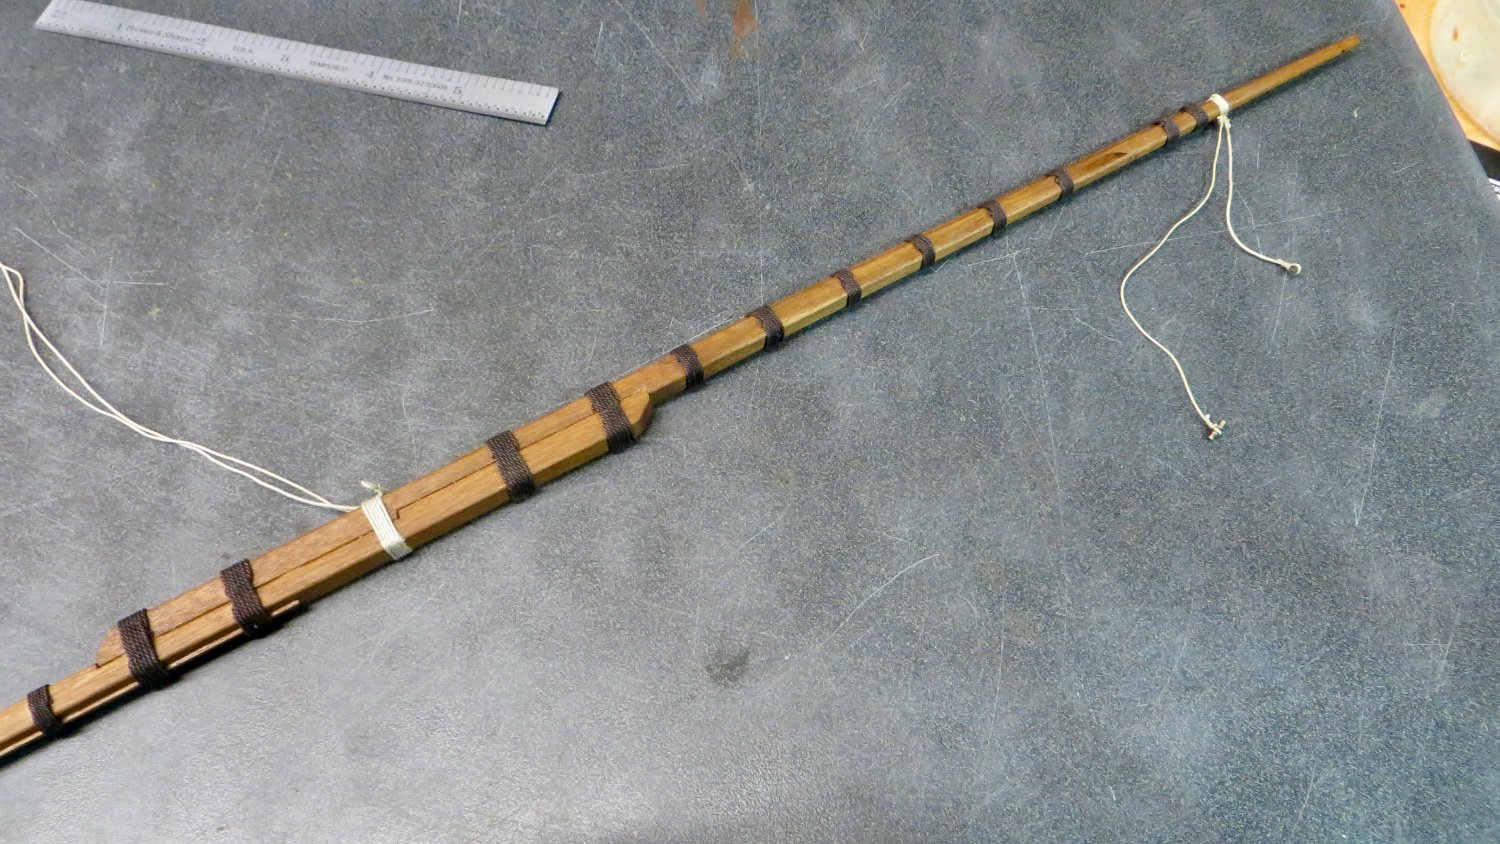
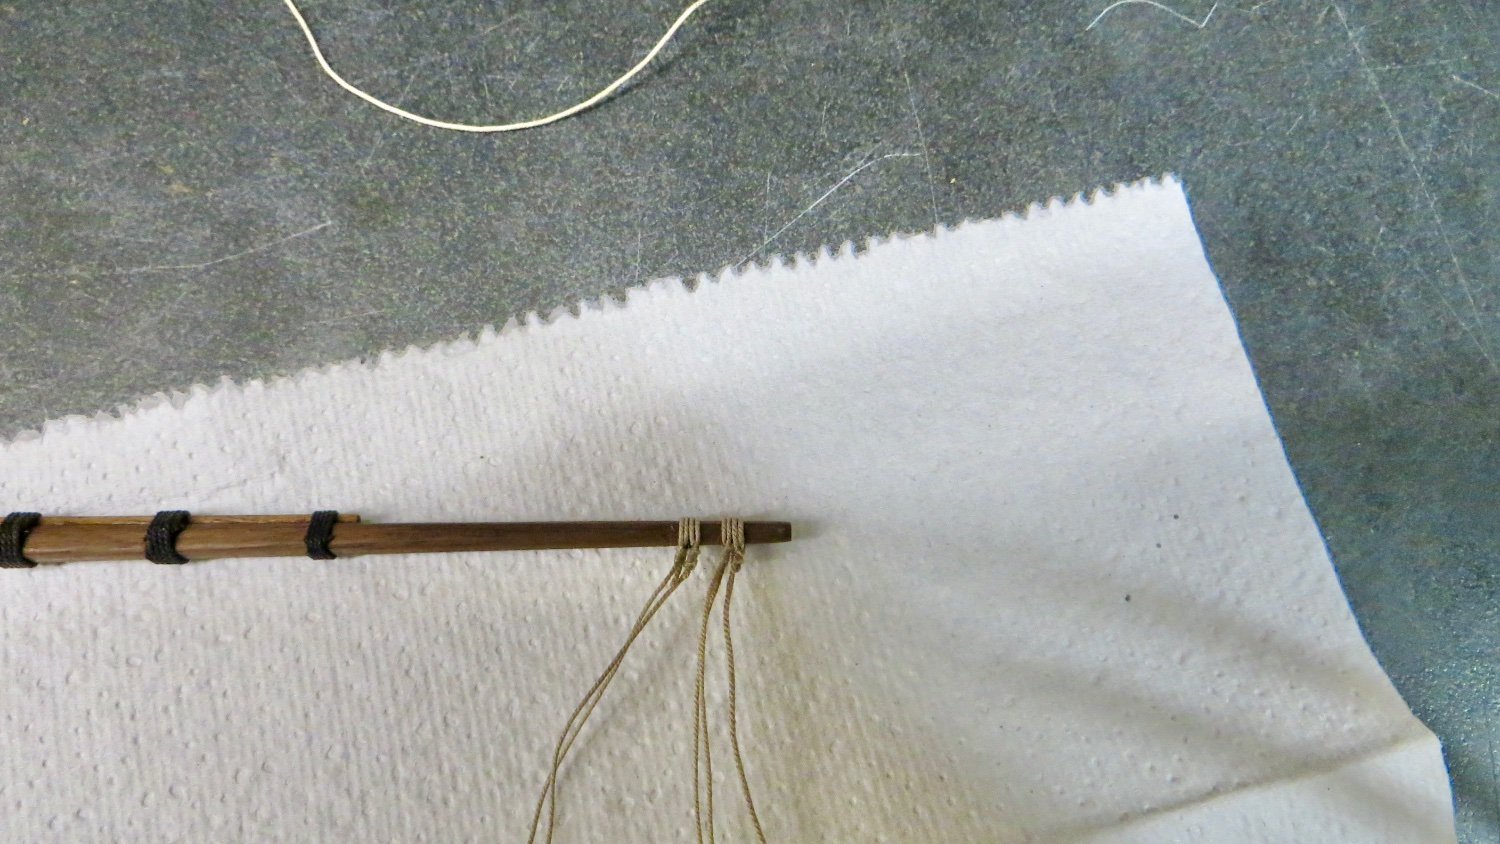
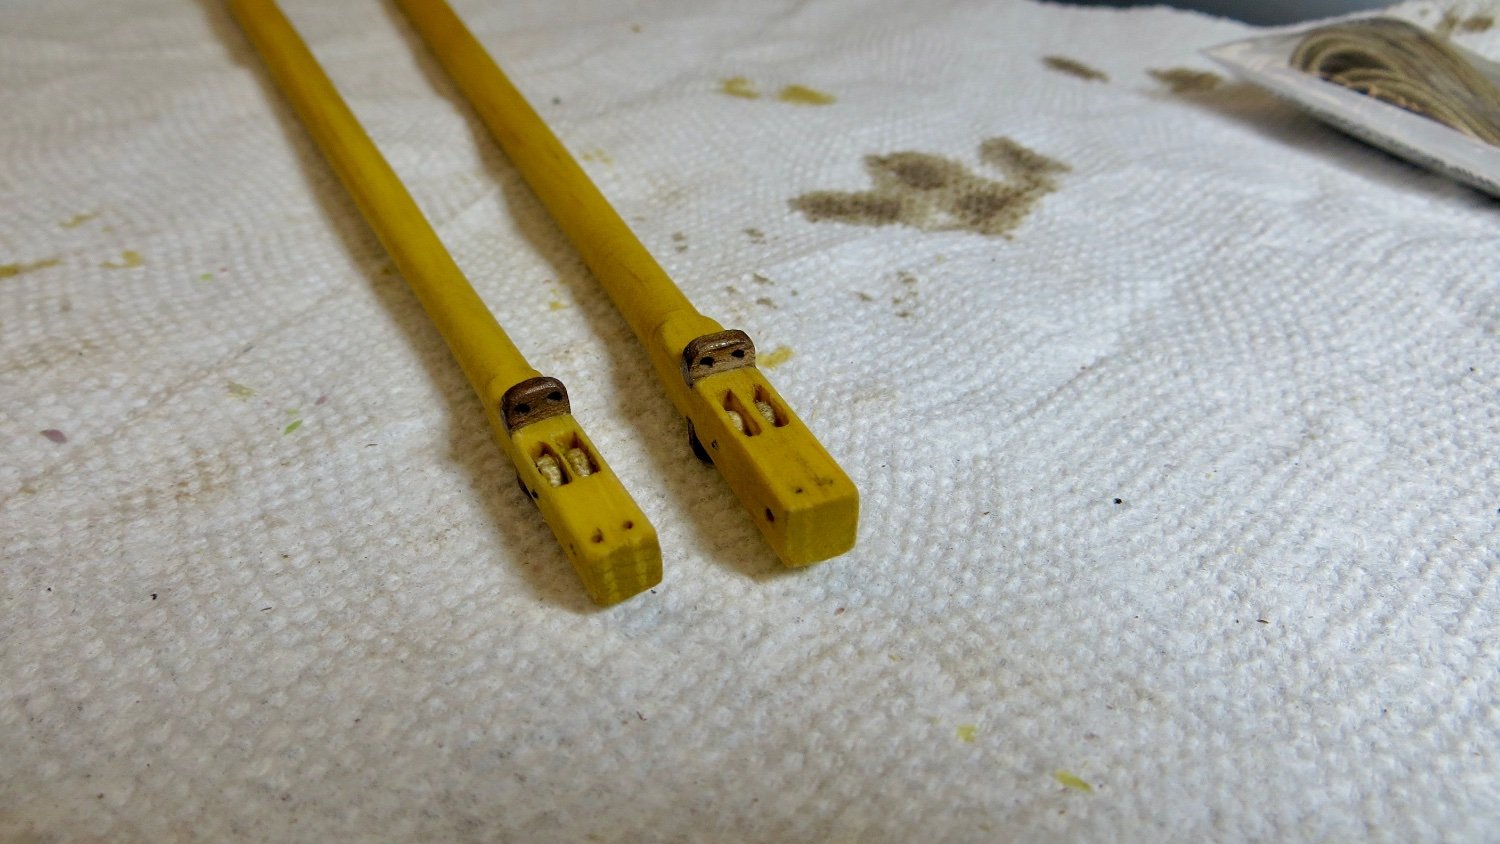
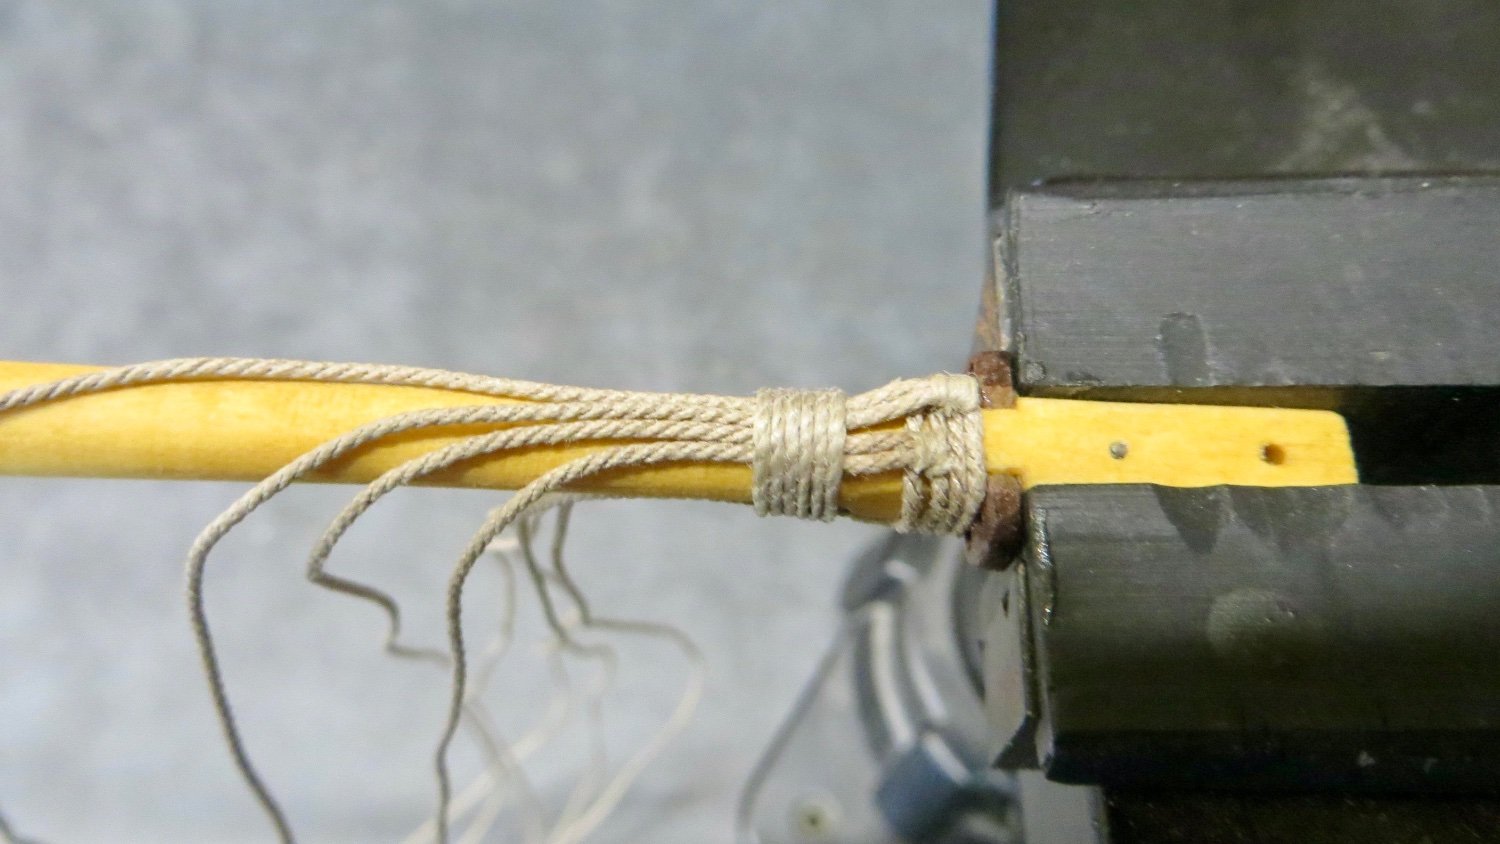
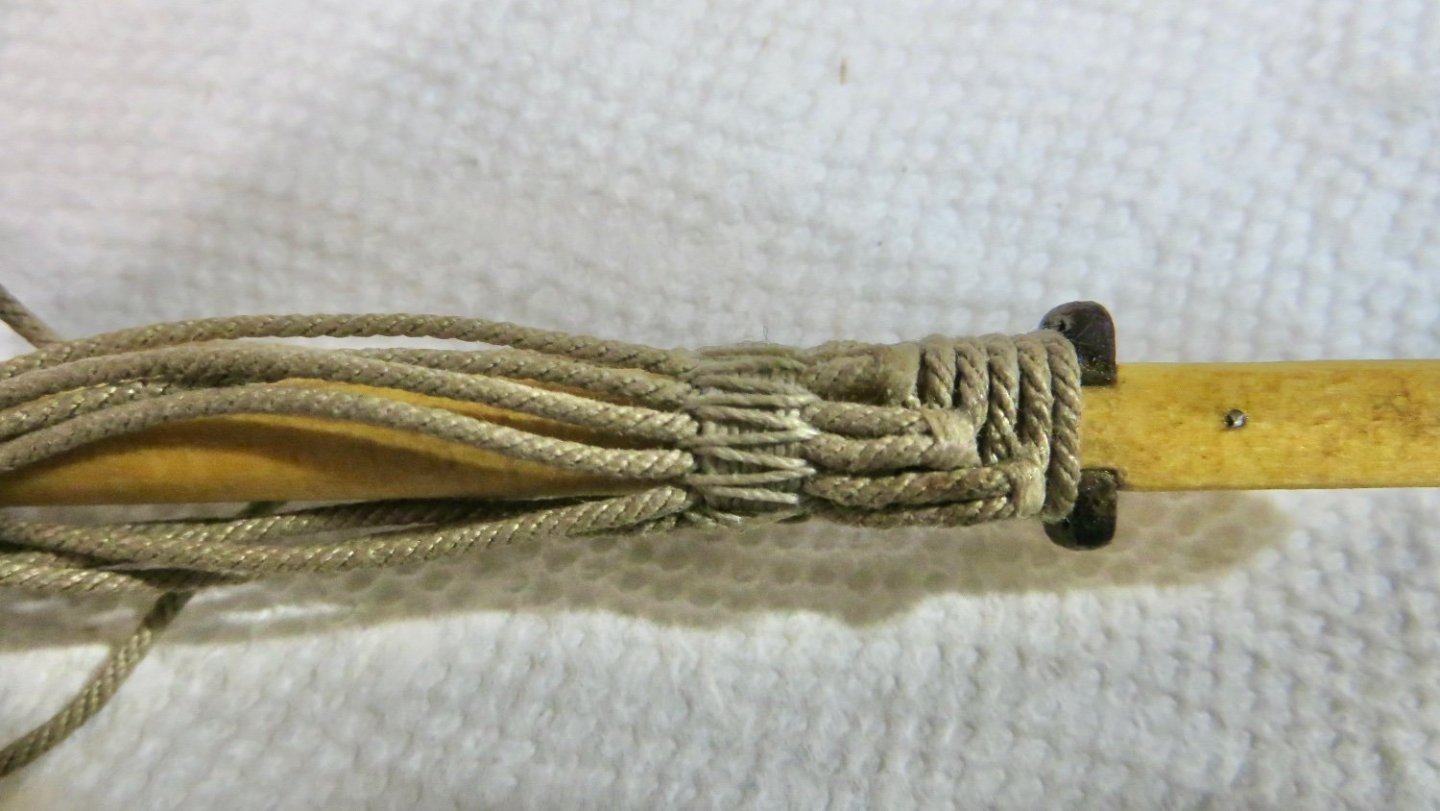
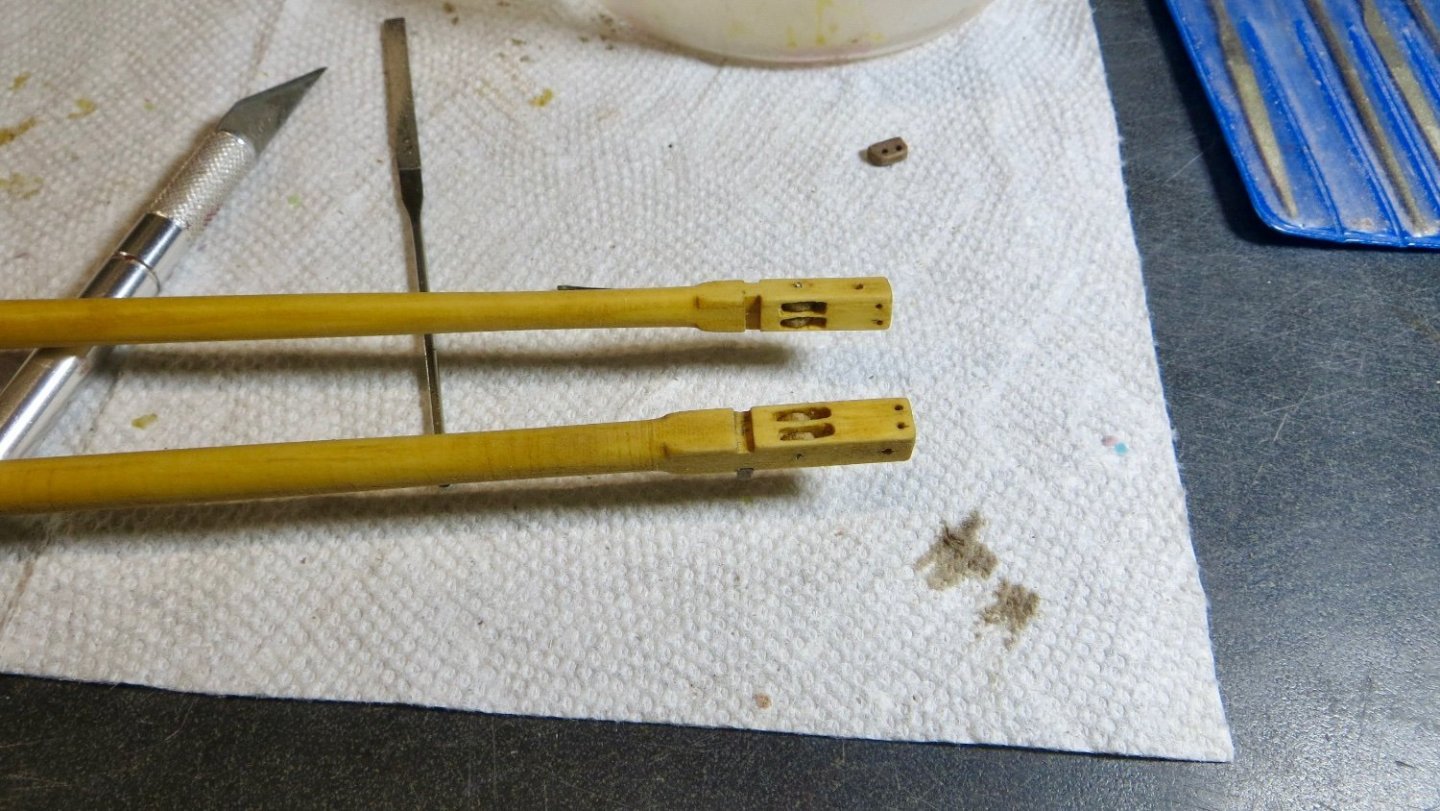
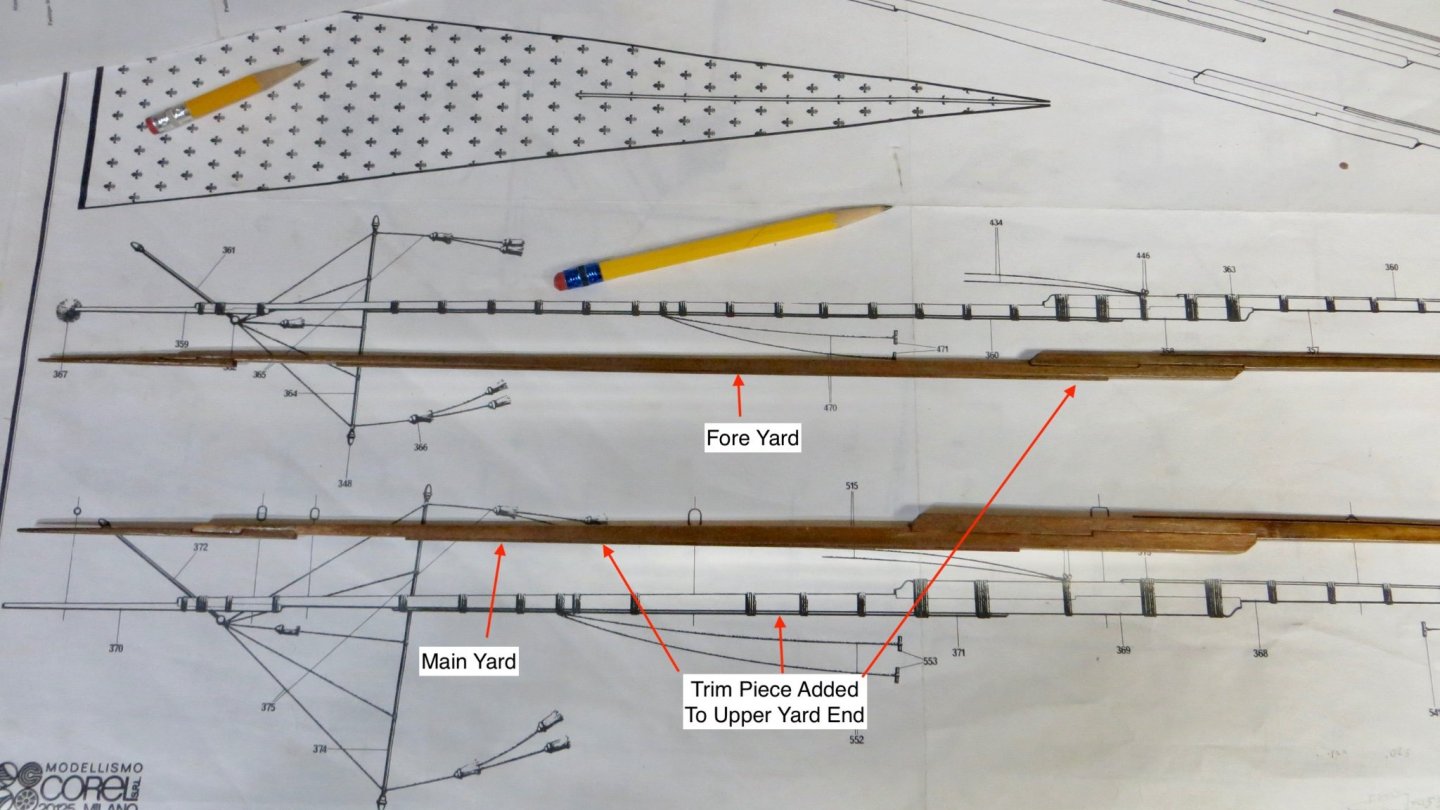
On both yards, the 3 pieces were glued to each other. Then small trim piece (1mm x 1mm) was added to the yards, which were then sealed with a satin finish poly. Both yards were then strapped, using top notch line from Syren Ship Model Company. So, work on the model will be intermittent for the next month or so. I will have to start the process of taking down my work room and move it to my new home. It will be quite the project. Thanks for stopping by Frank


- 510 replies
-
- 6
-
-
- reale de france
- corel
- (and 1 more)
-
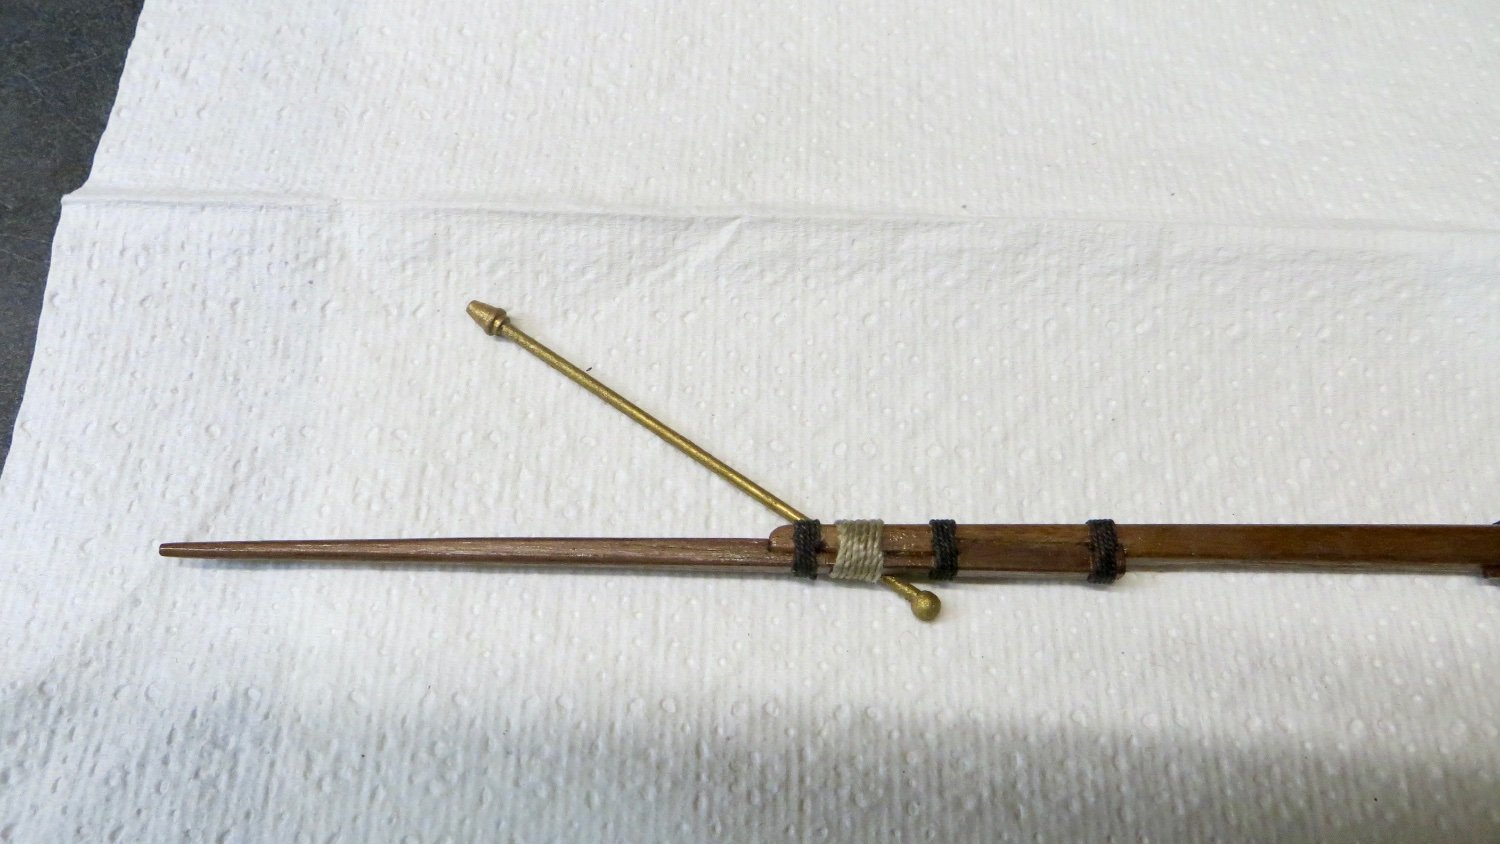
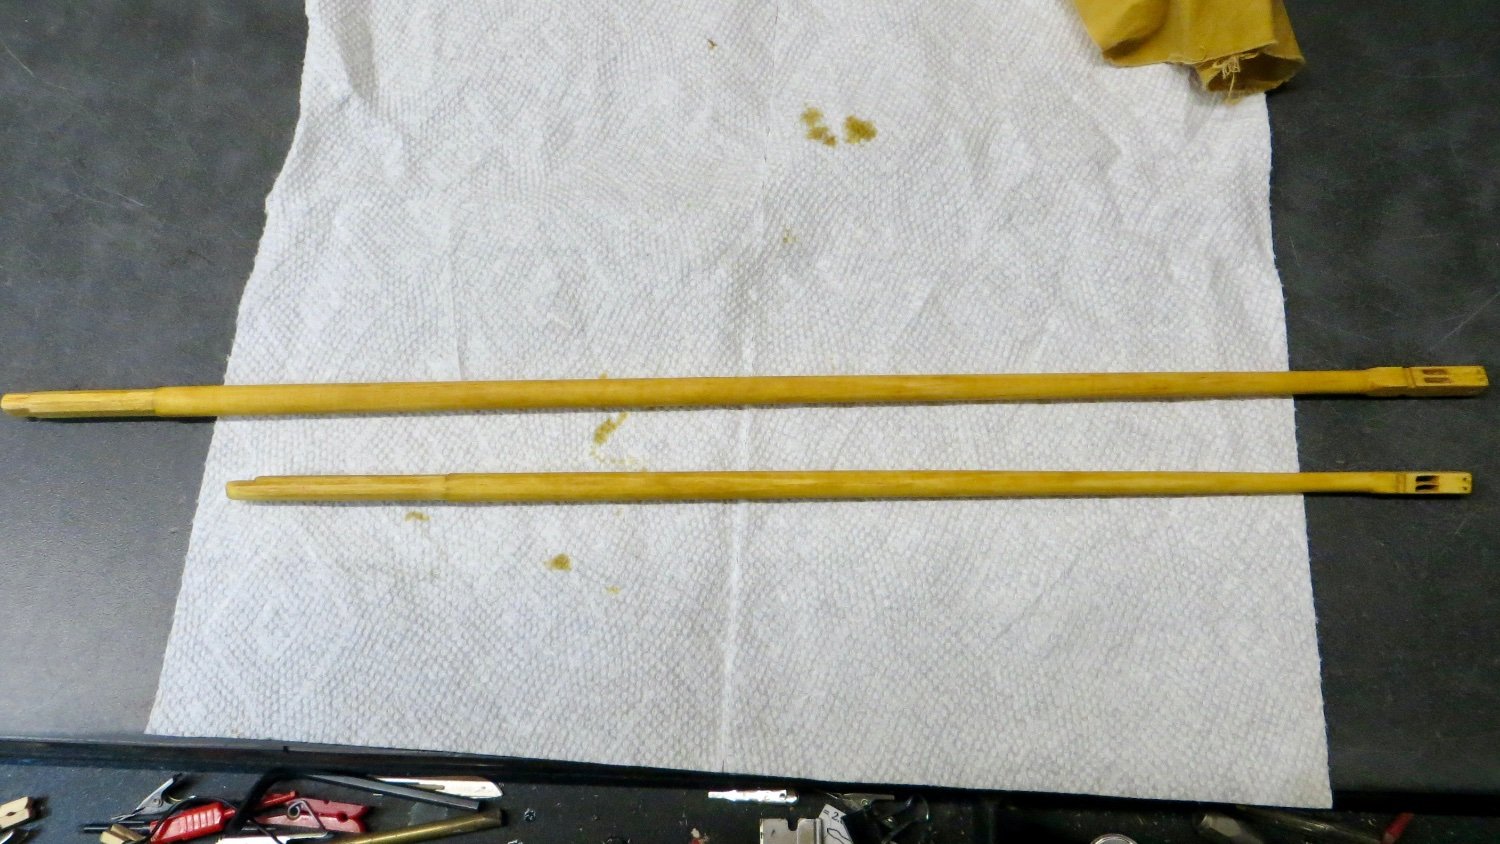
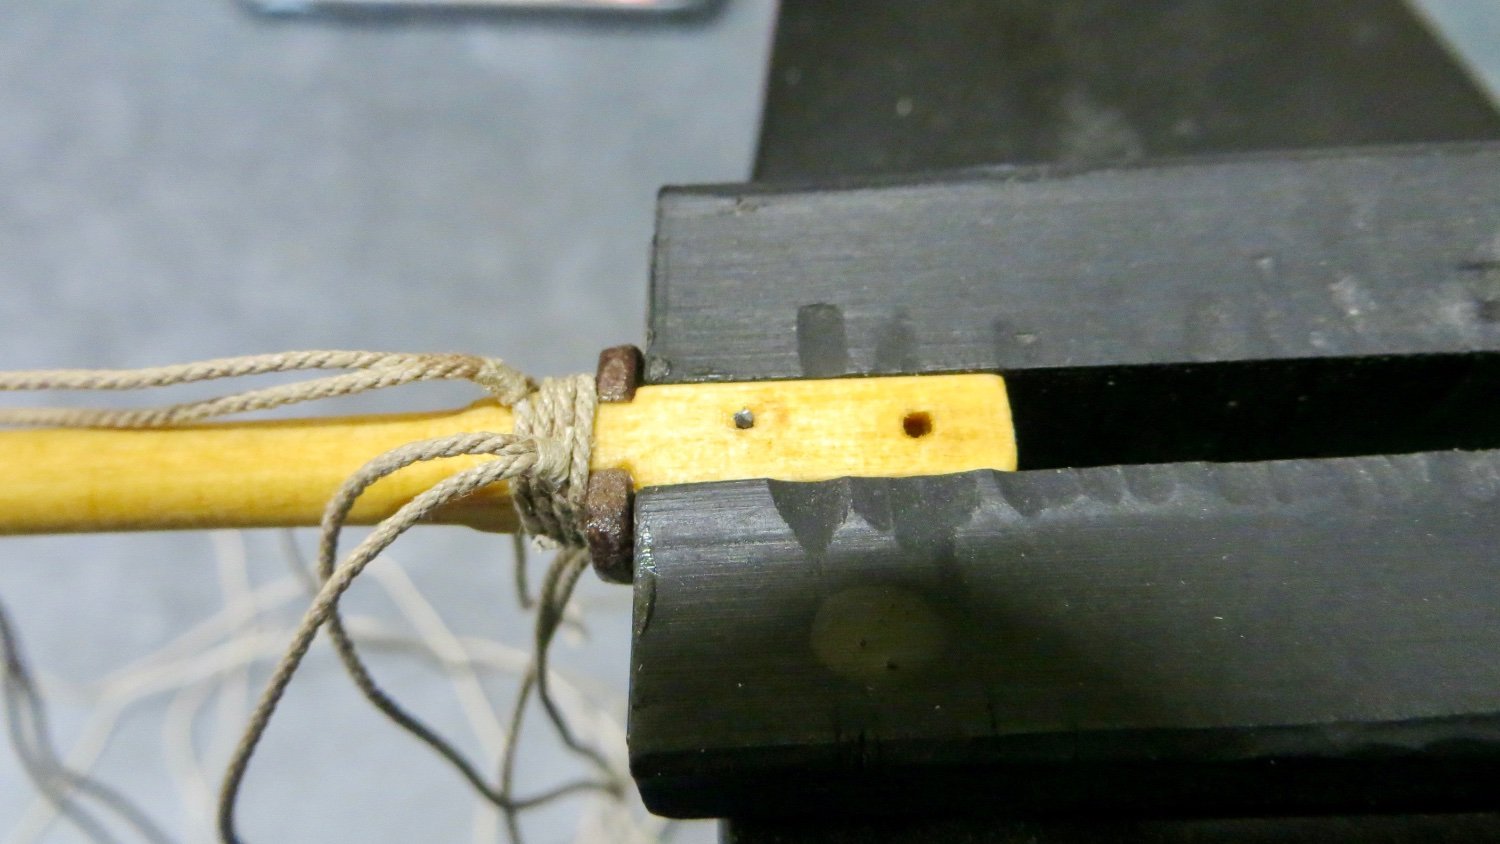
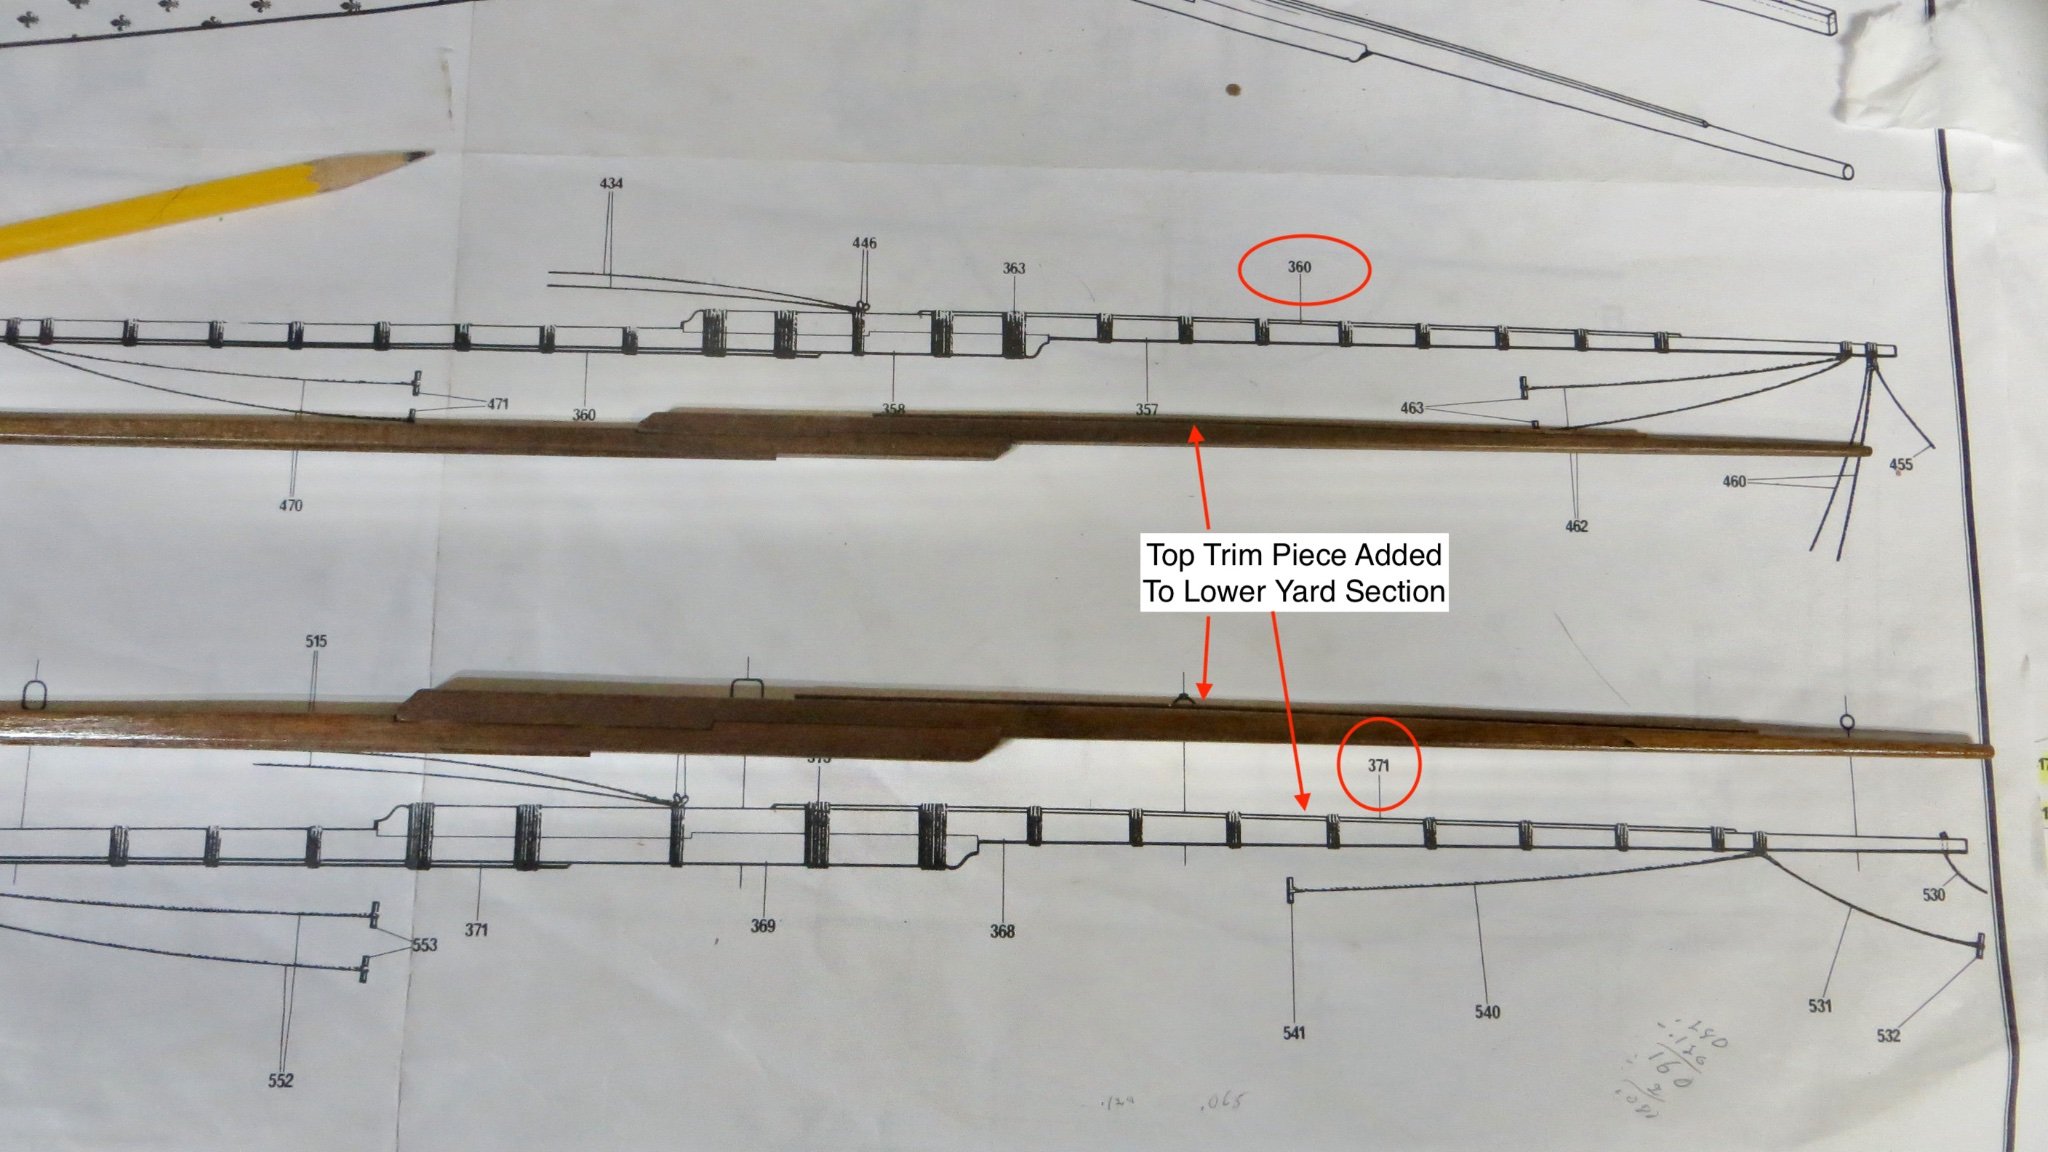
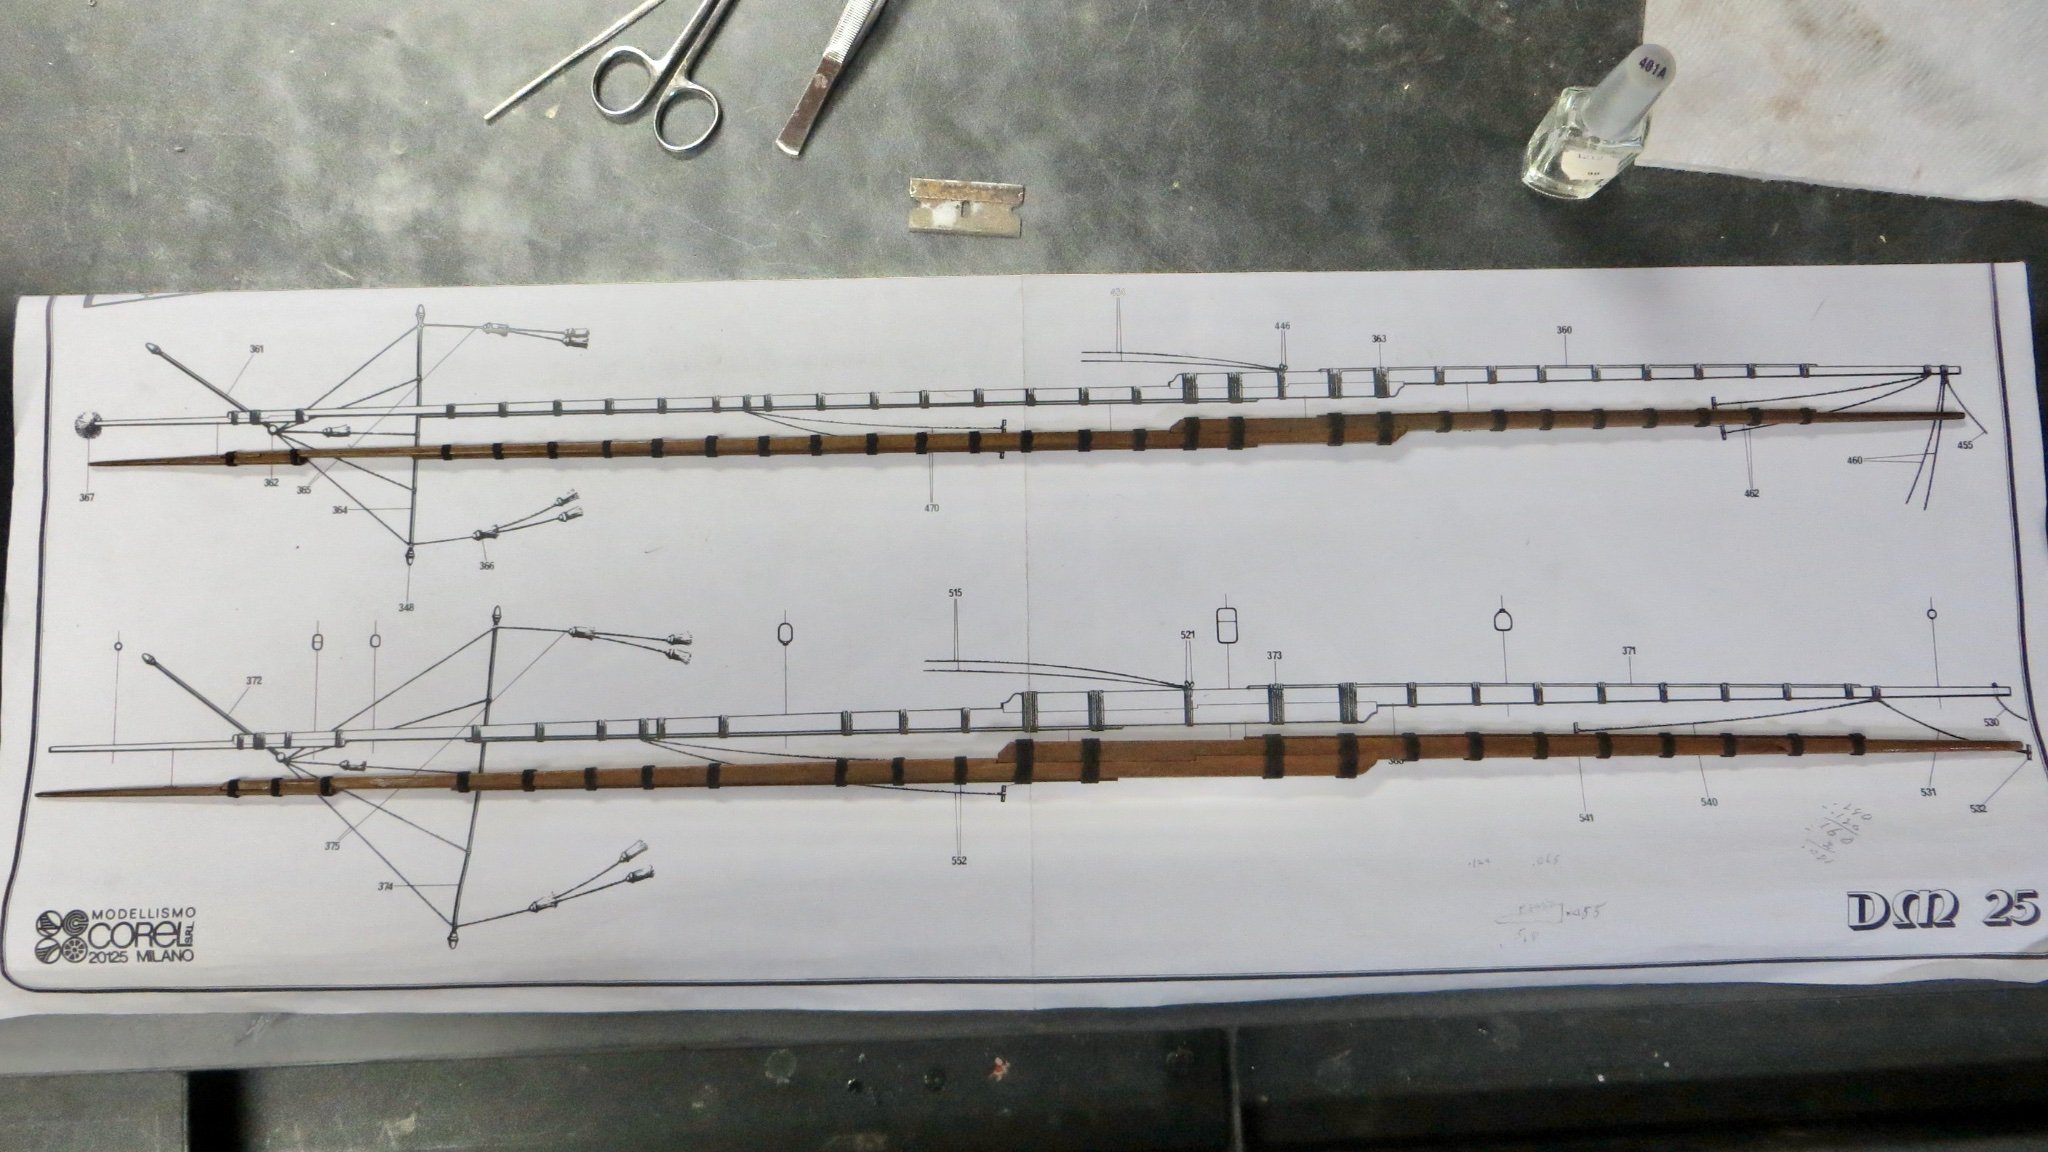
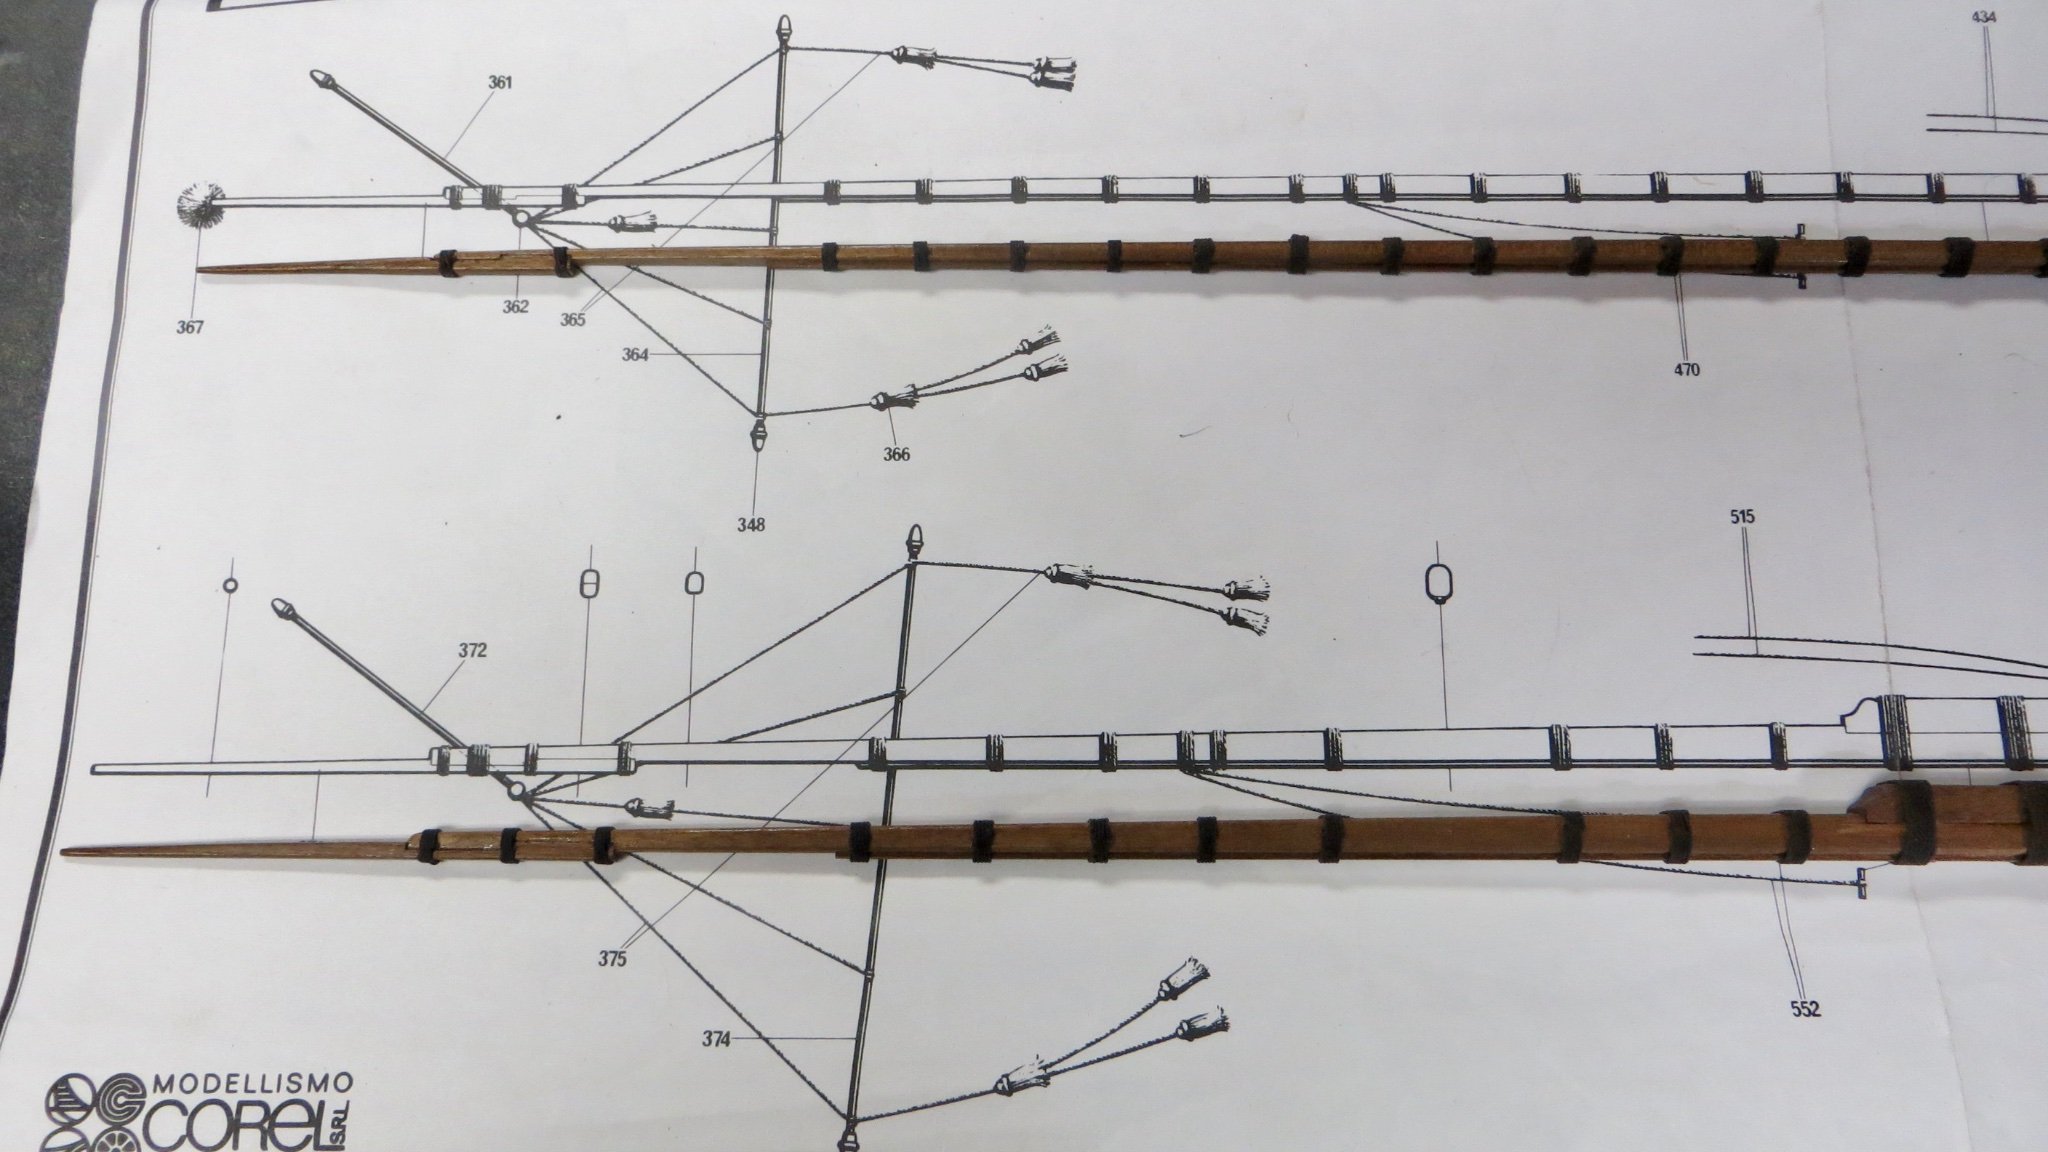
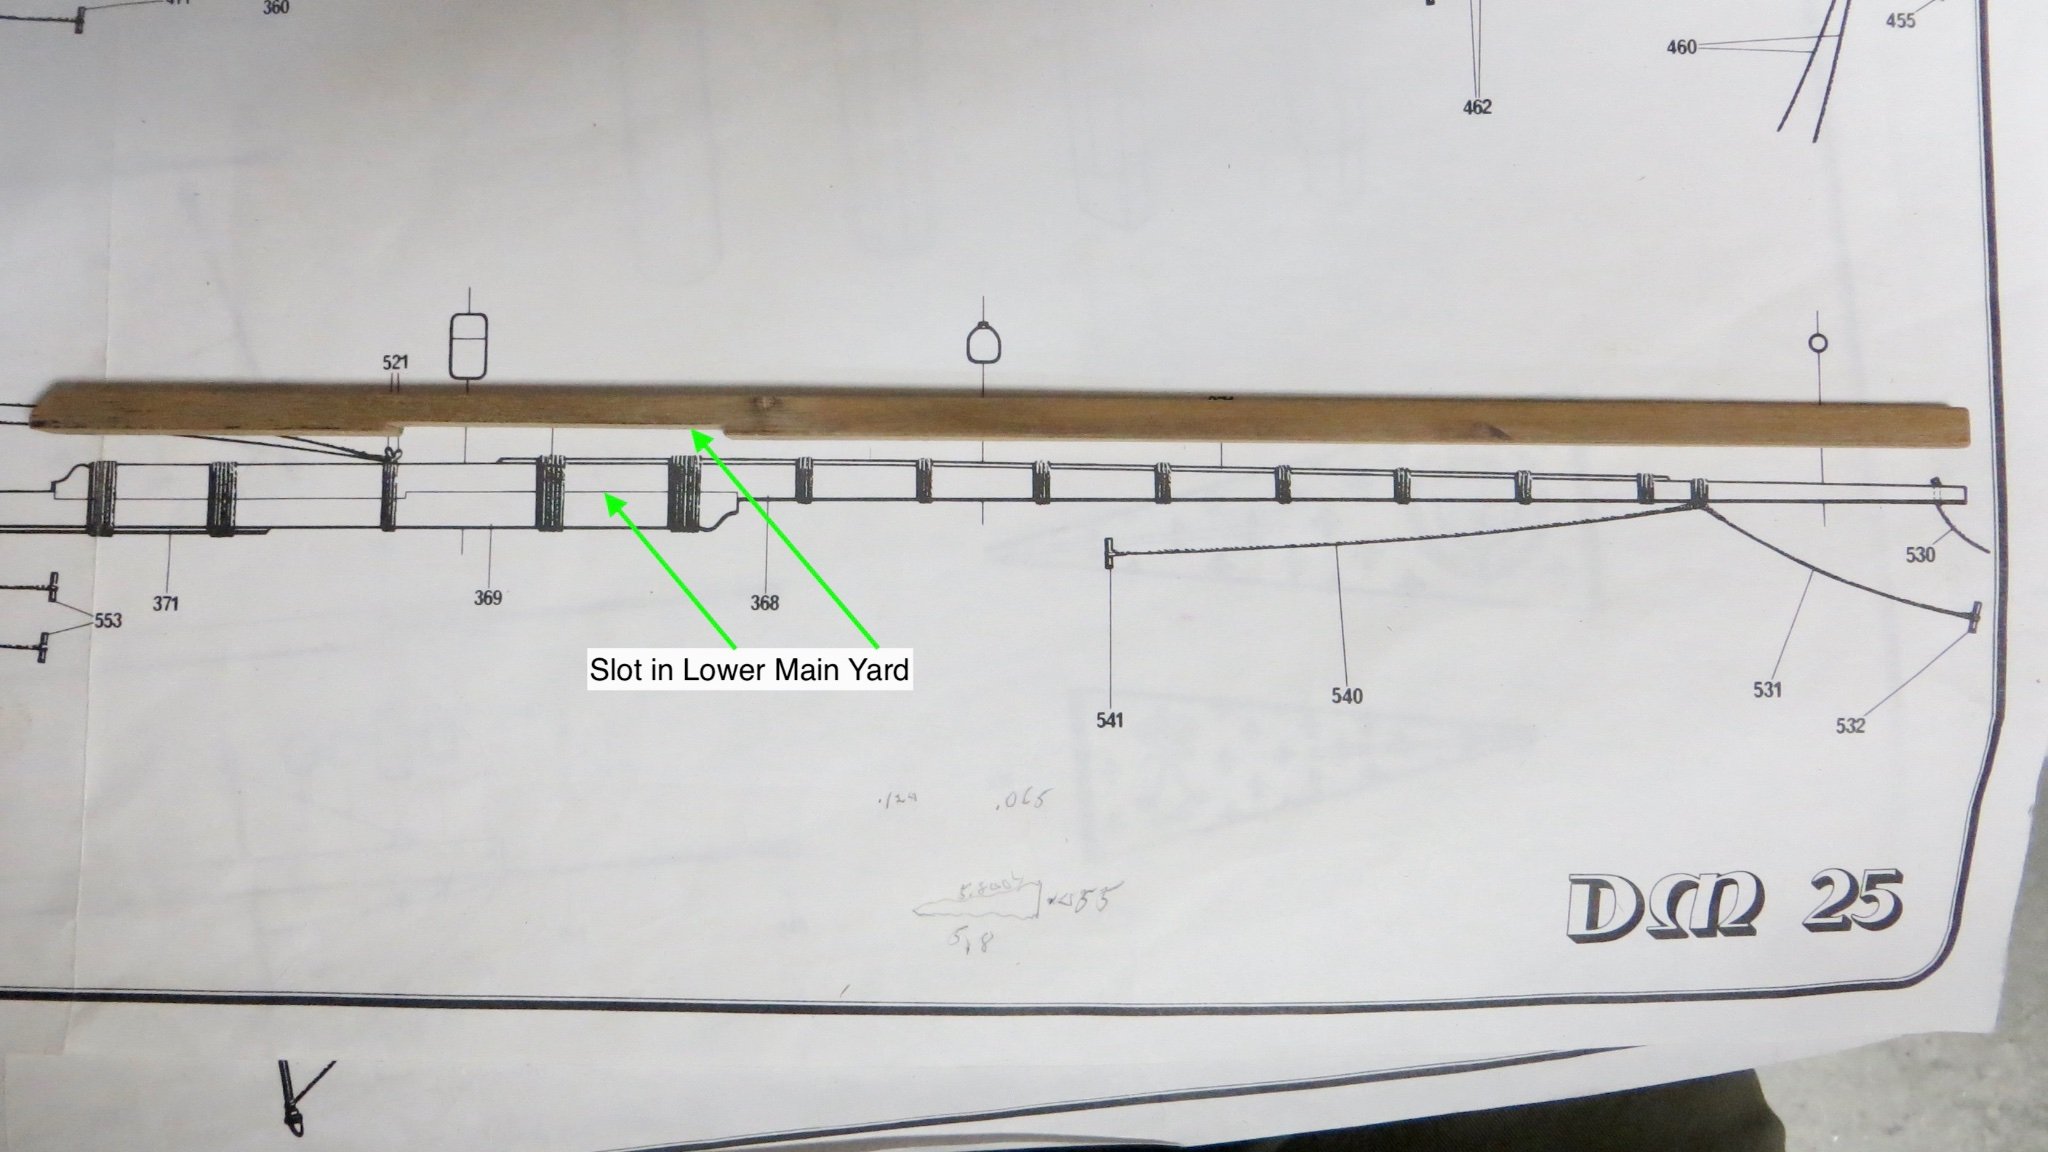
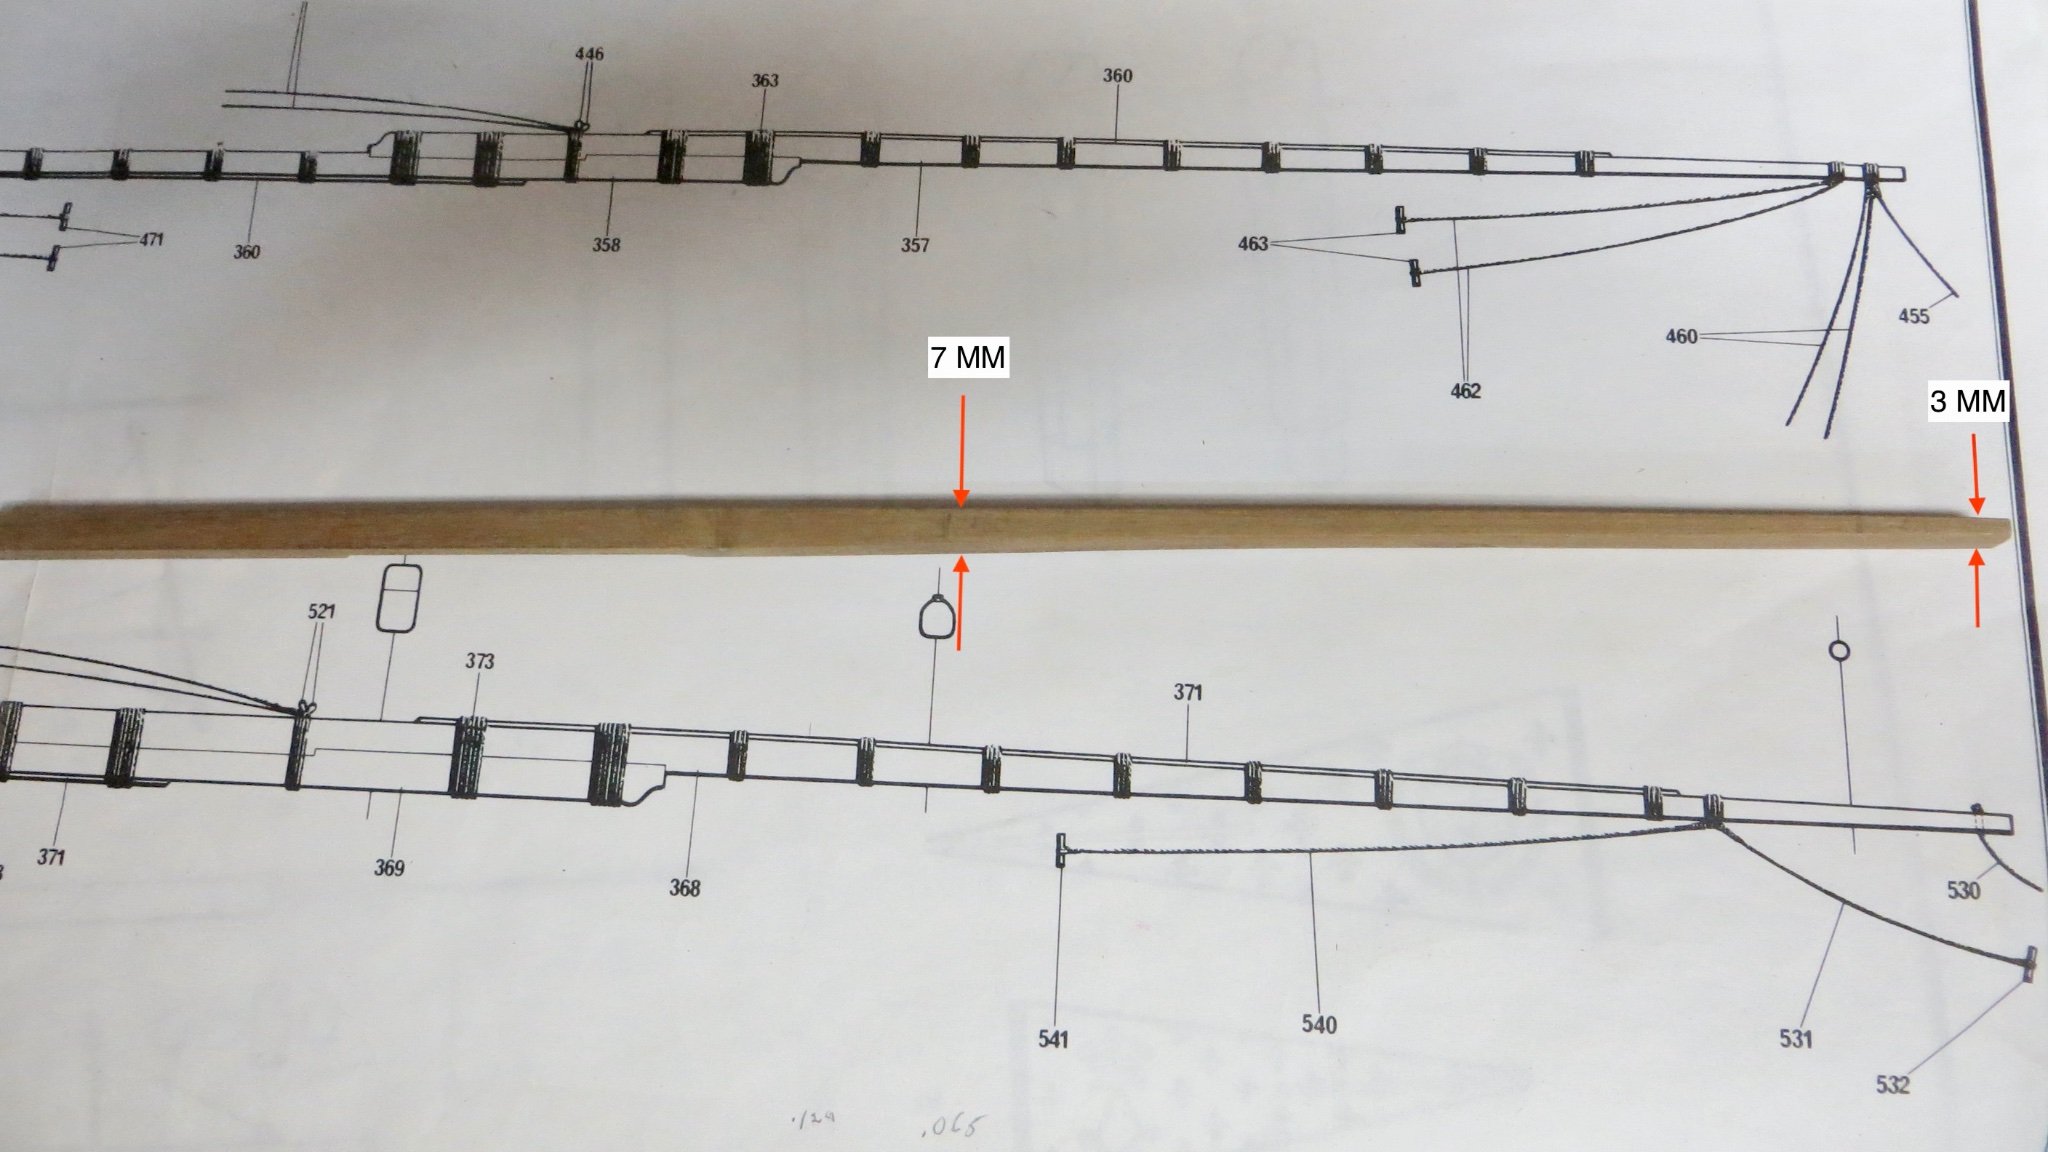
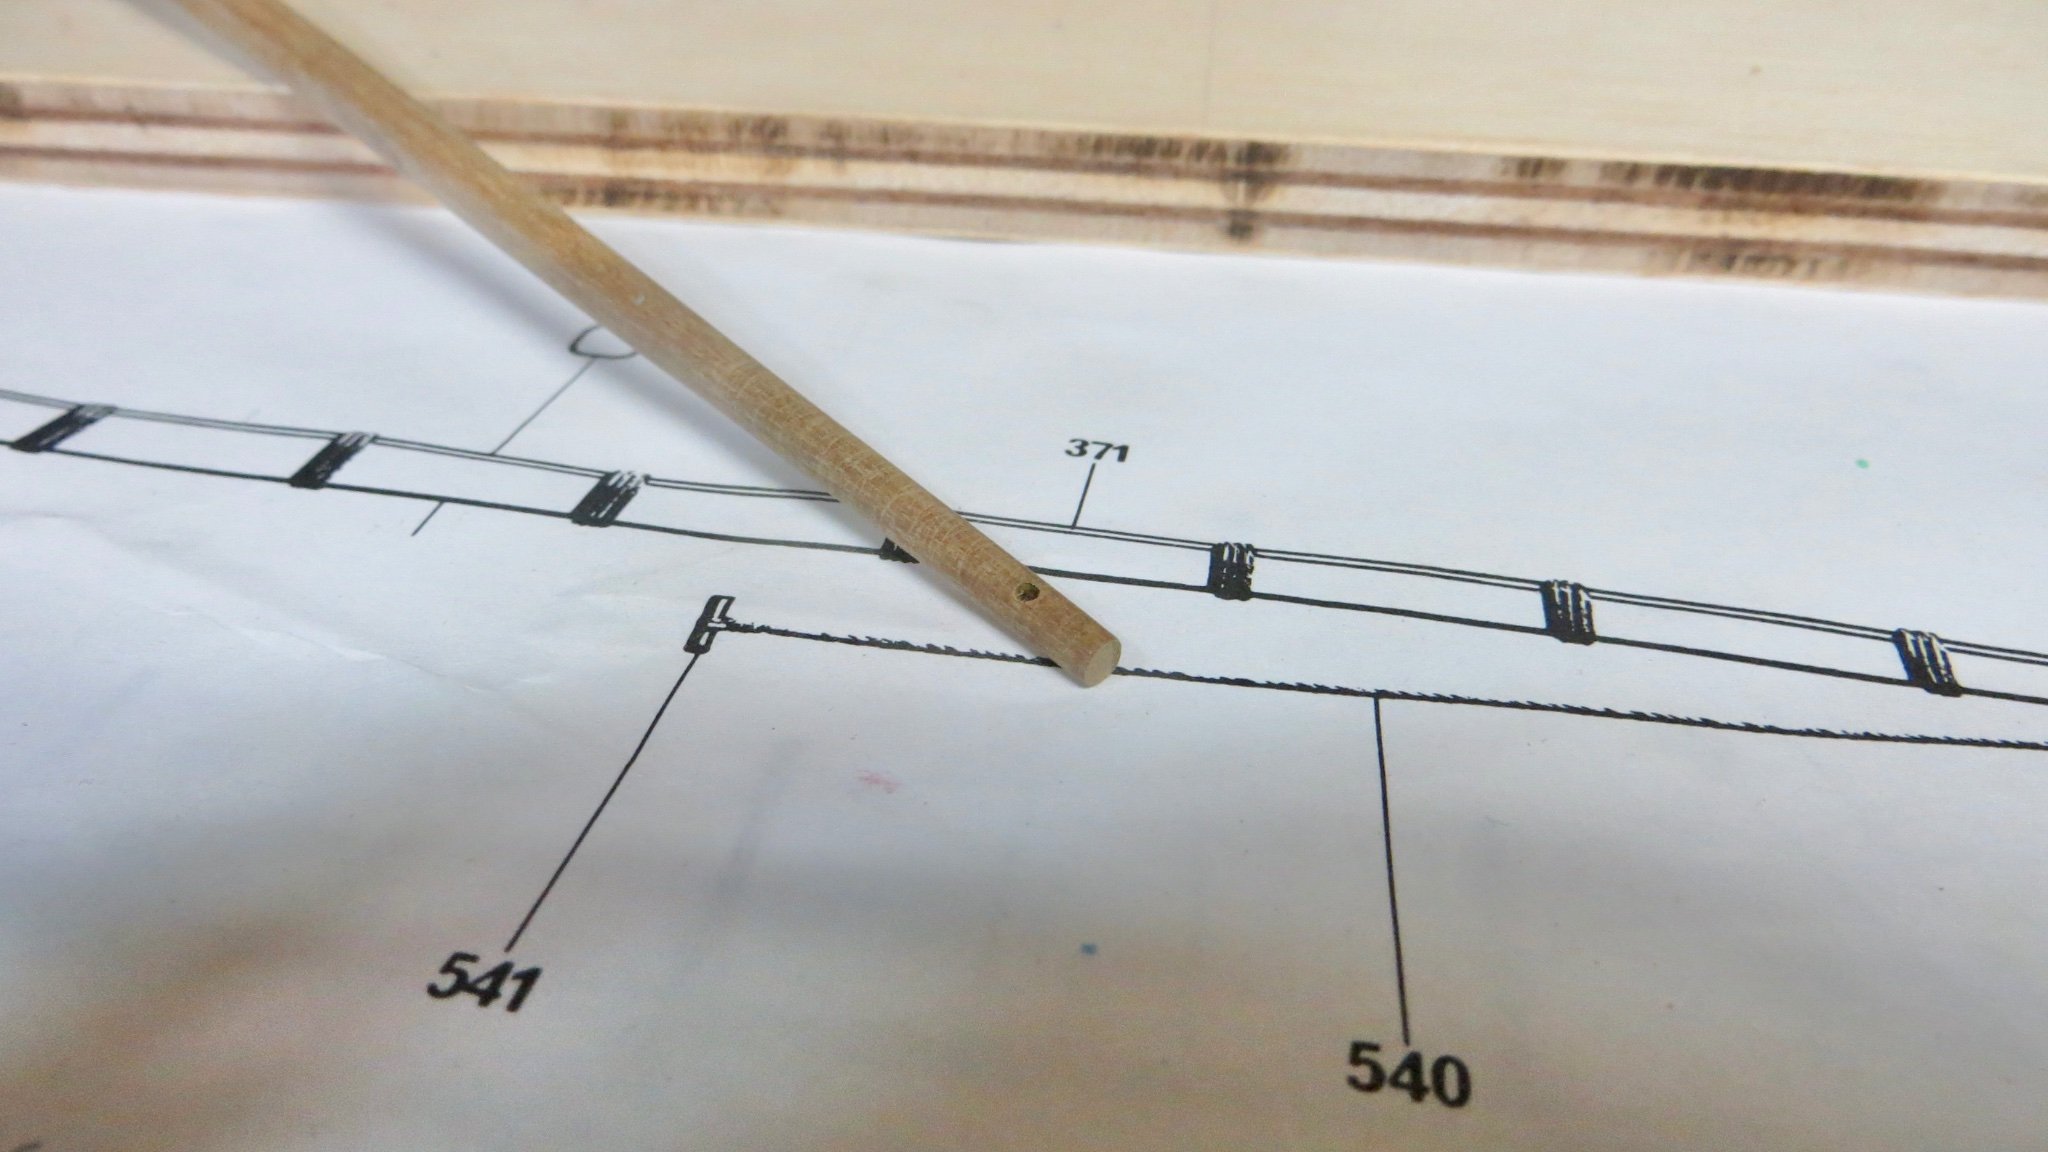
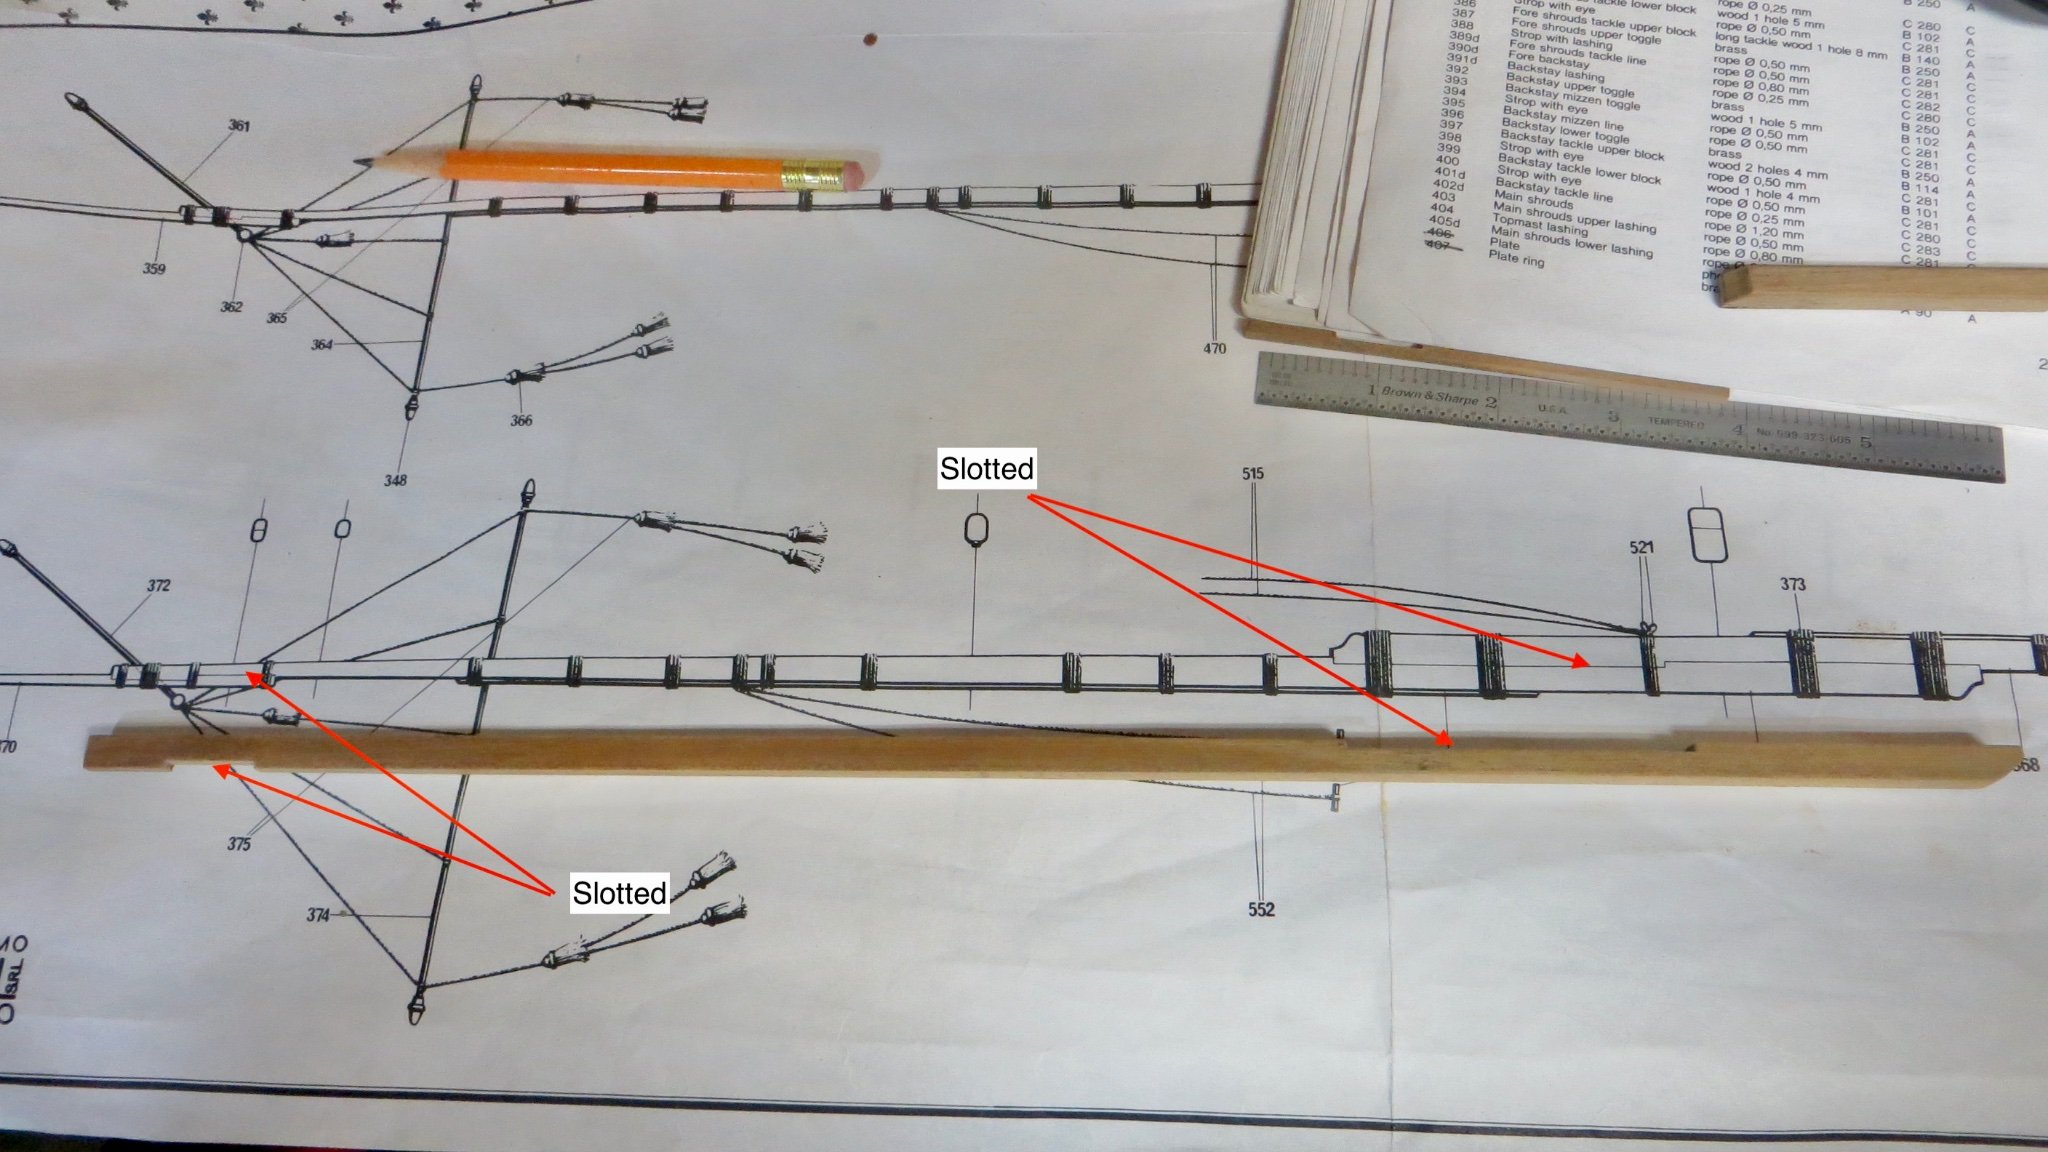
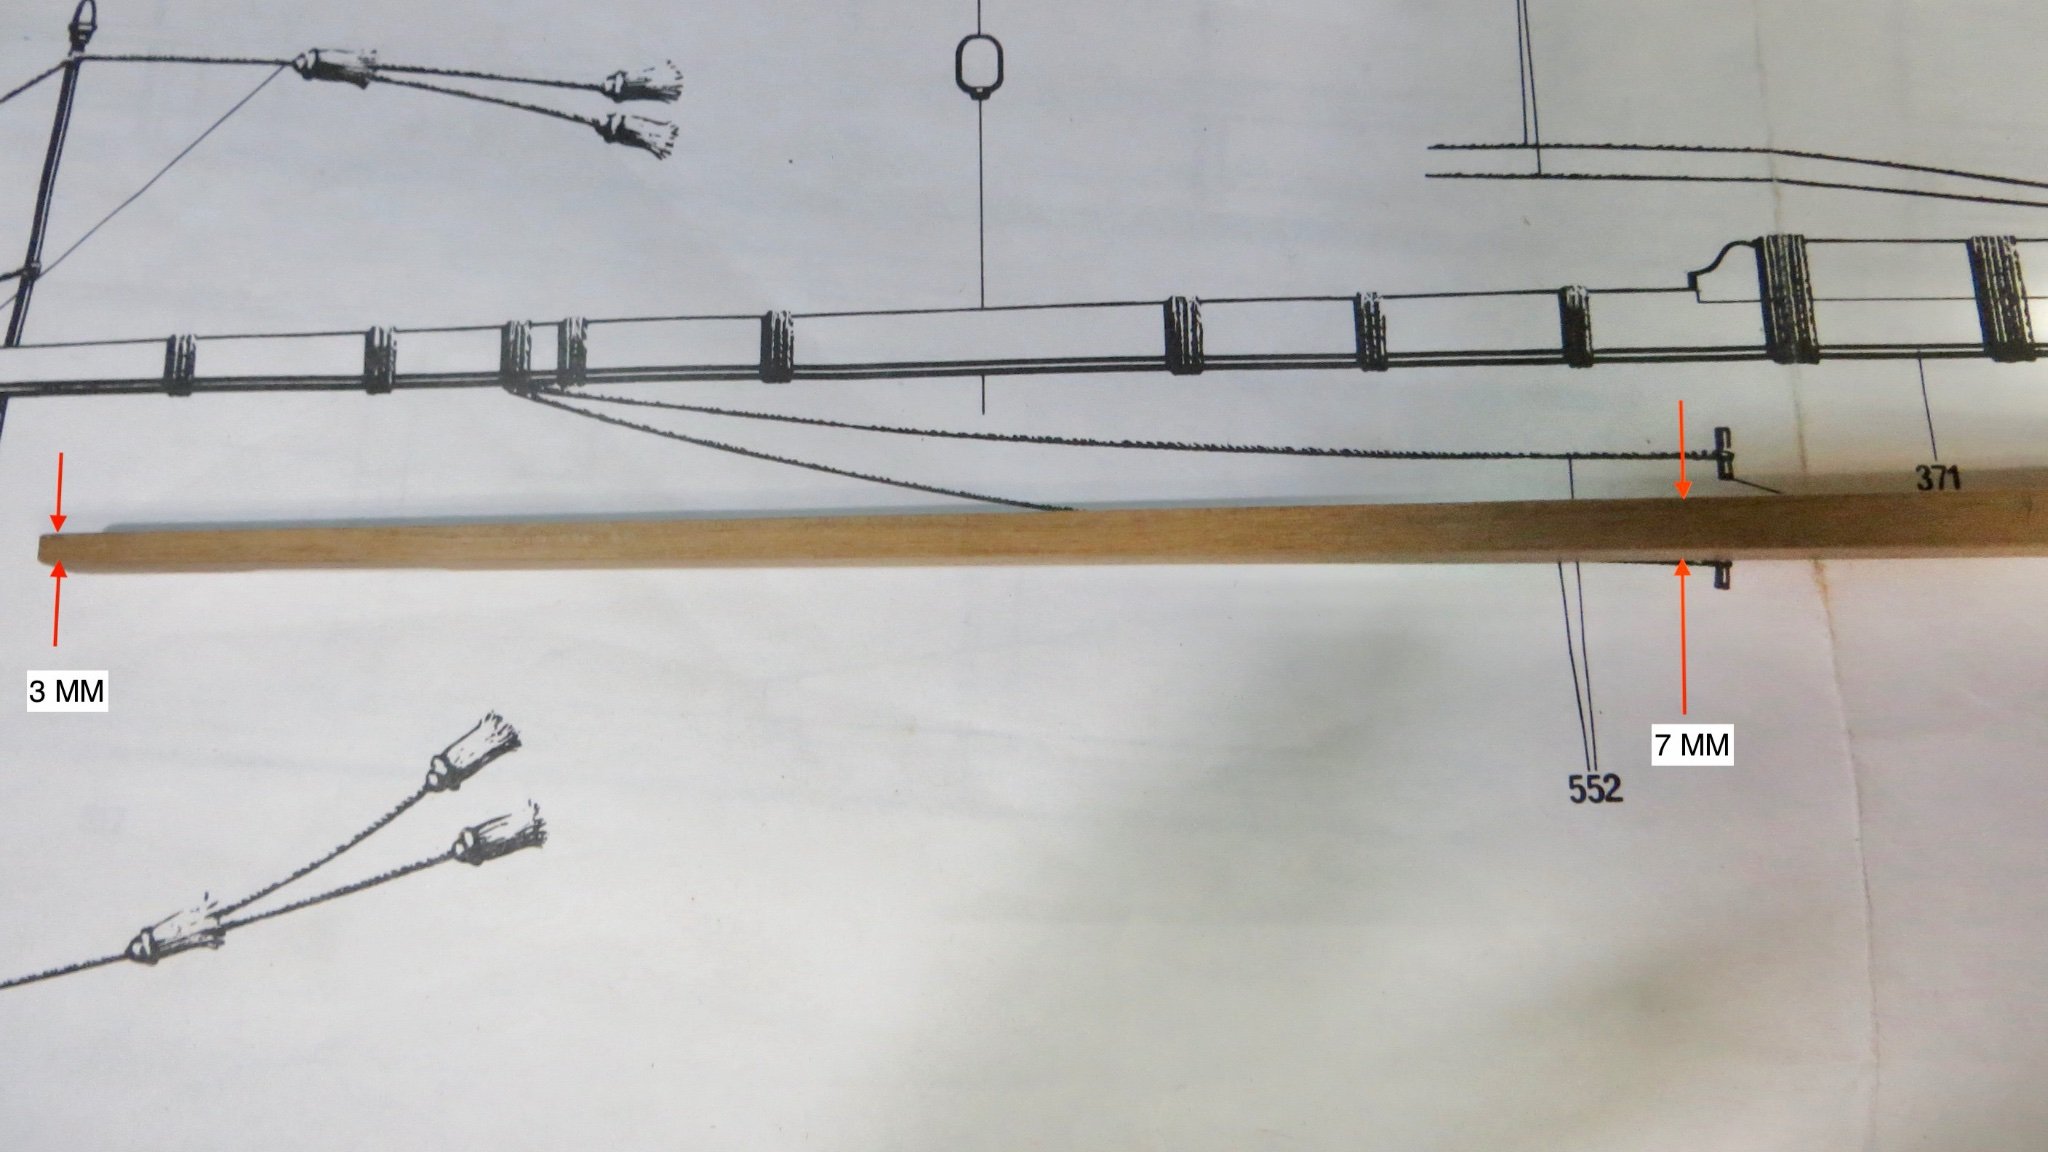
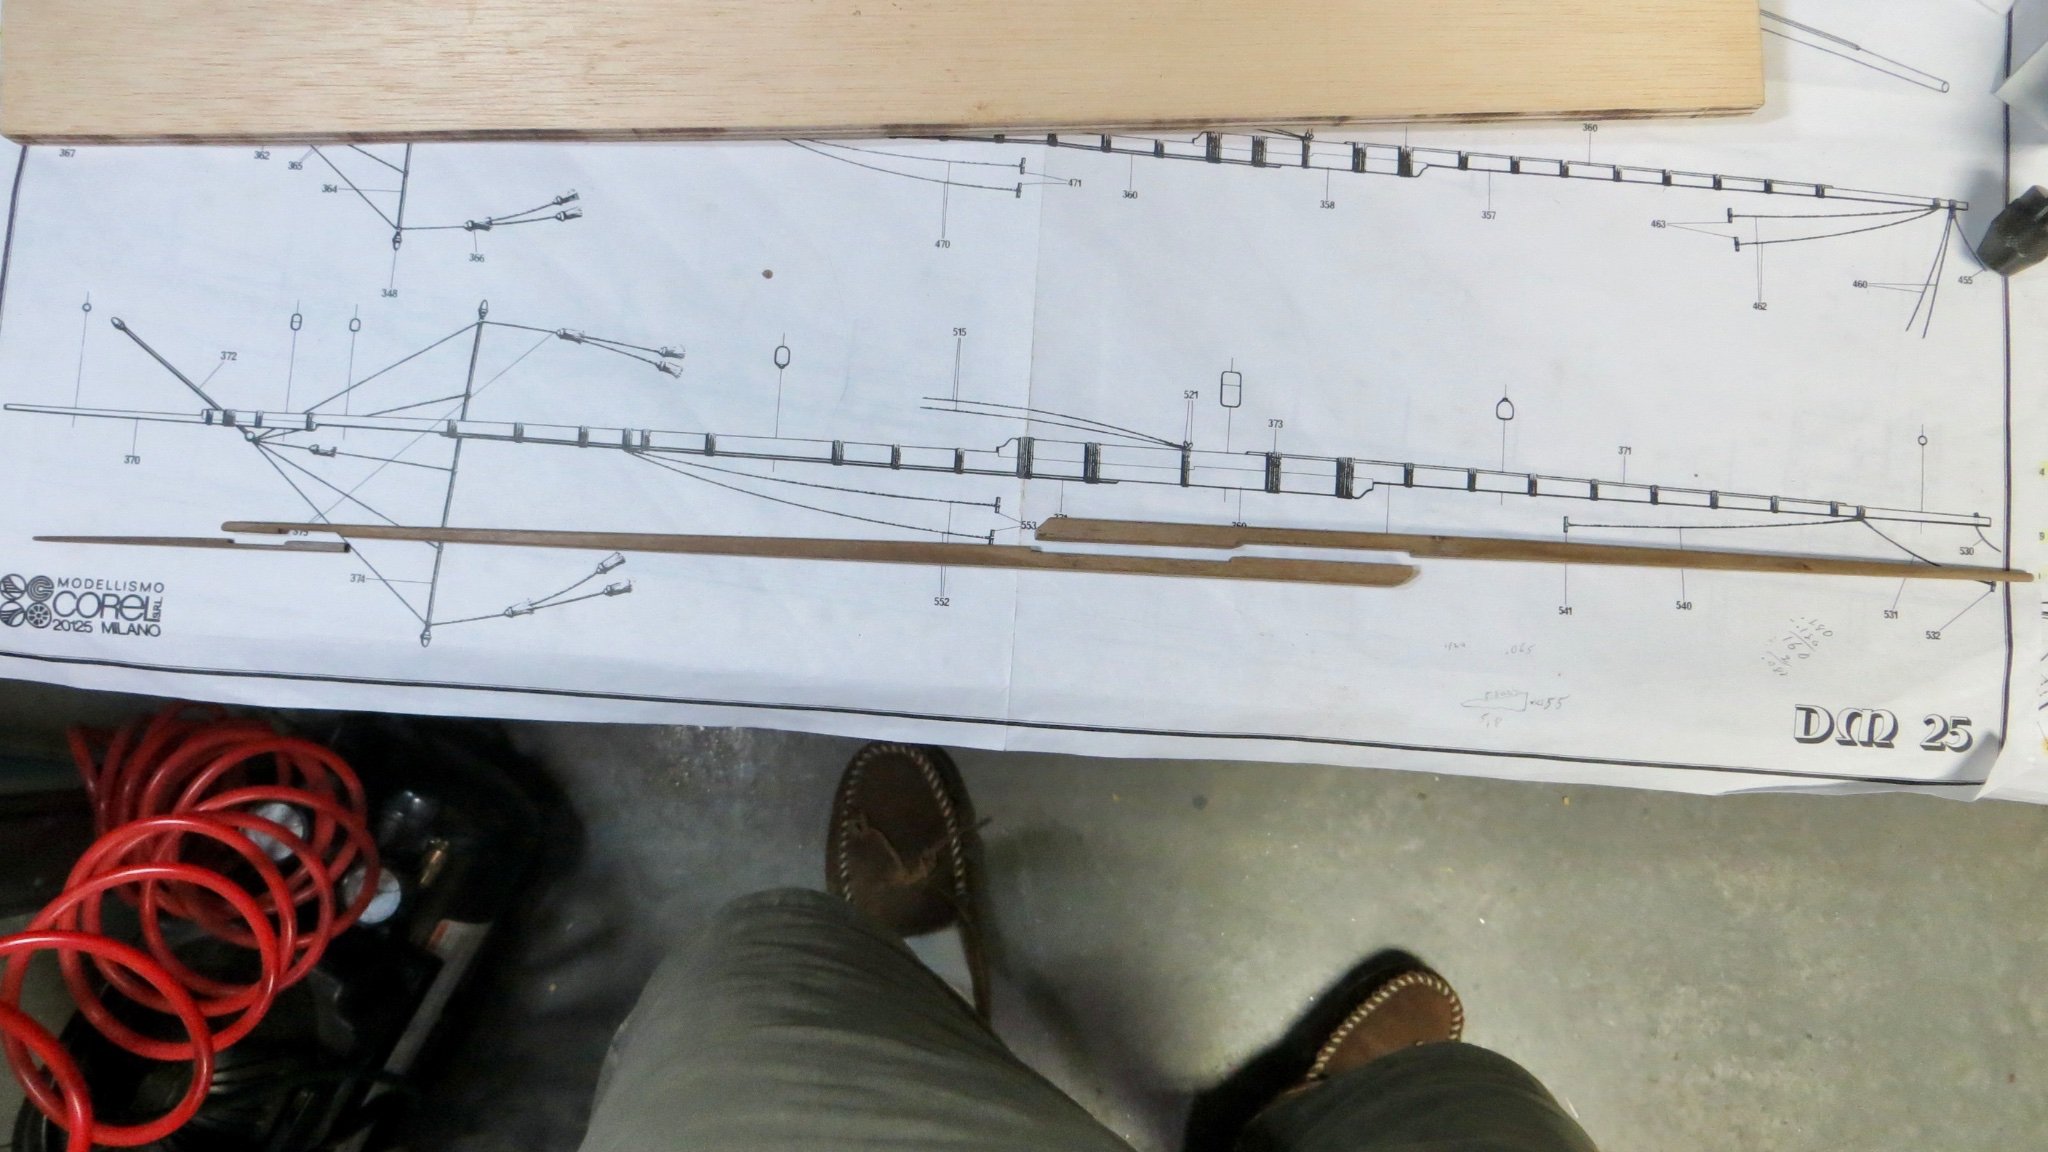
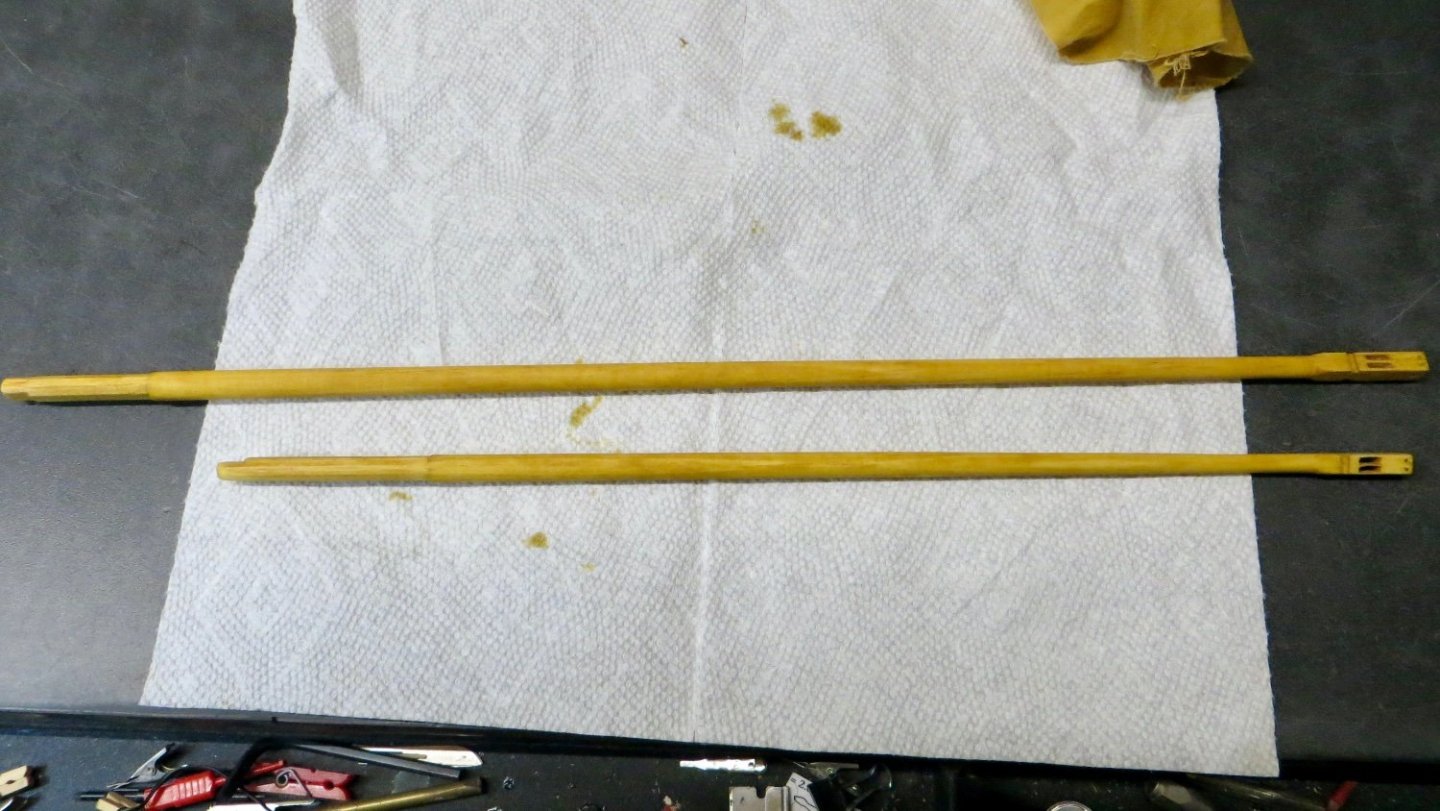
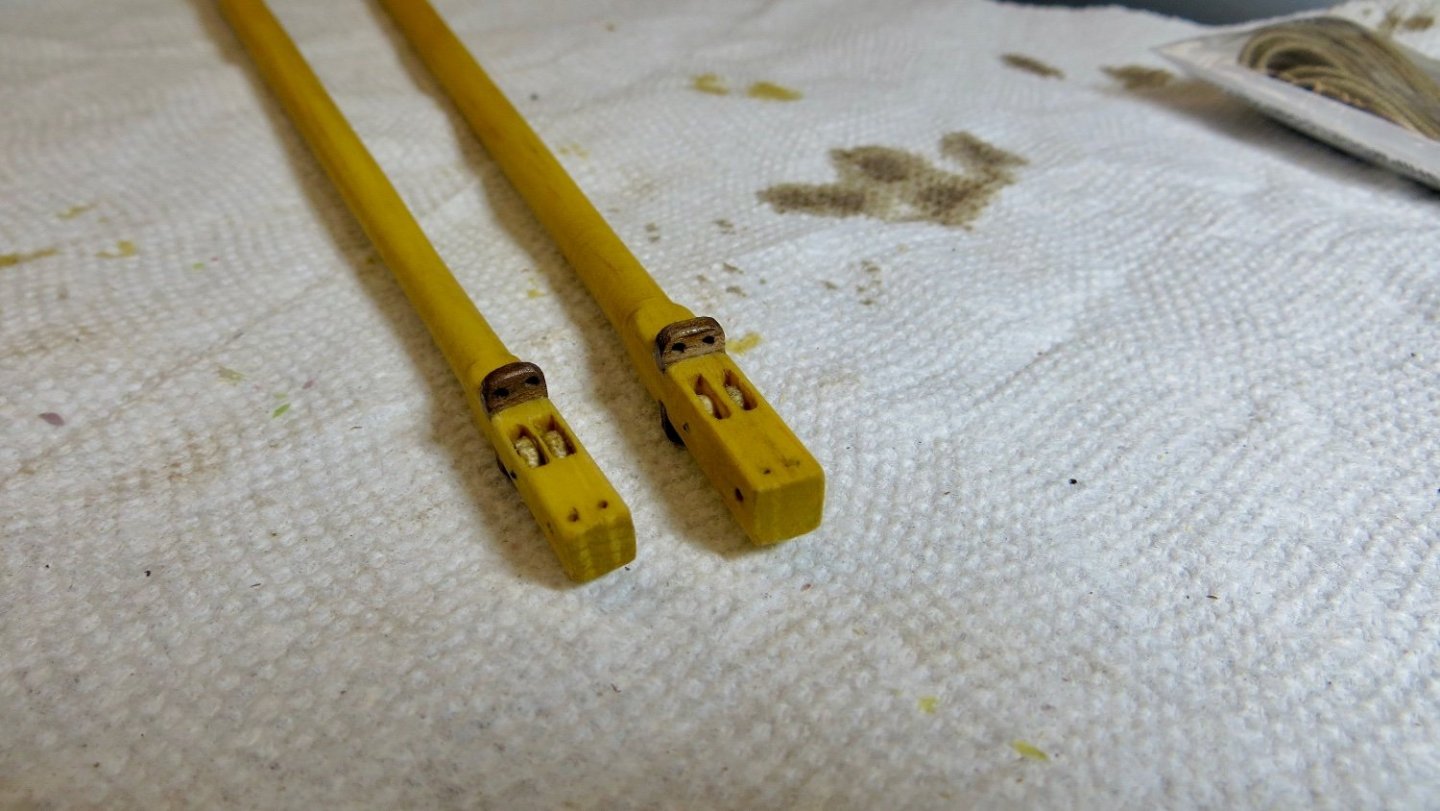
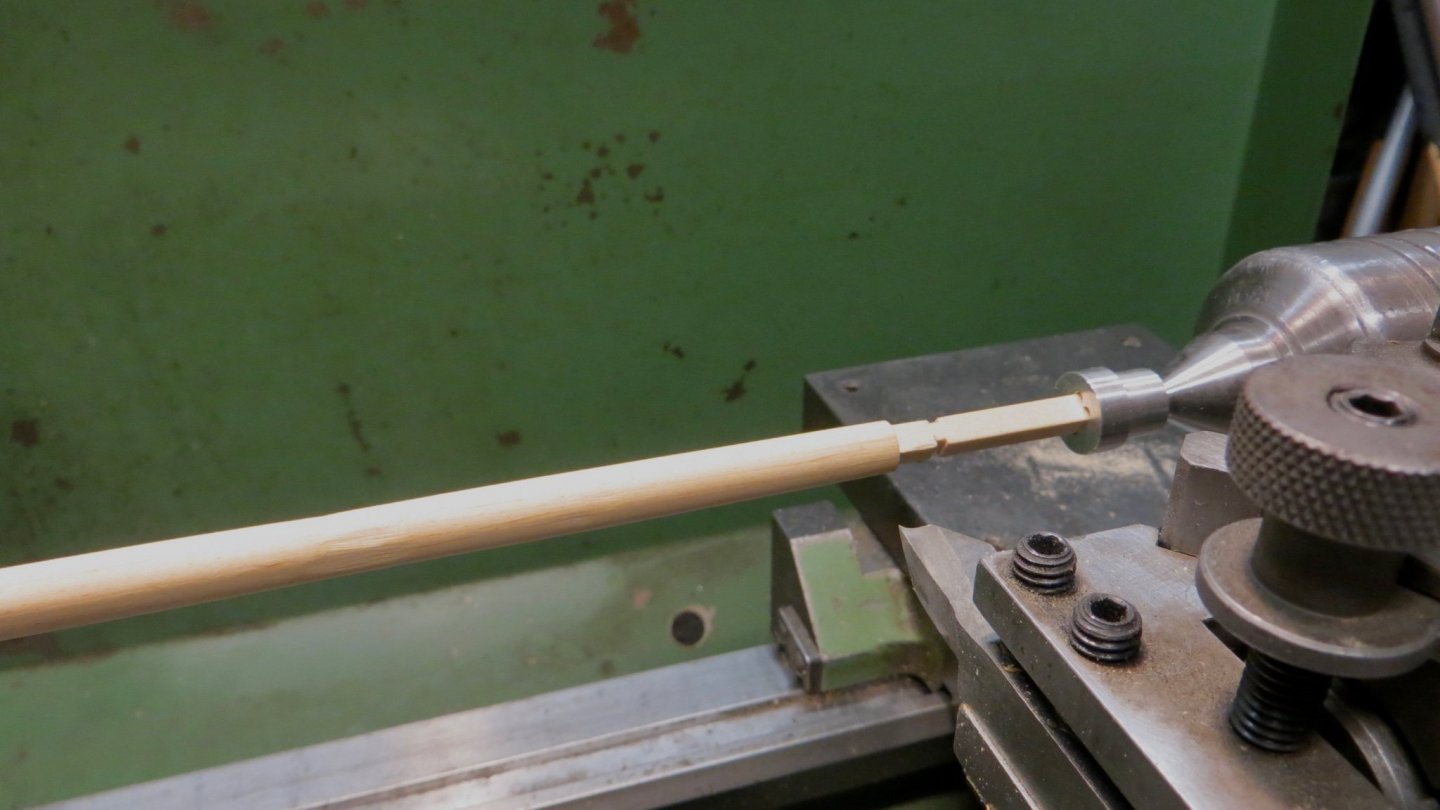
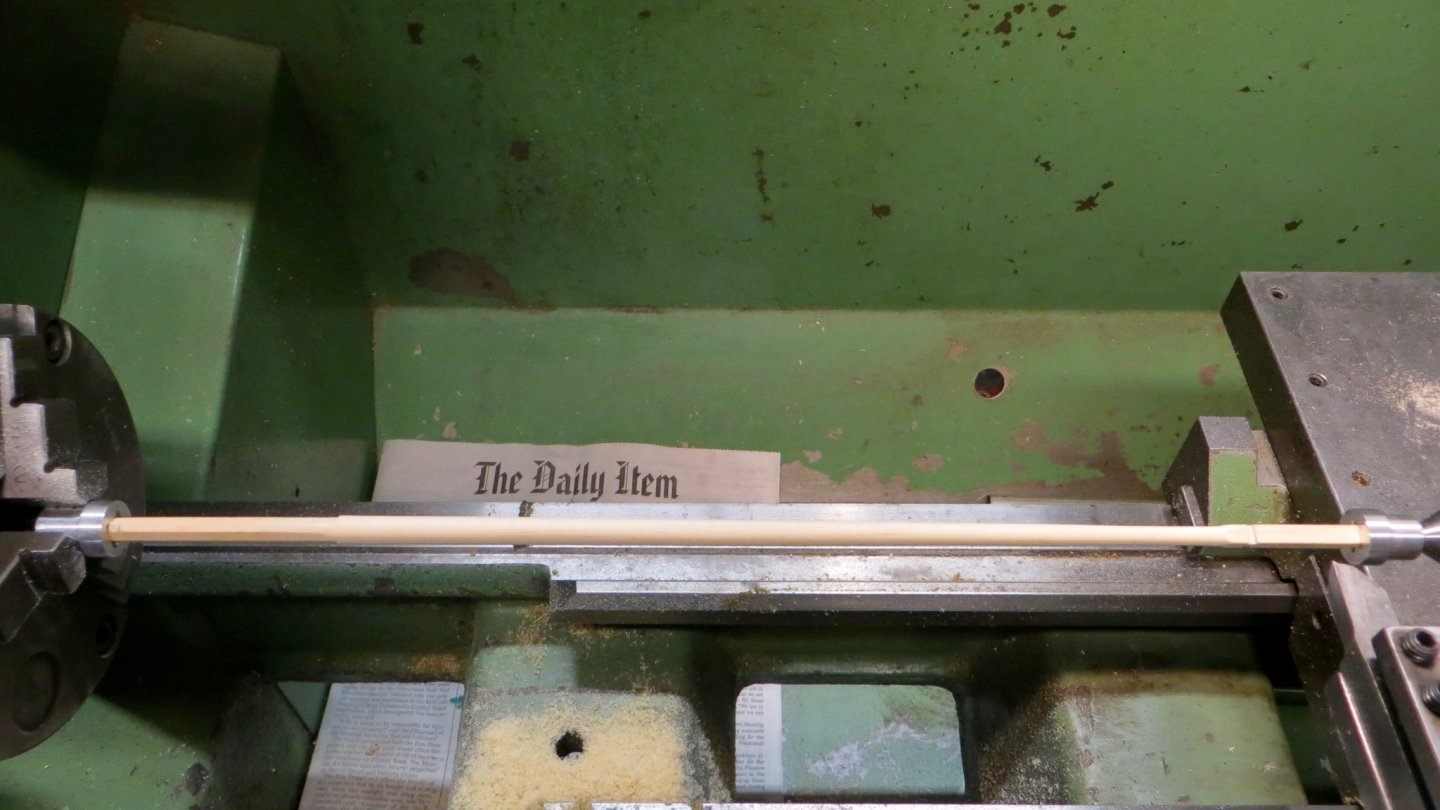
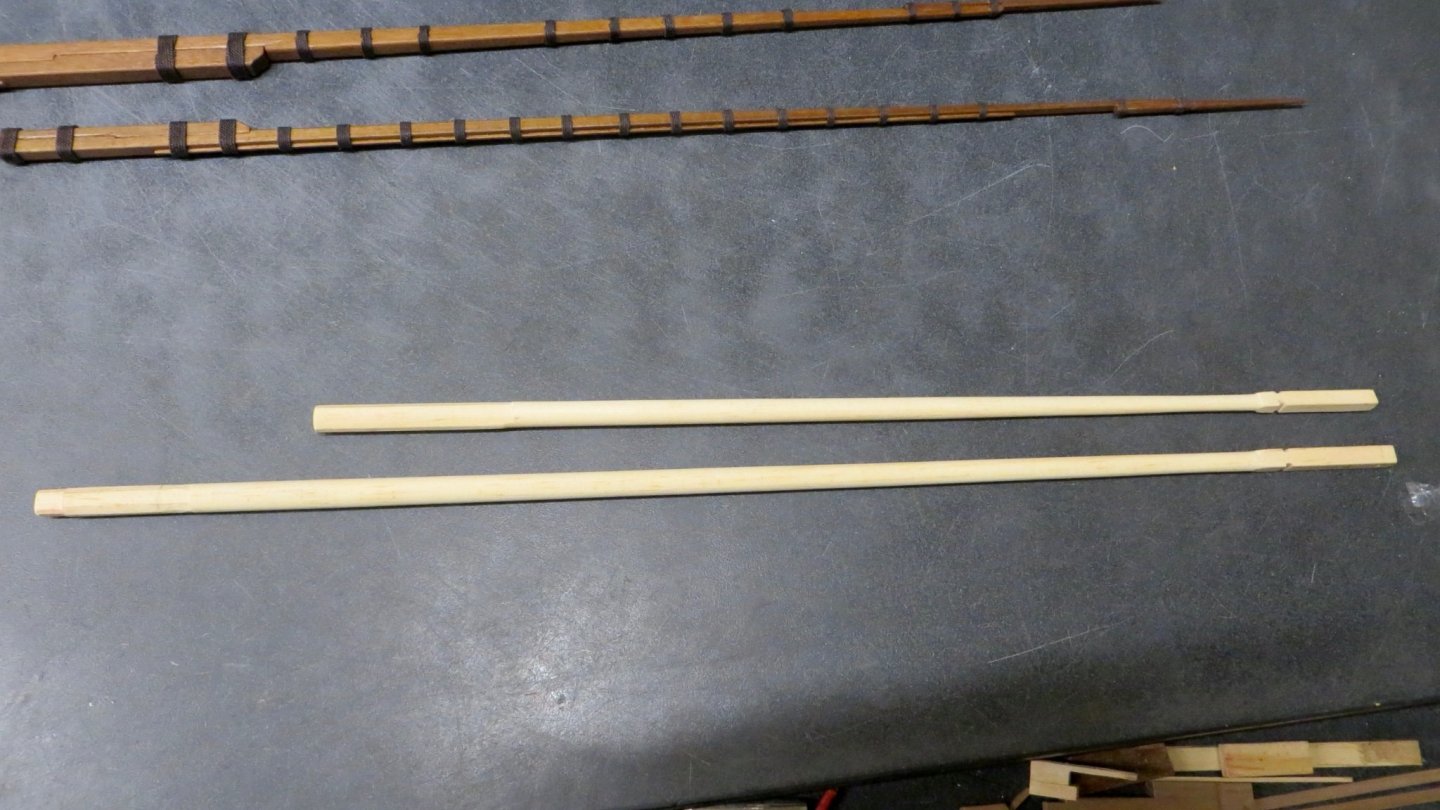
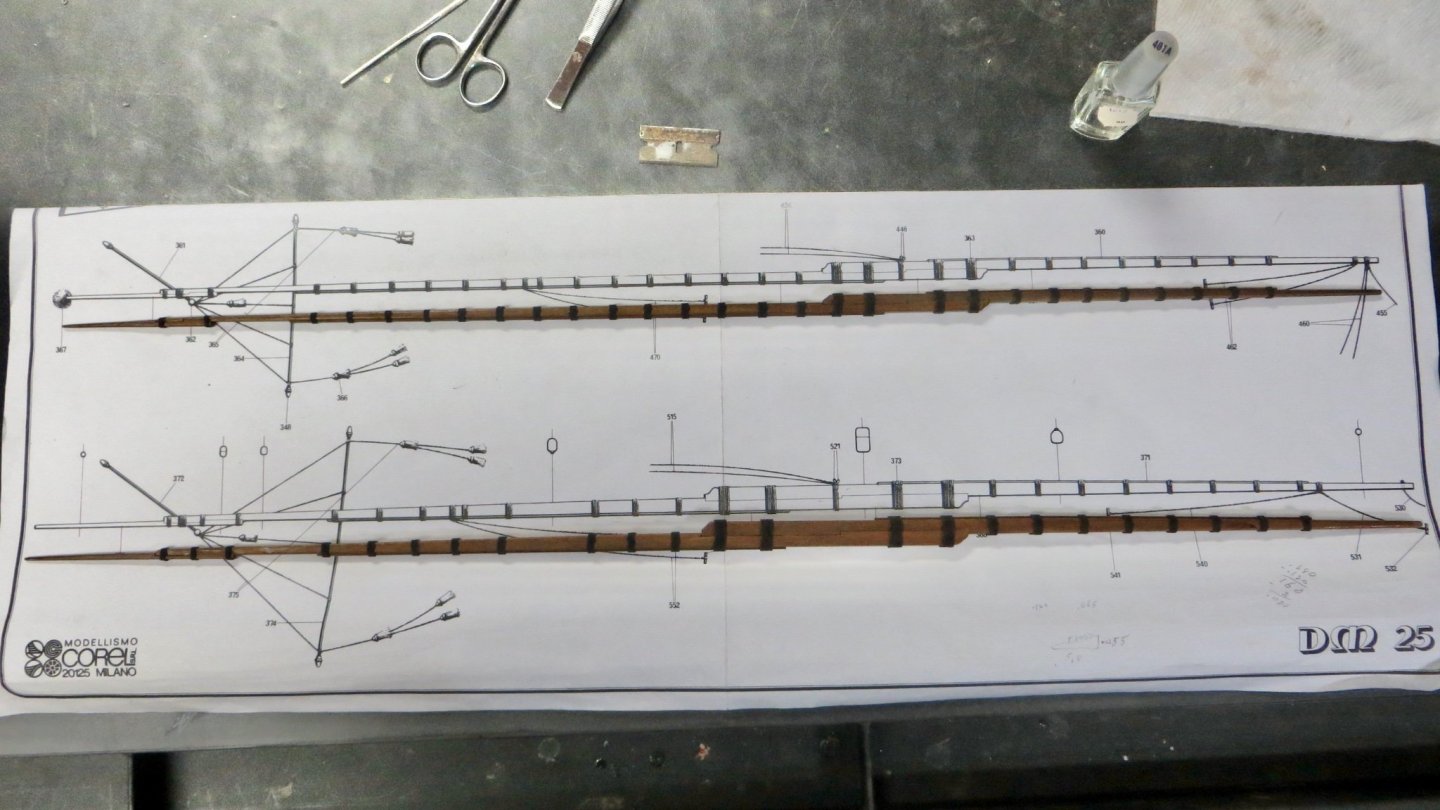
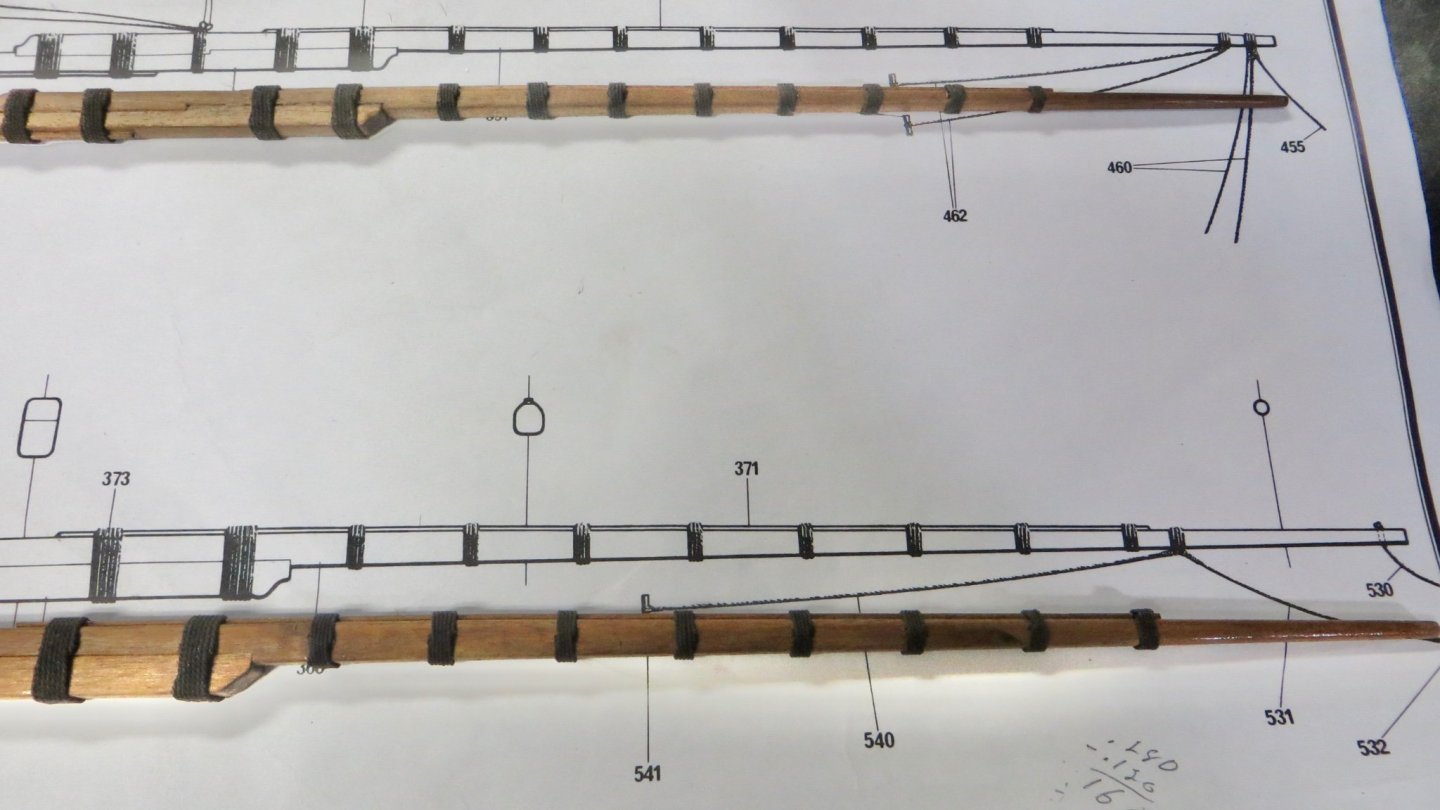
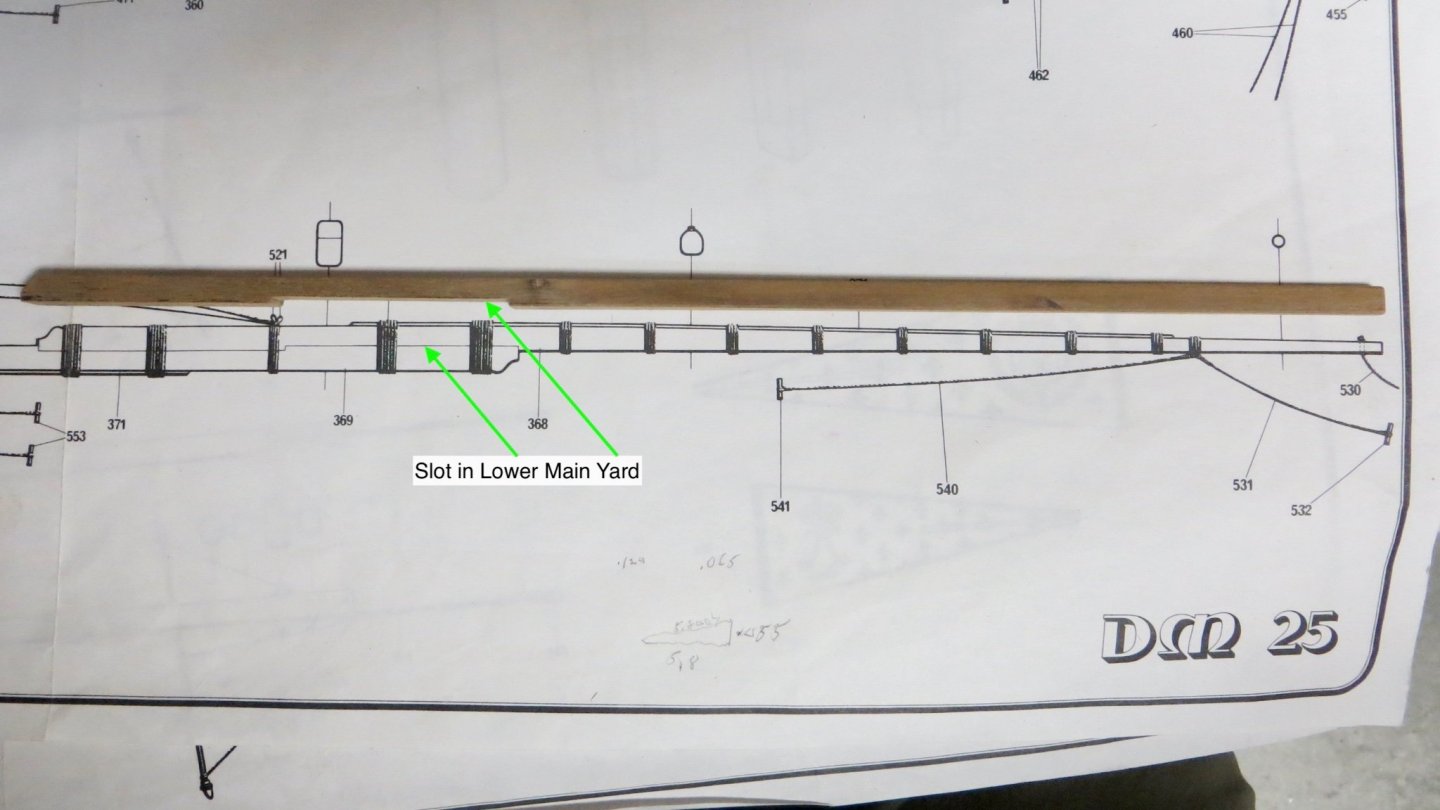
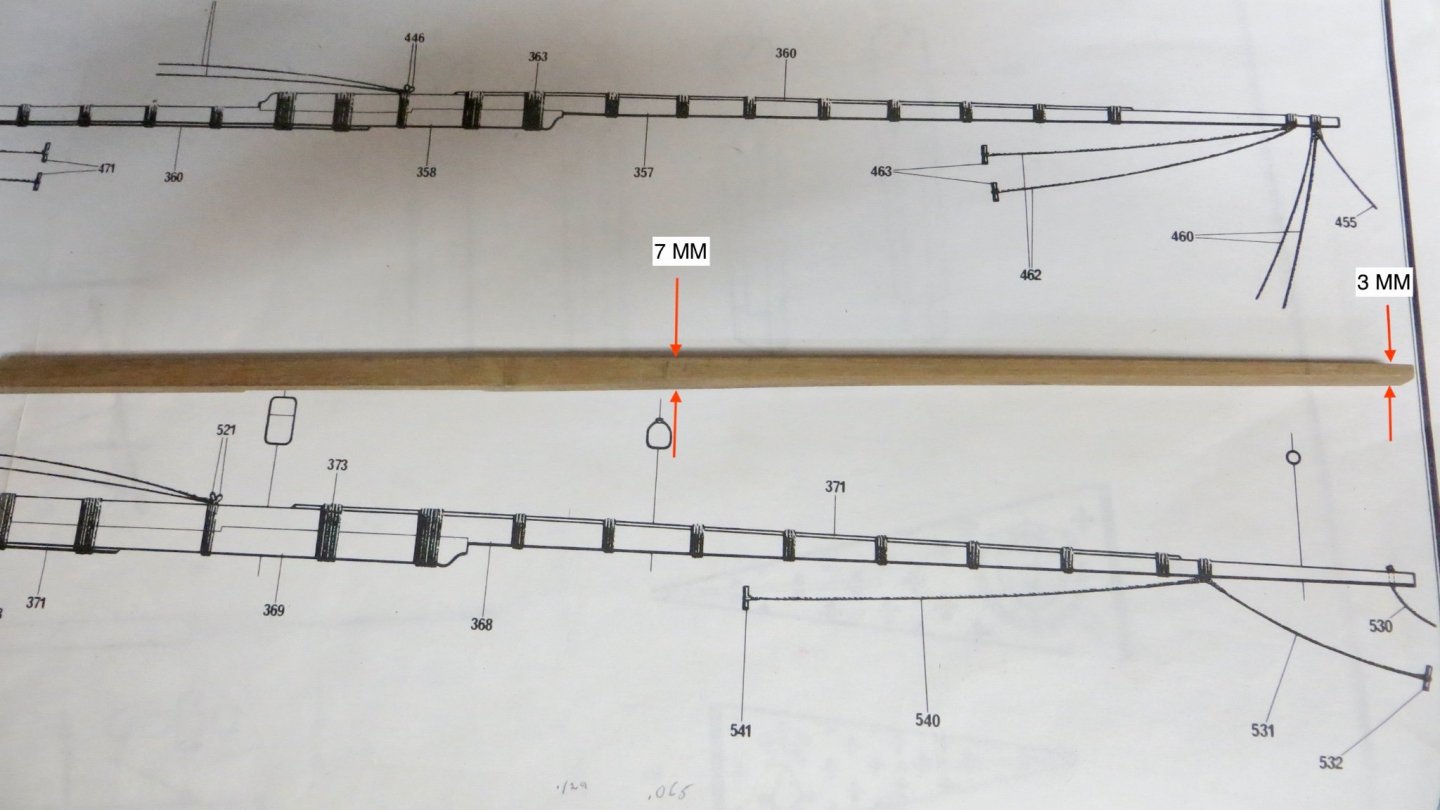
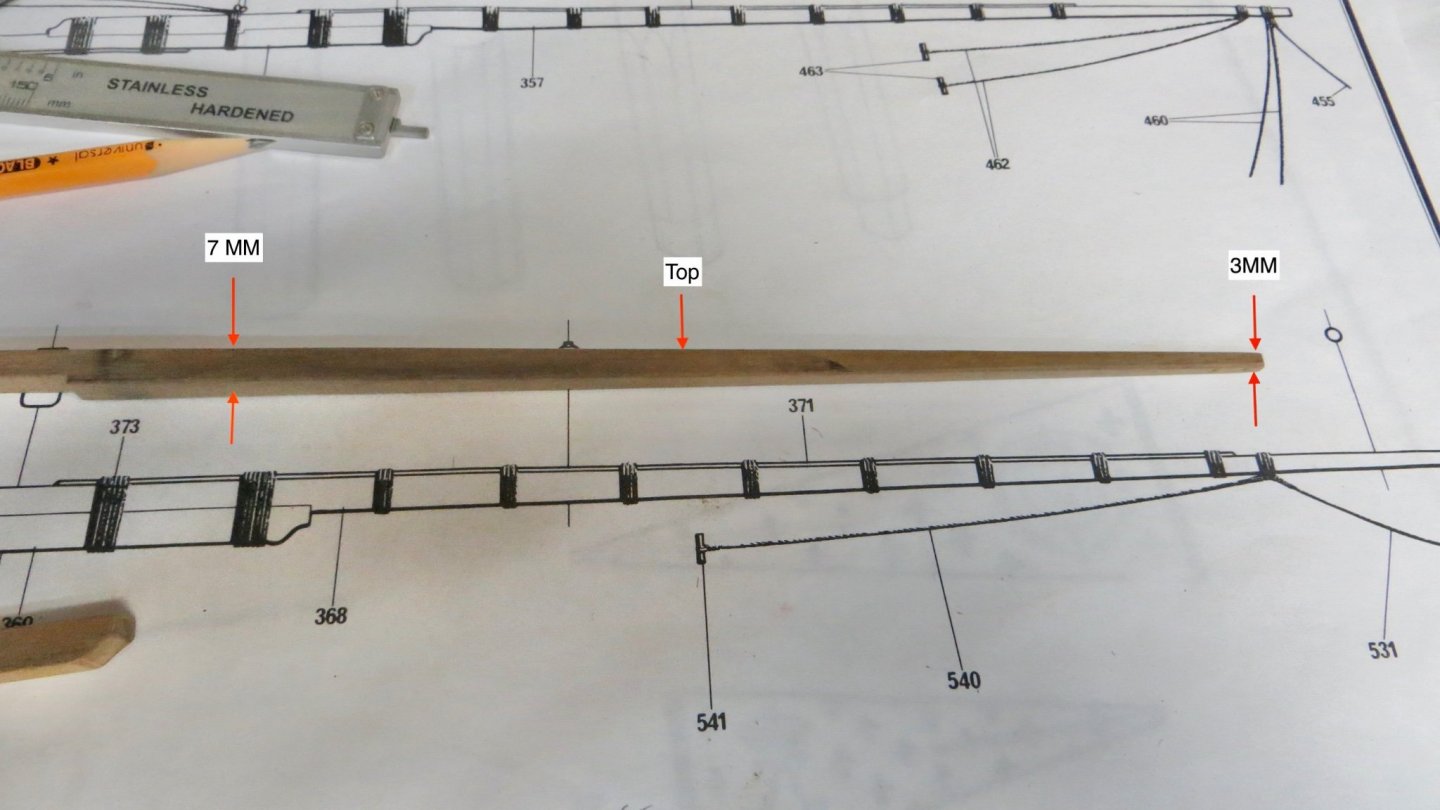
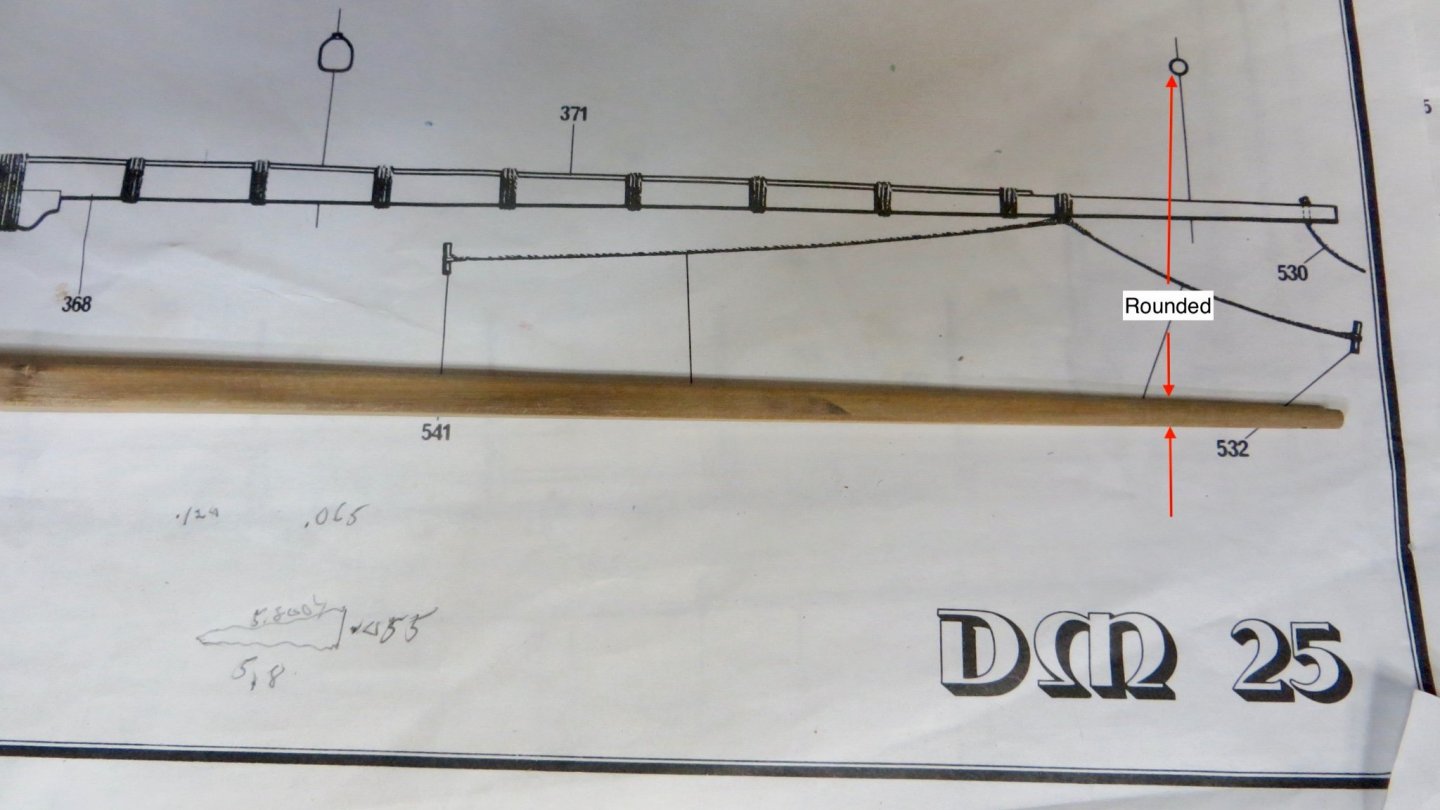
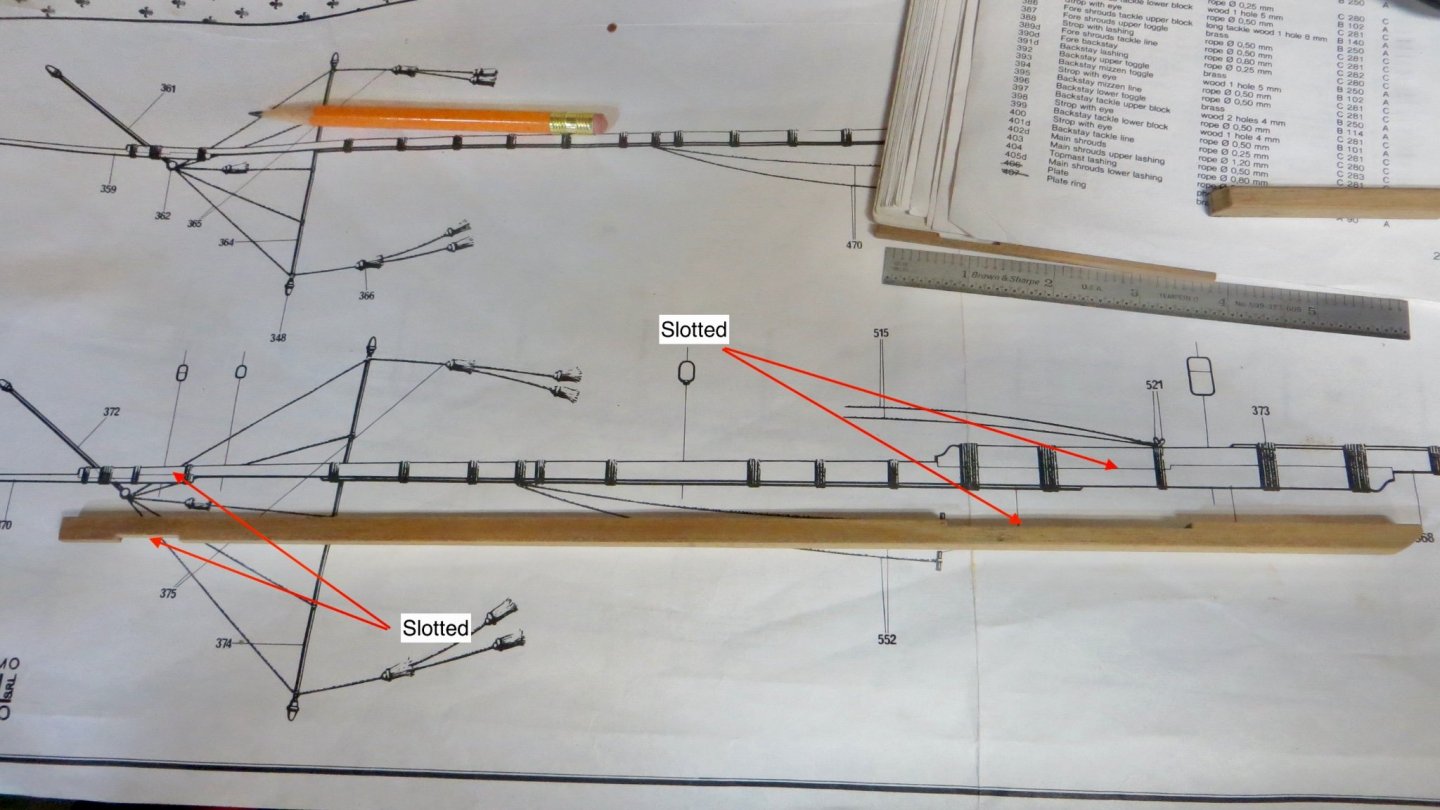
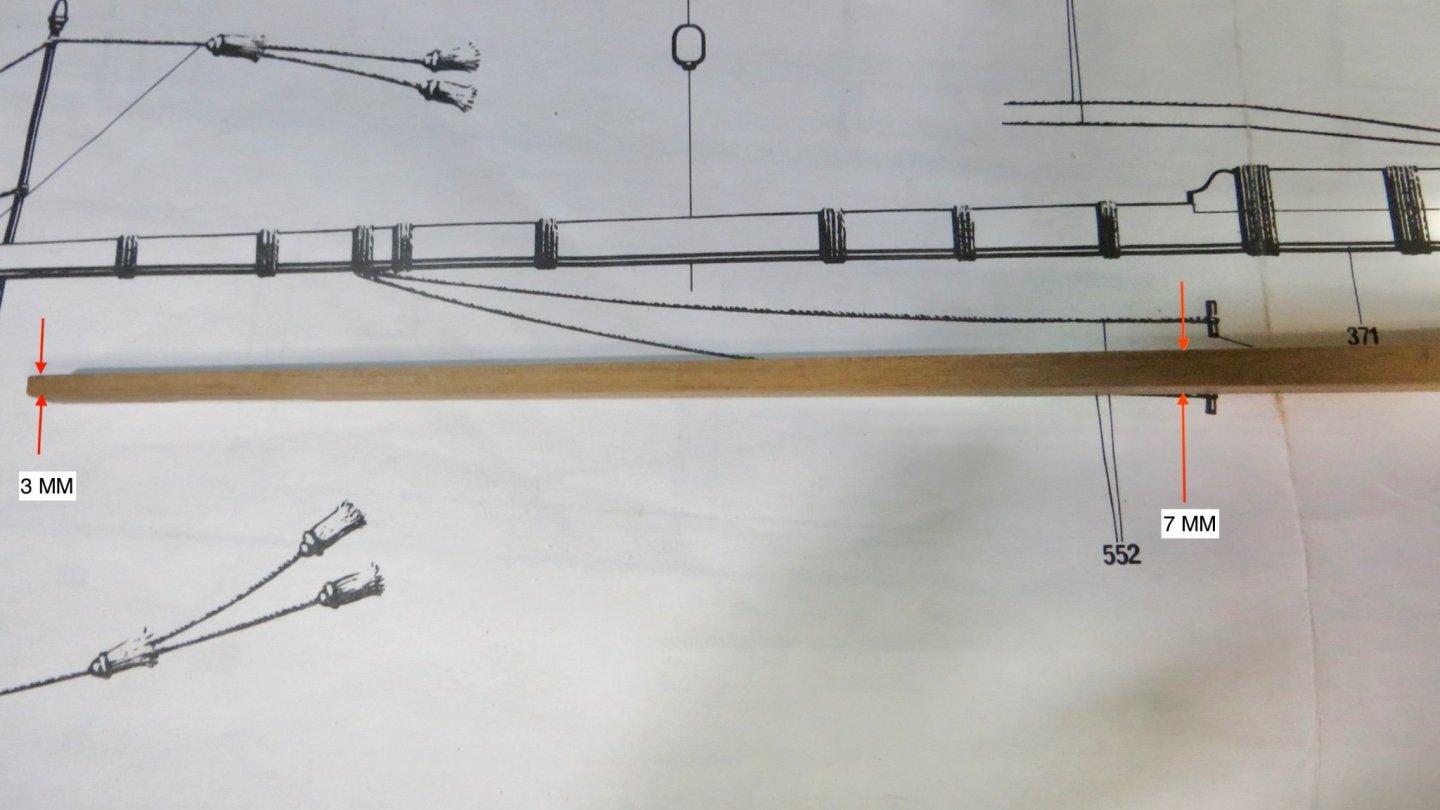
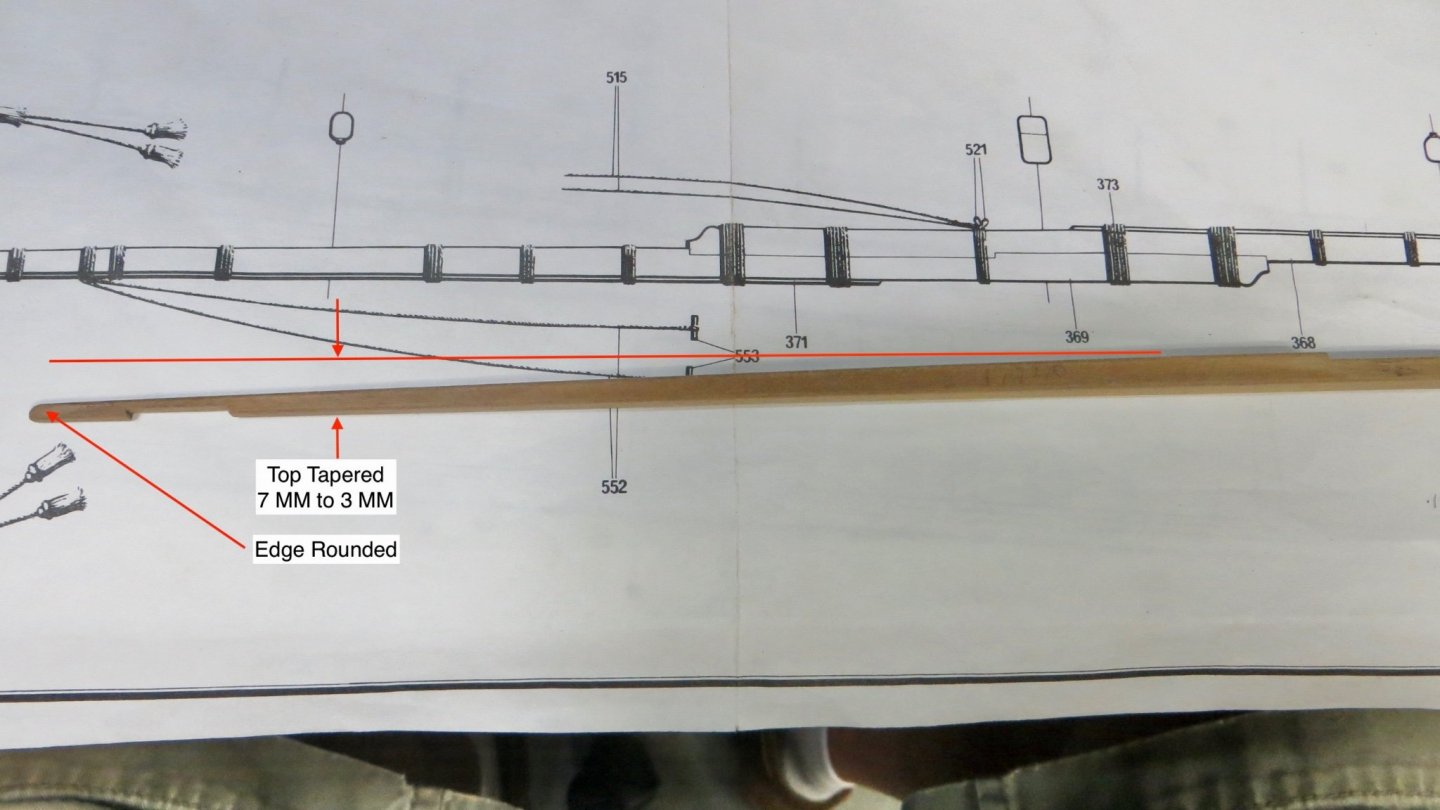
Hello, Next step for me was to make the Main and Fore Yard. The Walnut strips (7mm for the Main and 5mm for the Fore) from the kit were very nice for me to work with. Below are some steps I took for the main yard, but both were very similar. First step was to slot the underside of the lower half of the yard. The next photo is a view from the top. (Slot from previous photo is underneath) I tapered the wood from 7 mm down to about 3 mm at the end of the lower yard. Next was to take the top side and taper the top from 7mm down to 3 mm at the end. Took the tapered lower half of the yard and put it in a 4 jaw chuck and sanded the bottom end from square to round at the end. Finally, finished up the lower half by drilling a hole for later rigging. Next step was to work on the upper half of the yard and slotting the top to fit the lower half and slotting the bottom for the top extension piece to follow. Looking down from the top, tapered both sides equally down to about 3mm Then, similar to the lower half of the yard, tapered the top down to about 3mm and rounded the edge Made the extension piece the same way. The 3 pieces of the main yard ready for assembly. Fore yard was done the same way.


- 510 replies
-
- 4
-
-
- reale de france
- corel
- (and 1 more)
-
Hi Tim, Thank you for your comments. You are too kind!! I will not be attending the conference on October 2nd. As you may recall in the last Guild meeting, my wife and I are moving in September / October. I have the unenviable task of moving my workshop to the new house quickly, but orderly, so I can continue to work on this model. Hoping to layout a better functioning workroom! As far as the red paint, it is "FolkArt Acrylic Imperial Red Number 4669". At the beginning of the build, I bought many "Red " samples until I fond this. It has worked out well! Thanks again for stopping by Tim, Frank
- 510 replies
-
- 2
-
-
- reale de france
- corel
- (and 1 more)
-
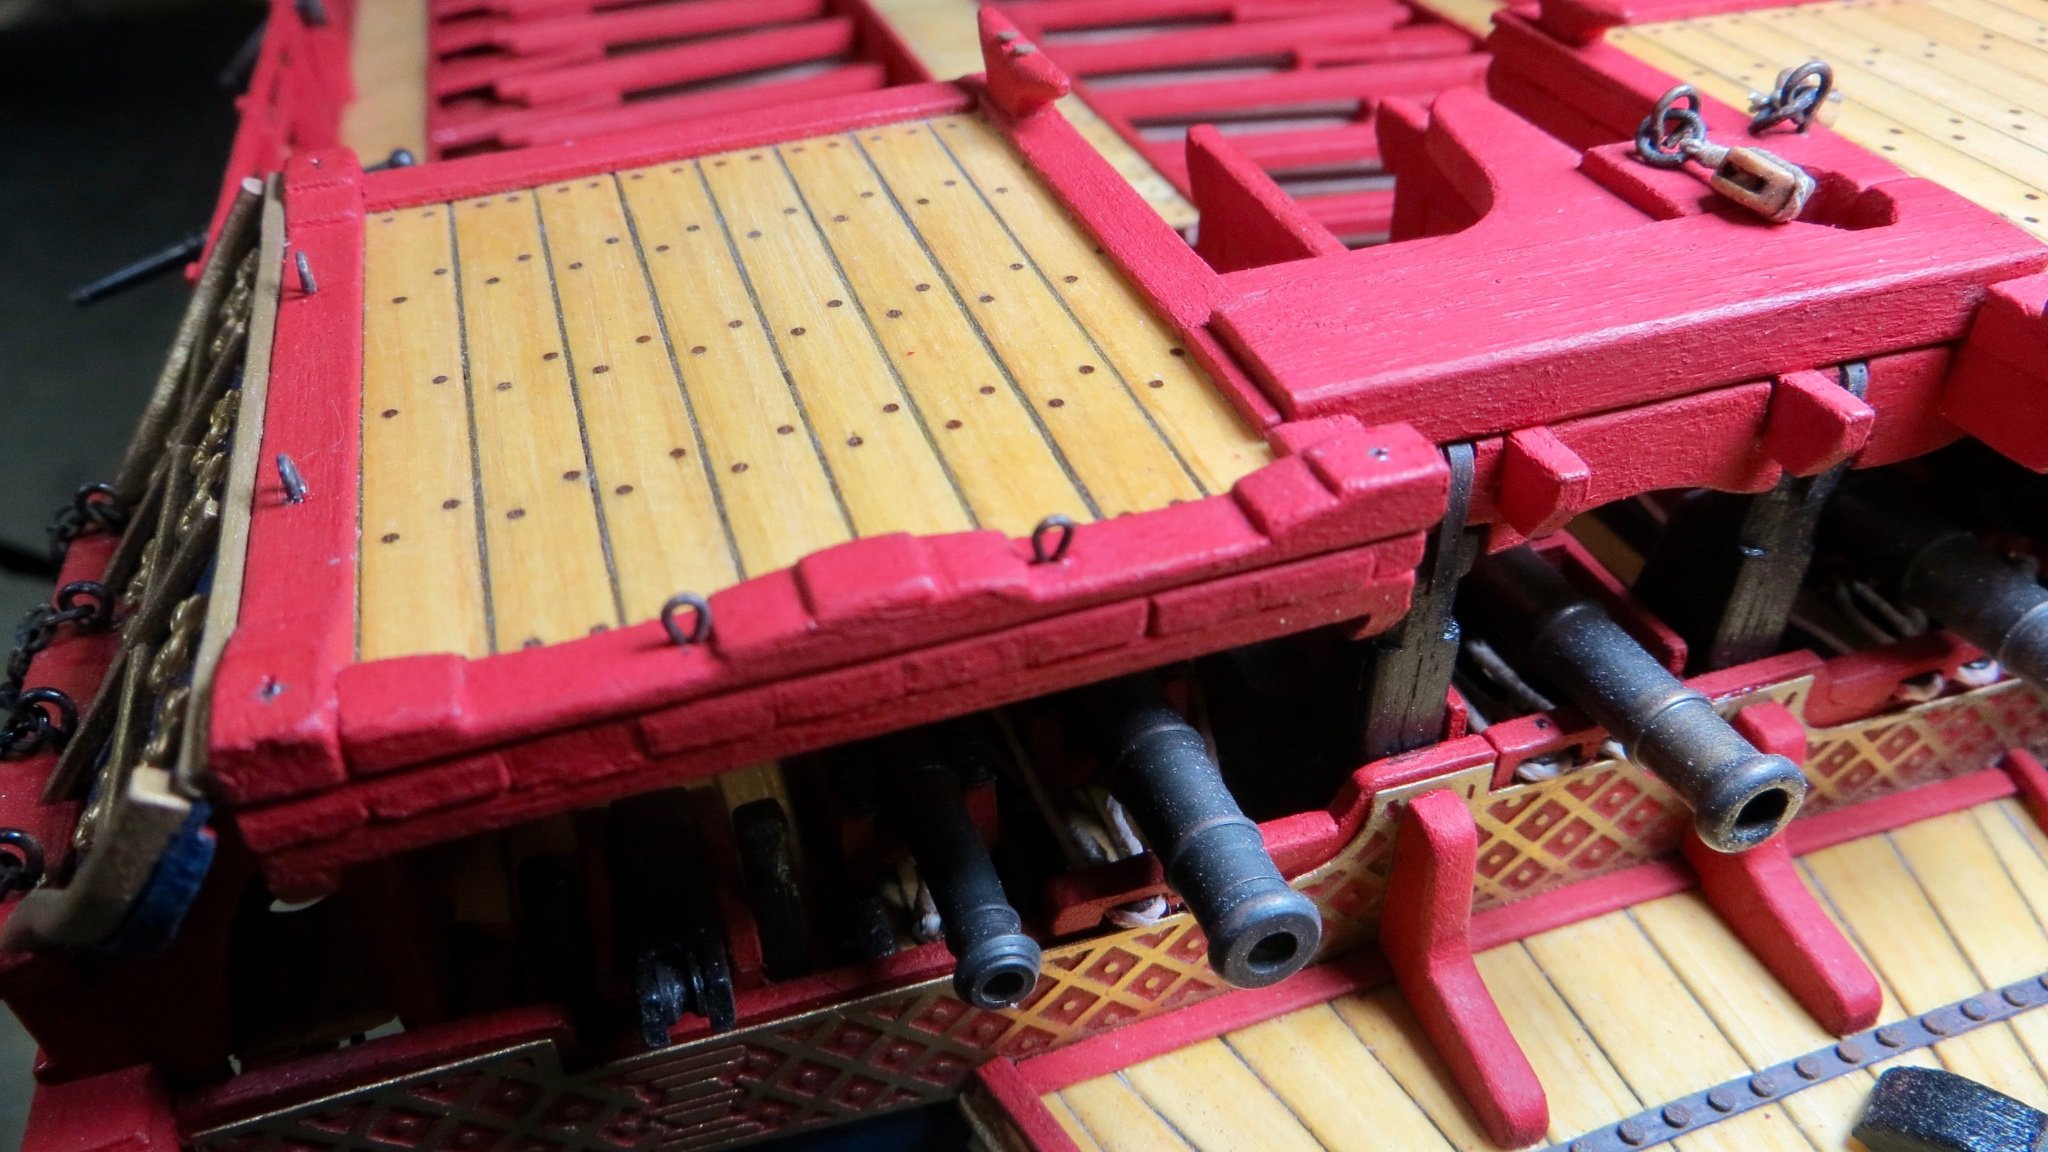
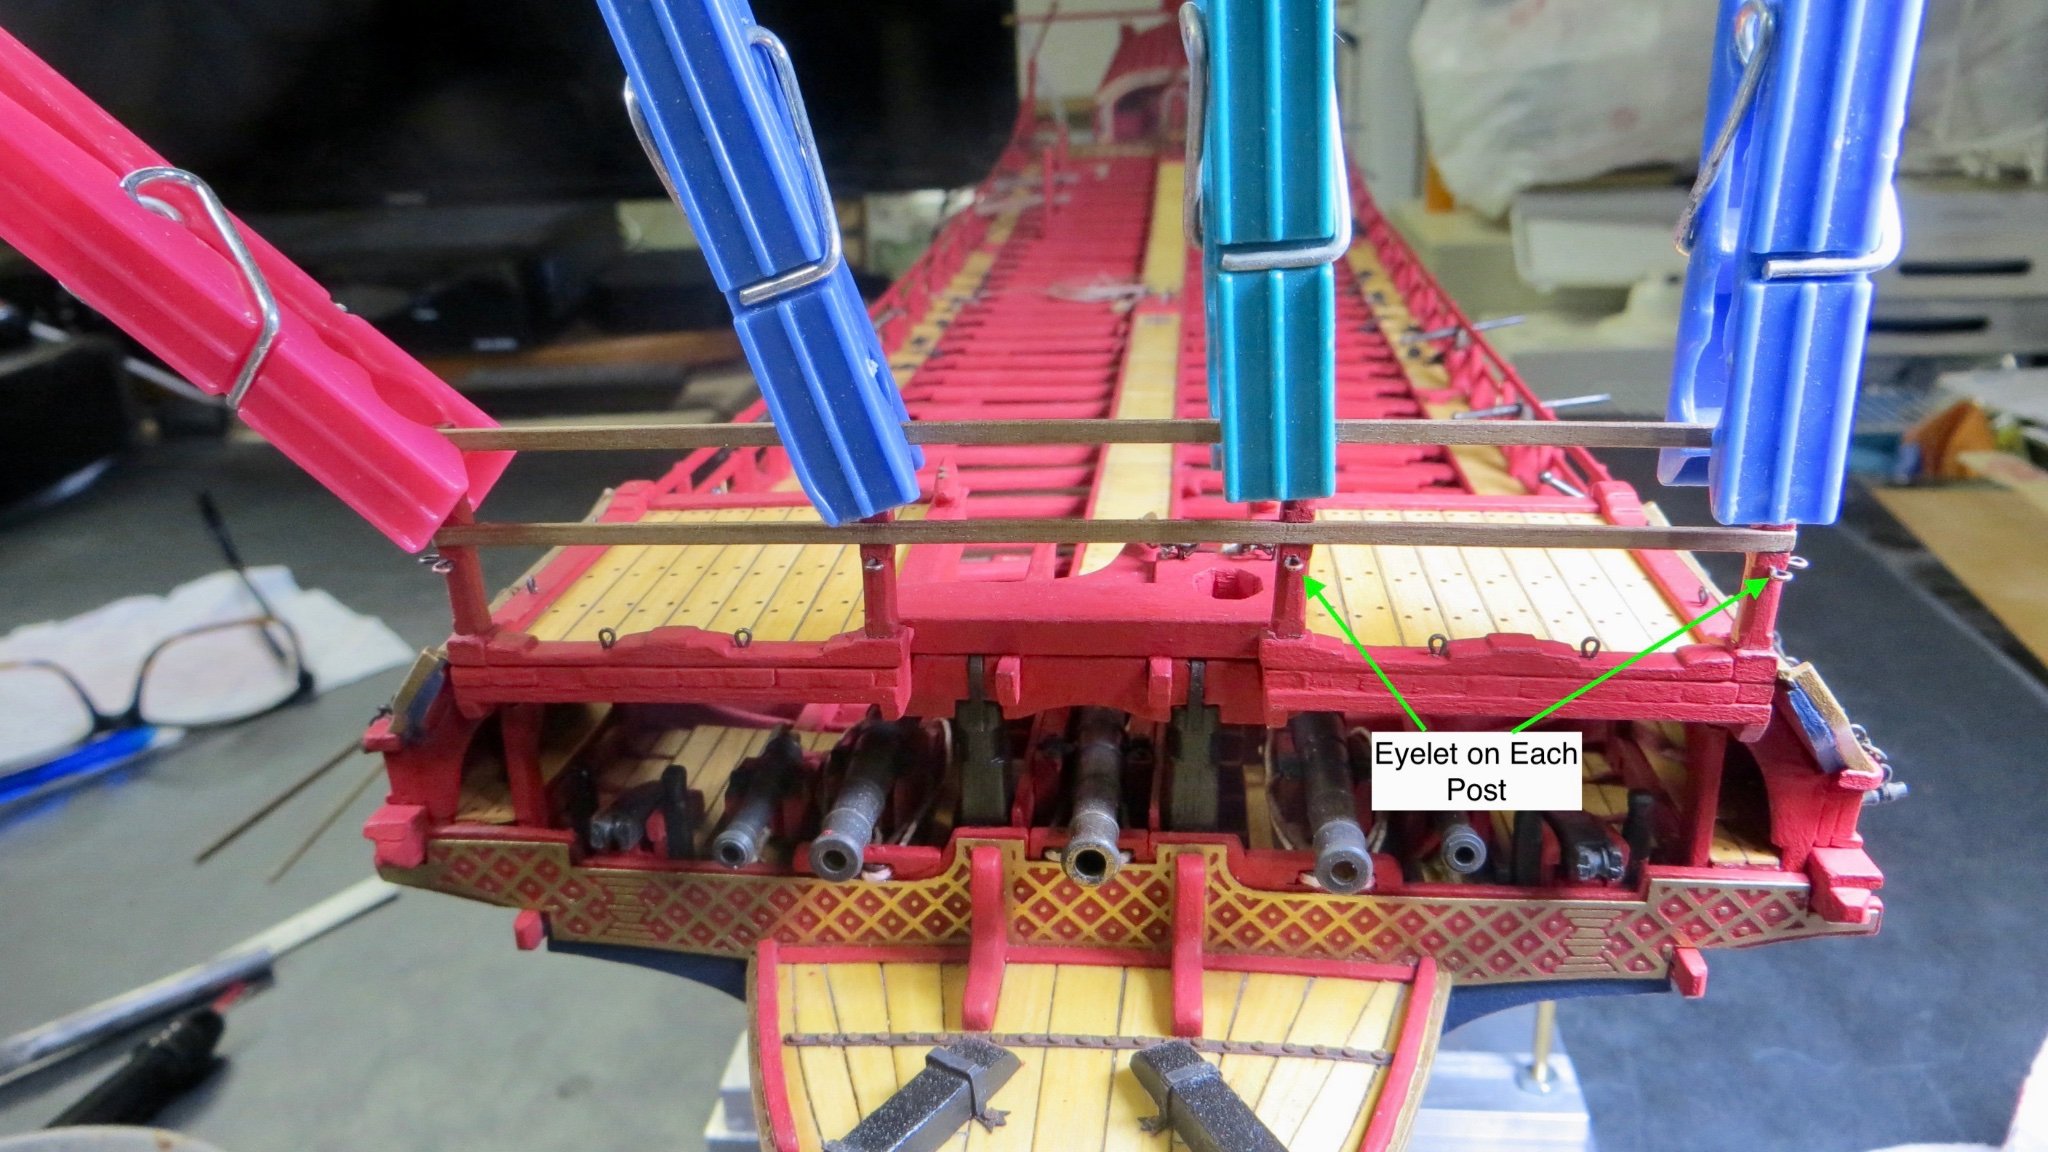
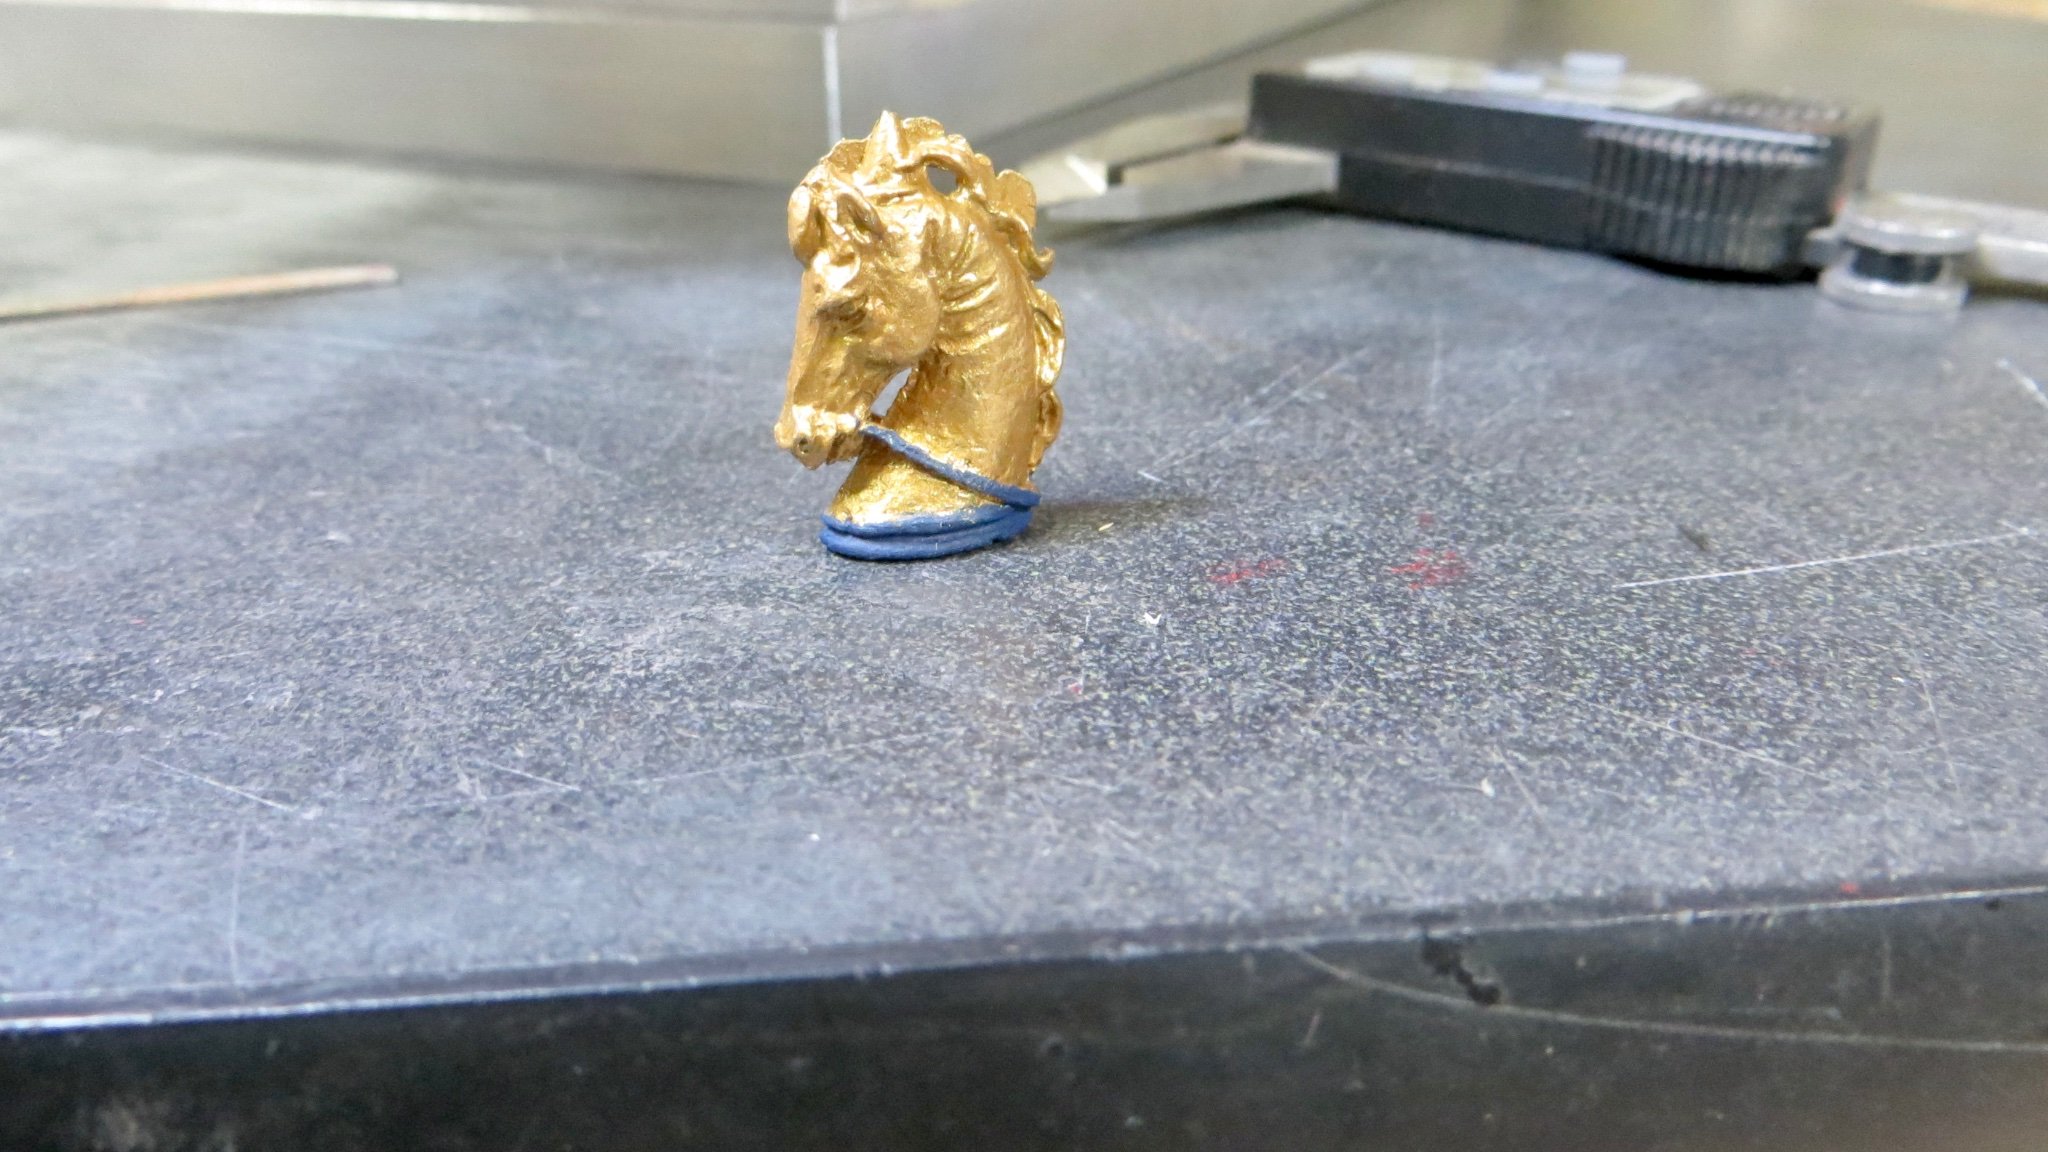
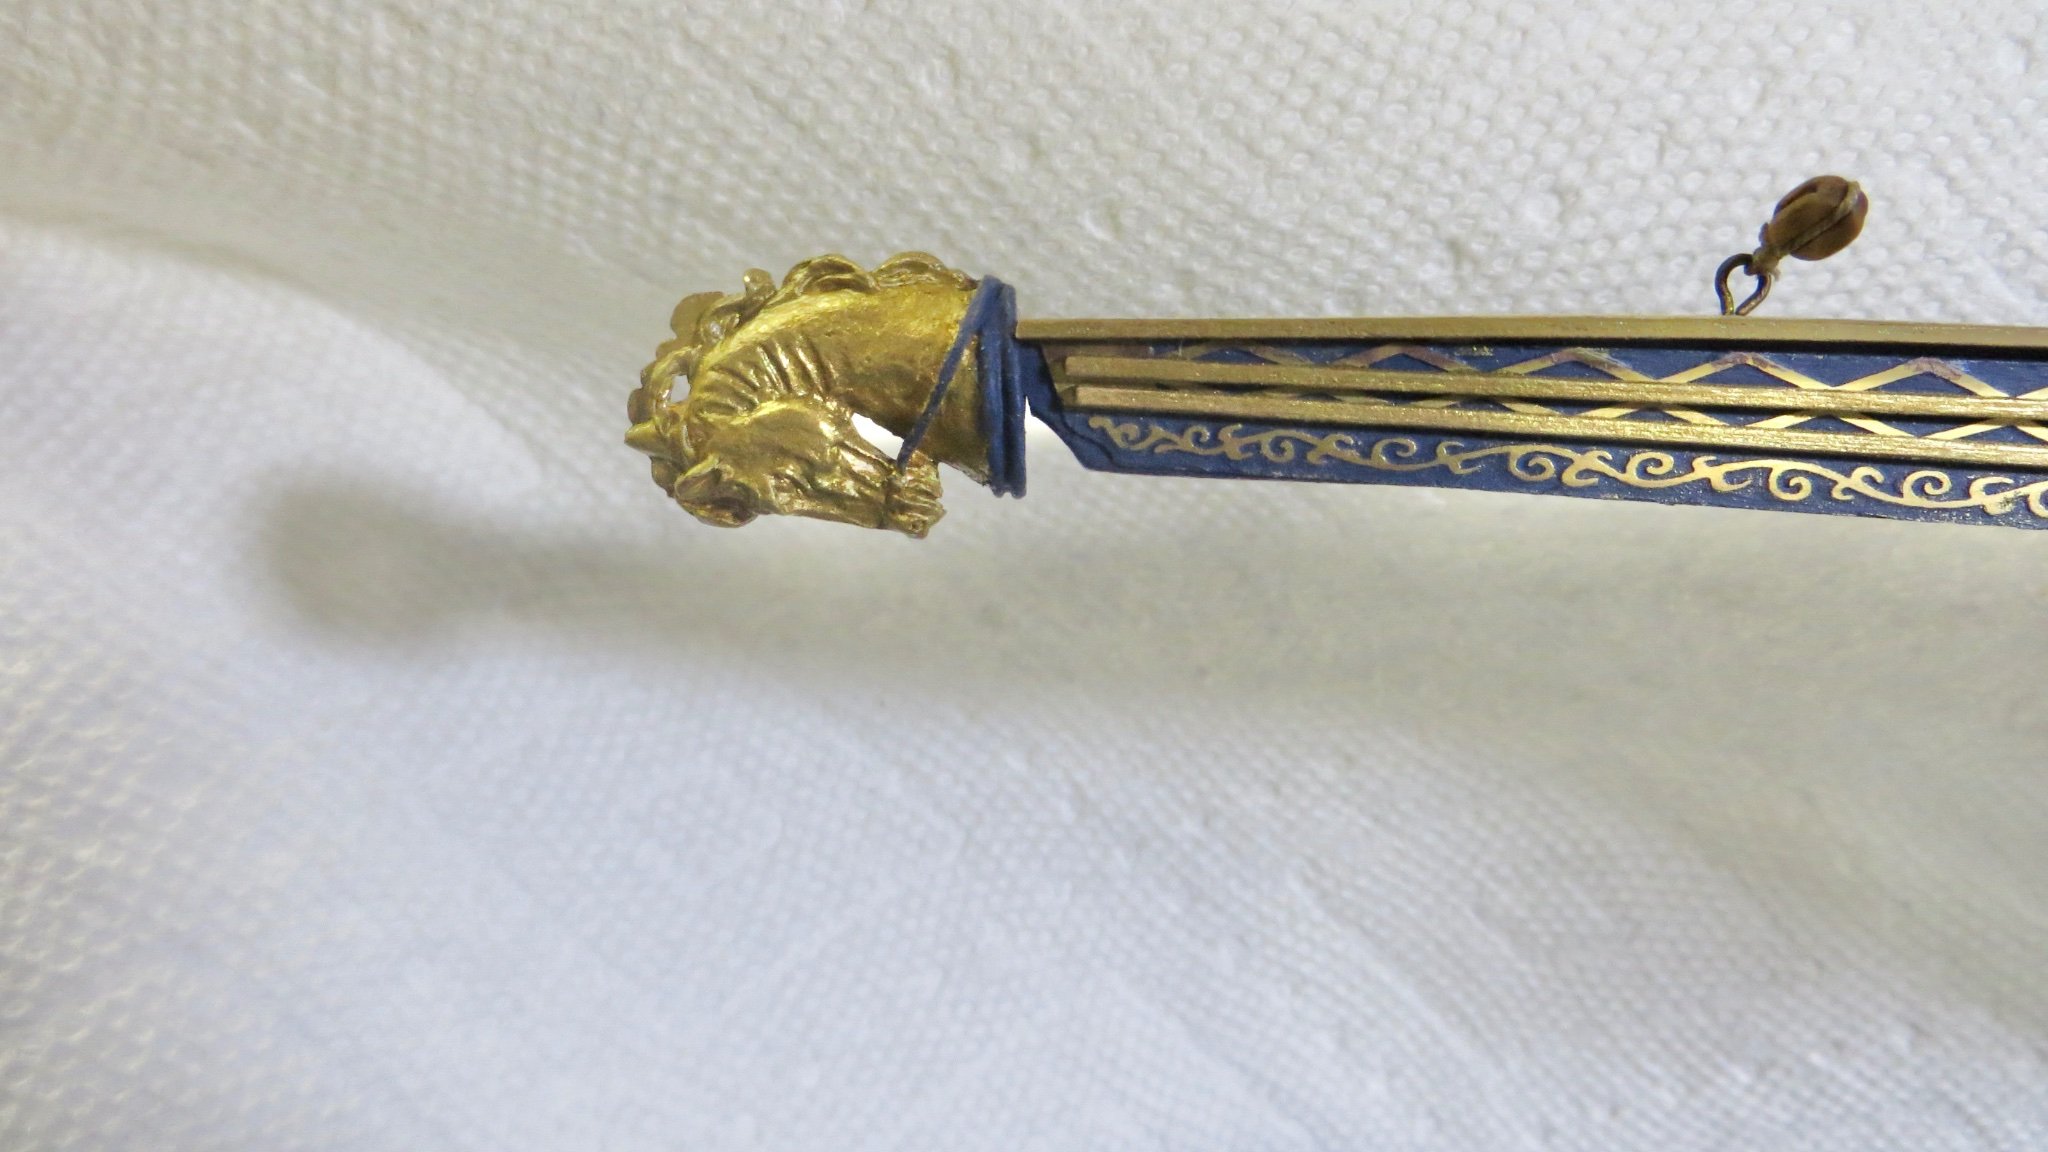
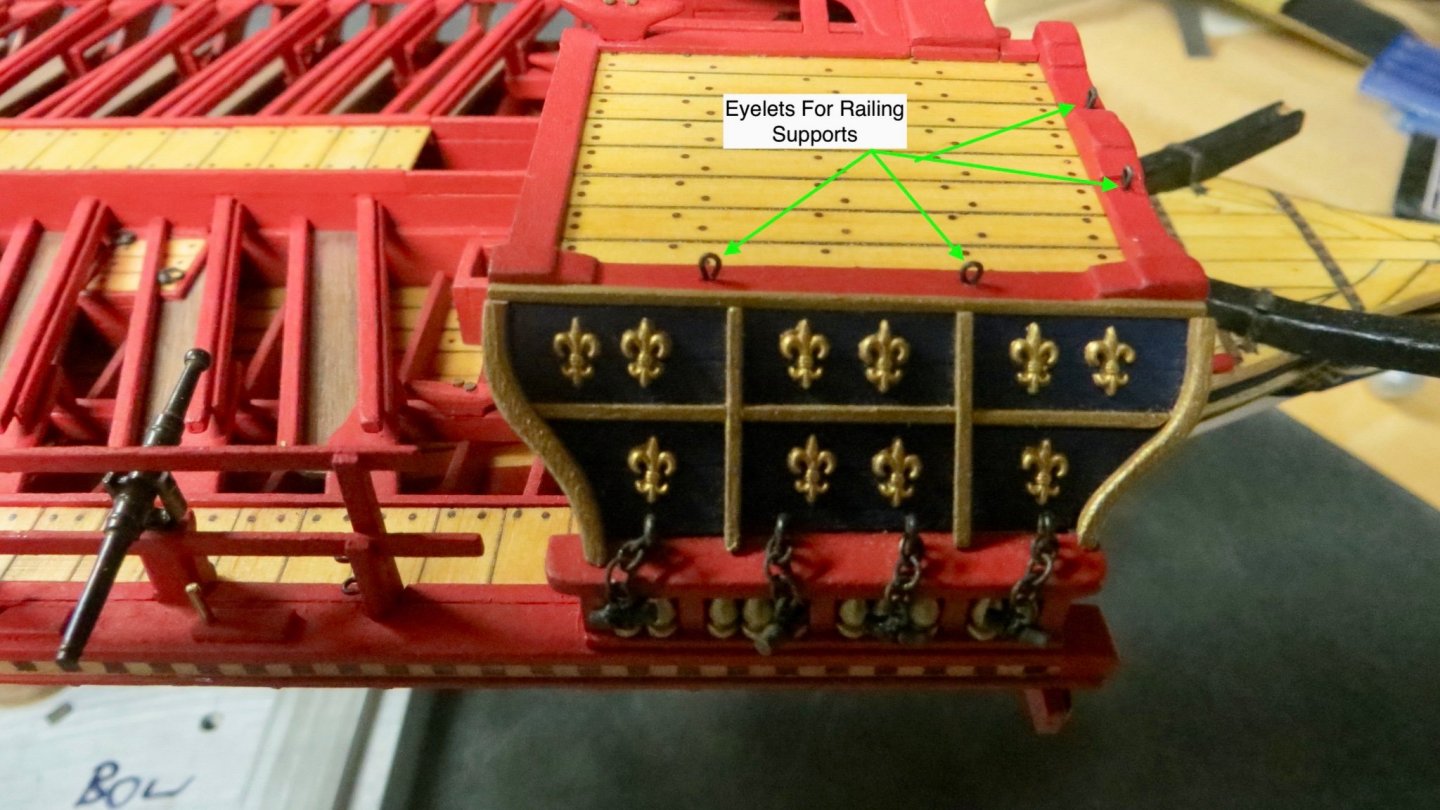
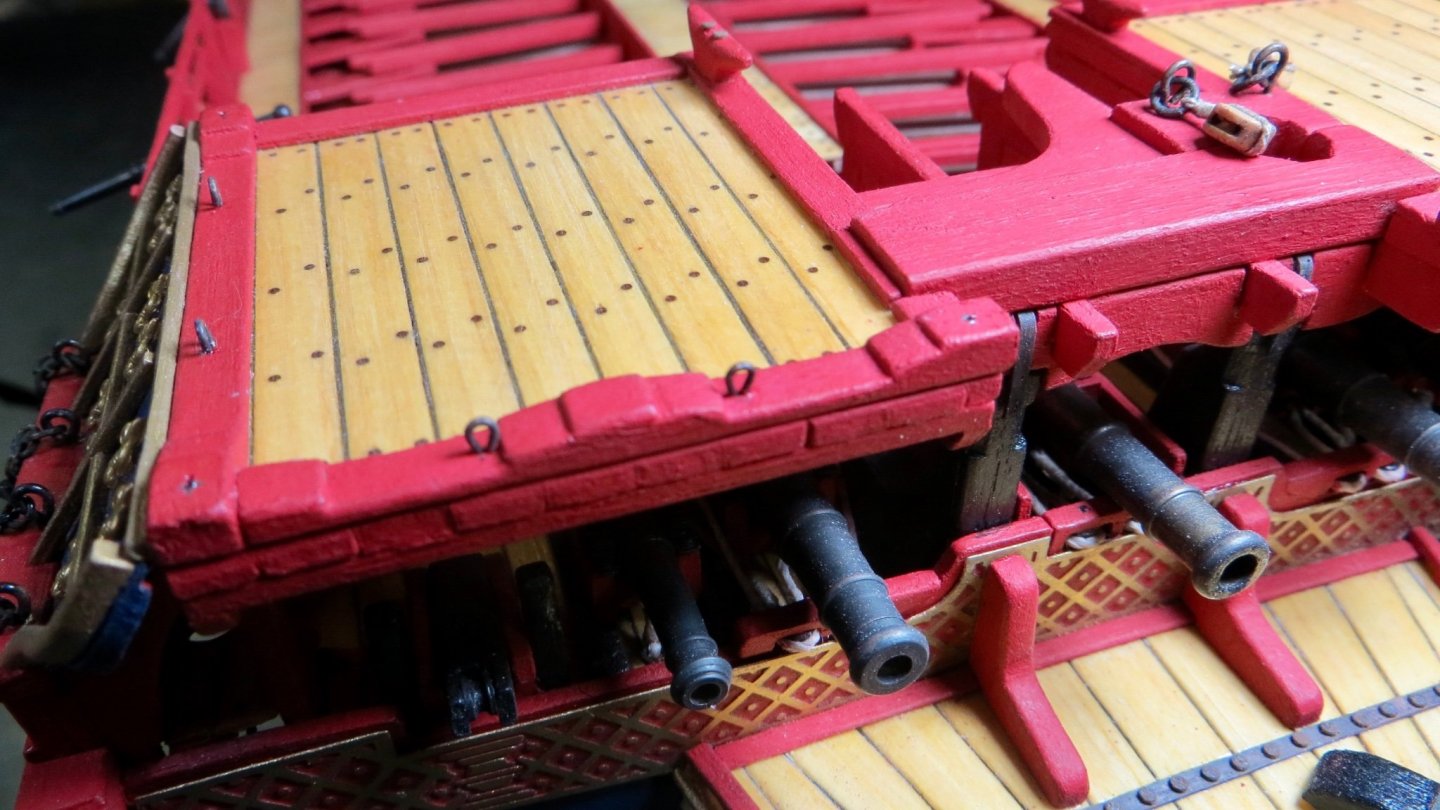
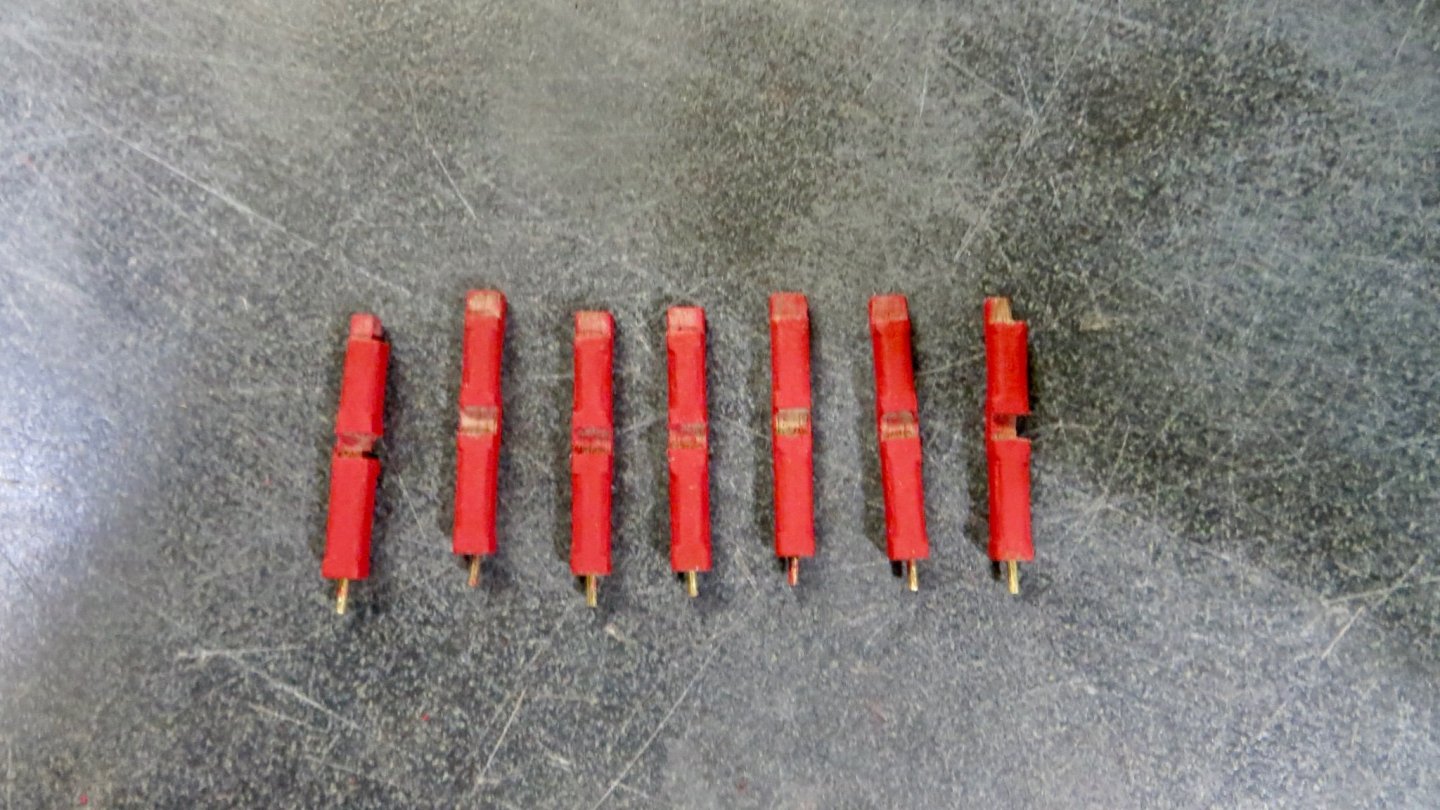
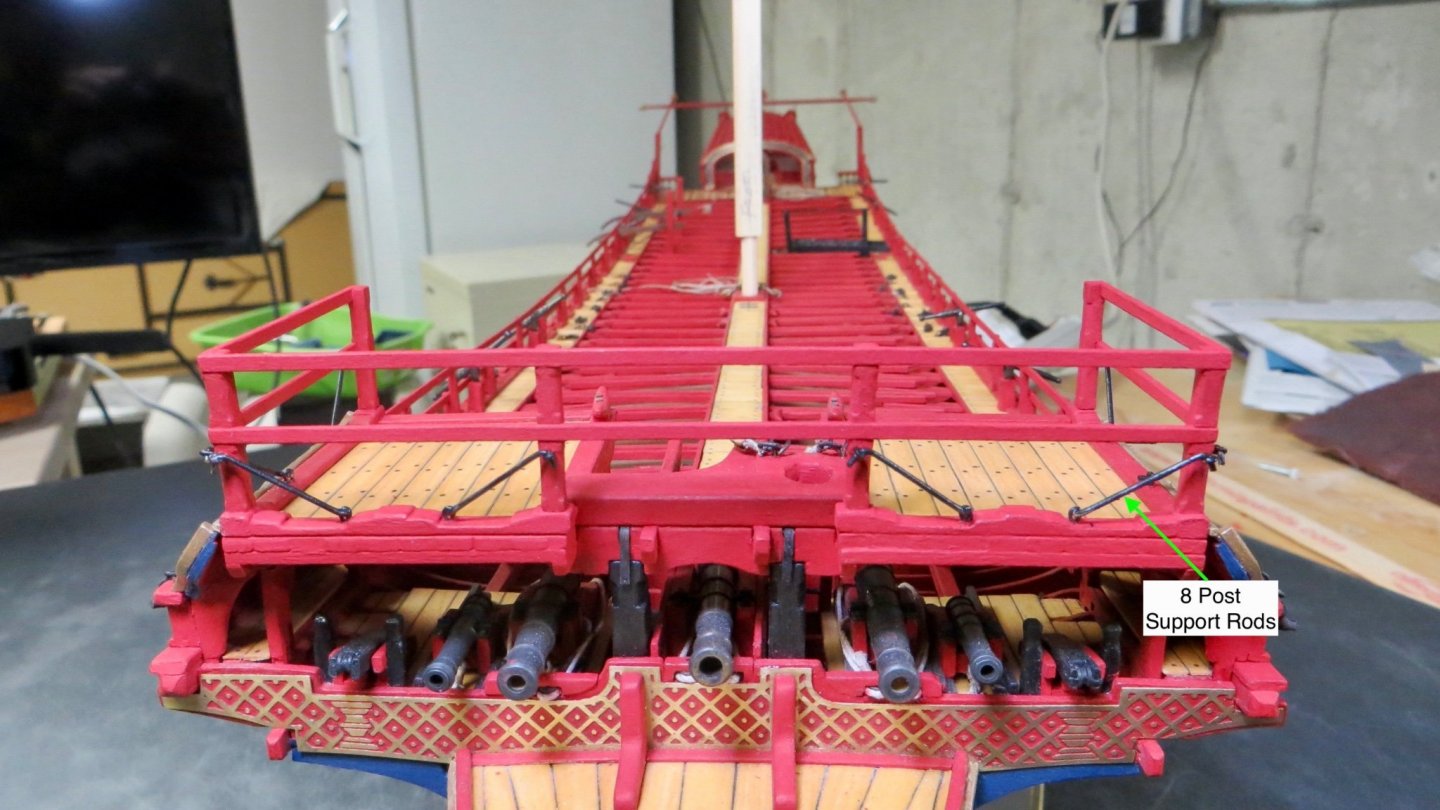
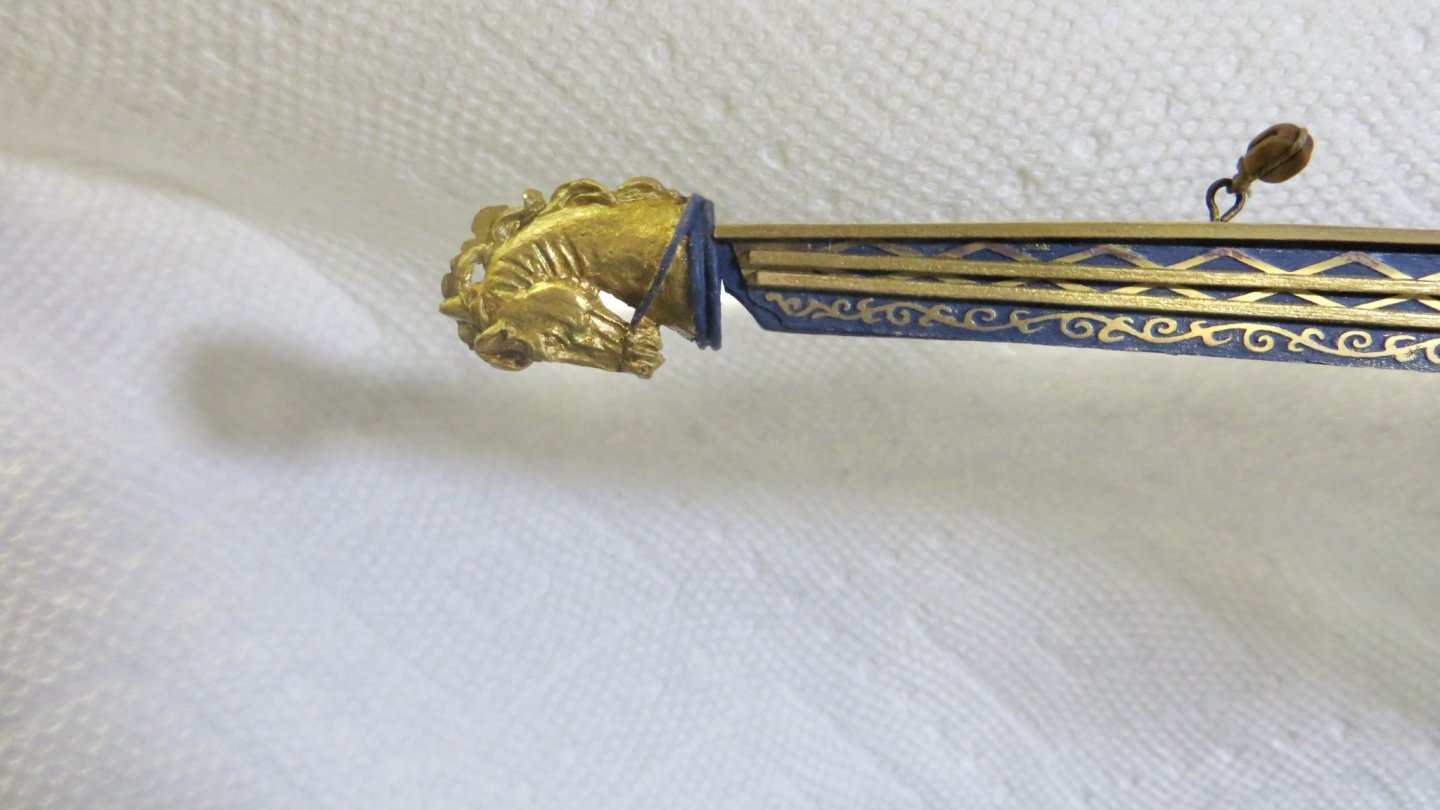
Hello, Turning my attention to finishing the bow railing. As in other areas, the Fleur De Lis plan show some extra detail for the bow upper deck railing system, namely rod supports for the railing posts. 1st step was to add 8 eyelets to the deck platforms (4 per side) Cut and slotted the 6 posts. (Made 1 extra) Added the front railings and an eyelet for the support rods on each post. Front Railing painted Side railings added and 8 post support rods (Following the Fleur de Lis plans) Final detail was to paint and attach horse head figurine to the bow Hopefully I am now ready to begin work on the masts and yards. Thanks for stopping by! Frank


- 510 replies
-
- 6
-
-
-
- reale de france
- corel
- (and 1 more)
-
Hi Michael, Thanks! I always thought that this model was complex, until I keep seeing your work on your Beautiful Sovereign. Every time I think of taking the easy way out on an item on my build, I remind myself of all the extra effort you take on your model, and redouble my efforts. Best, Frank
-
Thanks for your kind comments! Glad you could stop for a view of the log. Frank
-
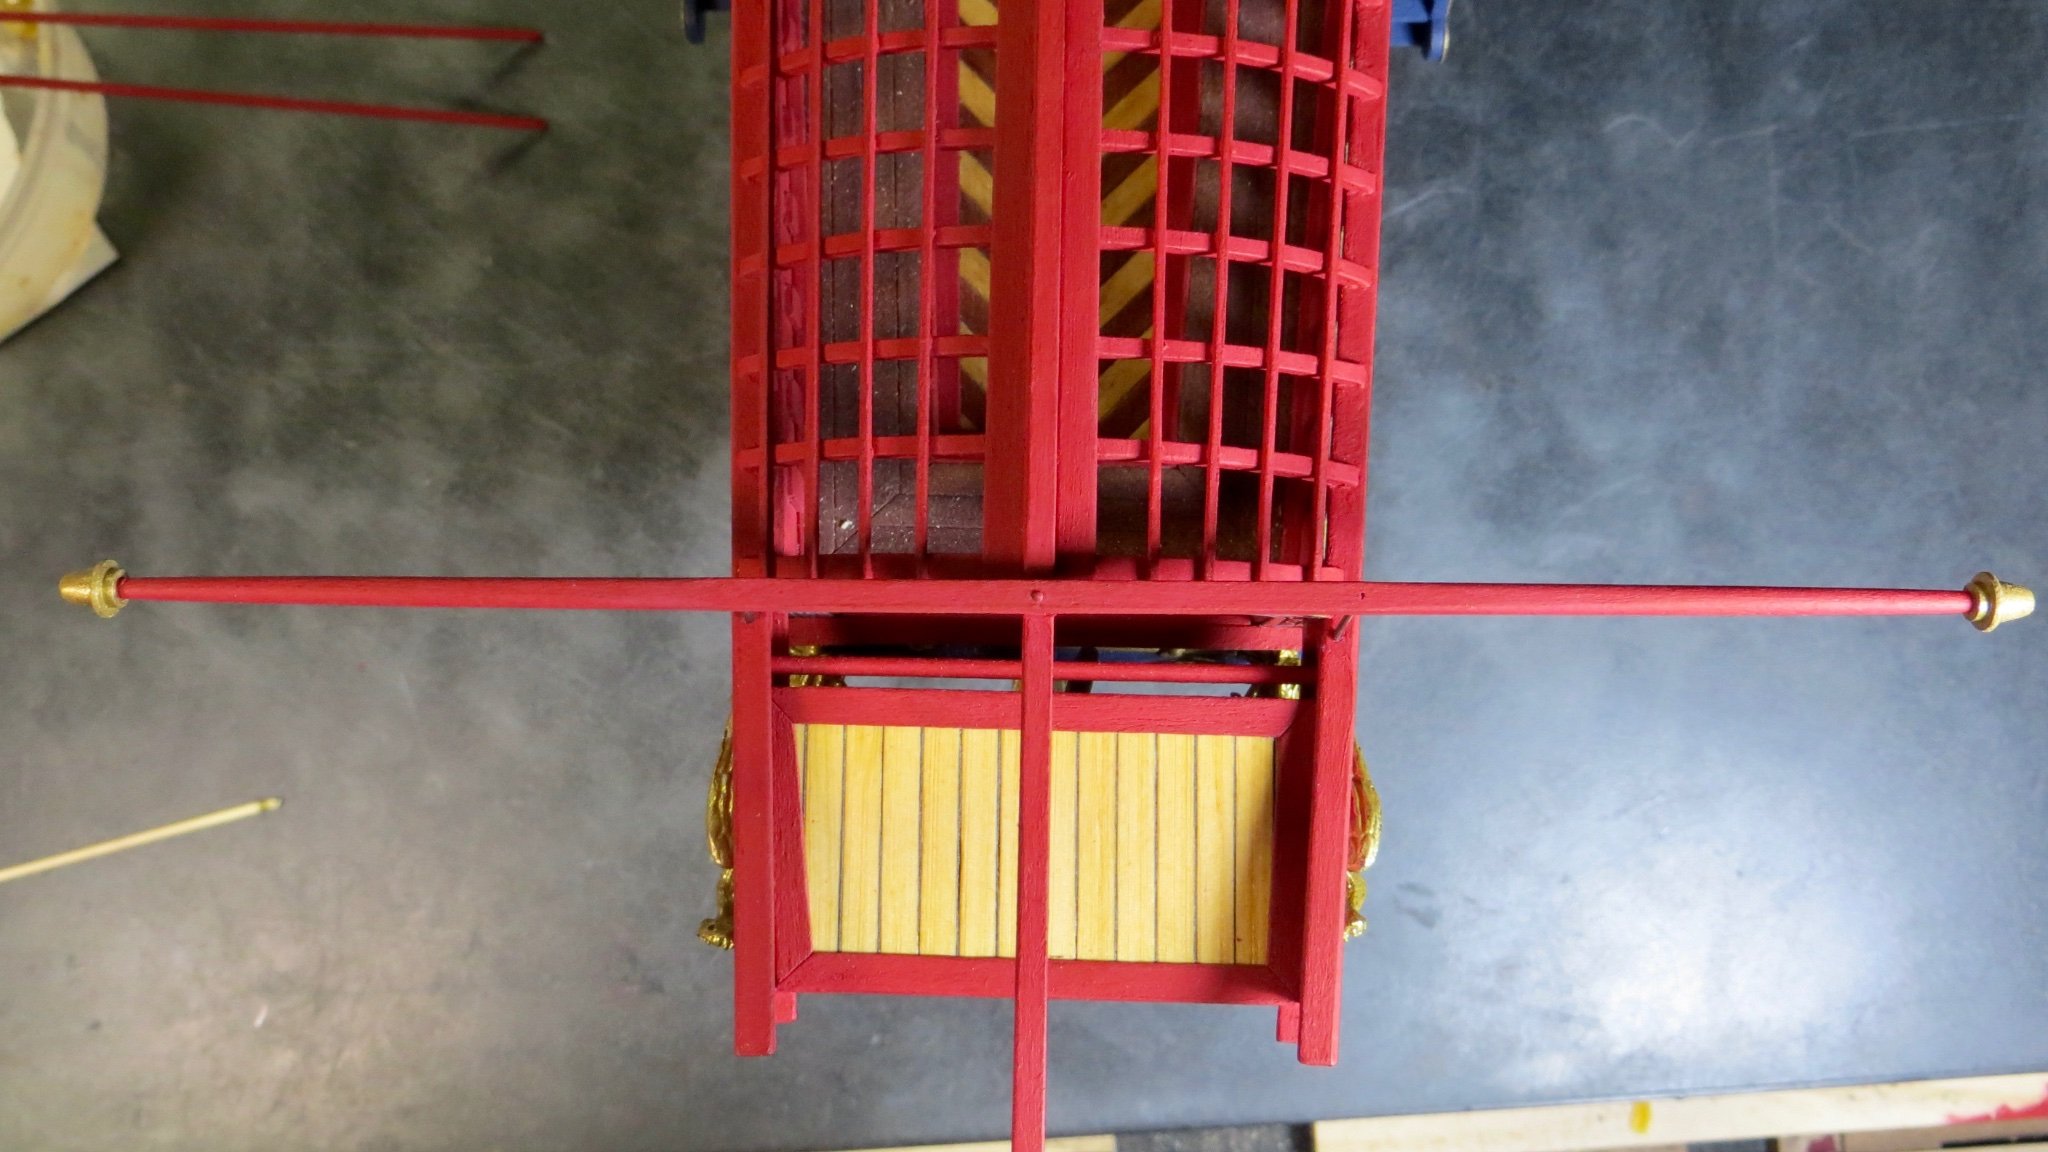
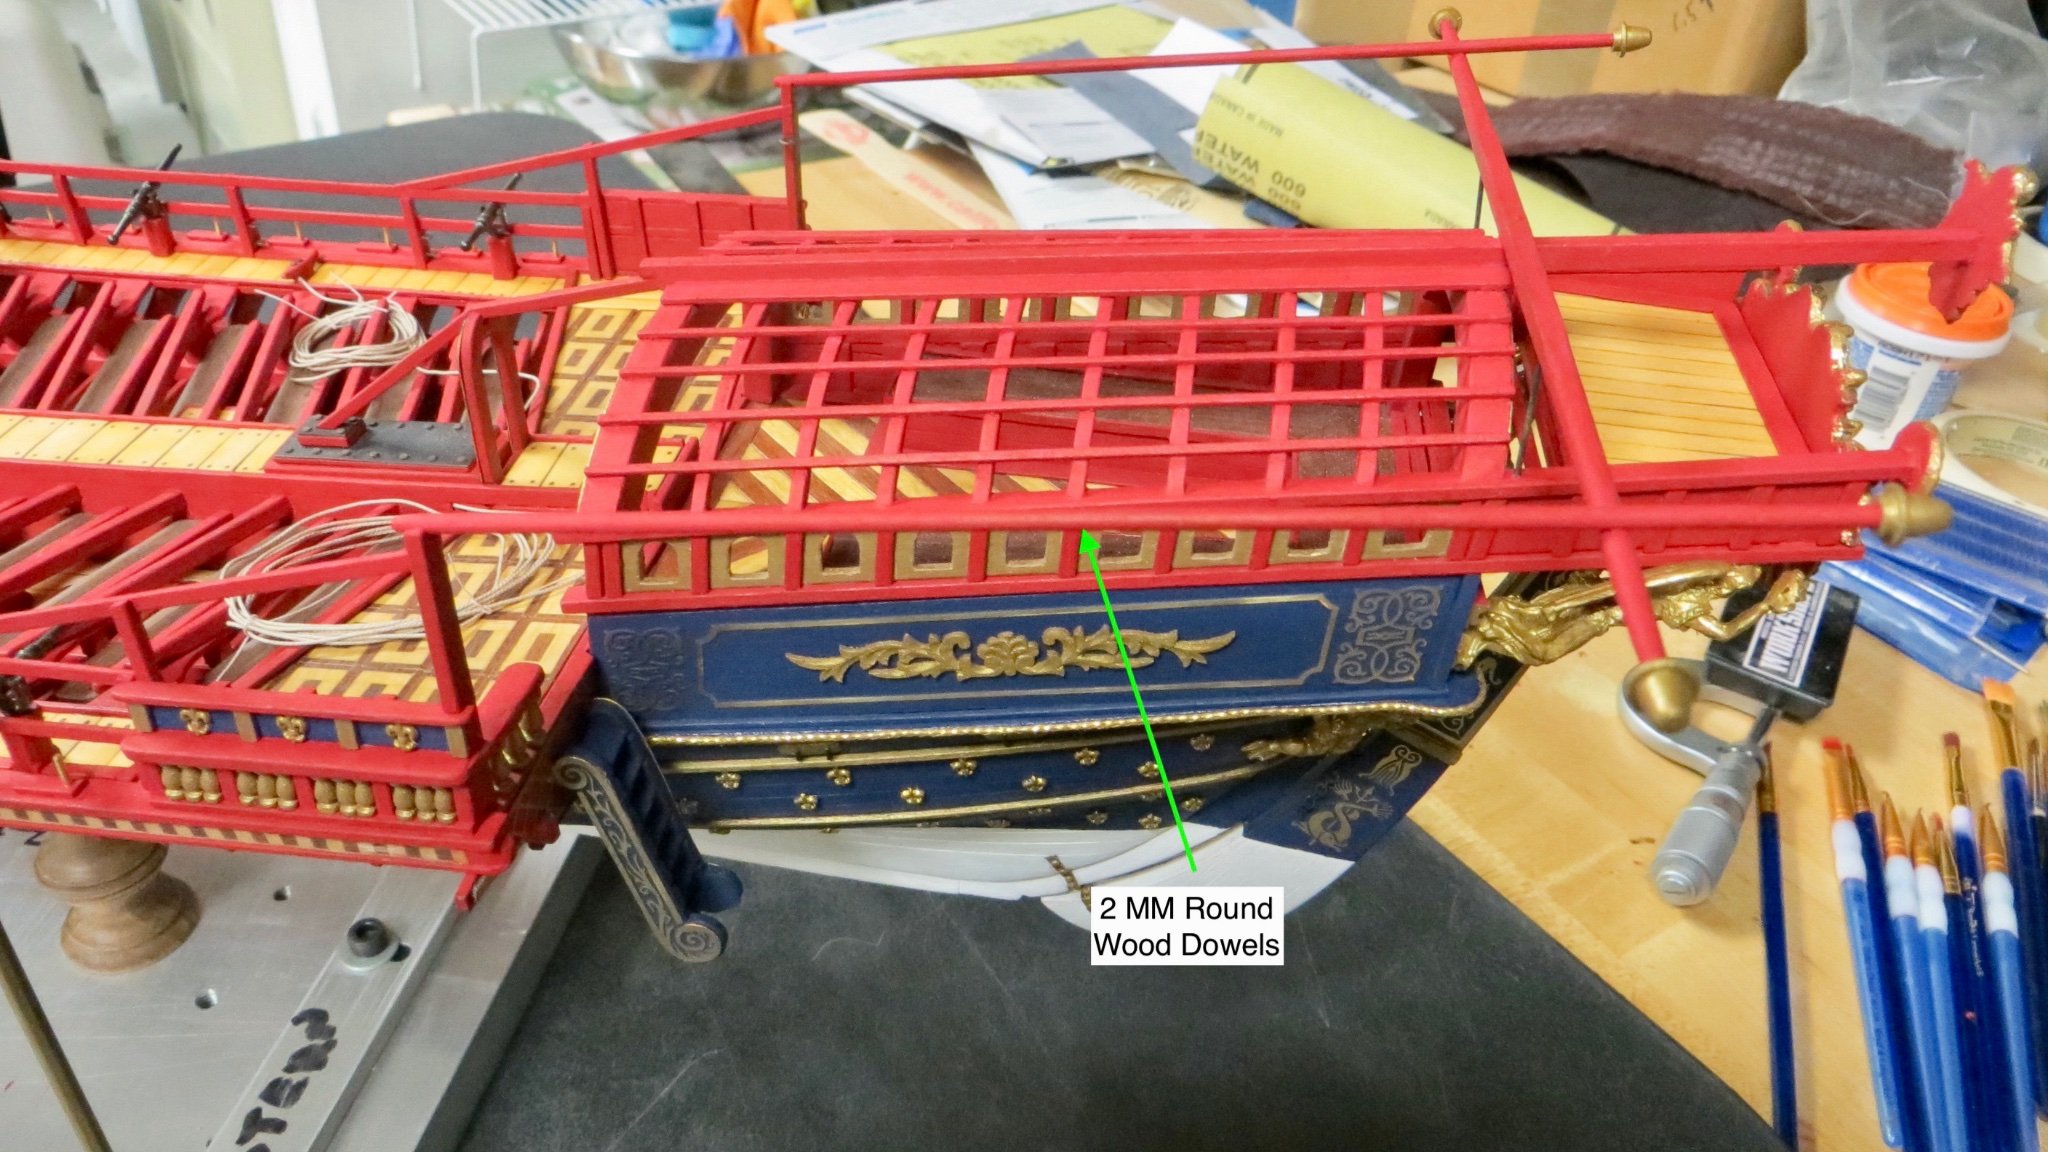
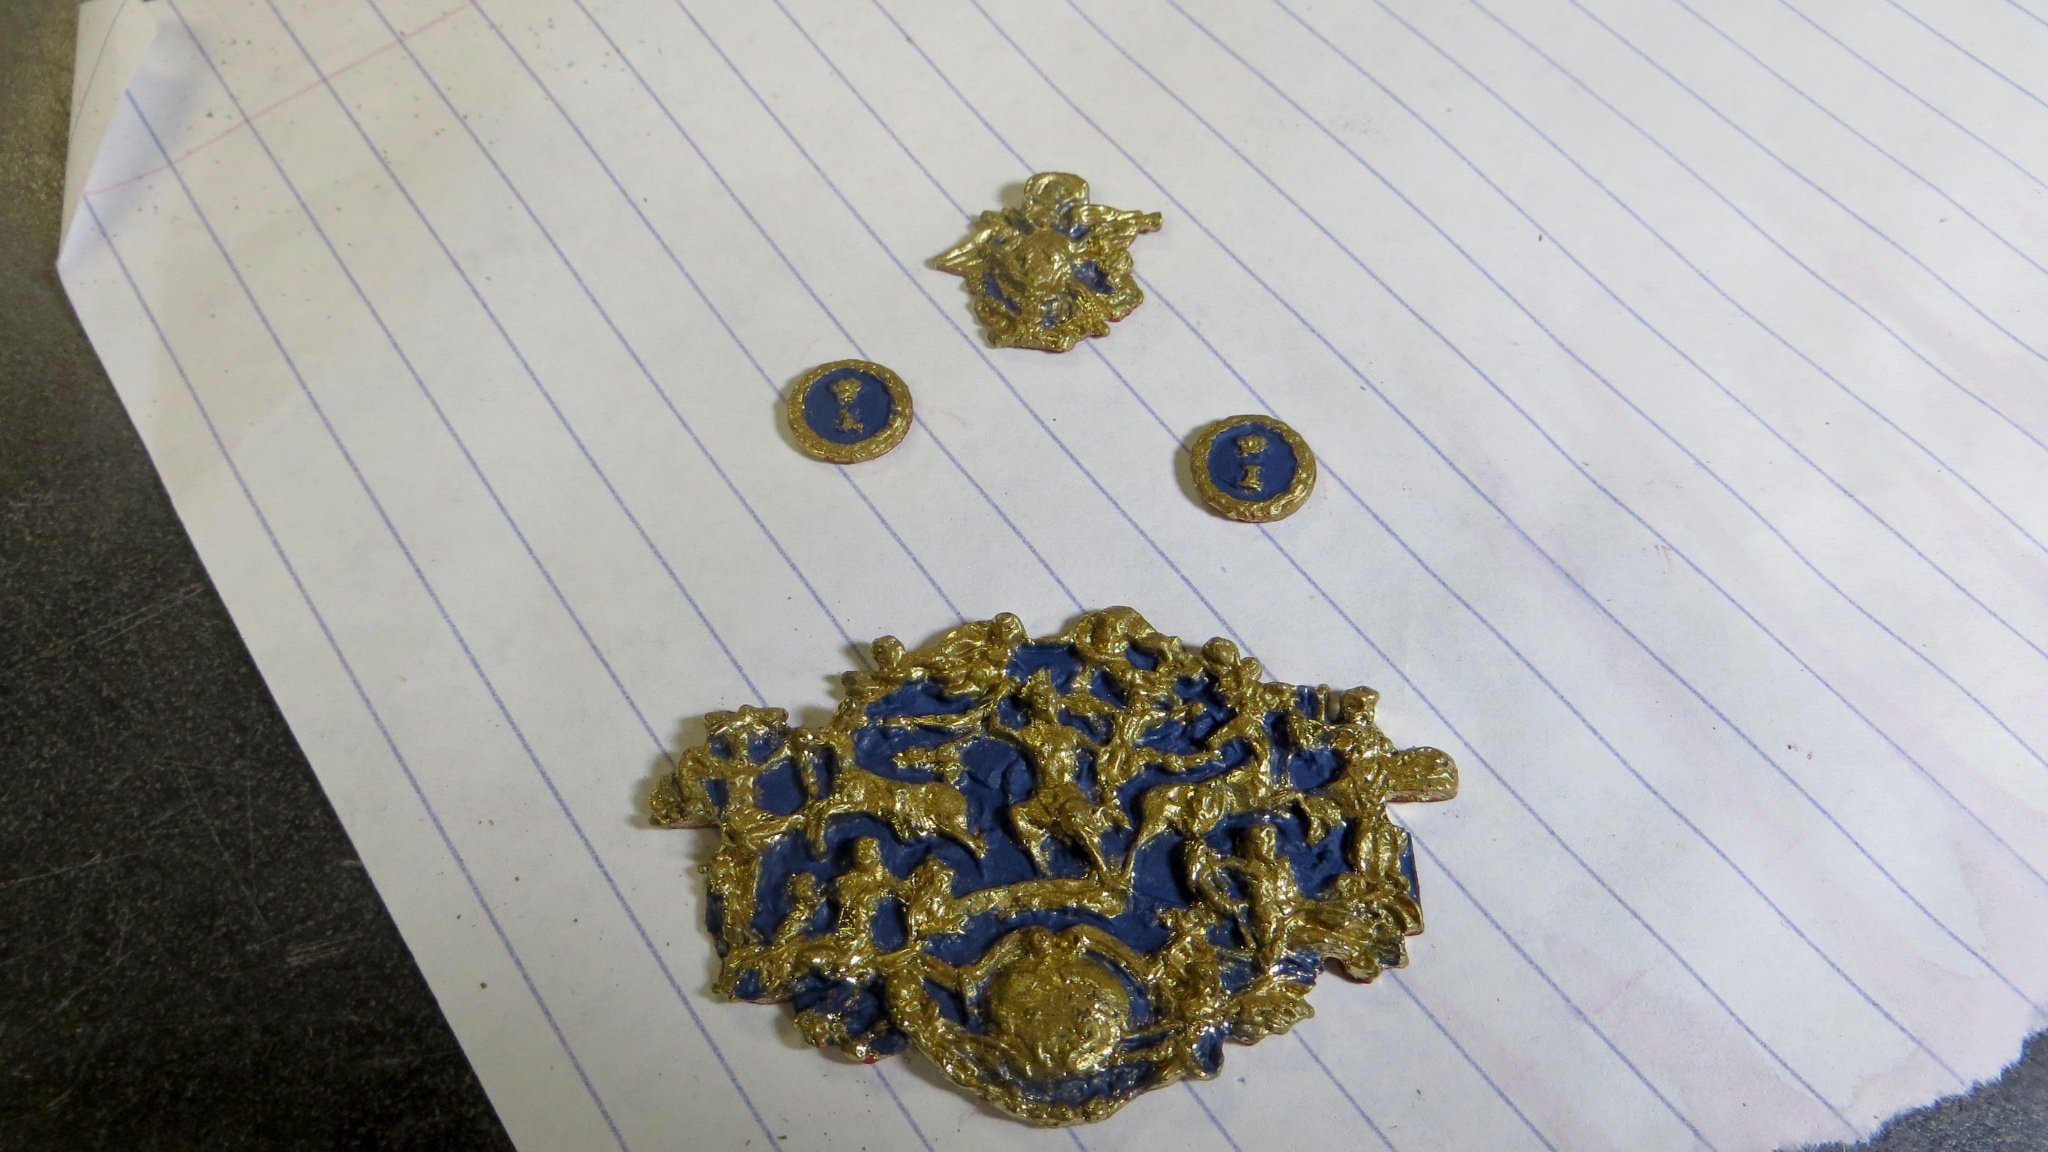
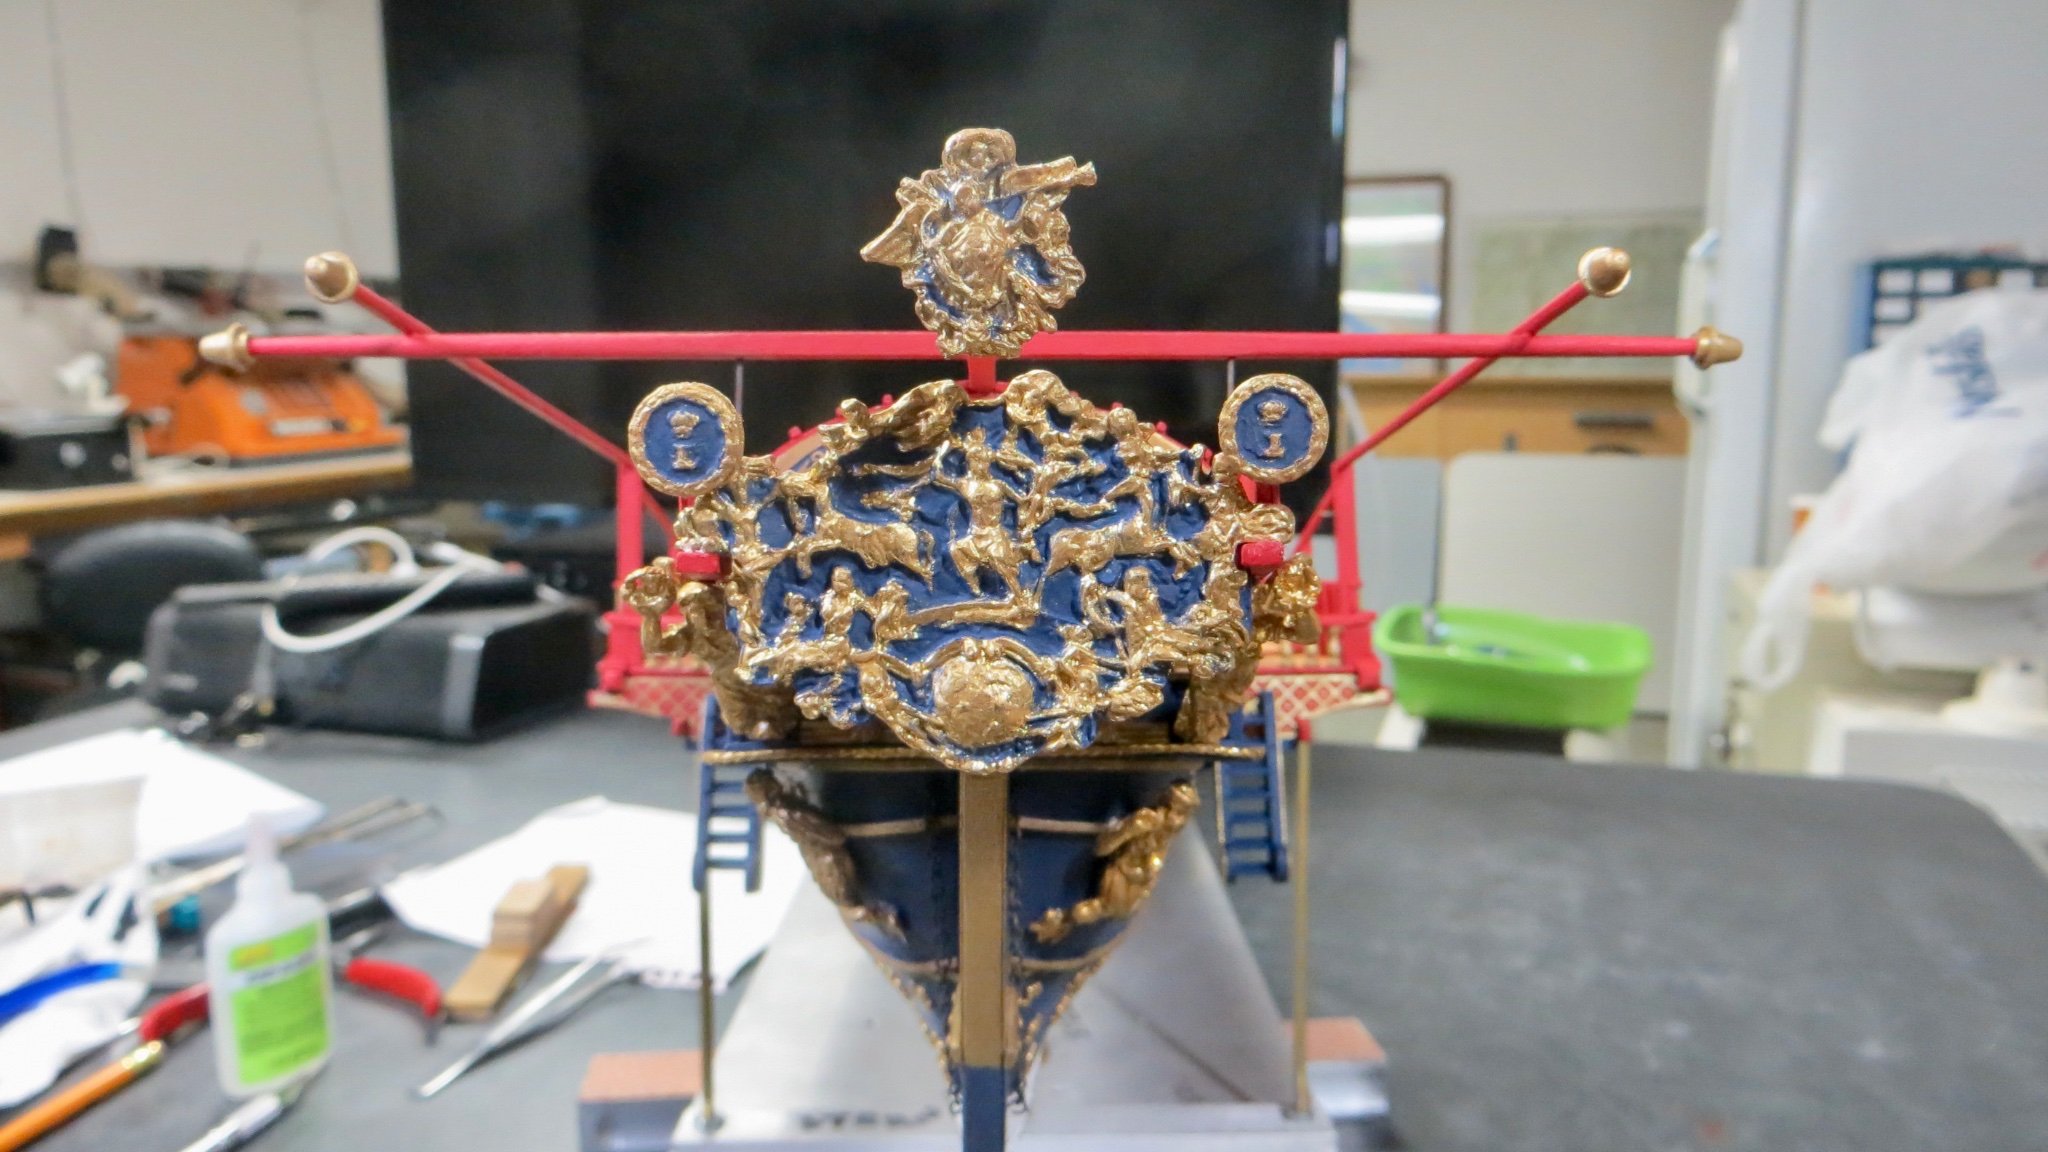
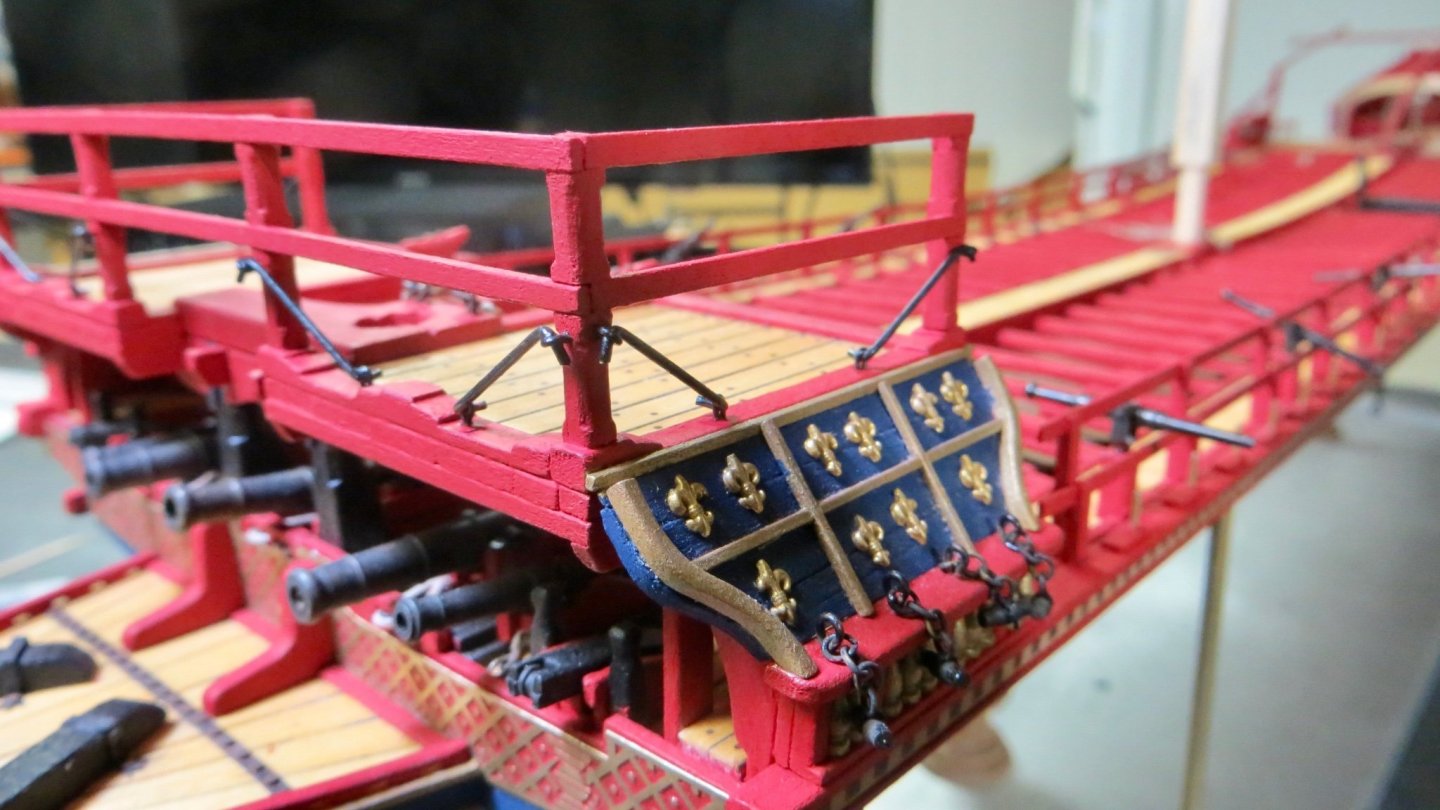
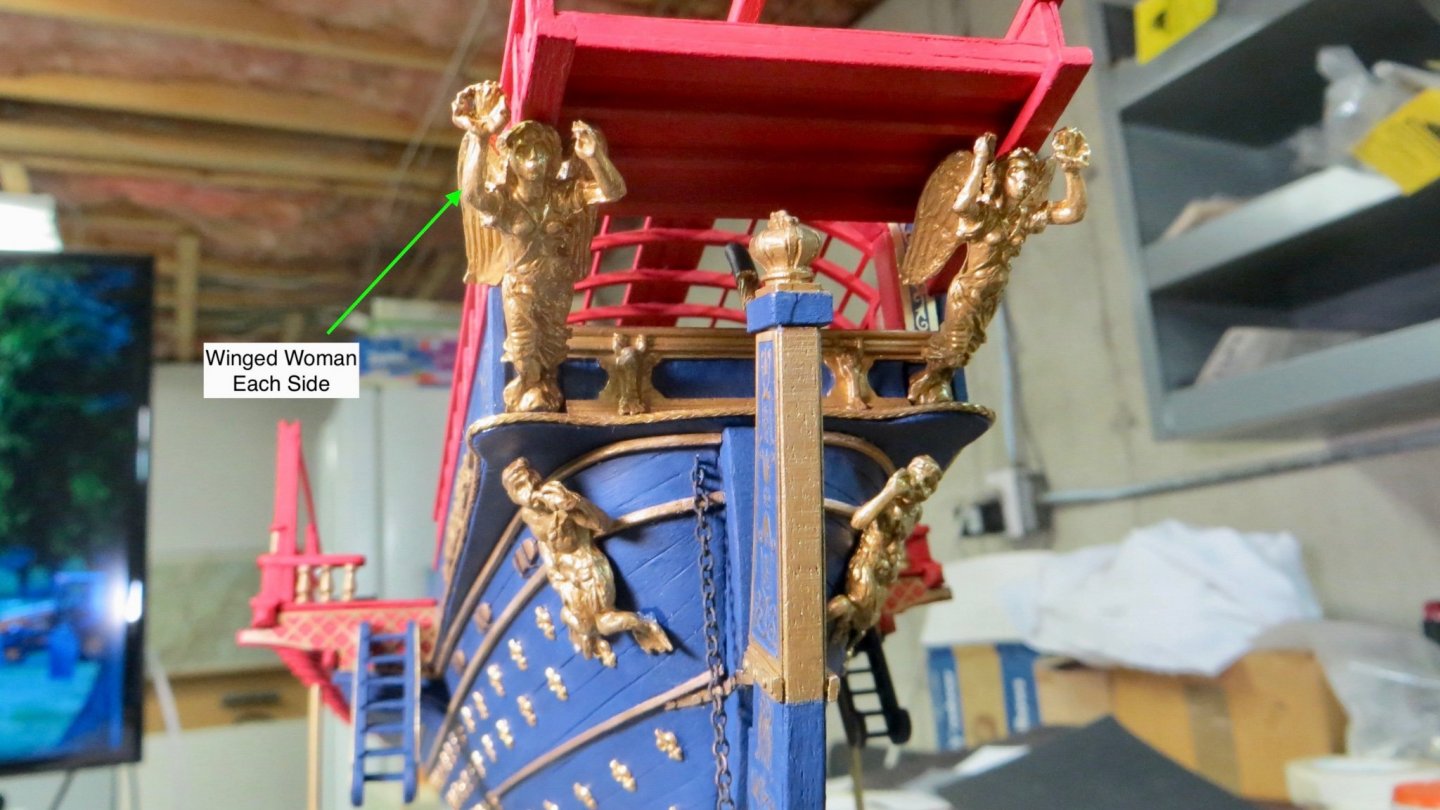
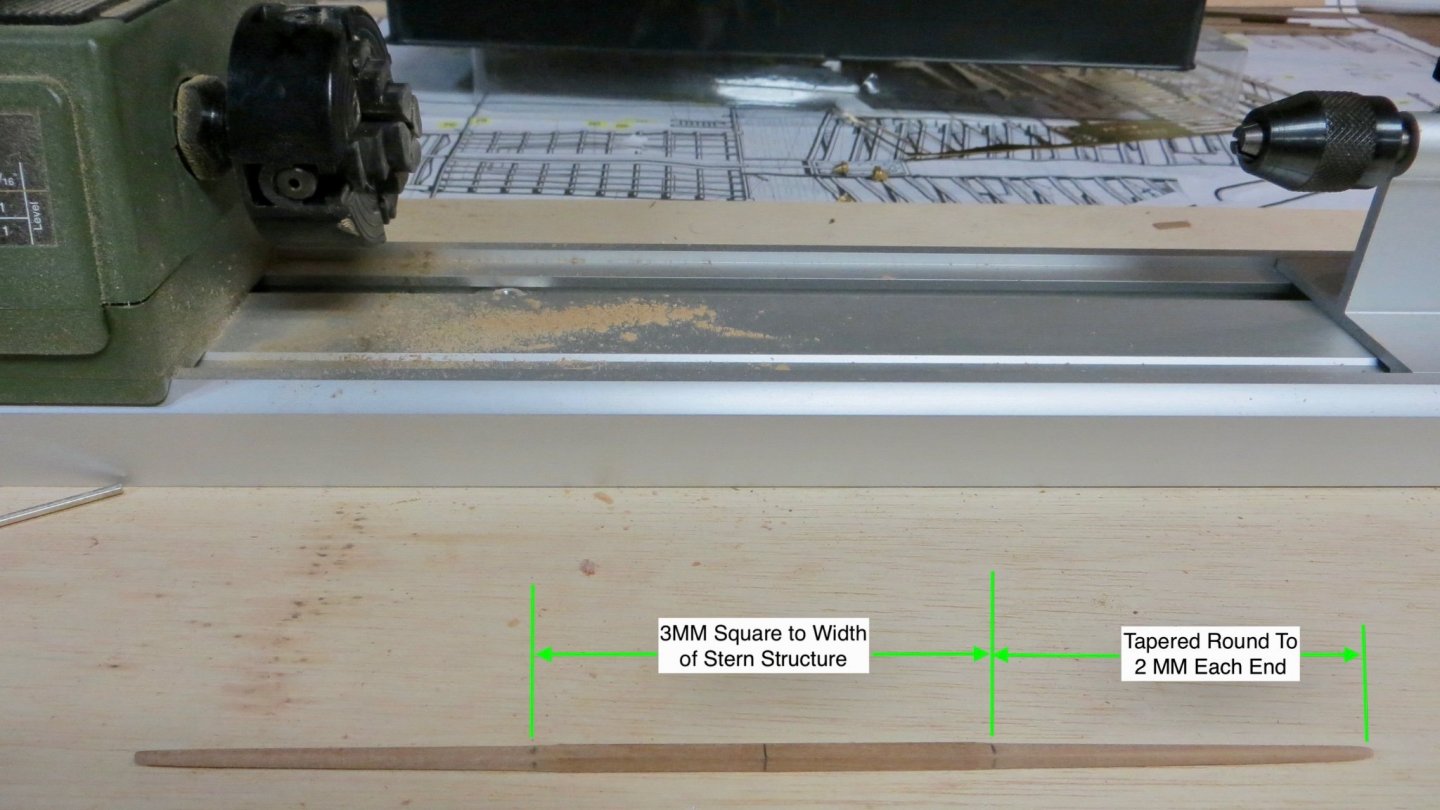
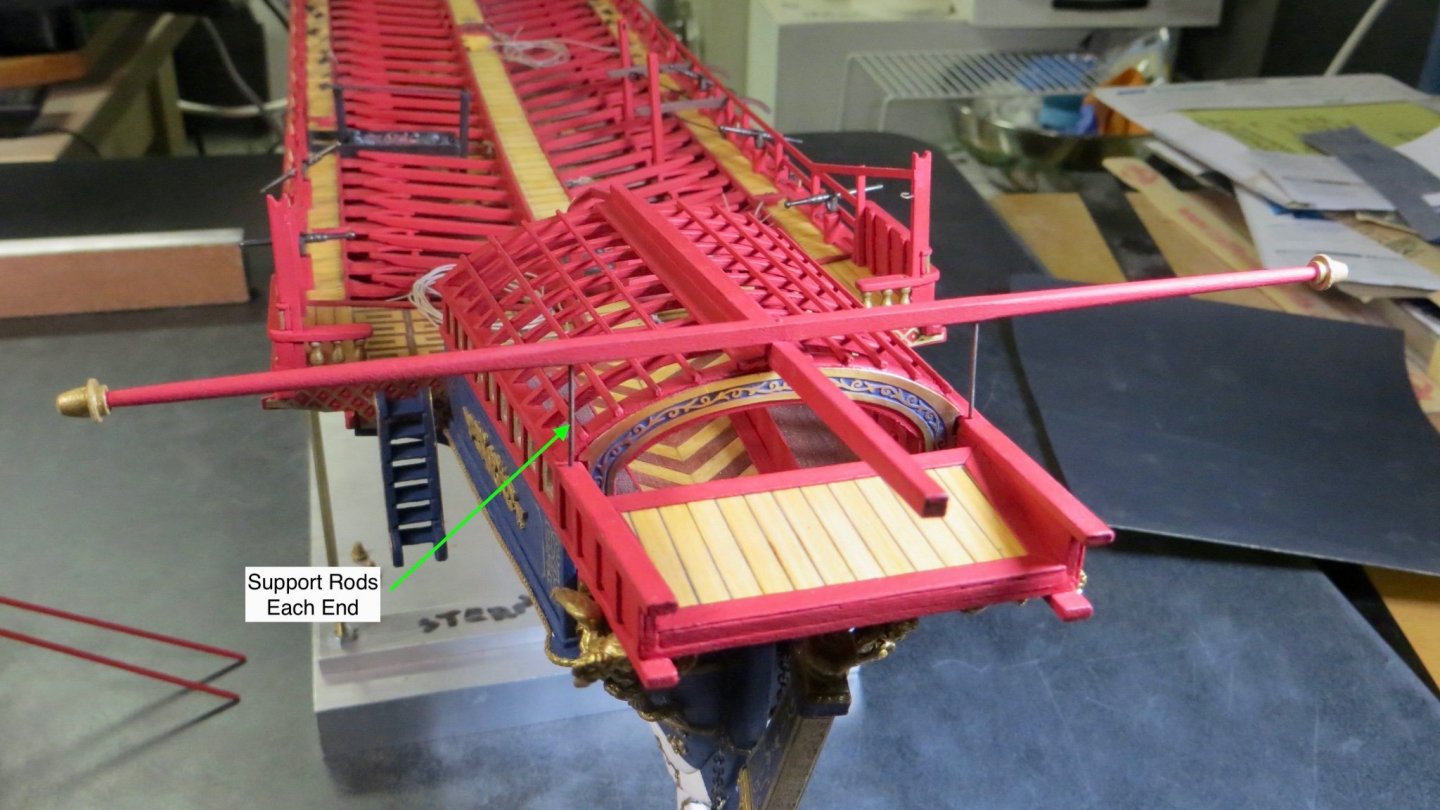
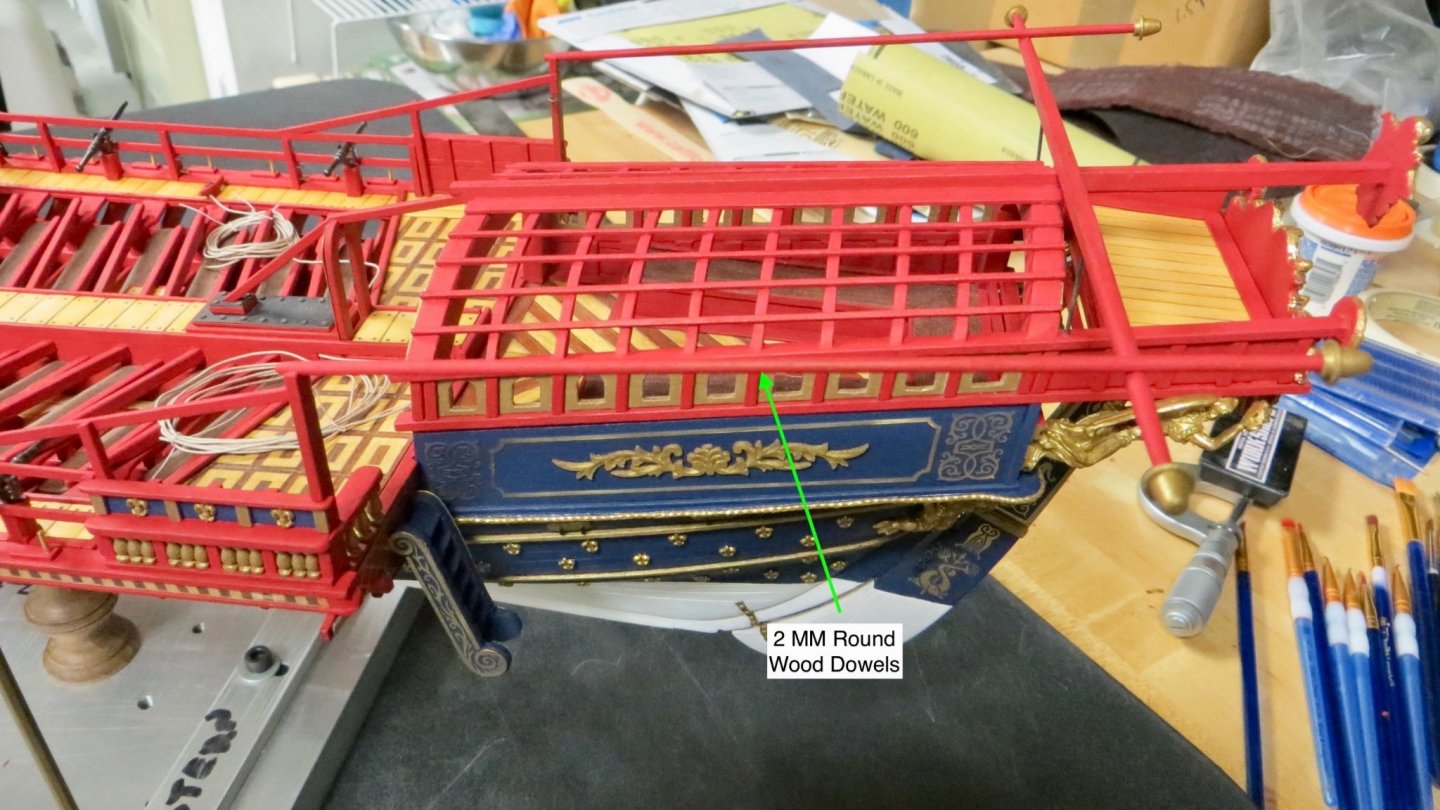
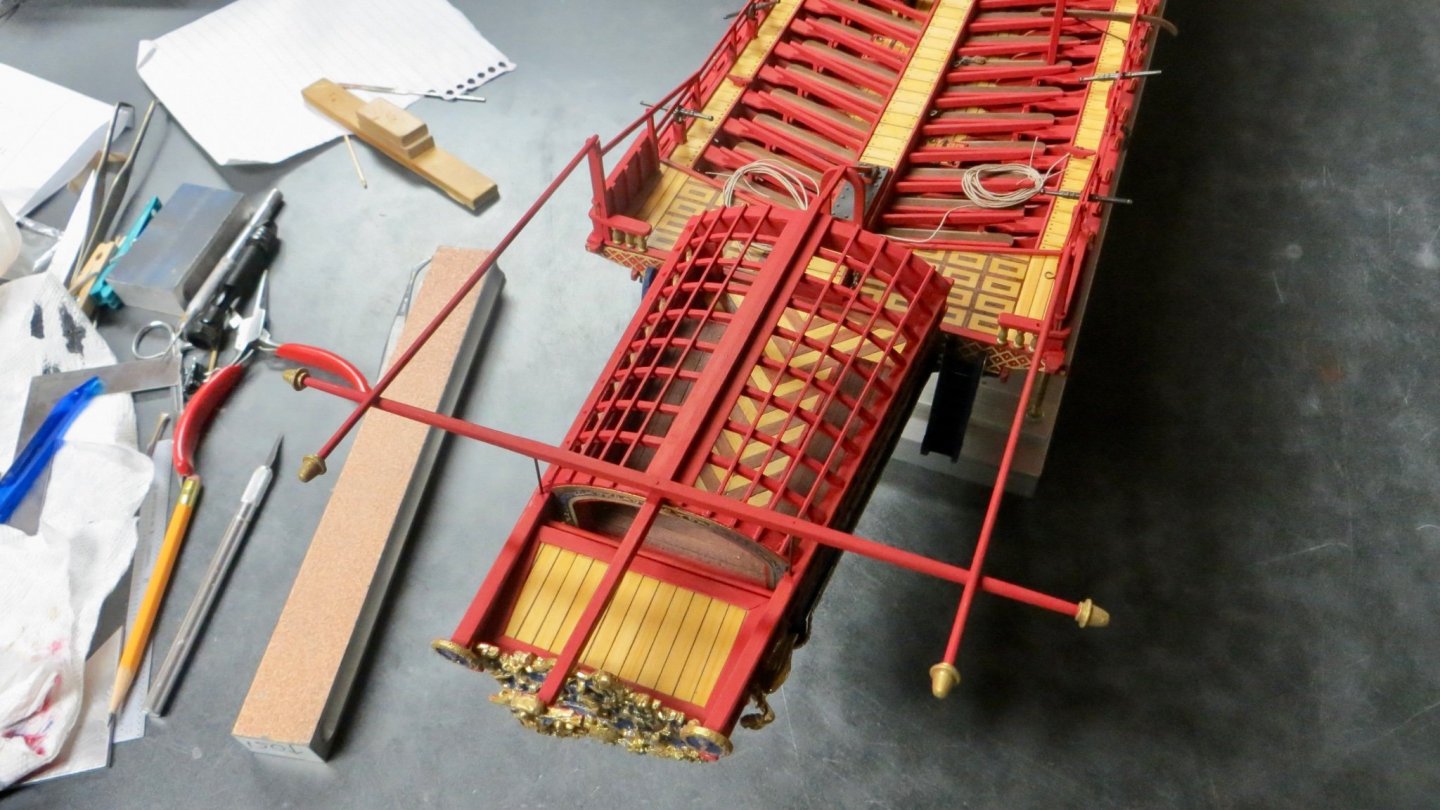
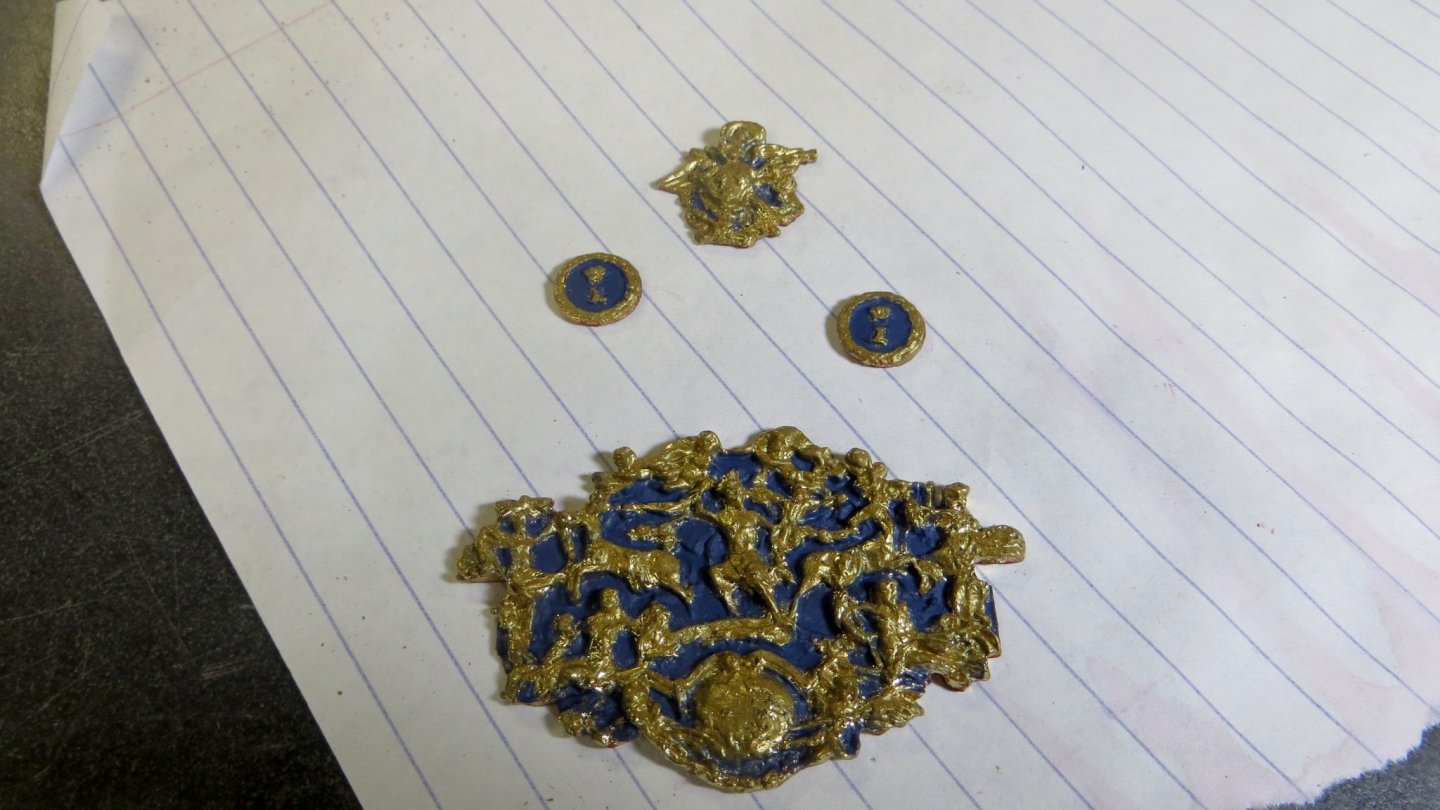
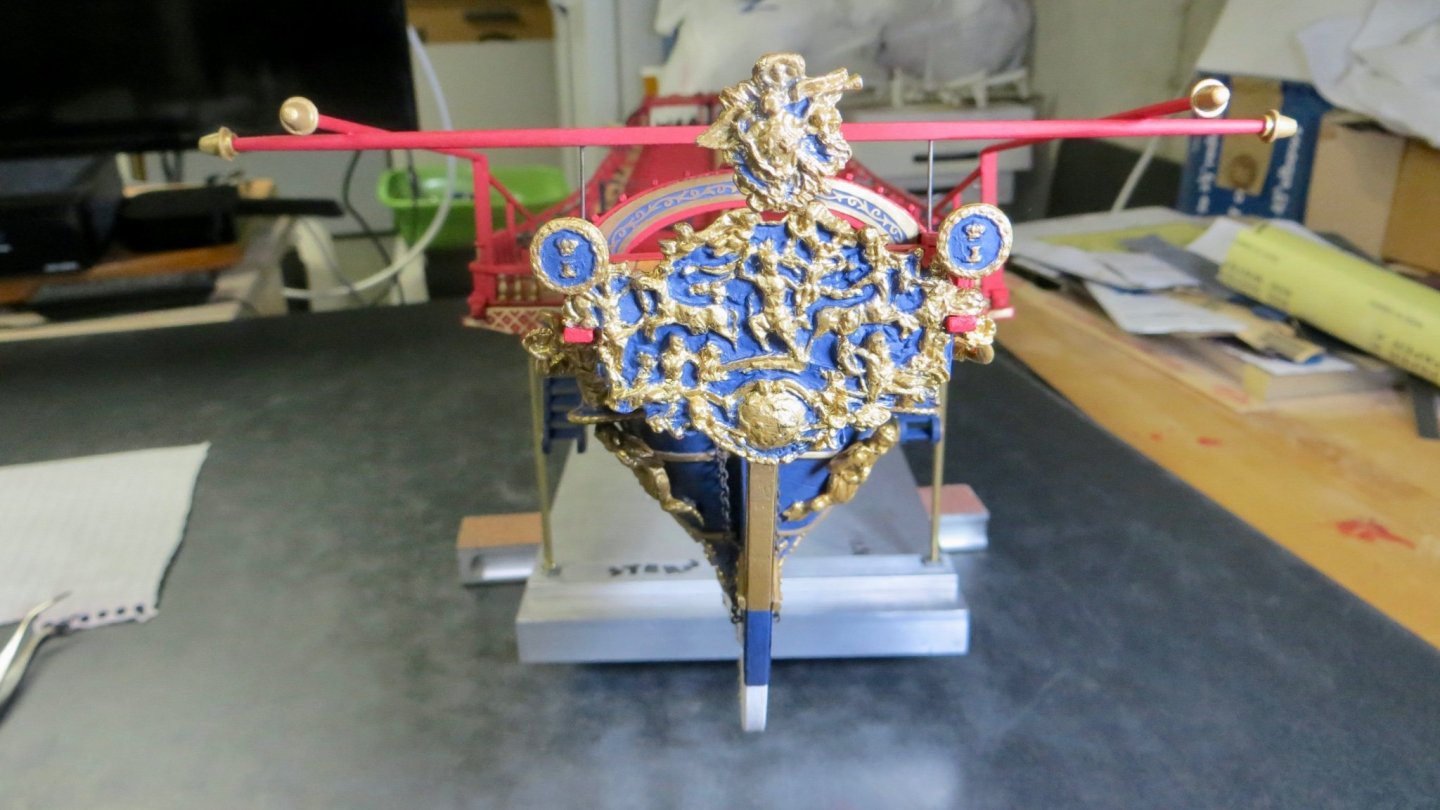
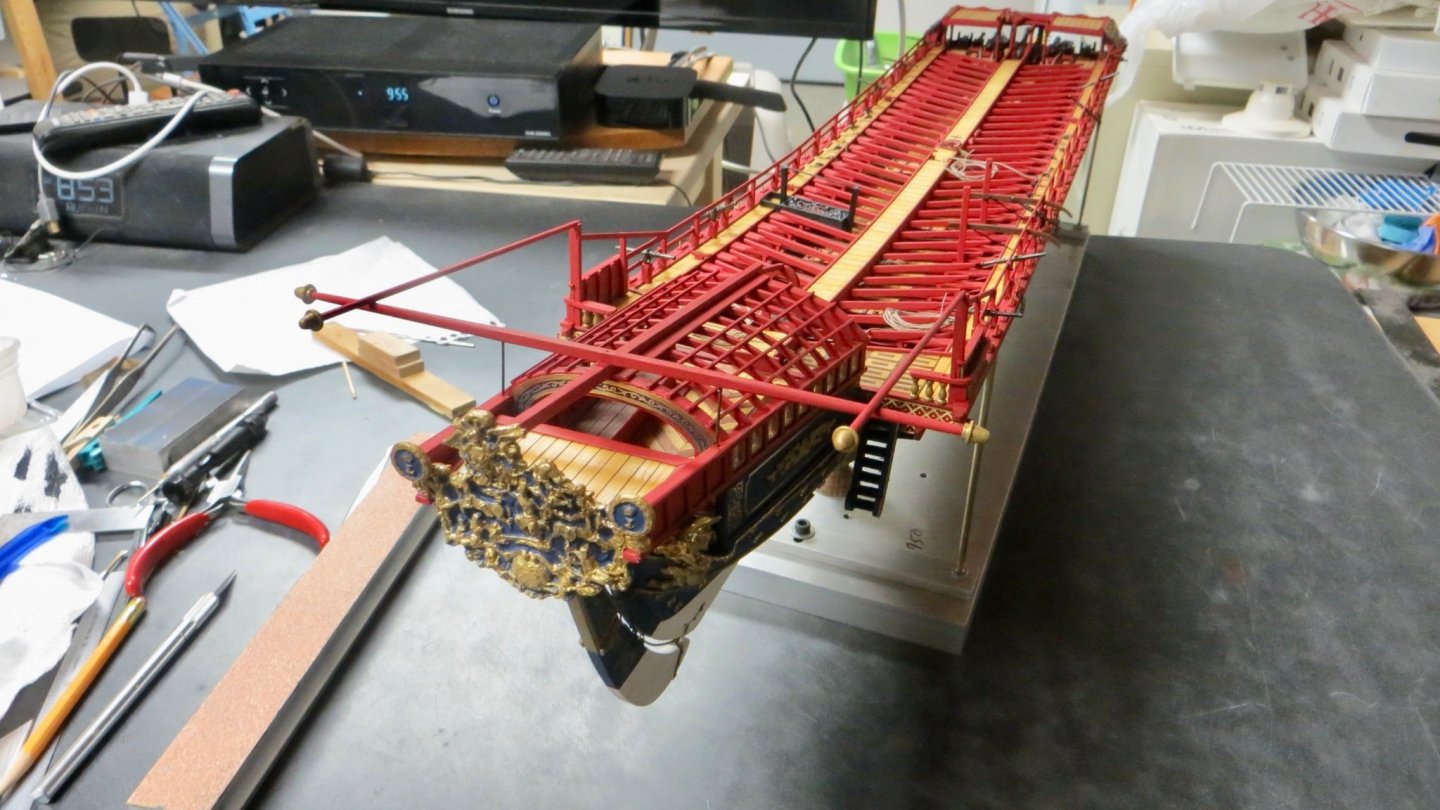
Hello, Continuing to make progress at the stern end of the model. 2 cast figurines, of a winged woman, were painted and attached under the stern platform Assembly of the canopy supports. The Corel plan calls for a 2 mm dowel to span across the width of the stern for the back cross support beam. The Fleur De Lis plan for the cross beam is a little different, which I tried to incorporate. The cross support in this plan is for a square beam for the width of the stern structure, then tapering the ends round. I started with a 3 mm square piece of wood. Used the 4 jaw chuck to hold the square section and sanded the ends round down to 2 mm. Attached the cross support to the model. The Fleur de Lis plan also shows support rods to help hold the beam. Decorative cast items added to each end. View from top 2 mm round dowels painted and added to finish the canopy support. One end supported by the post near the railing and the other end on top of the stronger cross beam. Next step was to add the decorative cast fittings to the stern area. The castings that I received in the Corel Kit were of poor quality and it was difficult to see or understand what depiction was trying to be shown. So I followed a photo of a Reale model that I saw in the past and I tried to bring out what the cast pieces were trying to depict by painting the indented background the blue of the model hull. The reliefs were now more pronounced to me. The items attached to the stern of the model View of stern section so far (almost completed). There is a stern lantern to be added right behind the canopy cross beam, but I will wait until later so I don't accidentally hit it. Almost ready to start working on the masts, but first have to turn my attention back to the bow and add the railing to the upper bow structure. As always, the "likes" are appreciated. Frank


- 510 replies
-
- 11
-
-
- reale de france
- corel
- (and 1 more)
-
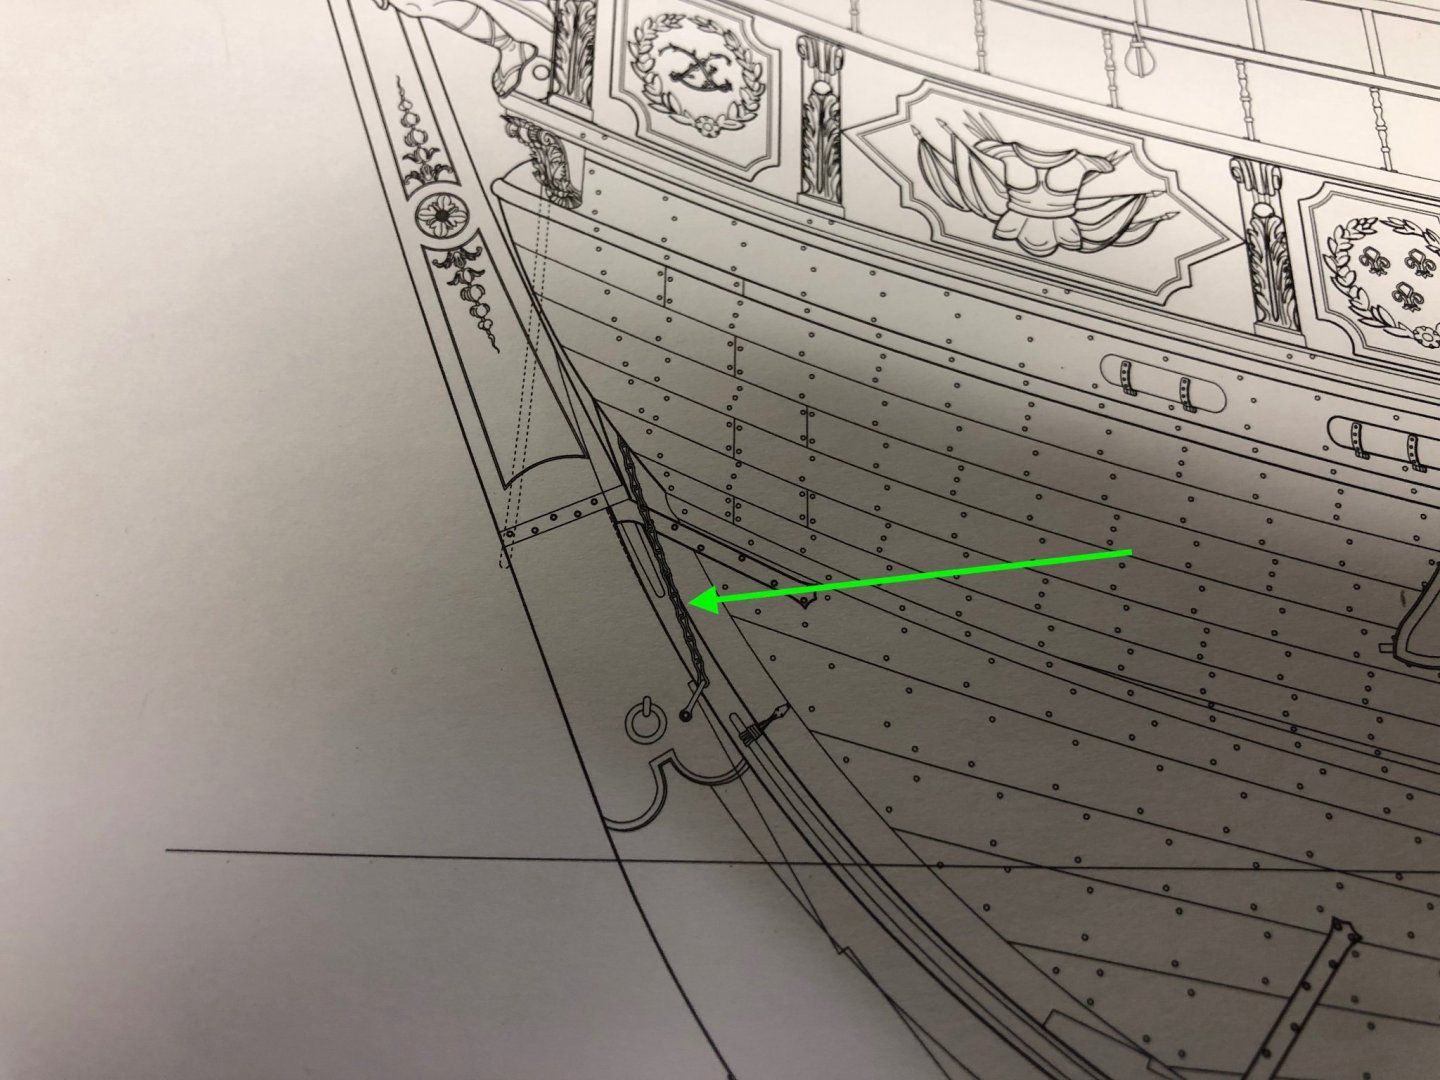
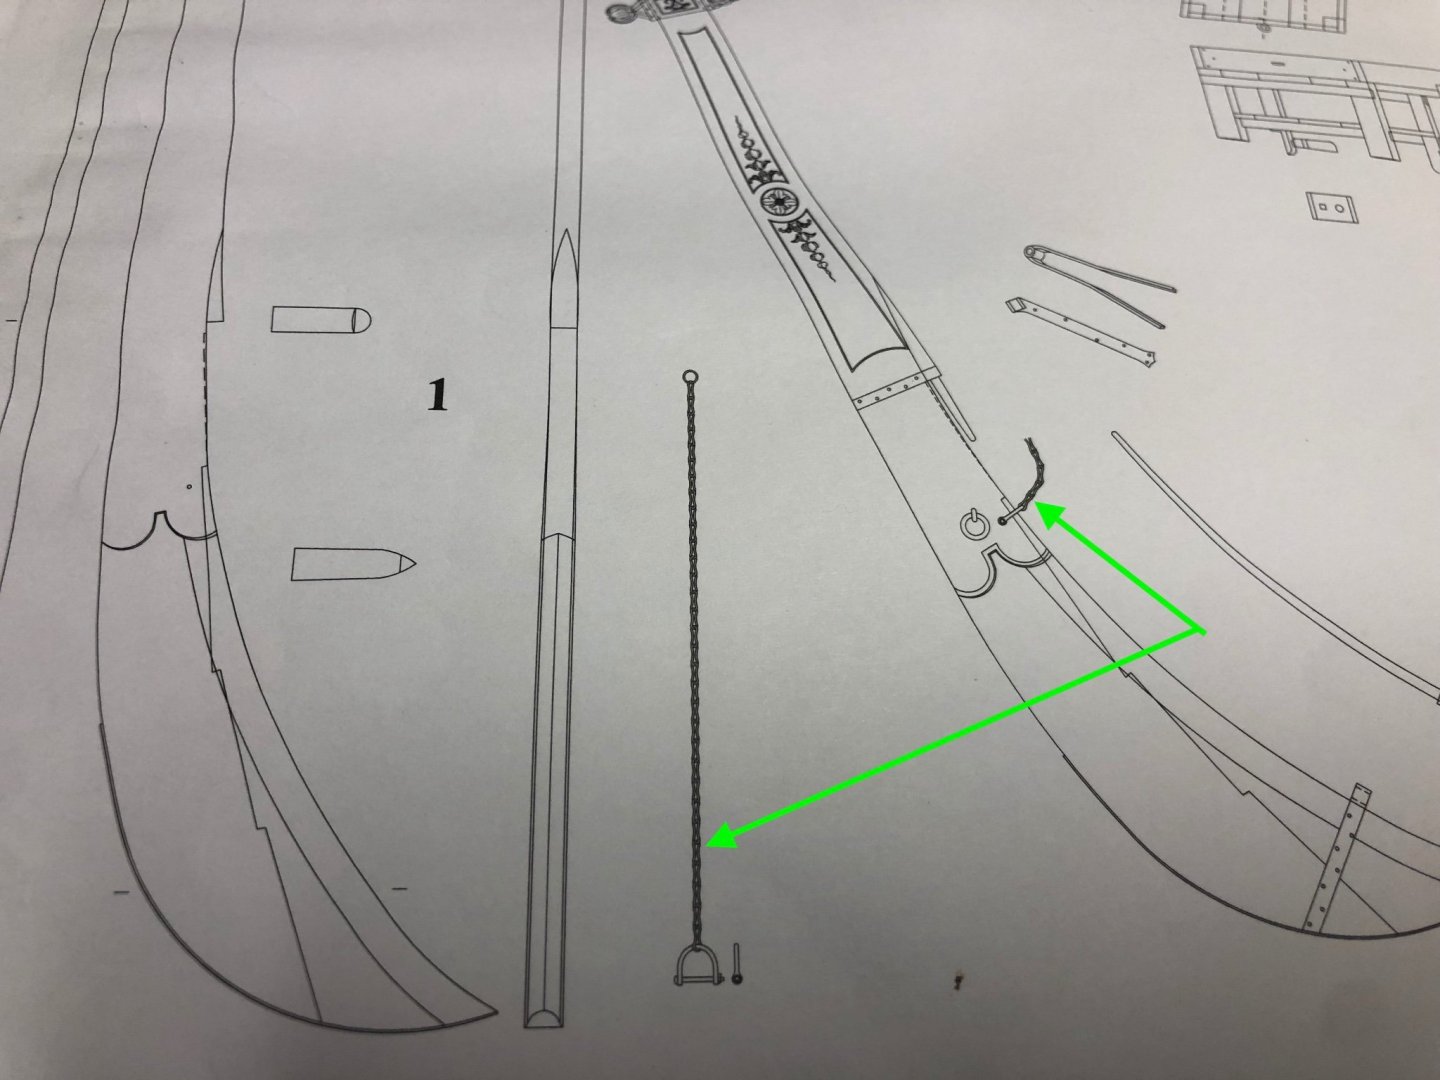
Hi Michael, Thanks for stopping by! For the rudder chain, Gerard's wonderful Fleur De Lis plans show a single chain attached to the rudder with a horseshoe style metal piece. (See photos) I could not squeeze the chain and attachment in-between the rudder and ship stem, so I compromised and put a chain on both sides of the rudder. Thanks, Frank
- 510 replies
-
- 5
-
-
- reale de france
- corel
- (and 1 more)