HOLIDAY DONATION DRIVE - SUPPORT MSW - DO YOUR PART TO KEEP THIS GREAT FORUM GOING!
×


fmodajr
-
Posts
868 -
Joined
-
Last visited
Content Type
Profiles
Forums
Gallery
Events
Everything posted by fmodajr
-
 Lol! Finally something that looks just as good as your model! Good looking dog, Congrats!! Frank
 -
Hello Michael and Kirill, Thank you both for your similar ideas. I just finished staining some single and double blocks and will rig them to see if I can hook the single blocks to the metal rings on the inside (as Michael suggested) and have The pulley system on the inside portion of the boat. I'll let you know how I make out! Working on finishing up the small flags now, but will try to re-rig the boat before attaching the flags. thanks again for your suggestions!! Frank
- 510 replies
-
- 1
-

-
- reale de france
- corel
- (and 1 more)
-
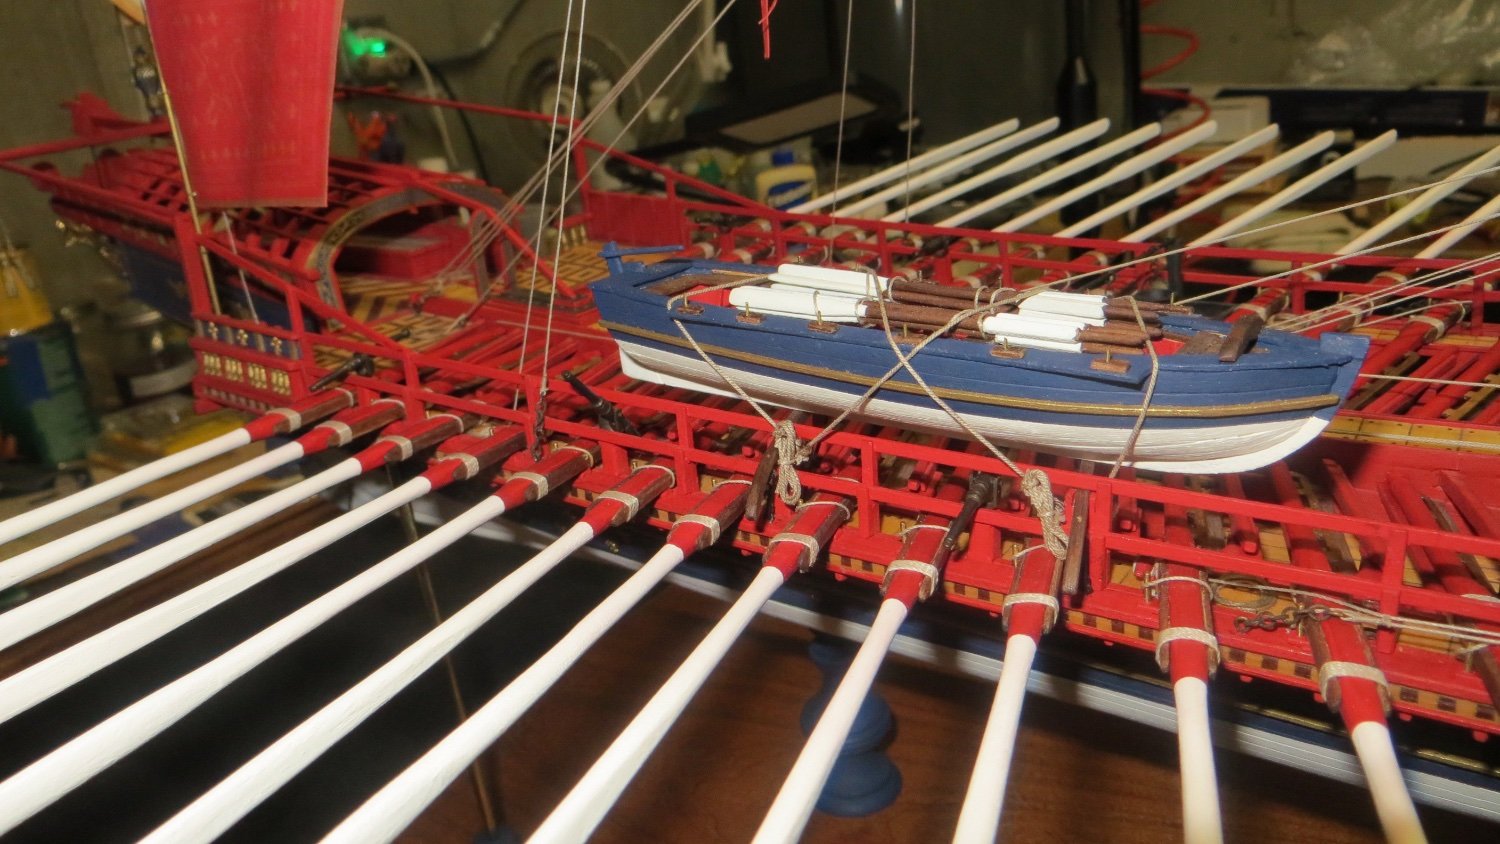
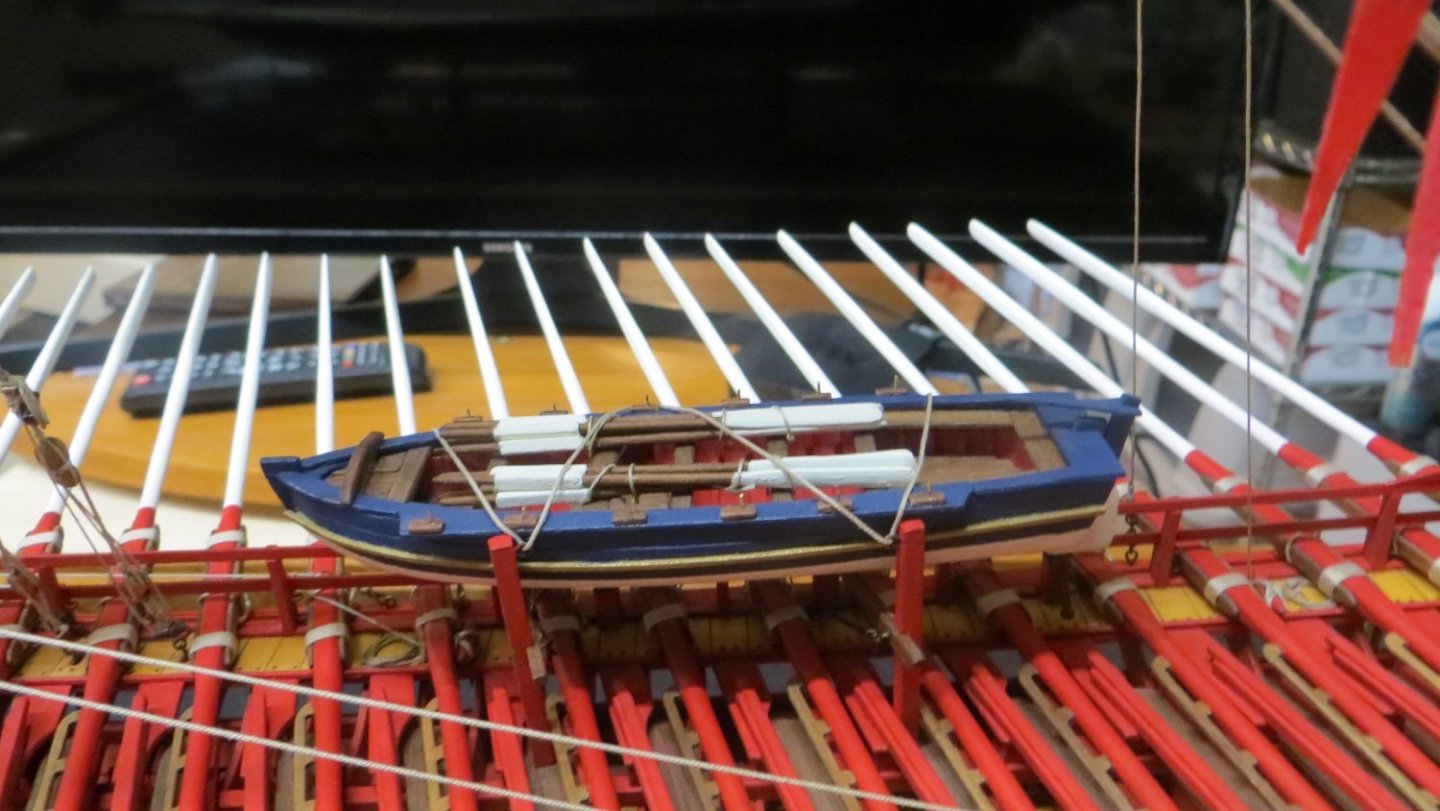
Michael and Kirill, Investigating Michael's thoughts above, I looked at the boat. From this photo of the back side, you can see that the eyelet is near the top. So, the block pulley system would have to sit on top of the boat. I am not comfortable trying to drill and add a lower eyelet at this stage. (trying to get my hands and a small drill device thru from the other side is risky) A line with a hook would work here. This next photo is from the outside side of the boat. A block and tackle system could fit on this side, but would it look funny? Realistic? Before I start disassembling anything, do you have any thoughts? Thanks Frank

- 510 replies
-
- 3
-
-
- reale de france
- corel
- (and 1 more)
-
Thanks Michael, I think I follow everything you detailed. So the end result would be two lines angled over the boat similar to Gerard's rigging, but angled with blocks on the backside. correct? I will investigate if I can get to the backside (working around the rigging lines of the ship and other obstructions) and place some blocks without ruining things. Thanks for your input!! Frank
- 510 replies
-
- 1
-
-
- reale de france
- corel
- (and 1 more)
-
Hello Kirill, Thank you for the information. Appreciated. So the problem I would have is that my davits are angled. Take a look at Gerard's plan for the Fleur De Lis. He shows 2 sets of holding lines, one near the bow and one near the rear. Similar to your example above (See my green arrows) His davit plan for the model shows straight top to bottom. The davits on the Reale are angled (See red Lines) I could eliminate the cross lines and do the lines like Gerard's plans, but they would be angled, because the davits are angled. Also, there is no place to tie down a line in the center of the boat (as shown in your photo above) because there are rowers seats and rowers underneath. I hope this makes sense. Lol! Let me know your thoughts. (I have to be careful if I redo anything at this point because the oars are in and there is little room to work around) Thanks, Frank

- 510 replies
-
- 3
-
-
- reale de france
- corel
- (and 1 more)
-
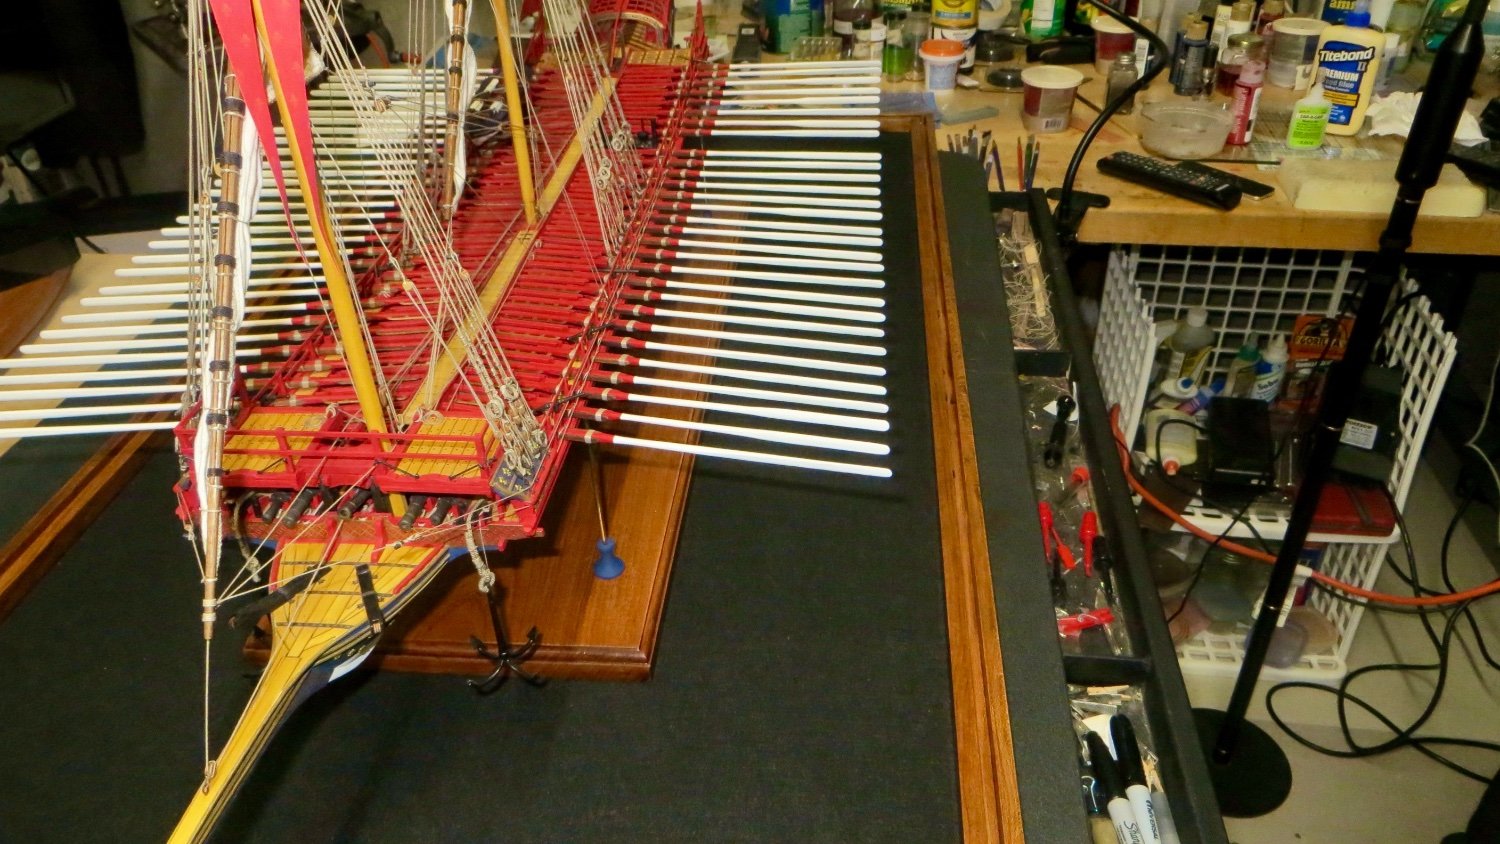
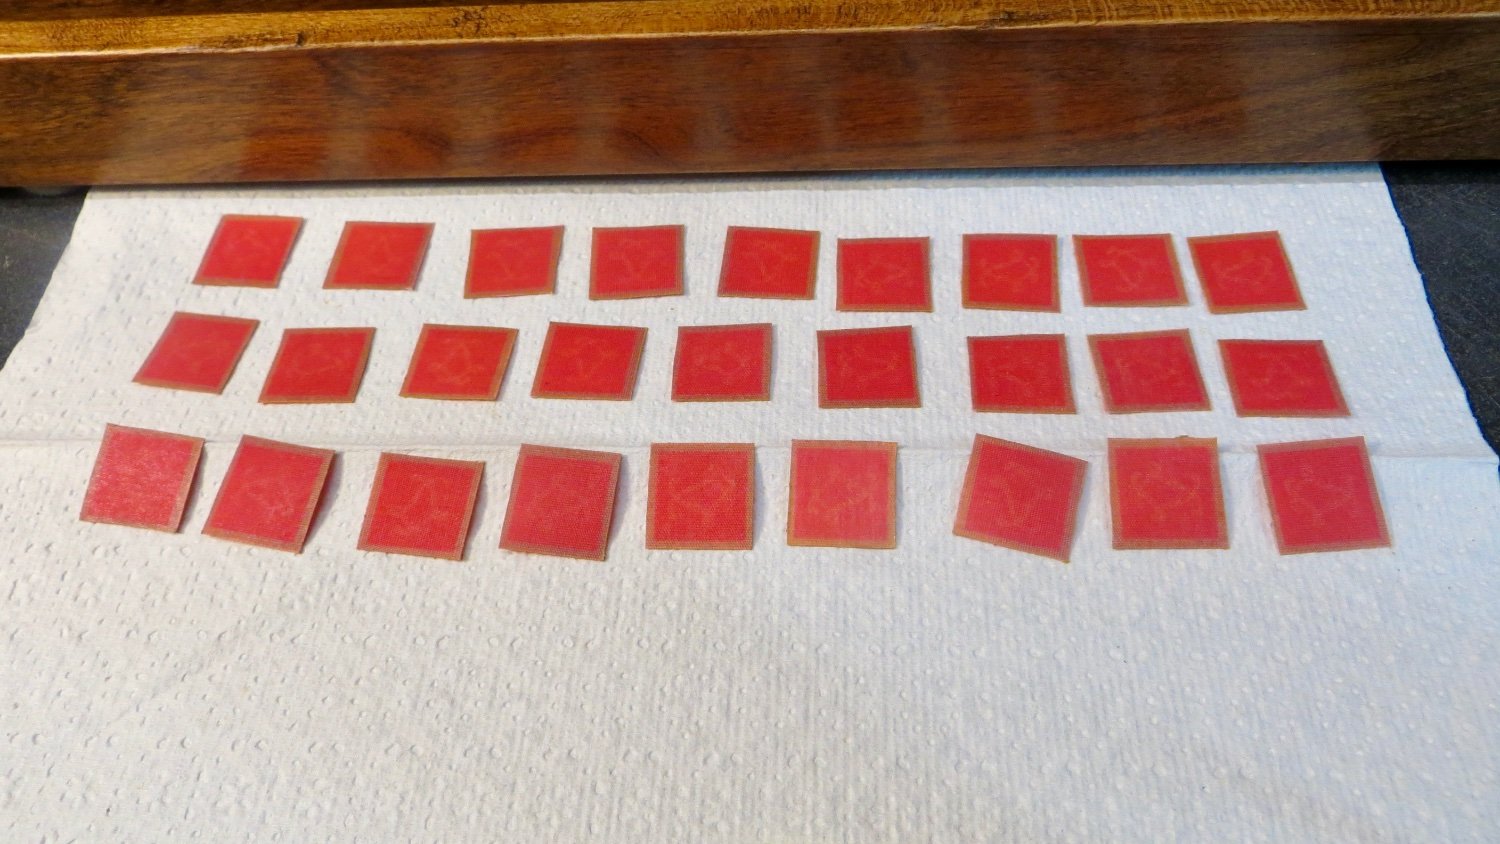
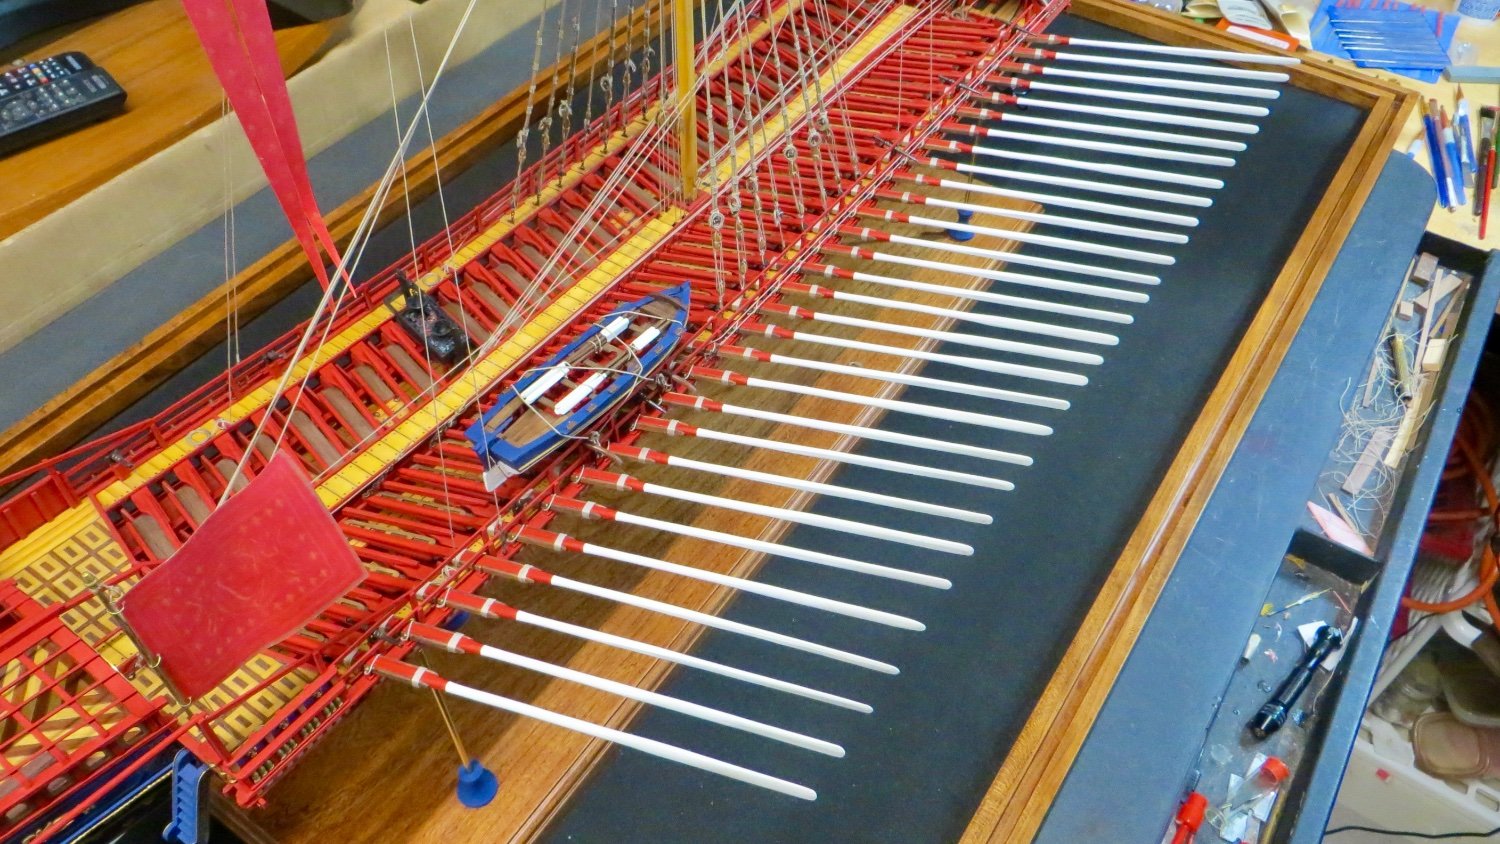
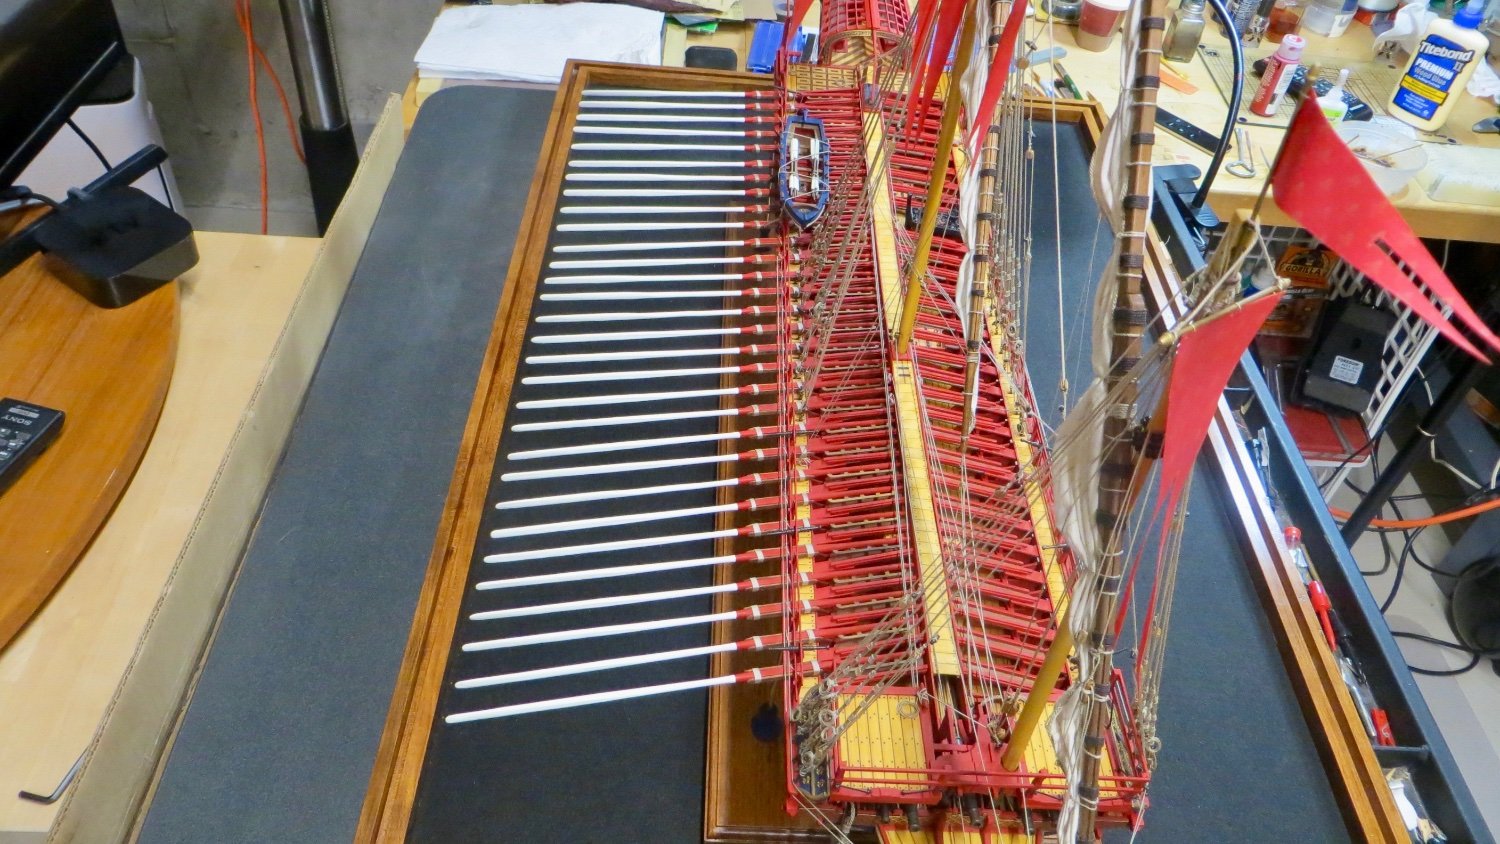
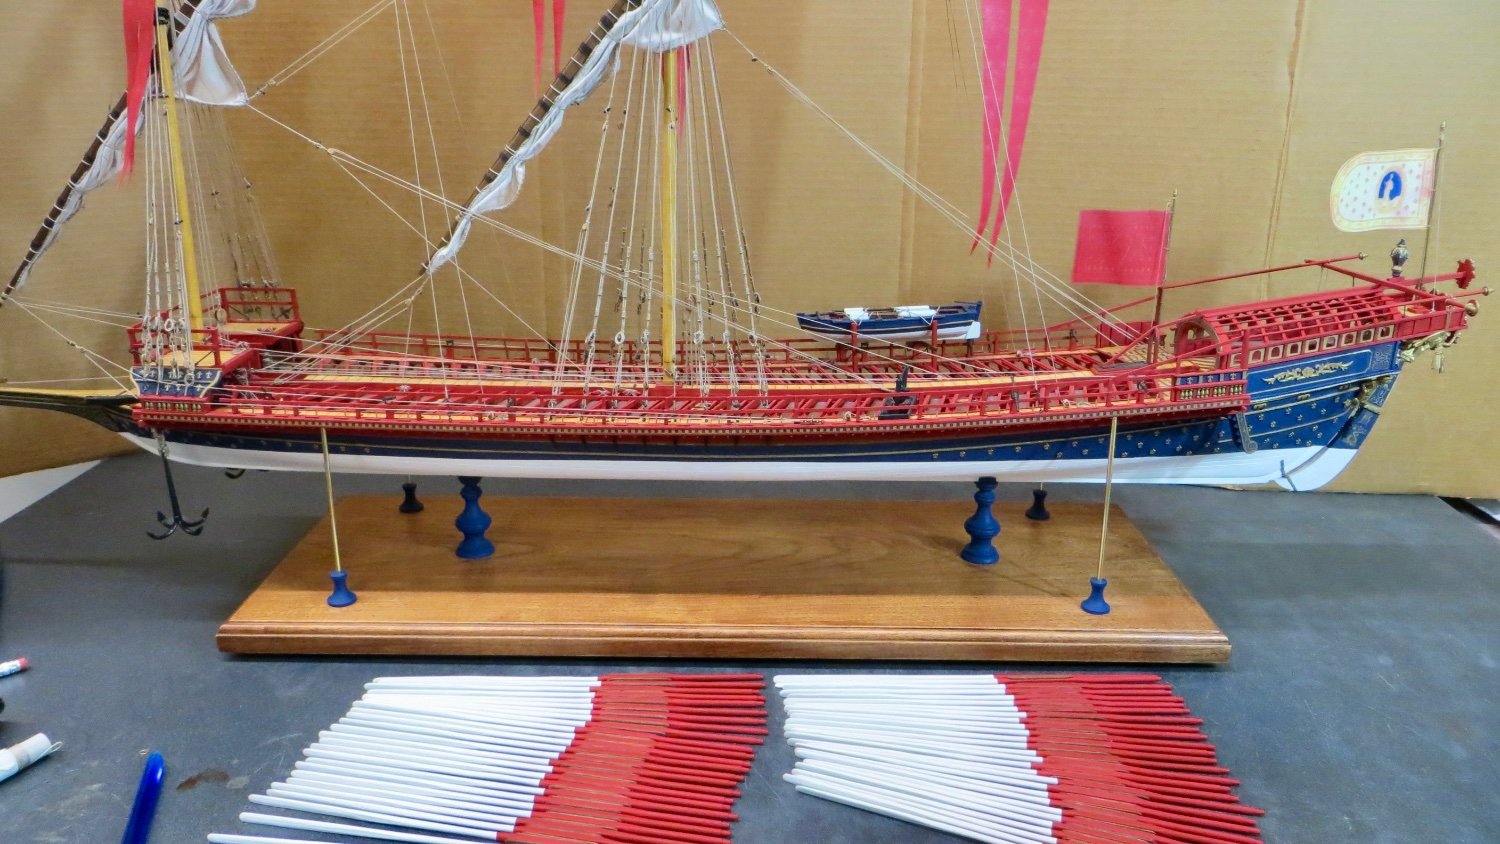
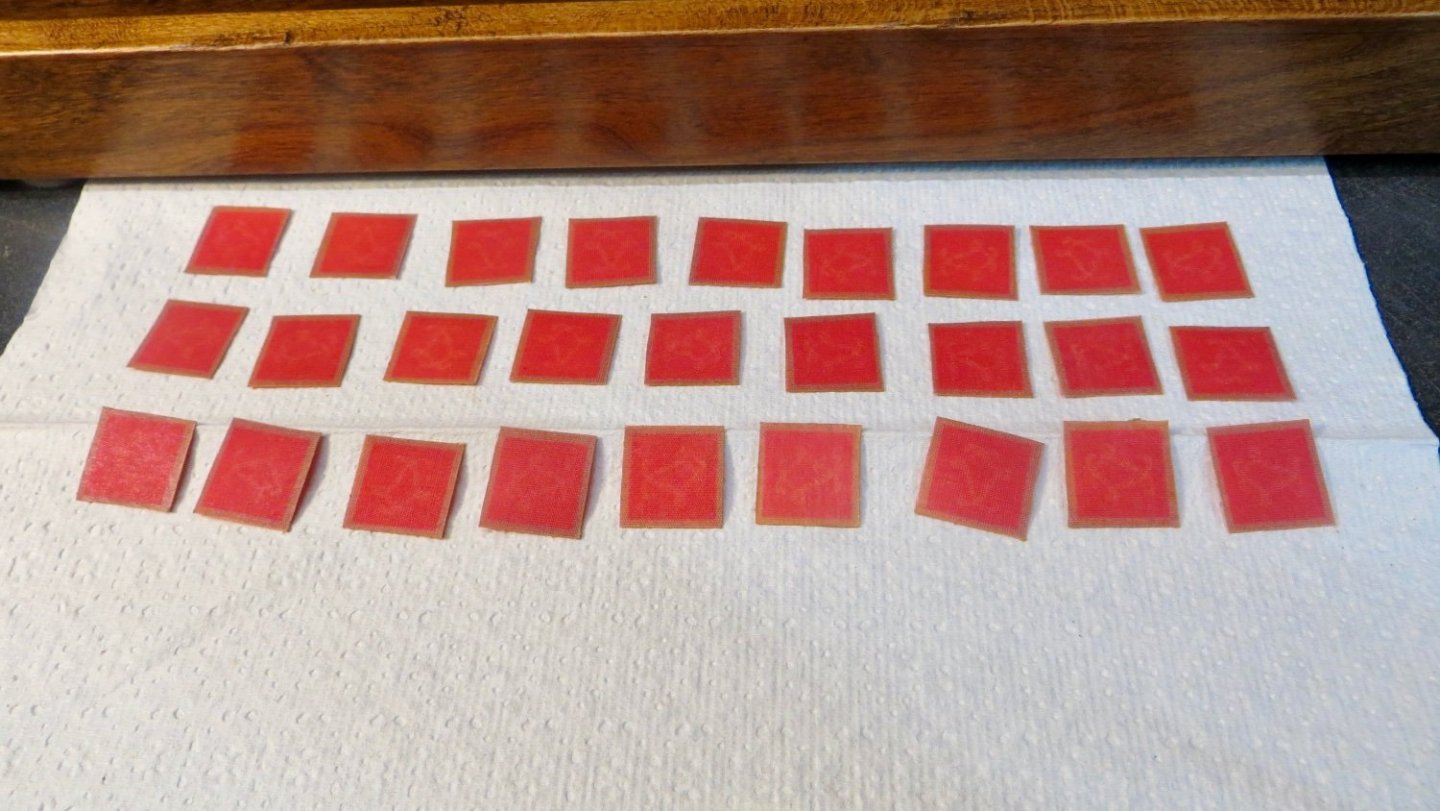
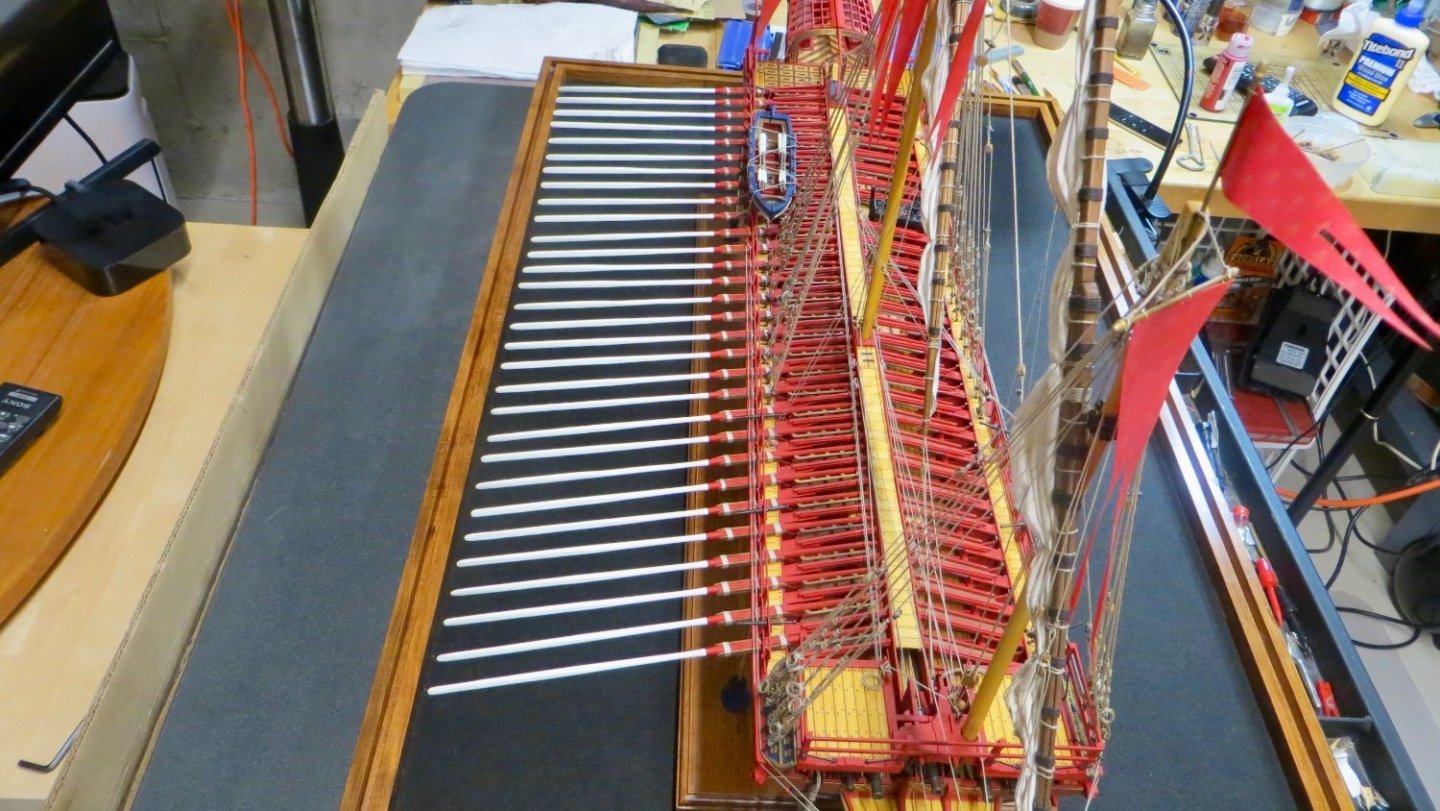
Hello, Finished up the oars on the other side. Less drama on this side. Just had to re-position 2 rope coils. One less oar on this side due to the cooking area. I have 4 extra oars left over that I'll keep and hope that I will never have to use. Lol! only if disaster strikes. My hands keep seeming to get in the way. Next step is to finish all the little flags attached to the railings. Cut the brass posts a little extra long for now and sprayed on a protective coating that will hopefully negate any future tarnishing of the brass. The flags were made earlier in the build using the same transfer process posted on my earlier posts. Just had to cut out of the pattern. Wanting to put a small cap on the flag posts, I cut some tiny walnut slivers out of a round piece of stock I had. Drilled a tiny hole in each to accept the brass rod. Started to paint them the ships red. Will finish up and mount these flags. Thanks for all the comments and for stopping by! Frank


- 510 replies
-
- 5
-
-
- reale de france
- corel
- (and 1 more)
-
Lol Tim!!! Too funny. Yes, wife is stressed. Just spent $1,500 on an extra wide table top to hold the width of the model case! Oh well! Kirill has been a great help with his wealth of knowledge. I've seen his posts on other logs that I follow and he has offered some great suggestions! If I am able to make the boat lashings better I certainly will. Lol! Very close to being done. Haven't figured out yet how to get it transported. My SUV doesn't have the height. Probably will need a Suburban style SUV Thanks Tim! Frank
- 510 replies
-
- 2
-
-
- reale de france
- corel
- (and 1 more)
-
Hello Kirill, Thank you also for stopping by!! I have been looking at other logs and the boat lashings seem to be similar to mine. I have seen other style lashings for boats sitting on top of gratings, but not on top of davits. Do you have any photos of boats on davits that I can check out? It would be appreciative. If I do any modifications to the lashings, it would have to be done quickly before I install all the small flags! thanks again for your kind thoughts and comments! Frank
-
Hello Marc (Hubac Historian). thank you so much for your kind thoughts and for stopping by! Frank
- 510 replies
-
- 1
-
-
- reale de france
- corel
- (and 1 more)
-
Thanks Michael, Almost done with the other side. No issues so far except for moving a couple of rope coils! Frank
-
Hello, Another minor update. I finished installing the oars on one side. Observations and agreeing with Michael (72Nova) in his post above) !! I ran into problems, some small and others not so small. 1. Had to pull up and move a couple of the rigging coils I had laid down on the deck so the oars wouldn't sit on top of them. This was no big deal. 2. The rigging cleats that were installed on the sides of the center walkway were in the way of a couple of the oars. So I had to file down a couple of the nubs of the oars so that they would fit under the cleats. 3. I got lucky on a couple of other cleats sitting on the outer walkways. The oars barely missed them. 4. The biggest issue I had was with one of the oars that sat next to the fwd side davit for the long boat. Earlier in the build I modified the davits to try to make it more like the Fleur De Lis plan. (See davit section of this log). Well the davit post was too wide for the oar assembly to fit. So I had to file down some of the post and also some of the batten on the oar and everything worked out. Not noticeable! The oars on the port side should be easier to install (i hope!) Thanks for visiting. Frank


- 510 replies
-
- 6
-
-
- reale de france
- corel
- (and 1 more)
-
Ccoyle and Grandpa Phil thanks for the likes! Michael, Thanks for your comments and for stopping by. Yes, endless oars!! Hopefully I can get 5 or 6 oars done each night. I checked under the long boat and the oars seem like they will fit, but be very tight! It would be a shame to get thru the whole model only to find trouble with the oars fitting. Fingers crossed. Frank
- 510 replies
-
- 2
-
-
- reale de france
- corel
- (and 1 more)
-
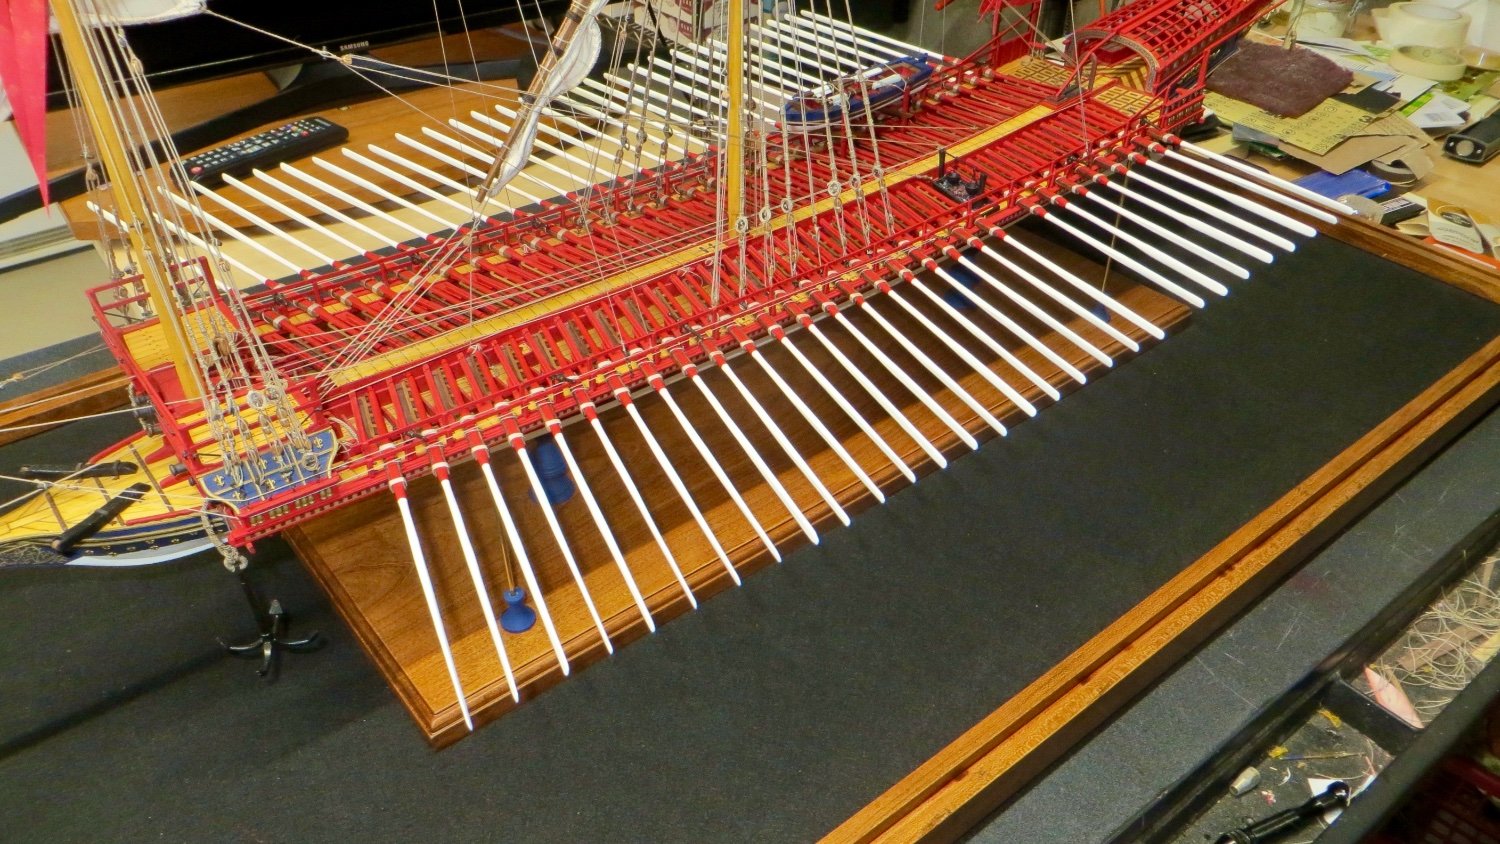
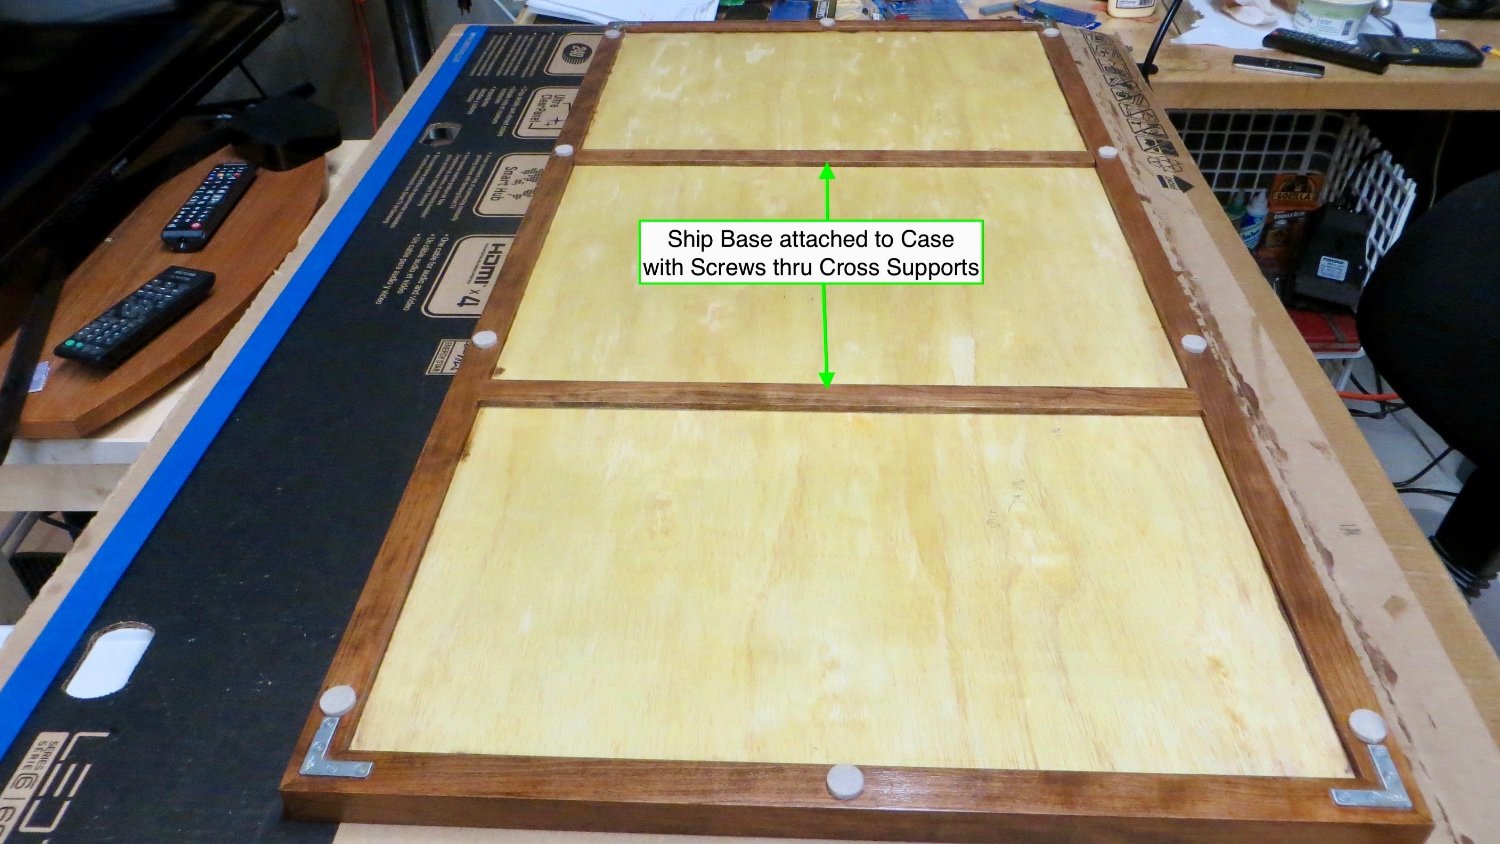
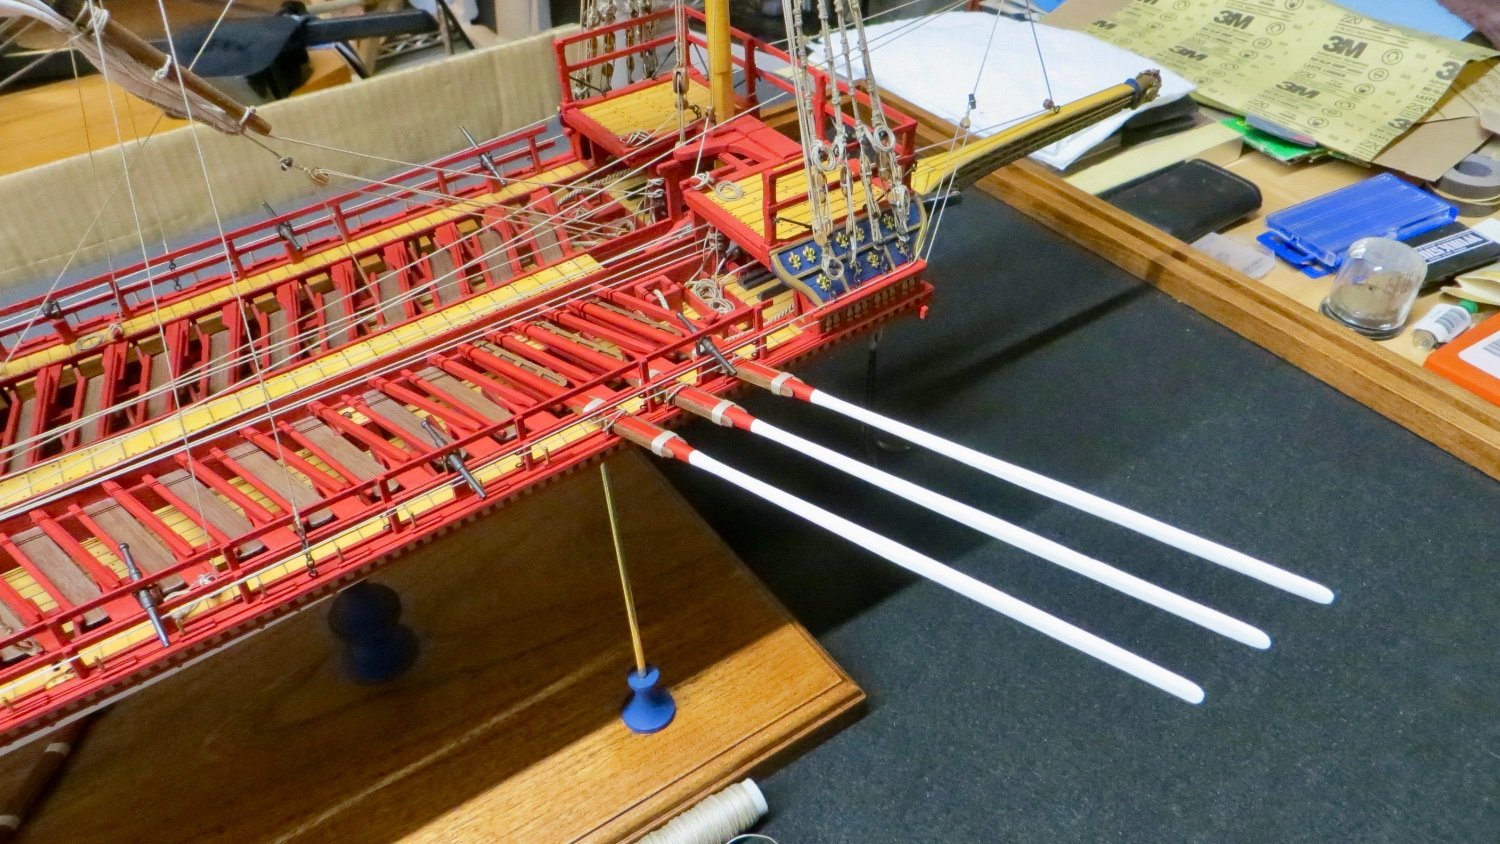
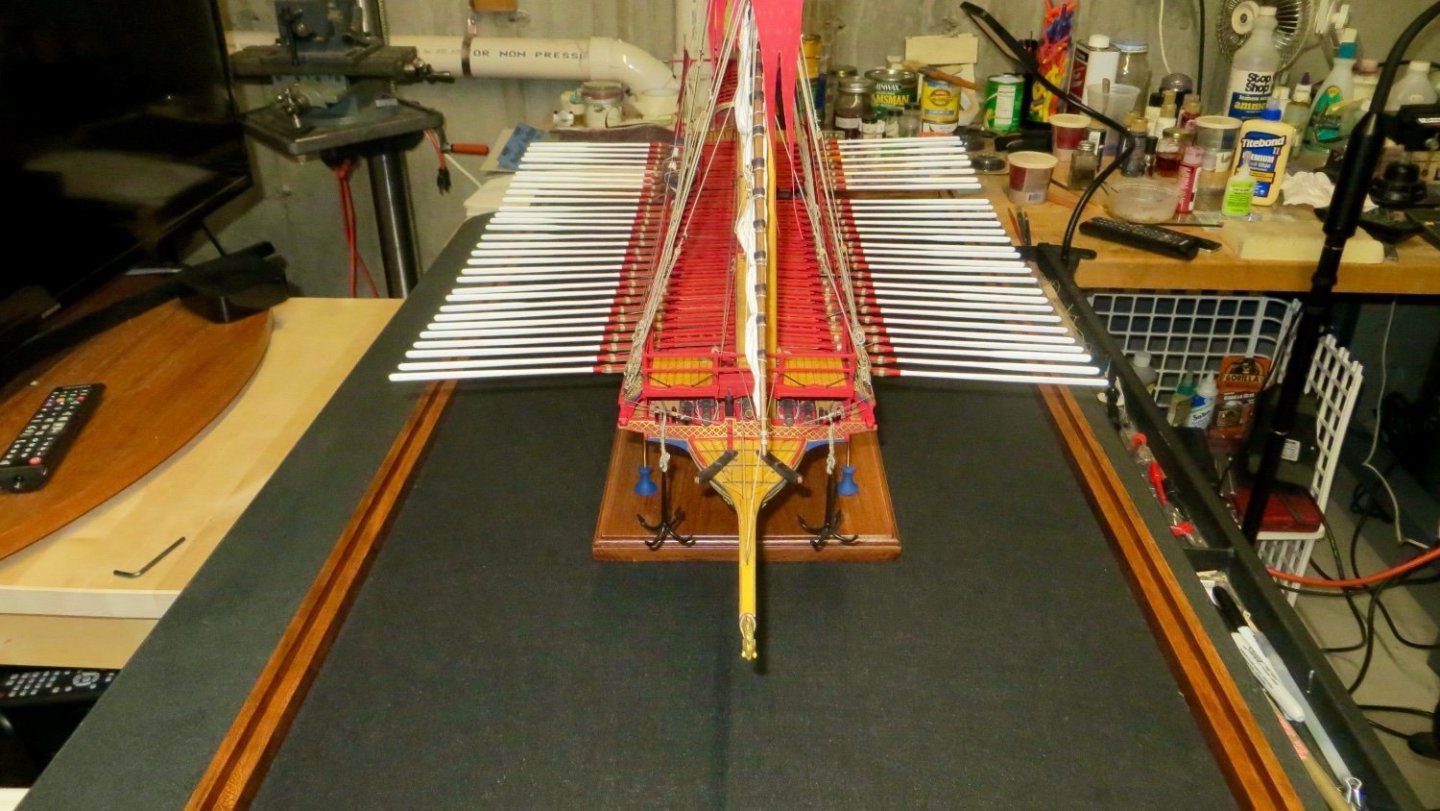
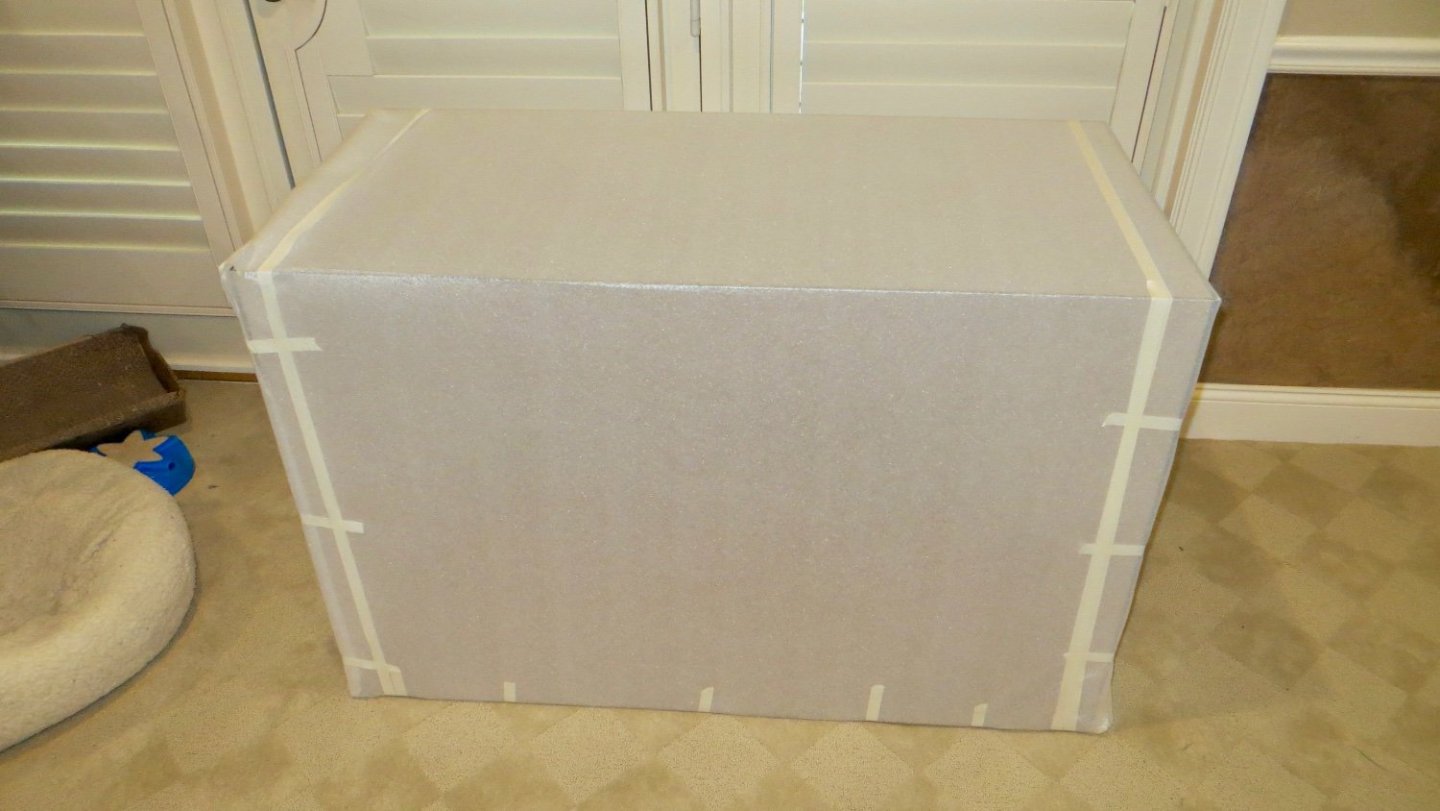
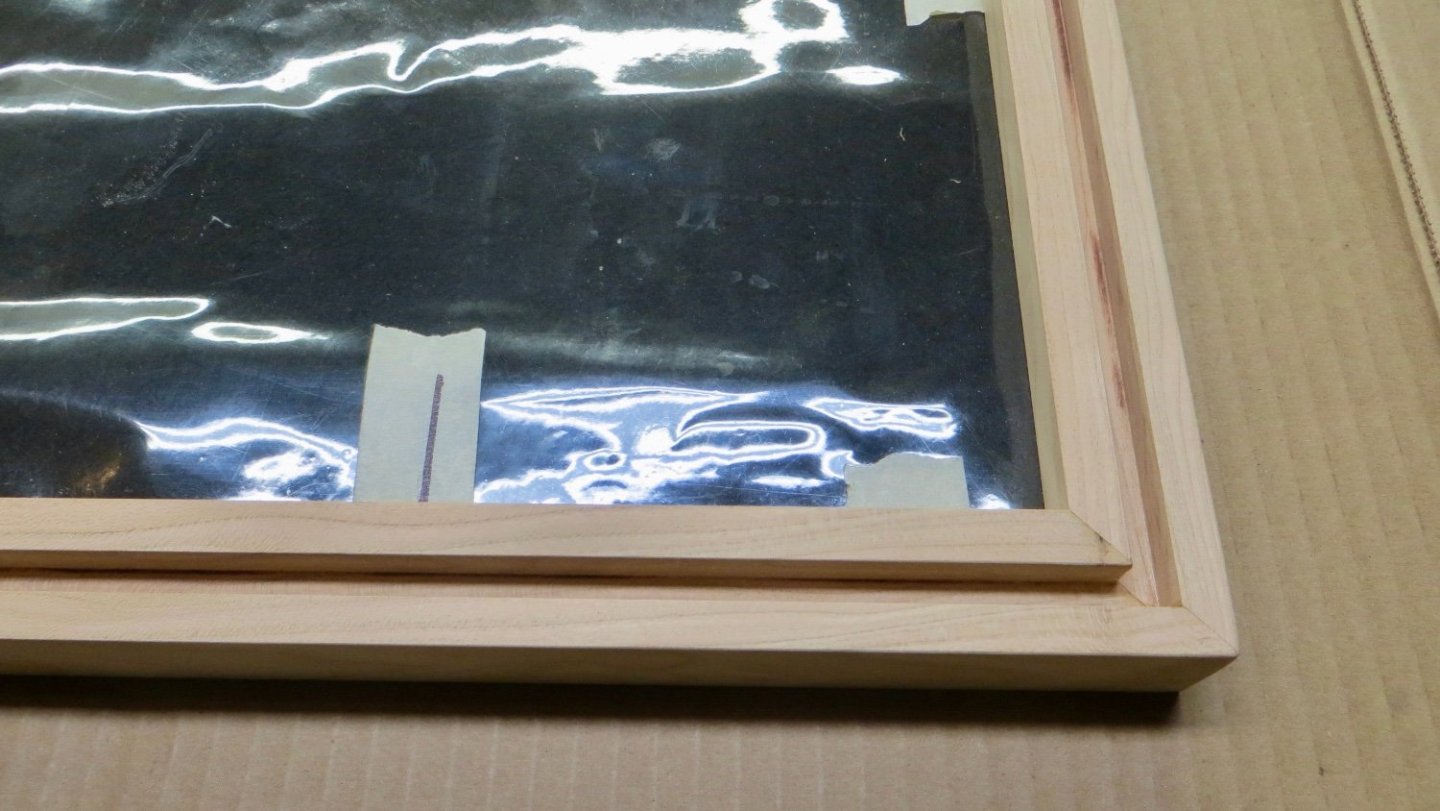
Hello, Small Update, Finally received the plexiglass case top made by Altec Plastics. Keeping it wrapped in bubble wrap until model is finished. Stained and Polyurethaned the underside of the case base and added protective pads. Topside finished stained and polyurethaned. Ship model base screwed onto case base from underside. All 4 sides will have a 2" clearance between the ship and plexiglass when oars are installed Model Ship permanently attached. Finally beginning work of installing oars and lashing. So far so good with the oars clearing the railings. We'll see how it goes as I work along each opening! Thanks for stopping by as always! Frank

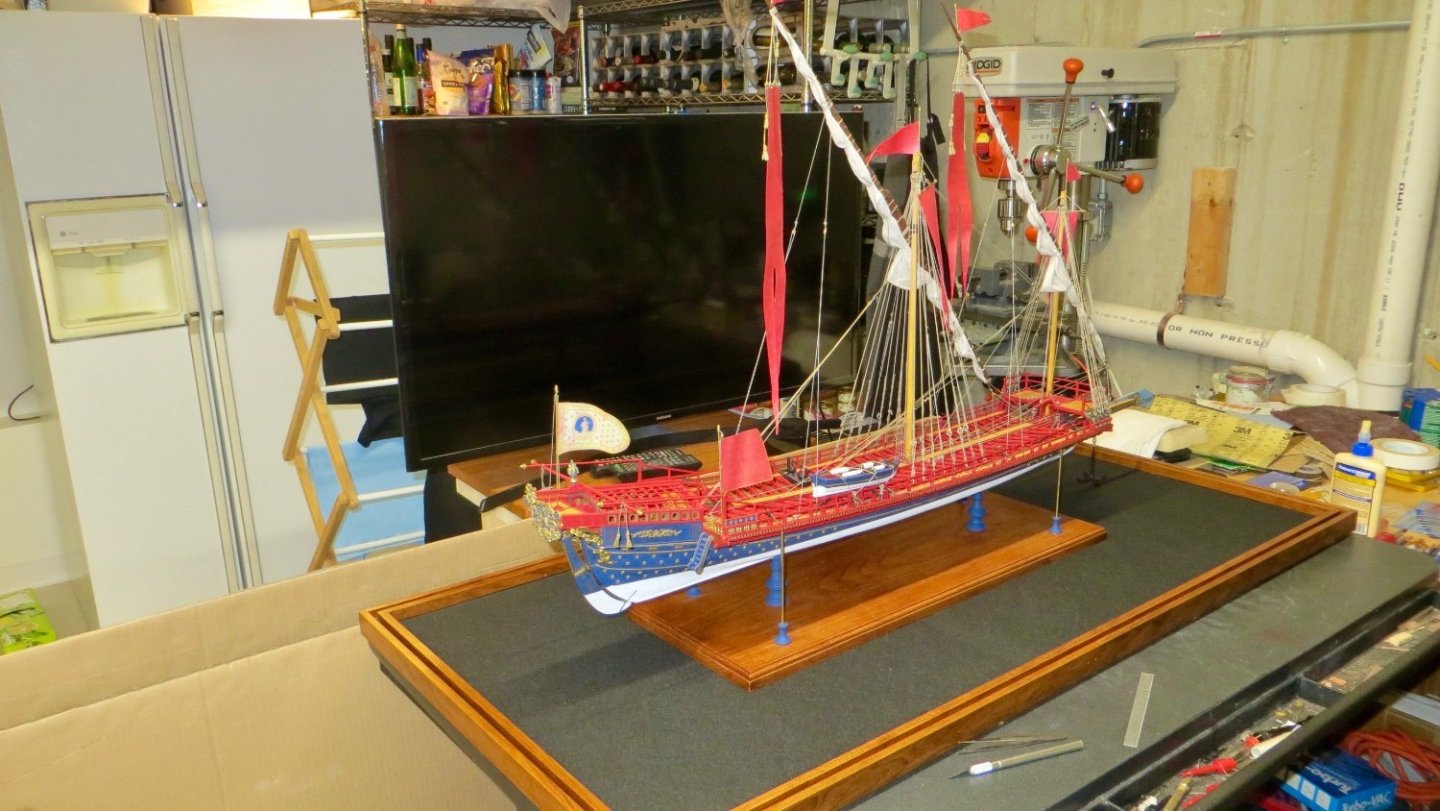


- 510 replies
-
- 6
-
-

-
- reale de france
- corel
- (and 1 more)
-
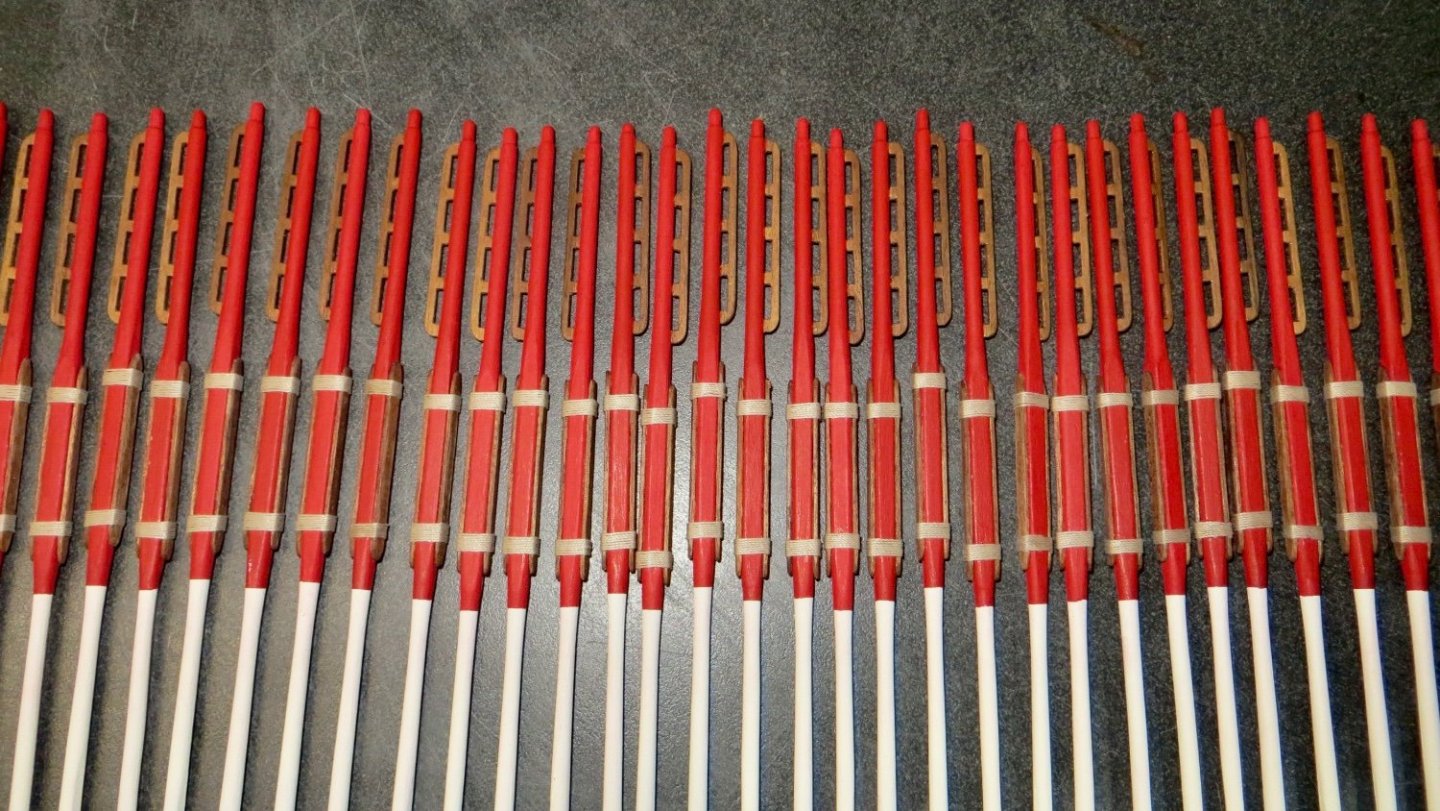
Thanks Michael! I forgot to mention a minor detail. The oar handles have 4 large openings (as shown in the above photo). The Corel plans call for 6 openings. I chose the 4 openings following G. Delacroix's plans. the 5th oarsman held the very tip at the end of the oars. Also G Delacroix's plans called for more ornate battens with the lashings. But I couldn't follow this because the openings under the railings to fit in the oars is so tight, leaving me little to no wiggle room. Also, Michael, I am starting to look at the multiple small flag assemblies. I looked again at your nice log and am trying to figure out how to attach them to the 1mm posts and get them to look realistic. (You might see some questions from me in the near future, lol!!) thanks for stopping by. Frank
- 510 replies
-
- 1
-
-
- reale de france
- corel
- (and 1 more)
-
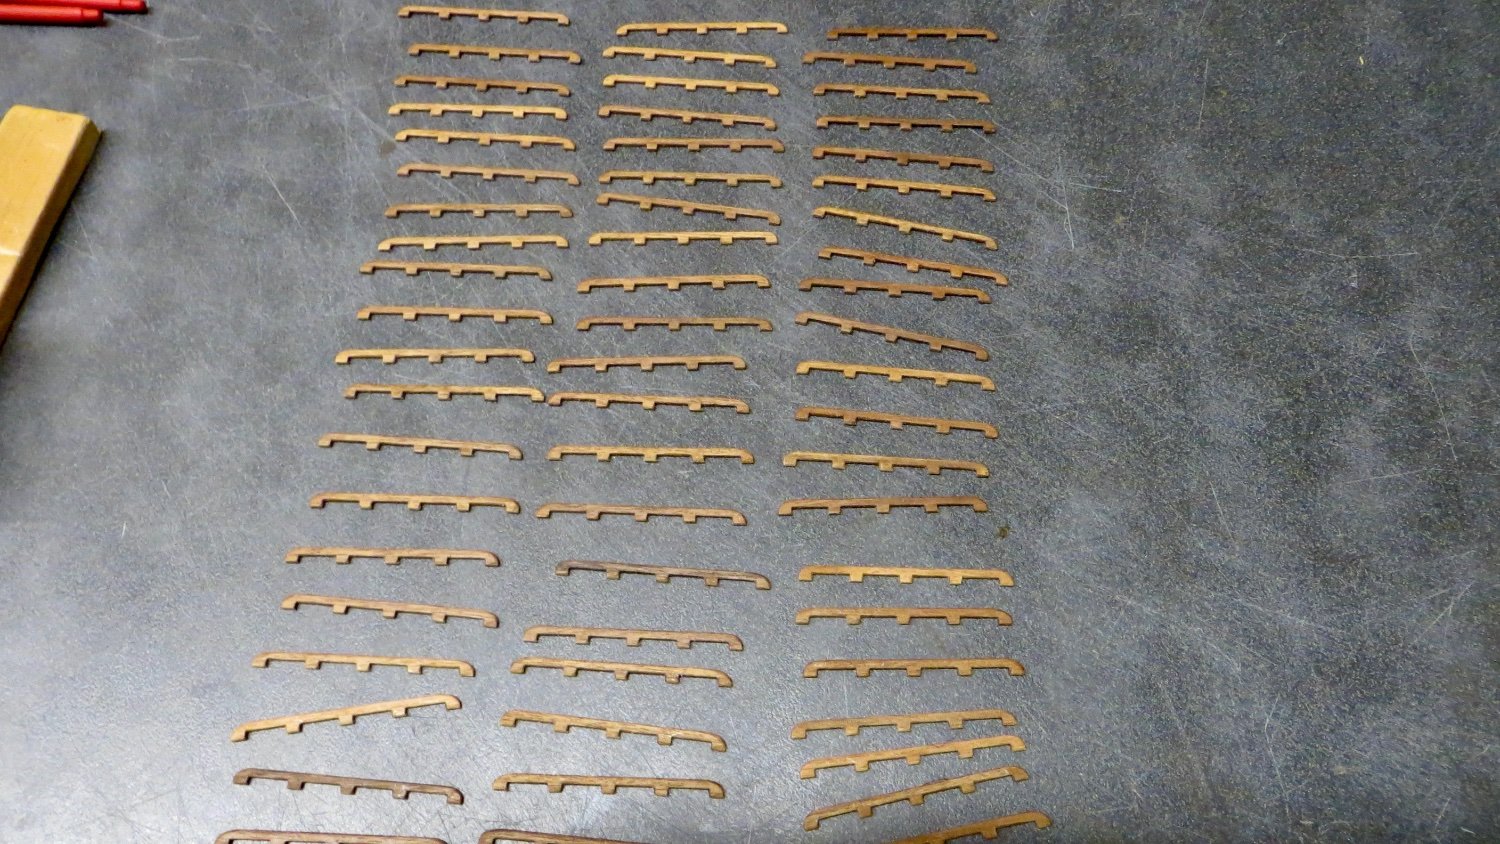
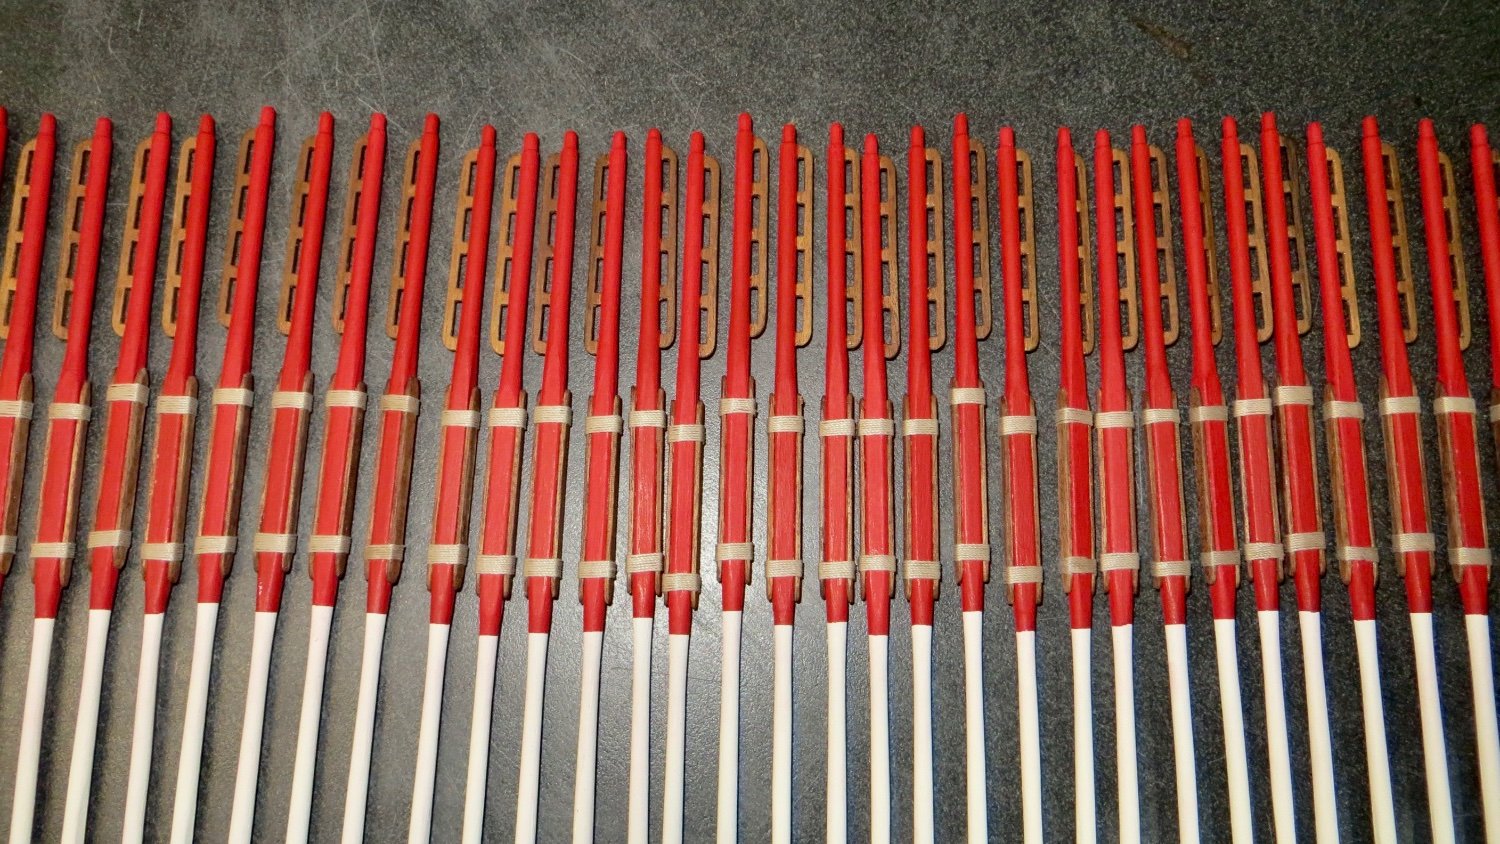
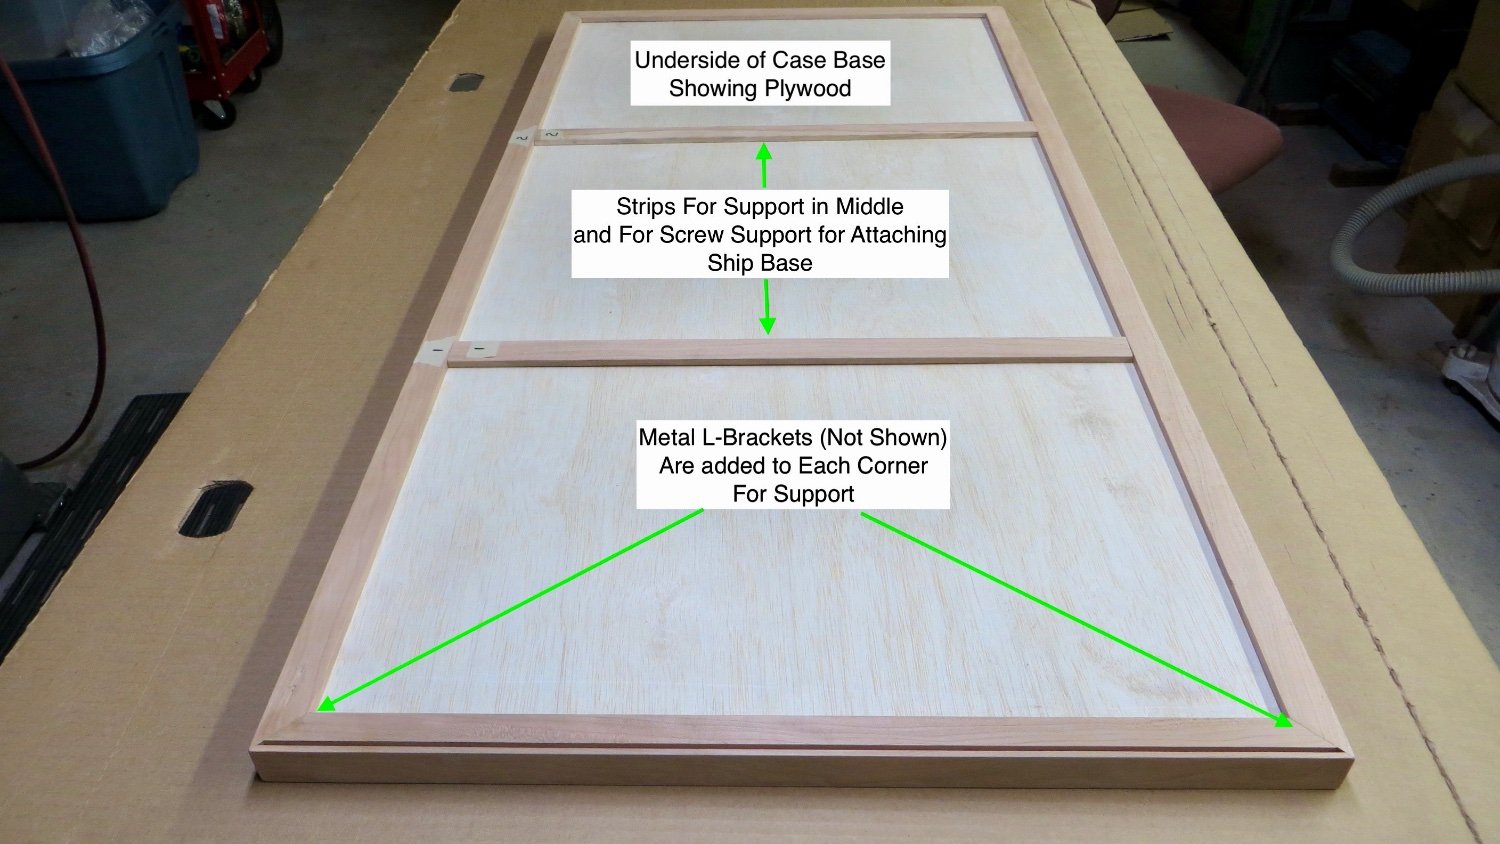
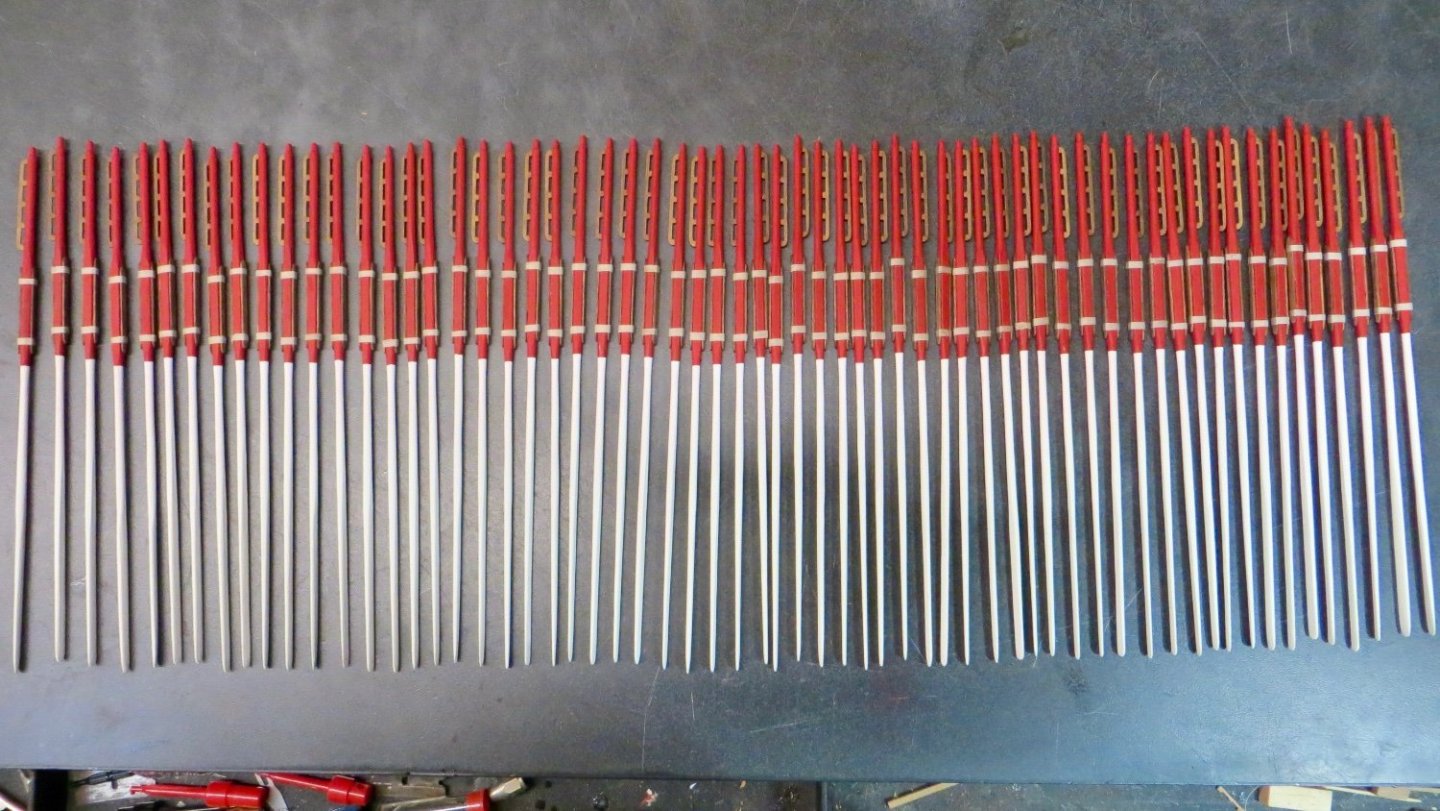
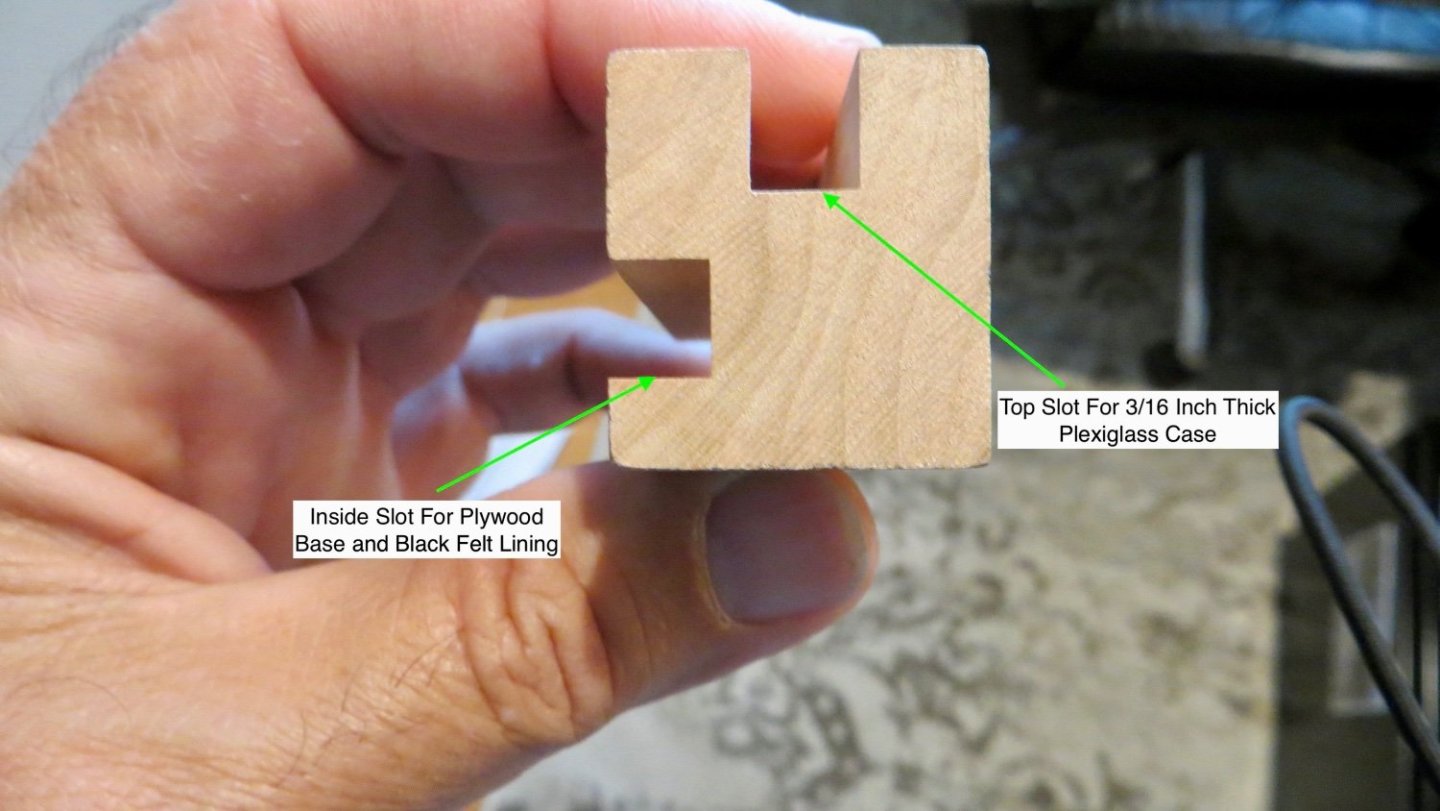
Hello, I finally finished up work on all the oars. Quite the project. Lashings attached on all oars I made the oar handles out of 1 mm thick walnut and then sealed the wood with polyurethane. Handles attached to the oars. The oars are complete and set aside until the model can be mounted to the case. Turning my attention to fabrication of the case base. I had to keep the base of the case as narrow as possible so that the finished case would fit on the piece of furniture we bought to place the model on. (Strict warnings from the admiral to not exceed the width of 24"!!) So the model with the oars attached will finish up at about 20 inches wide. I added roughly 2 inches on each side for the plexiglass case and just made the 24 inch restriction. Because of this I kept the design simple. I would have liked to add some corner rounding radius and made the frame wider if I had the room. Cross section of Cherry wood used for the base Top side view of finished case. I will stain and seal the wood after I receive it back from the manufacturer of the plexiglass top. The assembled base was sent to Altec Plastics in South Boston. I sent them the base so the plexiglass top could be fitted into the top slots without any miscommunication! The 1/4 inch plywood in the middle is covered with self adhesive black felt and protected for now (while at Altec Plastics) with plastic. Underside photo of completed base. I mistakenly took this photo before I attached thin metal L-Shaped brackets at each corner for extra support. So they are not shown. The middle strips are for extra support down the middle to prevent any sagging over time and to help give the screws, used to attach the ships base, extra material to grip. Steps Left to do: 1. Stain and seal the case base, when returned from Altec Plastics 2. Attach the ship base to the case base and place and permanently set the model 3. Add the oars and oar lashings 4. Assemble and add all the small flags next to the oars on both sides 5. Fix the ship's rudder and bow cannon that have been knocked around 6. Finalize decision on stern canopy 7. Lightly dust Thanks for stopping by and again thanks for looking in and for the likes. Appreciated as always, Frank


- 510 replies
-
- 5
-
-
-
- reale de france
- corel
- (and 1 more)
-
Very Nice! I like the idea of weighing the lines for a day or so. I have to do that more often on my builds! Frank
-
Tim and Peter, Tim, thanks for your comments. Looking forward to seeing you at the next meeting! Peter, thanks for stopping by. Yes, an expensive kit, but fun to build. Thanks for your kind comments. To those stopping by and with the "likes" appreciated. Frank
- 510 replies
-
- 1
-
-
- reale de france
- corel
- (and 1 more)
-
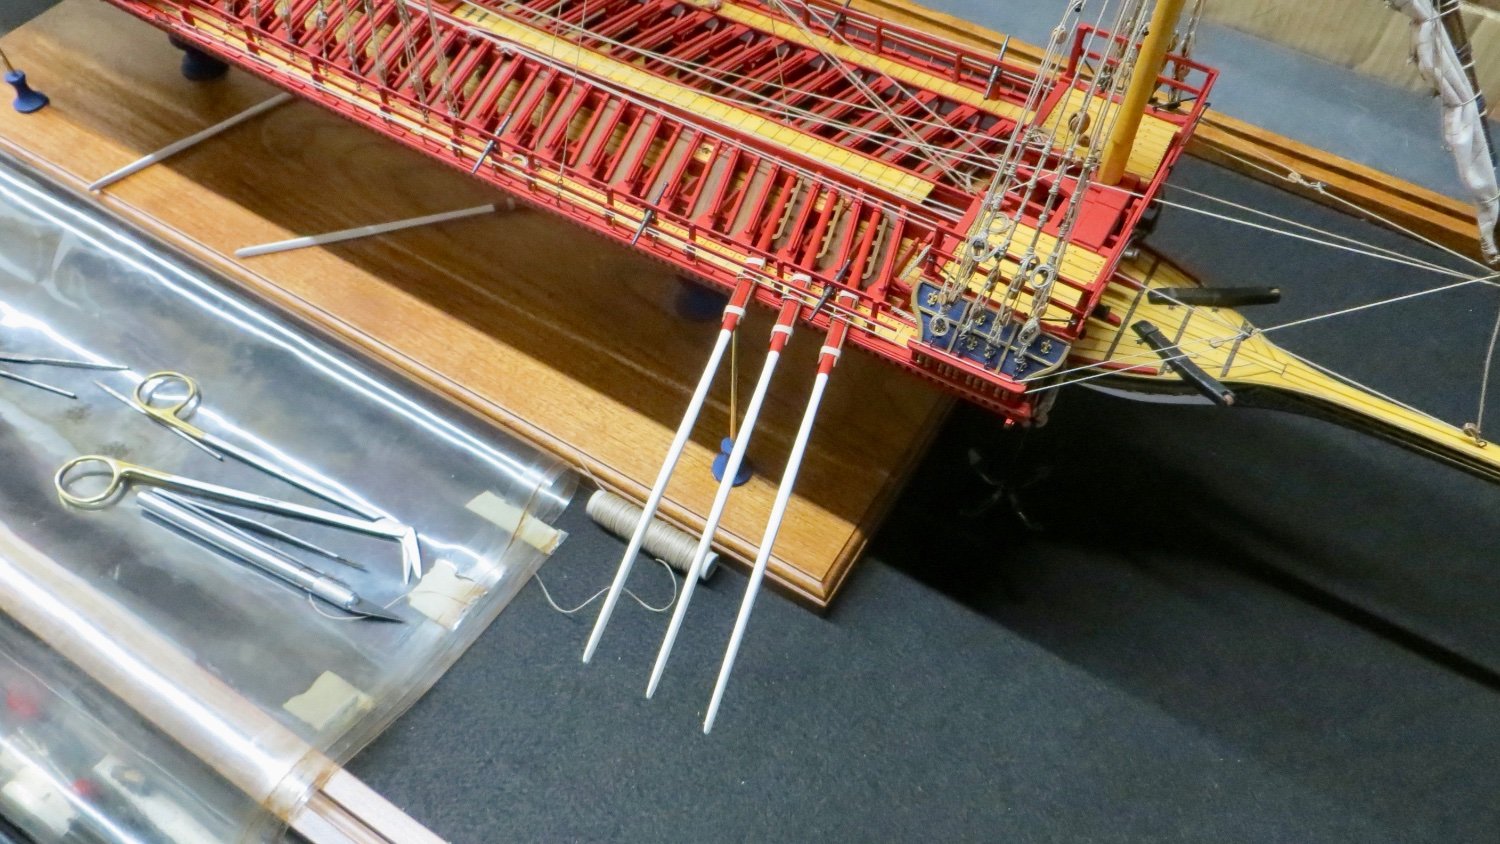
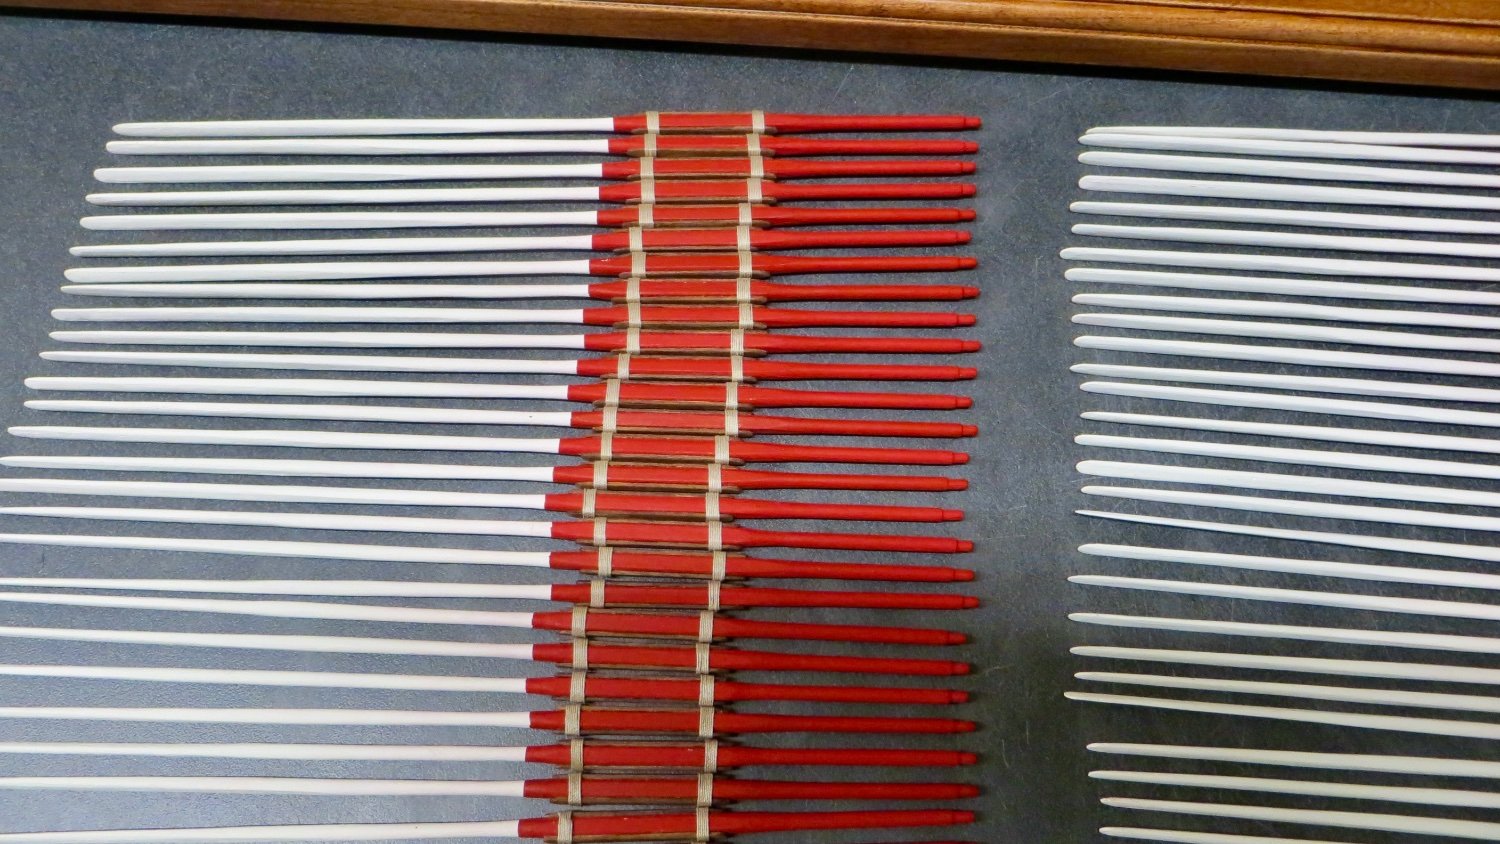
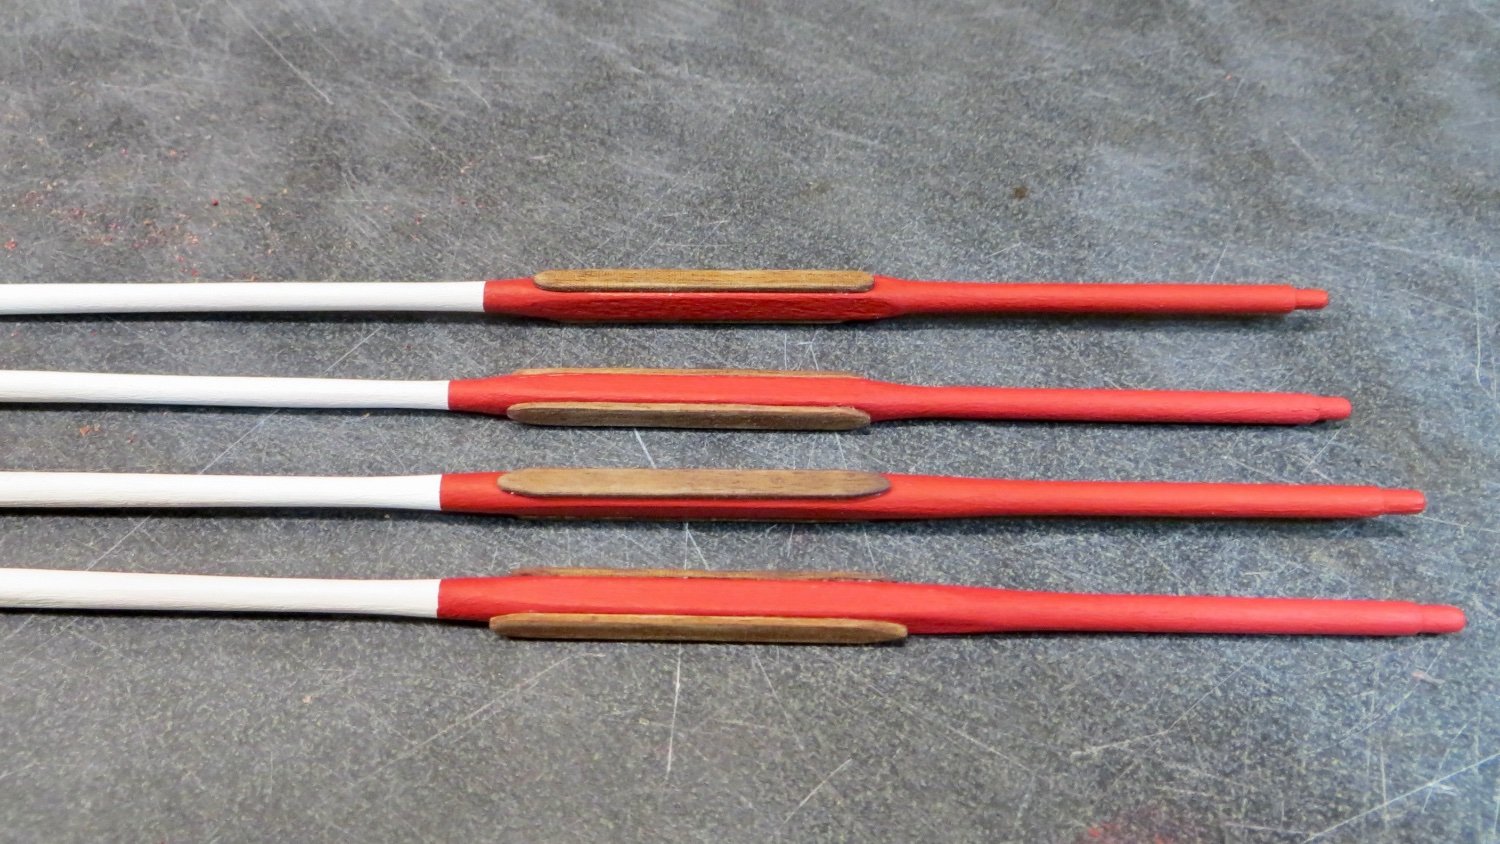
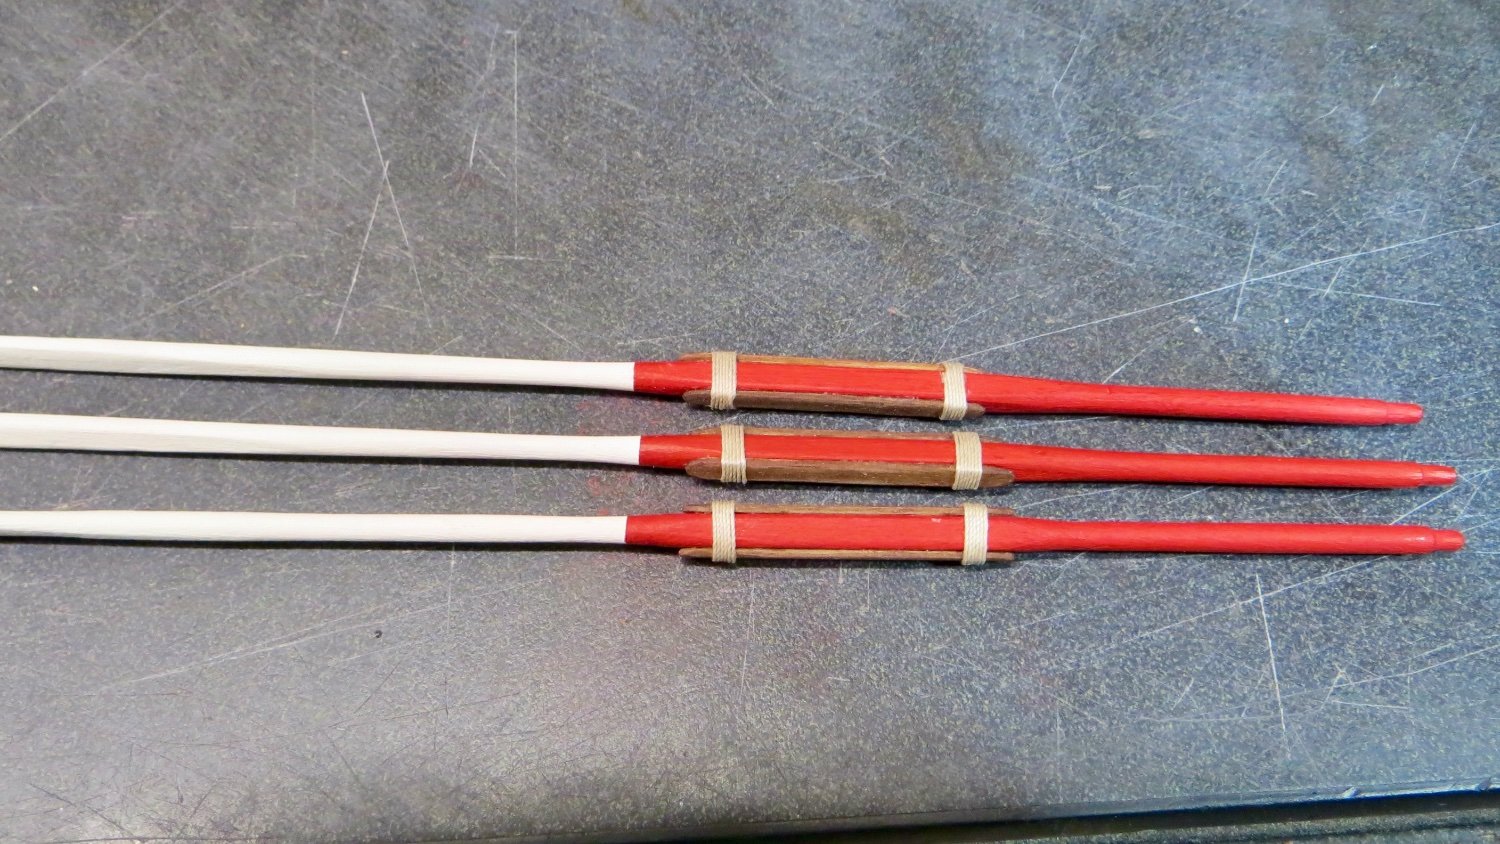
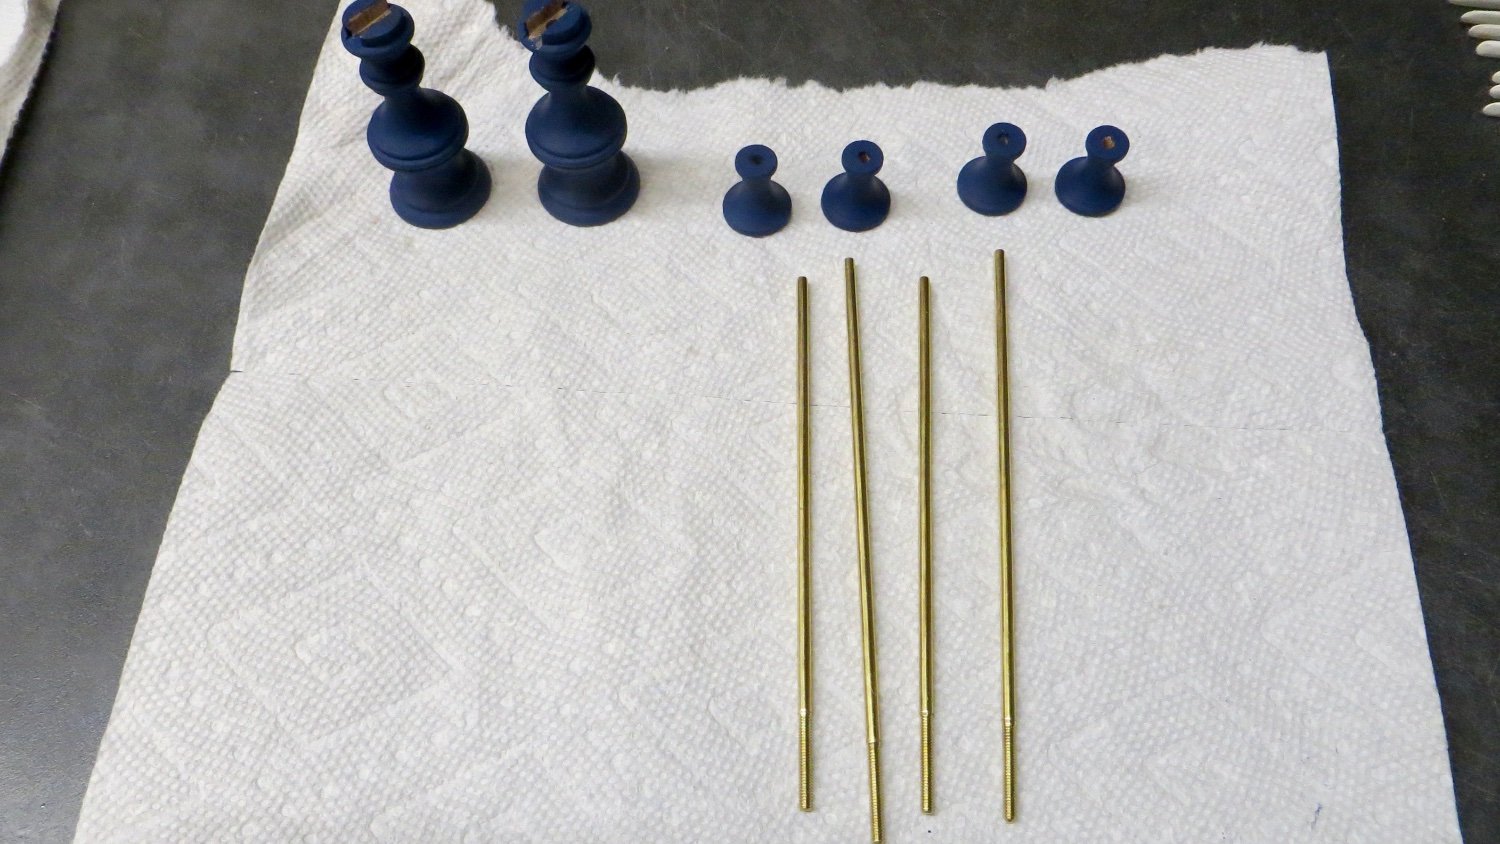
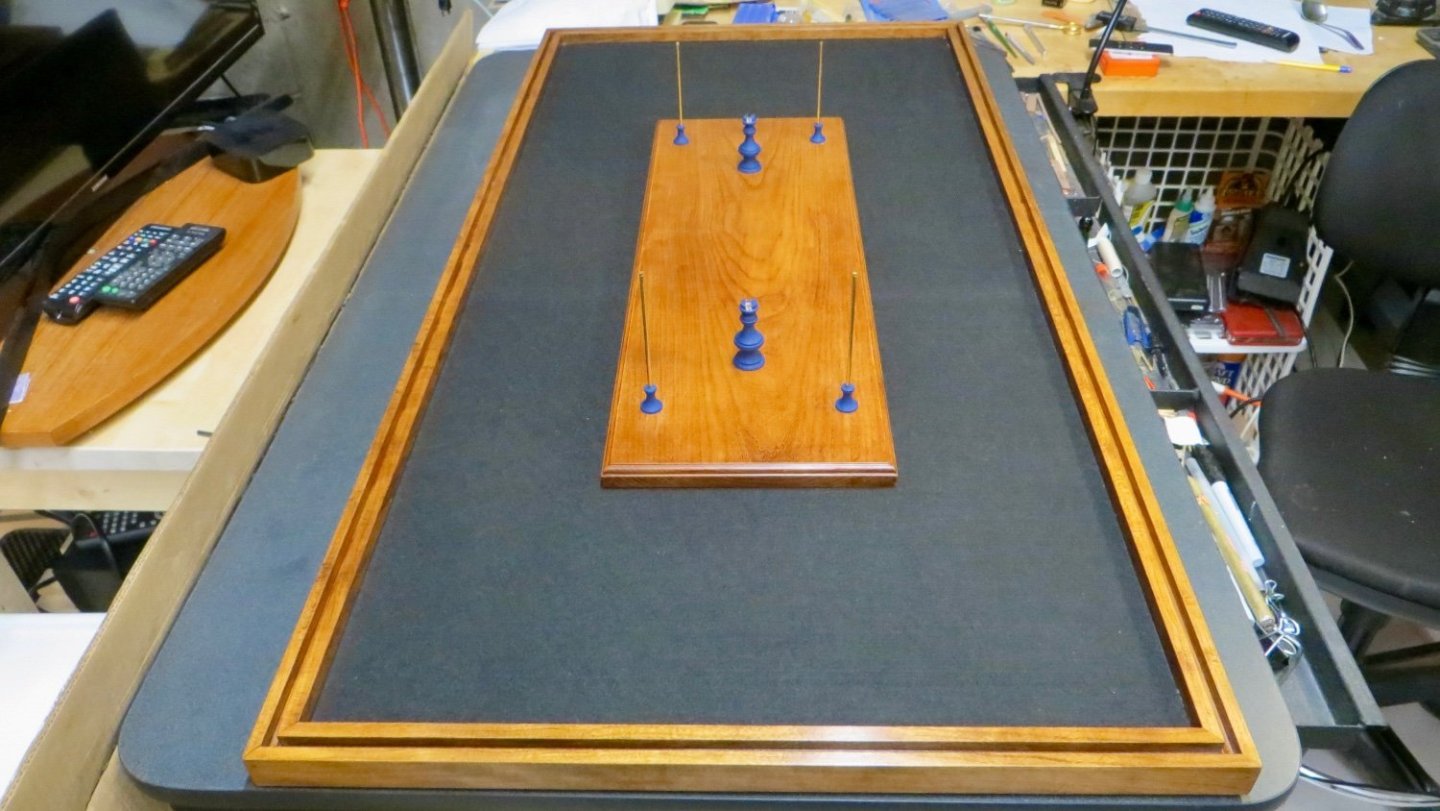
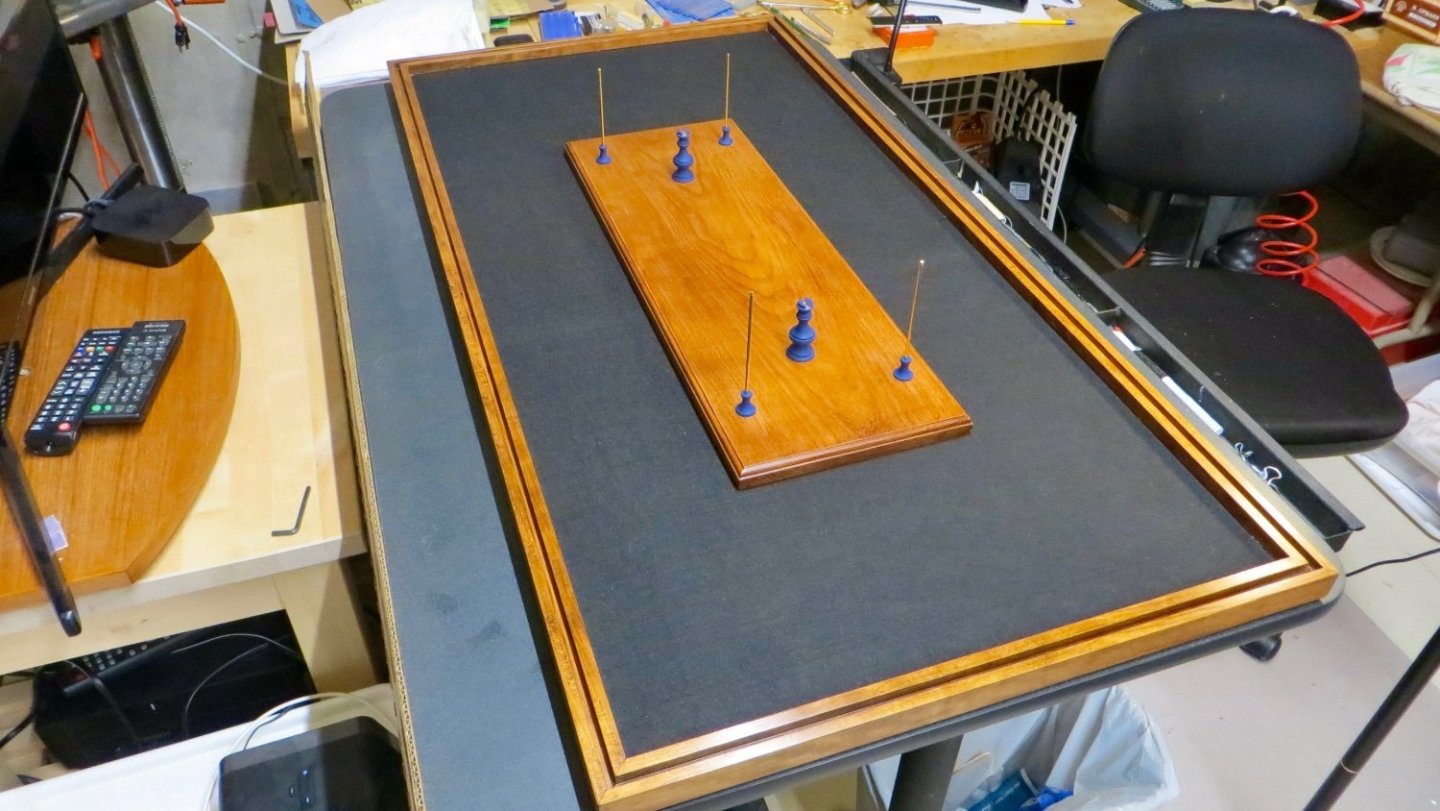
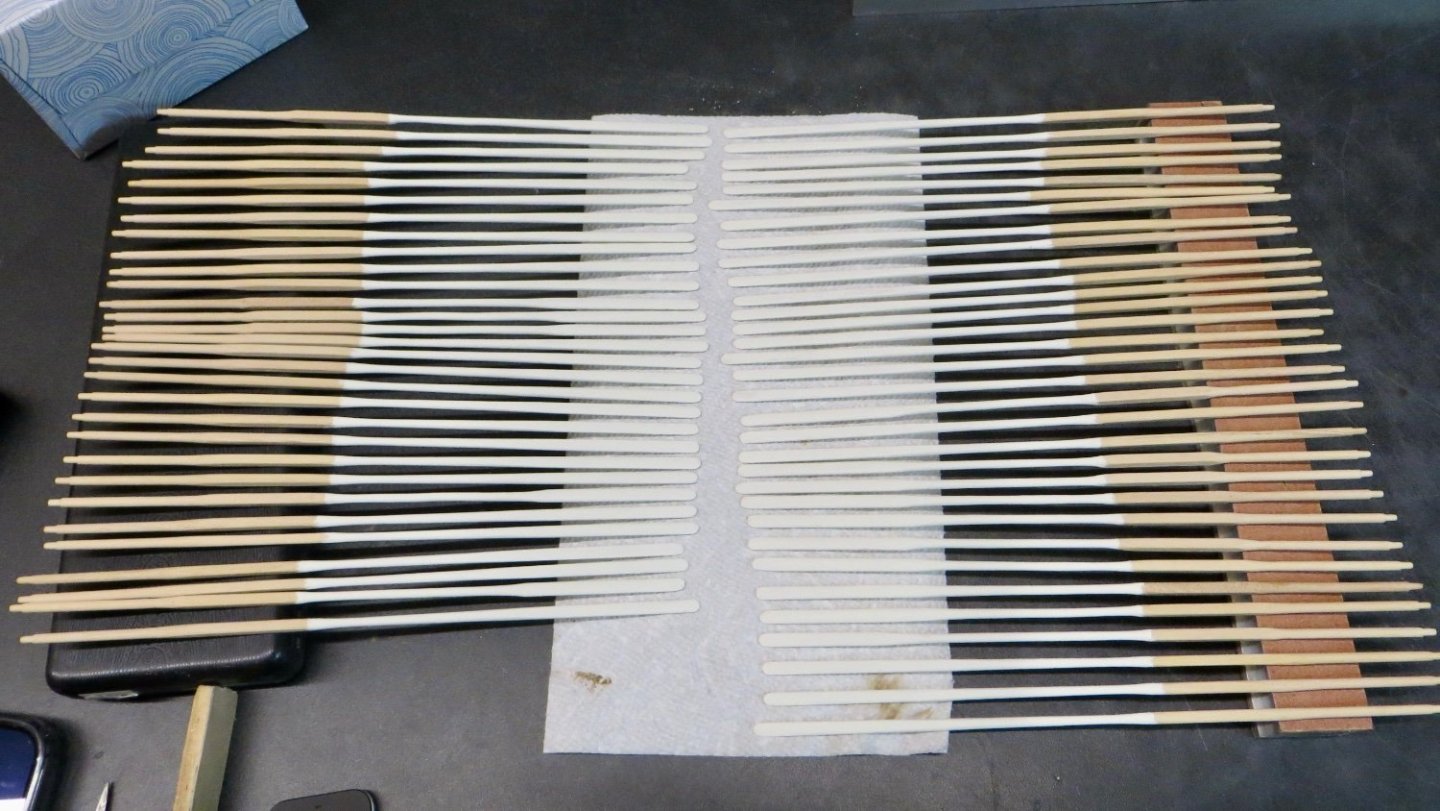
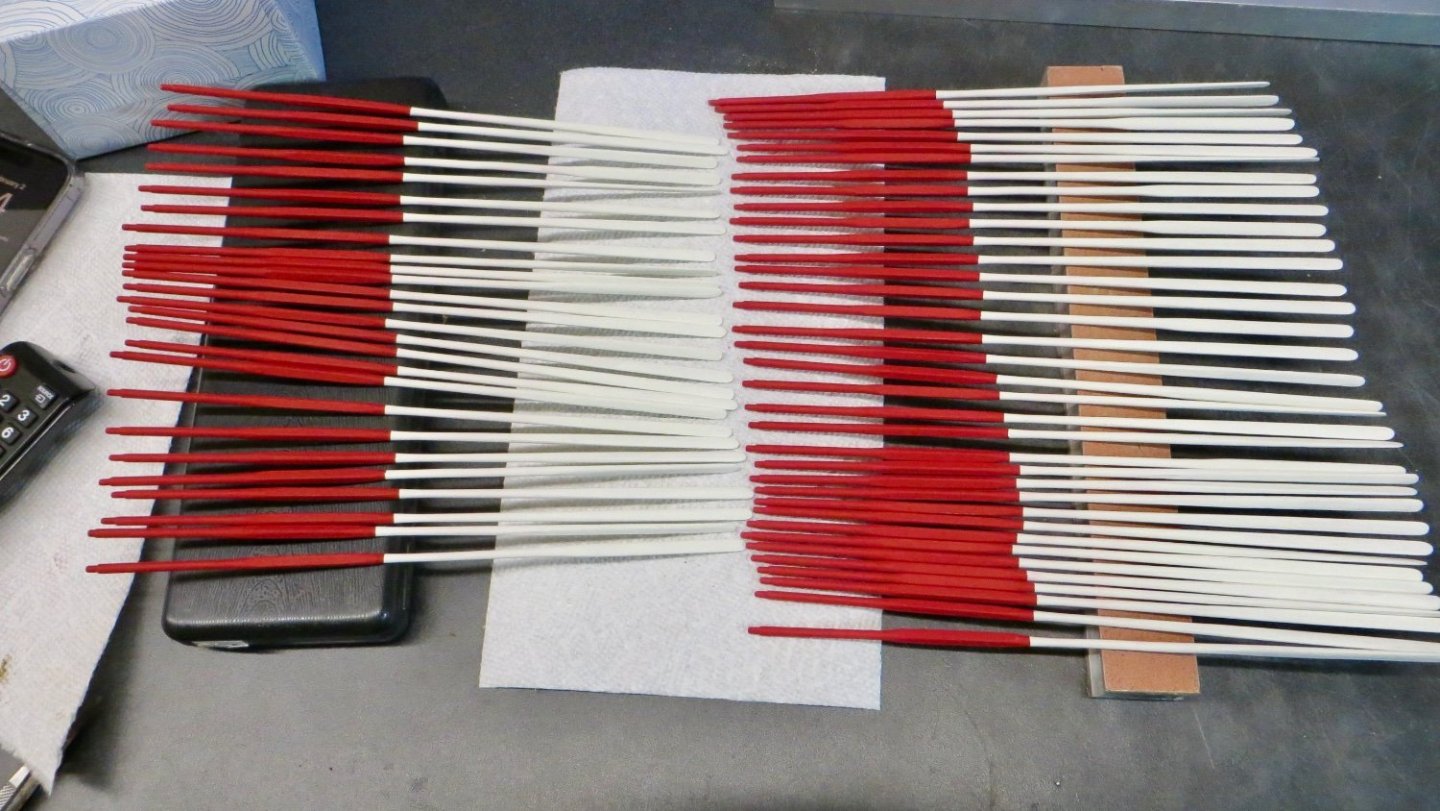
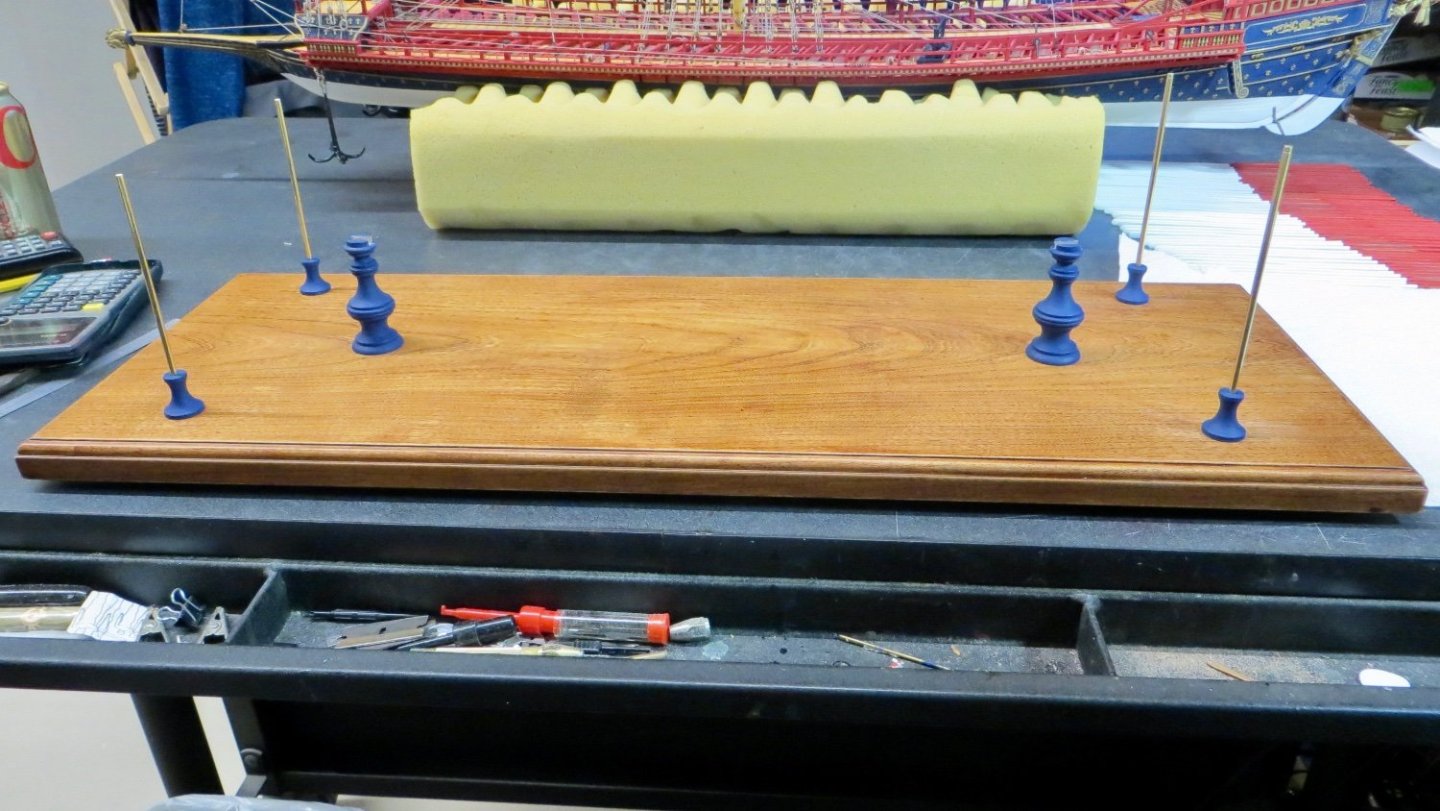
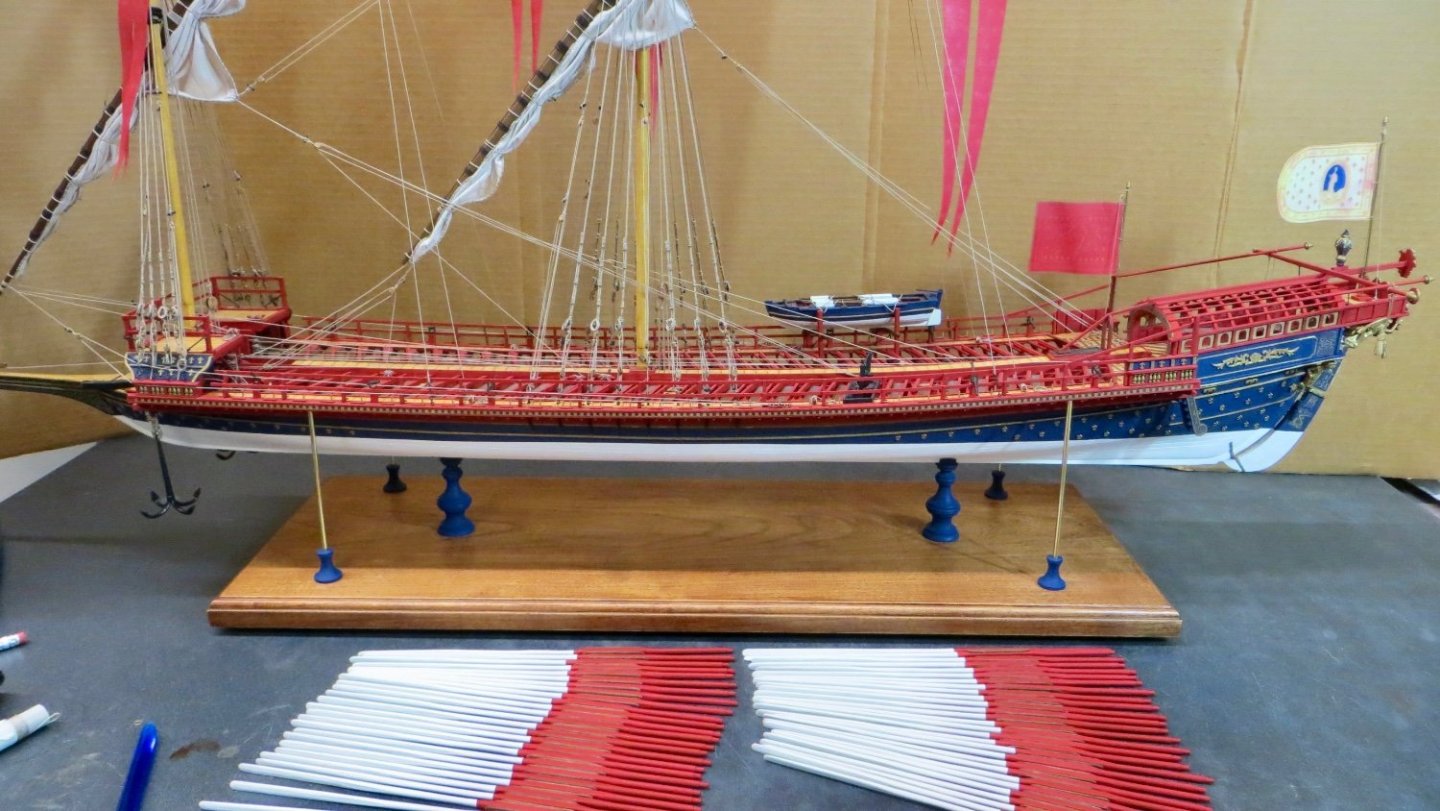
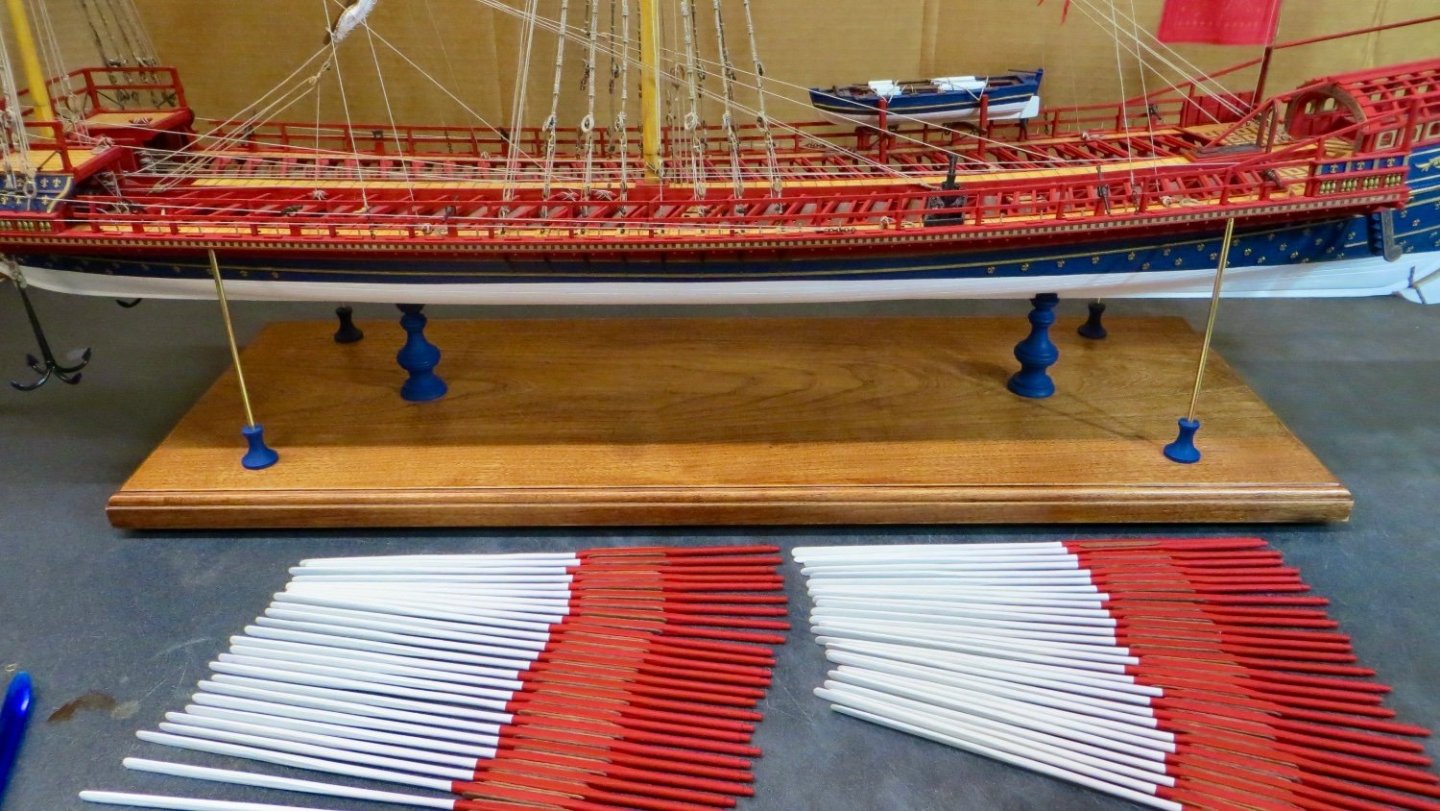
Hello, It's been a while since my last post. I took a month off for vacation. When I returned, I turned the water to the house back on. Unknown to me that night, the water valve in the master bath shower started leaking down the wall into the basement over my work bench. So lucky that the model was 2 feet away from the dripping and not harmed in any way! Finished forming the 60 plus oars and proceeded to paint them. Made the battens and stained and glued to oars. I am now working on attaching the lashings to the oars. First 3 done. After finishing the lashings, work will begin on the handles for the oars. Also finished up the base for the ship model. Painted the 2 main stanchions the ships blue. Turned and painted 4 smaller posts and threaded and polished (4) 1/8 inch rods to the correct height. Model mounted onto base. Found another piece of cherry wood and have begun to cut the wood for the overall case. Once done with the case base, the model base above will be fastened to the case. Then the oars and remaining flags will be installed. Thanks for the previous likes and for stopping by, Frank


- 510 replies
-
- 10
-
-
-
- reale de france
- corel
- (and 1 more)
-
Wow! Ship Modeler and electrician all in one! Who Knew!! Lol! Great job, Frank
-
Hi Tim. Thanks for your comments. Appreciated!! I do keep track of all my hours, but have not pulled out my calculator to add them all up yet. However, I know I'm over 2,000 hours. Lol!! Frank
-
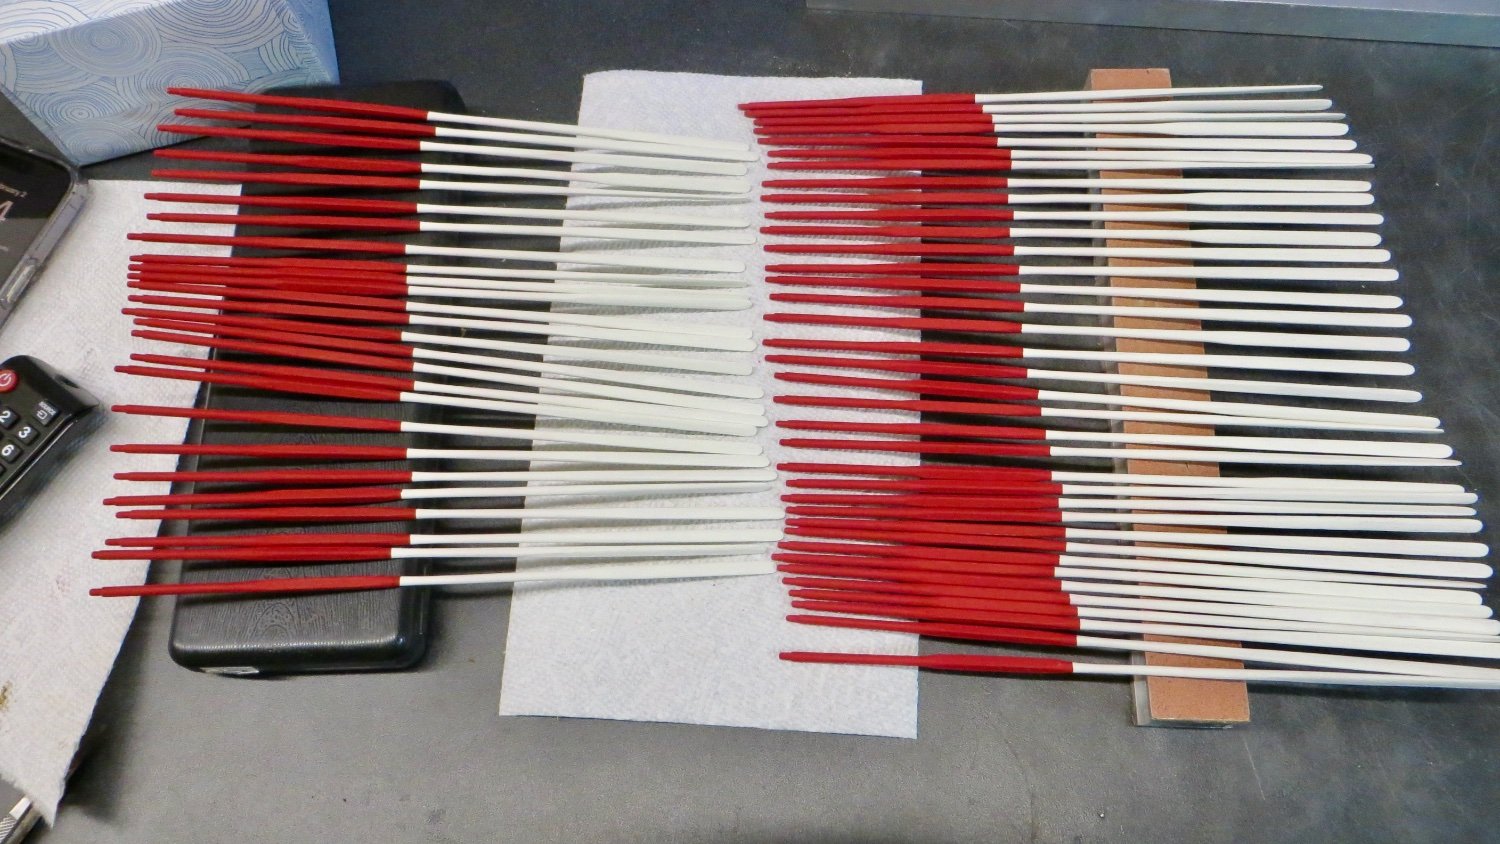
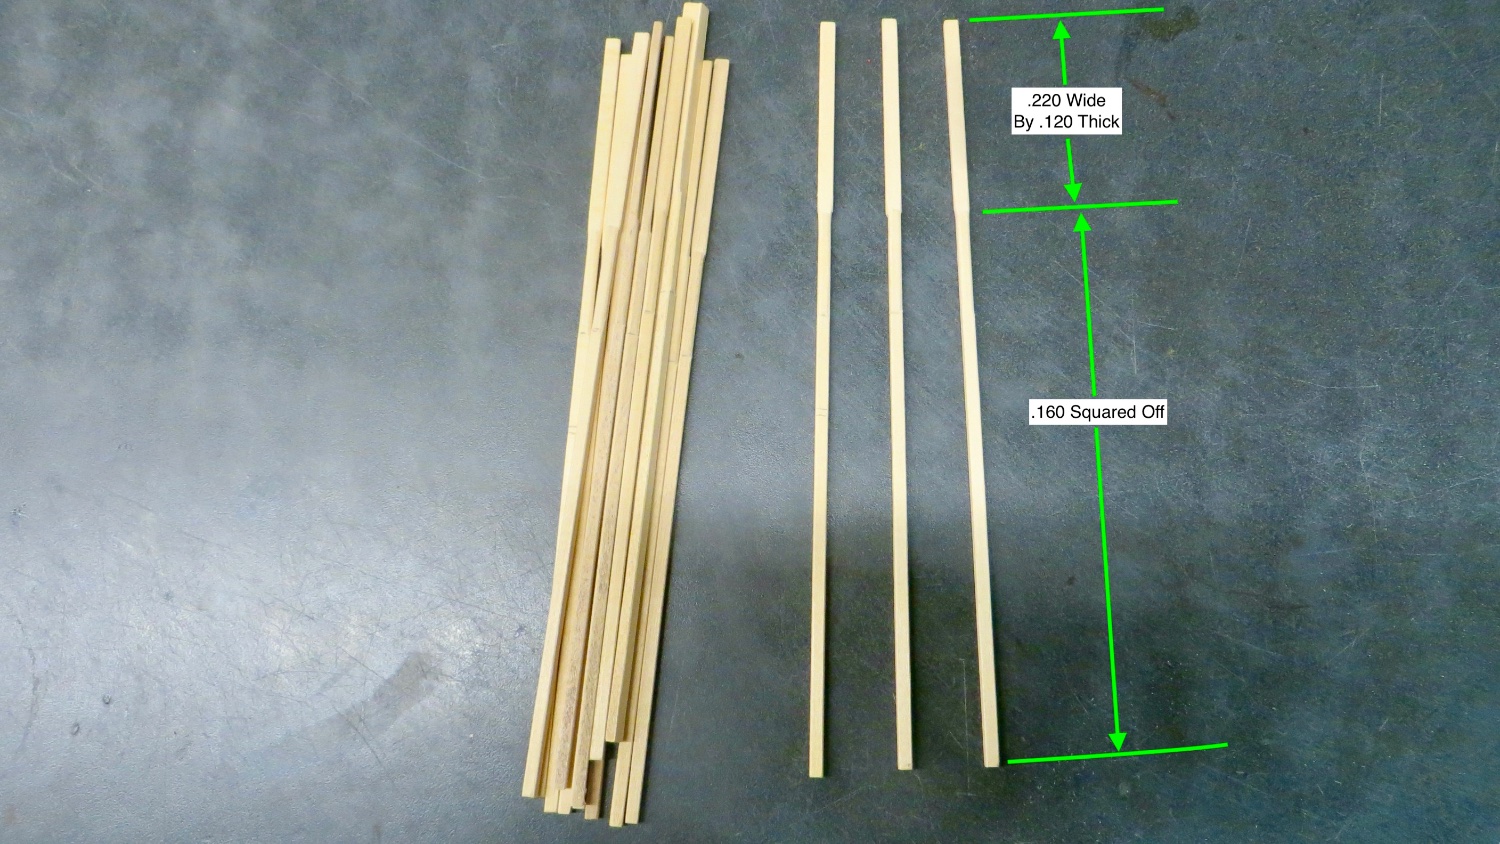
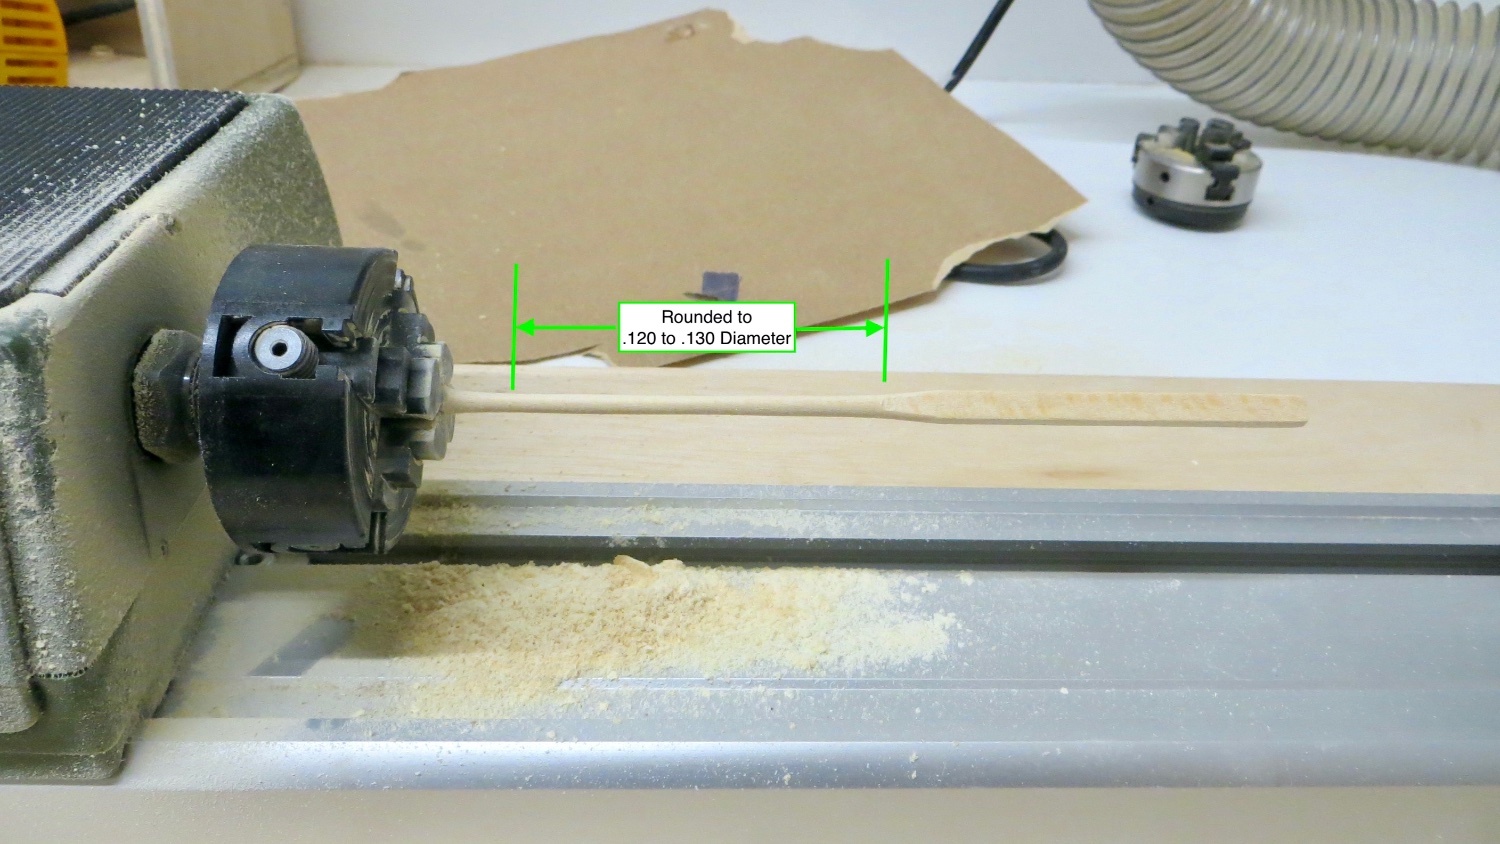
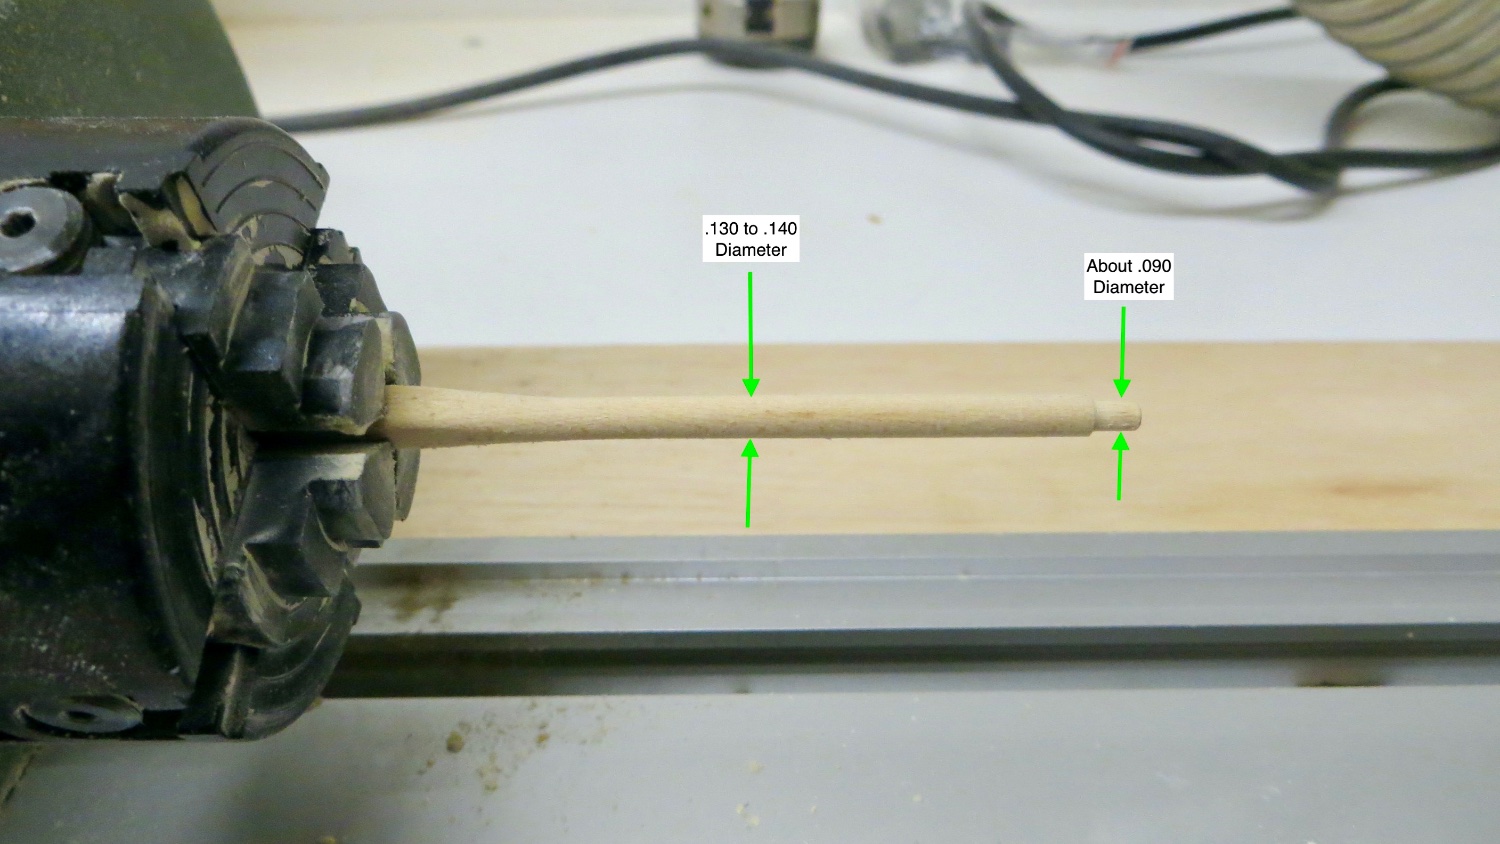
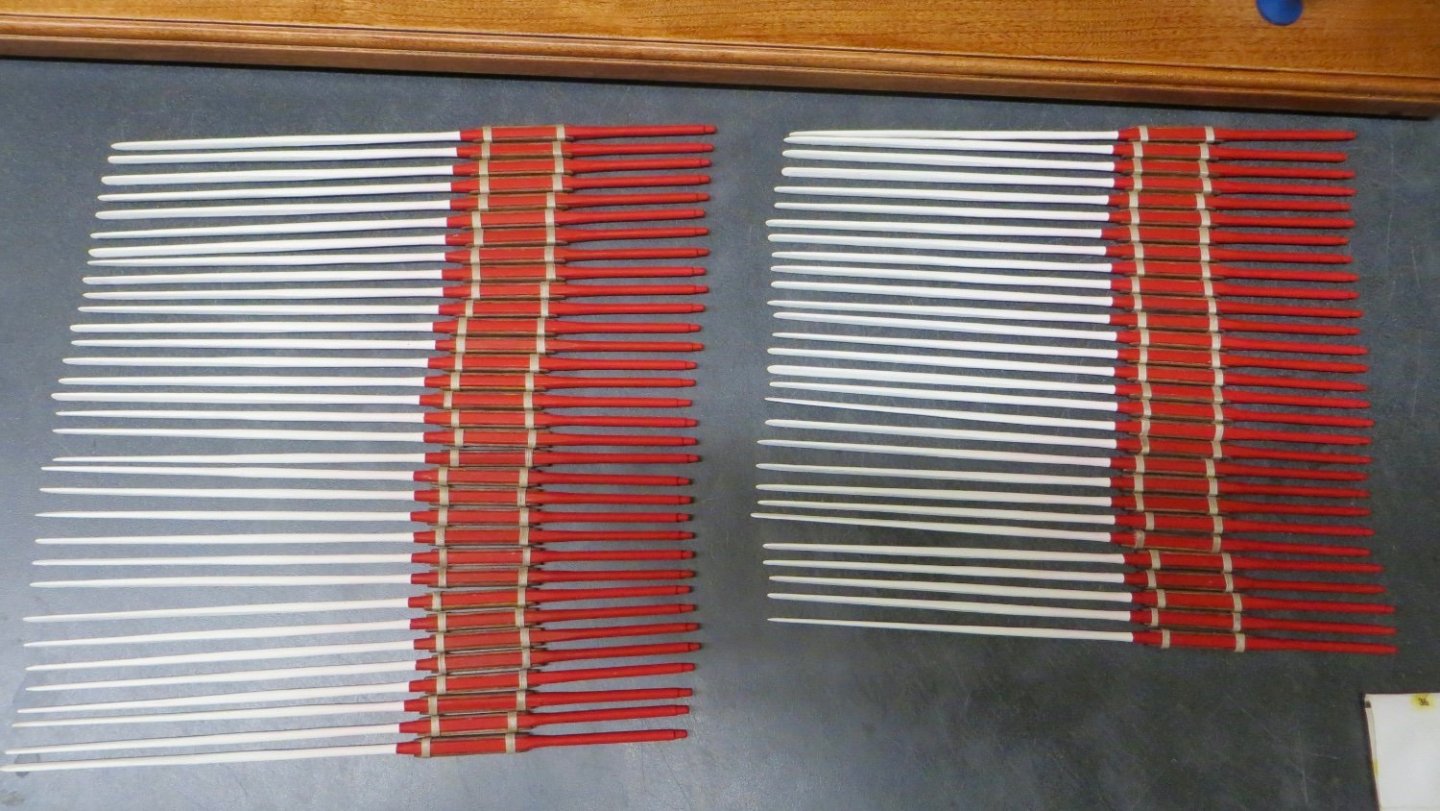
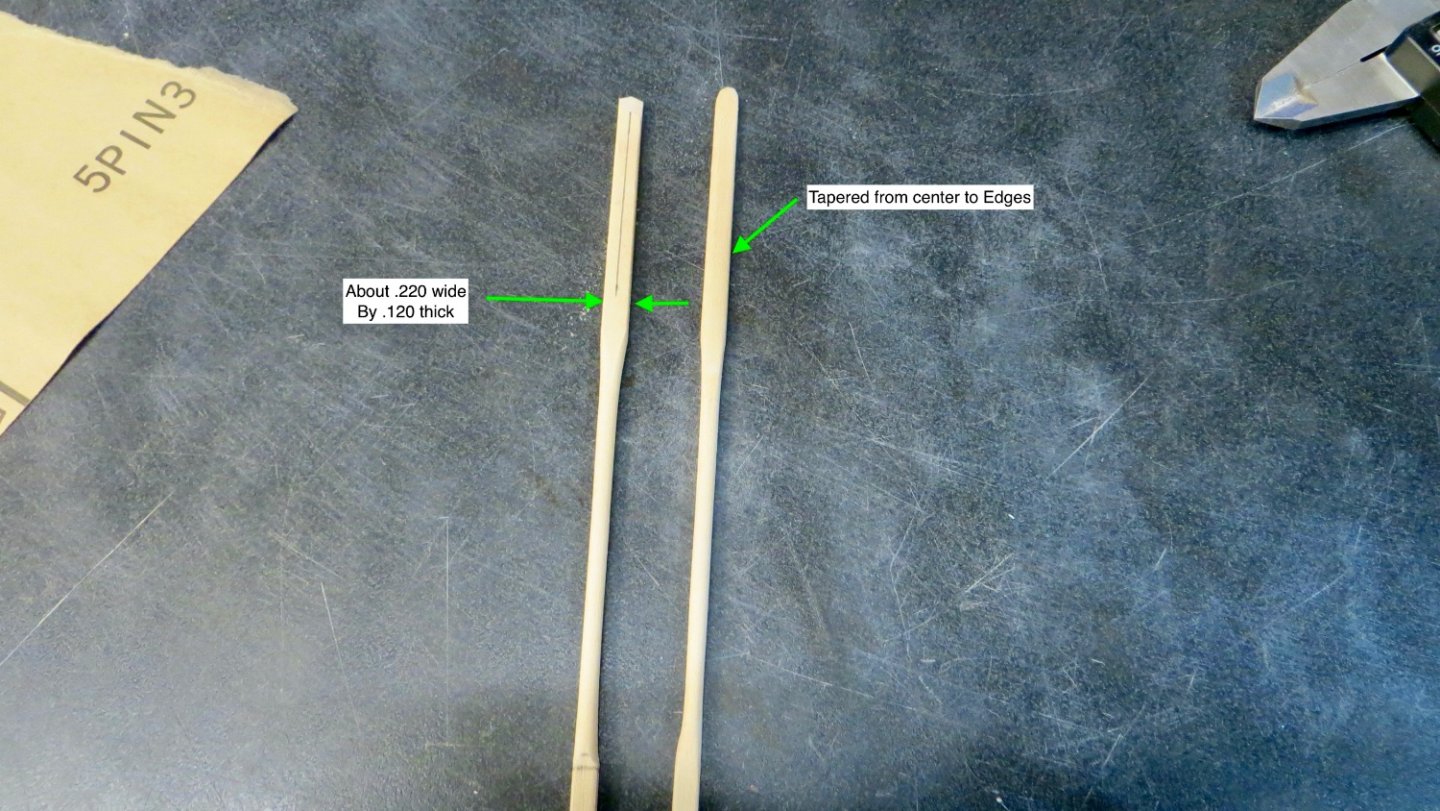
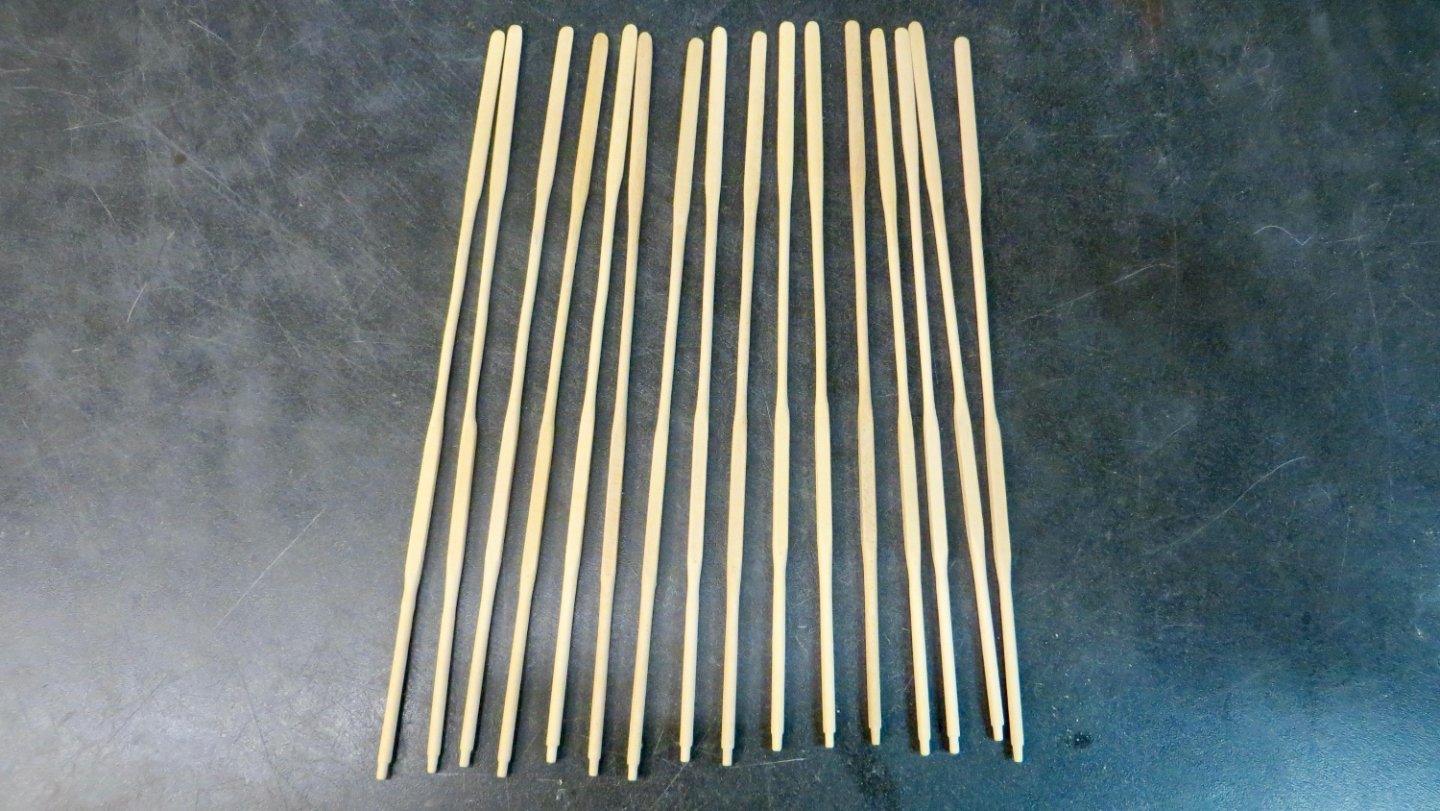
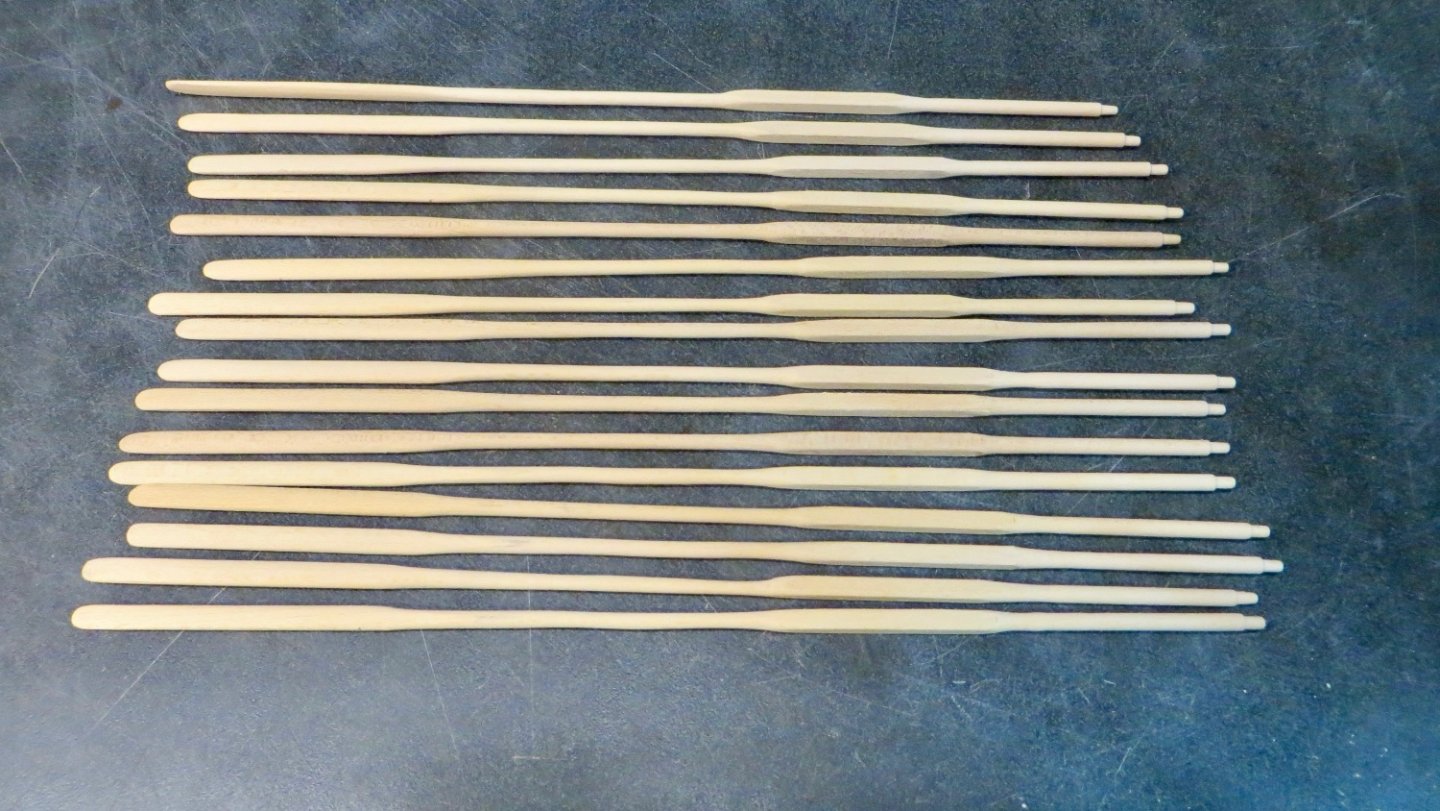
Hello, While waiting for some new pedestals to come in for the base, I started working on the oars. The oars that came with the kit leave much to be desired, so I figured I'd make them from scratch. Instead of making all 59 at once, for my sanity (lol) I decided to make them in batches of 15 or 16 in order to verify my process before making them all, only to find out something was not right! First step was to cut some stock .250 by .250 to the correct length. Then mill one side to .220 for the oar width and the other side .160 thick. (Ending up with .160 x .220). Finally milled the oar end to .120 thick Put the oars into the 4 jaw chuck and rounded the oar side to .125 (1/8 thick) or so. At the oar end, the wood was tapered from the center to the edges on both sides and the top end finished off. At the handle end, the wood was rounded to about .135 and the stub end to about .090 16 oars finished. I'm happy with the way they turned out, so going back to make the rest of the 59 oars plus a couple of extra. After the oars are finished, they will be painted and then the handles and lashings will be added. Thanks for stopping by. Frank


- 510 replies
-
- 10
-
-
-
- reale de france
- corel
- (and 1 more)
-
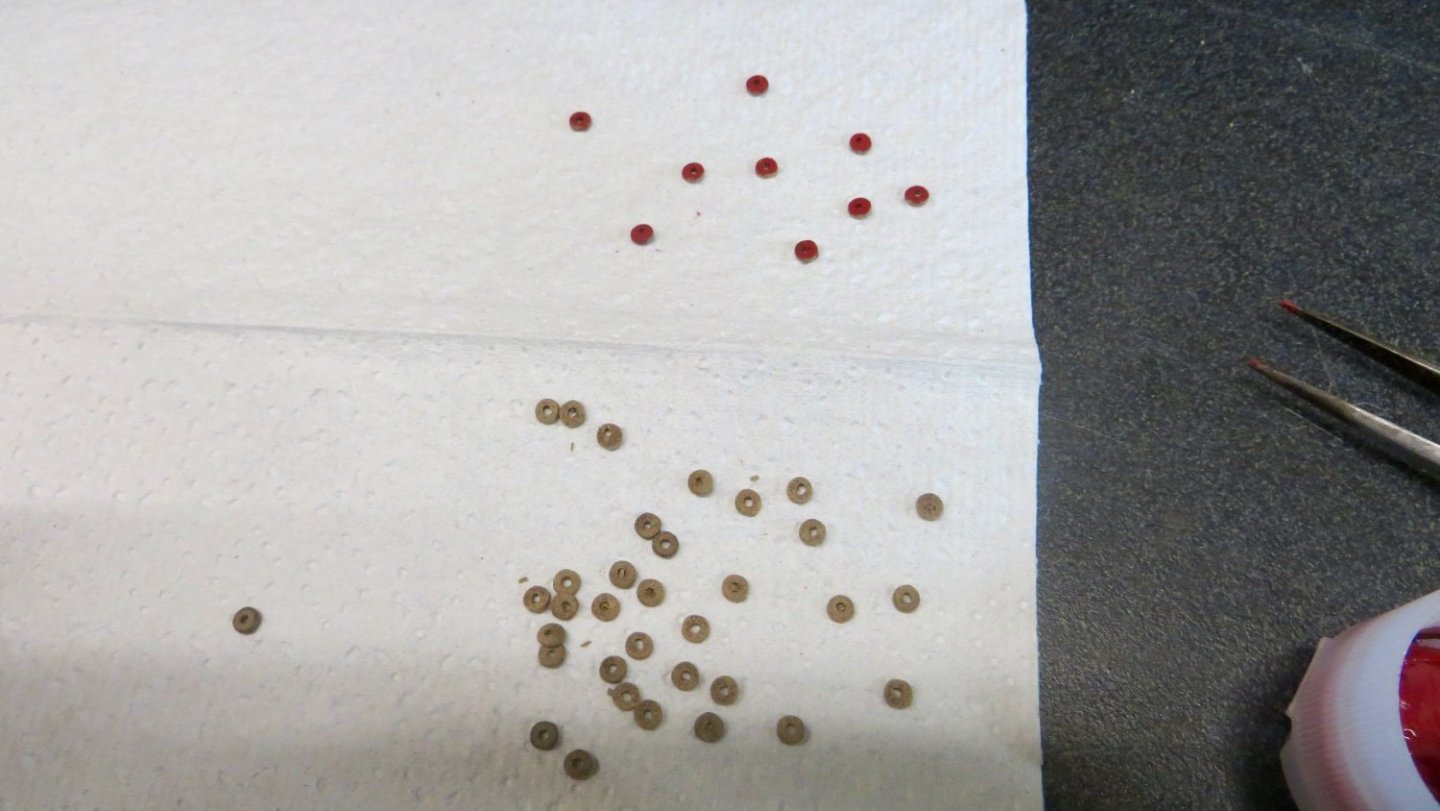
Wow, Big difference in the quality of the metal bits! Nice work as always, Frank