HOLIDAY DONATION DRIVE - SUPPORT MSW - DO YOUR PART TO KEEP THIS GREAT FORUM GOING!
×


fmodajr
-
Posts
868 -
Joined
-
Last visited
Content Type
Profiles
Forums
Gallery
Events
Everything posted by fmodajr
-
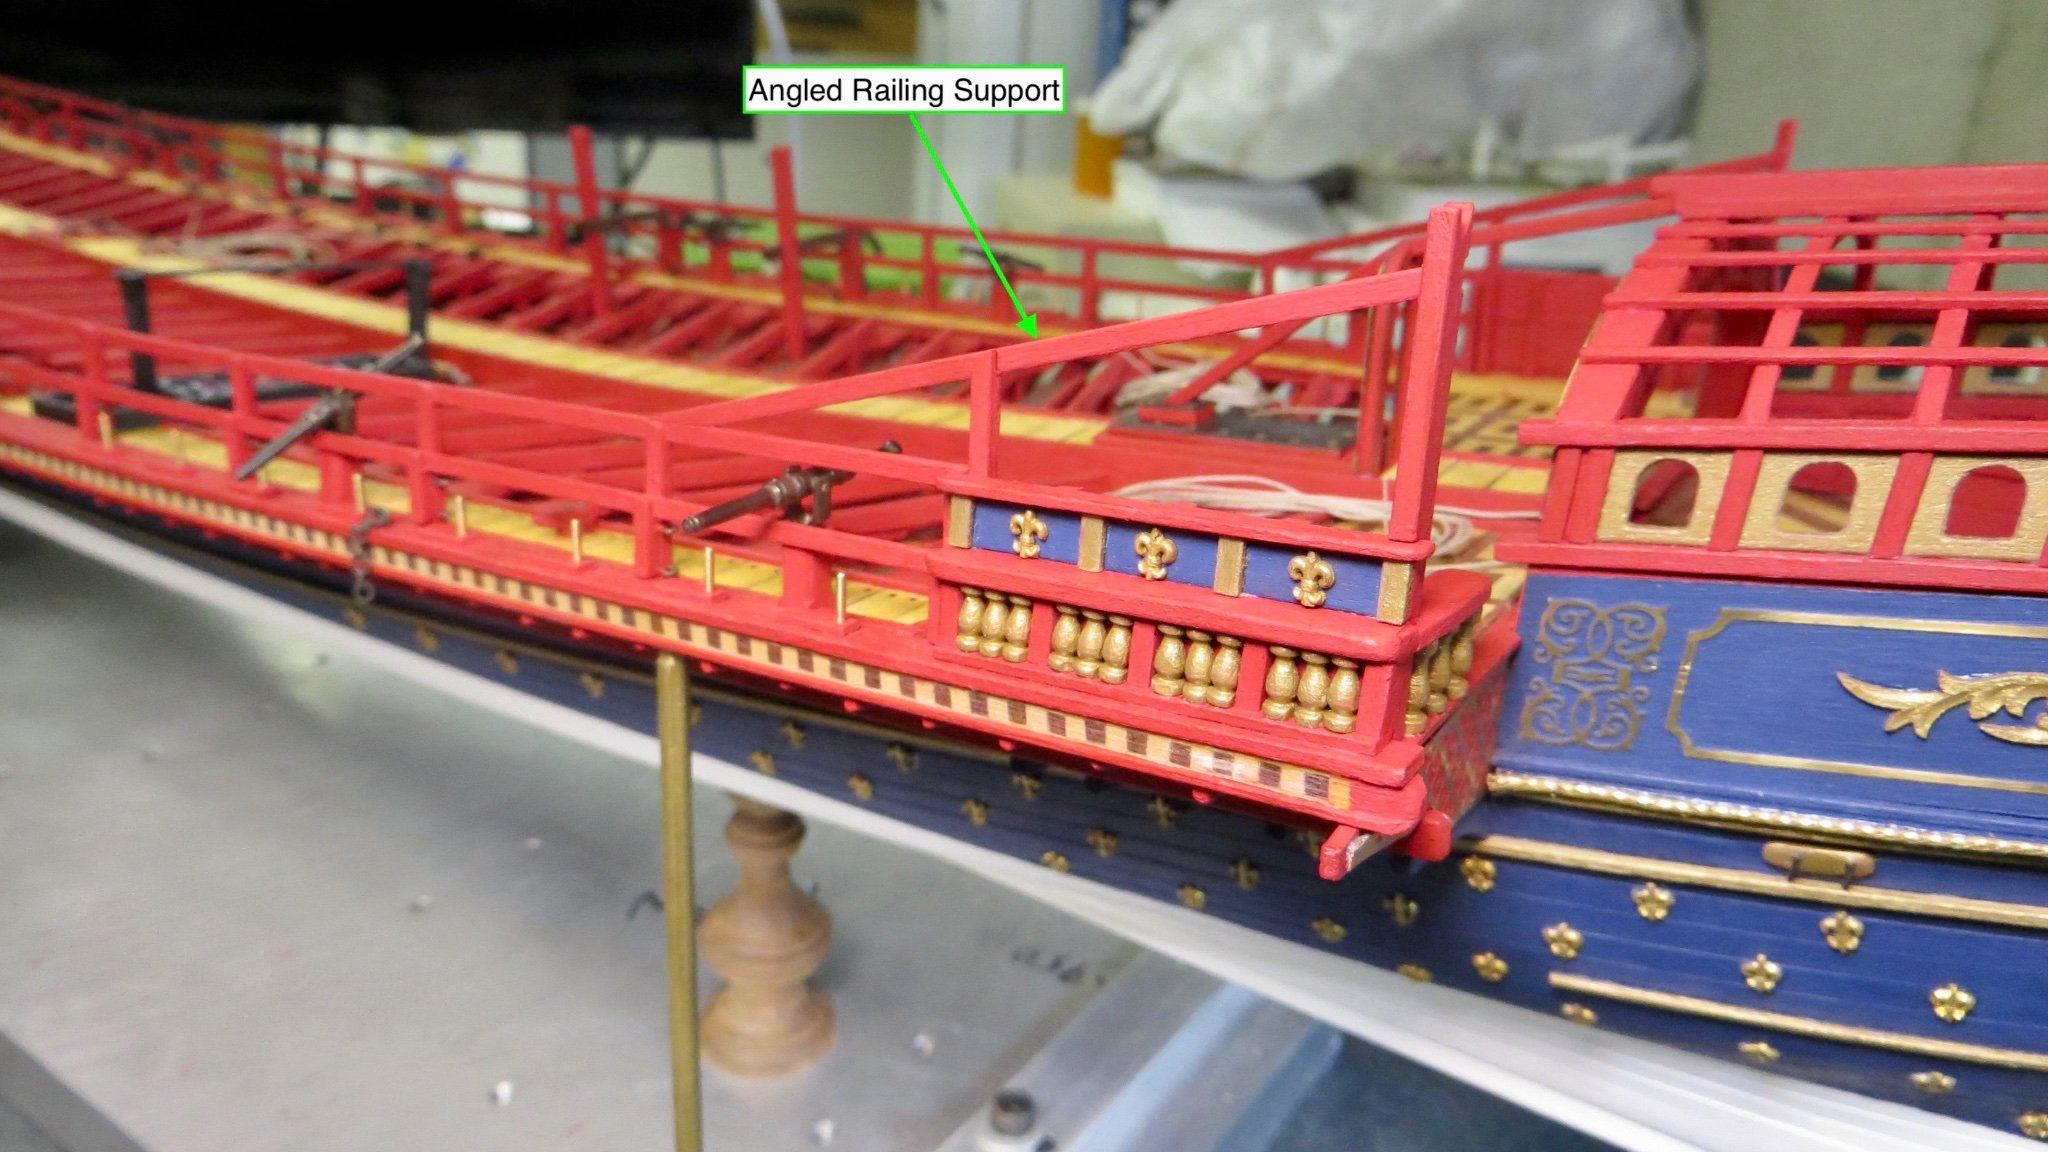
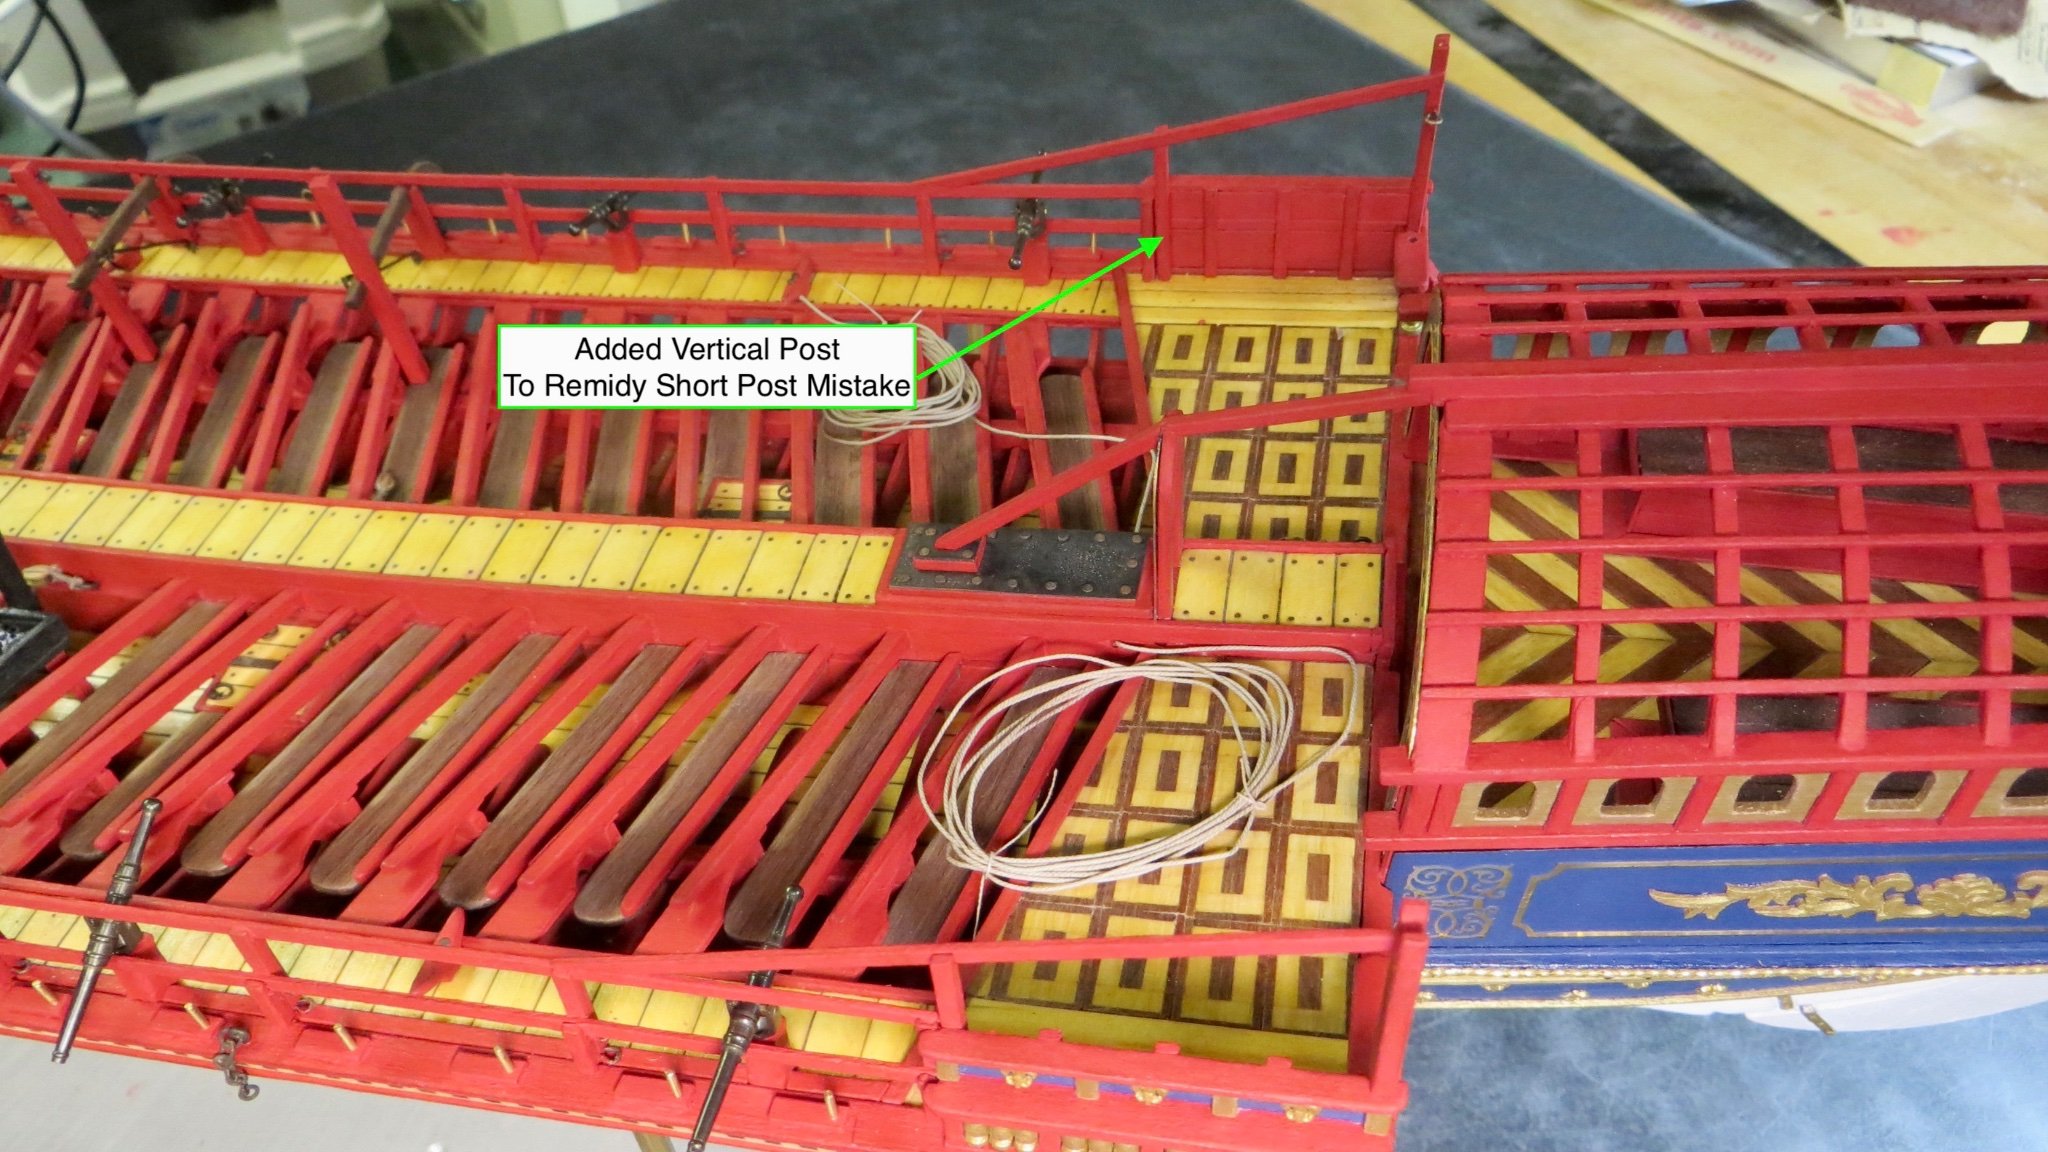
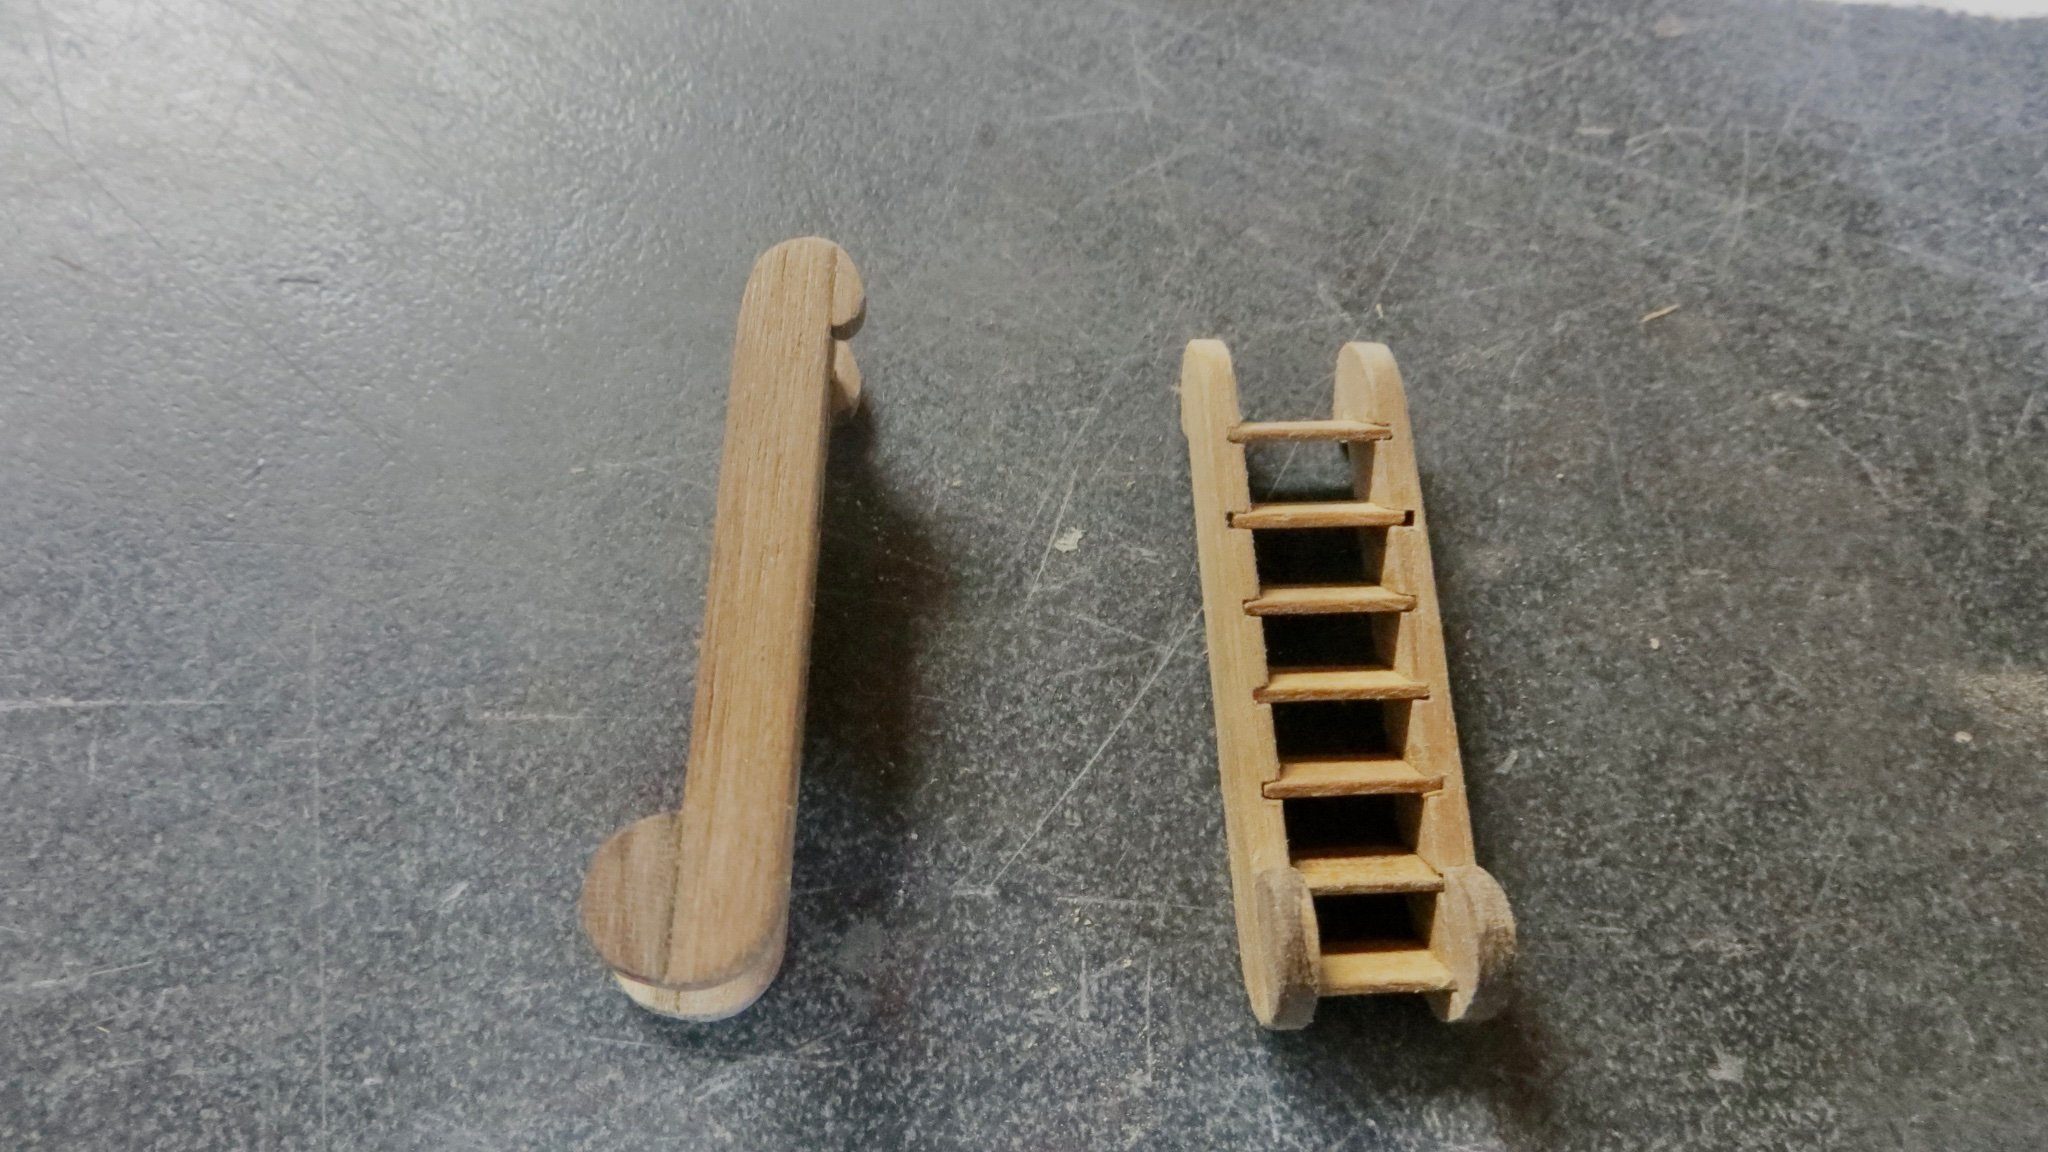
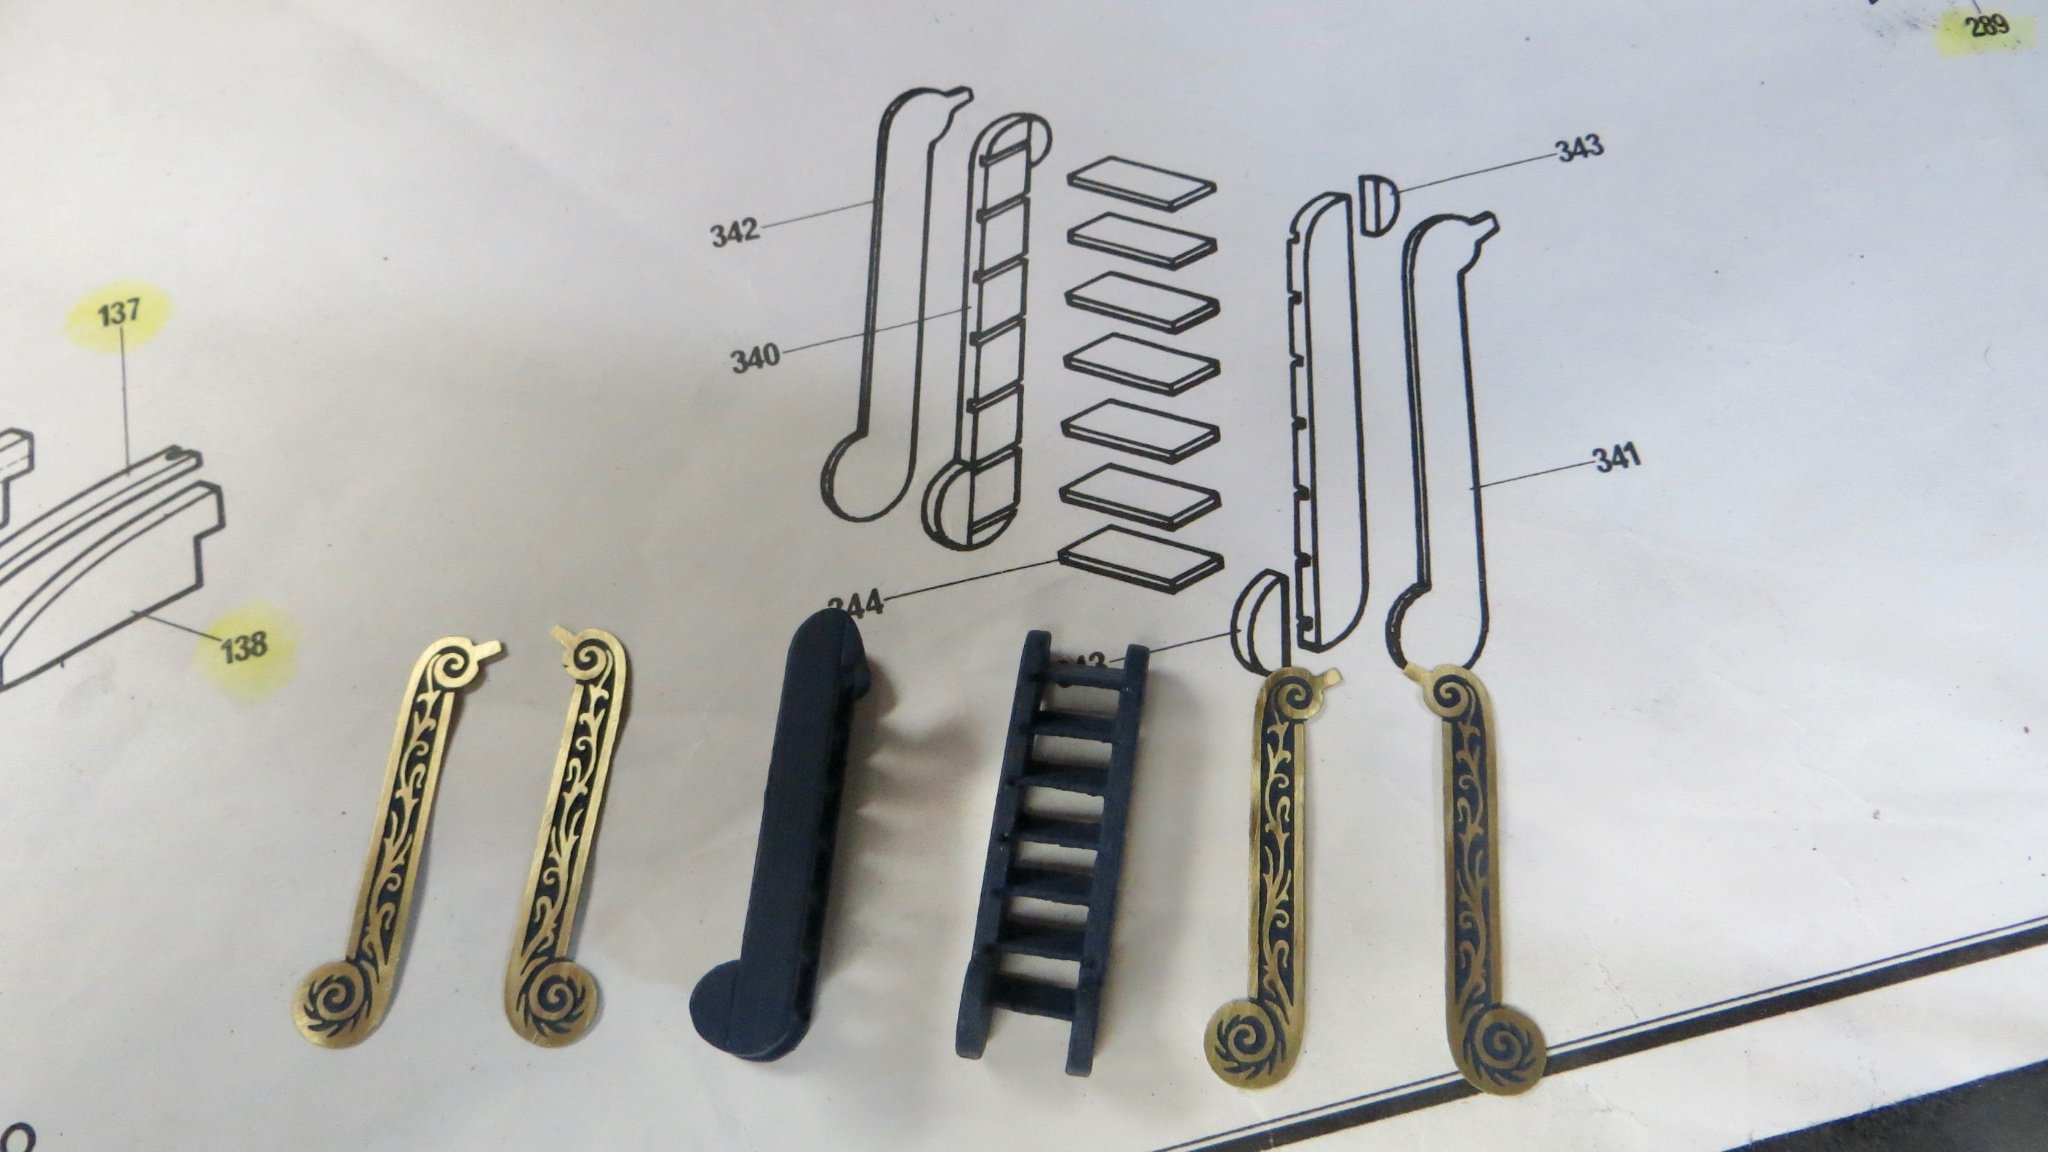
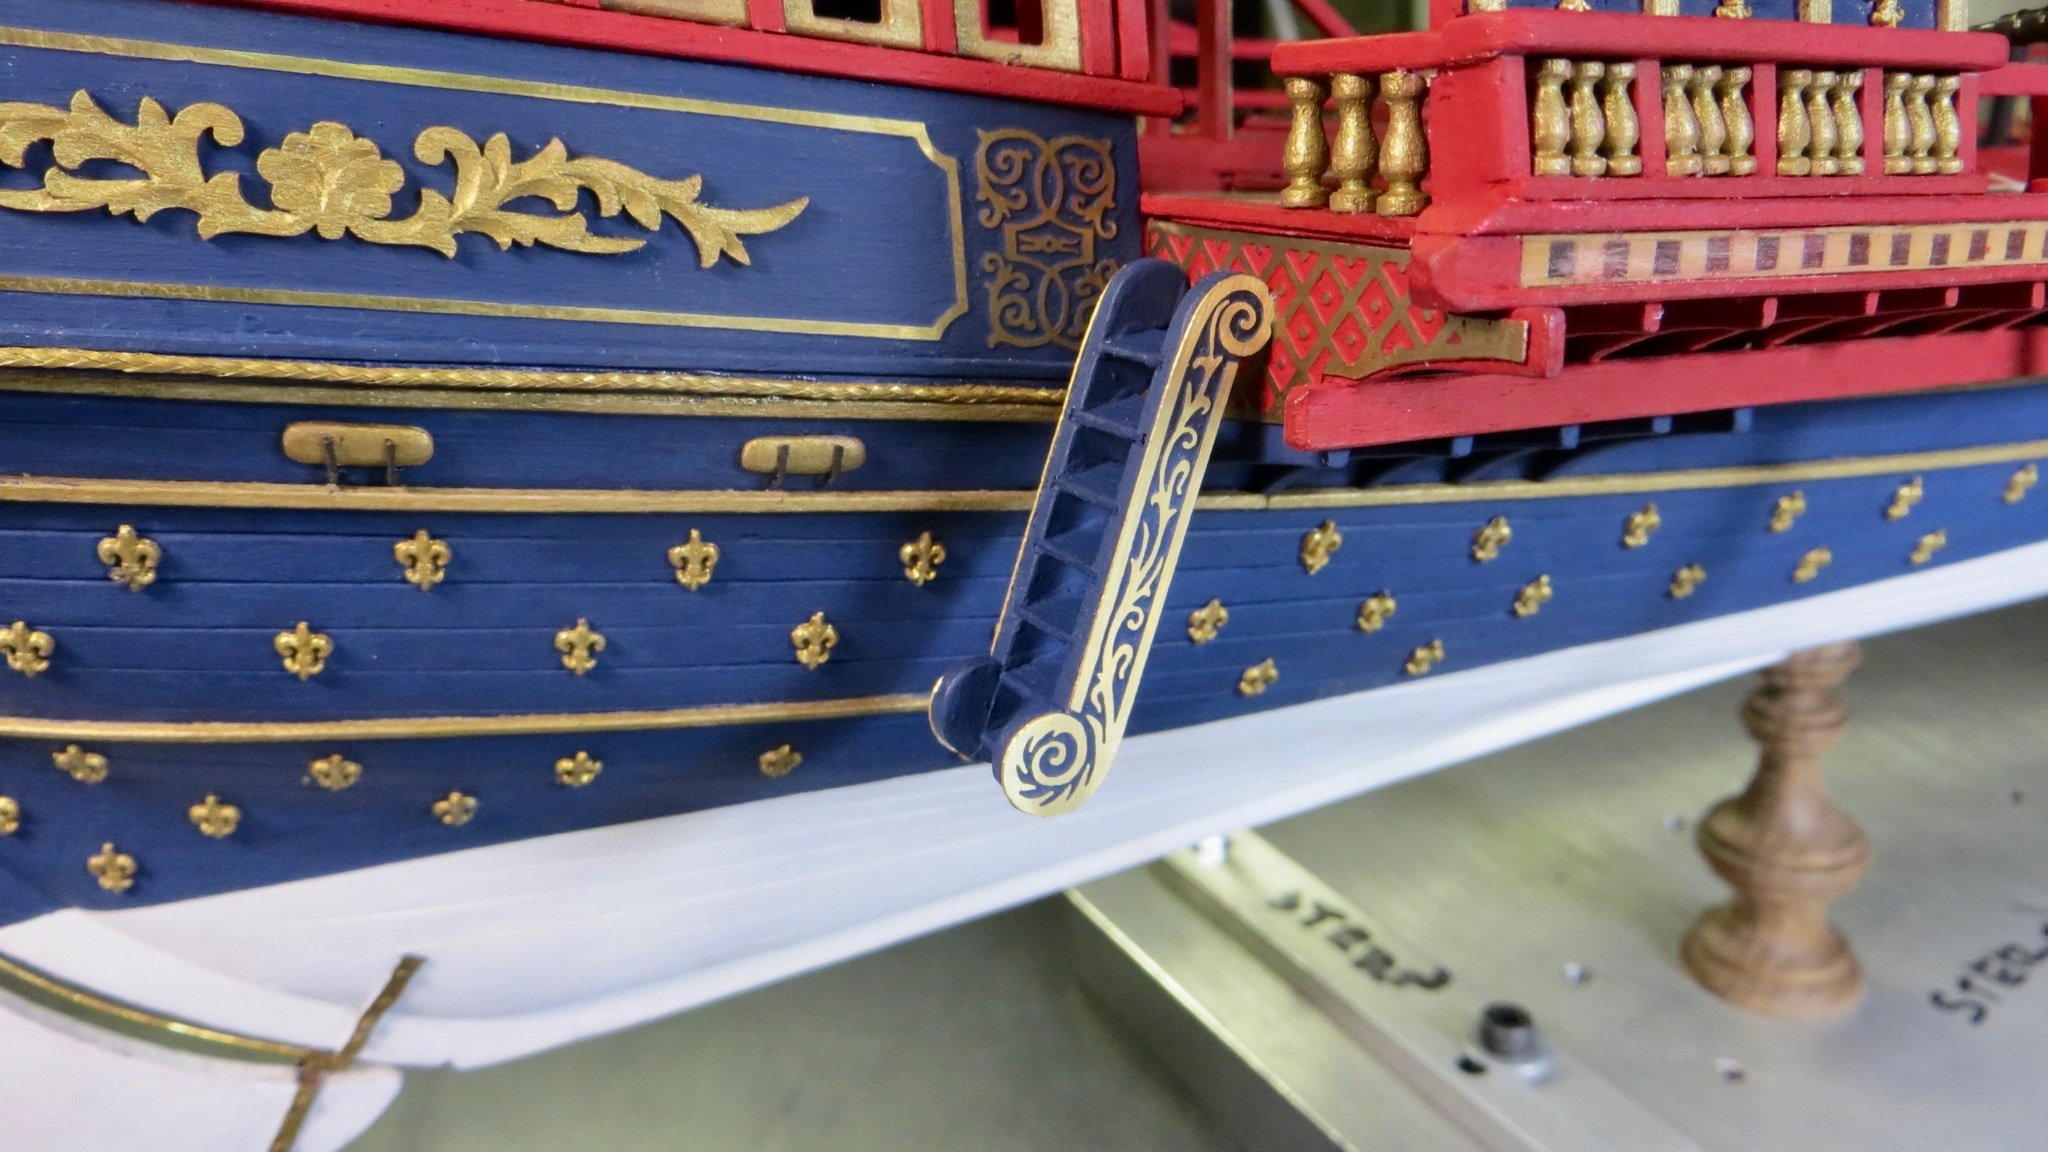
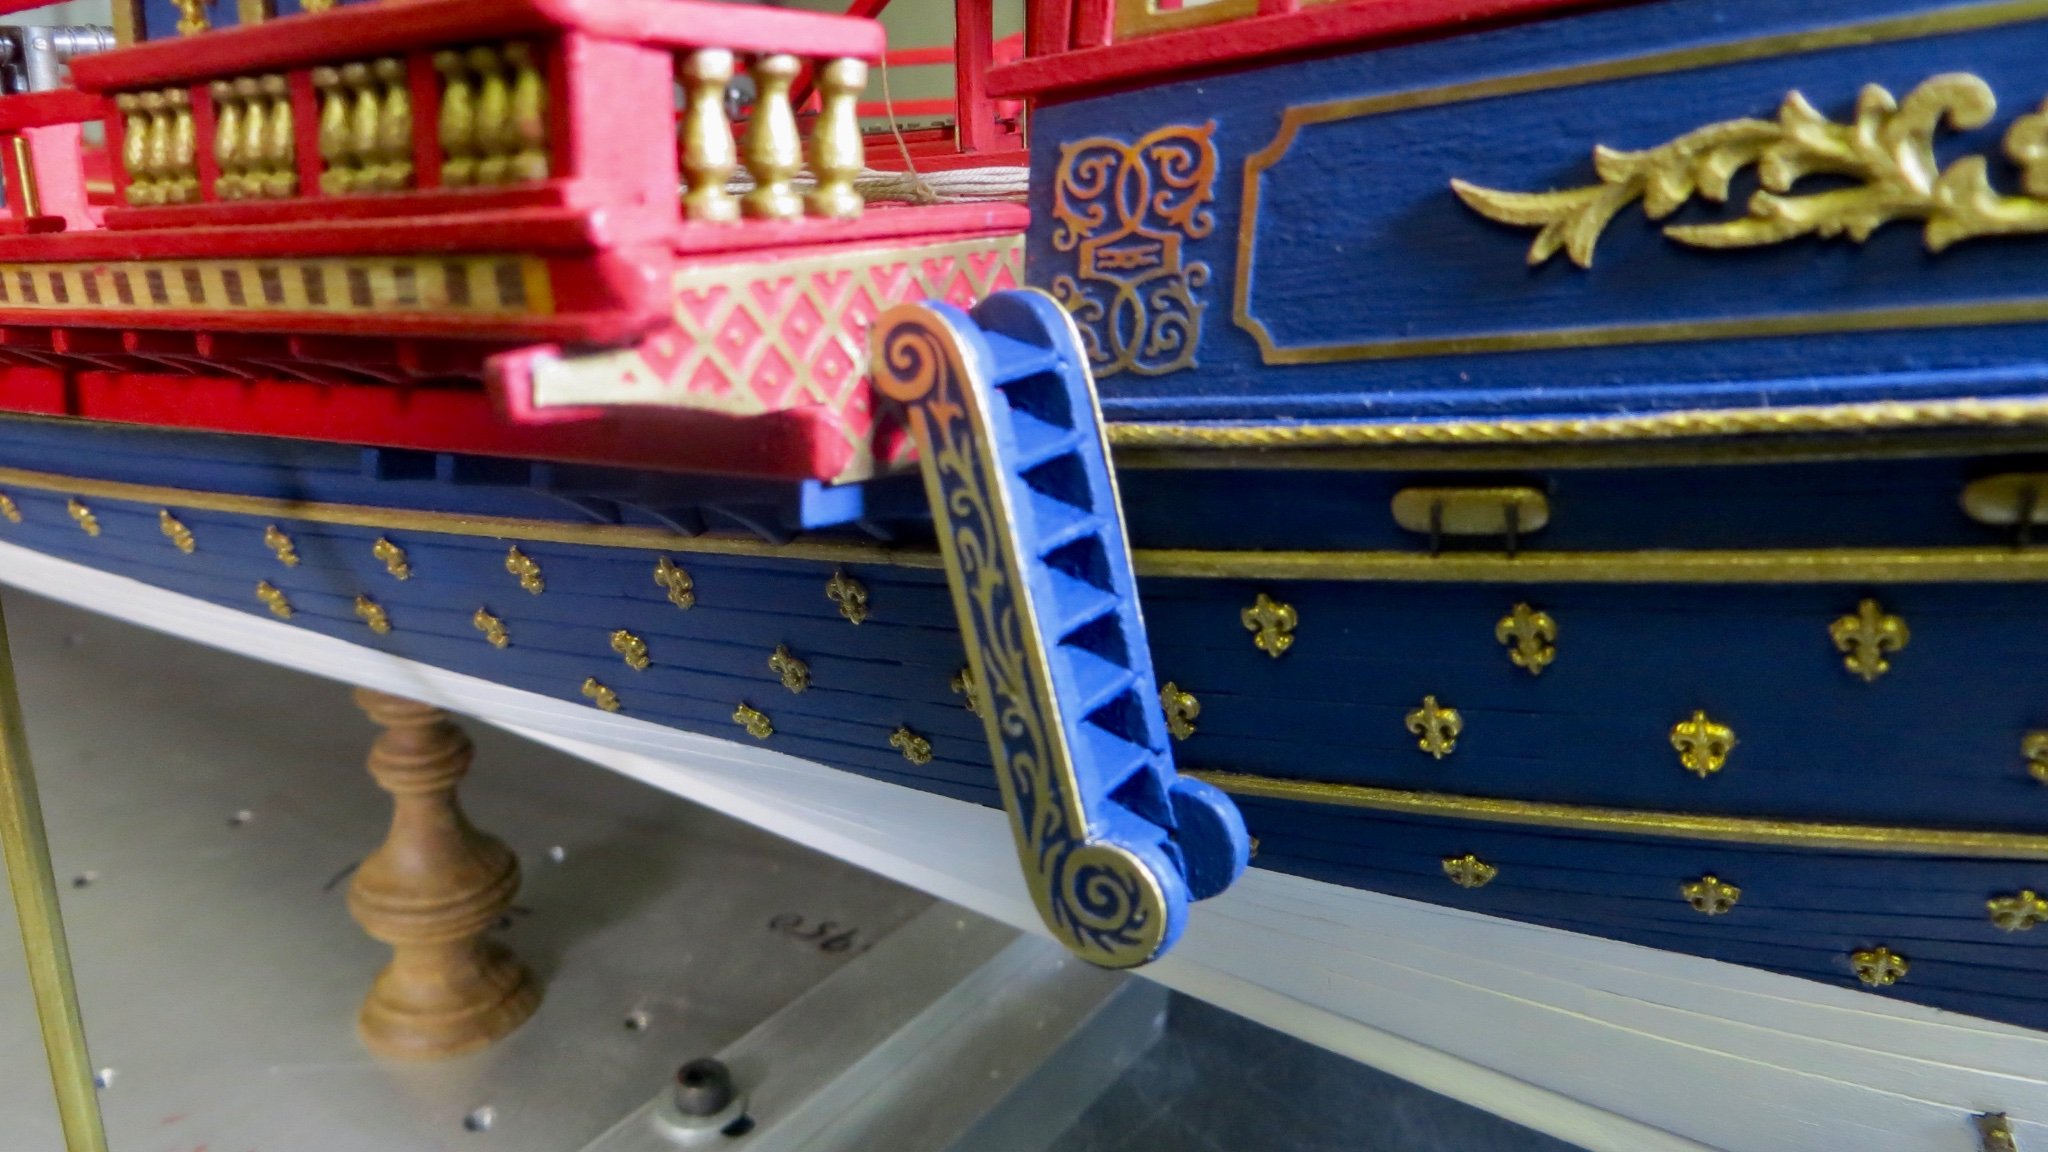
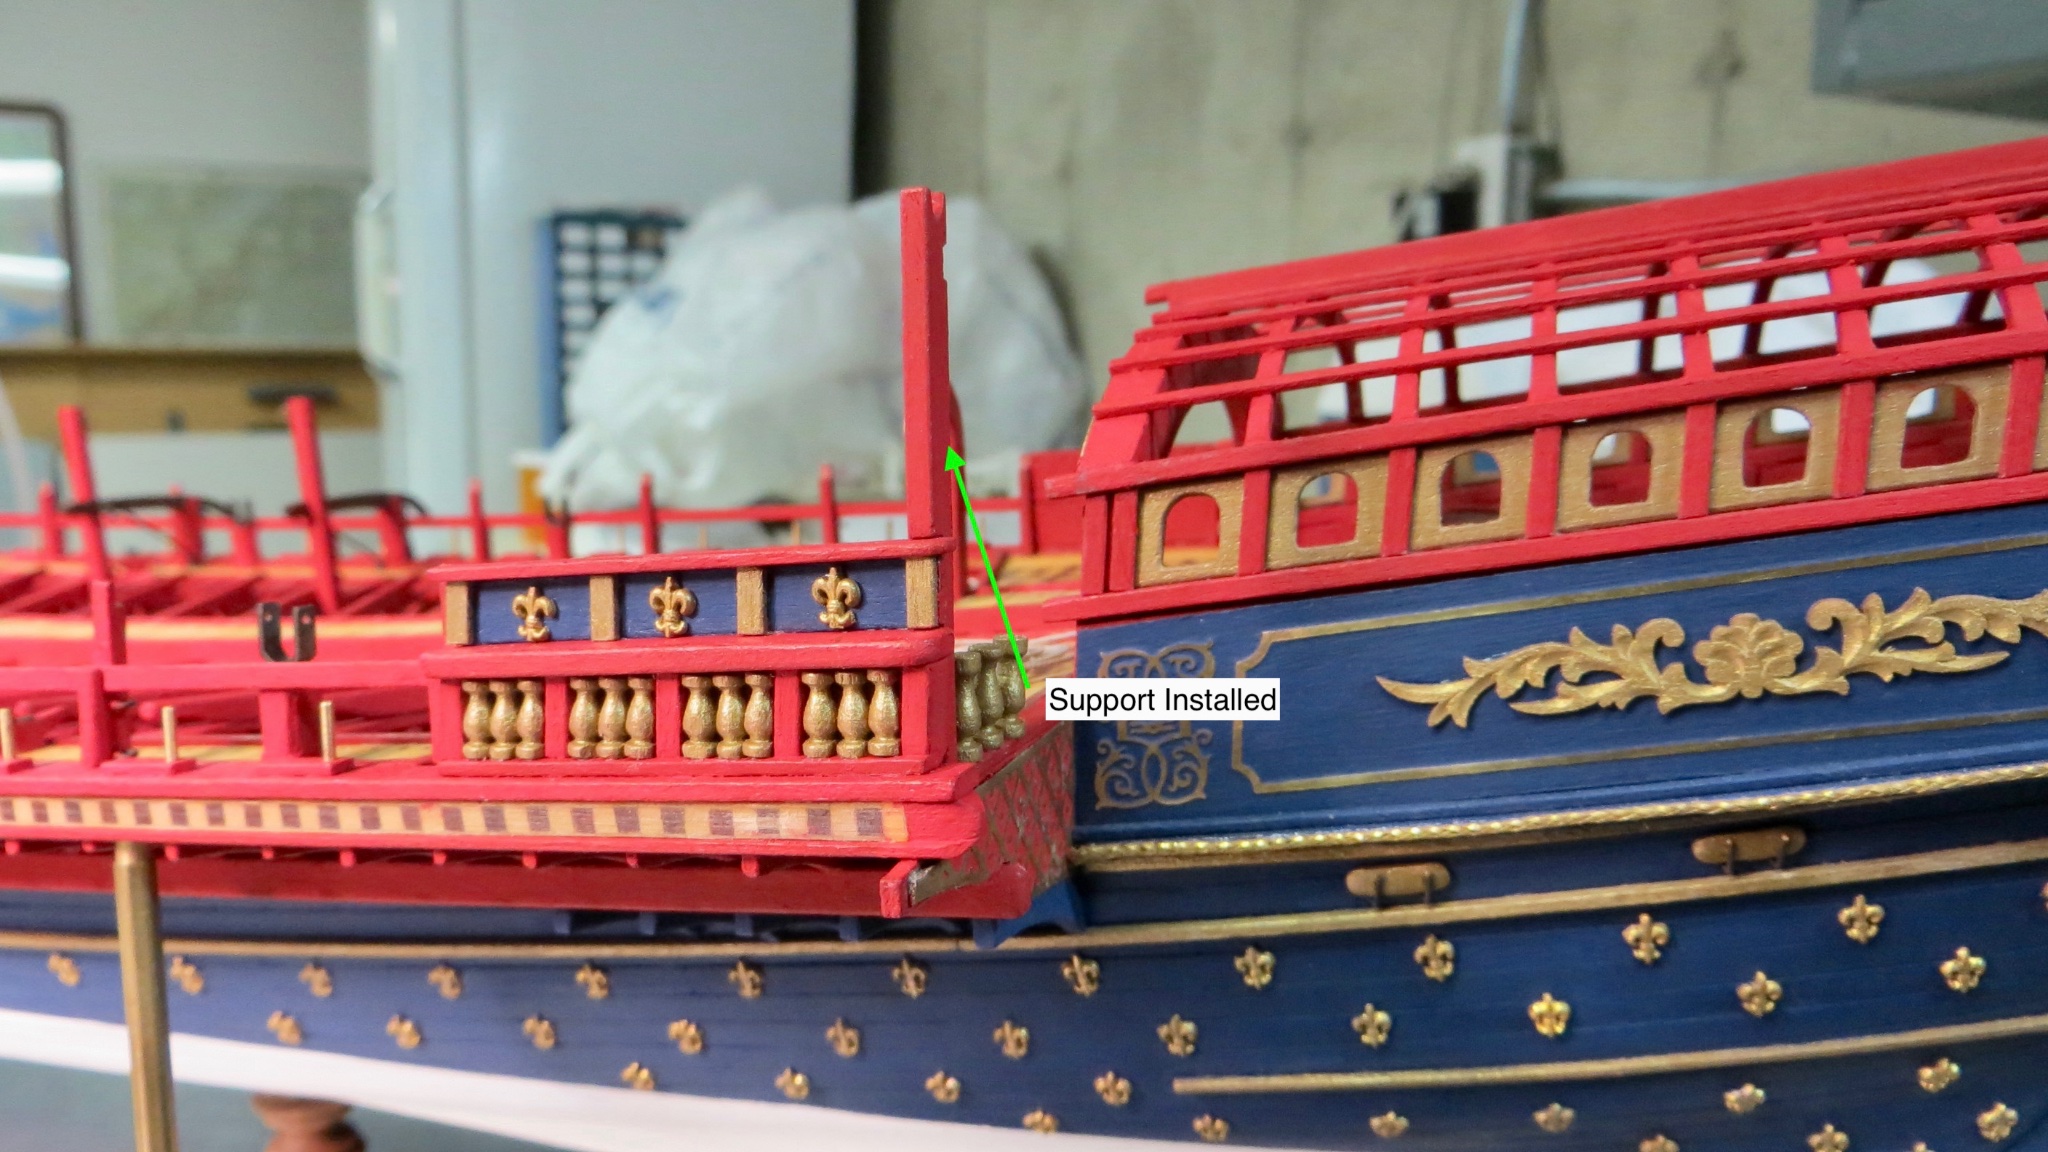
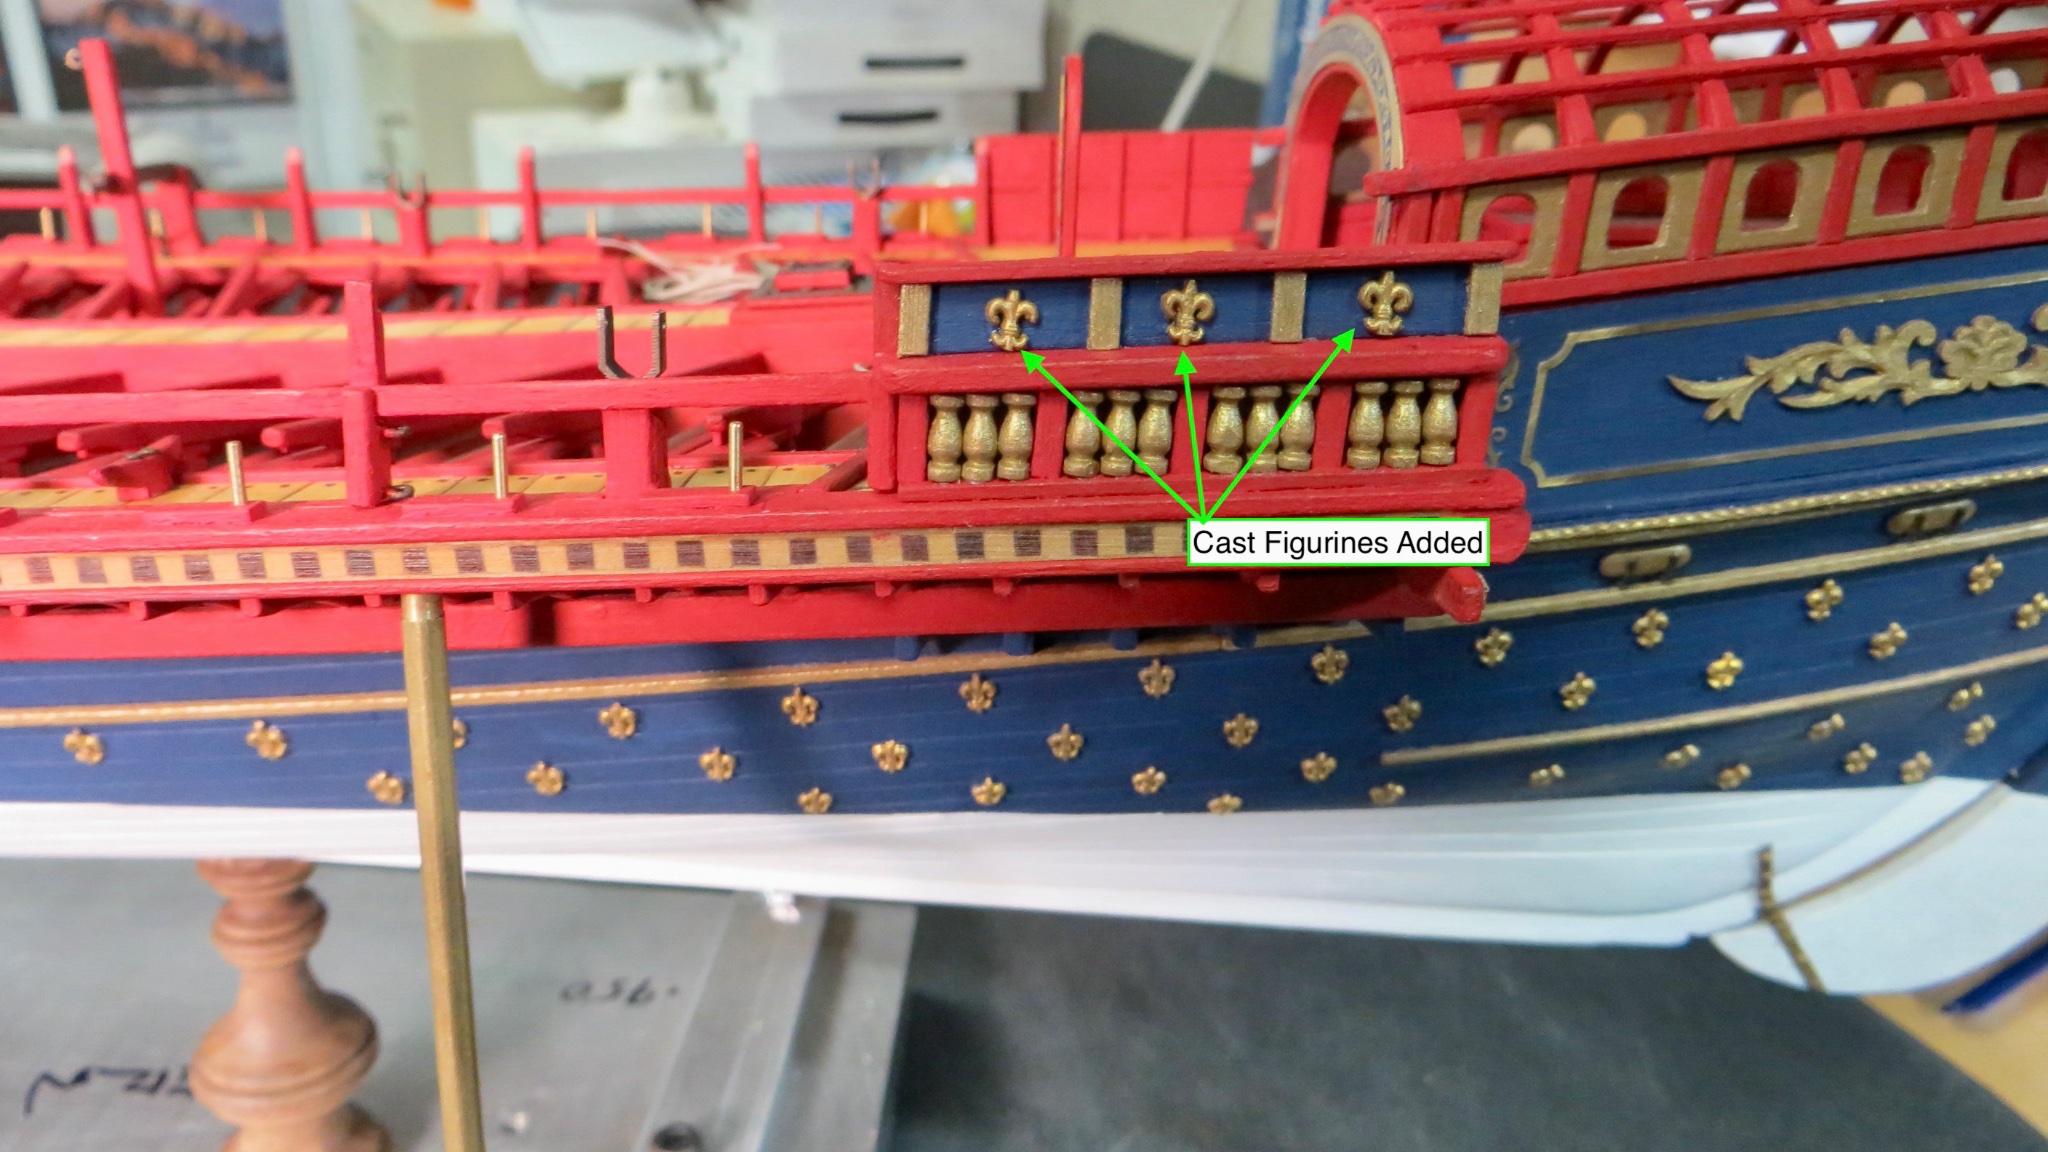
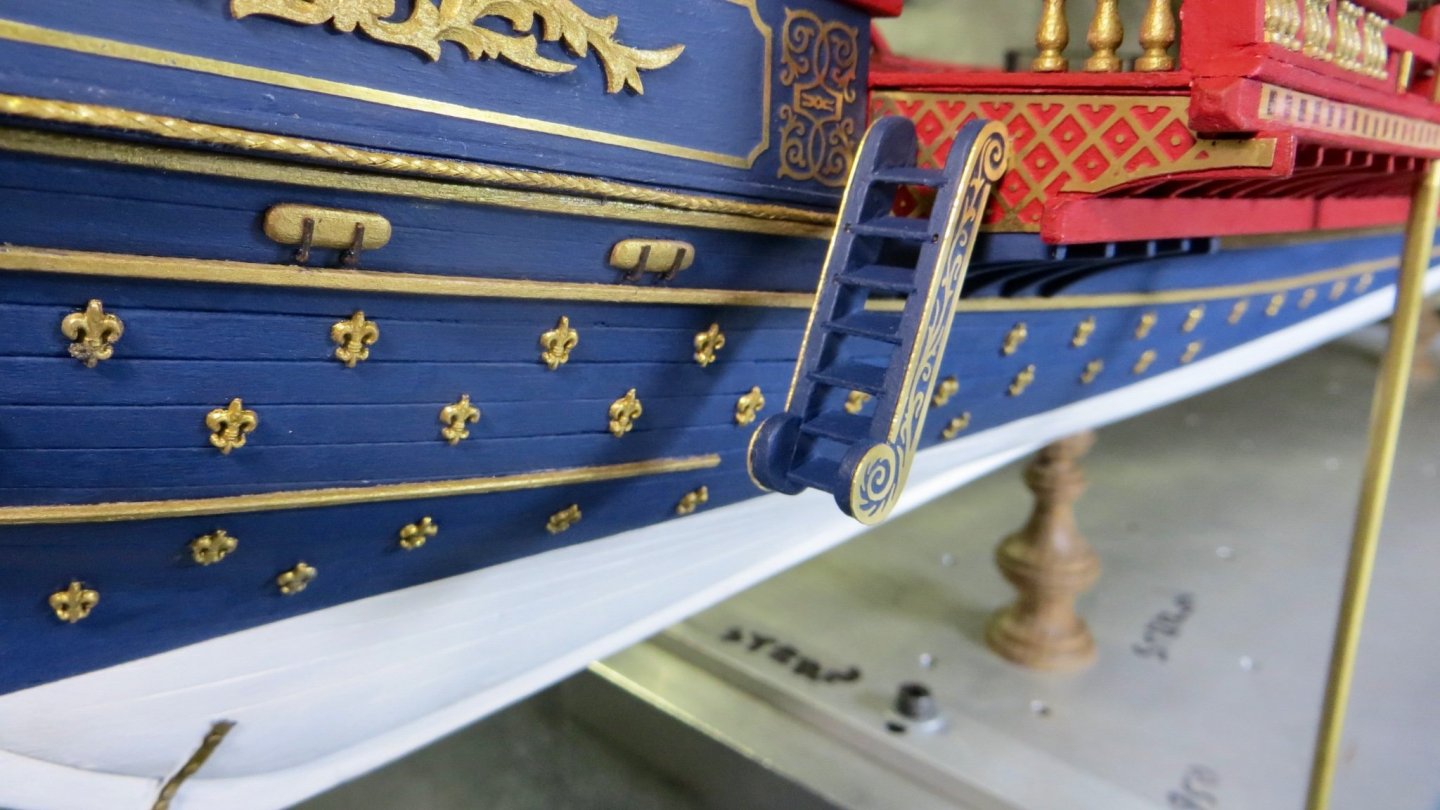
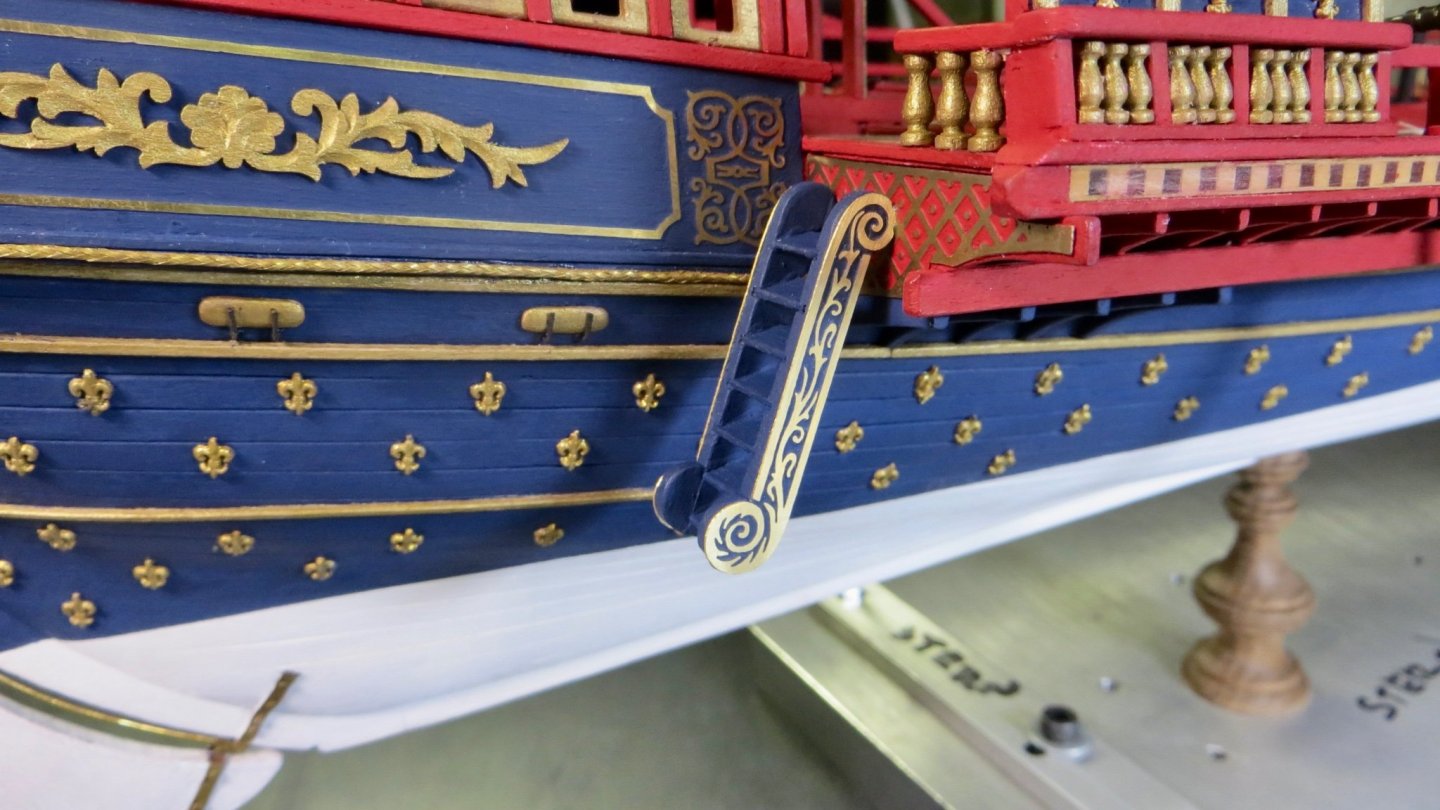
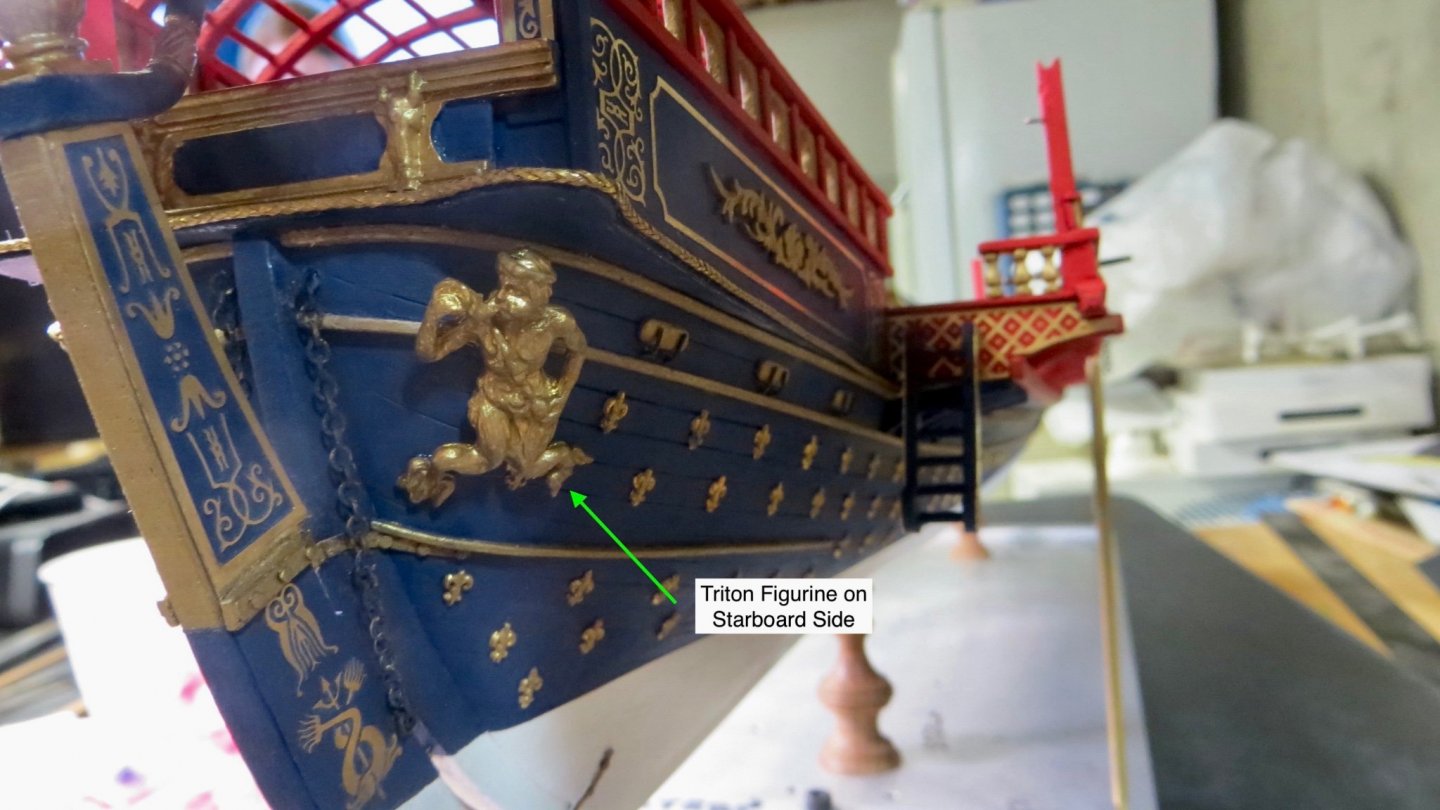
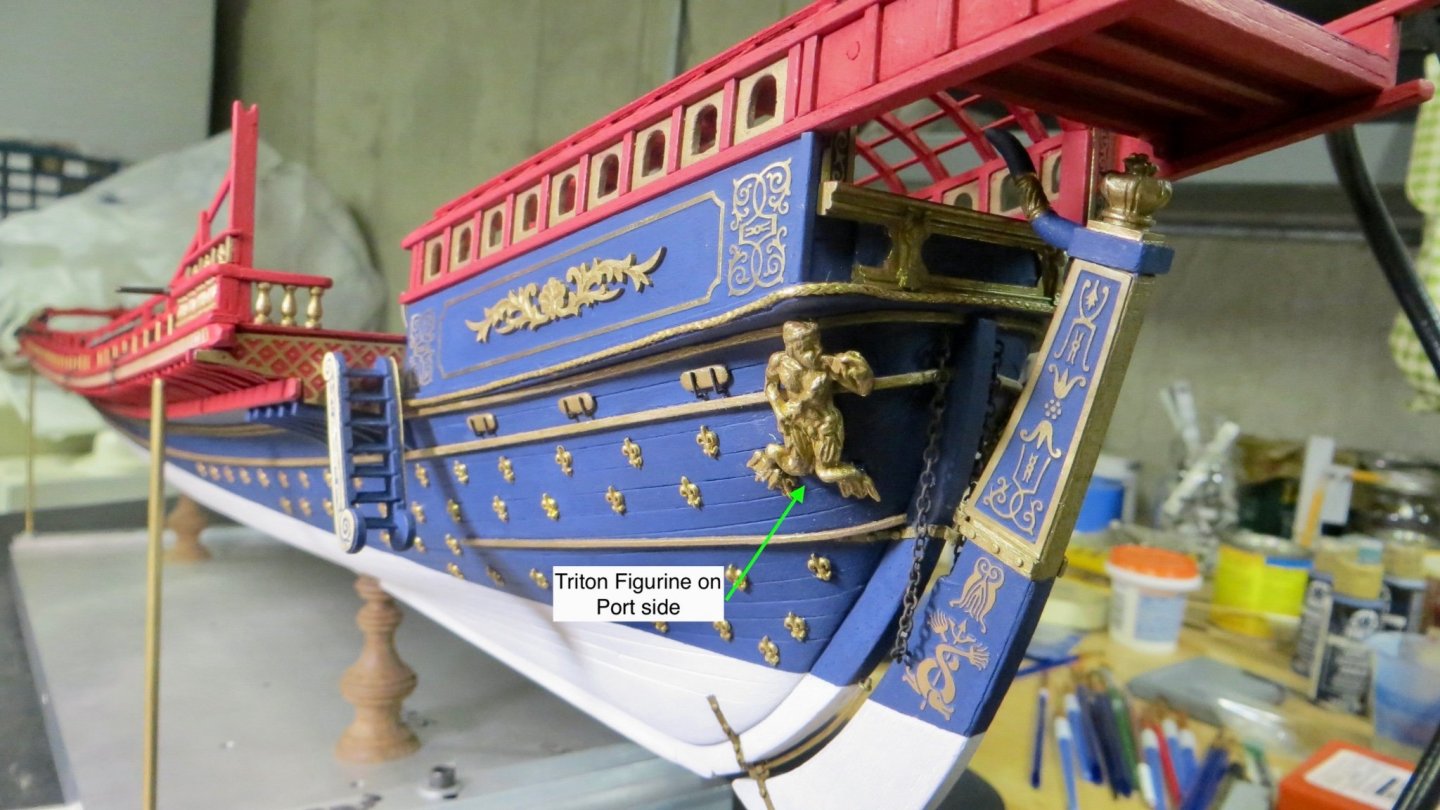
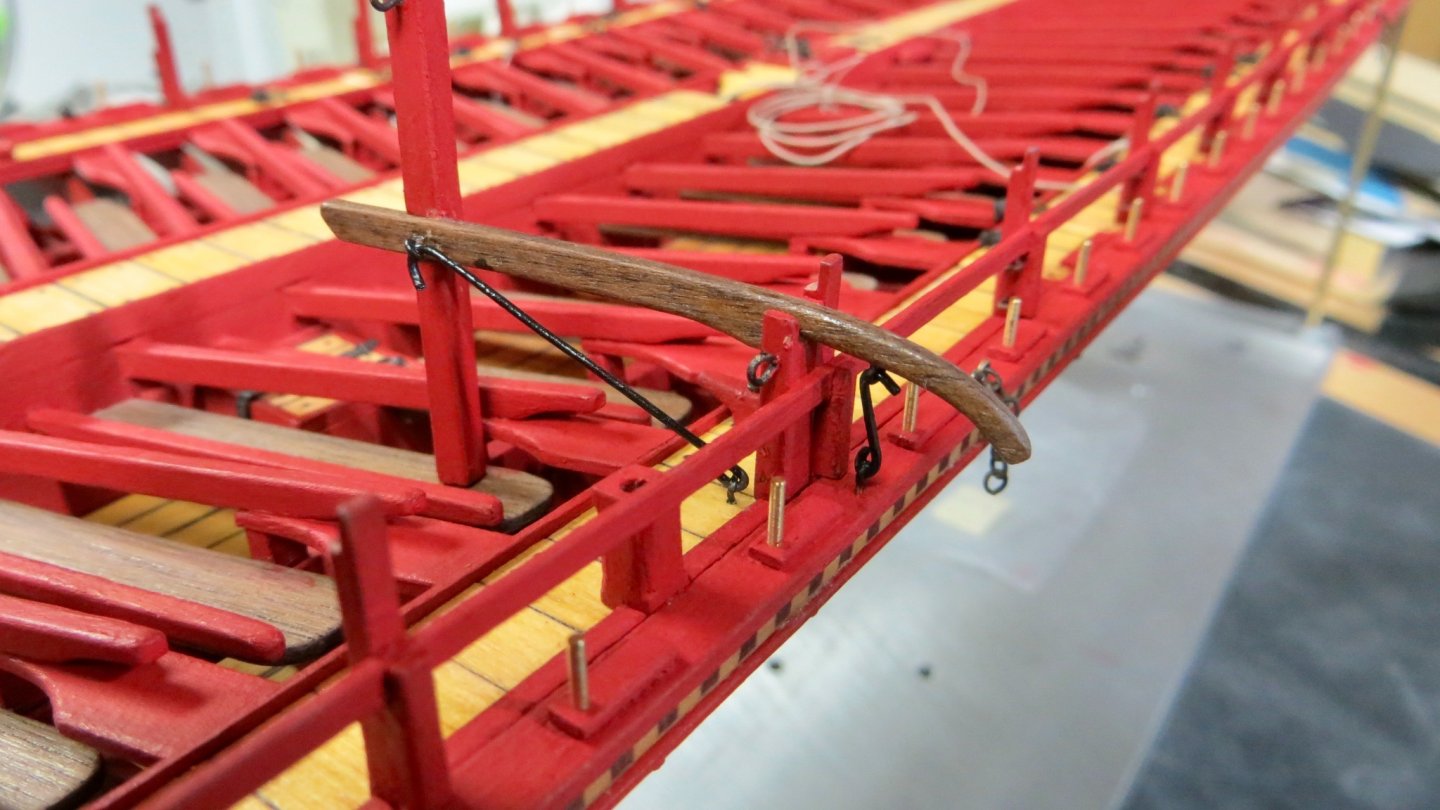
 Hello, I was able to make more progress around the stern area of the model. Added the angled side railing support to each side. (I believe the support is for steadying the post that will support the canopy. As I mentioned on my last post, I made a mistake in not extending the height of the railing post to support the angled beam. As a remedy, I added a new post right next to the railing post that was supposed to be taller. This seemed to me to be the better solution than risking destroying the railing system by trying to remove the shorter post. Following the Corel plans, I made up the boarding ladders that will be attached to the stern yoke on each side. Ladders Painted blue and painted the brass trim using the same technique taught to me in earlier posts. Assembled ladders ready for install. The only thing making the build of these ladders a pain was making sure the width of the stairs, with the brass decor added, was exactly the width of the slots in the stern yoke. The little tabs on the decorative side pieces had to fit not these tiny slots. Ladders installed onto the stern yoke slots. Decorative Triton figurines were painted with the same gold paint used throughout the model and then added to the lower stern area. View on Port side. As a side note, I've broken off the lower end of the rudder pintles a couple of times already. I should have waited longer on the rudder install!! Thanks for stopping for a look! Frank


- 510 replies
-
- 10
-

-
- reale de france
- corel
- (and 1 more)
-
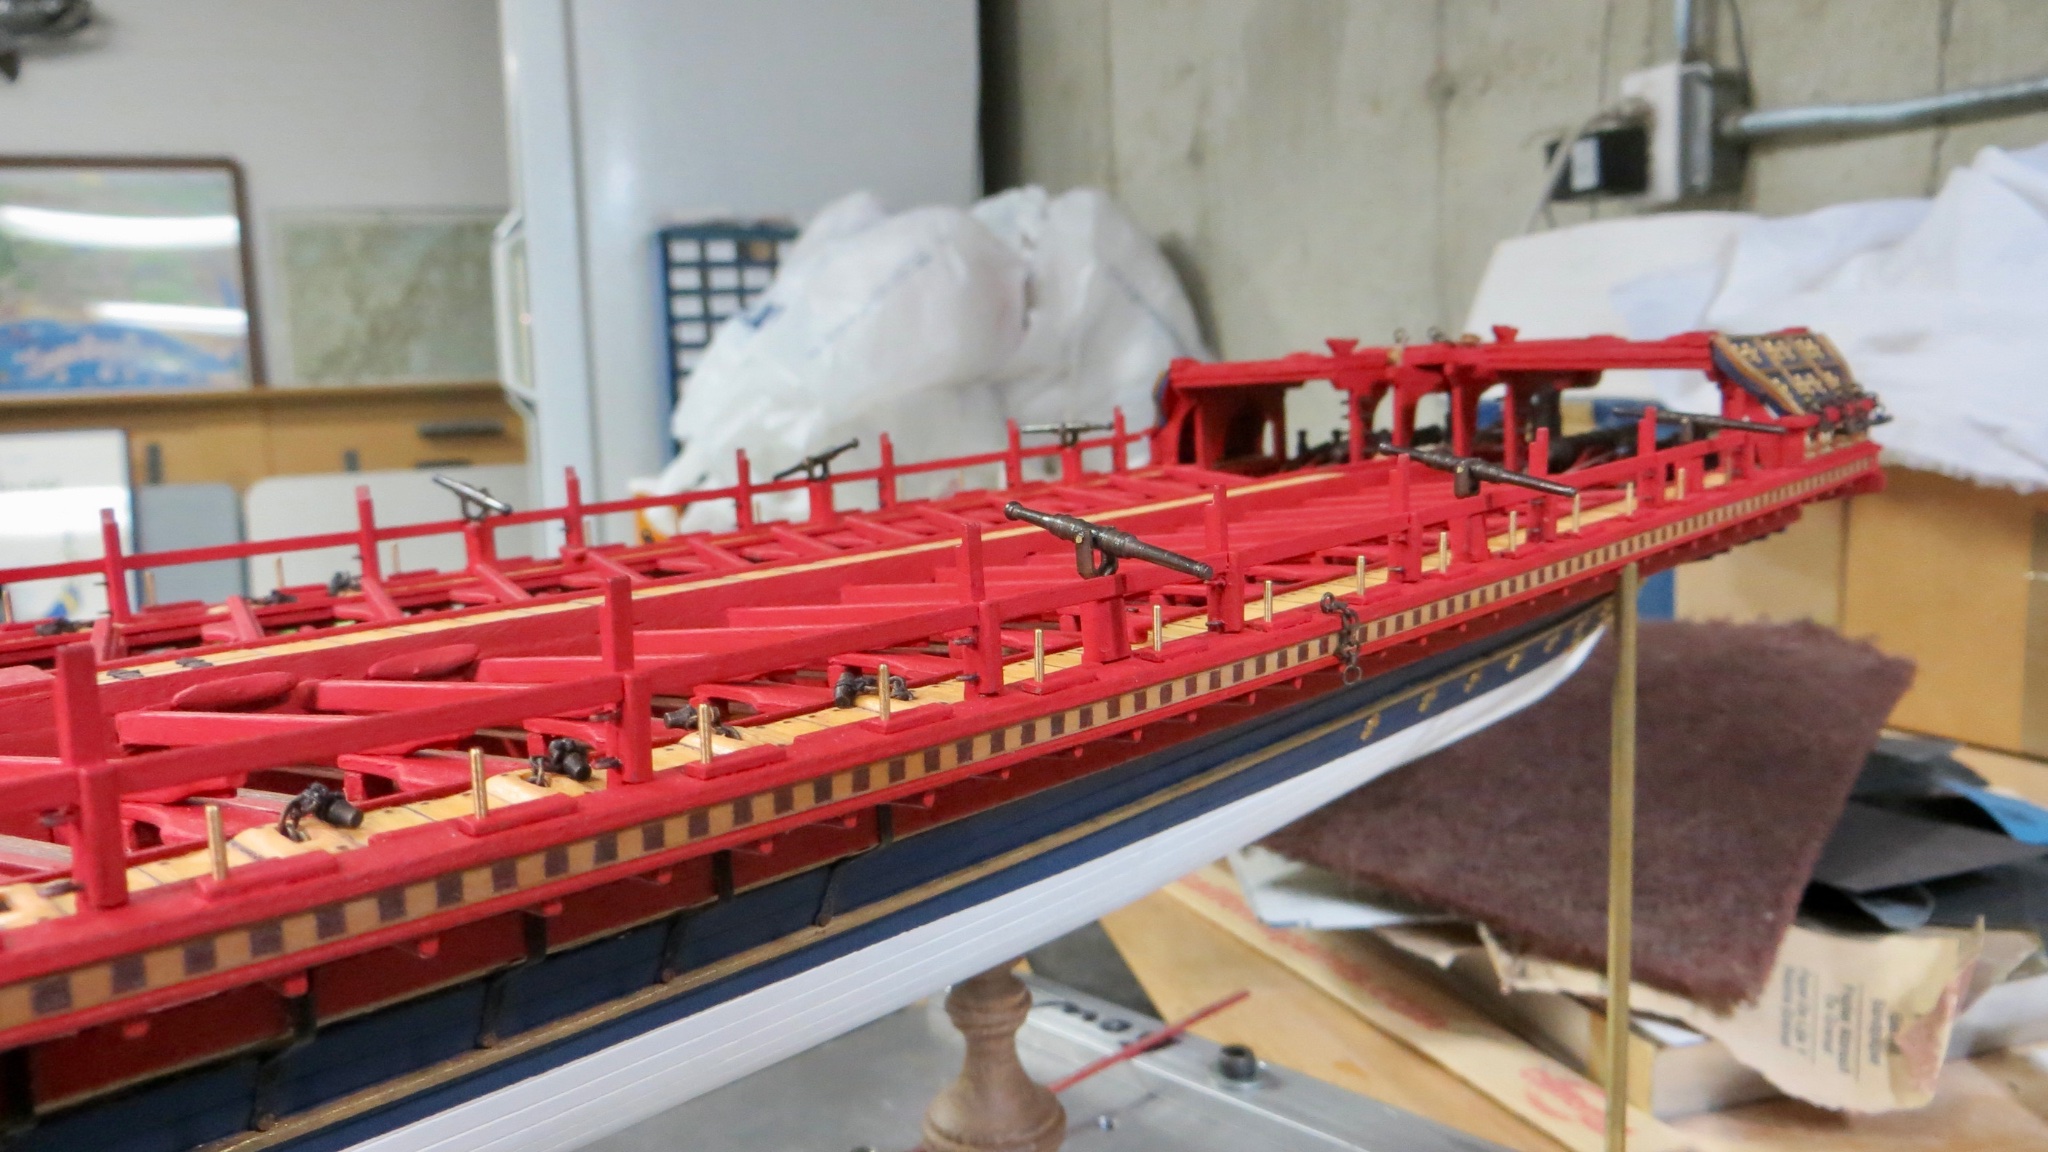
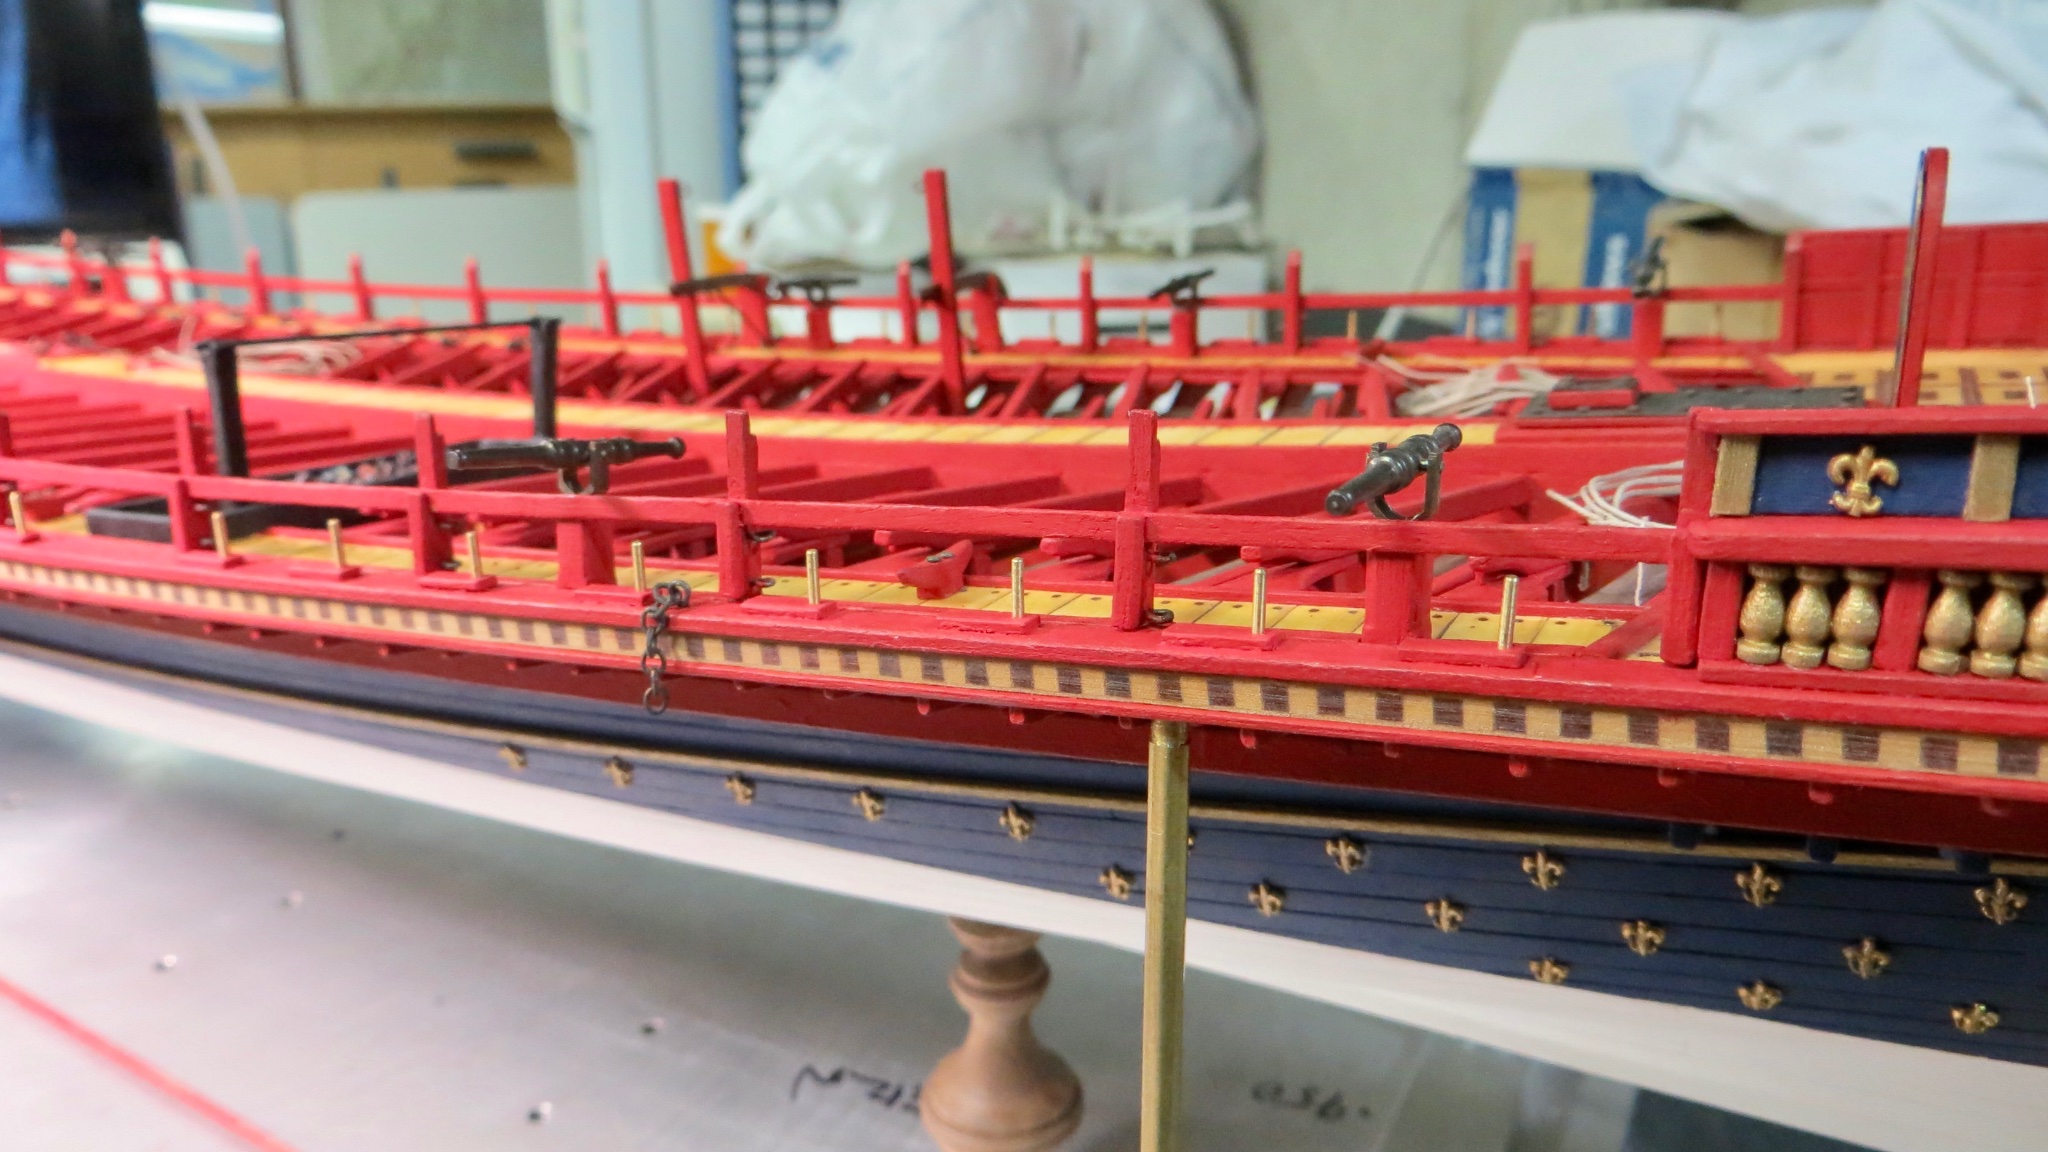
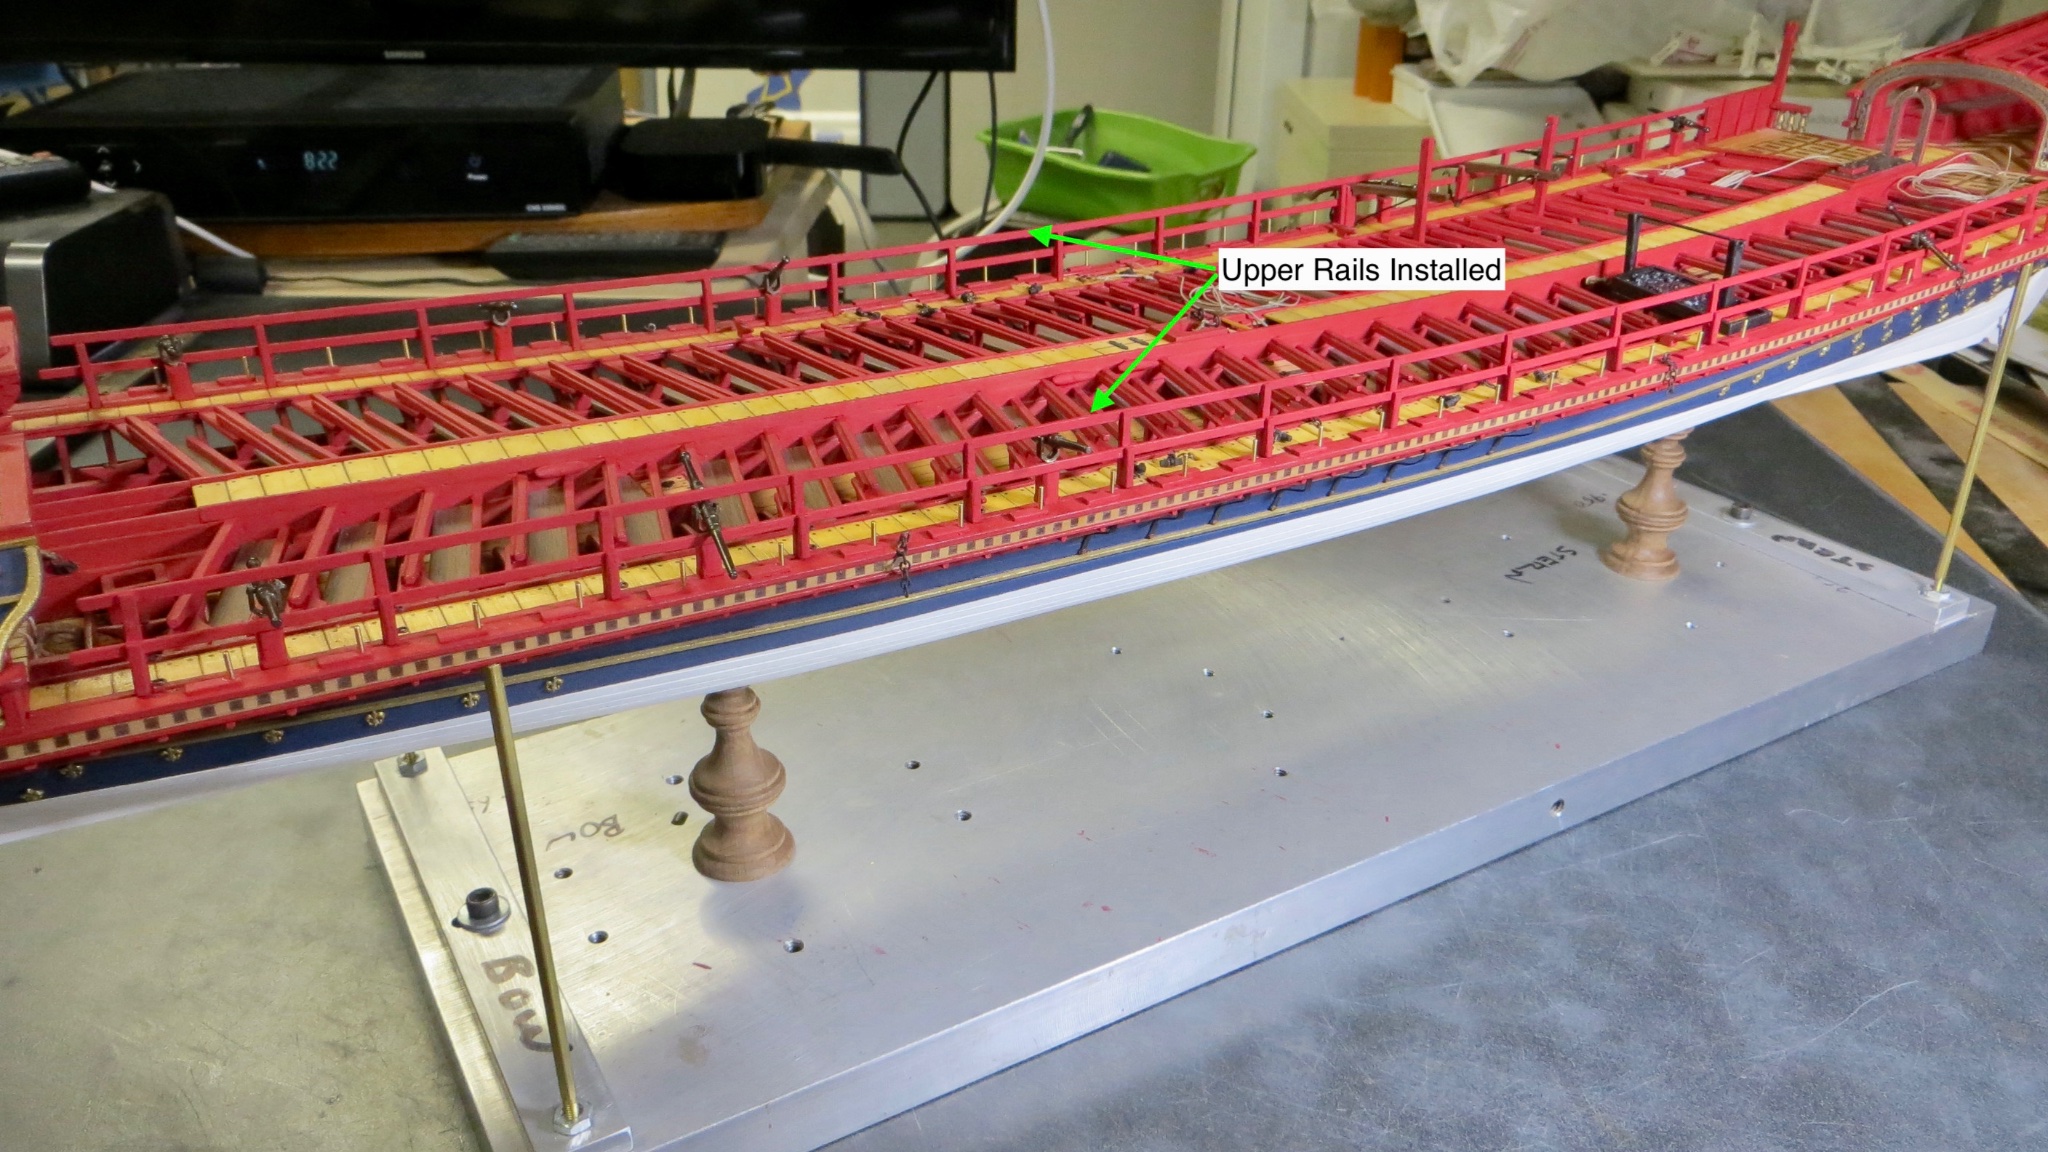
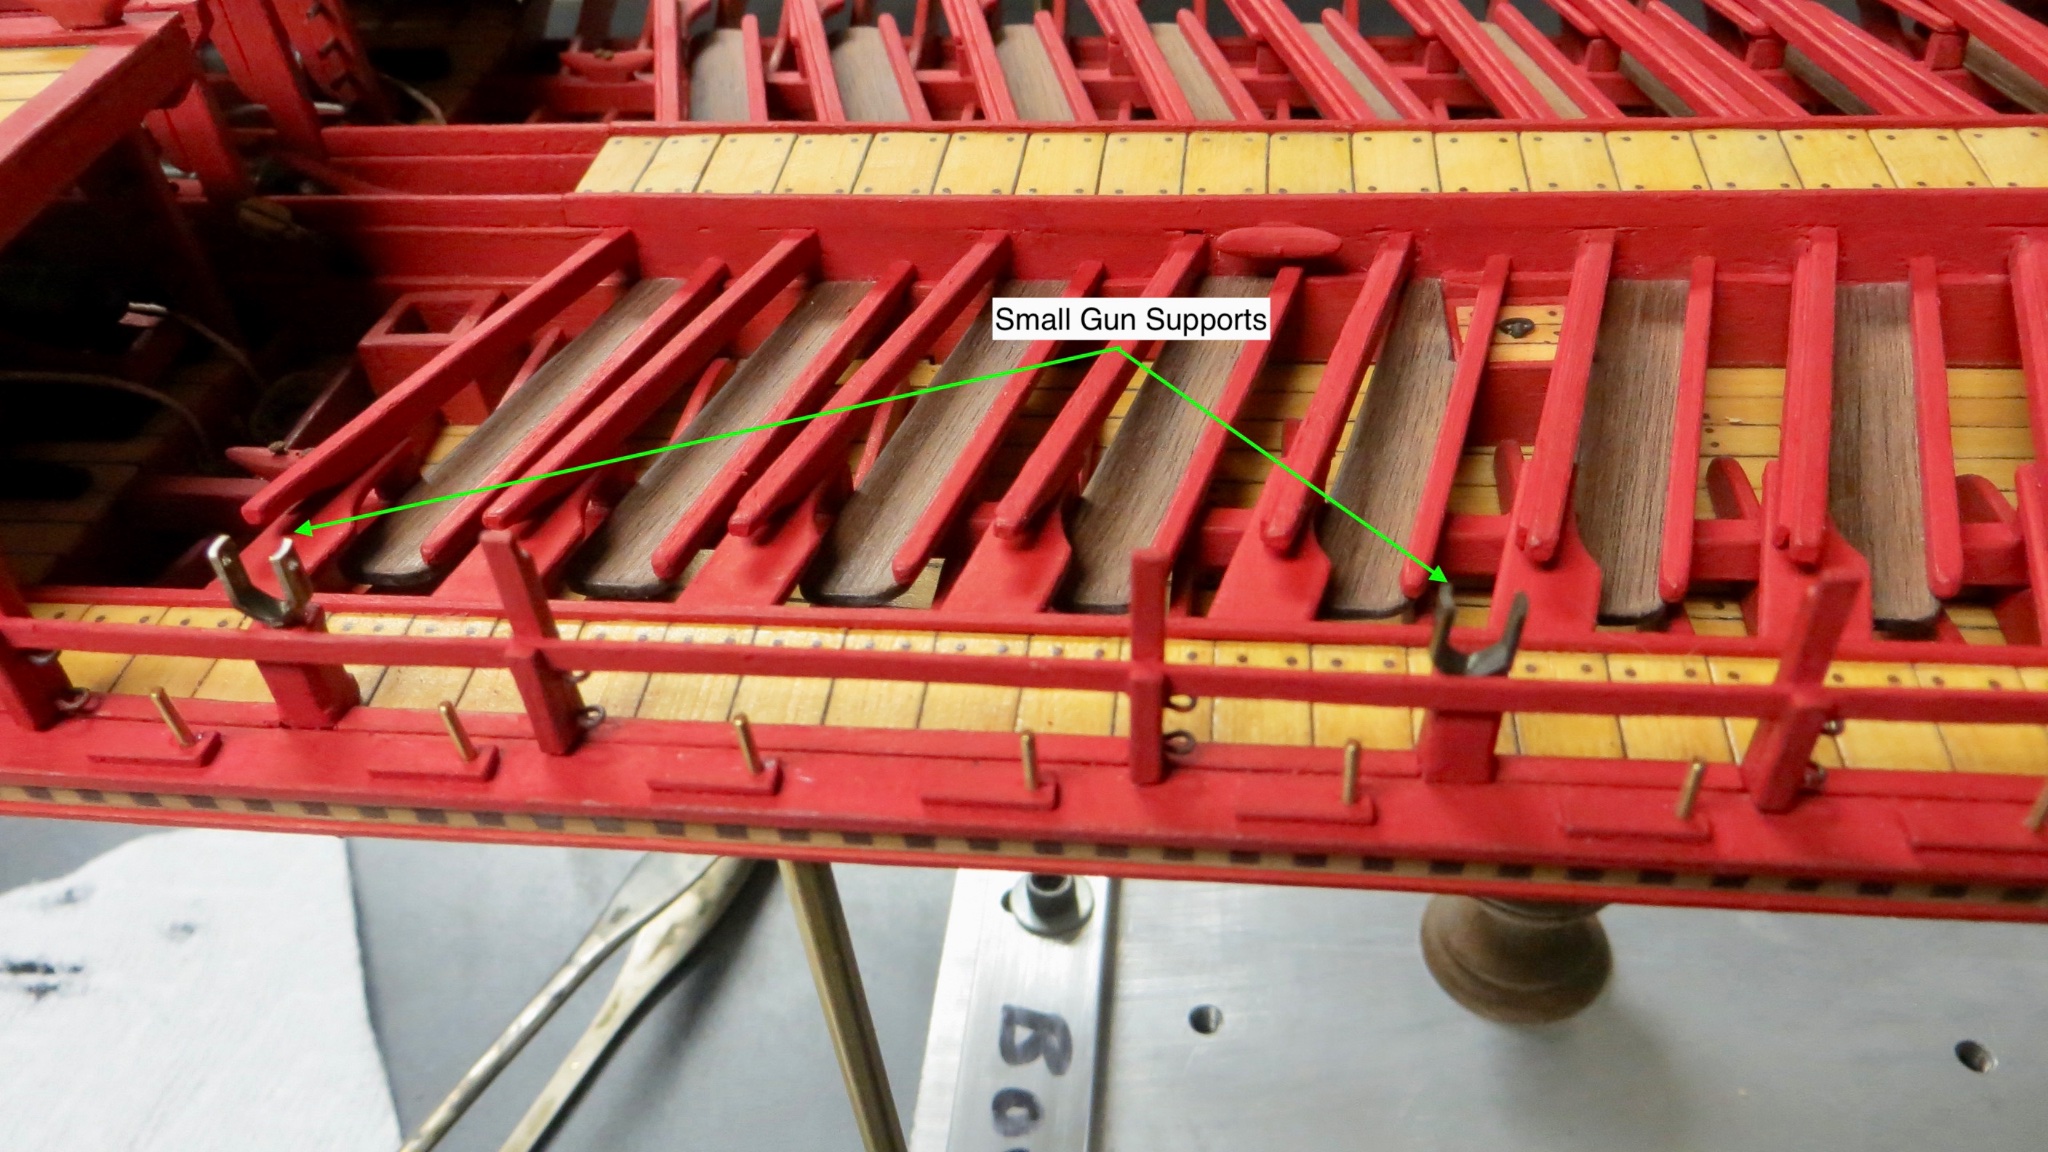
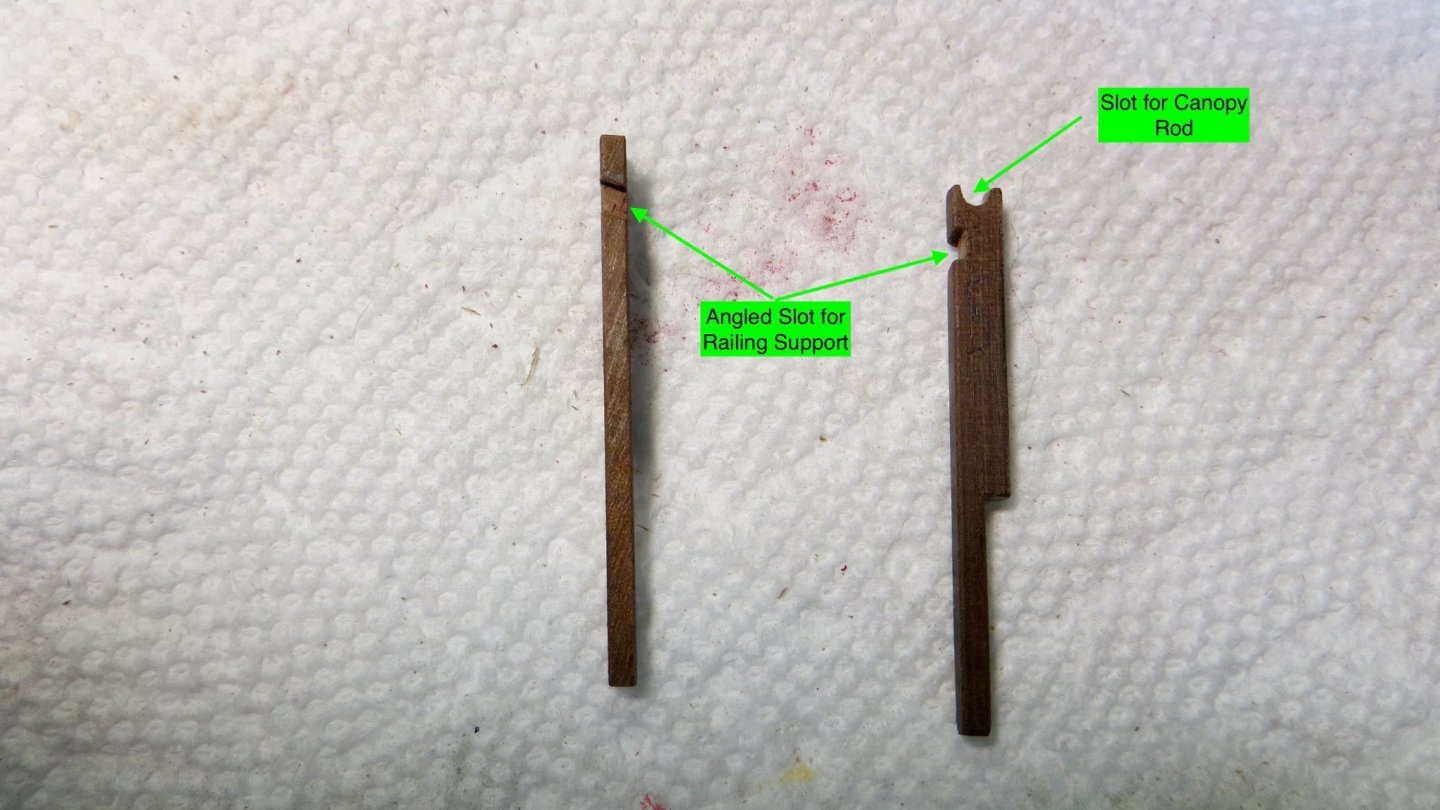
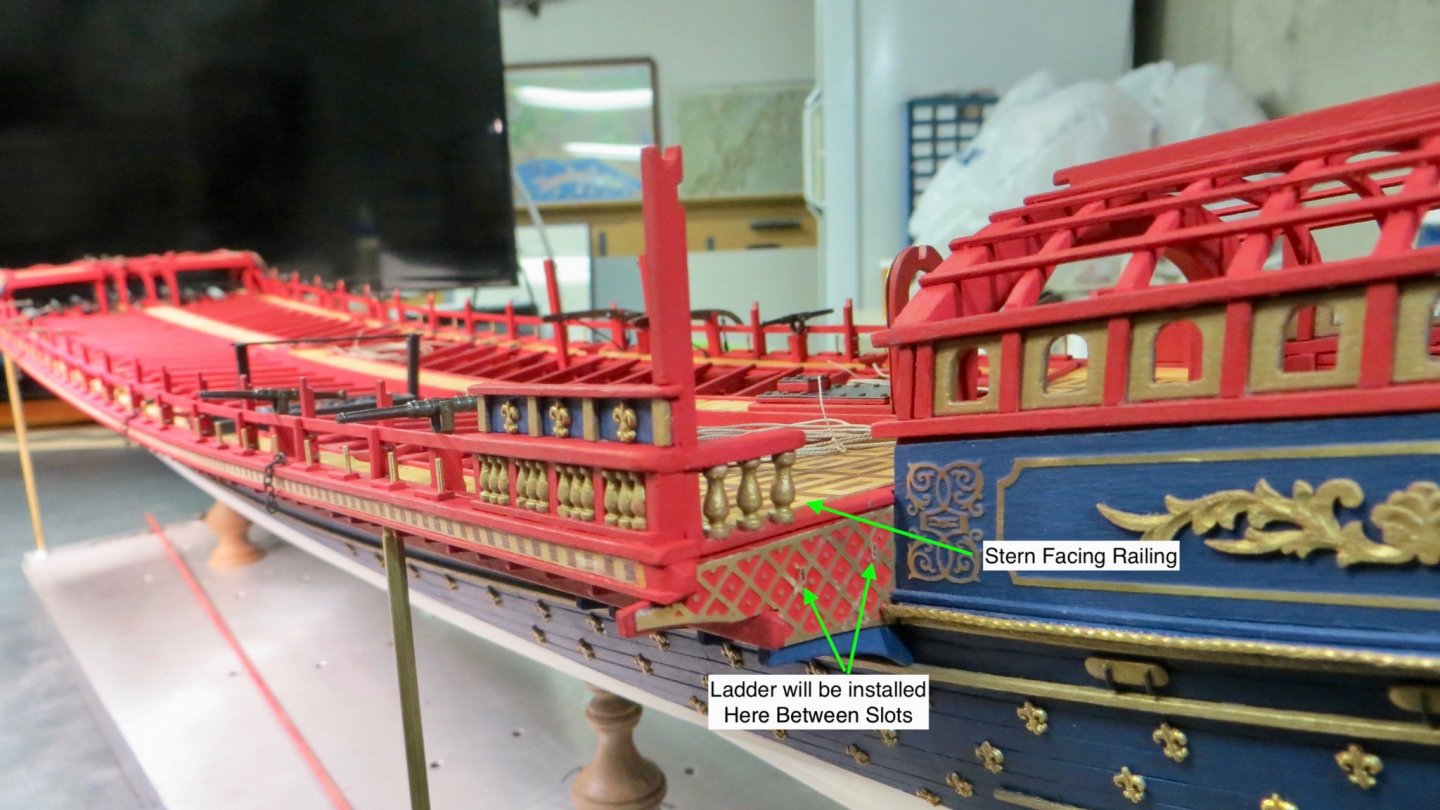
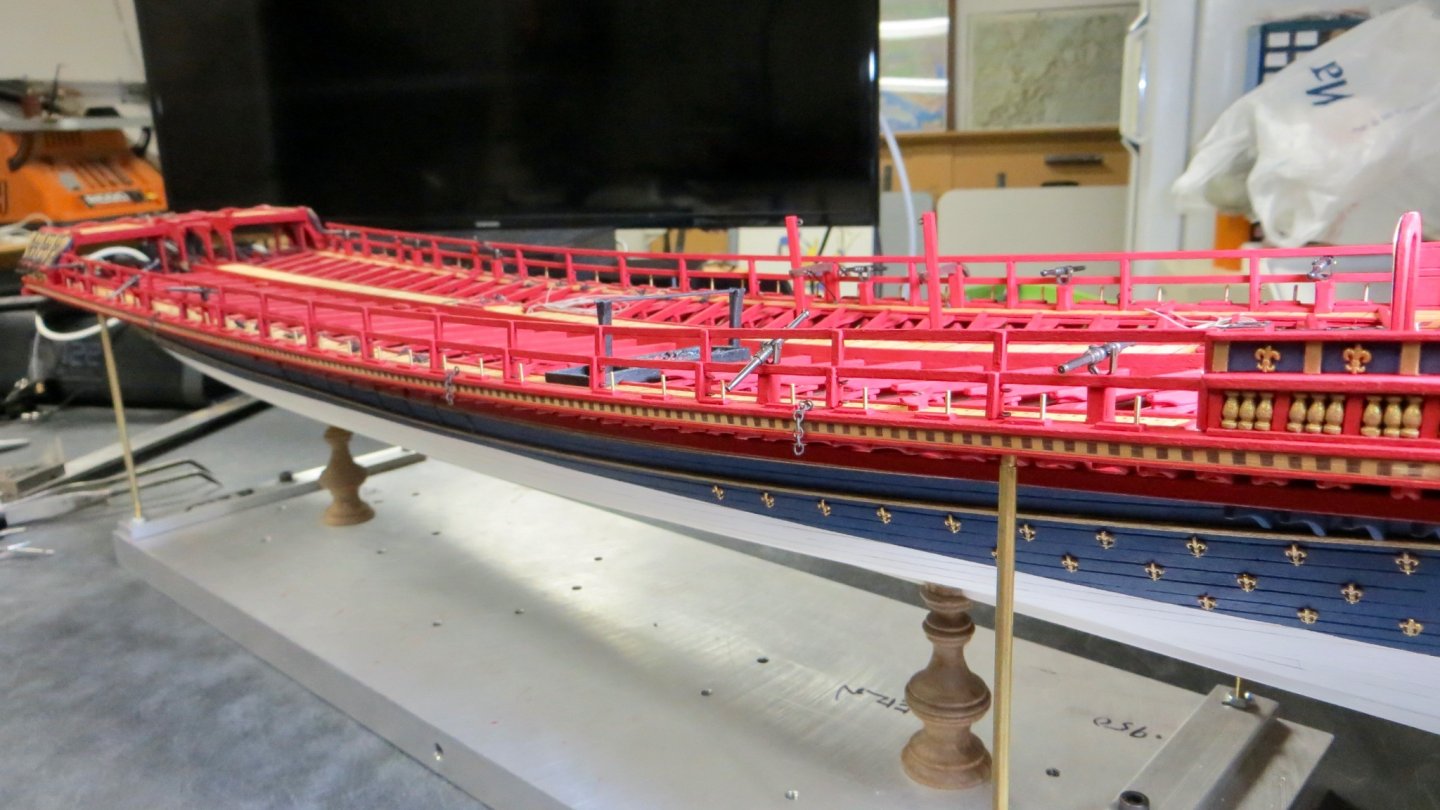
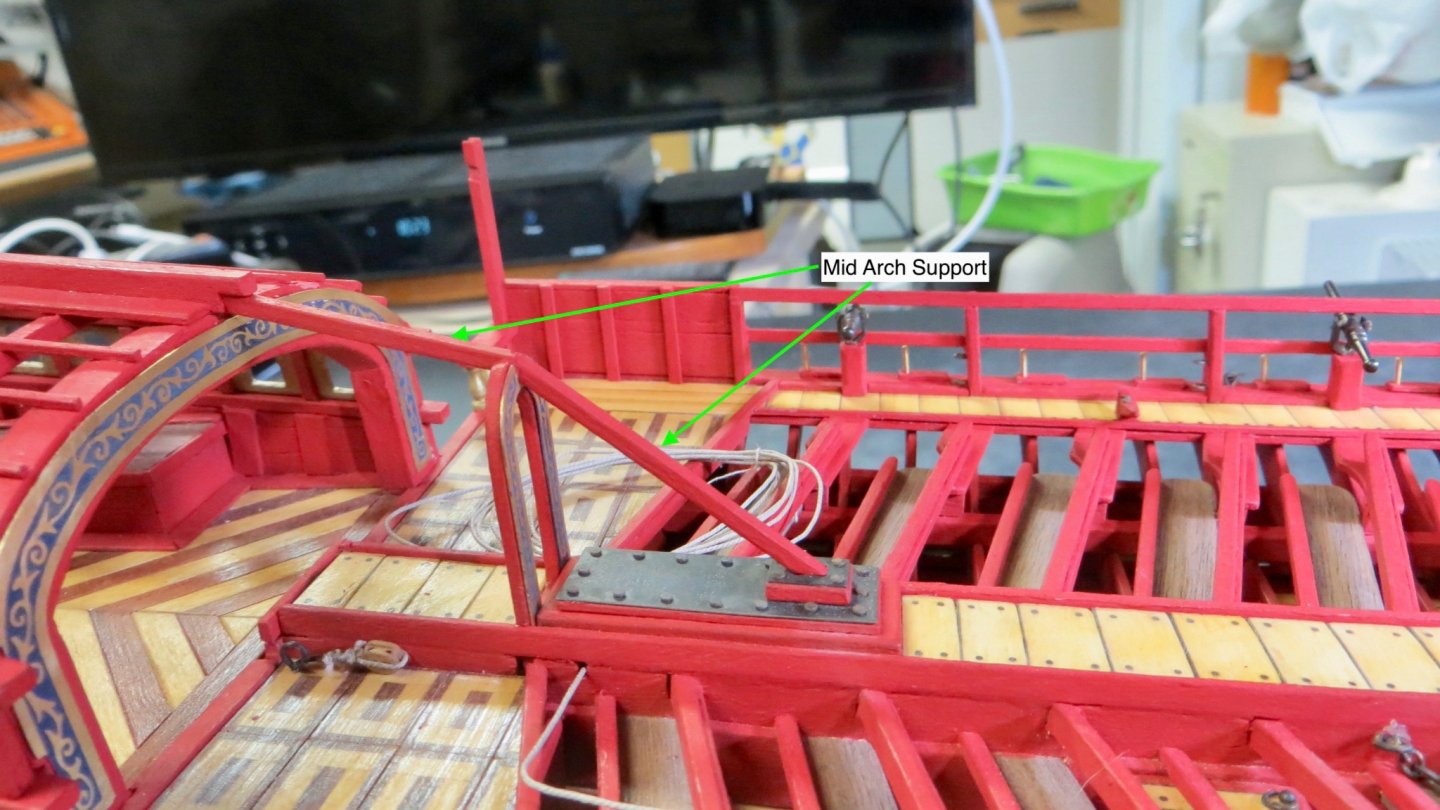
As always, thanks for the likes and for checking in. Appreciated! Continued working on the sides of the model. The kit calls for the 2 stern canopy supports to be made from 2 pieces of 2mm x 2mm wood glued together. I made them from 1 piece of 2mm x 4mm. Added the slots for the railing supports and the slot on top for the canopy 2mm round rods. Posts installed perpendicular to the waterline At this time, decided to fasten the small guns to the U-shaped gun supports. The guns are sitting loose (not glued parallel to waterline) at this point. I'll knock them around for sure with my clumsy hands! The Corel kit does not show a stern facing railing where the boarding stairs are to be located. The Fleur de Lis does show a railing system, I have added an extension to the port and starboard facing railing. The Upper Railing is now added Mid Arch Support Beams 2mm x 2mm Added Next steps are to add angled stern railing supports, stern boarding ladders etc. Thanks, Frank


- 510 replies
-
- 9
-
-
- reale de france
- corel
- (and 1 more)
-
Thanks Michael! I hope all is well! Frank
-
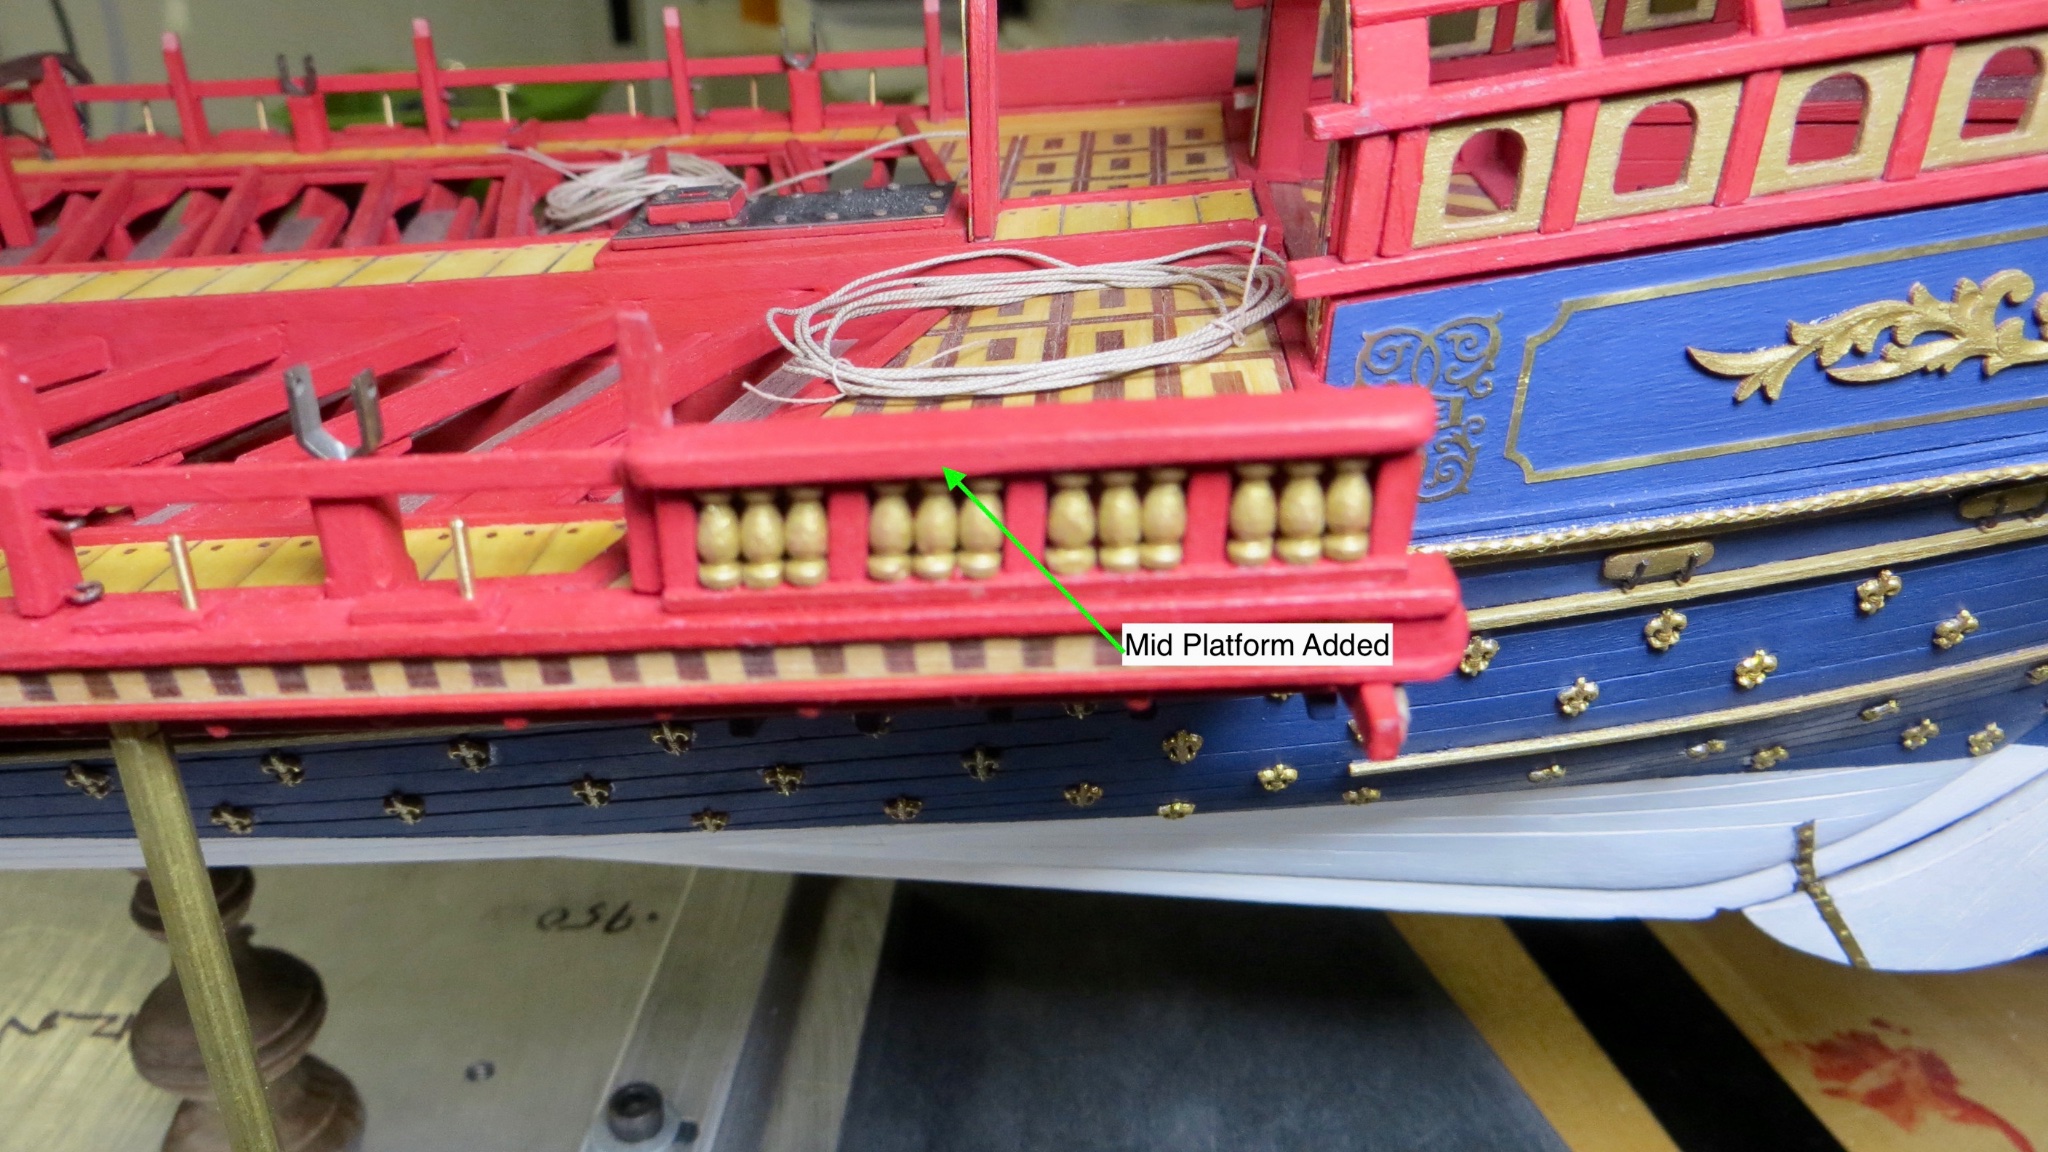
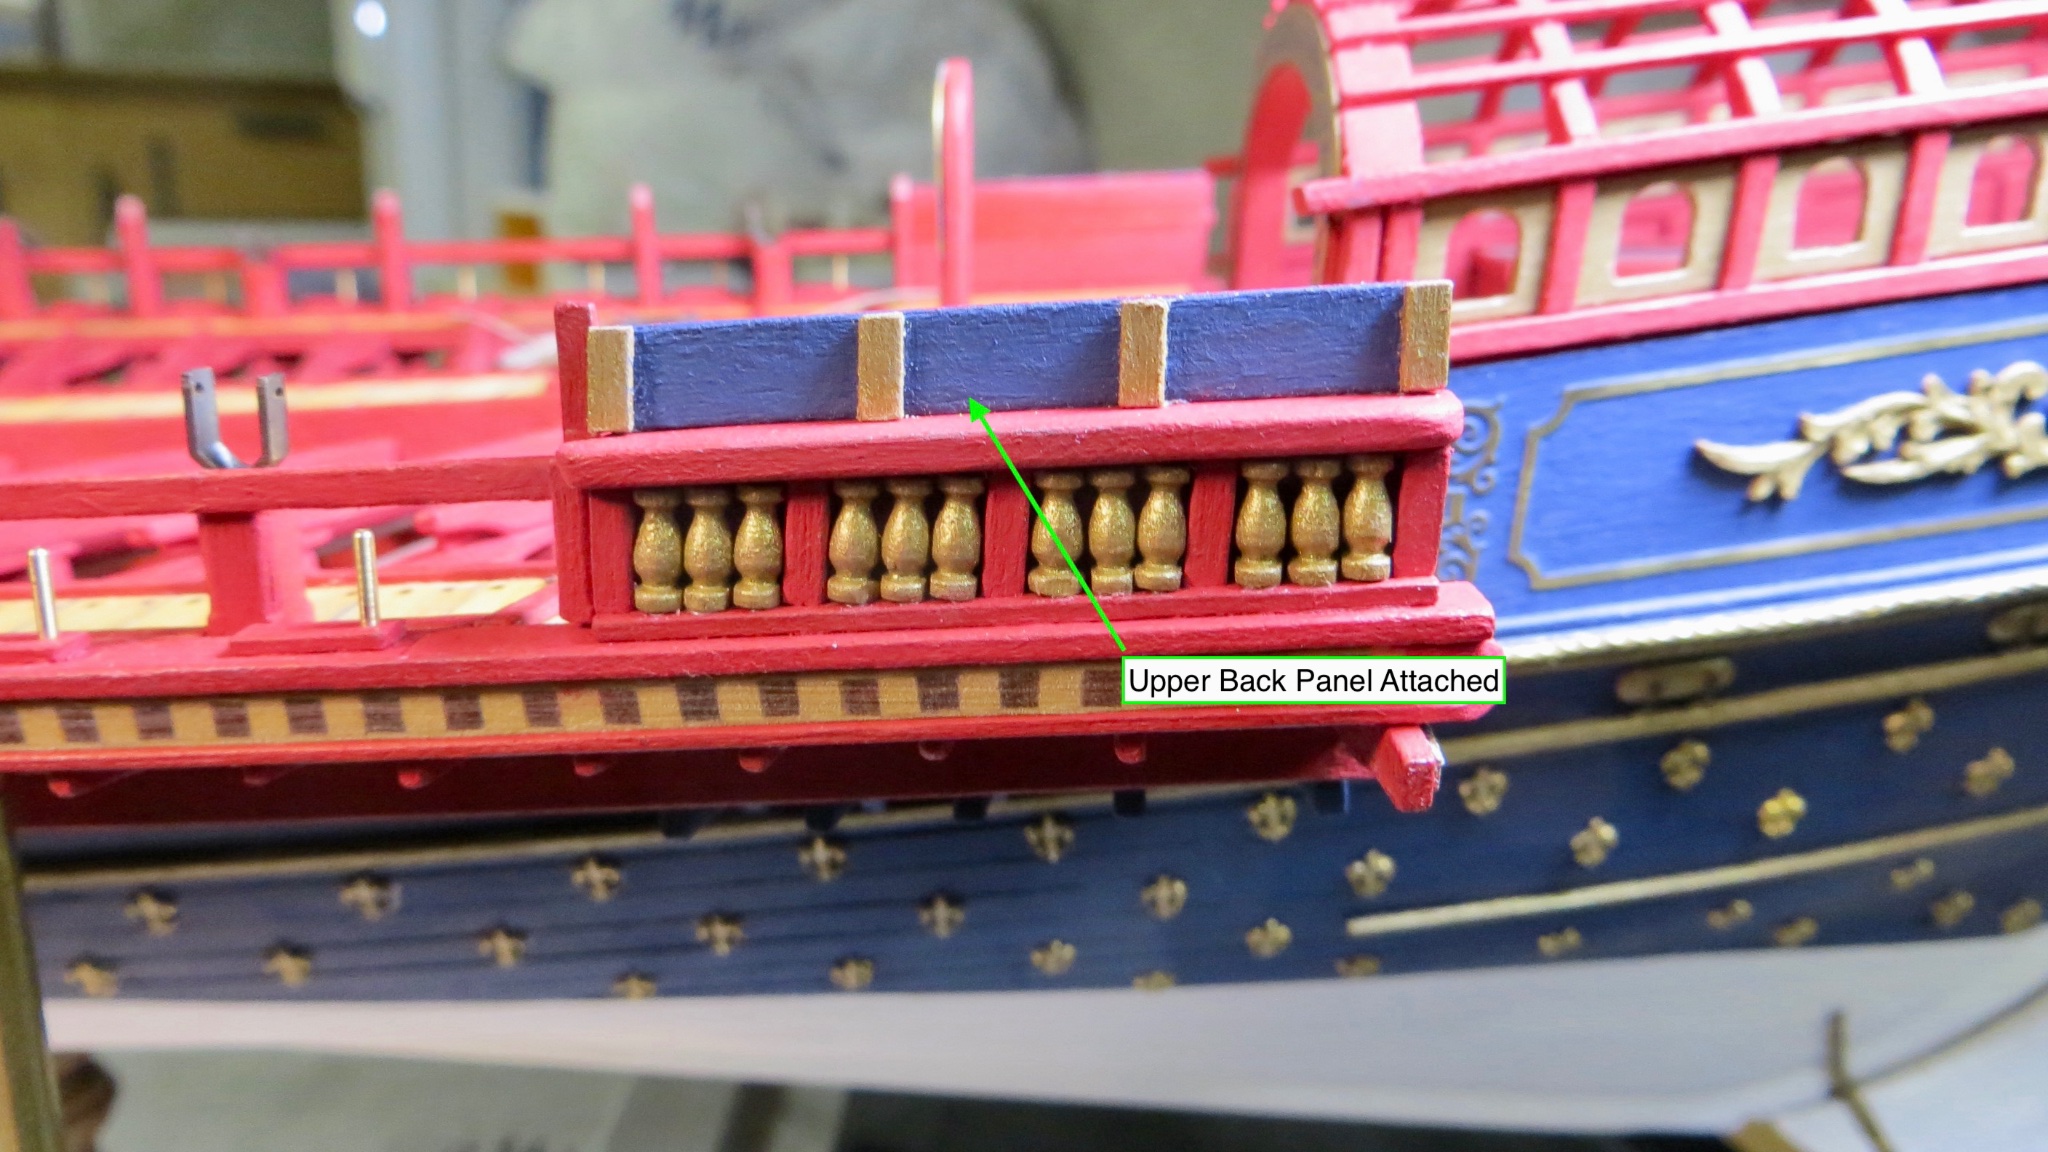
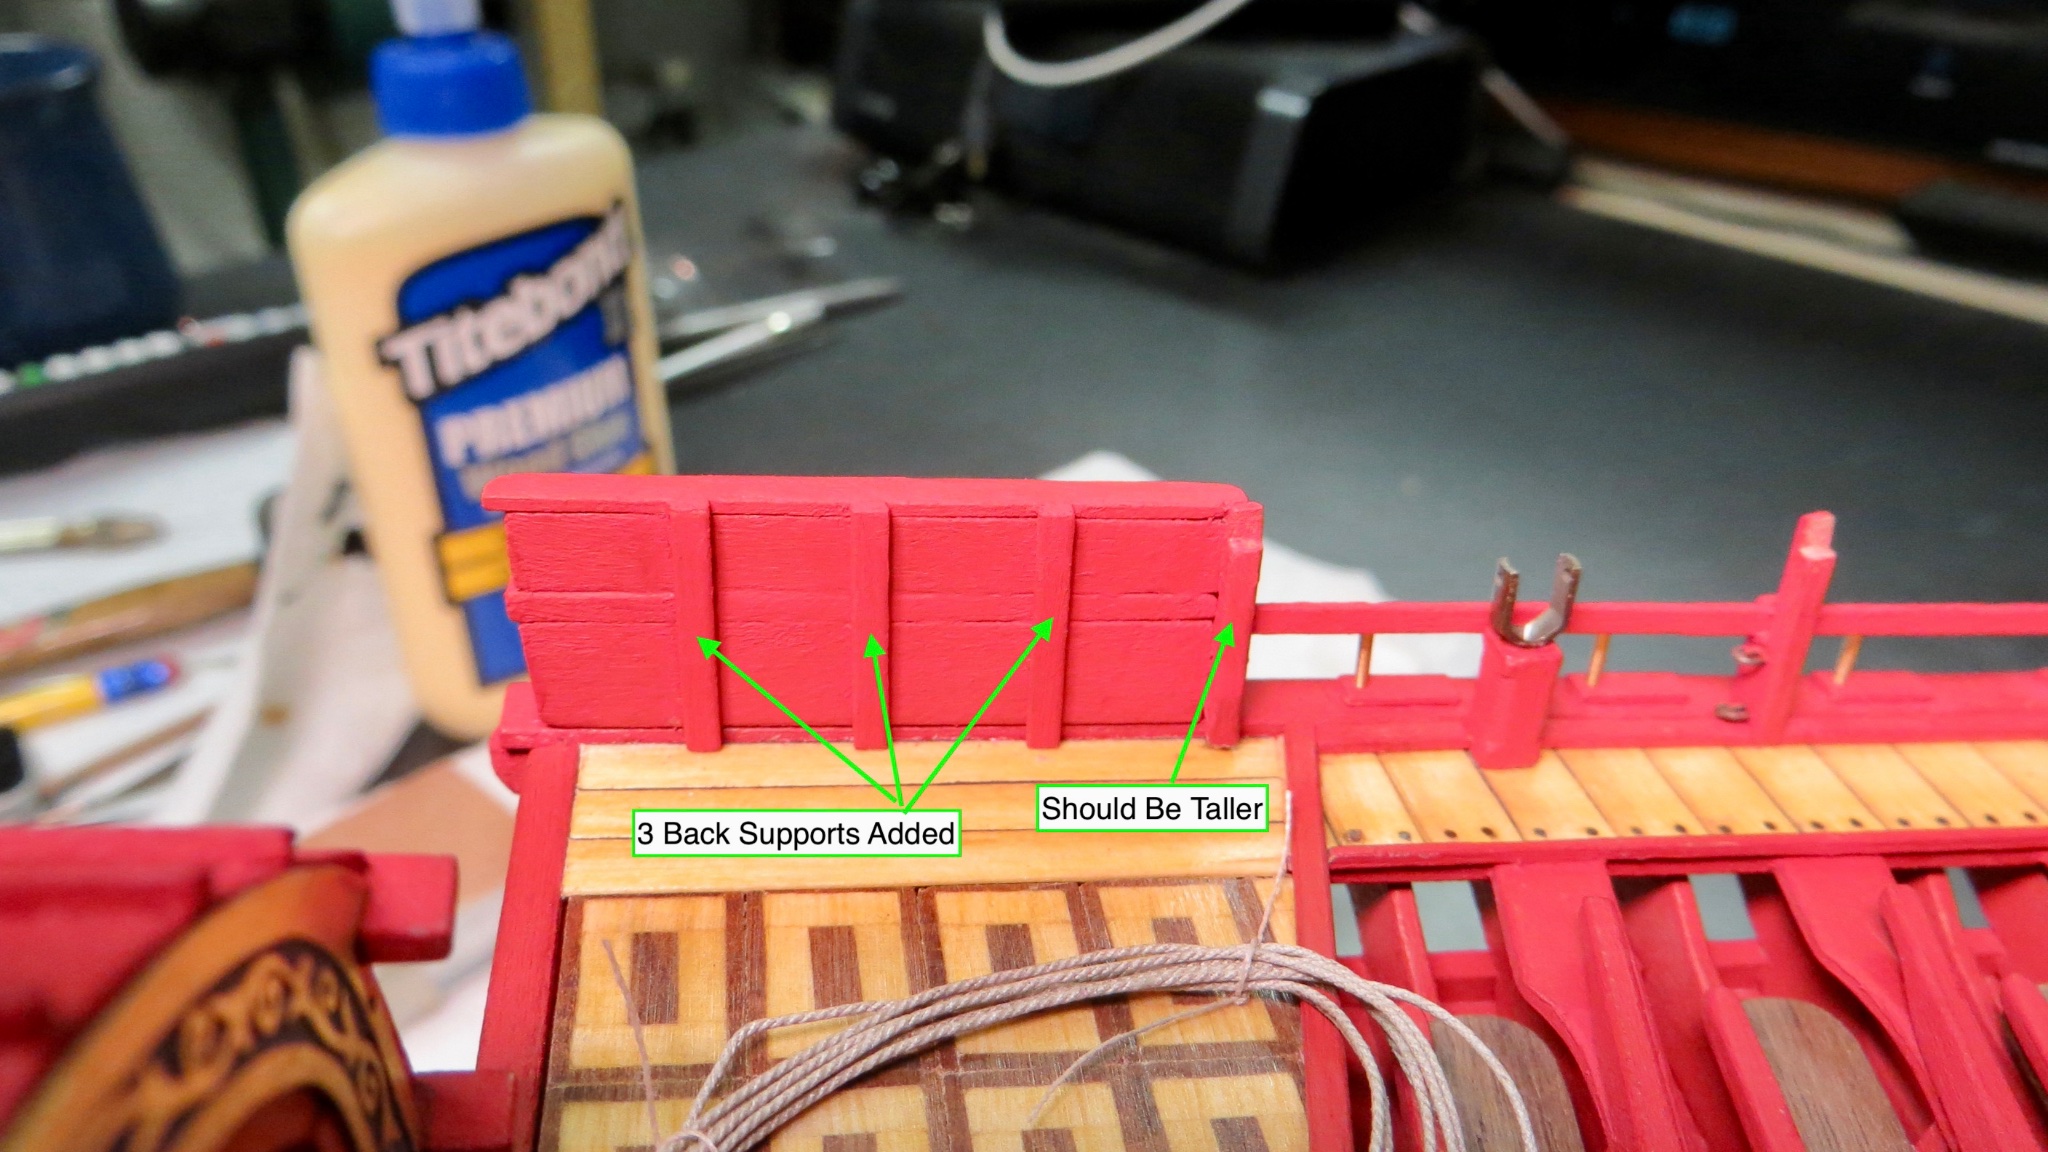
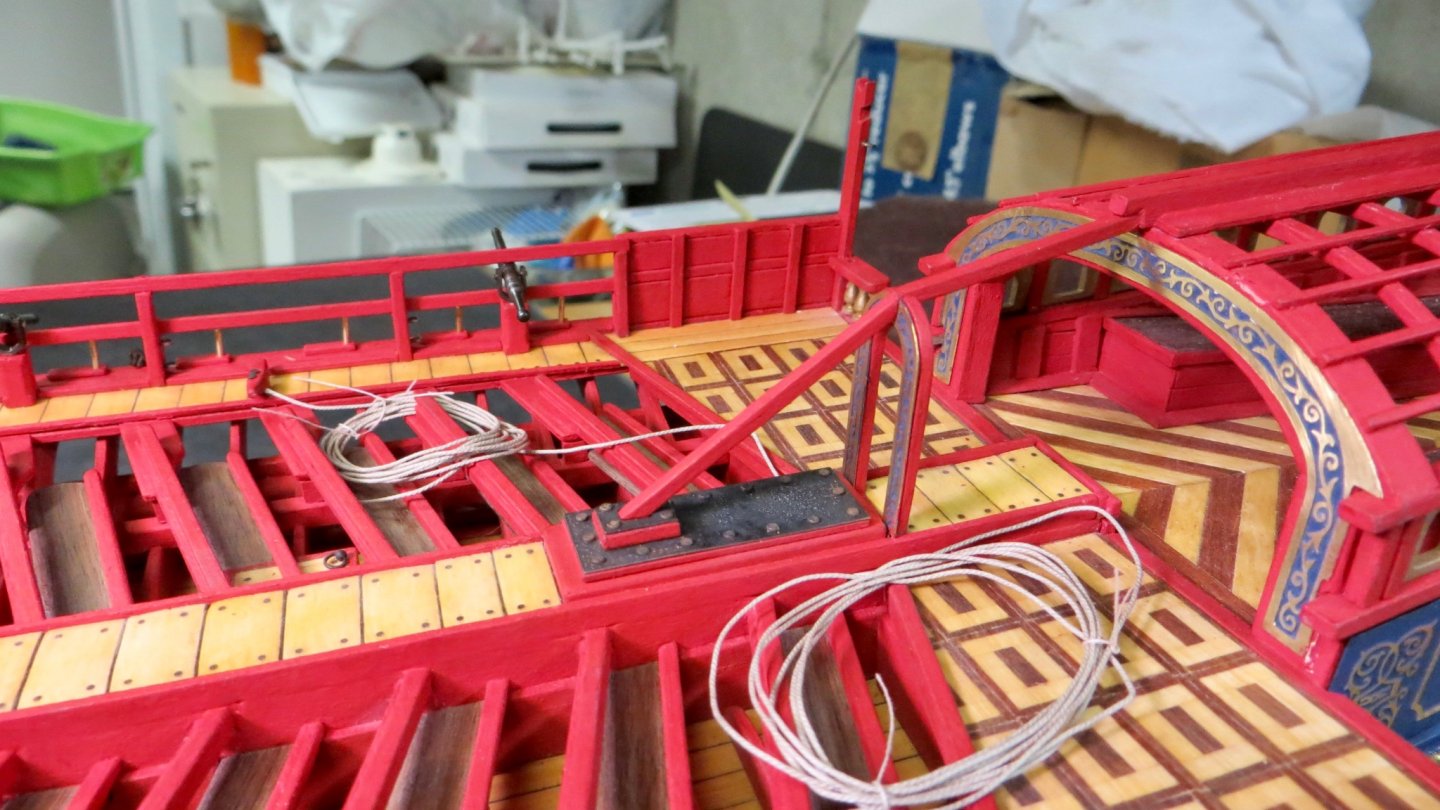
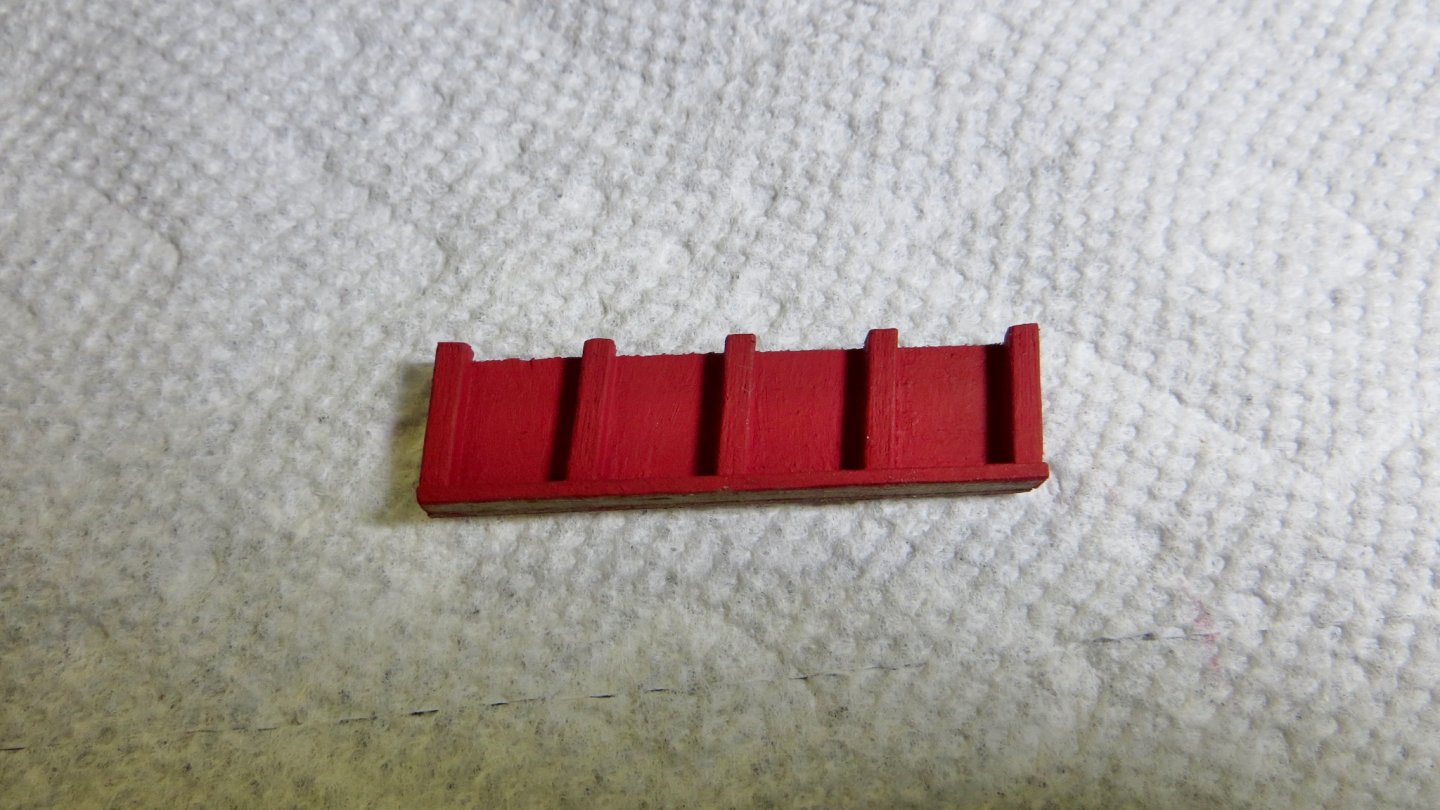
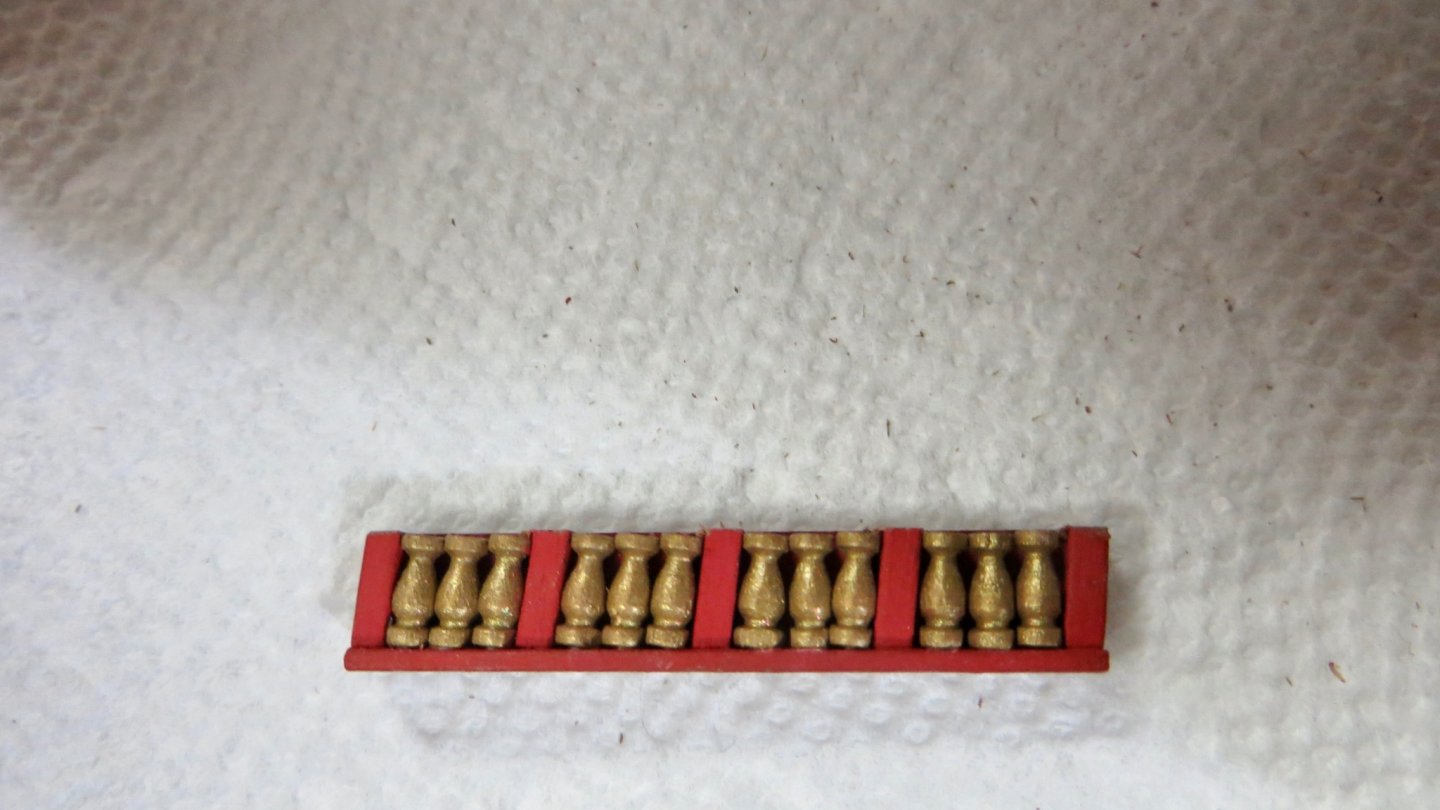
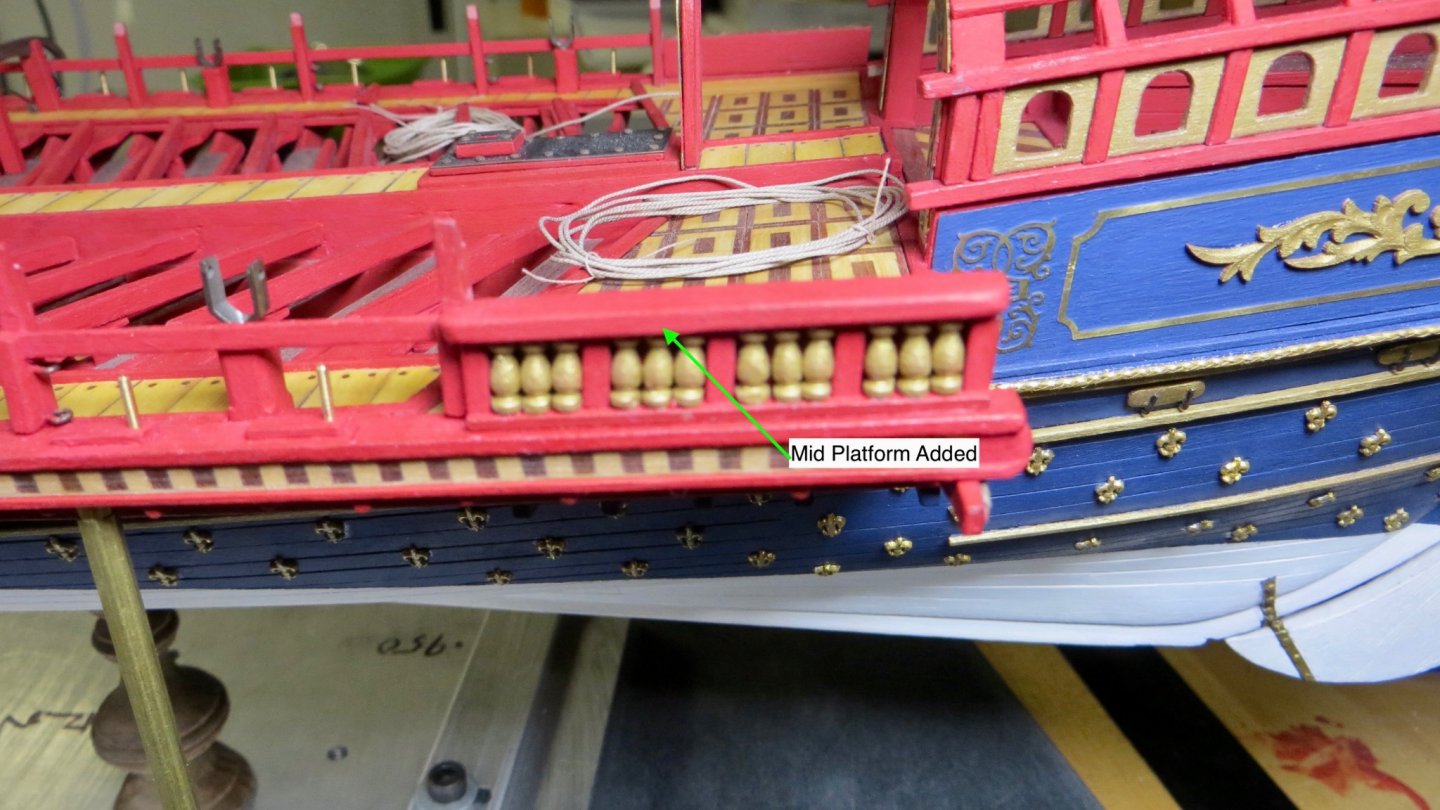
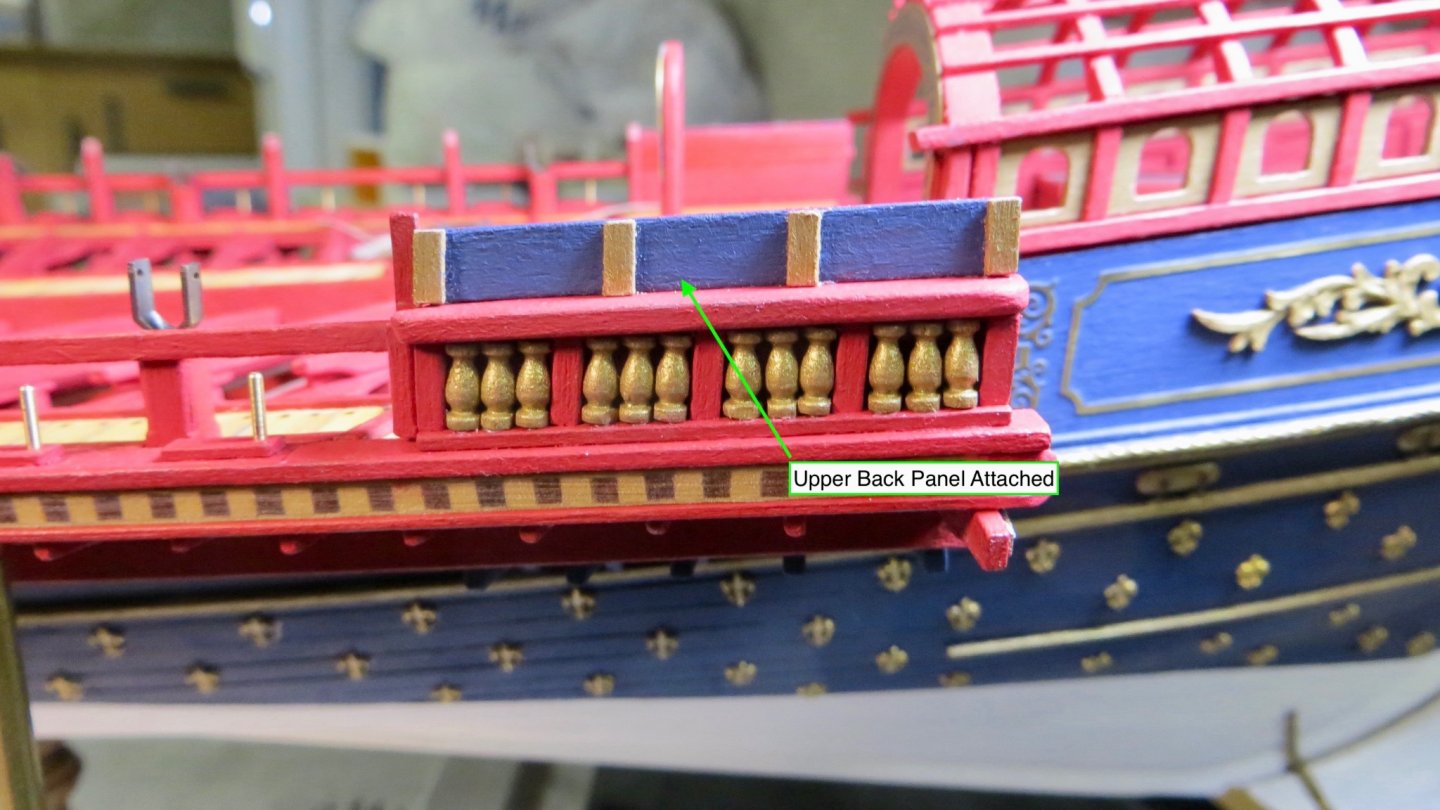
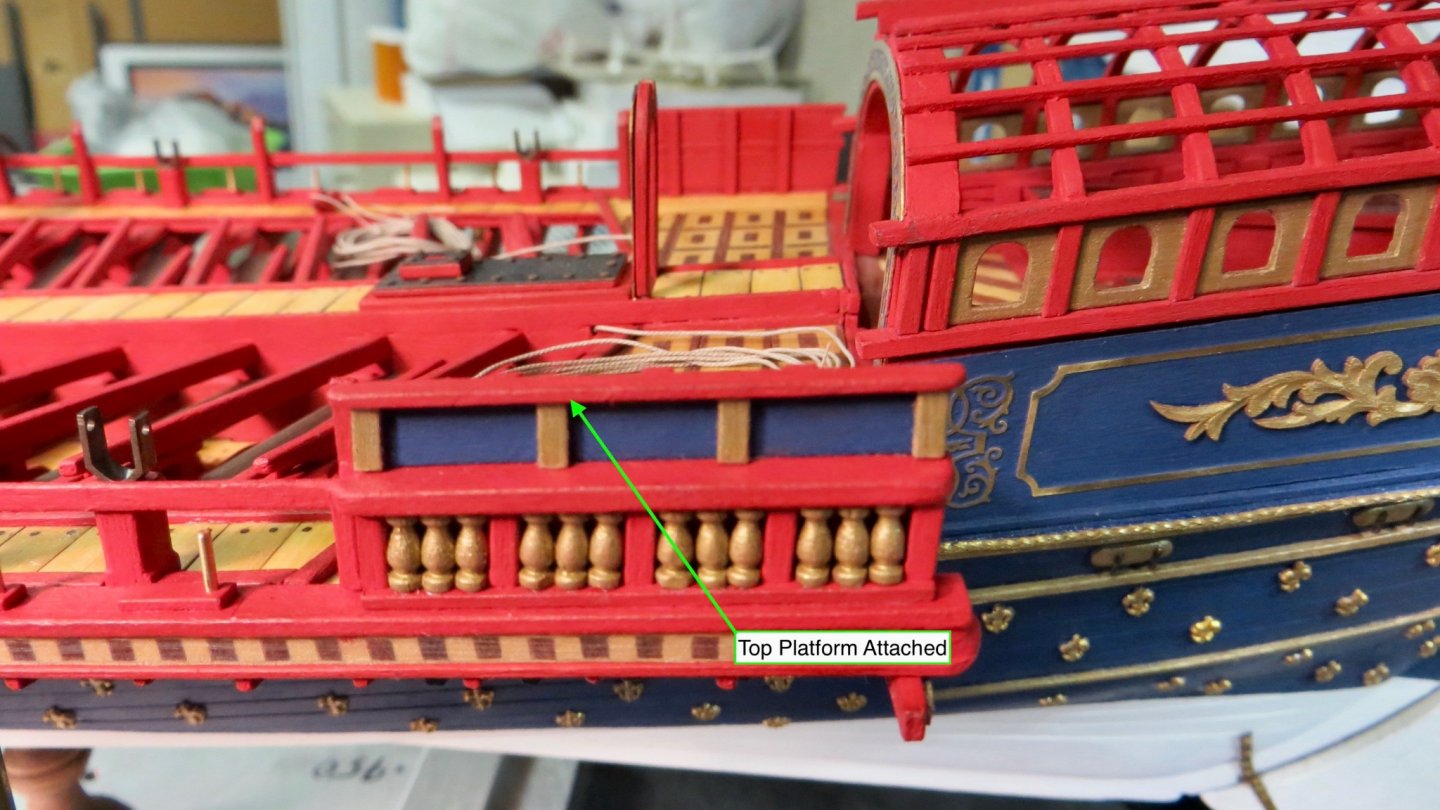
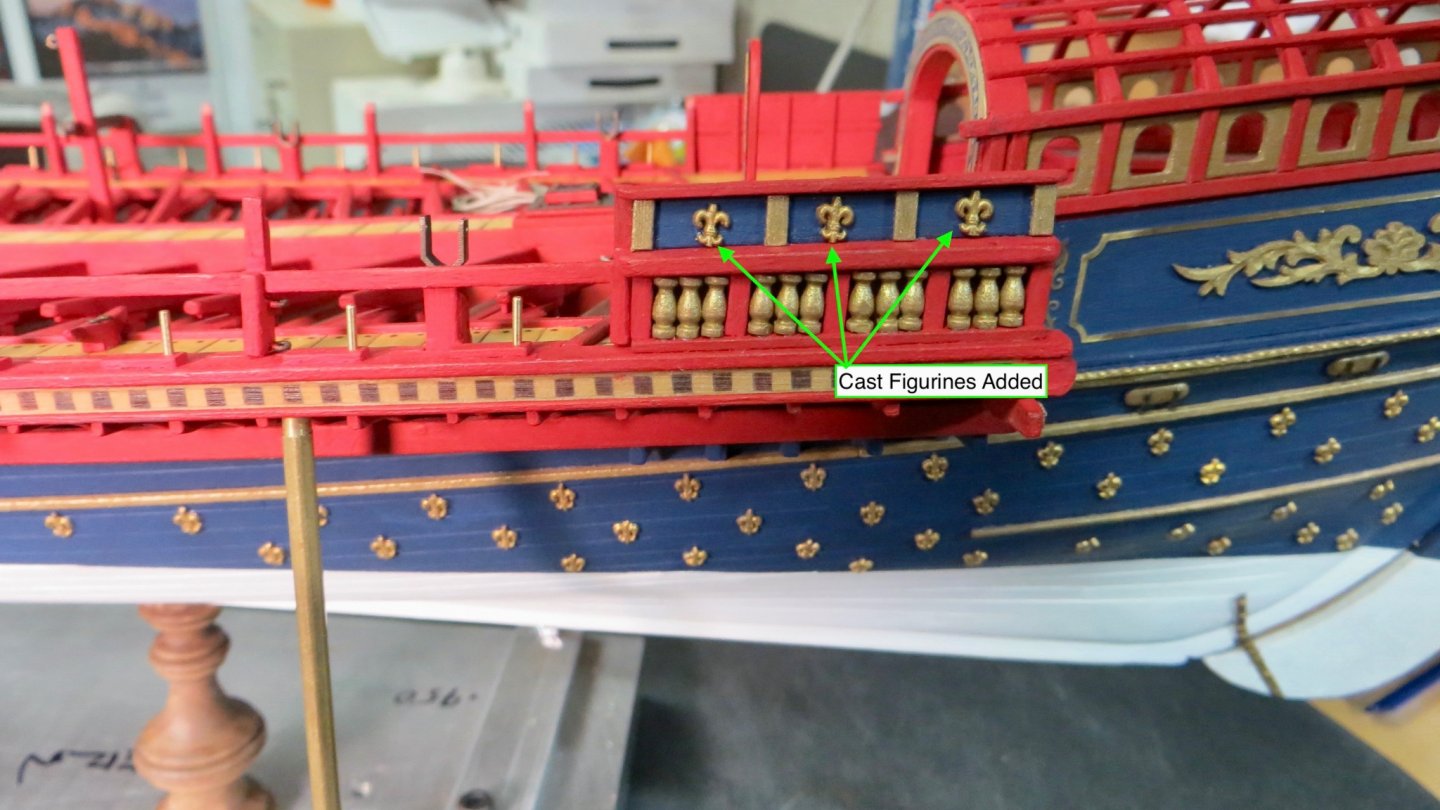
Hello, I started work on the decorative side panels near the stern. Photos are pretty much self explanatory. Made the base and pillars to house the columns. Added the columns after painting. Inserted the mid platform On the "La Fleur de Lis" plans, there is an upper railing with spindles. Since I had a few of the metal decorations left, I decided to follow the "Corel" plan for this area and use them. First added the back panel. Then the top platform Next step was to add 4 back supports to the structure. I added 3 of them. the 4th was to be added next to the last railing post on the right. I realized, however, that I made a big mistake. The last railing is supposed to be much higher than the rest, to support an angled diagonal cross beam that is to be added. Instead of trying to take out the railing post, and possibly ruin the lower railing glued in place, I decided as a fix to add a taller post just to the left of the railing post (replacing the 4th support). Oh well! Finally added some remains decorative pieces. Next steps are to continue work in this stern area. Thanks for the "likes" and for stopping by, Frank

- 510 replies
-
- 10
-
-
- reale de france
- corel
- (and 1 more)
-
I agree with Mark! Vintage vote for me also! nice work in getting everything to fit properly Frank
-
Hello Michael and Gerard, Gerard, Thank you for your detailed explanation above. As you are aware, I purchased your wonderful monograph and have been taking bits of information from the monograph to try and make my Reale de France more interesting. At my current skill level, I still have to rely on the Corel plans in order to make sure I don't "get in over my head". Every time I look at the monograph I discover many new pieces of information that I missed before. Thank you for your effort! Michael, The photo below is from the Corel plans that I have. It shows the anchors similar to your layout. I will try to position my anchors, when I reach that stage in the build, more towards the way the video by Gerard shows them to be. I think you are doing a fantastic job on your model, especially with the rigging, and I hope to learn a lot from your log when I reach that point! Best, Frank
- 222 replies
-
- 4
-
-
- reale de france
- heller
- (and 1 more)
-
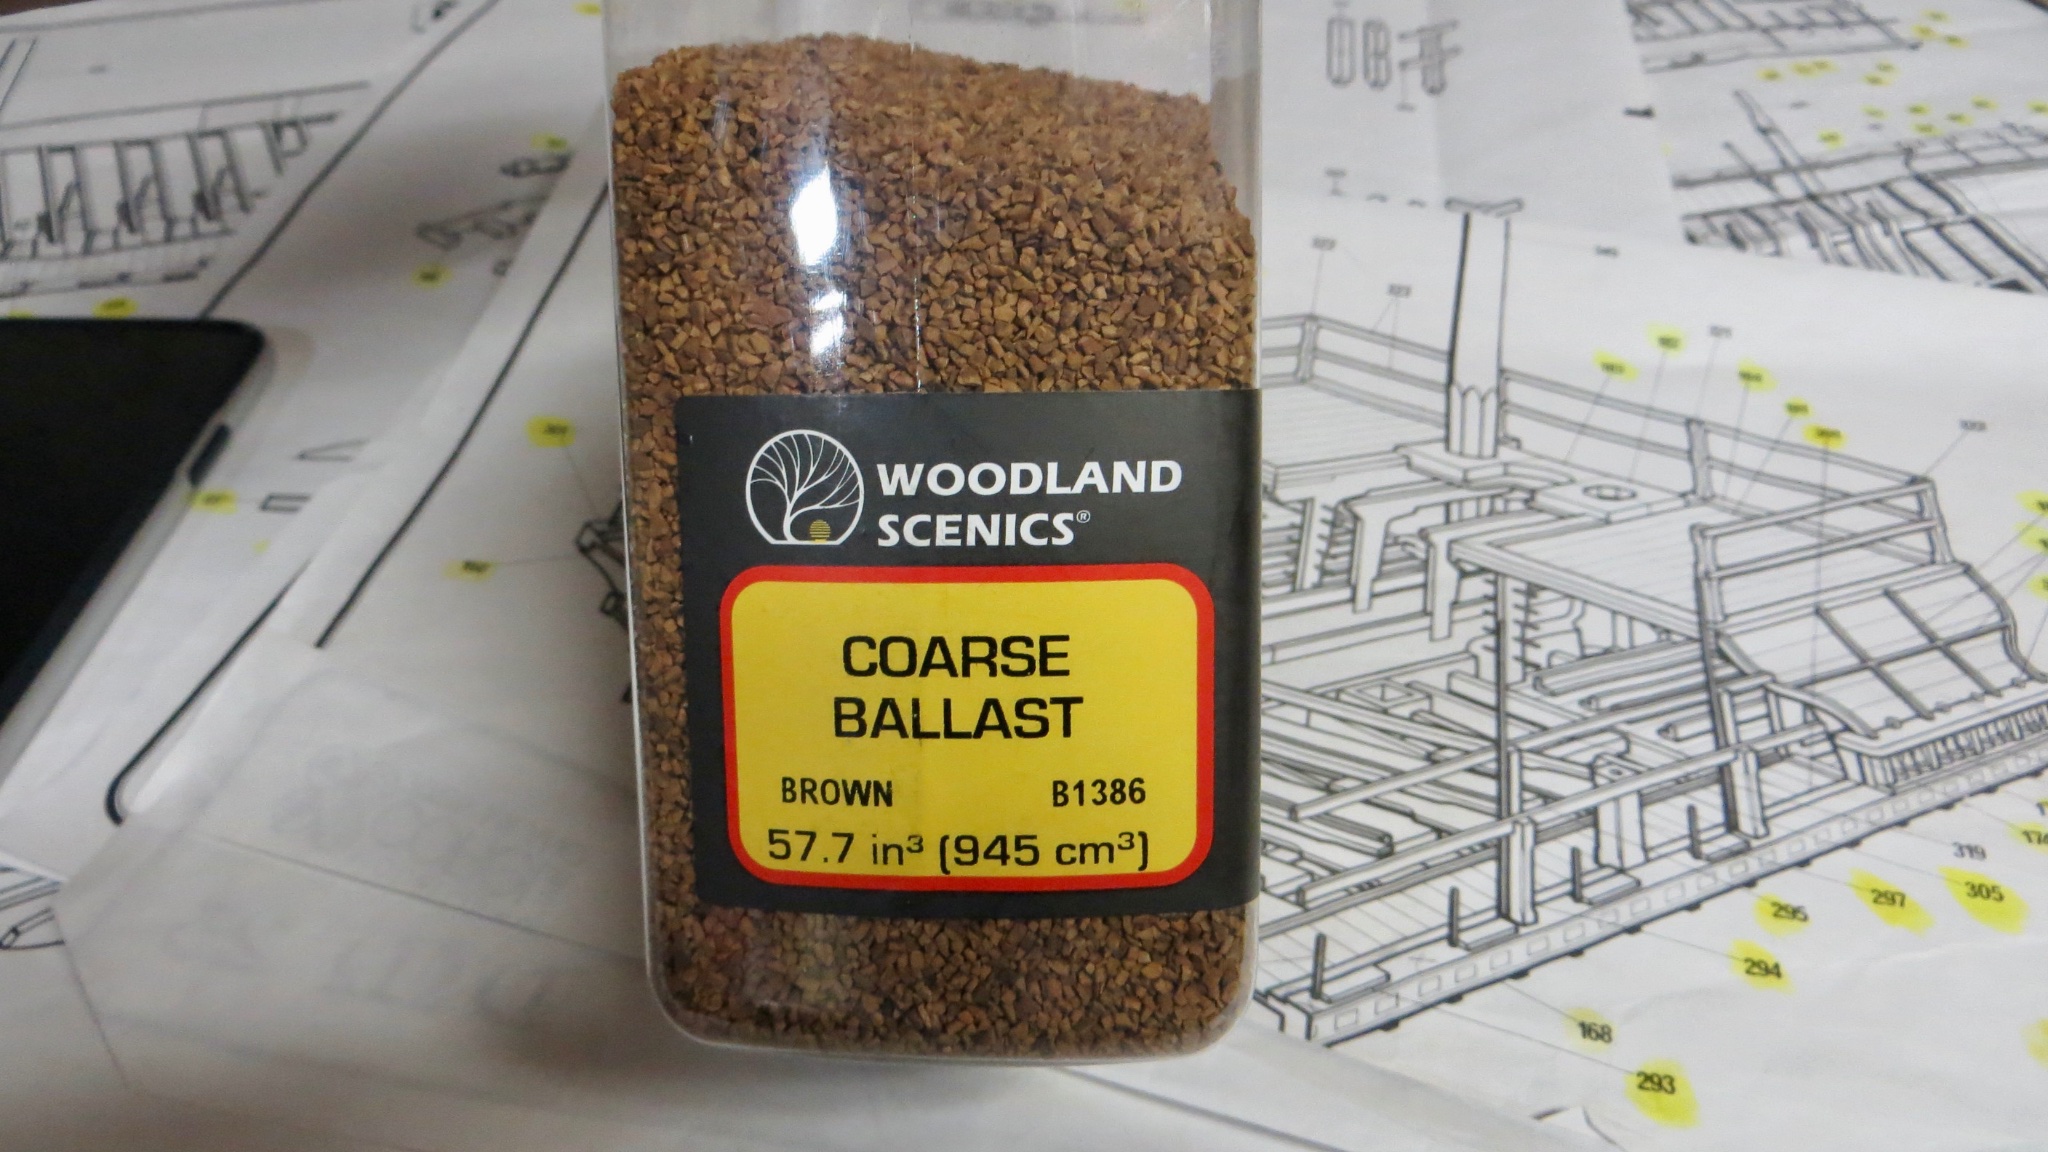
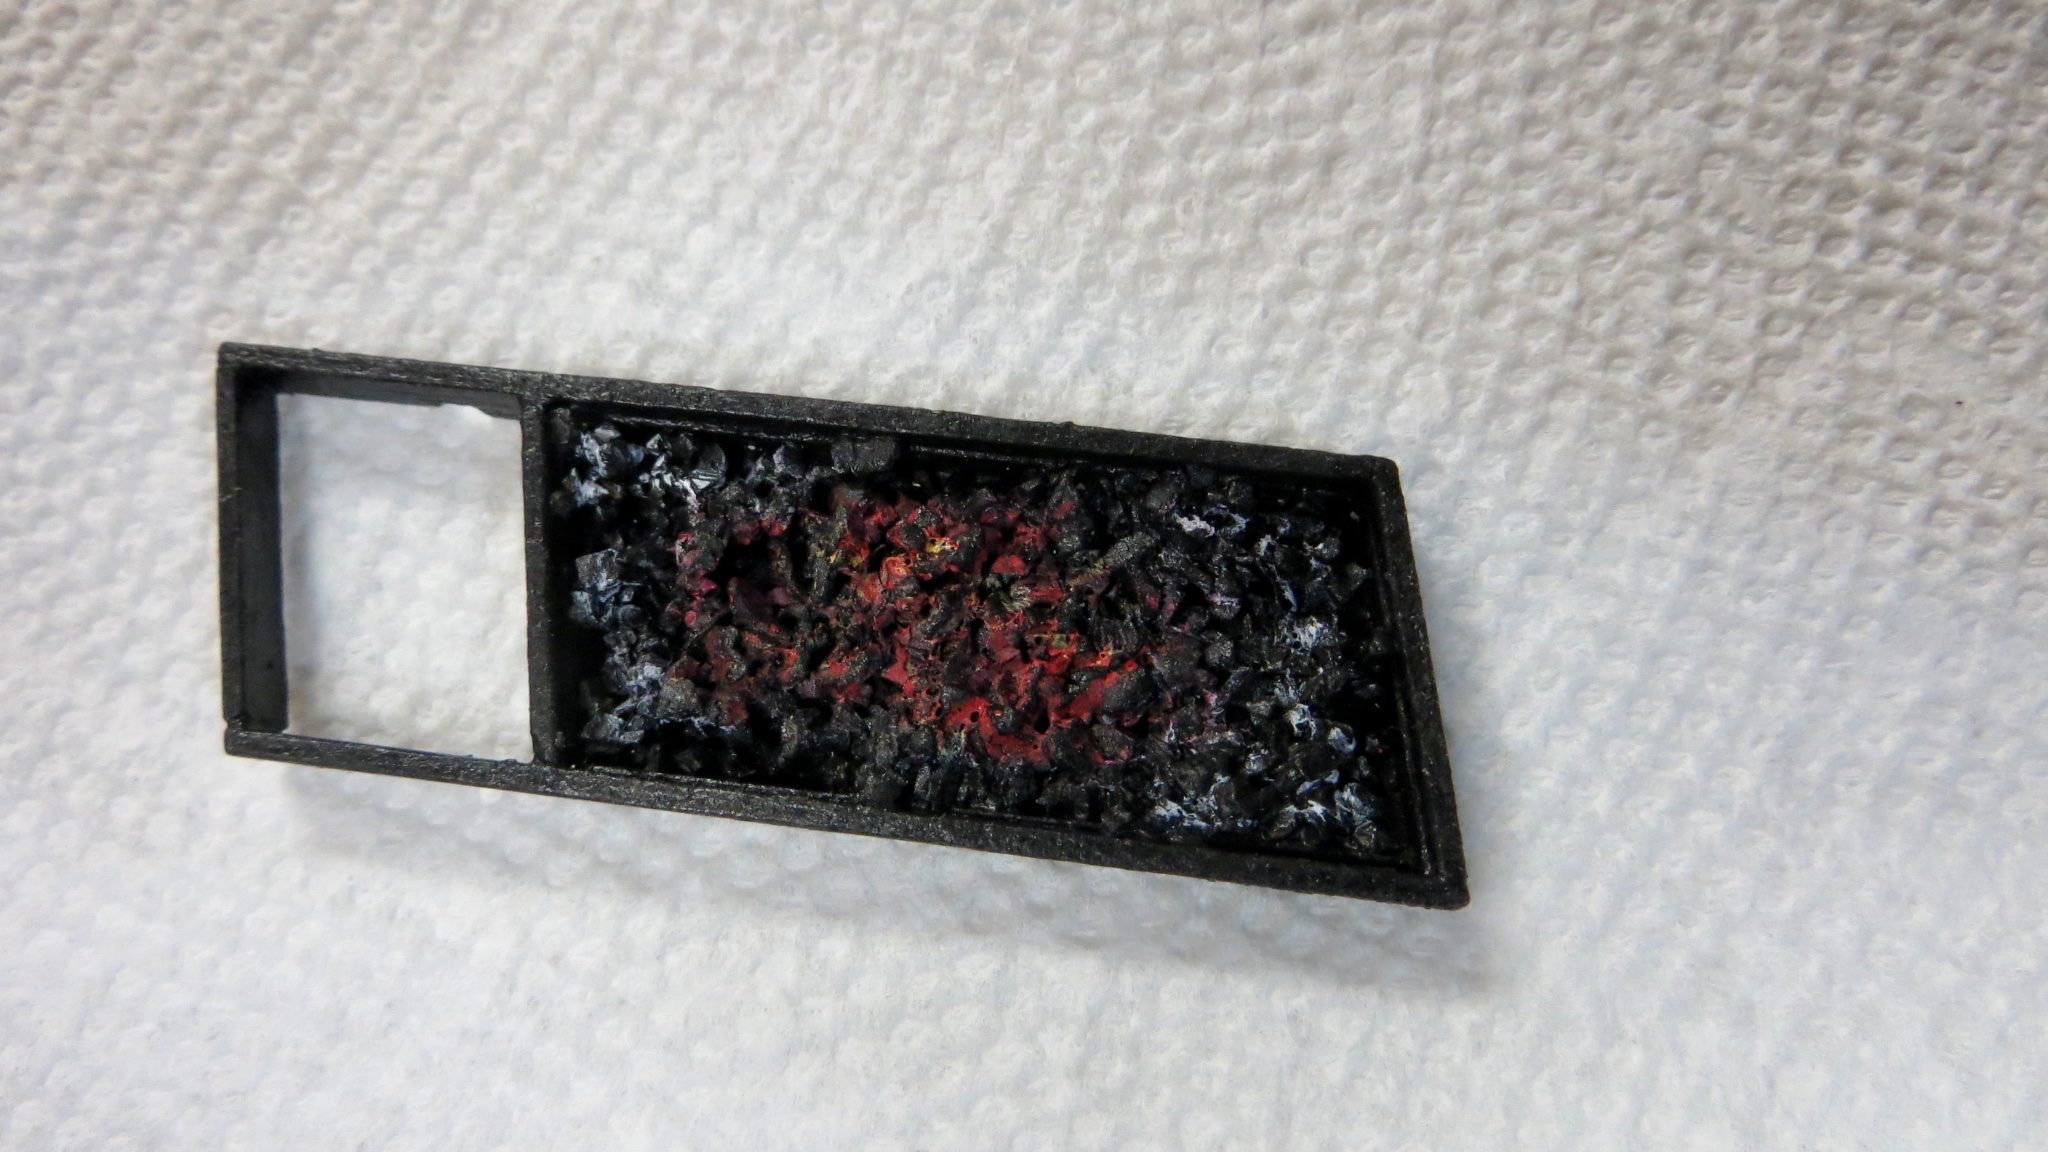
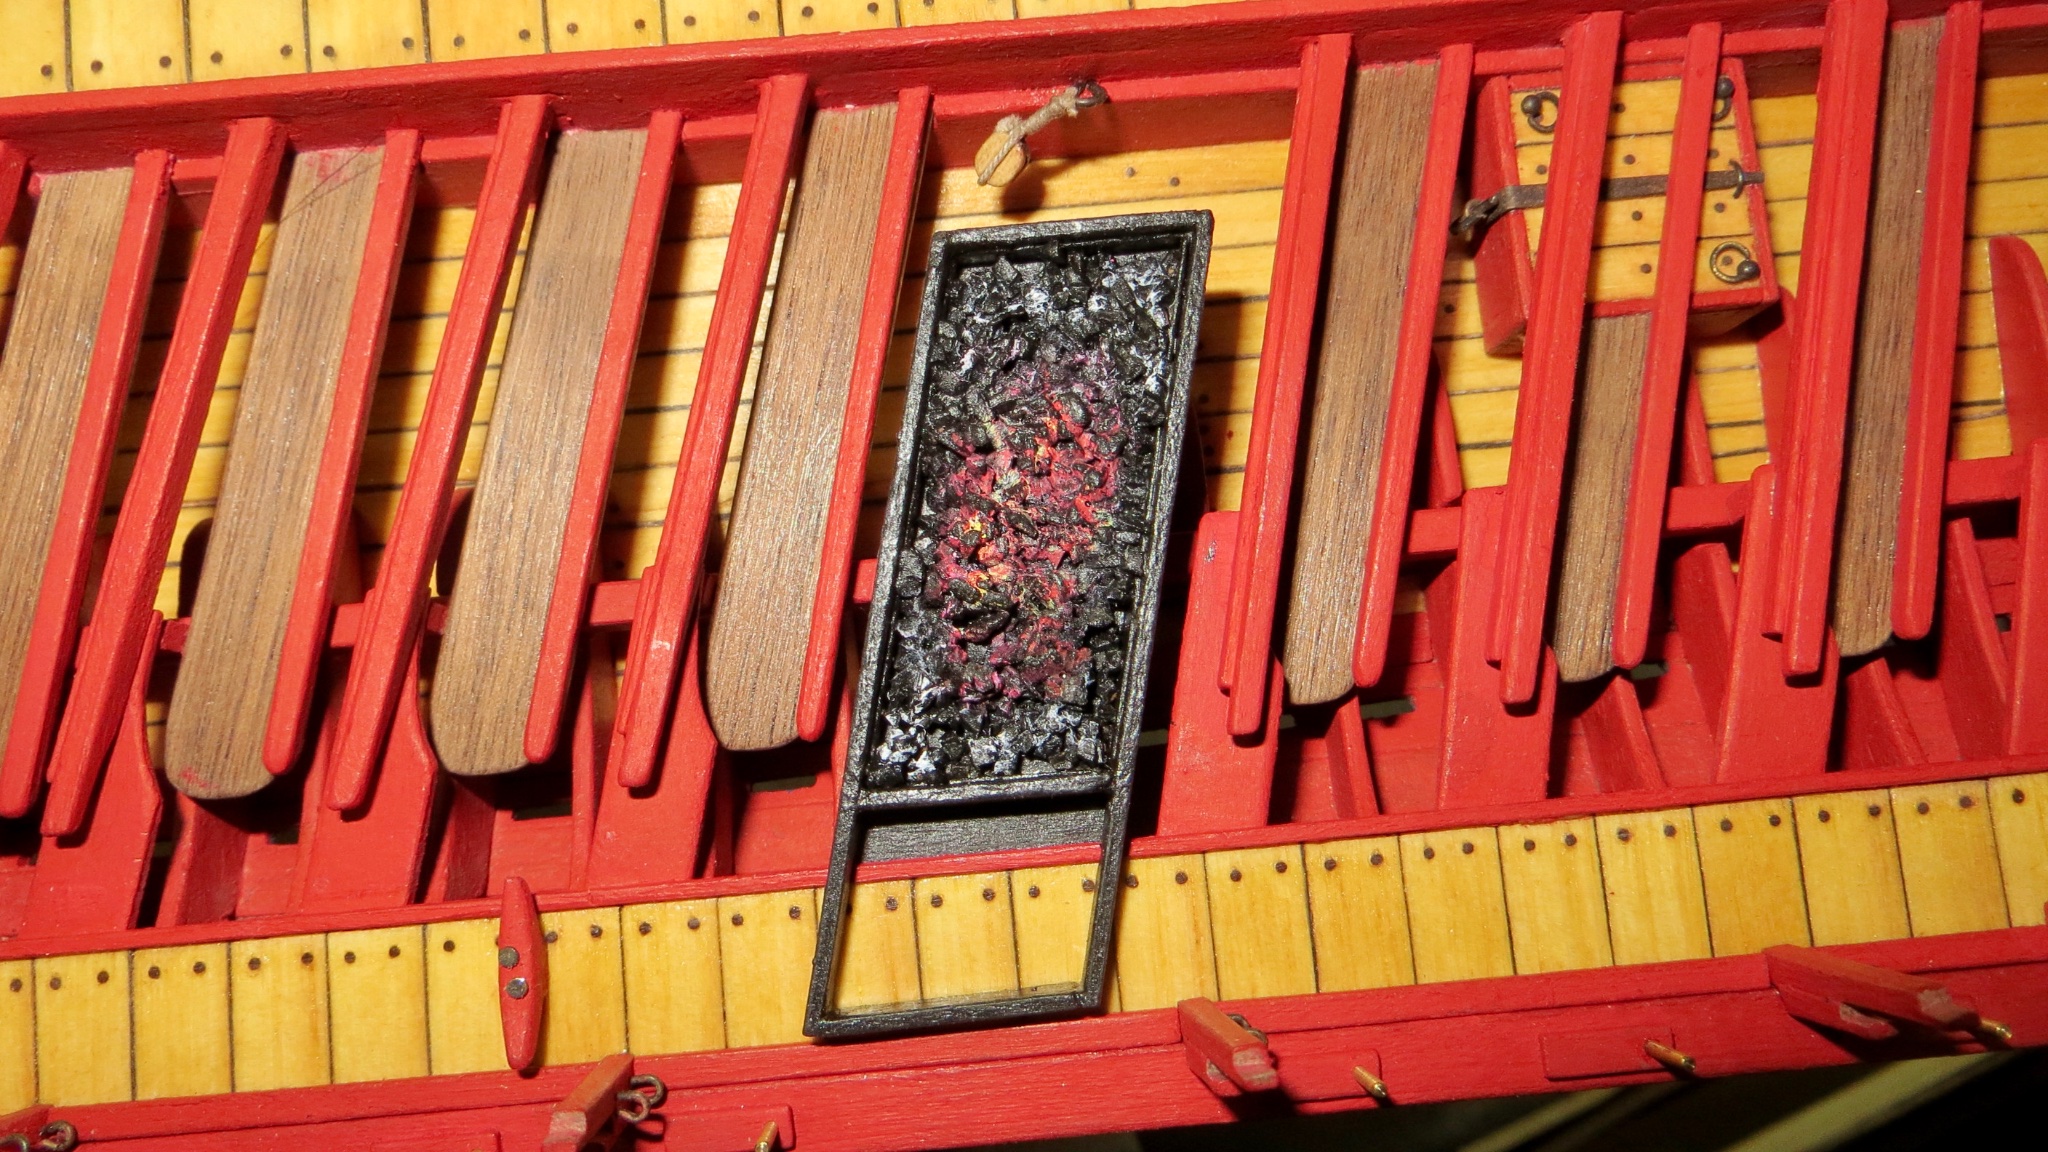
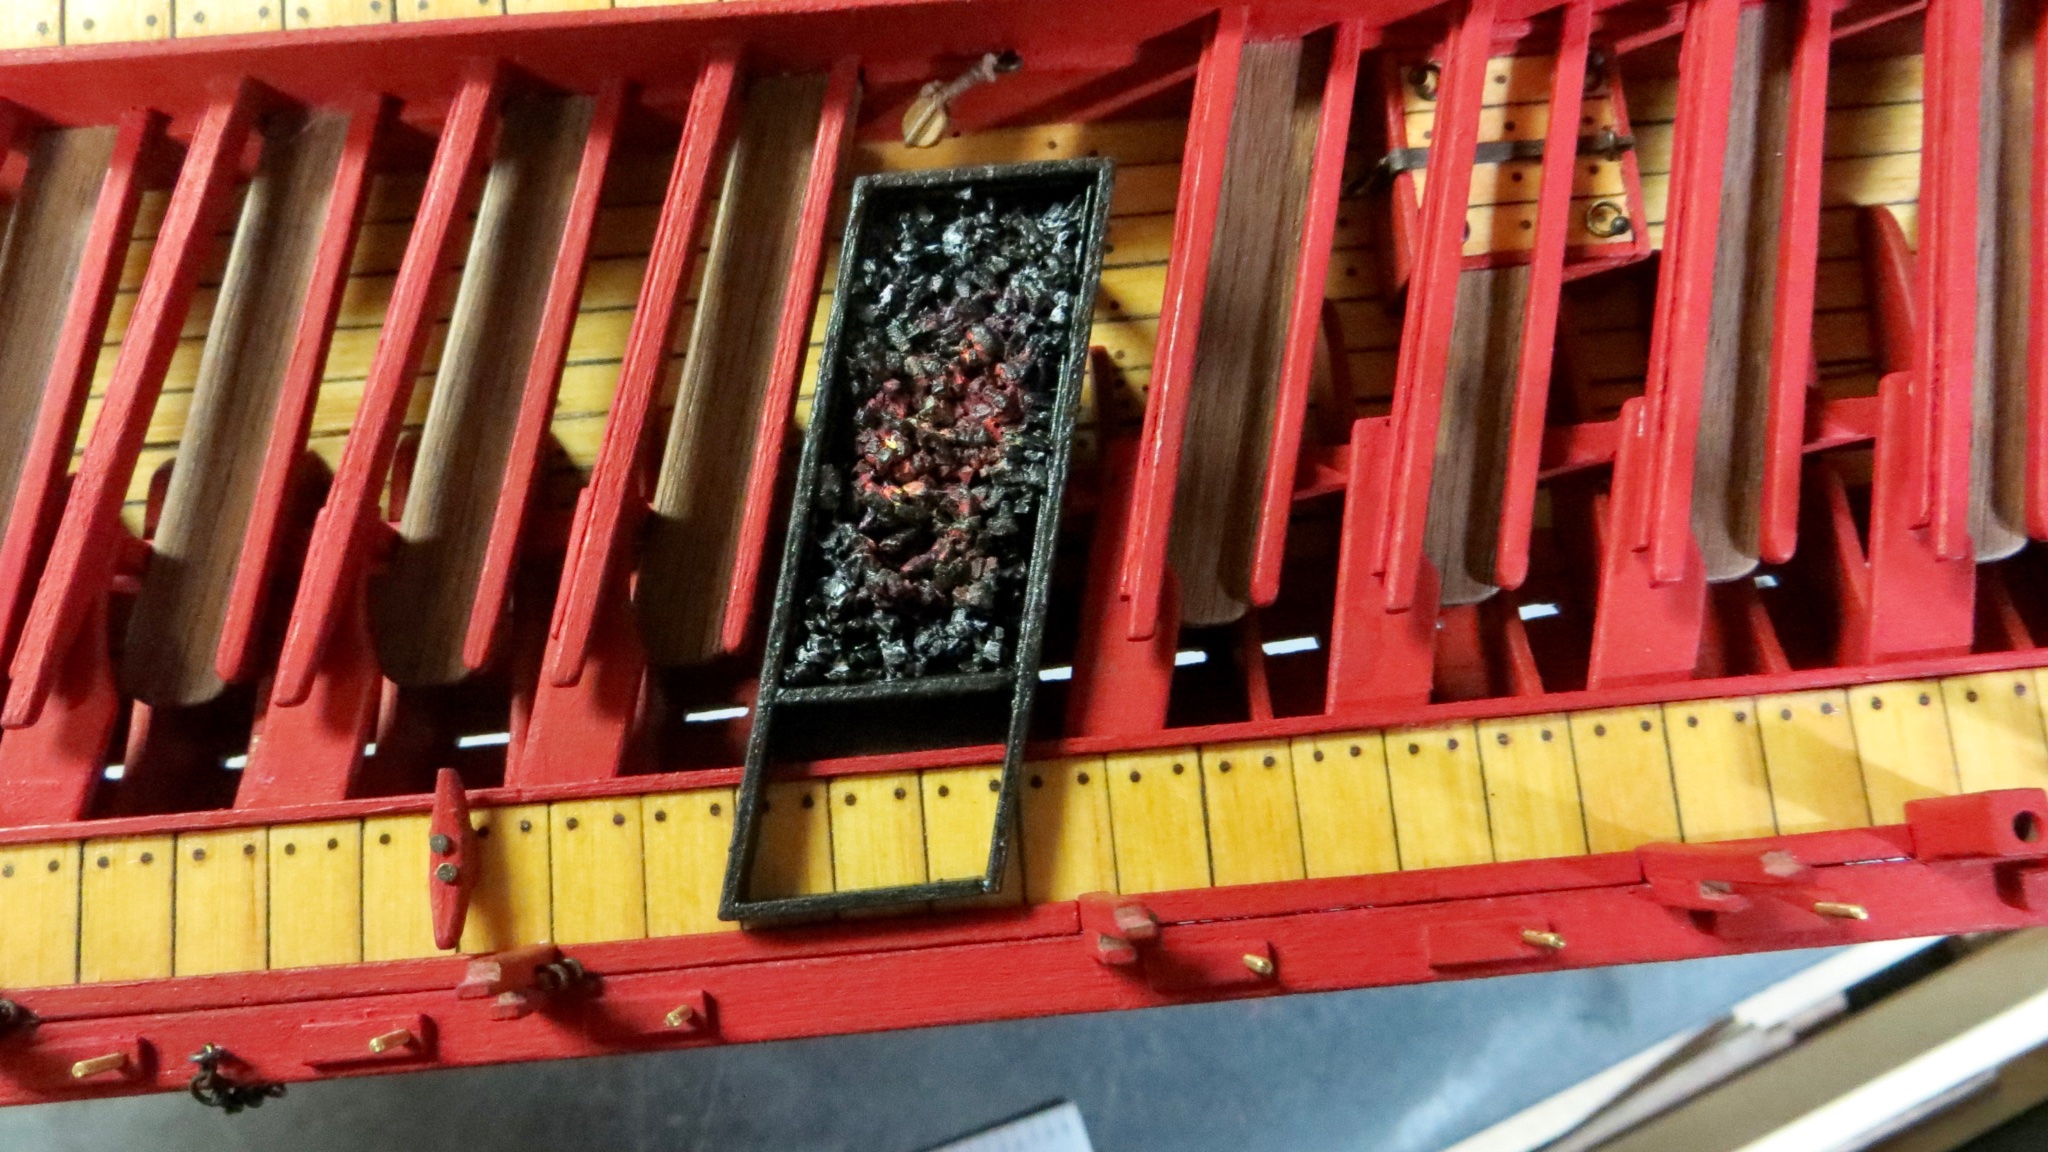
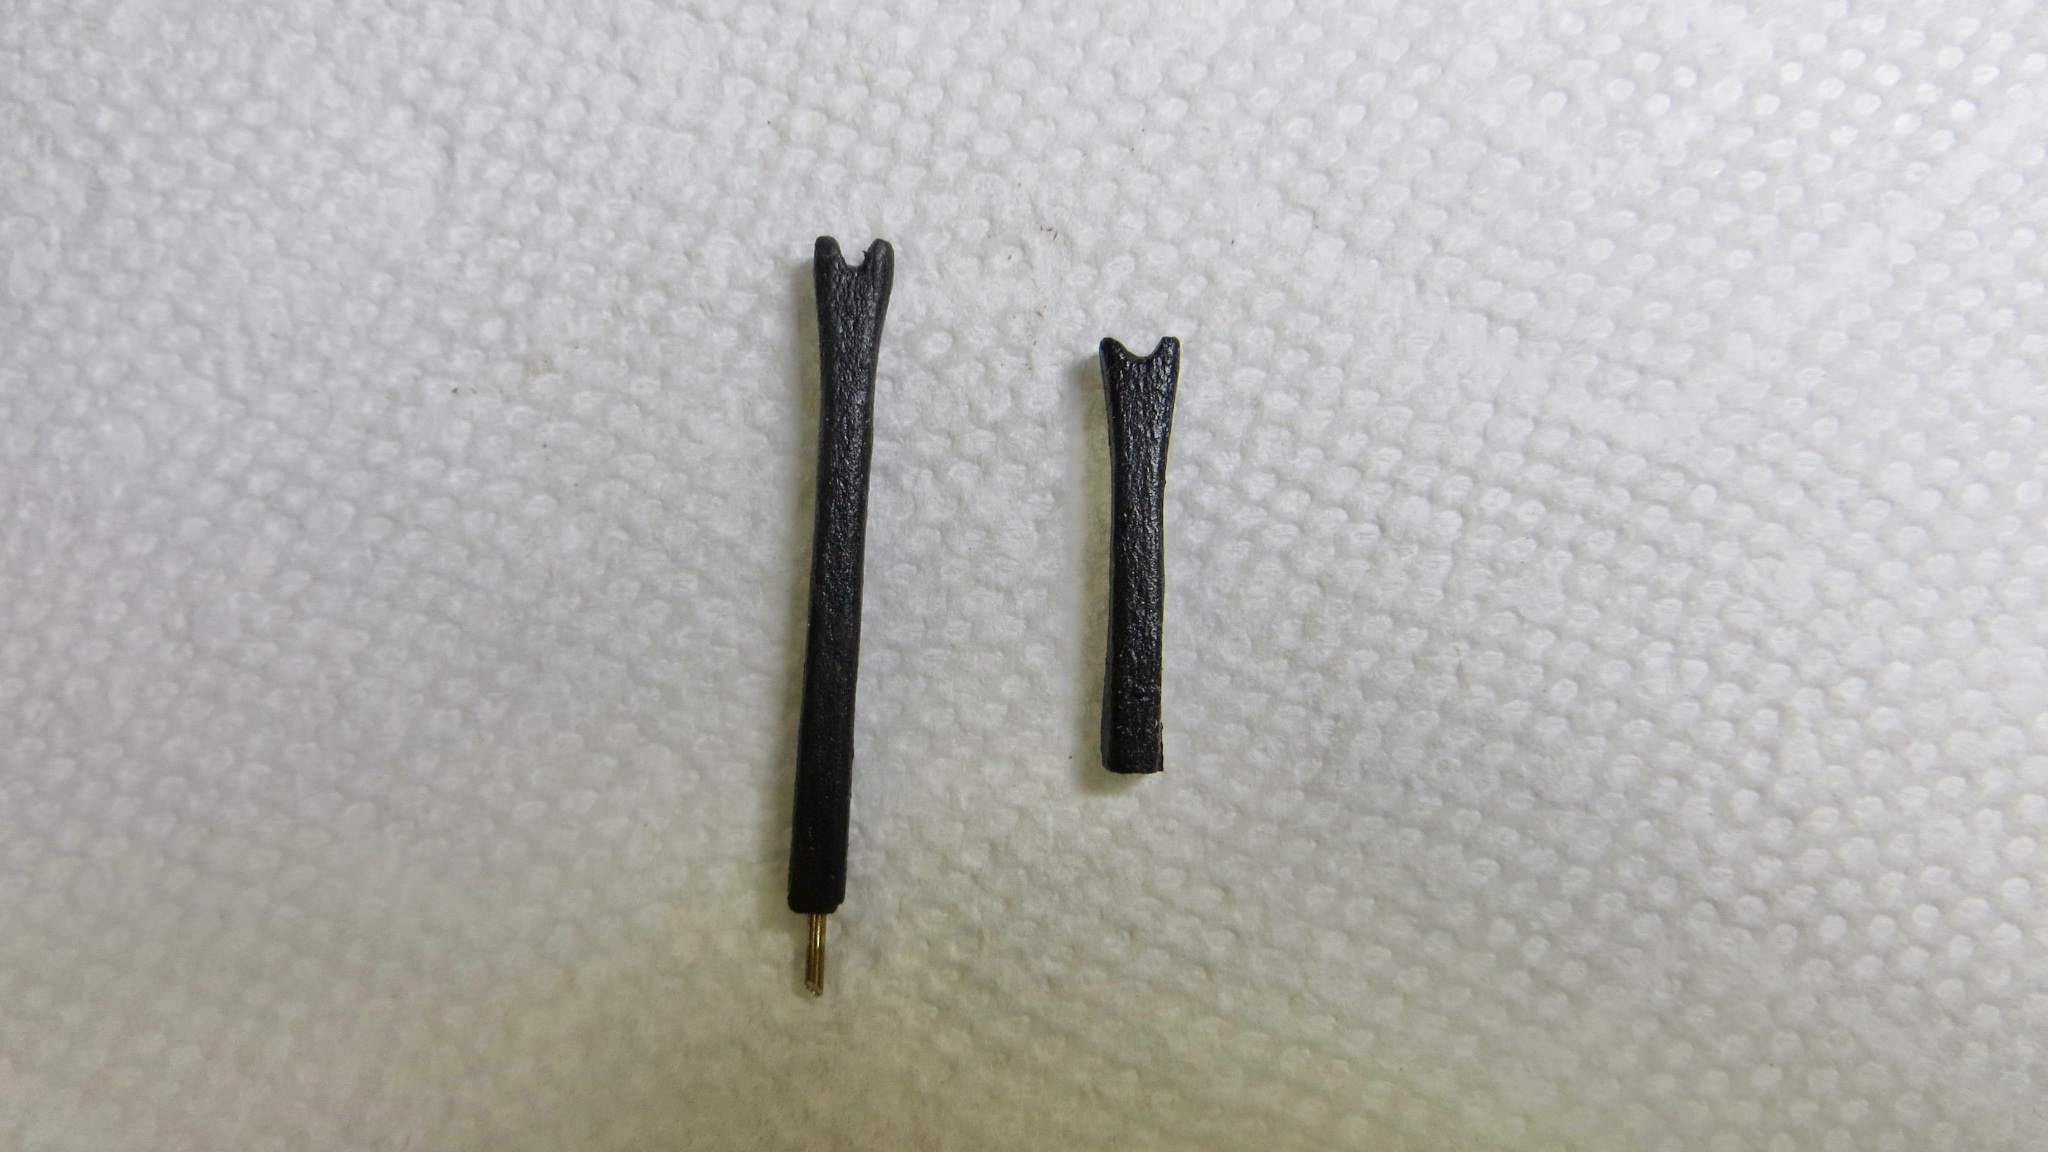
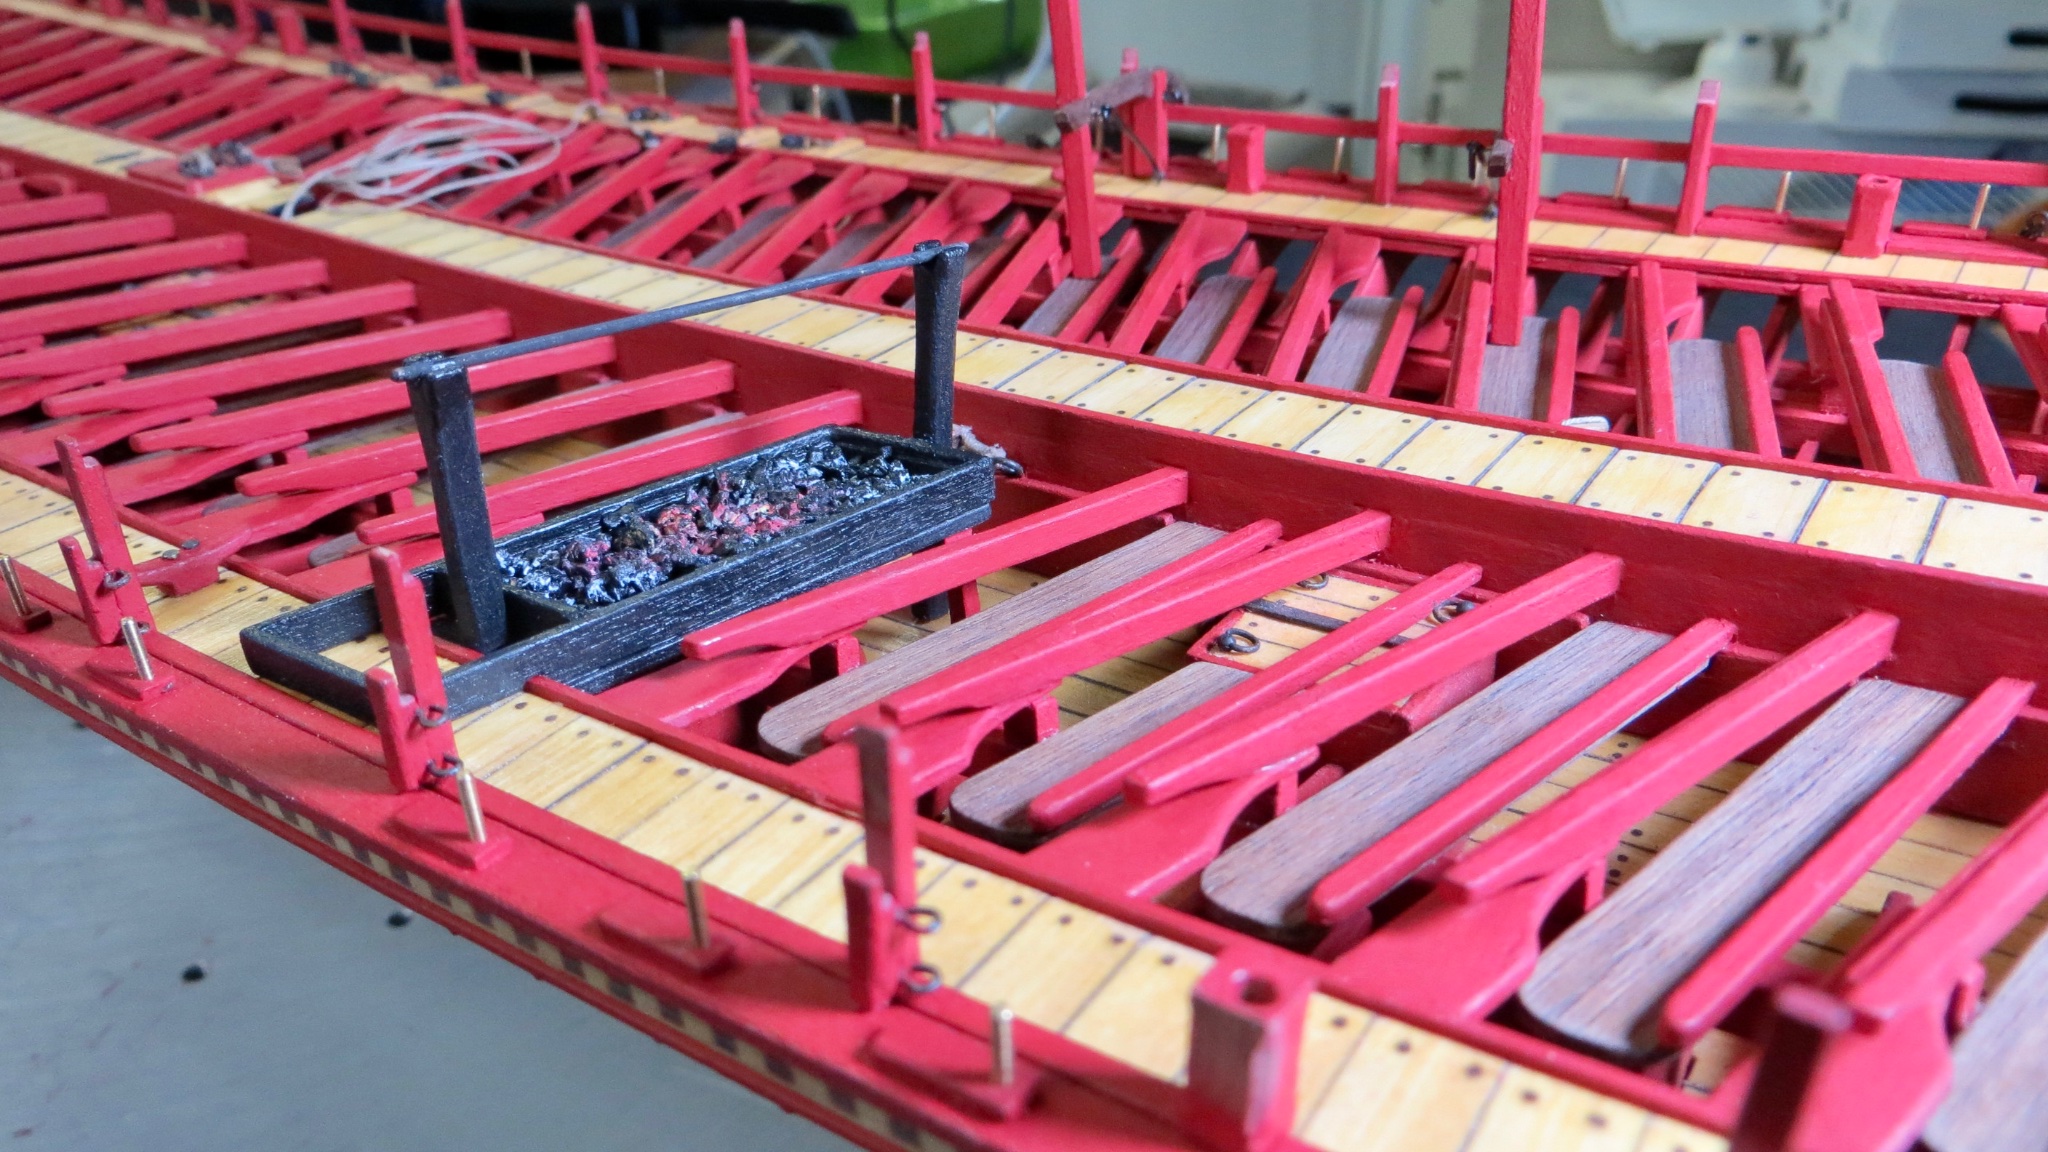
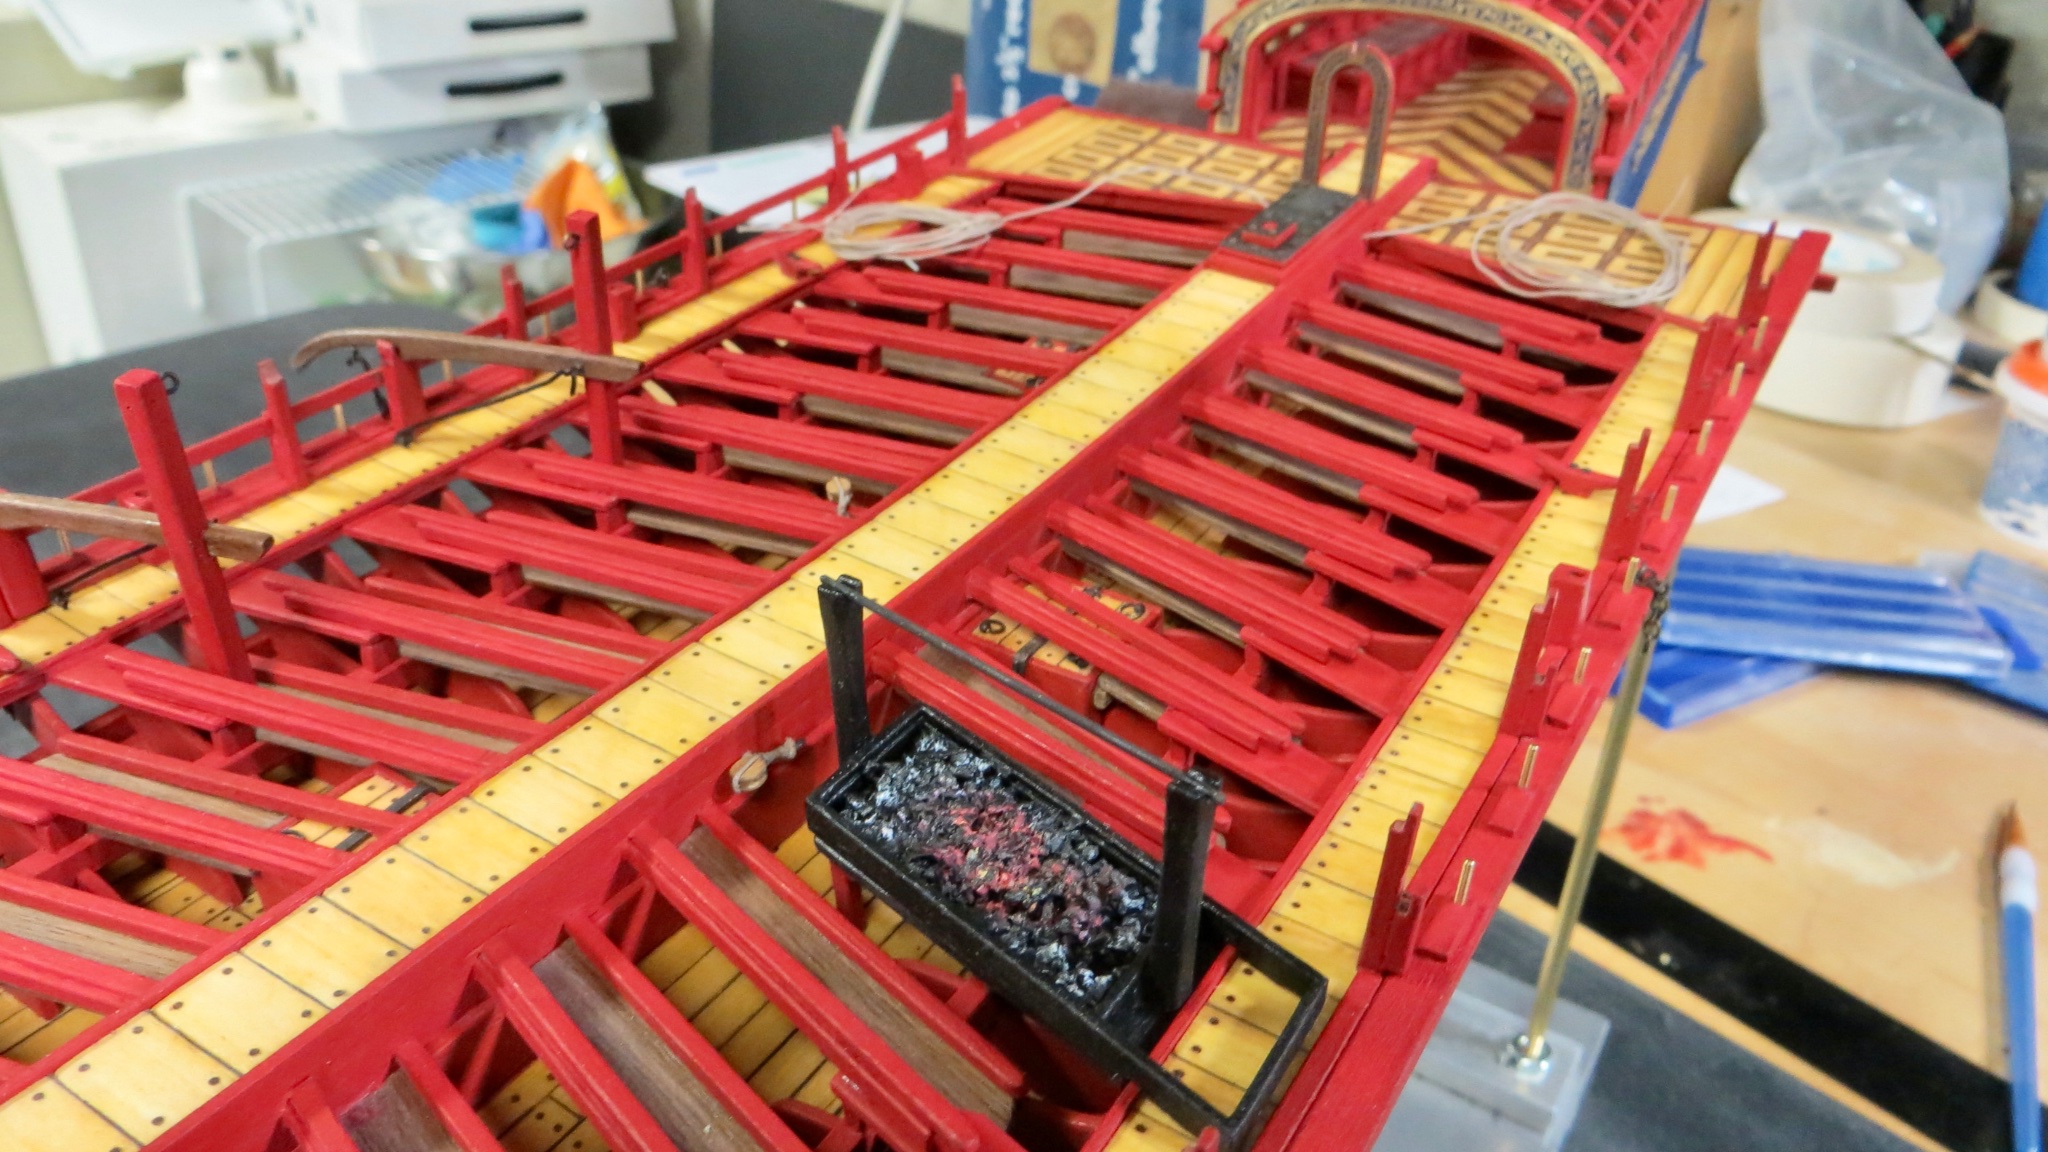
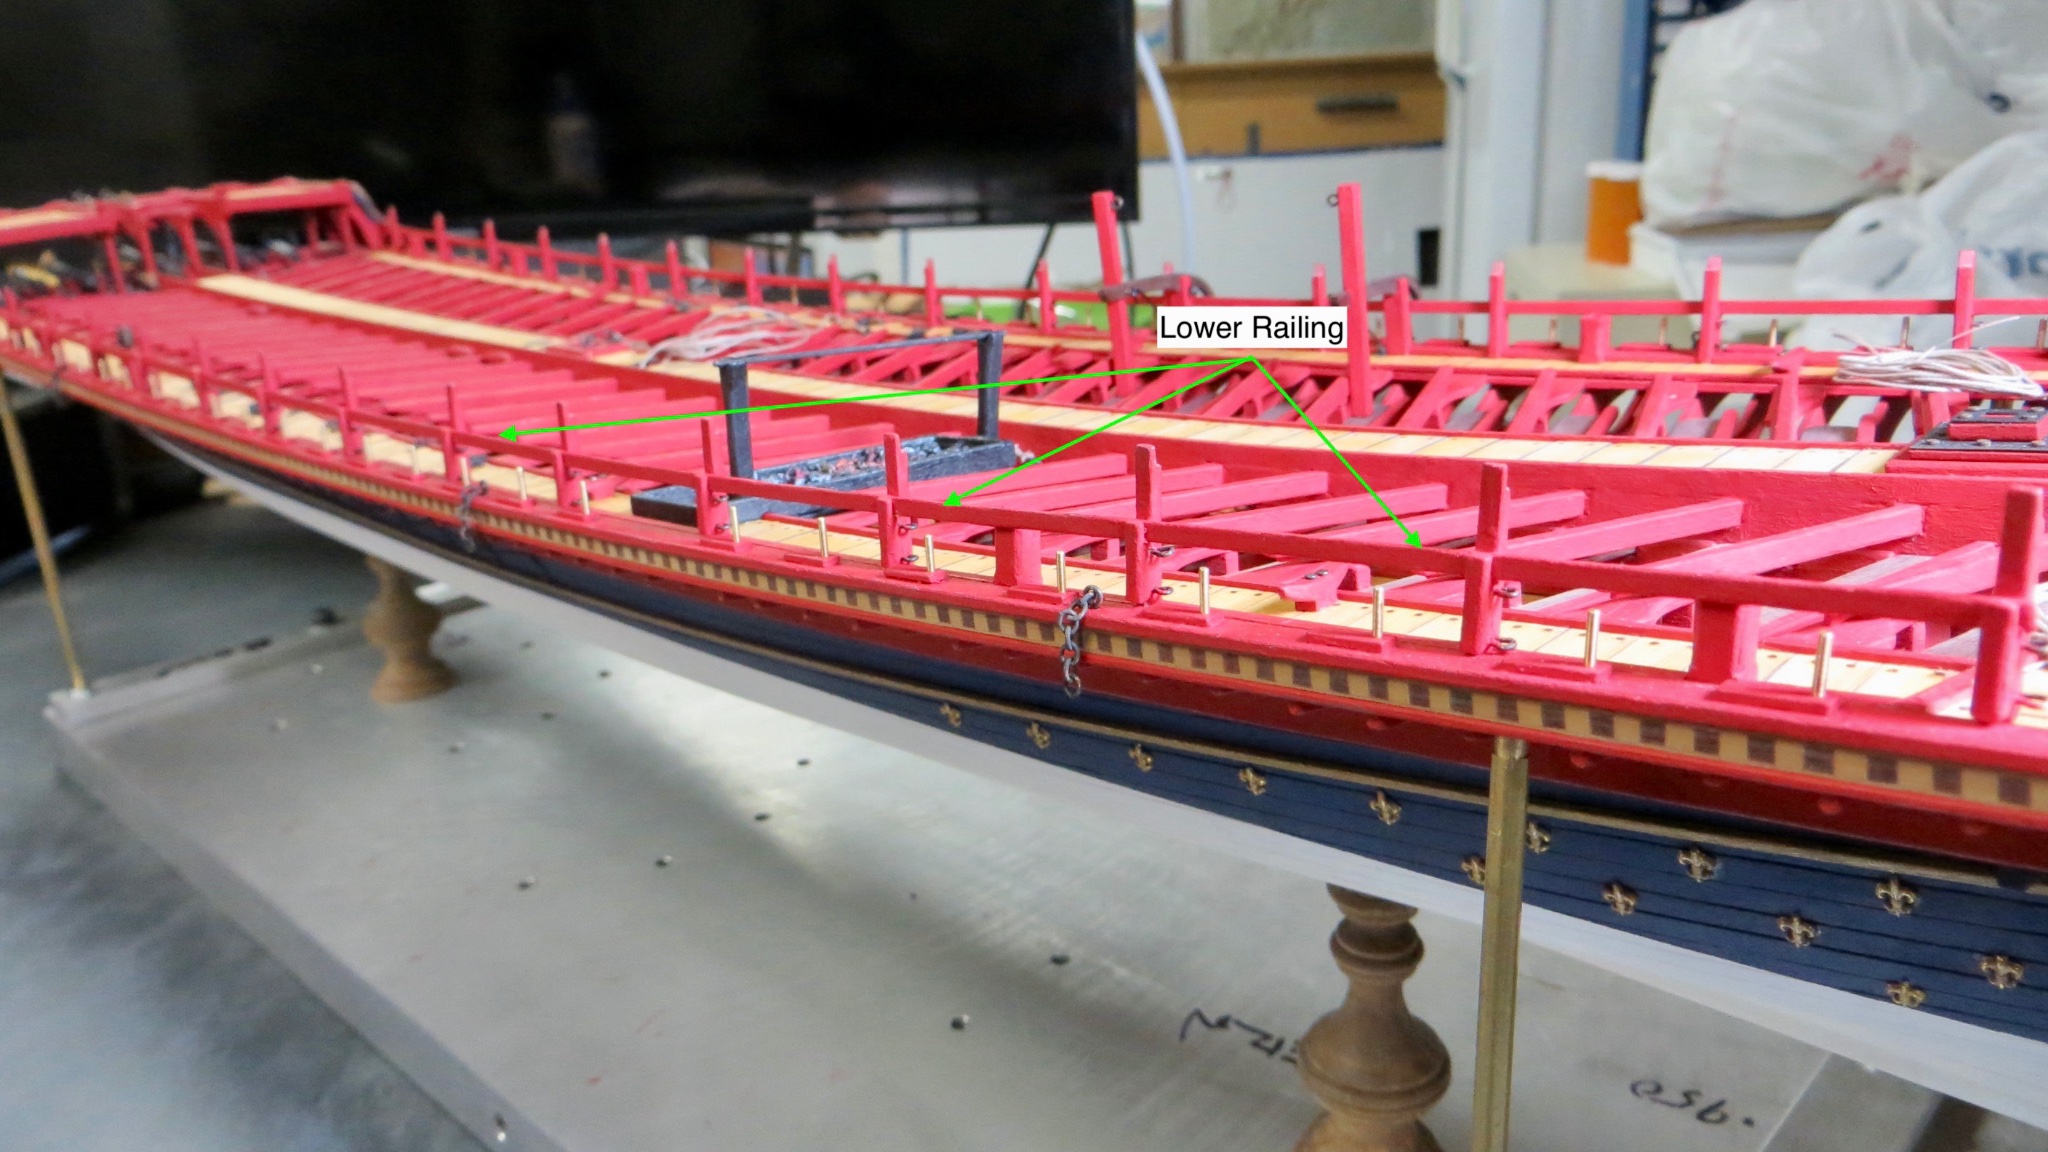
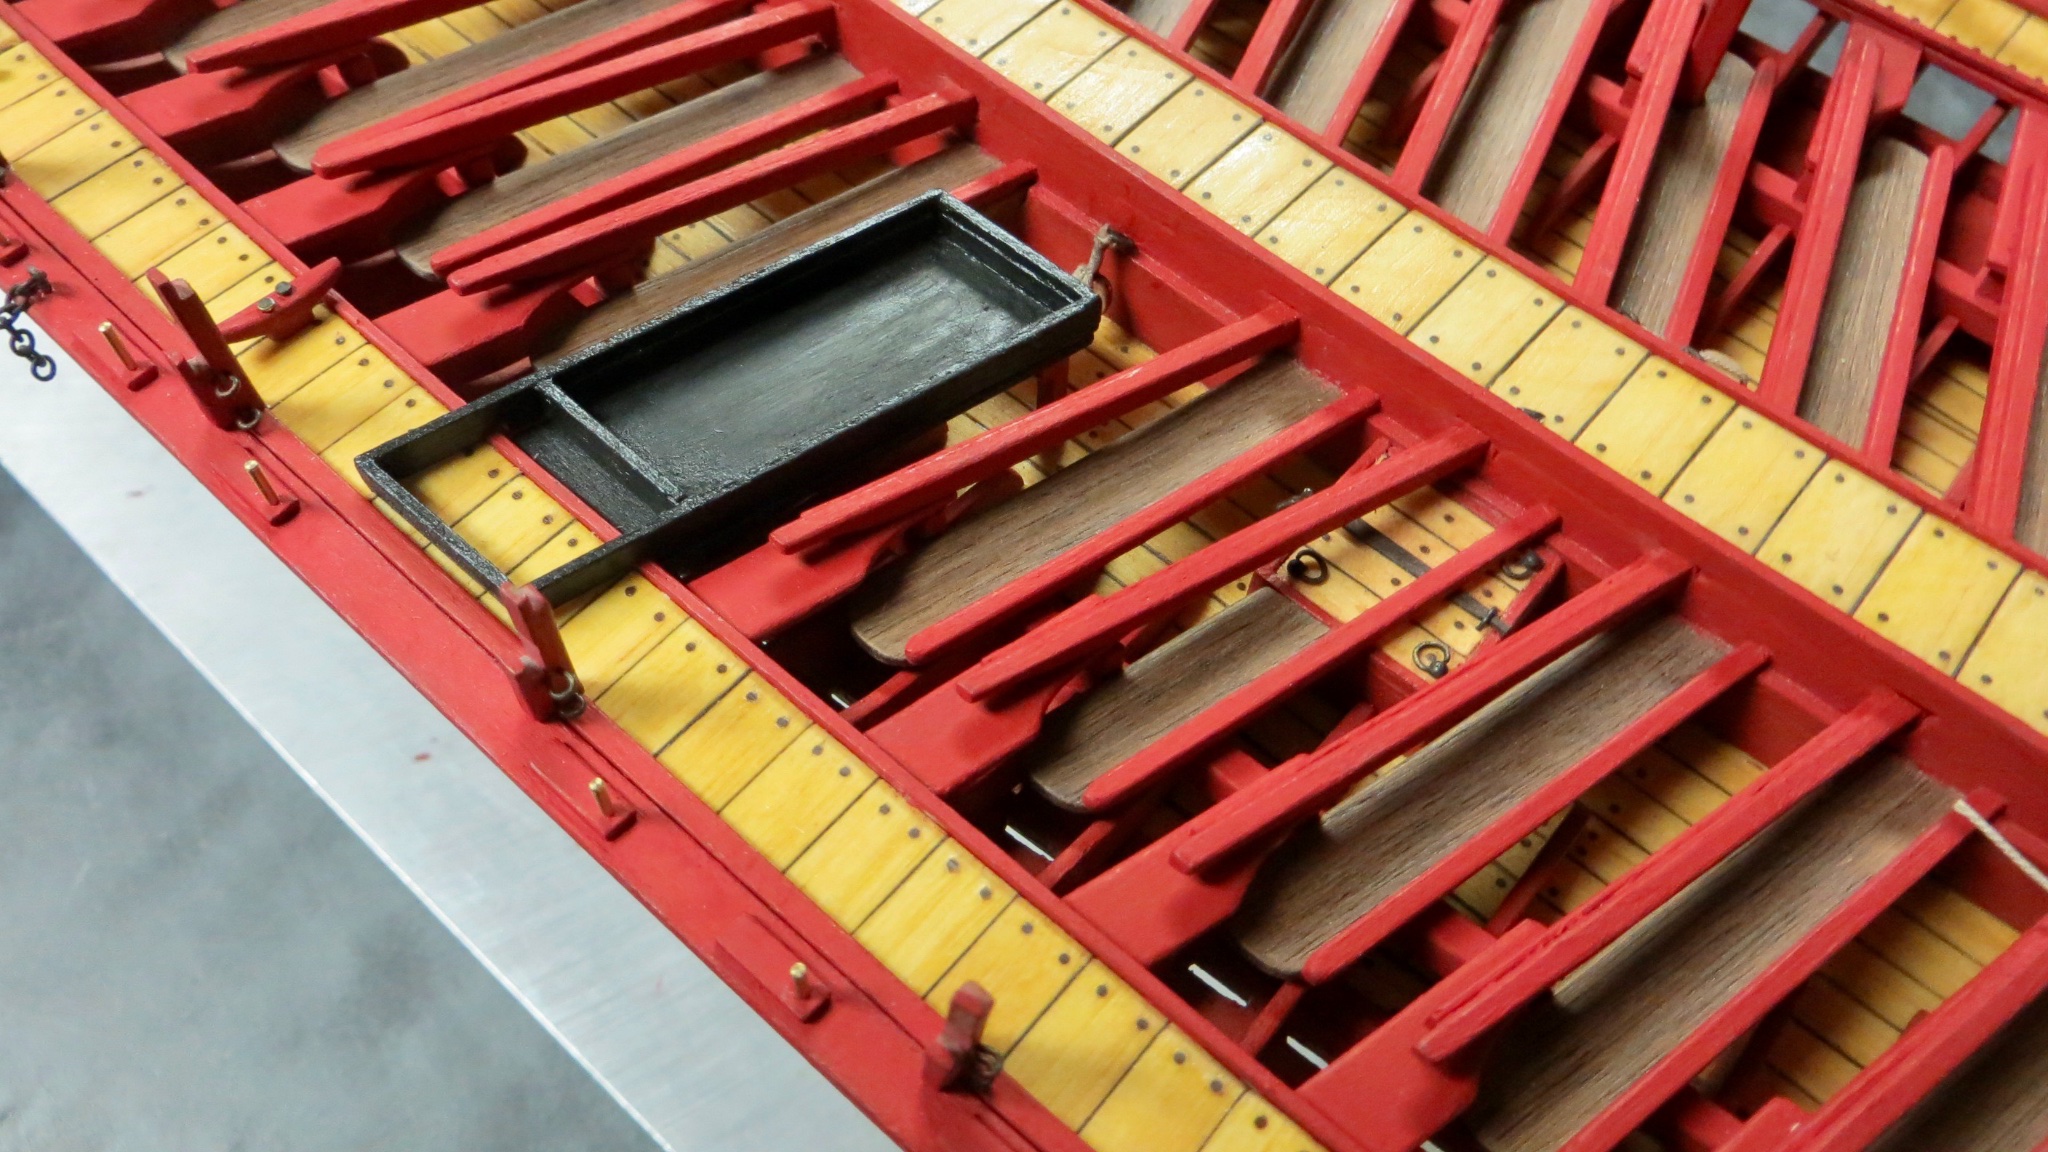
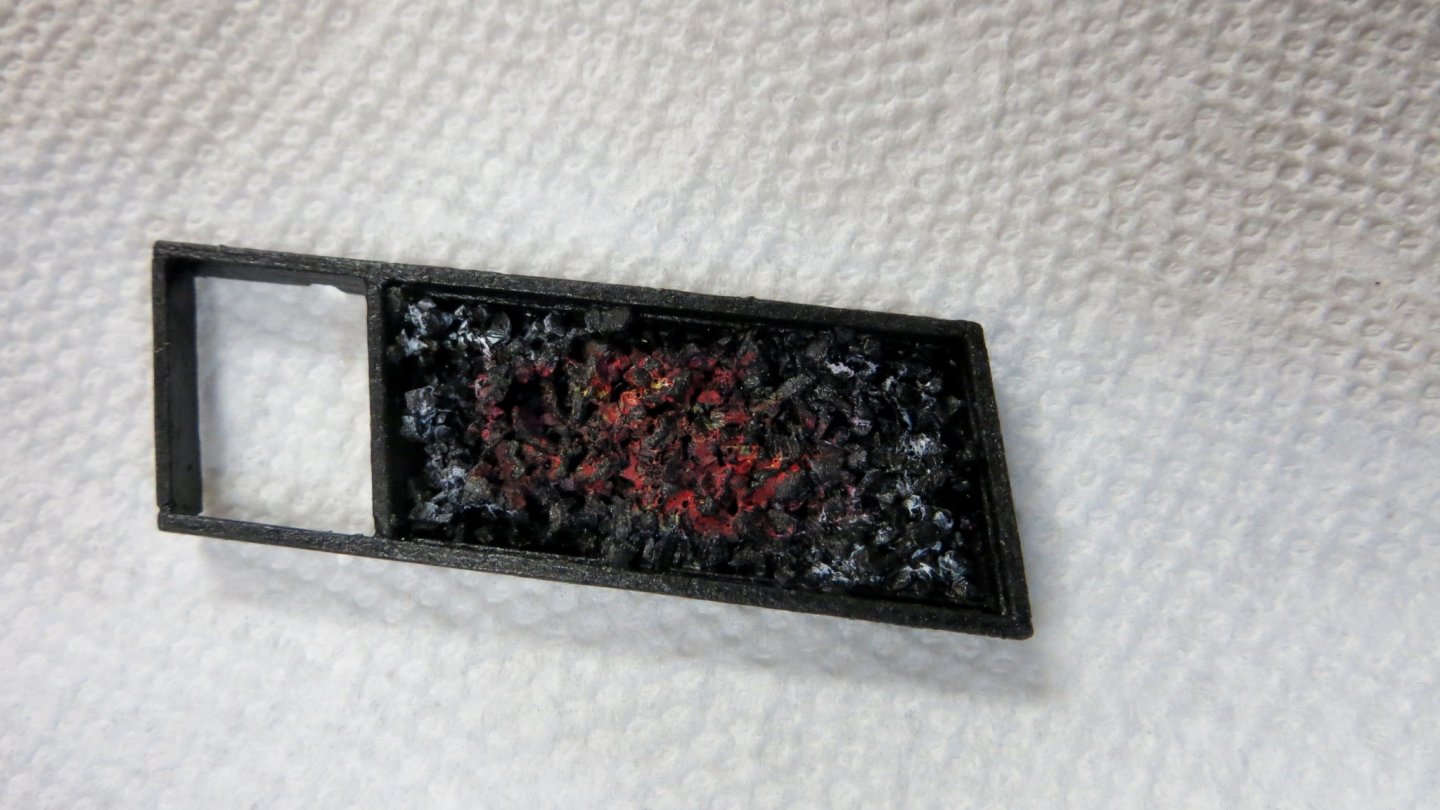
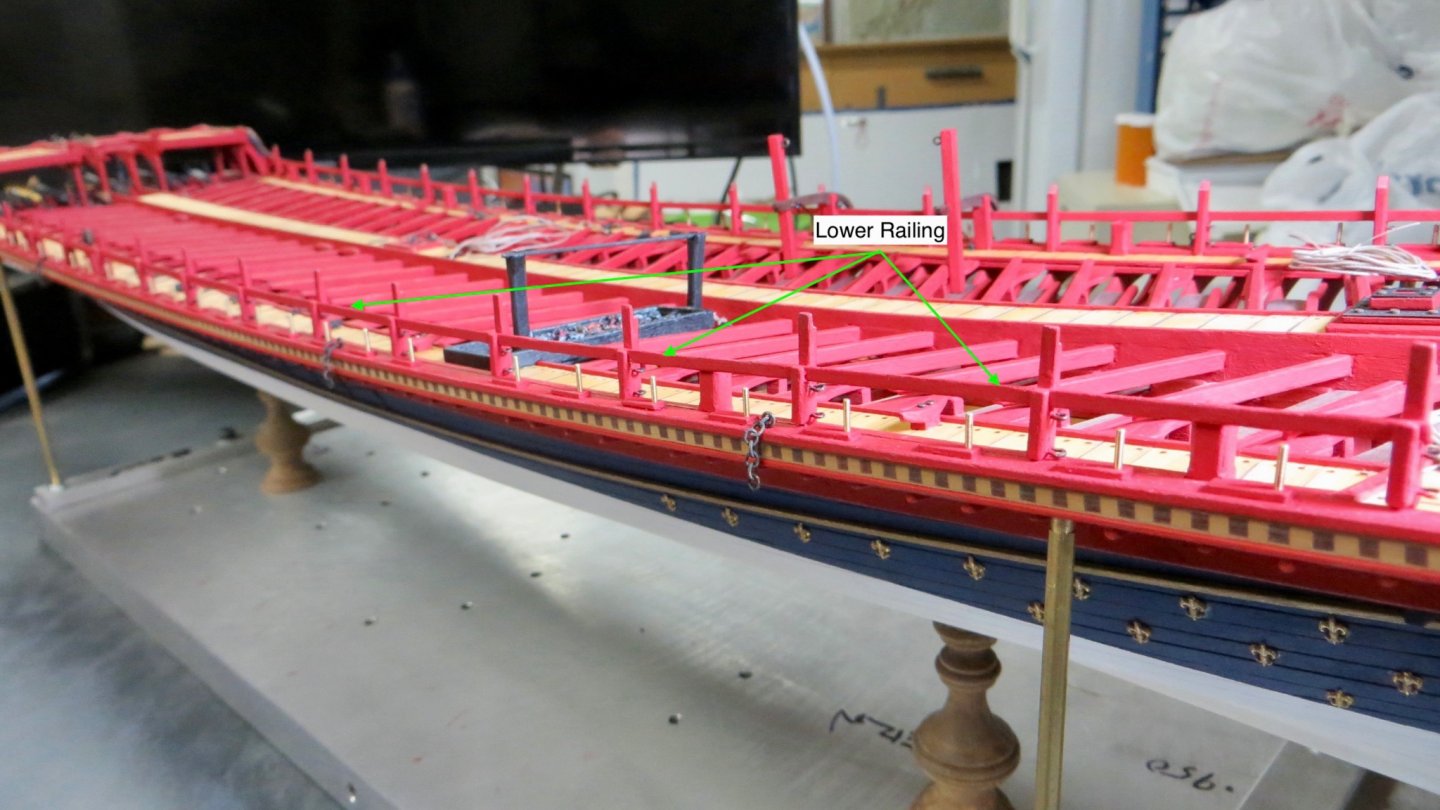
Hello, I was able to start back up on the model this past week after a couple of months off. I had made the base of the cooking station before I stopped work. First step was to create some coal or ember simulation. Although I am not that skilled in this area, I was able to pick up on some hints on the internet. First, bought some coarse ballast at a hobby shop and laid this into the cooking station pan. Next steps were as follows: 1. Paint the ballast a flat black 2. Highlight the high spots with a titanium white paint. 3. Added a yellow, then a touch of orange. 4. Brushed over all the above with the flat black again. This was the result: Assembly attached to the model. Hopefully the final result is acceptable!! Made up 2 stanchions to support the bar that will hold the pots Stanchions and Bar in place. Pots will be added later. At this point I was able to fit in the lower port railing. (the starboard lower railing was added earlier) Finally added the supports for the small guns. I did not attach the guns at this point so they won't be in my way. The next step is to finish the port and starboard stern area next to the railing. Thanks for stopping by! Frank


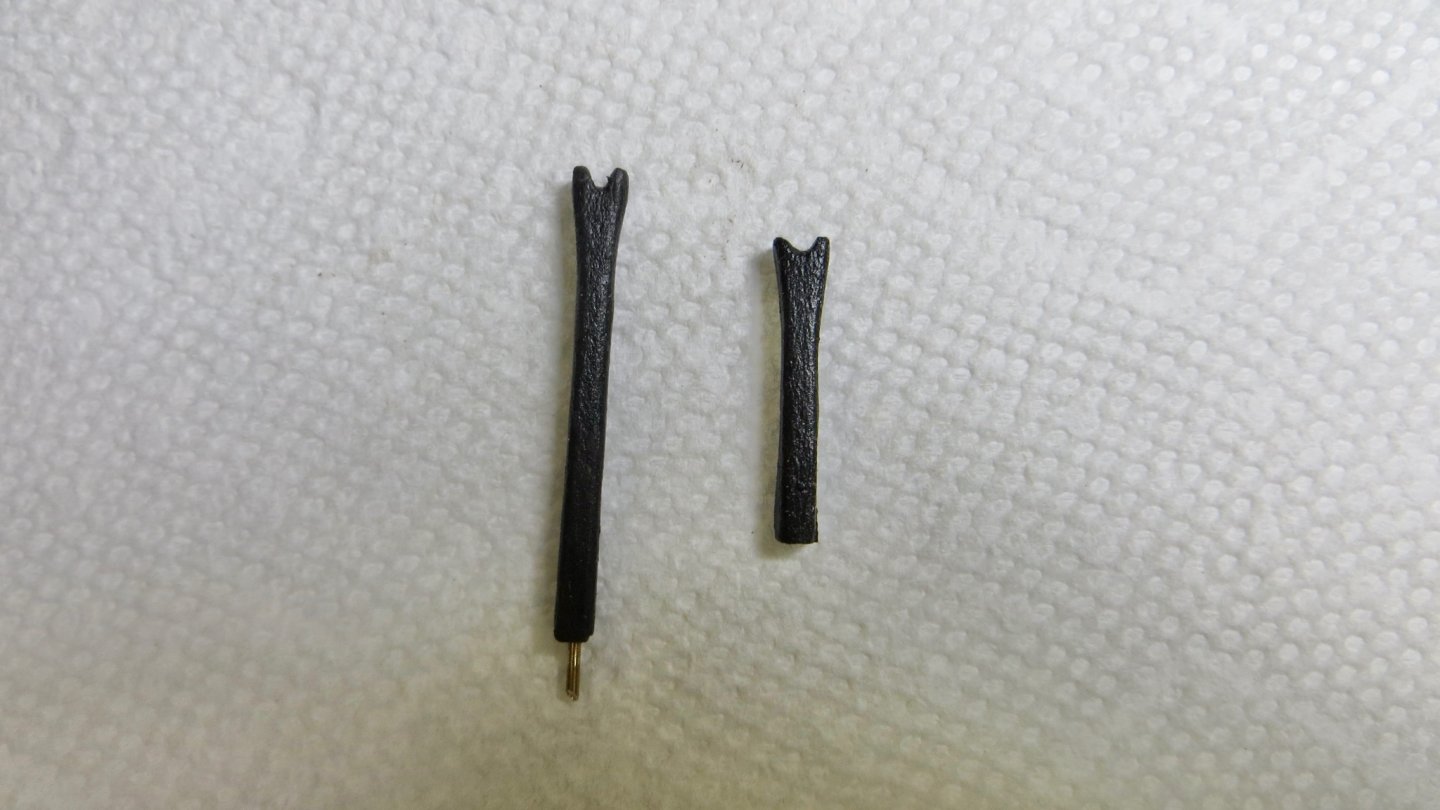


- 510 replies
-
- 9
-
-
- reale de france
- corel
- (and 1 more)
-
Best of luck on your issue Mark! Be well, Frank
-
Takao, Thank you very much for giving me a "heads up" for this potential issue. I will look into it. After a 2 month stoppage (helping my daughter and son in law remodel their new home) I hope to be back at work with my model at the end of this week. Have to sit down and review where i'm at!! Thanks, Frank
- 510 replies
-
- 4
-
-
- reale de france
- corel
- (and 1 more)
-
Nice idea with that simple jig! Frank
-
Great job on a tough section of the ship model. Looks like you put a lot of time and thought into the process! Frank
- 112 replies
-
- 1
-
-
- corel
- reale de france
- (and 1 more)
-
Excellent job in covering up the missing section and beautiful work overall! Congrats, Frank
- 222 replies
-
- 2
-
-
- reale de france
- heller
- (and 1 more)
-
Hello to those who stopped by for a visit and for the "likes" All appreciated!! I had to take a month off from the build to help out family with some moving projects. Can't wait to get back to my build soon! Thanks, Frank
- 510 replies
-
- 2
-
-
- reale de france
- corel
- (and 1 more)
-
Very nice! What material did you use for the sail? Scale looks very good! Frank
- 222 replies
-
- 1
-
-
- reale de france
- heller
- (and 1 more)
-
Congratulations on finishing your project! Yes, get a display put on to protect your beautiful work! Frank
-
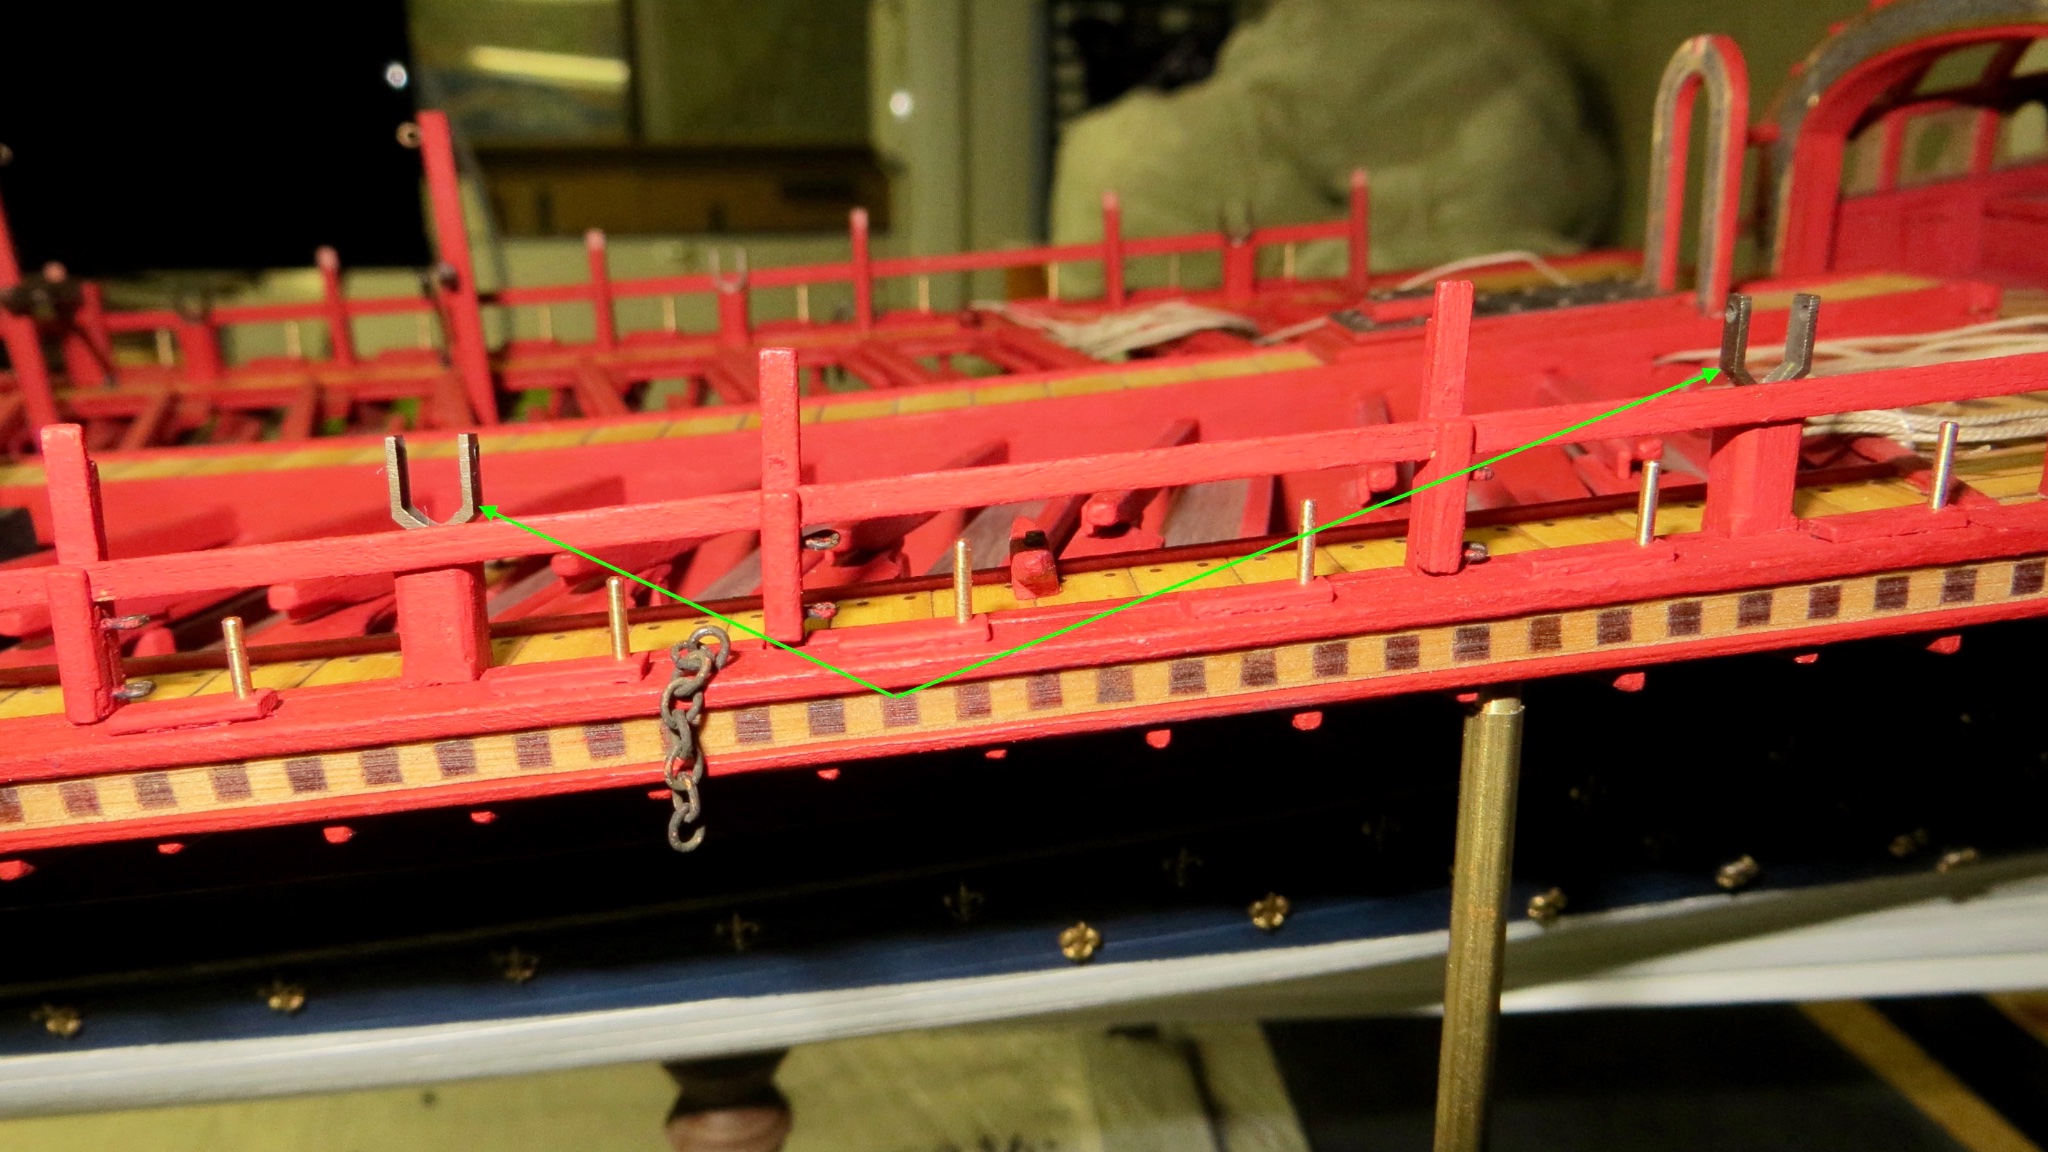
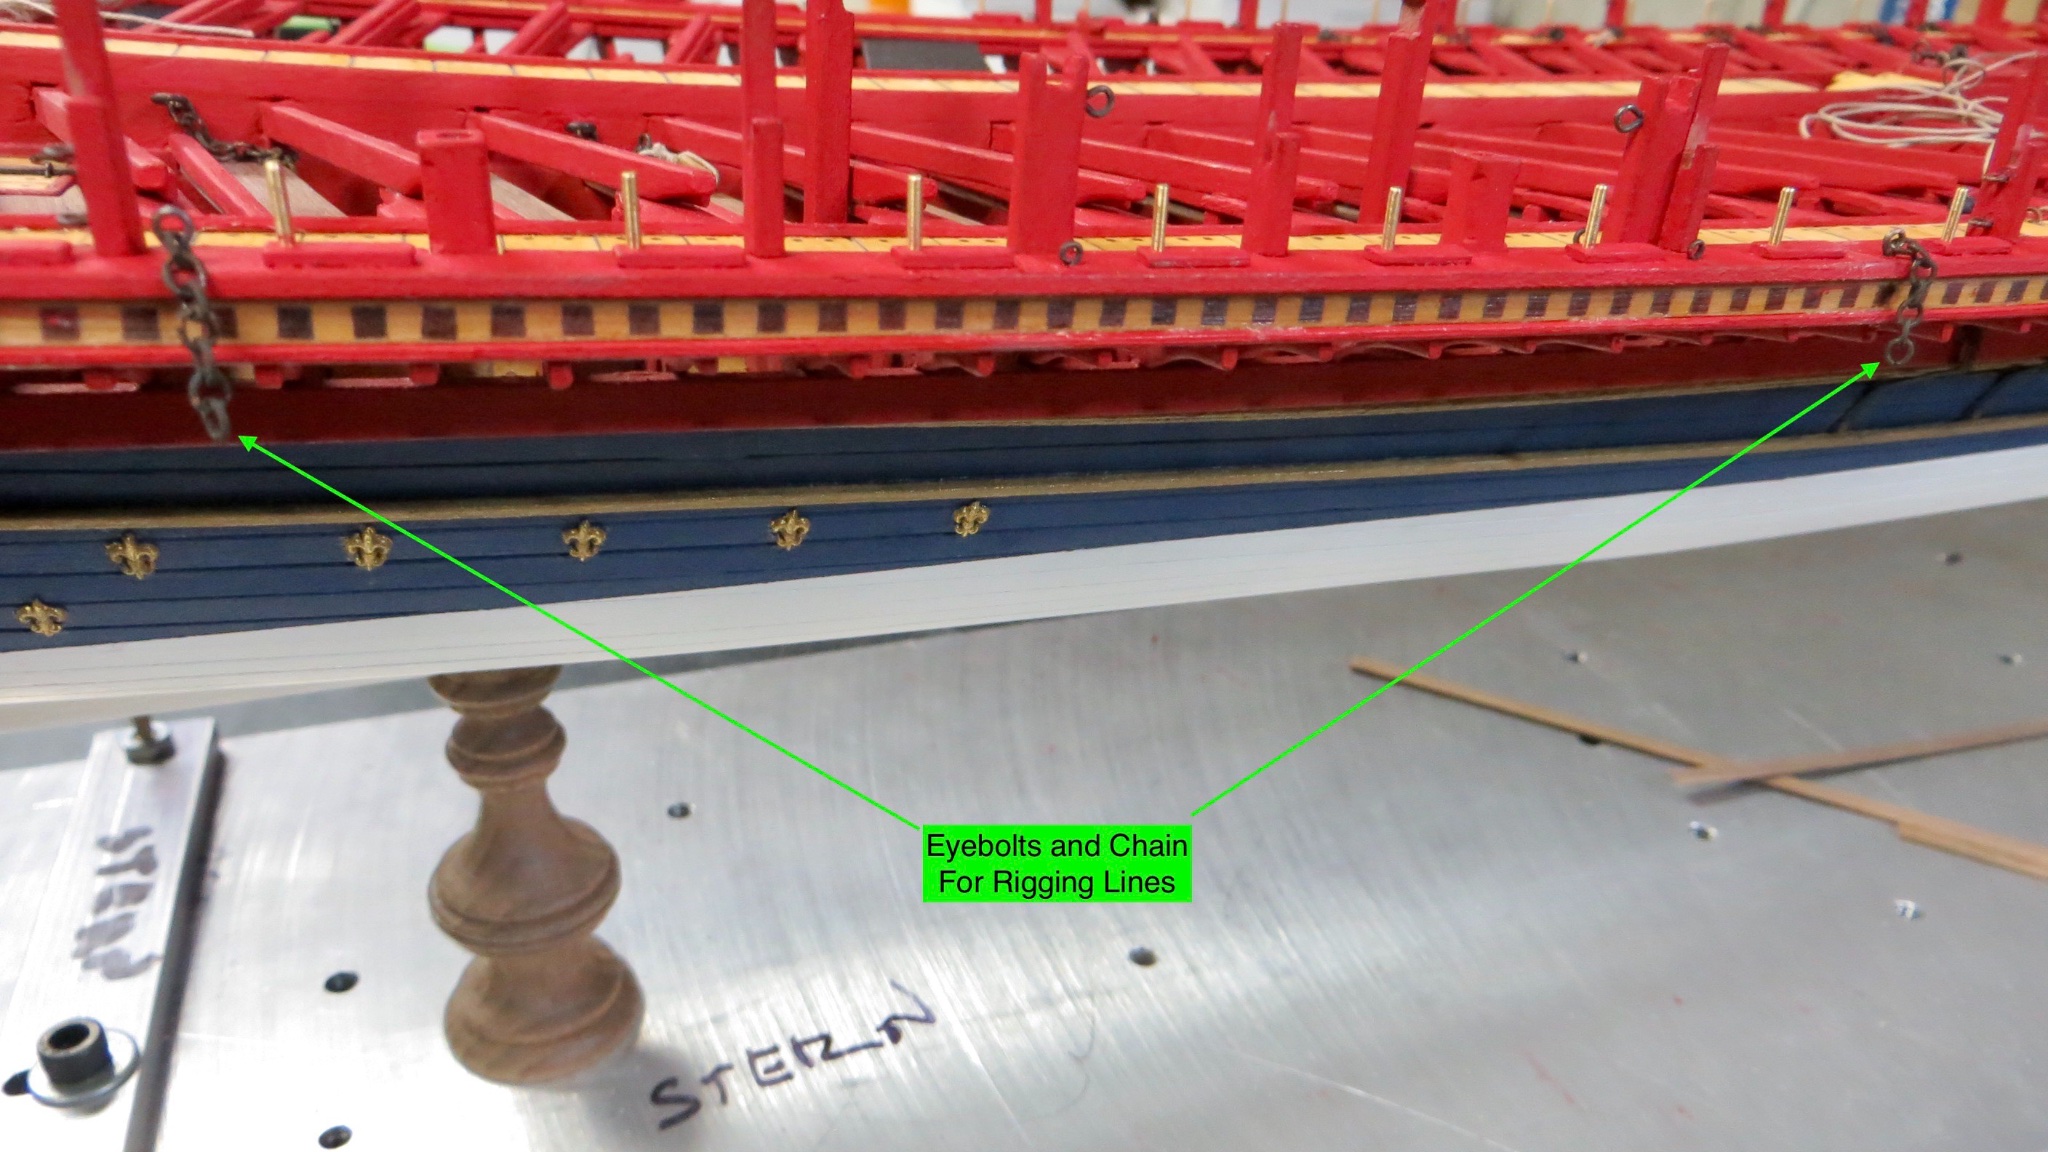
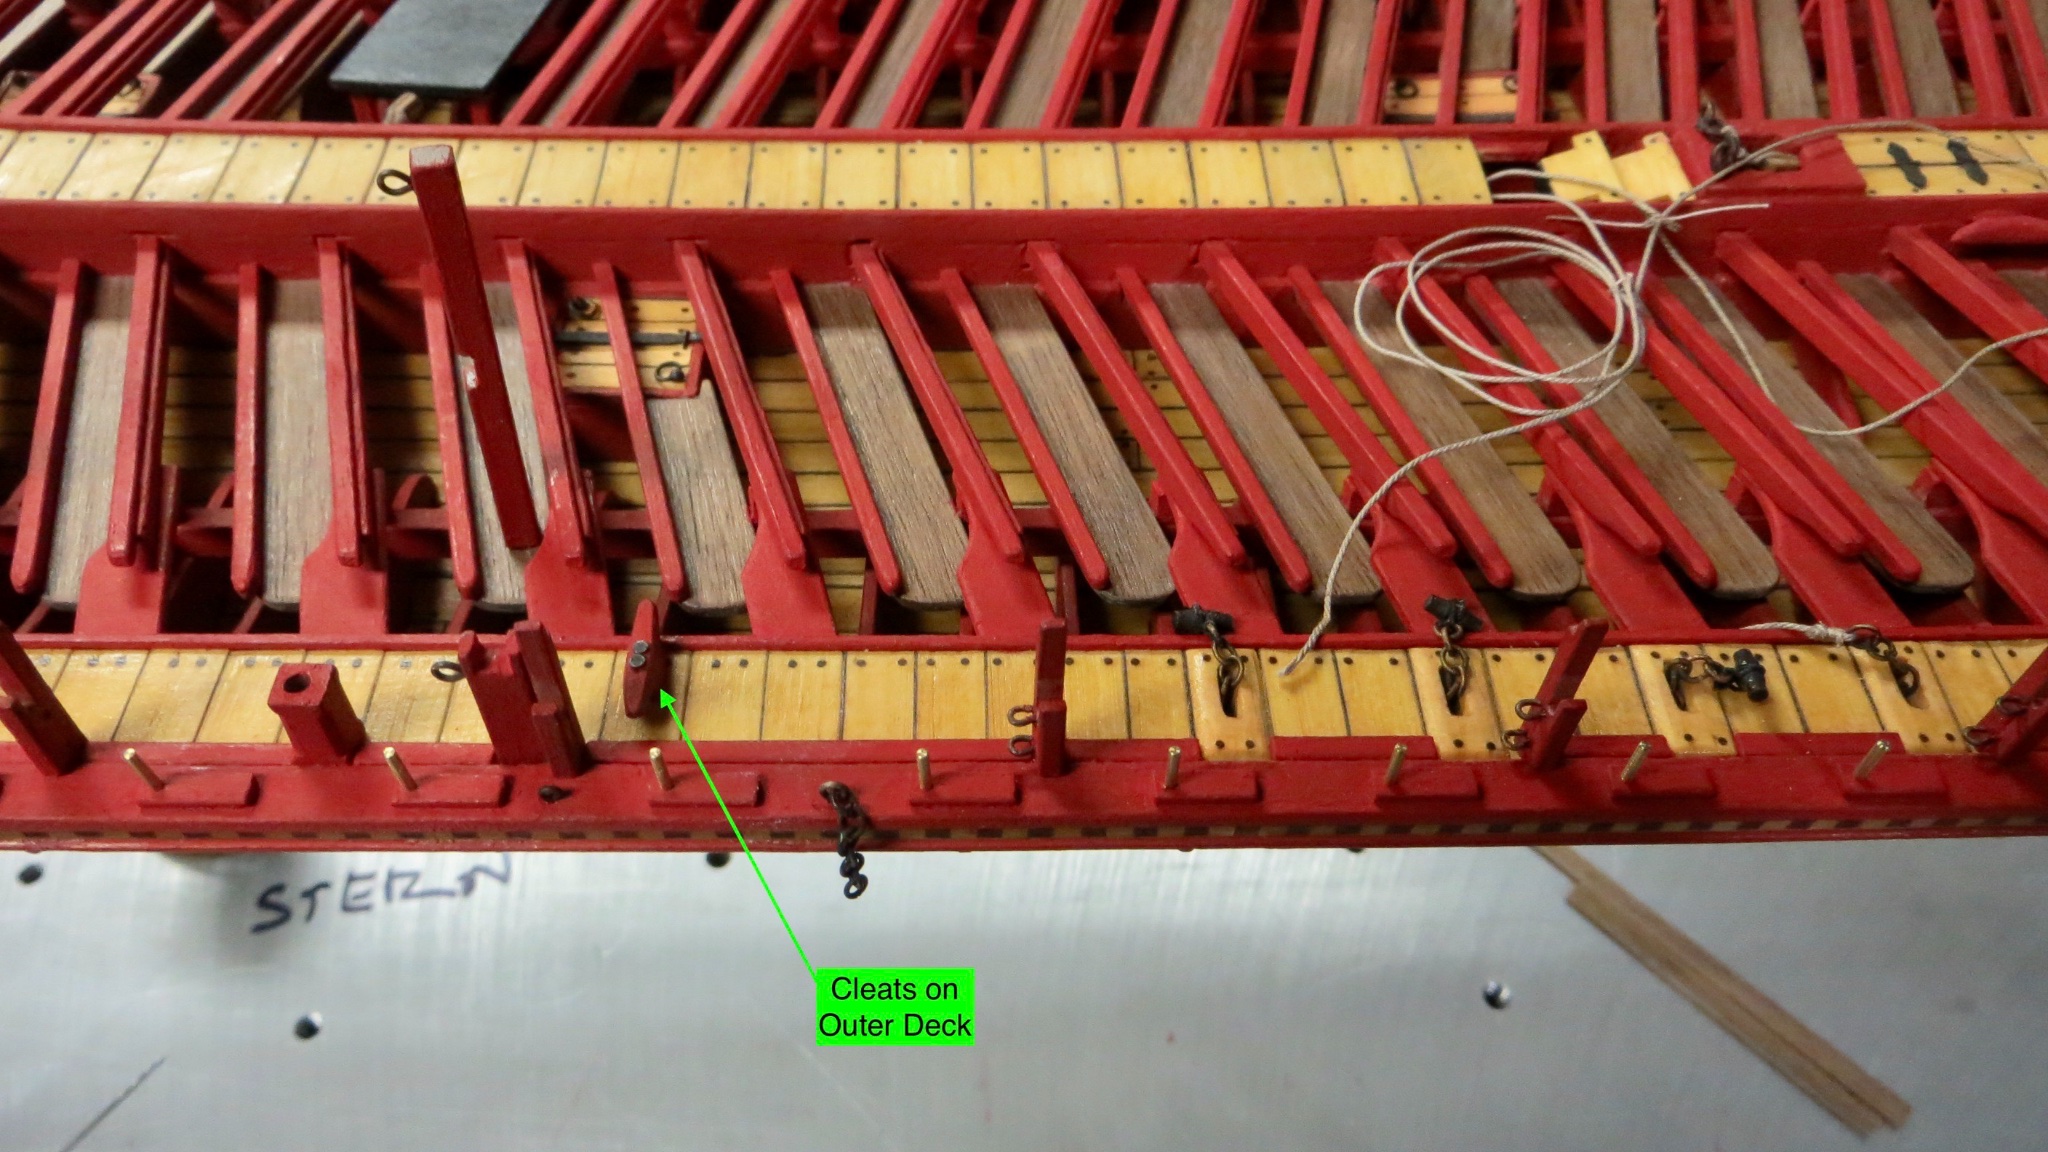
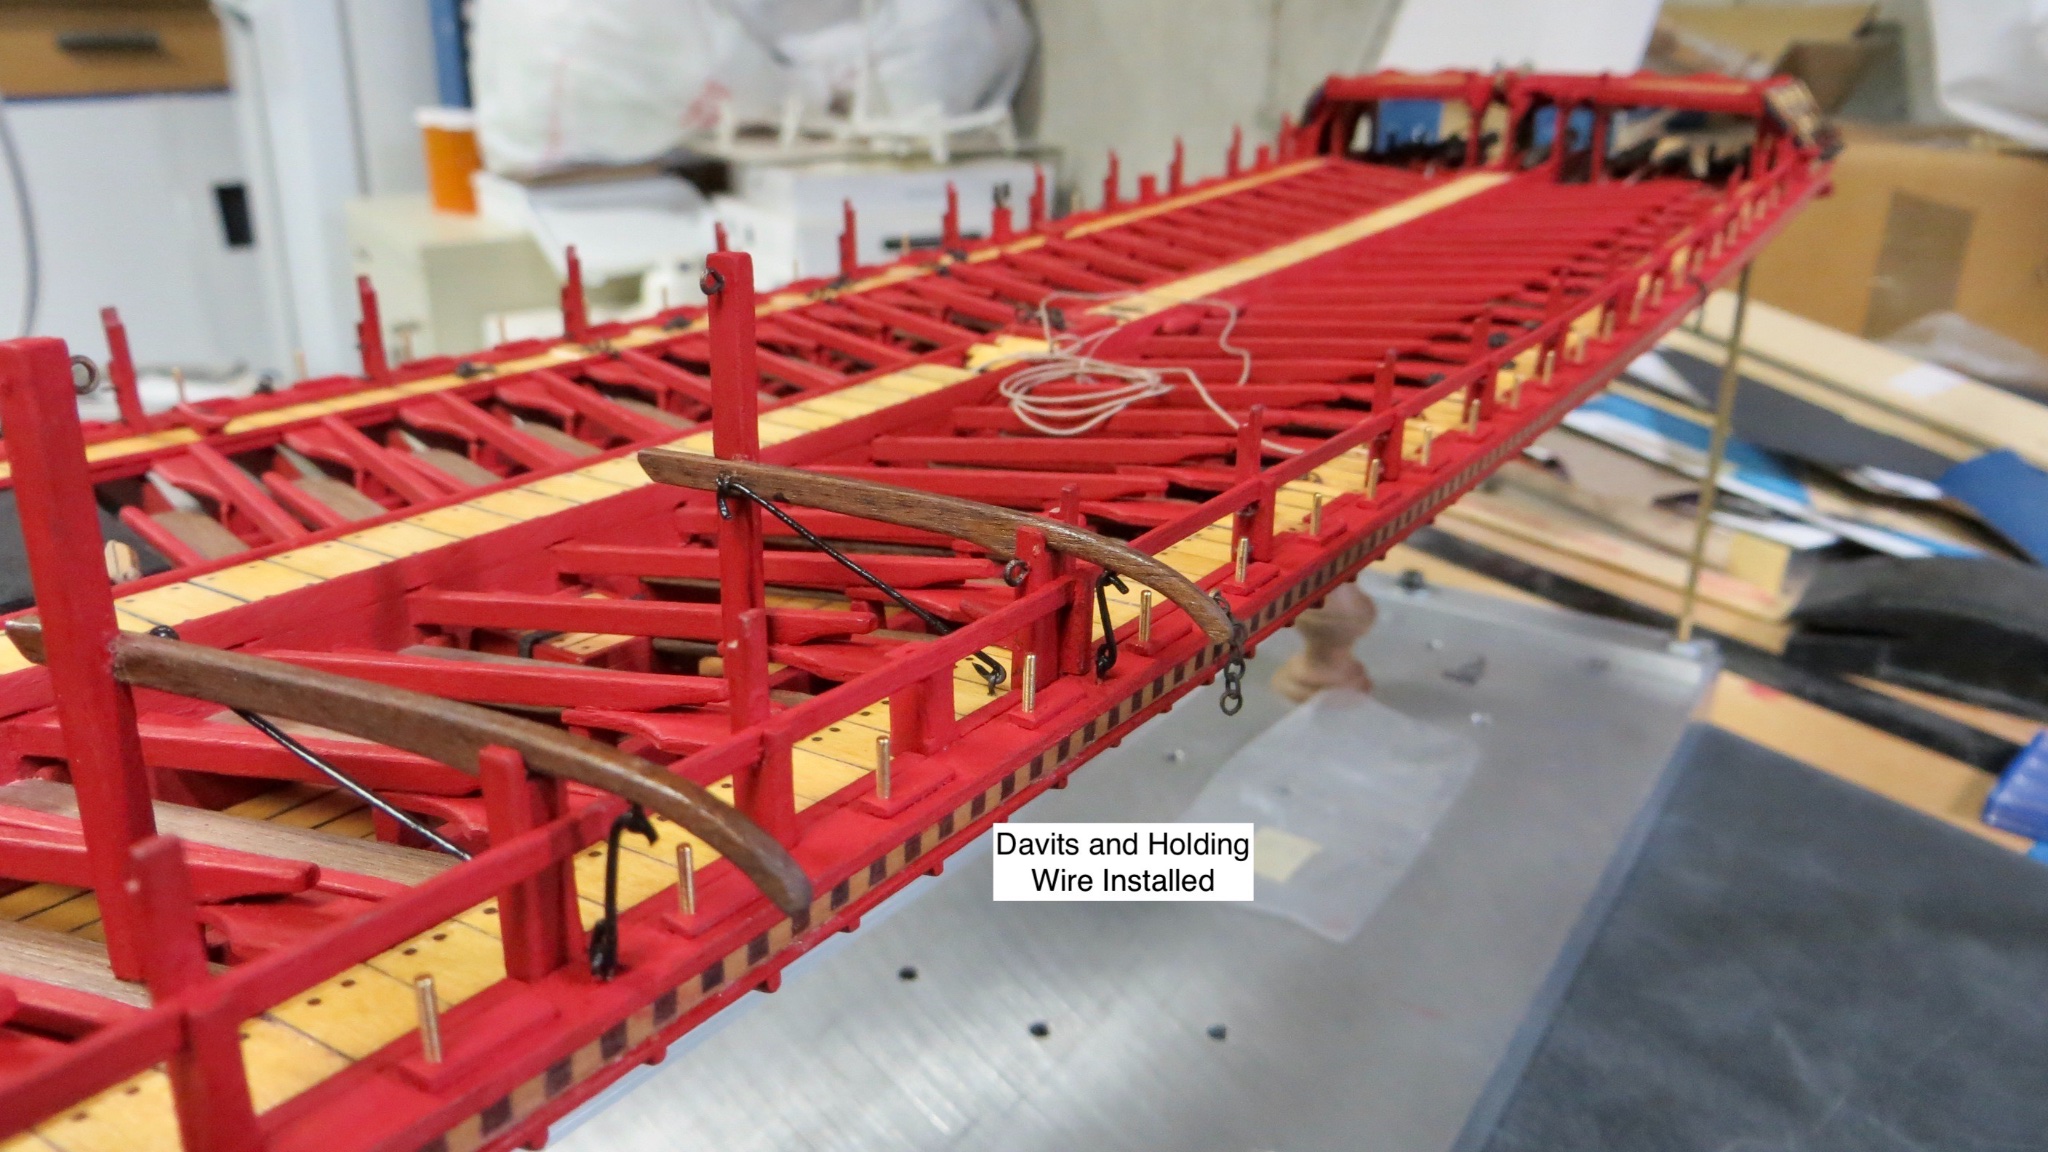
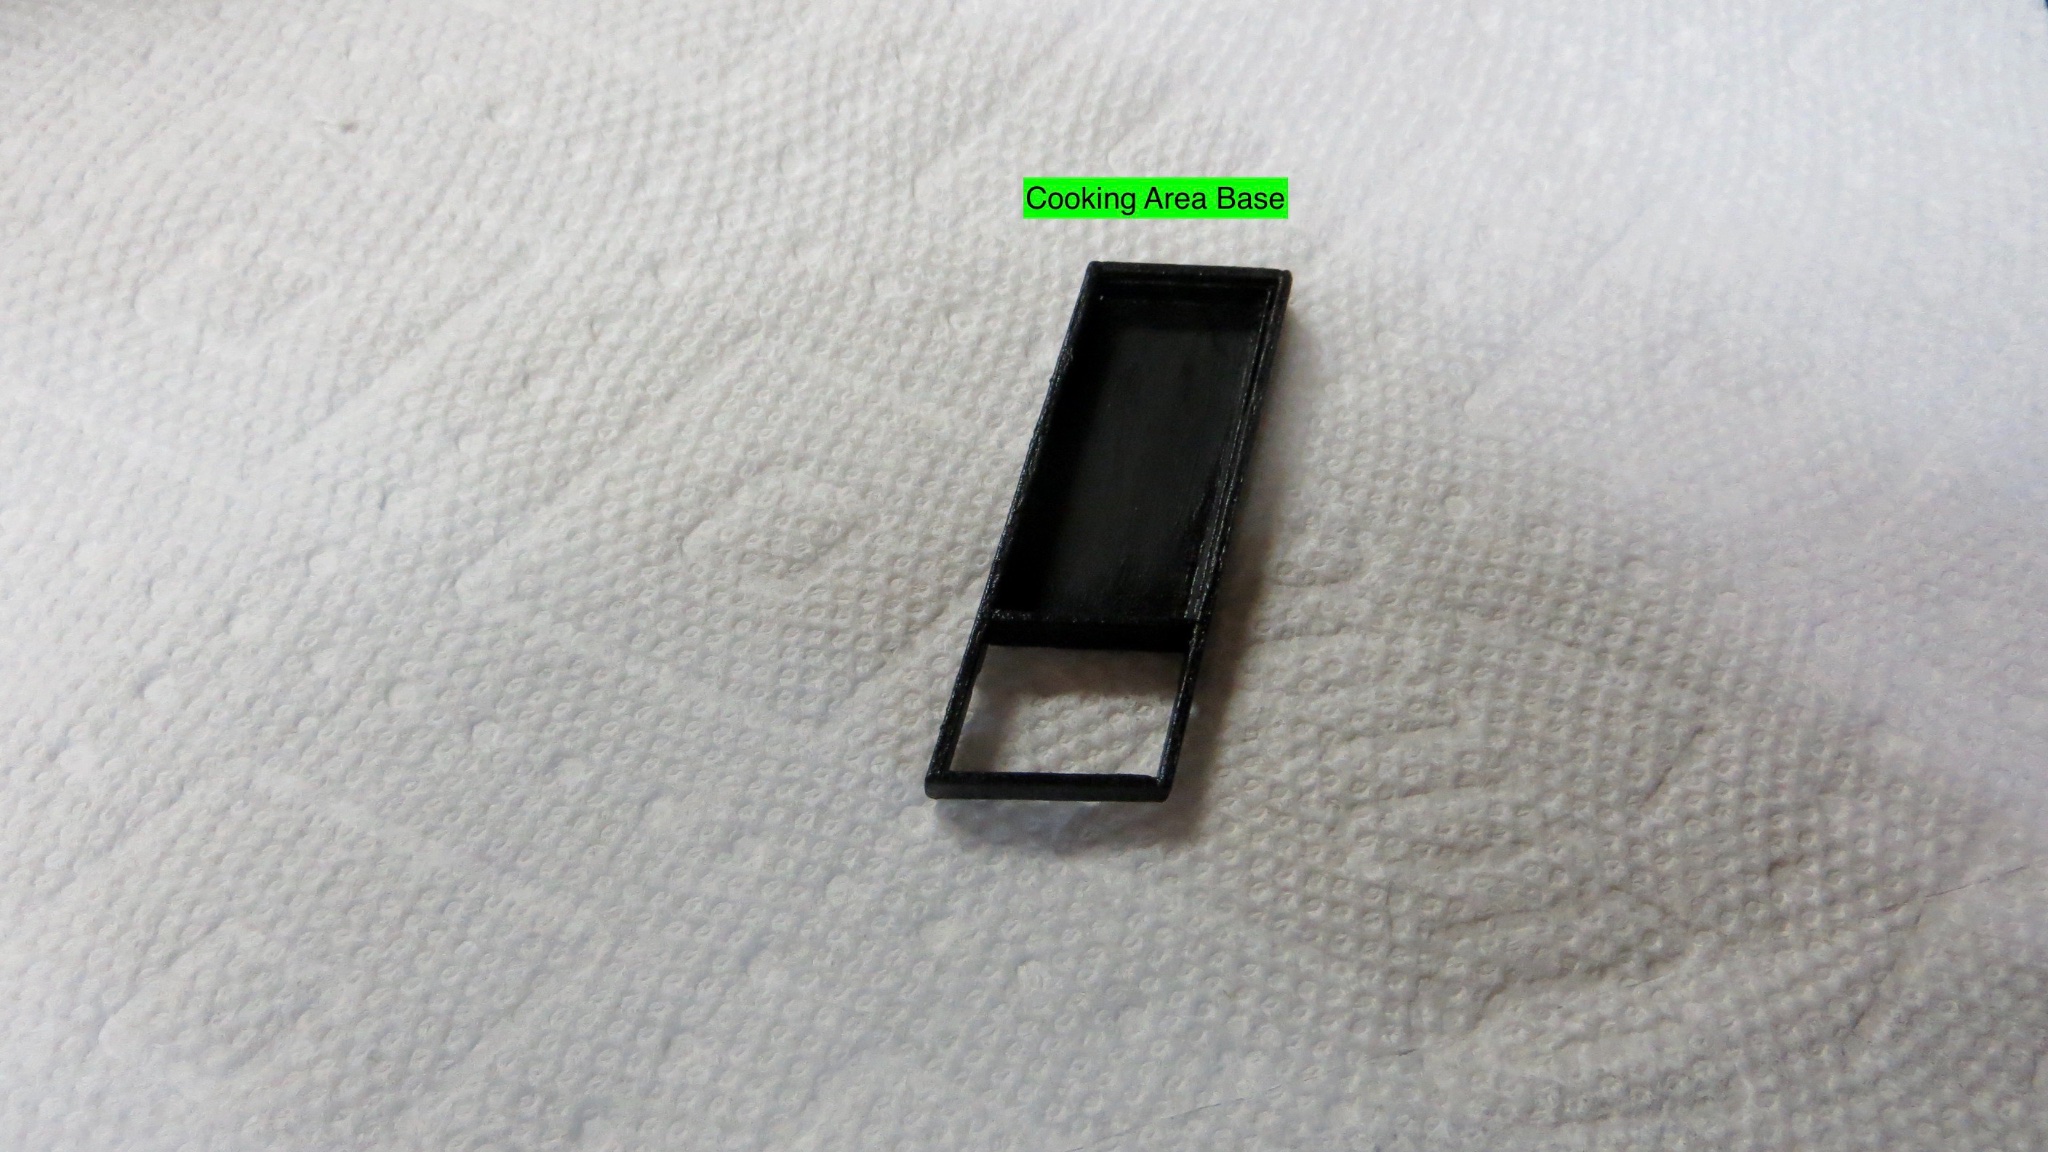
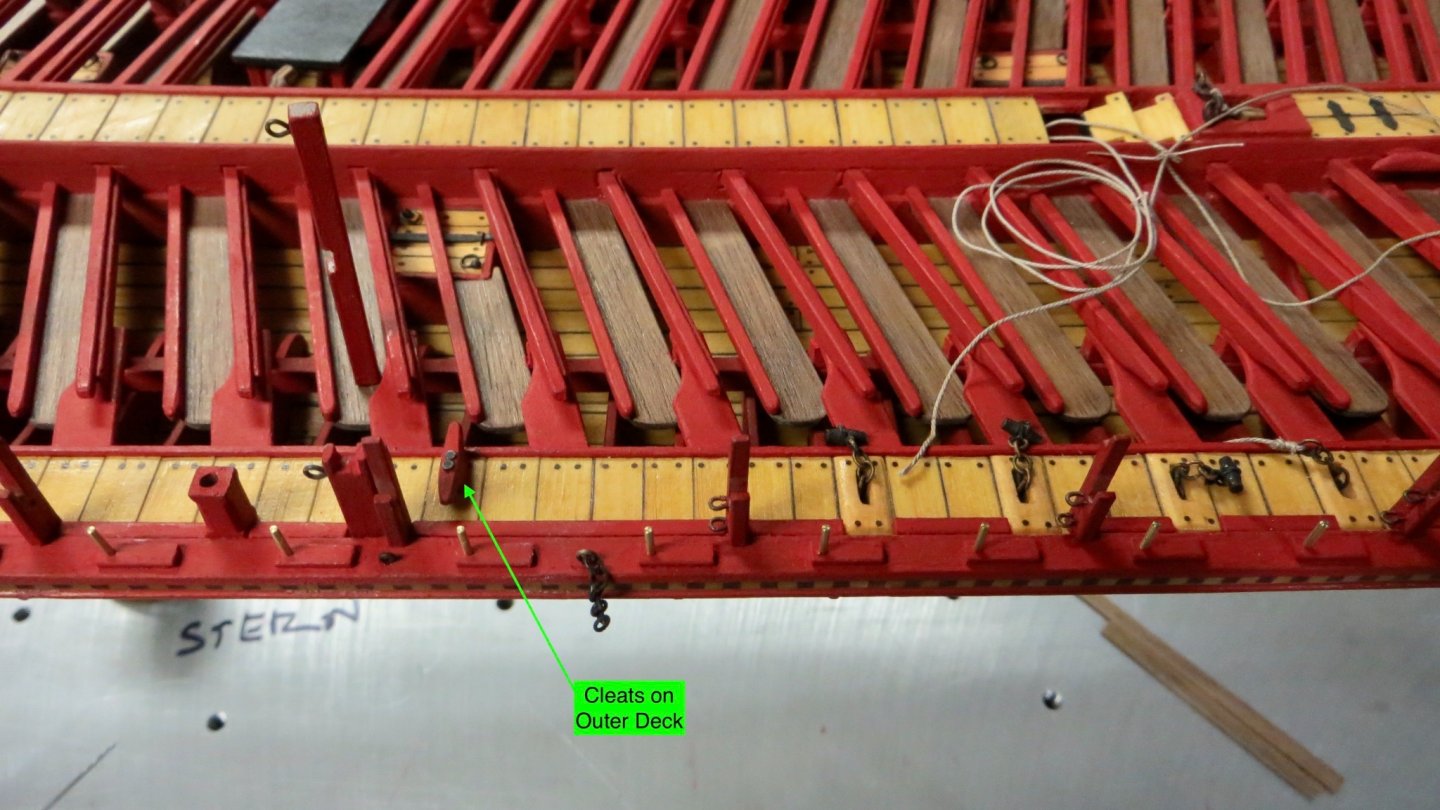
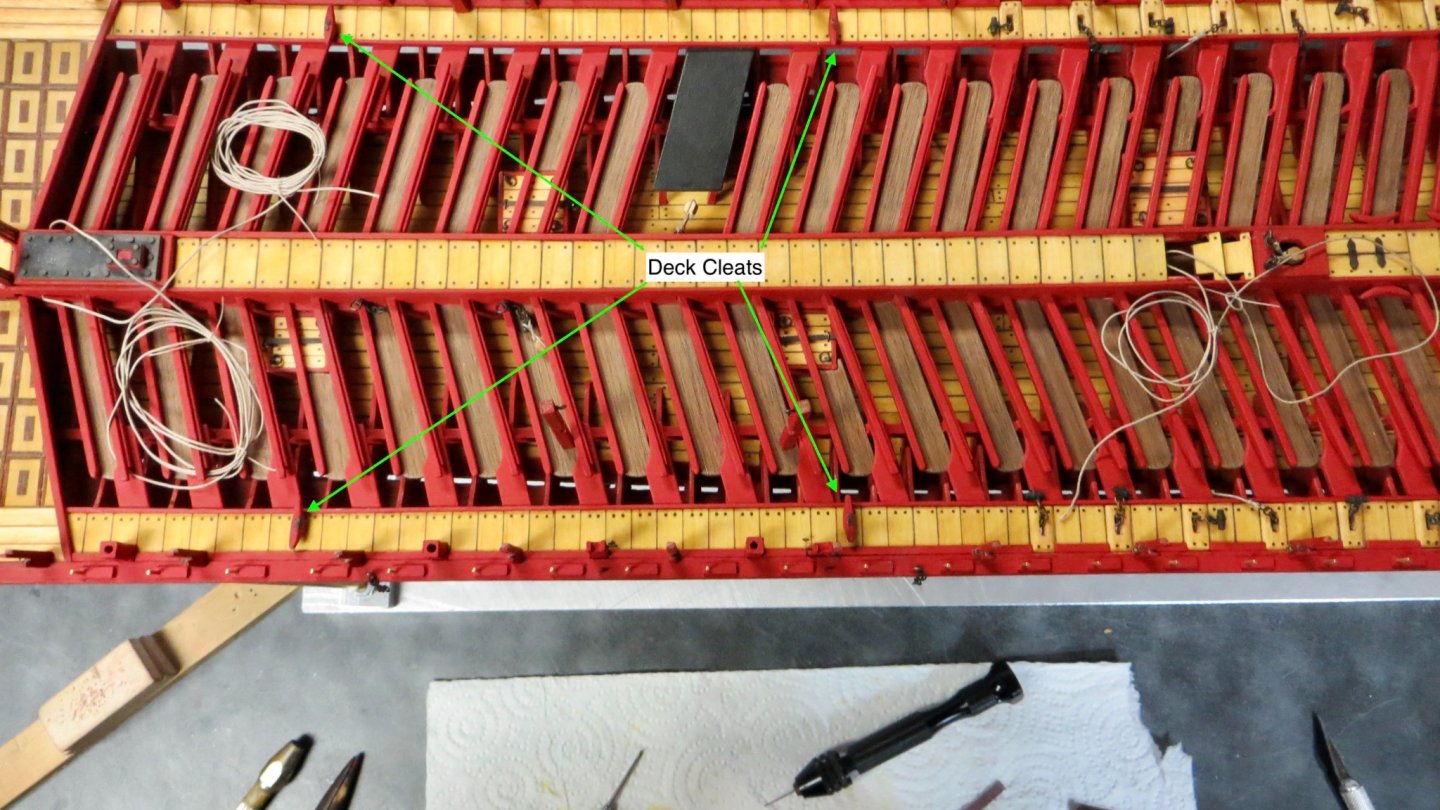
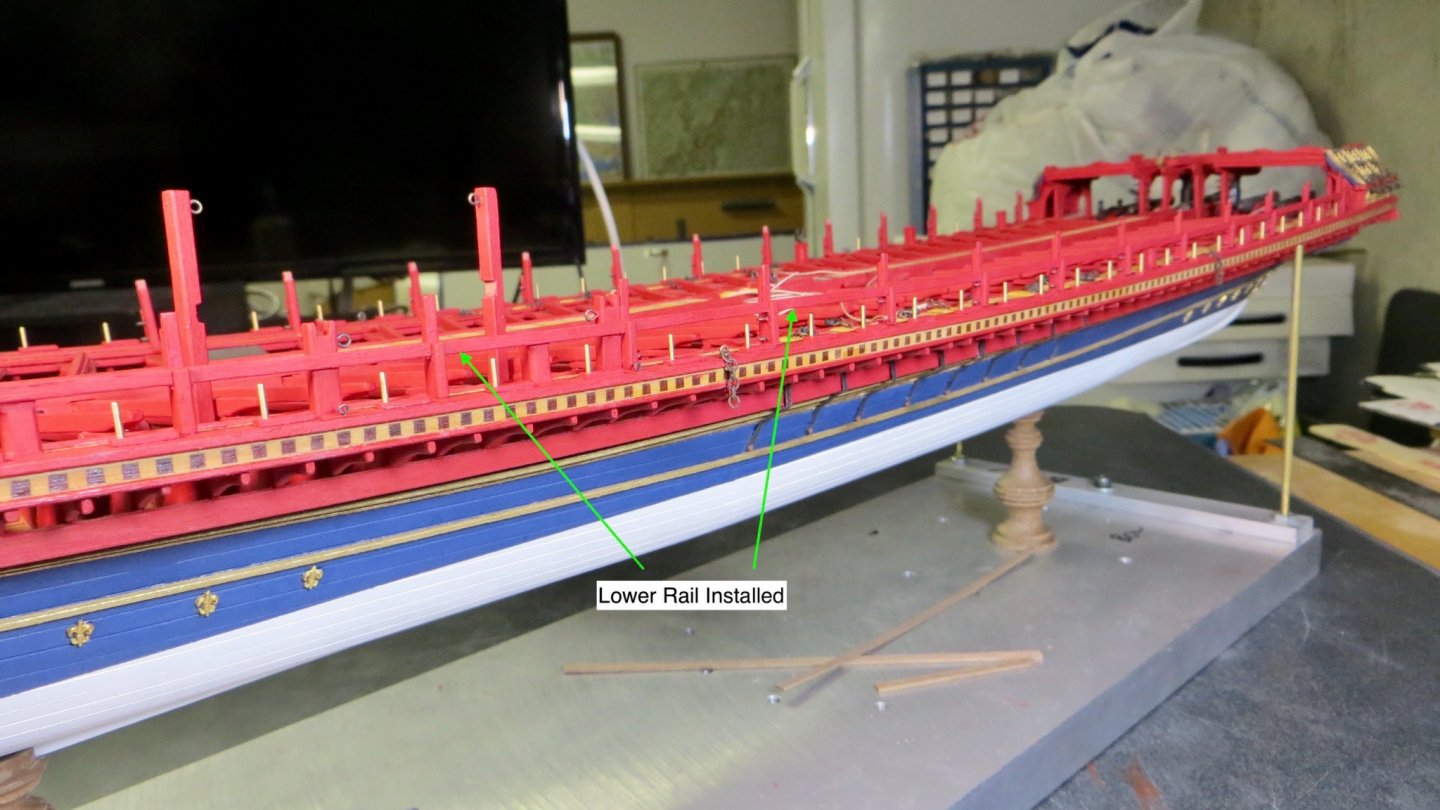
Further update: Before attaching the davits on the starboard side, some small items were added first. (So, I wouldn't damage the davits!!) First off was adding 6 eyelets and chain links (3 sets each side) for later rigging attachment points. Then continued on by adding 6 cleats (3 on each side, Port and Starboard) to the outer deck area. Lastly, before adding the davits, I installed and painted the lower outer railing on the starboard side. Finally the davits attached to starboard side. Also attached the holding wire to the deck and davits, as shown on the "Fleur de Lis" plan Before installing the lower railing on the port side, I wanted to start the finishing of the cooking platform. The kit supplied a brass cooking base that was notched so the 4 sides could be bent upwards. Then a wood frame was built around this base. (I should have taken a photo before I put a coat of black paint on everything) Not yet attached to the ship. Before attaching the base to the model, I will do some experimentation using some ash from my fireplace and see what I can come up with to simulate the cooking charcoal ash, as other logs have successfully done! As always, thanks for the comments, likes, or for just checking the log out! Frank


- 510 replies
-
- 13
-
-
- reale de france
- corel
- (and 1 more)
-
Yes, very nice! Nice looking eyelets for cannon rigging! best, Frank
-
Nice job with the flags! My Corel large stern flag came with one side bold colors and the other side faded, which was frustrating! Frank
-
Lol! How true! Impressive work Frank
-
Thank you for the detailed photos and instruction appreciated! Frank
- 222 replies
-
- 1
-
-
- reale de france
- heller
- (and 1 more)
-
Beautiful detail! Can you give me some direction on how you accomplished what I assume is called the "Garland"? Or the wrap with the X stitching? Very nice Frank
- 222 replies
-
- 4
-
-
- reale de france
- heller
- (and 1 more)
-
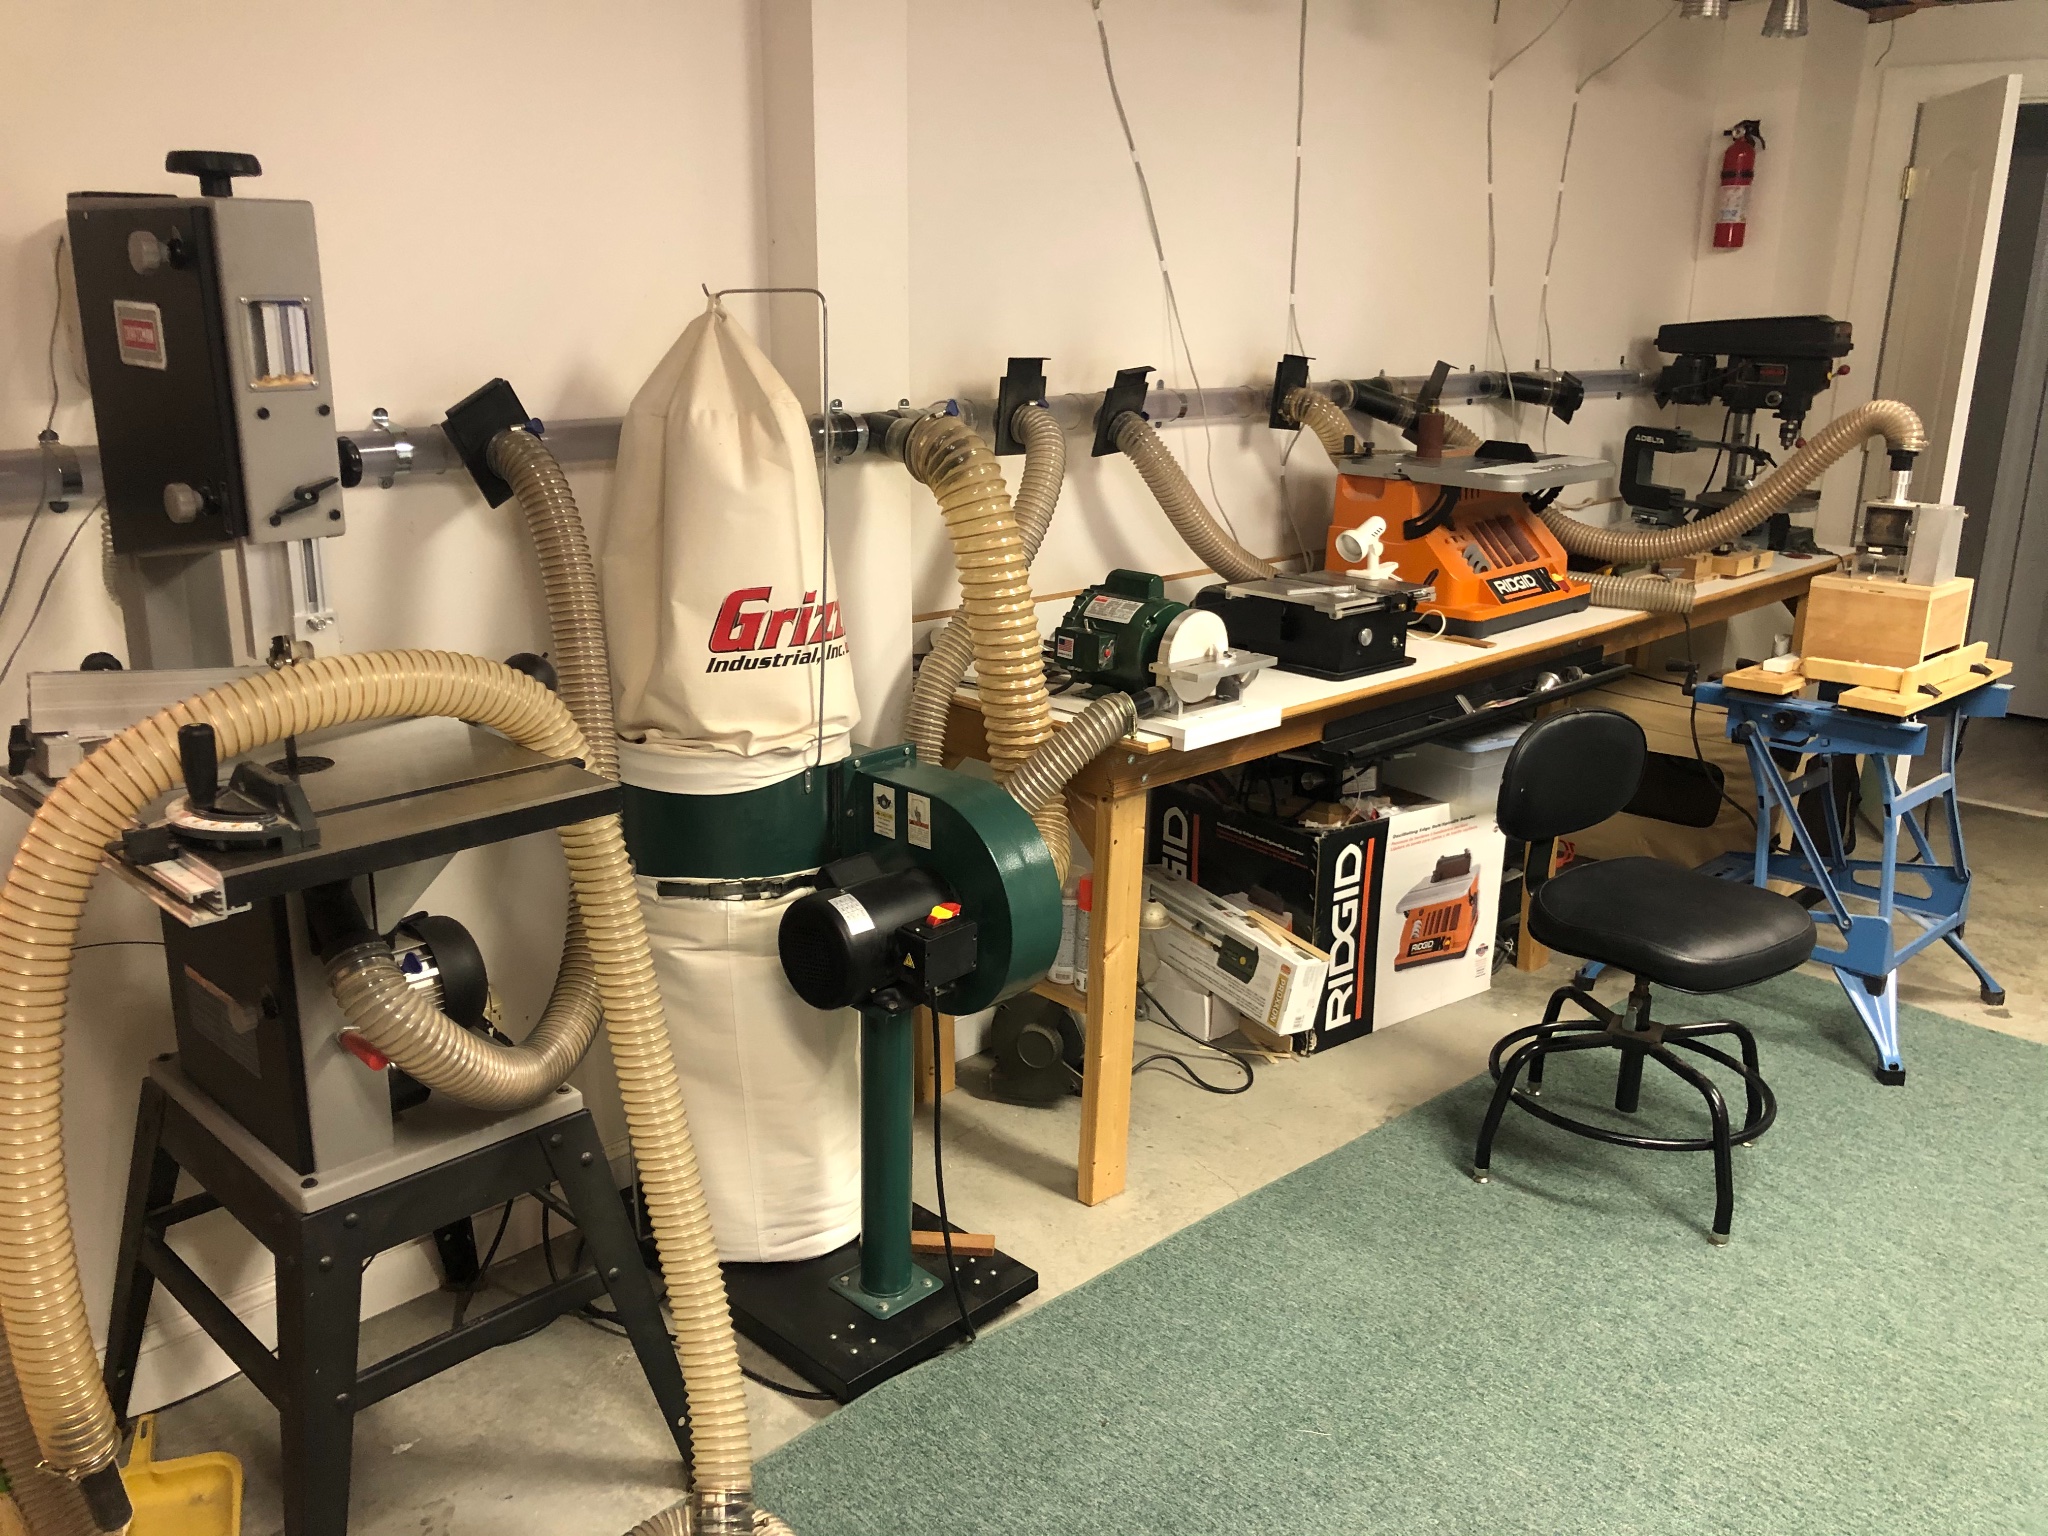
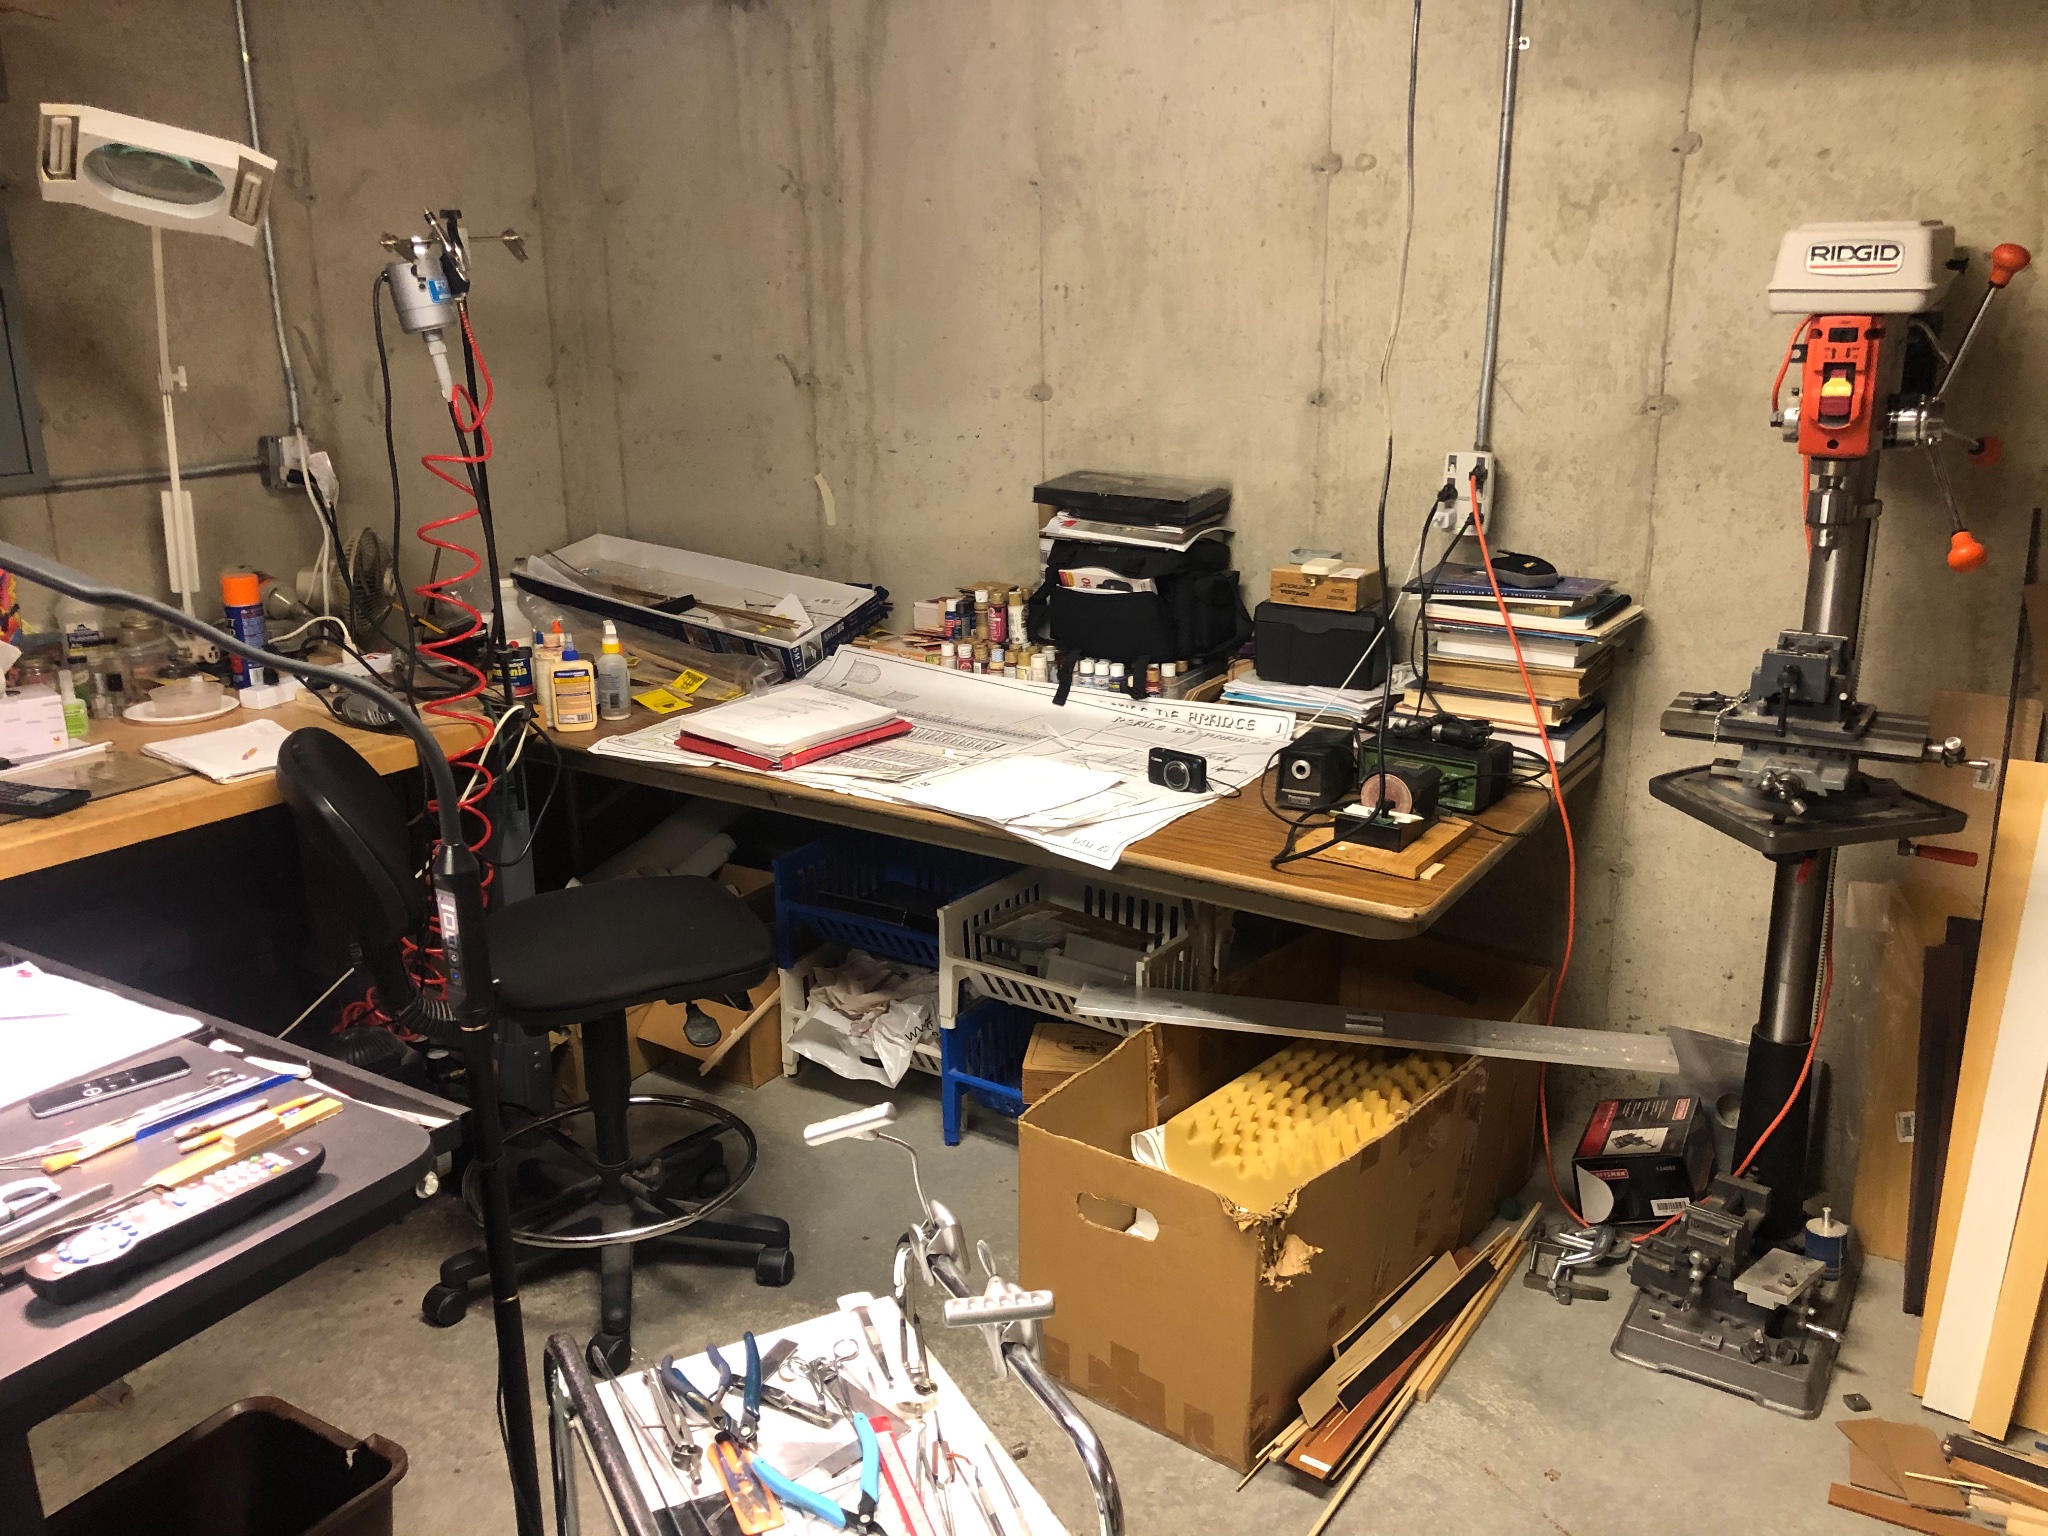
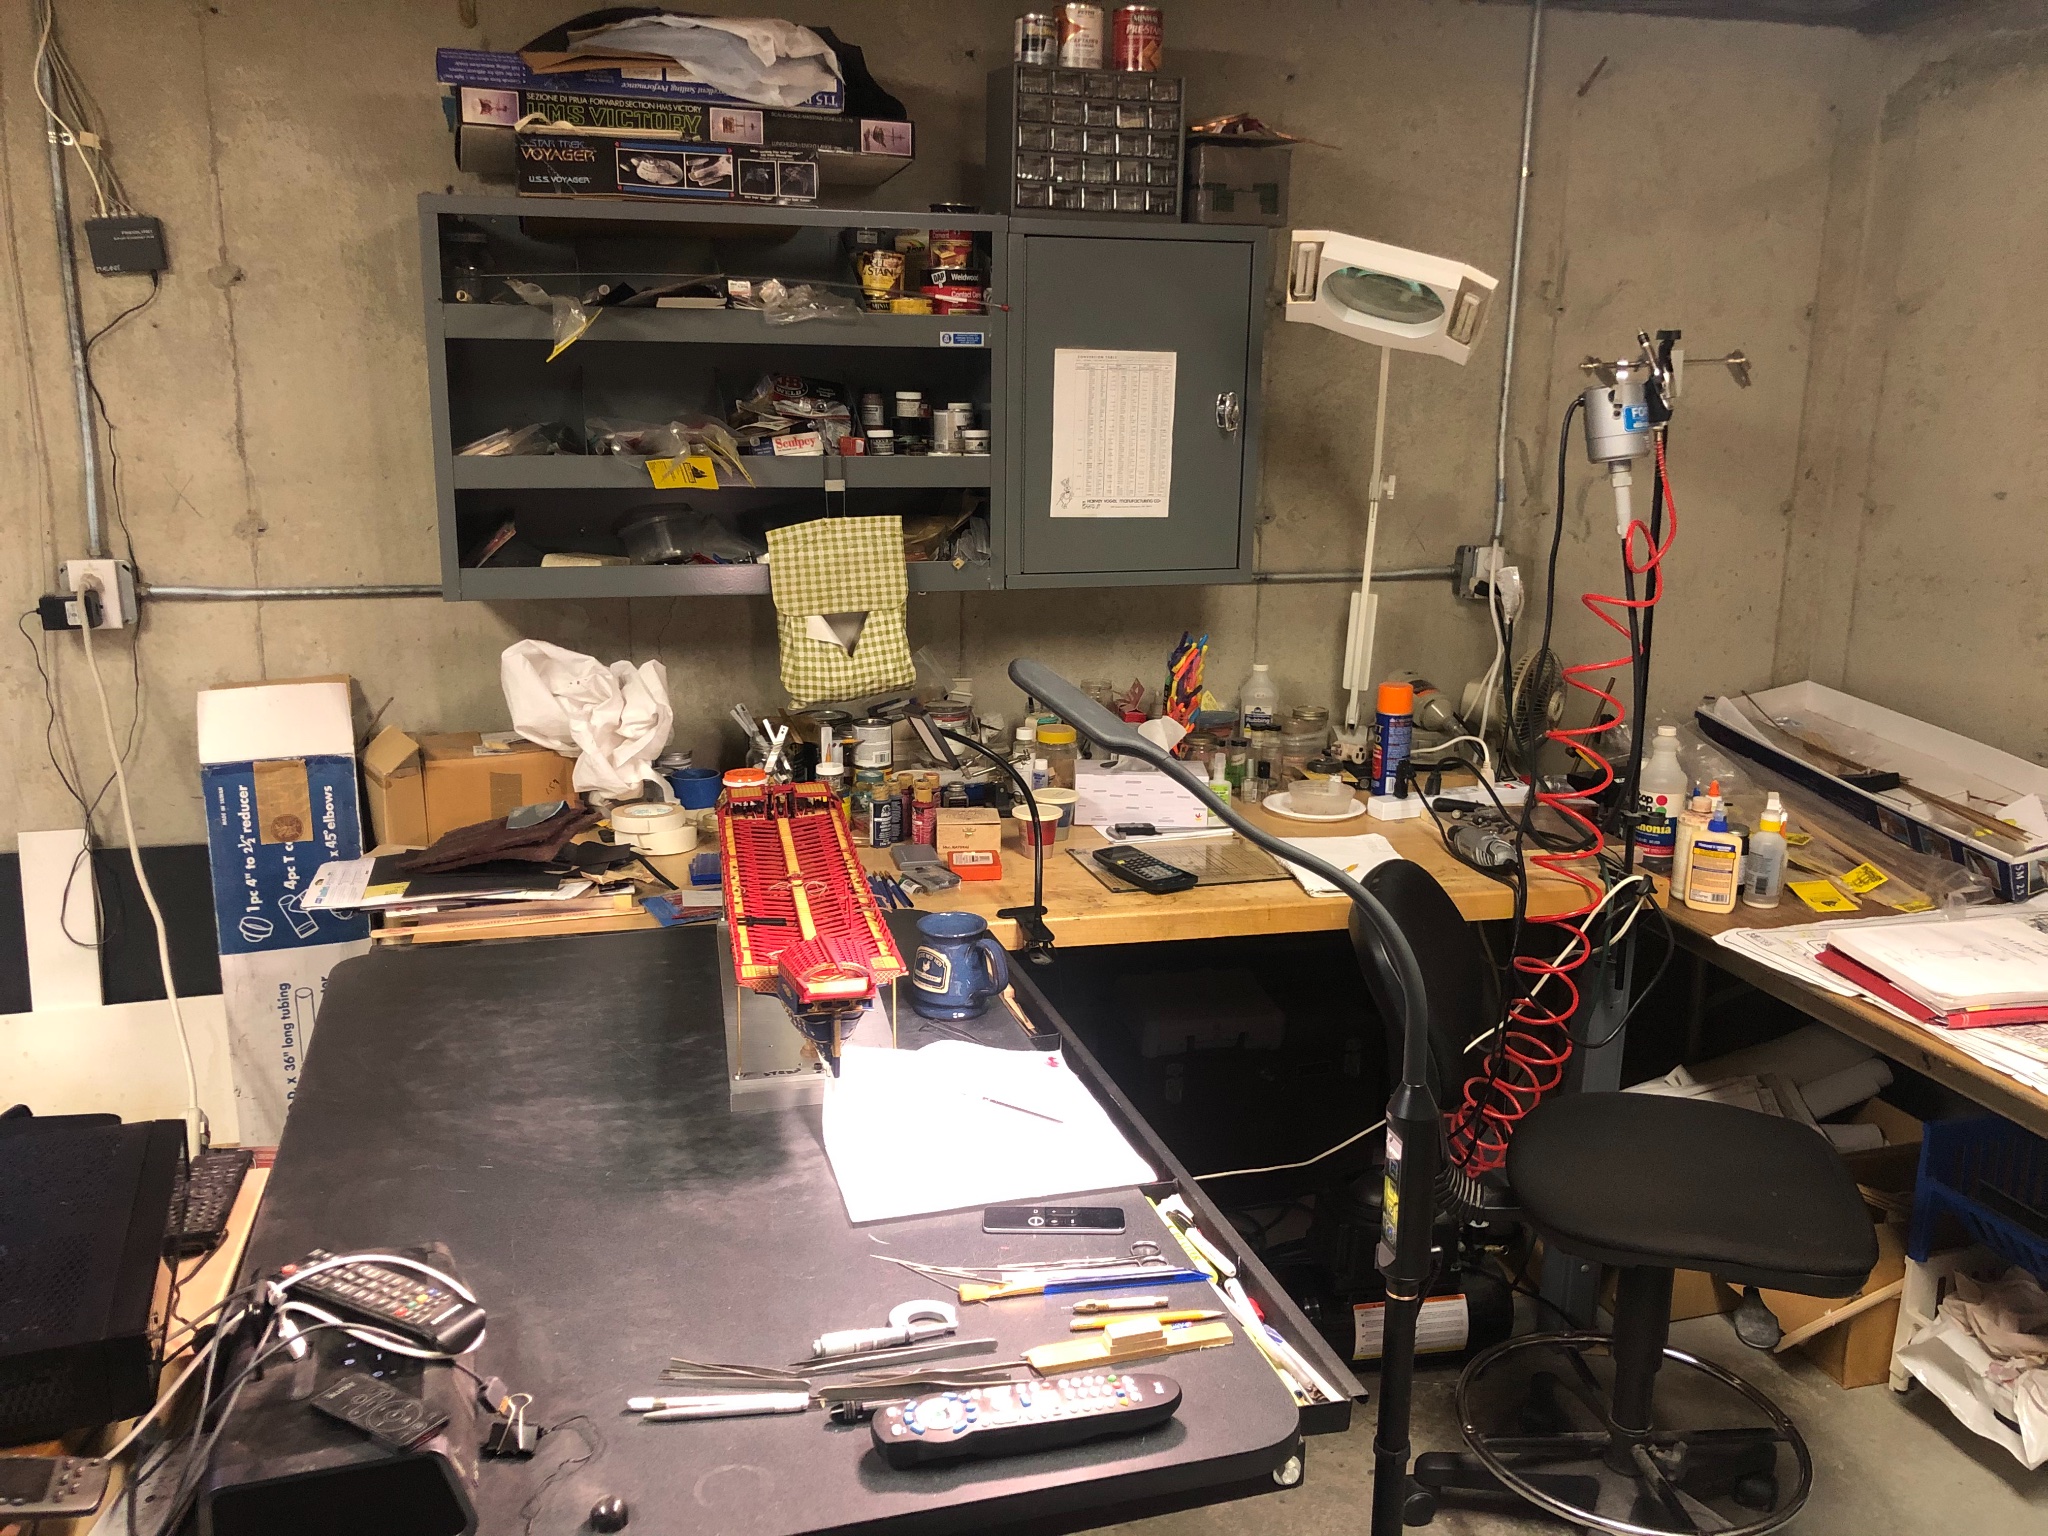
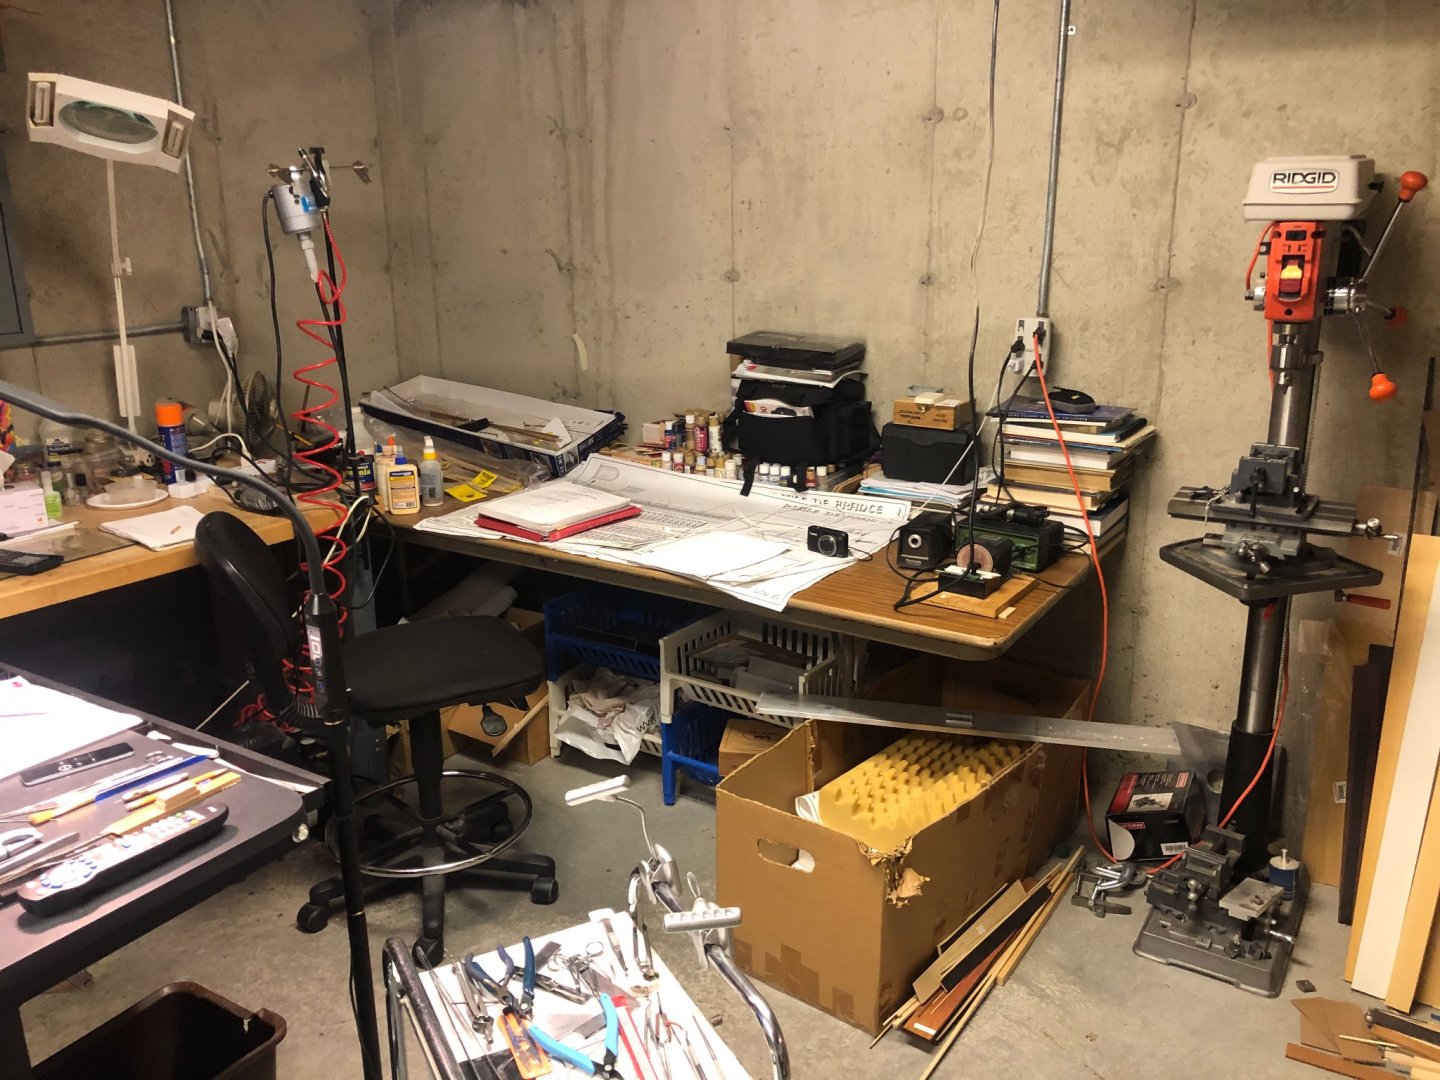
Hello Christian, Thanks for stopping by. Appreciated. The answer to your question is a tough one. As I told a friend of mine, I mainly buy a kit for its plans, instructions and metal decorations. So I always over pay! I prefer to make everything else, as much as I can, from scratch using my own woods etc. I can do most of this because I have equipment in my work room. Having said that, if you are interested in only using the Corel supplied items, I think you will like the quality of the metal castings and the various stock wood strips. The laser cut wood components leave a lot to be desired however, and probably should be made from scratch. If you have a way of using your own wood and have a way of making the metal decorations, getting a hold of the plans and instructions would cost you a lot less. The instructions are important because it is critical to follow the order of assembly since the ship is built in layers from the deck upwards. Just my opinion and I hope this helps in some way. My messy workroom!!! Thanks, Frank


- 510 replies
-
- 10
-
-
- reale de france
- corel
- (and 1 more)
-
Thanks Michael! I should have the davits installed by next weeks post. I've been following the very interesting discussions on your log! Clark, Mark, Kirill4 --thanks for the likes! Frank