HOLIDAY DONATION DRIVE - SUPPORT MSW - DO YOUR PART TO KEEP THIS GREAT FORUM GOING!
×


fmodajr
-
Posts
868 -
Joined
-
Last visited
Content Type
Profiles
Forums
Gallery
Events
Everything posted by fmodajr
-
 Matti, Best wishes on your recovery. Your Vasa continues to be an inspiration for me. Happy Holidays and may the New Year bring you good health! Frank
 -
Thanks Ulises! I think your Vasa log was one of the first logs I started visiting in order to give me inspiration to start my Vasa build. Hopefully you have it proudly being displayed in your home! Frank
-
Hello Nautilus! Thanks for your comments! I think a lot of us Vasa builders are in roughly the same stages of the build. It is very interesting to see all the different ideas that come from all the logs! Frank
-
Hi Michael! The nails I am using were bought at Micromark.com. I believe you bought your spikes there? The nail size item number is #14315. I blackened them before I nailed them in. Sounds like you are going to have a great time with you son and his family! Enjoy! I will have a difficult time working on my ship this next week or so due to all the festivities going on at my end. Happy Holidays and talk to you soon! Frank
-
Mark, Thanks for visiting! I wanted to let you know that I used 3 tools and manual files to make those brackets. First I cut the width and length of the brackets with a small table saw (I have the Byrnes model but a preac would work fine) Then, using the same table saw, I set the height of the saw and making a few passes, I notched the slots on the right side. Next step was to grind the lower angle using a small face (disk) grinder. Finally I shaped the curve on top with my Rigid oscillating grinder, using the smallest tube I had. Then I touch up cleaned everything with a small hand file. (no milling machine used!!) The brackets for the 4 smaller platforms will be a little more difficult, because the items will be much smaller and harder to hold while repeating the steps above. Happy Holidays to you and best wishes for the New Year! Frank
-
Hello Edwin! Thanks for your kind thoughts and for your kind toast! Happy holidays to you also and a great 2015! Frank
-
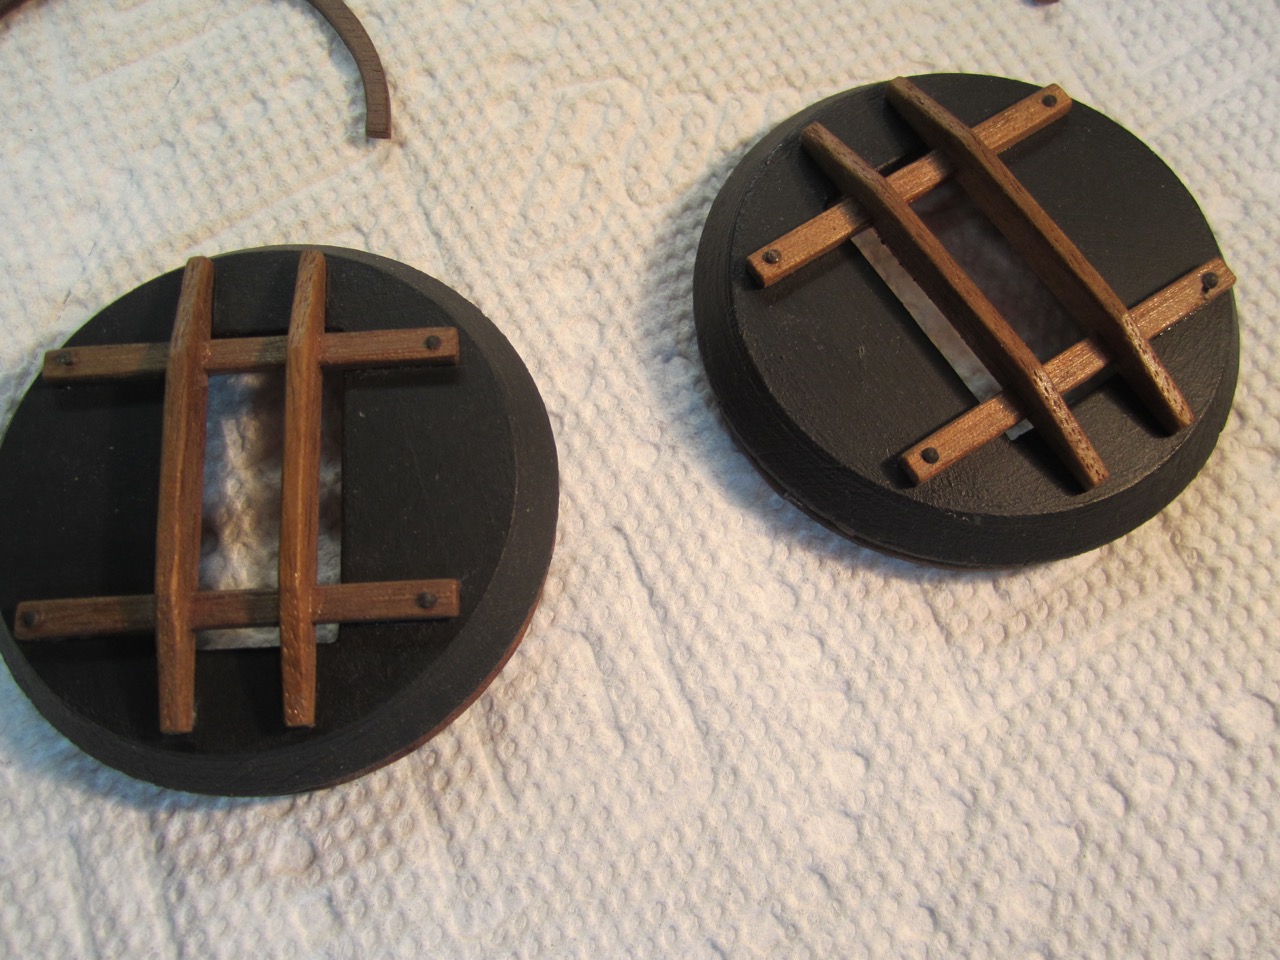
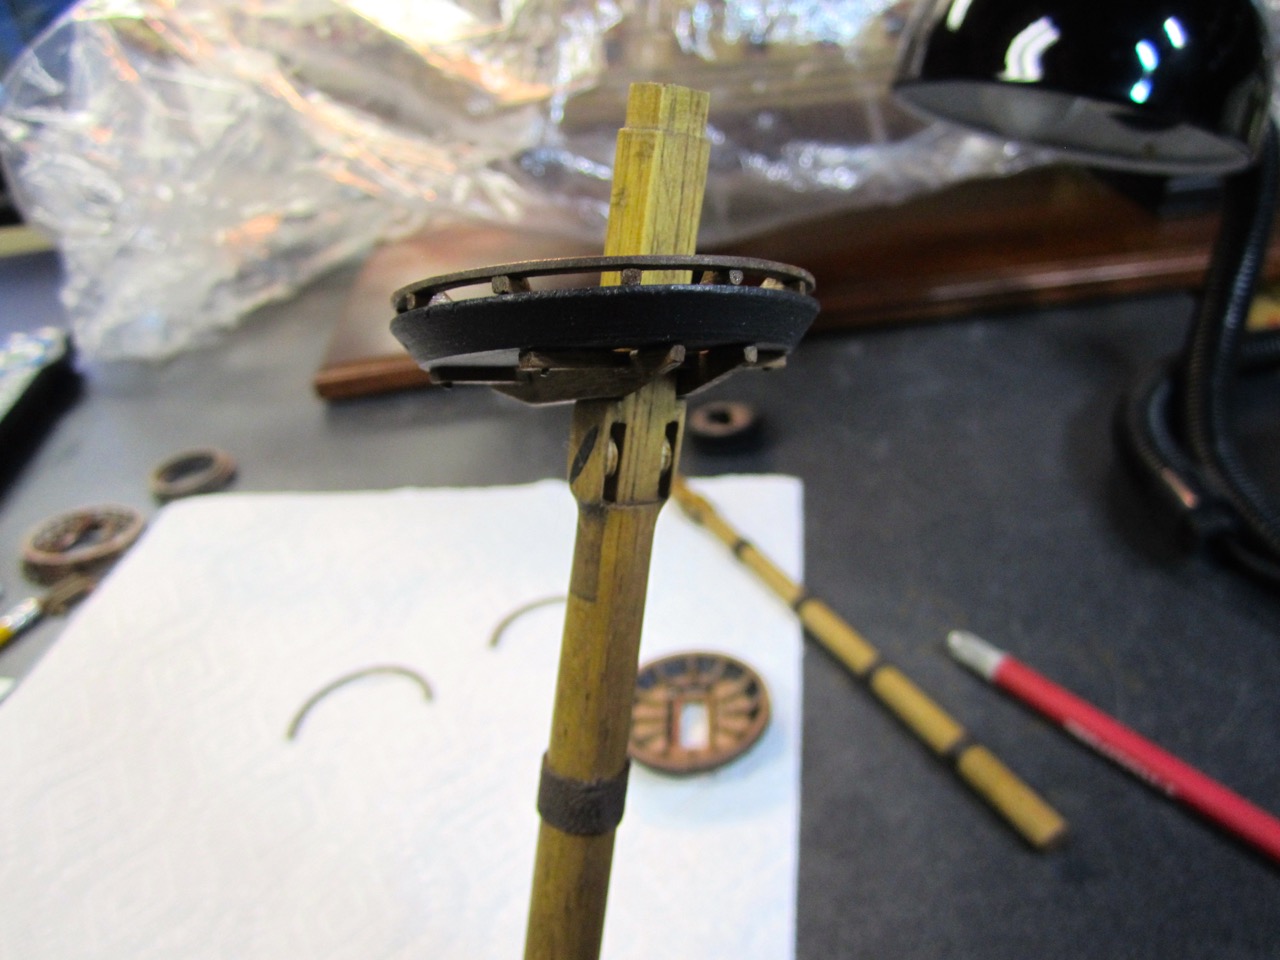
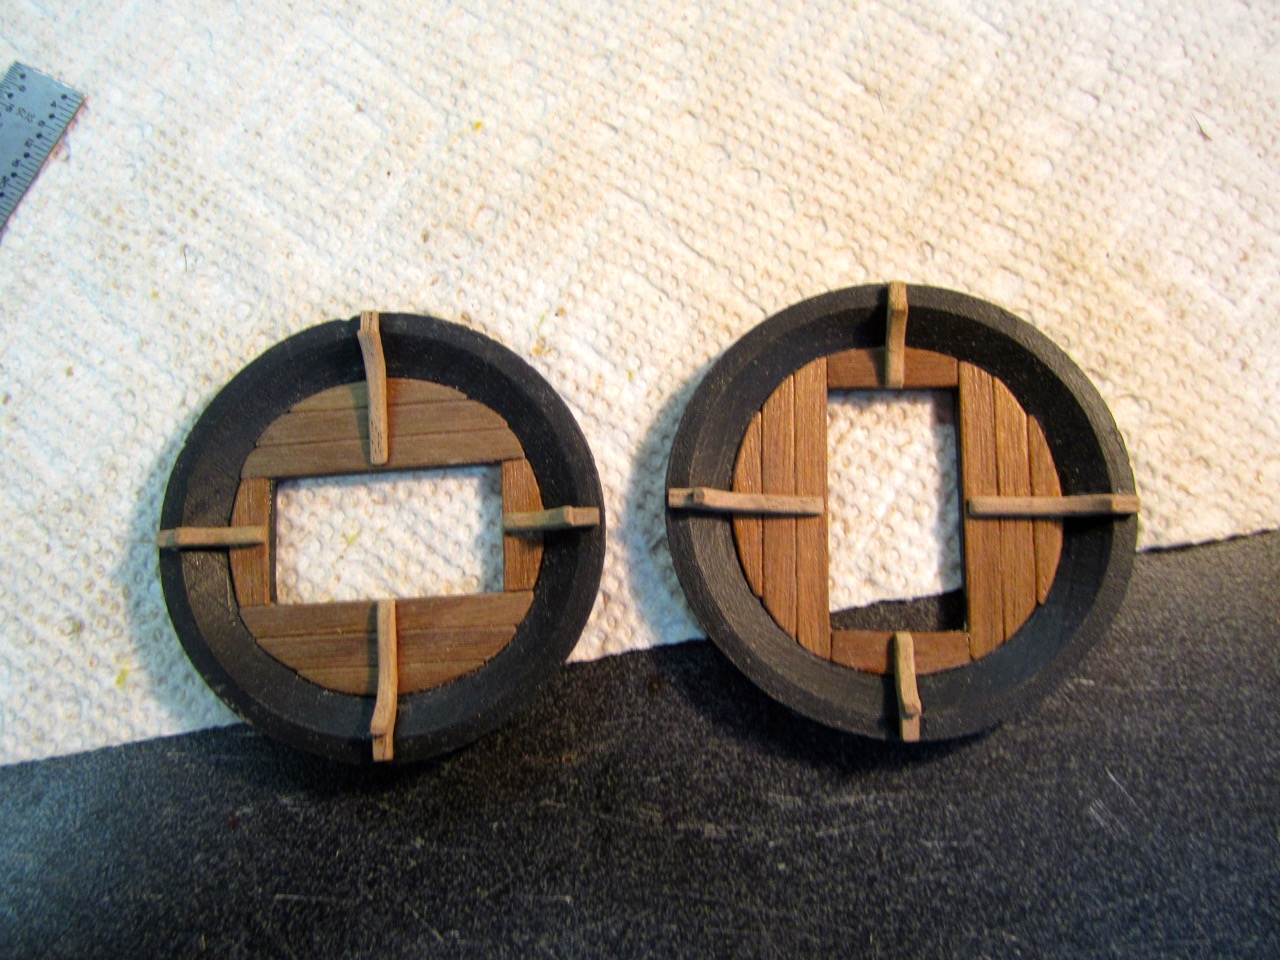
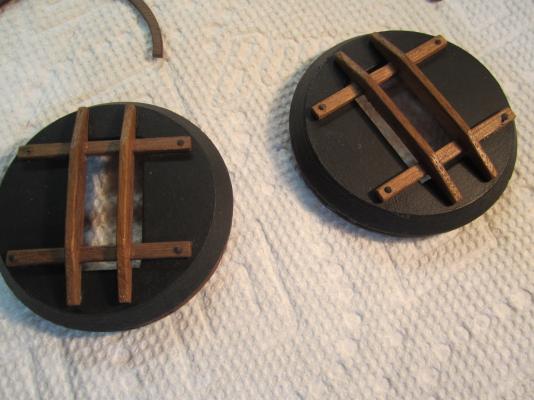
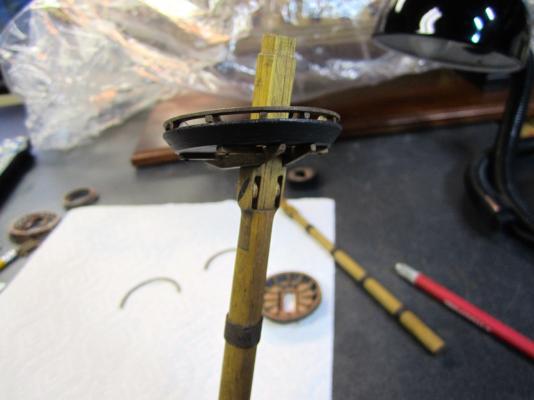
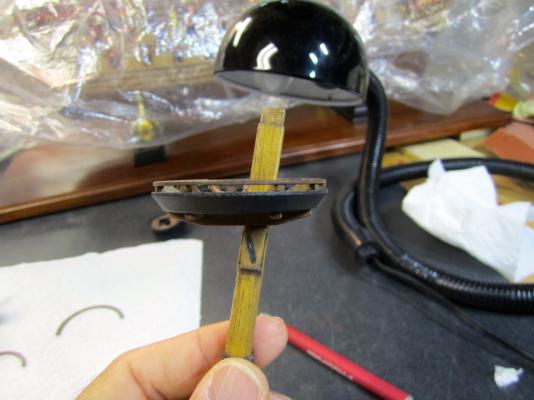
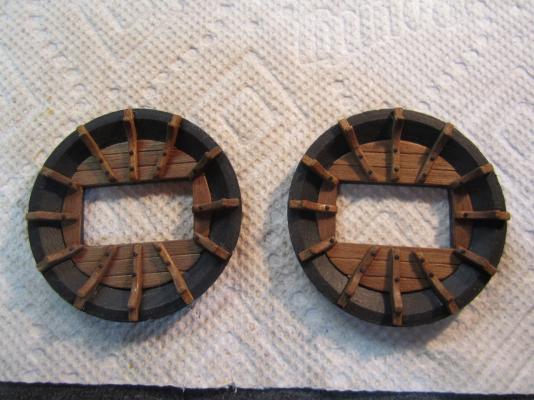
I decided to mount the cross tree assembly, made earlier, onto the bottom of the platforms at this point (before adding the upper half rail on the top side) Cross tree glued and nailed to underside View from top side Trial fit of the mainmast platform Trial fit of the foremast platform Before I make the legs and finish the 1/2 circle upper railings, I think I will work on the 4 smaller platforms and catch them up to where I am on the larger platforms. Hopefully the final result will be a little closer to how the actual platforms looked on the real ship, rather than using the metal rings that the Corel kit provided! Happy Holidays everyone! Thanks, Frank
-
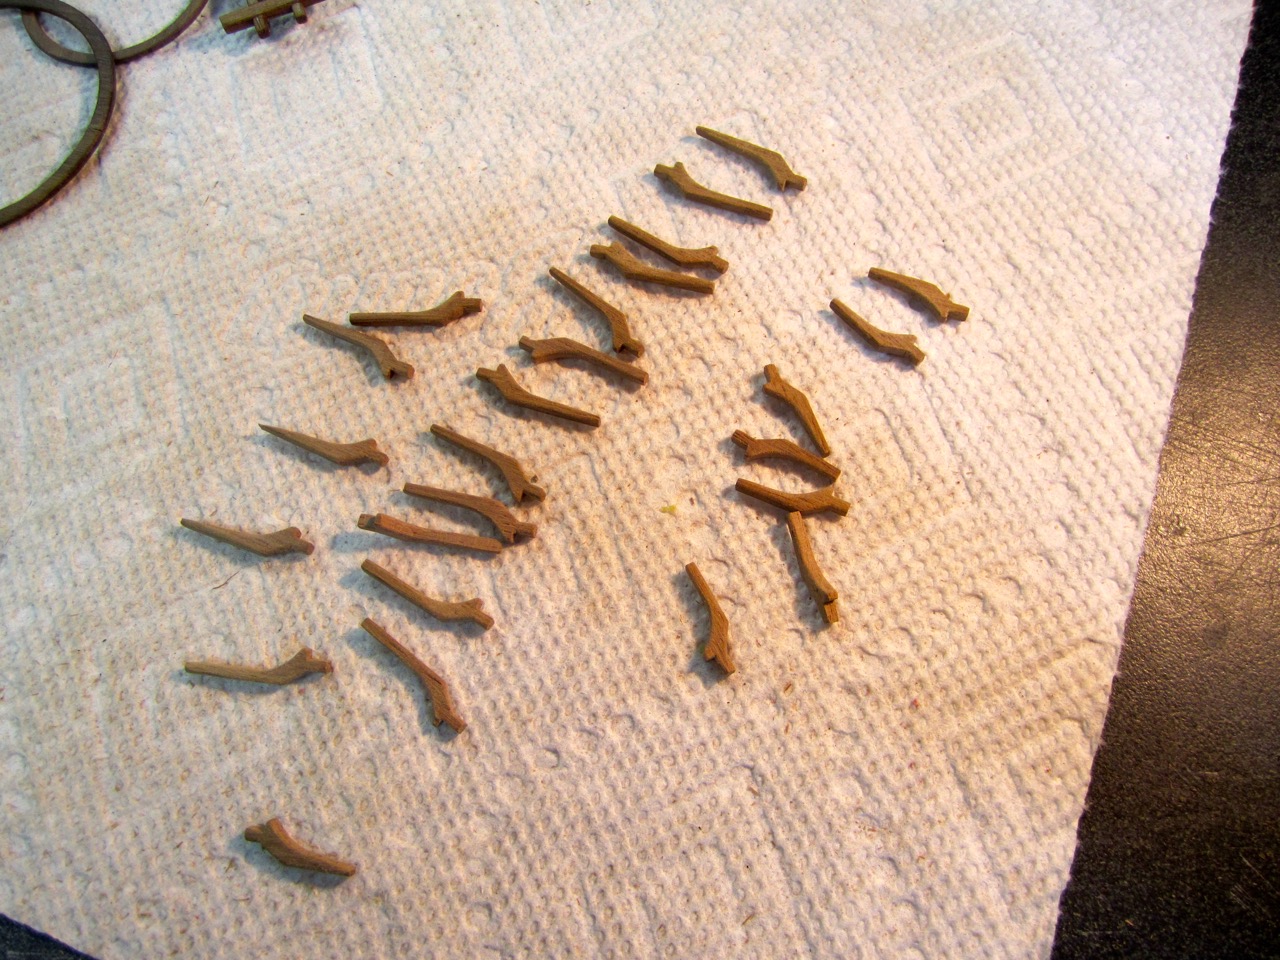
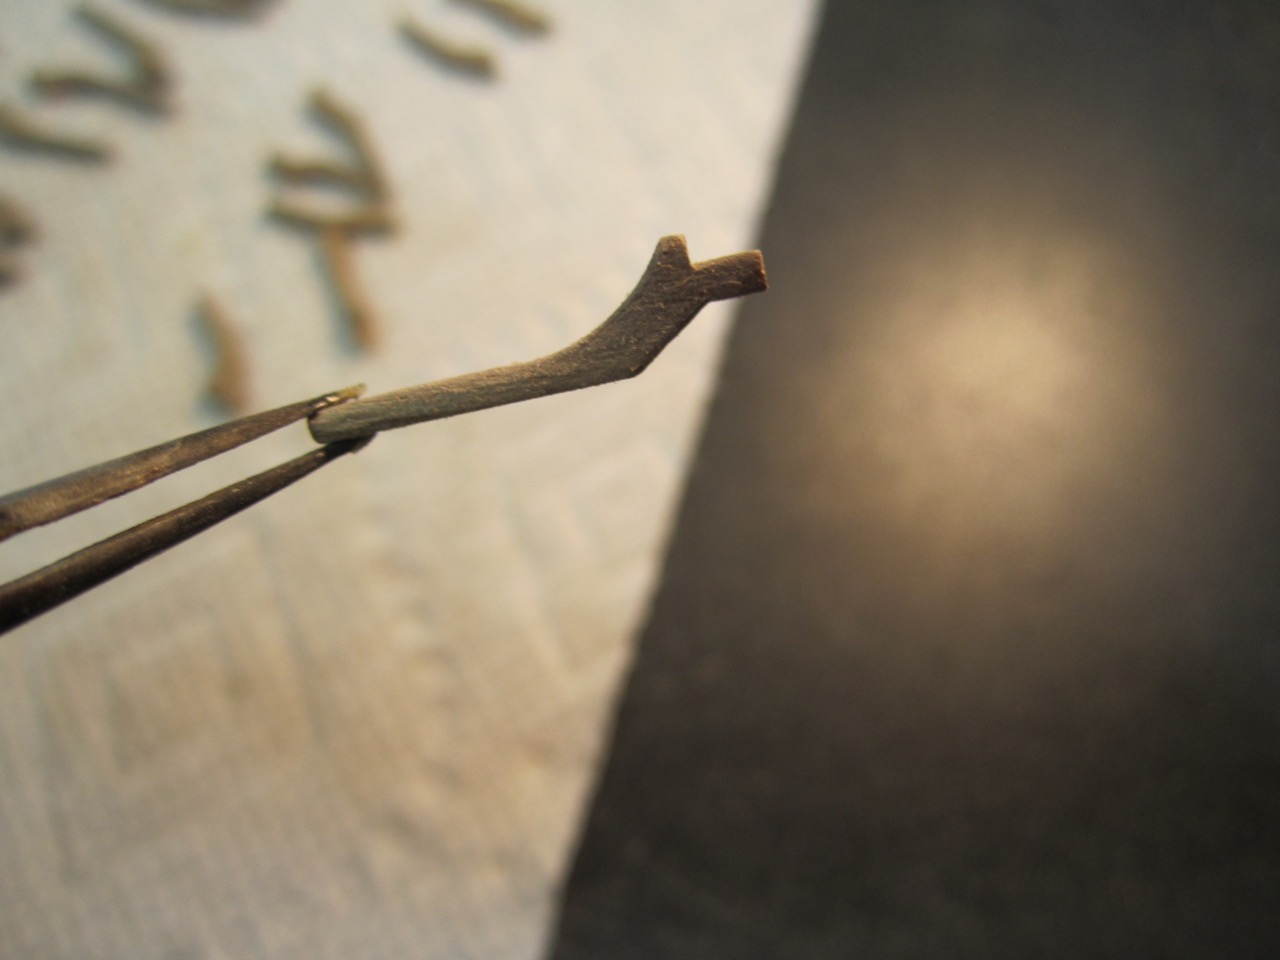
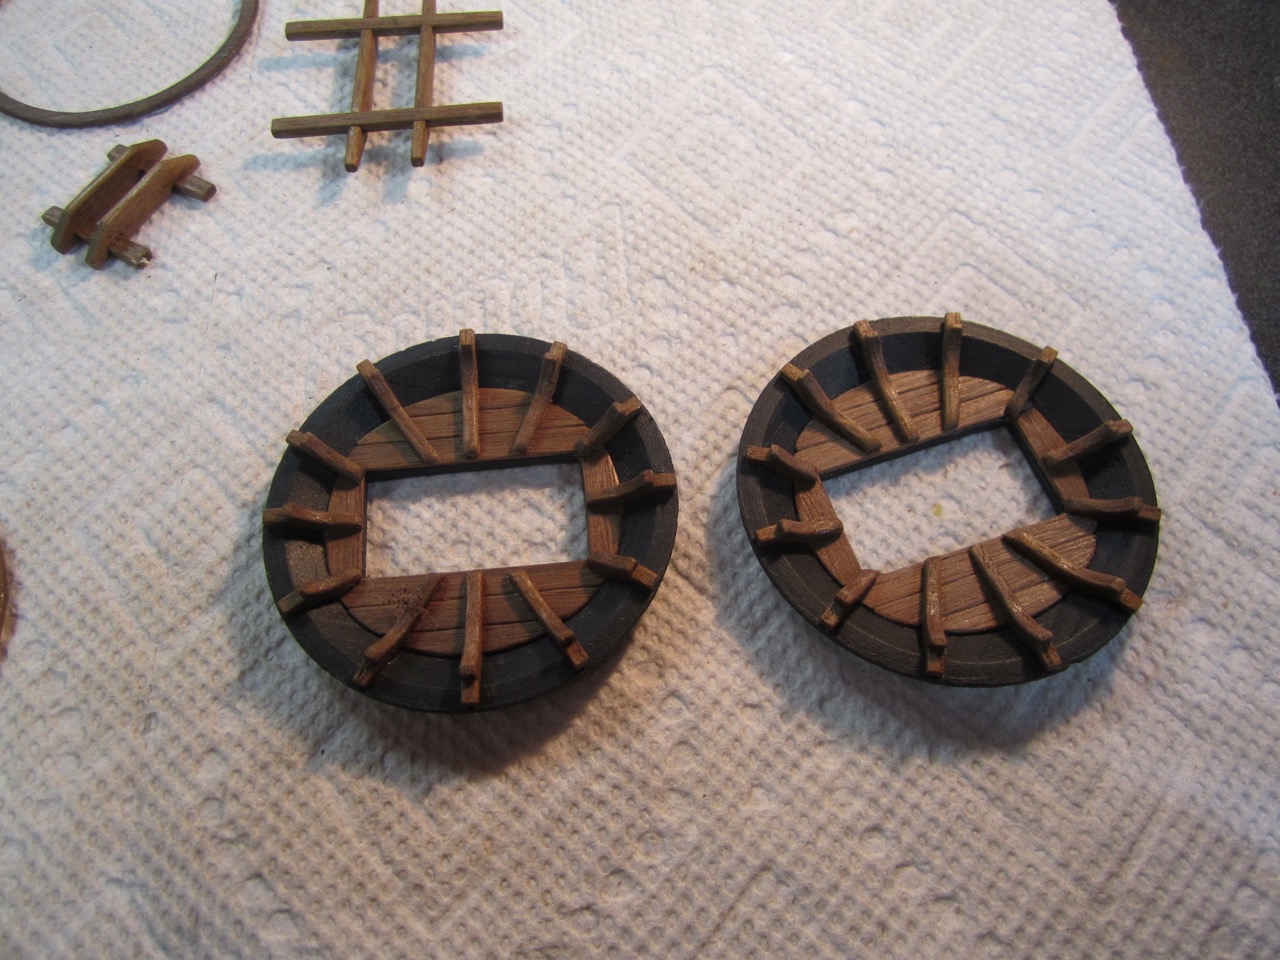
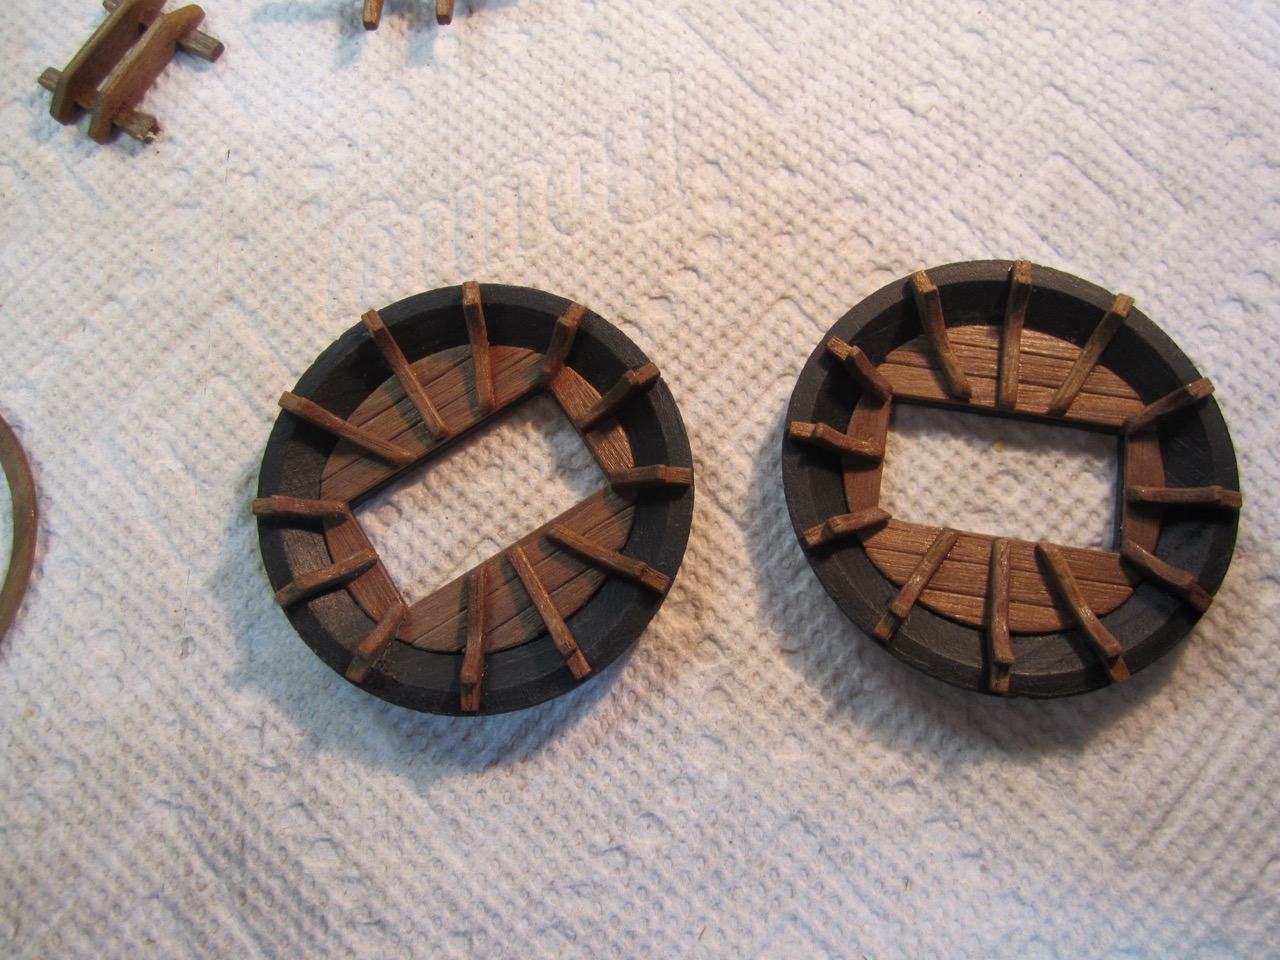
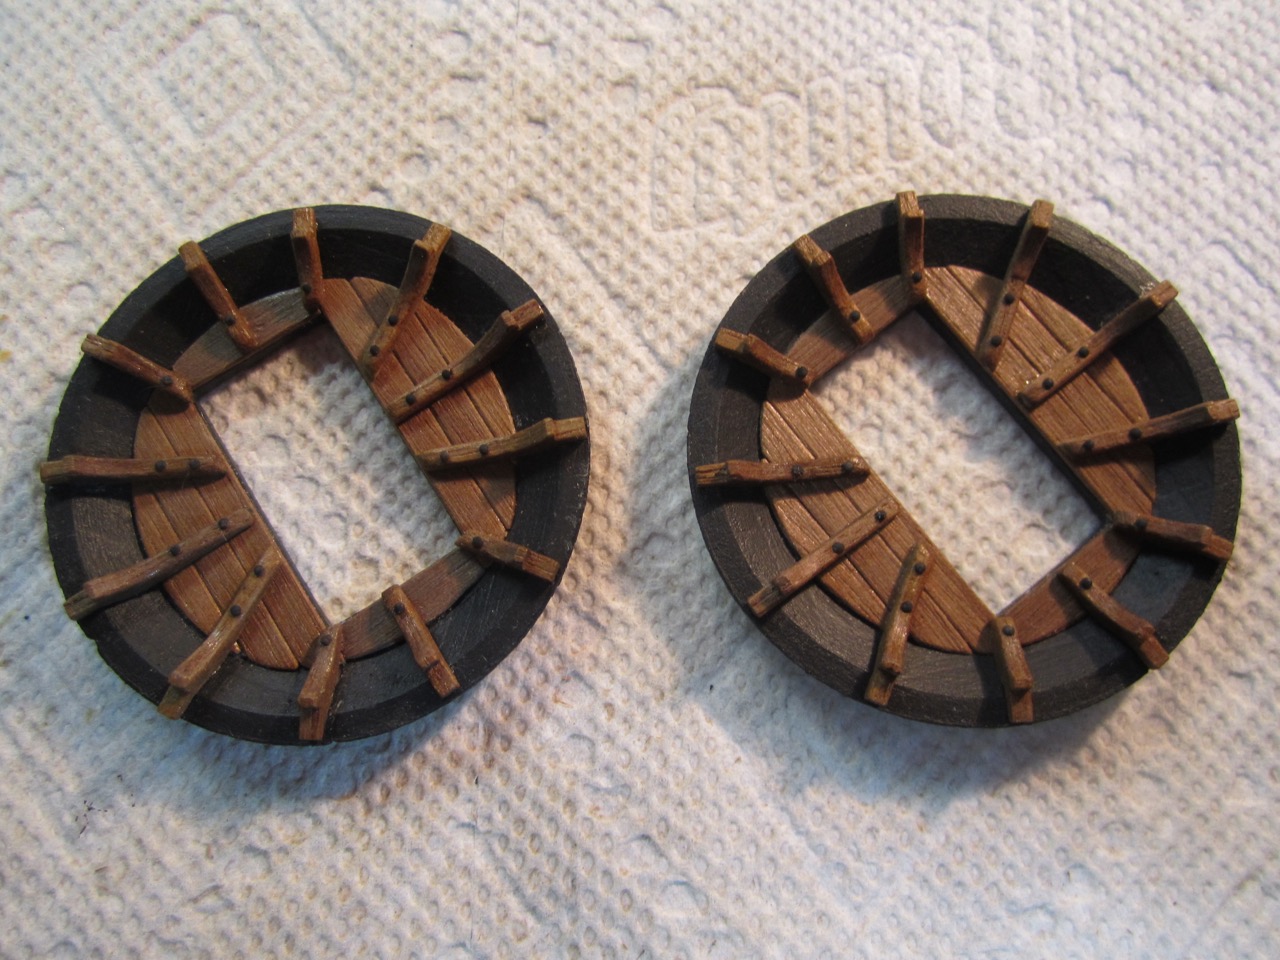
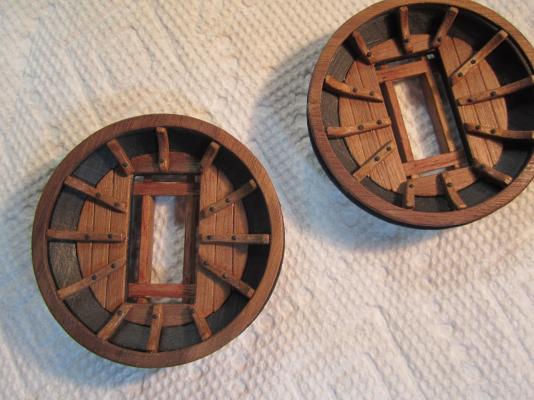
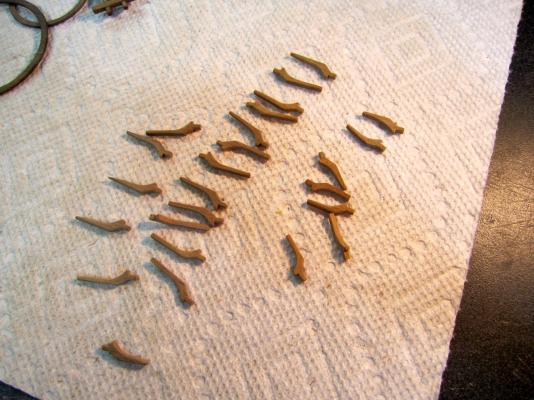
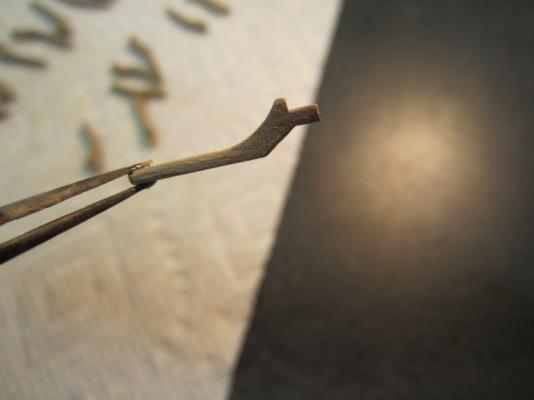
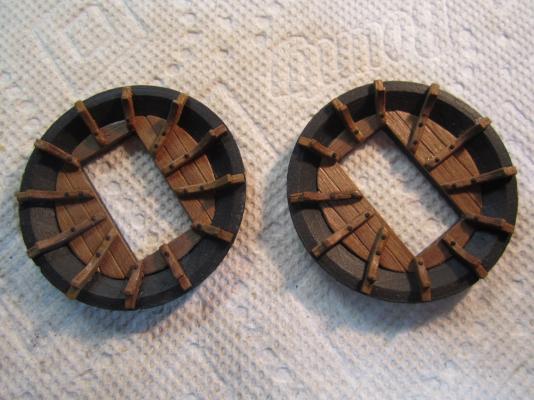
Thanks everyone for the likes and thanks again for visiting my log! I have continued working on the platforms. I milled and shaped the "legs" or "arms" for the two large platforms. I made 12 for each platform. Glued the first 4 legs on at the midway points of the platforms Located and glued the rest of the legs. Now added some blackened nails to the legs. At this point I glued the full rings, that I made above, onto the legs (for the lower railing)


-
Hi Karl, Beautiful work. Thanks for doing some of the research on the rigging for the rest of us. I know I will be spending less of my time "scratching my head" trying to figure things out and more time actually rigging! Frank
-
Hi Michael, Great solution you have for getting the false carriages added "after the fact"! Frank
-
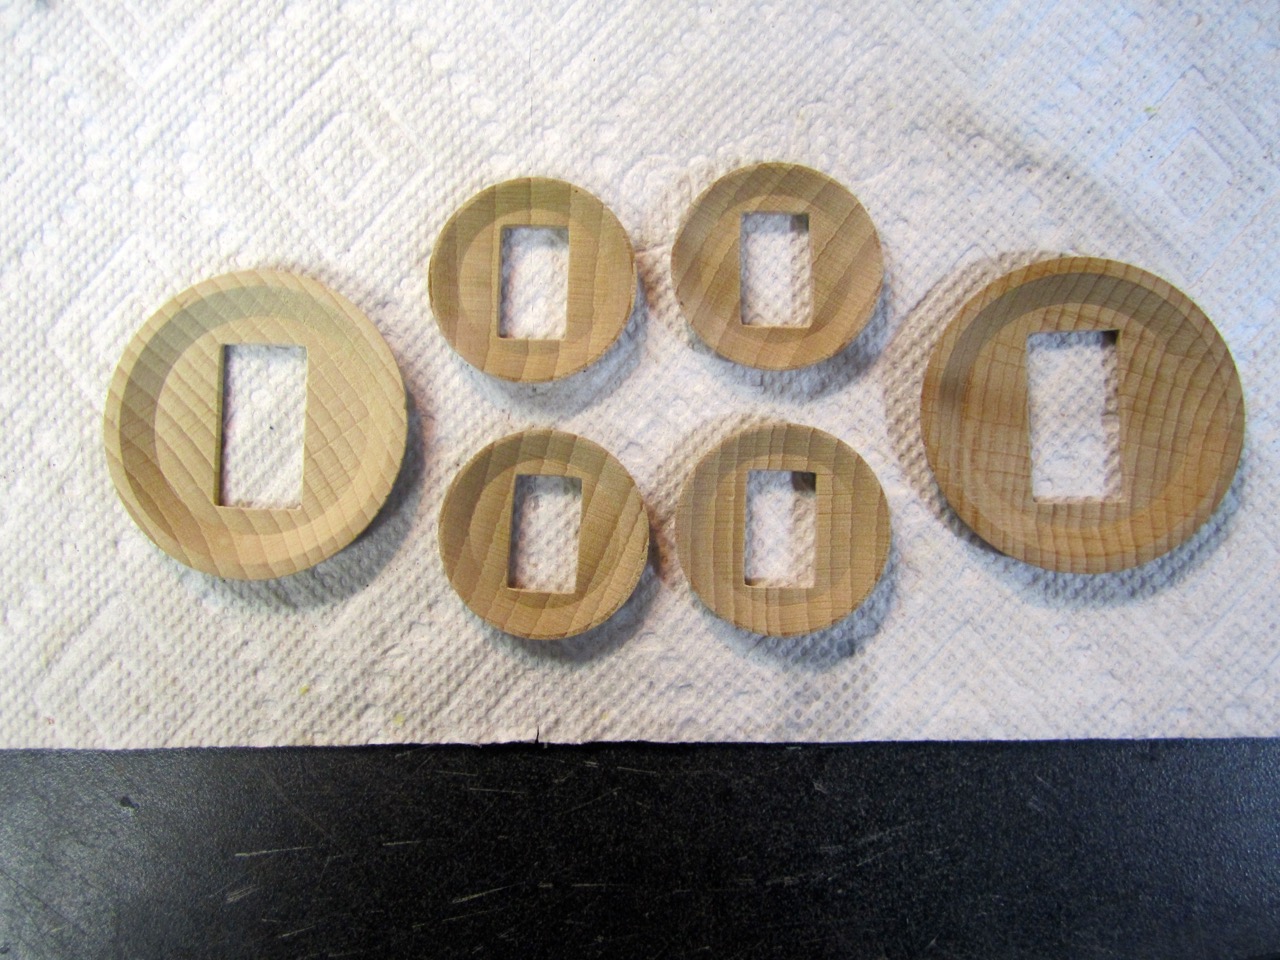
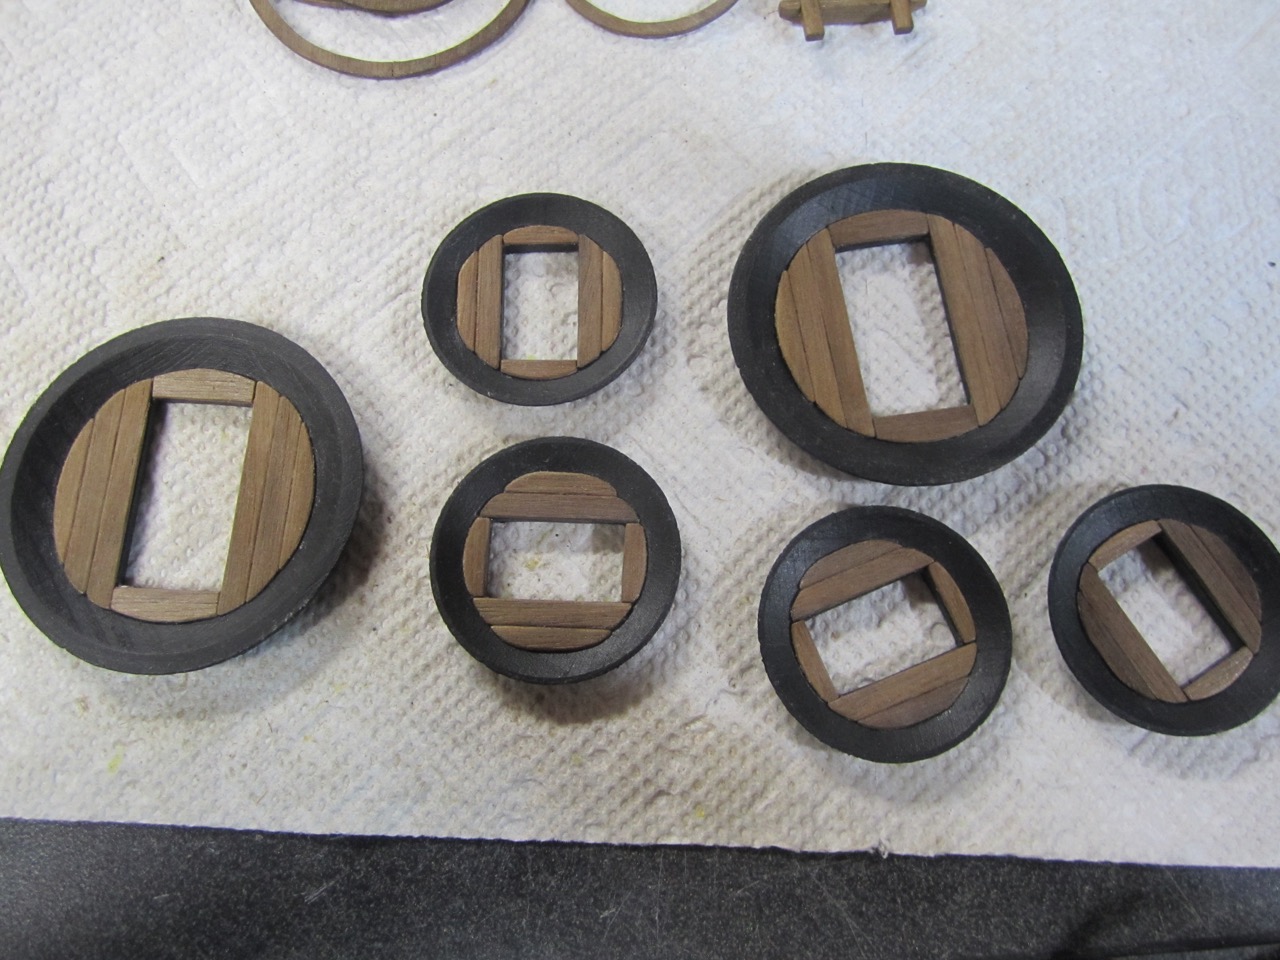
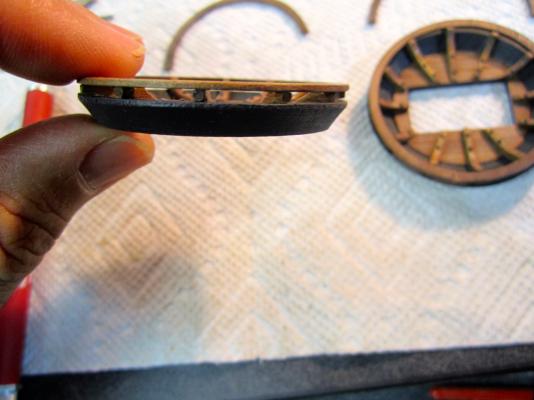
Hello! Thanks for all the likes! Just a couple of small updates. (Relatives finally left from Thanksgiving weekend!) I milled out the centers of the cross tree platforms to size. I painted the platforms a dull black Then I added deck floor planking using thin (.030 thick) strip walnut. After I get back from a couple of days of fishing (early christmas gift!) I will start working on the legs to support the upper platform rings I made above. Thanks again, Frank

-
Karl, I love the look of the partial folded sail! I might have to steal that idea when I get to that point Great job, Frank
-
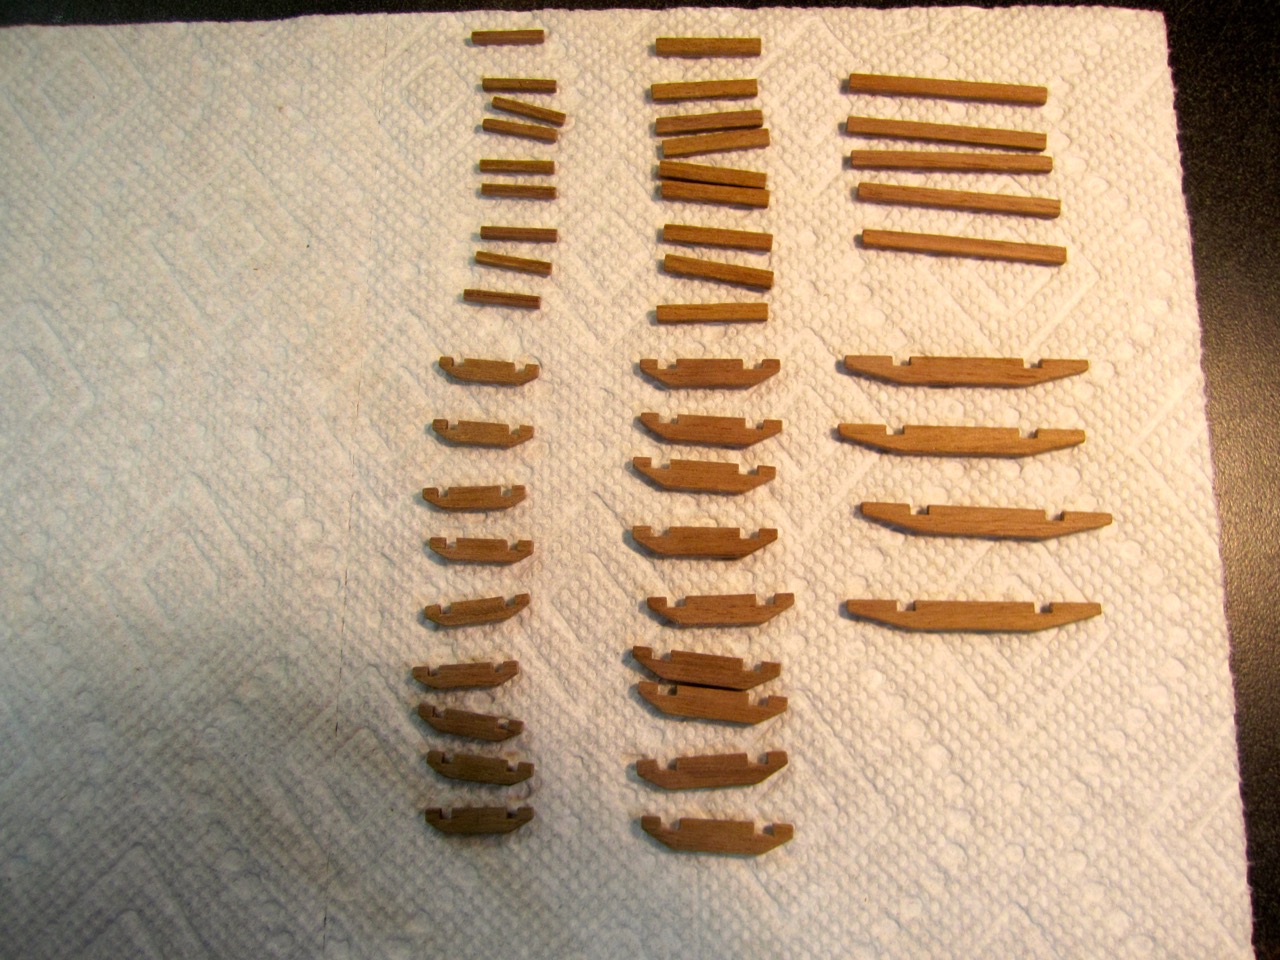
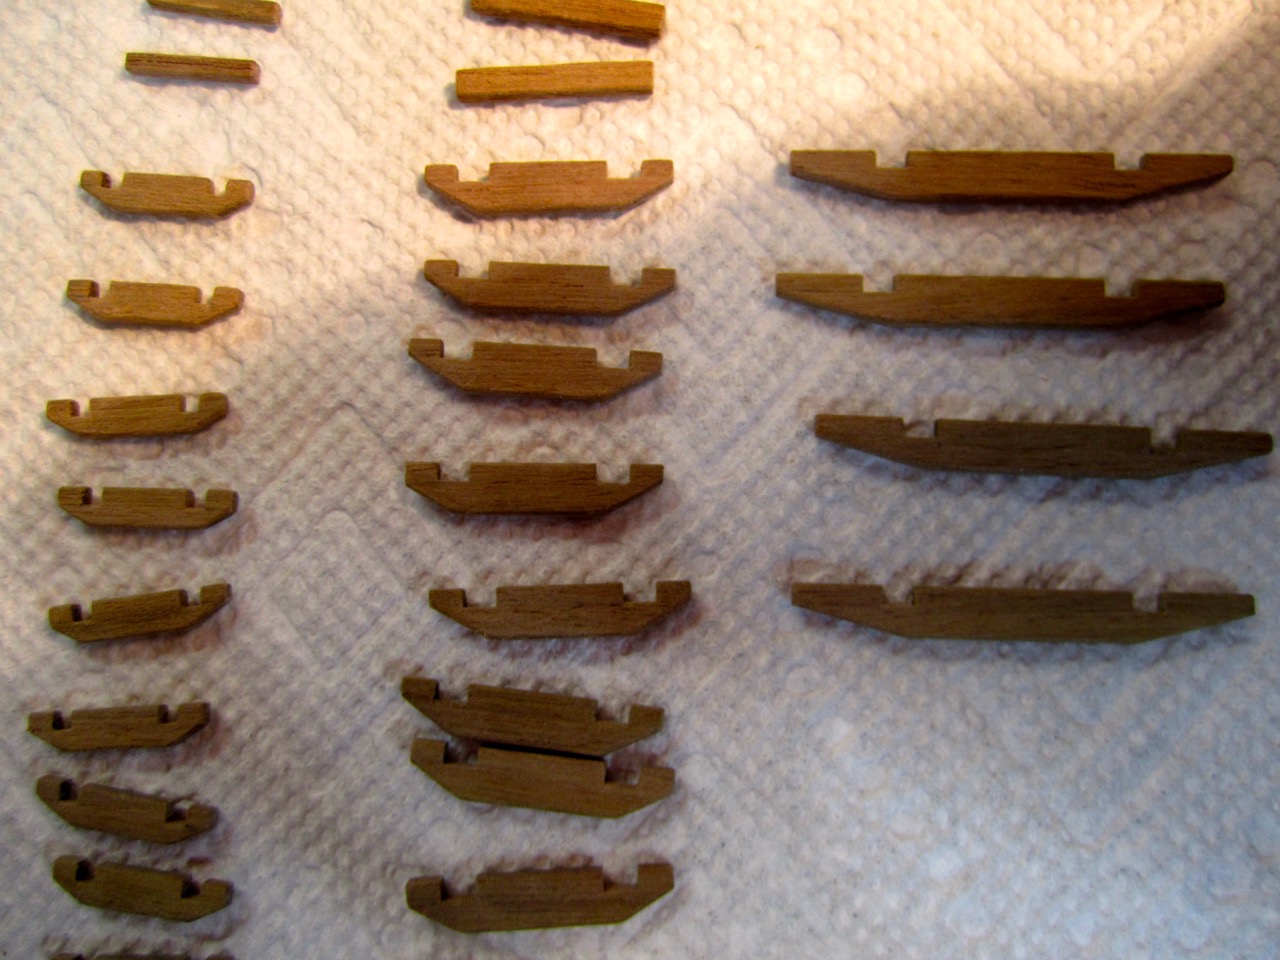
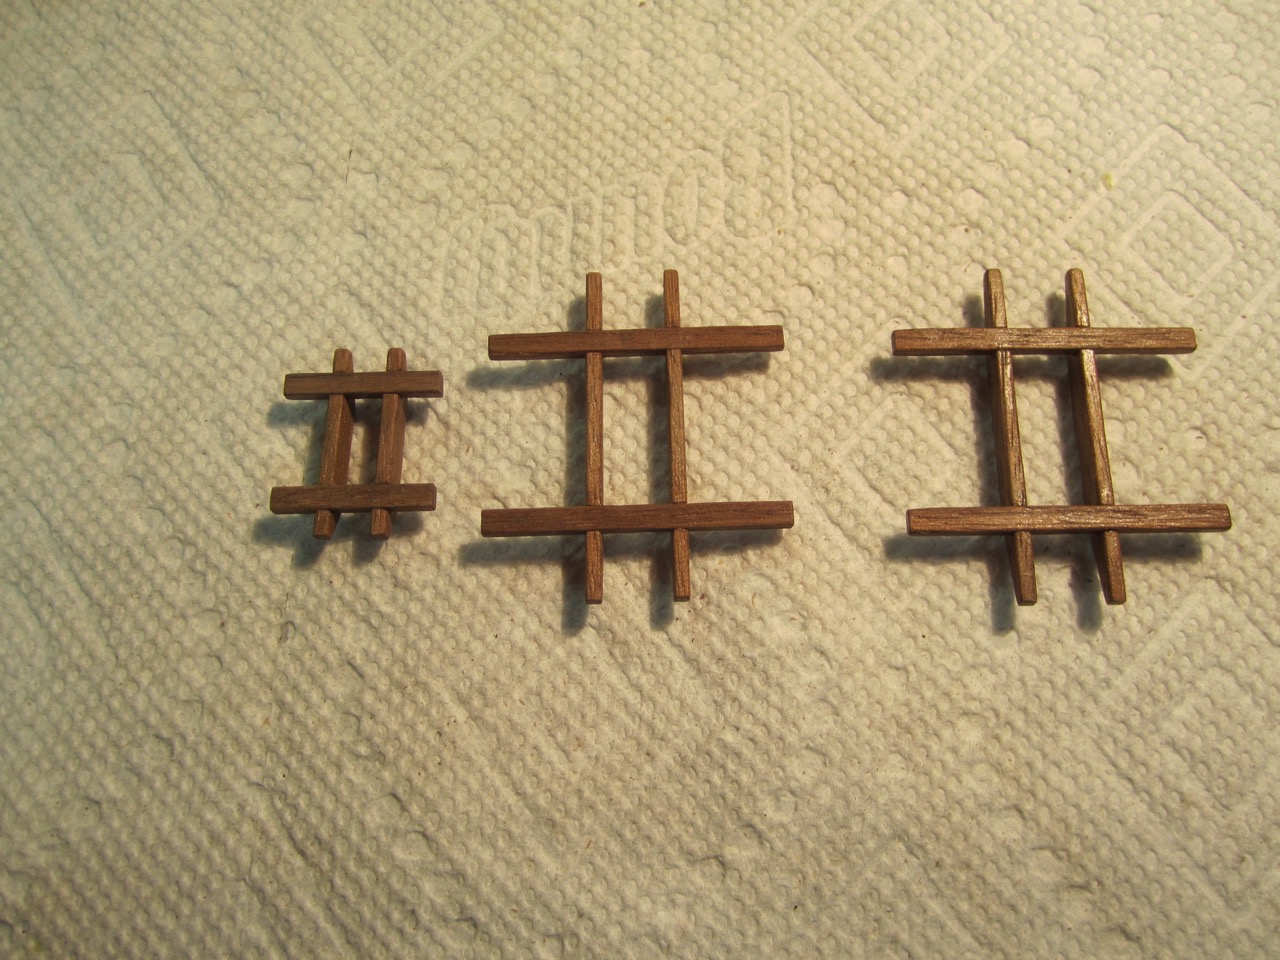
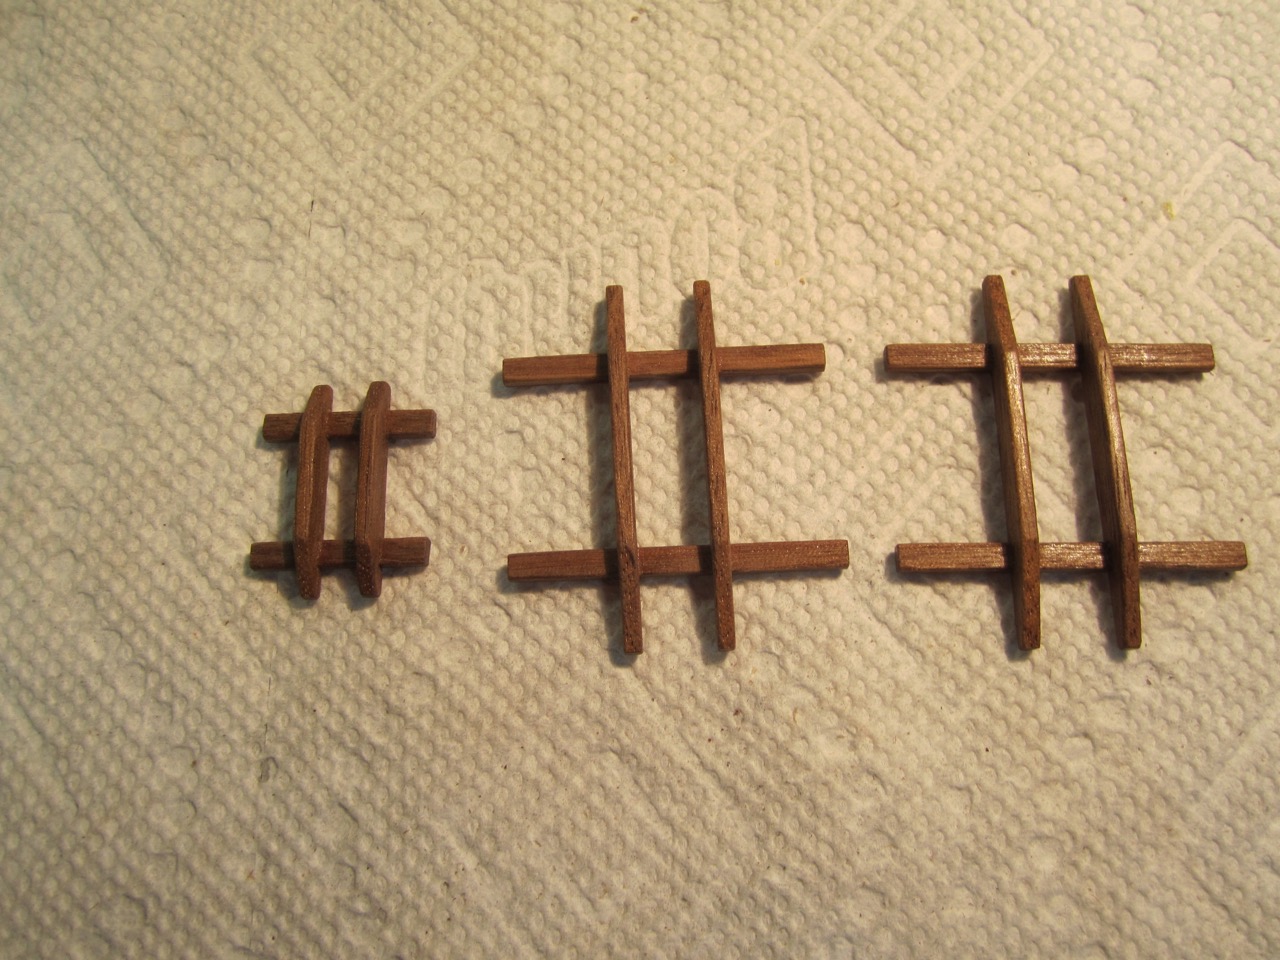
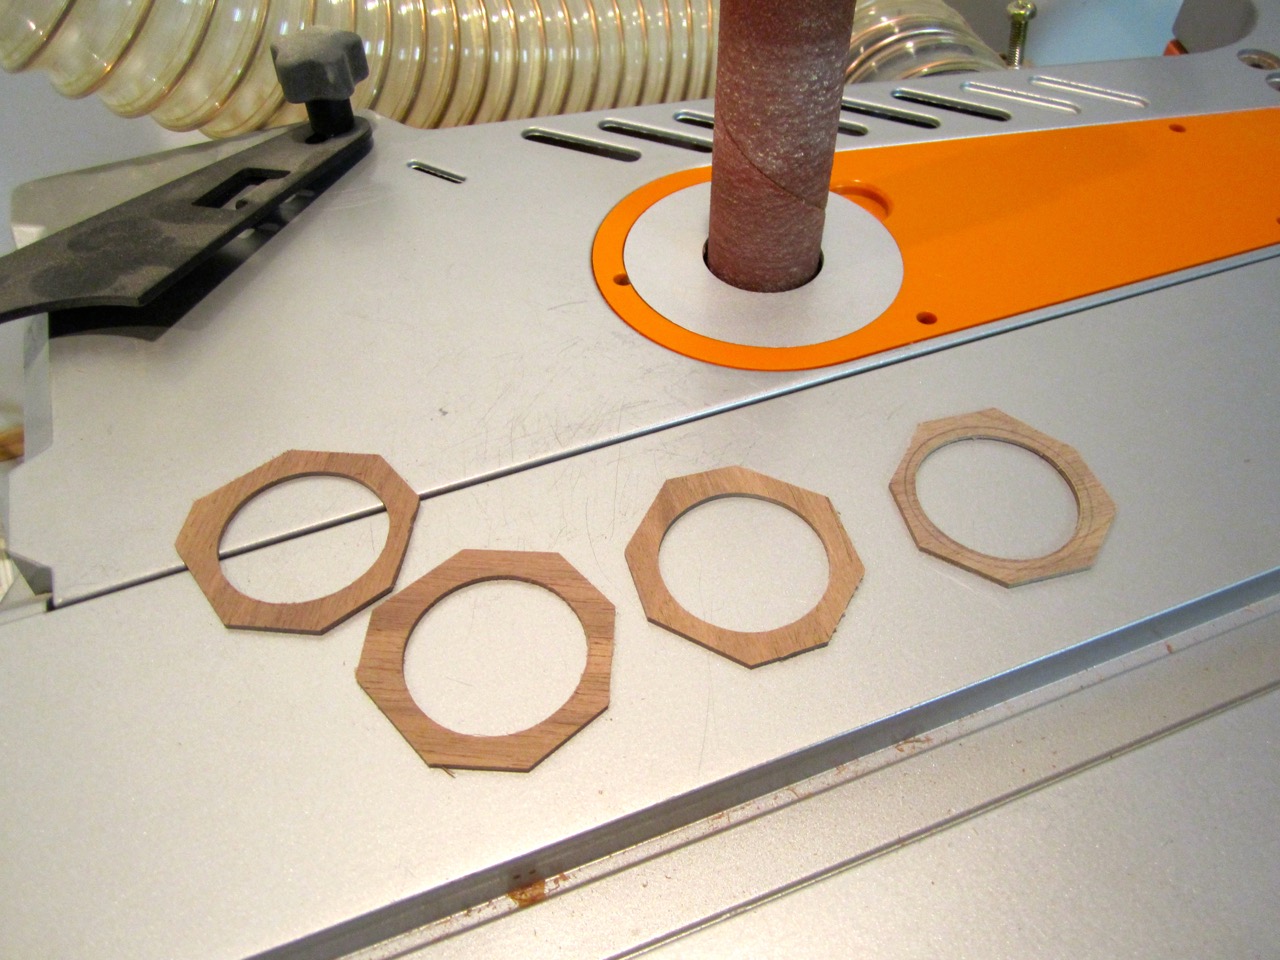
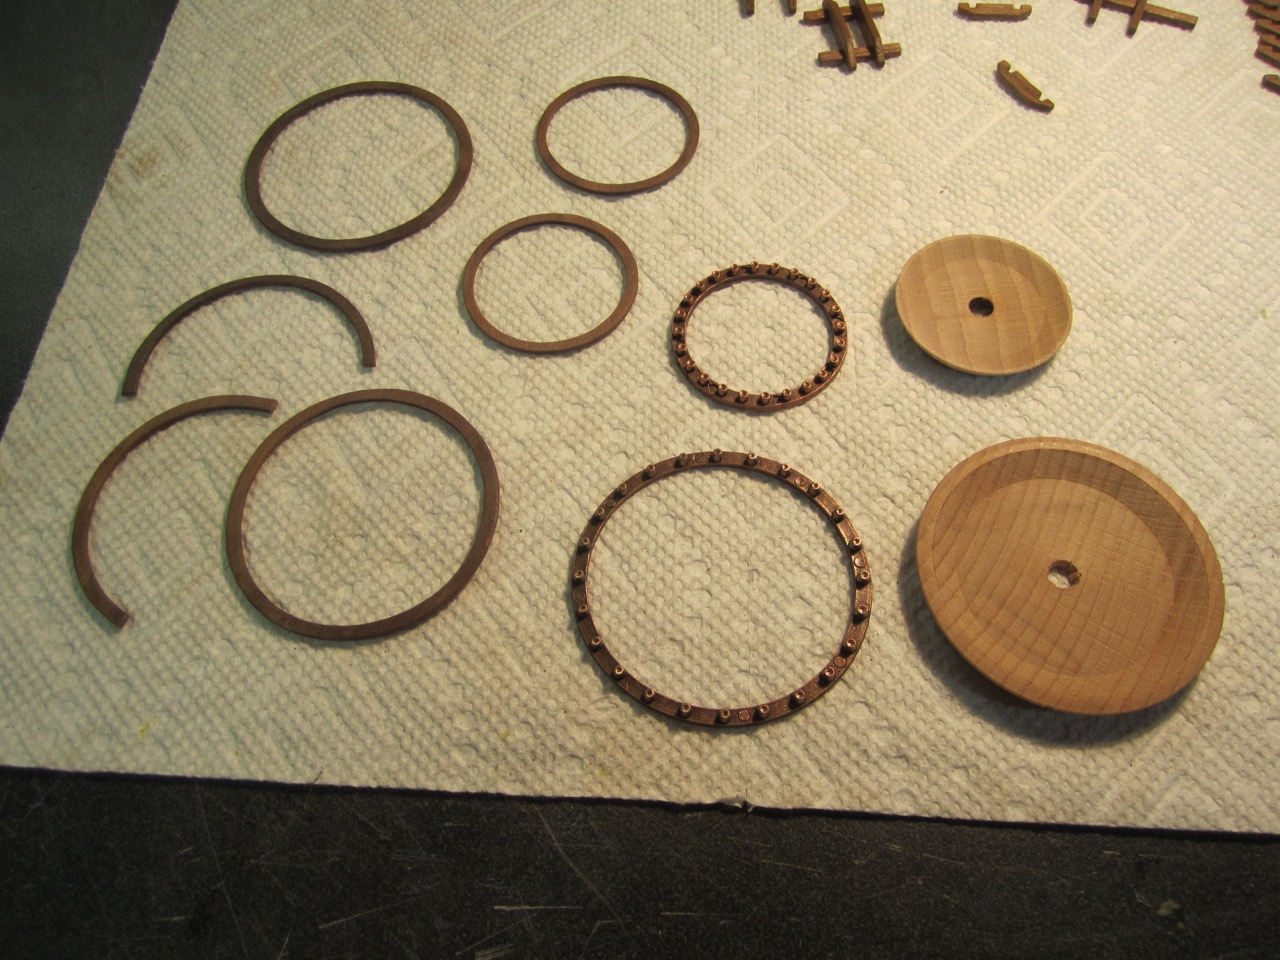
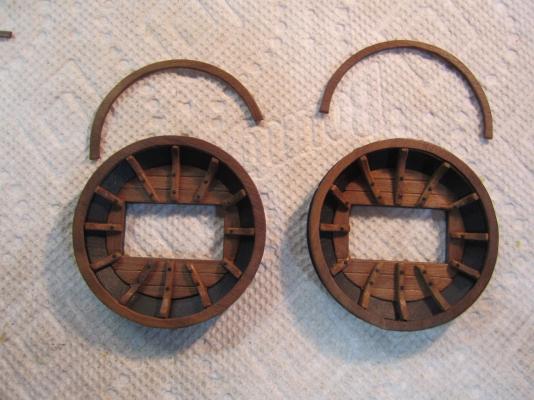
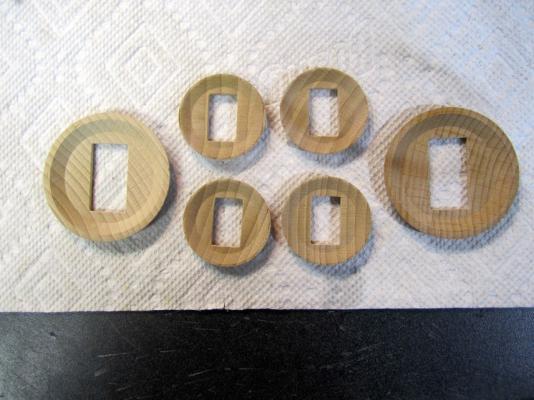
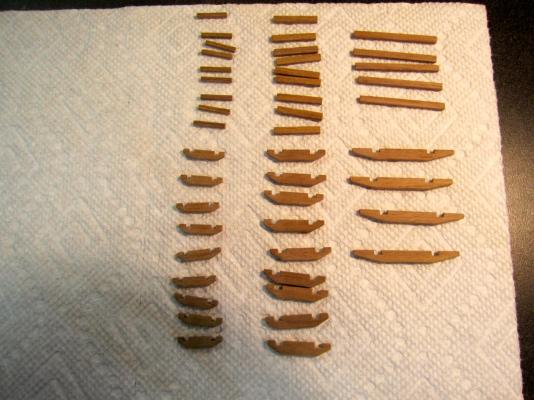
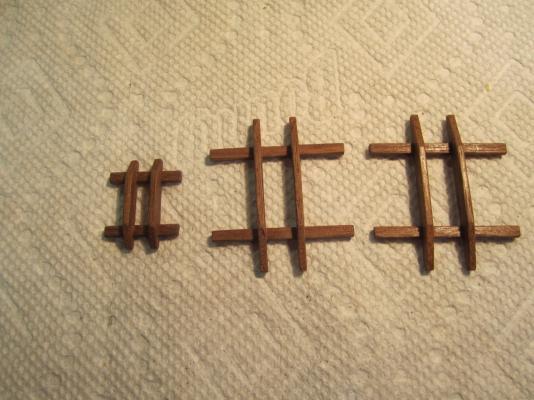
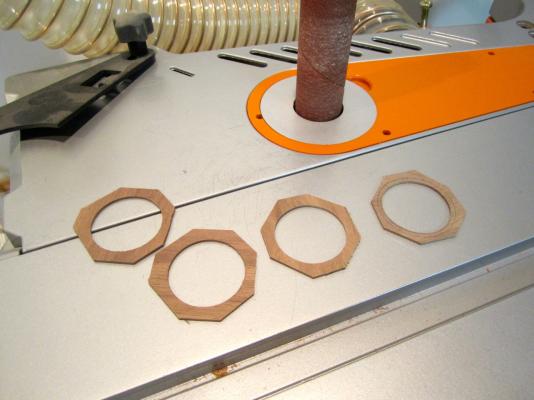
Hello! I cut up some wood to size and then notched them, for the different size crosstrees. I then ground the angles on the underside of the notches. I test fit and assembled the crosstree pieces for the 3 lower masts I built (see above). I will wait until I finish the upper masts before I assemble the rest. Top: Bottom: So now I have to start working on the 2 large platforms and 4 smaller ones. (I might as well finish them all now!) I will attempt to NOT use the metal rings that came with the kit and also to modify the platforms in order to make them look a little bit more authentic! We'll see how it goes I worked on trying to create some rings (to replace the metal rings). Using a thickness sander, I ground up some sheets of wood to 1mm thick. Then I used the oscillating grinding machine and tried to hollow out the inside diameter of the rings. Then I sanded down the outside of the rings to create hoops that are stress free (no bending, but brittle). I will also split some in half in order to create the second upper railing that goes halfway around the platform. My goal is to build the wooden legs to support these rings. I hope this will work. I also need to cutout the inside of the 6 platforms and create a false deck. Have a wonderful Thanksgiving everyone! Frank


-
Thanks Edwin! It is appreciated. And thanks to everyone for the likes! Frank
-
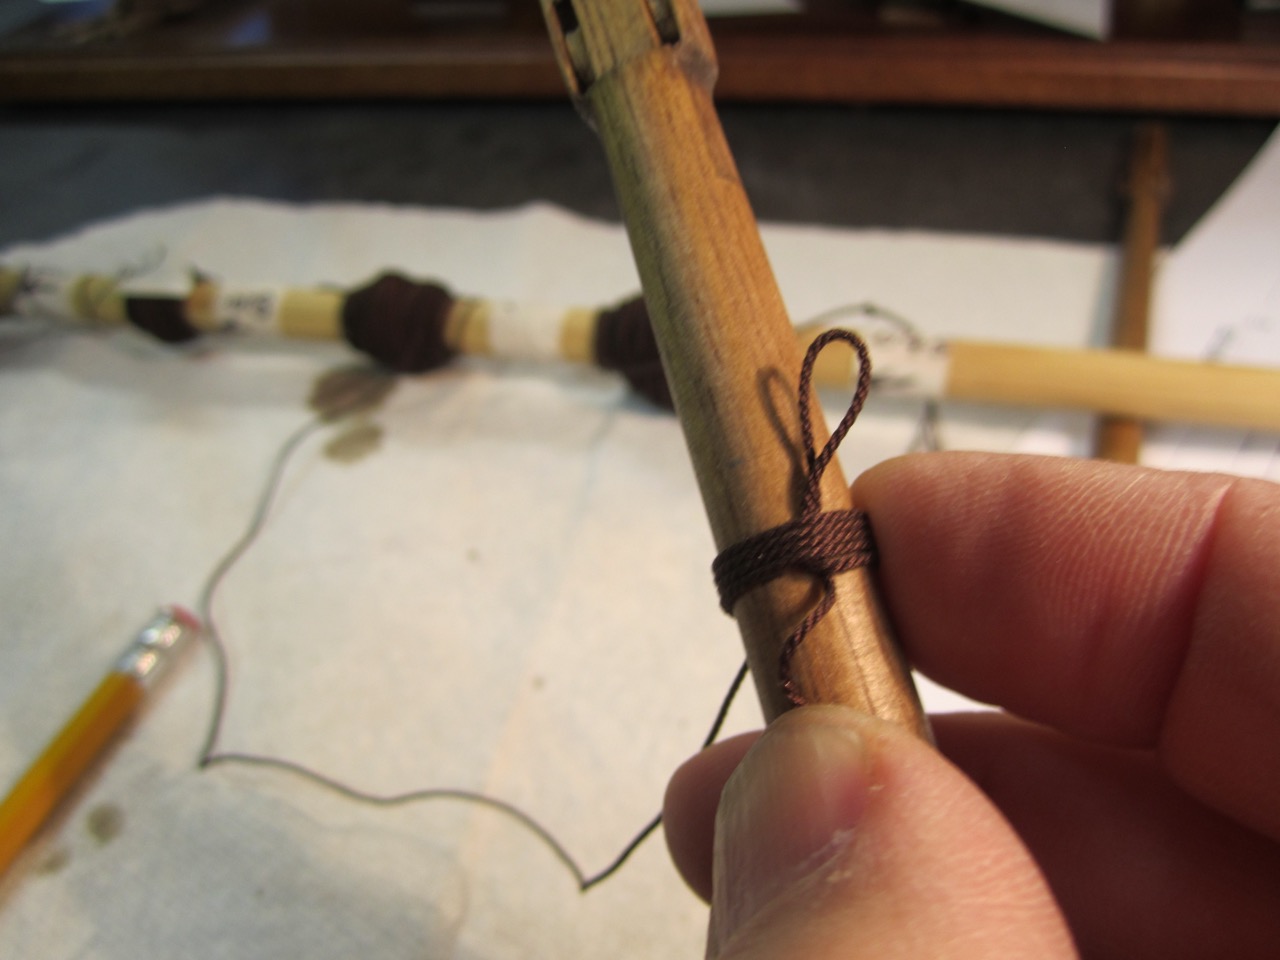
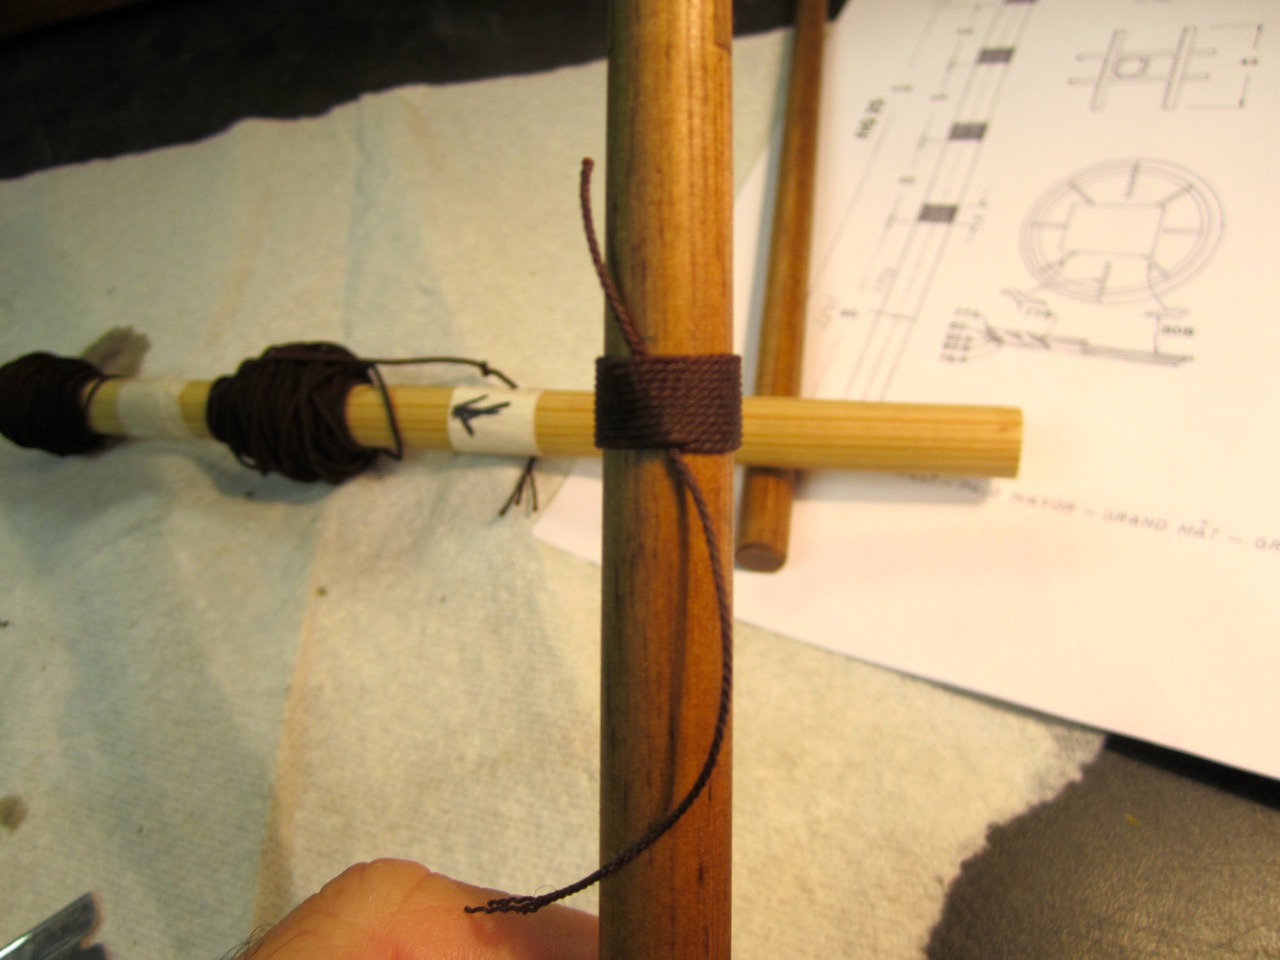
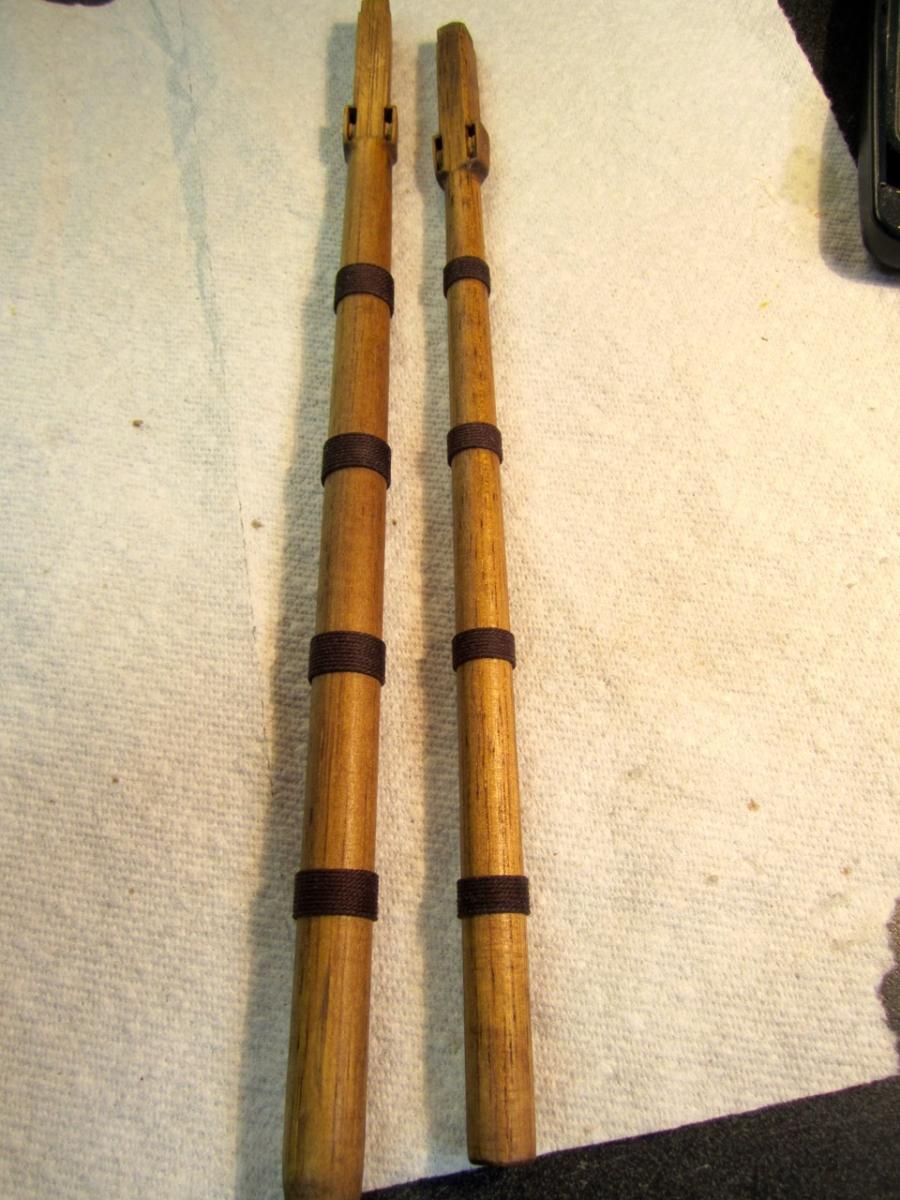
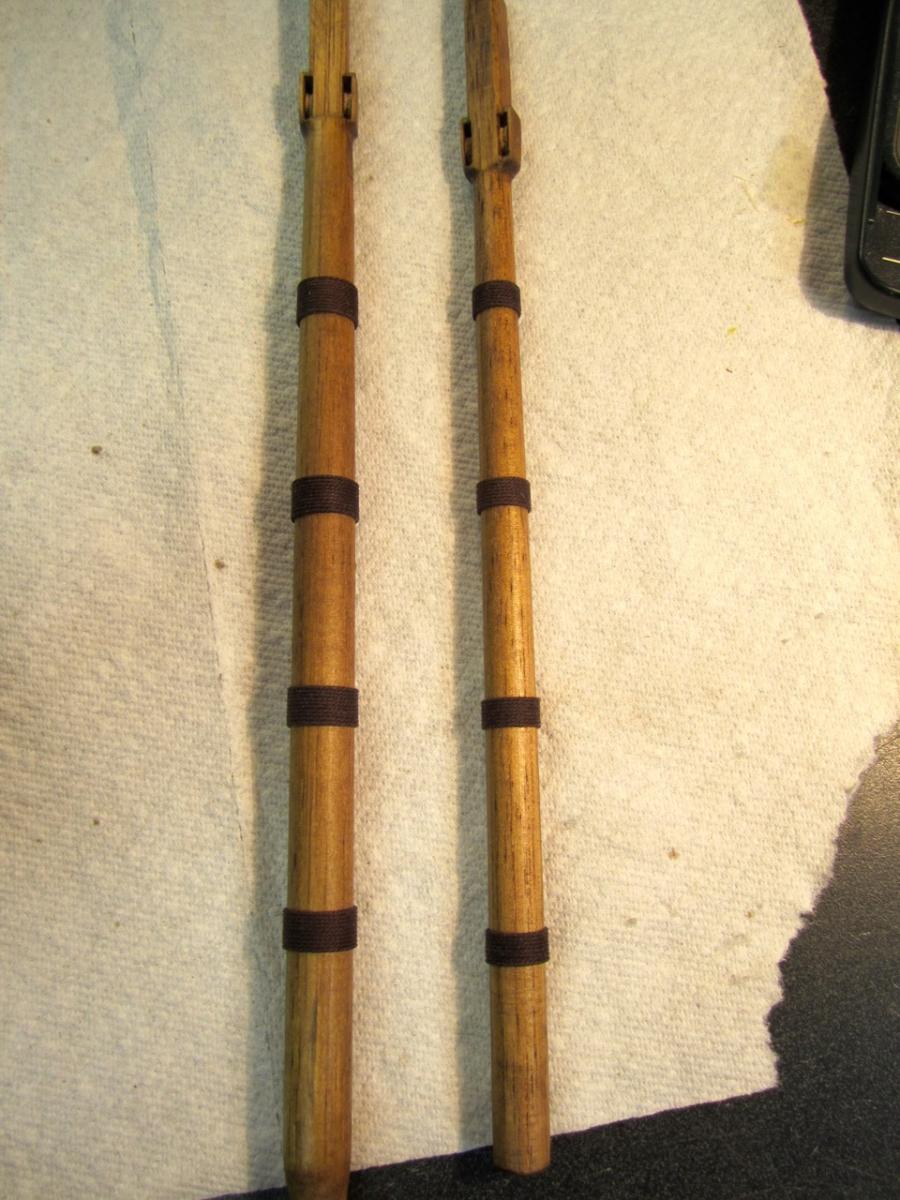
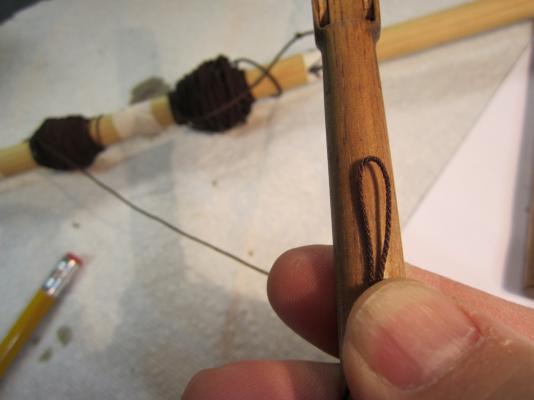
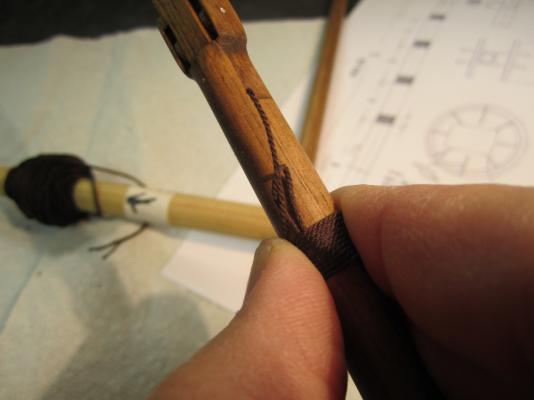
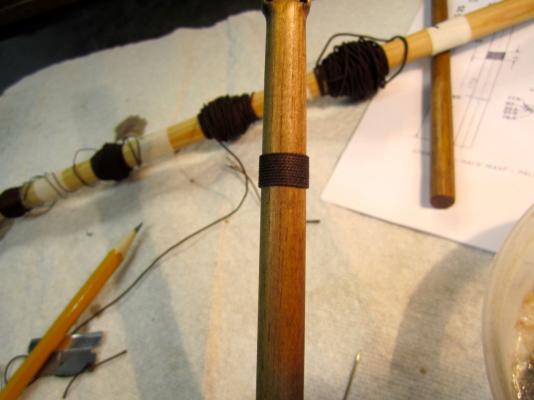
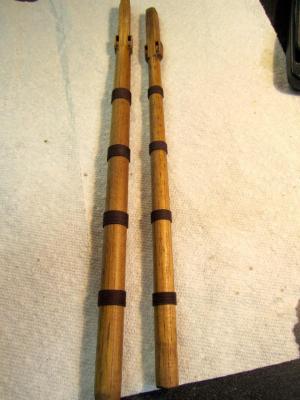
Now I worked on making the straps on the masts. Woolings? I started by making a loop with the rigging line Starting with the lower end, I wrapped the line around the mast the correct amount for the width I wanted to achieve. Then I threaded the top of the line thru the loop Then from the end of the loop (at the bottom of the wrap), I pulled the loop down behind the wrap Then I placed some glue at each end and trimmed the ends with a razor blade finishing the wrap. Finished woolings (straps) on lower mainmast and lower foremast Checking the lower masts on the ship Added the metal fitting for the sheave support each side Now onto the lower crosstrees! Thanks, Frank


-
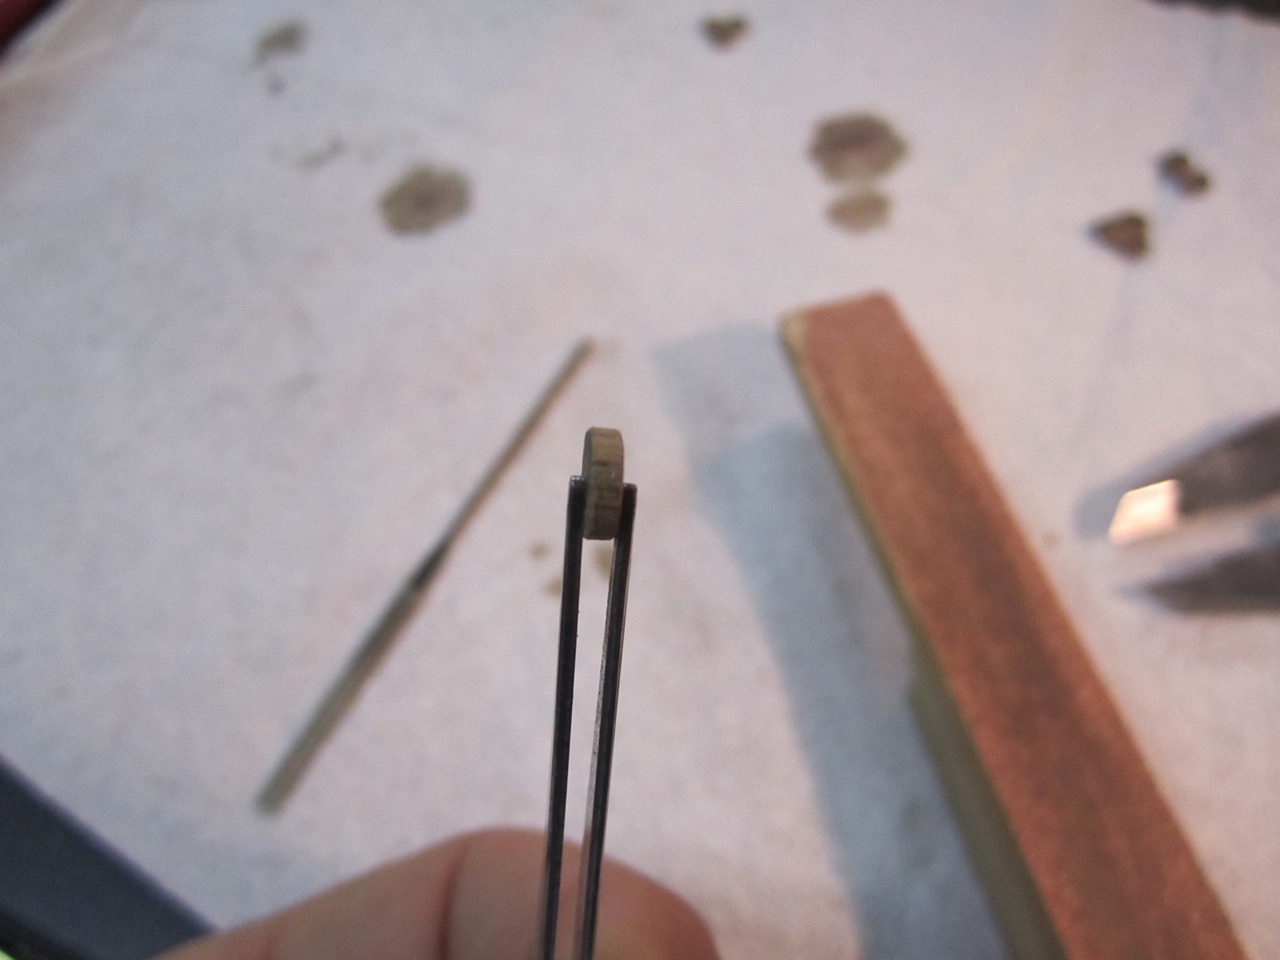
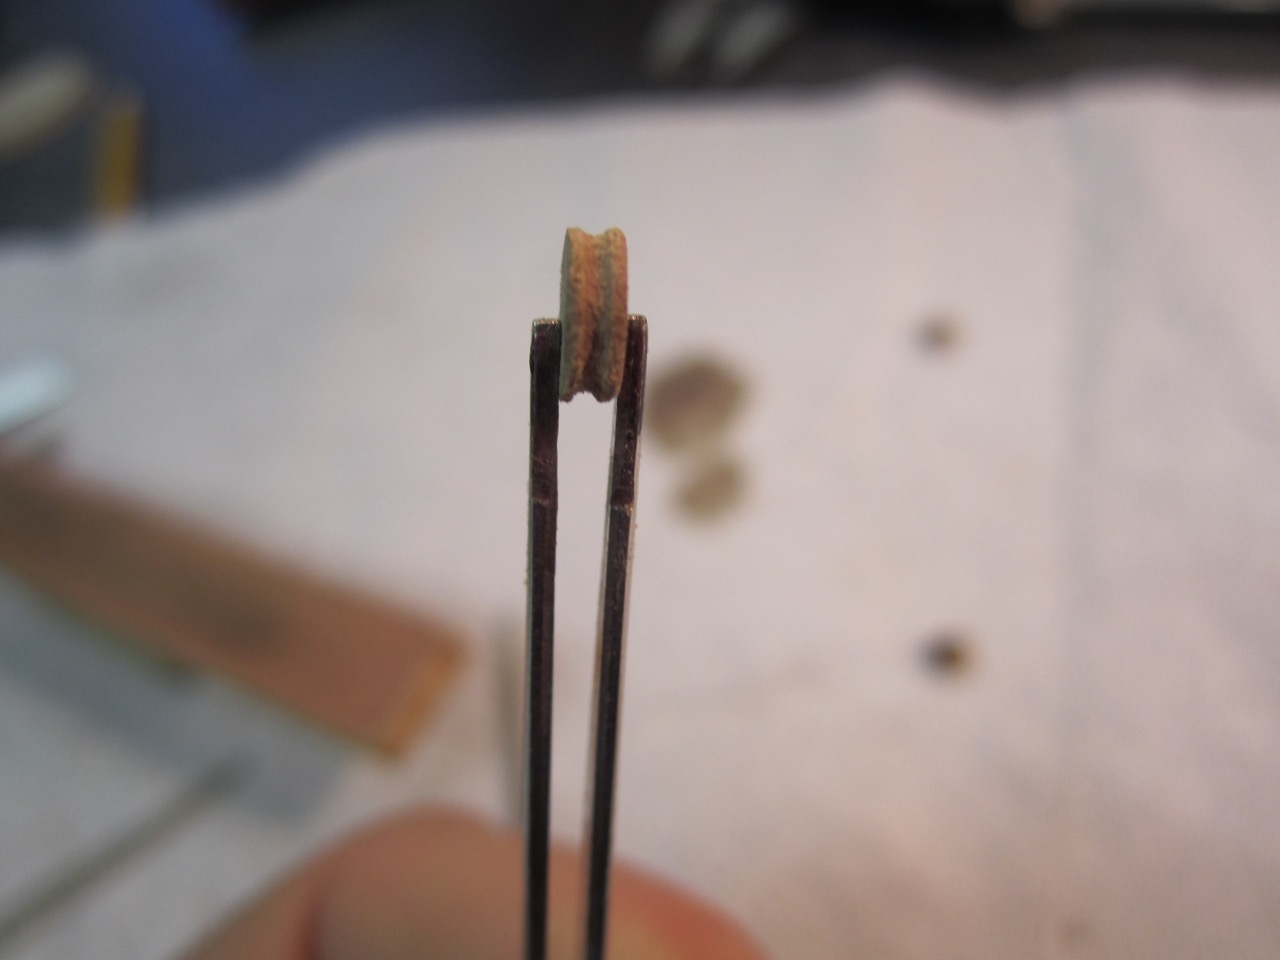
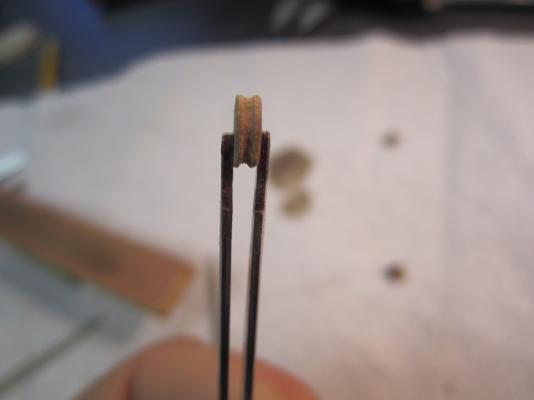
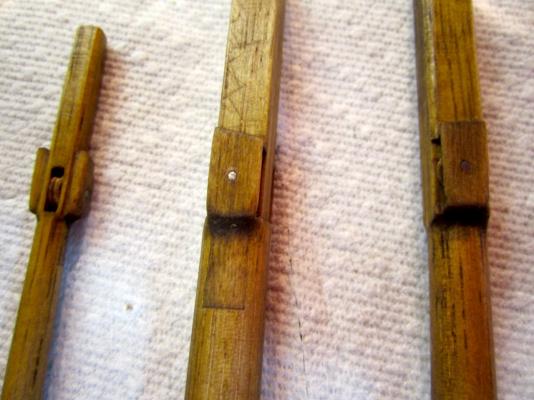
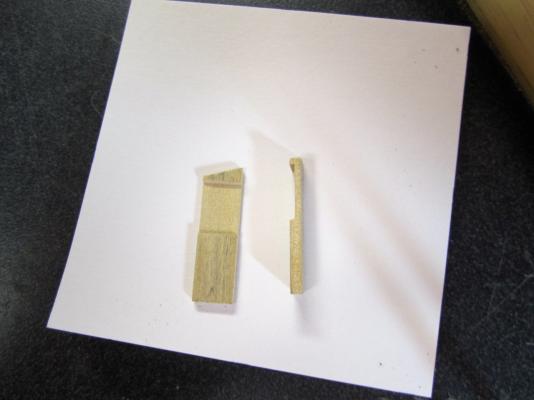
Hello, Some updates! I stained the lower masts, using a walnut stain. In making the sheaves, I sliced some walnut dowels then grooved the middle. Drilled a hole thru the center and pinned to mast

-
Mark, Your deck looks real nice. When I did my deck planking, I missed the curved cutouts for the ladders between the lower deck and the next deck. I was too scared to go back and put them in (fearing I would do more damage!) Yours turned out nicely! Frank
-
Hello CptNautilus and Michael, Thanks for the input! Yes, things are confusing between the three plans. I just have to keep working through everything with an eye towards the upcoming rigging and to see what works the best and what feels the most accurate. Thanks, Frank
-
Hi Edwin, Thanks for your comments. It is appreciated. Since I joined this forum, I also have learned a lot from other fantastic logs. So it works great both ways! Thanks again, Frank
-
Thanks! I'm sitting here with my Corel mast plans, copies of the Billings mast plans, and the actual Vasa plans from the 1980's! Trying to figure things out between the 3 plans! Frank
-
Thanks everyone for all the likes and for visiting. It is appreciated! Gunther, I visited your log today. Great job so far on the Virginia Sloop. Interesting ship! Frank
-
Thanks for the comments Mark! And thanks again for supplying those dimensions! Frank
-
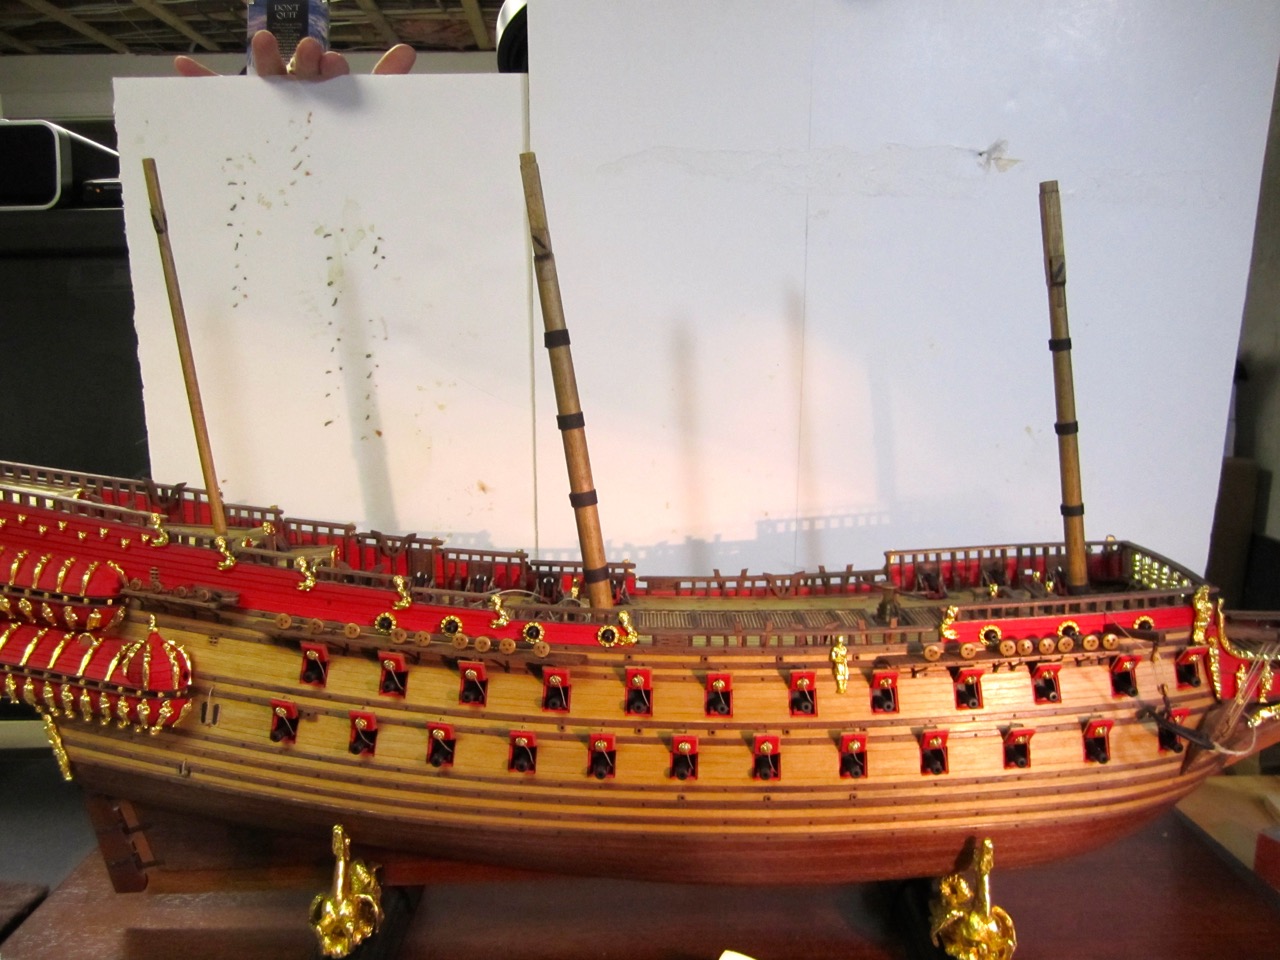
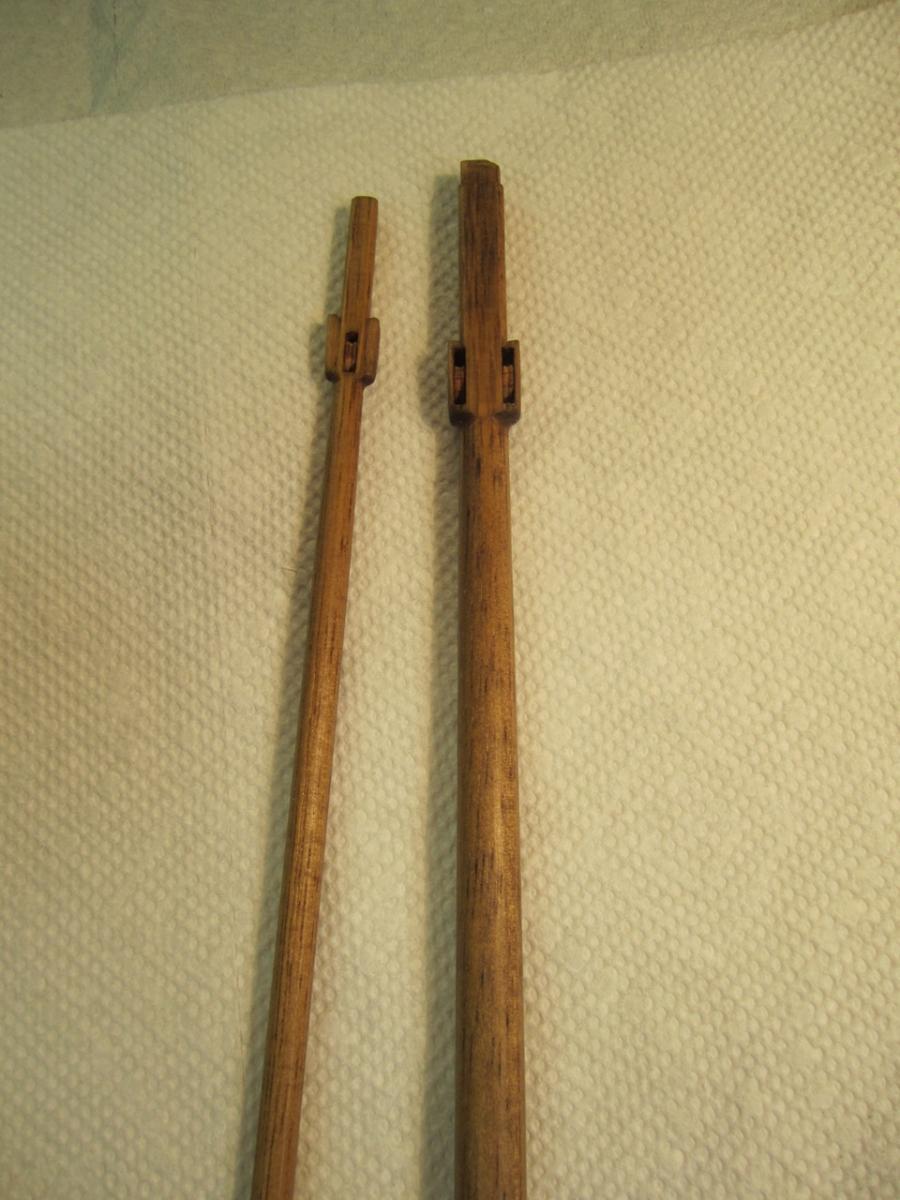
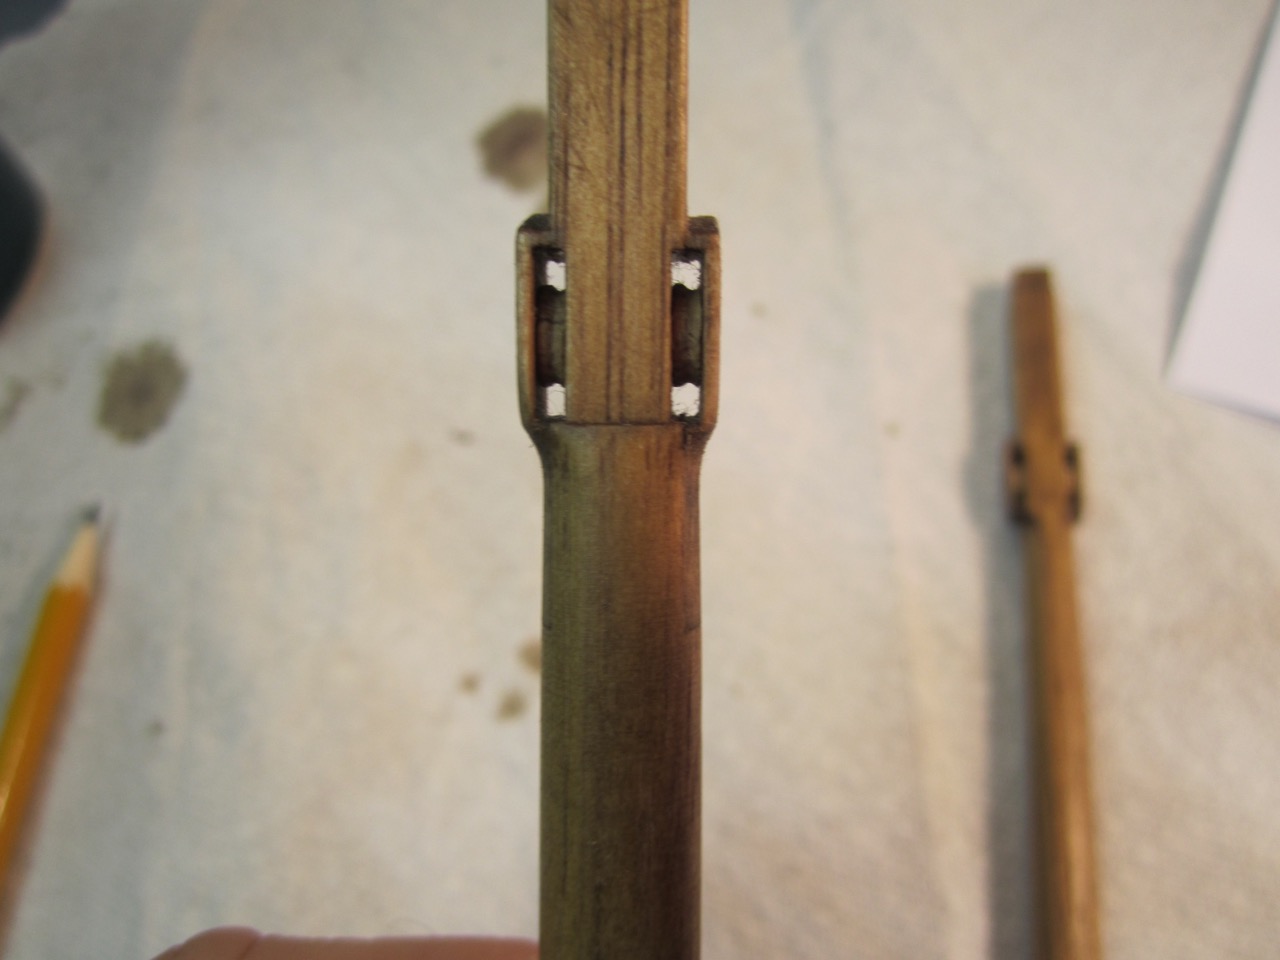
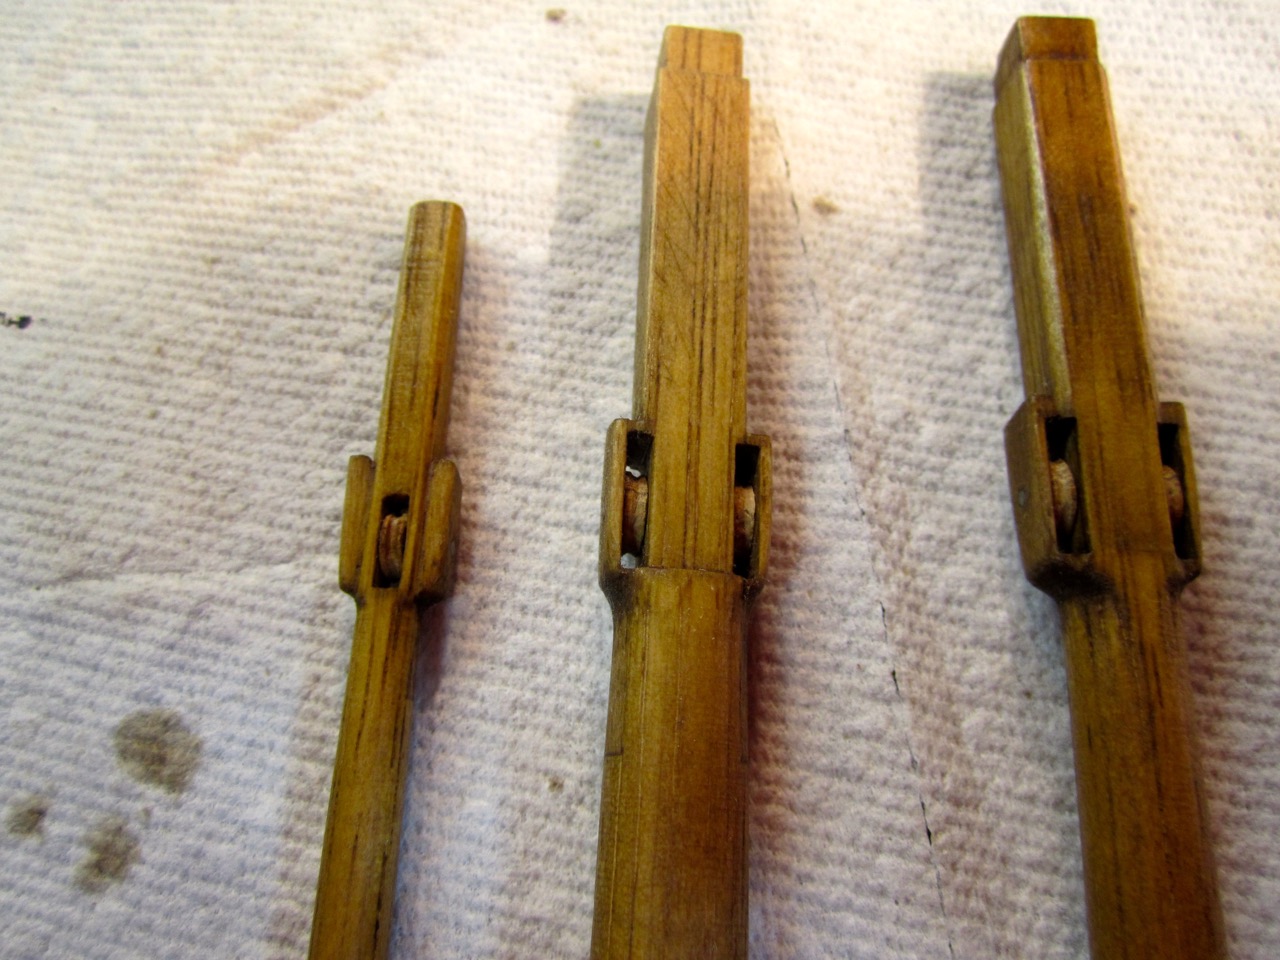
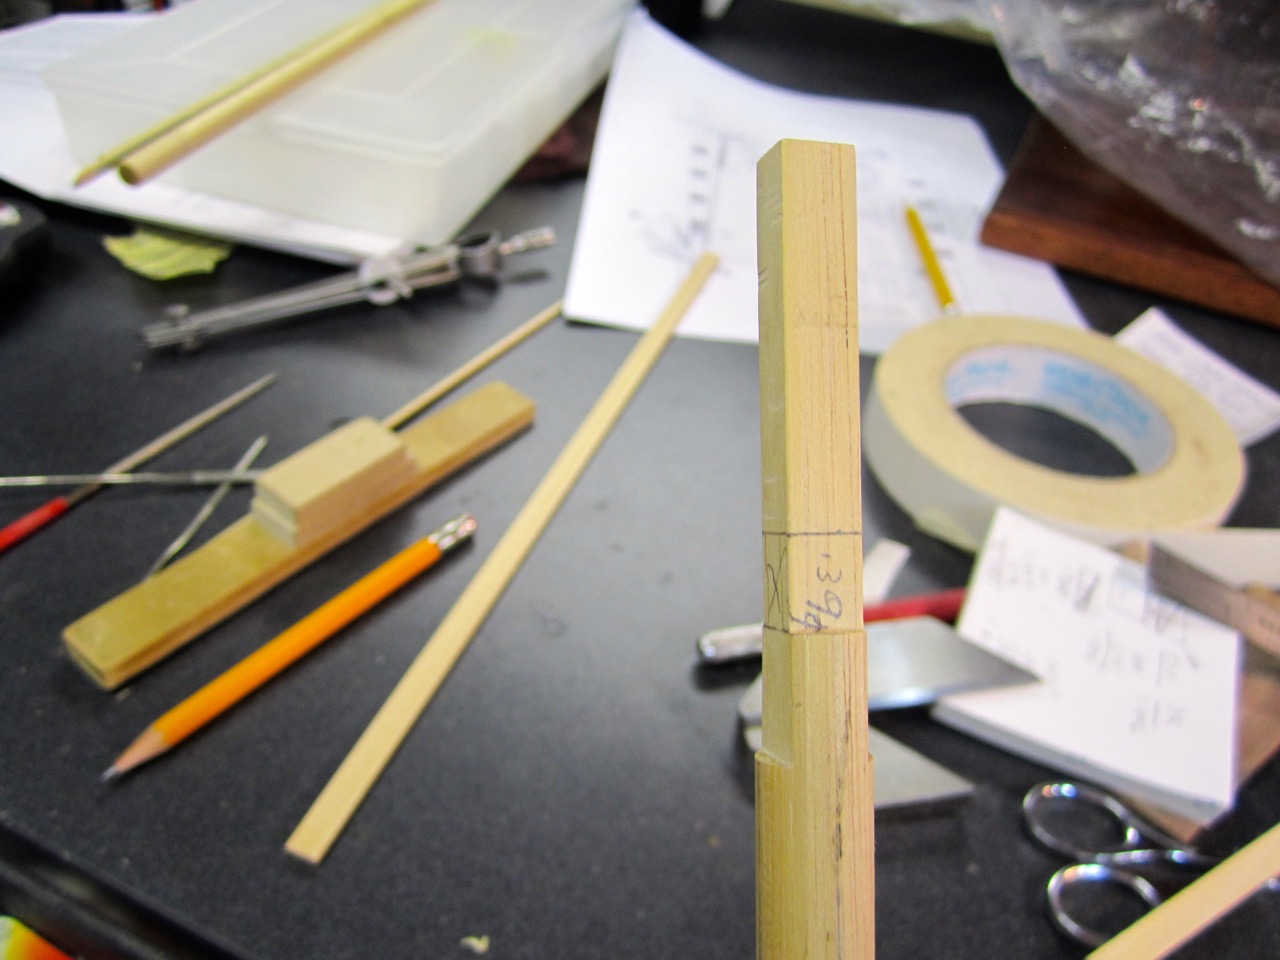
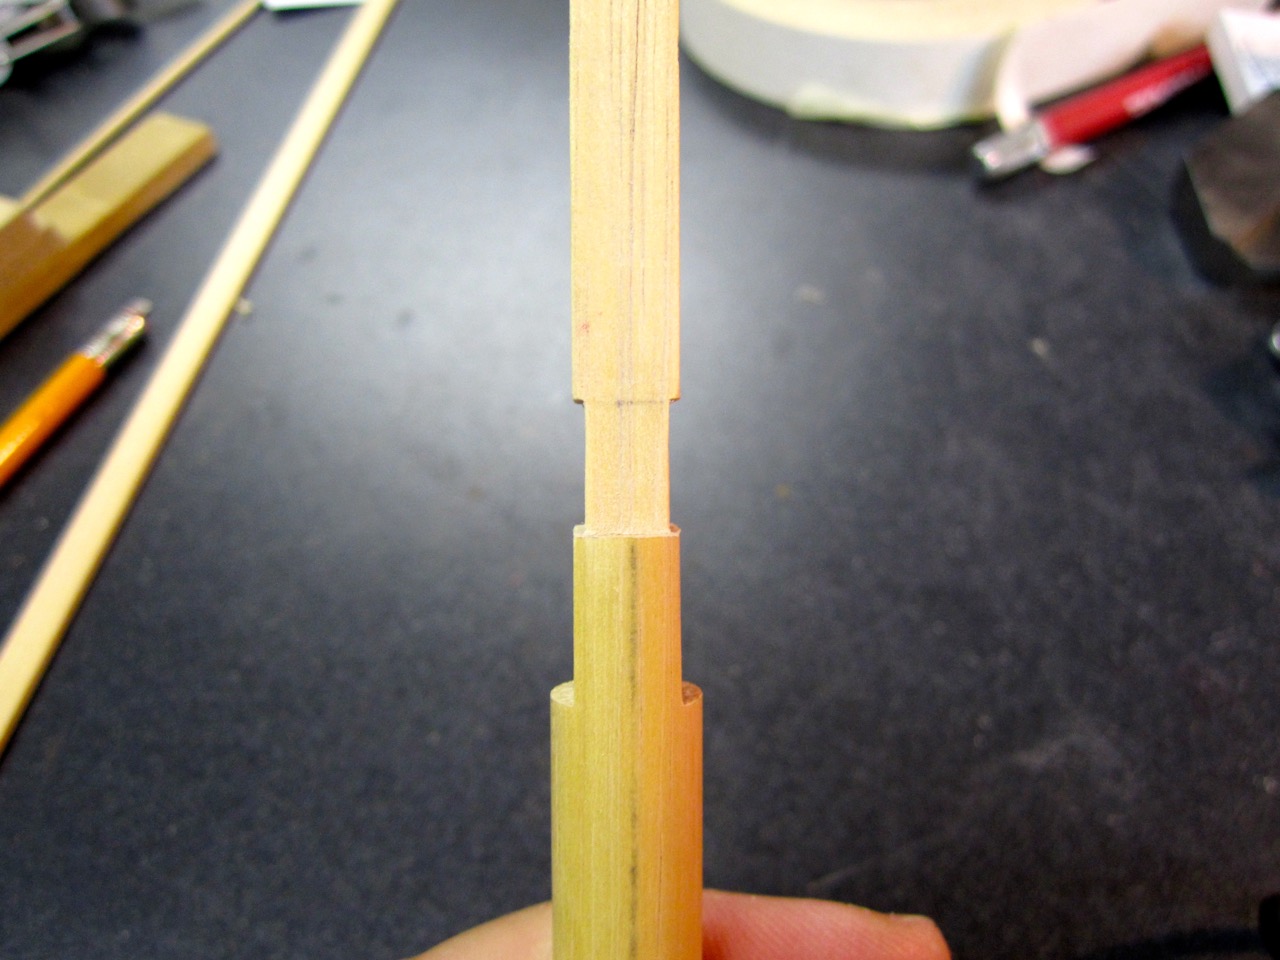
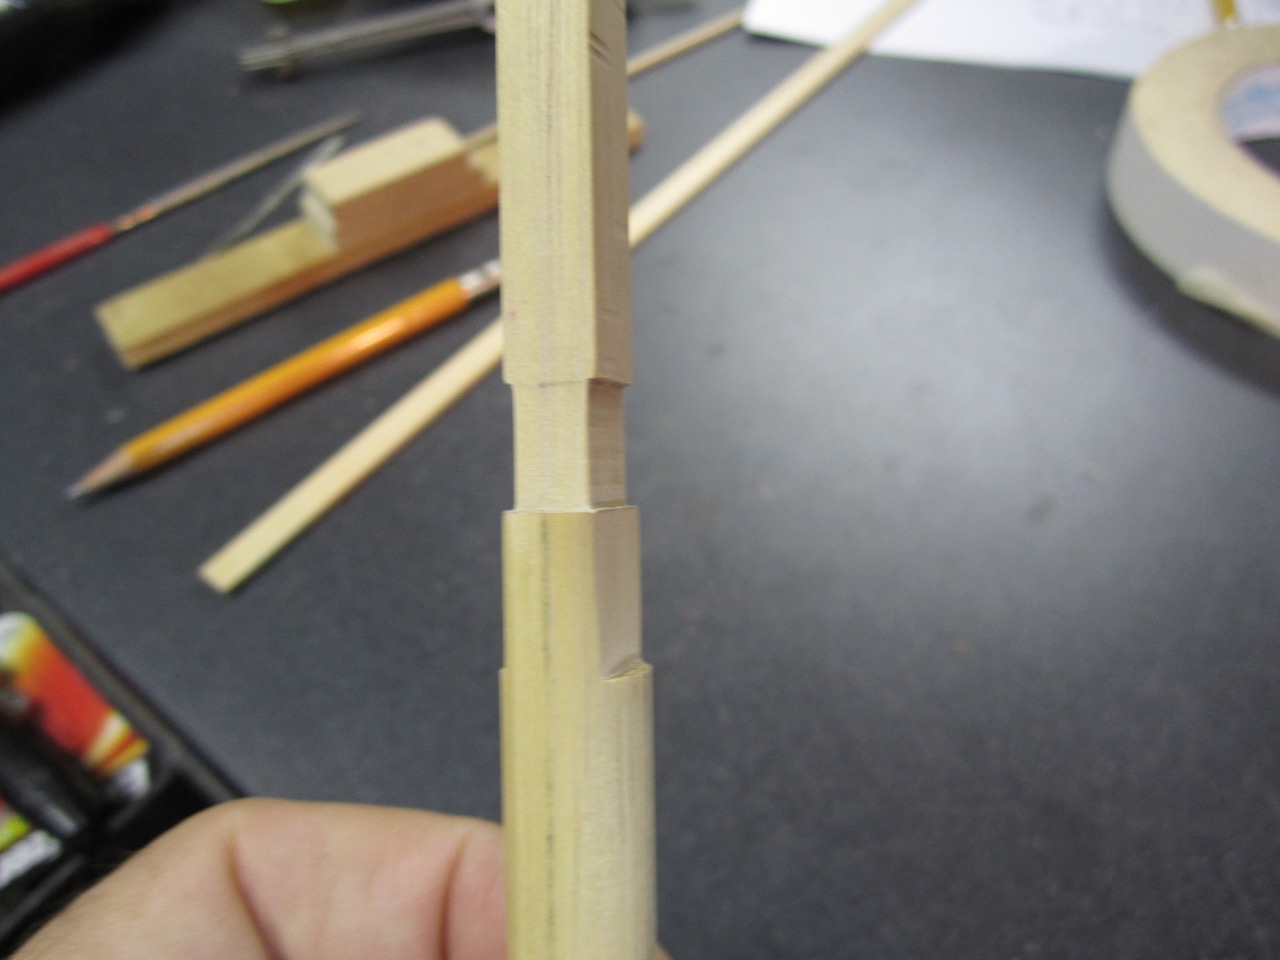
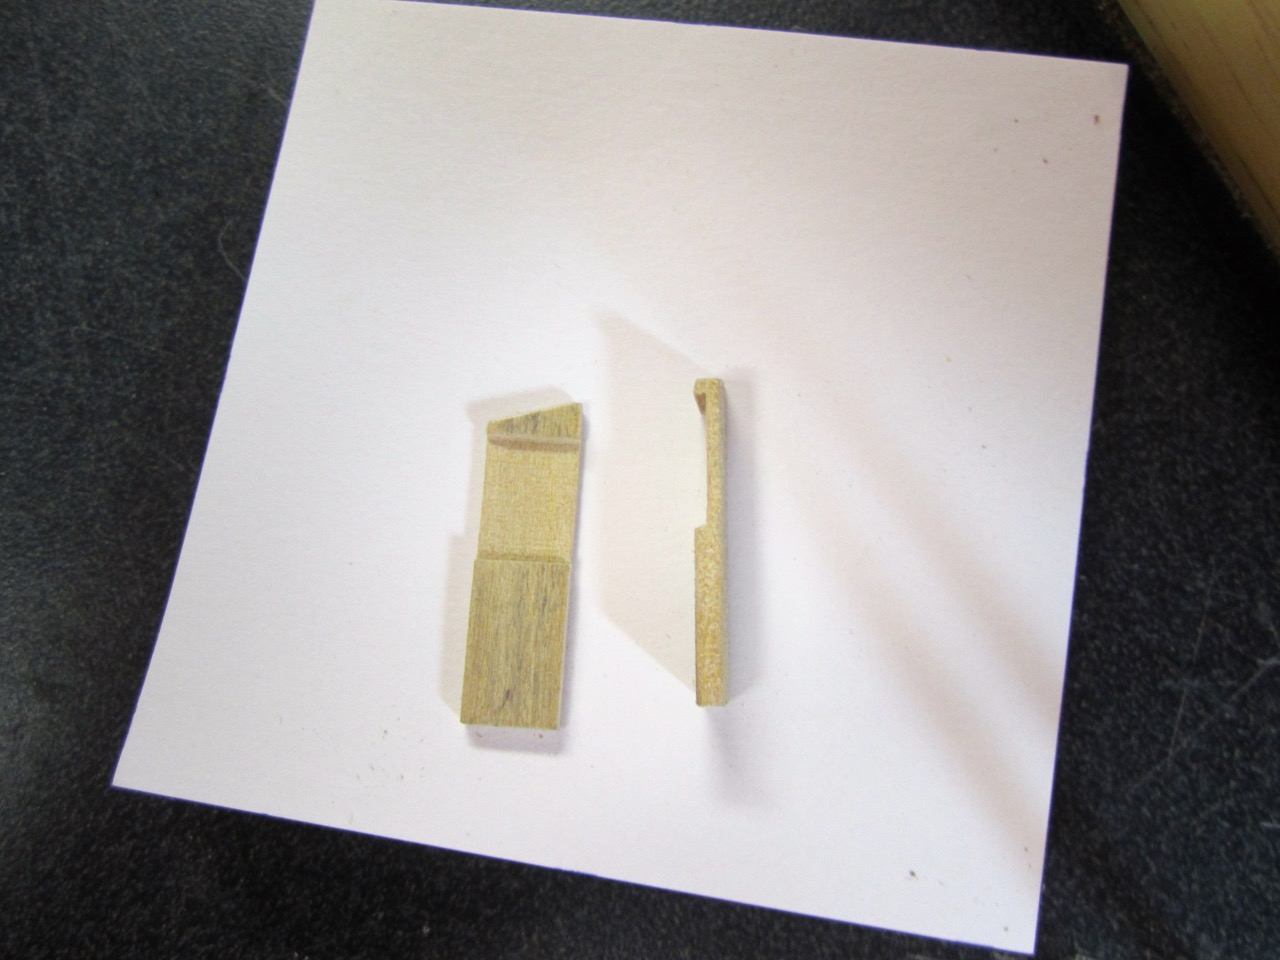
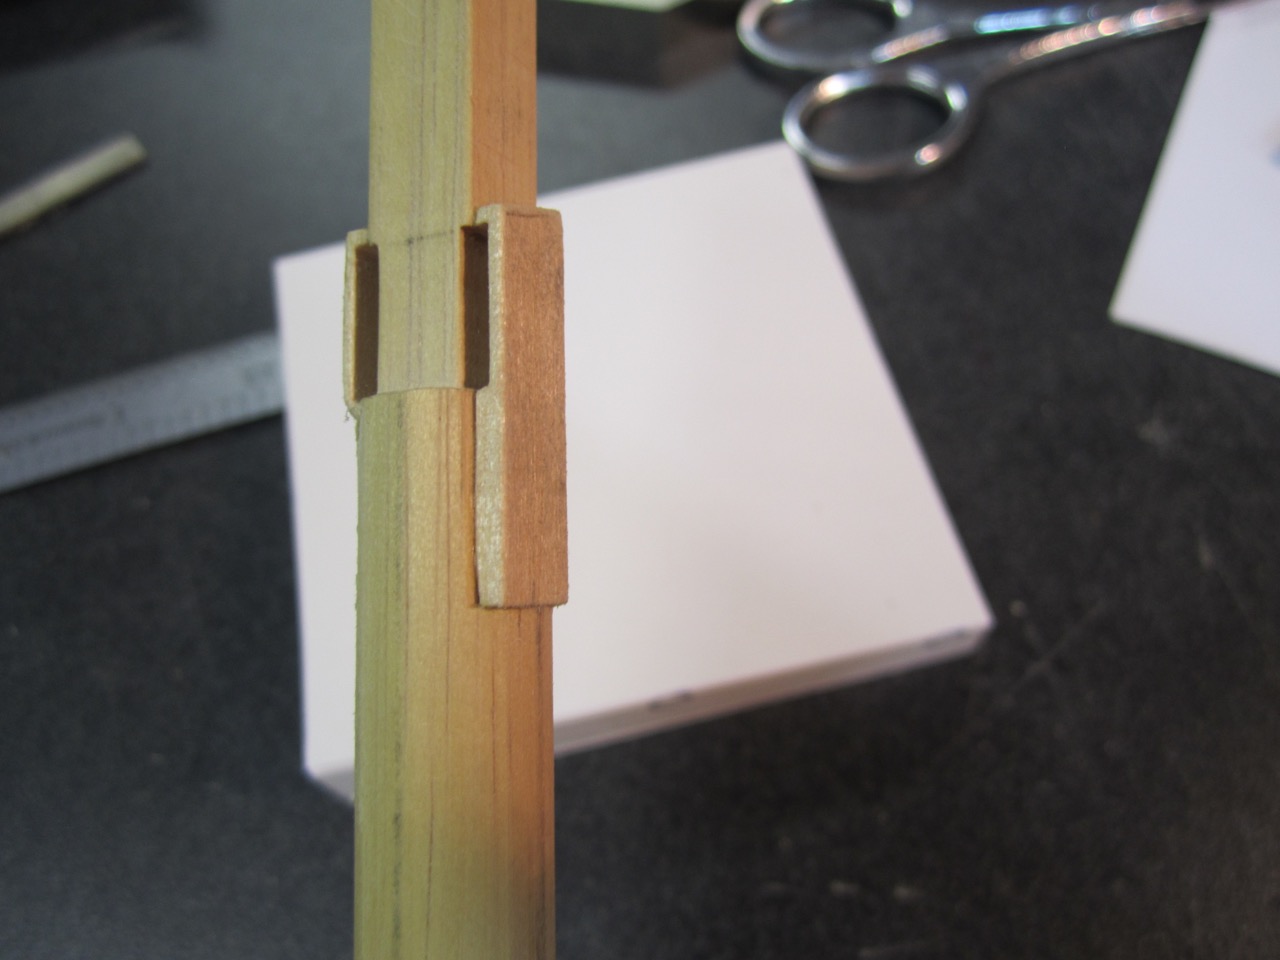
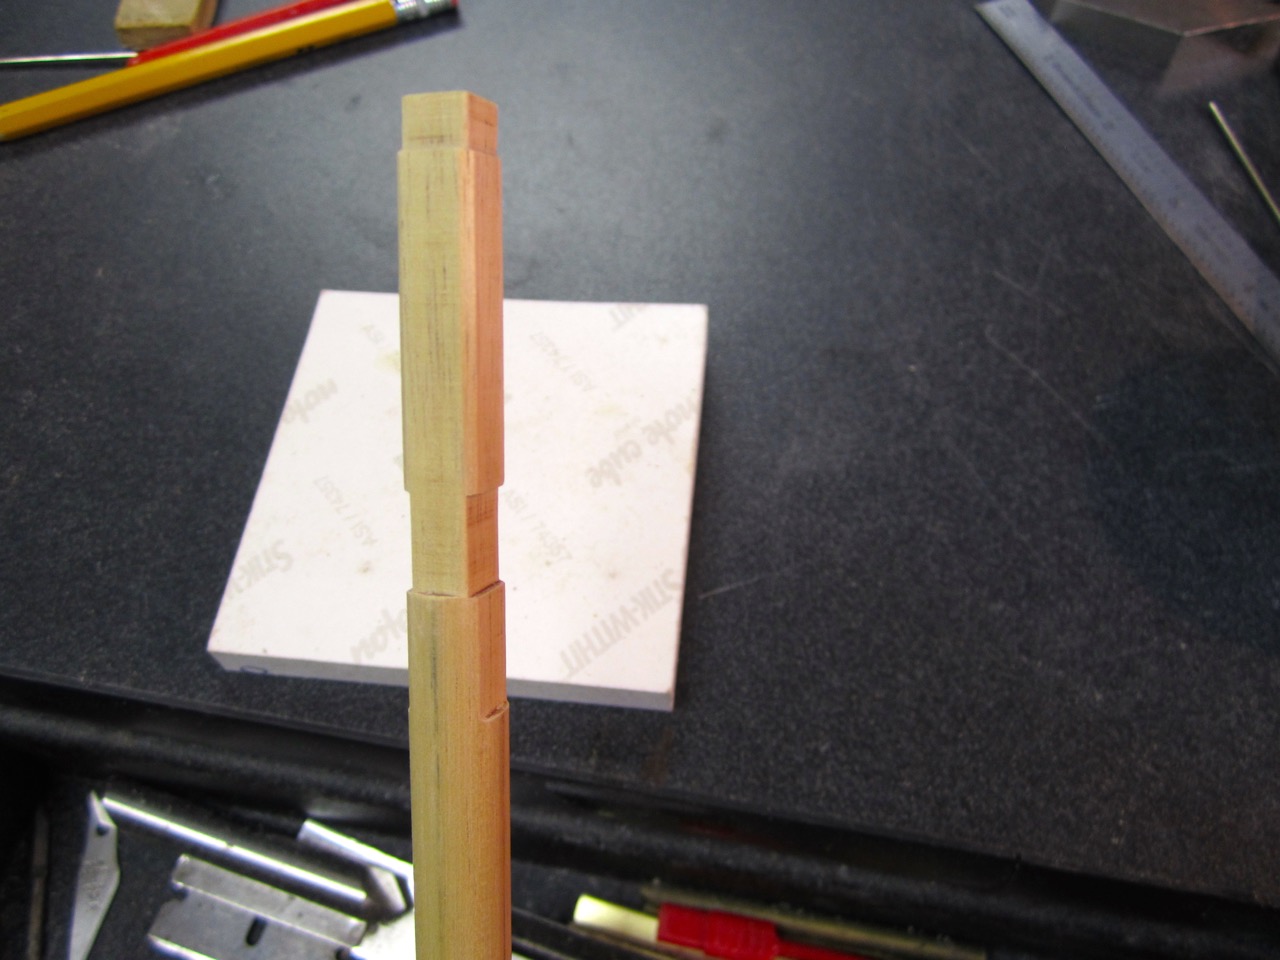
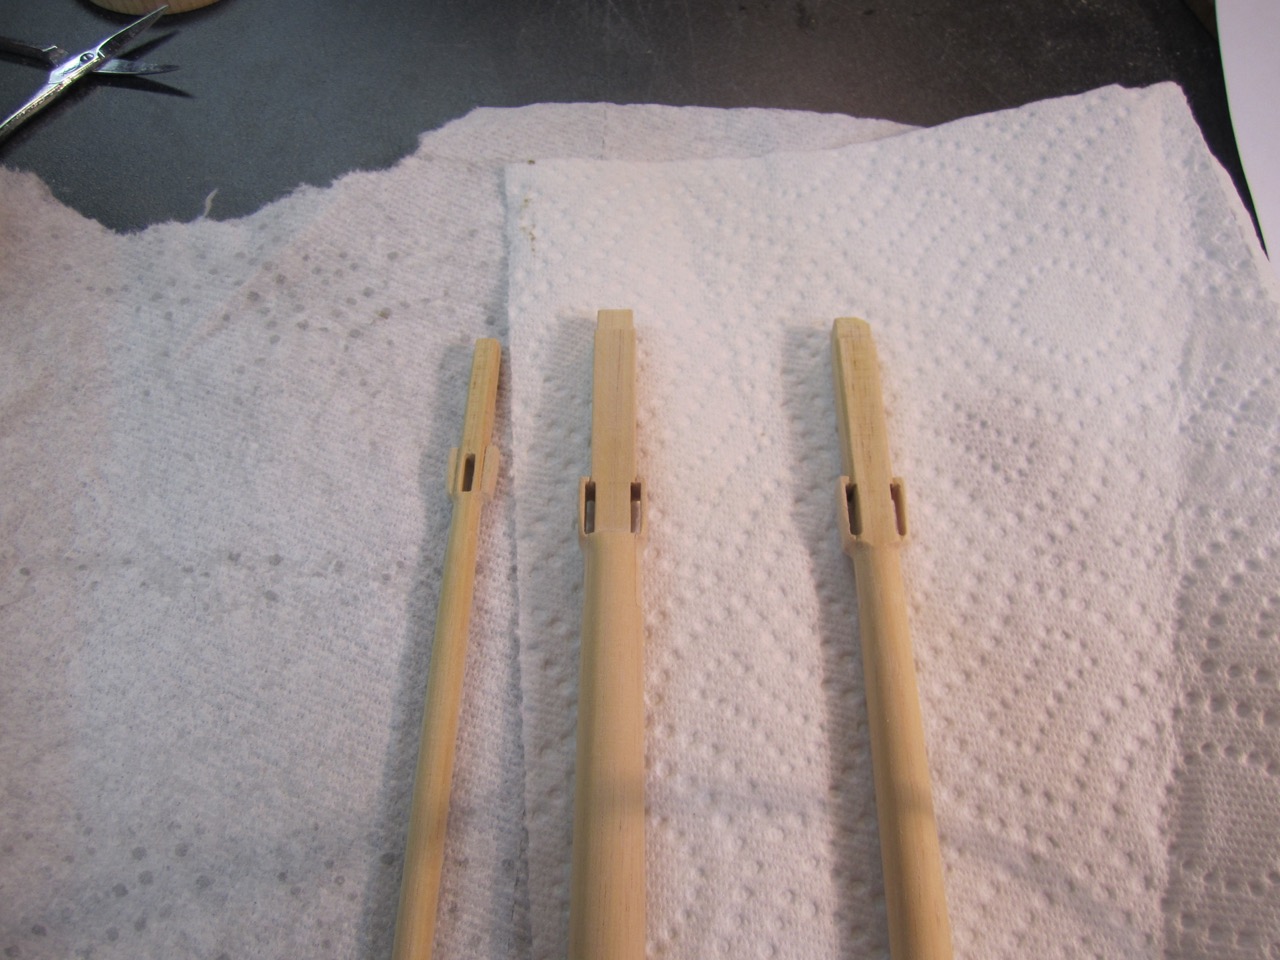
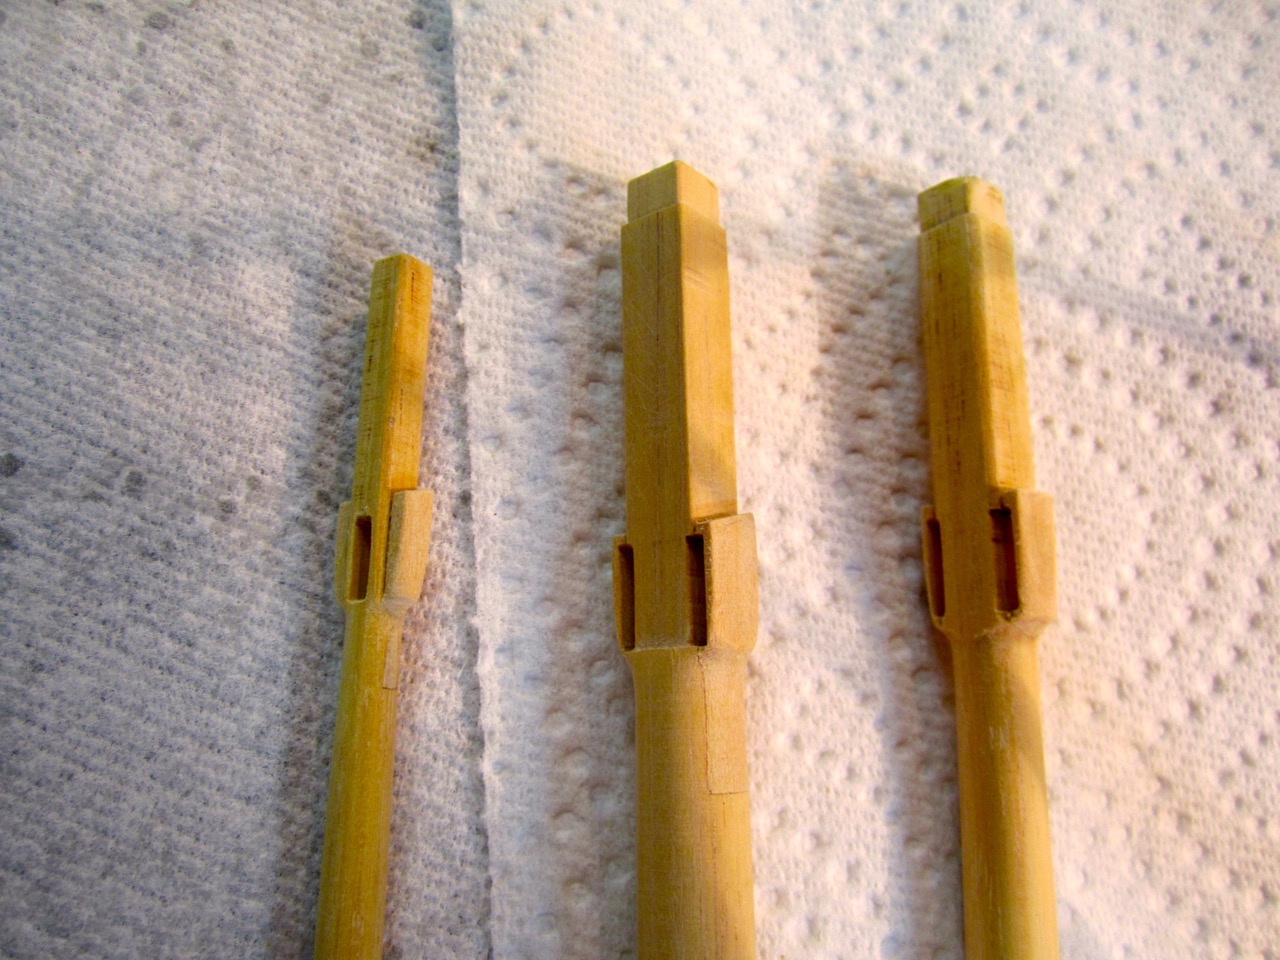
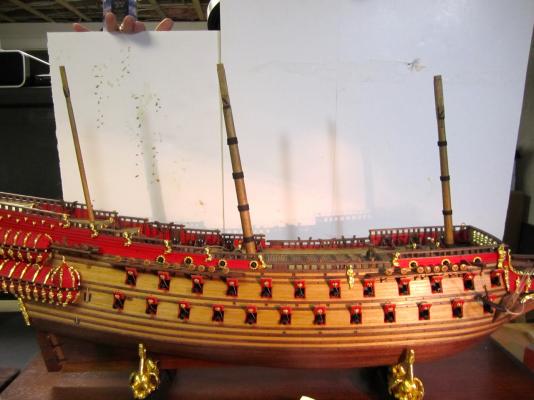
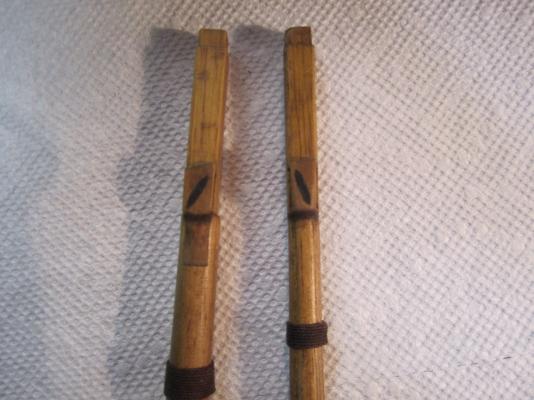
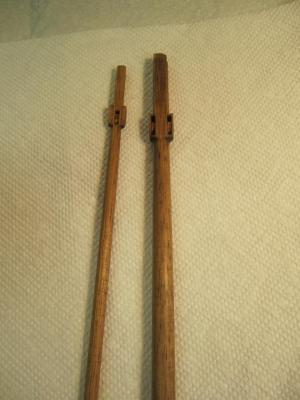
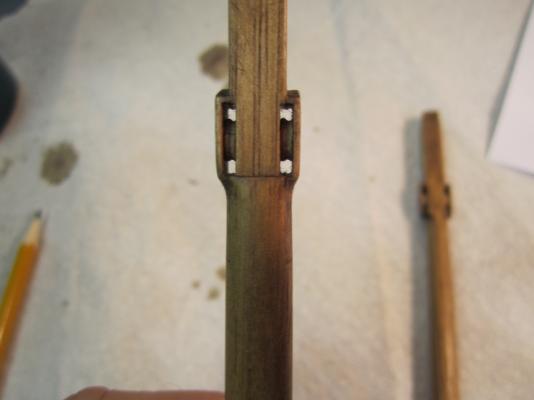
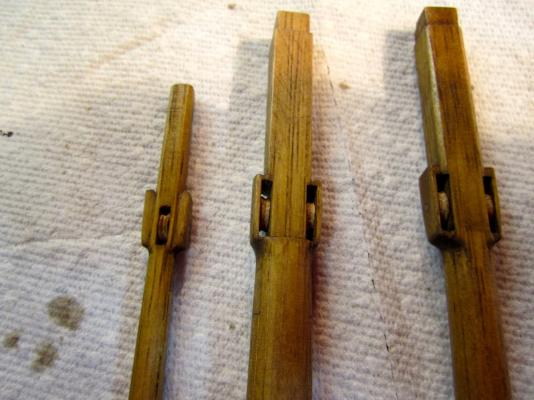
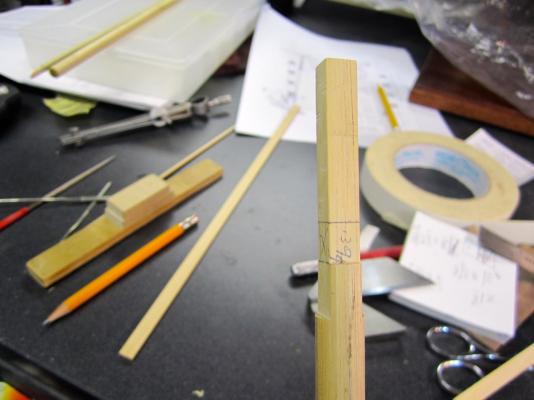
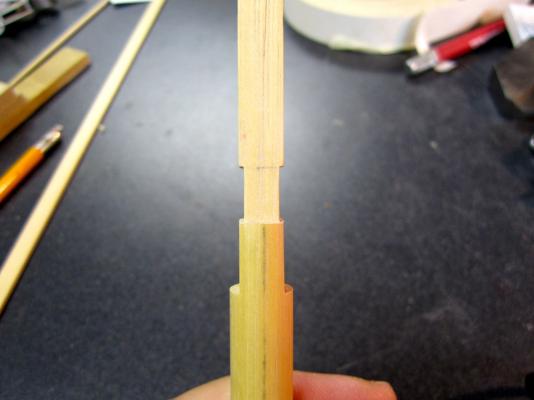
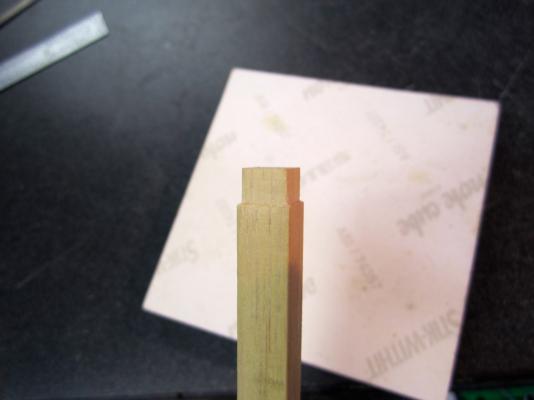
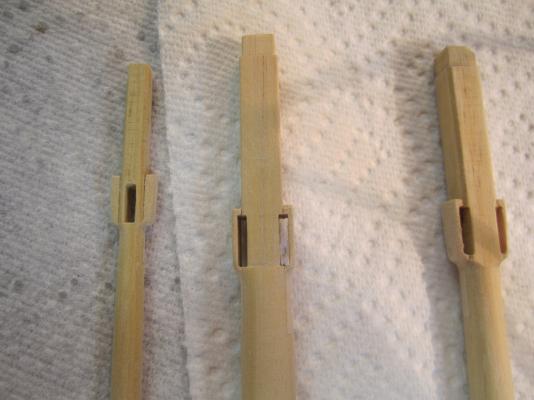
Hello, I started working on the lower masts. After cutting them to the correct lengths, I squared up the top ends. Then I extended the sides down, where I will be gluing the housings for the sheaves. Now, I notched slots for the sheaves on both sides. Squared up the very top for the caps. I'm not sure what you call these, but I made the housings for the sheaves to go into. The ones for the lower mainmast and mizzen mast are set at a 15 deg angle and the foremast at 3 deg. (this will set the angle of the lower crosstrees) Pieces glued to the masts Foremast notched The 3 lower masts with the dowels tapered and ready for the sheaves. Side view of the angles for each mast Now I will be working on the final sanding and touch-up. Then staining of the masts followed by the installation of the sheaves and woolings (bands) on the masts. Thanks, Frank


- 493 replies
-
- 10
-

-
Hi Michael, Hatches are looking good! I look forward to seeing pictures of them assembled to the ship! Frank
-
Karl, I love the way you got the sail to billow out. Great job! Wow, 18 lines for one sail Frank