HOLIDAY DONATION DRIVE - SUPPORT MSW - DO YOUR PART TO KEEP THIS GREAT FORUM GOING! (Only 66 donations so far out of 49,000 members - Can we at least get100? C'mon guys!)
×


Javlin
-
Posts
1,681 -
Joined
-
Last visited
Content Type
Profiles
Forums
Gallery
Events
Everything posted by Javlin
-
Barncave Shipyard by mbp521 - Scale 1:1
Javlin replied to mbp521's topic in Non-ship/categorised builds
Nice shop Brian almost laughed floor tile on the ceiling never knew they made those.I made a bench out of 2X4's and capped the ends just like your door with biscuits and the pine shrunk over 3 yrs I guess and it's indoors but maybe some humidity may prevent that.The door to my shop I made out of Aromatic Cedar been up for a year now exposed to rain doing well just a heads up?Nice work area enjoy the solitude and quiet. -
Alfa Romeo Spider Touring Gran Sport by CDW - Pocher - 1:8 Scale
Javlin replied to CDW's topic in Non-ship/categorised builds
I'll tag along Craig. I do not usually follow auto stuff seeing I have been in that industry way to long hence the reason I like to do wood work and furniture. -
A quick build means a Nice fit looking Good!
-
De Havilland Mosquito by Javlin - FINISHED - HK Models - 1/32
Javlin replied to Javlin's topic in Non-ship/categorised builds
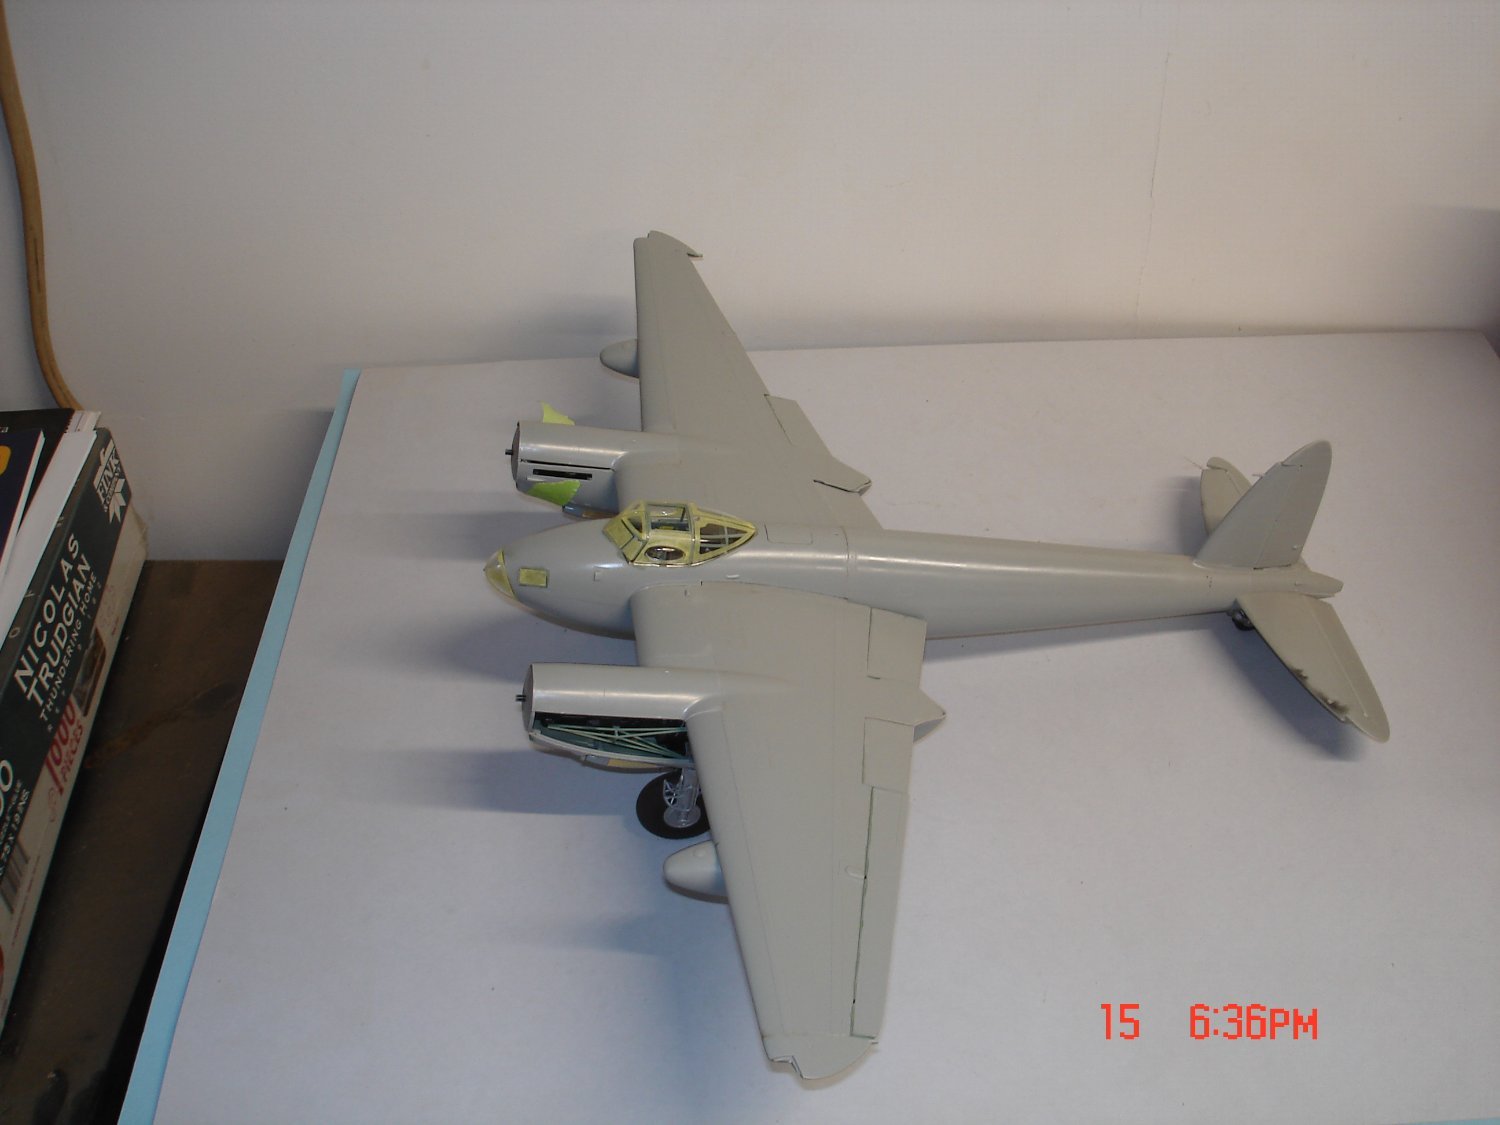
Fuel Tanks painted,Cleared and Stripes revealed.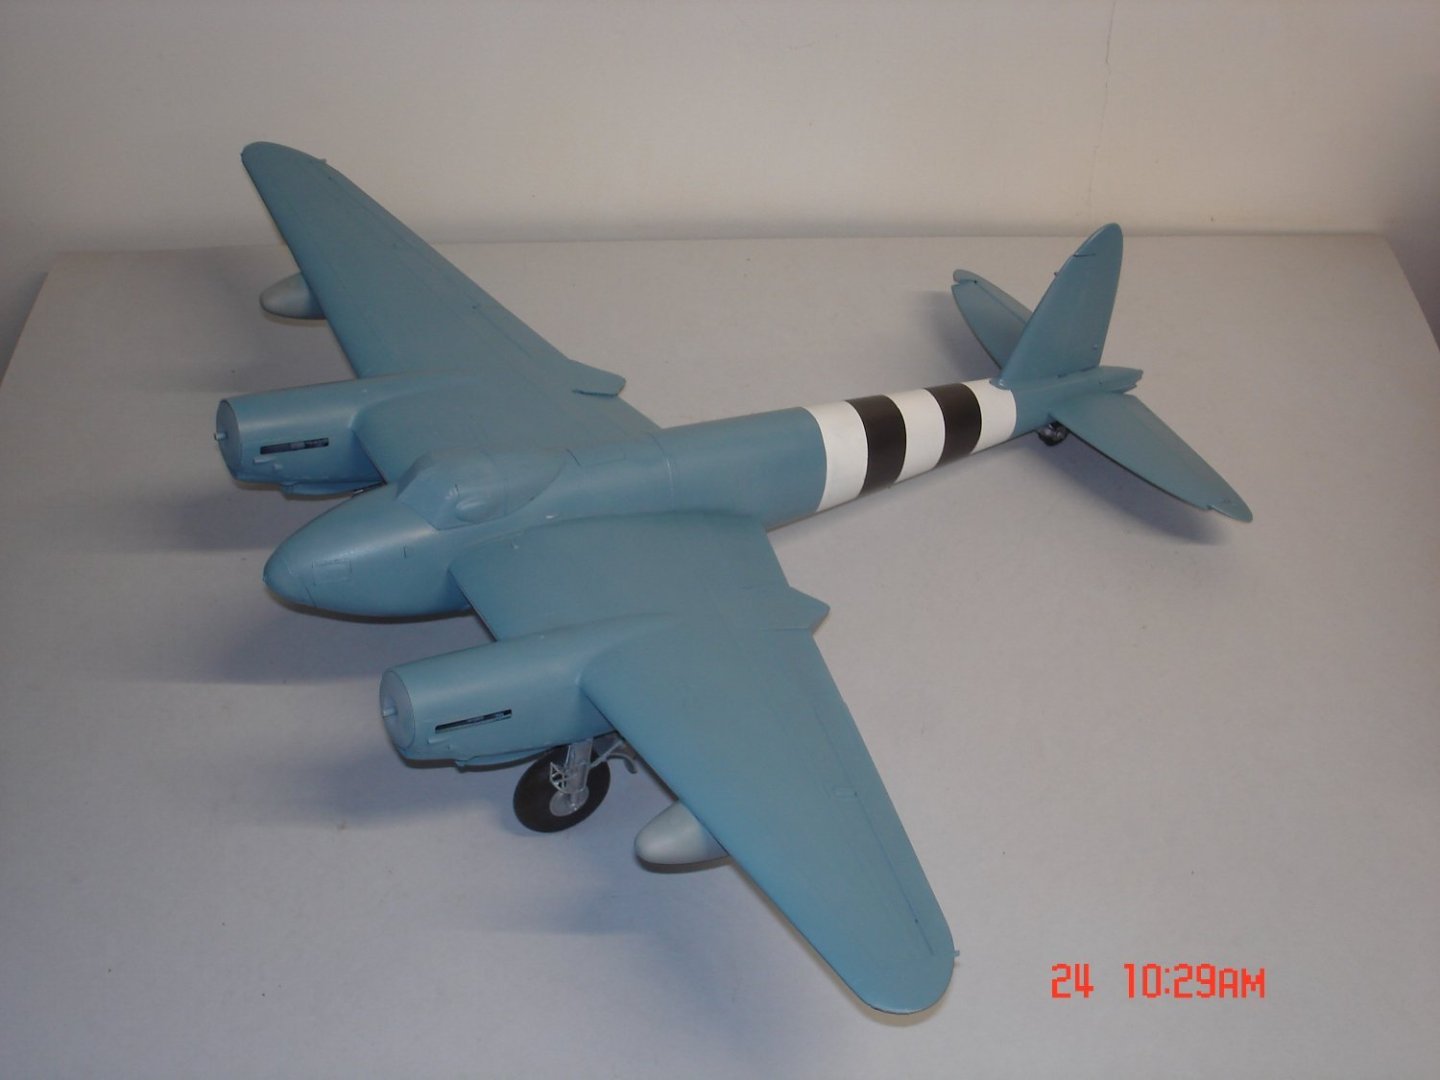
- 99 replies
-
- 12
-

-
De Havilland Mosquito by Javlin - FINISHED - HK Models - 1/32
Javlin replied to Javlin's topic in Non-ship/categorised builds
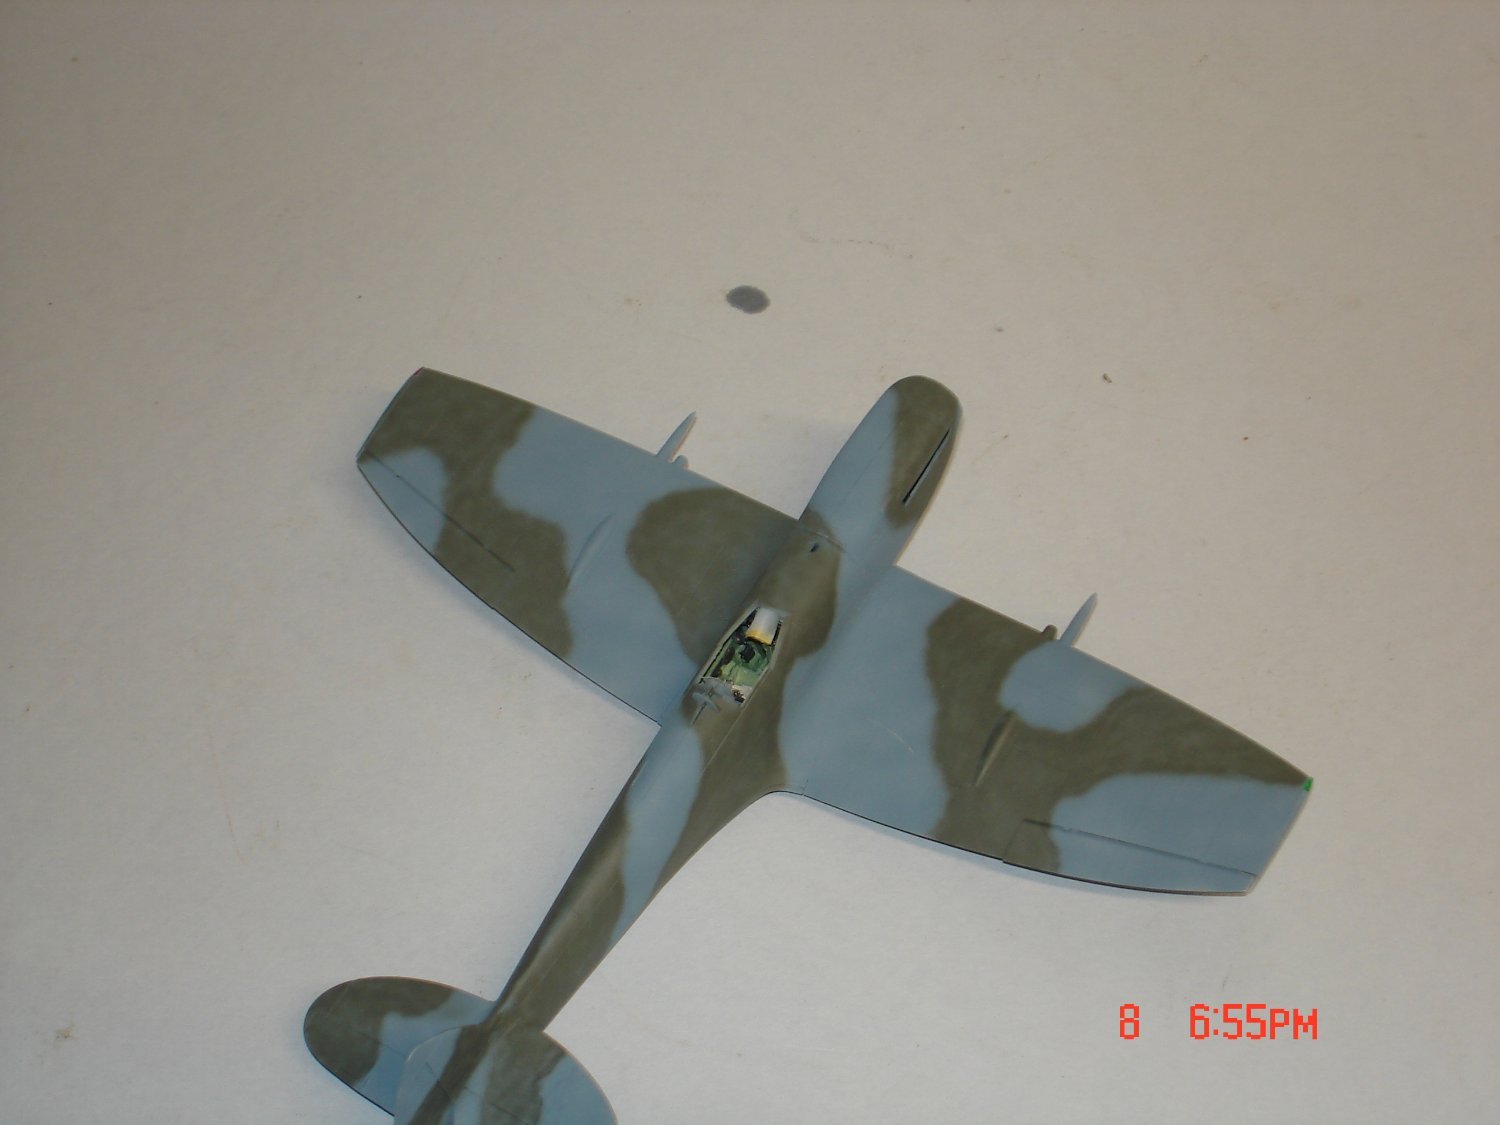
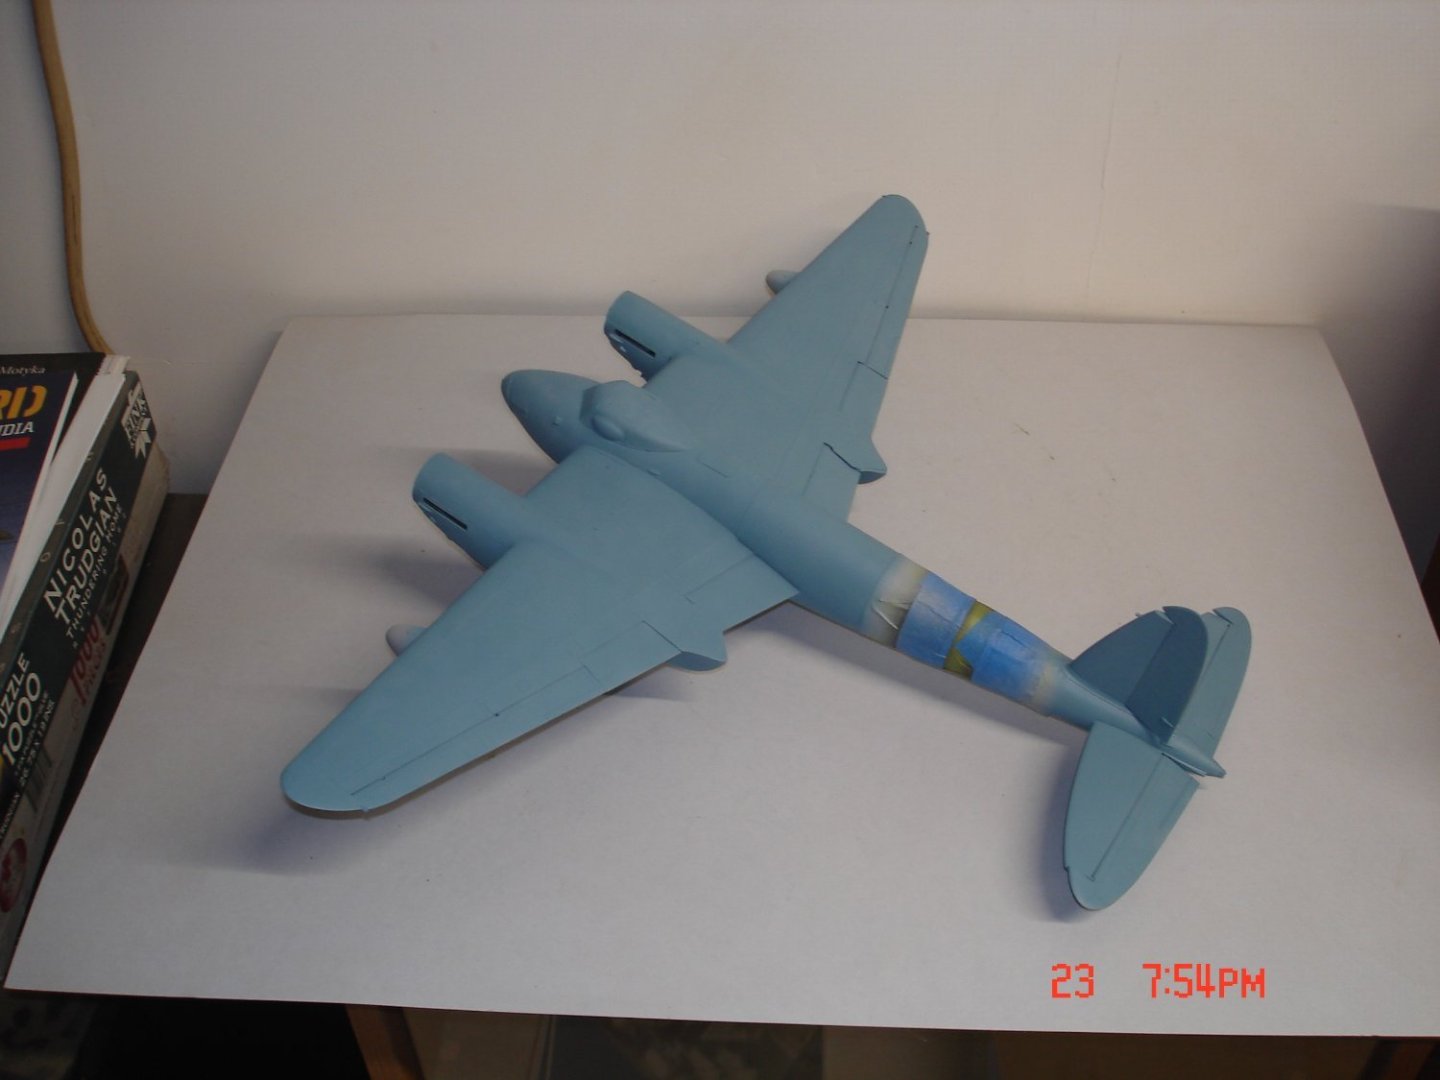
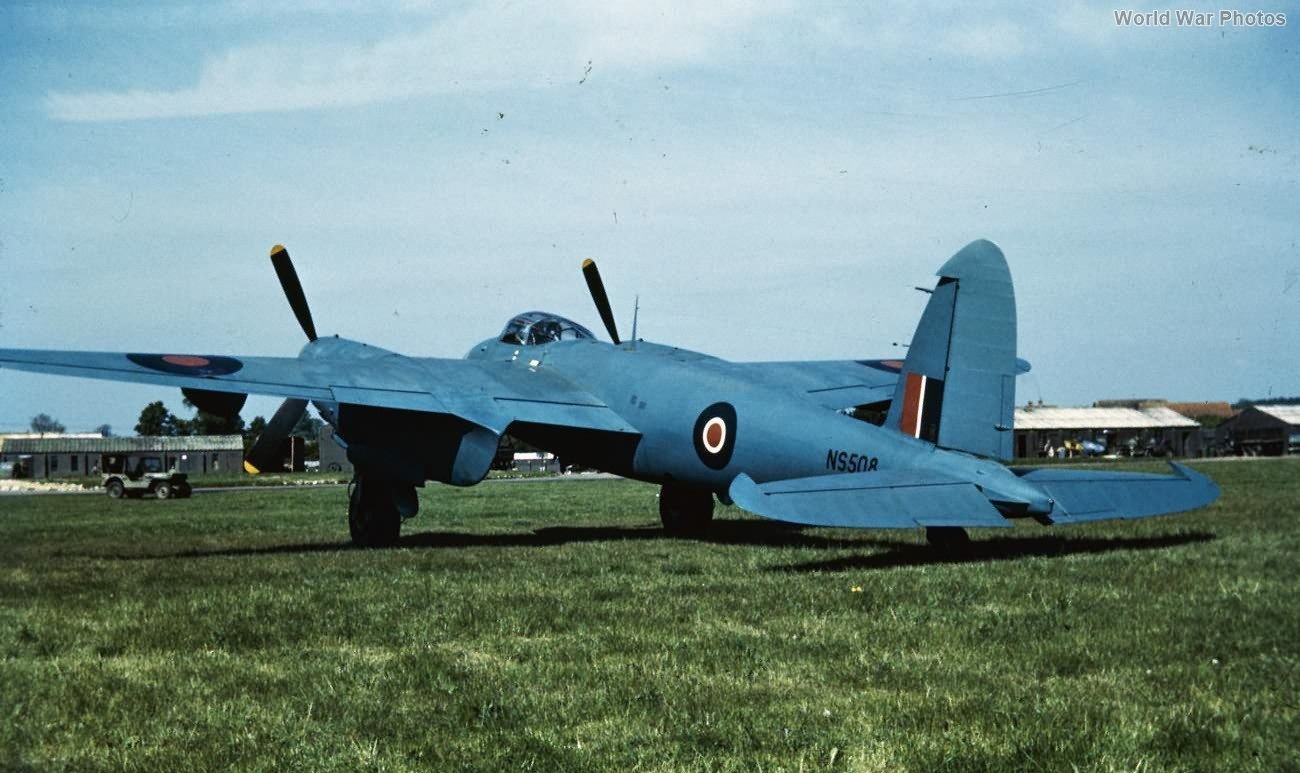
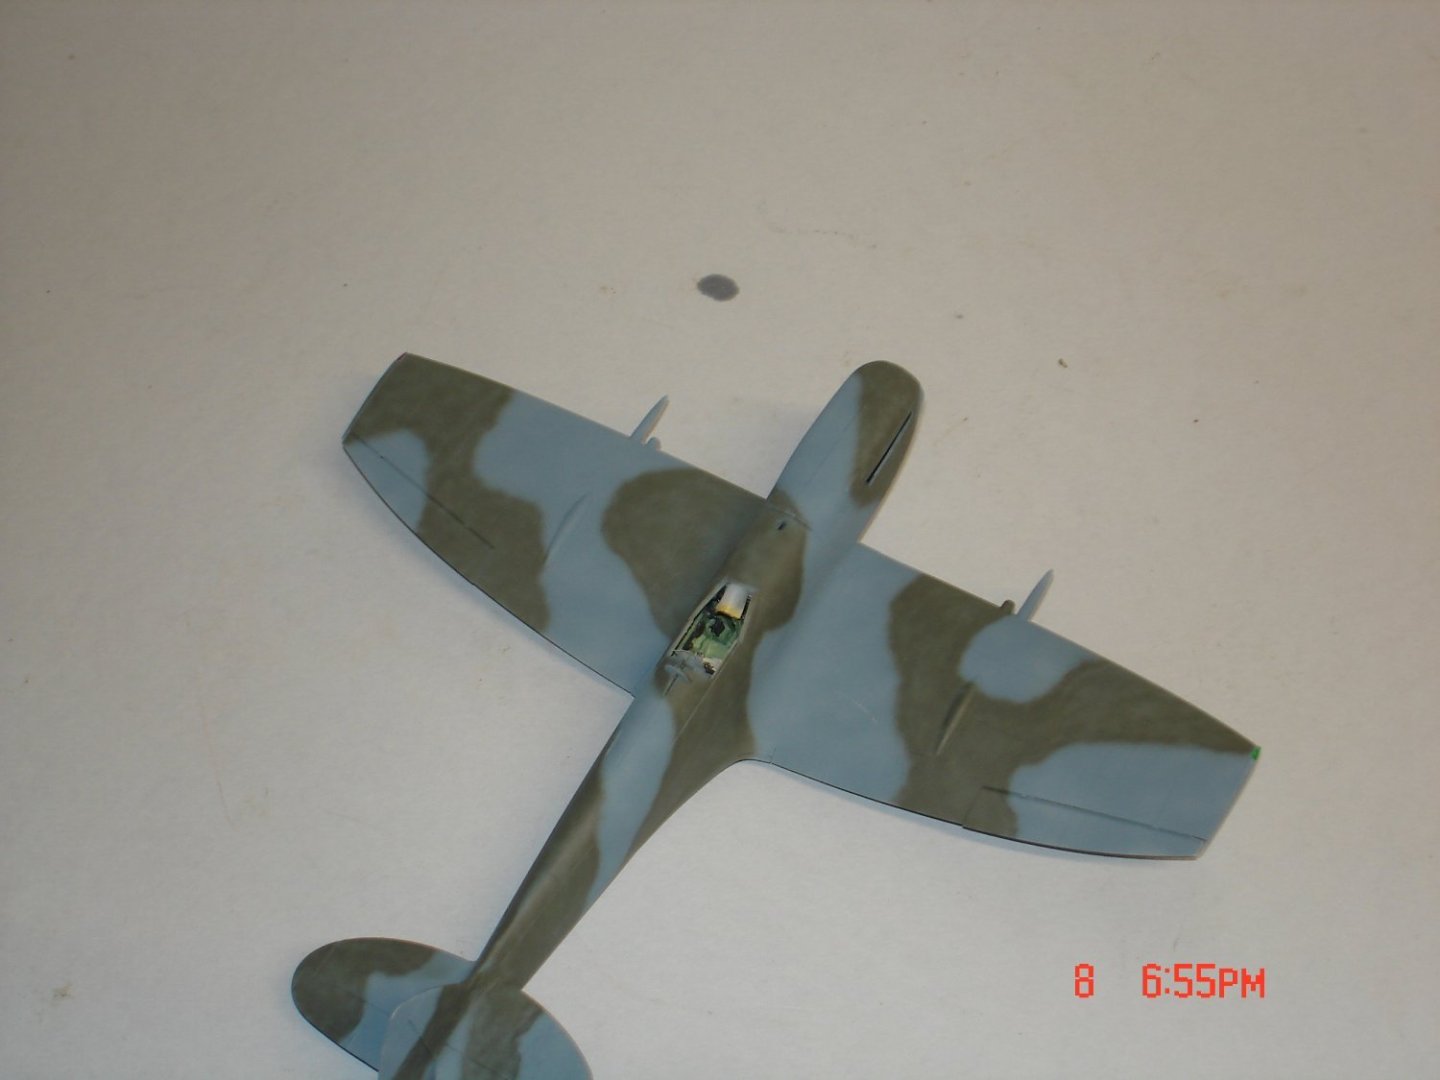
I have finally got some paint laid boys and I think it looks pretty close to PRU Blue not exact but their seemed to be some variances even back in the day.The first pic wasa Soviet blue but said not quite to much baby blue so looked at some more color chips and pics.The second pic is the same blue with about 25% intermediate blue needed a little grey introduced.The last pic is off the net and we do not if the color has been saturated or not.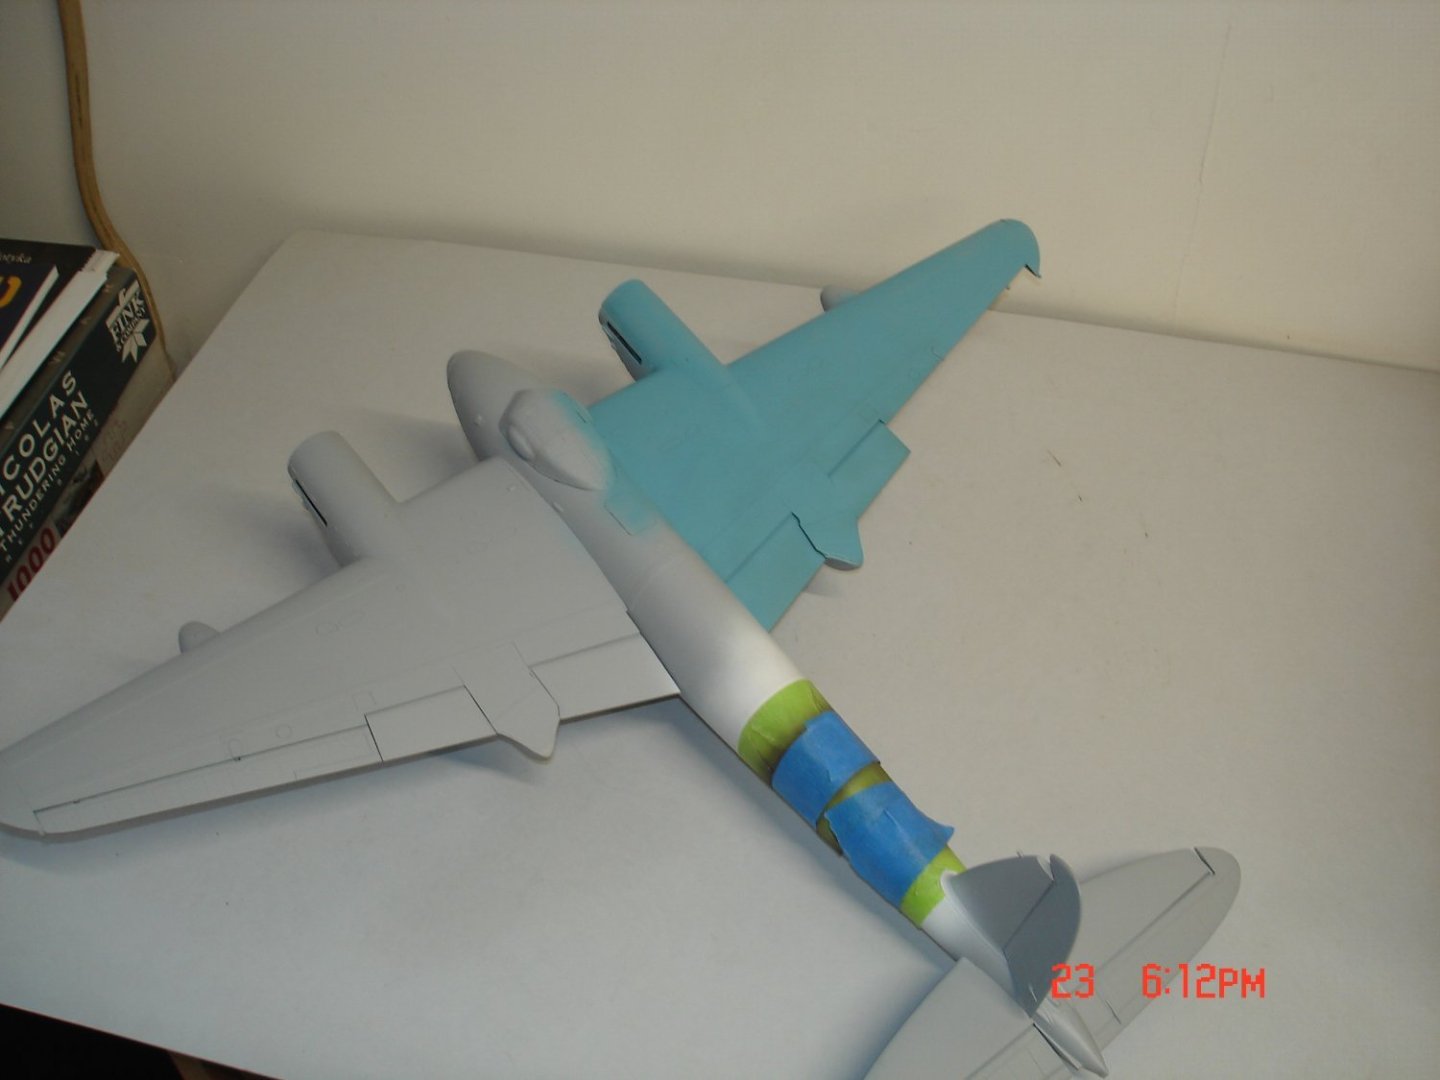
- 99 replies
-
- 14
-
-
Looking good you will do a video? You ever watch these guys/I will do some armor but I am getting more interested of late.
-
De Havilland Mosquito by Javlin - FINISHED - HK Models - 1/32
Javlin replied to Javlin's topic in Non-ship/categorised builds
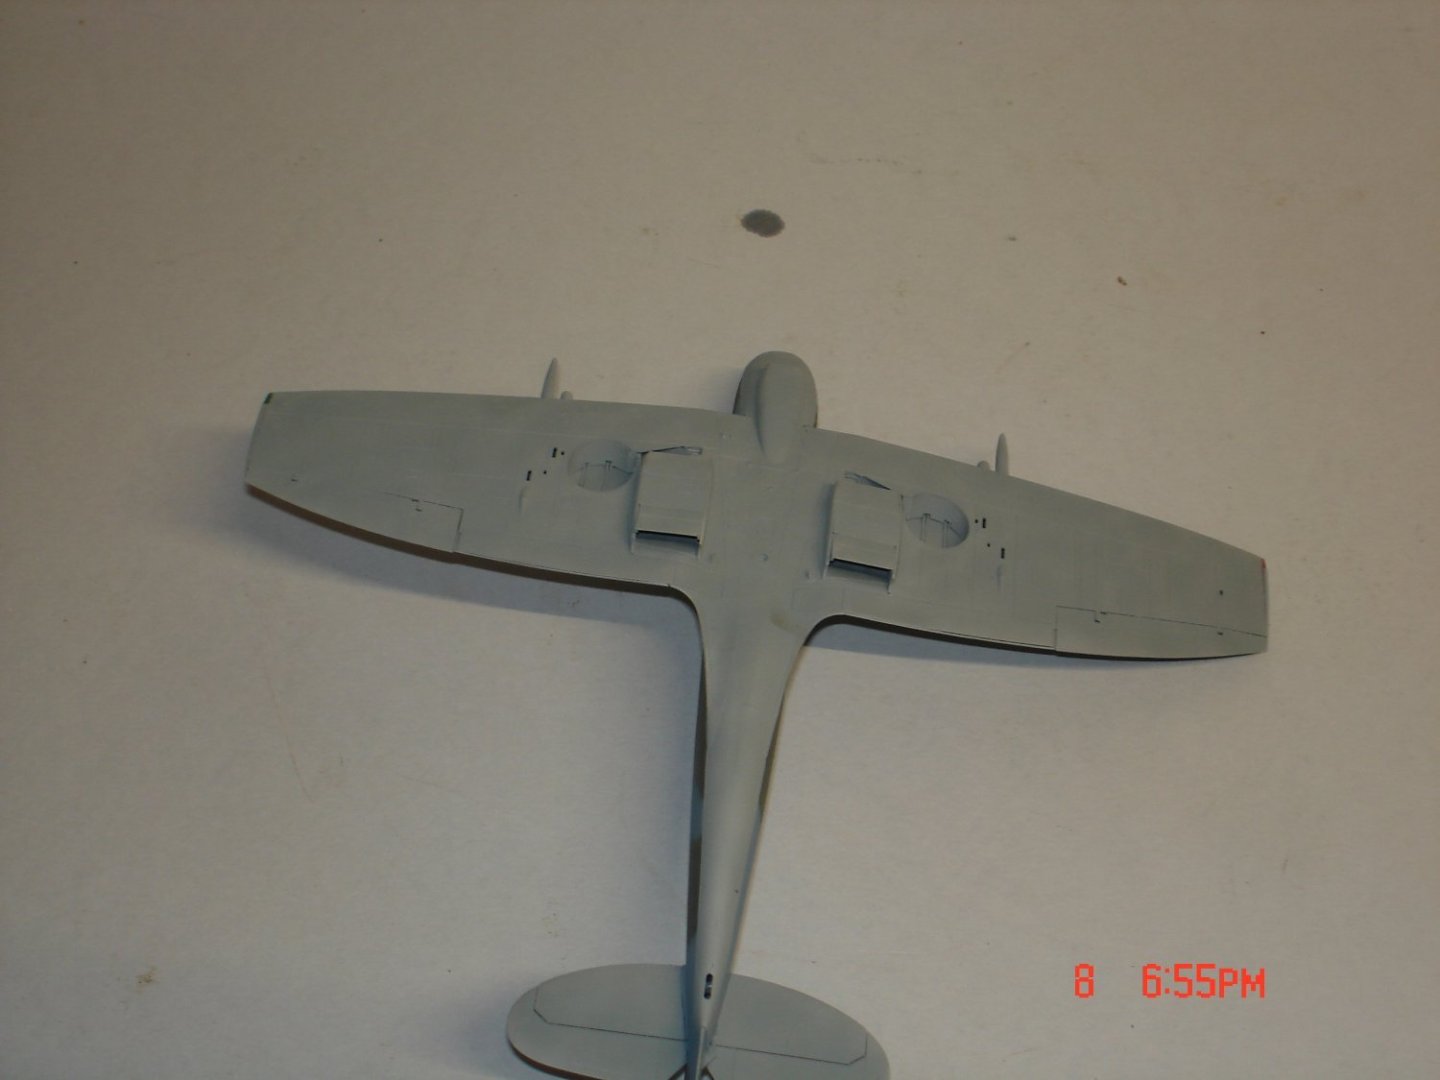
The wing is now glued into place and masking has begun.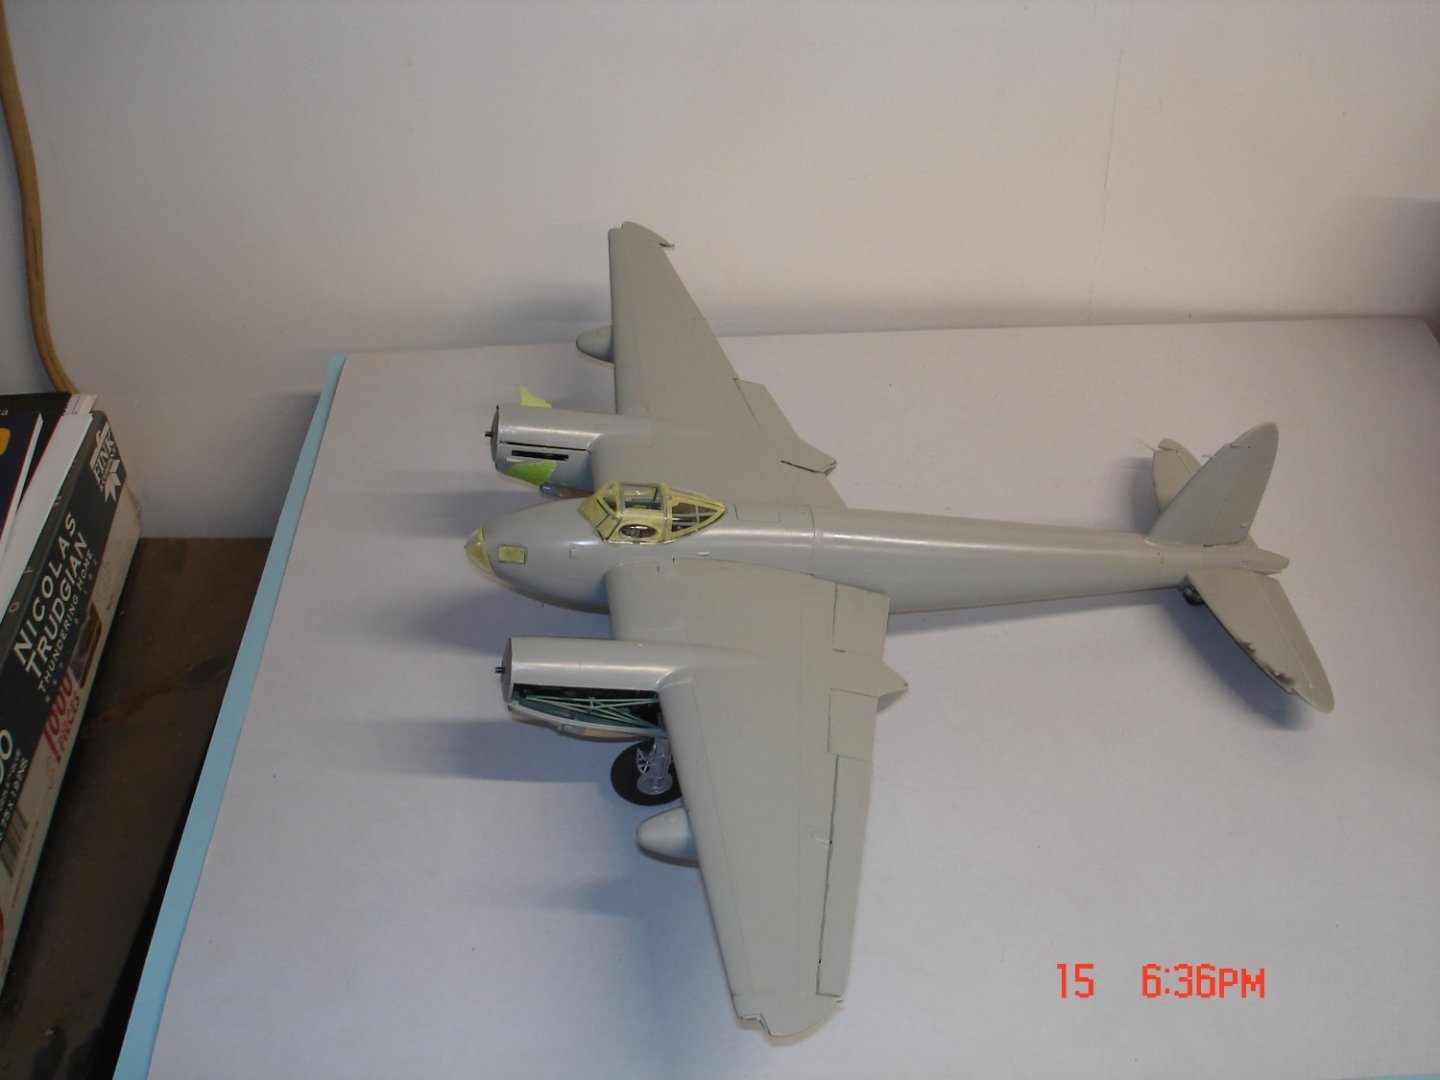
- 99 replies
-
- 14
-
-
Hawker Typhoon 1b "Car Door" by AJohnson - Airfix - 1:24
Javlin replied to AJohnson's topic in Non-ship/categorised builds
I'll be poking my head in Andrew a Brute like the Typhoon/Tempest one always needs to keep an eye on -
De Havilland Mosquito by Javlin - FINISHED - HK Models - 1/32
Javlin replied to Javlin's topic in Non-ship/categorised builds
Shes back on the table figure maybe 2/3 wks biggest part was figuring were I left off.I decided to do zilch with the engines close them up and turn her into a PRU bird with D-day Stripes.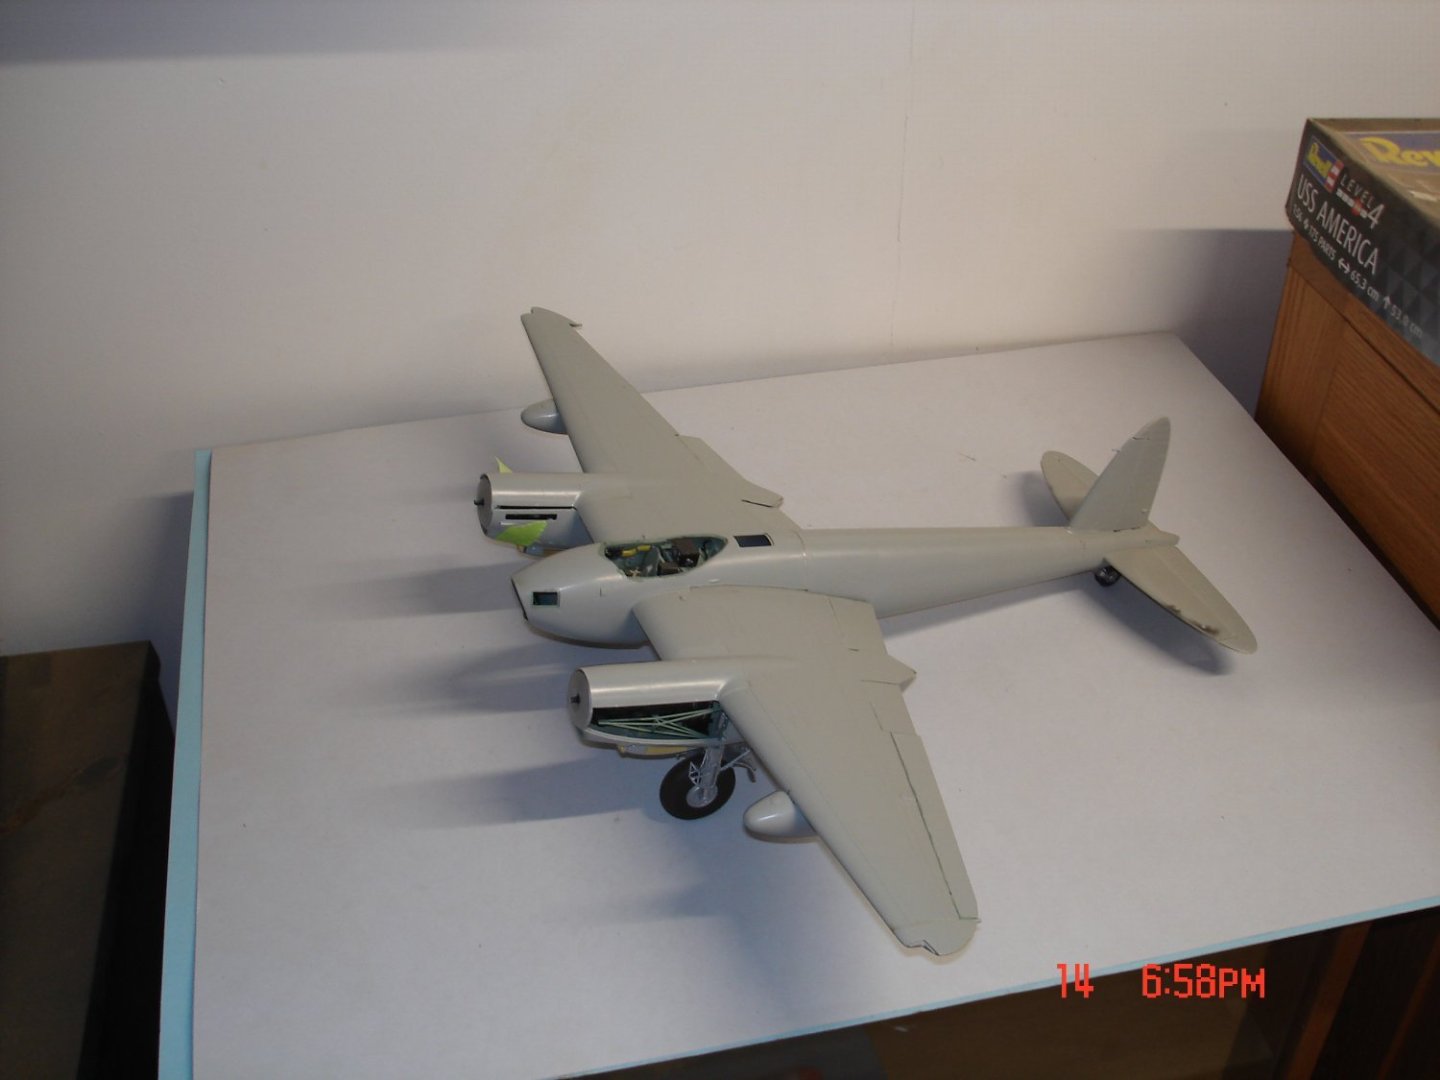
-
Thanks Fella's I had started the pit over a year ago and lost interest but even that was maybe 10/15% of the build the kit fell together like a Tamiya kit. Now #2 hits the table from the SOD HK's 1/32 Mossie
-
Thanks Ken she was a quick build.
-
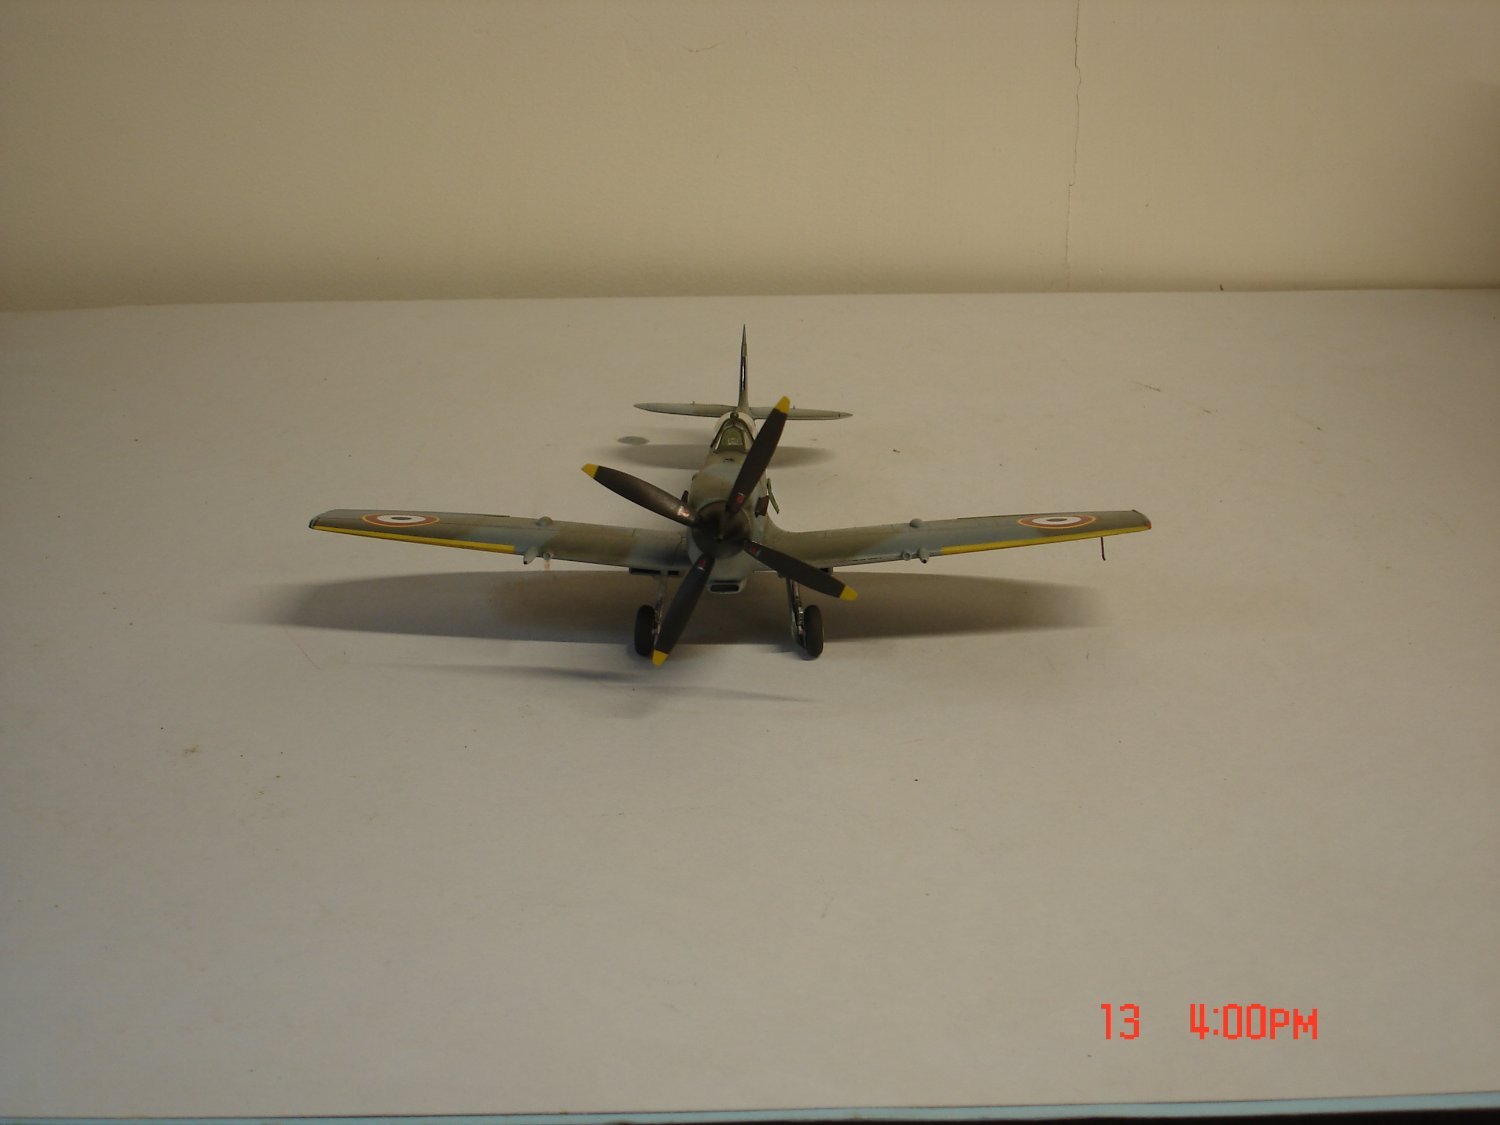
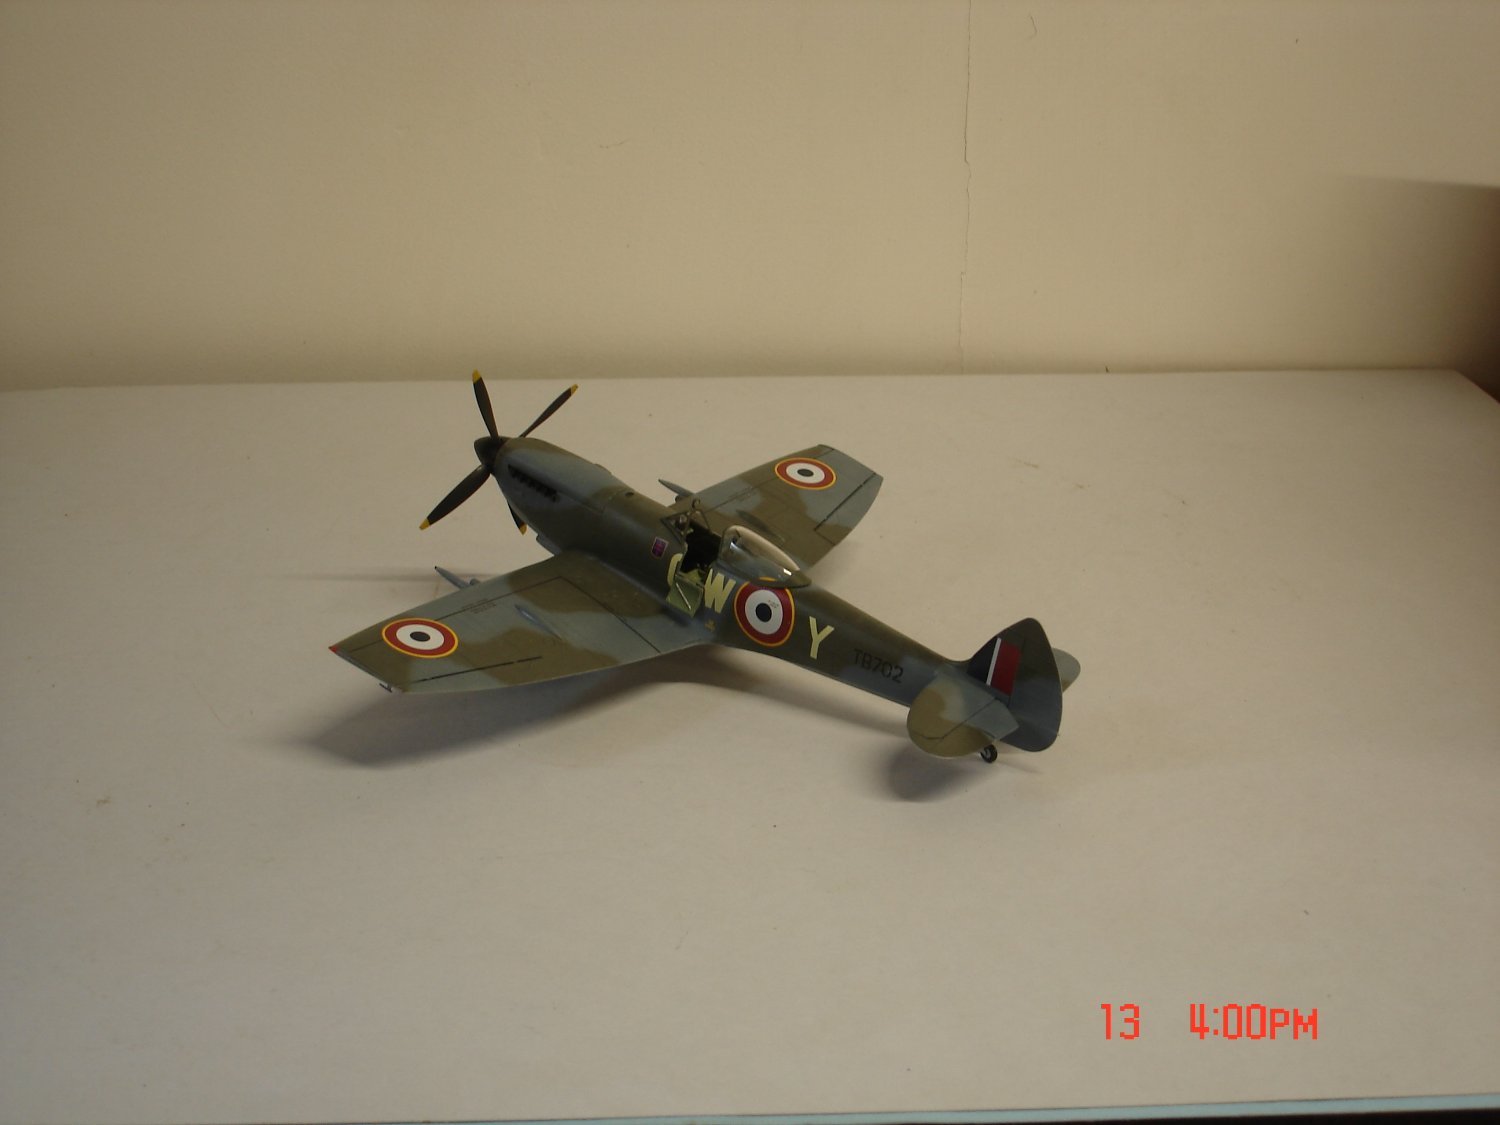
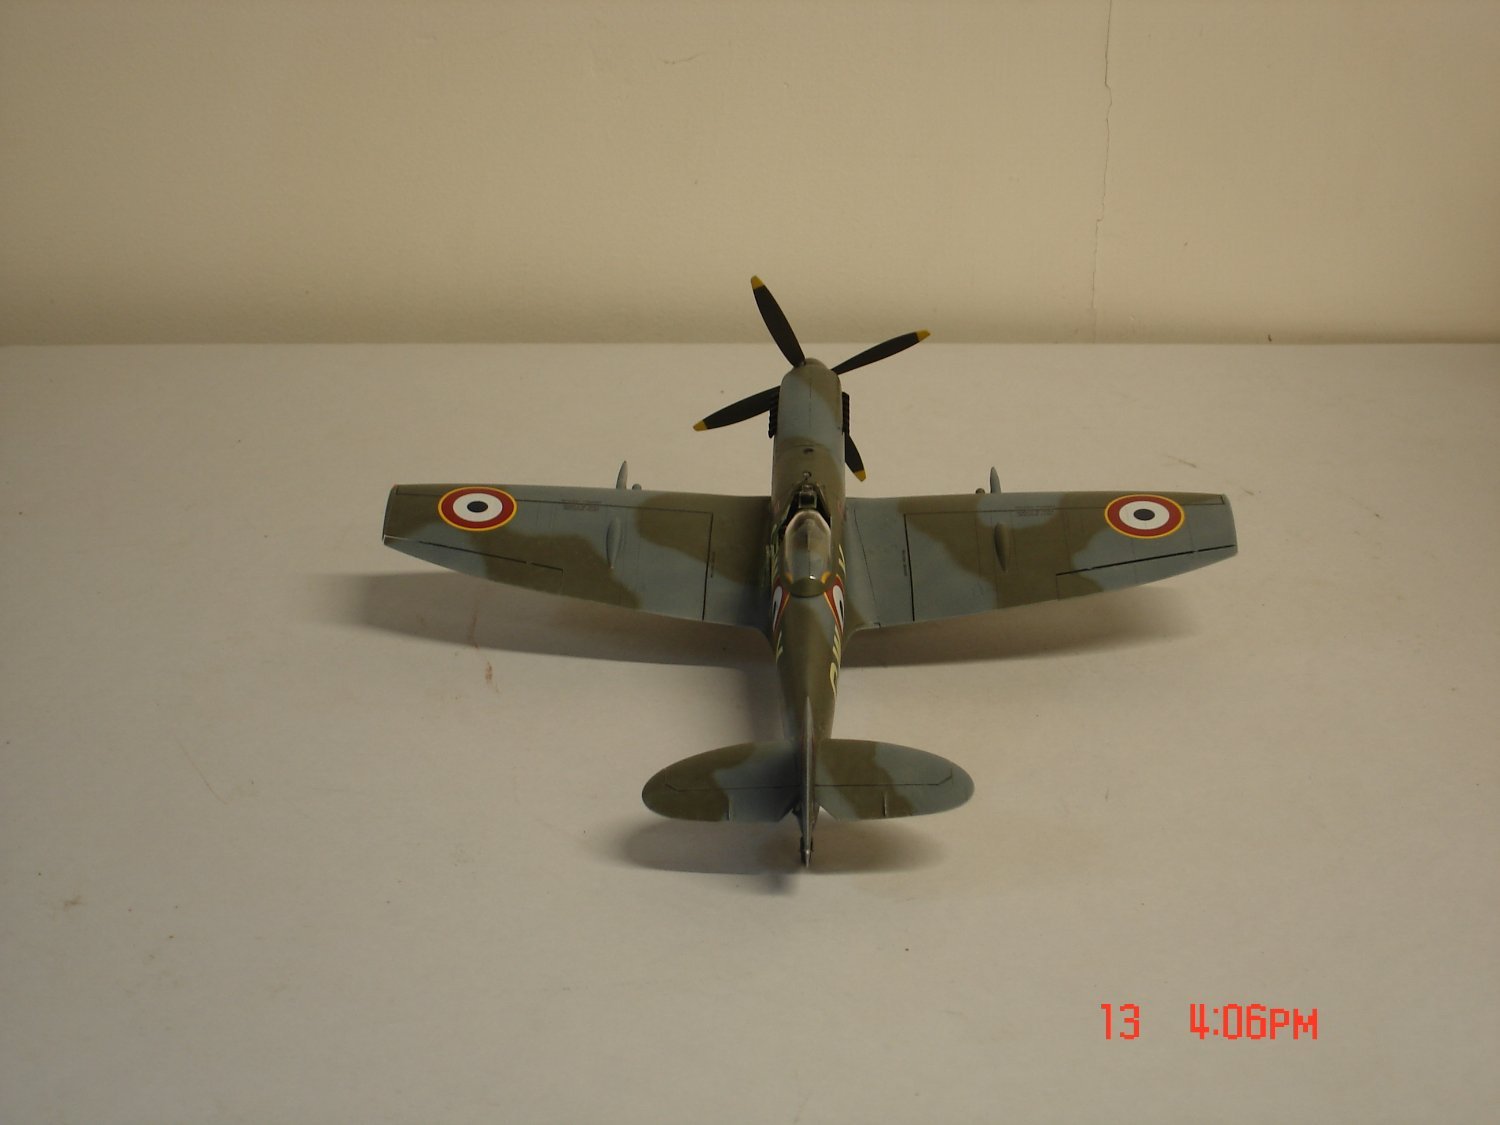
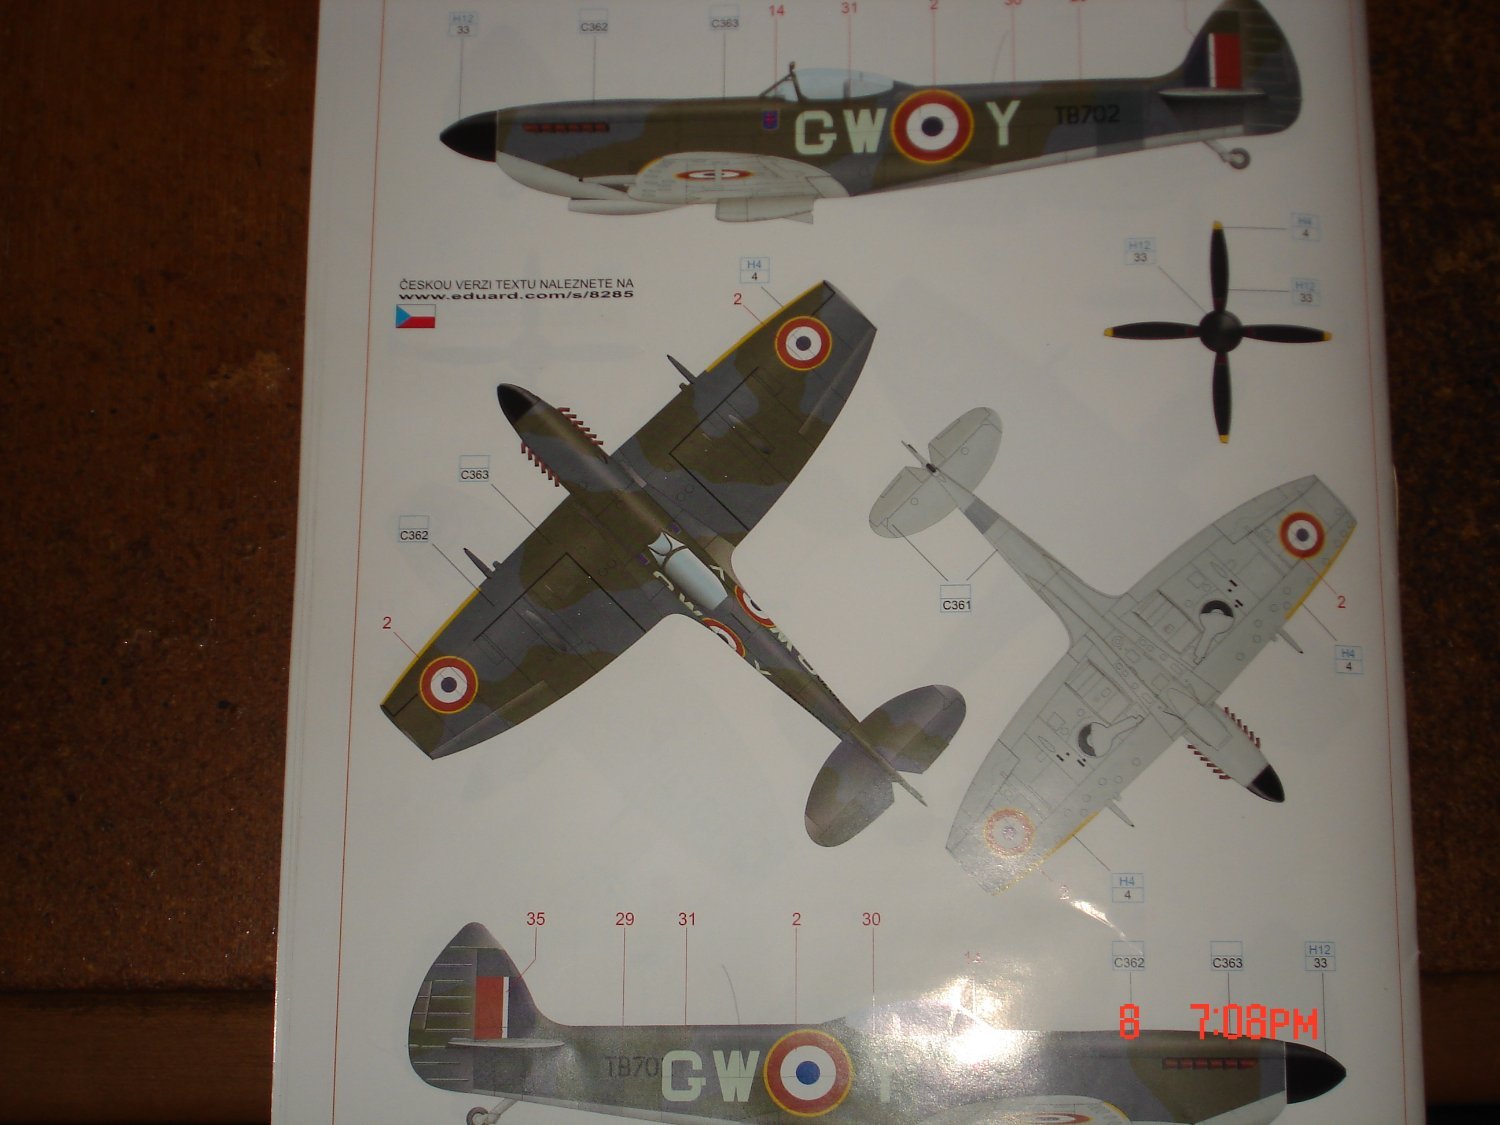
I think the MkXVI's were generally used for V-1 doodlebugs.The tips could be changed easily in the field in minutes. Your answer; Clipped = tip of clipped wings Advantage:increased speed and lateral maneuverability. wings reduced by about one meter. Disadvantages: this reduces the bearing surface and increases the marginal vortices https://aviation.stackexchange.com/questions/77164/why-did-some-spitfire-variants-have-their-wings-clipped Edgar Brooks: Clipped wingtips were an essential modification (one of several, in fact,) when fitting the fuel tank behind the pilot, and, even then, the stub-spar, on frame 5, also needed strengthening. (11 Group hated the idea, and fought against it, due to the detrimental effect the mods had on performance,)Post-war, use of the tank was banned, which probably allowed standard wingtips (and elevators, which had to be metal-covered on the XVI) to be refitted. Edgar More Ammo;Clipped wing: This mod was found to be necessary on the Spit IX when used for dive bombing, as several cases of severe skin wrinkling occurred in 2TAF. A gain in strength of 10% is obtained by this means. It is considered by the MAP that on a Spit IX or XIV with full bomb load and extra internal fuel, the reserve strength factors would be unacceptably low unless the wings were clipped
-
They are very Nice Dan did the Tempest remember.
-
She does good work!Oh and everything that breaks or needs some kind of repair including her friends stuff ends up on the other side of the shop the wood work area it's 23'X16'......no rest for the weary I deliberately move slow alot of times
-
Had not really thought of that aspect Mike the no removal part.
-
From what I can see about 160 sq/ft?A bit bigger than my room of 7'X16' for the office area of the shop should work well if the Wife does not try to commandeer any of your space?Ask me how I know........
-
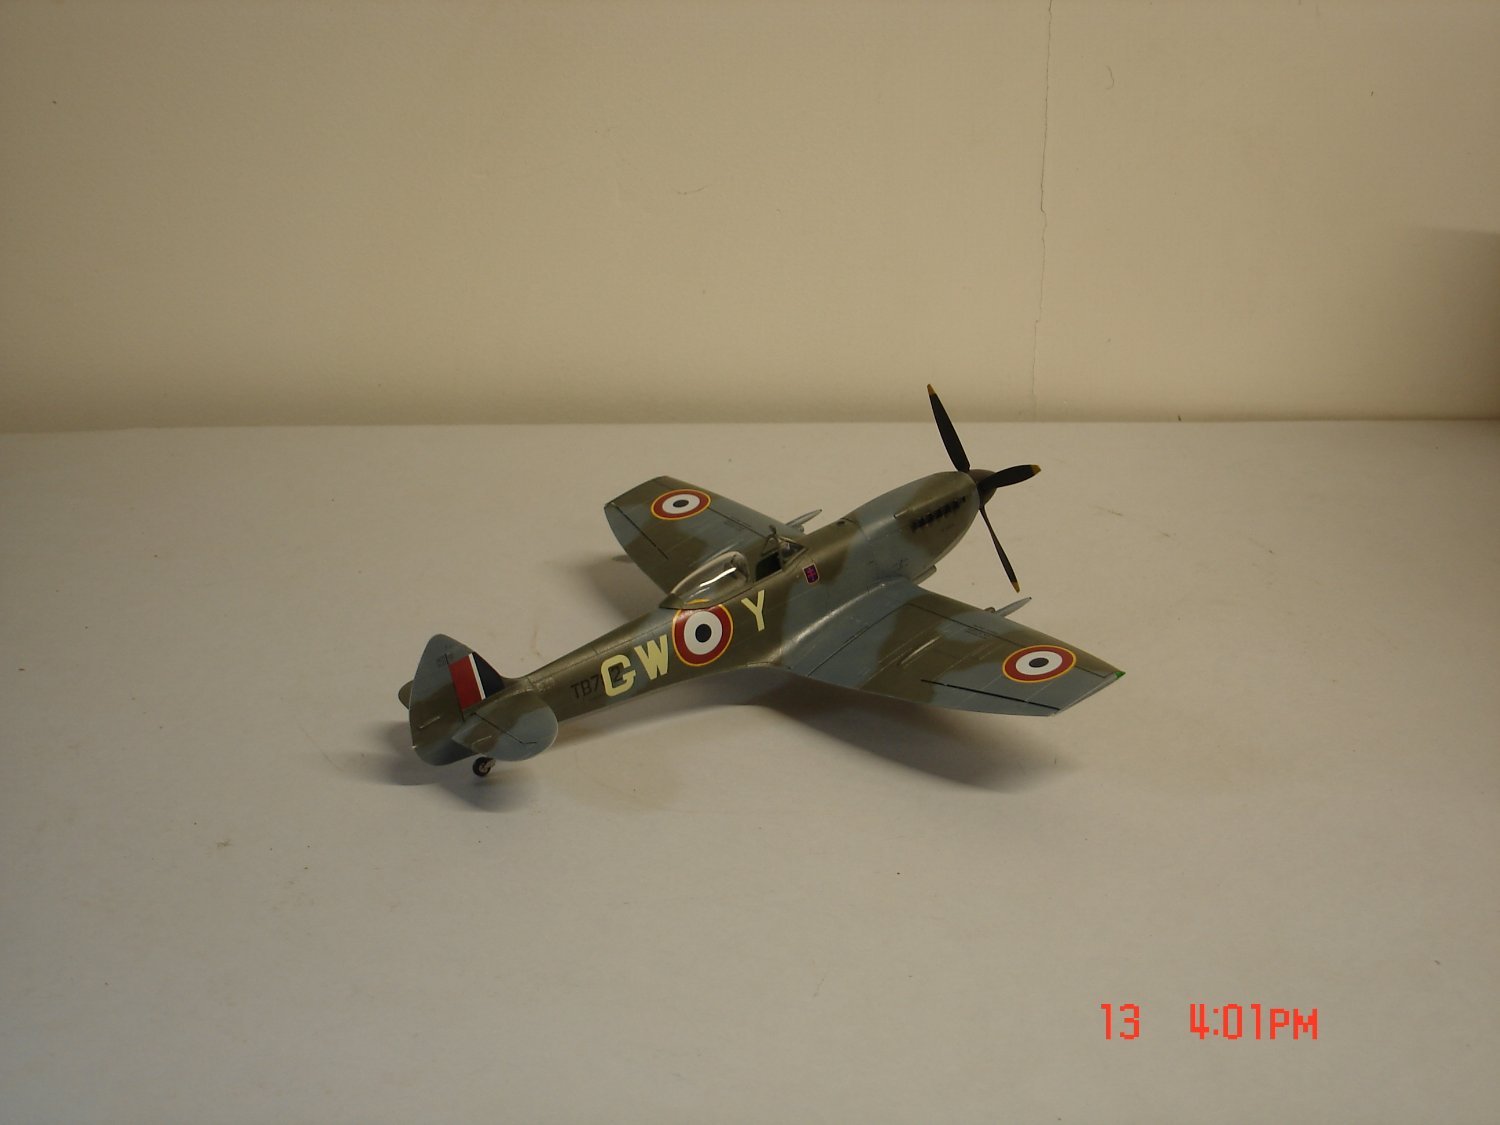
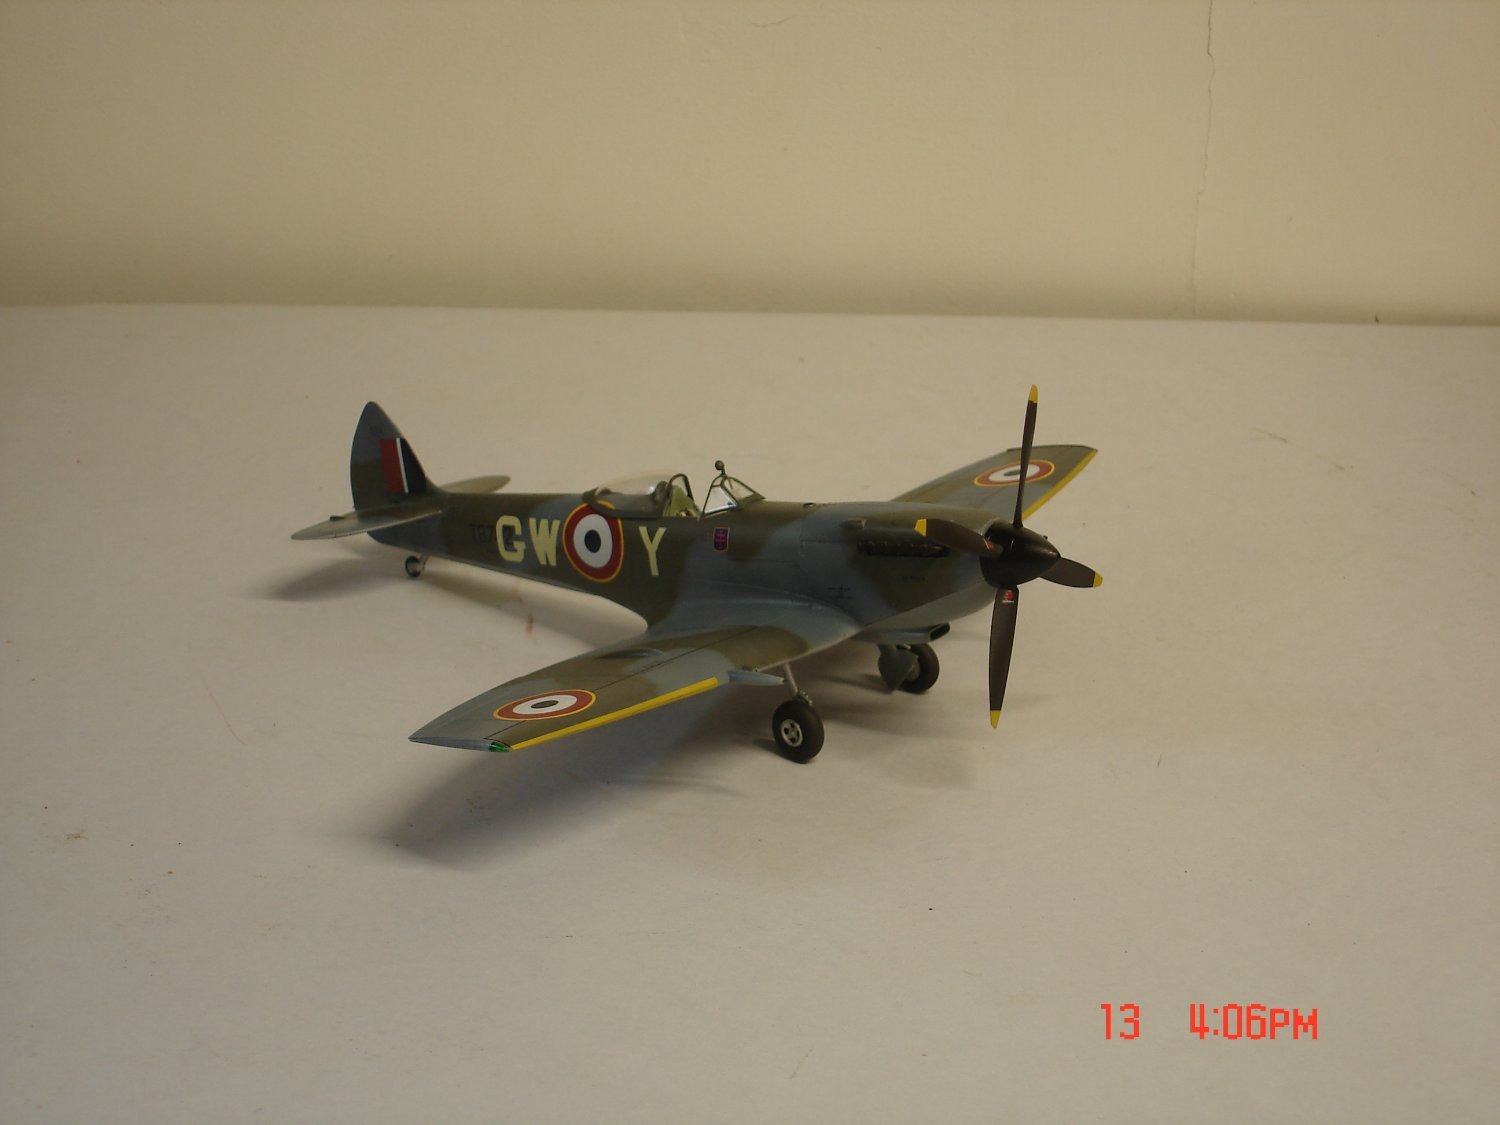
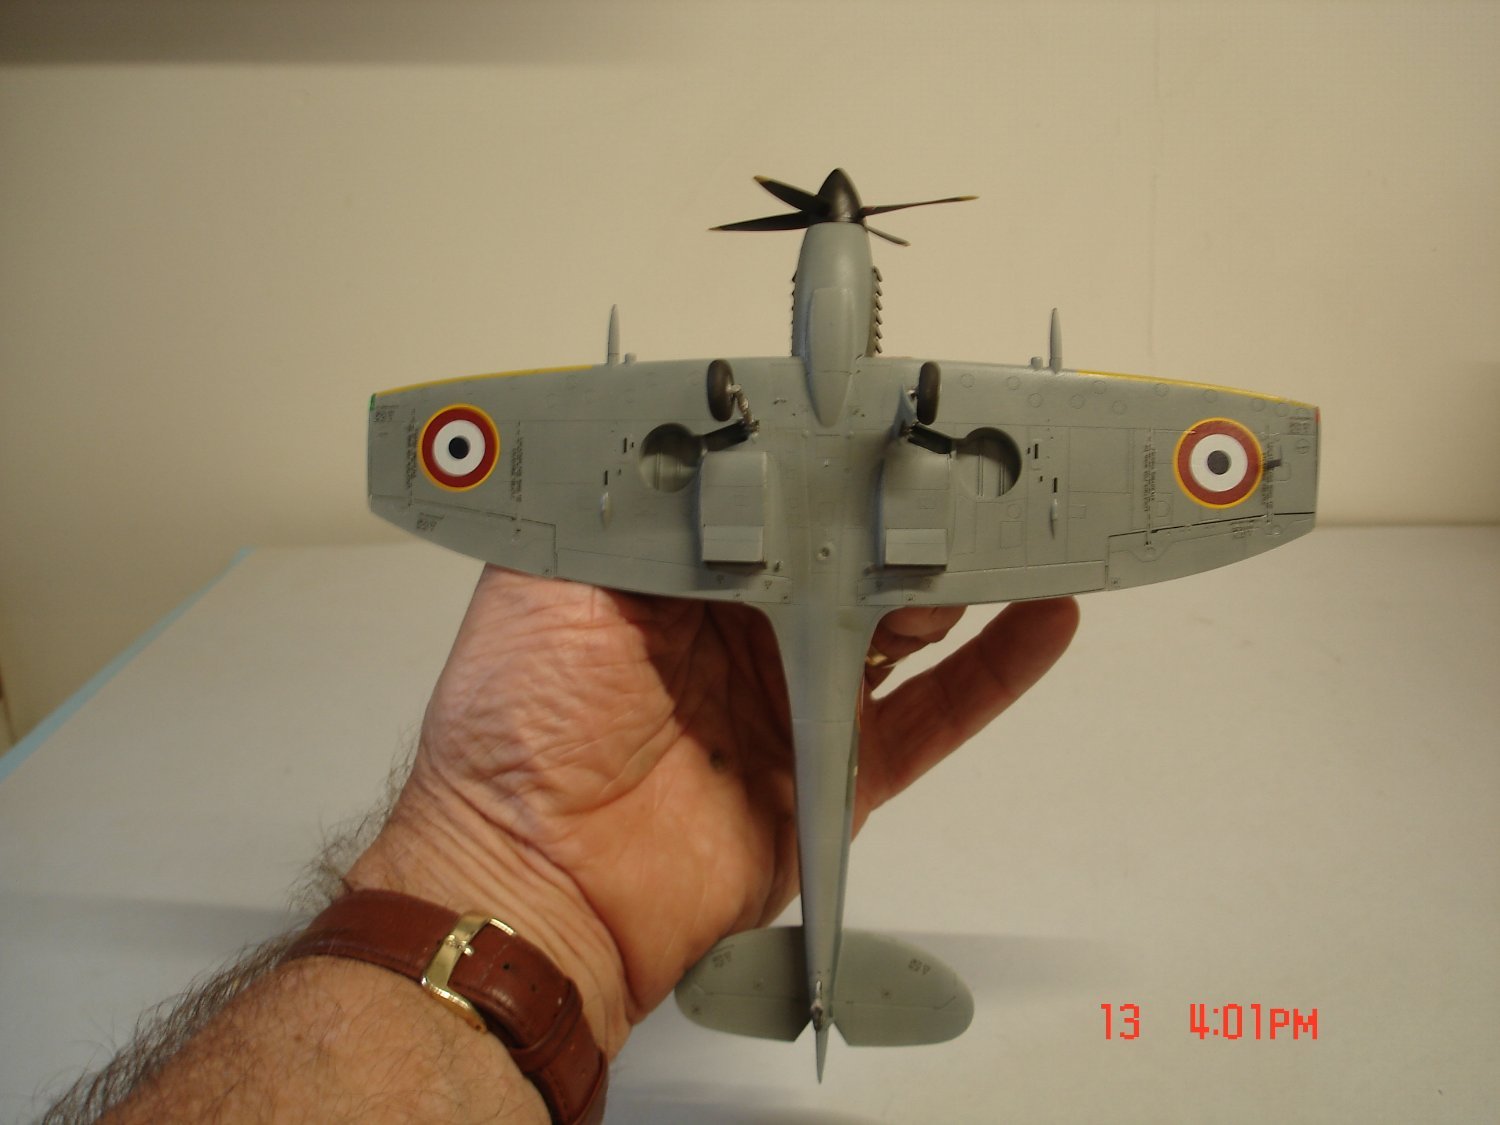
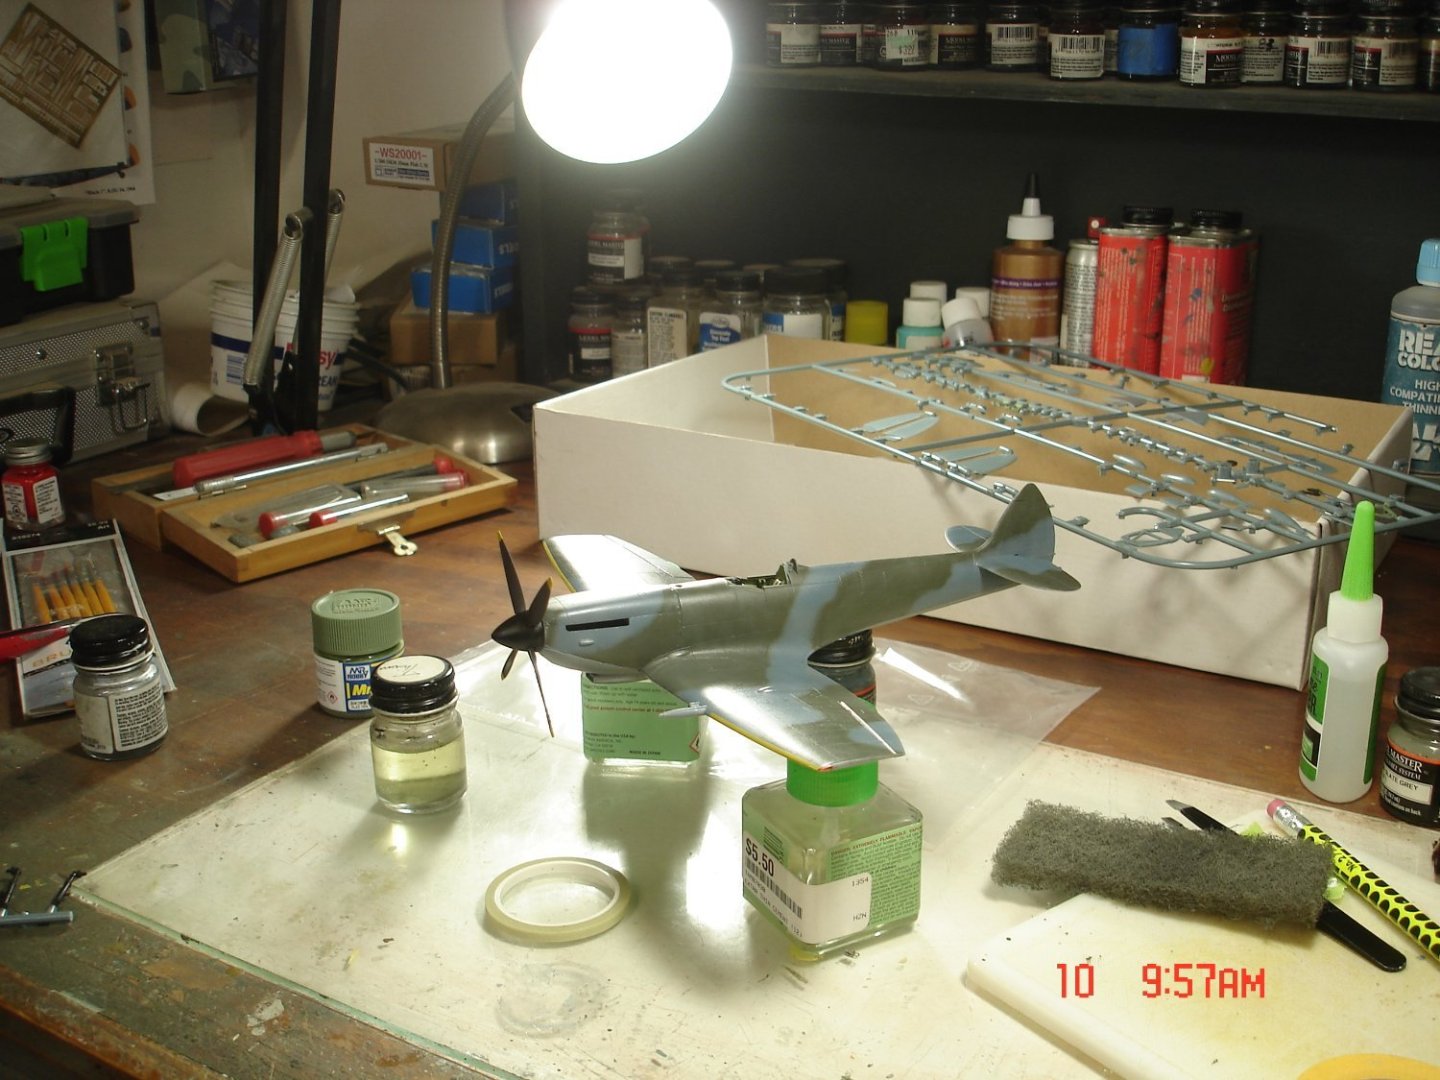
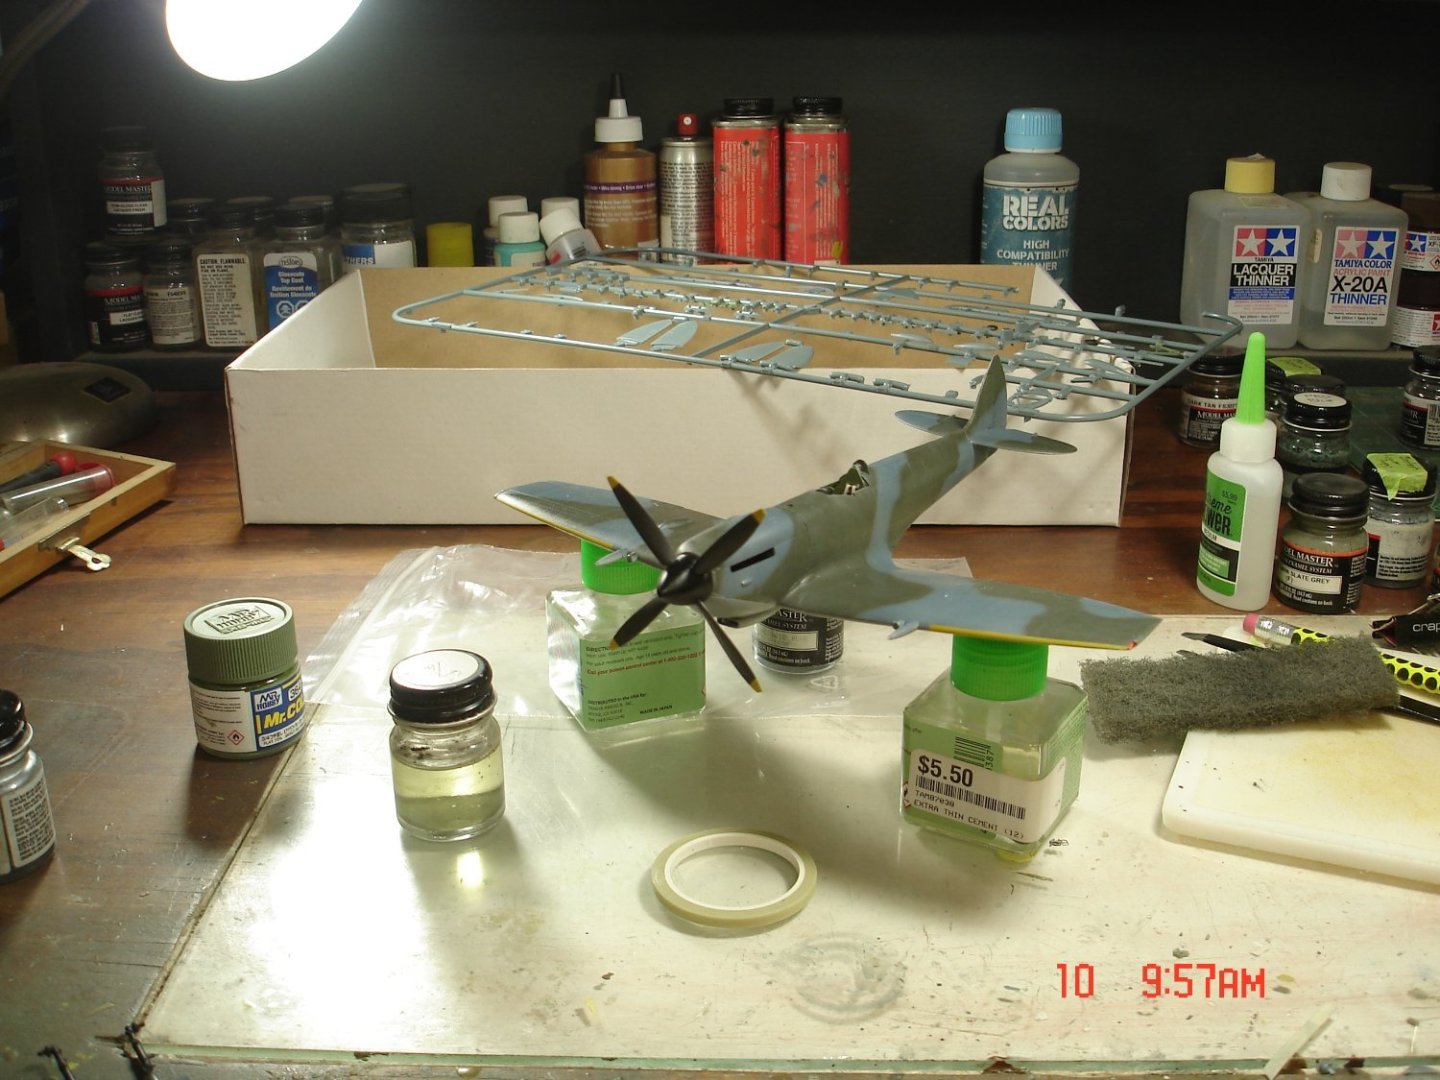
Got the leading edge yellow bands done and glossed coated with Future.The plane will not get much if any weathering seeing being introduced to the SQ. in May/45.No Flash.
- 19 replies
-
- 10
-
-
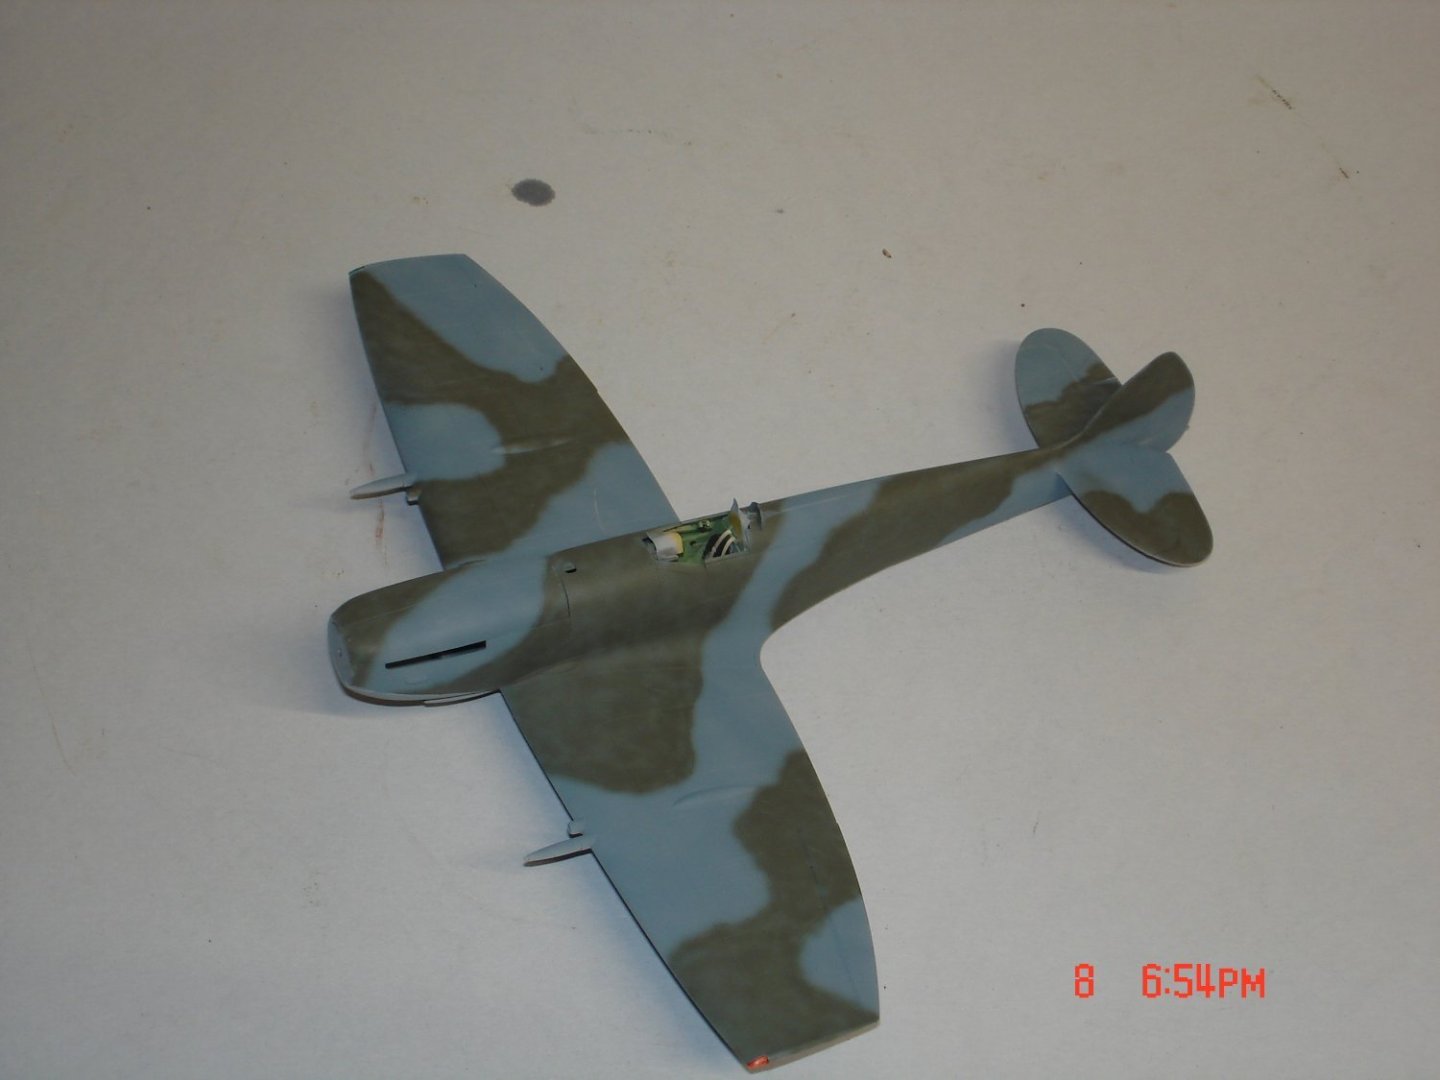
Thanks Alan it's a process I have been working the last year kinda gives that faded effect before the washes or powders are applied.
-
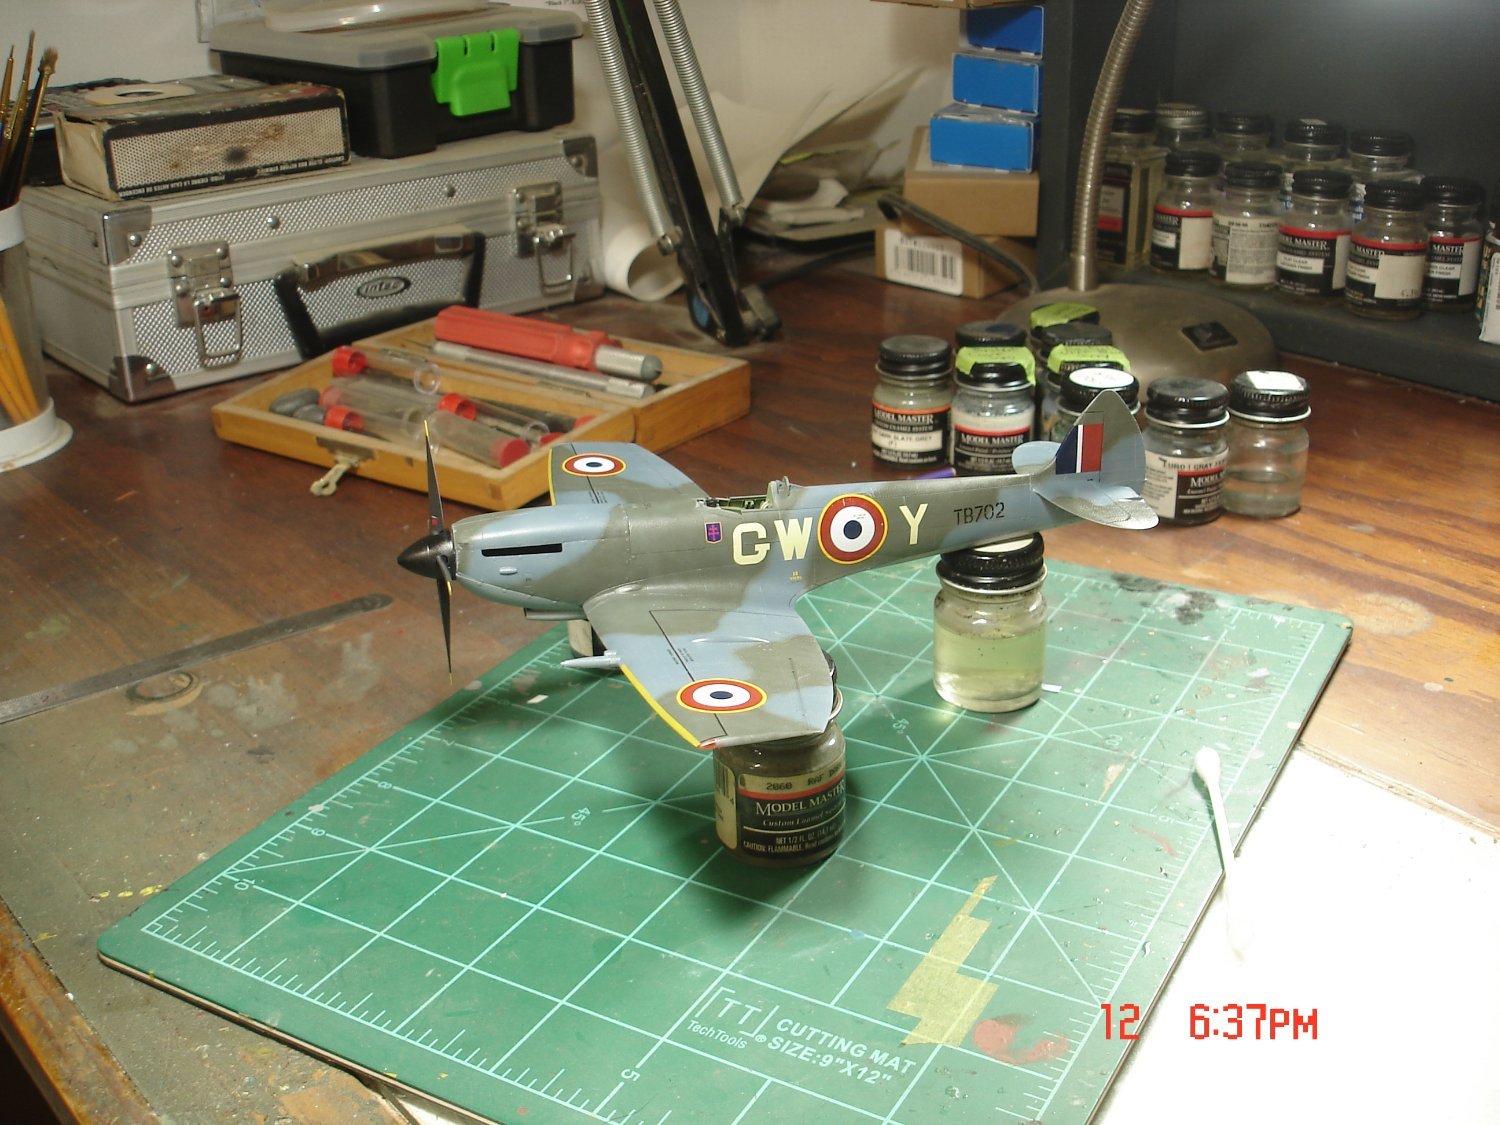
My MM Ocean Grey was to far gone to bring back with the leveling thinner and OG has a tint of blue I went US Intermediate blue I'm thinking a little to blue but the flash also is overstating the blue some what. I went back out to the shop to clean the AB definitely not that blue will take final pics outdoors natural light next week.
-
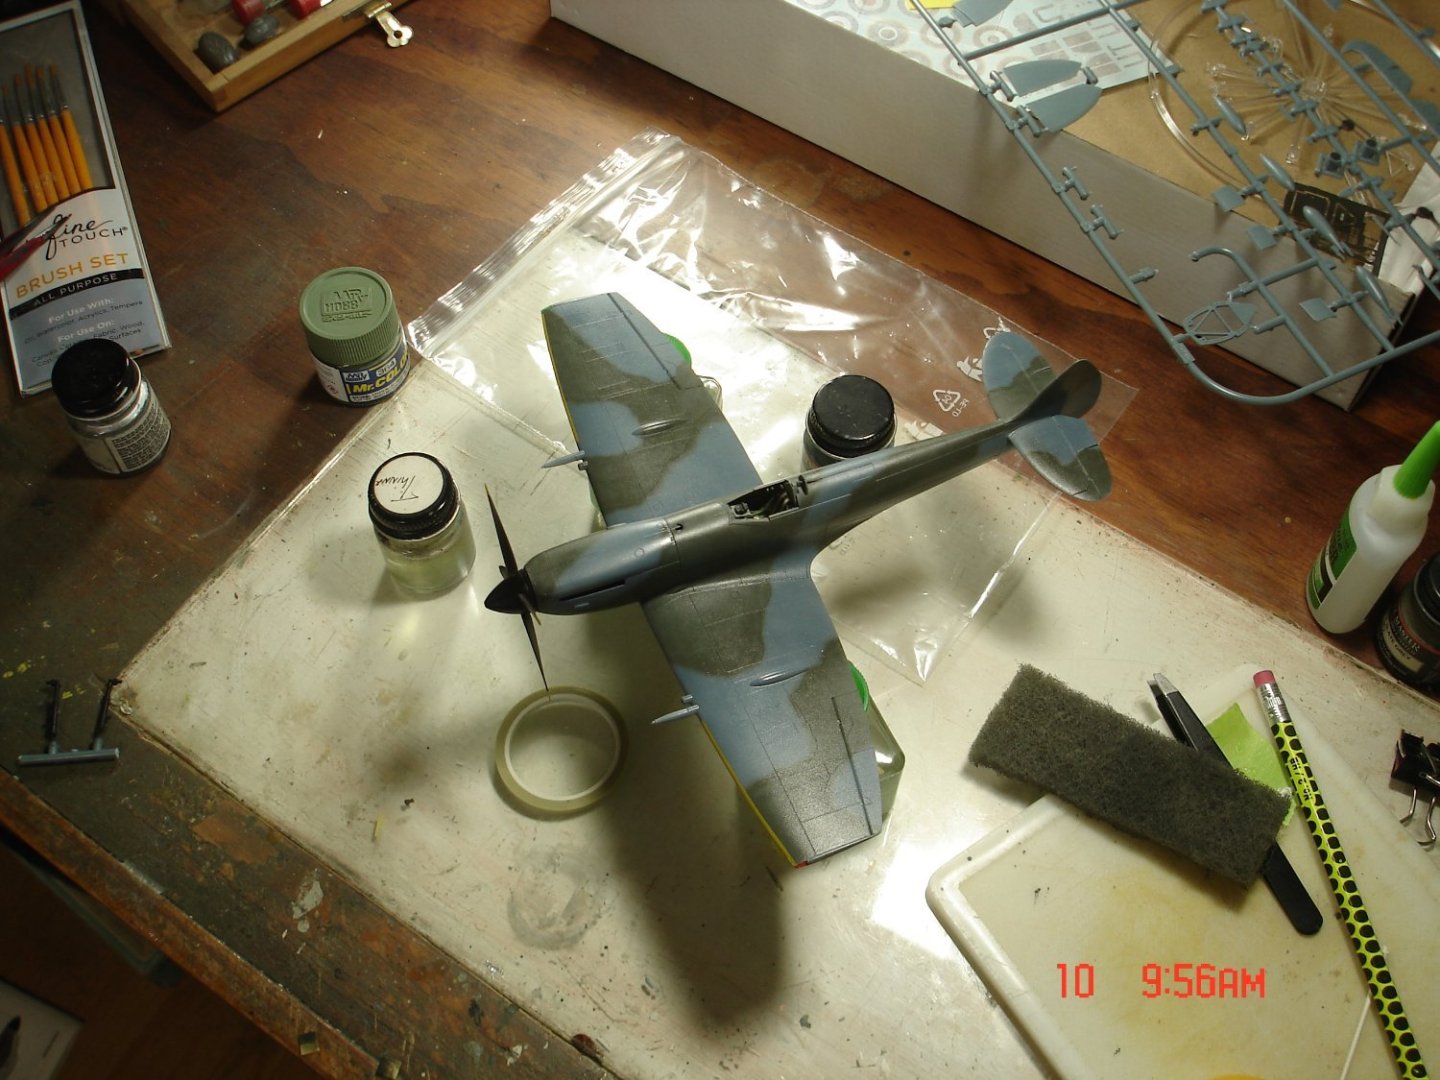
I have not built an Eduard in a while if ever and have to say this is a saaweeeet Kit! The fit is just about perfect filler was a minimum on one wing root only.The kit supplied the PE to build up the pit though being a Spit not alot to see but I did use for the first time the SG with the light worked great for the bezels.I have been back with my MM enamels of late having found that MR.Color Leveling thinner for lacquers works Frigg'in excellente allowing me to thin to a 60/70 ratio of thinner and get a good application and is reviving some of the ole paints.The camo was all applied @17psi with the draw back on the trigger set to very light spray.The camo was drawn out with a pencil one at a time hitting the pencil line 2X and filling in the area it took me about 1 1/2 to 2 hrs to paint the whole plane,the airbrush never stops moving in various patterns.I started the build last Monday after shelving it for sometime for lack of interest but I think it's time to clean up those off the SOD.

- 19 replies
-
- 11
-

-
-
Looking really Nice Mike!!
-
I like your engineering of the rafters as EG said very innovative in design