HOLIDAY DONATION DRIVE - SUPPORT MSW - DO YOUR PART TO KEEP THIS GREAT FORUM GOING! (Only 36 donations so far out of 49,000 members - C'mon guys!)
×


Javlin
-
Posts
1,681 -
Joined
-
Last visited
Content Type
Profiles
Forums
Gallery
Events
Everything posted by Javlin
-
Lots of stencils and waiting on paint and thanks for the likes guys.
-
I have thought about either this kit or the ICM will be looking in Andy.
-
Nice work on the build feel like I am watching Mark Novak on Ytube he rebuilds parts for rifles at times actually simpler than what you are exhibiting at times.
-
Honda RC166 Grand Prix Racer by CDW - FINISHED - Tamiya - 1/12
Javlin replied to CDW's topic in Non-ship/categorised builds
Isn't that the truth and we continue to amass faster than the building -
Curtiss BF 2C-1 by CDW - FINISHED - Hasegawa - 1:32 scale
Javlin replied to CDW's topic in Non-ship/categorised builds
I built one of these eons ago Craig and think it still resides in the cabinet.Yellow Wings are Nice and Colorful! -
Oh the joys of masking!!
-
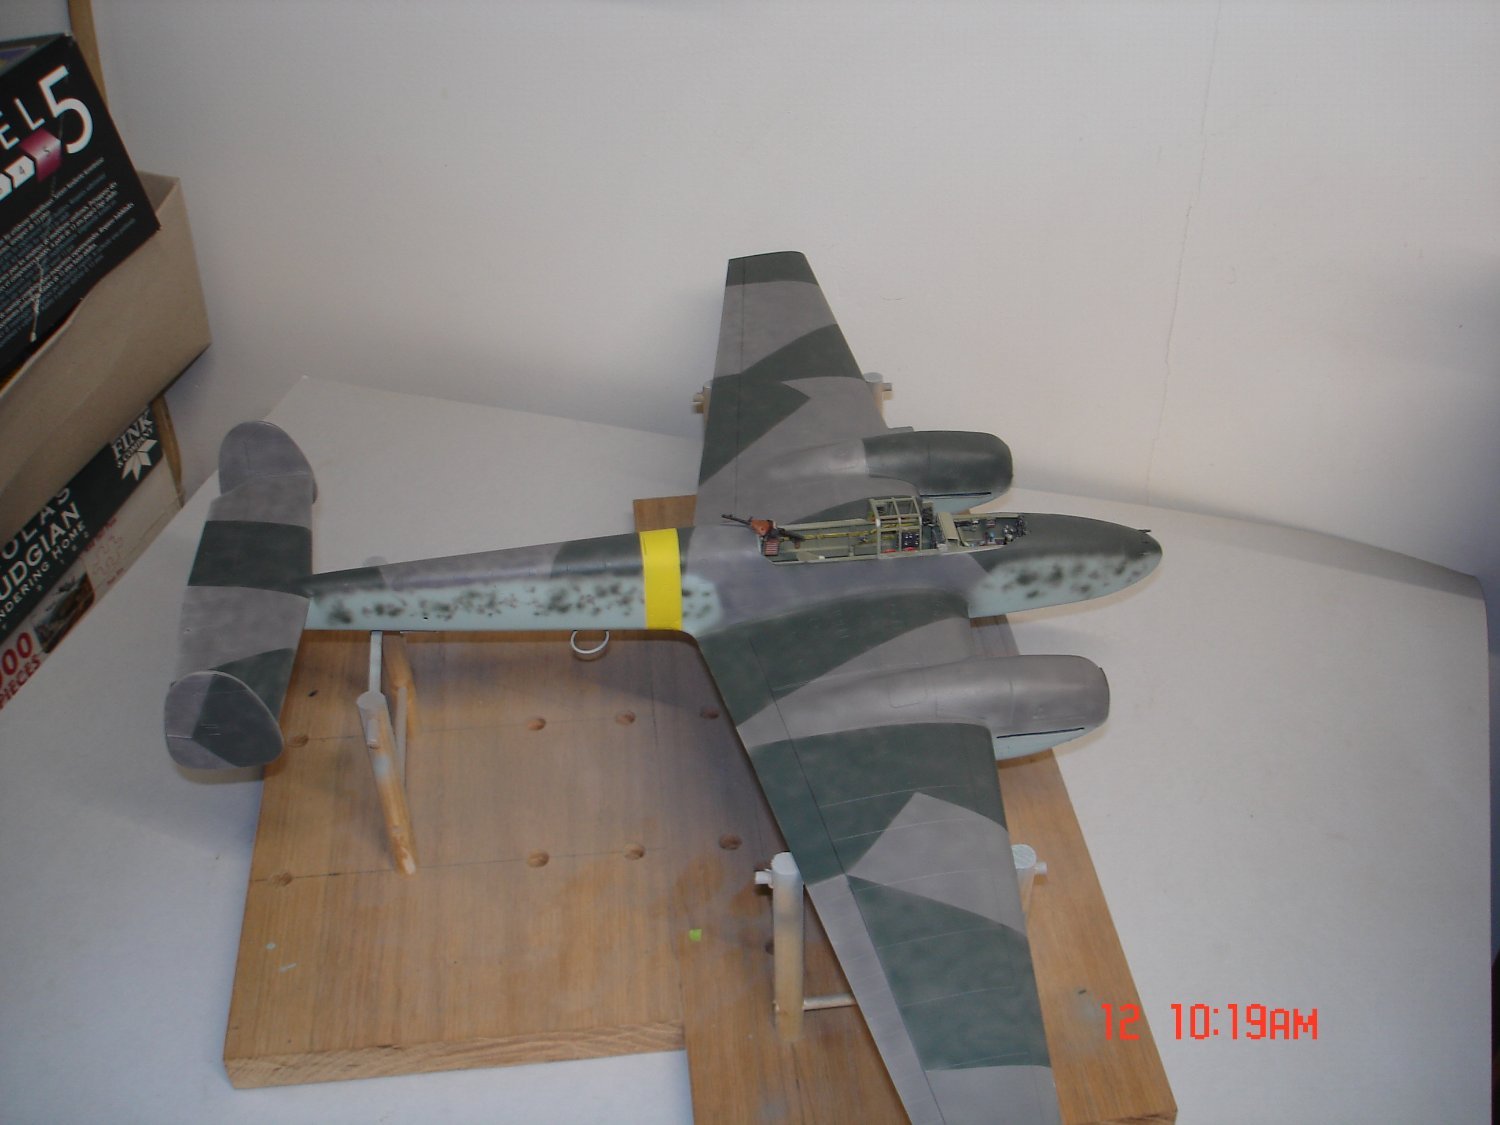
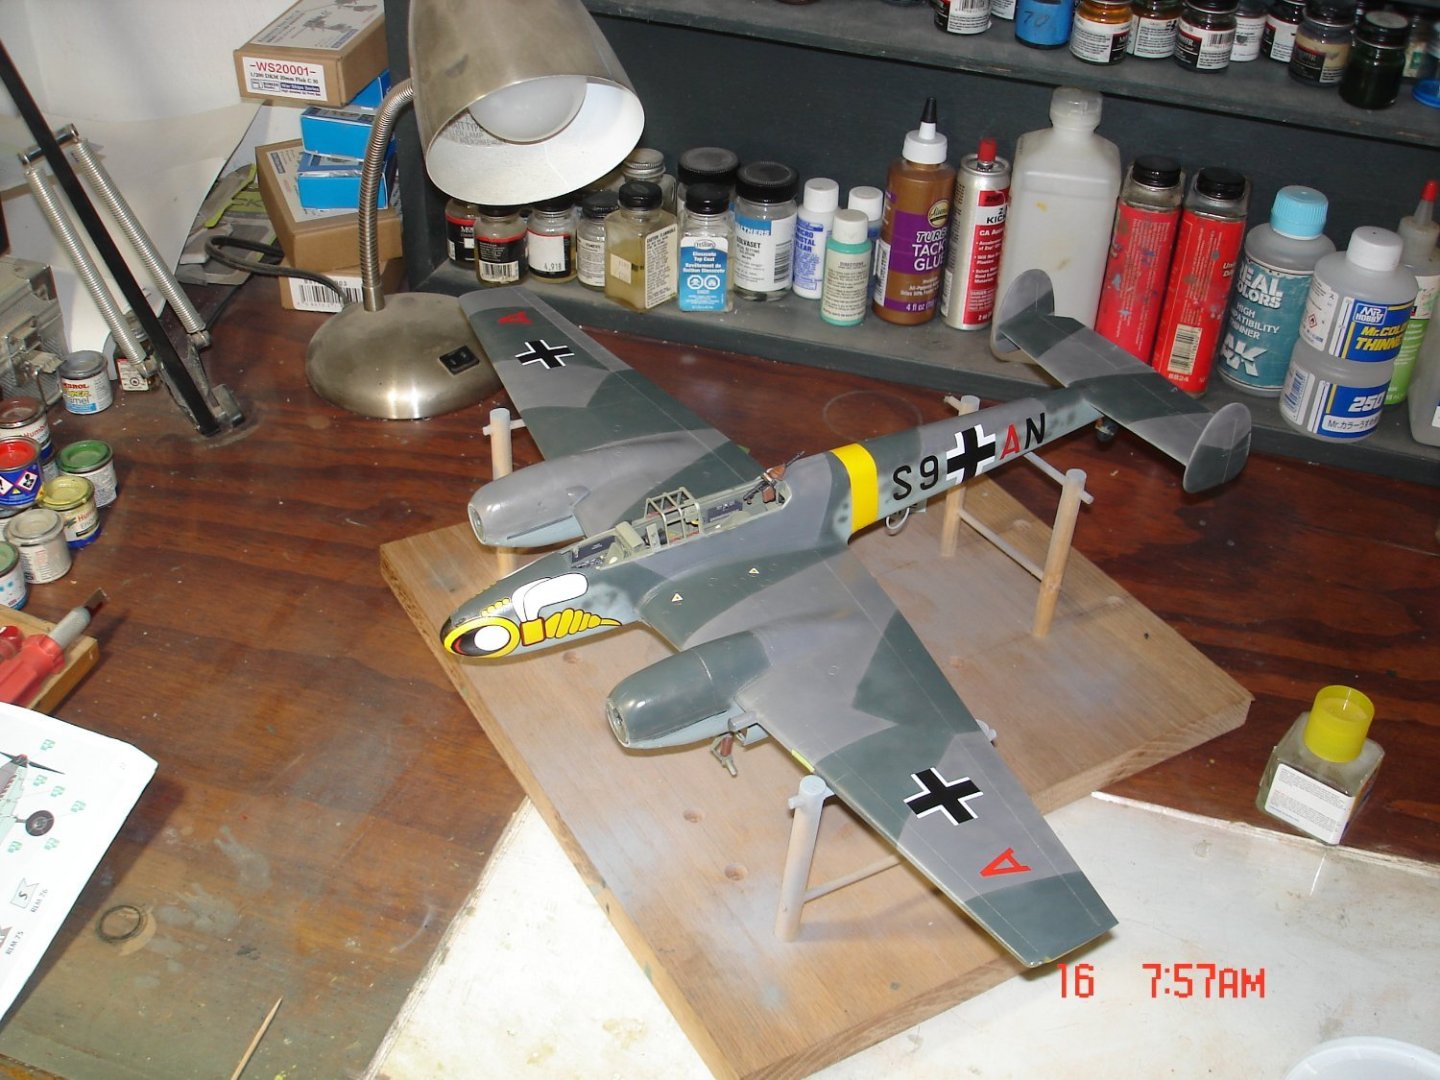
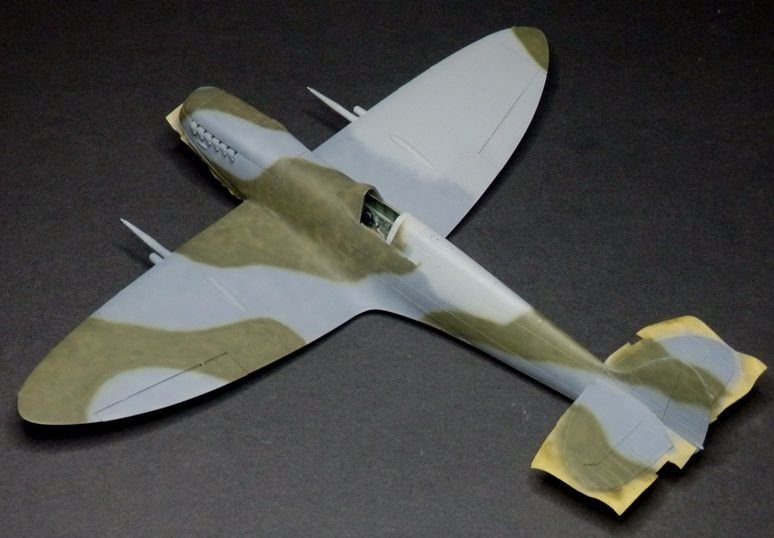
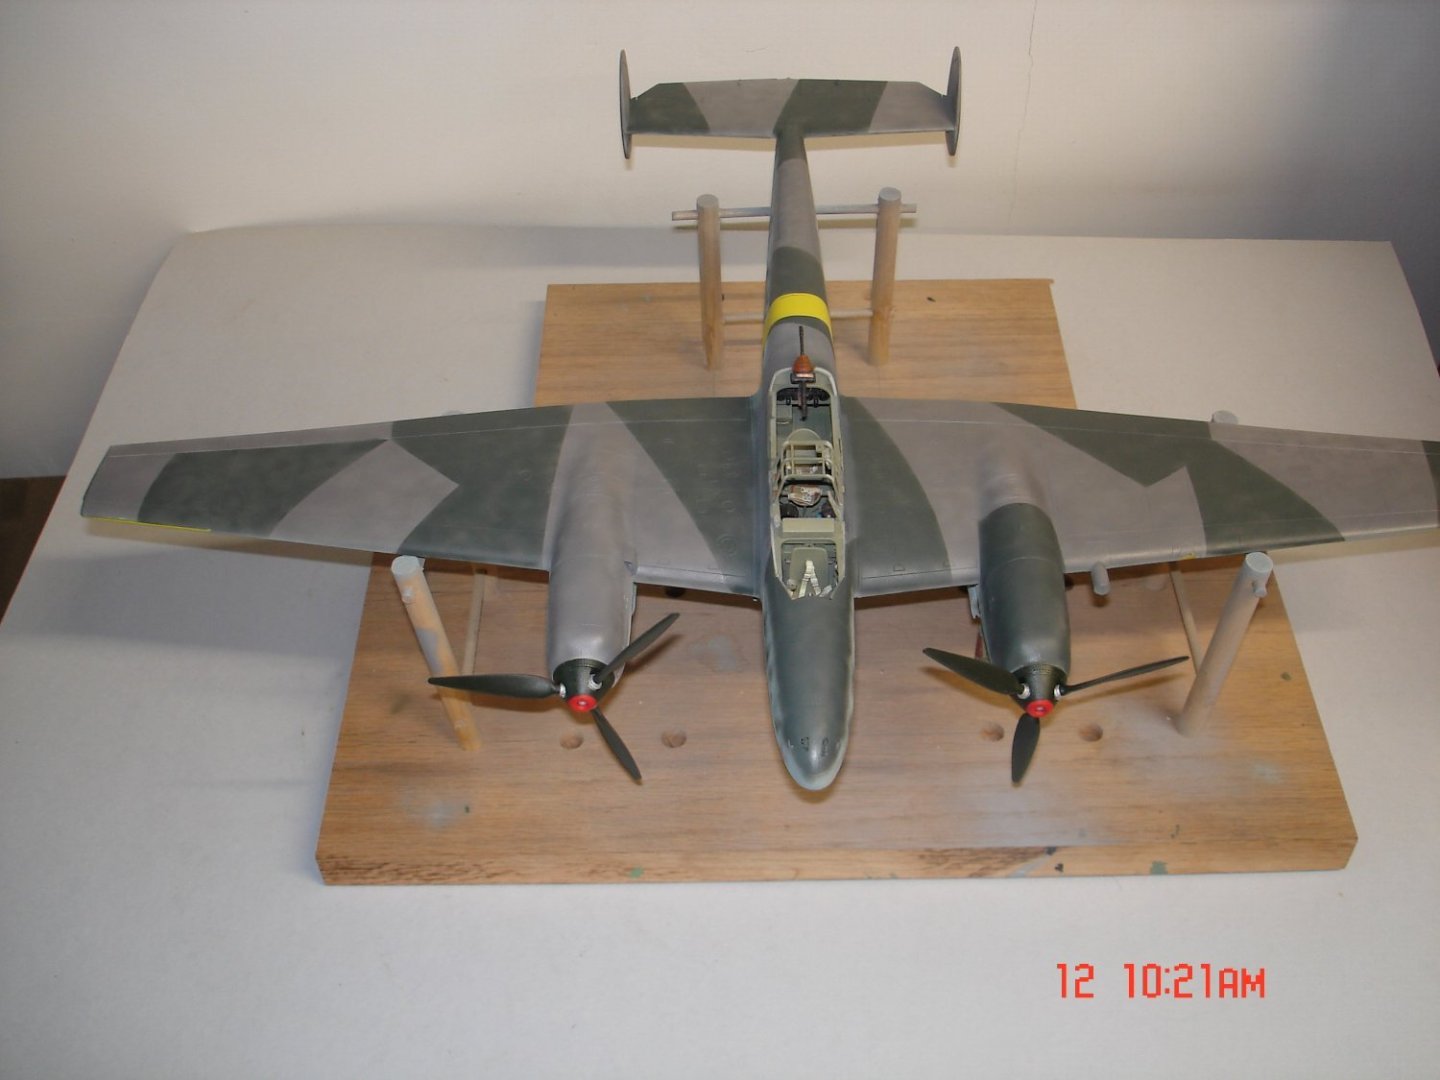
Just a pic of some progress the nose decals need some touch-ups kinda a PIA they were.I used the decal for the ban on the fuse an order from SB coming this week swastikas for the tail and a Eduard Tempest courtesy of Dan's build and insignia yellow.
- 45 replies
-
- 17
-

-
bookmarked and ordering some.
-
No one will ever notice but that Nose decal is a beotch.I had to order some more paint Insignia Yellow I still cannot track down any RLM04!?!
-
Maybe some one can relate/explain but I just about fooked this one up.I was spraying Light Sheen lacquer on the plane to get ready for decals did not like the texture so buffed with 800grit scotch bright got a weathered look but not what I was going after.I decided to wipe with alcohol and it stripped to the plastic in a couple of areas I was like WTH?It has to be because it was 91% alcohol?I repainted all's good and laid down my usual Future I think I well relegate that stuff to the final fluid through the airbrush on a cleaning!!
-
And Chris I think to me a certain skillset is learned to pull off what you accomplish in Card!
-
EG I work it with an extra fine tip thin paint and 25psi the AB never stops moving mainly circle 8 pattern much of the time I kinda like the fade look some what.I know a fella on another forum Down Under who paints Tamy Acrylics high pressure 30+psi and many little dots looks really sweet but takes hours of work this me took 2/3hours.This is some of his work he likes 1/48 he does 1/32 just as Nice but how many more hours of labor?
- 45 replies
-
- 11
-
-
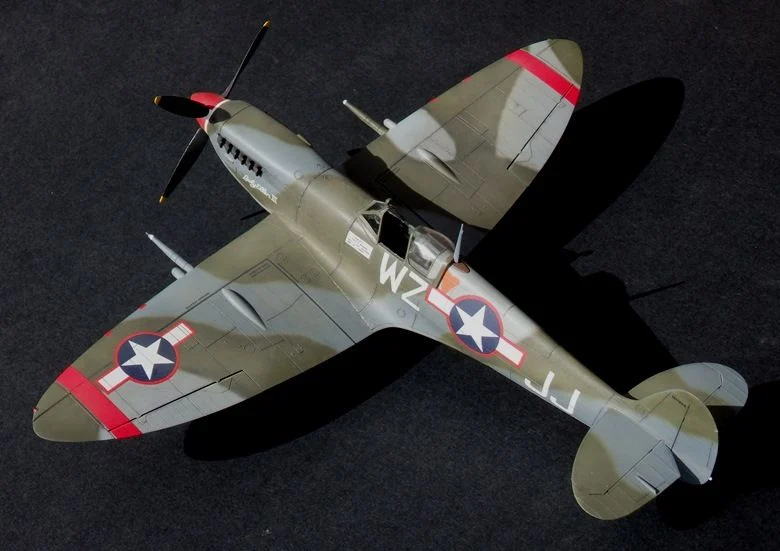
Getting close to the finish line fellas.The paints are all MrHobby lacquers and slowly learning the curve here if paint builds up on your forks of the airbrush it's to thick.I am thinking that these paints thin out like 60/70 thinner? I hope she comes through with some approval from you guys I'm thinking when all said and done she will be a smart looking crate. I think the yellow is a bit bright but no RLM04 was to be had this is Tamiya's yellow and not RLM04.


- 45 replies
-
- 13
-
-
Hey Mark atleast you were getting on Track and thanks for the explanation EG
-
Paint leveled off Nicely!!
-
Mark went and dug out the old Squadron book for that and paint application nothing about the wheels I saw just a special jack for changing tires.The other reason was the camo were presenting the wavy lines to the underwing but videos I watched did not represent that.I found two pics in the book about the Waspen Gruppe straight across the leading wing edge .
-
Looking good Rob will always looks better to after the paint levels off also.
-
Honda RC166 Grand Prix Racer by CDW - FINISHED - Tamiya - 1/12
Javlin replied to CDW's topic in Non-ship/categorised builds
I do her to!!!!!!! -
I felt in the beginning of the build to much green but the lighting has alot to play with the perception of the color later working with it.I find the color acceptable now and will be ordering some more down the road.
-
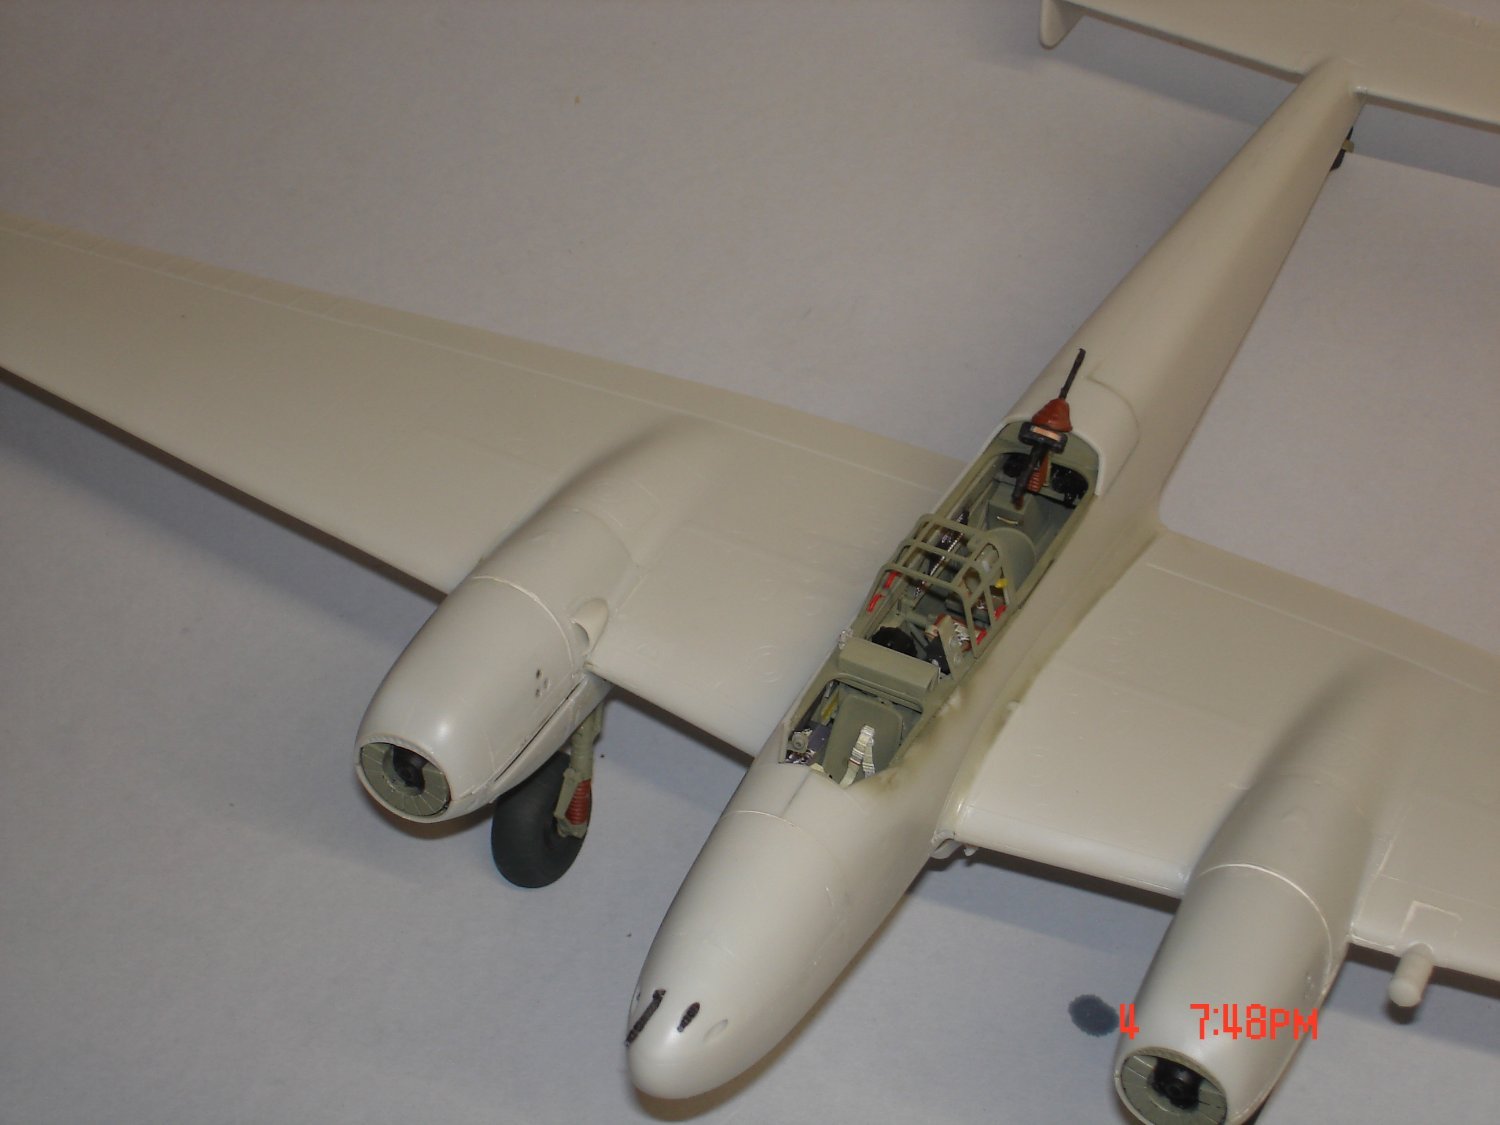
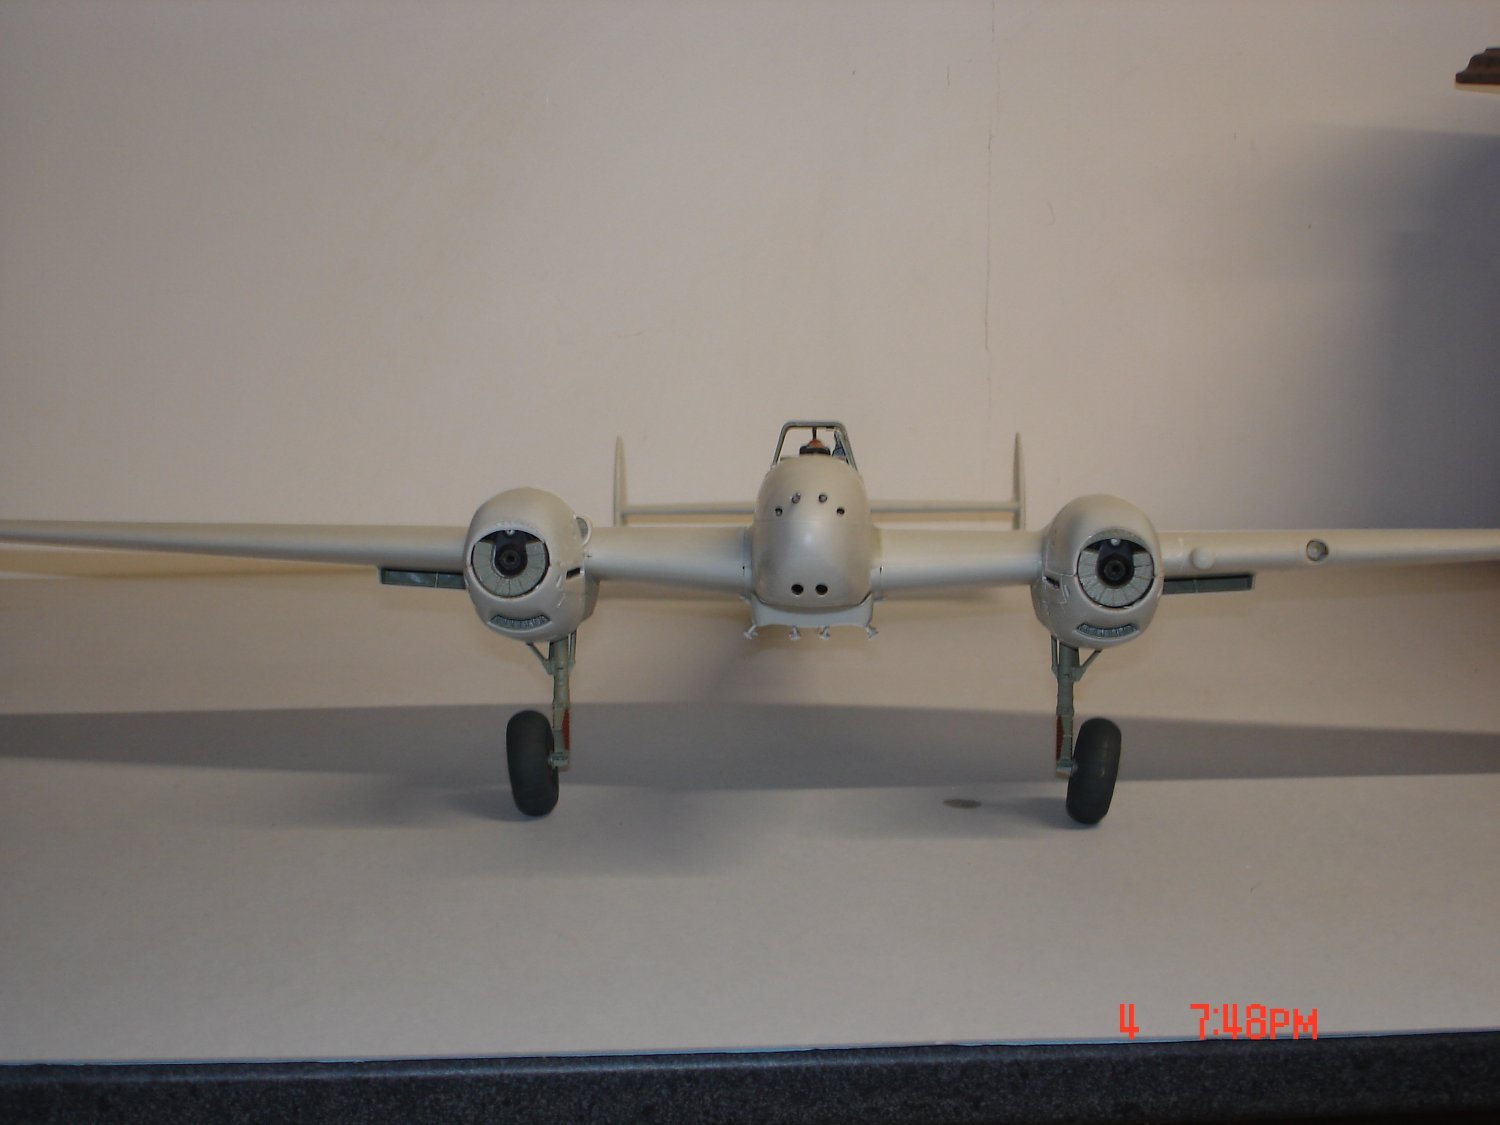
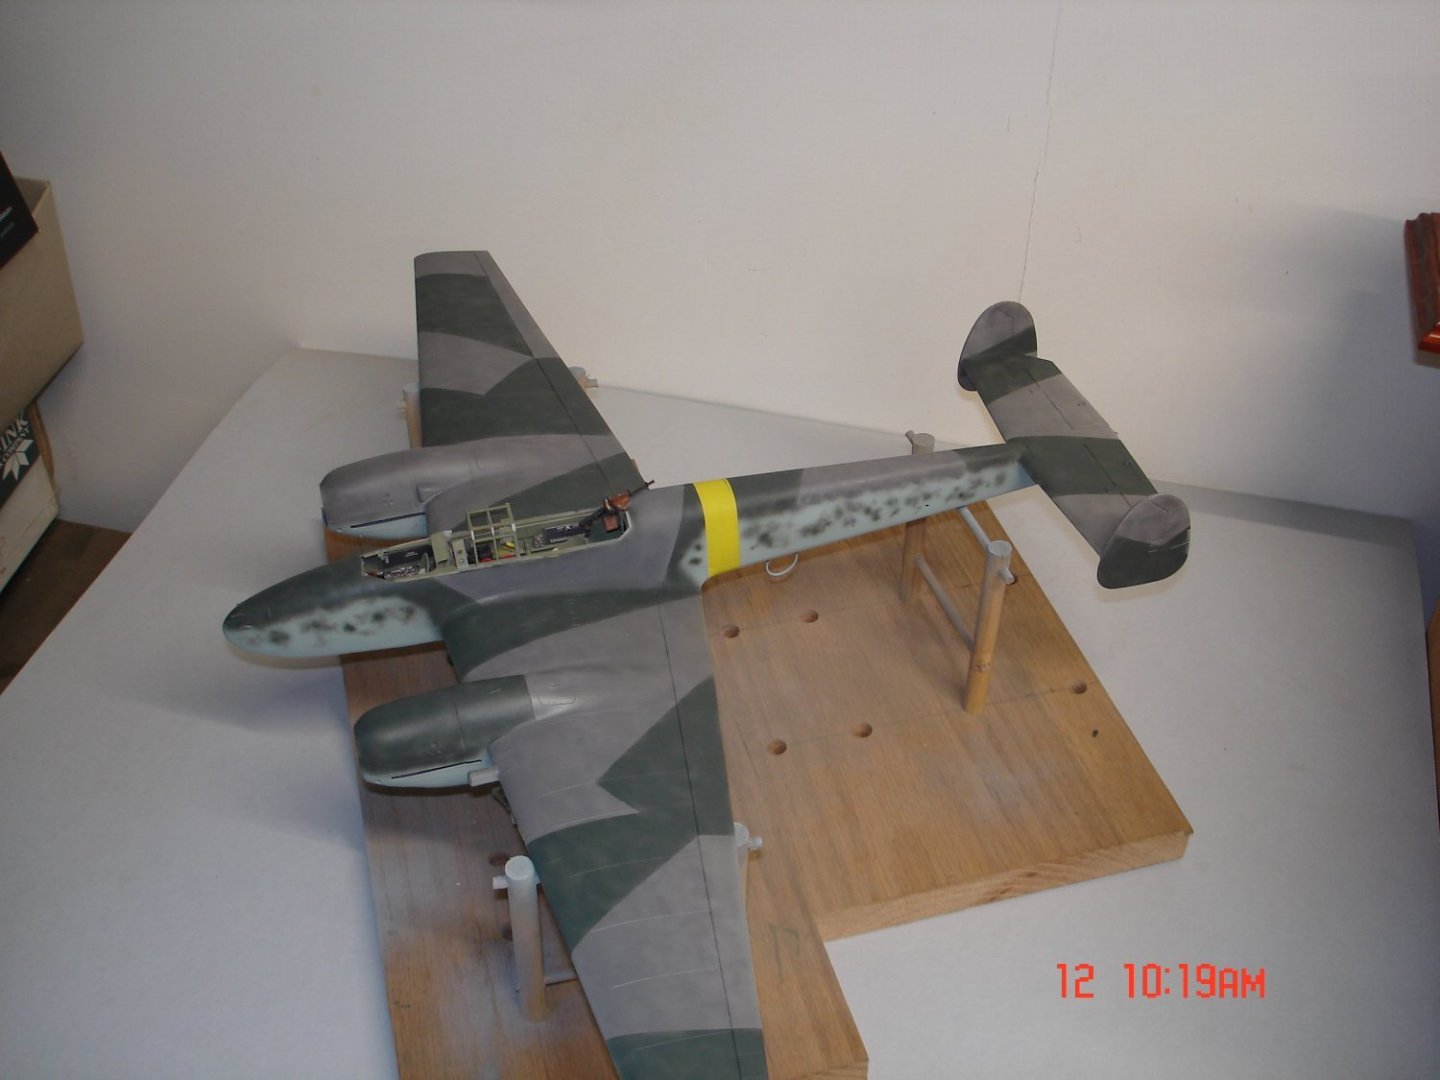
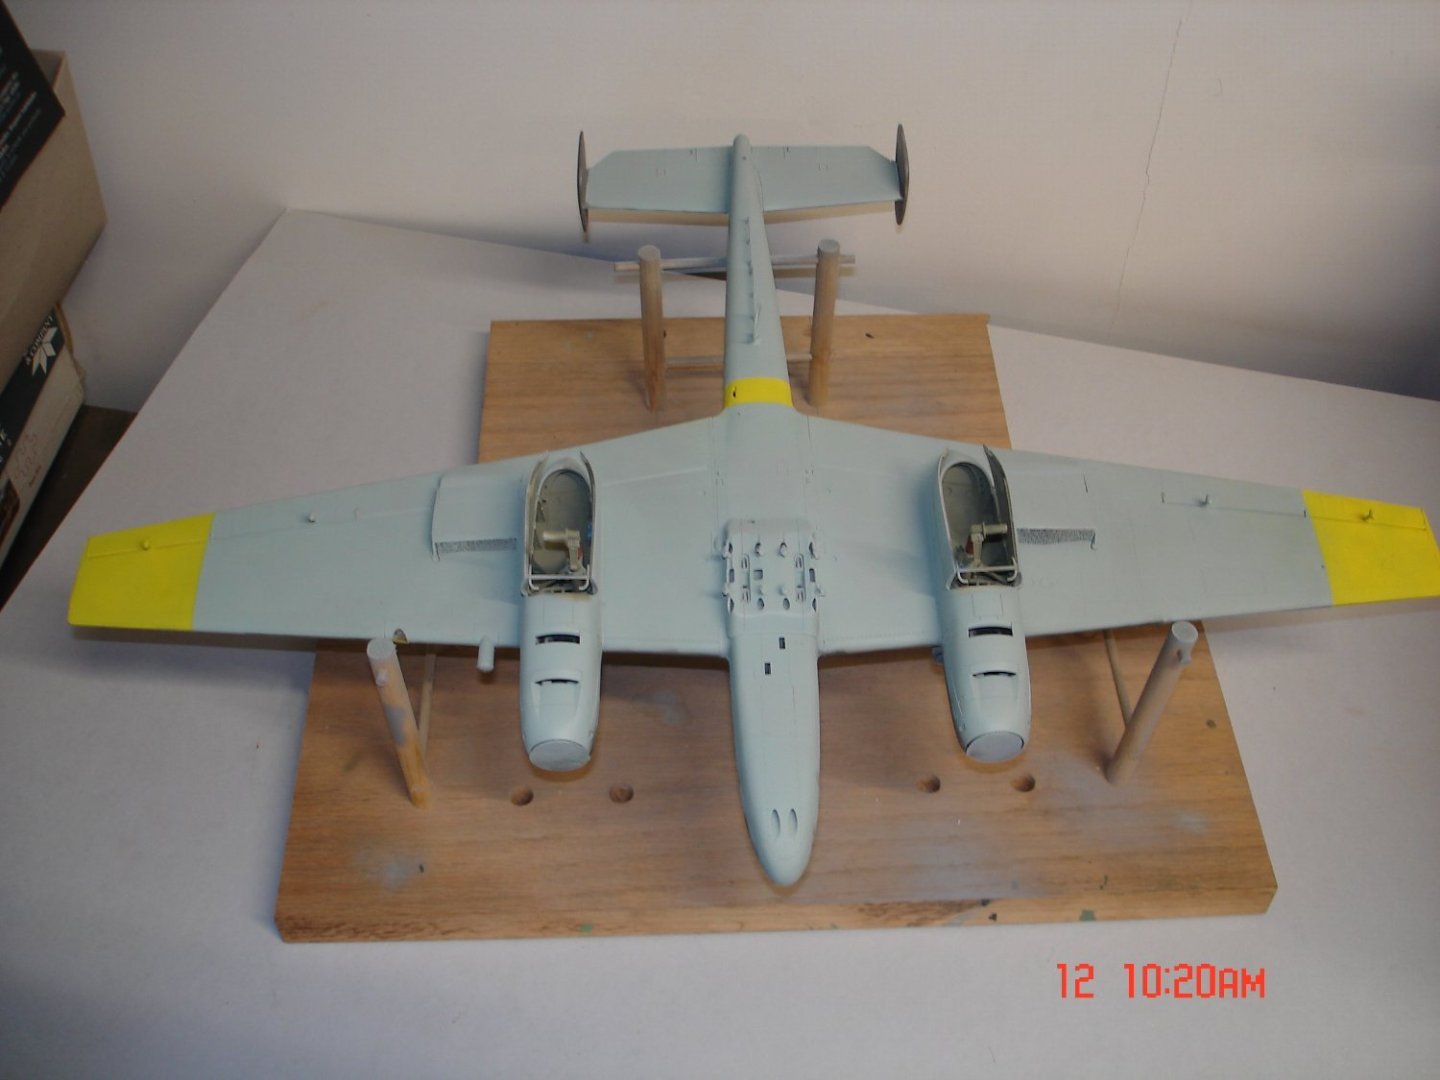
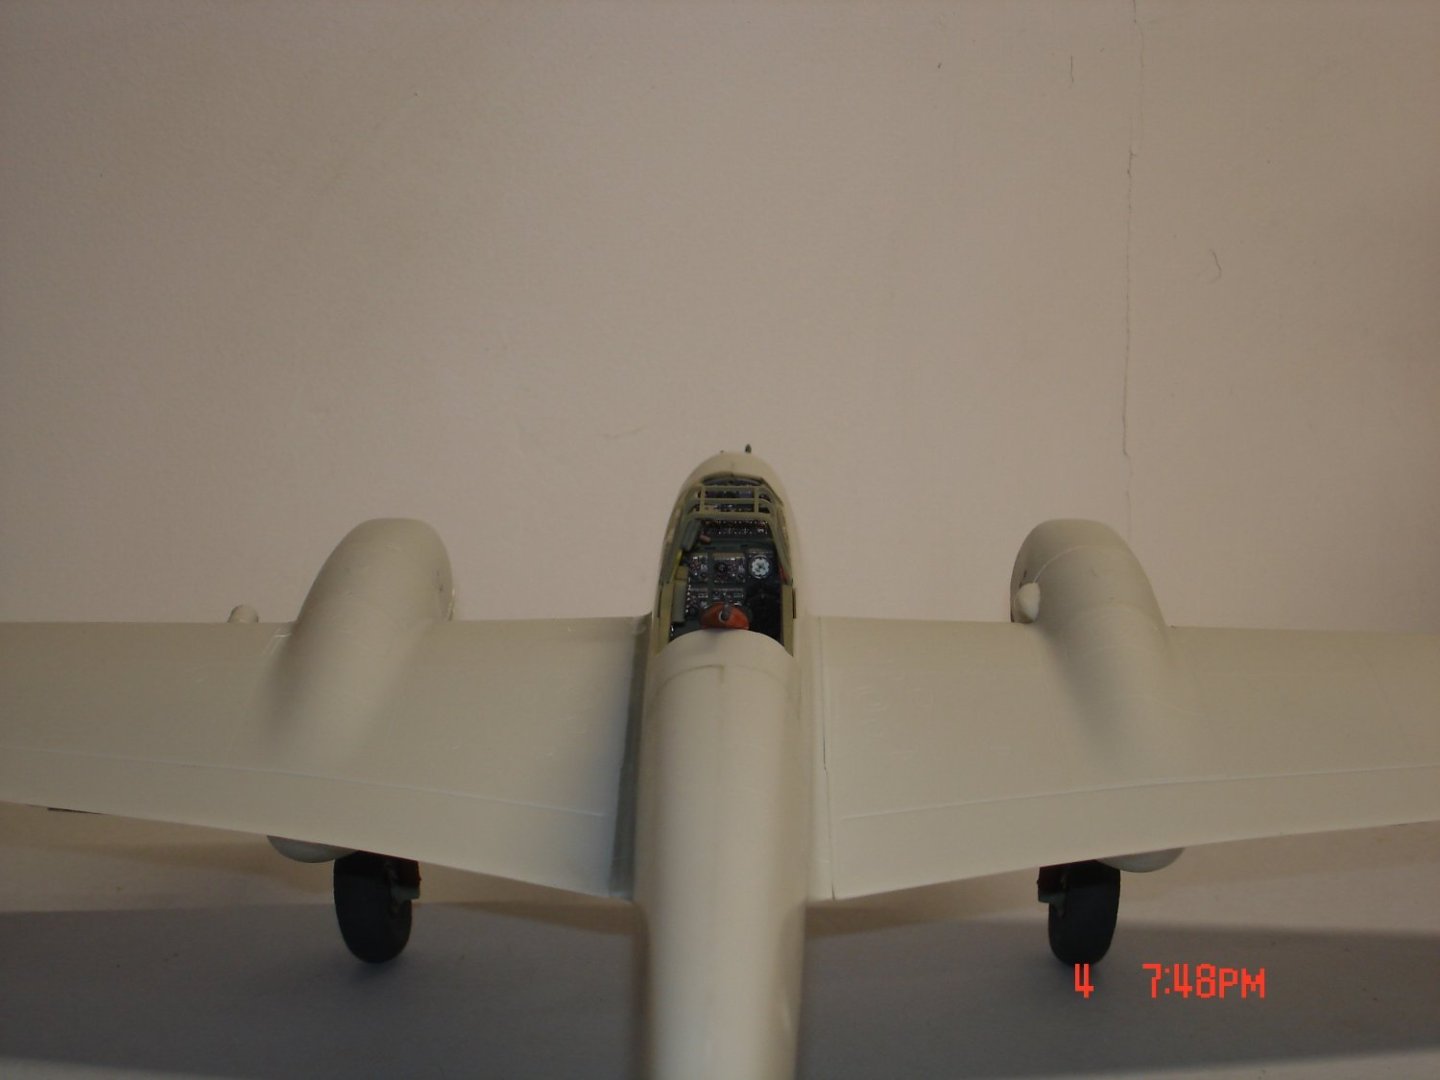
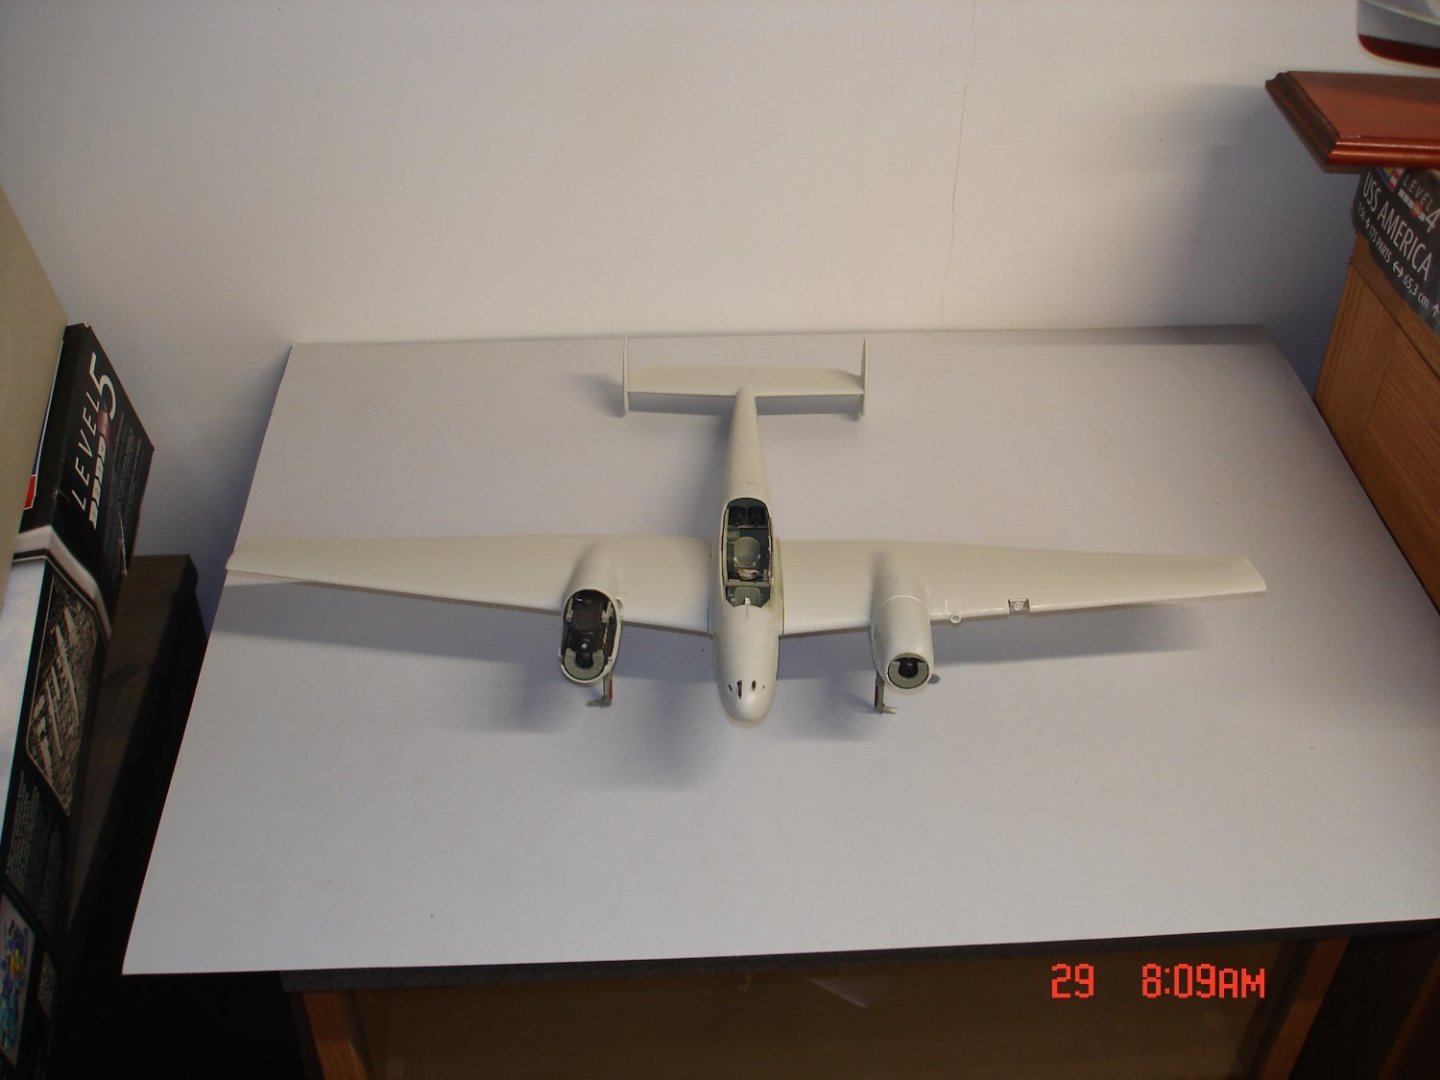
I have gotten a little accomplished over the last couple of weeks been working out of town turning 10hr days into 12 but that seems to be finished for now.The cowls on the other engine a bear as much as the first requiring a little more filler than the first.....maybe I should of followed the instructions version of assembly but I hate to put on the exhaust before the paint.The bomb rack under the fuse while the holders for the sway of the bombs have locating pins no holes in the rack or were to drill I look at the pics drilled and applied.The wheels are not glued in yet just there and That's the correct angle for the main LG had to go look that one up.The copit with the Quinta's is a Nice combination worth the few extra bucks.Guys RLM02 for the main bombs can never remember for Luft A/C?I have no filler for the upper wing joint and could almost forget about the bottom but I will pay it the little attention that is needed.The build overall has been quite Nice to me I give the fit 85/90 and the instructions 75/80 with the engine nacelles being the worst part of the kit ditch the engines and drop in a plate for the exhaust would be my solution if a redo should happen.


- 45 replies
-
- 10
-
-
The Airshow was pretty good not enough vintage A/C but for the first one since 2019 I'll take it.The CAF had a few planes and had brought along the Tora brigade and was really pretty cool I thought I was watching the Movie.The sound of a double row of Radials is just something to love and the B-25 "Yellow Rose" did it's part,The Mig-17 I have seen it before but was a screamer today.The event then moved from the flight line to the beach GOM @3pm for the Thunderbirds I got some good parking about 1 mile from the main spot and sat on the boardwalk on the beach with literally thousands of other people .......frigg'in Nice!!The TB's when sideways over the GOM about a mile out even though white looked silver in the sunlight..cool.
-
I thought I drop a pick before the airshow today at Keesler.The LG assembly according to the instructions was poor without clear indications of the manner position said pieces.I found it necessary to build the A-arm on roof of WW and move out from there.The instructions had one build the whole LG outside the WW and position just did not happen I had to disassemble the first and start over being wrong.The engines are basic.The nacelles around the engines again poor instruction to locations via pics presented.I found it best to assemble everything to the lower wing,install engine/WW,assemble wing and build the upper Nacelle into place.I still needed filler but nothing major.The fit of the wing looks good thus far what you see Now is not glued.The LG final assembly was the high point of this area and to me very Nice and strong.
- 45 replies
-
- 15
-
-
Honda RC166 Grand Prix Racer by CDW - FINISHED - Tamiya - 1/12
Javlin replied to CDW's topic in Non-ship/categorised builds
Looking Good and Real Craig! -
Oh by the way got bigger 50.6cm better than 20" Craig.I have been working the engines nothing fancy since they will not be shown but I am practicing some hand painting for a 109 one day.
-
Grumman F7F-2N2 Tigercat by Javlin - AMT - 1/48 - PLASTIC
Javlin replied to Javlin's topic in Completed non-ship models
Yep pretty much sums it up.