jablackwell
-
Posts
304 -
Joined
-
Last visited
Content Type
Profiles
Forums
Gallery
Events
Everything posted by jablackwell
-
 Yep - I have a hard time seeing which way you carved on your prop. What Carl said is absolutely correct. So.... if you did go backwards with the angle, you can always try again. ~j
 -
Mike, The good folks at Model Airways will send you a new set of prop parts for you if you want. ~j
-
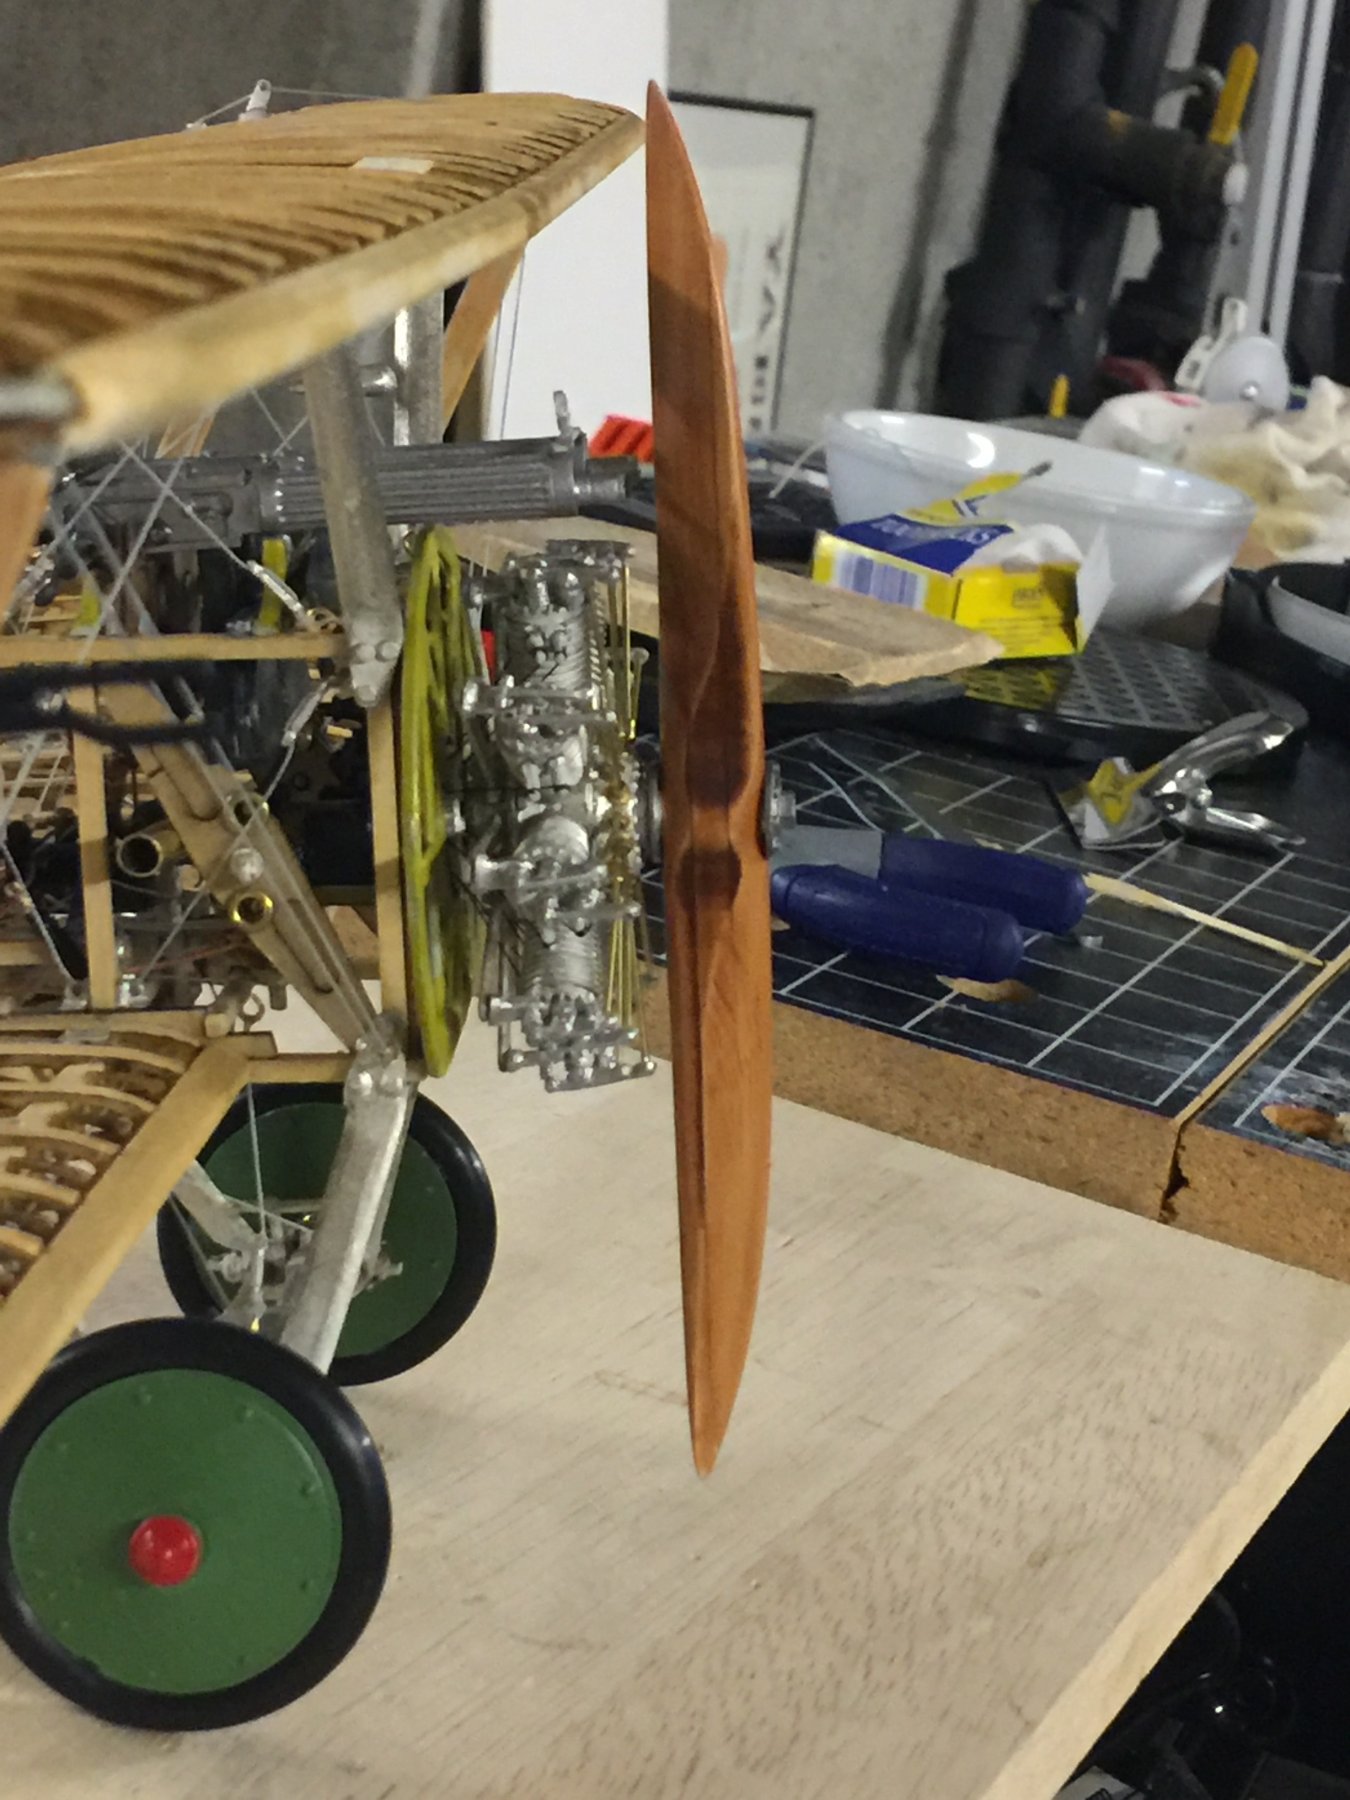
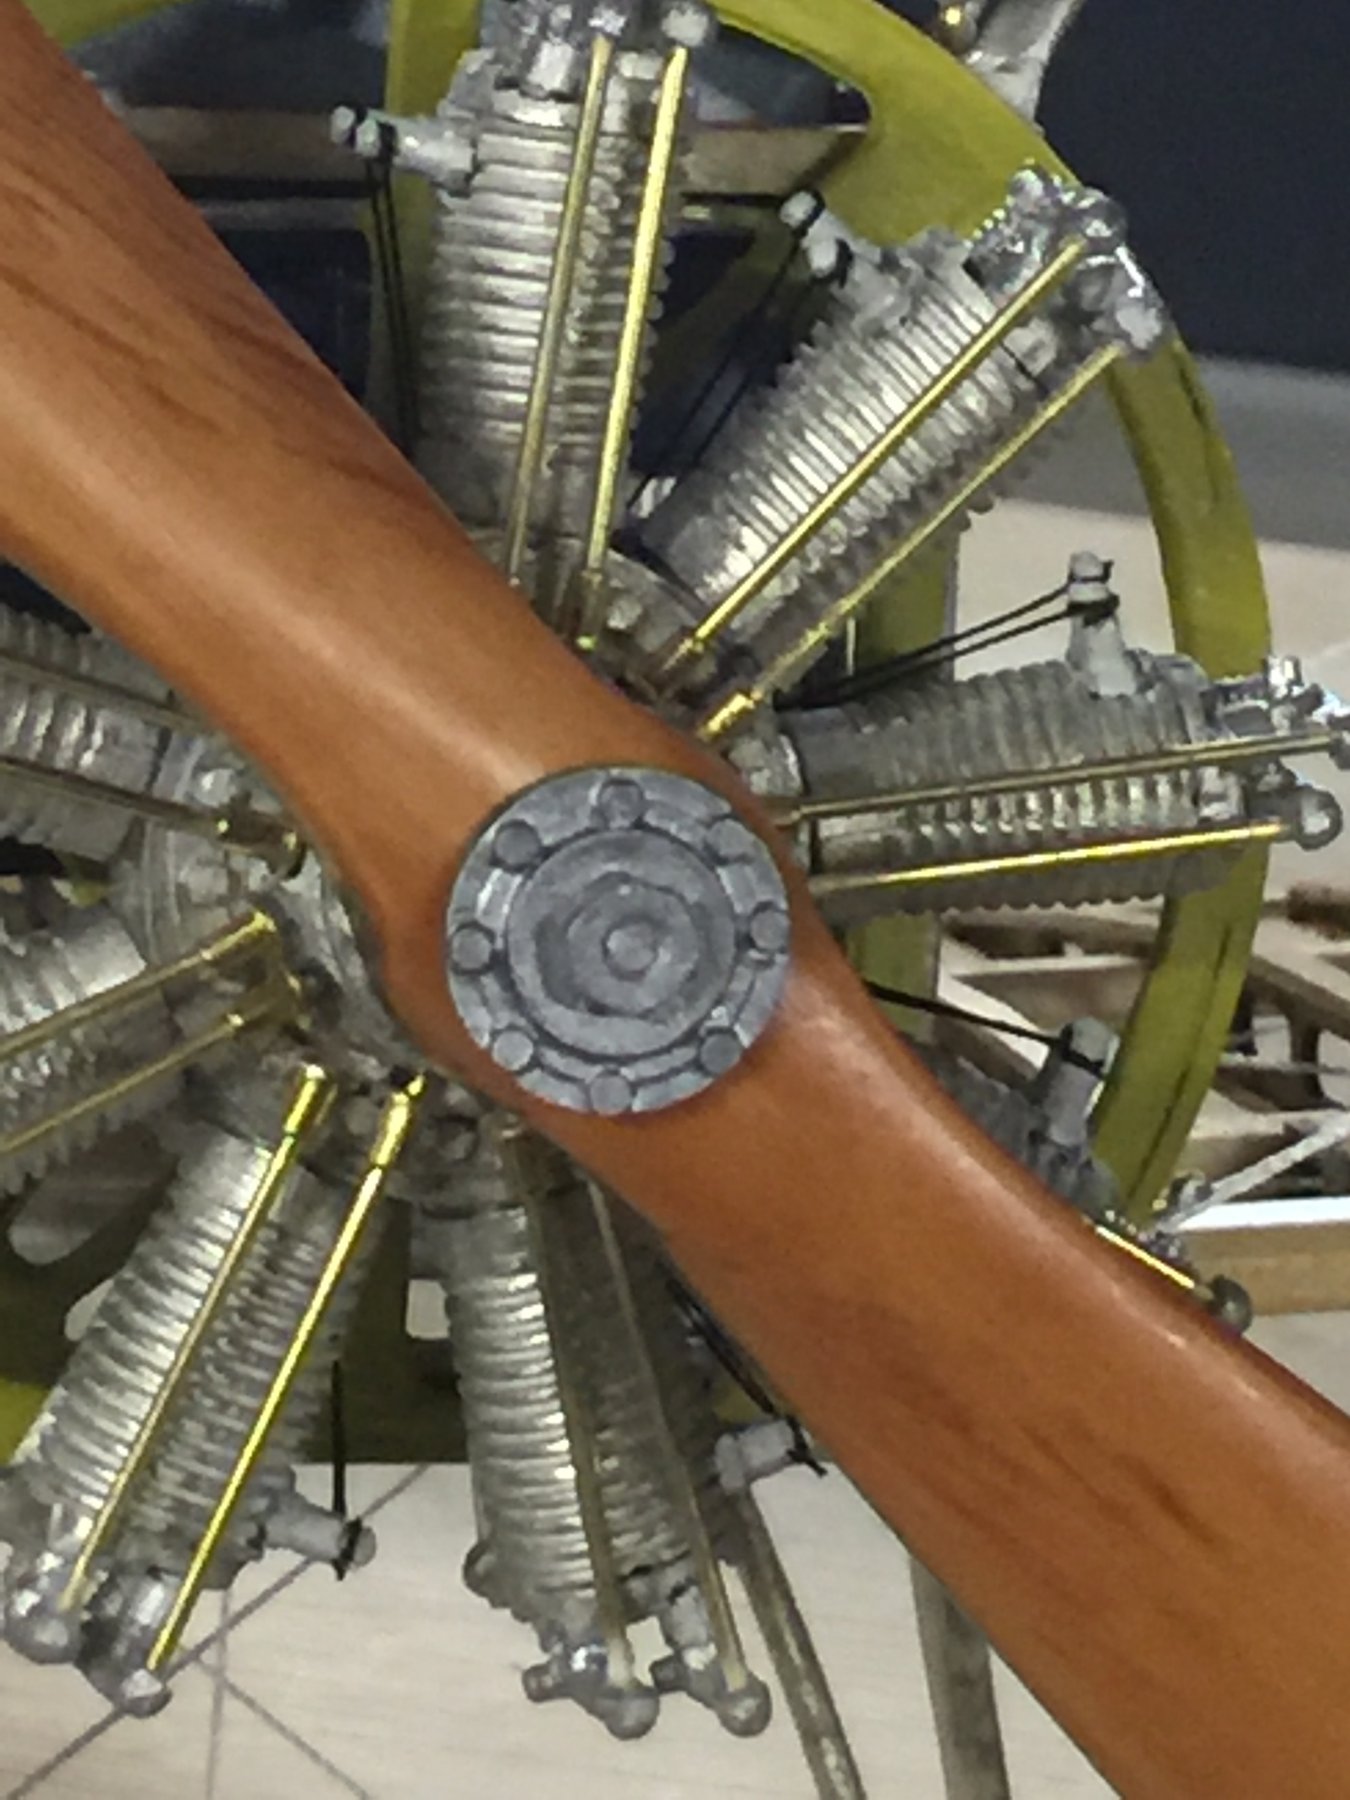
The blade starts thickest at the hub and becomes smoothly thinner to the end of the tips. The blade can't be concave on both sides.... only one side and this is the back side, the side closest to the engine. It is very slight.
-
Nope - nothing horrible :-) ~john
-
Hi Mike, No worries - you're not being a pain. ;-) The prop should be thinned equally from both sides. So if you have carved away enough from one side, then work on the other. The images in that link show just how thin the prop blade should be, and their angle. ~john
-
The trailing edge is that flat edge, the straight one. If you think of it as a cross section, the point where your edge is not is correct. You just need to thin the blade out. Imagine it as a wing.... it has a airfoil shape to it. The side view (profile) should remain constant. Check out these images: http://www.johnsshawaviation.co.uk/wordpress/sopwith-camel-f1-2/sopwith-camel-reconstruction/sopwith-camel-propeller/ ~john
-
Hi Mike, Yes, more wood needs to be removed. The shape and patter you have are correct, but the blades need to be thinner. The front edge will be more rounded than the trailing edge from a cross-sectional standpoint (and also longitudinally which you know and is looking good now). The trailing edge should be thin as can be. All this while maintaining the really nice side-view shape that you already have. Not sure if I am making sense.... I kind of wish they had provided a series of cross-section sketches for the prop shape. ~john
-
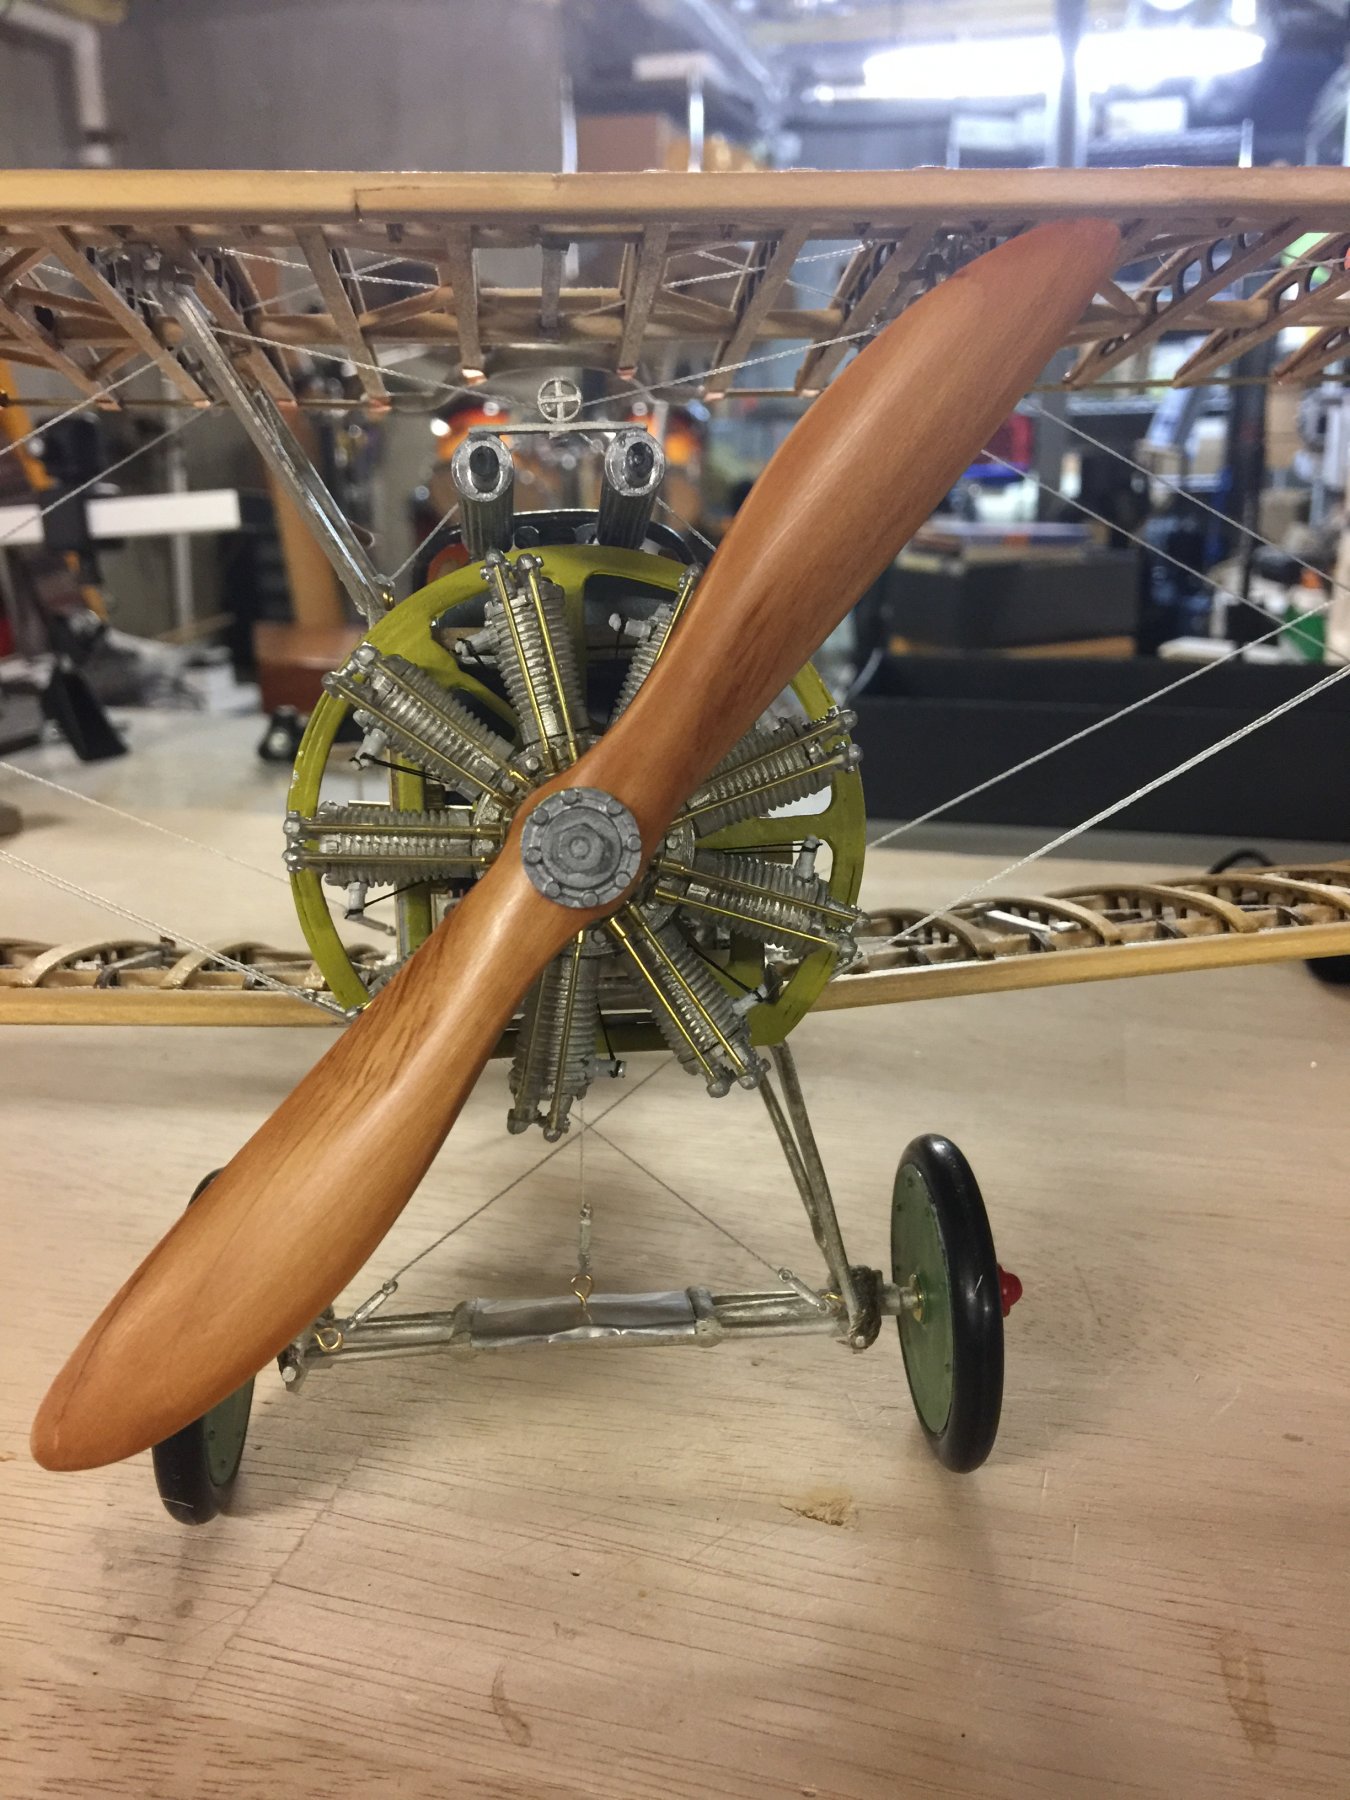
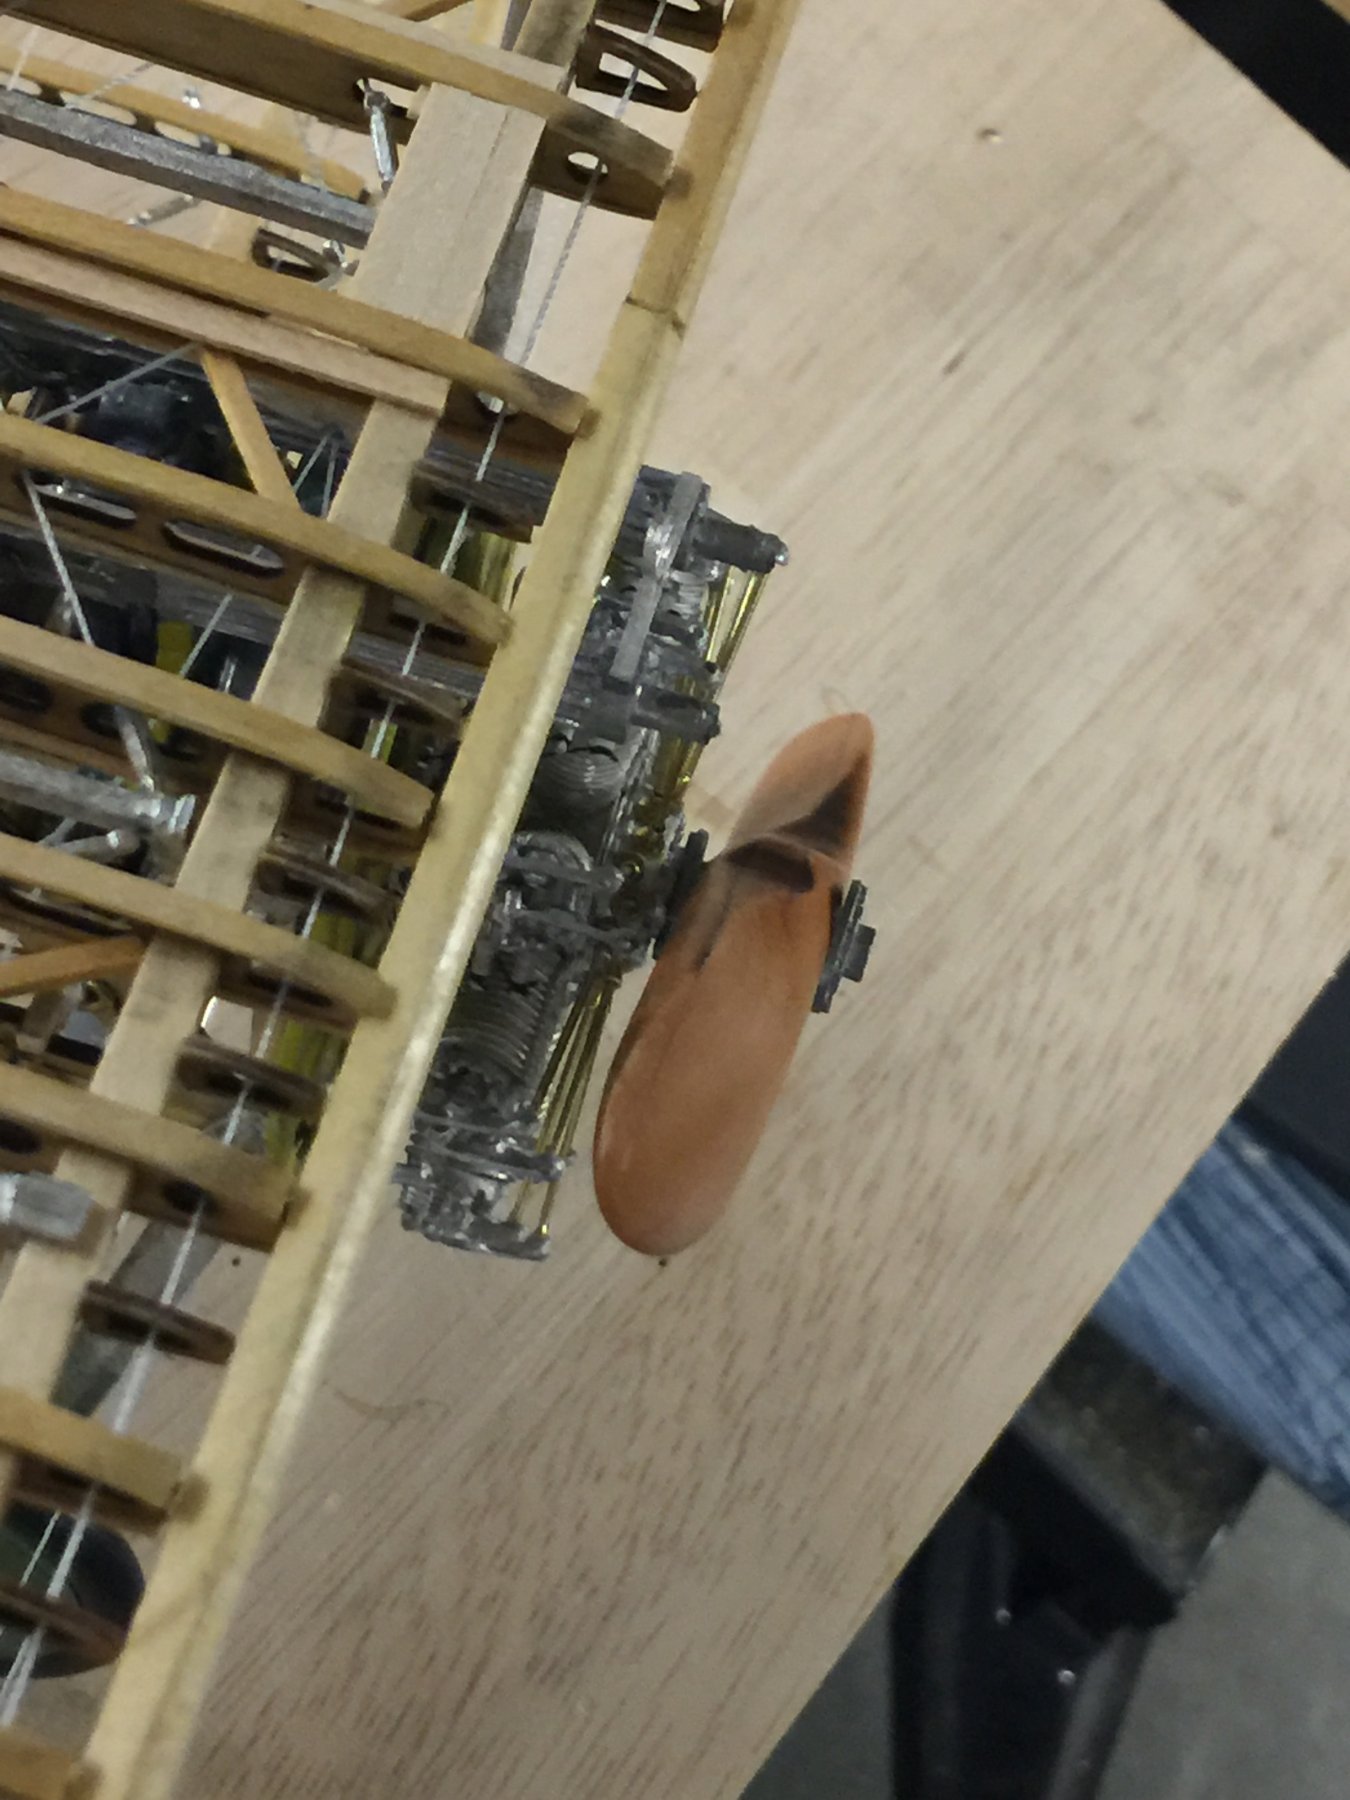
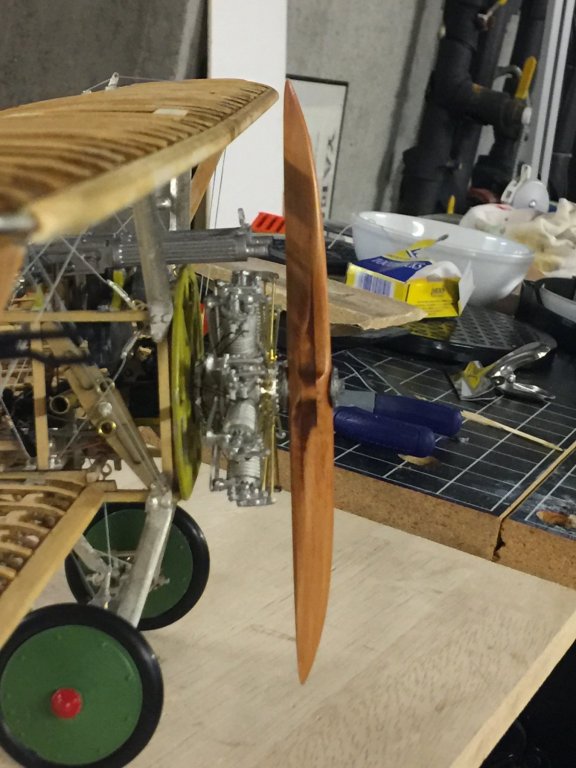
Hi Mike, The prop is looking good. The side view looks perfect. You have done a good job keeping the profile to the right shape and dimension. Now to the angles of the blades. I find it difficult to see what your images are showing me in terms of 3D, so I will try words. The prop spins such that the rounded edge of the blade is the leading edge. It might seem like that is backwards, but it is true. So let's look at the last pic you posted. The left hand side, towards us, is the curved edge and is the leading edge of the prop. On the right side, this curved edge is up top of the frame: that is the leading edge for the other side. The trailing edge is the flat edge, without any curve. Looking at the front of the prop, you want to sand or carve (or both!) away the wood on the flat edge of the prop, the trailing edge. Looking at the back side of the prop, you want to remove wood from the curved edge side of the prop. Doing this will create an angled propellor blade that pushes wind behind the plane as the prop spins. Maybe this helps? Hard to do in words and in 2D images. ~john
-
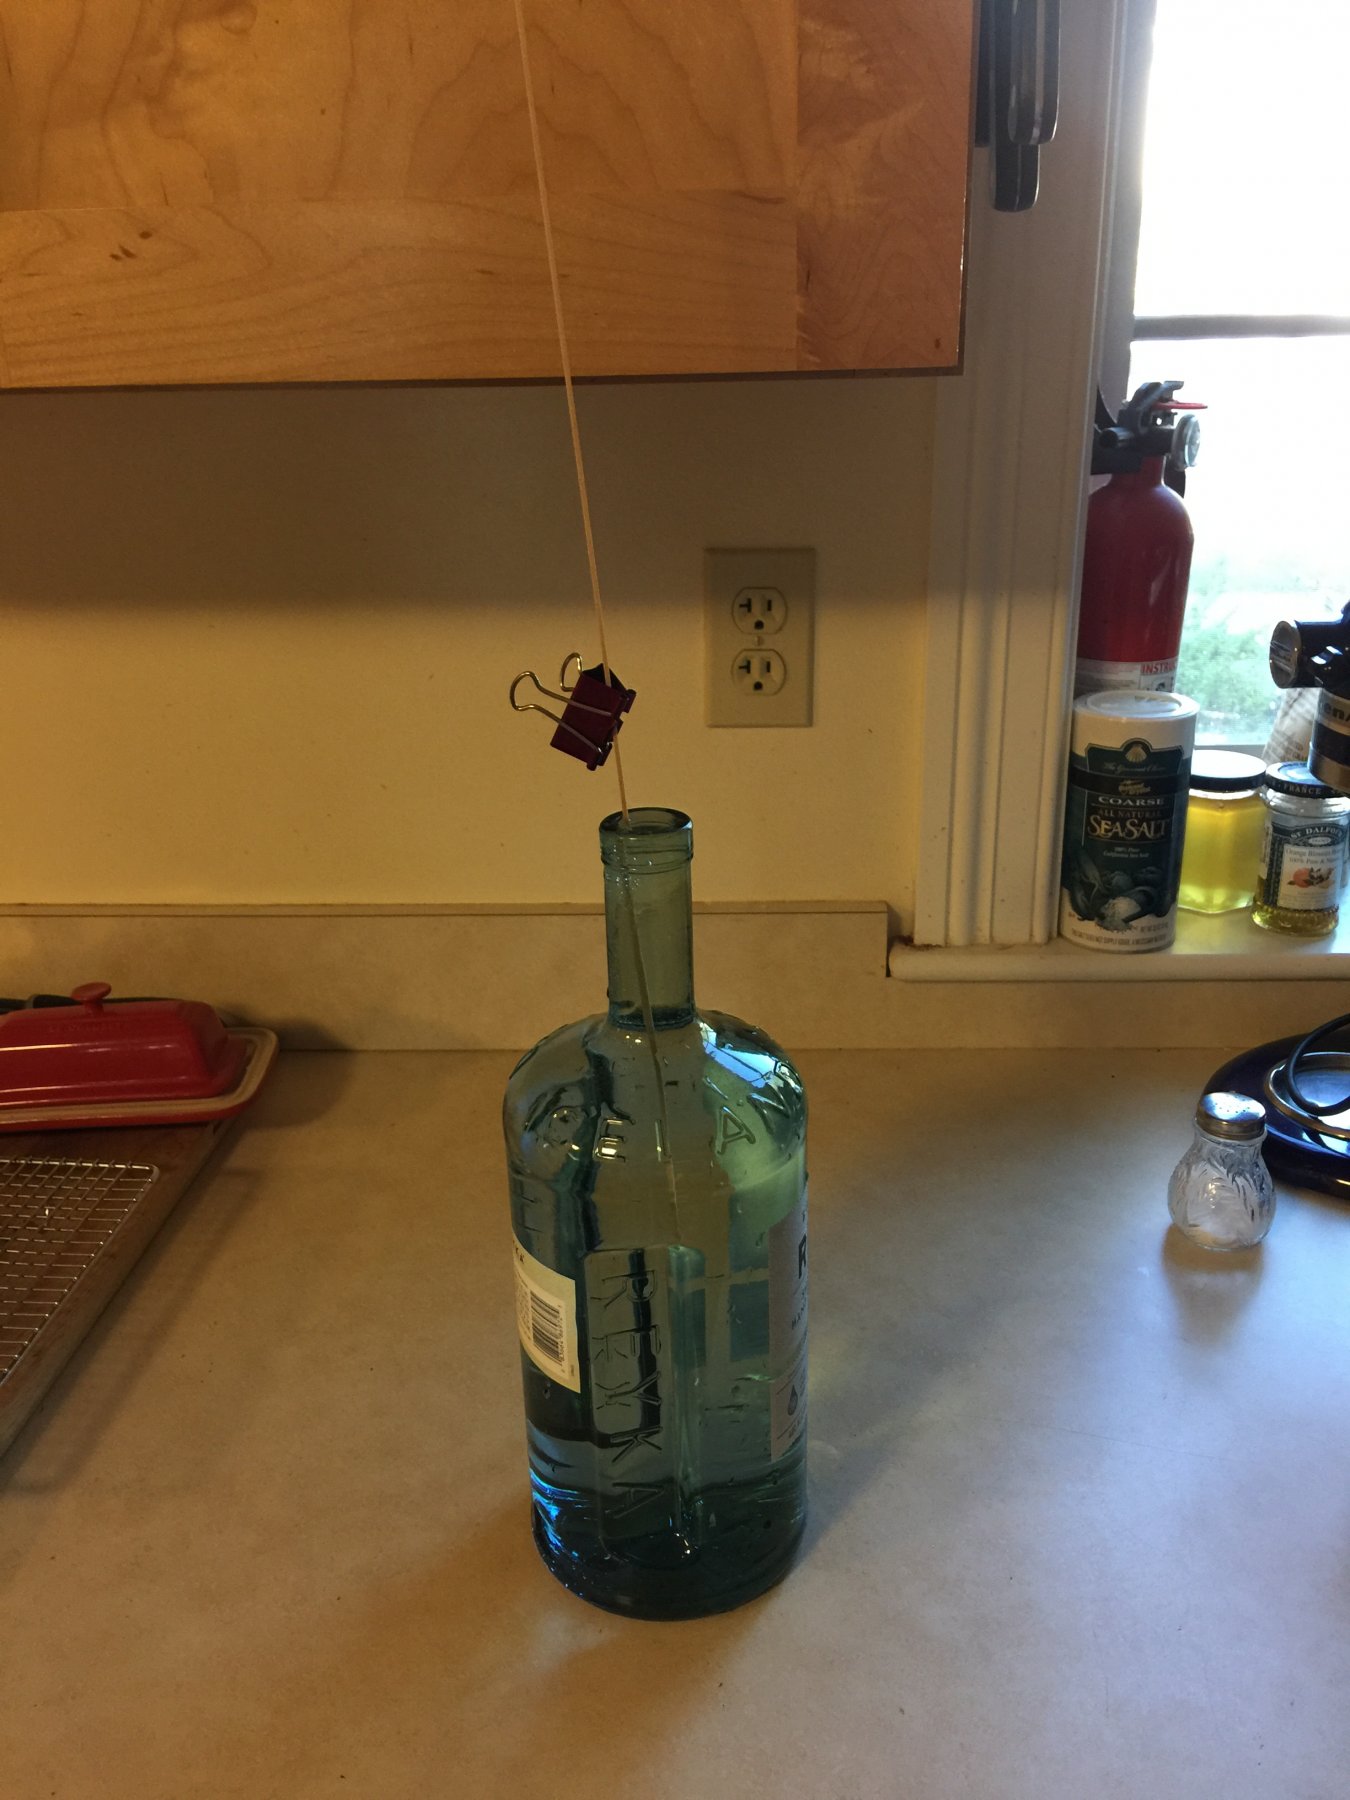
The adventure DOES start! Had some time to figure out that an empty vodka bottle makes a fine way to soak rabbet strips for a keel ;-) It is now curved around the keel and waiting to dry before I glue it in place. After that, onto the rabbet itself. In the meantime, I am starting to hunt around for filler block material. I was thinking balsa, but not quite decided. Any commentary or advice on this? Perhaps something stronger would be appropriate? ~john

- 90 replies
-
- 7
-

-
- syren
- model shipways
- (and 1 more)
-
Nice! Those ribs are so time consuming. There were points when I was almost just DONE with the whole model thanks to these ribs. Well, now you are on your way! ~john
-
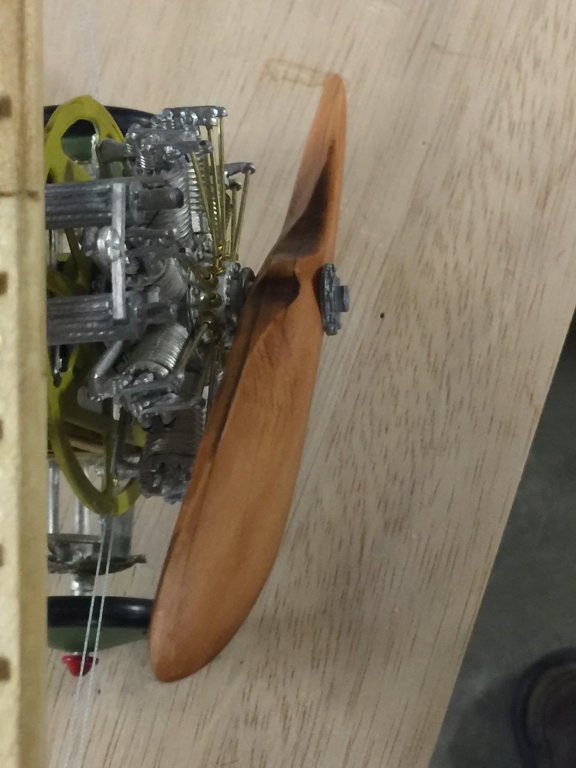
Hi Mike, Pics of the prop for you. Counterclockwise rotation when viewing the nose of the craft (as if it was going to run you over ;-) (figure 5 in the instructions). Their prop is thinner than mine (and likely more accurate). The side view shape is correct. I could have spent more time sanding and sanding and sanding.... With this engine, the prop was attached to the engine solidly, and the WHOLE engine rotates. Amazing to see in real life actually. Very noisy things. Here's a vid: ~john


-
Hi Mike, Sure. I'll do that later in the afternoon when I get home. There are some (not many) images of the prop being made in my build log here, I think on the first page of the log. More to come later today. ~john
-
Thanks, everyone! I am looking forward to this build as well. The keel is still a little itty bitty bit curved, but I think now manageable with filler blocks. I need to get some wood.... that will be the weekend mission.... some 1"x2" strip to use. ~john
- 90 replies
-
- 1
-
-
- syren
- model shipways
- (and 1 more)
-
I started with wood glue PVA and then tired of that rapidly and got some 15 second CA. It was just enough time to get the pieces in place properly before setting ;-) DO make a jig: it helps a lot.
-
Mike, PS - with the sides, note that the side facing the aircraft is flat. The curve starts at the hub and tapers to the tips. Ignore the angle of the prop blade when working on the side view.
-
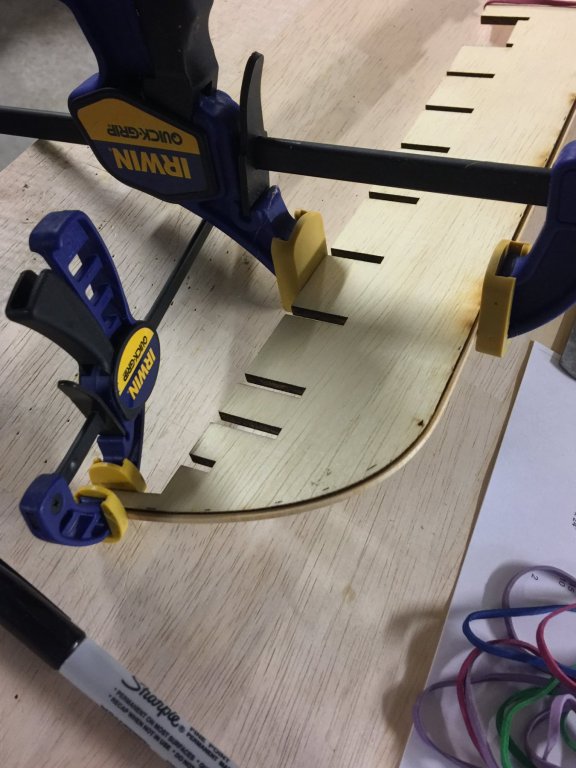
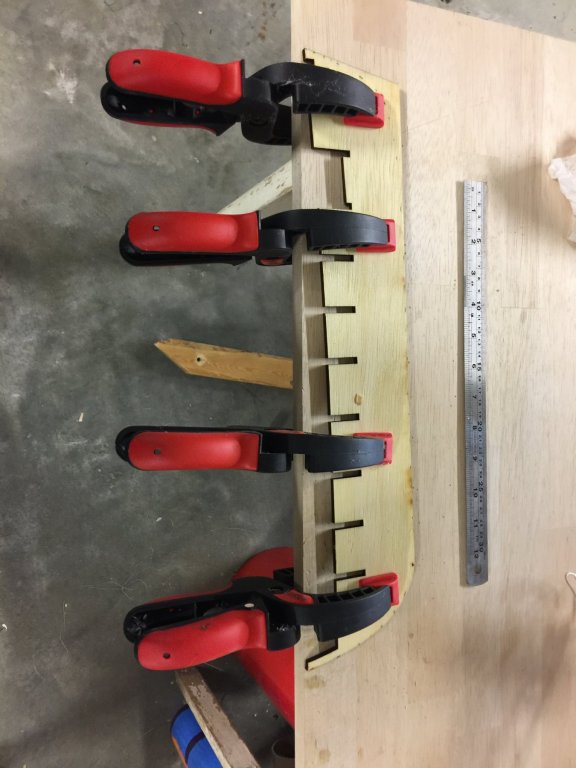
Hi Mike, I started by gluing the layers altogether being careful to get glue on every square millimeter of the surface before bonding. A couple of days later, I unclamped the layers and then shaped the side view first, tapering evenly to the tips. I started that using a sharp pocket knife, then ended up with rough sand paper. I then worked on the front/back views of the prop. It might help to take a pencil and sketch in the shape near the central hub. Go slowly with this part. I used an XActo blade (11) and then medium sand paper until I was close. The whole thing was then finely sanded and stained/varnished. If you've not made one before I suggest getting a block of balsa or other carve-able wood and giving it a whirl.... mistakes are easy with the prop. Look at lots of pics online for the Sopwith prop. ~john
-
I think I was lucky on the wood, as I ordered the kit well over a year ago - it has been sitting on the shelf calling to me from time to time. Not sure that I'll overtake you.... this is going to be one LONG build for me. ;-) Cheers, ~john
- 90 replies
-
- 1
-
-
- syren
- model shipways
- (and 1 more)
-
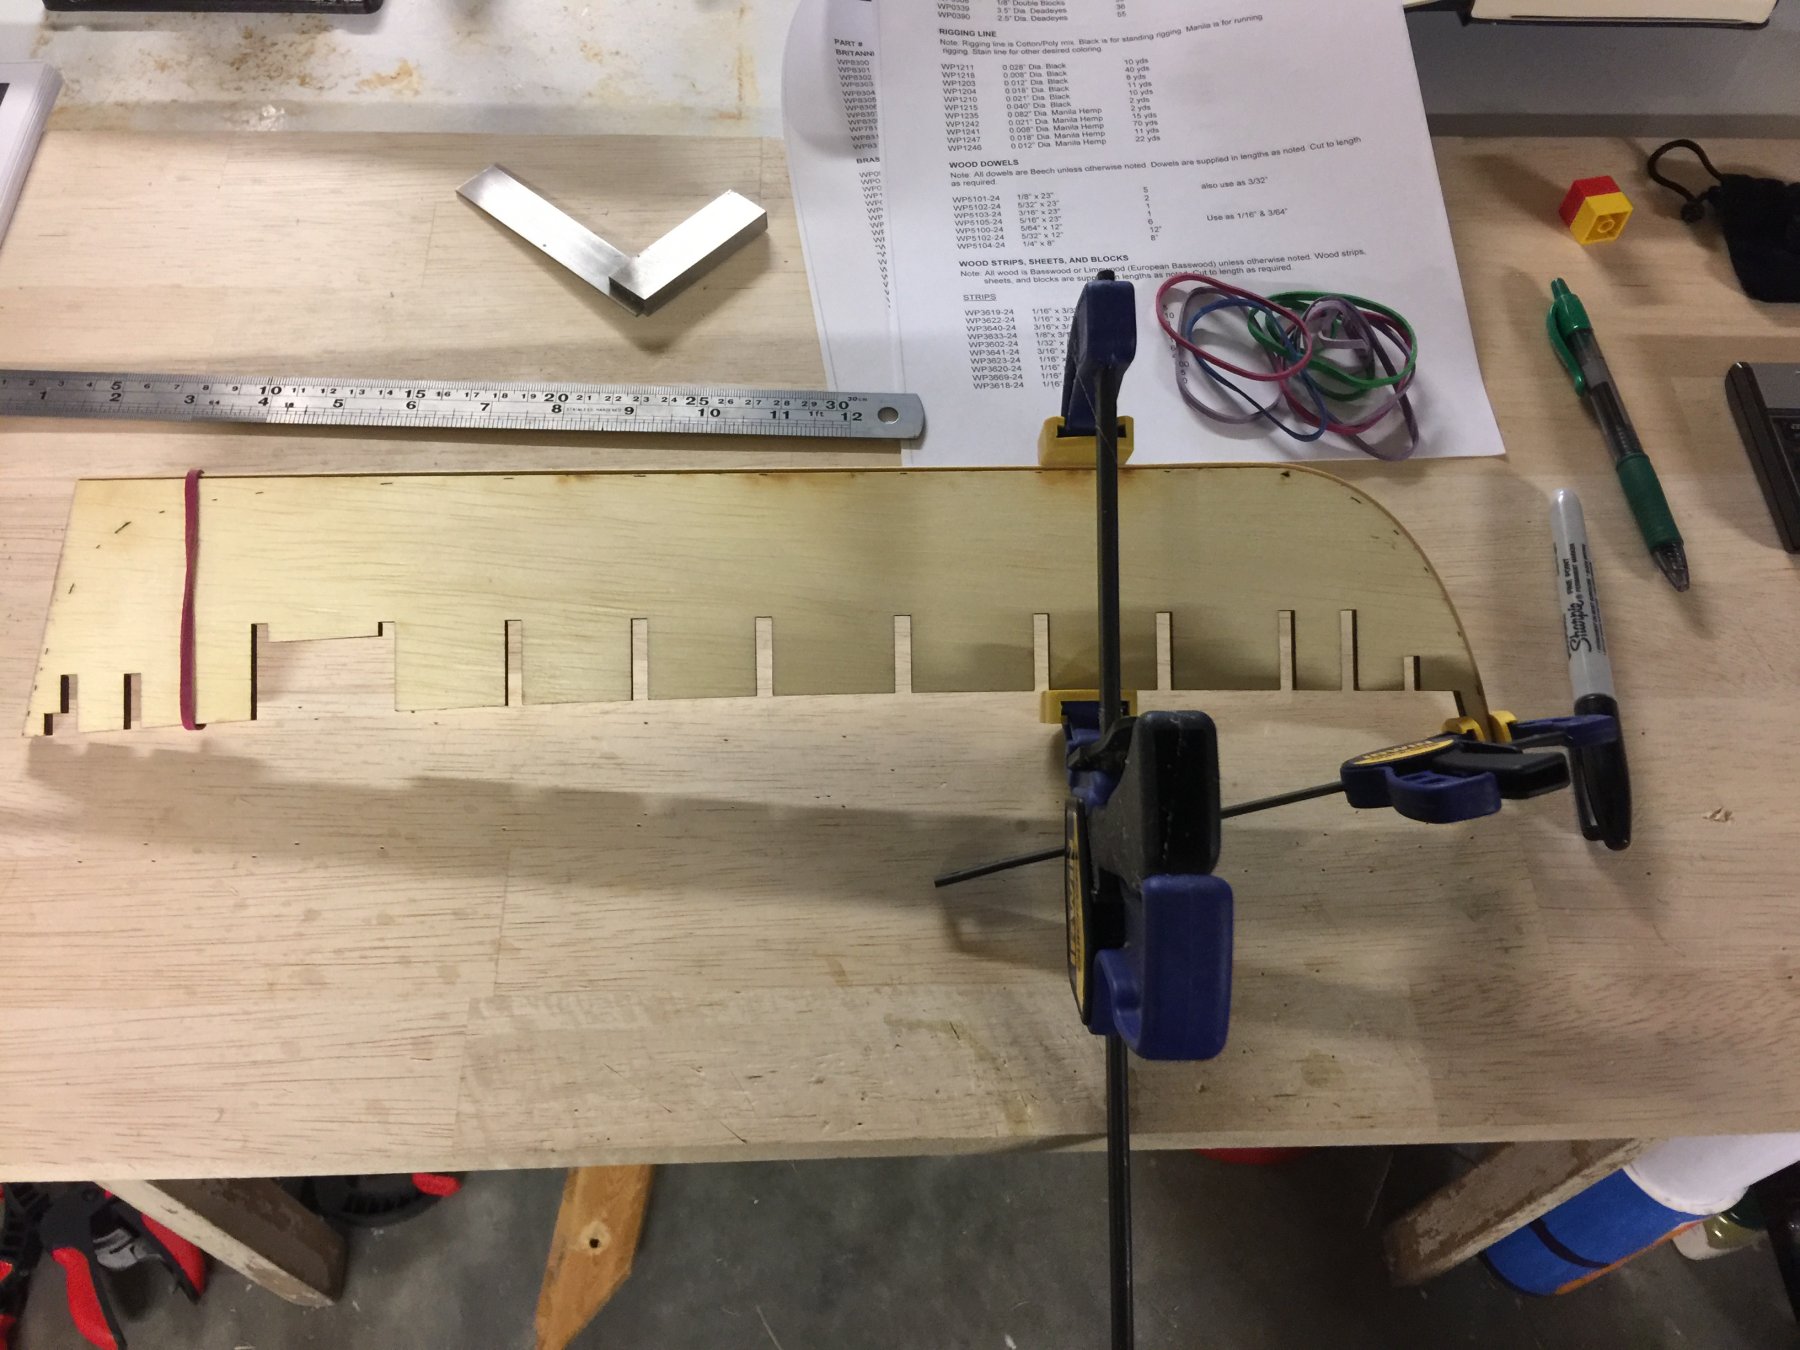
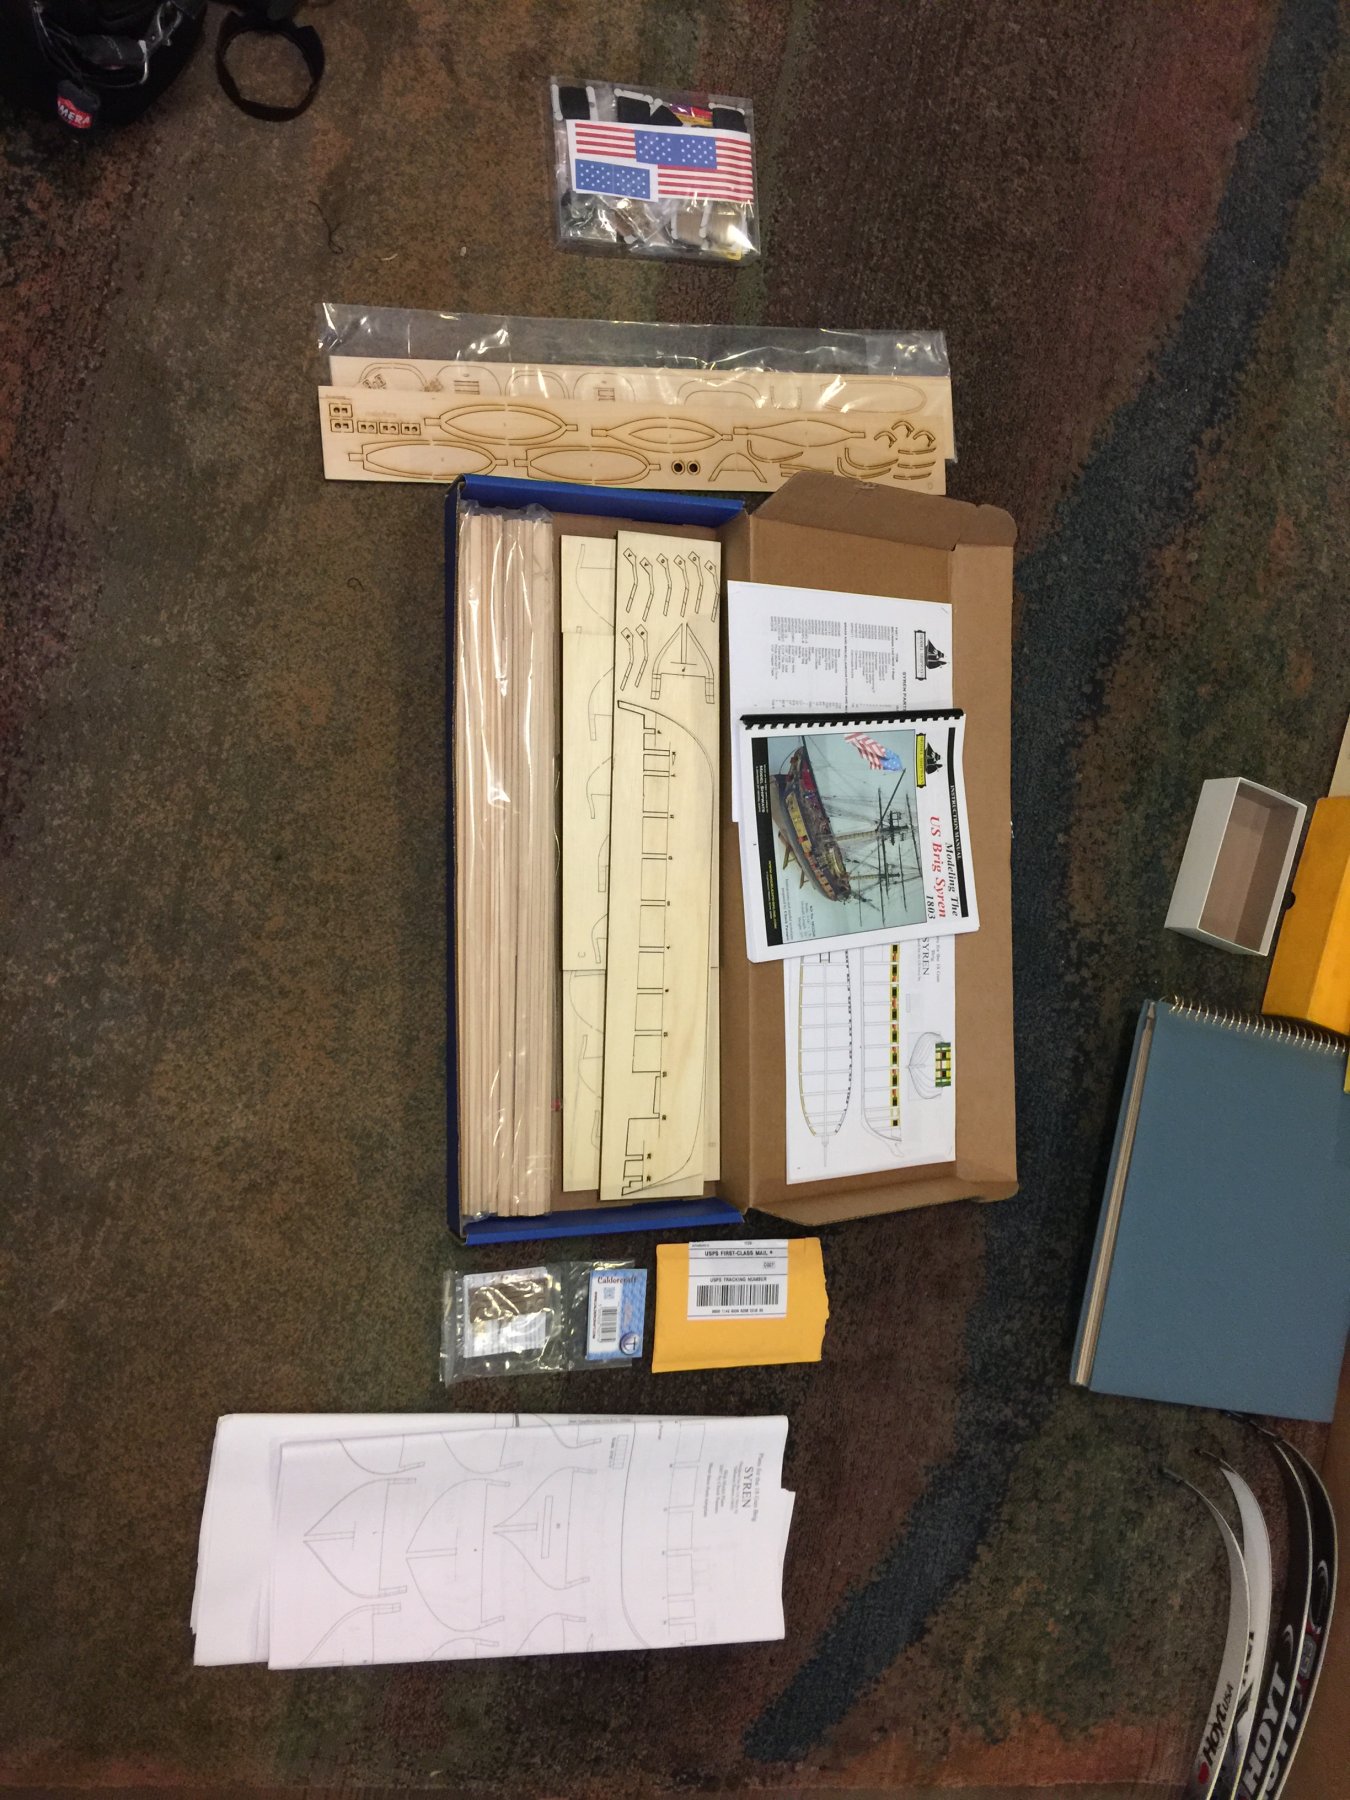
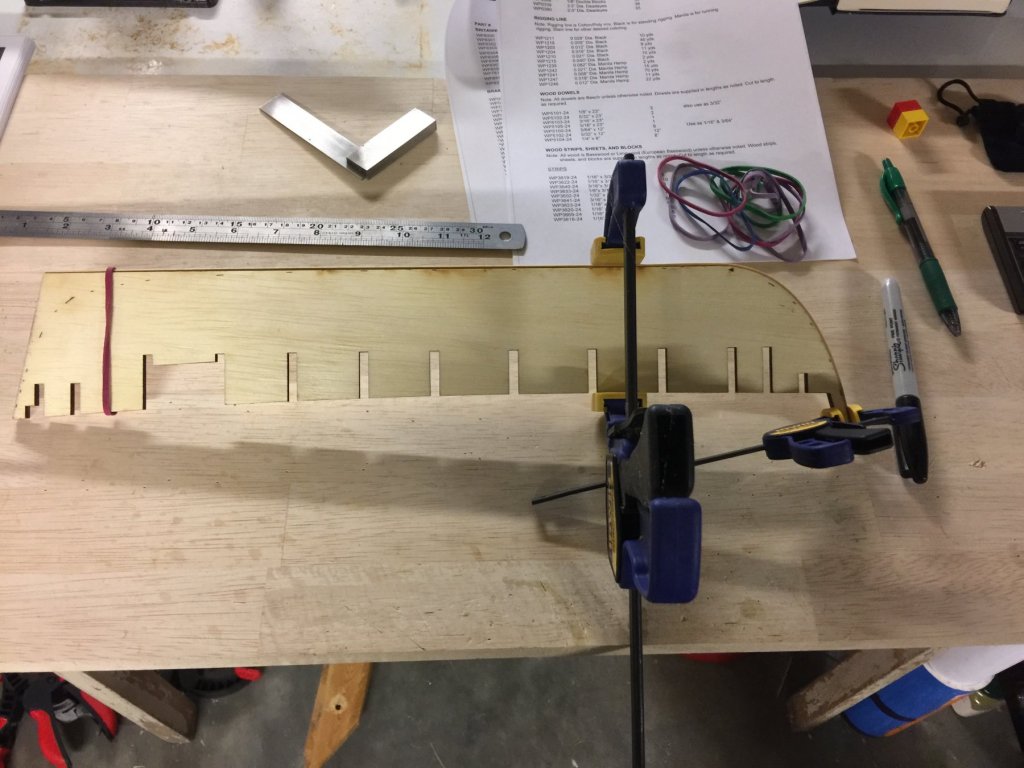
All, Back to ships! With so many excellent builds of the Syren here on the site, I have decided to put my skills to the test and give her a whirl. I'll need all the help I can get, as this will be my first plank on bulkhead build. Looking through the other logs, I can tell there will be more scratch work than I have done to date, too. I am really looking forward to the journey! All parts have been accounted for. Plucking out the keel board, the very first order of business is to straighten it out. There is a slight curve to it, so I gave it a quick soak in water and have clamped it flat. We'll see how it looks in a couple of days when dry. The curve is slight, so filler blocks would very likely be able to set it right, but I like to make things a little easier on myself. Making those filler blocks is something I am not quite sure that I am looking forward to doing. Well, I can say this: my woodworking skills are going to get a workout! Onward! ~john

- 90 replies
-
- 5
-
-
- syren
- model shipways
- (and 1 more)
-
Hi Mike, Found you! Looking forward to your build here. ~john
-
Hi Jeff, Thanks! I enjoyed the build a lot. It got me away from ships for a while and I am now refreshed enough to want to take on the Syren ;-) Thanks also for the search tip for figures. I did some serious hunting for 120mm scale WWI figures and came up with a lot of soldiers and some German aces.... I kept hunting around and found three resin editions of WWI pilots from the Michigan Toy Soldier Company michtoy.com : Eddie Rickenbacker, Billy Bishop, and Frank Luke. They haven't arrived yet, but I'll post some images once I get them in and painted a little..... ~john
-
Mike, Yep - I had to resort to using epoxy for the engine parts. CA didn't work well on the large cylinder heads nor attaching them to the hub. The rest of the small parts, I used CA. Looking forward to hearing how your build goes! ~john
-
Mike, I think you are replying to Scott, not me ;-) I was also interested in "pinking"..... Maybe "planking? Not sure. Maybe he meant this: https://www.craftsy.com/blog/2013/05/seam-series-serger-and-pinking-seam-finishing/ Scott? ~john
-
Yep - exactly! SilkSpan and dope are what I was thinking. Then layers of dope with added paint until the desired level of darkness is reached. Some things I was thinking about: What to cover? Top of the wings, but not the bottoms? One whole half of a wing, top and bottom? Half the fuselage, like just the left side? So many options. I have lost it now, but someone had done this kit with top covered and bottom uncovered.... then had it displayed on a mirrored base. ~john
-
Mike, Thanks for the kind words. I think you are in for a nice treat: the Sopwith is a nice build. Feel free to reach out if you need anything. I am still thinking about a half covering for it... I have a pile of SilkSpan, so it is calling me....