AON
-
Posts
2,772 -
Joined
-
Last visited
Content Type
Profiles
Forums
Gallery
Events
Everything posted by AON
-
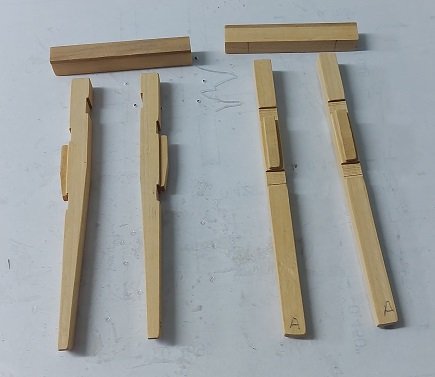
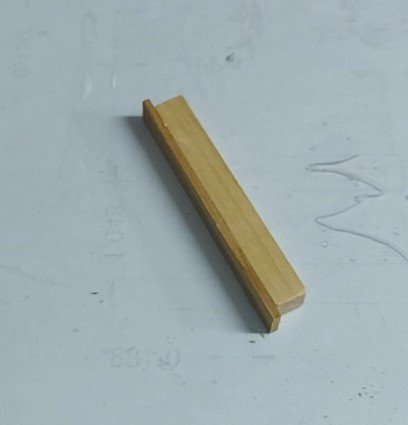
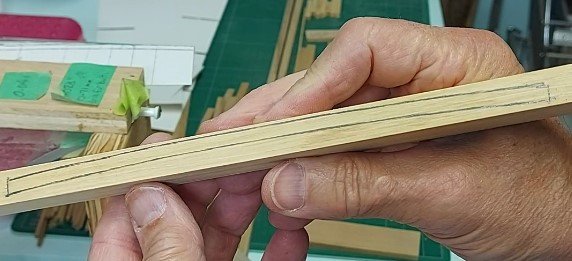
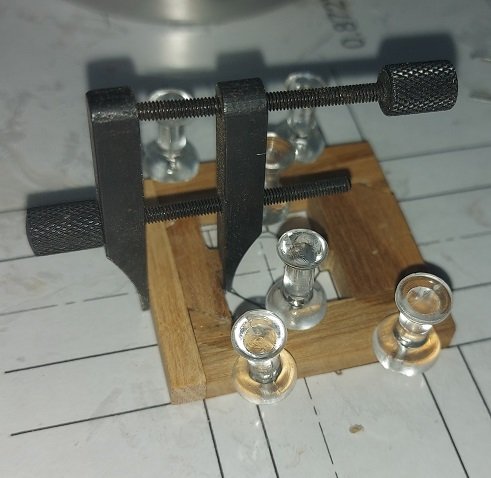
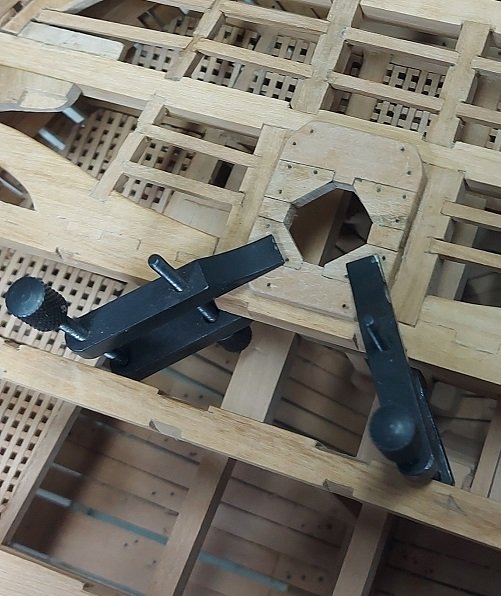
 A picture is worth 1000 words! The plan showing the lower cleat and the forward pin bevelled on the forward (right) side whereas the aft pin is bevelled on the aft (left) side per all other references A photo of my parts to date.
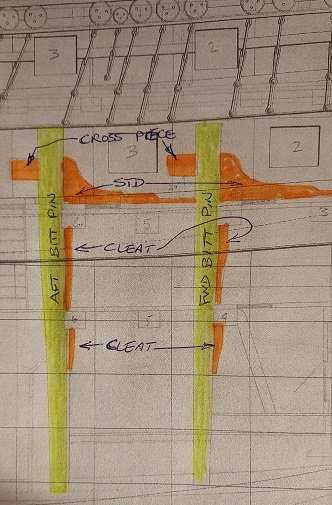
-
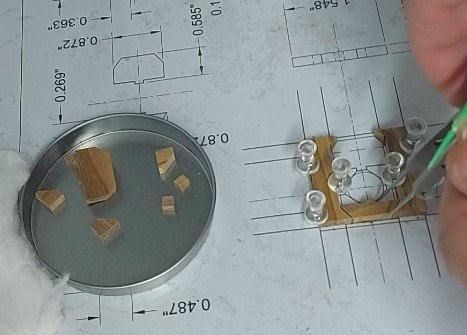
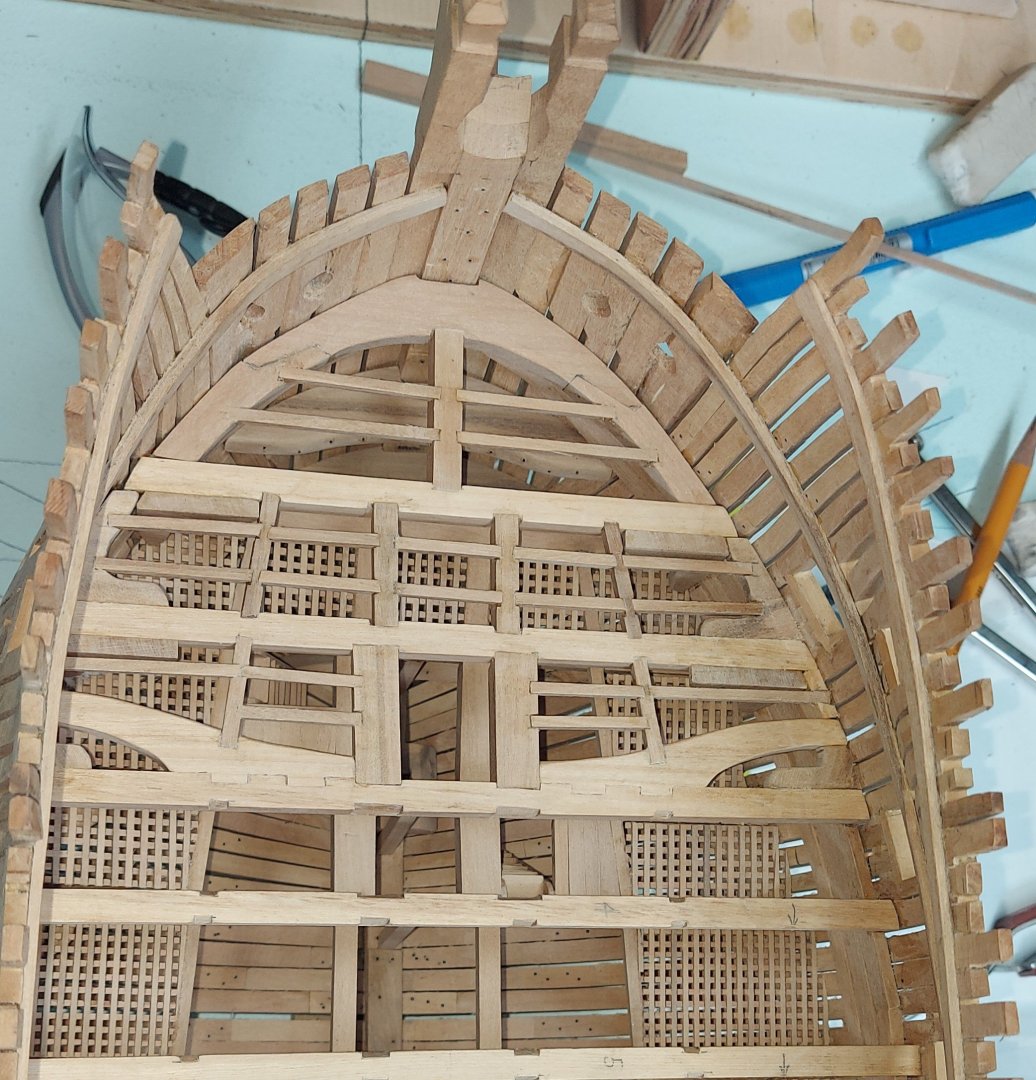
Presently working on the gun deck riding bitts. The plan shows the bitt pins, cross beam, upper cleats (below the gun deck beams) and lower cleats (below the orlop deck beams) and standards (knees). The contract only mentions the upper cleats as do all other references (books). The plan also shows the tapering of the bitt pins but the forward pins are tapered opposite to the aft pins and all other references (books). As it doesn't make sense to taper the forward side of the forward pins as this makes it not set into the orlop beam, I didn't do this. Presently the cross beams are cut and the elm backing piece is glued on. As I haven't any major pieces of Castello left I am now using Pau Marfim (Pau Amarello) wood stock. It is lighter in colour so I found some small pieces of castello to use for contrast as the elm, hence the light and dark pieces. The ends have since been trimmed back. The bitt pins are all made, notched to fit into the deck beam by 2" (0.03" at 1:64), and the head has been chamfered 0.03" at 45°. The (upper) cleats are made, and with the pins dry clamped to the deck beams, the cleats were glued and clamped to the pins. I needed to use my spring loaded tweezers to get them in, and again to get a clothes pin in to clamp them on to dry. My fingers wouldn't fit in the space. Still some work to do to finish these off. There is some shaping to the pins and cross pieces to be done where the anchor cable is meant to wrap around them. Then I have to make the standards and some wire hooks and eyes for the cross beams. I have a problem with how the ledge beams and carlings are supported. The contract reads the carlings are under the standards. I imagine a block was added to the aft face of the bitt pin for the carling to rest on... or the bitt pin had another notch in it to receive the carling. The latter makes it difficult to bolt the bitt pin to the deck beam through the aft face. I think I'll be adding support blocks.
-
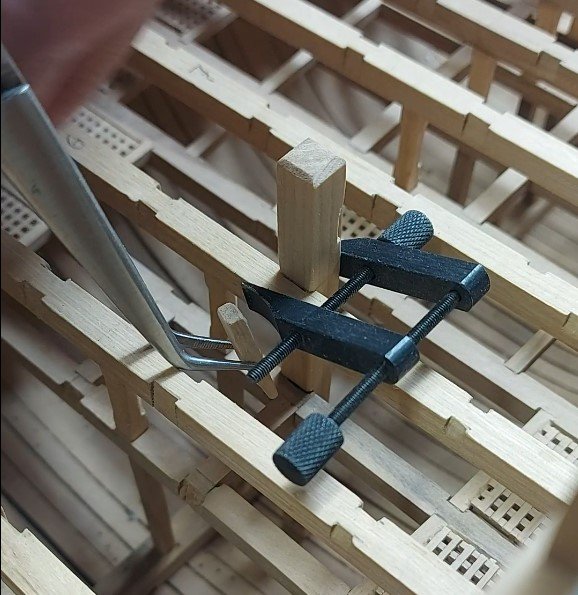
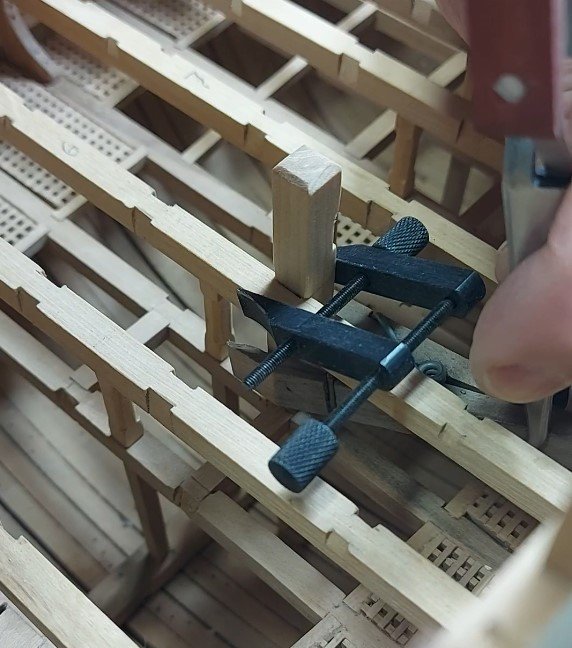
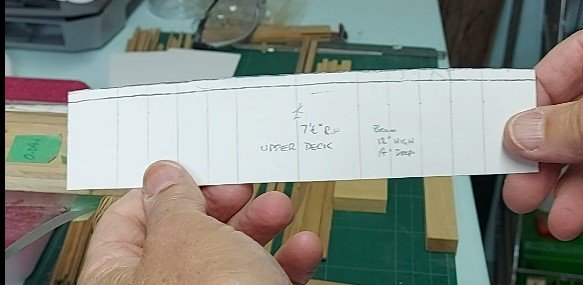
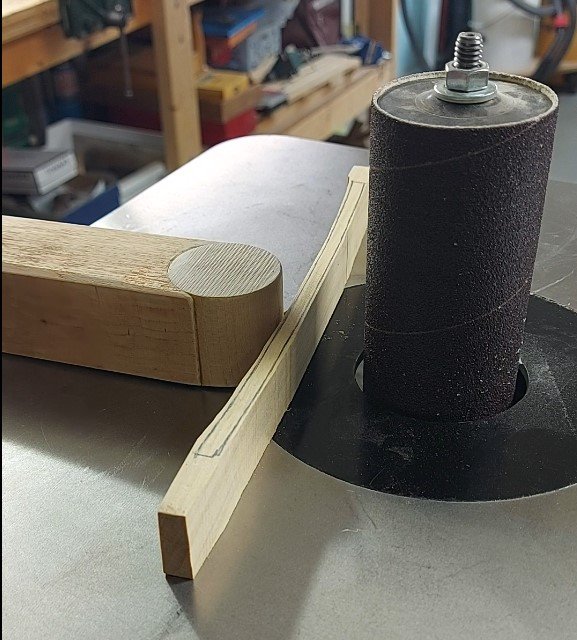
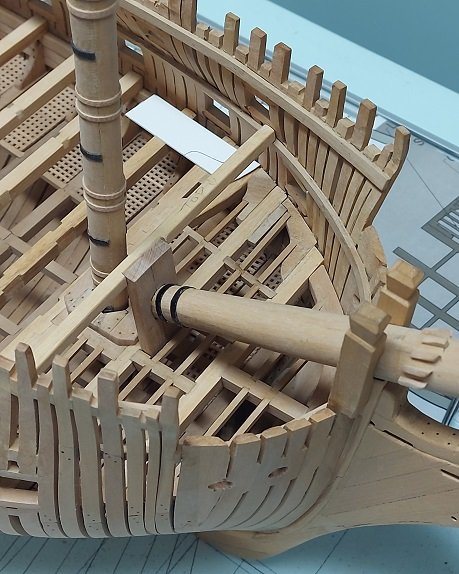
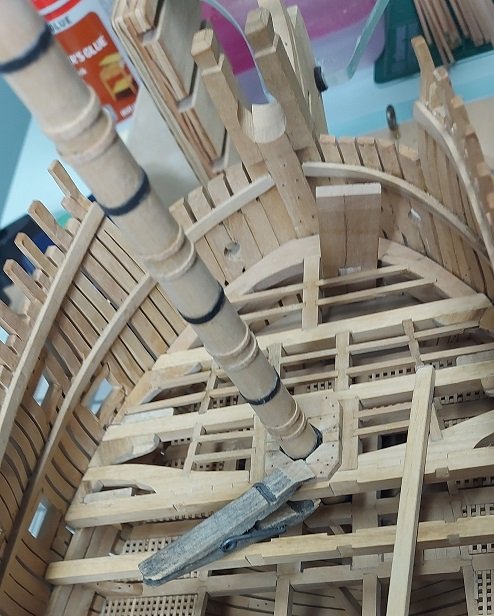
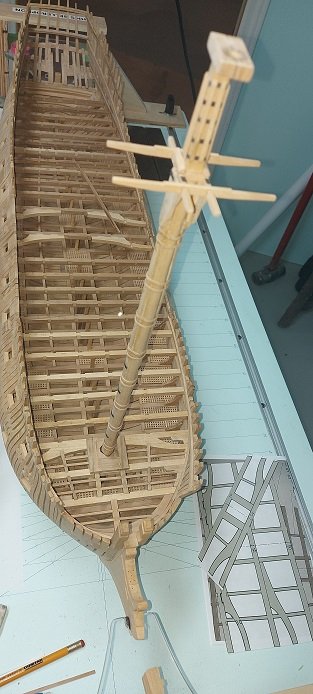
Then I turned to installing my bowsprit step. It is supported on the gun deck beam forward of the partner and the upper deck beam above. I needed one upper deck beam to set it at the correct angle assuring the foremast would be clear of it all. The beam is 12” high and 14” deep with a 7-1/2” rise. Some stock was cut and sanded to thickness. The card stock template was traced on one end of the stock to outline the beam and I cut most of the waste away on the band saw. Using a “resting block” to assist in holding the stock parallel to the sanding drum and at a right angle to the base plate, I slowly sanded the stock to the line and finish up with a sanding block. The individual beams were cut from the shaped stock. The beam was cut to length to fit the location. After considerable time and fuss to once again get the alignment correct, eyeballing the bowsprit from stern centre counter timber to the knight heads at the stem, the beam was notched to receive the bowsprit step. In the image below the assembly was temporarily glued with small drops of PVA, clamped and allowed to dry up for a final alignment check. Moving aft, I will next be installing the bitt pins, cross pieces, standards to the bitts and a couple of small scuttle coamings… along with more lodging and hanging knees and ledge beams. I also see in the contract that there were twelve standards (standard knees) on each side of the gun deck. These go between select gunports on top of deck beams.
-
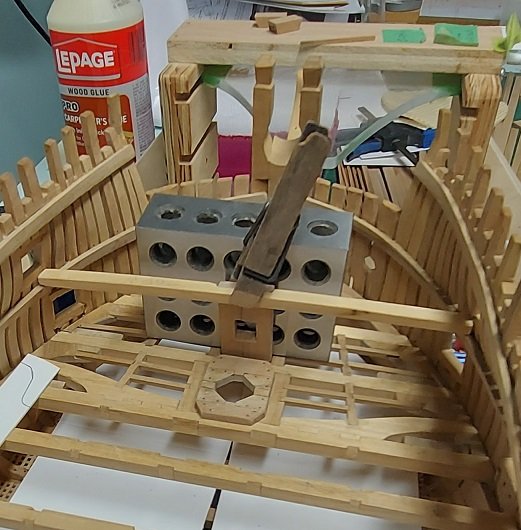
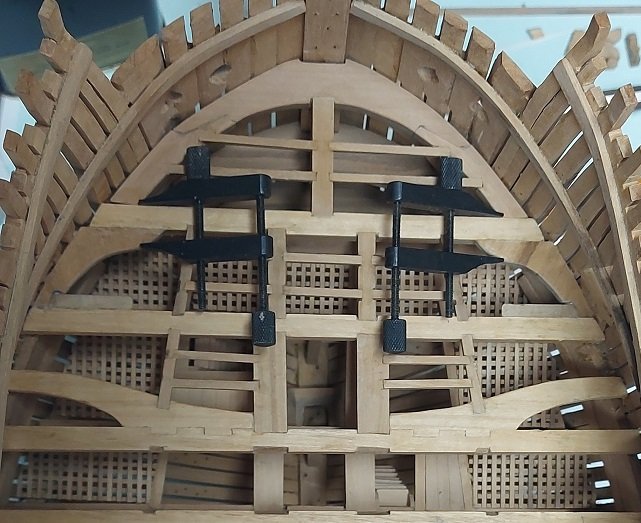
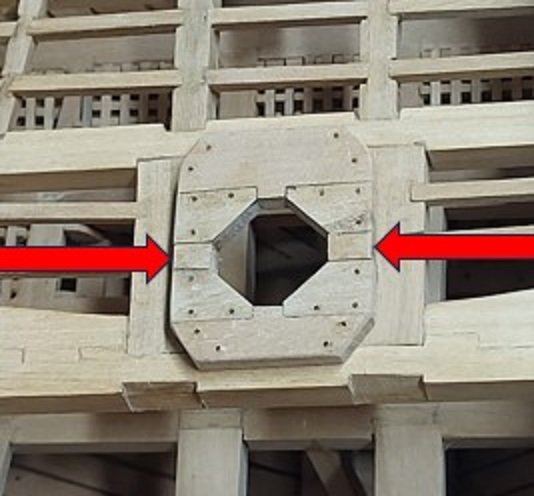
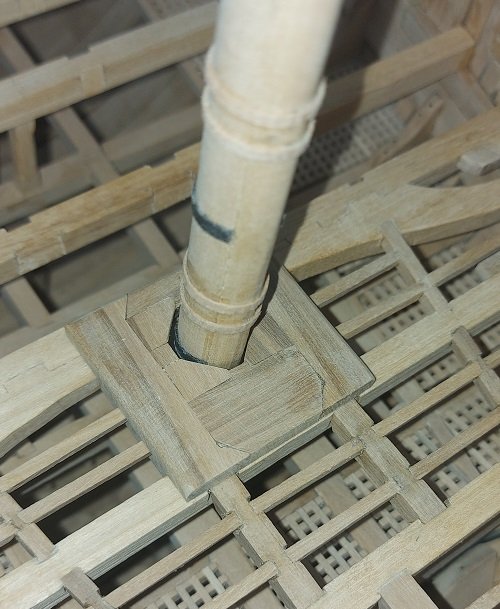
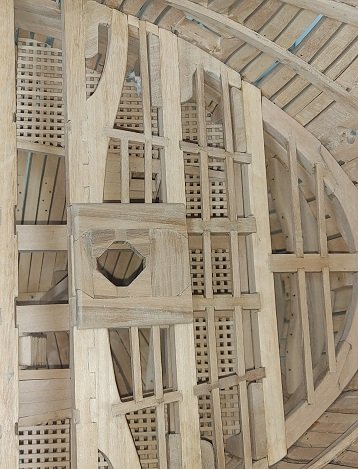
Quite a bit has happened since my last post. The lodging and hanging knees were removed as they were backwards and have since been replaced as can be seen below. The foremast partner has been remade for the third time. In the images below you can see how I built it on top of the pattern with a sheet of plastic in between so any excess glue wouldn’t stick the paper to the wood. I clamped the outside pieces down with push pins/thumb tacks and squared and clamped the end piece with a left over short square beam piece. I drilled with a #70 drill bit and added faux bolts (black monofilament fishing line roughed with sand paper to allow the glue to grip it). The topside outer edges were rounded off with sand paper and then placed on the beams. NOTE: the small square blocks (red arrows in photo below) do not belong there. The carling should be raised slightly and steps chiselled into them for the partner to rest into. The small blocks should be part of the carling but I simplified it by not raising the carling, not chiselling steps, and using this small blocks as the spacers. With the partner clamped to the deck beam using a wooden style spring clothes pin and the foremast installed, the alignment was checked by eyeballing from the stern, aligning the tallest centre counter timber through the centre of the mast and moving the partner so the mast was centred between the knight heads just beyond (at the stem post) and seen on both sides of the mast. This involved walking away and coming back to it for about 3 days. I needed it to be correct and agonised over minute adjustments… likely much more then I need to. Then I tried to devise a fool proof method to allow me to remove the partner, add glue and put it back in exactly the same location. I didn’t want to clamp wooden beams to either side as excess glue might fix them to the structure below. I tried pins but could get the darned things in! I resorted to pencil dots. Got it glued and clamped.

-
Yes I have a number of errors. 1. the partner assembly has two extra parts that need to be removed. 2. my lodging and hanging knees are reversed position and I need to tear them out. ouch! such are the experiences of a novice. I will go back and add a note to some earlier postings.
-
It seems I may have made a blunder with the foremast partner. I may have added the two outer fore-aft running pieces and they shouldn't be there. What I thought I saw on the drawing seems to actually be the carlings running between the deck beams. I'll give my head a couple shakes and look again after lunch. If I'm correct, they are easily removed.
-
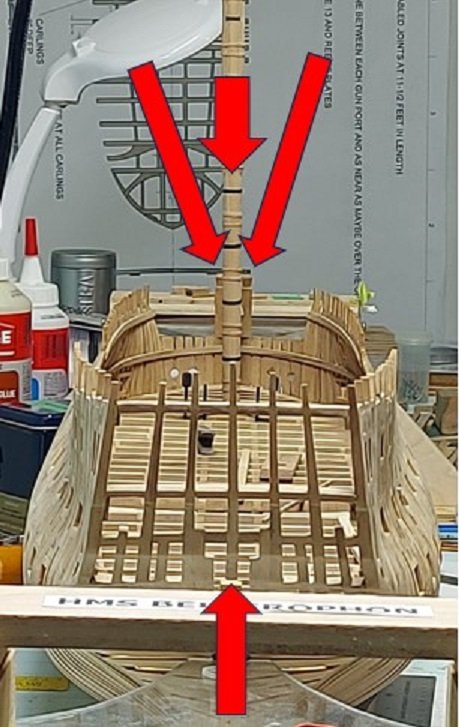
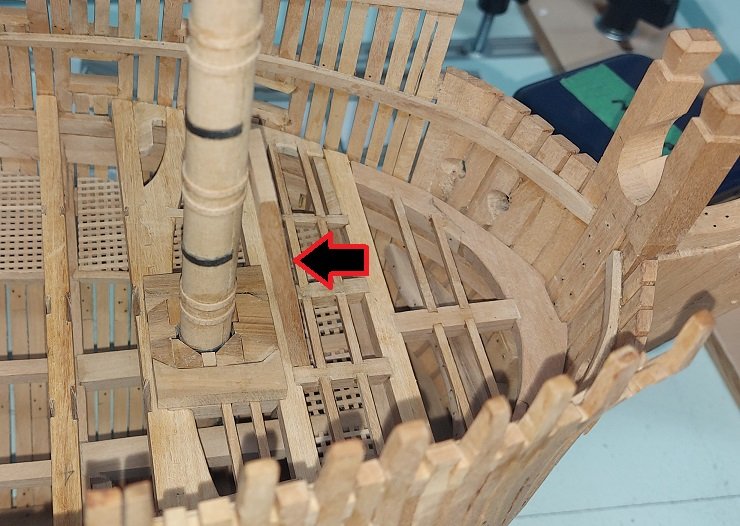
NOTE: MY PARTNER IS WRONG AND WILL BE CORRECTED AFTER POST #1711 Made the replacement partner and dry fitted it on the deck beams with the foremast installed and the bowsprit step set on the beam and its present extra length leaning on the mast. The arrow points to it as it seems to blend into the background at this angle. The step is not finished as yet. It needs some sanding and rounding off the four top outer edges. It will also rest slightly forward of where it is now but I need to make one upper deck beam to support the bowsprit step so it can be cut to length and prove the assembly location of the foremast partner. That is my next item to make. I didn't call it a mast this time! But I will ....
-
The reality is, I'm just trudging forward...
-
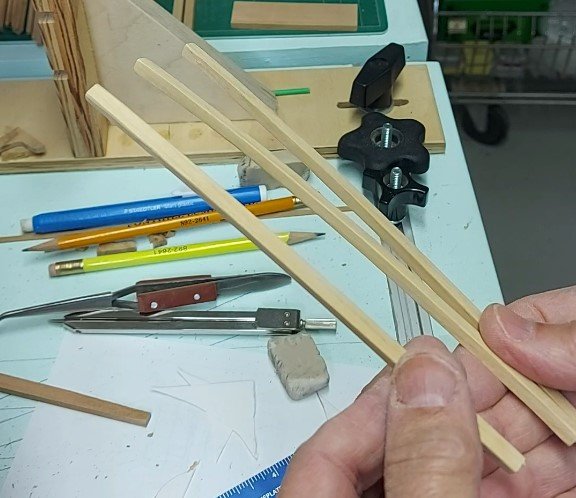
Thanks Tom but I owe it to the masterful drawings in TFFM volumes that I copied from. I sanded down the forward end of the partner, and after placing it and the bowsprit (mast) step I decided I could do better. By the time I do the partners on the weather decks I'll be a professional! The new stock is sanded to thickness, cut in half and rubber glued together. I'll rubber glue the templates on tomorrow and then cut the pieces out for assembly. Let's hope I don't screw it up.
-
Well, here I am!!! 😁
-
Yes. It is a mast but not thought of as one.
-
NOTE: MY PARTNER IS WRONG AND WILL BE CORRECTED AFTER POST #1711 Some images from my making of the Gun Deck Foremast Partner First is of all the various 10 pieces. I have a cork board I can pin pieces to. I laid my plan on it, a layer of clear plastic over top and pinned my parts down onto it. The plastic keeps the glue from sticking the part to the paper. Then is the partner assembled and placed on the beams (dry fitted). NOTE: MY KNEES ARE INSTALLED INCORRECTLY AND WILL BE CORRECTED AFTER POST #1711 Next a fitting in place with the lower foremast. It just slipped through with minimal clearance. Problem being the forward part of the partner should be 1/16" or more back from the forward edge of the beam under it. The bowsprit mast step needs clearance here. I could sand it back. With the bowsprit mast step leaning backwards over it and the mast itself in place and two decks installed above I suppose no one will ever notice the slight "fix". Or I could just do it over. I'll let you know what I decide.


-
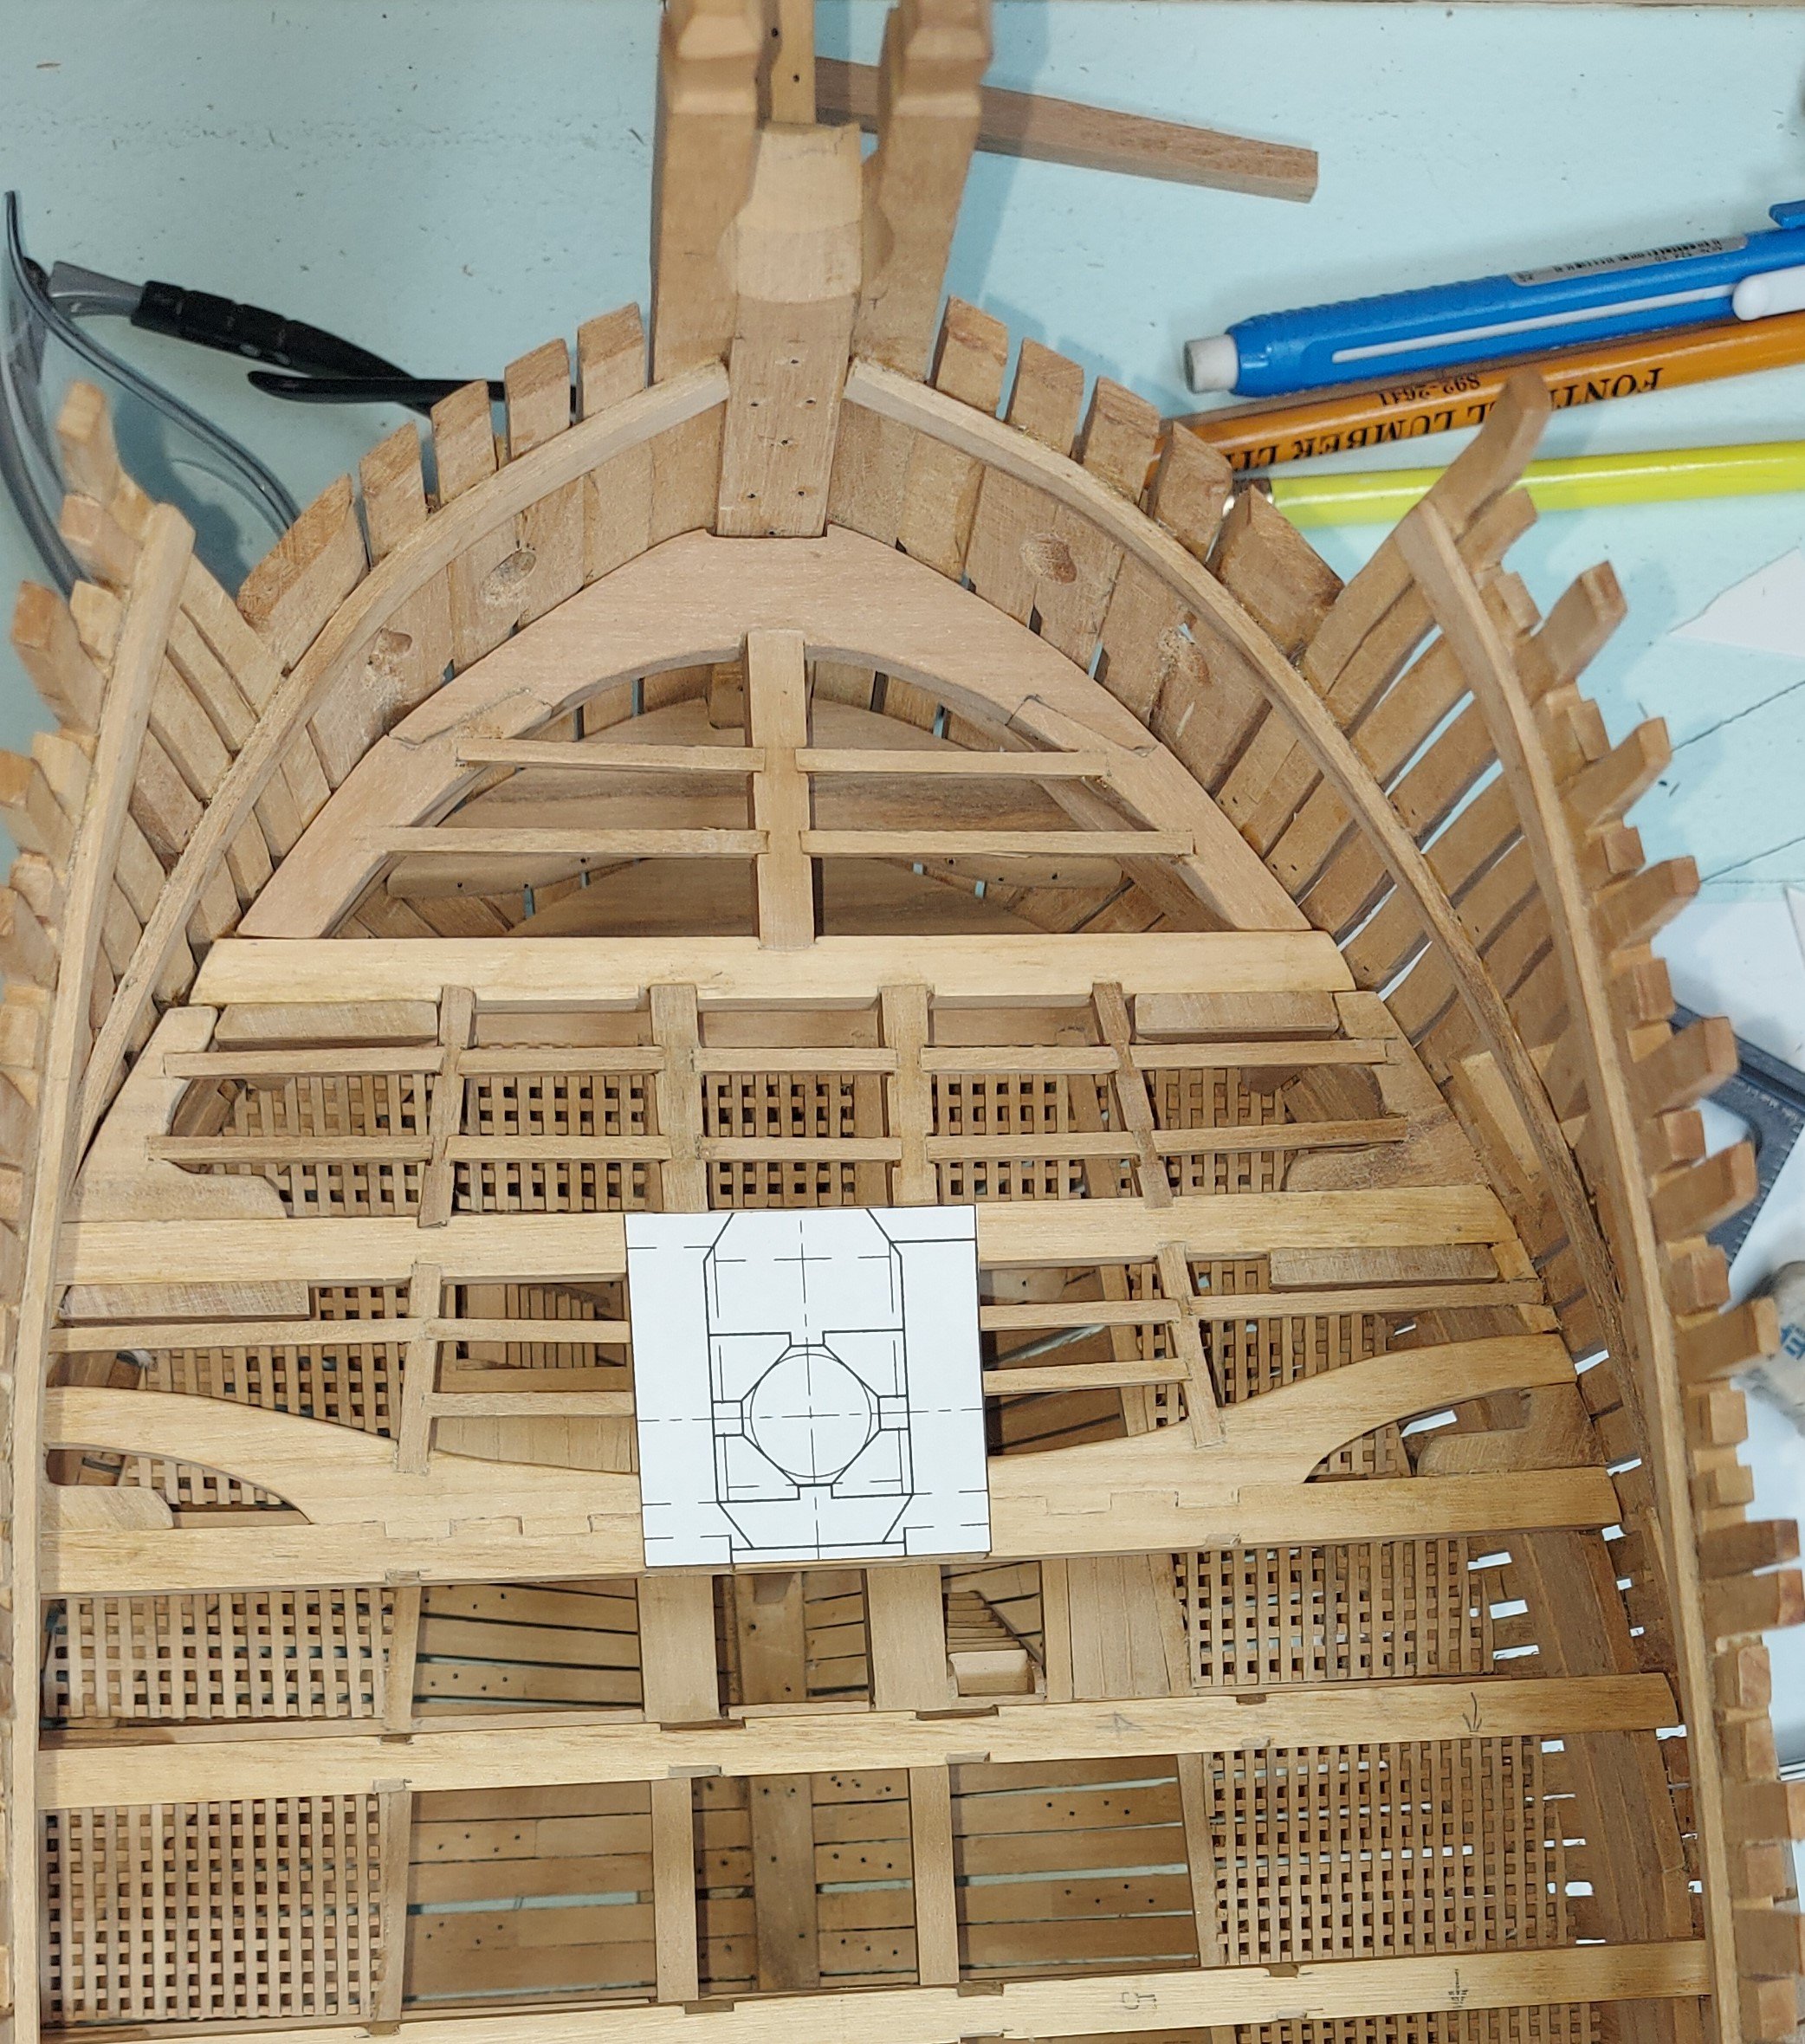
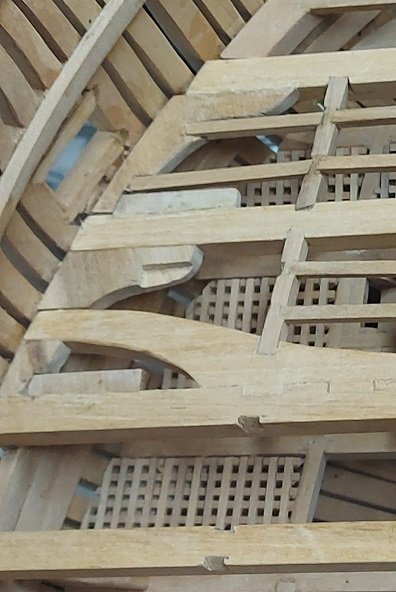
Cutting and fitting the carlings. ledges, lodging and hanging knees is slow going. Might have a lot to do with distractions! As I work back I'll be adding some additional pieces. Here you can see the foremast partner template I've just made. Hope to be cutting tomorrow as I already have the material sanded to thickness.

-
Surprisingly it does kick it up a notch.
-
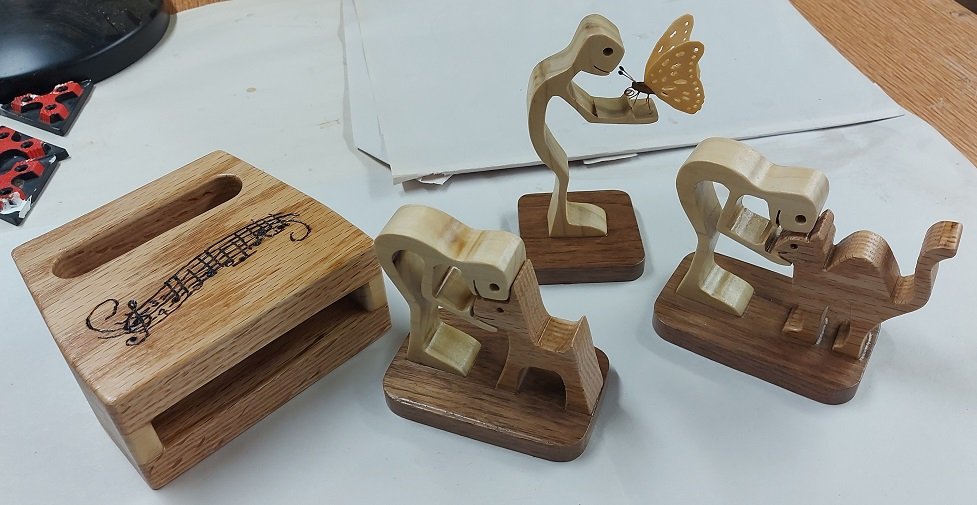
I am making and installing my ledgers, lodging and hanging knees beginning at the bow and working aft. I may need to install one upper deck beam to secure my bowsprit step. Then as I work further there will be riding bits, capstans, grating and coamings and mast partners. For something different to look at, I completed my gifts and I've decided to give them to my family members at our Thanksgiving dinner next month (3 weeks), not waiting for Christmas. The wood block is a cell phone amplifier for my son, the dog for my daughter, cat for my daughter-in-law and butterfly for my wife. Hope the like them.
-
Yes. After having been mentioned earlier above I did a search and that posting for the quarter deck and forecastle came up... but were there scuttles below those two, on the upper deck feeding to the capstan on the gun Deck?
- 18 replies
-
- 2
-

-
- capstan
- small boats
- (and 1 more)
-
Thanks. What a mess of lines! eh? I'll try and contact them to see if they can provide a close photo of where the lines go but I have a strong suspicion they are just tied off.
- 18 replies
-
- 3
-
-
- capstan
- small boats
- (and 1 more)
-
In the era the third rate had two on the upper deck and two immediately below on the gun deck. The spindle of the upper connected to the lower but could be detached allowing the lower to be operated independently
- 18 replies
-
- 1
-
-
- capstan
- small boats
- (and 1 more)
-
Ah, but there are in fact four capstans. Those below on the upper deck. At the time the upper and lower halves could be un-joined and operated separately. Were there scuttles to pass ropes through the upper deck to the gun deck? Could they hear the orders from above through to the gun deck? Man handling the ropes might have been the easier option. I am left wondering... even though I admit not using the capstans would work.
- 18 replies
-
- 2
-
-
- capstan
- small boats
- (and 1 more)
-
Thanks you. I did read where Dr. PR wrote all of the falls would be handled by sailors. My experience has been that no matter how many people you put on a tackle line, one or two are doing all the work, the rest a great actors. My thought was possibly they would use the capstan as it would be easier work plus the pawls were a safety feature when lifting. So, Wolfram zu Mondfeld in his book Historic Ship Models, top of pg 178, was misleading. That buggers the plan formulating in my mind.
- 18 replies
-
- 2
-
-
- capstan
- small boats
- (and 1 more)
-
Thank so very, very much! (MSW rocks!) I`ve spent the better part of two days trying to find any sort of detail on how it was done in the books in my library and the only one that came close was The Fully Framed Model, vol. 4. Several other books brushed up against the subject but left me as confused. Your images above answer almost all questions. I know the larger boats could weigh more than a ton and I imagine a few men on the tackle alone could raise the boat and swing it over the side without bothering with the capstan. What would be the preferred means... man handle by tackle alone or utilise the capstans with the tackle?
- 18 replies
-
- 3
-
-
- capstan
- small boats
- (and 1 more)
-
My build is British 3rd rate MOW in the 1790-1800 era. I've just read that capstans were used for hauling anchors, installing yards and lifting/lowering boats. My interest is in lifting and lowering boats. I understand there were blocks used in the standing rigging and on the yards to lift/lower and swing in/out. I assume the lift/lower lines ran to blocks on the upper deck (below the boat stowage beams) and were joined together into an extension single rope that wrapped around the capstan. Has anyone ever read or seen anything to prove this? Would the men manning the capstan be on the gun deck below that so as not to trip over the rope and be protected by the overhead deck from the boat being maneuvred overhead?
- 18 replies
-
- 3
-
-
- capstan
- small boats
- (and 1 more)
-
Top timbers that thin will likely catch on something (shirt sleeve) and snap off
-
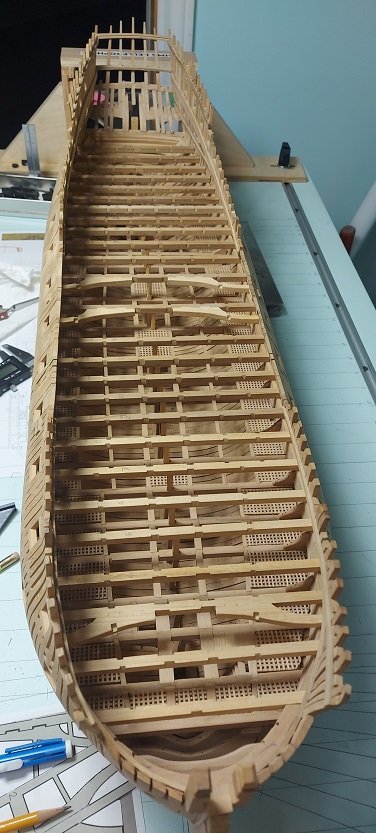
all columns installed moving on to the next challenge