Jump to content

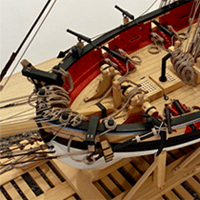
HM Brig Badger by captain_hook - Scale 1/48 - Modified from Caldercraft plans


Recommended Posts

After a longer break I have resumed the build. Next thing is to build front and rear axis of the cannons. I used a rather complicated and time-consuming method but it gave good results in the end. First I determined the diameter of the central axis the wheels will be attached on later, it is about 1,5 mm. So I cut a 1/16 square boxwood stripe segment (rather large for better handling) and glued two .5 mm thick segments on either side that will form the basic shape of the axis - 9 mm for the front axis and 9.8 mm for the rear one.
 

4F60B730-9EC2-46B4-BC2F-8AE933F67E4A.thumb.jpeg.e57bd8ce0842fa5c86b51f4dd292e8ad.jpeg


The parts are then cleaned and the length is reduced. 
 

4D5D5970-FEBB-43E3-9BB7-197B25065A2F.thumb.jpeg.94a7c9cb1223f55eef09583ec73f268f.jpeg
 

With a needle file (triangular shape) a tiny groove is made just along the outside of the center pieces. This is to use the drawplate later without getting stuck. 
 

A2DF4A65-6819-44A7-9265-D3E5777146C9.thumb.jpeg.7e39ce18858d33cff2a52a81c3c8867b.jpeg


Then the axis are rounded up, just a little sanding for the basic shape. I made myself a sanding stick with sandpaper (120 and 240 on the opposing side) attached by double-adhesive tape close to the sides.


F2D98B34-6B48-491E-B88F-0CE5C03513F4.thumb.jpeg.cc7ffaecc24811827085212f09614d77.jpeg
 

At last a selfmade drawplate from scrap is used to give the axis the round shape.


DFD4F33D-676F-47AA-9399-BEDD62E96FF9.thumb.jpeg.8db882bb37e15d30ab665d134871ecce.jpeg
 

Just sand a little and then use each step on the drawplate to finalize the shape. The groove will enable to use the drawplate close to the center pieces without getting stuck.
 

9BC684AA-0D07-4A89-A152-710DC9CF824D.thumb.jpeg.d83ab0c00d9d065333de67b779eebfaa.jpeg
 

Some final cleaning and you‘re done. Complicated but give nice results.
 

C21FFD2C-5EE1-4E05-81F5-0C091FDB0974.thumb.jpeg.75ce5c11ddfaa775c17cdd6b690579f9.jpeg


Now only the side covers are missing. After that I can finally build up all guns. 


4F68FCBA-CAAE-4EBA-A0F6-DA8E9801645C.thumb.jpeg.13c8346e85c807aac80d066e7f6831d4.jpeg
 

42113E4A-97D1-41D4-9D6D-4B73917BFB16.thumb.jpeg.5ce6c70722f0234578bcffe8bb2c5de6.jpeg


Stay tuned and save.


Andreas


Edited by captain_hook

Current Build:

HM Brig Badger 1/48 from Caldercraft plans

Le Coureur 1/48 by CAF


Completed Build:

Armed Virginia Sloop 1/48 by Model Shipways / Gallery
HM Cutter Sherbourne 1/64 by Caldercraft / Gallery

Link to comment
Share on other sites

Thank you all for the likes, The side covers have a complex shape and lot of holes for eyebolts and other stuff. I first made a template for both sides with Corel Draw and printed it on adhesive paper. The template was then glued onto a 1/16 inch boxwood sheet. 
 

CC7EBBAE-1B07-4D11-ADF8-025885A1704A.thumb.jpeg.6b32a6ee1e479051aa7e8e5ae32626b9.jpeg


Then I carefully pinned all template marks for holes with a prick and drilled the holes with a small hand drill. The sides were then cut out with a bandsaw and a disc sander was used to sand the pieces to shape. At last the final shape was done with needle files. 
 

5F4C454A-587D-42A9-9F29-660C3B4D2F0D.thumb.jpeg.f23785afebadb1124c68b2367596fe0e.jpeg


I try to finalize a test cannon by the end of the week but there are still some parts missing. But here is a sneak preview ..


BB11BCA5-CB84-40A3-99A6-C6D5C319456D.thumb.jpeg.ff861c1007a637e84ca7c4dac9d93eb9.jpeg


Stay tuned and save.


Andreas


Current Build:

HM Brig Badger 1/48 from Caldercraft plans

Le Coureur 1/48 by CAF


Completed Build:

Armed Virginia Sloop 1/48 by Model Shipways / Gallery
HM Cutter Sherbourne 1/64 by Caldercraft / Gallery

Link to comment
Share on other sites

I have finished a prototype 4-pounder gun today - my first scratch-build carriage. It is not very accurate yet (I misaligned the etched line at first time so my gun has two lines and the just applied WOP give it a quite dirty look) but the goal was to prove the correct dimensions of the gun / the height of the gunports and to try some new techniques that will be used when all the guns are build later. The final carriages will be painted red but I decided to leave this one natural.


B39B5418-25DD-41B2-BBCD-1DC38FE0A141.thumb.jpeg.1c807f76c1ccdae438e56880aaaef9e4.jpeg
 

5FBDF3AD-3A00-4916-8F53-6BC324A928D8.thumb.jpeg.fd33ee0f0a04e53cb9a7794be5682df6.jpeg


The chain for securing the iron bands is still missing and it will be added for the final design. If any company had sold 4-pounder gun carriages in quarter scale it would have saved me a lot of work. But I understand what scratch building is about. At least I have done all parts for the carriages, so building them won’t hopefully take too much time.

4431F041-85D2-48BF-9994-213EA0942A11.thumb.jpeg.1abbc01936546fe6d9758bda31074796.jpeg


The good thing is that the test-gun fits the gunport - the barrel almost centers it.  


967D2232-0E0B-432F-B14E-9F9428A0D153.thumb.jpeg.dd0c7caeb3102e06a49c40a6cb66929d.jpeg


BCCF2870-DA6C-4463-B700-D3CE3904FFD3.thumb.jpeg.252e56bc32b0c00e5231cff47872f995.jpeg
 

Now I can continue to work on the hull. Stay tuned and save.


Andreas 


Edited by captain_hook

Current Build:

HM Brig Badger 1/48 from Caldercraft plans

Le Coureur 1/48 by CAF


Completed Build:

Armed Virginia Sloop 1/48 by Model Shipways / Gallery
HM Cutter Sherbourne 1/64 by Caldercraft / Gallery

Link to comment
Share on other sites

Excellent work on the gun carriage, it looks superb 🙂

Current builds;

 Henry Ramey Upcher 1:25

Providence whaleboat- 1:25     HMS Winchelsea 1764 1:48 

Completed:

HM Cutter Sherbourne- 1:64- finished    Triton cross section scratch- 1:60 - finished 

Non ship:  SBD-3 Dauntless 1:48 Hasegawa -FINISHED


Link to comment
Share on other sites

Join the conversation

You can post now and register later. If you have an account, sign in now to post with your account.

Guest
Reply to this topic...

×   Pasted as rich text.   Paste as plain text instead

  Only 75 emoji are allowed.

×   Your link has been automatically embedded.   Display as a link instead

×   Your previous content has been restored.   Clear editor

×   You cannot paste images directly. Upload or insert images from URL.

  • Recently Browsing   0 members

    • No registered users viewing this page.
×
×
  • Create New...