Rab999 Posted July 17, 2020 #1 Posted July 17, 2020 After a few years of building model boats I’ve finally decided to do a build log of Mantua Models Trotamares due to being unable to find a build log anywhere. I normally use build logs as a helpful guide when the provided instructions are a little sketchy. Hopefully I’ll not have too many problems with this build. ccoyle, BobG, gieb8688 and 2 others 5
Rab999 Posted July 17, 2020 Author #2 Posted July 17, 2020 Well here goes... keel and frames cut out and dry fixed on my building board...so far pretty good...all seems to fit pretty good with little adjustment required. gieb8688, BobG, yvesvidal and 1 other 4
Rab999 Posted July 17, 2020 Author #3 Posted July 17, 2020 All frames now glued in place and started to taper the frames ready for the planks. This is the bit I’m never too sure about and worry about removing too much. Appears to be ok so far... BobG, gieb8688 and yvesvidal 3
Rab999 Posted July 17, 2020 Author #4 Posted July 17, 2020 Moving onto the decks all seem to fit pretty well and easily held in place with a few pins until the glue dries gieb8688, BobG, chris watton and 2 others 5
Rab999 Posted July 19, 2020 Author #5 Posted July 19, 2020 With the glue dry...pins removed and final sanding of the frames complete (hopefully enough removed so the planks fit ok) yvesvidal and BobG 2
Rab999 Posted July 19, 2020 Author #6 Posted July 19, 2020 Next step appears to be to plank the fore and aft decks..looks like the instructions and plans don’t match up.....so I think I’ll go with a combination of both... hopefully will look ok when completed... Looks like it’s going to be quite fiddly... yvesvidal and gieb8688 2
Rab999 Posted July 20, 2020 Author #7 Posted July 20, 2020 Fore deck planking completed....trimmed, sanded and coated in sanding sealer. Now onto the aft deck. yvesvidal, Geowolf, BobG and 1 other 4
BobG Posted July 24, 2020 #8 Posted July 24, 2020 On 7/17/2020 at 12:34 PM, Rab999 said: I’ve finally decided to do a build log of Mantua Models Trotamares due to being unable to find a build log anywhere. I'm glad to see a build log of this interesting model here on MSW. She looks great so far! I'm curious about how you used wood spacers for the caulking between the deck planks. It looks really good and is very uniform. Were these spacers included in the kit or is this your own modification? Will you eventually add color to them also? I look forward to following along on your build. Good luck! Bob Garcia "Measure once, cuss twice!" Current Builds: Hms Brig-Sloop Flirt 1782 - Vanguard Models Pen Duick - Artesania Latina 1:28 Completed: Medway Longboat 1742 - Syren Ship Model Co. Member of the Nautical Research Guild
Rab999 Posted July 26, 2020 Author #9 Posted July 26, 2020 On 7/24/2020 at 6:20 PM, BobG said: I'm glad to see a build log of this interesting model here on MSW. She looks great so far! I'm curious about how you used wood spacers for the caulking between the deck planks. It looks really good and is very uniform. Were these spacers included in the kit or is this your own modification? Will you eventually add color to them also? I look forward to following along on your build. Good luck! The spacers were included in the kit. Not easy to get even but so far looks ok. At the moment I’m thinking that I’ll leave them the colour of the wood, but will decide later. BobG 1
Rab999 Posted August 2, 2020 Author #10 Posted August 2, 2020 After a weeks holiday finally got round to doing a little more... Planking on stern deck completed ready for trimming and sanding.. gieb8688, BobG and yvesvidal 3
Rab999 Posted August 2, 2020 Author #11 Posted August 2, 2020 All trimmed and sanded and a coat of sanding sealer applied...looks ok apart from a few small gaps between planks if you look close...not sure whether to try and fill them but for now I’ll leave them as they are.. BobG, gieb8688, yvesvidal and 1 other 4
BobG Posted August 2, 2020 #12 Posted August 2, 2020 She's looking great! Excellent work. Bob Garcia "Measure once, cuss twice!" Current Builds: Hms Brig-Sloop Flirt 1782 - Vanguard Models Pen Duick - Artesania Latina 1:28 Completed: Medway Longboat 1742 - Syren Ship Model Co. Member of the Nautical Research Guild
Rab999 Posted August 3, 2020 Author #13 Posted August 3, 2020 Right now for the bit I tend to struggle with...planking the hull. First couple of planks seem to be on ok...hope the rest go on the same... yvesvidal, BobG and gieb8688 3
Rab999 Posted August 6, 2020 Author #14 Posted August 6, 2020 Slow going with the hull planking and not as even as I would have liked but it is only the first planking. Guess I’ll need to do quite a bit of filling and rubbing down before the second layer of planks on . Quite away to go though before I get to that. BobG and yvesvidal 2
Rab999 Posted August 19, 2020 Author #15 Posted August 19, 2020 Well finally completed the first layer of planking...not perfect and not totally sure the bow and Stern look right but hopefully I can sort that out with a bit of sanding and filling before the 2nd layer of planks.. chris watton, VTHokiEE, BobG and 1 other 4
BobG Posted August 19, 2020 #16 Posted August 19, 2020 You can use a good filler and then sand the hull to make a very nice base for your second layer of planking. Take following post is an excellent, brief tutorial regarding an great planking method: glbarlow 1 Bob Garcia "Measure once, cuss twice!" Current Builds: Hms Brig-Sloop Flirt 1782 - Vanguard Models Pen Duick - Artesania Latina 1:28 Completed: Medway Longboat 1742 - Syren Ship Model Co. Member of the Nautical Research Guild
glbarlow Posted August 20, 2020 #17 Posted August 20, 2020 Thanks for the reference Bob. I also cover this technique in my Lady Nelson log BobG 1 Regards, Glenn Current Build: HM Flirt Completed Builds: HMS Winchelsea, HM Cutter Cheerful, Lady Nelson, Amati HMS Vanguard, HMS Pegasus, Fair American, HM Granado, HM Pickle, AVS, Pride of Baltimore, Bluenose, Royal Barge, Medway Long Boat
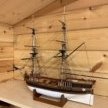
JerryC Posted September 9, 2020 #18 Posted September 9, 2020 I was traveling in Italy and purchased this kit sometime around 1995. I started it sometime in the 90s, but got frustrated with the second layer of planking and put it away. What with our current environment, I pulled it out again and have been making some good progress. The photo is staged none of the deck furniture is fastened yet. You’ve got your work cut out for you. I will enjoy following along. BobG and yvesvidal 2
JerryC Posted September 17, 2020 #19 Posted September 17, 2020 I don’t see the need for filler, unless you want the practice! Just fill in the small square at the stern them smooth the whole thing out. It’s looking really good. I like the way you used the walnut down the center. Are you going continue that on the main deck?
yvesvidal Posted April 21, 2021 #20 Posted April 21, 2021 On 8/2/2020 at 12:31 PM, Rab999 said: That is quite a puzzle that you are building there.... Fascinating how this deck is engineered. Yves
JerryC Posted April 22, 2021 #21 Posted April 22, 2021 Sparky, are you going to do a build log? I’d love to follow along. I put my framing together so long ago that I don’t remember, but I think I would have glued it to add strength. I did use the walnut caulking supplied on the bow and stern, like Rab999 did, but on the main deck, I just blackened the edges as I installed them. It was easier and I think it looks better.

Recommended Posts
Create an account or sign in to comment
You need to be a member in order to leave a comment
Create an account
Sign up for a new account in our community. It's easy!
Register a new accountSign in
Already have an account? Sign in here.
Sign In Now