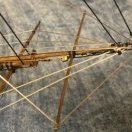
Jonathan_219 Posted May 26, 2021 #1 Posted May 26, 2021 Building the San Felipe and many of the brass castings have a hard whitish, almost crystalline substance in many of the crevices. A gentle probing with a dental tool seems to do almost nothing to remove it and it really degrades the look of the piece. I'm looking for ideas to clean the pieces with this residue up some, the casting is already of fairly poor quality and I'm hoping I can do something to improve the look before attaching them to my kit. I've thought of trying an old toothbrush with some toothpaste and seeing that if does anything but if a dental tool doesn't dent it I doubt a soft brush will either. Removing this material from the crevices would help restore some of the definition and it would be nice if it was brass color everywhere without the whitish crystal look in the crevices. A side question is this really brass or some brass like alloy? Some of the pieces have the color and brightness of brass and these pieces are much better cast with good definition. The pieces with the residue have a more tarnished and dingy look with softer edges. I tried taking a picture and it doesn't show it very well. The piece also doesn't look as bad as the picture makes it look, it's not great though. thibaultron 1 Completed Build: Revenge 1577 - Amati Models - 1/64 Current Build: San Felipe - Mantua Panart - 1:75
bartley Posted May 26, 2021 #2 Posted May 26, 2021 Brass is an alloy anyway so "alloy of brass" is a kind of funny term. Anyway if it is brass, you might try a pickling compound like Sparex but be careful it does etch the surface if left to long. Maybe try brushing it on and then stopping the reaction with bicarbonate of soda. John mtaylor and thibaultron 2 Current Build: Medway Longboat Completed Builds: Concord Stagecoach HM Cutter Cheerful Royal Caroline Schooner for Port Jackson
marktiedens Posted May 27, 2021 #3 Posted May 27, 2021 I believe the Mantua kits actually use bronze for their castings - at least the older kits. Don`t know about the newer kits. As far as cleaning them, you might try a buffer wheel in a Dremel tool if you have one. They use the lost wax method of casting, so the residue may be some of the wax that has hardened. You might also try applying some heat to them - like a hair drier or very hot water - to see if the residue softens up. Mark Canute, thibaultron and mtaylor 3 current build - HMS Vanguard - Model Shipways
bartley Posted May 27, 2021 #4 Posted May 27, 2021 (edited) Brass is an alloy of copper and zinc while bronze is an alloy of copper and tin and sometimes other metals. So, both will react with pickling compound but it is designed to remove oxide coating. However, as Mark says the contaminant may simply be wax and if so a bit of heat is worth a try before going with a chemical treatment. Edited May 29, 2021 by bartley Canute, mtaylor, marktiedens and 1 other 4 Current Build: Medway Longboat Completed Builds: Concord Stagecoach HM Cutter Cheerful Royal Caroline Schooner for Port Jackson
Don Case Posted May 28, 2021 #5 Posted May 28, 2021 Silly question but have you tried soaking it in in water? mtaylor and thibaultron 2 HMS Discovery 1789 by Don Case - 1:48 - - Build logs for subjects built 1751 - 1800 - Model Ship World™
Jonathan_219 Posted May 28, 2021 Author #6 Posted May 28, 2021 Quote Silly question but have you tried soaking it in in water? I haven't tried soaking it in water but I did spend quite a bit of time under very hot tap water with an old toothbrush and toothpaste. This did help quite a bit and now it seems that where the residue was before that the surface texture is different than the "good" areas. I'm calling a good area one where the surface is smooth and shiny. It's hard to tell if there's still a slight bit of residue left or if it's completely gone and the surface of the brass where it was previously just has a different texture than the other surfaces. I'm still debating if I'll try soaking in Sparex, on one hand I'd like to try it and see what it gets me for learning but on the other hand if the texture of the surface is just different in these areas now (which I believe to be the case) I don't see how it could do much for that. Luckily I have a lot of time before I have to attach any brass to the kit so I can keep thinking about it and make a decision. Either way I'll report back whatever I decide and the results. Canute, mtaylor and thibaultron 3 Completed Build: Revenge 1577 - Amati Models - 1/64 Current Build: San Felipe - Mantua Panart - 1:75
Jaager Posted May 29, 2021 #7 Posted May 29, 2021 If it is wax, paraffin - petrol based wax, an organic solvent should have an effect on it - e.g. mineral spirits, naphtha, lacquer thinner - or hot white pet (Vaseline) or mineral oil or 3-in-1, Then the detergent and scrub to remove the lower MW liquid material. wefalck, mtaylor, Canute and 1 other 4 NRG member 50 years Current: NMS HMS Ajax 1767 - 74-gun 3rd rate - 1:192 POF exploration - works but too intense -no margin for error HMS Centurion 1732 - 60-gun 4th rate - POF Navall Timber framing HMS Beagle 1831 refiit 10-gun brig with a small mizzen - POF Navall (ish) Timber framing The U.S. Ex. Ex. 1838-1842 Flying Fish 1838 pilot schooner - POF framed - ready for stern timbers Porpose II 1836 brigantine/brig - POF framed - ready for hawse and stern timbers Vincennes 1825 Sloop-of-War - POF timbers assembled, need shaping Peacock 1828 Sloop-of -War - POF timbers ready for assembly Sea Gull 1838 pilot schooner - POF timbers ready for assembly Relief 1835 packet hull USN ship - POF timbers ready for assembly Other Portsmouth 1843 Sloop-of-War - POF timbers ready for assembly Le Commerce de Marseilles 1788 118 cannons - POF framed La Renommee 1744 Frigate - POF framed - ready for hawse and stern timbers
Dr PR Posted May 29, 2021 #8 Posted May 29, 2021 You mention a texture to the surfaces. I recall seeing in one of the carving threads on the forum that often the "background" surfaces between carved figures was pitted to create a surface that wasn't smooth and shiny. wefalck, Canute, mtaylor and 1 other 4 Phil Current build: Vanguard Models 18 foot cutter Current build: USS Cape MSI-2 Current build: Albatros topsail schooner Previous build: USS Oklahoma City CLG-5 CAD model

Recommended Posts
Create an account or sign in to comment
You need to be a member in order to leave a comment
Create an account
Sign up for a new account in our community. It's easy!
Register a new accountSign in
Already have an account? Sign in here.
Sign In Now