Overview
About This Club
This is a public group build project for Syren's 1/48 Medway Long Boat
Group Type
MSW Online Group Project
- What's new in this club
-
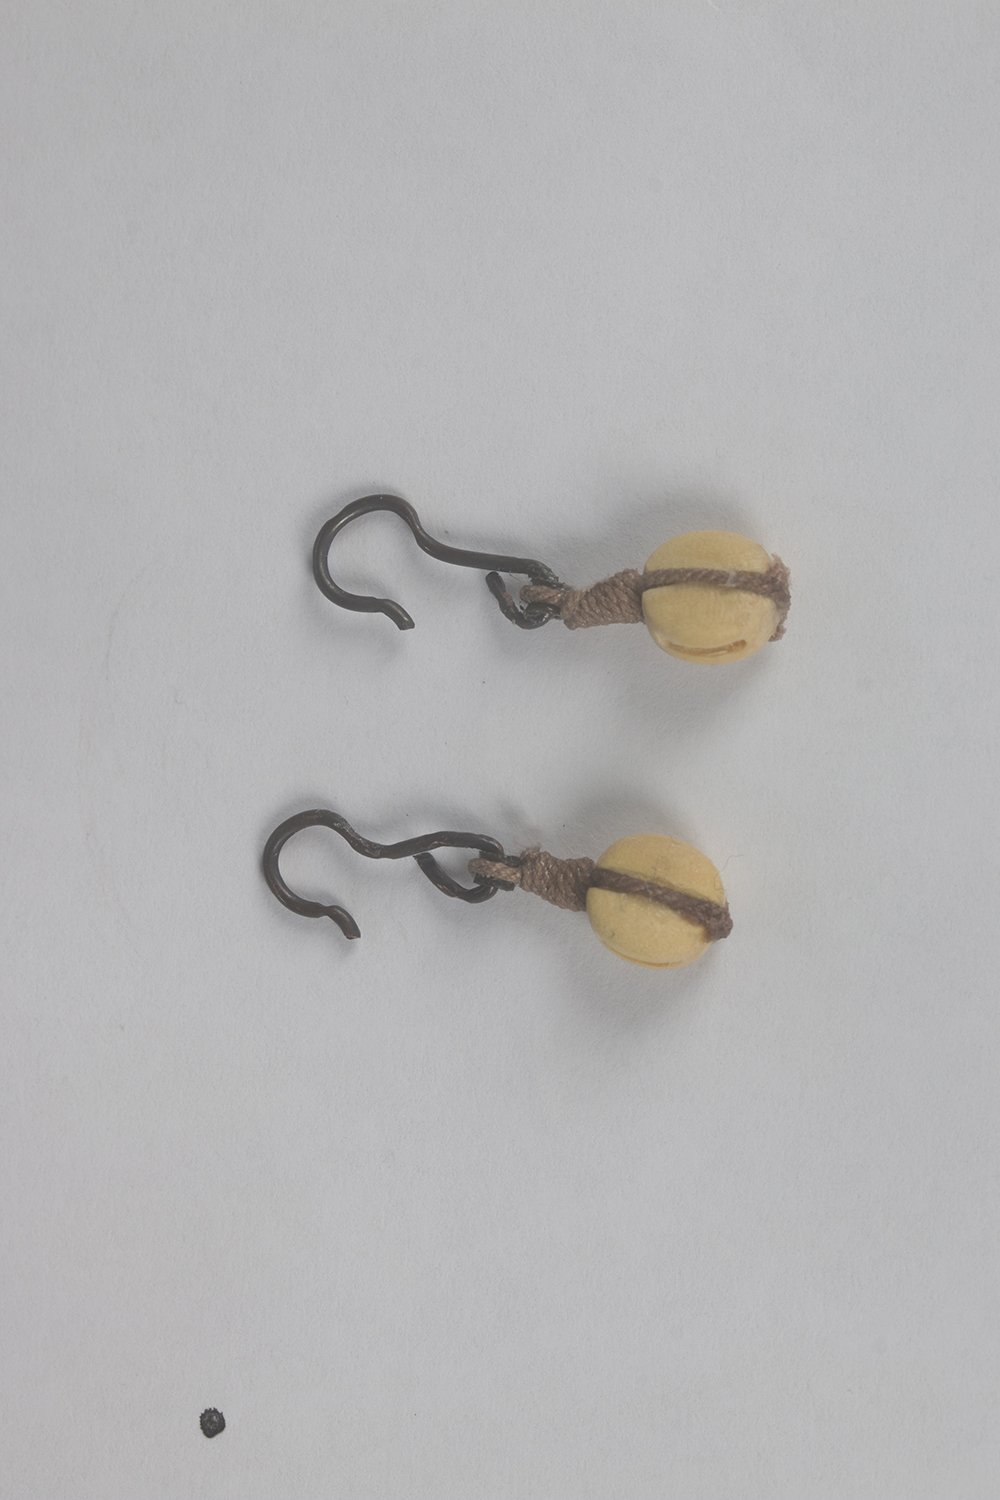
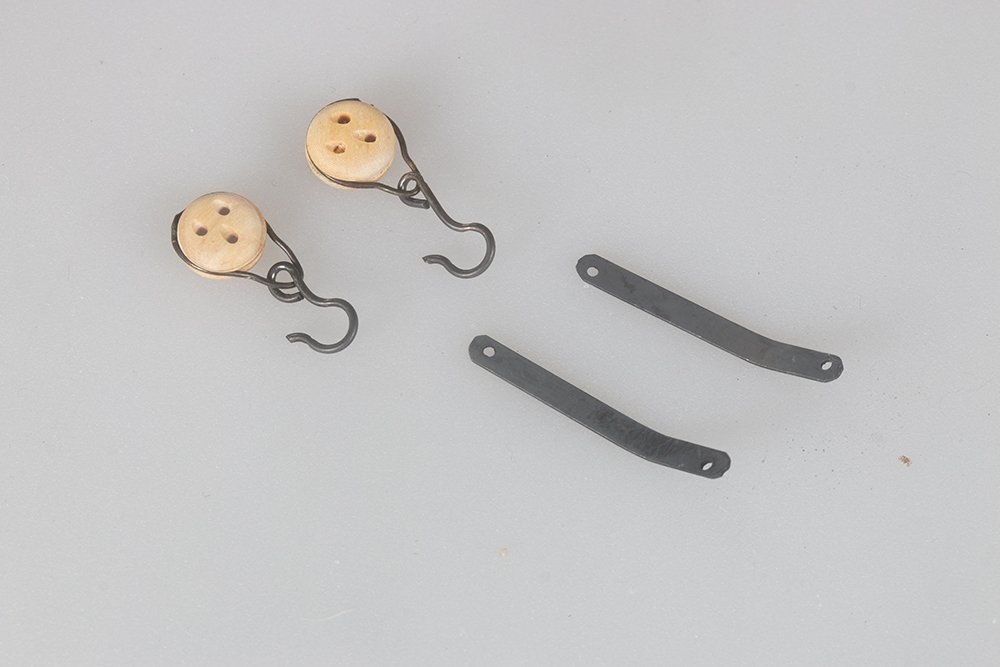
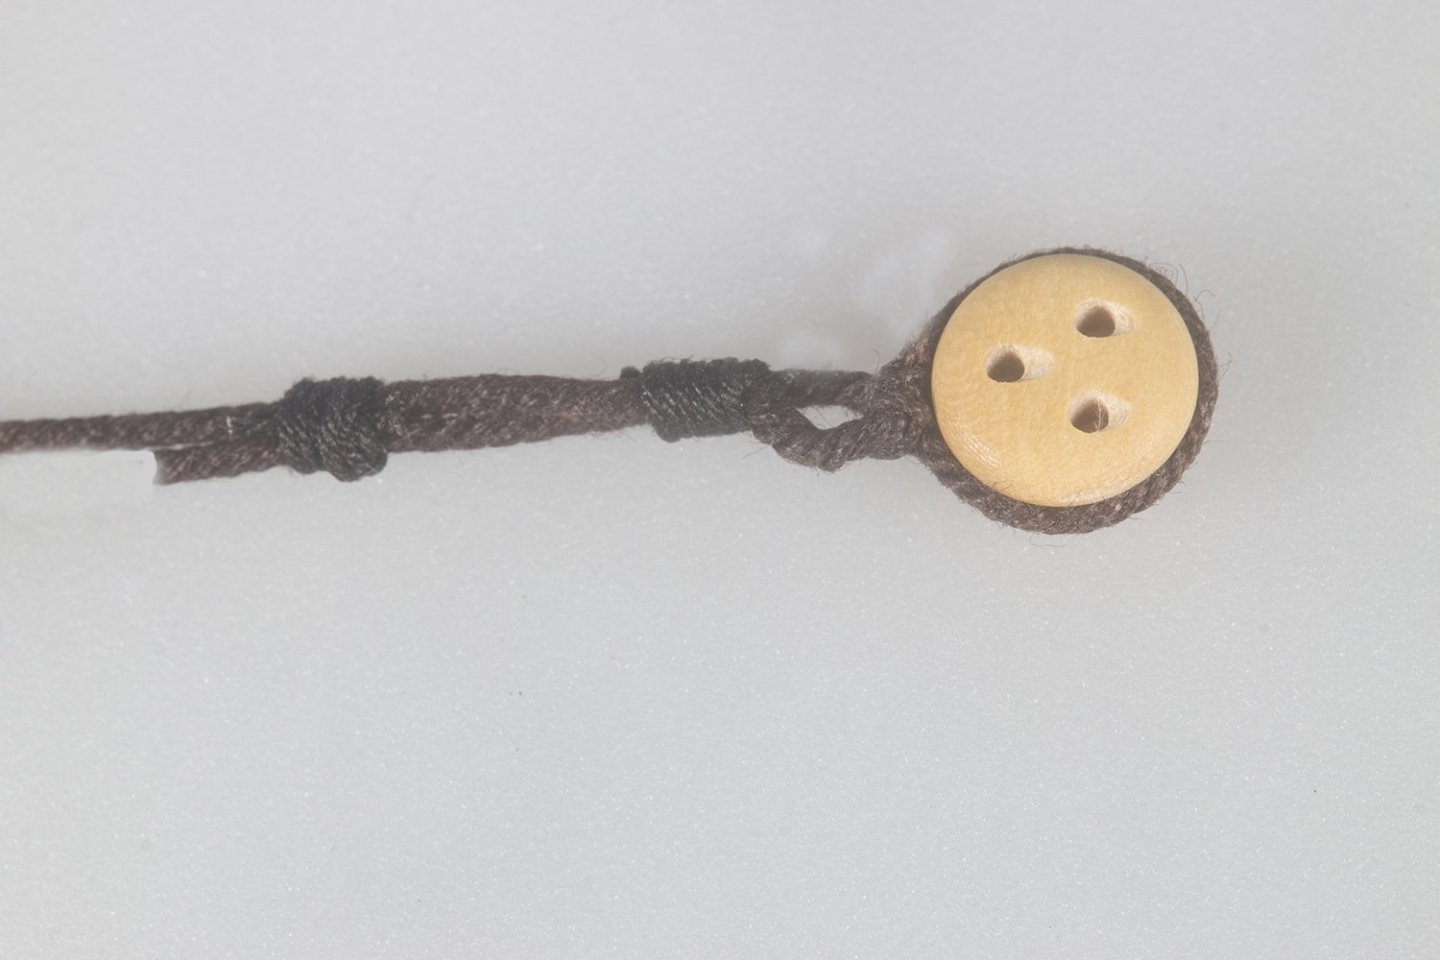
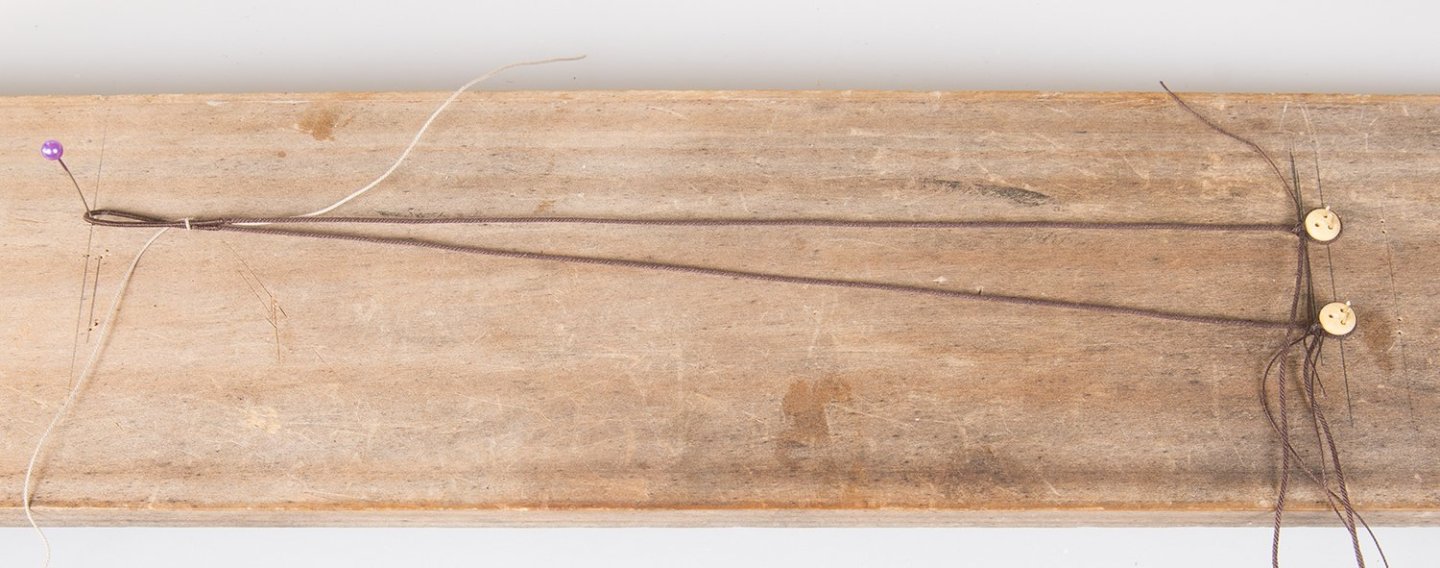
 Back Stays The installation of the back stays was straight forward. The straps had already been installed earlier aft of the mast. Two 1/4" blocks were seized to hooks to hooks to fit these straps. After seizing the falls around the mast they were reeved to these blocks: John
-
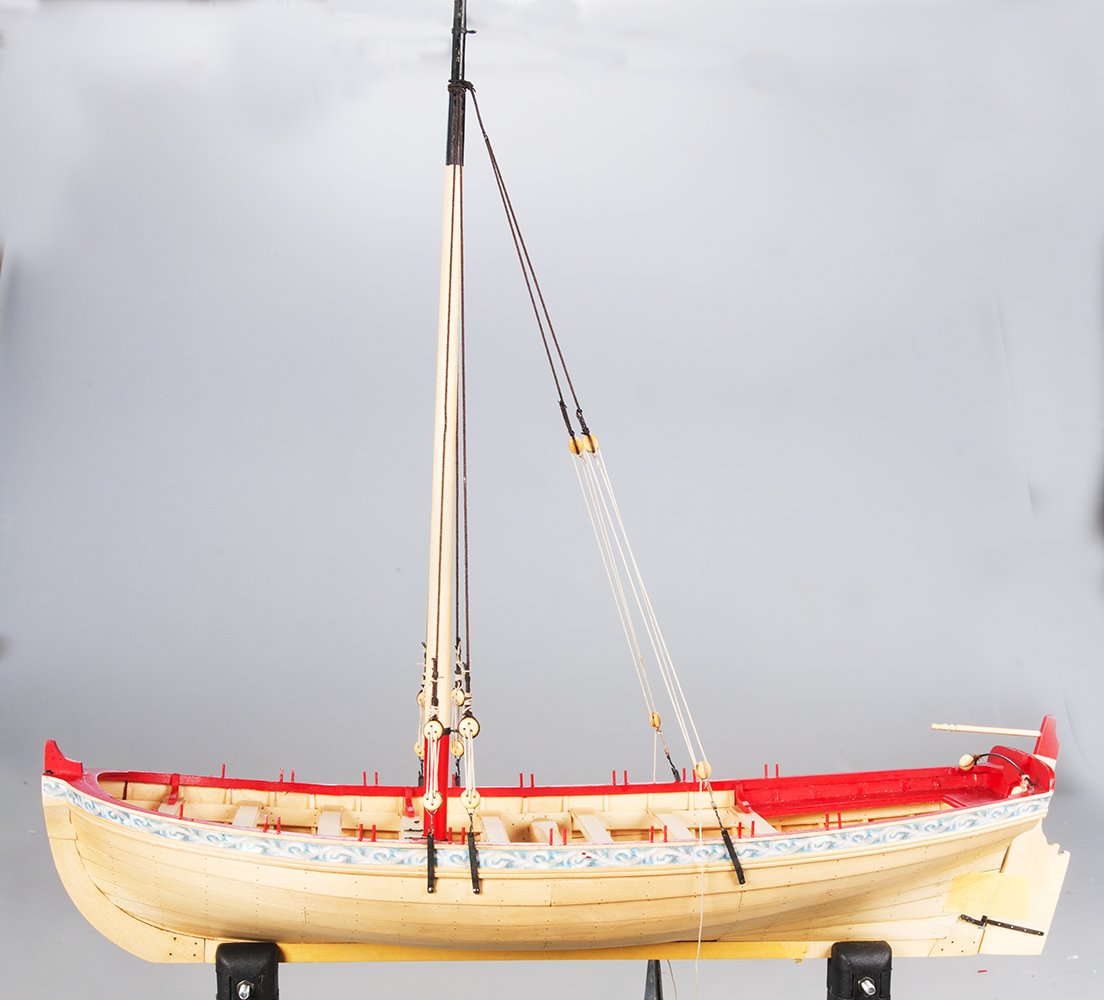
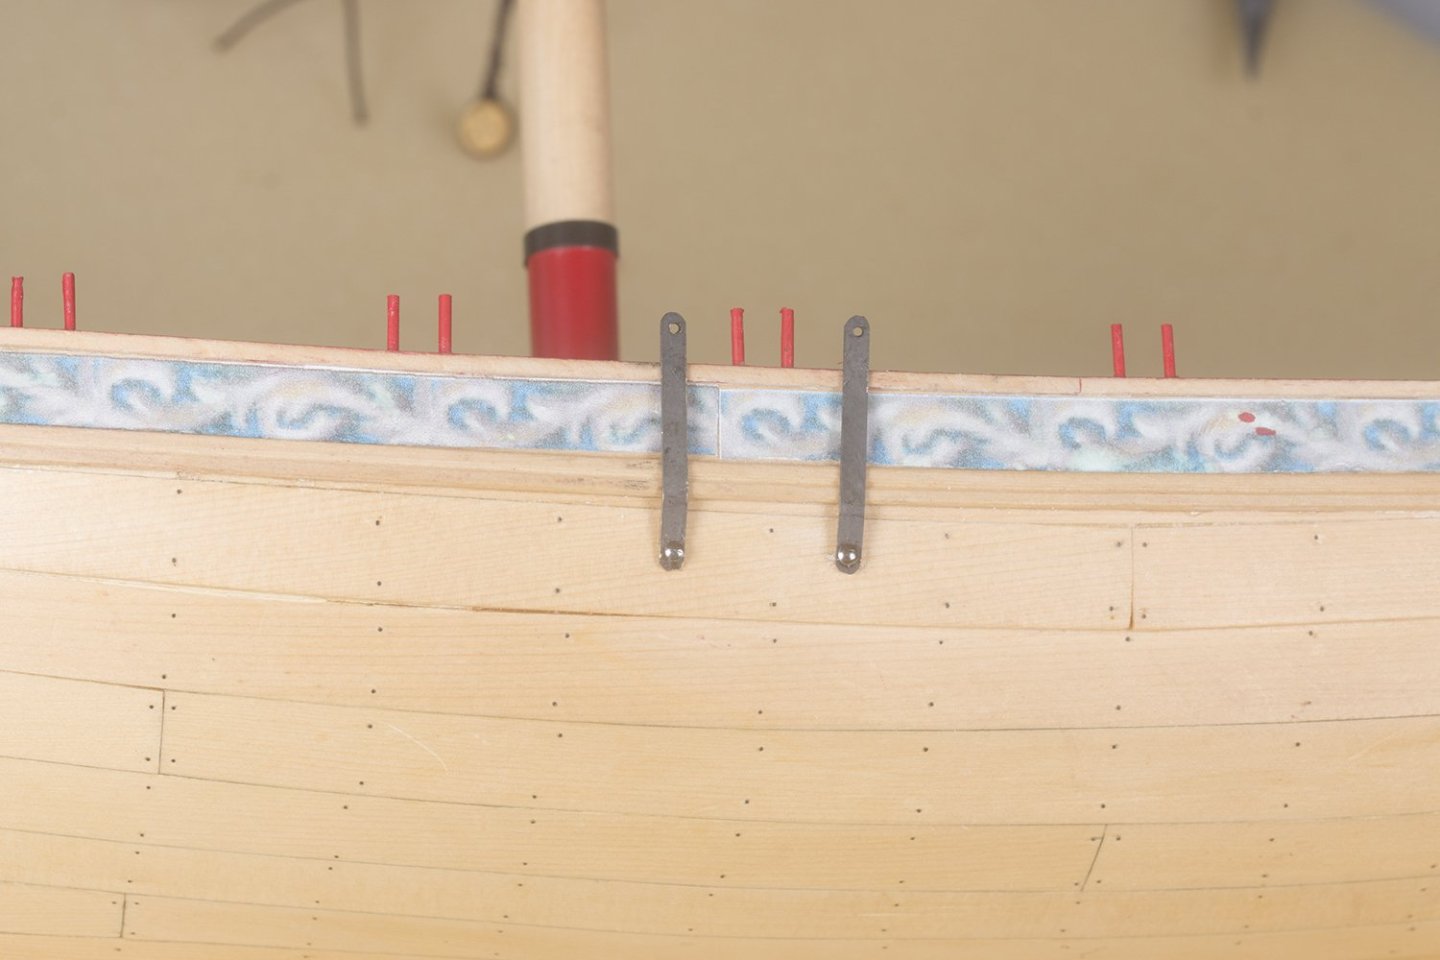
Rigging For once I elected to deviate from Chuck's monograph and install the shrouds and other standing rigging before the running rigging for the boom and gaff. I normally rig my mast from low to high so that I can fabricate the stays, for example, off the model and them slip them over the mast. A further advantage is the mast is then held tightly into the step and does not jump out as it tended to do when I installed the boom first I made up the hooks stropped to the lower dead eyes. The straps were made fro 3/32'' brass plate as suggested. The upper dead eyes were stopped to the shrouds in the usual way: I used this simple jig to ensure that the length was the same on both sides and that the aft dead was slightly lower The staps were nailed to the hull as shown: The lanyards wee now laced between the dead eyes in the usual manner: The shroud gang on the mast looks like this: Once the dead eyes ere tightened and tidied up the front view looked like this: I will install the back stays next but probably leave the fore stay so that I can still get good access to the pin rail. John


-
 That looks fantastic, and a reasonable price also
- 131 replies
-
- 1
-

-
- Medway Longboat
- Syren Ship Model Company
- (and 1 more)
-
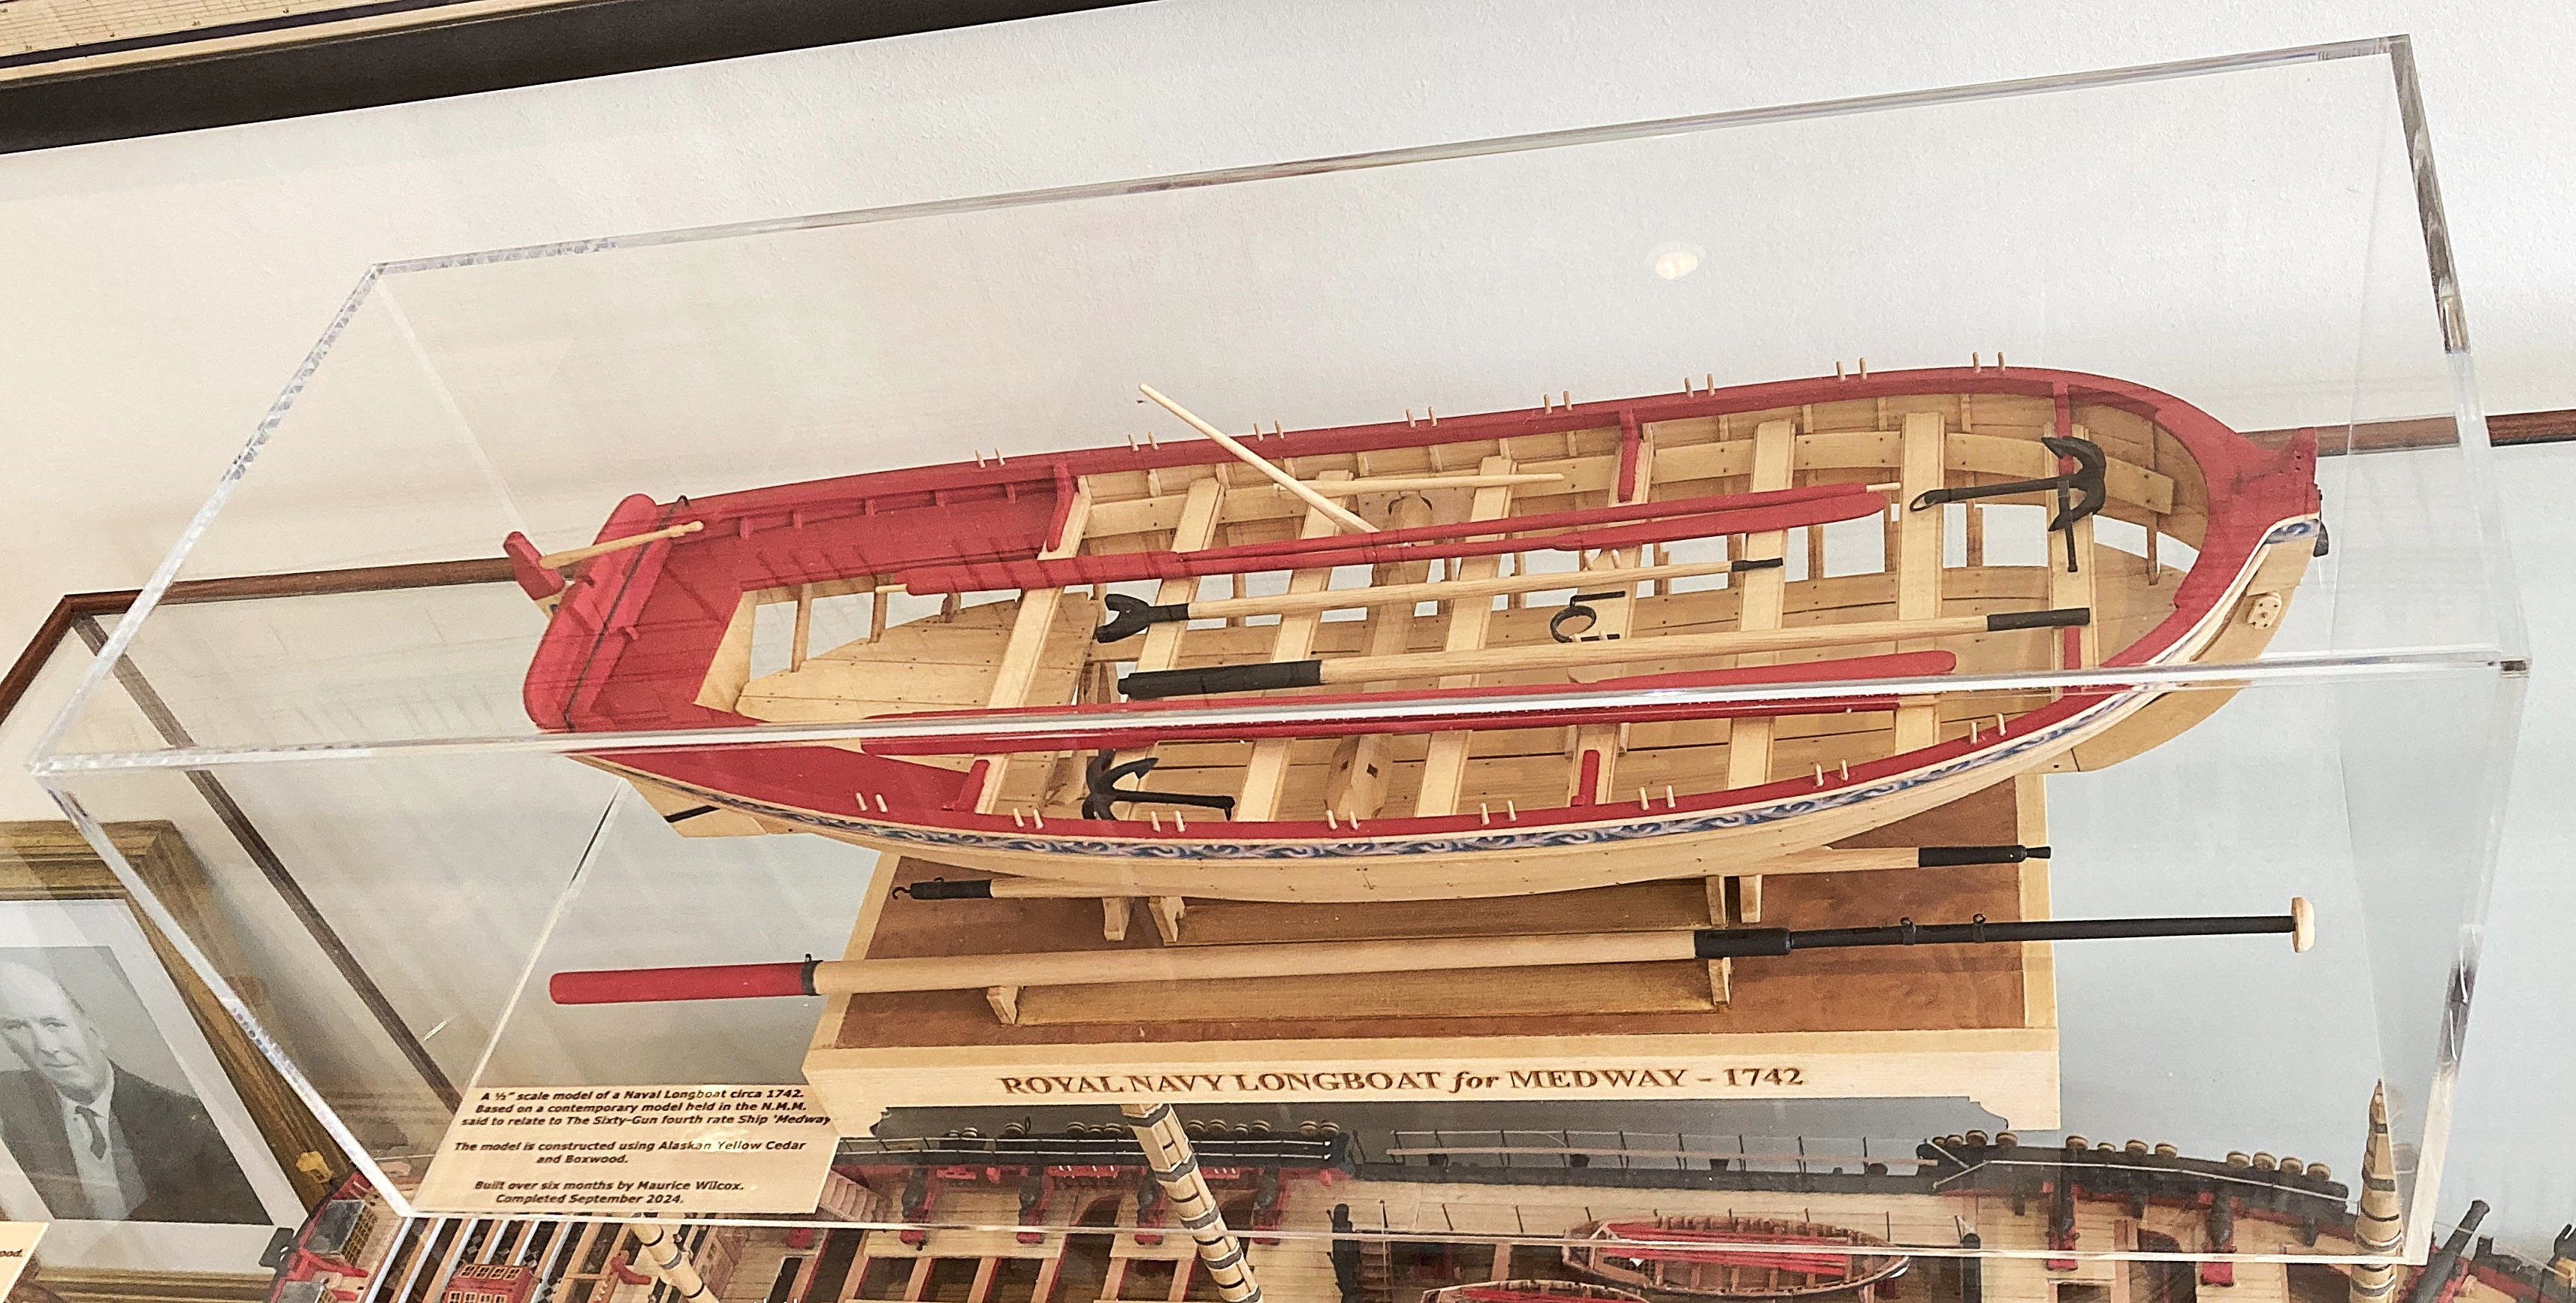
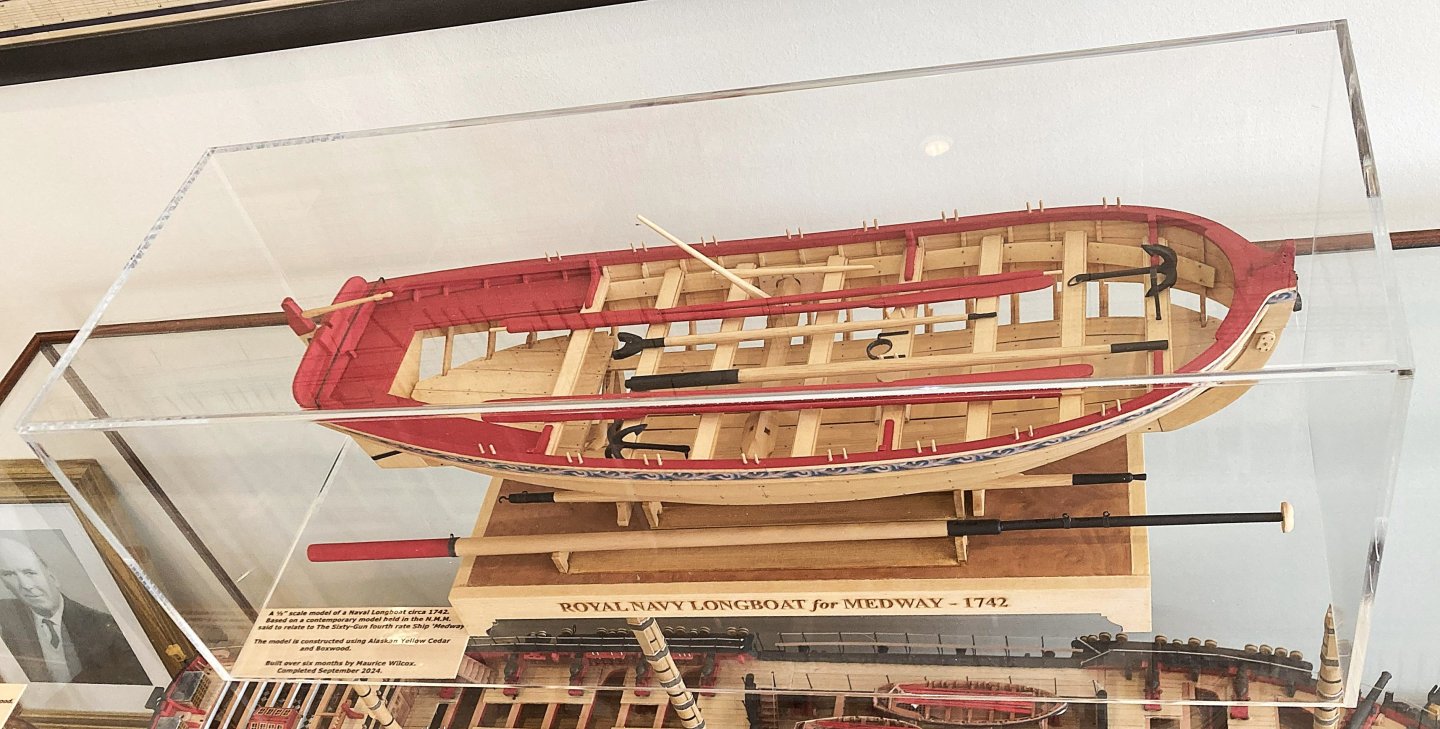
 A Display cover for the Medway Longboat. I thought I would give a heads up for the Acrylic cover I ordered for the model. The dimensions: Thickness 4mm Internal Length 490mm Internal Depth 180mm Internal Height 170mm The cover was obtained from: Custom Display Cover | Tielo The company is based in Hull, Yorkshire, and the delivered cost was £42.64 (free delivery) 2992A 2993A Difficult to get a good shot of the cover but it is very nicely made and at a competitive price compared to other UK suppliers I checked out. B.E. 11/10/2024
- 131 replies
-
- 7
-
-

-
- Medway Longboat
- Syren Ship Model Company
- (and 1 more)
-
Thank you Clark, Rusty, and Glenn, I do have a 'dio' in mind to while away the dark winter days. B.E.
-
 I agree with Rusty, there is always another model that needs building. Two dozen has a nice ring.
- 131 replies
-
- 2
-
-
- Medway Longboat
- Syren Ship Model Company
- (and 1 more)
-
 Another well done model, and your display is perfect. I'm looking forward to what's next. Don't suppress the desire!
- 131 replies
-
- 2
-
-
- Medway Longboat
- Syren Ship Model Company
- (and 1 more)
-
 Congratulations B.E. Perfect like all your models
- 131 replies
-
- 1
-

-
- Medway Longboat
- Syren Ship Model Company
- (and 1 more)
-
When completing my model, I was also unsettled by the illogical rope guidance. It's nice to know that others feel the same way. It would make sense if the horse ran over the tiller but not below. Has anyone seen that before? Clark
-
The way the sheet is rigged on the contemporary model looks typical of the period, but it is difficult to believe that sailors would adopt such an impractical arrangement as the horse below the tiller. The NMM which holds the original model makes no reference to this. Our kit is a model of a model and individuals can decide to 'tweak' it as they wish. Regards, B.E.
- 131 replies
-
- 1
-
-
- Medway Longboat
- Syren Ship Model Company
- (and 1 more)
-
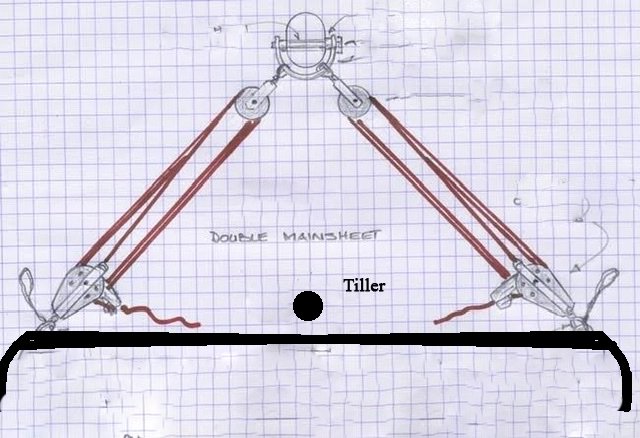
Strange indeed BE. On modern boats we usually use a traveler to which the mainsheet is attached and this sits forward of the tiller. On older boats which use a horse it is not uncommon for the horse to sit aft of the tiller. In which case the boat would be rigged with a double mainsheet like this. Maybe this was what was done but is not clear in th photographs
- 131 replies
-
- 1
-
-
- Medway Longboat
- Syren Ship Model Company
- (and 1 more)
-
 Another superb model, B.E.! Congratulations on this superb longboat, and thank you for sharing in its construction. Once again, it's been a real pleasure to follow your work.
- 131 replies
-
- 2
-
-
-
- Medway Longboat
- Syren Ship Model Company
- (and 1 more)
-
 Congratulations BE! The way that you decided to display your Medway is fantastic. I love it! I look forward to seeing what you decide to build next after your respite (hopefully a brief respite!).
- 131 replies
-
- 2
-
-
-
- Medway Longboat
- Syren Ship Model Company
- (and 1 more)
-
 An office with 11 amazing models is a life goal I didn't know I needed until now 😃.
- 131 replies
-
- 3
-
-
- Medway Longboat
- Syren Ship Model Company
- (and 1 more)
-
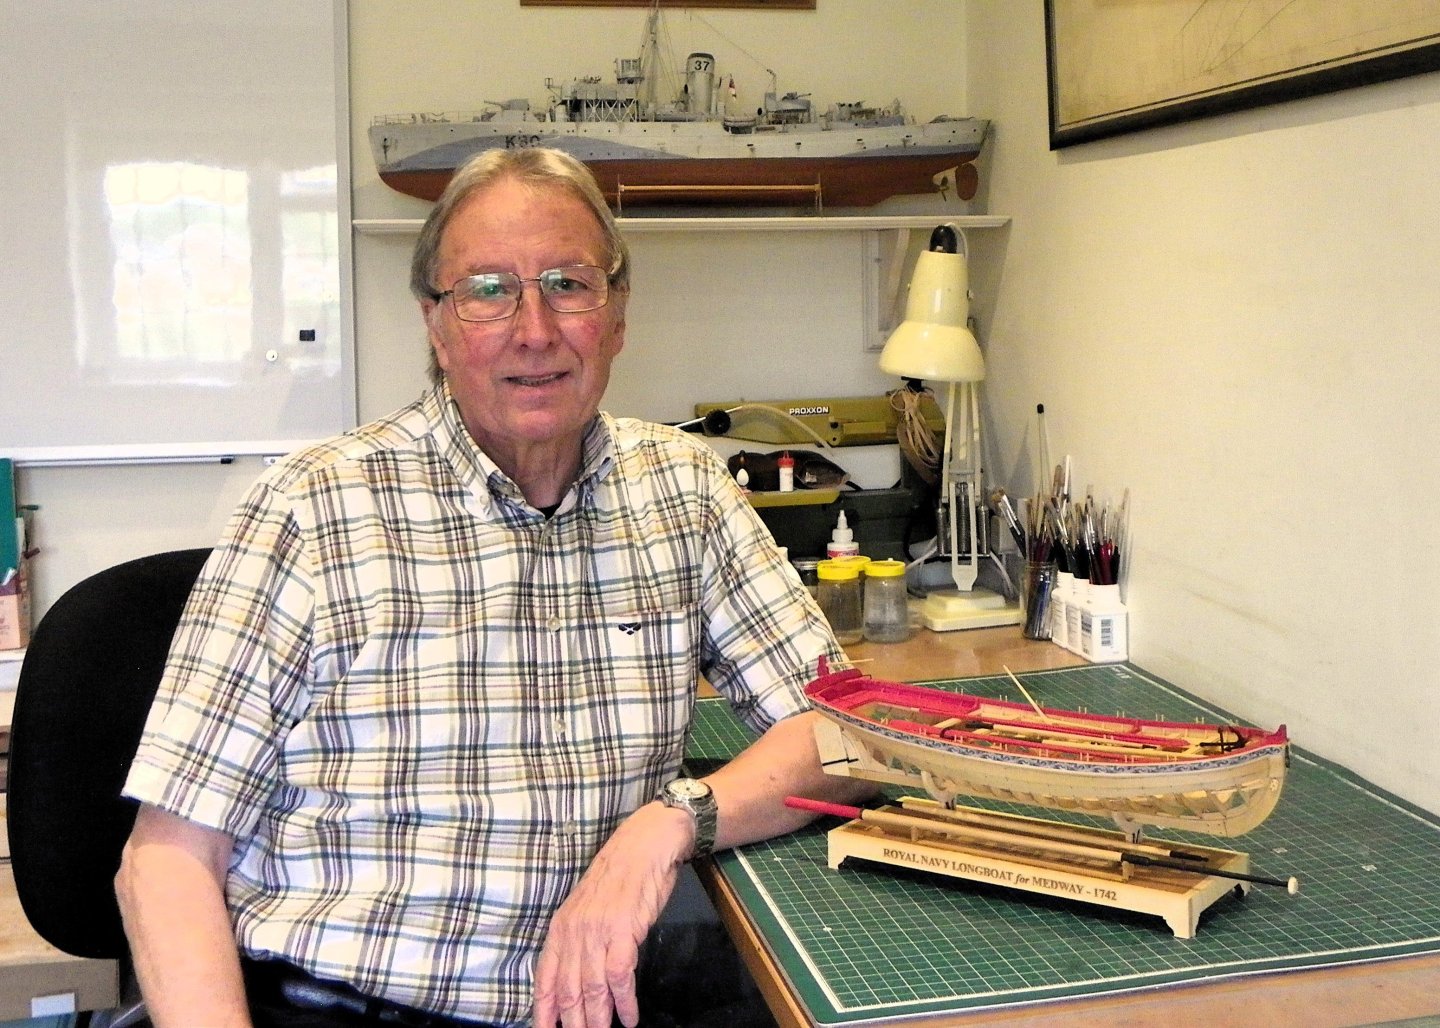
Cheers Guys, Sitting in my office/workroom I am surrounded by eleven models (and there are another eight around the house) not including those lying in ordinary in the loft. This disjointed view around my office gives you the effect. I can't imagine at the moment where I would put another, the desire is still there, but I will have to see how long that can be suppressed.🫤 Thanks again for the interest shown. B.E.

- 131 replies
-
- 7
-
-
- Medway Longboat
- Syren Ship Model Company
- (and 1 more)
-
 Awesome build and display B.E.! I also love that Corvette on the shelf behind you! Best Regards …. Rick
- 131 replies
-
- 1
-
-
- Medway Longboat
- Syren Ship Model Company
- (and 1 more)
-
Another great build. I’ve followed yours going back to Pegasus I think, they are all so wonderfully build and so fully documented. I really like the clever display for this one. I hope to see you back at it soon.
- 131 replies
-
- 3
-
-
-
- Medway Longboat
- Syren Ship Model Company
- (and 1 more)
-
 Congratulations on yet another fine build B.E. I hope for our sake that your break from ship modelling isn’t too long!
- 131 replies
-
- 3
-
-
-
- Medway Longboat
- Syren Ship Model Company
- (and 1 more)
-
 Congratulations, nicely done. And thank you so much for all your posts, your logs will inspire many new modelers, Thank you Bob M.
- 131 replies
-
- 2
-
-
-
- Medway Longboat
- Syren Ship Model Company
- (and 1 more)
-
Congratulations on finishing! Another great build from your hands
- 131 replies
-
- 1
-
-
- Medway Longboat
- Syren Ship Model Company
- (and 1 more)
-
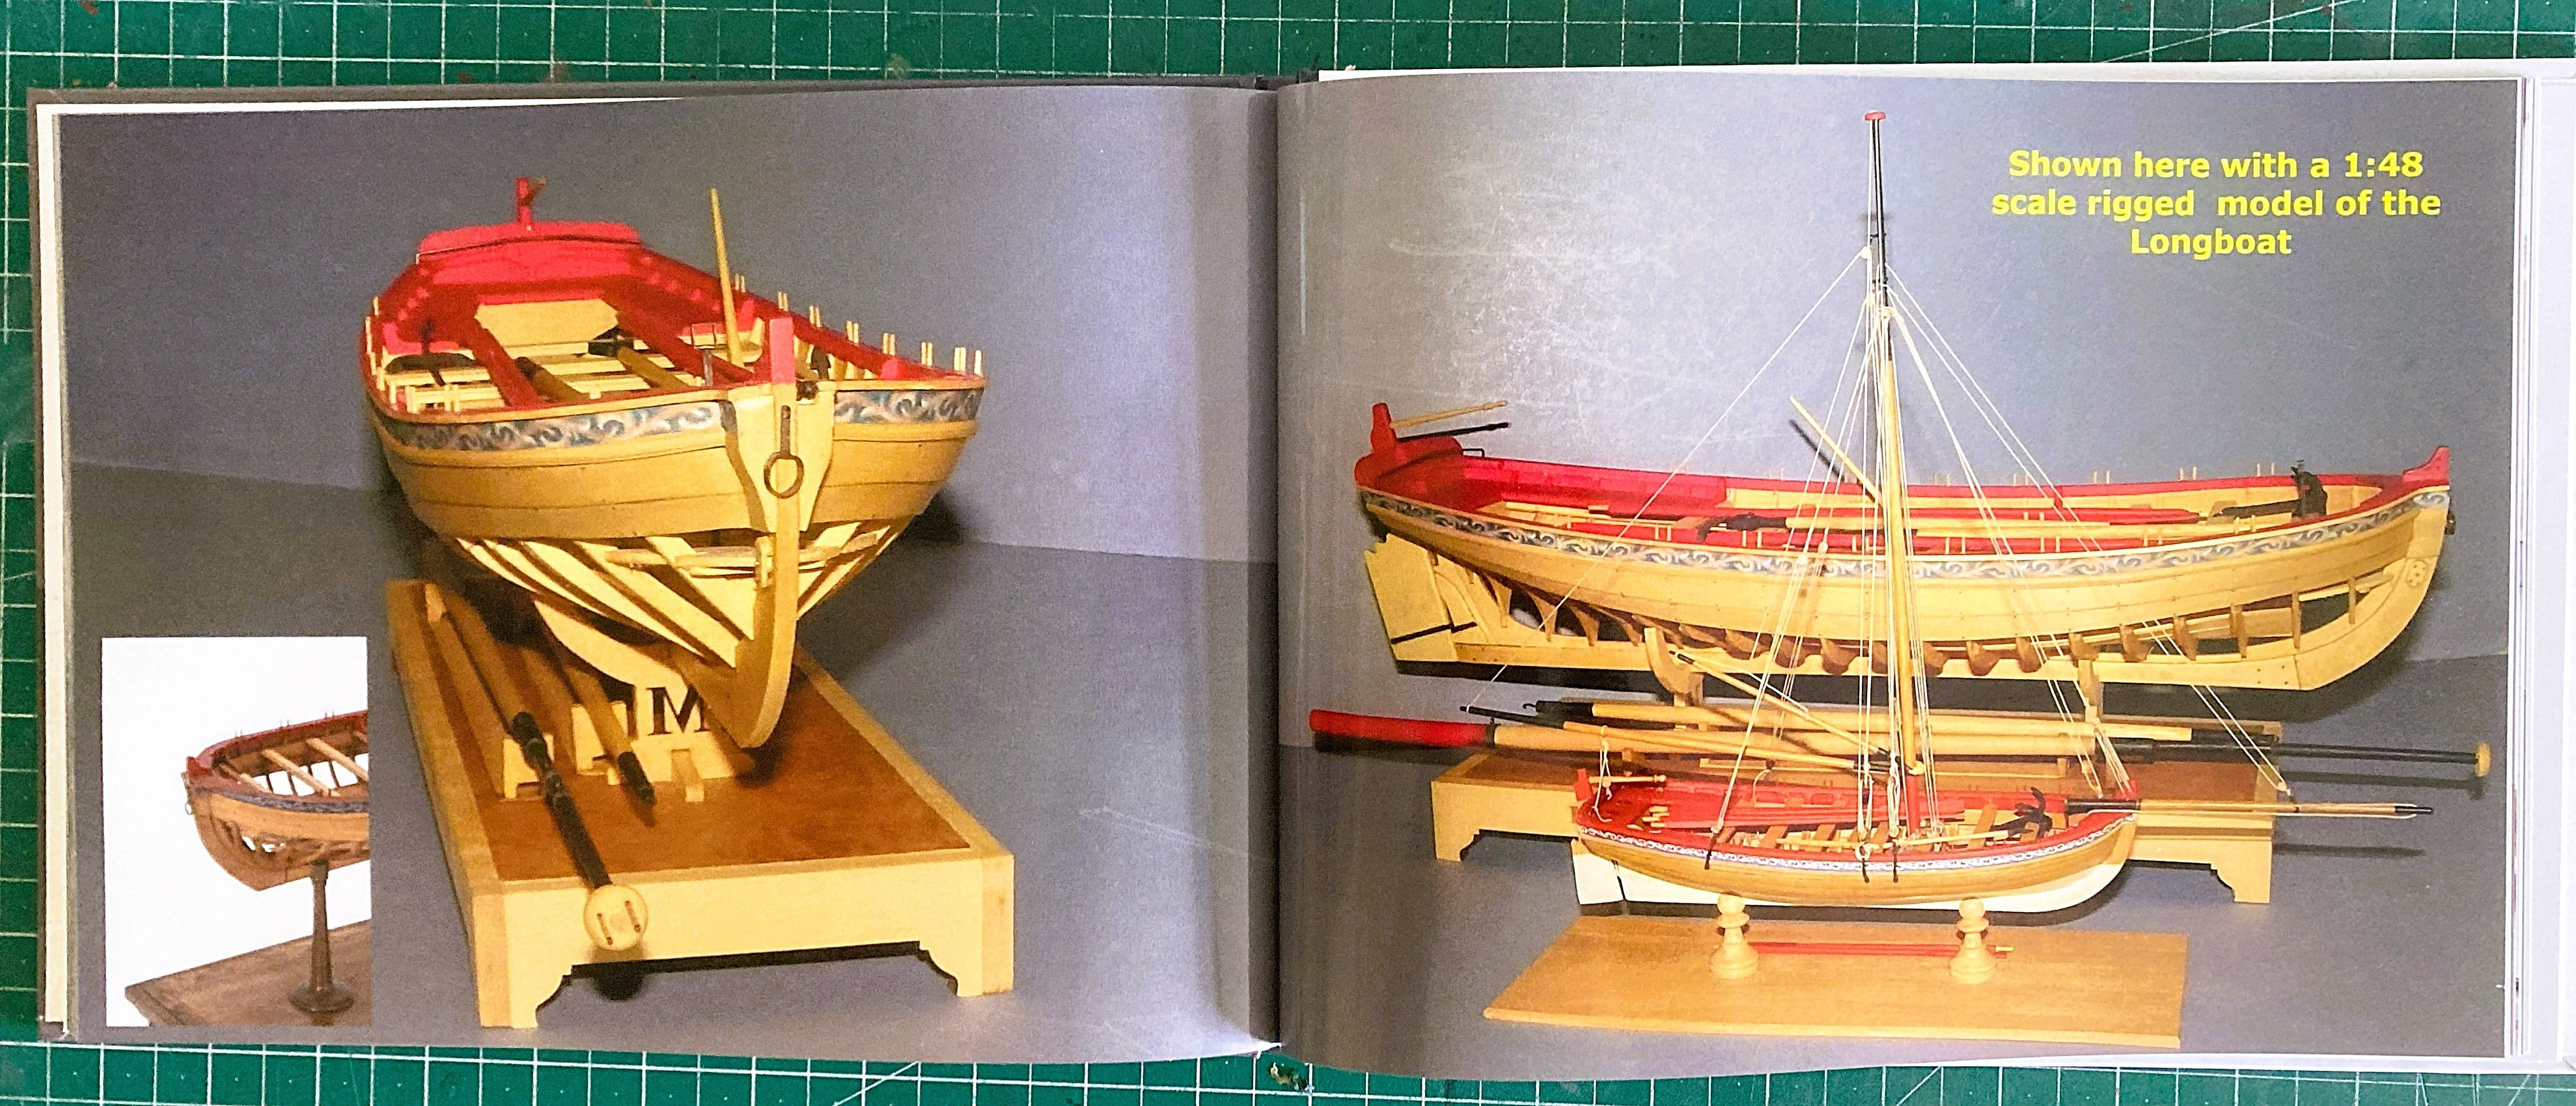
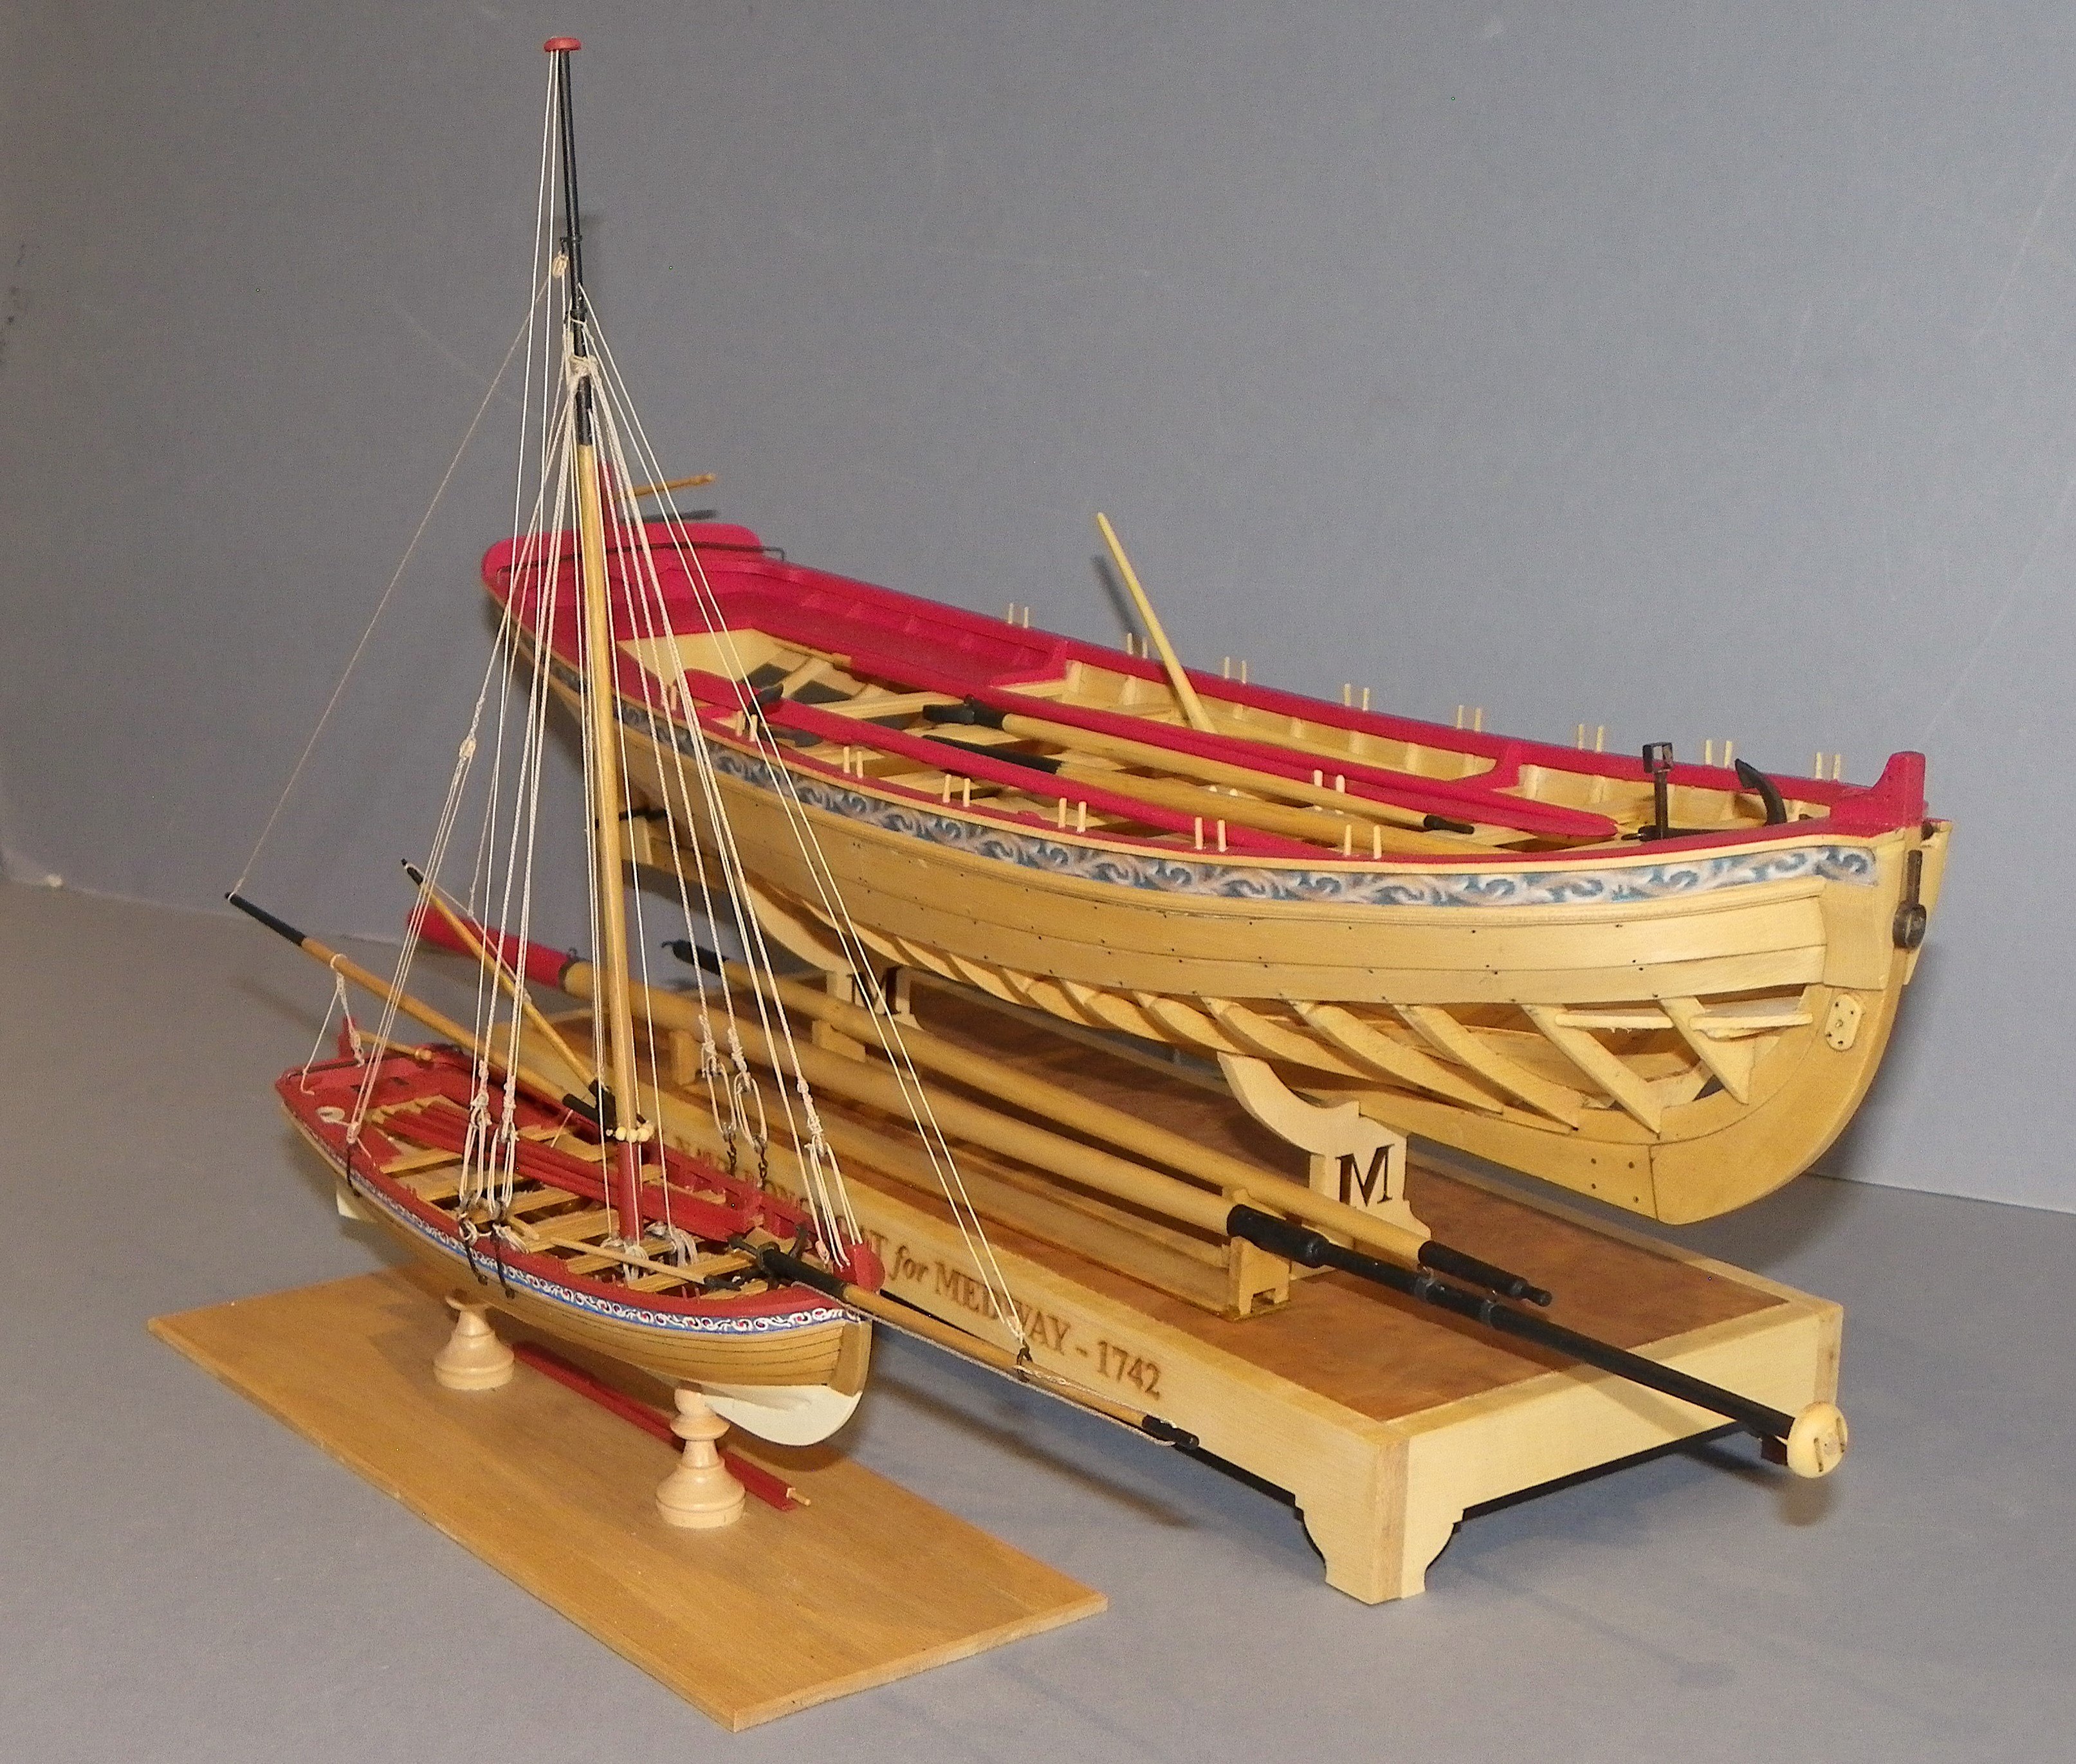
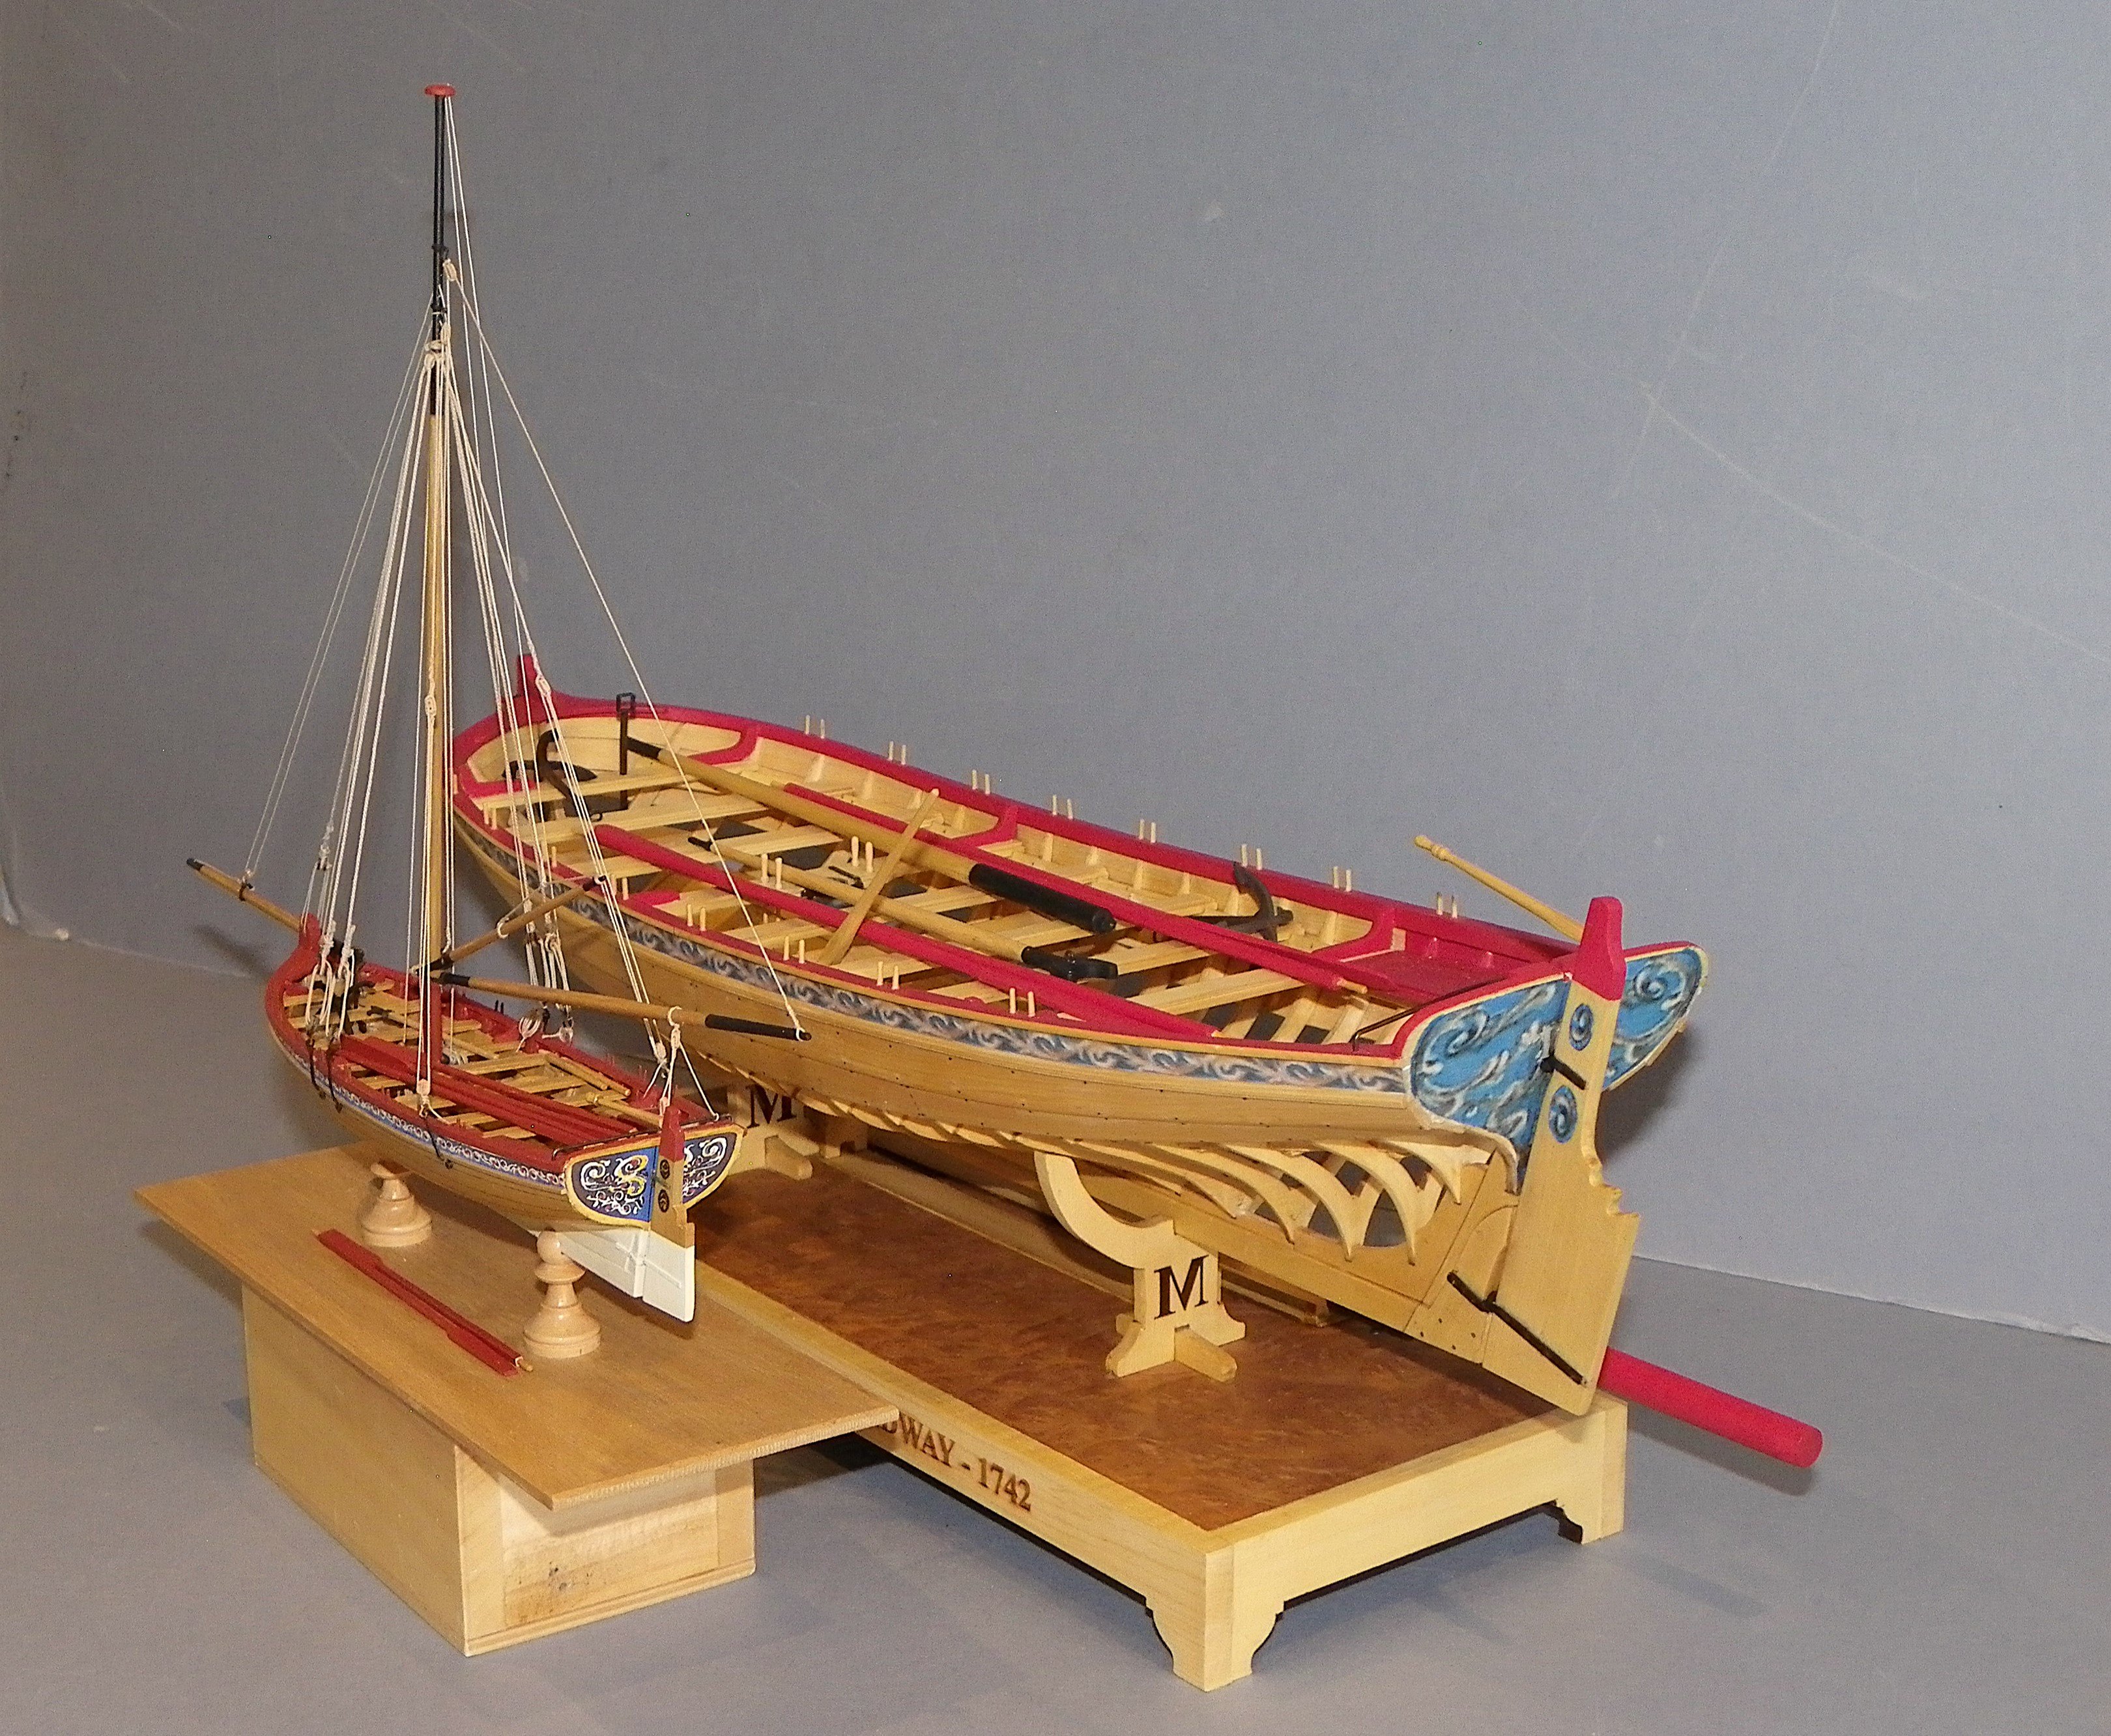
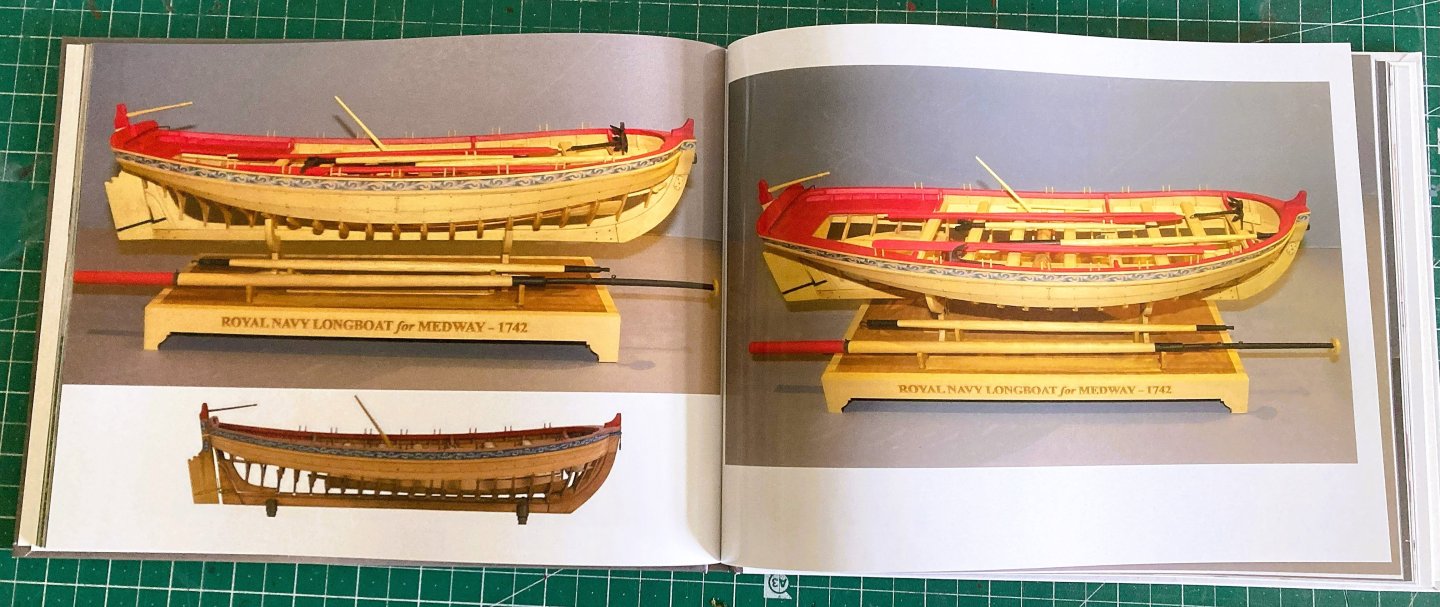
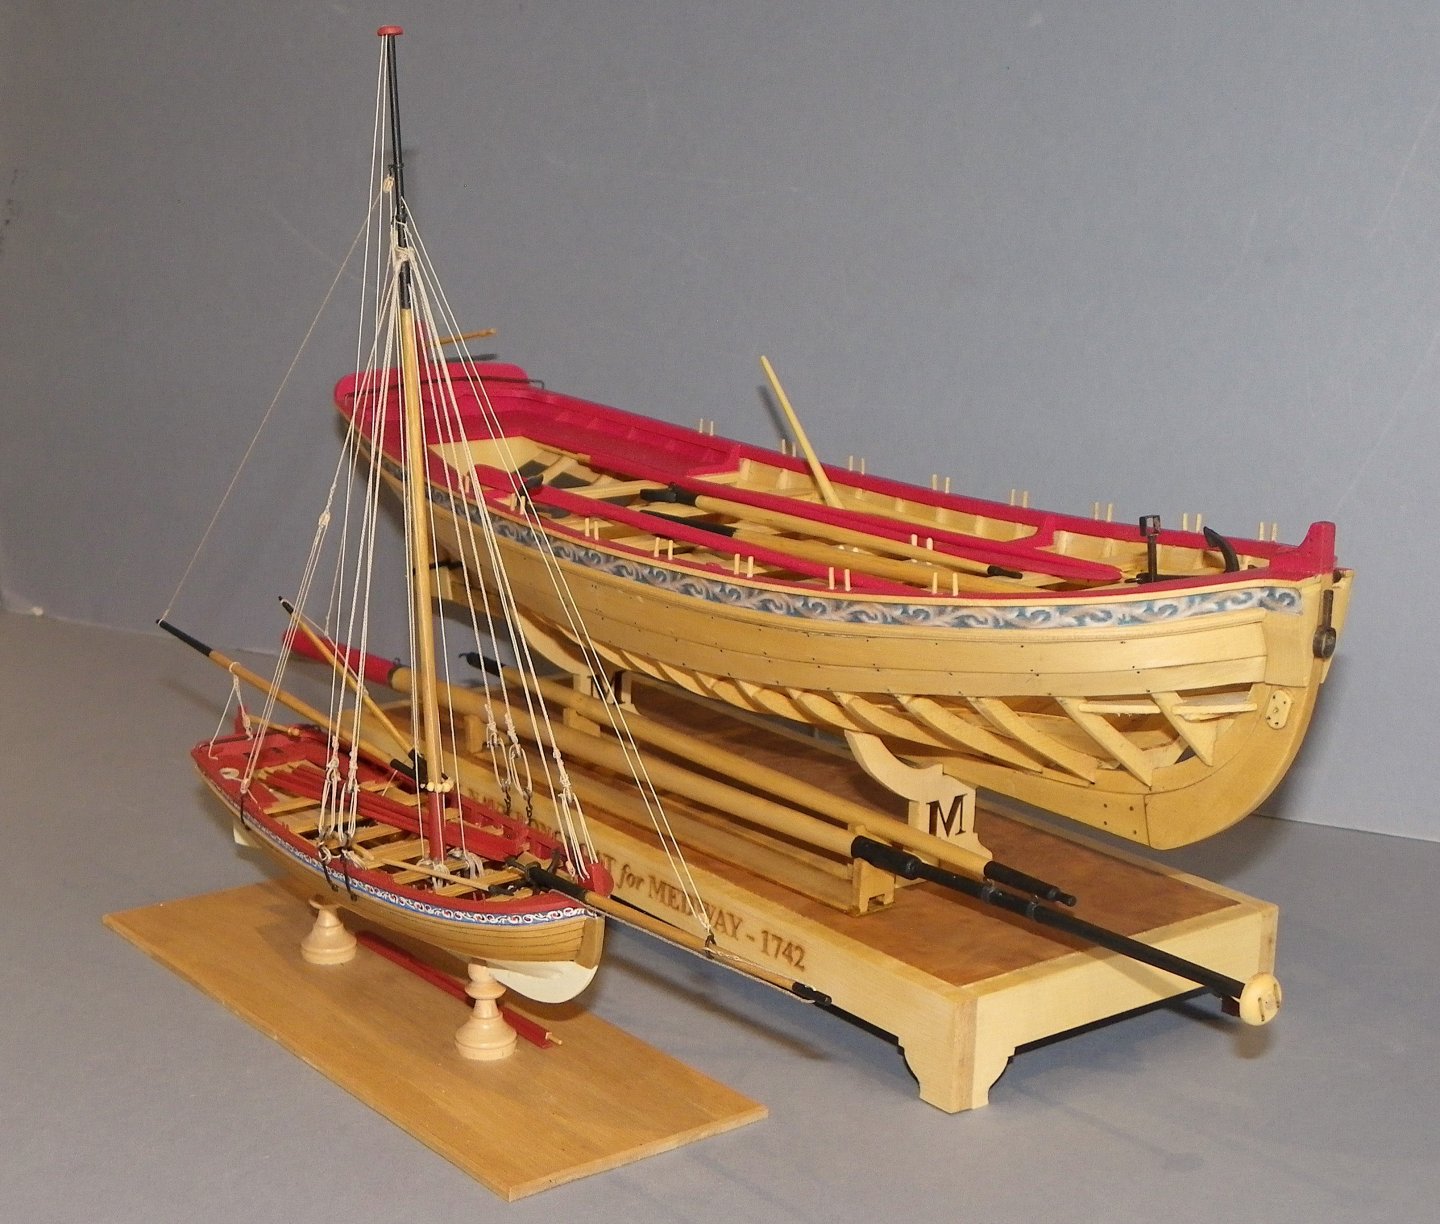
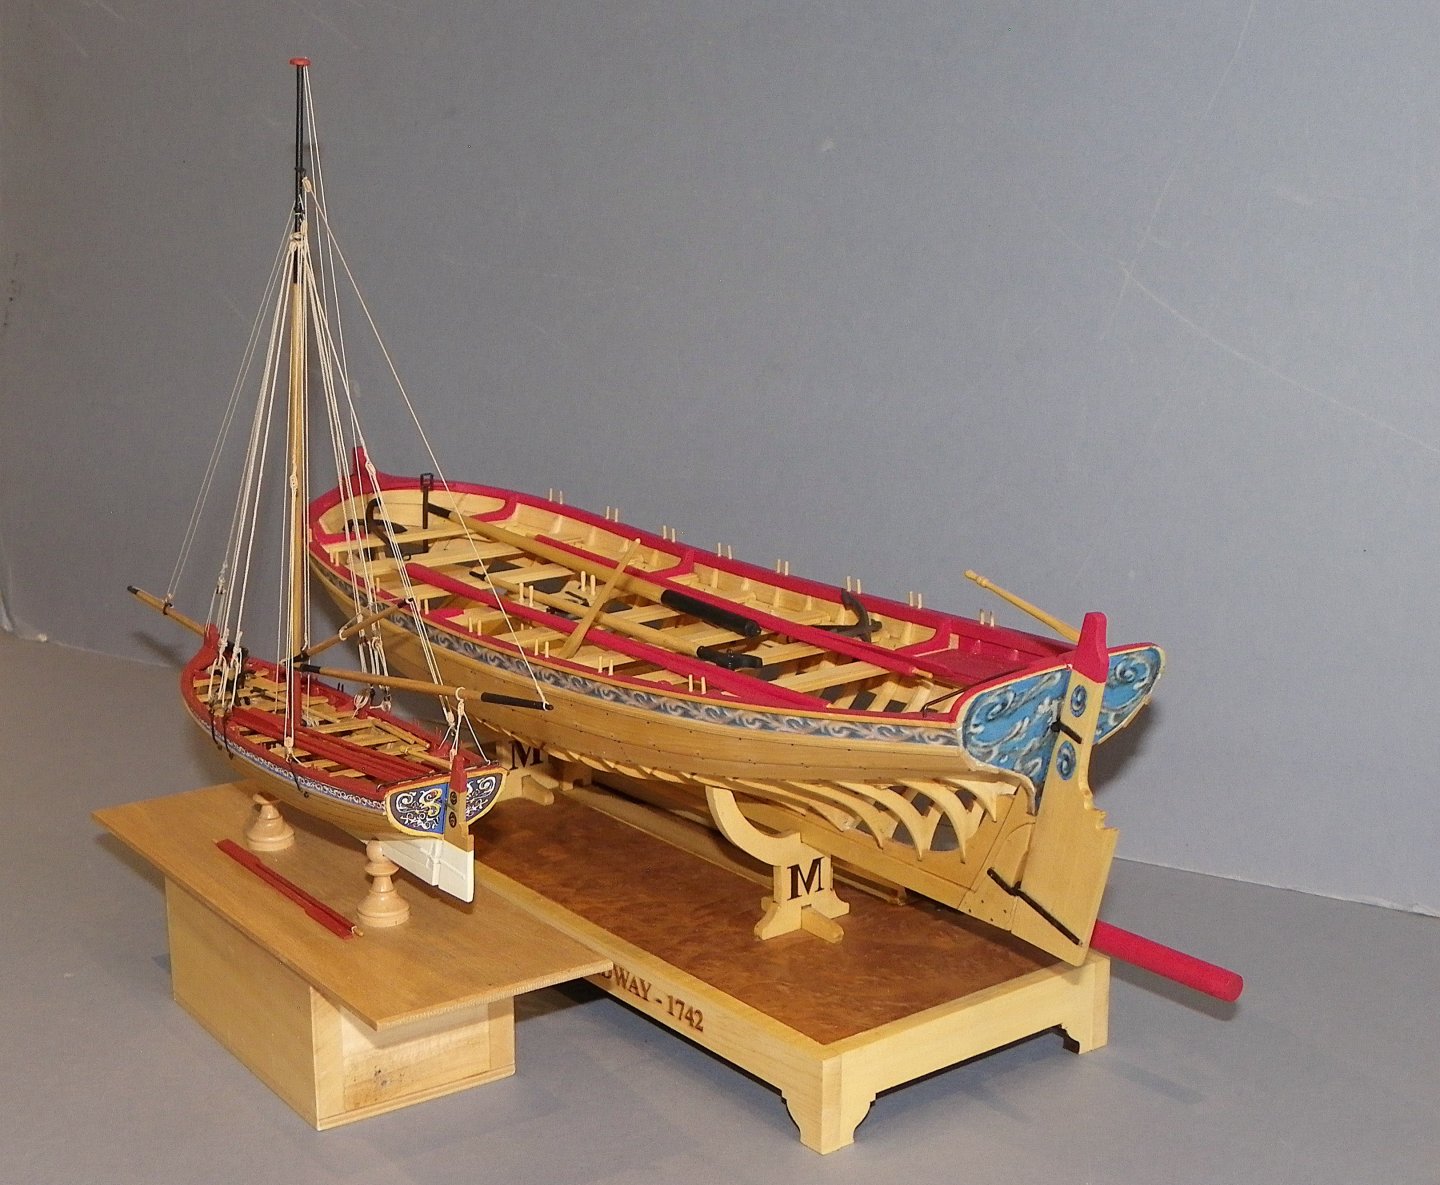
 Congratulations B.E. on finishing your Medway Longboat. It turned out great. The photos of the two different scale longboats are my favorites. I have enjoyed following your build log.
- 131 replies
-
- 1
-
-
- Medway Longboat
- Syren Ship Model Company
- (and 1 more)
-
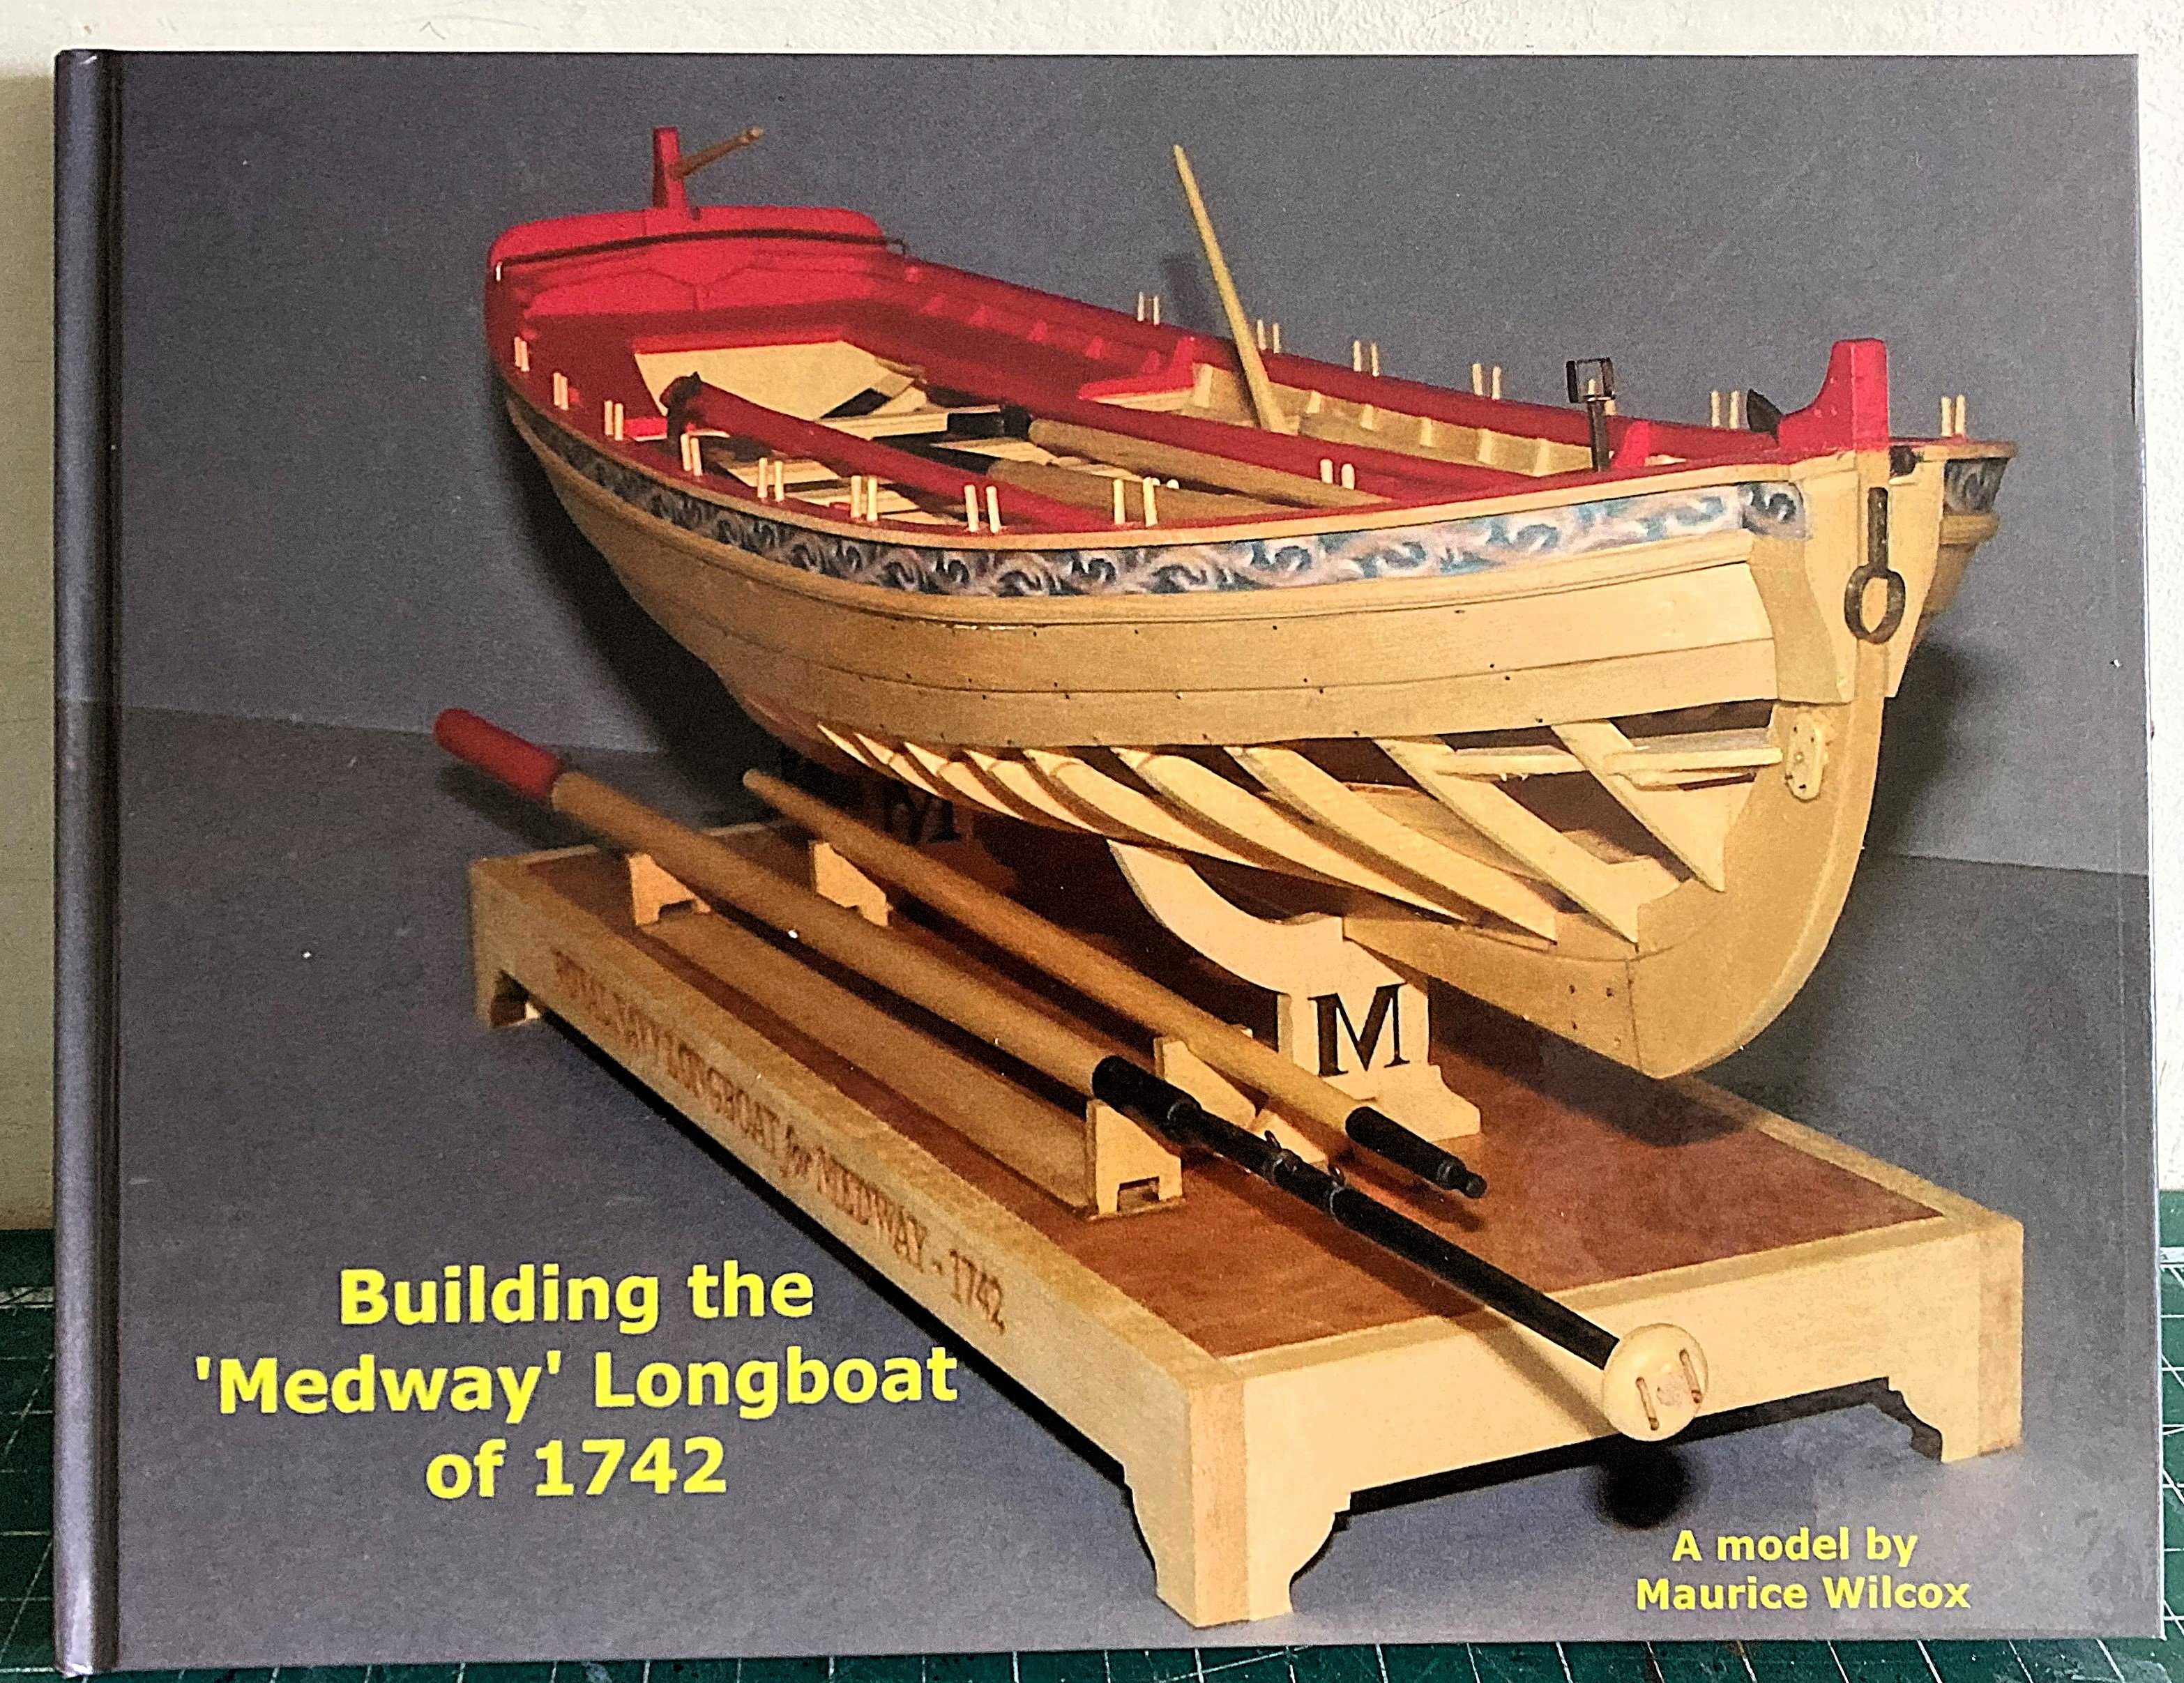
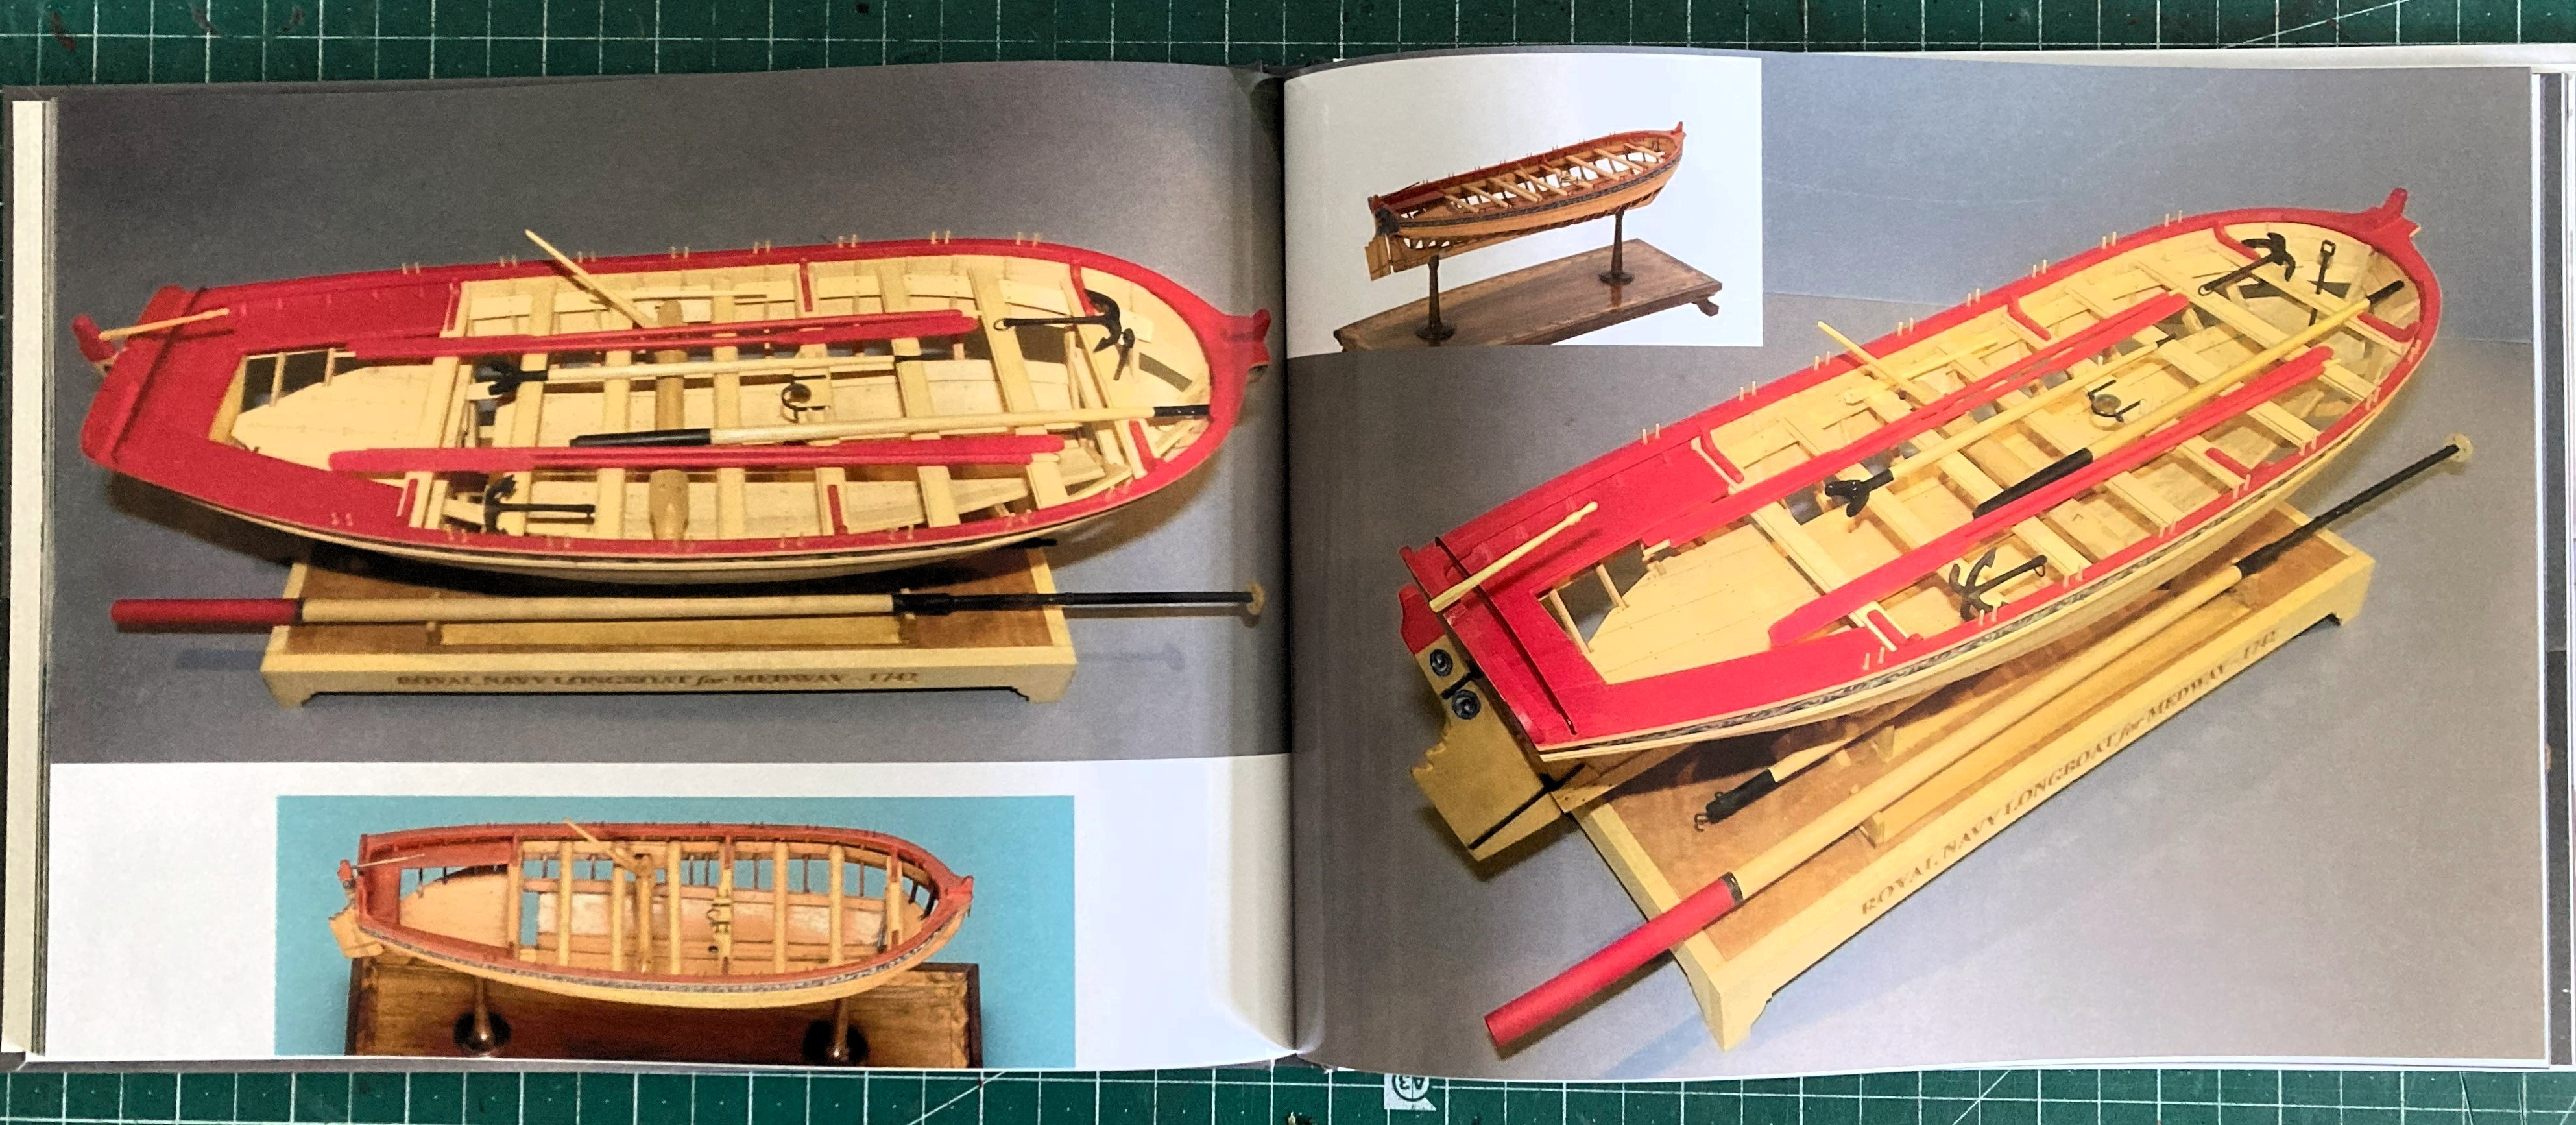
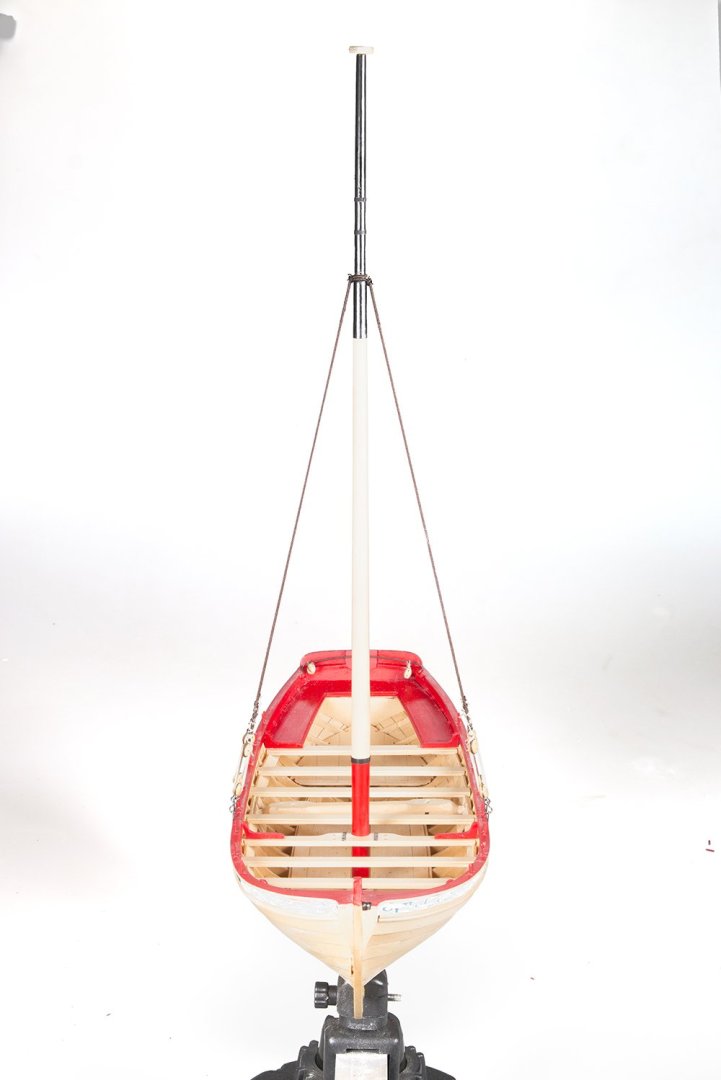
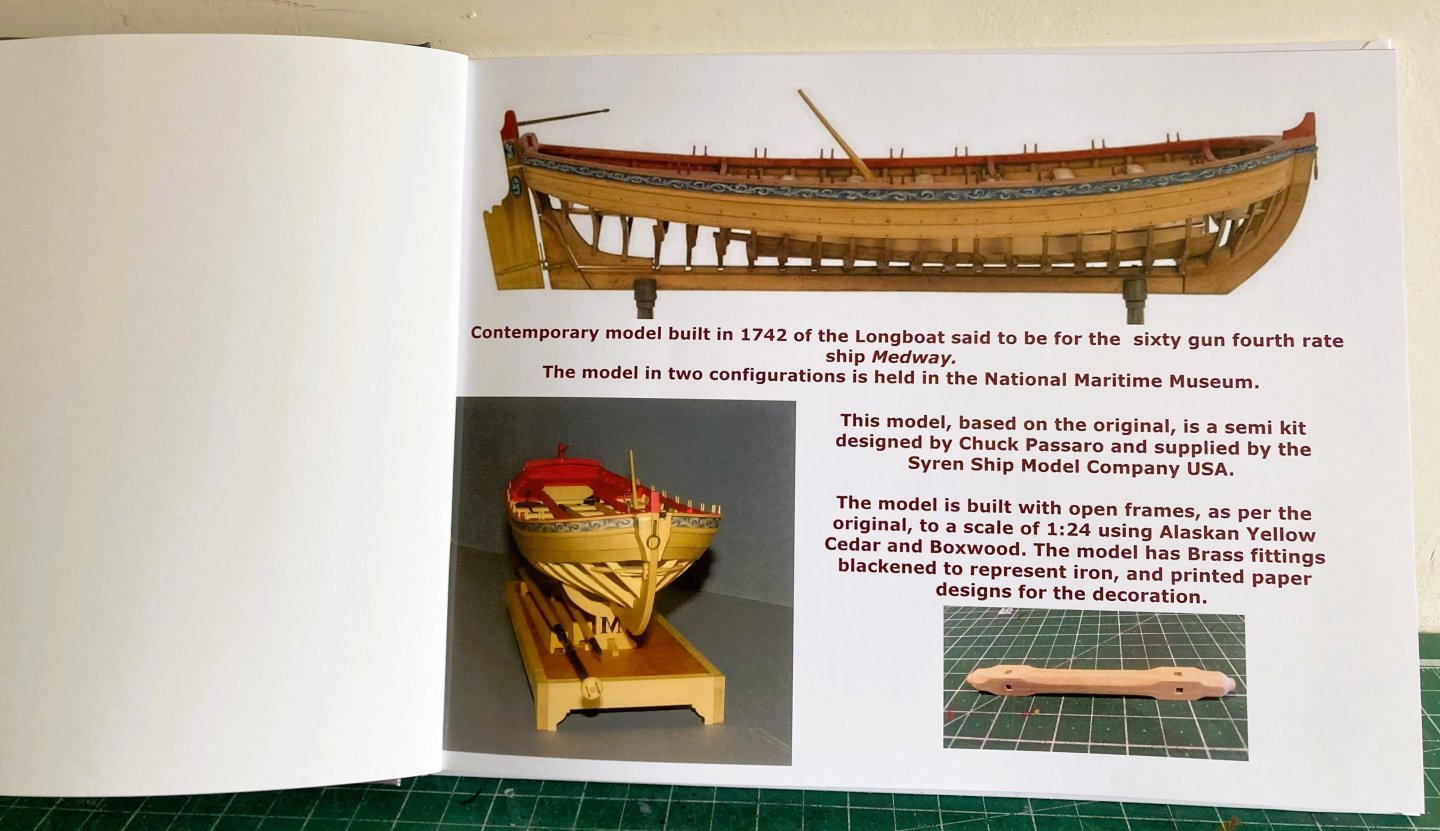
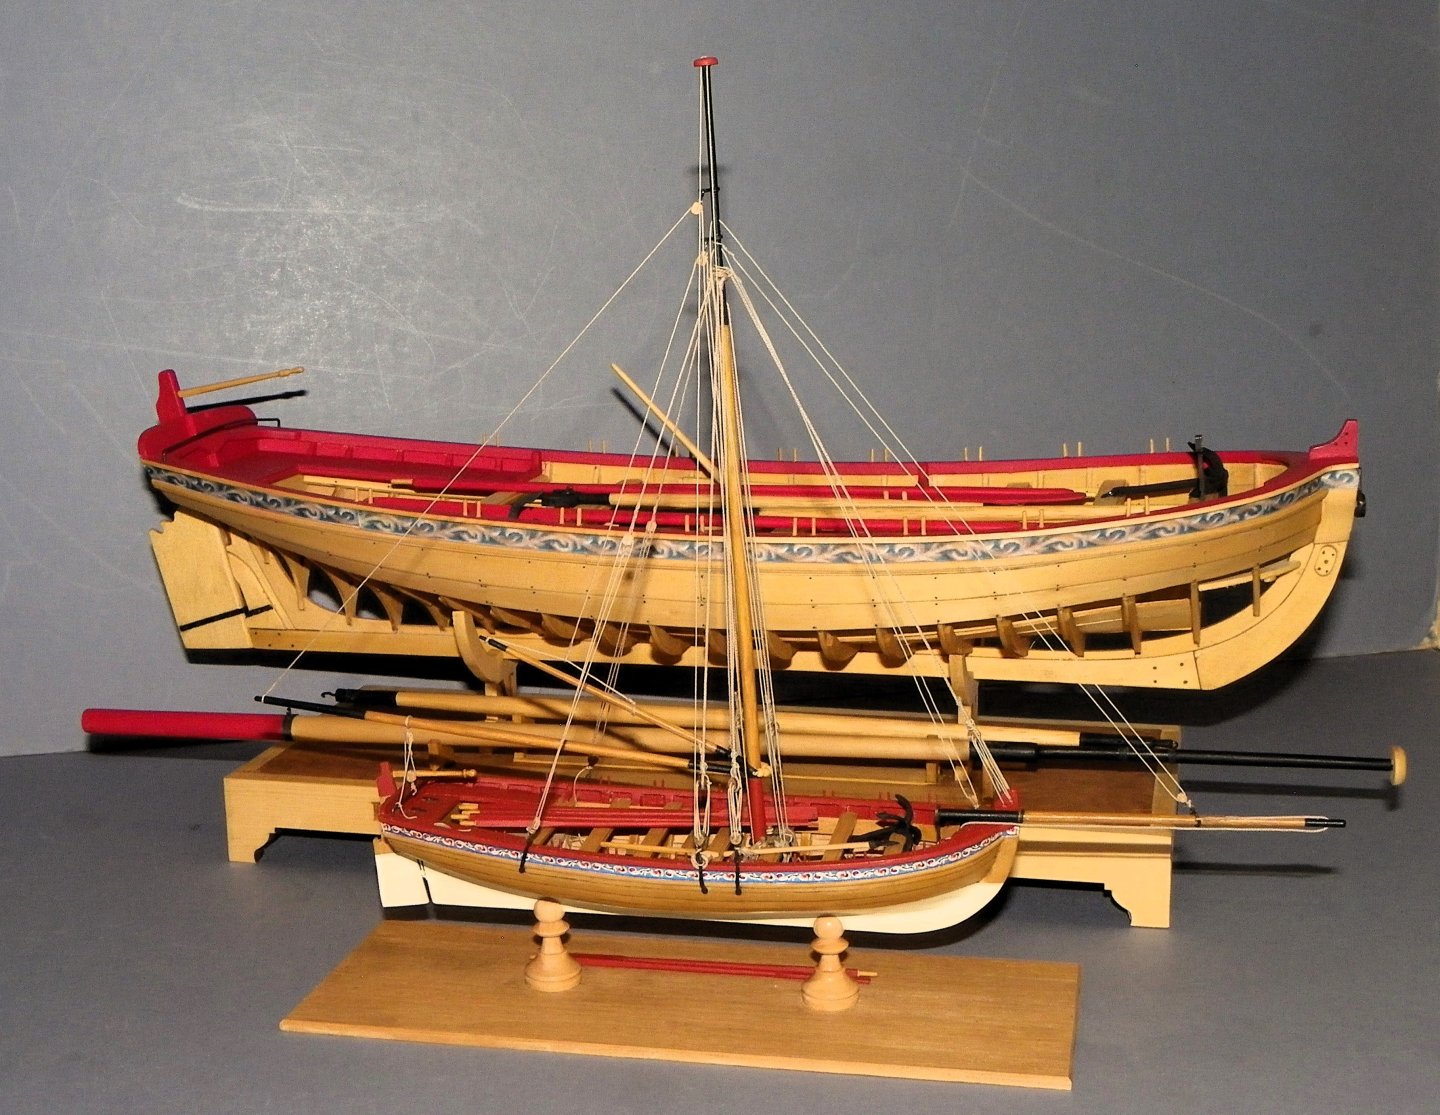
And finally….. Those familiar with my logs will know that I create a build photo book for my builds. The one for the ‘Medway’ Longboat has just been received. 2932a 2933a 2936a 2938a 2939a Purely for my own satisfaction but it is nice to have a ‘hard copy’ recording one’s efforts. One of the reasons I didn’t mast and rig her apart from space considerations is that I also have the Chuck designed Model Shipways Longboat at 1:48 scale, fully rigged. 0318 0319 0324 My eyes find it hard to believe the scale difference between 1:48 and 1:24 for basically the same boat, but I love the look of them both. 0343a I’m currently taking a break from ship modelling, for how long I don’t know. Regards, B.E. 24/09/2024


- 131 replies
-
- 19
-
-
-
- Medway Longboat
- Syren Ship Model Company
- (and 1 more)
-
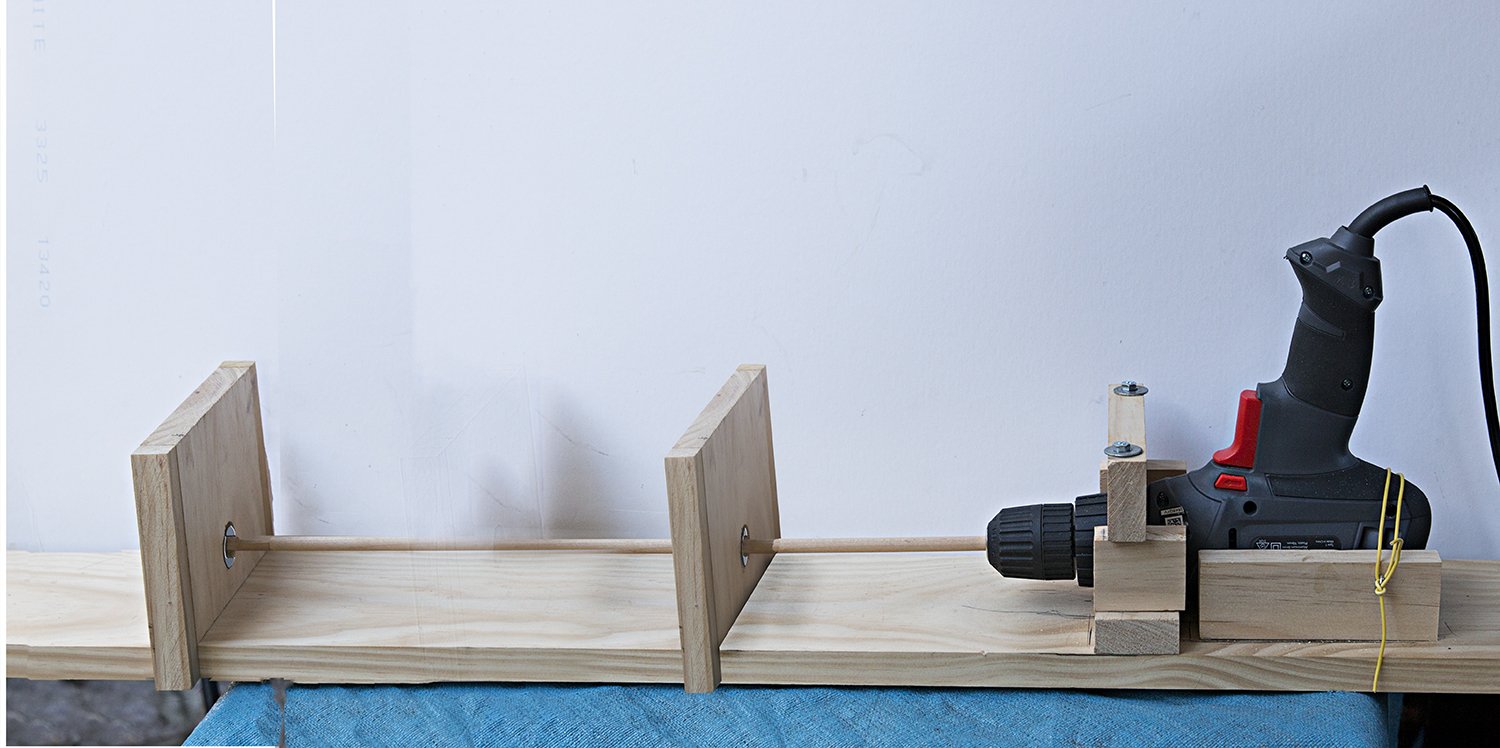
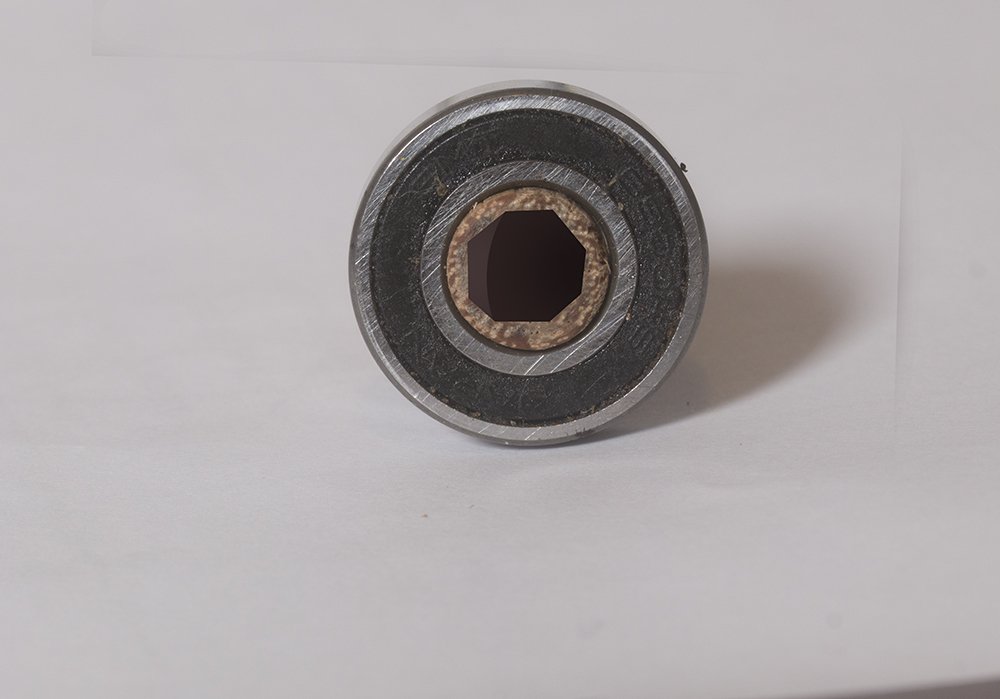
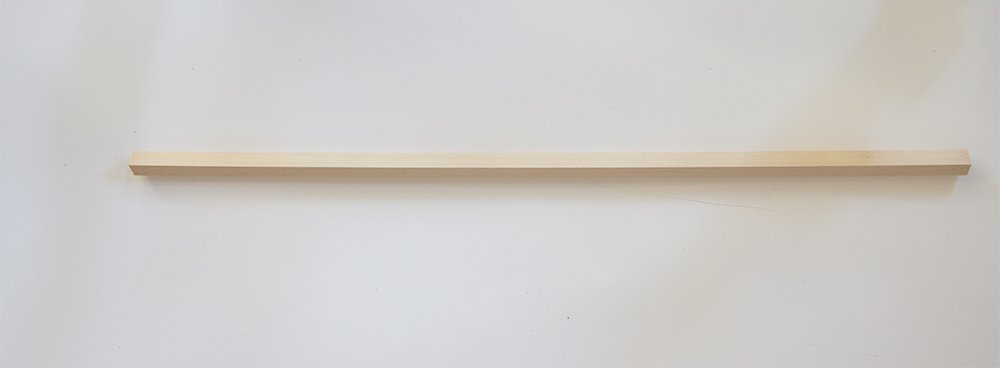
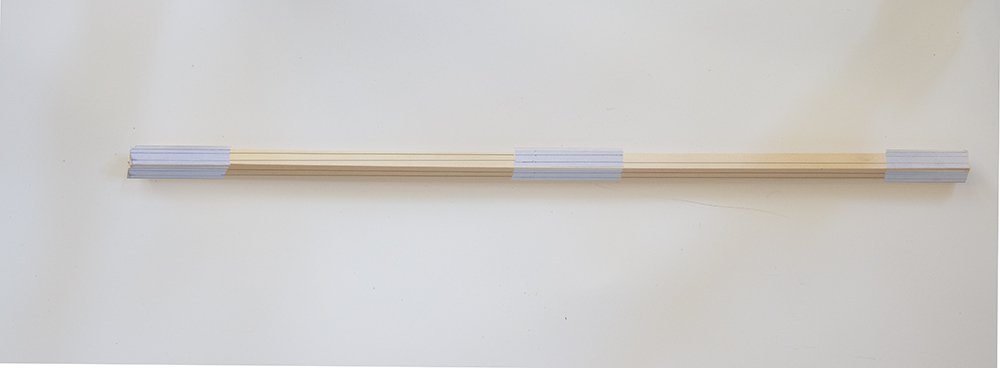
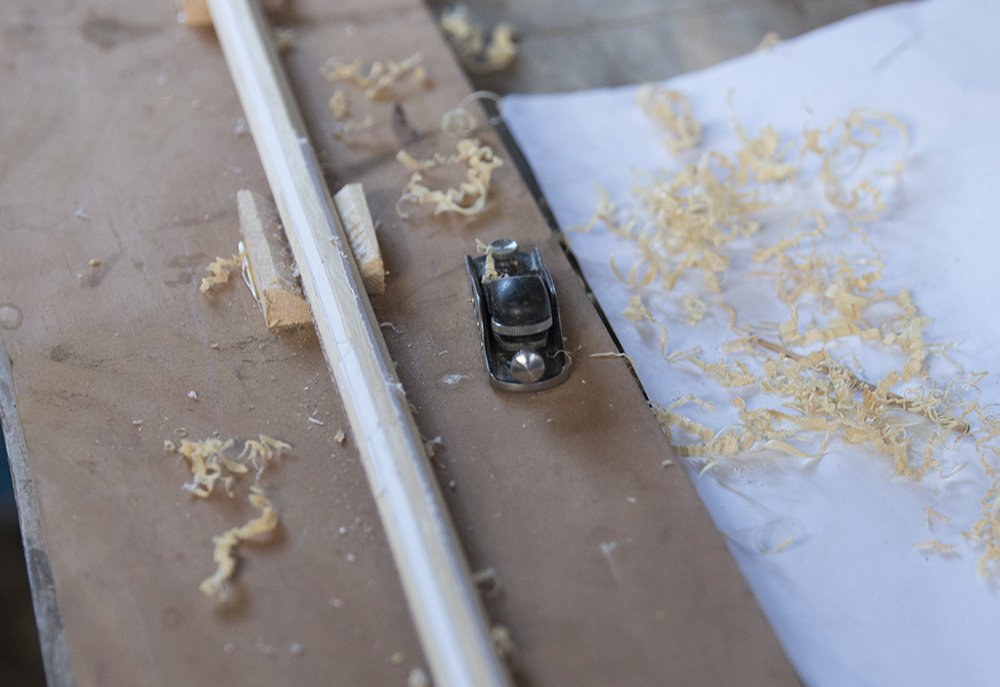
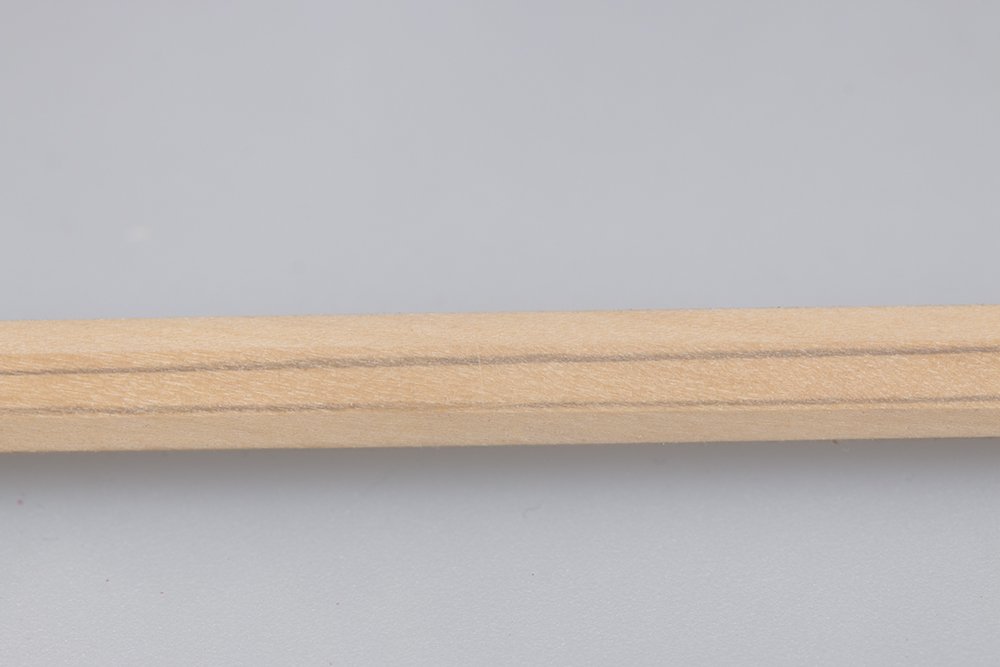
Fabricating the Mast The mast is turned from square stock which is first planed to an octagon using a 7:10:7 template provided by Chuck Yo can see that in this last shop a little more planing is required but I feel this is not critical. However it does help with the subsequent turning if the blank is symmetrical.. I use a home-built lathe to do the turning. This is not just to save a few dollars but believ that my version addresses some of the deficiencies I found using The Proxxon 250 owned by a colleague. These are: 1. even the slowest speed is two fast. 2. There is no steady support provded 3. Although this deficiency is claimed to be addressed by the hollow chuck, I found that specially for narrow spars, this caused a "whipping" which often shattered the spar motion which often shattered the spar. So in my version I use a variable speed electric drill and two moveable platforms. These align with the drill chuck and have a roller-skate bearing mounted in the center. If the spar is hexagonal or smaller diameter than the bearings, then wooden inserts are fitted. After here is the result after completing the turning And then after painting steel bands are simulated with black tape an eyebolds added as detailed in the plans John


-
Yes, Tom, they are intended for applying glue or paint but the foam is quite stiff and I find that with a little pressure toward the perimeter of the sail the wrinkles are rolled out. The large one is about 40 mm and the small one about 20 mm . It may not work for everyone of course and you have much more experience than me on using your fingers. Regards, John
-
 I'd be interested is how they work. I've also smoothed out the wrinkles with a weight bristle brush. On first impression, the sponge may not be stiff enough smooth out the wrinkles. I think that these are intended to apply glue etc. If they work for you that's great. Tom