Modeler12
-
Posts
1,716 -
Joined
-
Last visited
Content Type
Profiles
Forums
Gallery
Events
Everything posted by Modeler12
-
 Well, I have given up on Corian for modeling (for now). I tried to turn another piece i my lathe to make a corronade and it also broke. It is just too brittle. It worked well with my mill, cuts nice and clean, takes paint, but is so-so with adhesives and it is too fussy when any force is applied to the side (like in turning a lathe project). But, like the old saying goes, 'nothing ventured, nothing gained' (or something like that).
 -
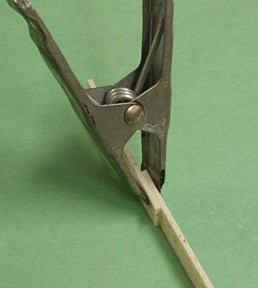
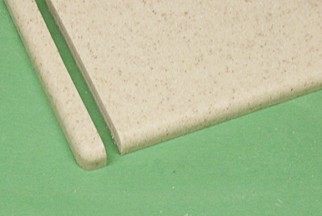
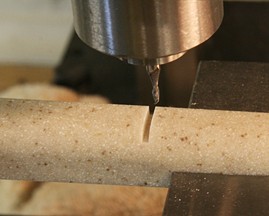
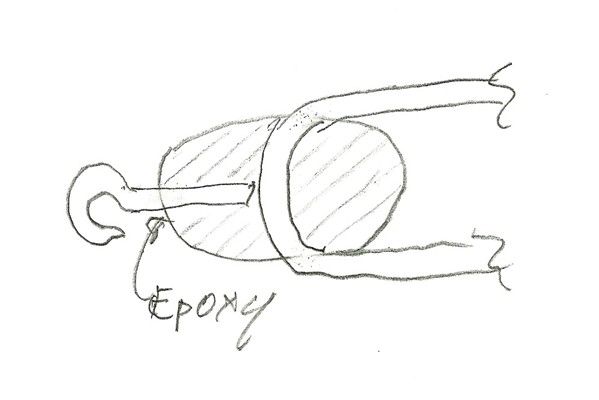
Weight should not be a problem if you compare it with materials typically used to make cannons. Brass and pewter are much heavier. Wood is lighter but not often used to make cannons. I don't know the exact density of Corian but it is probably similar to Plexiglass (acrylics). Here are some results of my tests. I took videos of all of this but it takes a while to edit and publish that. Perhaps I'll add more later and show the results. But let me use words instead, right now. 1. Bonding Corian with PVA did not work. It fell apart almost by lifting the pieces off the table. No big surprise. 2. My first try using CA did not fare much better, but that was because I did not sand the surfaces. They were as cut on my table saw. When I repeated the CA test after sanding the results were much better. Pulling on the two strips was very strong (I could not break it). However, when bent the two came apart with a snap. This 'cleavage test' is tough on any adhesive including epoxy. 3. Borden's plastic cement did not work very well which surprised me. The upshot is to try epoxy and if that does not work I'll give up using Corian for anything that needs a strong bond. Meanwhile I tried turning a square piece in my small lathe. I purposely had the piece stick out of the chuck by about 2 inches. As expected, it chattered a lot when I used a regular bit until I got down to round stock. I forced the issue and took a good size bite which broke the piece in two. The cantilevered end just did not like what I did to it. I repeated this but after getting it round, I drilled a center hole in the end and used a center support to turn the piece down to about 3/16 inch. After that I forced the bit towards the center and as expected the part broke. With care I am sure I could have gone down to 1/8 inch diameter and with a shorter piece and some support down further. However, I learned enough to say that this was no worse than I have happen with wood. Metals such as brass are better, of course. Finally let me just say that I would not make a 'wooden ship model' with Corian, but I may use it for small parts such as cannons and special items. Let me add this picture. The drawing is full size of the cannons I need. The break did not come as a surprise because I knew that I was stretching the bite I was taking. So, next time . . .
-
Don, that could be where the rub lies. The stuff is not cheap. You can buy tiny samples at Home Depot or go directly to DuPont. http://www.dupont.com/products-and-services/construction-materials/surface-design-materials/brands/corian-solid-surfaces/products/corian-all-colors.html?src=SNP-en_us-BI-corian-link2 You can see the large variety of colors to choose from. A 2x2 inch sample costs $4.00 at DuPont (or $10 at Home Depot). A 10x10 inch sample is $23.50. Don't ask how much a whole counter top would cost. If there is a local contractor who installs kitchen counter tops, you might be able to get some scrap pieces. That is how I got mine. If I can turn it well on my lathe, I might still consider buying some black for making the cannons I need, or paint them.
-
Before I go to bed tonight, I decided to add a couple more 'tests' about glue. I took the broken pieces of Corian (0.085 inch thick) and glued them with some CA. Then I took the previously cut piece and glued it to the slab with some PVA. We'll see what happens tomorrow when I try to 'break' them along with the others. I left out the epoxy test because I already know it would outshine the others. So why bother?
-
Mark, to repaint a counter top and expect it to be ok is a real test that paint will work. I am not sure that we have to worry too much about wear and tear for our model ships. For an interesting article about epoxies go to: https://davidneat.wordpress.com/tag/what-does-epoxy-resin-stick-to/ Note in particular the fact that epoxy resin is relatively harmless to the skin; however, the hardener can be very much so. There are several different chemicals that will act as 'hardeners' or catalysts, but the one I use causes itching very quickly after contact. I have to wash my hands with soap soon afterwards. Of course, the manufacturer won't tell you what they use, unless you send for their MSDS.
-
Good point, Mark. I am positive that AC will work if the surfaces are smooth enough and in good contact. After all, Kodak developed AC (known as Eastman 910 back then) for use in spllcing acetate film. PVA most likely will not work and epoxy most likely will. I'll give them a try. PVA was designed for use on wood products and I cannot see how that will hold plastics together. Epoxies work with plastics if you prepare the surface by sanding, etc. The release agents used on plastic parts needs to be removed. Perhaps MEK based glues used on plastic models might work. We'll see.
-
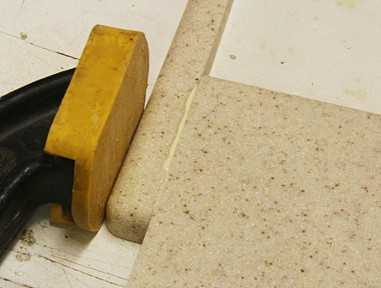
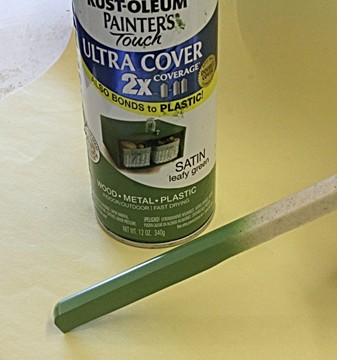
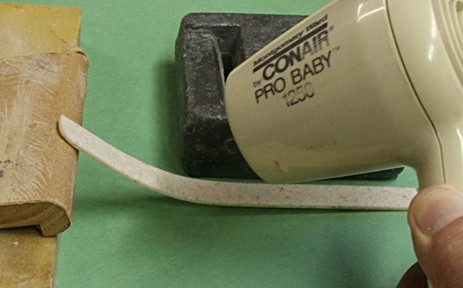
Ok, more questions and that is good. Let me mention what I have done today. It is with regards to earlier questions. Painting Corian is no problem. Will it stick? That is the real question and I will find out tomorrow morning after the sample below has had a decent time to 'cure'. The top and bottom of the slab were 'as received' and the edges were machined (and in one case sanded by me). I''ll scratch the surfaces tomorrow. Can I cut strips? I used my large table saw and cut a slice off the slab. I didn't really care to set the thickness exactly, I just wanted to see how it cut and what the surface looked like. I found that it cut more uniformly than most woods. It was easy to lead it through the saw blade and the cut surface was just fine. The thickness ended up being 0.085 inches with a variation of +/- 0.002 inches along its length. Will it bend? Corian is impervious to most liquids and steam won't do diddily. Being a thermal plastic I figured heat would be the only way. As it turned out it took a lot of heat before it would take a change of shape. I broke the strip on my first try when I bent it too cold. More heat and then a heavy weight did the trick. On hind sight, that is just as well, because this is a material for kitchen counter tops and I have placed hot pots on it with no harm (but not too long, please, says the admiral). The material sands well. Is the dust harmful? Probably, if you were to inhale it. It is just like cutting any thermoplastic such as clear acrylic. It smell bad, so don't breath the smoke. If it smokes, stop cutting. Use ventilation and common sense. Tomorrow I will try to put some on my mini lathe.

-
I will try to turn some of the Corian I have and see how small I can go (diameter). I also want to try other things like bending it (with a little heat?). As far as I am concerned, ship modeling is just that and I don't call them 'wooden ship models'. Like I mentioned, there are beautiful museum quality models made out of ivory. If you like to use wood for those parts made out of wood on the real ship, fine. But shouldn't you also be using steel for the cannons (not brass, although there were some, of course) and no plastic what so ever? Hemp should be used for the rigging, no synthetics, no nylon, of course. That I think is stretching things a bit too far . For those interested, I will let you know about my machining experiments later on.
-
Elsewhere on this forum there is a heated discussion going on about the kind of wood to use for modeling, should you grow your own, etc. But how about 'non-woods'? I have seen beautiful models made out of ivory and bone. I am not sure if anyone has made a complete model out of metal, but how about Corian???? Corian is an acrylic based material made by DuPont for use in kitchen counter tops. We have it and I love it. It is easy to keep clean, works great for kneading pasta, and you can buff it to re-shine or repair the surface. So, I tried to cut a piece left over and band-sawed it. Worked fine. Then I chucked a piece in my mill and cut a 1/16 inch groove. Worked like a charm with nice clean edges. I want to use some to make cannons and carronades for my model. So, we'll see how that goes. Does any one have experience working with Corian or other similar products? I know there are some Youtube videos out there.
-
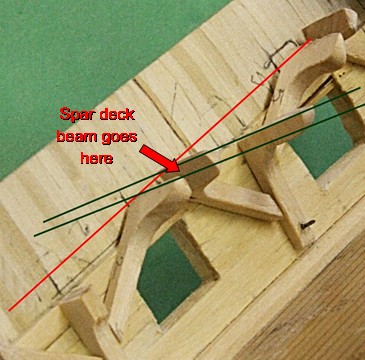
May I clarify, please. In real life, the three knees come together and are bolted to each other and to the frame before the spar deck is added. Of course, I chose to be different and built the spar deck before all of the above. Trouble!!!! During my fiddling, I had to keep in mind the alignment of all those weird body parts. The vertical knees support the beams above. The horizontal knees tie the spar beams together and then the slanted knees tie those all into one happy family. Easy!!! Bull. I have had more trouble here then anywhere. The horizontal knees are already attached to the spar deck. likewise, The beams of the spar deck are already in place (but the whole thing is still loose). So, when I added the vertical and hanging knees I had to be extremely careful that they were in line and matched the beams of the spar deck above. In the real thing (picture above), you can see an extra board near the ceiling. Ii might very well be to cover up the mismatch that I encountered. I hope you are as confused as I have been
- 572 replies
-
- 5
-

-
- constitution
- frigate
- (and 1 more)
-
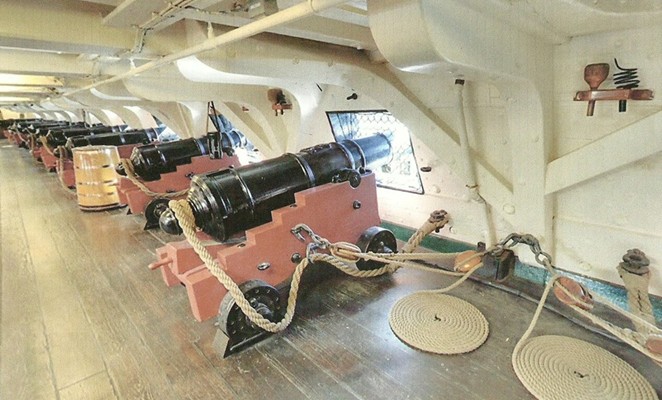
It helps to refresh my memory banks from time to time. This is what it is supposed to look like. Minus the sprinkler pipes and electrical wiring, of course. If I am not mistaken, the vertical pipe you see is another lead pipe that comes from the orlop deck. This is something I discussed a while back. It is probably part of the 'sanitation plumbing'. Notice the slight bend in the pipe (so typical of lead pipes). When are you going to make the cannons, Jay?????
- 572 replies
-
- 4
-
-
- constitution
- frigate
- (and 1 more)
-
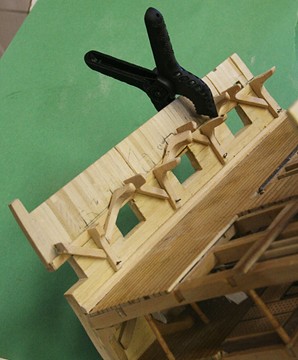
Back to the gun deck. The cannon openings in the hull are finished along the port side and the standing and hanging knees are in place. I have to remember to drill holes for the breech line eye bolts in the waterways. The double eye bolts you see in the standing knees are for the gun tackles. The alignment of the hanging knees with the spar deck is not perfect but has been tricky to work on, to say the least. Once the spar deck is in place those intersections will not be visible, unless you use a dental mirror . The next step is to cut the openings and install a few knees on the starboard side.
- 572 replies
-
- 5
-
-
- constitution
- frigate
- (and 1 more)
-
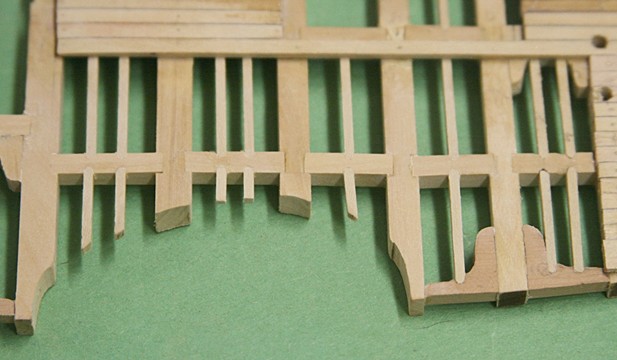
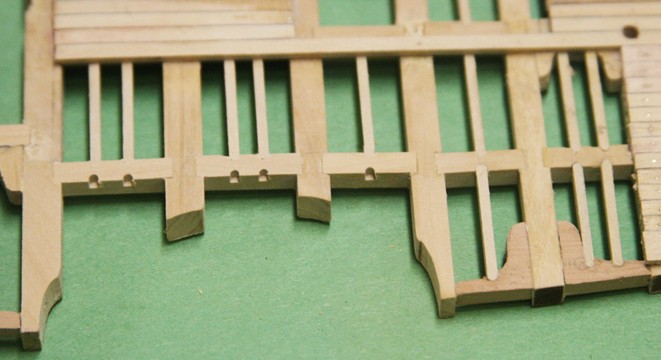
The following is primarily intended for Mark. I show the closeup below because of the dimensions and the vertical calibration of my mill (from Little Machine Shop). The joist stock I am using measures 0.062 x 0.082 inches. Hence I use a 1/16 inch diameter bit and route the slots I show. The depth is set at 0.080 inches so I have a little bit extra for sanding. To set this depth on my mill I have to turn the z-axis dial one full turn plus 0.010 inches more. Strange design to have 0.070 inches per turn. But I am used to it now. The slots are flat on the bottom but rounded at the ends. Thus I have to round the ends of the joists to fit. I know this is not kosher but the result is ok for me. Locating and cutting these grooves by hand would be a monstrous task.
- 572 replies
-
- 5
-
-
- constitution
- frigate
- (and 1 more)
-
I agree with jb. On my Conny I ran into a lot of extra eye bolts that I did not install until needed during the rigging of the masts, etc. You might also consider installing the pin rails now for the same reason. In addition there are several cleats, but it looks like you already did those. Once you have the locations of the canons done, you don't have to permanently put them in place until much later. One suggestion I have for the pin rails is to add a couple nails or pins to the back side where they butt up to the bullwark. You then drill holes to match. This gives a much stronger joint which is important during the rigging. I happen to break a couple loose because I did not do that. The channel and fife rails are areas where that helps. Your work looks great, Mike.
-
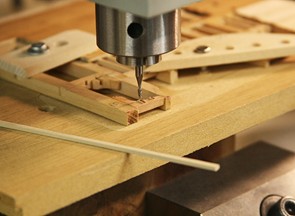
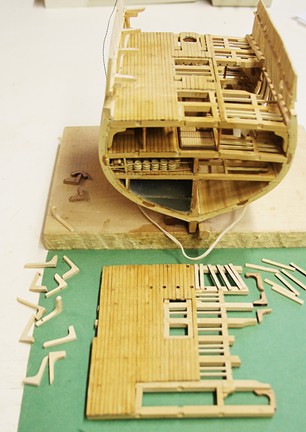
Ok David. Here is the next step. Even though the gun deck still needs lots of work, I decided to do a couple more things to the spar deck. It will be the most visible from above and I want to make sure it will fit in correctly. After I installed the horizontal knees I also had to add a few more joists fore and aft. The mill came into use and I had to remember how I did this last time. The 4 inch vise and rotary table are still in place and I made a wooden top with block that I can mount in the vise. A couple screws and wooden plates hold the spar deck to this wooden top and this is good enough to mill the 1/16 inch wide slots as shown below. The second pictures shows two of the joists in place to the far right. I also added two more deck planks along the port side. This is where the waterway fits against the frames and planks. Thus I had to do this fitting with the deck in place. There is another waterway full length on the starboard side. It worked fine. Now a bit of sanding with my mouse, install some more tree nails and stain to 'almost' finish the pre-assembled spar deck. But no, I still have to cut the opening for the mast, the missing hole for one fife-rail post, and several eye bolts .
- 572 replies
-
- 8
-
-
- constitution
- frigate
- (and 1 more)
-
For a detailed review of their mill go to http://modelshipworld.com/index.php/topic/5783-a-review-of-a-mini-mill-from-little-machine-shop/?hl=%2Blittle+%2Bmachine+%2Bshop I have used this mill for some time and am very happy with it. It runs quietly, goes up to 5000 rpm with a digital speed indicator right in front. The vertical motion can be changed from an accurate dial indicator type to a 'drill press' type with the push of a single button. The table is larger than most mini mills and the accessories are great and of good quality.
-
Mike, the drawings that Allen show should help. Let me add that the block hooked to the eye bolt in the waterway or bullwark is a double whereas the one hooked to the carriage is a single block. The addition of the breech line in the drawings may make it a bit more difficult to see. Also having the eye bolts low (such as the waterway) is more common than high up. There are a couple ways to attach the hook to the block. The standard way takes up a lot of room and I resorted to attaching the hook directly to the block by drilling a tiny hole in the block and making the hook have a straight 'shaft'. To prevent the epoxy from plugging up the line hole, I inserted a pin coated with some wax.
-
Capt'n Bob said it well in his post above. Although I use the two parts (in bottles like he shows) from another source, these epoxies are mostly the same. I also simply squeeze a few drops of the resin and the same amount of hardener right next to it onto a piece of scrap plywood. Then, with a round toothpick I mix the two quickly and use the same or a new toothpick to apply it to the surfaces to be bonded. The big advantage of epoxy is that it is 'gap filling', so the two surfaces don't have to be in exact contact, which is something that is very important with CA glues. With epoxy there is a 'cure time'. This is not to be confused with 'pot life'. The 'five minutes' on the label refers to the time you have before the resin kicks over and the end of the pot life. A full cure can take a few hours or a day. I also have another epoxy that mixes in a ratio of 5 to 1 (resin to hardener). It's pot life is 30 minutes or more which makes it great for large parts that require careful alignment and clamping. The cure time, however, is a day or more. One place where I insist on using epoxy is installing eye bolts. I have tried CA but you need the gap filling feature to really get a strong bond and not have the bolt pull out. There are lots more examples.
-
Captain Steve, you are not only funny but a genius. I just got back online (or inline?) and realized that in your post 393 you started all of this when you decided to take on Conny's back section. You improved her, you dressed up her interior and even took care of her ribs. Good for you.
-
Let me ramble on a bit. I remember that I had the crazy notion to 'section' a canon and the carriage that is in the front of the model on the canon deck. Before I get serious about that I have to make or buy some canons first. Chuck, are you still there and are you making canonades? I do have a mini lathe and could make my own, but I don't have the skill to make them out of brass like Chuck. I mention this because I have to be very careful with each deck that all has been taken care of on one deck before I glue in the next. On the gun deck I need to install the knees, canons and their rigging, the tools that go with that, the hatches and ladders to the deck below, the oven and the hitches, anchor cables, etc. So, obviously, I need to do lots more before installing the spar deck. However, the frame needs lot more attention also. I need to continue the inside planking and think about how much of a cut-out I am going to make on the starboard side. The outside planking will not only be done on the port side, but also in several locations on the starboard side (fore and aft). That way I can still install the channels with the deadeyes. I hate making 'to do' lists, but maybe I should.
- 572 replies
-
- 6
-
-
- constitution
- frigate
- (and 1 more)
-
So, let's make some more saw dust. The hardest thing when you get back after a long delay is to remember where I left of. First I cleaned up my workbench and tools and sorted out what I had in boxes etc. I decided to modify the spar deck a bit. I cut more beams away, but am adding a few more planks towards the bow along the starboard side. That way I can add one more canonade in that position. I am also adding four of the horizontal knees along that side. Meanwhile I have to continue with the slanted knees on the gun deck. You can see them lying in the foreground to the left.
- 572 replies
-
- 9
-
-
- constitution
- frigate
- (and 1 more)
-
I not only like doing it, but also to take pictures of the result.
-
Landlubber Mike's technique for furled sails
Modeler12 replied to Landlubber Mike's topic in Masting, rigging and sails
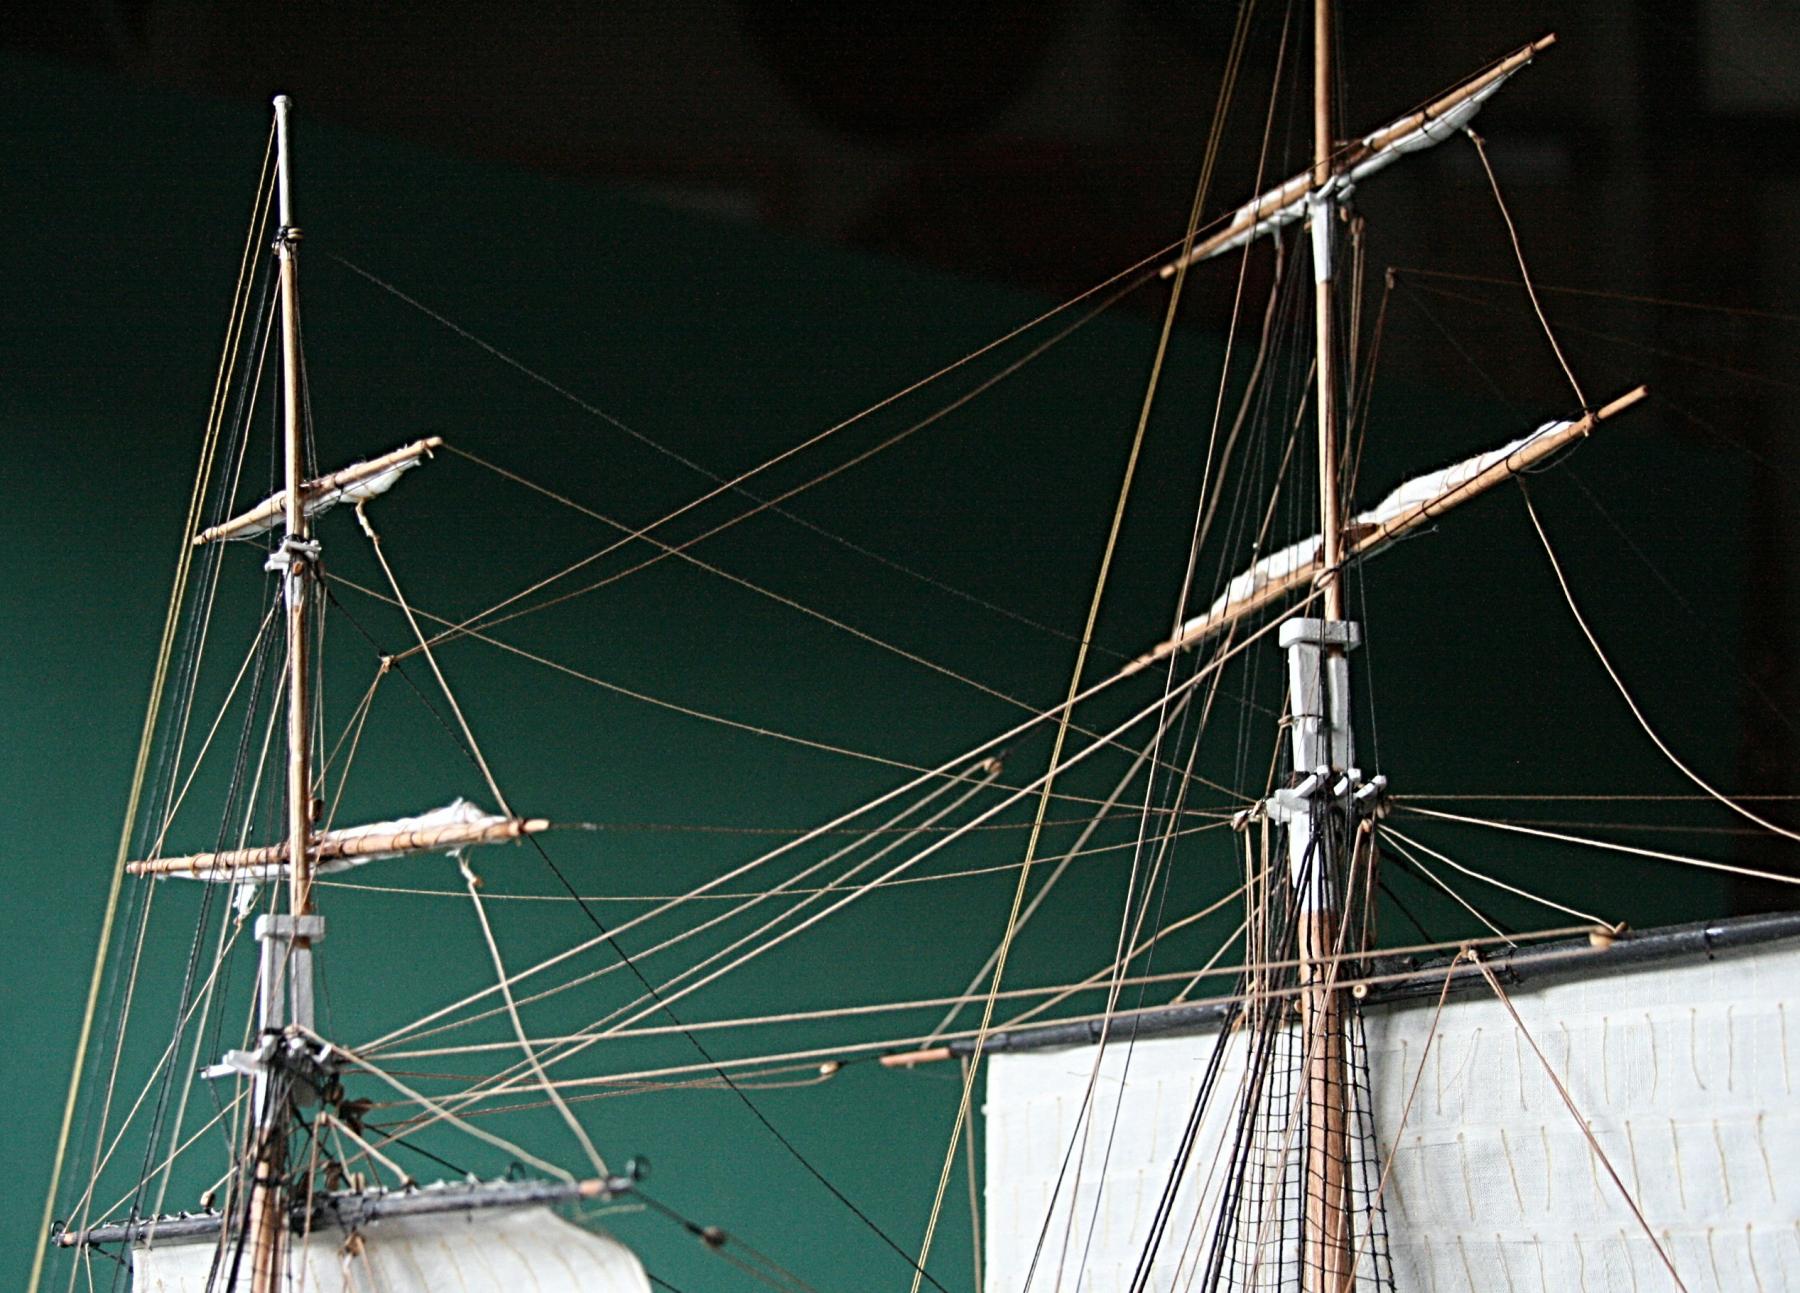
Rob, I really like the picture you included. It clearly shows how all the rigging lines are being used on each sail. It wasn't until I rigged my Conny with topsails that I learned about all those lines (sheets, clewlines, buntlines, etc.). To use those lines to hoist the sails in order to dry them is neat. -
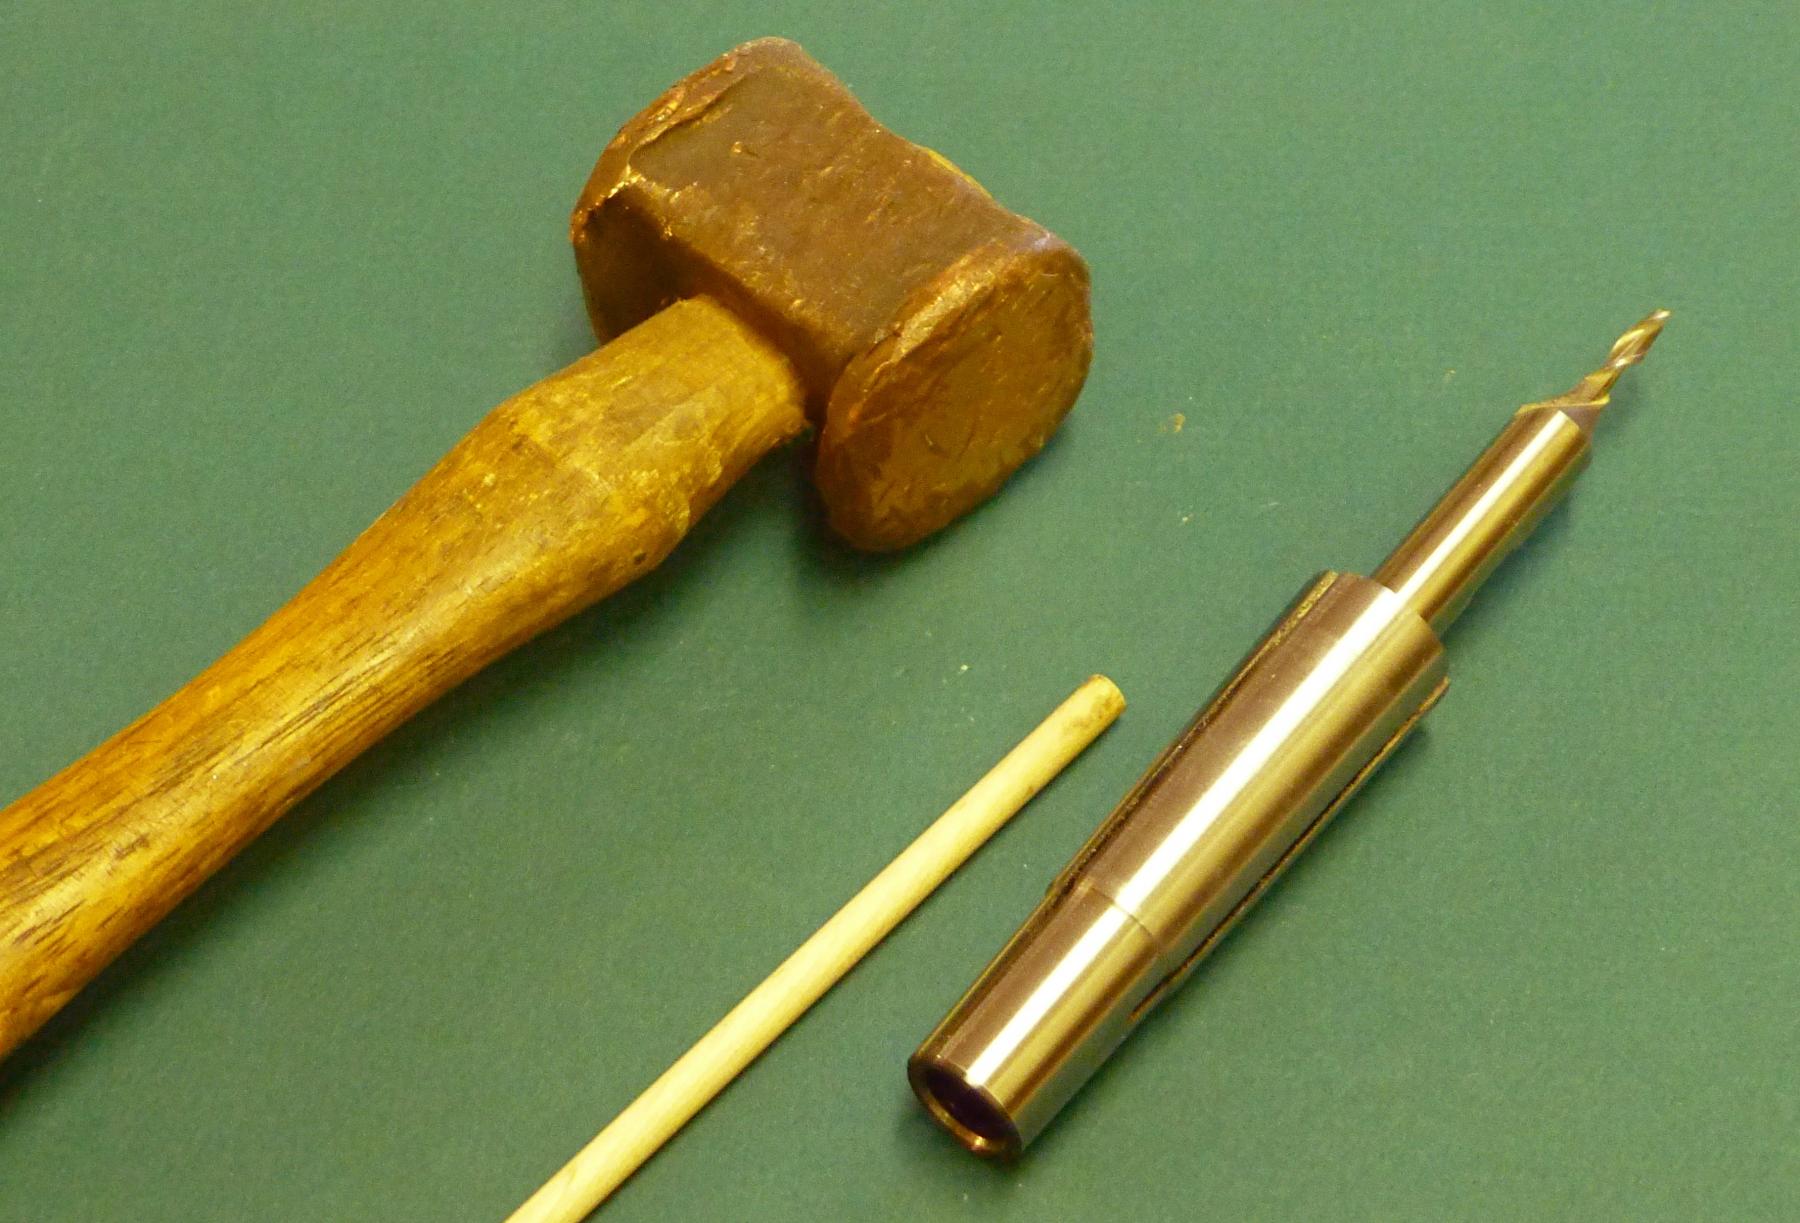
I would suspect that either your bit or the inside of the collet has a slight burr. I have never had such a problem. Can you use a piece of dowel inside the collet to knock the bit out? When I mentioned the use of a 'mallet' I did not think of using a lot of umpf. I have a hammer with a copper head. It must be close to 100 years old and belonged to my wife's grandfather who was an auto mechanic back in the twenties. The hammer does the trick for me.