
Search the Community
Showing results for tags 'Rigging'.
-
Anyone know of any suppliers of decent larger size rigging blocks. I'm building an RC square rigger at 1/36 scale and need blocks about 7-12mm in size. They don't have to be functional, just strong and look the part in wood.
- 3 replies
-
- 1
-

-
- scratch build
- RC
- (and 2 more)
-
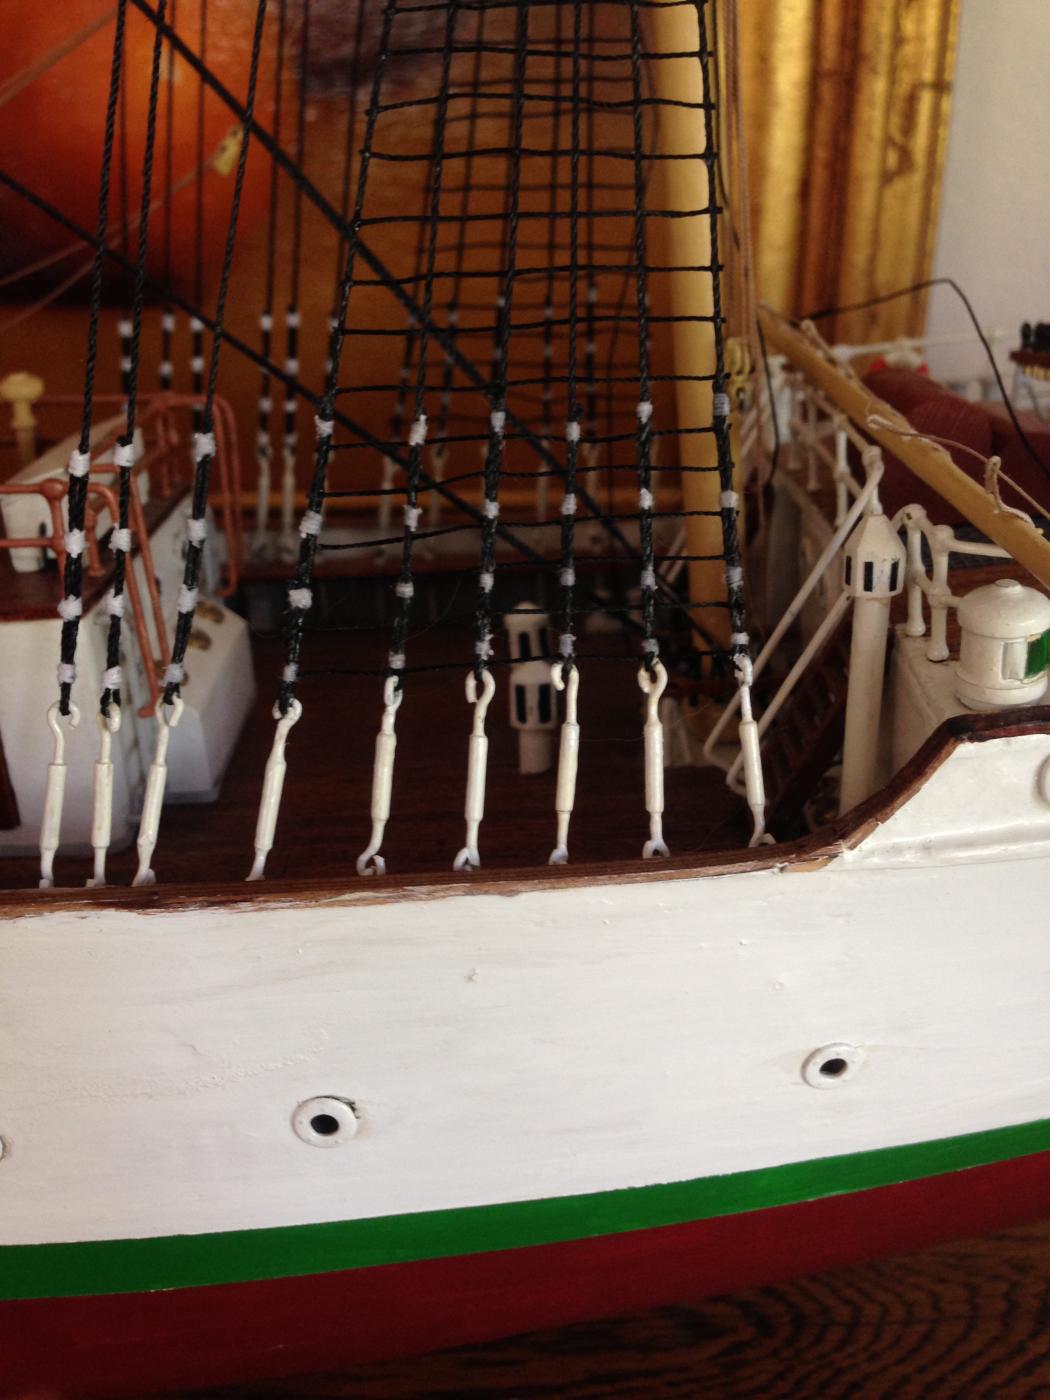
 Hello Modellers: I am building the old Denmark 1:75 scale and am looking for suitable material for shear poles. As I understand the term, these are the metal rods that are placed between the rigging pins to keep them from turning and they function as the first couple of rungs up to the ratlines on the shrouds. I've included a photo showing the fore mast starboard pins. I constructed them with paper clip wire and 1mm brass tubing. I need to install the shear poles but have a couple of questions. (1) should they be installed between the pins and if so, how, or should they be attached to the outside and overlap the pins slightly. (2) In either case, what material would be suitable? I could cut short lengths of wire and try to glue them in-between the pins but I sense this would be extremely difficult and might not result in a uniform look. Attaching them to the outside allows me to align them but don't know the best material to use (wire, wood, ??) All suggestions and experience gratefully welcome. HKC
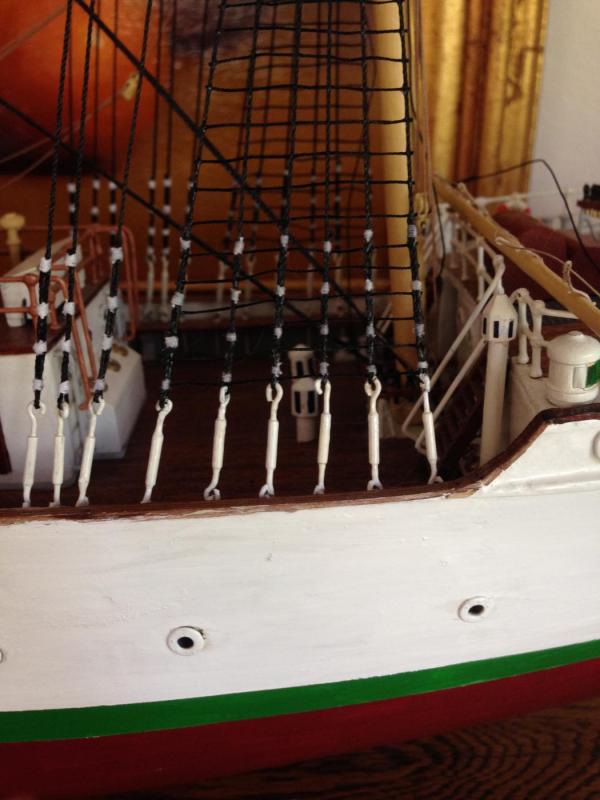
-
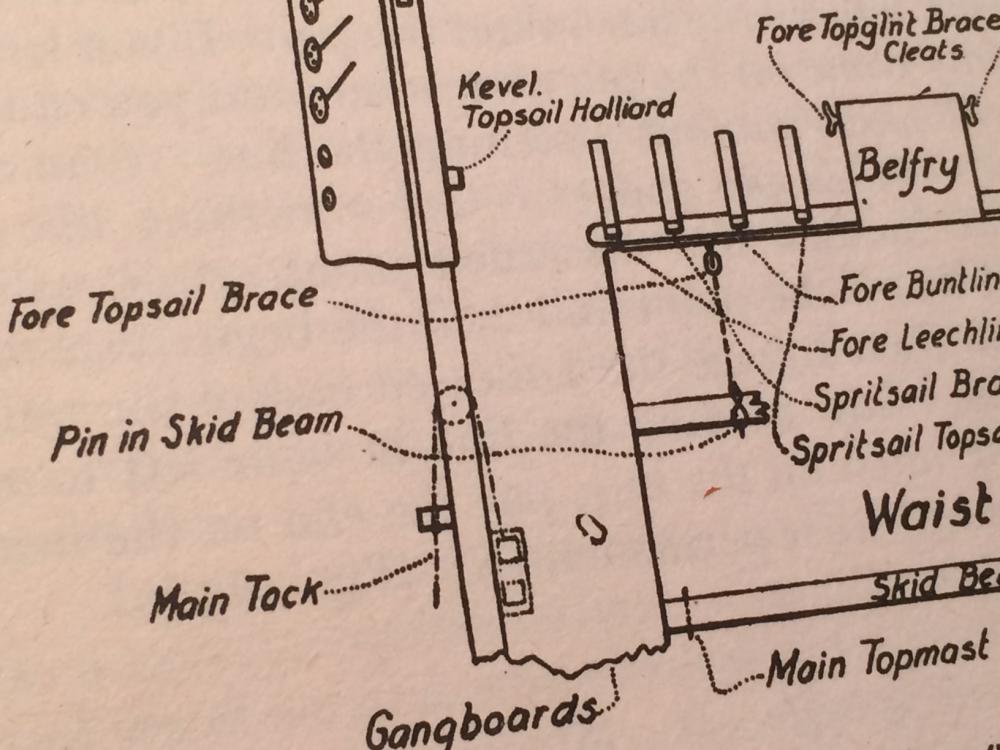
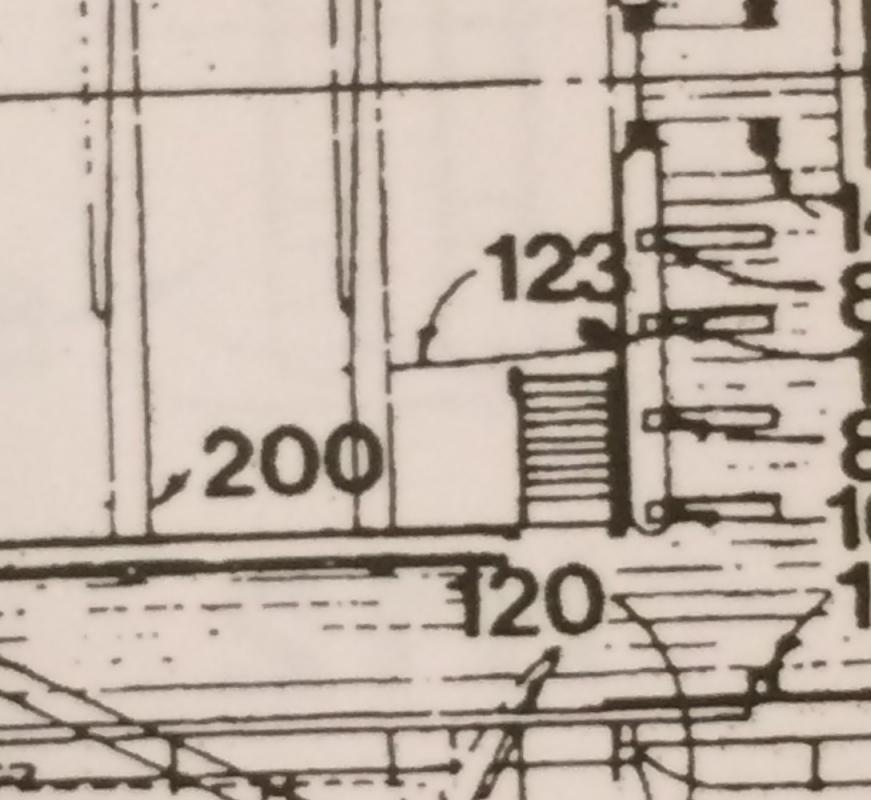
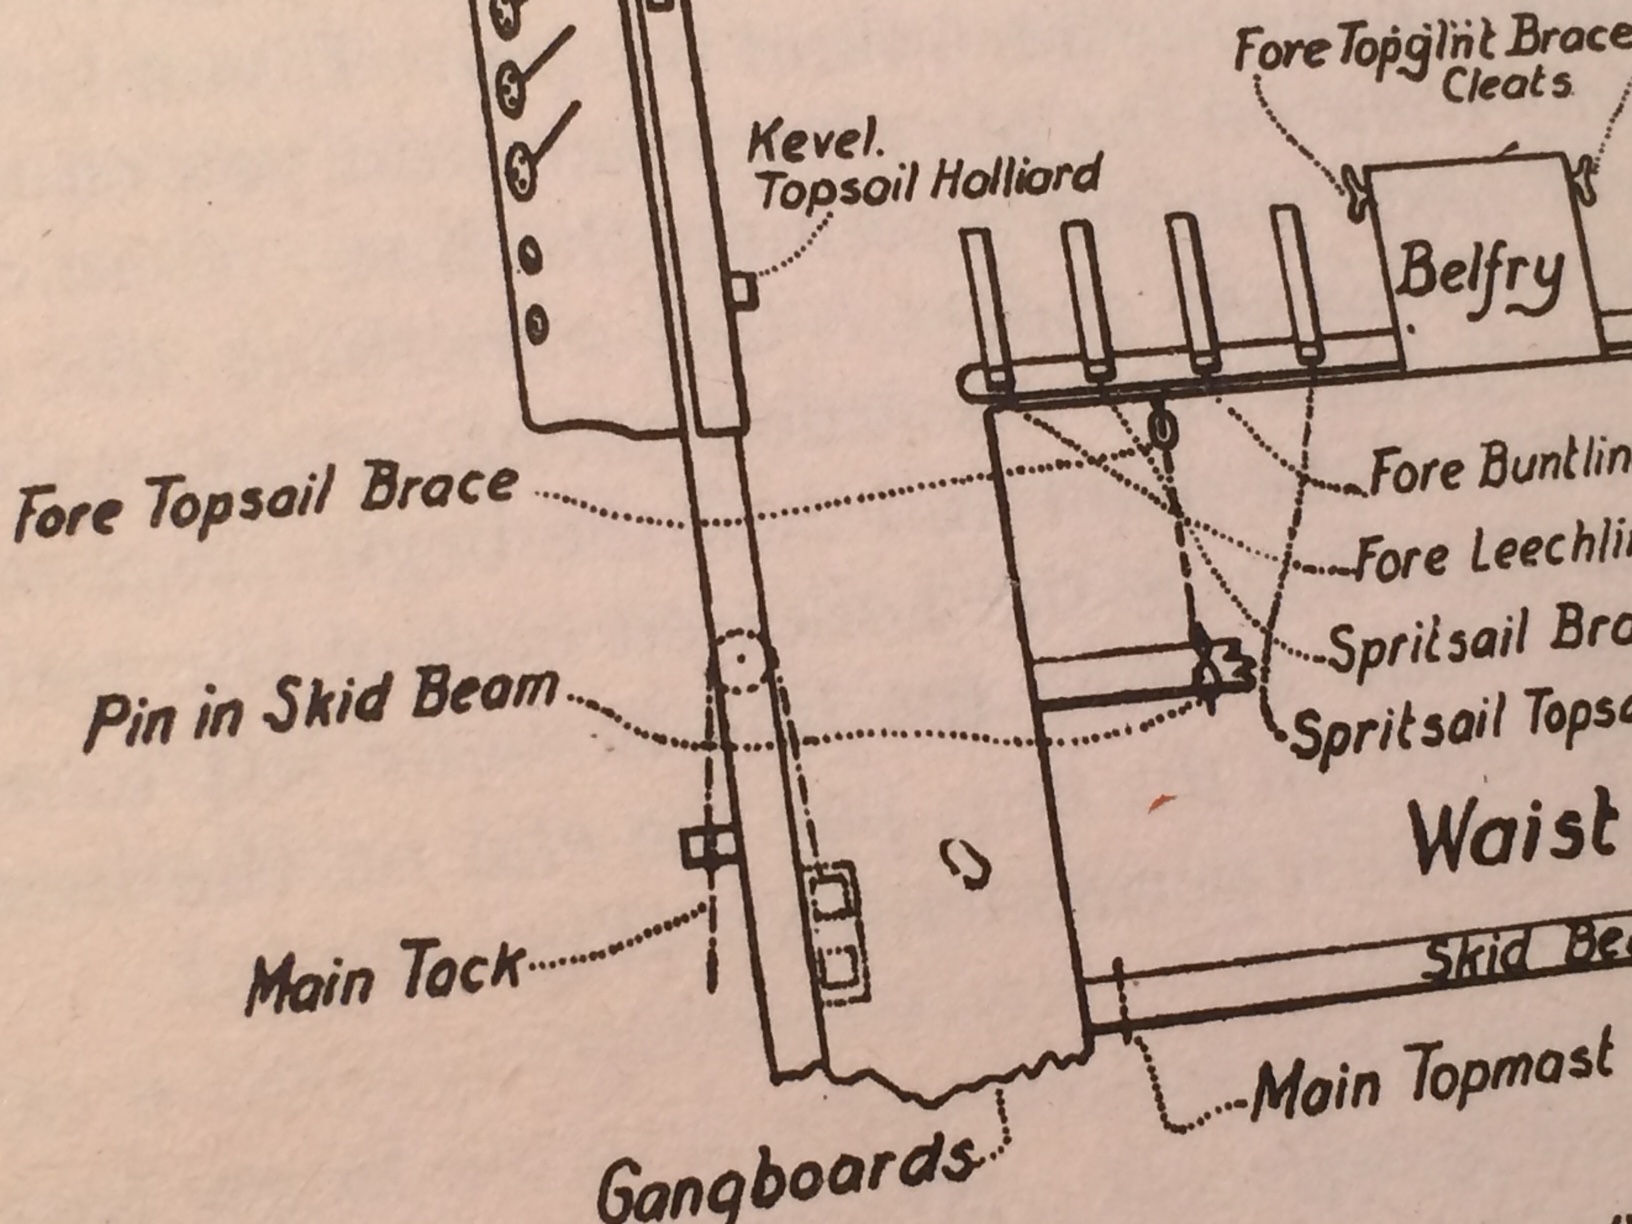
I'm getting nearer to finishing my Heller HMS Victory and I am at the stage where I am literally tying up loose ends. I had installed all the running rigging but most of it was left dangling and not made off to anything so I could have flexibility and access to the deck. Now I am belaying the lines going from fore to aft. The foremast looks great and the bow area is now clear of Irish pennants and lose ends.. , But I have come across something I find odd: the Fore Topsail Braces belay to the second skid beam. This strikes me as an odd and awkward and hard to access place to put these frequently used lines. There are many lines of running rigging on a ship, but the Fore Topsail braces are on the short list of lines you will be using all the time. And they are lines which will be under a LOT of strain and which will require a lot of crew to take up on. . John McKay, Longridge and the Heller instructions themselves have them belaying in this odd place (although the kit instructions may indicate the rail at the forward edge of the hatch, the kit has a molded on pin where the others say the lines belay). Lees doesn't specify where they belay in his section on Fore Topsail Yards. . The lines begin on the main stay close to the main mast then run to the blocks on the yardarms. From there they come right back to lead blocks on the stay, close to where they originated. From there they run forward down the stay to another pair of lead blocks on the stay above the belfry, and from there to a lead block on the forward edge of the hatch (or a fairlead in a timberhead there?) then belay to a fore and aft pin which pierces the second skid beam. The references I have that show the pin show it several feet away from the gangways, not within easy reach of someone standing there. . The only way this makes sense to me is if the crew were intended to handle the line from the gundeck below. Which makes me wonder then why it wouldn't belay on a big hefty cleat on the bulwarks there. Why above their heads in a place difficult to access? Why not on one of the timberheads at the forward edge of the hatch? The way it is rigged it zigzags through space quite a bit and I believe it could have been lead nearly anywhere with the resources it is using. So why is it 1/4 of the way inboard on a skid beam, which I believe would be a difficult place for anyone to manage it?
- 4 replies
-
- 3
-
-
- HMS Victory
- rigging
- (and 2 more)
-
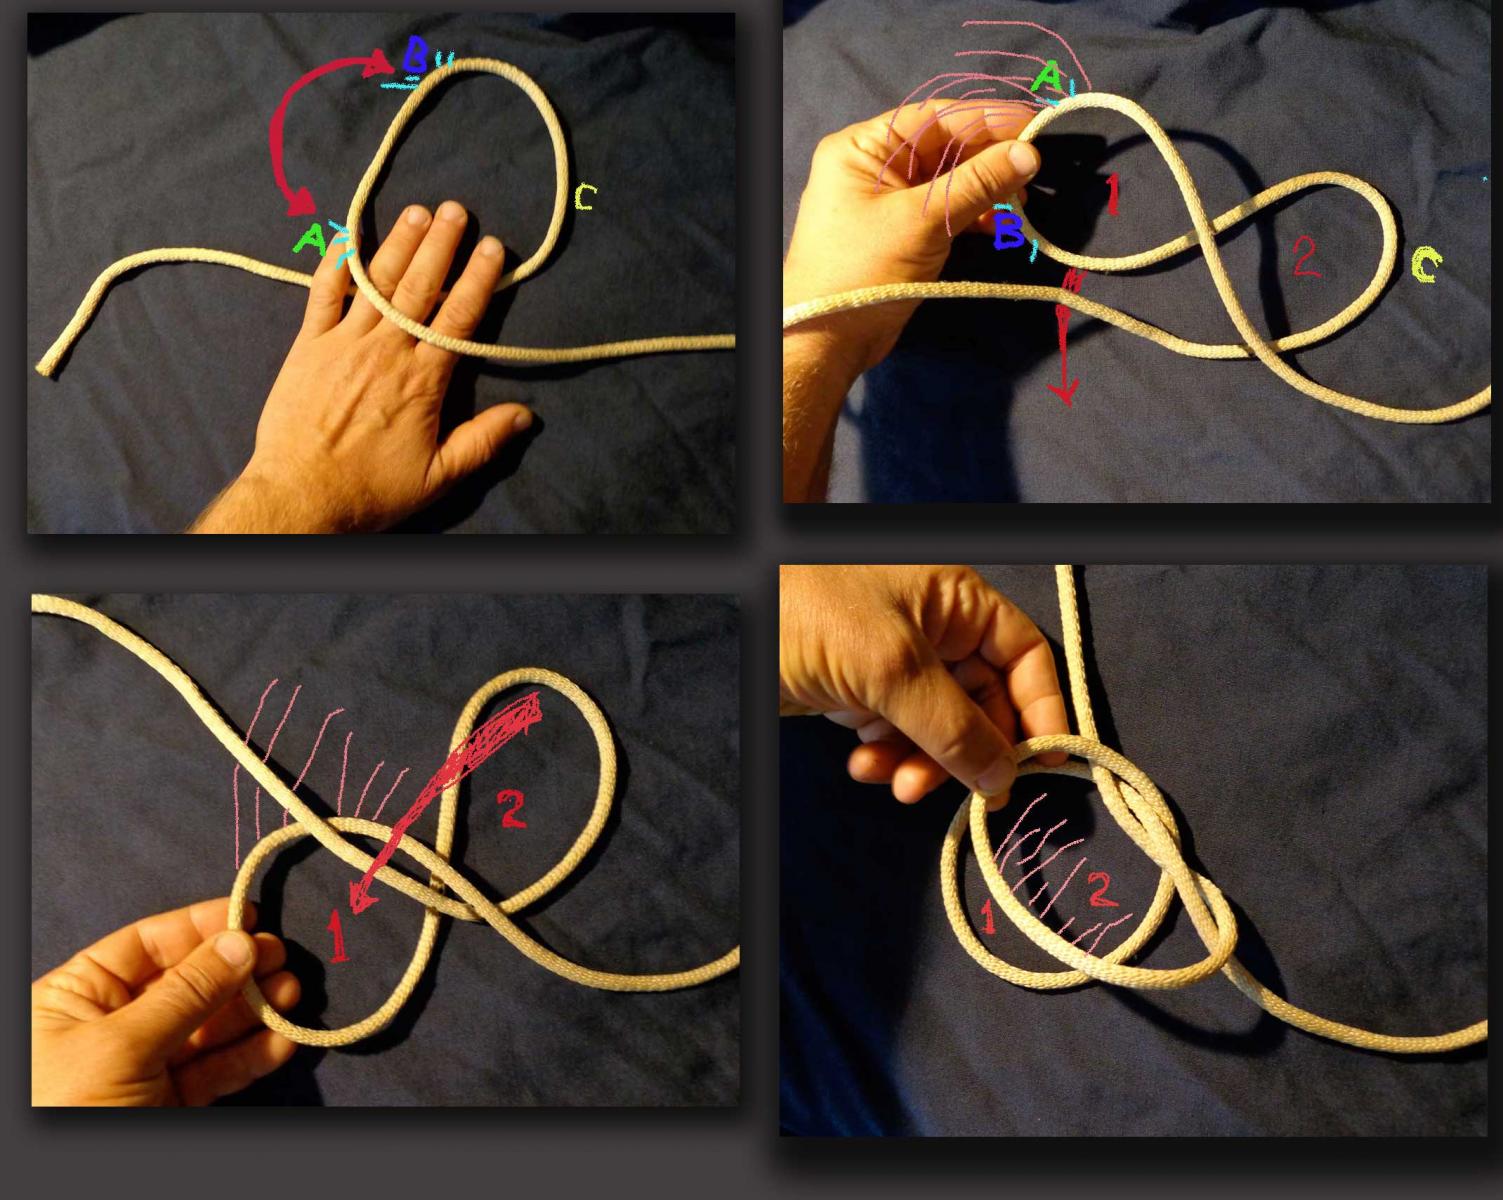
I’m a big fan of the Constrictor Knot. It’s a very useful knot for fixing a line to a spar such as in the case of a stay or backstay attaching to a topgallant masthead on small models or on lighter lines on larger models. Its got a low profile and its easy to tie and when tightened it constricts as advertised. Clifford Ashley apparently invented it and its number 1249 in his book. It’s also mentioned in the original Ship Modelers Shop Notes in a Merritt Edson essay on page 187. Unfortunately the illustration included in Shop Notes tends to make the knot look difficult to tie. In fact most descriptions of the knot fail to show how easily it can be tied. Its litterly just a loop that is twisted once into a figure eight and the two lobes thus created are folded together to form the knot which can be slipped over the end of the spar in question. If the knot has a drawback it is that once tightened it can be very difficult, if not impossible, to untie. This photo shows the steps involved in tying it and below I will break down the individual steps. It may appear complex but it really boils down to a few simple hand moves.

-
Can anyone help with pictures or info on how the anchor was rigged? I would like to have anchor lines on the gun deck from the capstan forward to the anchor to as though the anchor was being lowered or raised. Were the anchors rigged so both were raised/lowered at the same time? Thanks
-
Hi, The kit is Mantua/Sergal CS. The kit has metric measurements (not a problem) but for the length it reads like this 0.25 by "60mt". The only time I've seen "mt" used was for metric tons or MT. for mountain. Can anyone help me with this? I had trouble with math in school but that is a different topic. According to a number of resources CS would have flown a "Red Ensign" being a merchantman. The flag supplied is a Union Jack. Any leads for cloth printed small flags would be most welcome. Happy Thanksgiving to all...
-
Hi folks, I'm thinking ahead to the rigging phase for the HMS Fly. I realize that serving protects rigging from rubbing. The question is, do I serve just at the upper part of the shrouds around the mast or all the way down to the deadeye. Same question for stays. Thanks in advance for any direction you give.
-
 I am currently building the Cutty Sark by constructo. This is my first model ship and I think I am over my head, but I do have the hull all built and the masts an yardarms installed. I think all that I have left to do is the rigging and the sails. I am not sure of the best sequence to finish this project. Do the sails go up first or is the rigging and sails installed simultaneously? Is there a good book available yet details a step-by-step procedure for completing this task. Any help or suggestions would be greatly appreciated. cmb
 -
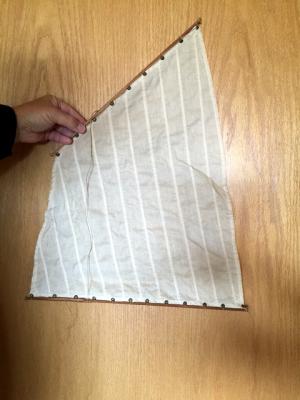
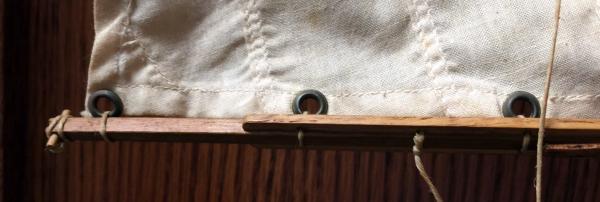
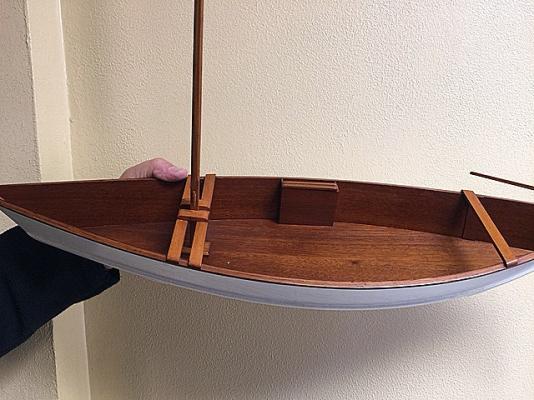
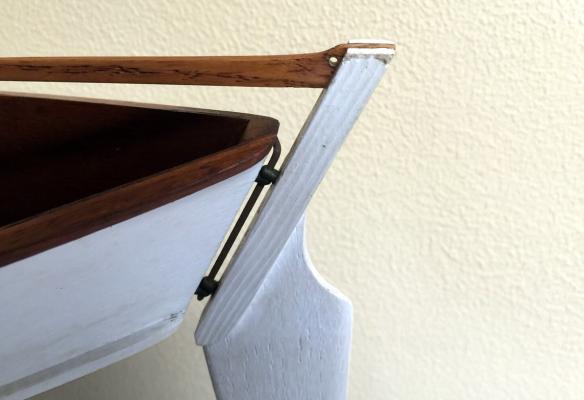
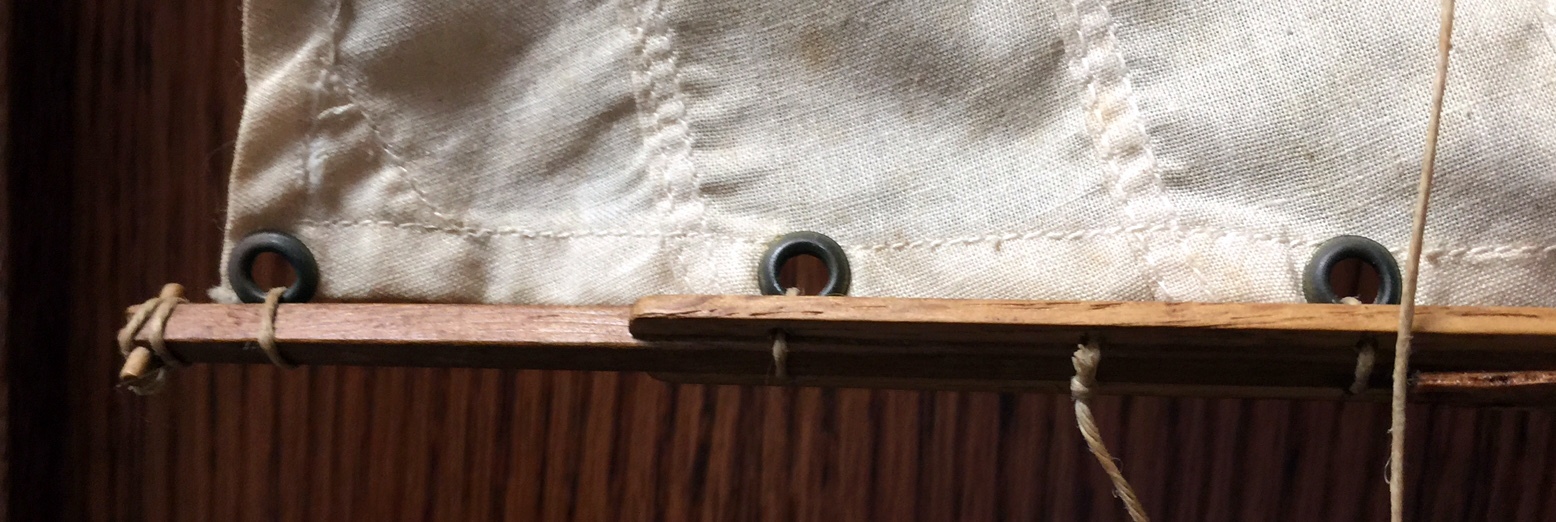
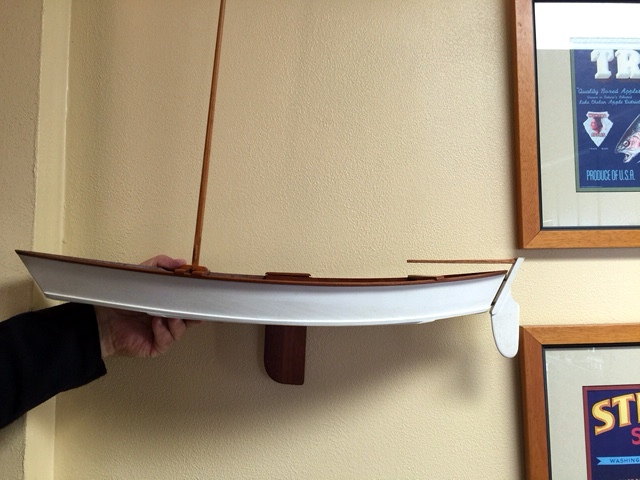
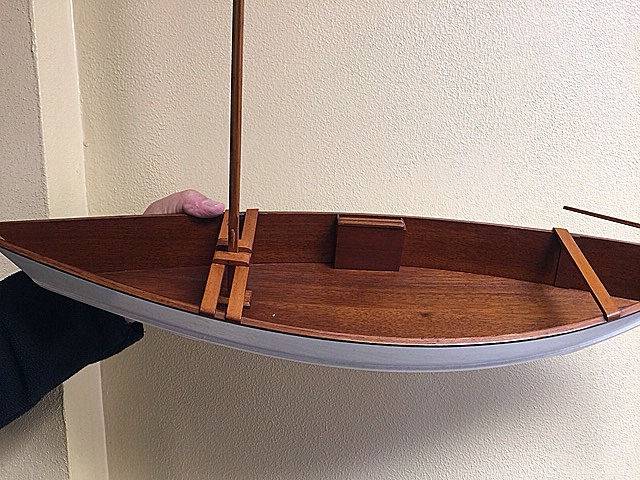
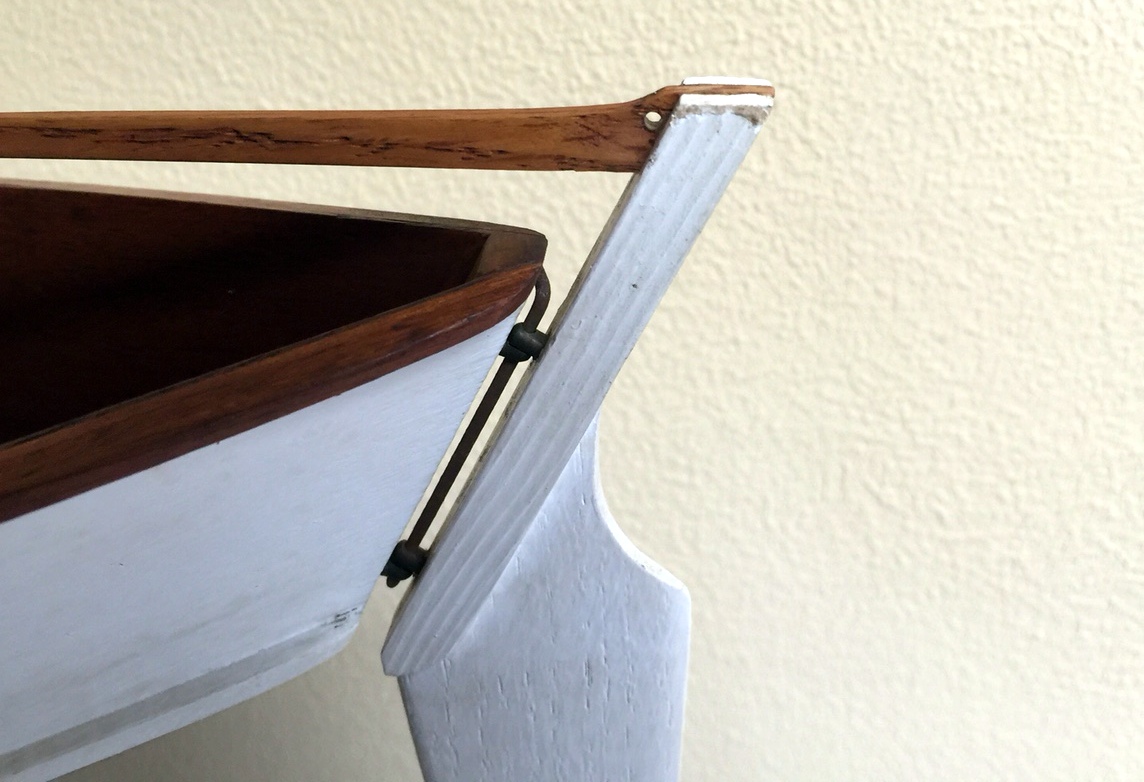
Hi - My husband and I are trying to figure out how to attach this sail to the mast. My father built this sailboat a long time ago and my stepmother gifted it to us after he passed. We had it on display until a gust of wind came through the house and knocked it over, breaking the boom. We took the sail off to get the boom repaired. Unfortunately, that was about 10 years ago. Now that we have repaired the boom, we can't figure out how to re-attach it. I'm attaching photos and really hoping someone here can help us. My stepmother is visiting next week so we would like to have it back together by then. Thanks for your help - Kathy

-
Hope this isn't a silly question. Can anyone explain to me how the clueline and sheet are 'tied' together on topyard and topgallant when no sails are present?
-
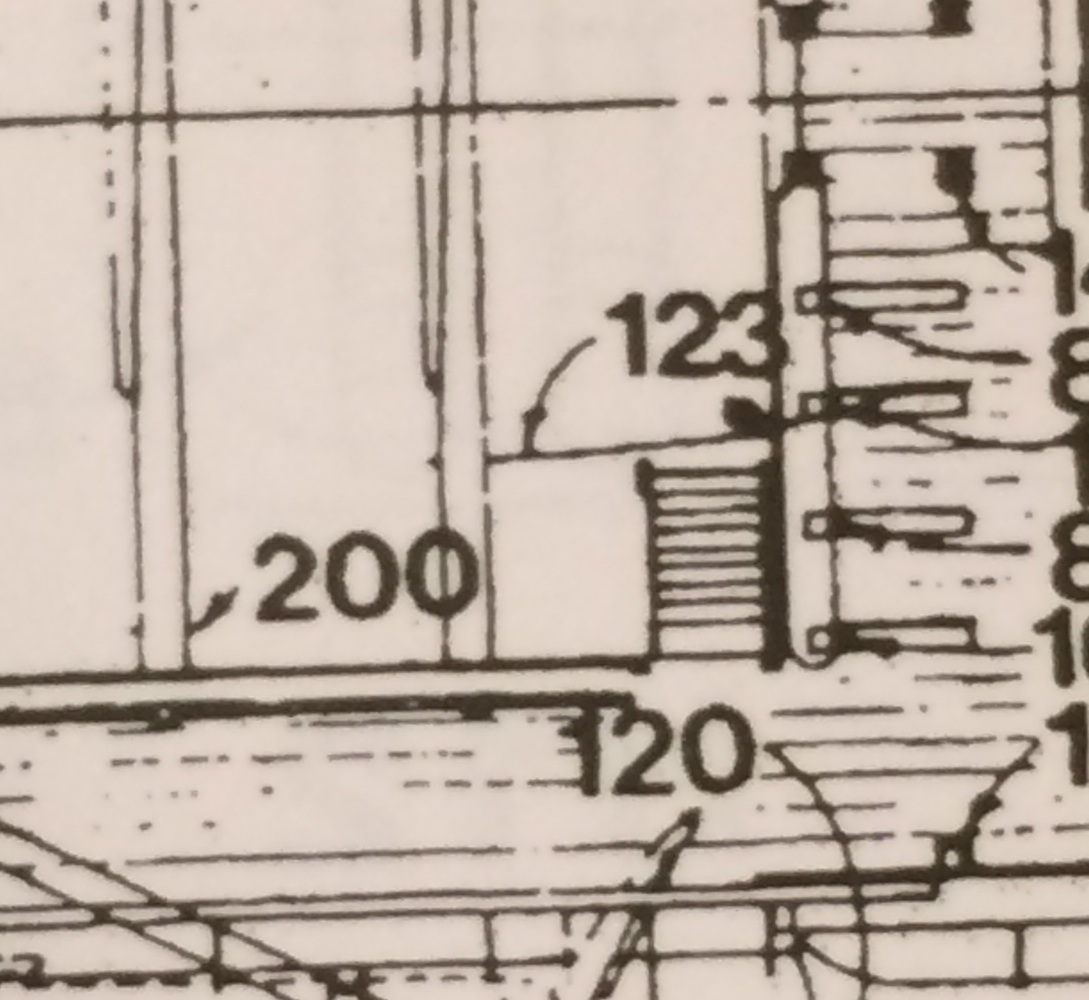
 In his book on Rigging Period Fore and Aft Craft, Petersson shows a diagram of a boom as follows: The arrow I have added shows some tackle fitted to the underside of the boom, quite separate from the mainsheet tackle (which is given the honour of a full diagram later), but there is no other mention in the book or diagram of how this might be used. I'd be very grateful if someone could explain it to me or give me some idea of its function and the points to which it might be fixed. Oh, and by the way, I'd also be glad of some explanation of the function of the bees at the end of the boom as displayed (just to grab as much info as possible in one swoop!). Thanks in advance for any ideas Tony
-
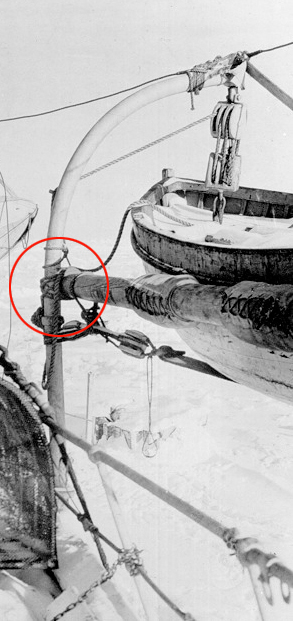
Any thoughts on the attachment of the strong back to the radial davits on the Endurance? This was the ship Shackleton used for the 1914 Antarctic expedition. Is it only lashed to the davit or is there a mechanical attachment? I can't make it out. I have a pic attached showing the area. Thanks, Terry PS Posted this in General Kit discussion in an old thread. Thought it may get an answer here. Thanks

-
These might be posted here already but I found them very helpful with the rigging on my Byzantium. The Elements and Practice of Rigging and Seamanship Boy's Manual of Seamanship and Gunnery Lextin.
-
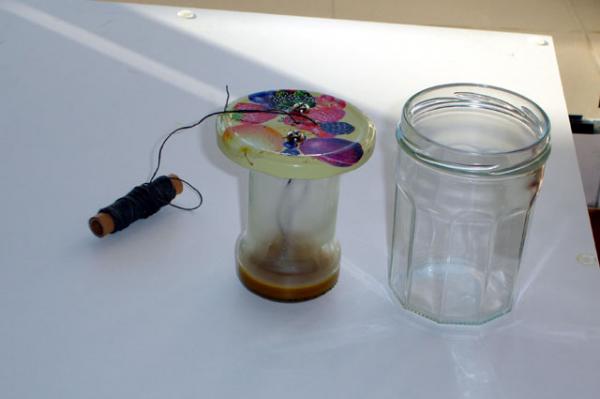
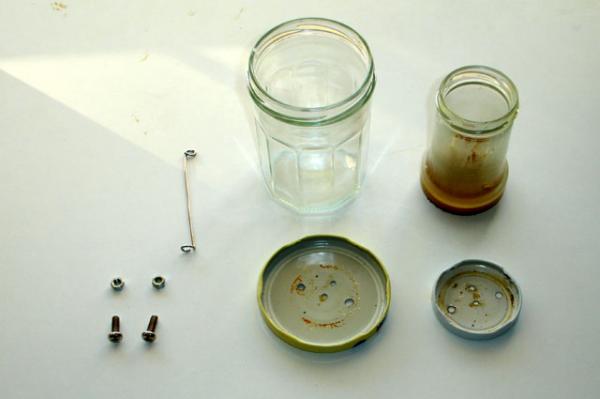
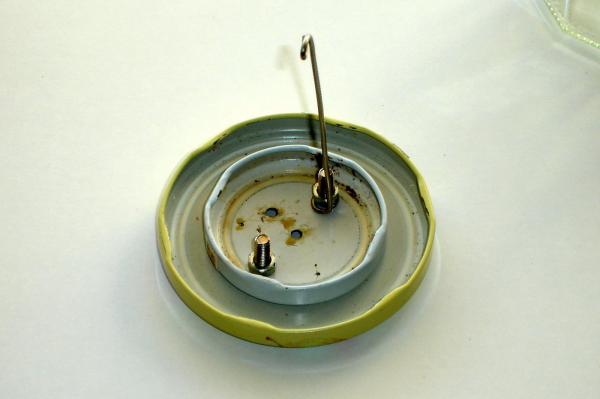
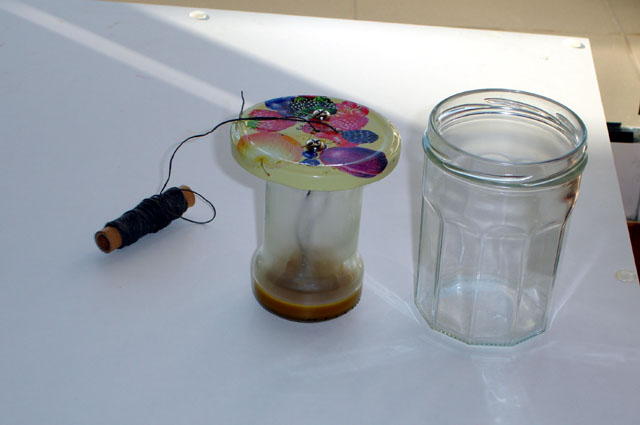
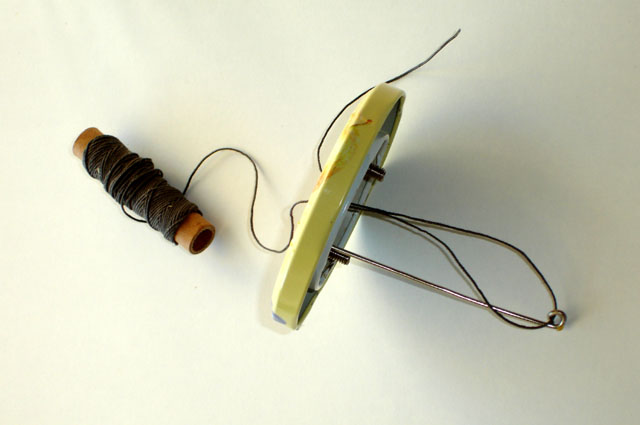
Dear all, I was browsing my archives and I found the pictures of my first working jig. I still remember the pride I felt when I managed -easily- to wax the threads for my then first build. It was used after the Bounty build with my two scratch builds and still rests in a self waiting for the next build. ( I hope). It is a rudimentary construction based on similar jig (more refined I must admit) I found in Ship-modeling forum. Since it works, I followed the rule number one: if it works efficiently, just don't touch it! The principle is very simple: Bring to melting temperature the wax in the small jar. This can be accomplished if you place it into boiling water (bain marie they call it) Pour some boiling water in the big jar and the then emerge the small one and seal the lid. Pull the string and wipe it with a rag. it is so easy. The construction itself I think is explained in the pictures. cheers Stelios

-
I was wondering if there were any advantages or problems that anybody has encountered with regards to doing the standing rigging after all the running rigging/sail hanging has been completed. I looked through the instructions and it seemed easier, to me at least, to do all the running rigging before the standing. Currently working on an AL 1:75 Bluenose II
-
 I have seen many references to " dilute CA". What is the diluting solution? Is there a prefered ratio?
 -
I am looking for a model to learn about rigging techniques. I am building 2 ships now but want to practice rigging before I get to the real thing. Any suggestions would be great. I was thinking of a model with the hull already done I just need to start on the masts and the rigging. Thanks in advance. Brad
-
 Roy - Bill - Jason - Barry - Tom - David - Ken - Jim - Tom - Larry The SMS-NJ recently had a custom Admiralty Models workshop on rigging. This very successful 2 day event was hosted by one of our members at his house. We covered a lot of the same ground as their most recent workshops in Baltimore and NOTL but also added some custom material tailored to our needs. Everyone came away from this workshop with a deeper understanding of advanced rigging techniques. Having the workshop locally enabled attendees to save the cost of hotels and restaurants. We have been advocates of David and Greg since the very beginning because of their ability to make difficult modeling concepts more understandable to ship modelers of all skill levels. In our group we had modelers that are working on their very first kit, others that are kit bashers as well as several scratch builders working on ships like the Warrior and Liverpool. If you are looking to advance your modeling skills you owe it to yourself to check out Admiralty Models. If you are a member of an active club with members that would like to better their ship modeling skills contact Greg or David about a custom workshop in your local area.
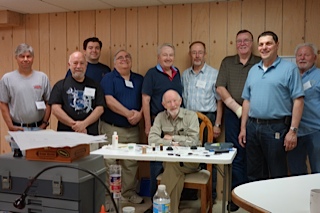
-
- 6
-
-
- Admiralty Models
- SMS-NJ
- (and 4 more)
-
Hi all. This is my first post but I've read lots. I'm working on my second boat and I'm almost to the rigging phase. My first boat was the Mississippi queen so I didn't need much help with rigging. I'm currently working on the AL San Francisco II. Basically what suggestion would you guys have as far as usefull tools. I have a solid background with wood and haven't struggled much with the woodworking part but I'll be honest the the rigging is intimidating. Also any suggestions on tapering techniques for the mast would be greatly appreciate. Johnny
-

Correct hitch and advice on rigging a flag needed
Gabek posted a topic in Masting, rigging and sails
Hello folks. I'm almost done my first wooden build - AL's 'old' Swift - and I'm getting frustrated with the rigging. The plans and directions aren't much help in what knots or hitches should be used anywhere. I've been forced into doing lots of research (I have Lever, Longridge, and perhaps a dozen more books), which is ok but I can't seem to find a hitch or stop that would be used to attach the *middle* of a rope to a ringbolt. In this model the throat halliards are tied to ringbolts on the deck. With gaffs fully raised on the masts there should be a lot of rope on deck, and I'd like to tie off that line in a logical manner. The closest seems to be the slippery hitch - but was there a 'right' one? A second rigging question is about the flag. Did flags in 1805 American ships have grommets? Were toggles used to rig flags at this time? I'd welcome any advice on how to attach the flag to the halyard. By the way, does anyone who has built this model think that the rigging is haywire? Seems very illogical to me. Thanks! Gabe "So happy to be a part of MSW" K. -
I'm new to building wooden model ships and I do not want to use a kit. I have build my rope walk but I need to know the different diameters of rope on the USS Constitution, but I can't find that information. Can anyone help, please!!!!
-
I came across yet another question that I have concerning the specs for "bucklers", specifically, "hawse bucklers." These were used to cover the hawse openings when the ship was under way in heavy seas and obviously, when anchors were heaved and secured. My question is simple: what do these look like? How were they secured to the hawse openings? Did they have a gasket to seal them? Made of wood - or metal? Thanks Mates.
-
 Several Questions: 1 - What are the rules of the amount of serving a line/rope? 2 - How do you know which vertical line on a ship needs to be served, and how much? 1/2? 3/4? I know it depends on the type of ship, what country is it from and what century. But are there some general rules and are there any books available. I looked in some of my books but there is no details. Several people on this site mention Steele (sp). I have looked at many models on this site and others and it gets confusing. I like to be accurate about all the models I make. Thank you, Marc
 -
Hi; Question: How do I decide what color rigging to go with? My Mamoli model the Royal Mary has all Tan line - do not like it much as the color is too light. My Bounty had black rigging and looked good. I see some models on this forum with shrouds that are black line for vertical and white line for horizontal. Did every century have different color line? Does it depend on what country the boat is from? Does it depend on the type of rigging? I always like to built my models historically correct, so who knows the answer, if there is one. Thanks, Marc btw. If my era boat is to have tan lines I will give it tan lines.
-
New to the forum, and what a help it is! I am building the San Franscisco ll, and I find the rigging info with the kit to be quite sketchy, to be polite about it. On the mast caps there are four holes for rigging lines to go over the cap and out the bottom of the caps. Just where do these lines get tied off? What is their purpose? The kit photos show the lines, but no mention at all of where to tie them off.


.jpg.d84ec4dad1d7791e855dca06210ab6f3.thumb.jpg.f45209242e851d4409eca1a09293165b.jpg)
