Search the Community
Showing results for tags 'polaris'.
Found 25 results
-
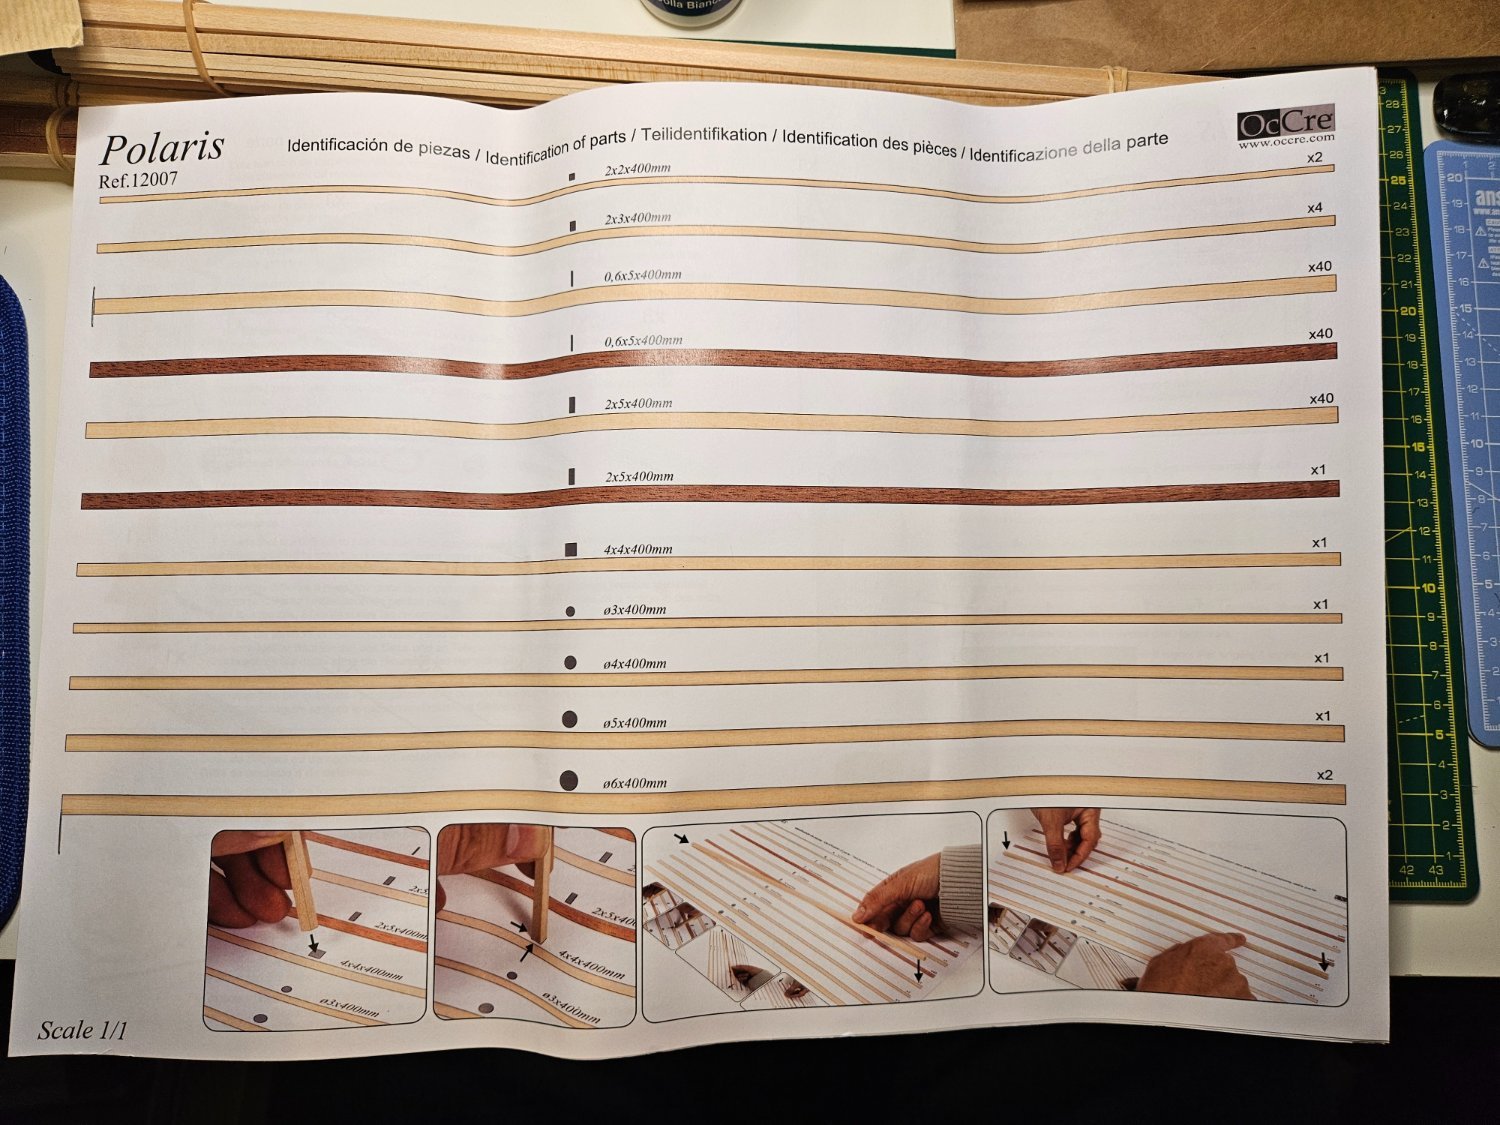
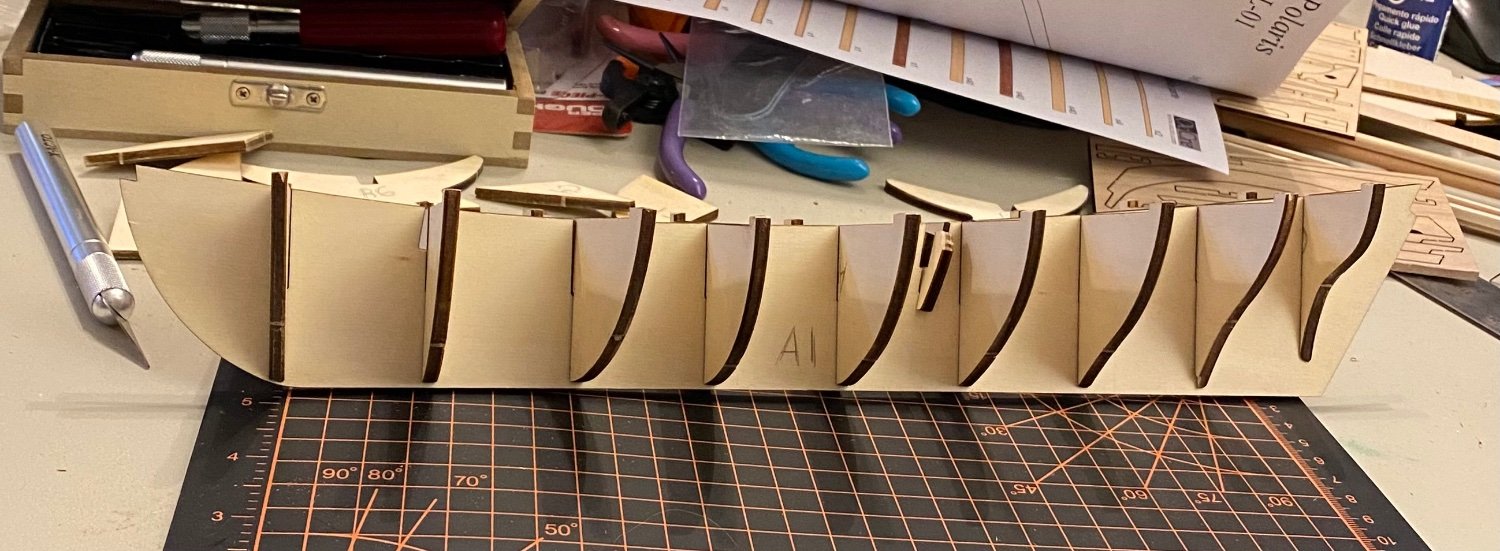
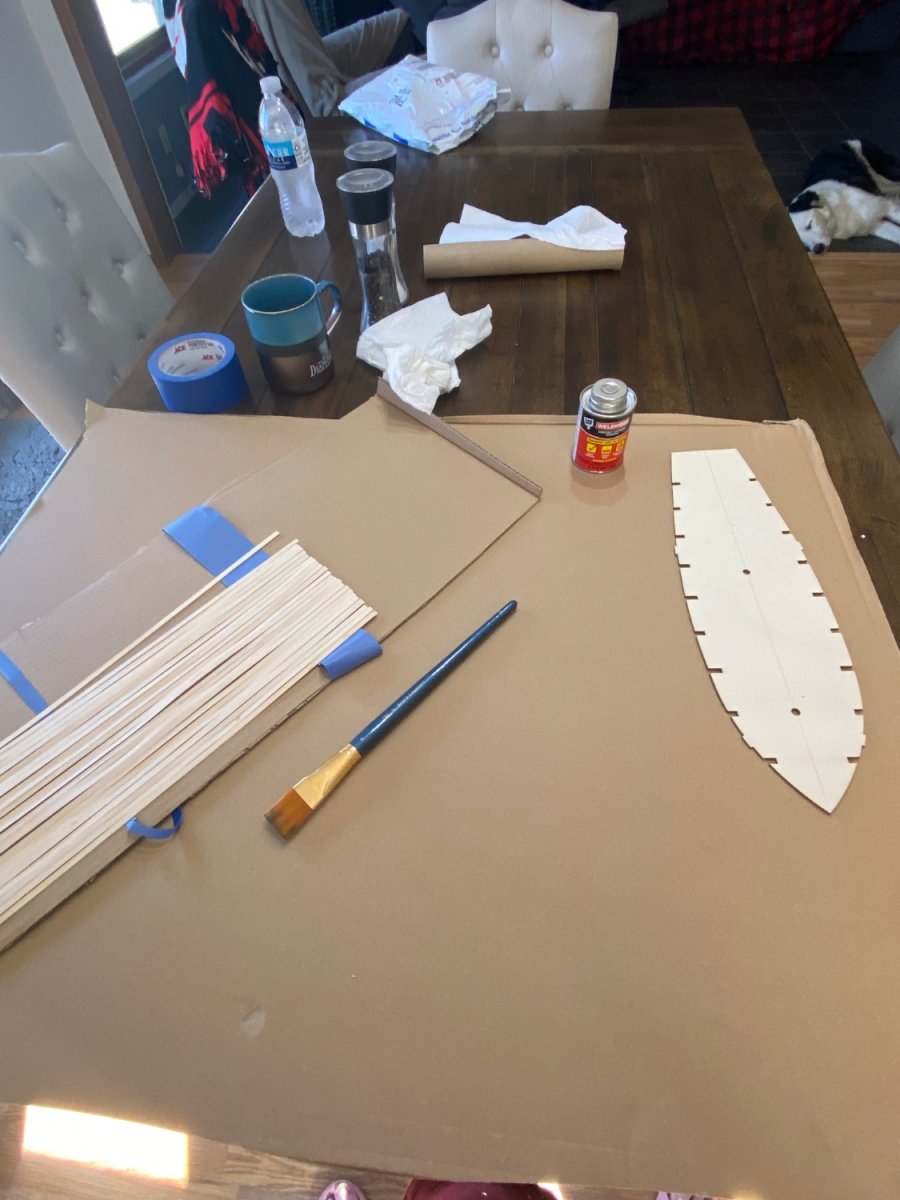
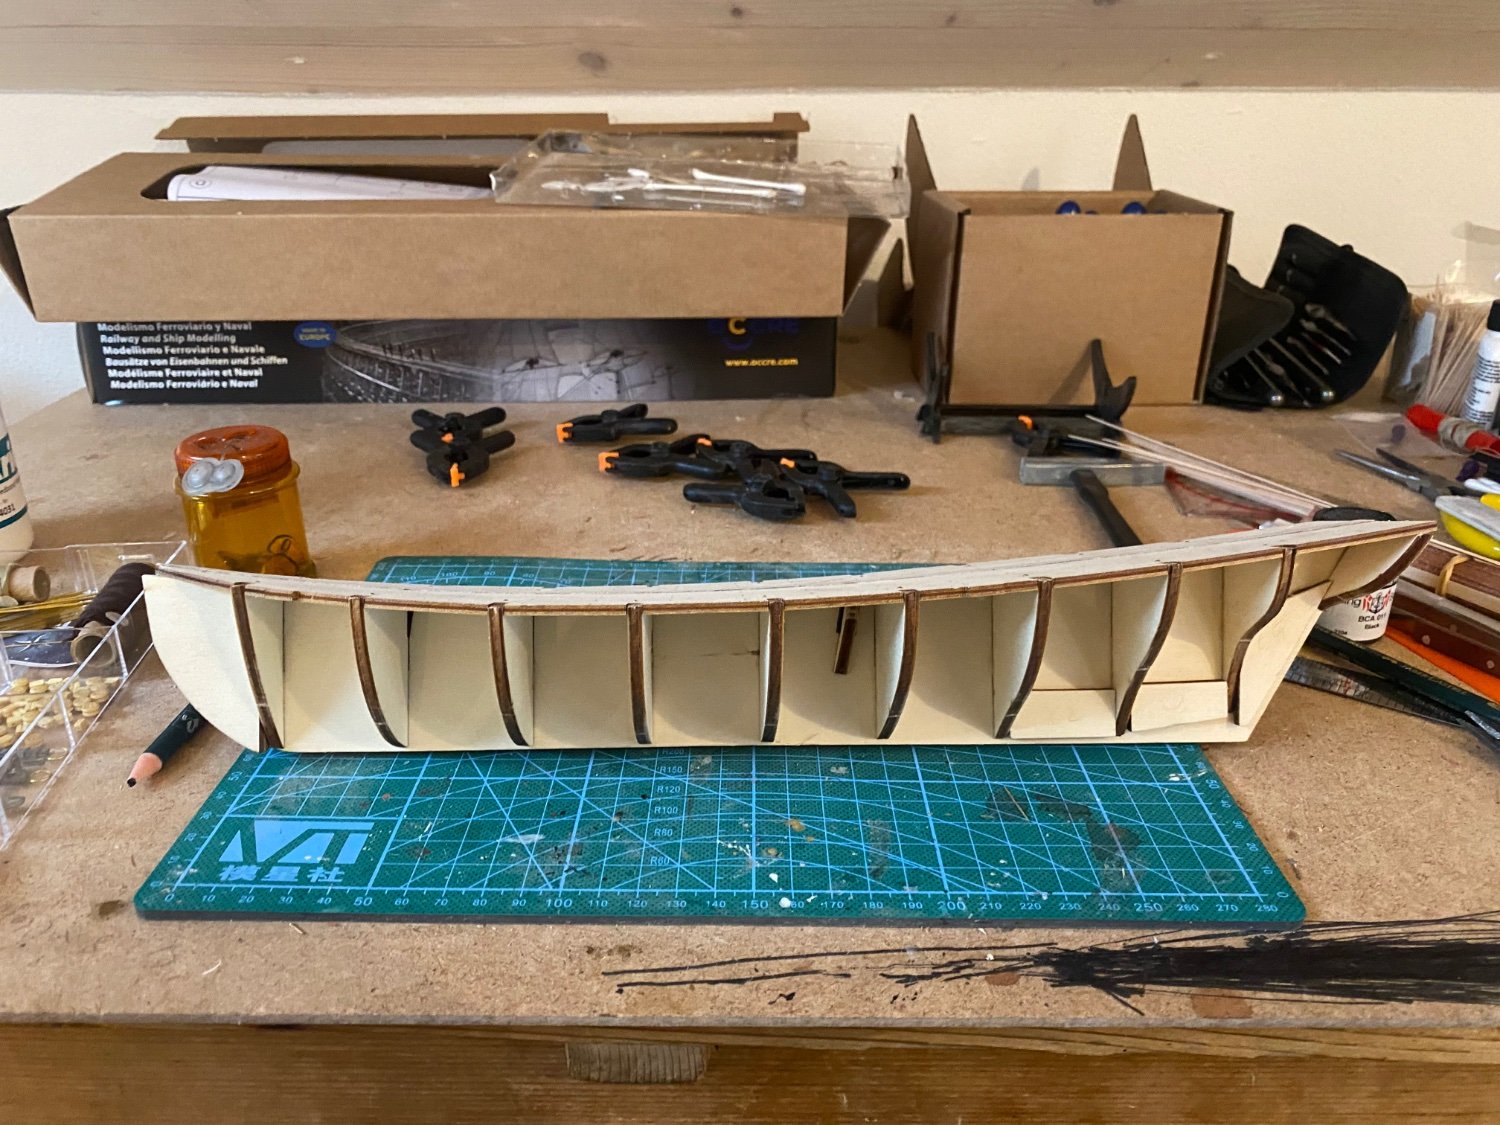
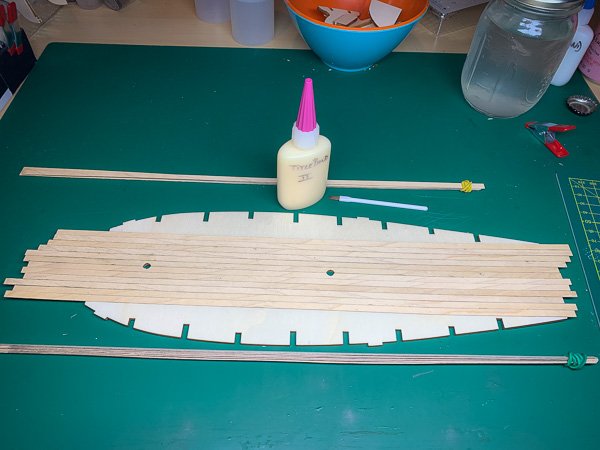
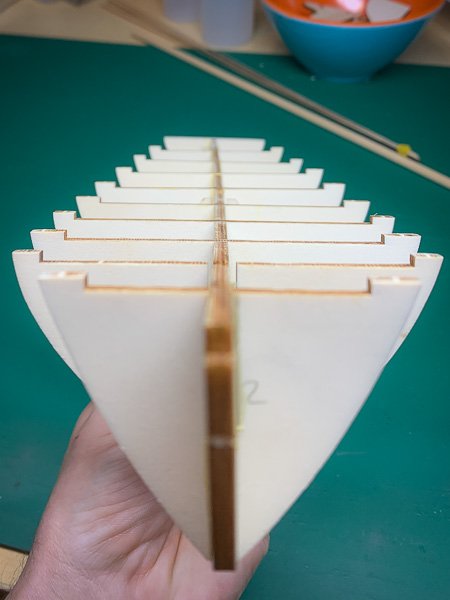
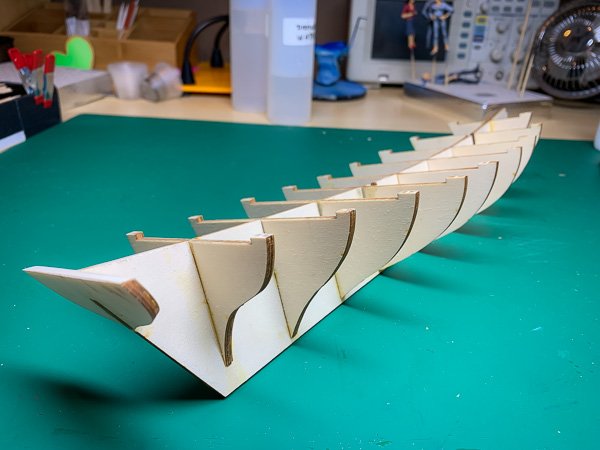
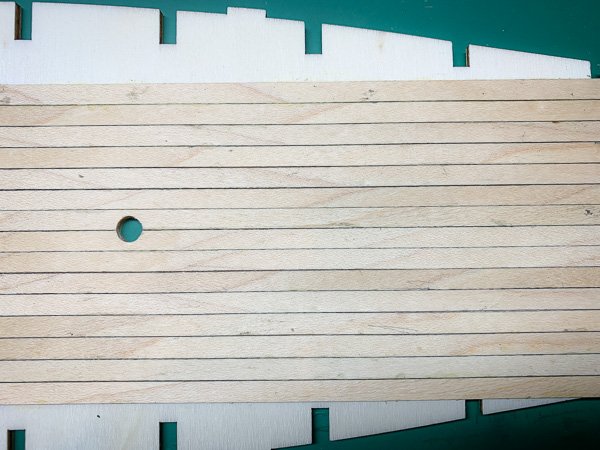
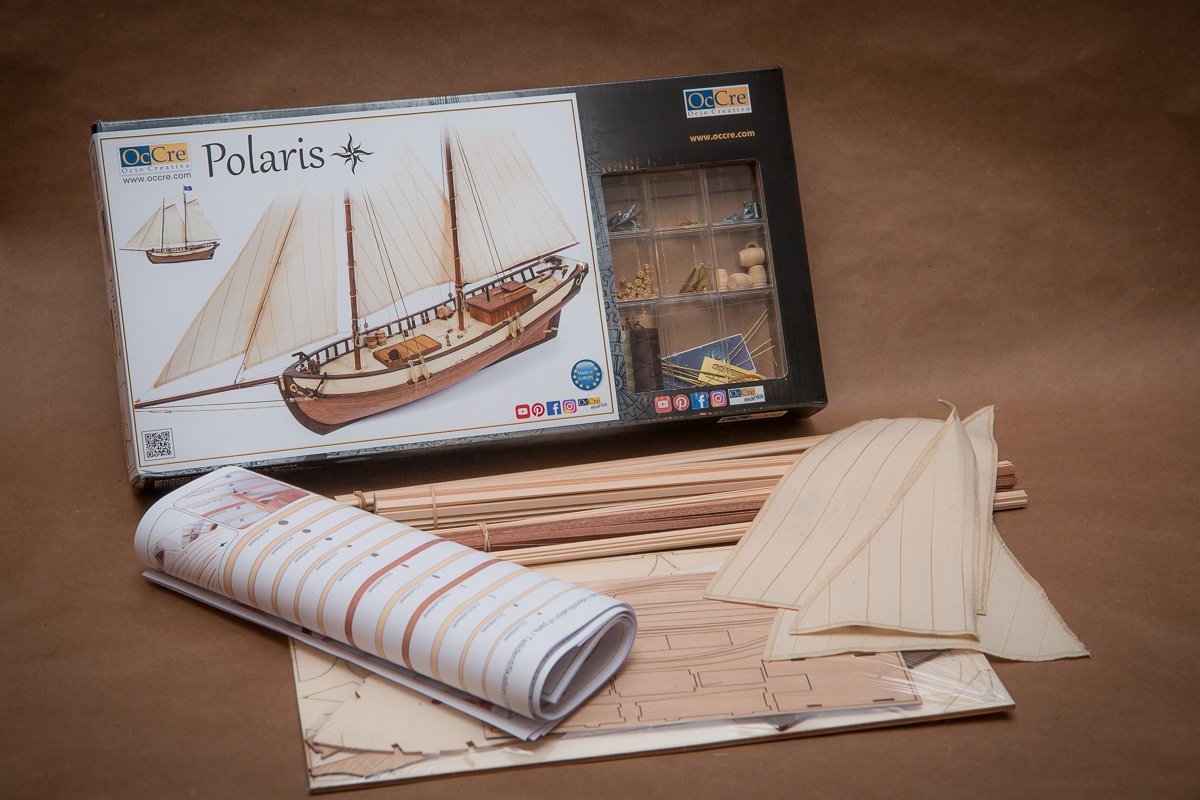
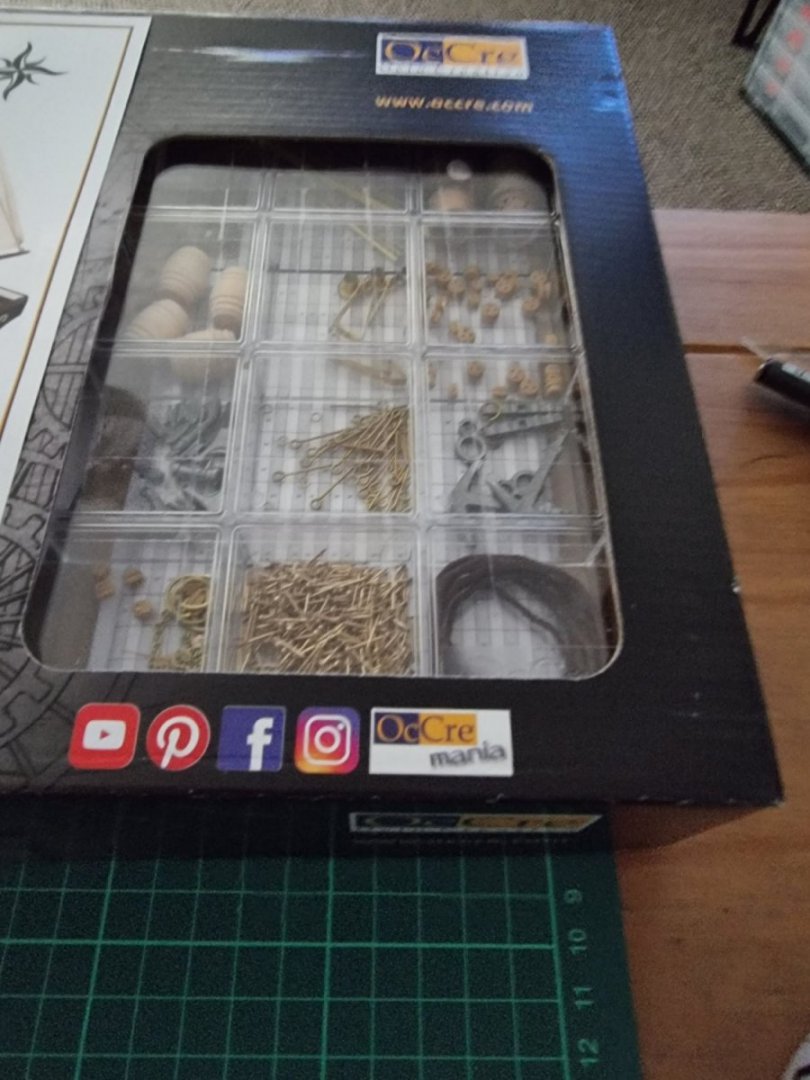
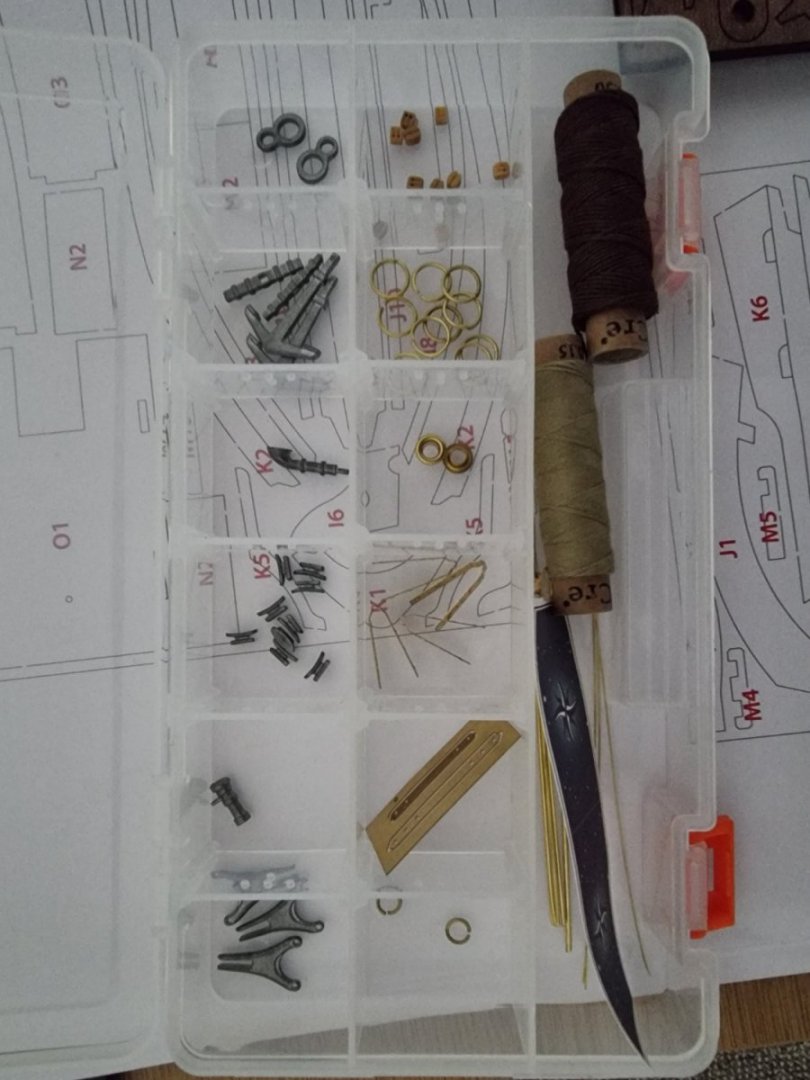
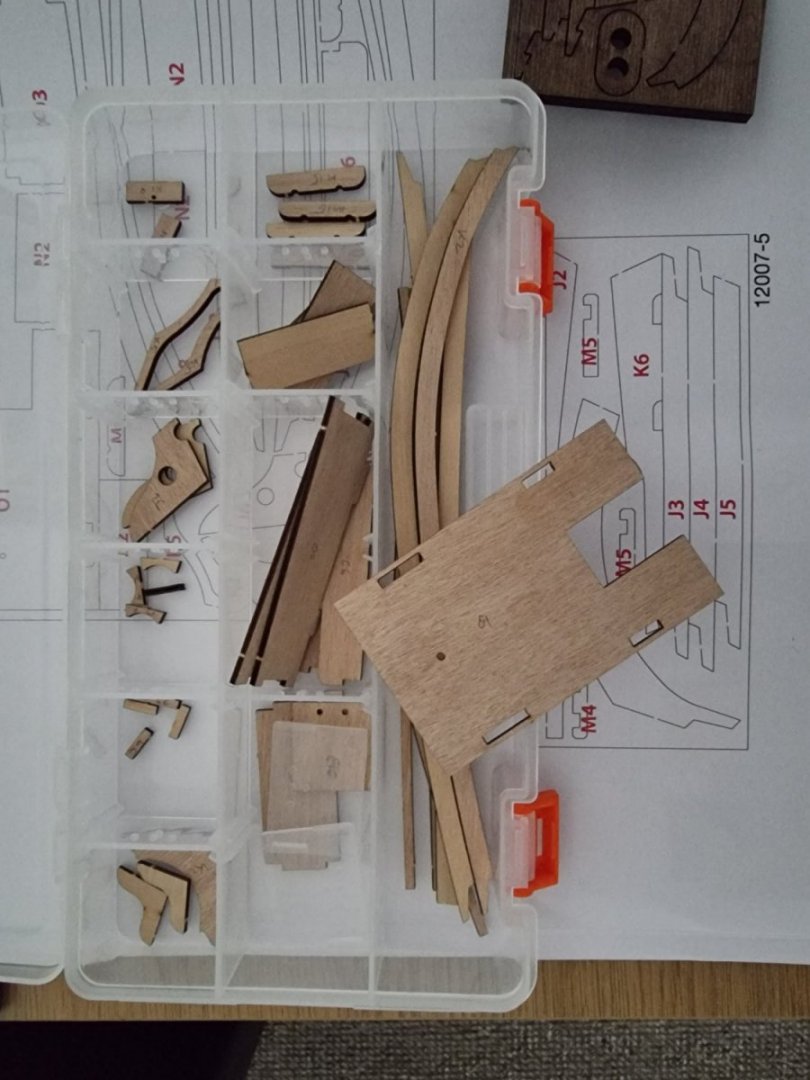
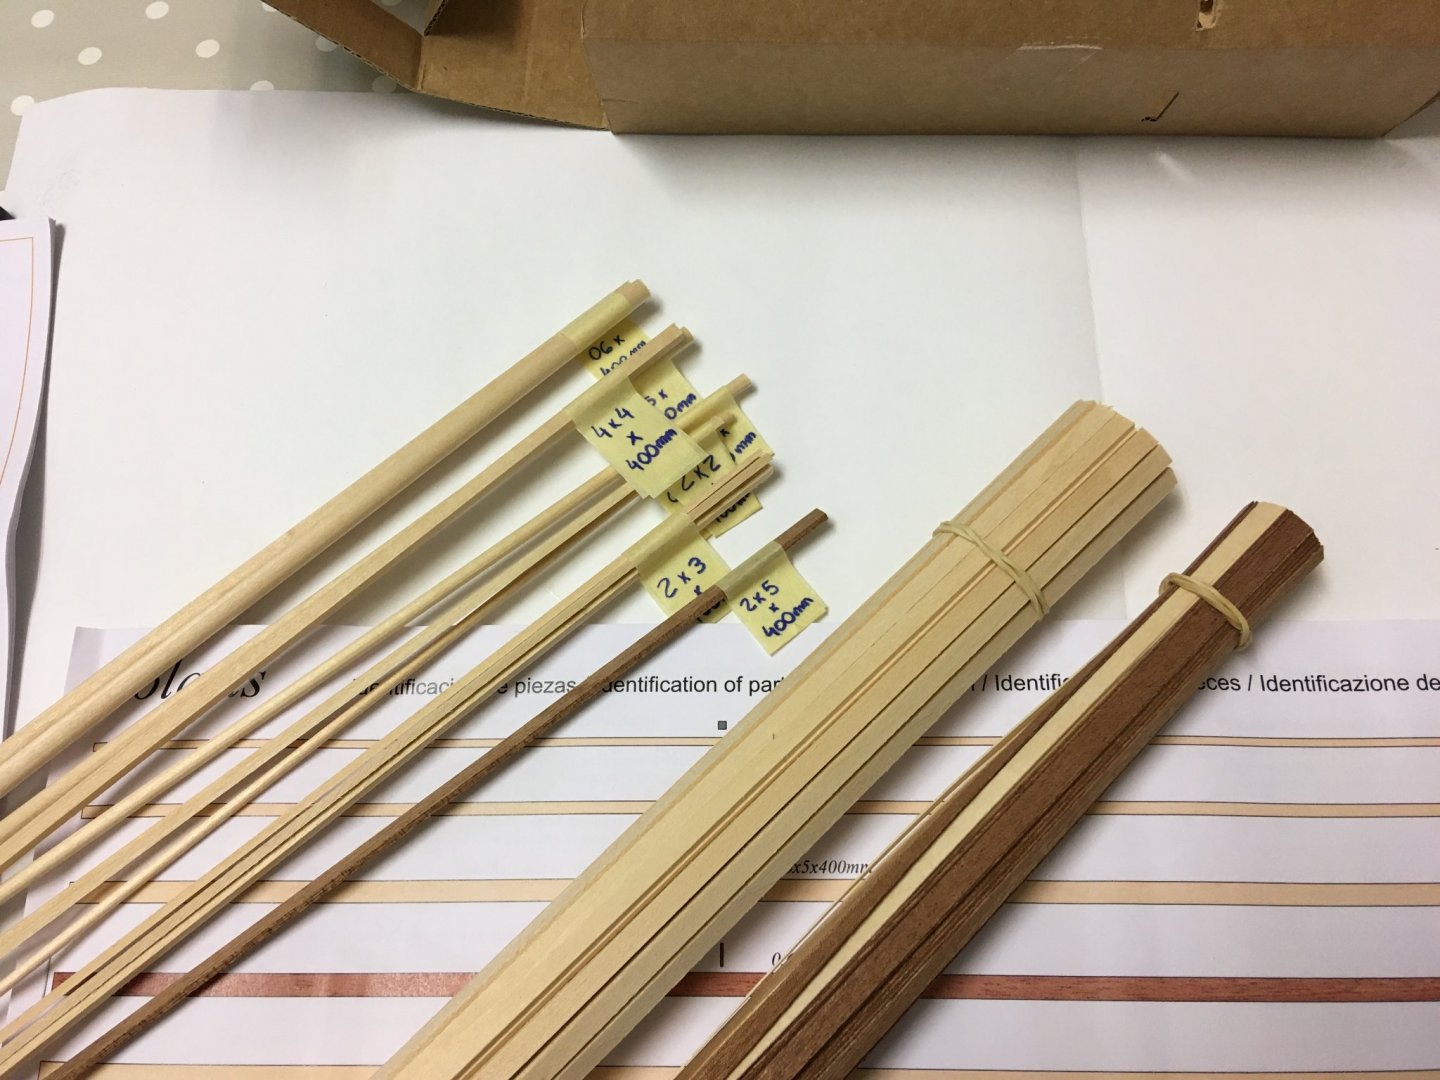
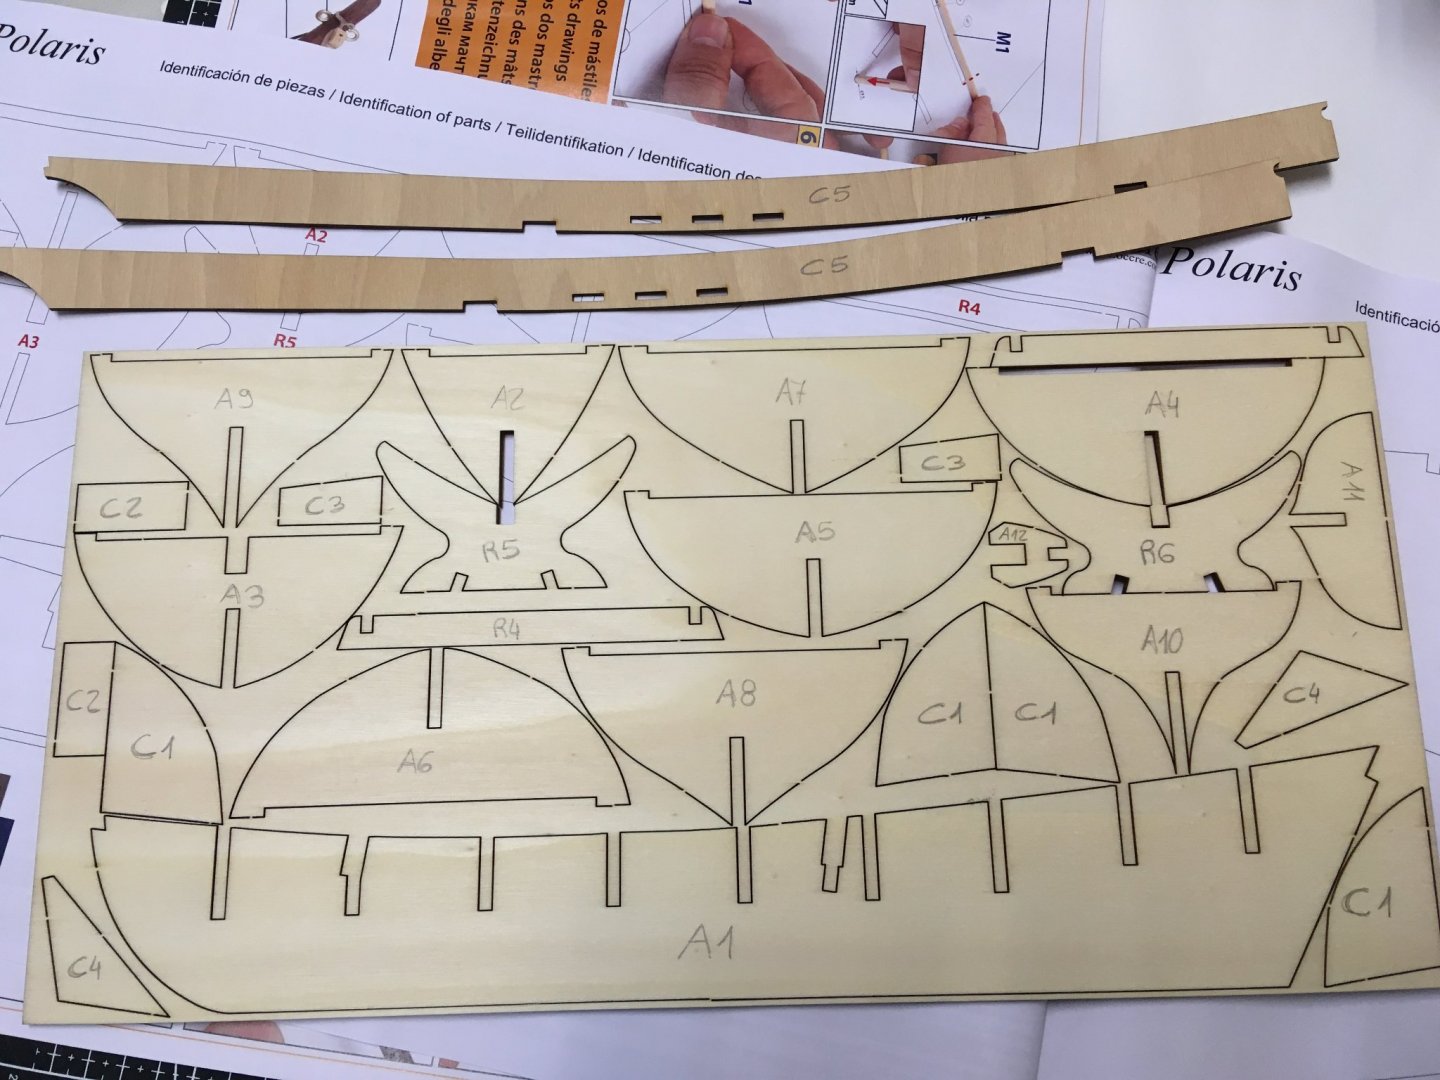
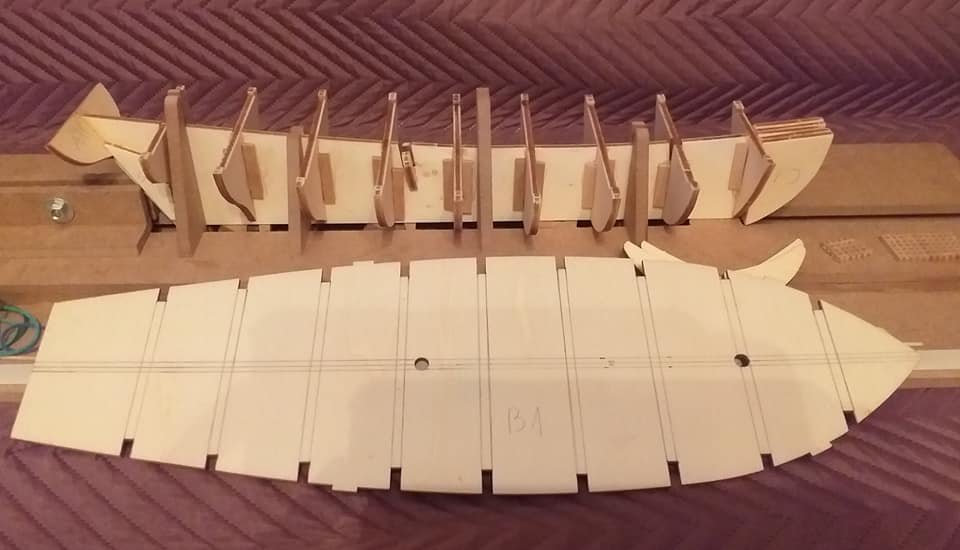
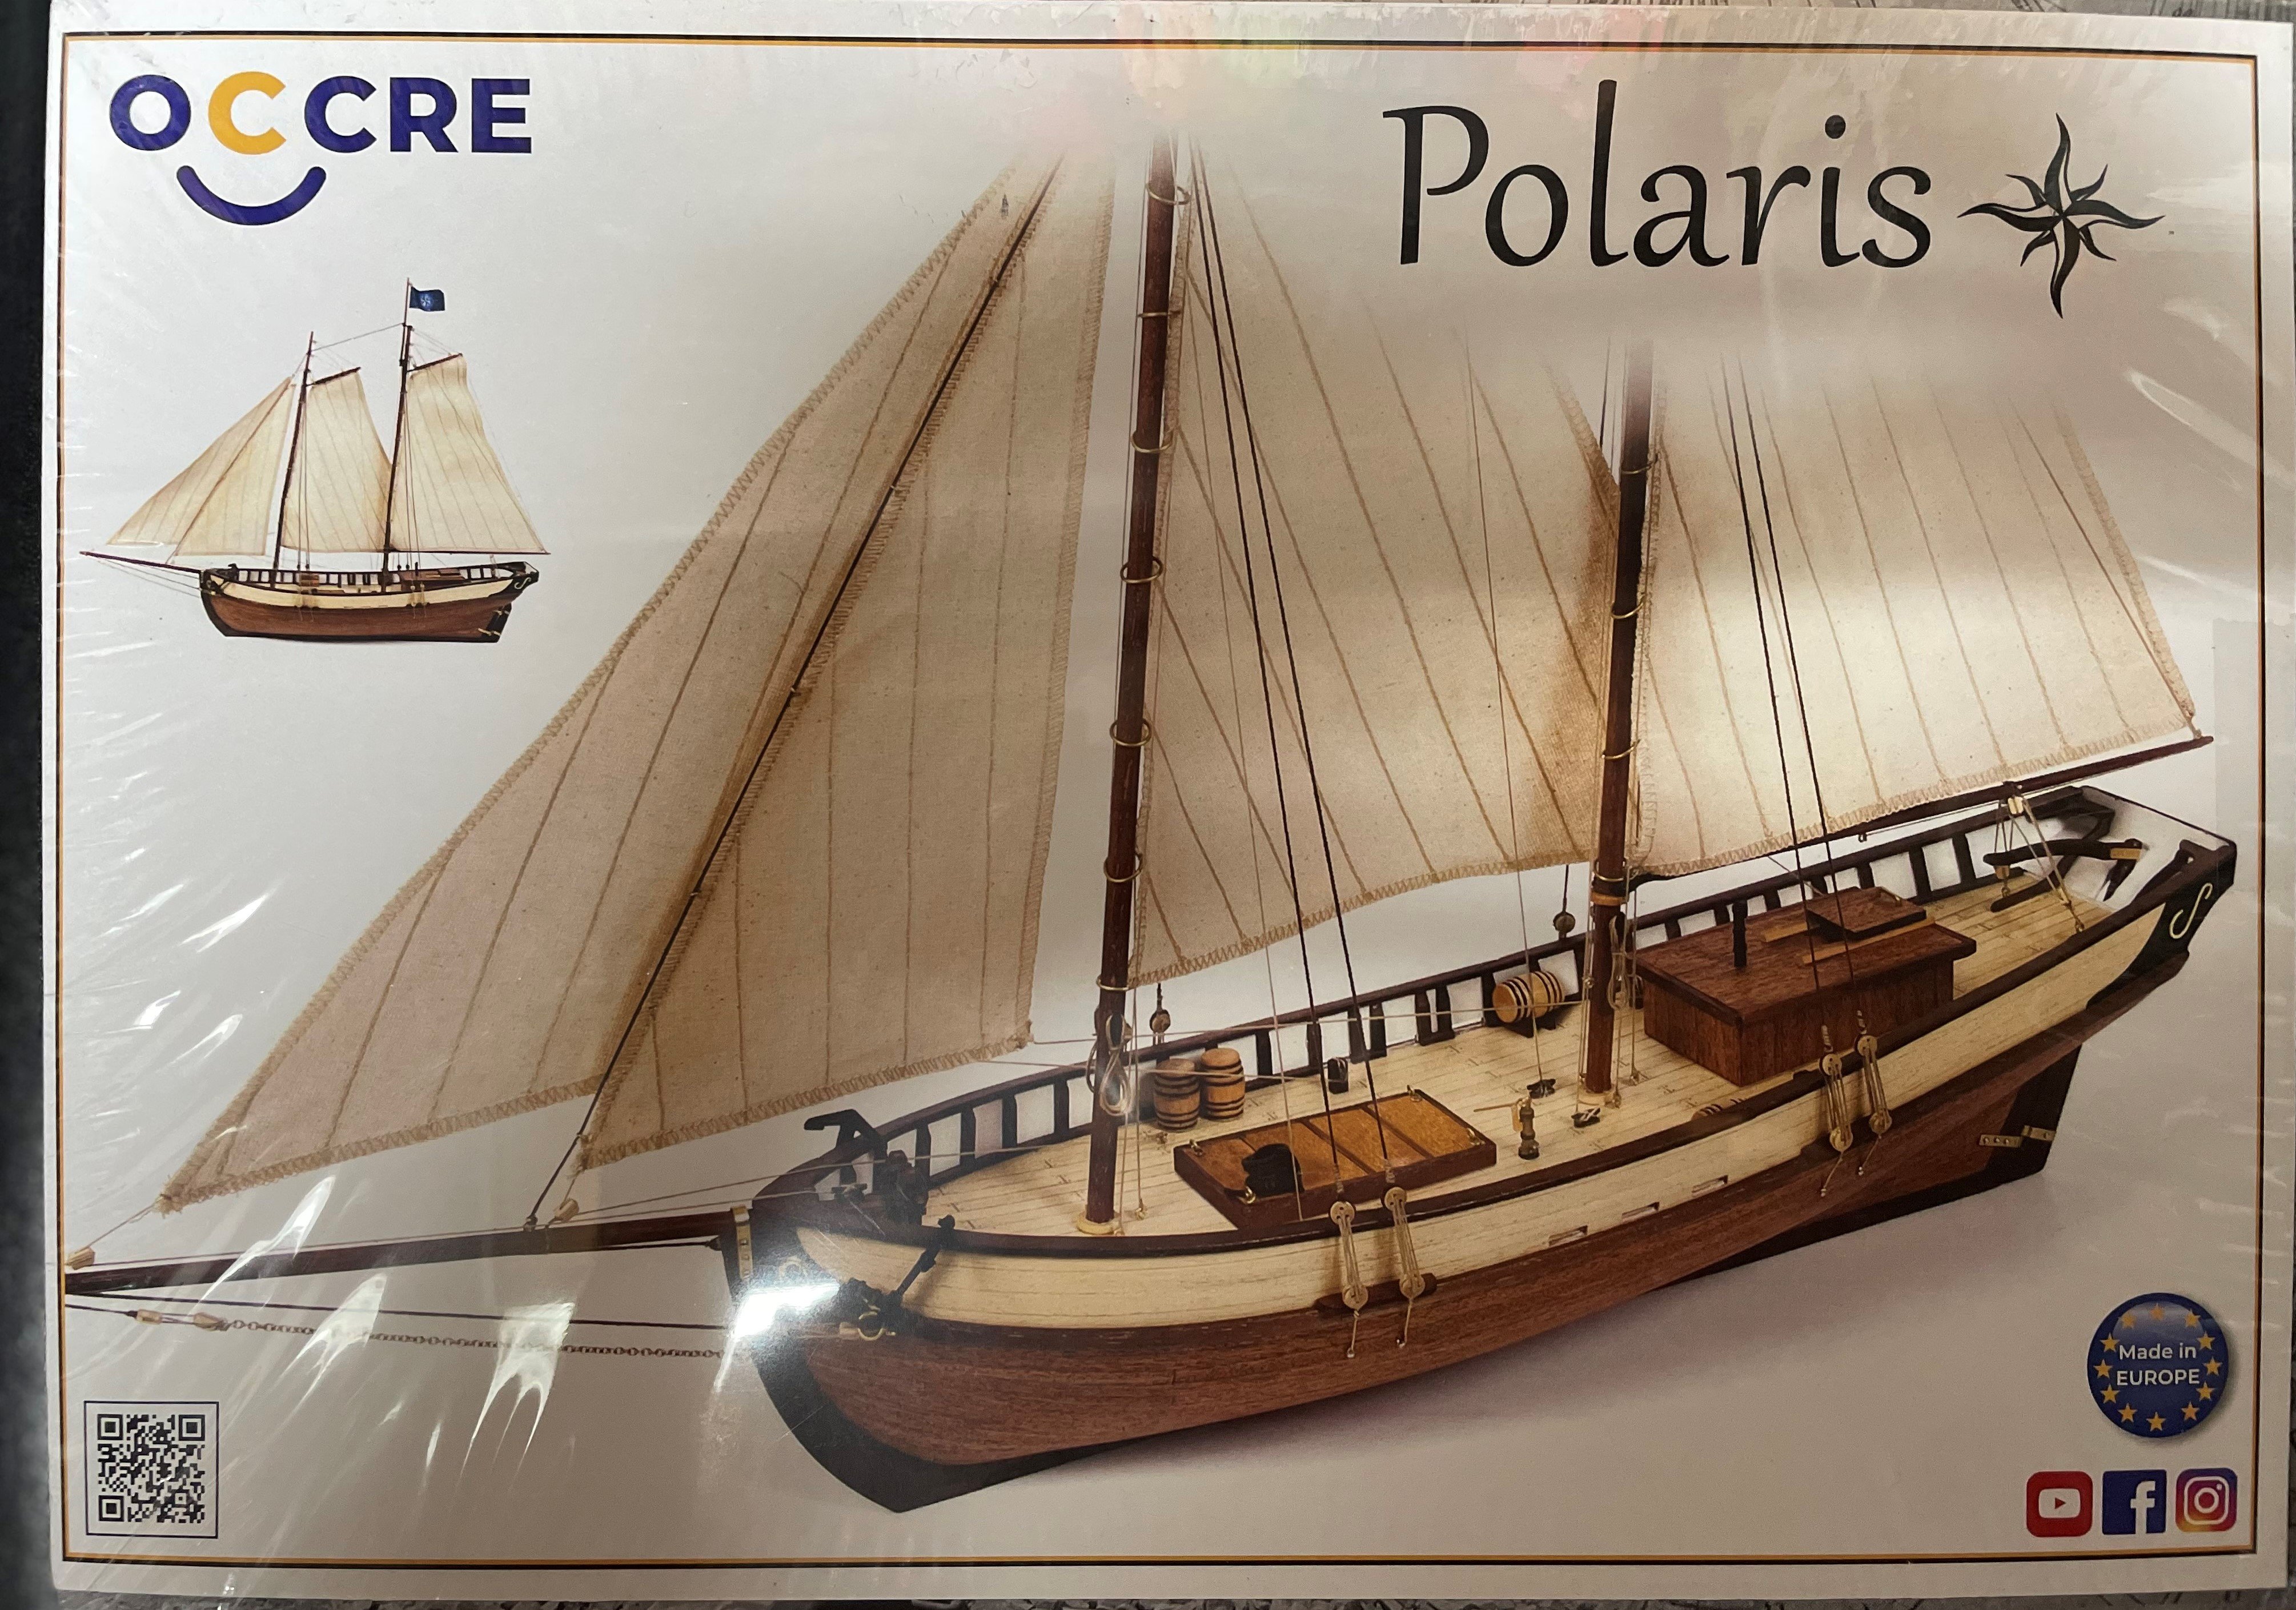
 Hello; Over the weekend, I began work on OcCre's Polaris. I choose this model as it appear to a good kit for a beginner. There was one for sale in the area that I purchased last week. I have looked over amazing build logs of this ship that have been book marked for future reference. It seems the place to start is a picture of the box. The following weekend, I opened the box and checked that all the pieces were present and counted. The false keel had a very small bend in the middle but didn't seem to be a bad as others have shared. After gluing the ribs in place, I learned two things; use less glue and buy white glue. Not shown in the picture are the corner pieces I used to square the ribs to the feel. They are were to big to glue more than rib at a time. While waiting for each rib to dry, I managed to get the deck plates marked up with a 7 HB pencil and marked the center line on the deck plate. Sunday was a trip to store to buy wood glue that dry's clear and some contact cement. Comments and critiques are welcomed. David
.thumb.JPG.a0e4a9c837e65b71d6ed91a0be5ba0c4.JPG)
.thumb.JPG.e7f06b48e02ce6a91fb34d258caa0e3b.JPG)
-
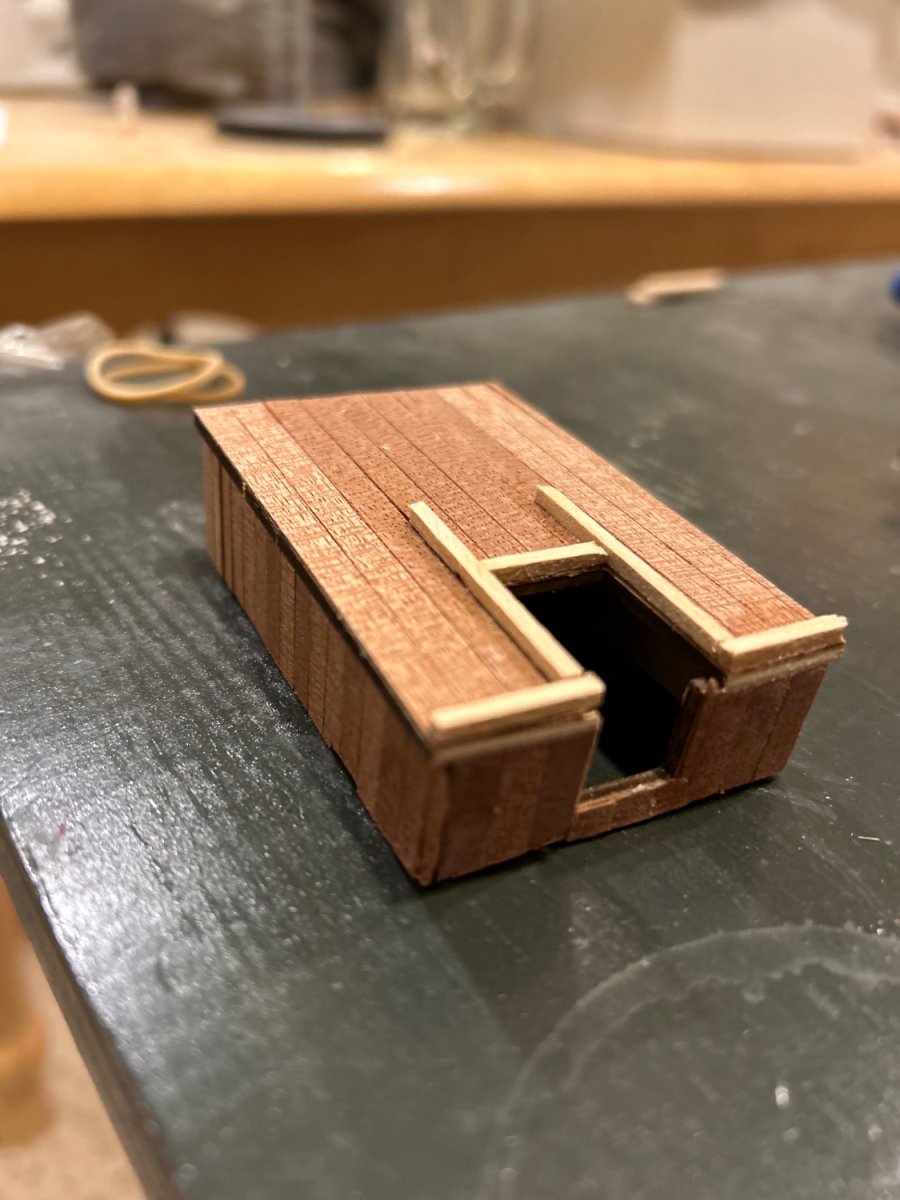
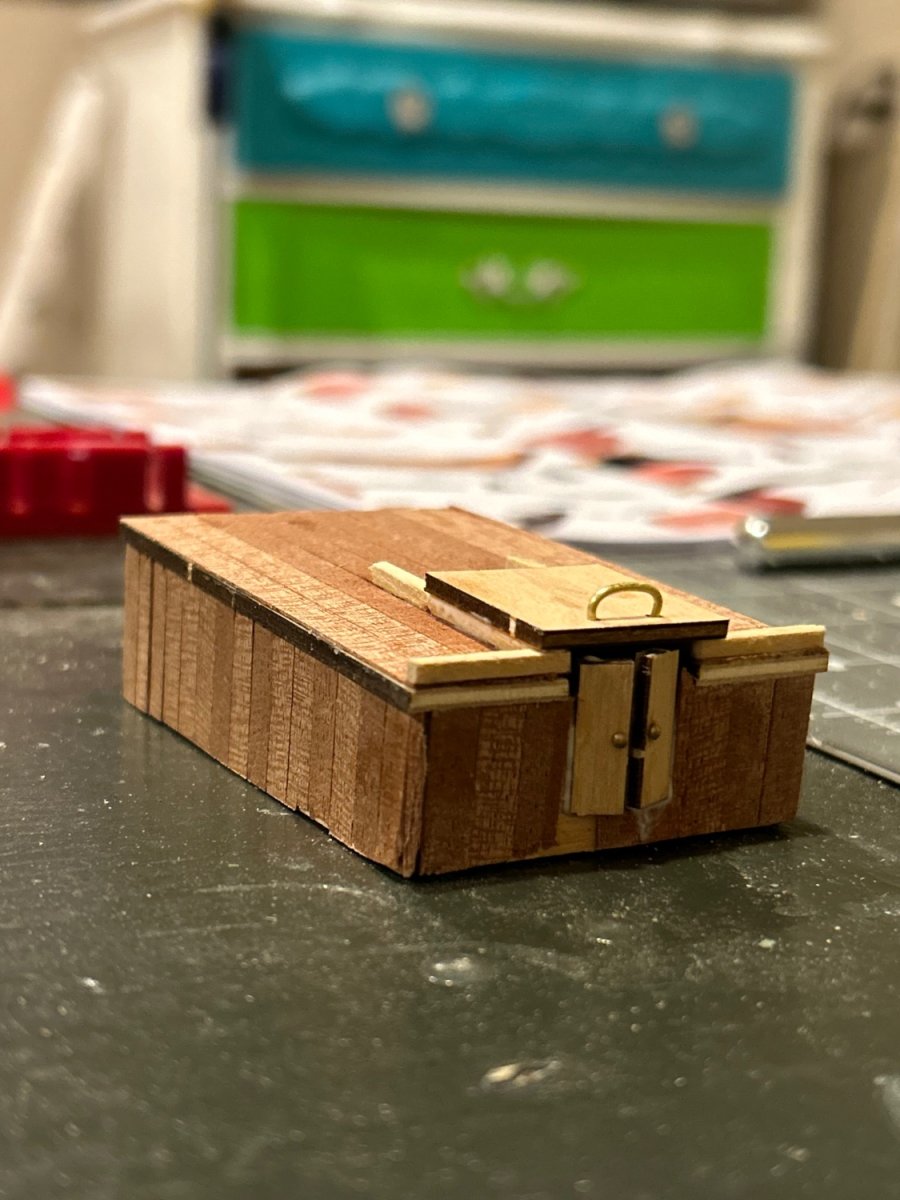
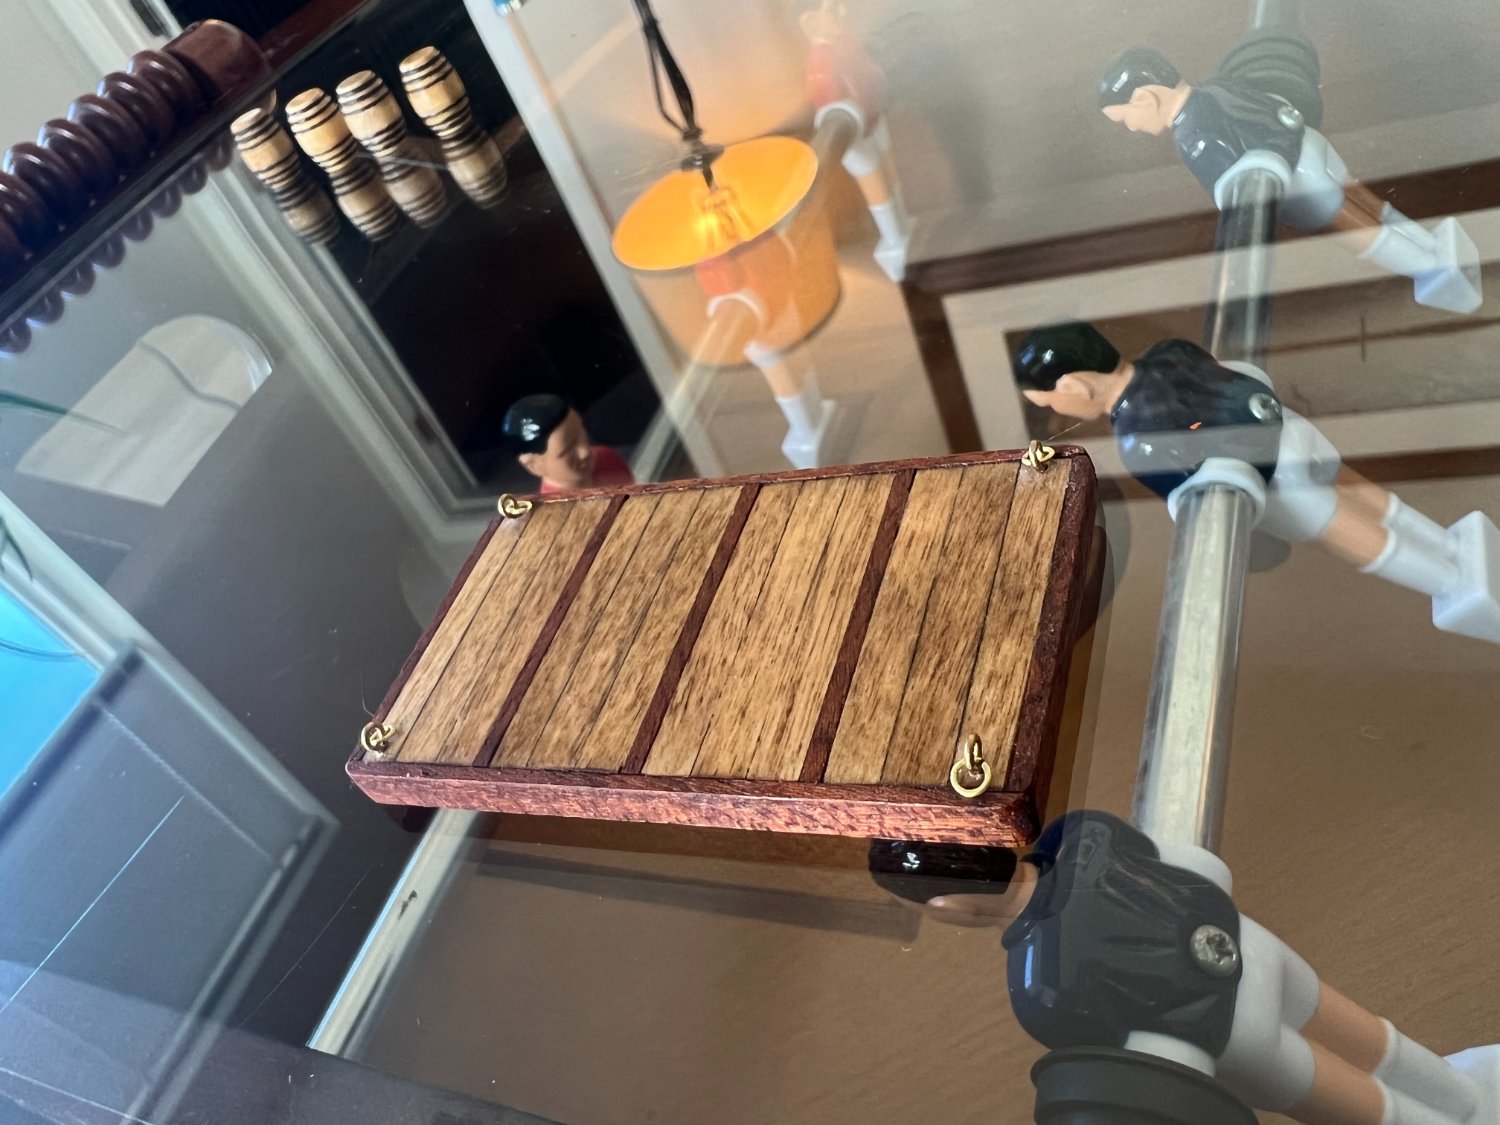
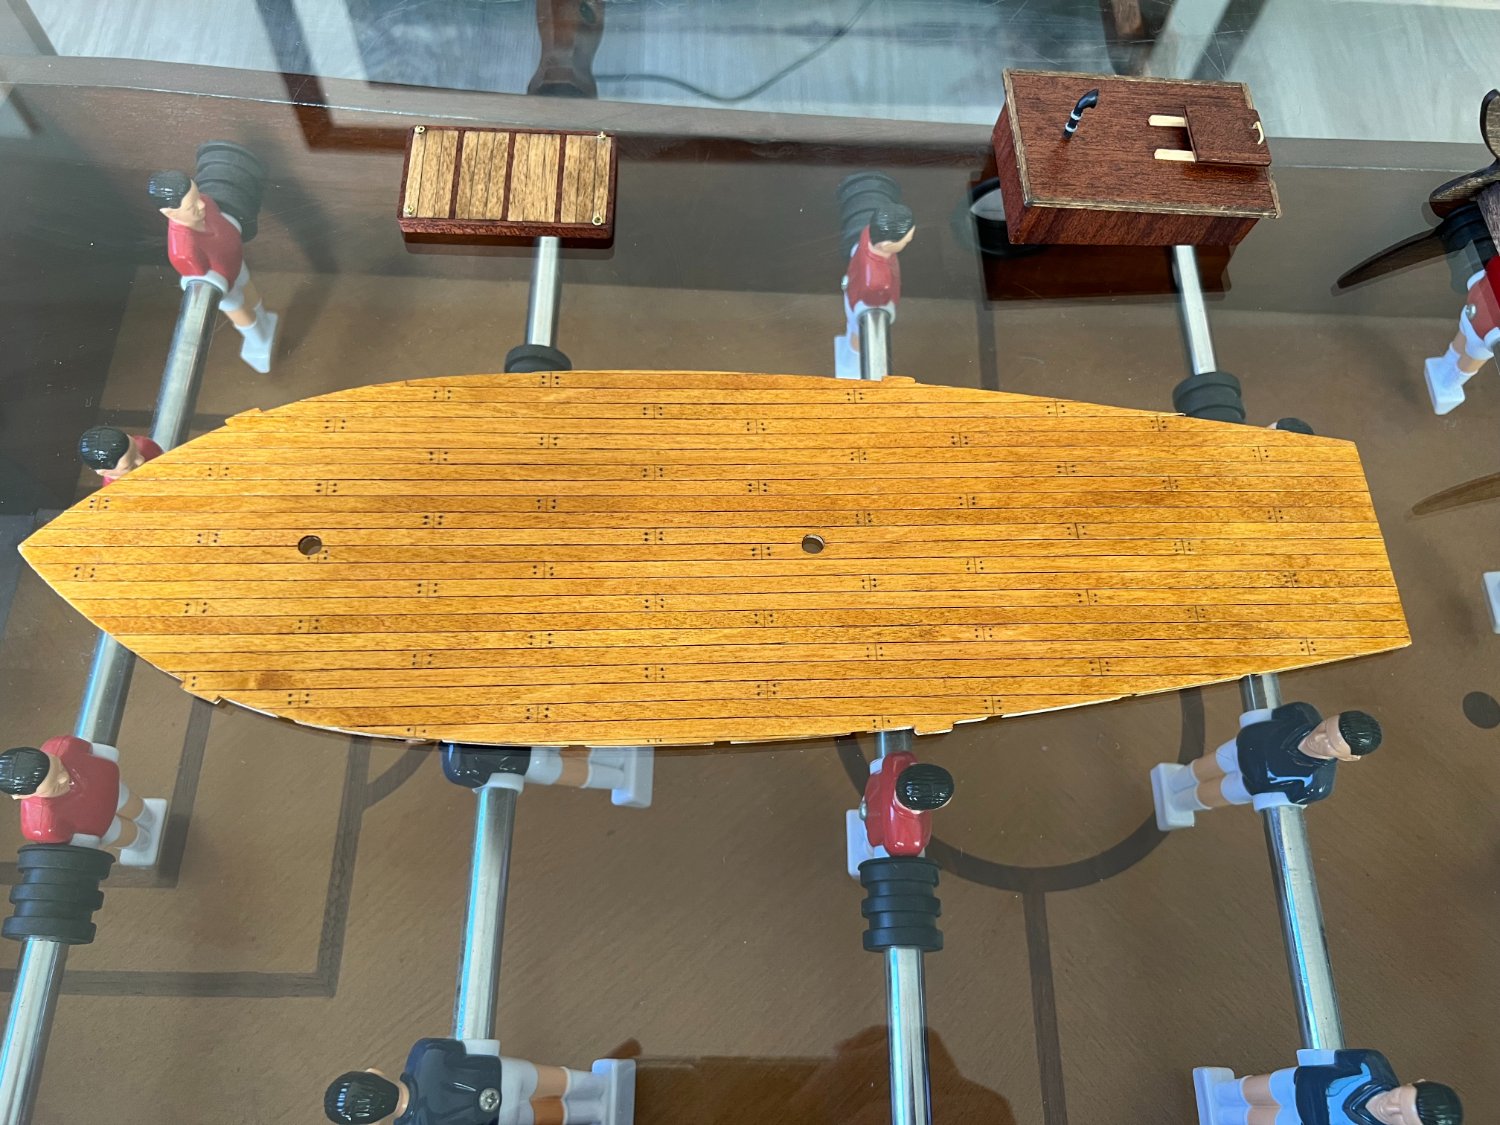
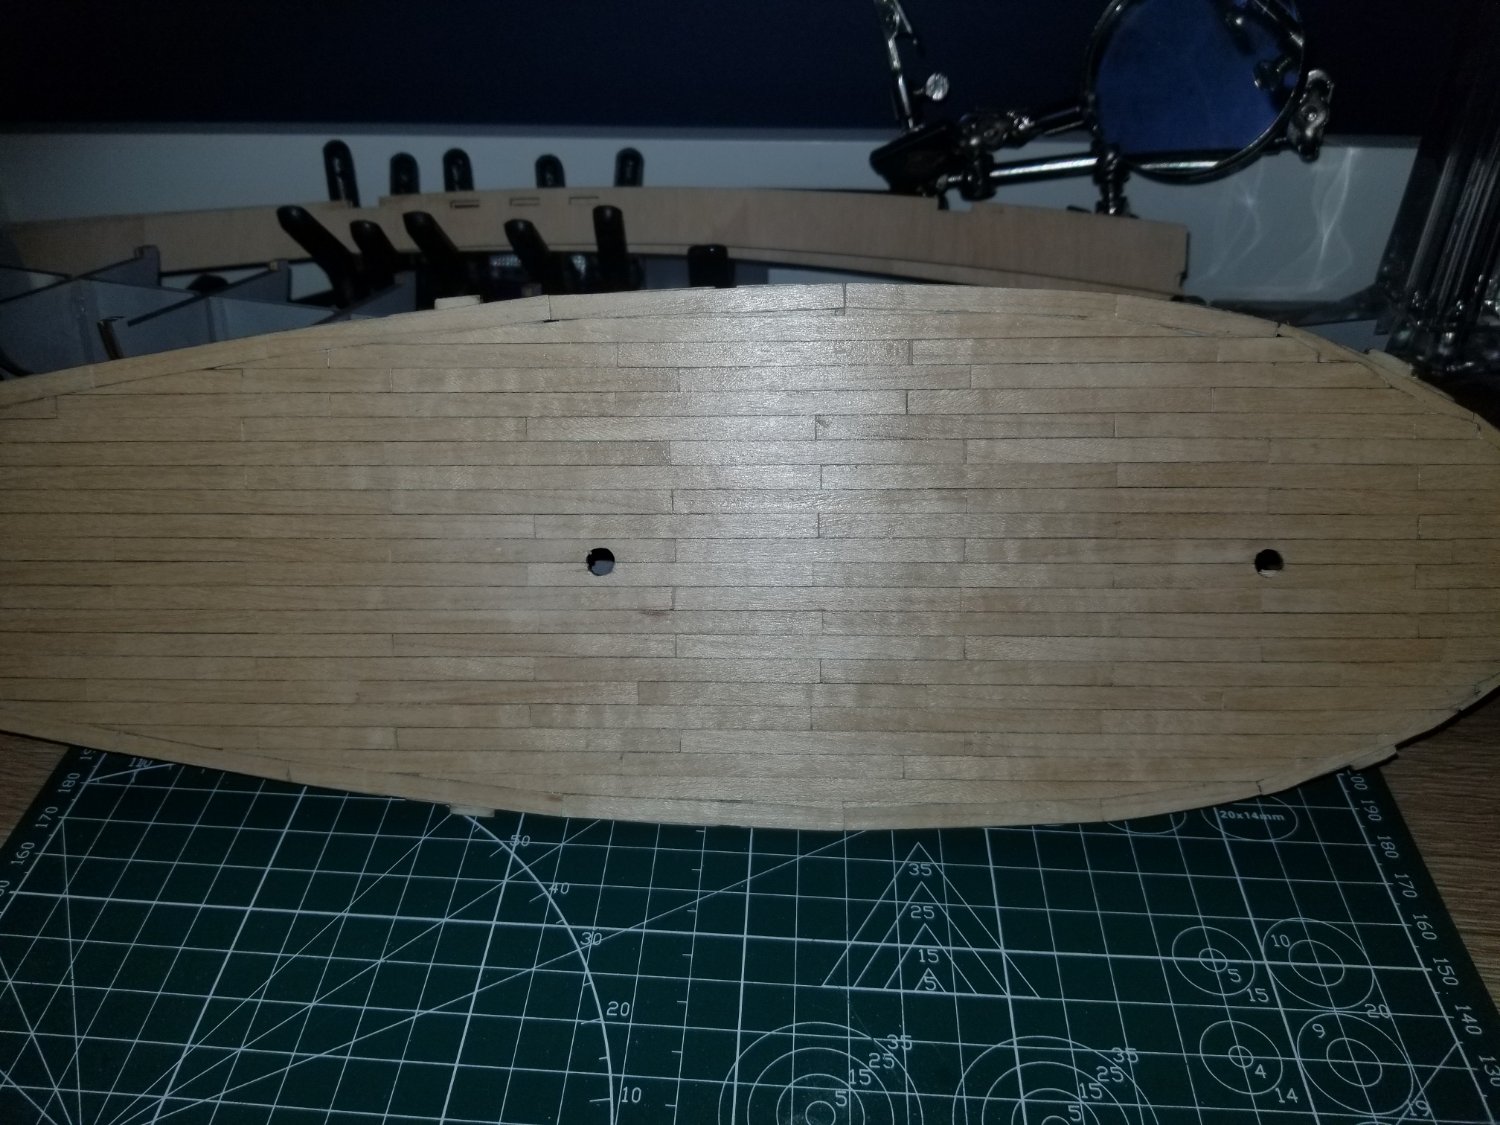
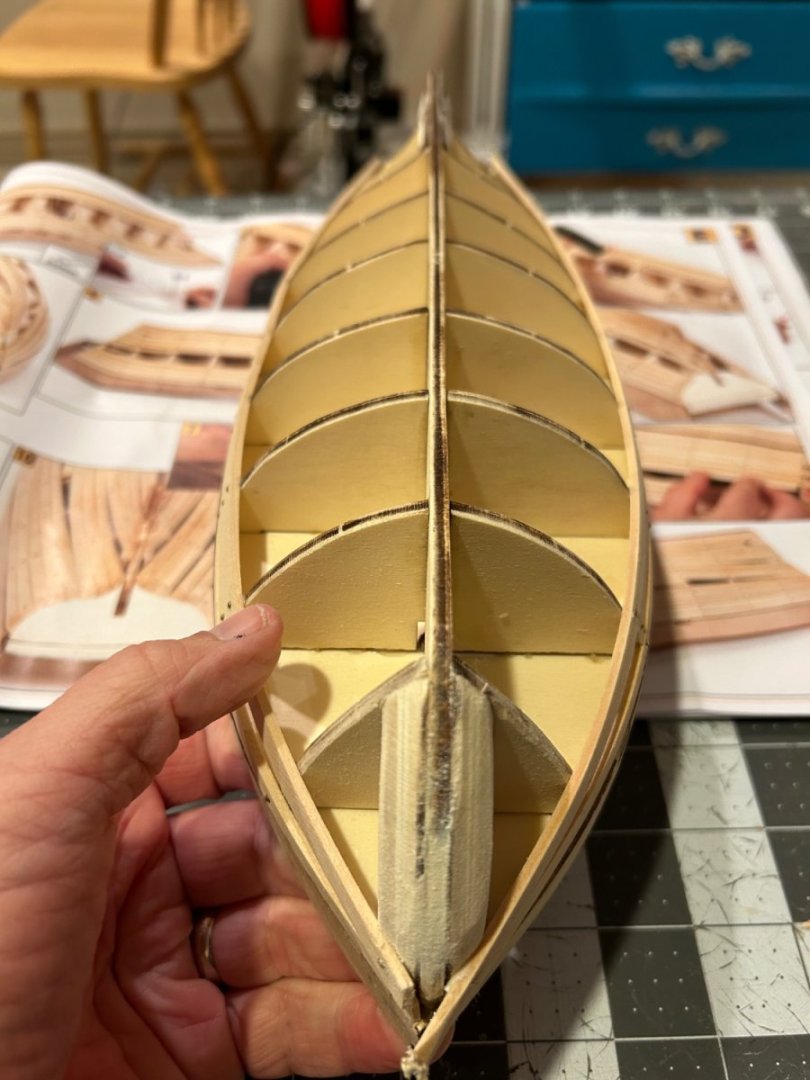
 Hi everyone, I just got done (kind of) with the shipwright series and decided to make a small step up and do the Polaris by OcCre. I botched the lobster smack and it’s now somewhere in our local landfill. I’ve never done a build log before and don’t really know all the part names and honestly will never figure out what side port is and if the front is aft or not lol. I’m sure this stuff will come, but for now I’m just enjoying building! I haven’t documented the process that well but here’s where I’m at. I’m getting a bit ahead of myself and have started putting together a couple things that go on the deck. Some of those little features are already on it. Hopefully that doesn’t cause probs for me later. id love for anyone to point out any places that need work. I’ll try to keep this updated, but I am a two job guy so my time is a bit limited. -Travis
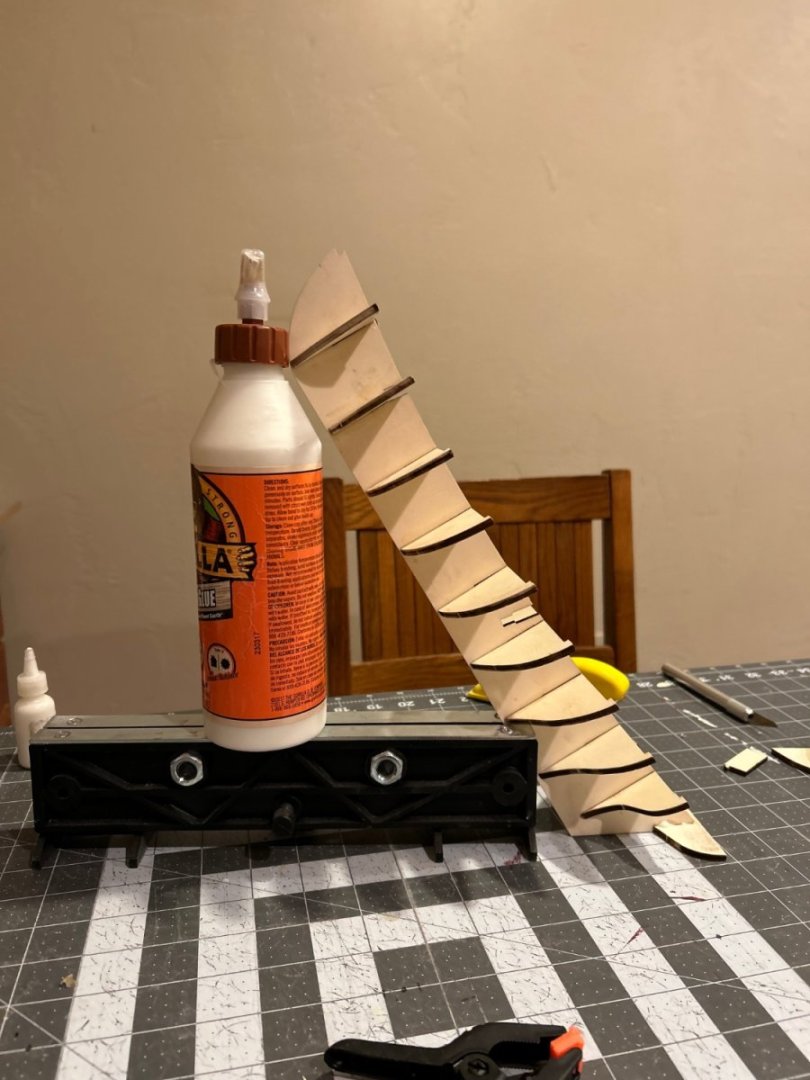


-
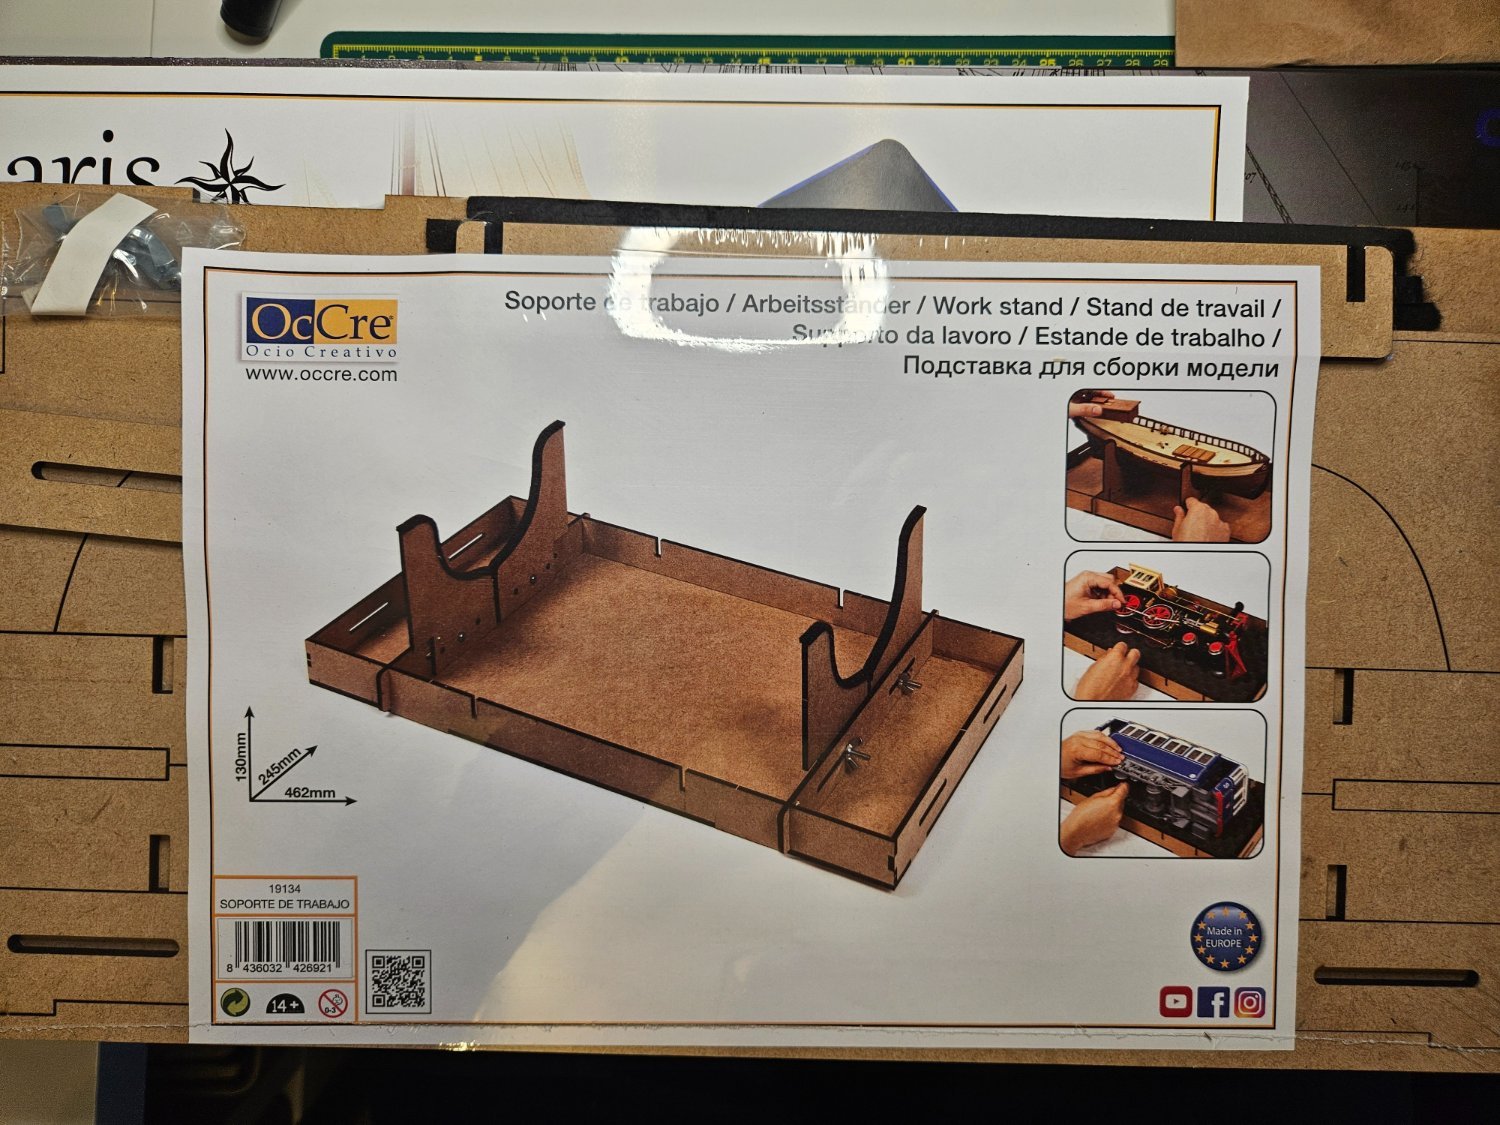
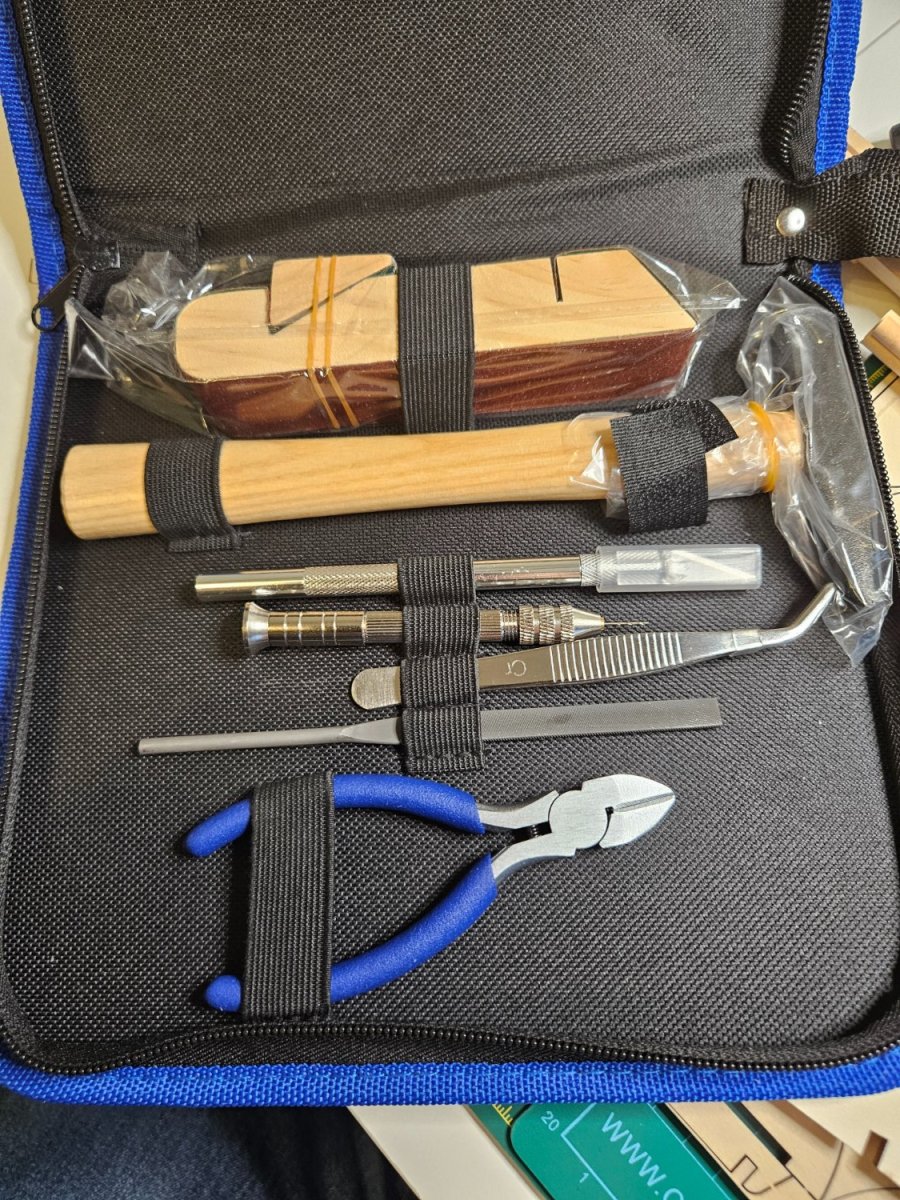
 Hi All, So my Polaris has arrived, along with the Occre Work Stand, starter kit tool pack and paints recommended by Cornwall Model Boats, who have been very helpful, which were quite a bit cheaper than the Occre paint set. I've also invested (a term I use often when explaining all the parcels arriving to my very understanding and supportive Wife) in some files, a pin pusher, sanding sticks, glues and filler. I suppose there will be other purchases along the way. It's coming with me to Brussels and I'll start her once I've finished my Airfix Titanic. I've been reading through Ilia's build log, what has completed a fantastic Polaris and I'm sure I'll be returning a lot for inspiration and tips!


- 10 replies
-
- 4
-

-
- OcCre
- First Build
- (and 1 more)
-
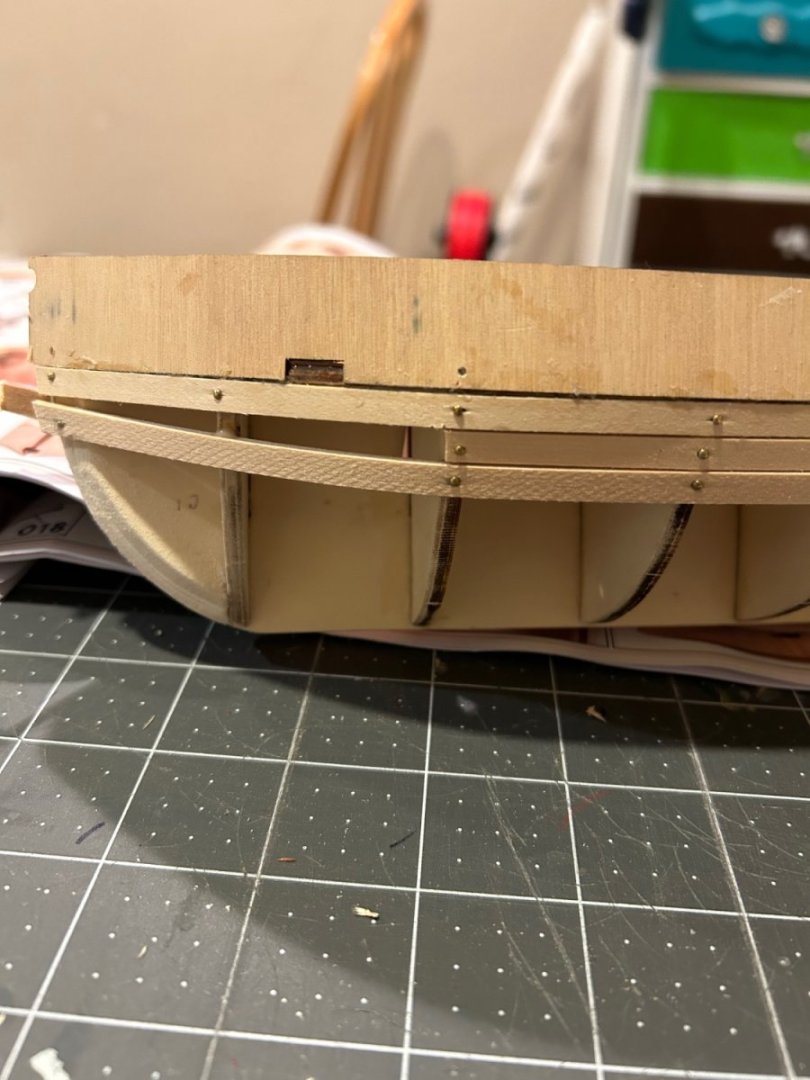
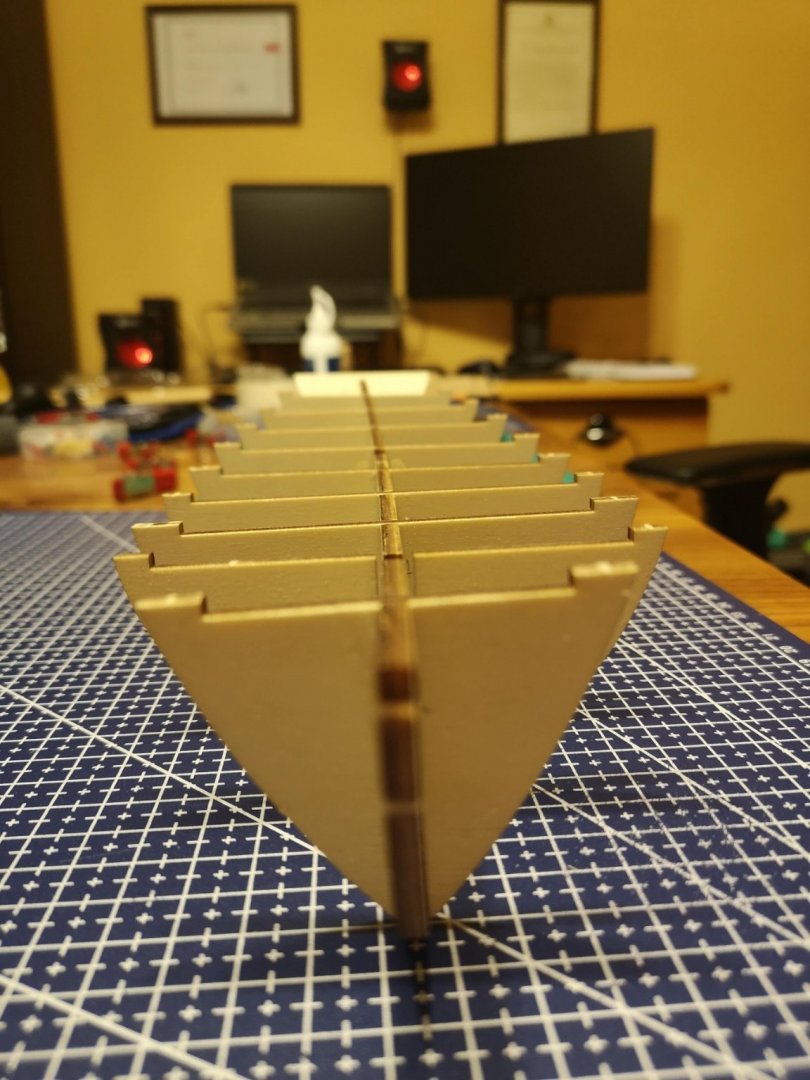
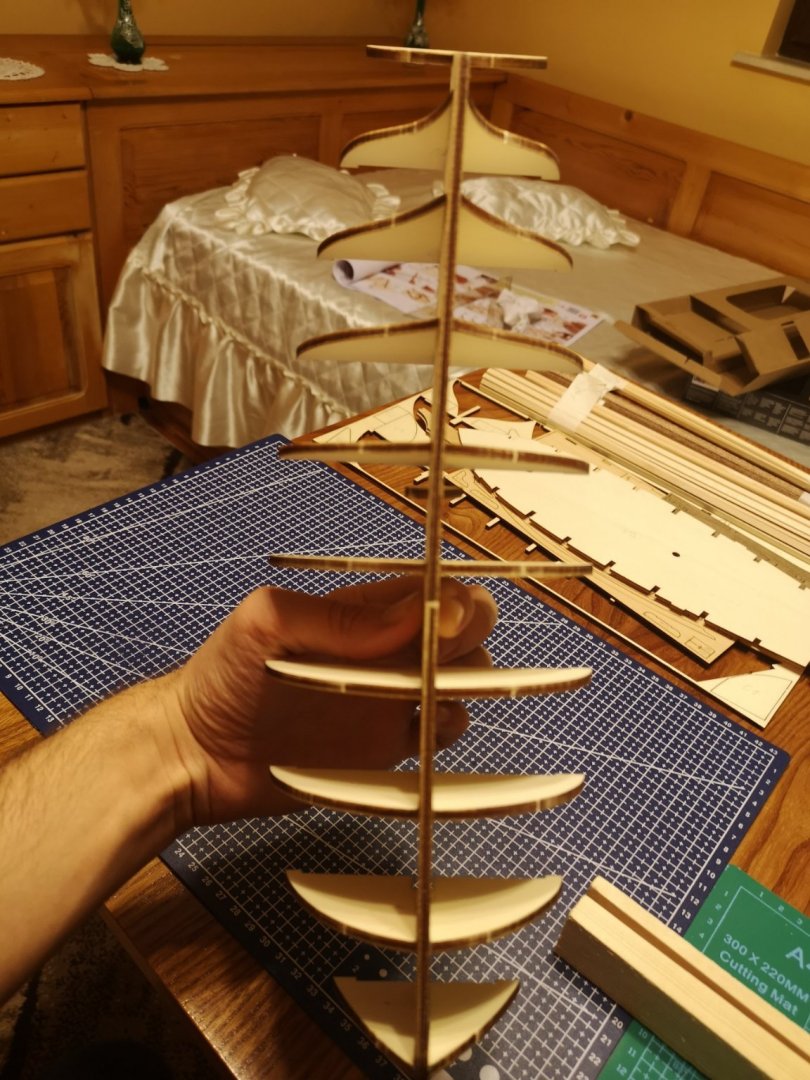
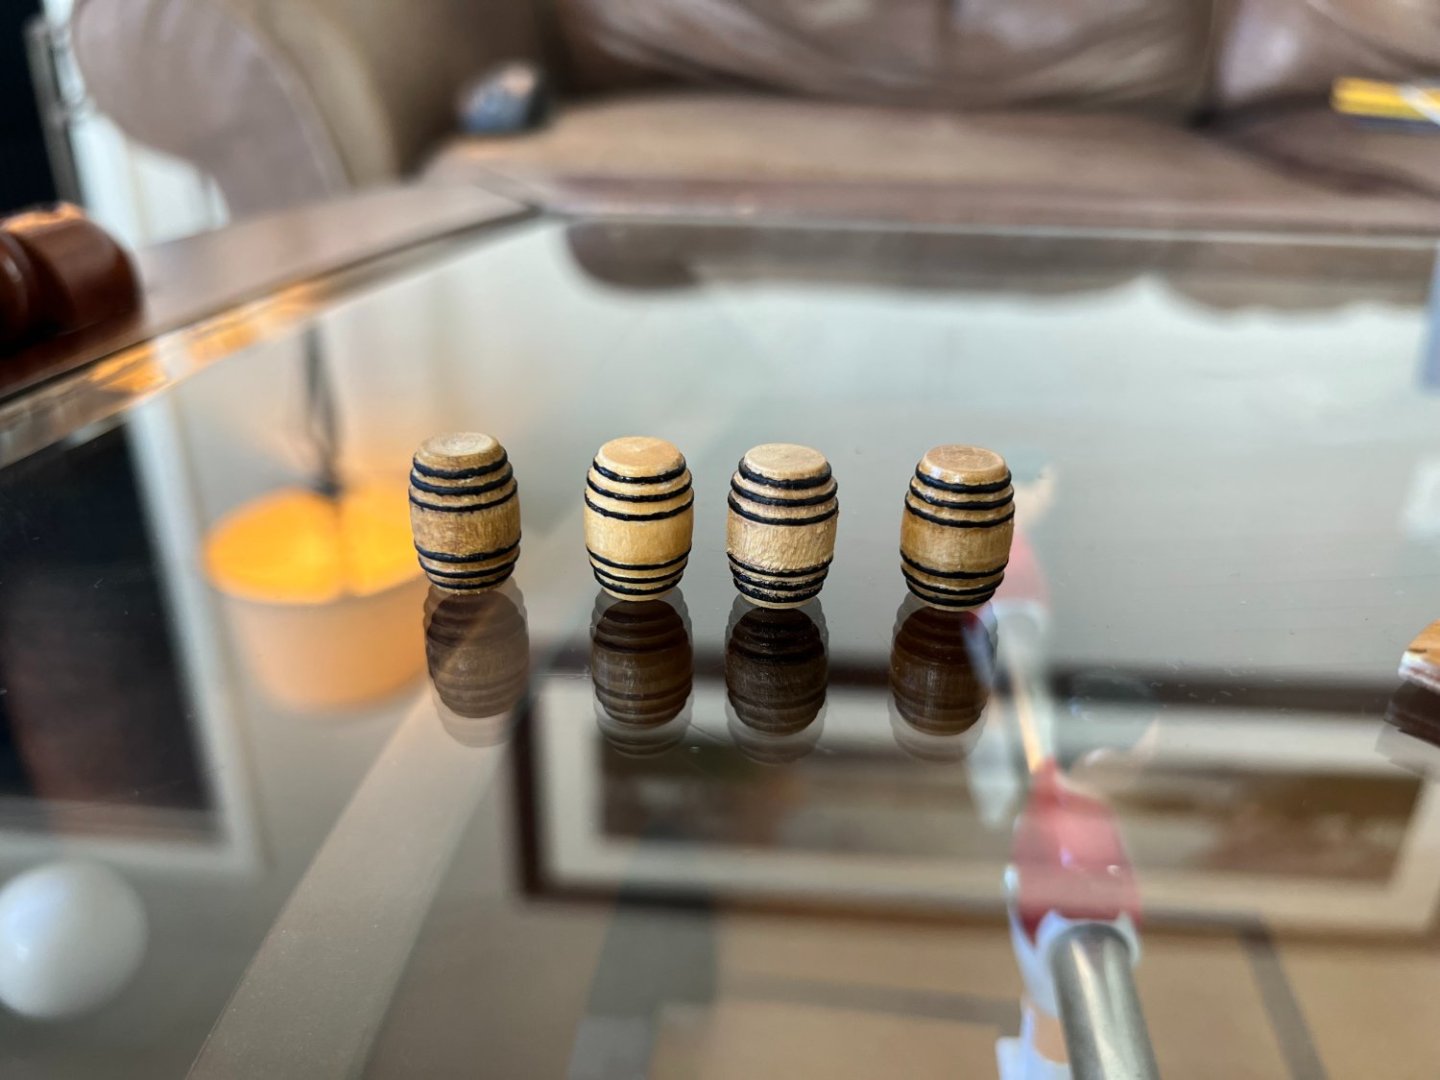
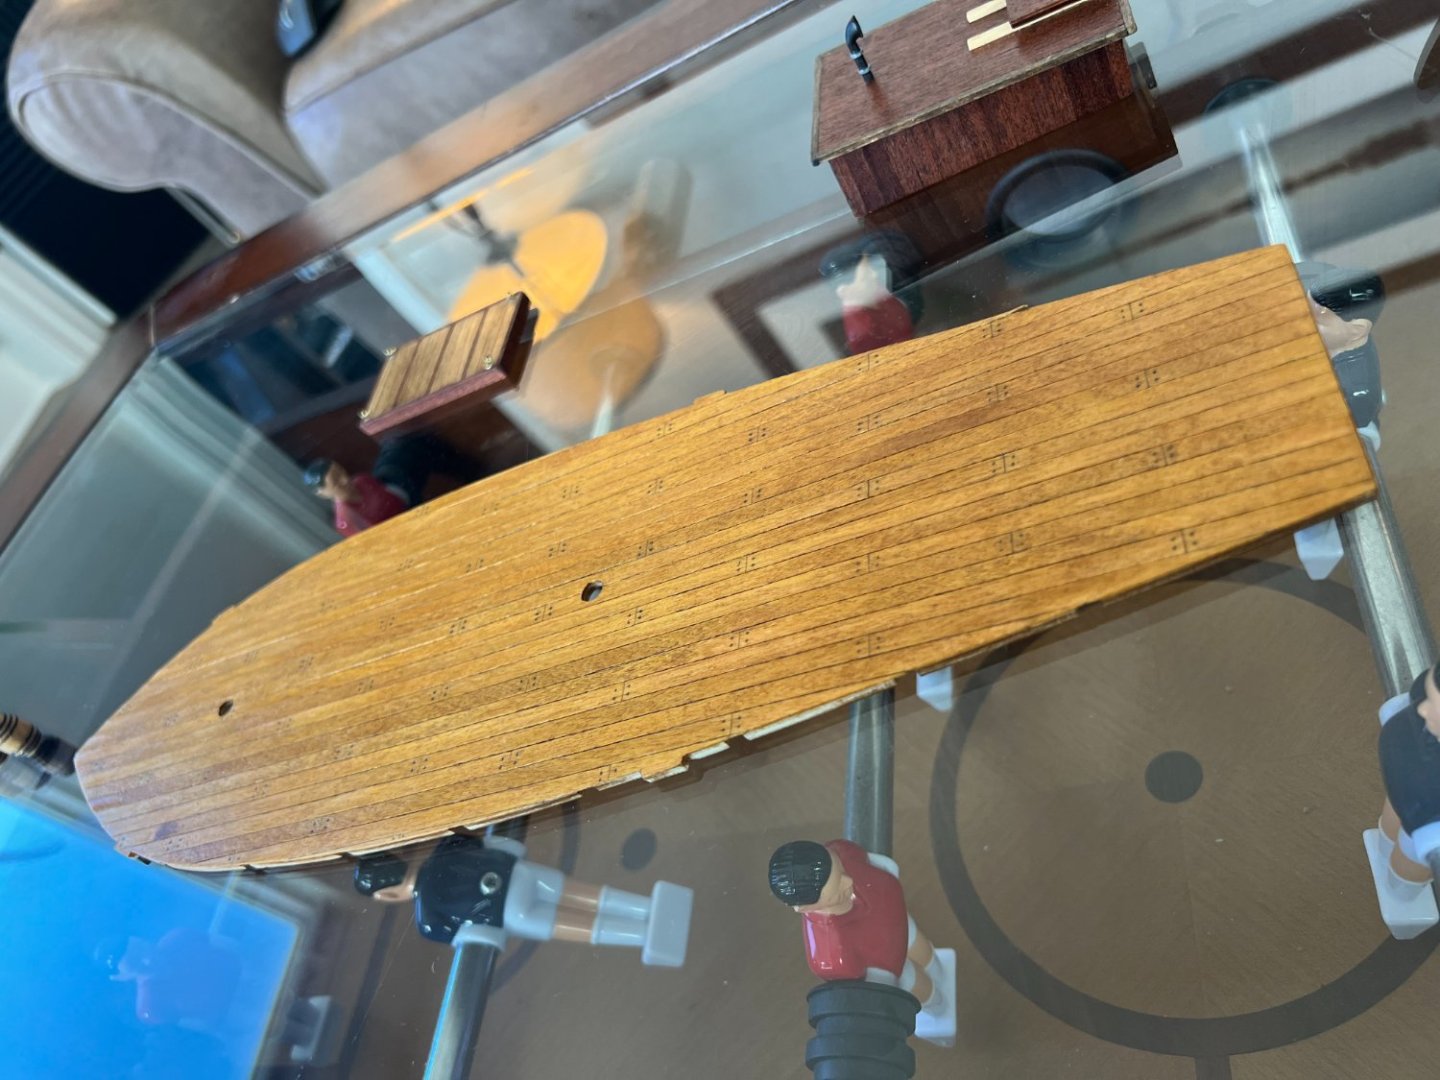
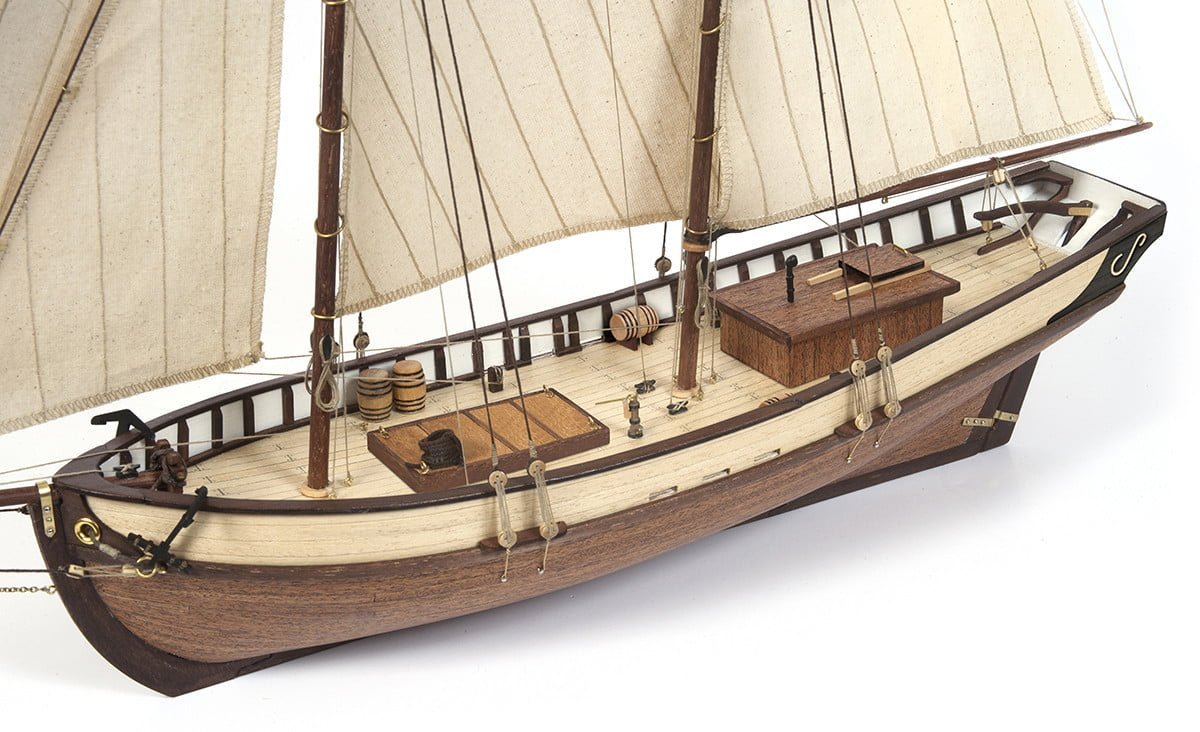
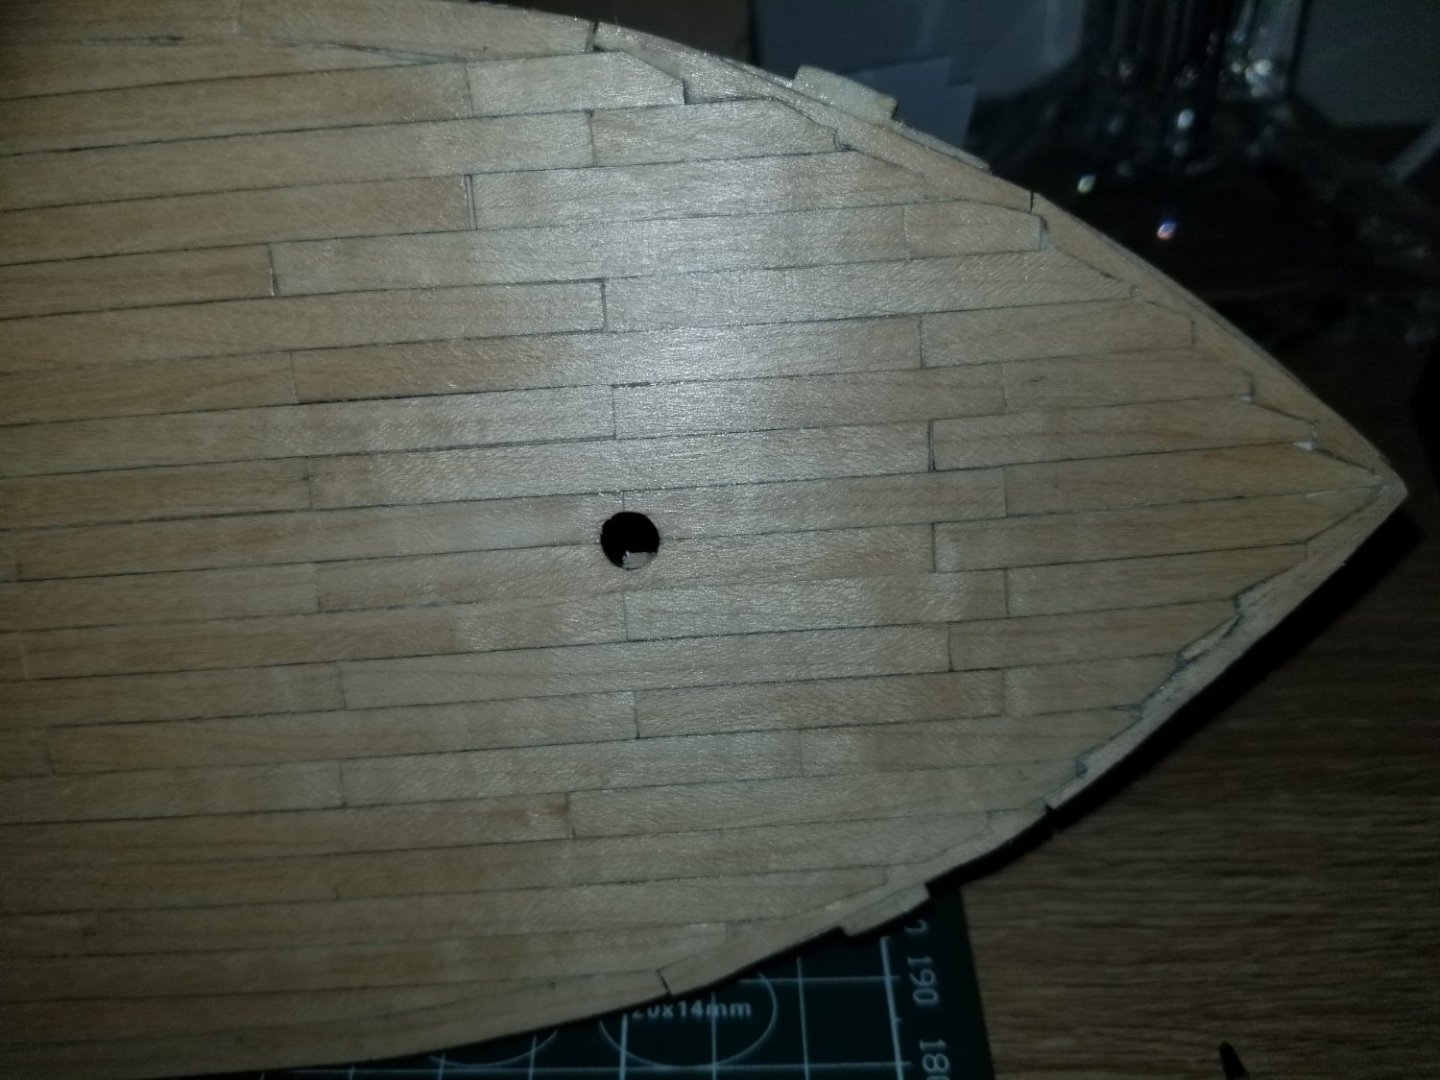
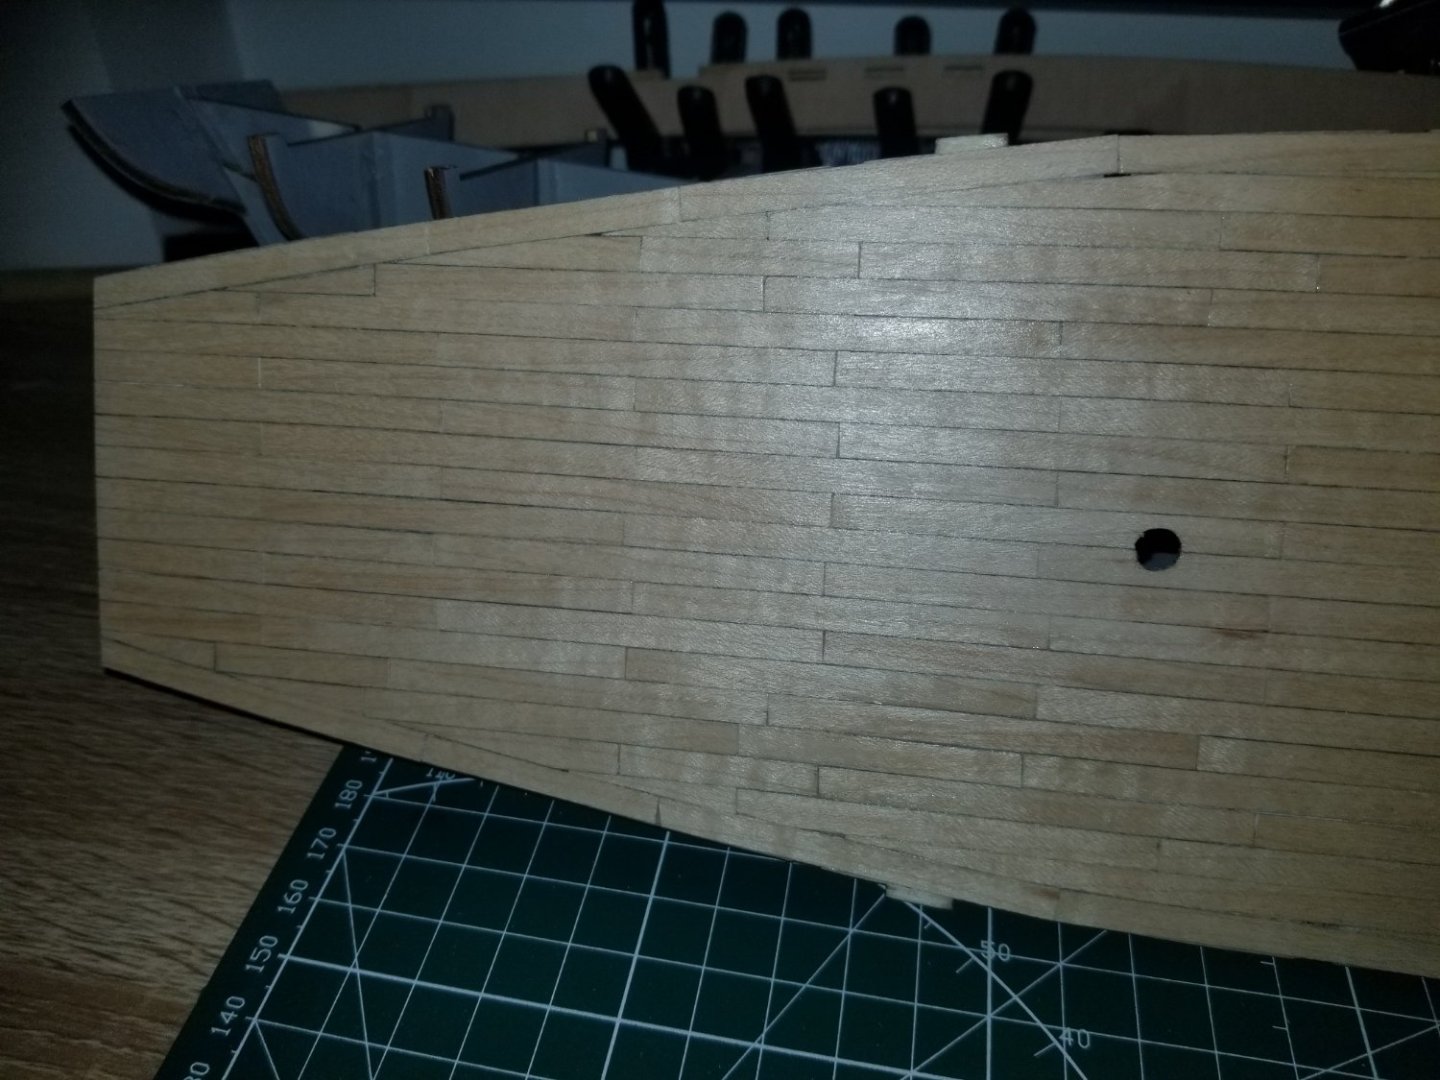
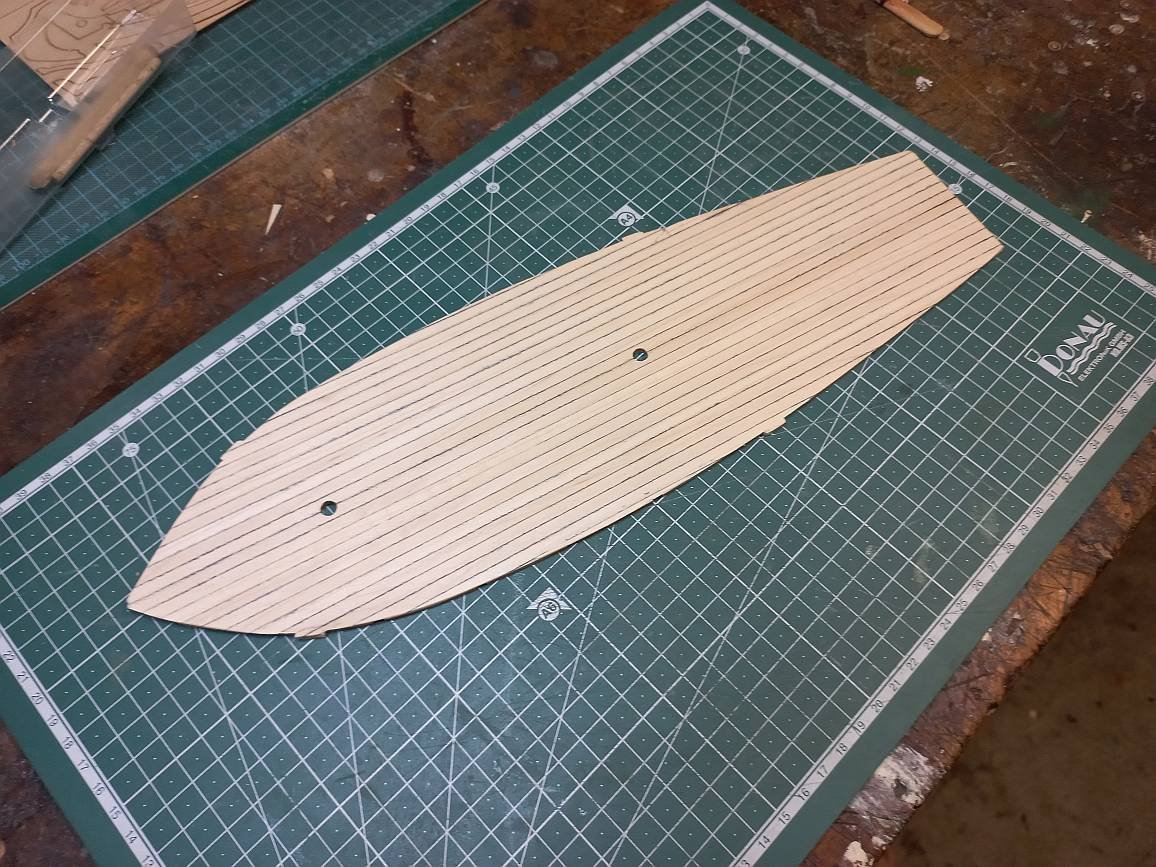
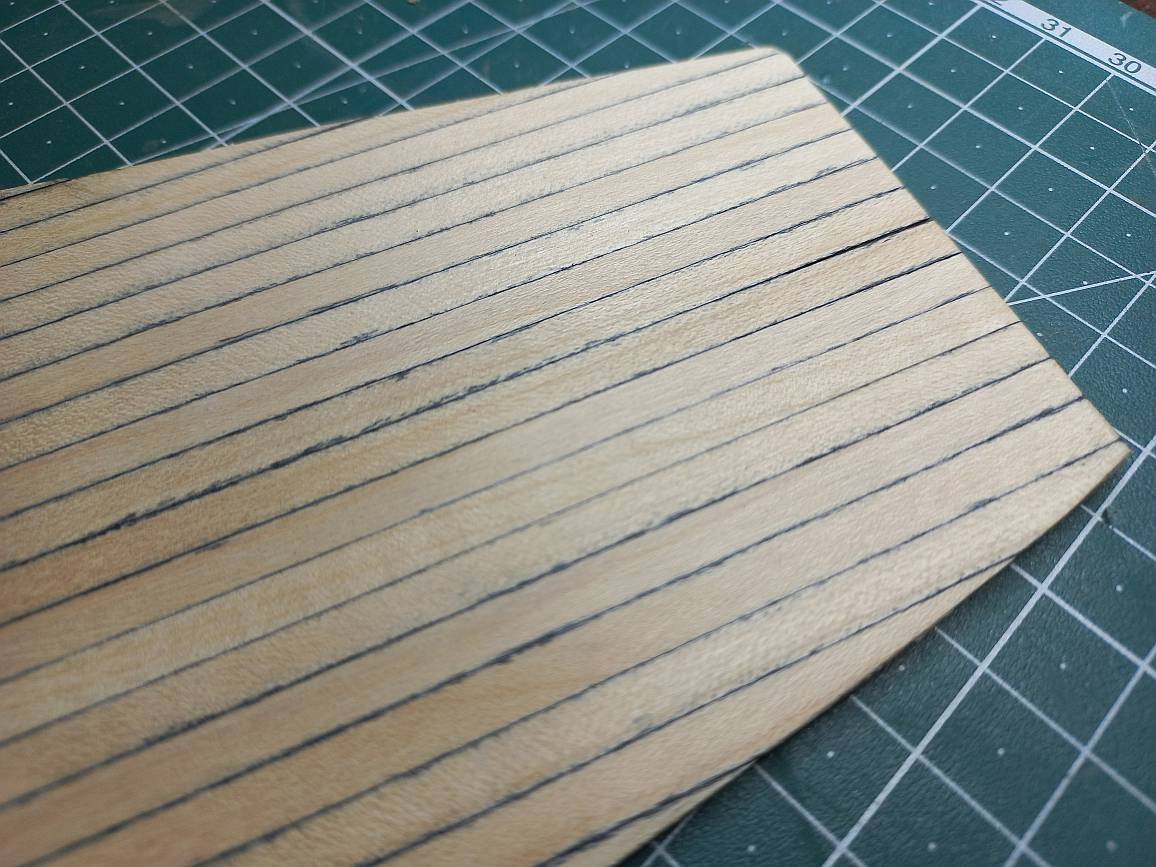
 Reflections on the kit and build: I thought it might be more useful for others, who might be thinking about building this kit, to write a short summary about my experience, and put it in this first post so it is easier to find. First off this kit is meant for first time builders, which I am, and I think they got it right. Its detailed picture-based instructions and the accompanying videos make it very clear how to build everything. There is no guesswork involved. I had only a few moments with the final sail rigging where the instructions were a little too brief but even then the videos helped fill in the slight gaps. The quality of the kit was also very good except for the deck planking strips but for my level of building that is a nitpick. However, the thing that I most liked about the kit is its level of difficulty; it was definitely challenging but not overwhelming. I felt that the time put into the build (which was 77 hours for me) was truly well spent. It really has a bit of everything so that when I now look at other more advanced builds I have a good appreciation of what level of attention and effort is required to achieve good results (which is actually very humbling). The other thing about the kit is that it's fairly forgiving with mistakes. I made a bunch of them and didn't executed things as well as I might have hoped but the design and relative simplicity of the boat is forgiving enough that you still end up with a good looking vessel. All in all I'm very please with the experience. It has whetted my appetite for more and that is a good result for a beginner's kit. Now back to the actual build log. Enjoy.... Another first time builder here, attempting to build OcCre's beginner kit: Polaris. I know nothing about ships or their historical accuracy and such, just want to get my feet wet and the Polaris seems like a decent enough kit to start out with. [There is a MSW review of the kit: here] I've managed to assemble the bulkheads/ribs to the false keel. This was relatively simple using small metal angle plates with clamps to get each rib square using Titebond II: I have to say there was quite a bit of play in the joints and while I did get the ribs square to the sides of the false keel, I wasn't paying attention to making it square along the top: And you can see that false keel has a slight bend too. However, I'm thinking it's not a problem as tolerances for mounting the deck shouldn't be that demanding. Well, I hope so. Currently working on the decking: Again using Titebond for glueing the deck planks rather than using contact glue per the instructions. I'm able to get a thin bead of PVA onto both the plank and deck, using the dispensing bottle shown in the picture above, and smooth it over with a small brush to avoid beads of excess glue forming. Working out really well. I get down 2 or 3 planks at a time and then use heavy books to press the planks while they set. Not so happy about the planks themselves. They have a lot of large grain criss-crossing them and I think ruin whatever scale effect the planks might have had to begin with. Not really a problem as I'm not looking to create a realistic model this time out. I'll be glad to just have something that doesn't look like a dog's dinner at the end of all this!
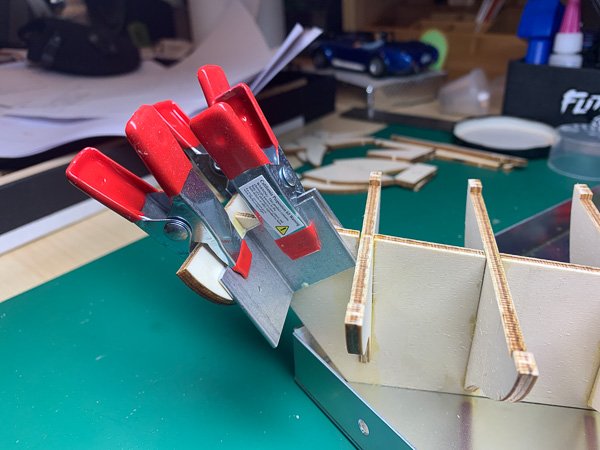
-
 Hello! so being new to the ship world and to modeling them, I thought the Polaris build from Occre was a completely random kit specifically designed to help you into the world of wooden models. I have since learned the Polaris WAS actually a real ship! And a steam one at that, so this kit is not completely accurate, from what I read this vessel was procured by the US Navy and was actually known as the USS Periwinkle prior to being an arctic expedition ship? That being said, I took a lot of artistic liberty. I have been learning some terminology in the nautical world, what parts and pieces are, how things work— but slowly. I have some learning disabilities so PLEASE don’t judge me too hard for sounding so basic with what I post! I know there’s measuring involved to make the strake planks accurate, Occre is very difficult in the sense that they just shrug and have you figure out how to hodgepodge the pieces. You’ll see I followed Occre’s instructions up to the second layer of planking, where I tried to fiddle with things a little to make it easier. anyway! I used a 90 degree ruler to make sure that the ribs were PERFECT, and of course they were! Until I tried to glue the deck on. Thankfully the wood glue I used it rather forgiving and a bit rubbery when it dries, so I could gently crack the ribs into place without breakage. I learned the cement I was used “contact glue” was garbage. I must have gotten a bad bottle because the planks didn’t stick to the wood very well. It was a frustrating process of using the glue I bought from Occre to get everything to lay down well AND HERE IS WHERE I MADE MY FIRST MASSIVE MISTAKE I followed the instructions TOO precisely. Using the varnish. That was a big whoops. It was after I applied the varnish I looked at other finished kits and saw that they stained the deck to get richer colors… Well, I guess I’ll be getting back to this—- and you can already tell what’s going to happen. All in all, I was feeling very proud and excited to be getting this far
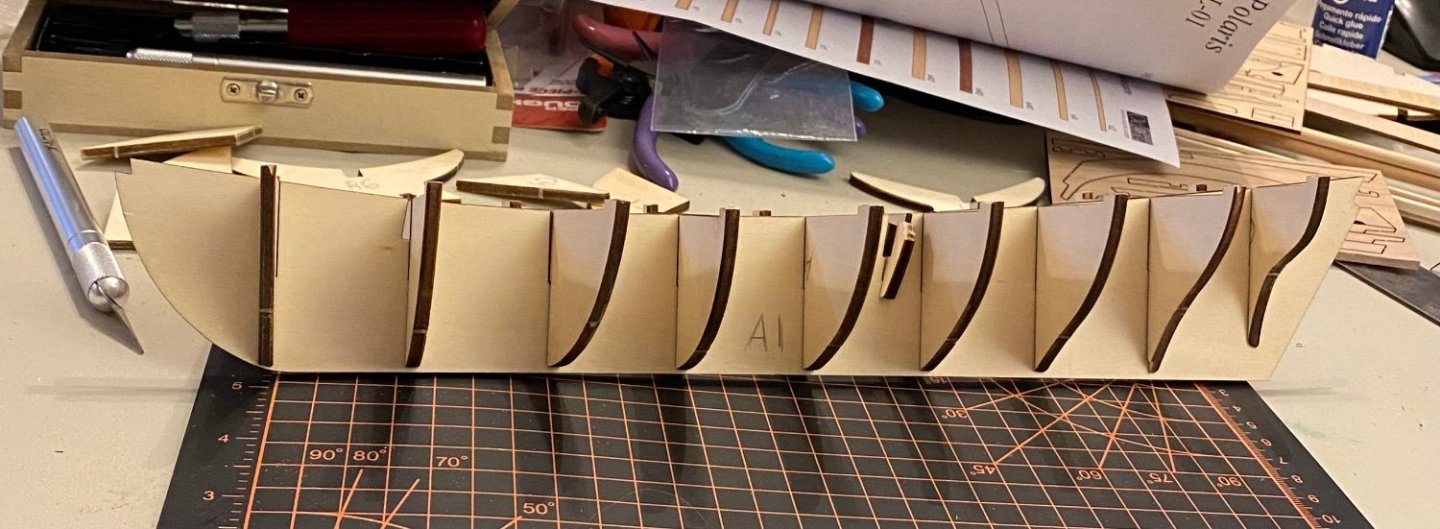

-
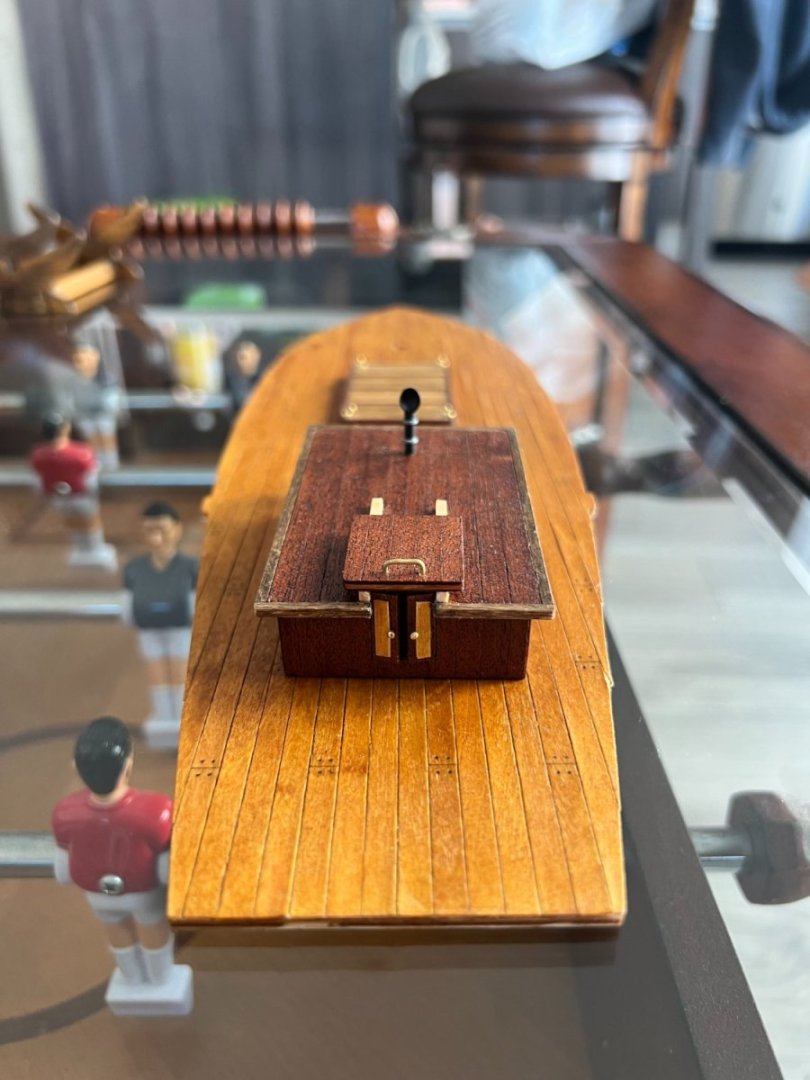
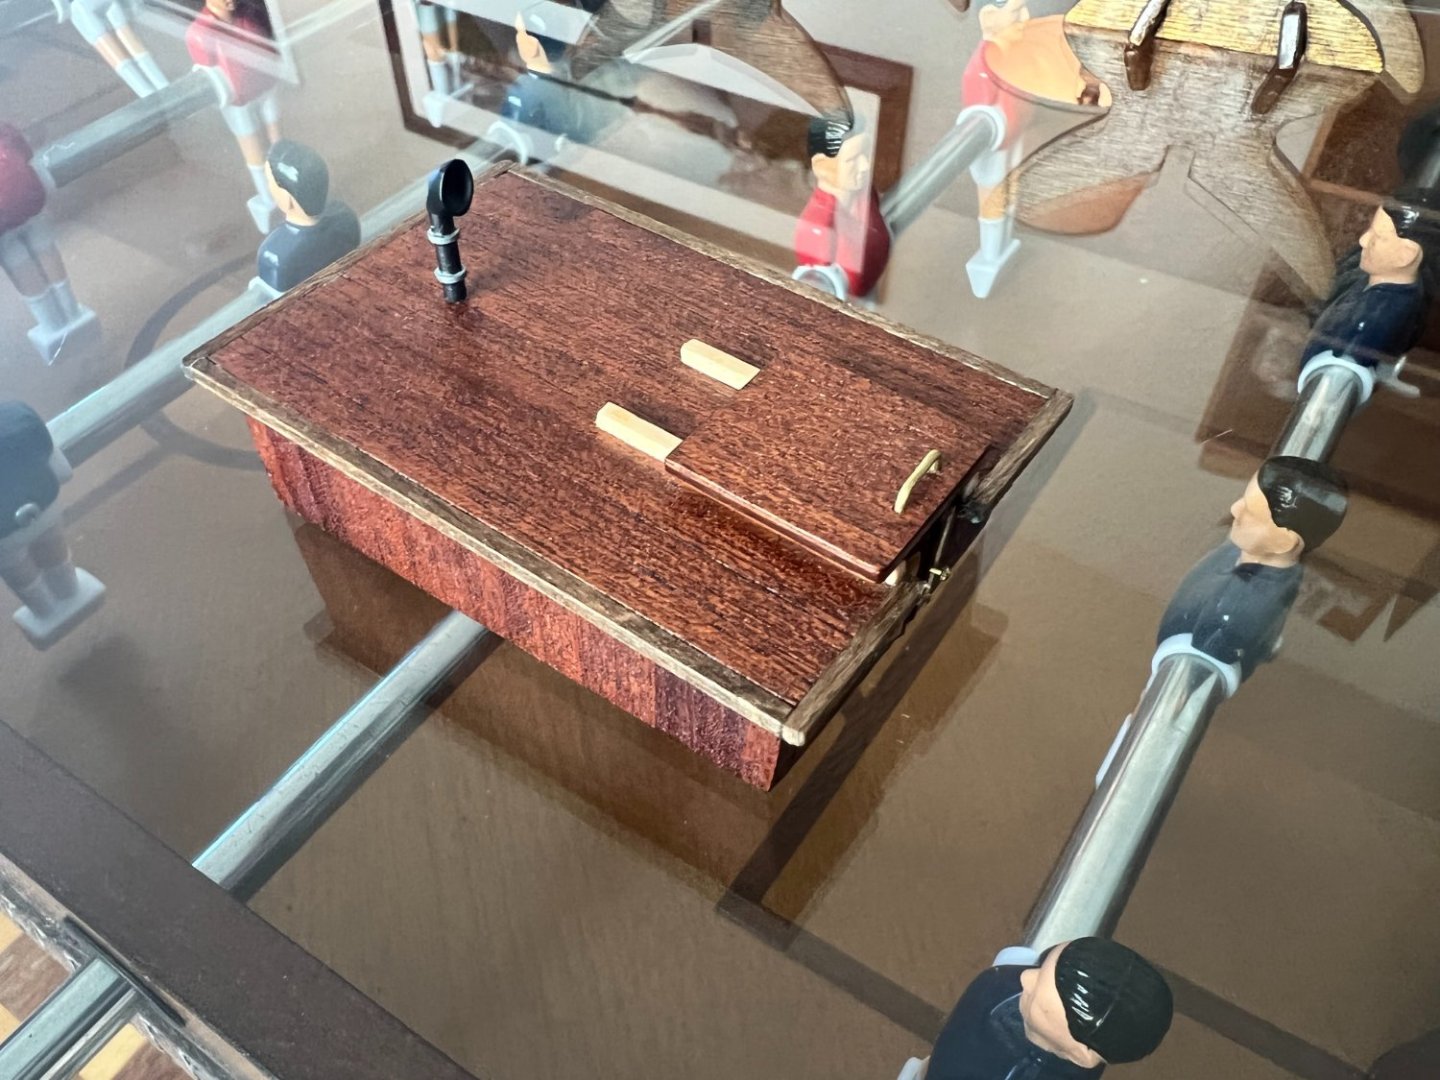
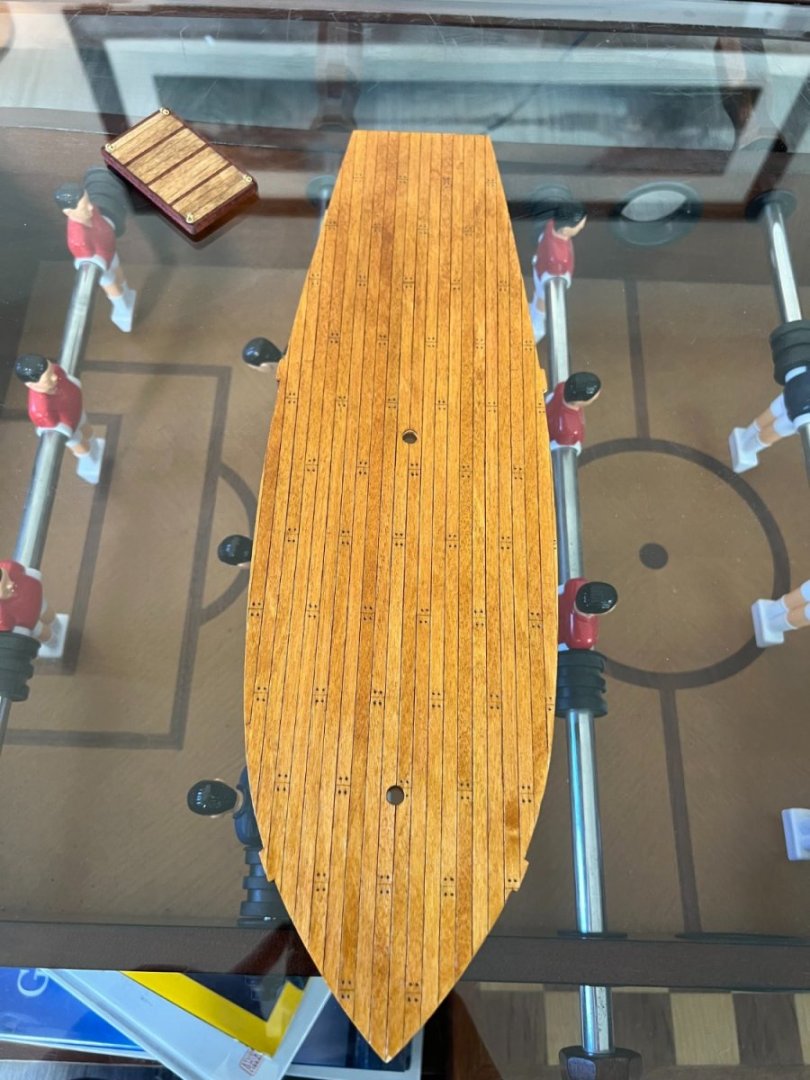
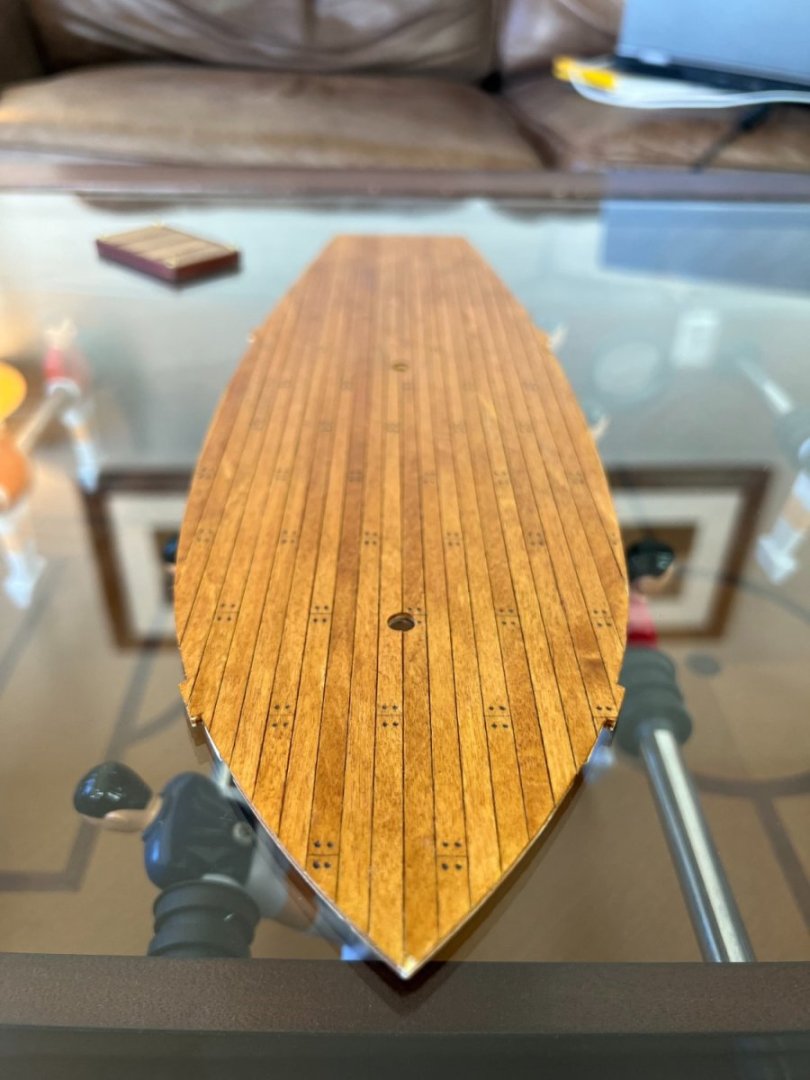
 This is my first build of a model ship. Unfortunately I don’t have any photos of the start of my build I have been taking photos from glueing the deck forward. Have to say I’ve really enjoyed every minute that I spend on my model. My false keel was also bent seems to be a common problem. I was able to straighten it with a light coating of water and heavy plates on top. I let it dry for several days. Seems to work. I’m really trying to follow the instructions for my own sake but I did make some minor changes to the decking. Instead of using the long strips in the instructions I cut the planks to 6cm. Very pleased with the results. At this time I’ve also finished the first planking and installed the bulwarks Probably shouldn’t have but I jumped ahead and built the cabin and hatch I’ll post more pictures as I finish stages Thanks for the warm welcome
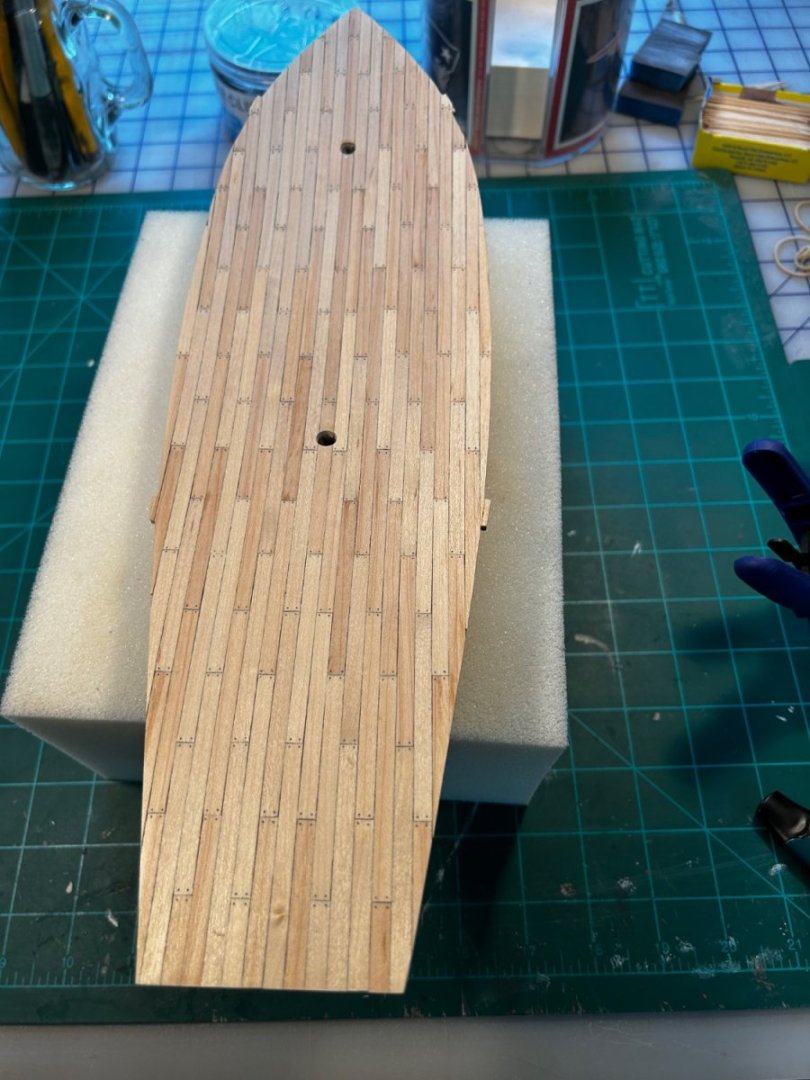

-
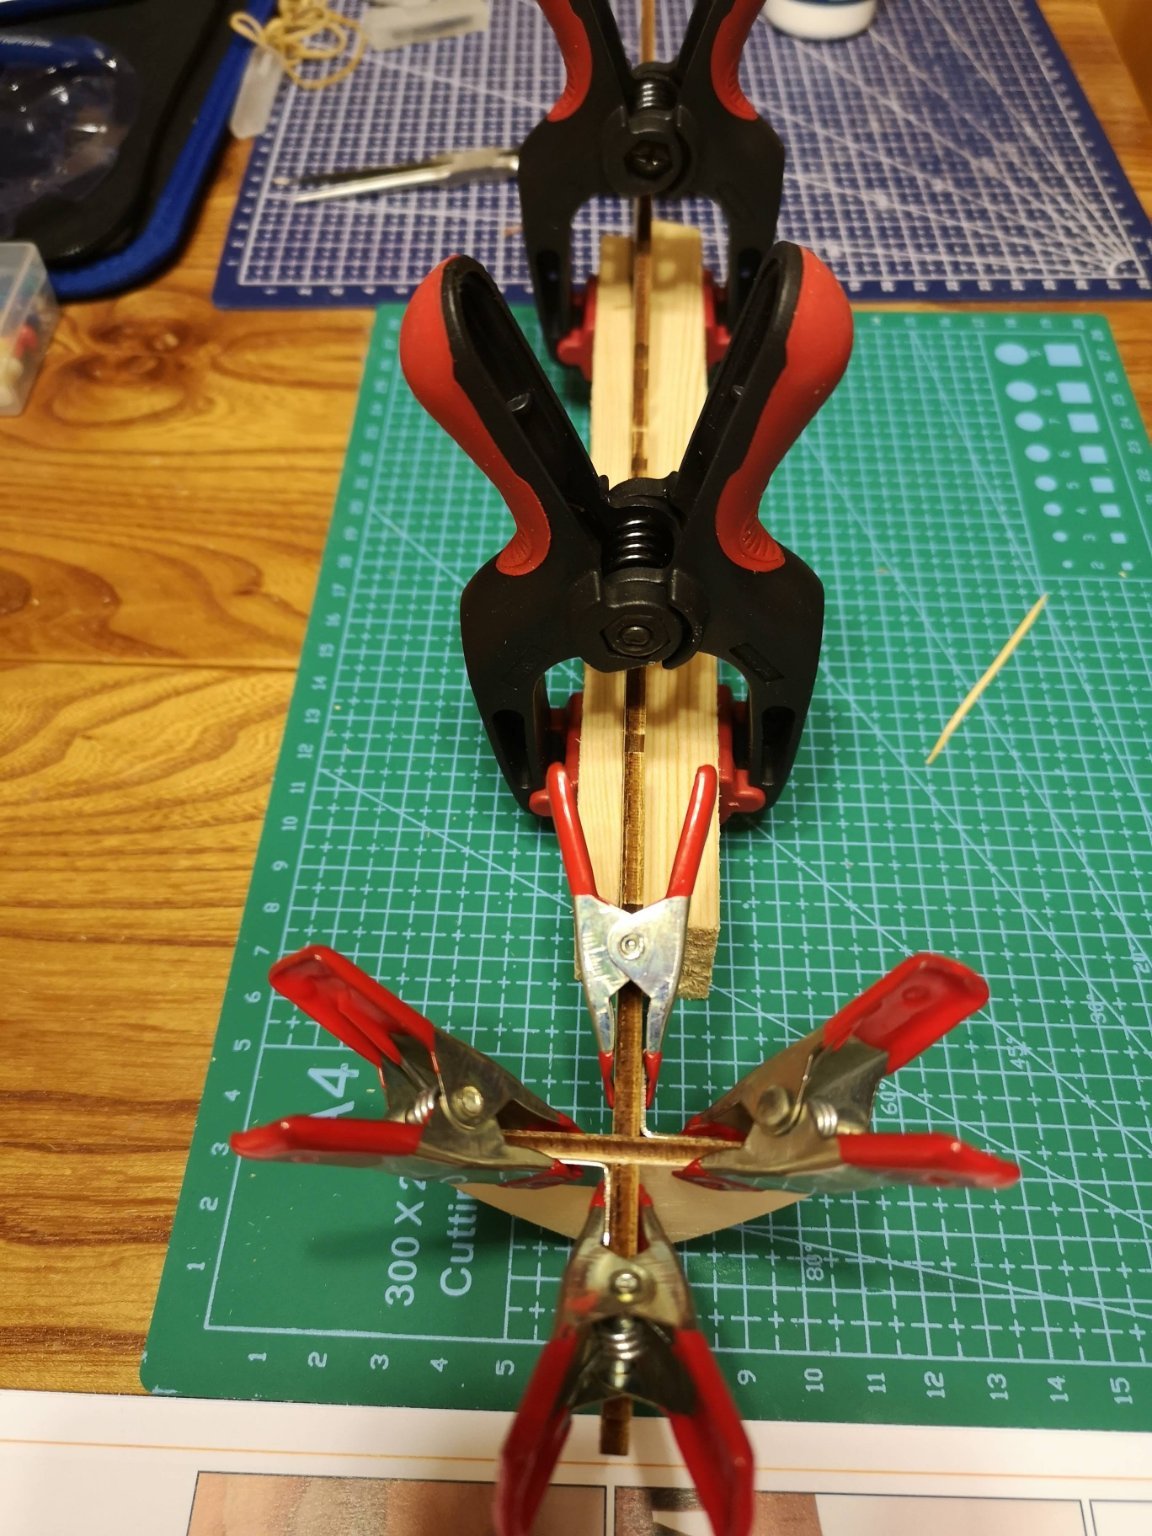
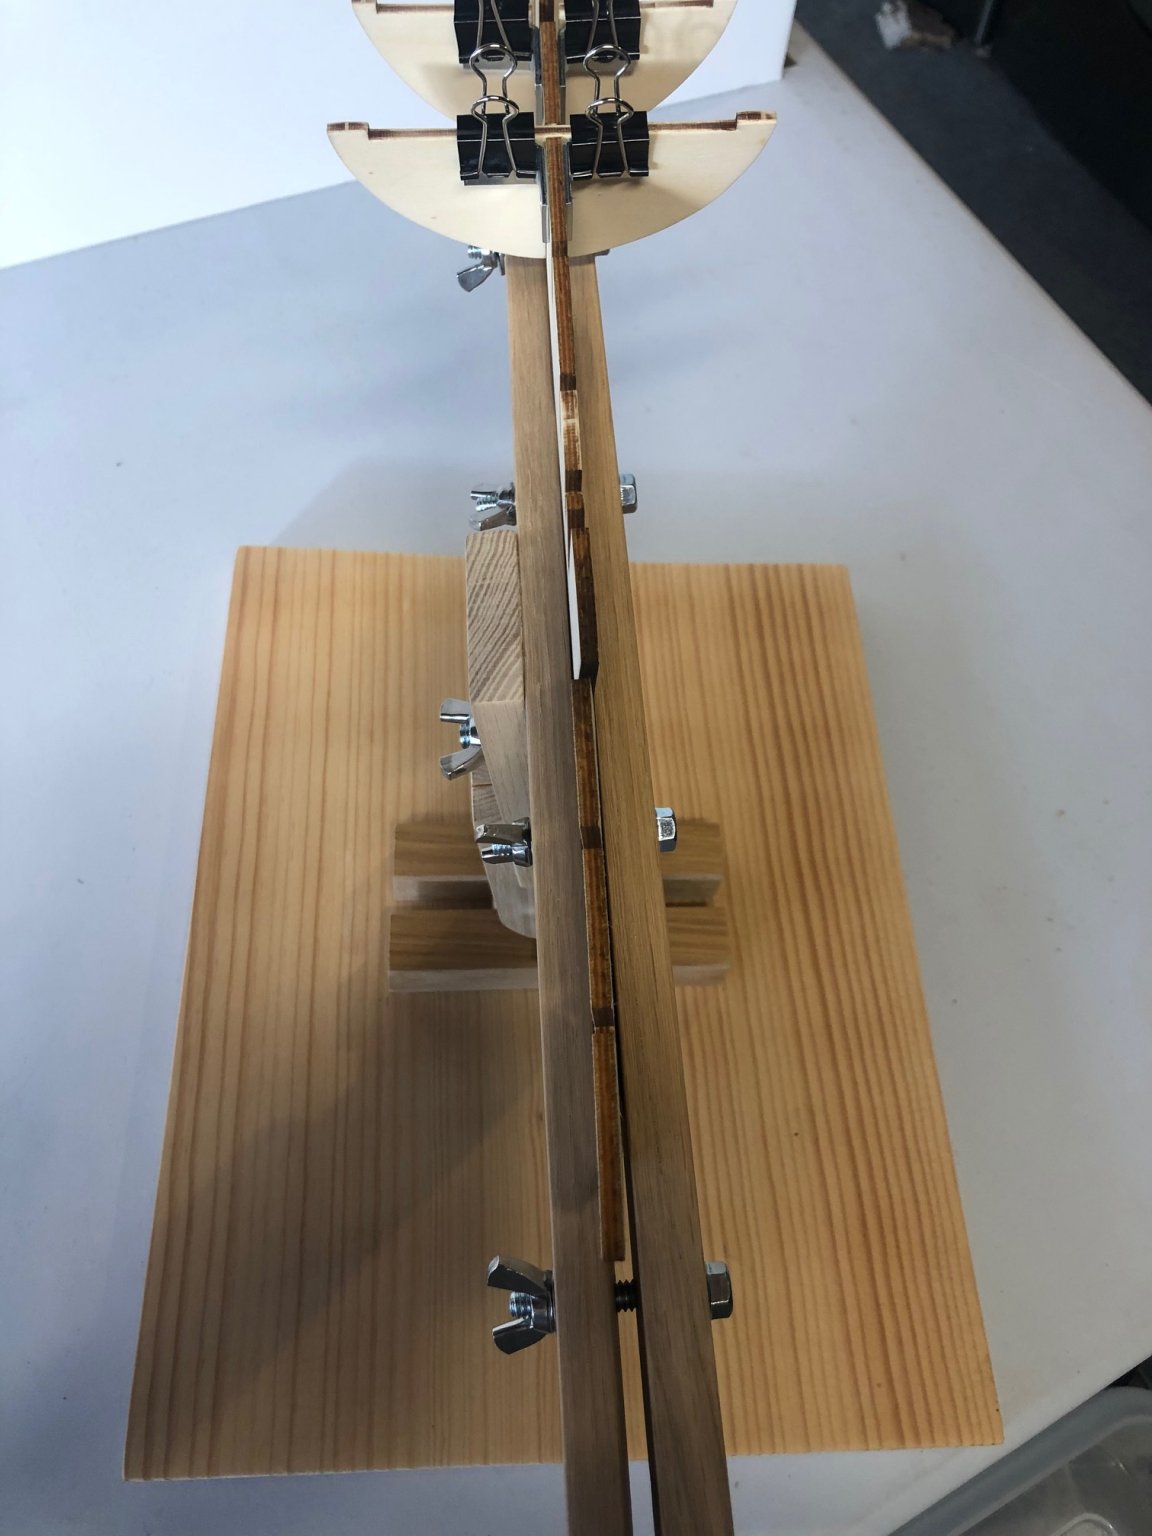
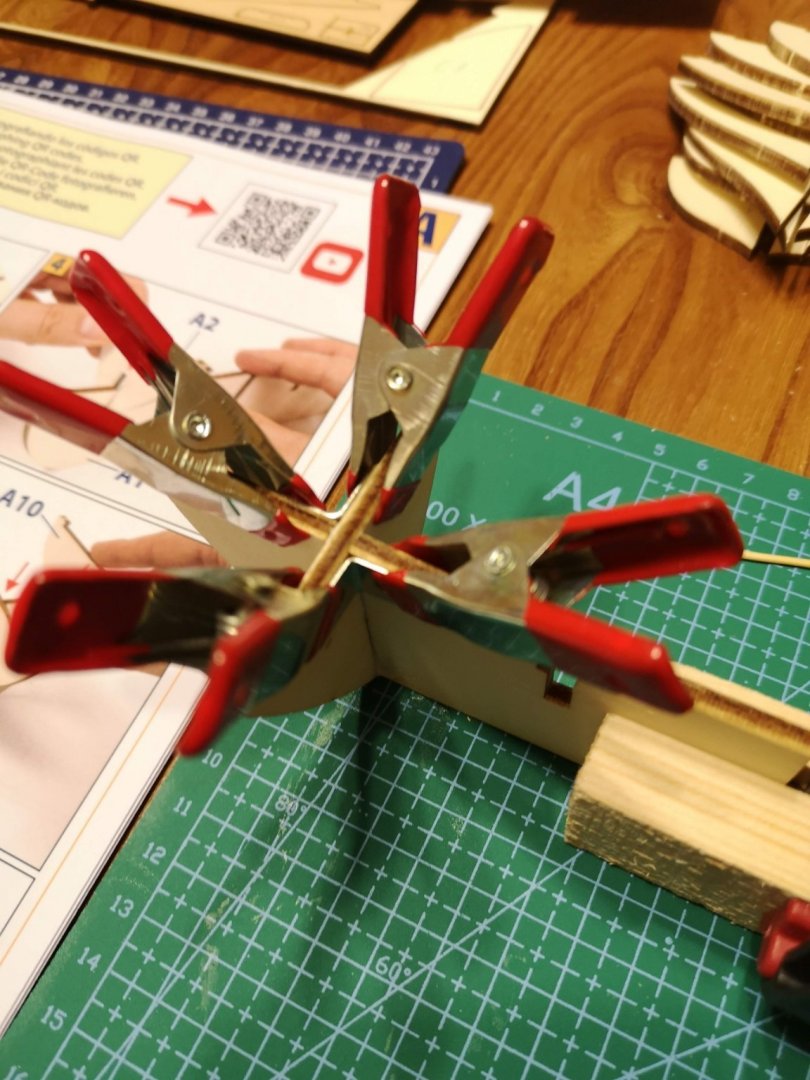
 Hello everyone and greetings from Bulgaria! 🙂 I'm really happy to be part of this huge community and for me will be a pleasure to share with you my first ever build log. Actually, I am a total beginner in this new hobby and I don't now anything about ships terminology and building techniques. In the past I've solved a lot of jigsaw puzzles (one of my other hobbies), LEGO and UGears kits, but I think it's time for something more difficult and time consuming. This new journey will be very challenging, but also interesting for me. Surely I will learn many new things and hope this won't be my first and last ship model. But enough talking about me, let's go to the actual build log: Initially I was decided to buy something huge and more difficult, with many sails and ropes, but after several days of research I found this great forum and read a few of the beginner topics. Now I am supper happy that I didn't make such a stupid mistake to buy an impossible (for me) ship model kit. So I chose the OcCre's beginner kit - Polaris. As I mentioned I am a total beginner, that's why I ordered bunch of tools with the kit (hope that's almost everything I need for the build). After I've sorted all of the wooden parts and I've started assembling the bulkheads to the false keel. One thing that I noticed during sanding, is that the false keel is a little bend. Maybe this won't be noticeable after the deck is mounted? For this reason I used two big clamps to keep the false keel straight when gluing the bulkheads: To keep the bulkheads in 90 degrees angle I used small metal plates (I saw this technique in another Polaris log). I could say this method was very helpful, because it wasn't necessary to hold each part with hands till the glue is completely dry: And this is the final result, again you can see the slight bend of the false keel: Next will be the decking. I plan to start it in the coming days. Unfortunately I don't have enough time to build after work and most of the progress will be done during weekends. But anyway, it's more important to me to build it well, rather than fast. 🙂
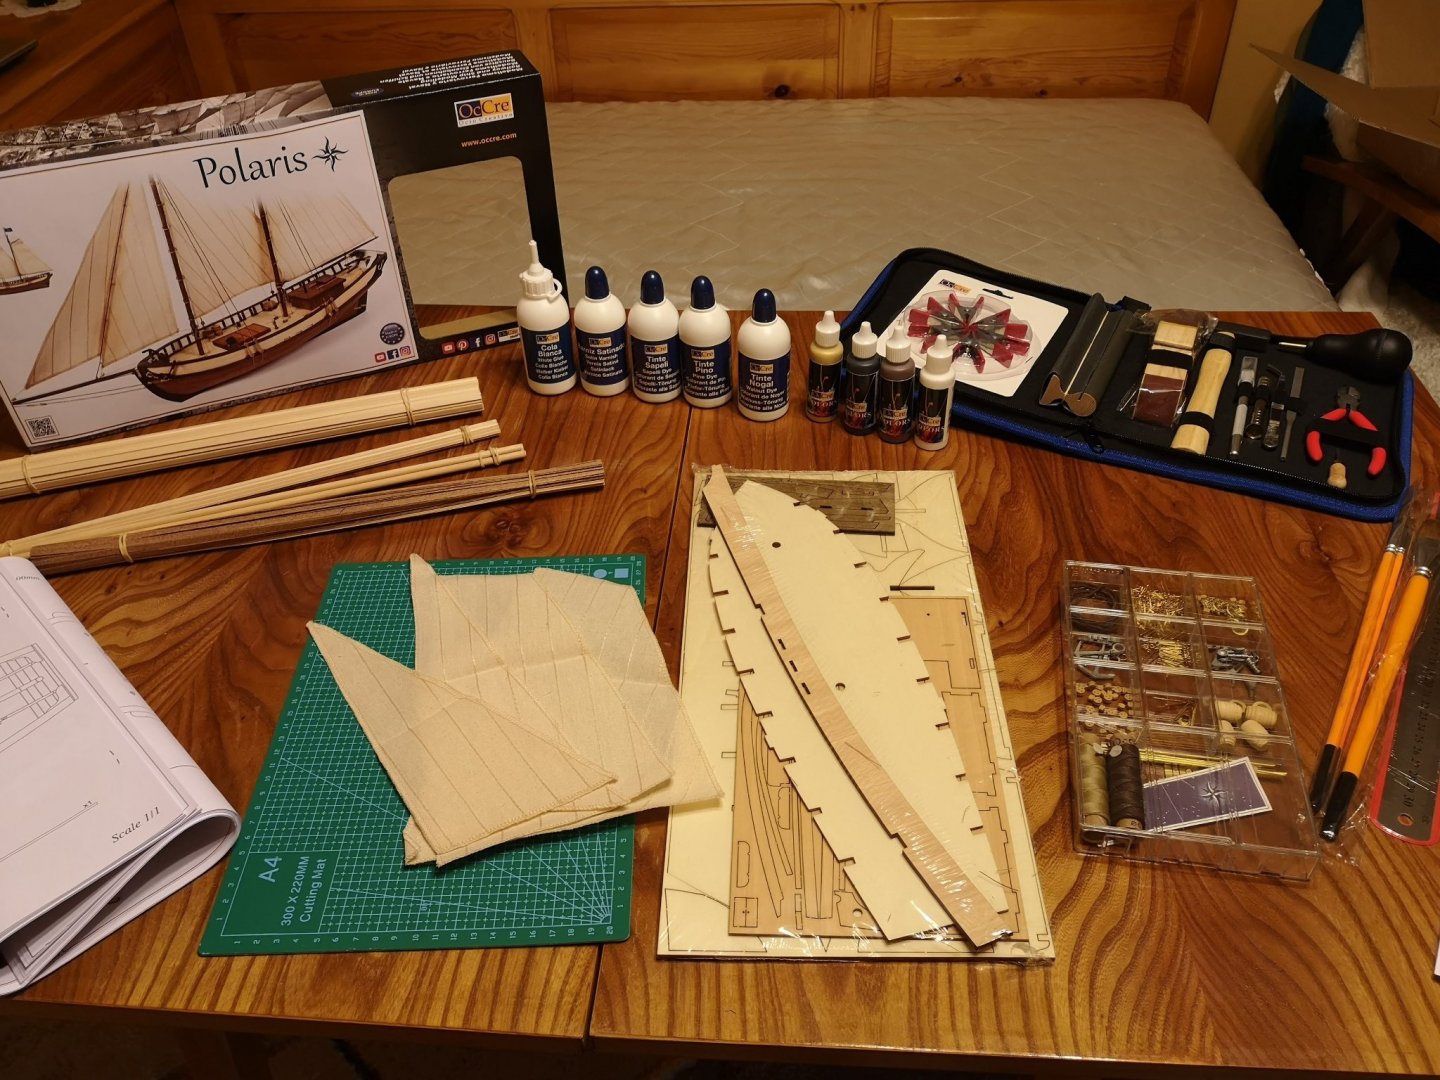

-
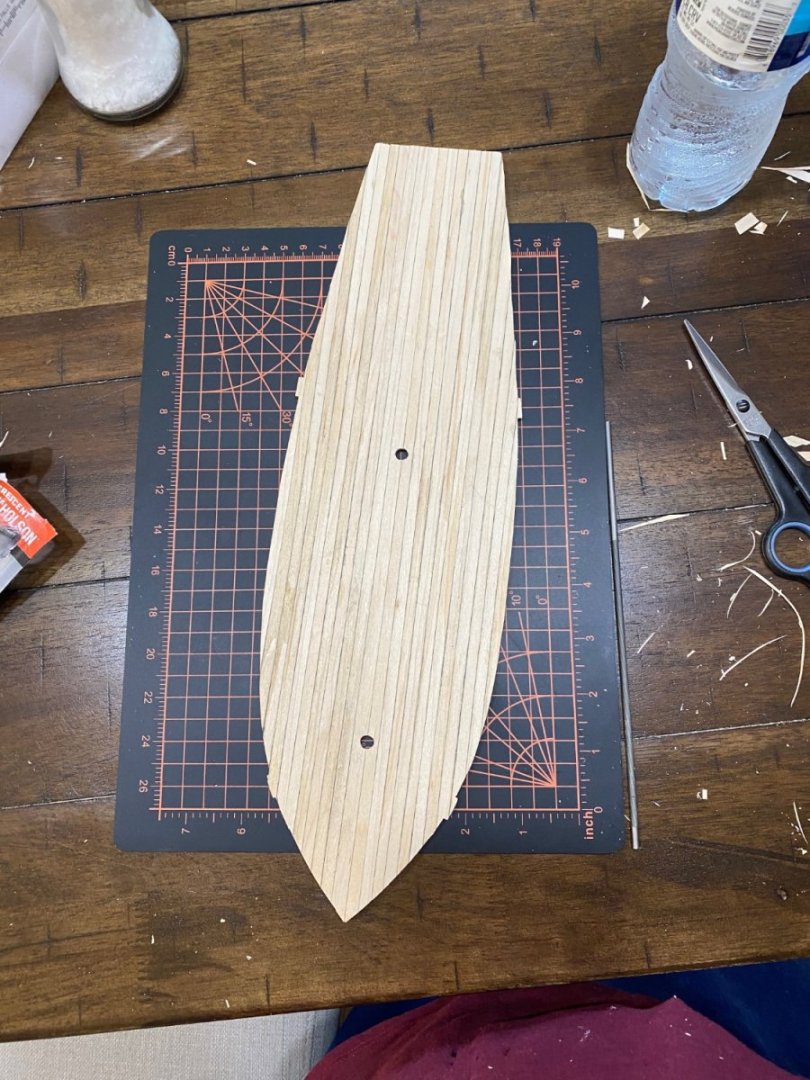
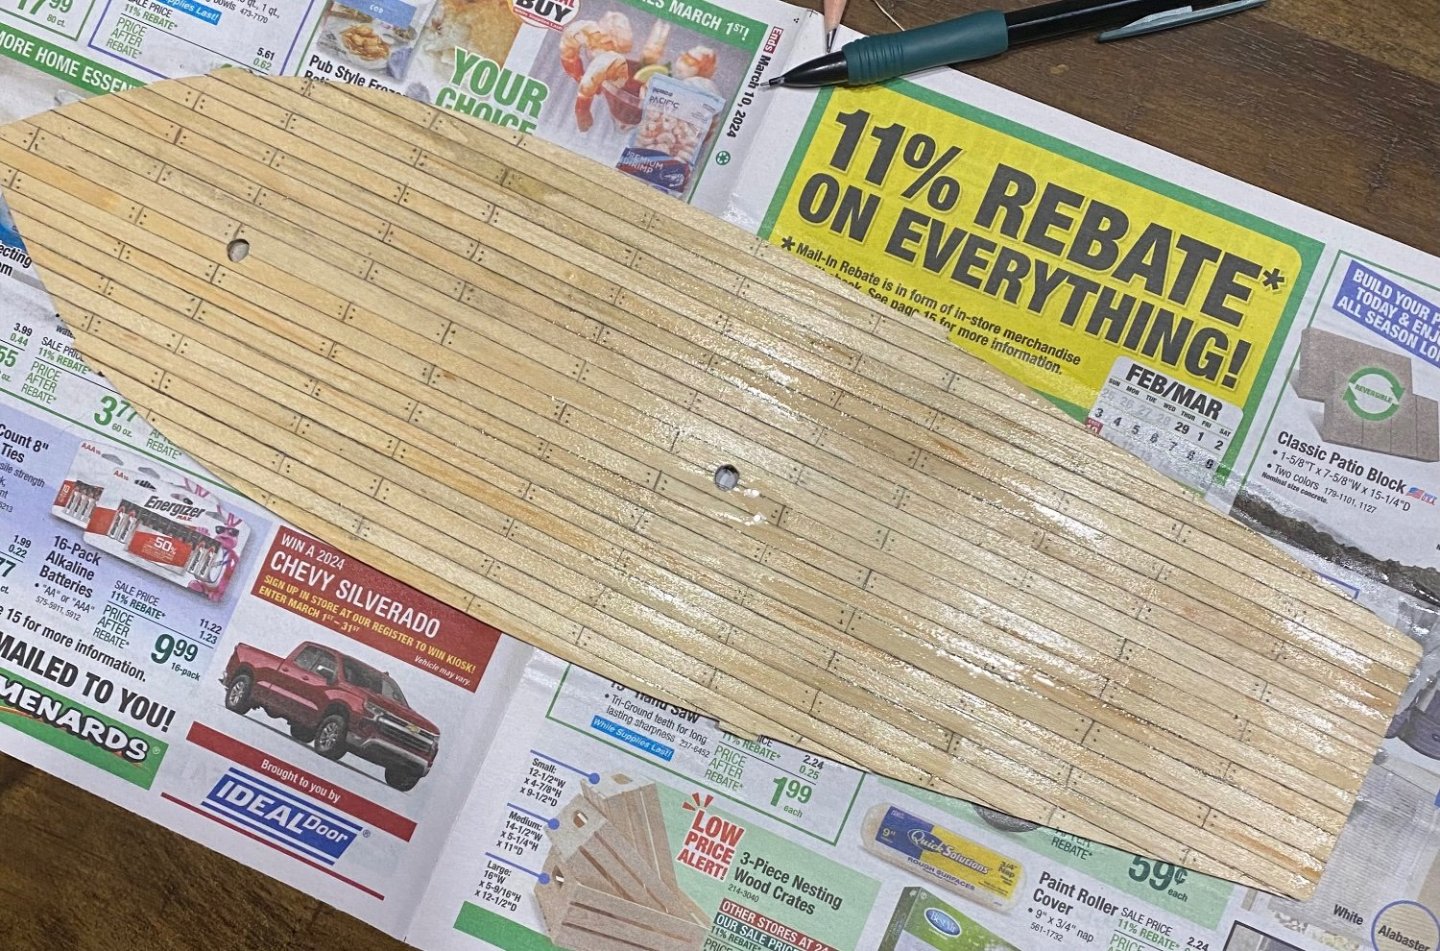
 After finishing the OcCre Bounty launch my next project already started: The OcCre 1:50 Polaris. Little bit bigger than the Bounty launch but same amount of sails. With this Model I will try a weathered look, let‘s see how this will work out. False kiel was perfectly straight out of the box this time. Scelleton is already done and the false deck is mounted with glue and the help of some nails. It is a little bit bended so the nails were useful and I would recommend everyone to apply the false deck first before planking it. In the instructions planking comes first. If you do so, you cant use nails to fix it to the scelleton. marked my planking pattern on the deck and started with 6 cm pieces planking. Also here I will do it different than the instructions. They use whole planks but I will use smaller pieces like it would be in reality. also glued the provided stand together and did the first two layers of Black colour. One more and clear coat will follow I guess.


-
 I decided to go with the Polaris wooden ship model 1:100 from Occre for my very first wooden ship build. From my perspective the quality of the model appears to be very good. I just do not have any prior experience, so that i am able to make an educated comparison. I have already cut out the pieces and began dry fitting the bulkhead frames to the false keel. After that it was on to the gluing. I need to buy some contact cement tonight, so that i can begin working on the deck.


-
- 6
-
-
- First Build
- Polaris
- (and 1 more)
-
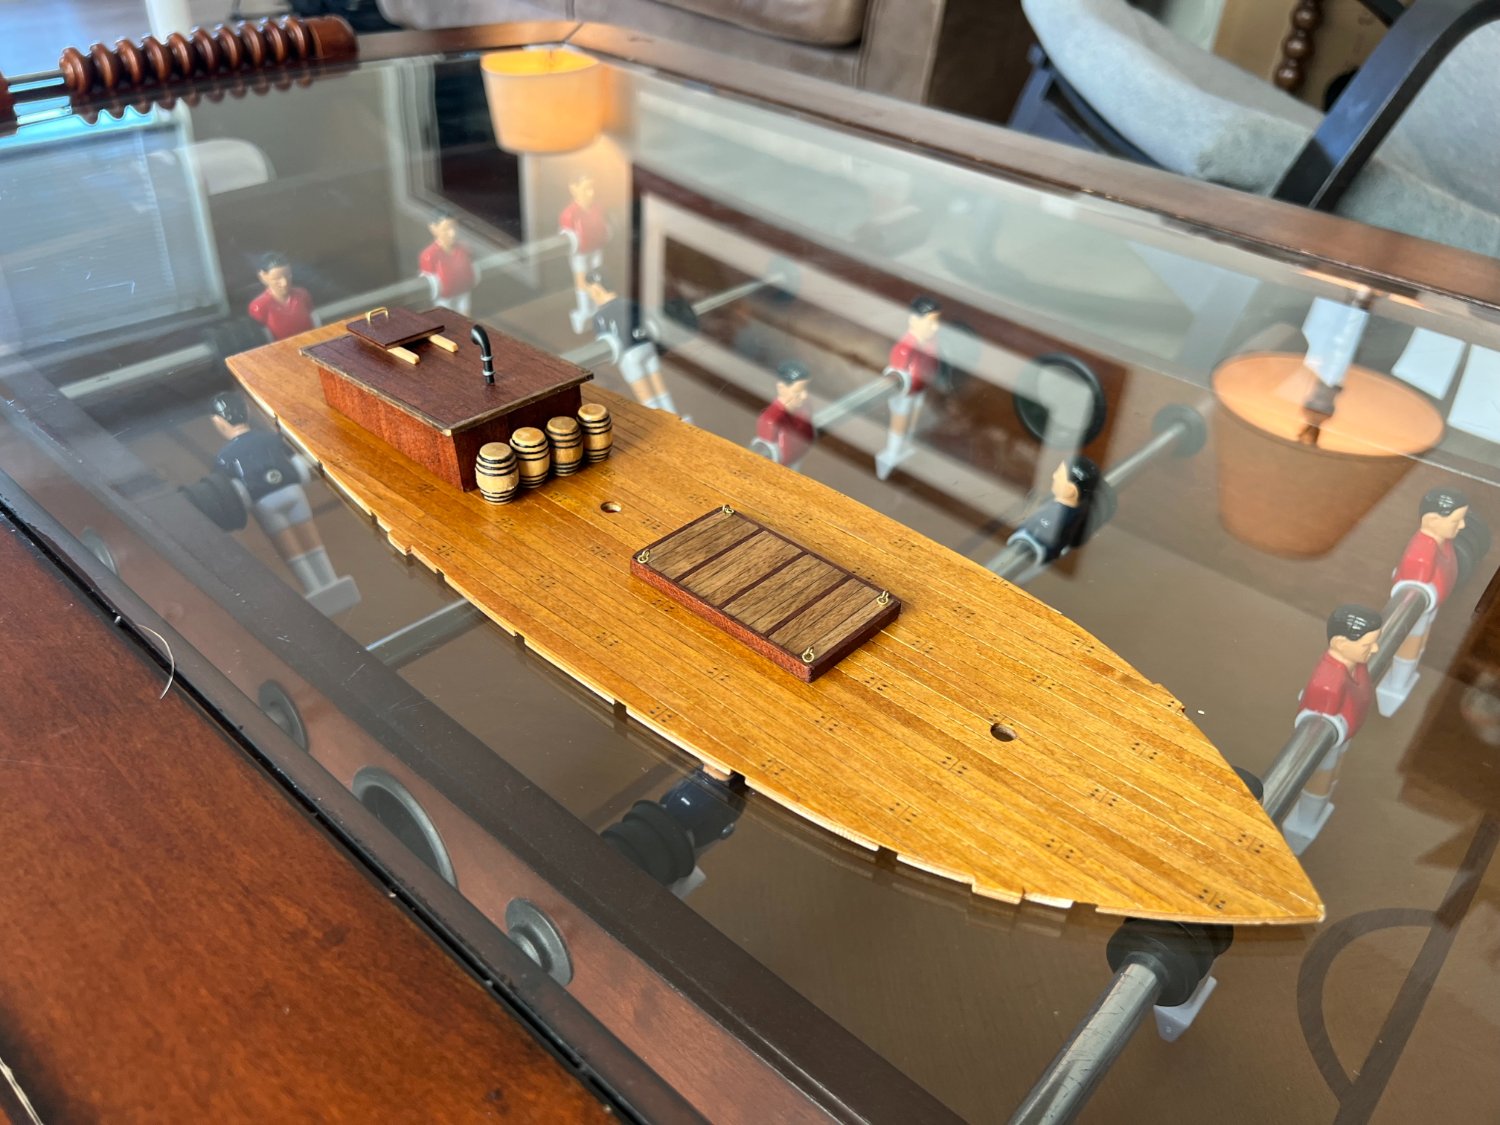
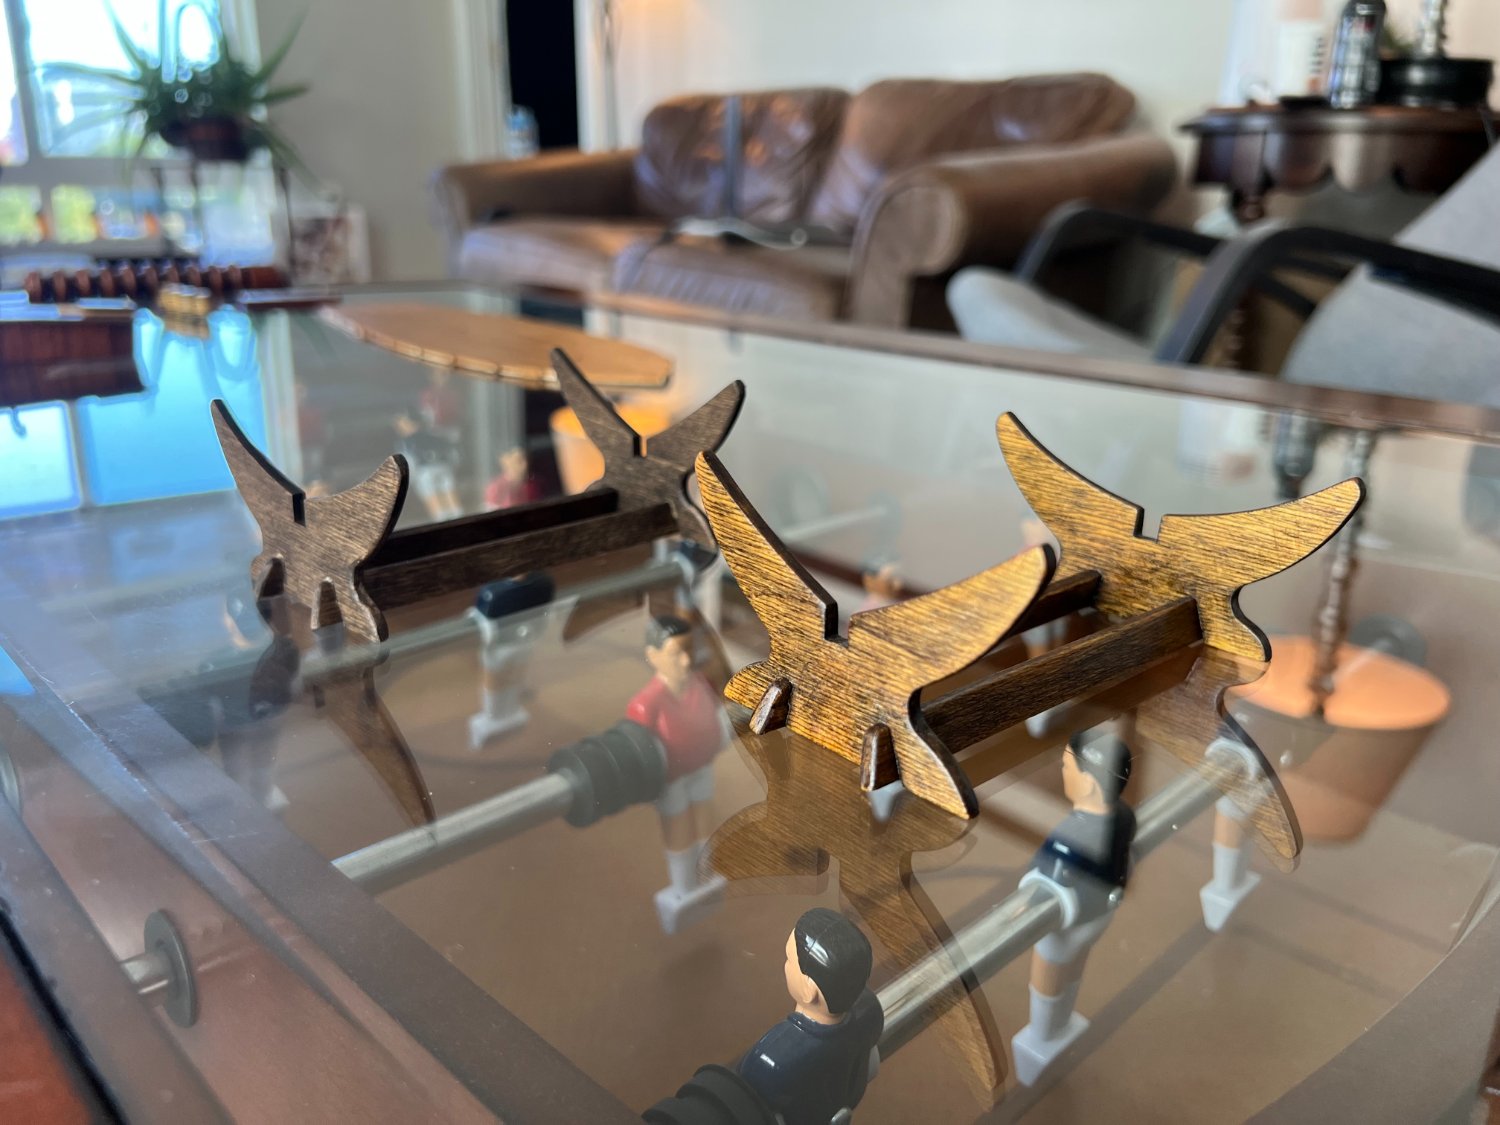
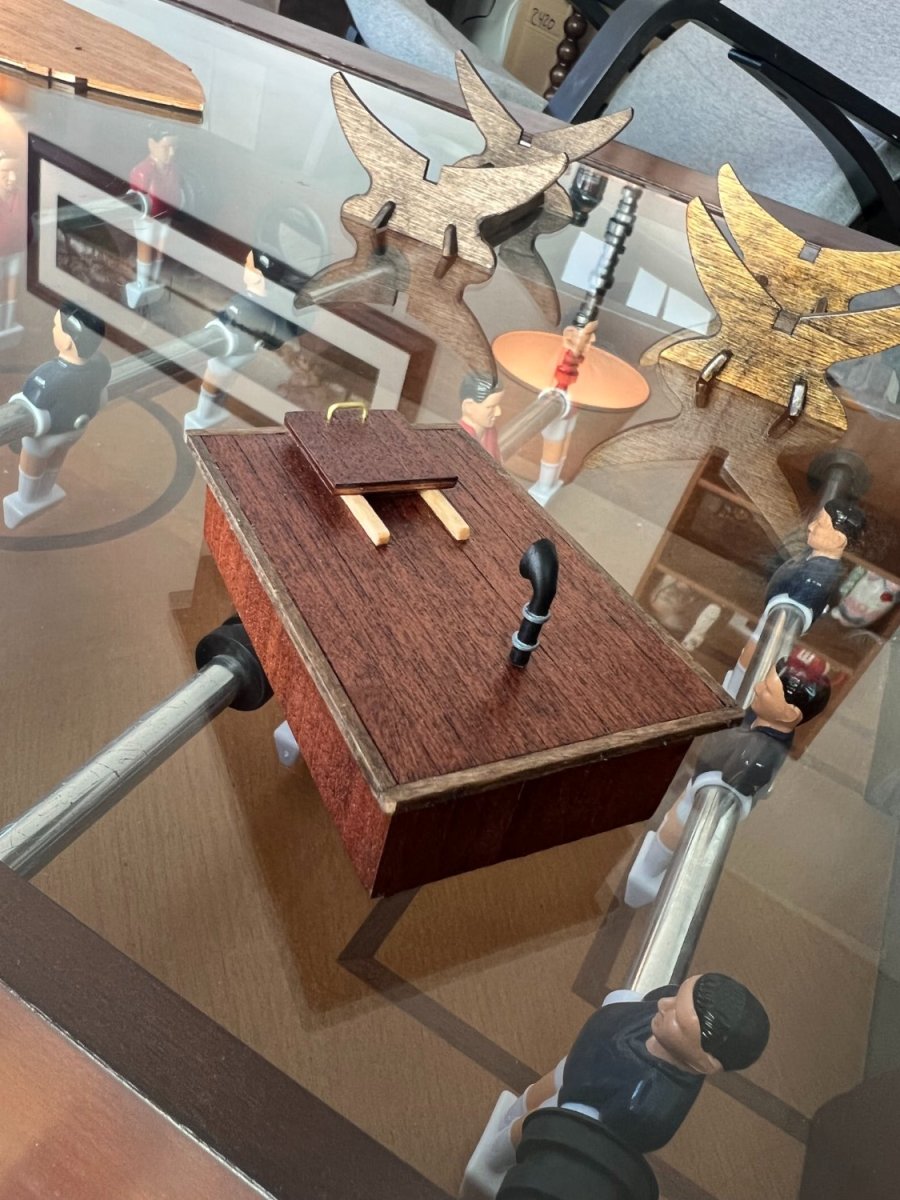
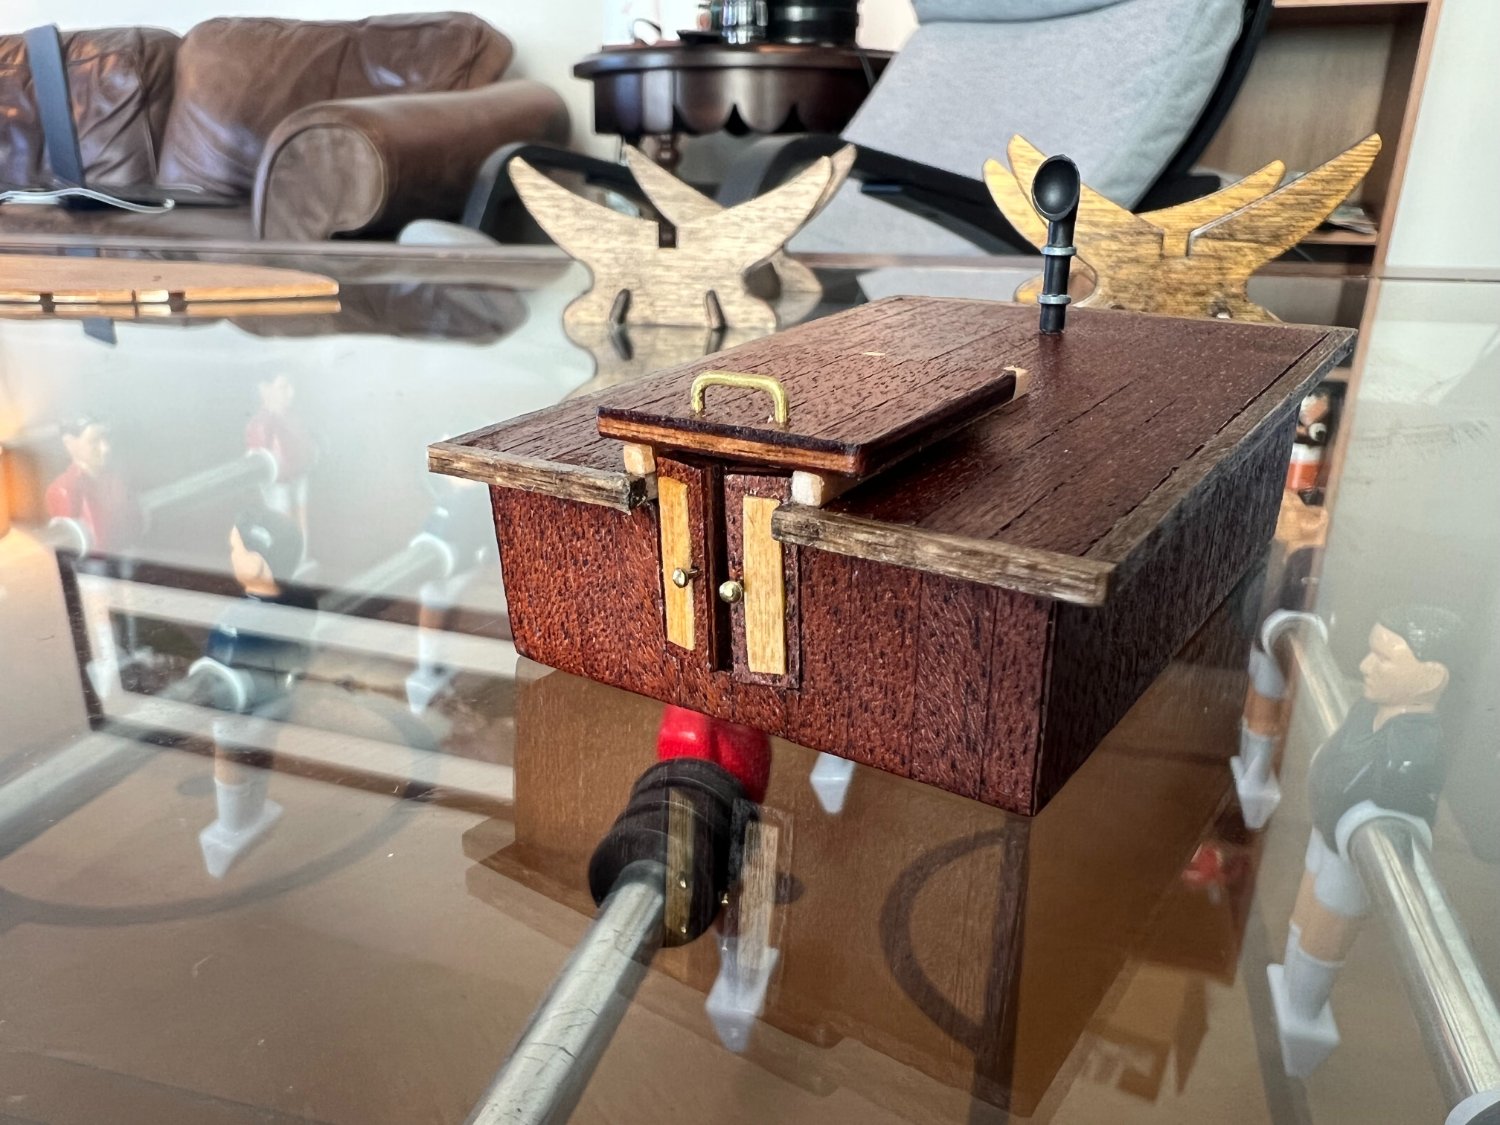
 Foreward Hello and welcome everyone. This is my first build log of my first wood model ship build. I have years of experience building plastic models, mostly jets, but this is a new frontier for me. I have always admired the beauty and artistry apparent in a well constructed wood model. I believe they are elevated to works of art in a way that plastic models rarely are. Although I have been modelling for many years, and although I find old men o war and wood ship models very beautiful, this is my first attempt to actually build a wood ship because the dreaded rigging always intimidated me. But I was getting burnt out on plastic models and I wanted to try something new. Plus I'd like to build something that I can display as a work of art; Something fellow modelers and average houseguests alike can examine and appreciate the effort and skill it takes to create (most of my plastic models go underappreciated by the average person. Alas they may be accurate, but not everyone finds a weathered old jet an aesthetically pleasing addition to a room). As for the structure of this blog, I would like to be fairly thorough and cover some things that others may not in the hope that this can be a helpful resource for others who may just be starting out in the hobby. In conclusion, please be kind, and I would like to give a special thank you to @hollowneck and @ibozev. Hollowneck's Sphinx build log is stunning in detail, skill, and advice. Ibozev's Polaris log is excellent and I have used it as my bible for my own build. I do not have the patience he has though, so I'm sure my results will vary somewhat. Both of these authors also stand out for the positive tone and humility they maintain throughout the challenges of their builds, which makes them very motivating to read. Anyway, enough with the foreward, lets get into it! Introduction You may very well be wondering, "Jack if this is the start of your blog, why do you already have so much done on the ship?" Well my friends, it's because I was nervous. I wanted to make sure that my work would be up to par with my own expectations and with the excellent examples seen around this website. I now feel confident that my work at least meets my own expectations. You might also be wondering why I have the deck and accessories done before the hull. Well we will get to that... These pictures are the build as is currently stands. Note that the pieces are not glued to the deck, so they are not perfectly positioned. In my next post I will rewind and start from the very beginning.


-
 Well, everything has now arrived for me to start my build but there'll probably be a few days yet before I'm ready to start anything worth photographing. I've spent the last week looking at every build on here (of Polaris, Swift and Virginia 1815), trying to gather as much detail as I can, about what to do and, more importantly, what not to do. This is my first build and so is a learning curve - though I'd still like to be able to produce something that I can put on the shelf and be pleased to say 'I built that'... What I don't want to do is build Polaris 'straight out the box' - I'm not intending to make massive changes (my thoughts of re-rigging her are, I think a little too ambitious for one who can only just tie his shoe laces and has never rigged a ship before!!) - Rigging is, at the moment, a dark art to me, though I'm reading as much as I can as well as looking at photos of similar vessels and, of course looking at all the builds in here. So, there are a few things I've been thinking about and I'd appreciate your thoughts. I've got to thank Bob Cleek for his thoughts on the Polaris in my earlier post which I've spent a long time pouring over, taking out as much detail as I can - really appreciate your help Bob (and would really appreciate any more you might have too!) Wooden hoops will replace the brass rings (well, paper, probably soaked in CA glue to be precise). I really don't like the eye bolts in the deck and would far prefer to replace them with a belaying ring around the mast (other than a fife rail?) what are your thoughts, also on the belaying bars on the frames? I've taken some inspiration from Giomun and his Swift build - I hope that's ok my friend? I would really have liked to cut the deck and frame work to give at least some idea of a hold, but I'm still thinking about this - too deep and it'll affect the integrity of the frame I think, to shallow and it won't have the effect I'm after. The coverings of the hold, I'd like to change to gratings (removable if I can sort out how to cut a hold that's worth looking into) and also the addition of a smaller piece of grating for'rard of the original. I'd really appreciate your thoughts, and suggestions - I'm always open to constructive critism and always have an open mind. Ive attached a couple of photos, the plan gives indications of my intended changes which, I hope makes sense. They're all quite small changes, but enough to keep me interested and to help make a slightly different model than that pictured on the front of the box. Thanks so much for your help and support - without it, this build - and the builds of many of the members here, especially us 'newbies' wouldn't get off the ground. Best wishes all Sam
-
 Hi All, greetings from Portugal. First time builder here. I’m newly semi-retired and recently moved from Austin, Texas to Portugal. I’m not a novice woodworker but no longer have the full workshop I had in Texas. I’ve had a lifelong love of wooden ships and am looking forward to this build. I decided on Polaris as a modestly priced, beginner level model and have been reading build logs and watching videos and working on understanding methods and techniques. My kit is due to arrive in a couple days and so I’m gathering tools and getting my workspace ready. I know Polaris is not based on a specific ship but in the interest of historical accuracy, I’m curious about what time frame and similar ships I might study as reference. It seems like the general idea is that she’s first half of 19th century, American design, based on a merchant type outfitted for polar exploration. Accurate so far? The actual USS Polaris was a “screw steamer” so clearly not the basis for this model. (Though reading through the Wikipedia article about her, she seems like she’d be a fascinating project!) So…. On with my first build!
 -
 Another first-timer working on OcCre's Polaris. I'm a law student looking for a hobby to keep me sane through long semesters. I used to spend my time doing home projects, but I don't have quite enough time for things of that scale anymore. My hope is that model building will keep me busy long-term without upending large parts of my house for months 😂. One of the reasons I chose the Polaris for my first build is that there are so many people on this board who've been generous enough to share their build logs on this kit, so I'm here to repay the favor. - Step Zero - I've taken inventory on all the parts in the box, and everything appears to be in order. Fortunately, the false keel I received doesn't have the problem with warping that many people here have had. Either I got lucky or OcCre got tired of sending out extra parts & fixed the problem. I'm waiting on the delivery of a couple essential tools, but I'm excited to get started, hopefully on 12/28.
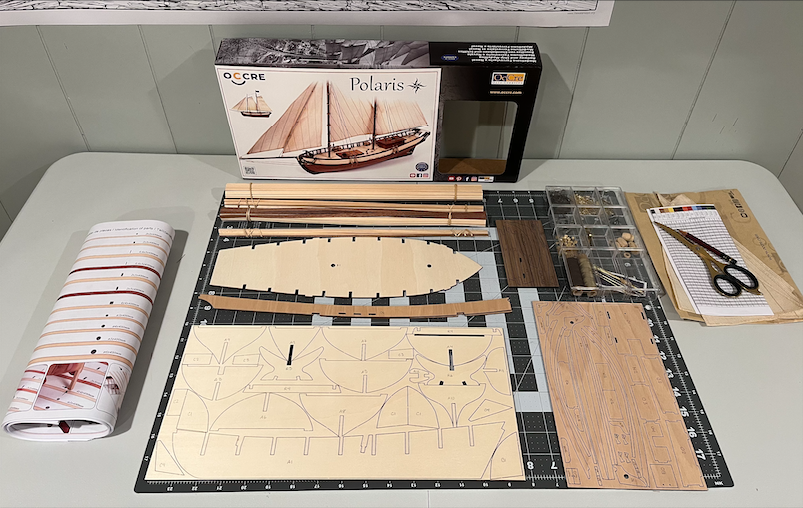

-
 So for my first build i decided on the Occre Polaris as quite a few beginners have opted for. Just finished the decking but i made a pigs ear of it. I know its my first build ever but wanted to get this right first time. didn't want to pencil in joins so opted to plank the whole lot. joggling stuffed me.
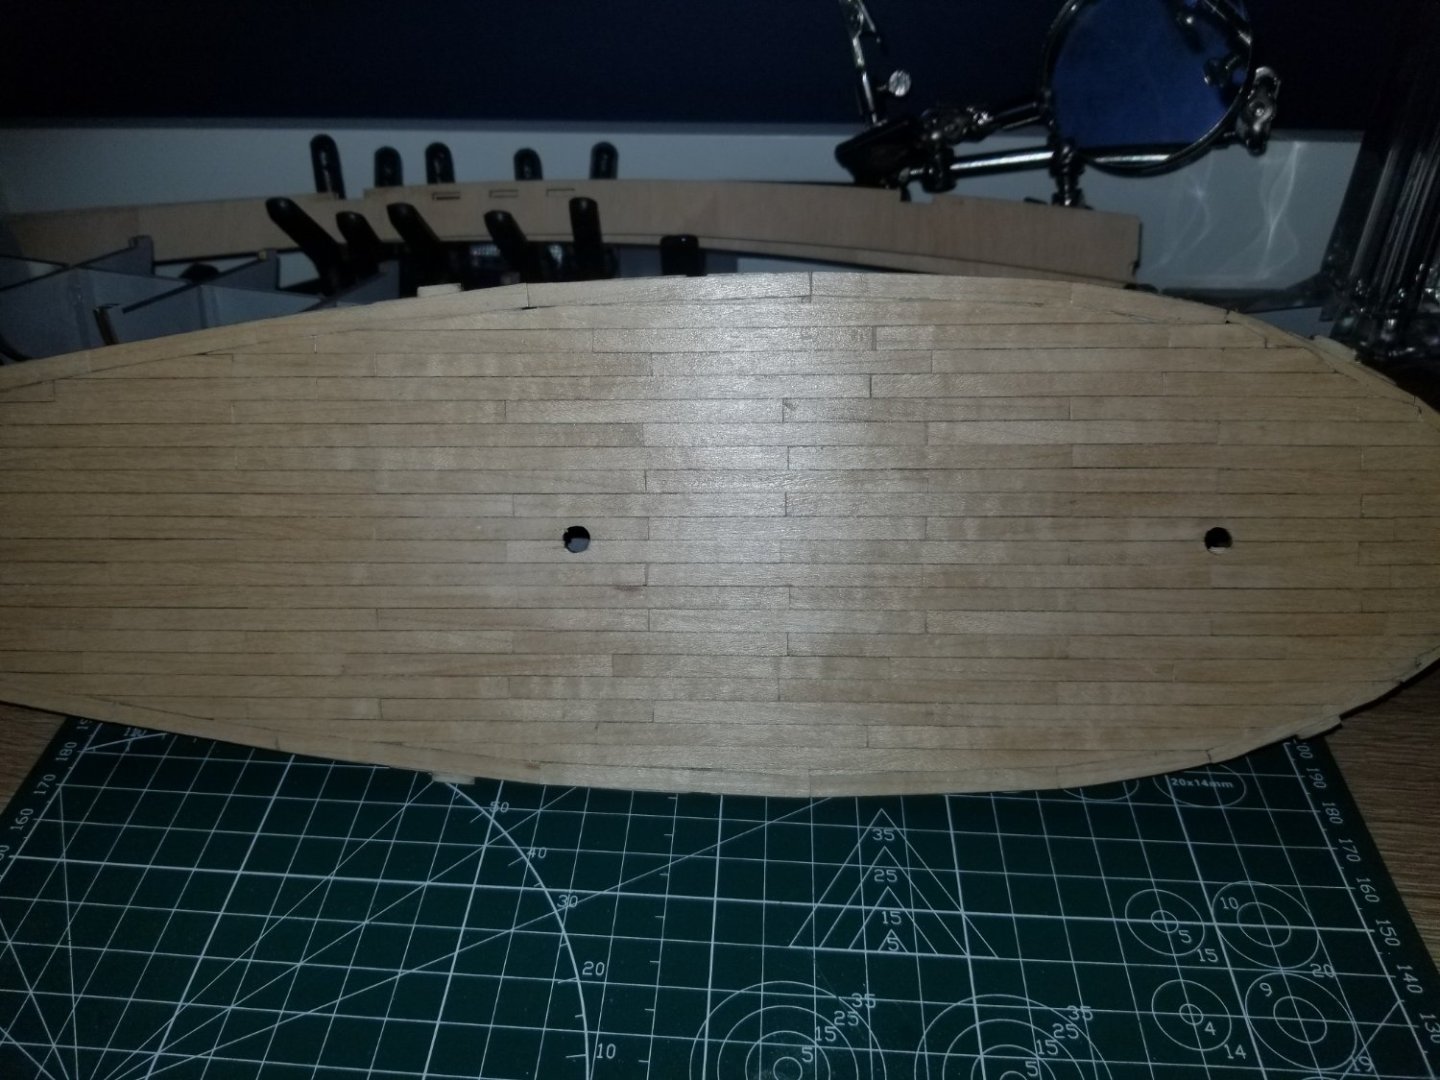
-
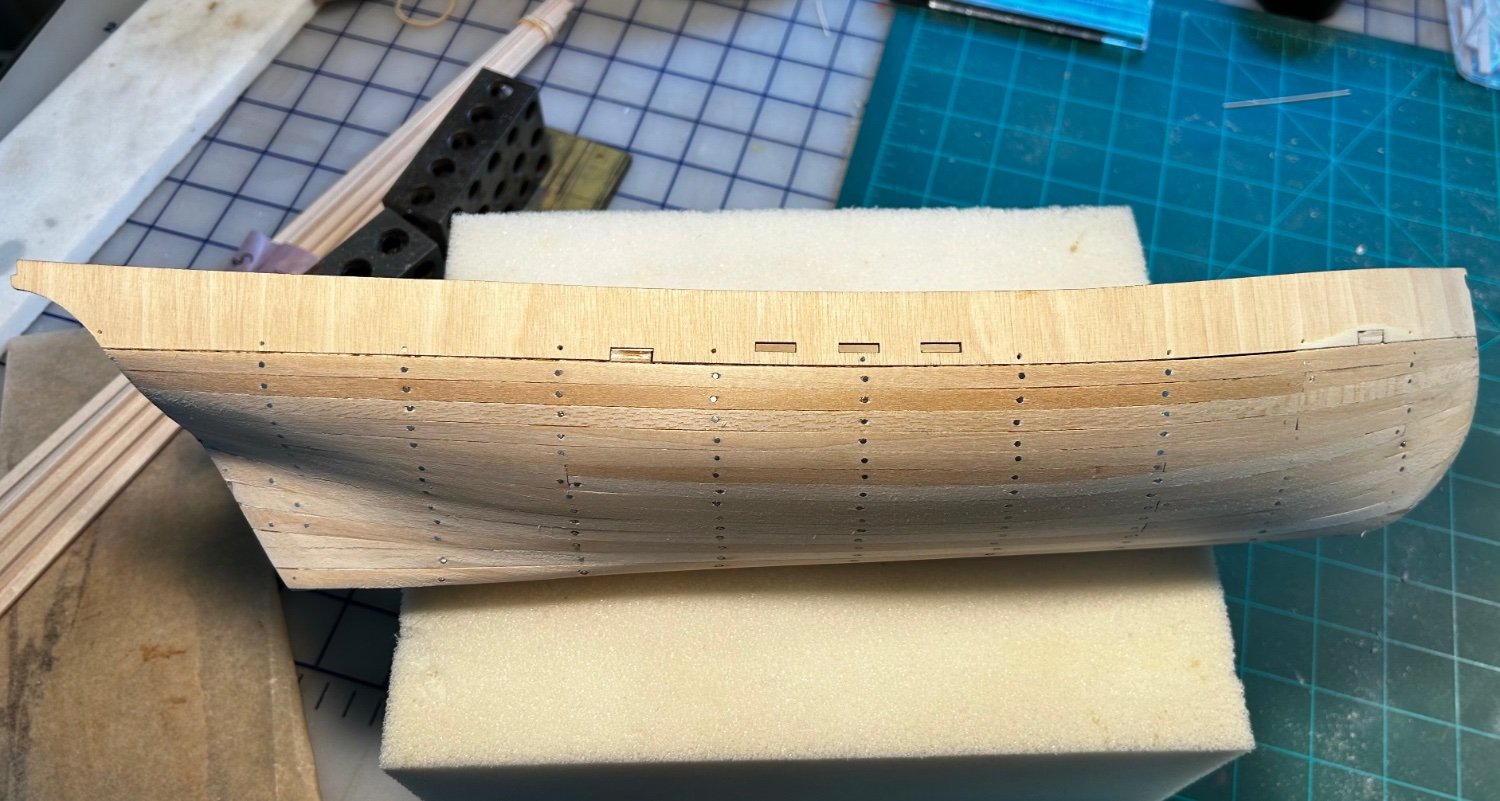
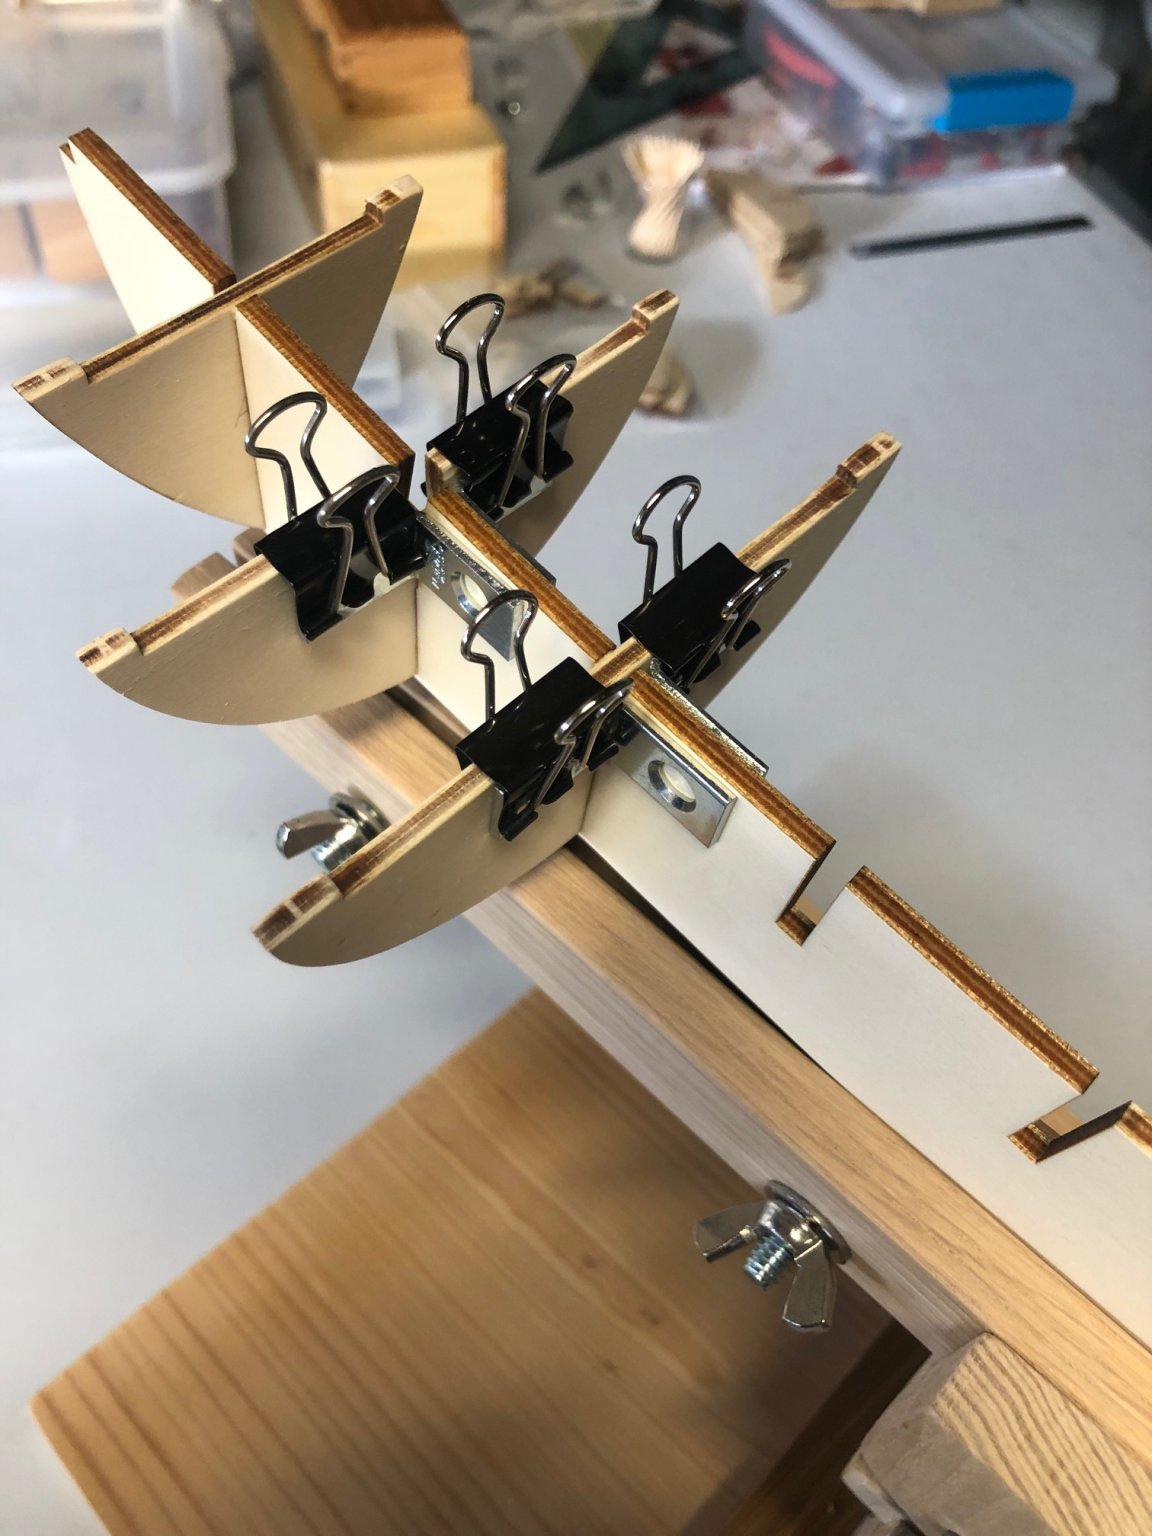
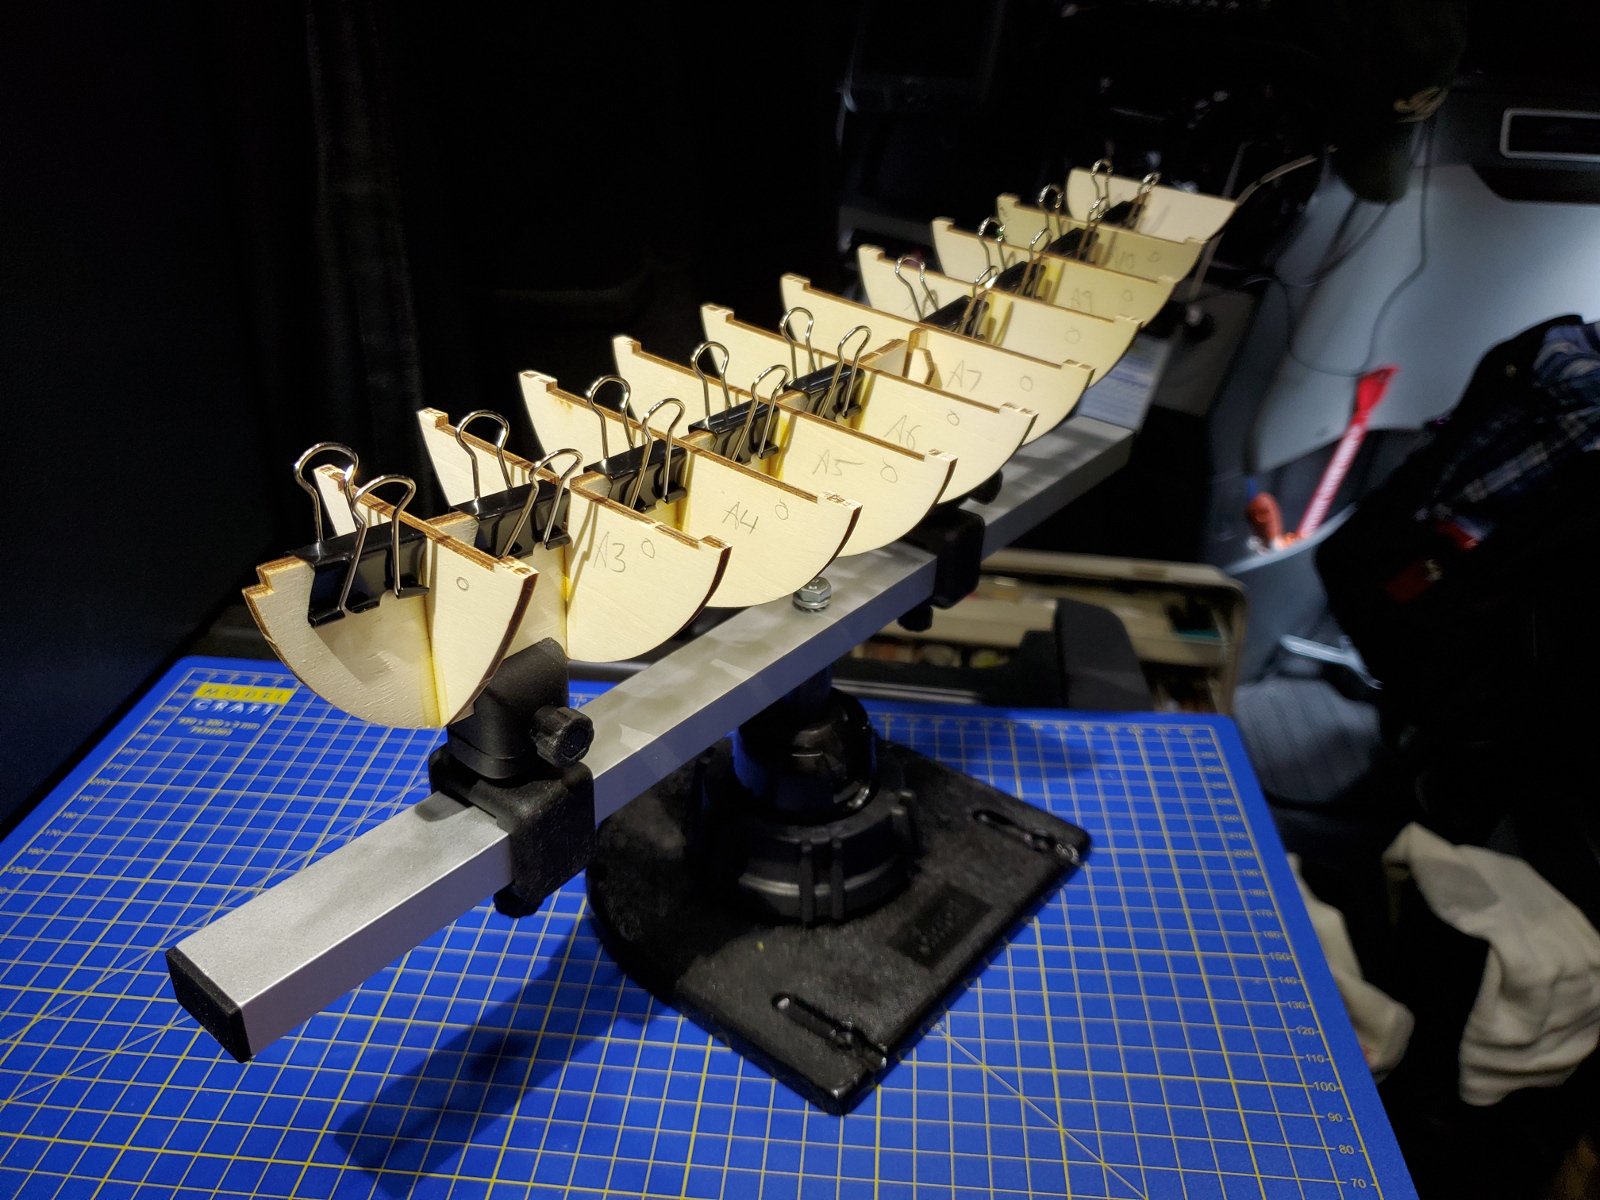
 With apologies, this is not a build log per sa but a resume of the problems experienced by a complete beginner and their solutions. As is common in most activities, manufacturers and authors assume a far greater knowledge than a novice possesses even though their product/literature is targeted towards them. Hopefully, as my jottings catch up with my build progress the following will evolve into a true build log. Ribs. Placing these was the first challenge. It is essential these are fixed perpendicular to the false keel. I read/watched many tutorials, which showed many and varied ways of achieving this with varying degrees of complication. In the end I opted for a very simple solution - bulldog clips. By placing a bulldog clip on the false keel and tight to each rib, the rib was a) kept in place and b) held at right angles to the false keel. There is the additional benefit of the bulldog clips providing 'legs' to support the skeleton while the glue set. Planking the deck. I was less than convinced with OcCre's instructions for planking the deck. For starters, nail heads would not be visible having been countersunk and plugged in a real boat. I subsequently learned, in real boats, the planks would be a) in 6, 9 or 12 foot lengths, b) begin with a king plank on the centre line of the deck and not a joint and c) laid to a 4 plank stagger for French built boats or 5 plank stagger for British built boats. Through trial and error, I also discovered shading the plank edges with a 5B pencil produced the best simulation of the caulking. Once I decided to use planks rather than complete strips, a contact adhesive was impractical and I reverted to PVA. To scale a 12' plank in a 5 plank stagger produced impossible fractions of a millimetre so I made the decision to utilise a 4 plank stagger. I also decided an edge plank was beyond my skill level and, in any event, this would be covered by the edge plank included in the kit. Planking the hull - 1st layer. I began by studiously following OcCre's instructions and the method I had seen on many tutorial videos. When I was about half way, impatience got the better of me and I started to prepare for the 2nd planking layer. I began by filing the heads off the pins as per the instruction but soon discovered I was doing more damage than good. The solution was to remove the pins. The planks stayed in place so, from then on, pins were only pushed in sufficient to hold the plank in place until the glue dried. Once this 1st layer was complete, it was thus a simple task to remove all the pins with a pair of narrow-nosed pliers. HM Schooner Cockle is born. Once the deck was fitted and the hull planking complete, I began looking at the rigging together with the deck fixtures and fittings. Based upon years of sailing, what was being proposed bore no relationship to how things would be in the real world. Now I know Polaris is a generic boat made simple for beginners such as myself but a degree of realism ought to be maintained. I began to research gaff rigged schooners. I soon discovered the 'fish' class of dispatch boat built 1805 to 1807 in Bermuda for the British Royal Navy. Polaris' hull and sail plan was virtually identical so it seemed a logical decision to complete Polaris as a 'fish' class dispatch boat. The only problem, as I saw it at the time, would be her armament. My build was too far advanced to begin piercing her sides for carronades so, instead, she would not be named as a 'fish' class boat but be named anything else and be fitted with swivel guns. It would also afford me a degree of latitude in not having to be historically accurate. So that is where I am at - building a model boat that is neither a kit nor scratch built and is well beyond my skill level, researching how anchors were correctly stowed, how standing and running rigging was correctly installed and sourcing additional fixtures and fittings such as capstans and the like.
 -
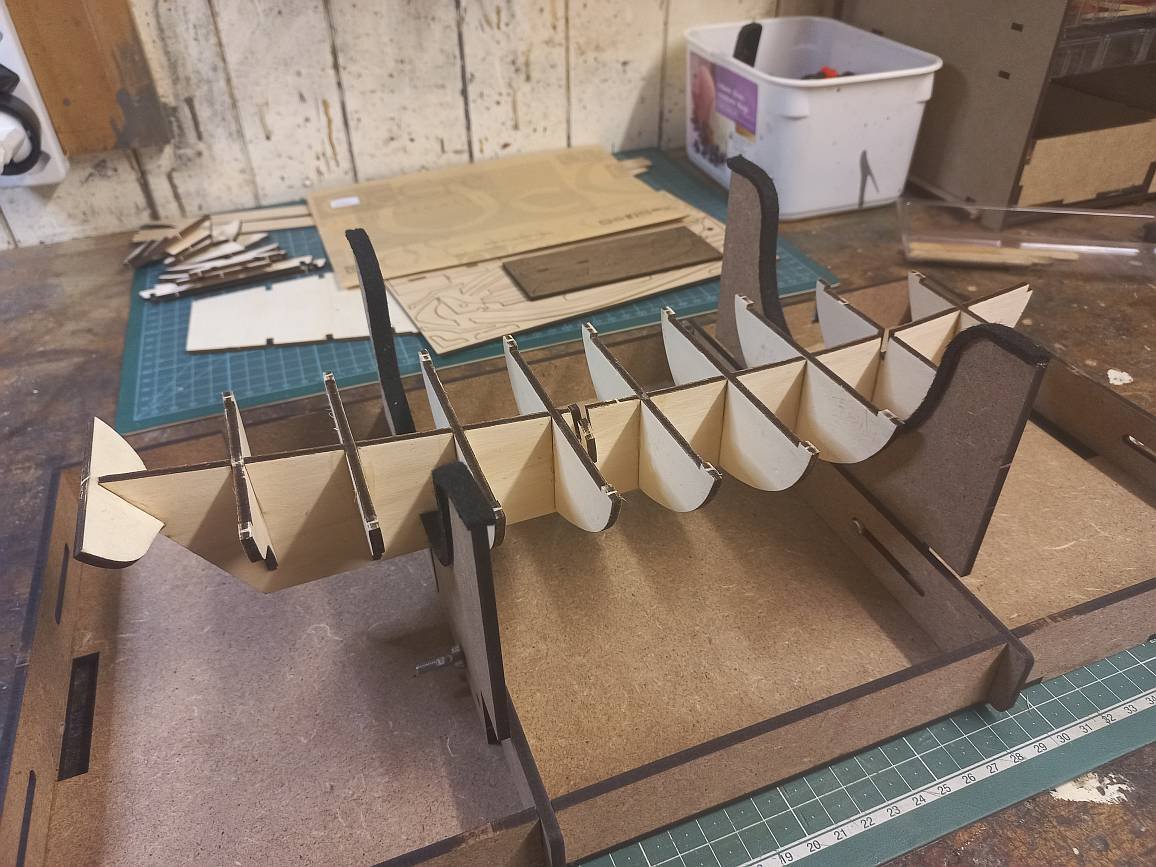
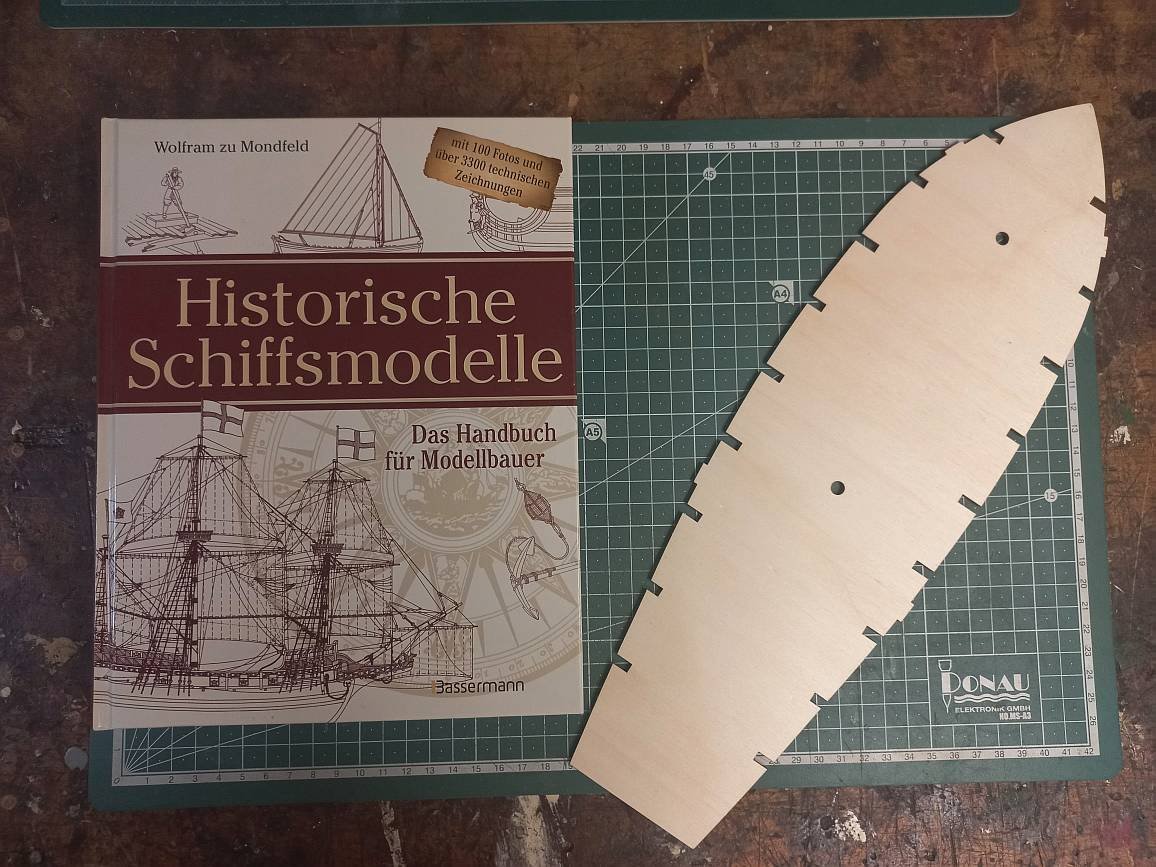
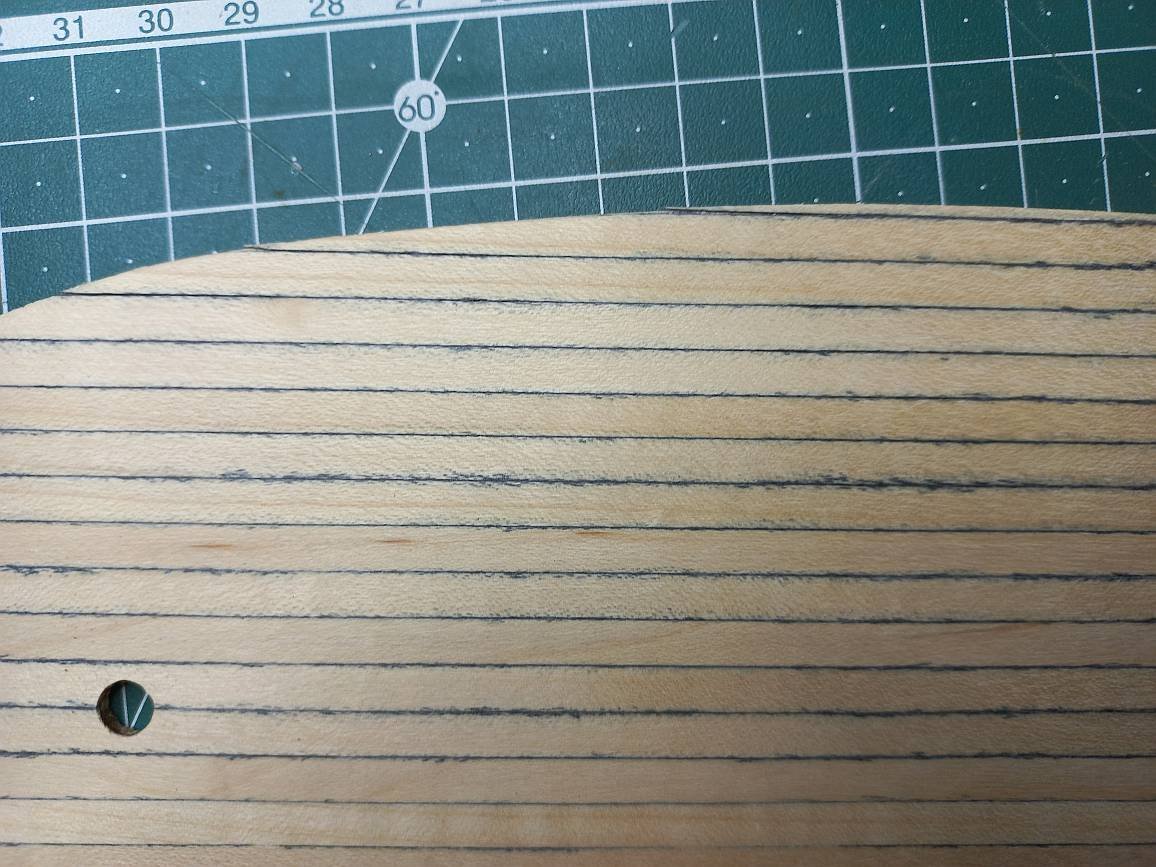
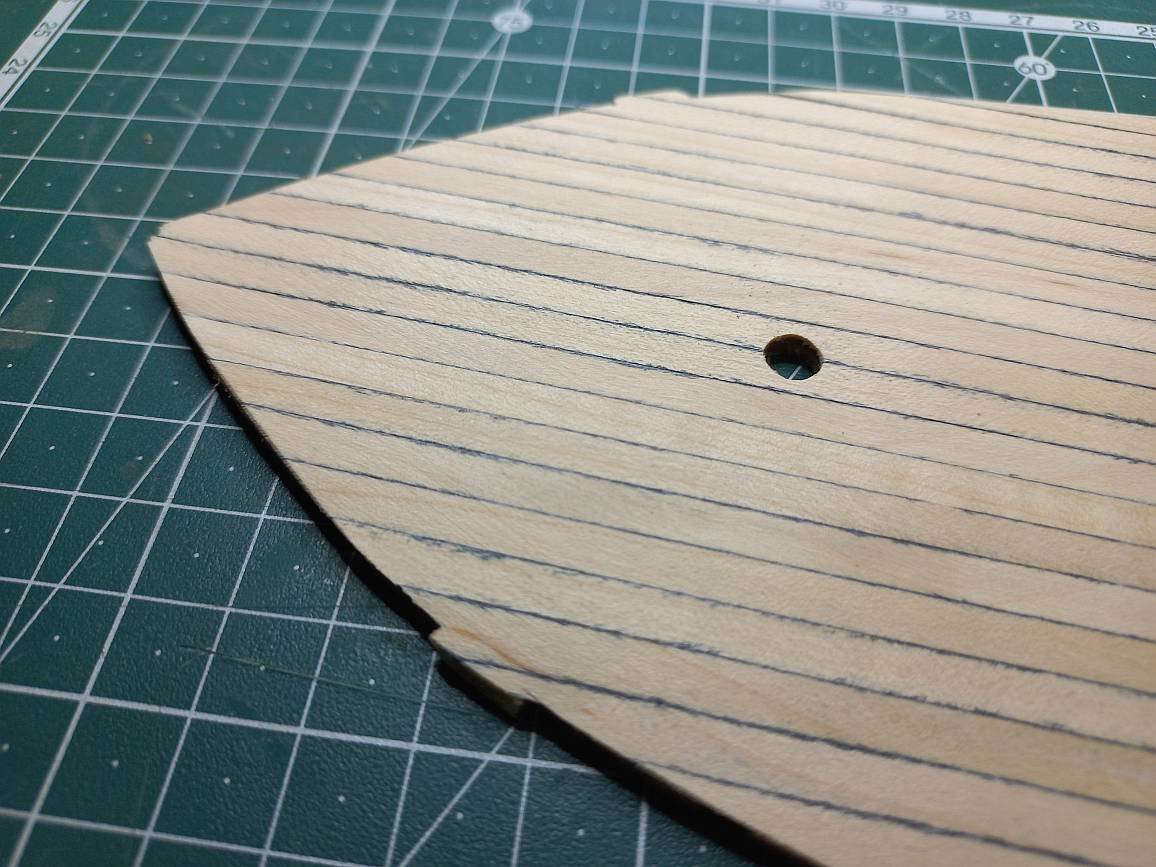
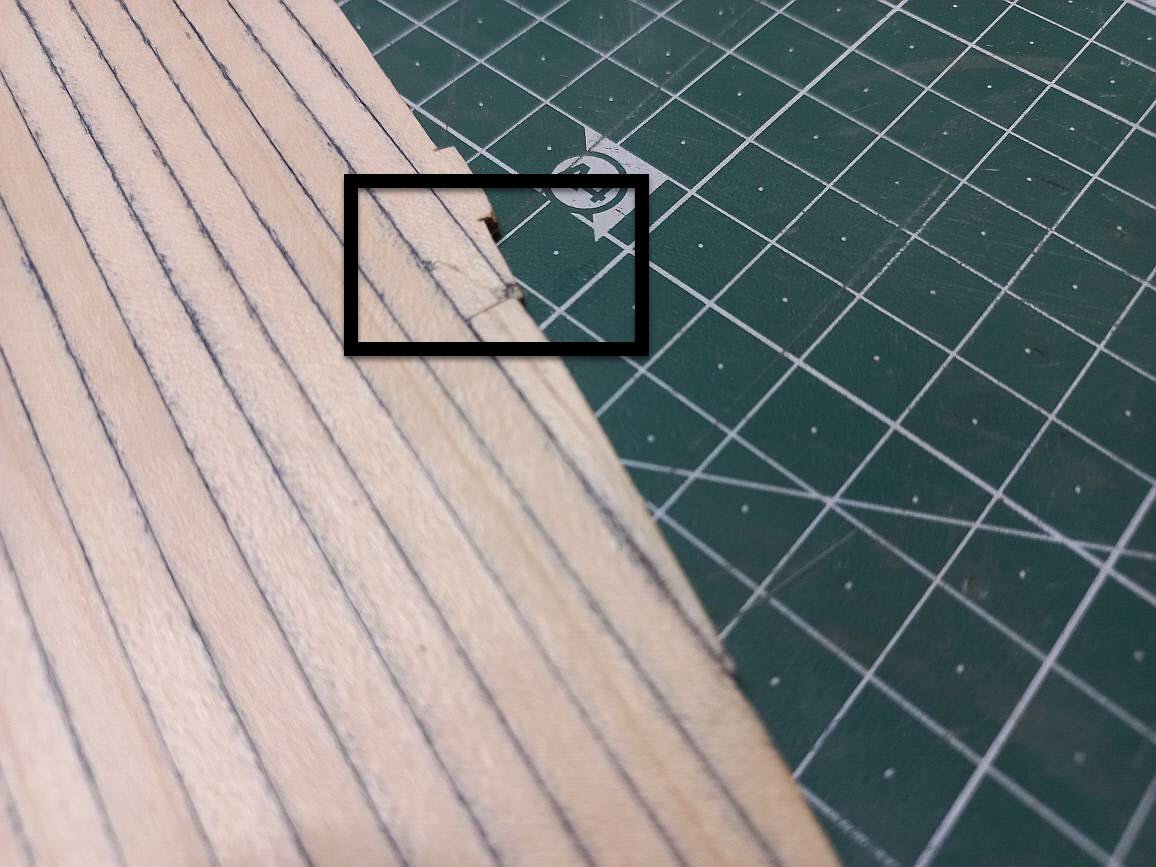
 Hello everyone, In my introduction I was invited to write a build log. Of course I don't want to miss this opportunity. Firstly, because I am a beginner and can certainly use some support. Secondly, I would like to participate in the forum in some way. Based on some research, I decided a few weeks ago to buy the Polaris kit from Occre in 1:50 scale. Since there are already some good reports here in the forum in which the kit is presented, I decided to start building it right here. For the sake of simplicity, I have written most of the text in German and had it translated with Deepl. I hope it fits. 🙂 After everything was unpacked and the missing tools were delivered, I started to separate the frames. I smoothed out the separation points with a small file. After I had sanded the surface briefly, and dry-fitted the frame together. Since everything fitted, I was able to use white glue and glue the whole thing together. The next step was the deck planking. I didn't want to rely on the instructions alone, but also to consult the technical literature. Years ago I bought the book Historische Schiffsmodelle by Wolfram zu Mondfeld. And I would be happy if I could finally understand what it says. 😉 The instructions provide for the laying of whole planks. The joint is indicated with a pencil. I originally had the idea not to do this but to lay individual planks according to the usual 1-2-3-4-1. However, I decided against it and laid whole strips. Before laying, I tried to colour the edges with a pencil. But I did not succeed as I wished. After I had tried a felt pen on a leftover piece, I coloured the edges with a black felt pen. In retrospect, it was a mistake after all. The black paint ran more into the wood than I would have liked. For a short time I had hoped to get rid of most of it after sanding. But that hope was in vain. Of course, one could say that ships only looked so great when they were brand new 🙂 And how the tar between the planks really looked... no idea Unfortunately, one plank was damaged during sanding and I had to carry out a repair. So, that's it for today. Thank you very much for reading along and have a wonderful evening. 🛏️ Greetings Daniel

- 5 replies
-
- 5
-
-
- Polaris
- first build
- (and 1 more)
-
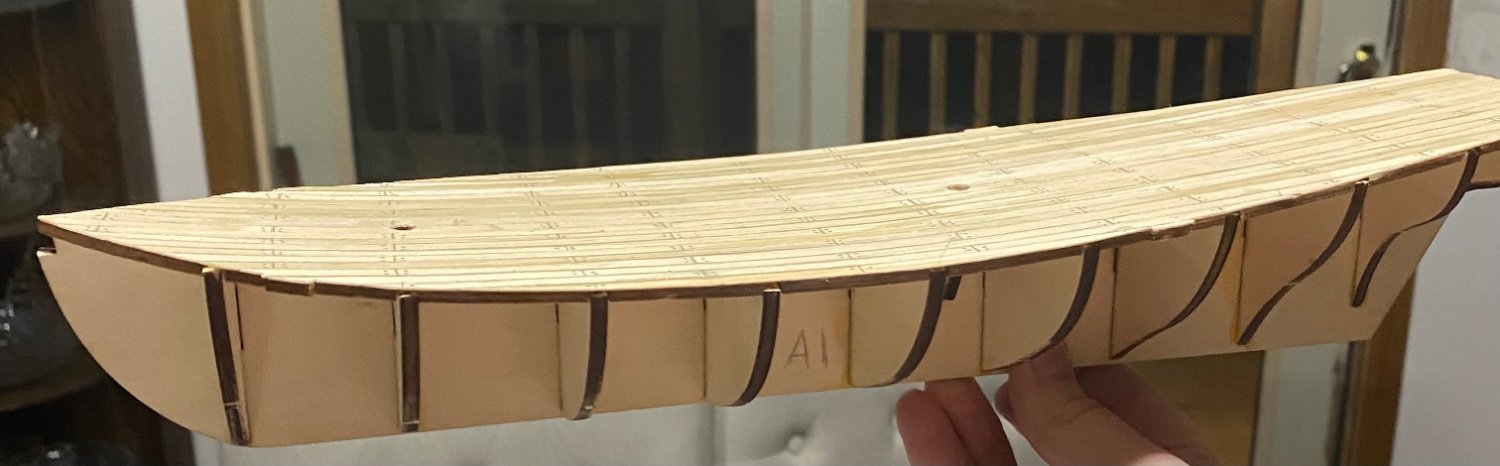
 My very first build. Shopping around for a kit for that first build I really wanted to get HMS Beagle from OcCre but from watching some of the build videos on YouTube I decided I'd be way in over my head with that one. No matter, this way I have something to look forward to if I really take to the hobby. I've already the read the completed - and ongoing - build logs from Havelock, LHSmith and Spongebob22 (and am expecting at least one more log to follow soon). I've learned a lot from those and am sure that I'll learn a lot more from them in the following months. So now for my build. I started out yesterday, sorting and counting everything to make sure my set was complete. It is 🥳 Then went on to cutting out all the pieces to build the hull. Saw that the false keel had a small bend to it (picture). It's actually worse than it looks on the picture, so I was wondering if there's some I could and should do to fix that since I read that Havelock had a similar issue which led to some problems attaching the deck and the bow not being completely centered and so on... If there's nothing I can do I'll just continue and follow Havelock's lead on fixing things as I go. His model turned out great in the end. 👌 Oh, I also "built" the little stand thing (don't know the proper name, have a lot to learn). Still requires quite a bit of sanding and all but I really wanted some "result" yesterday
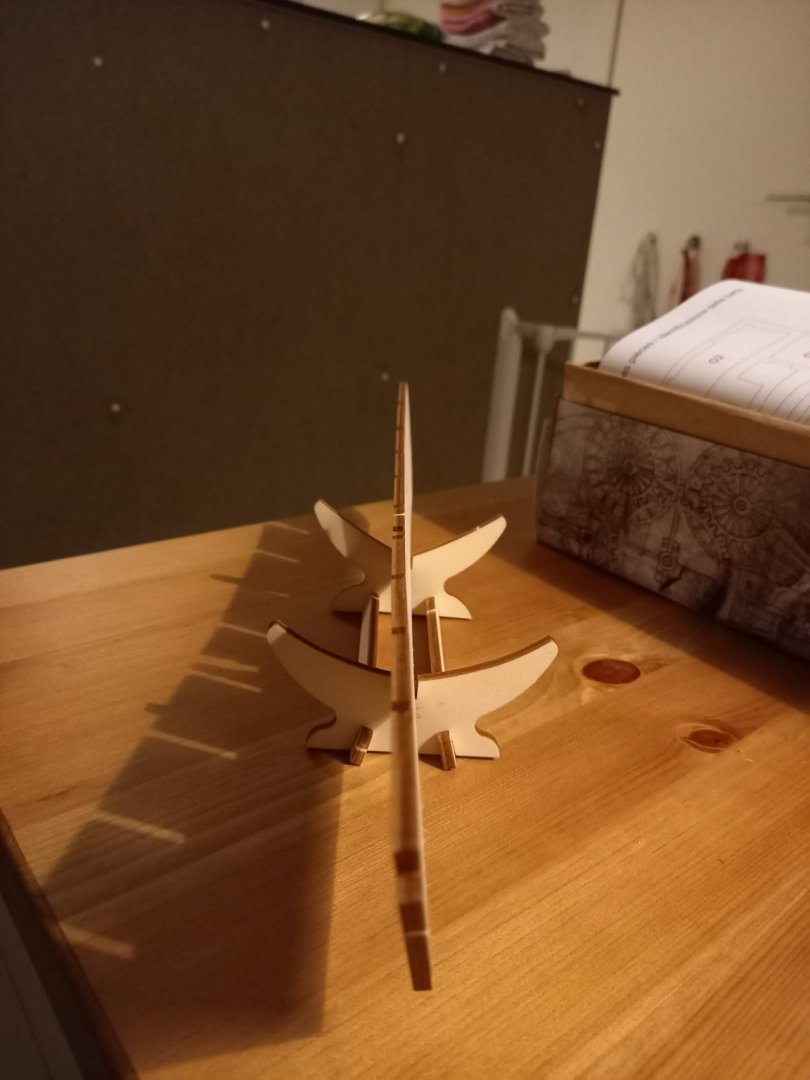
-
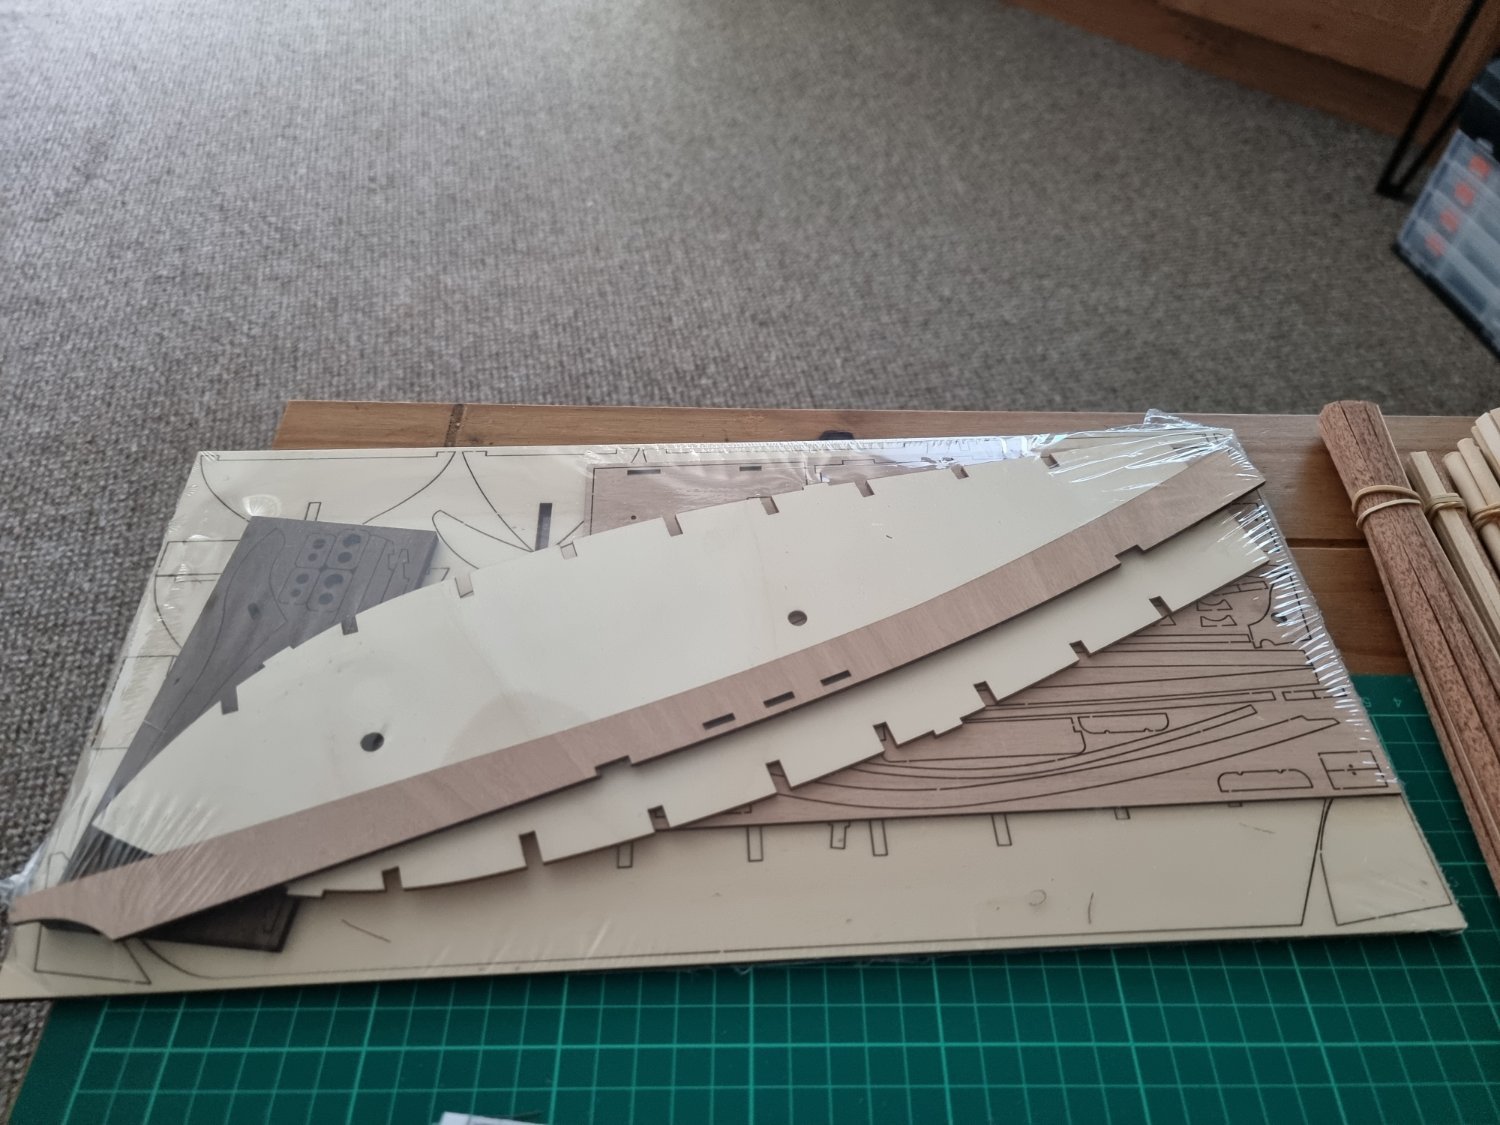
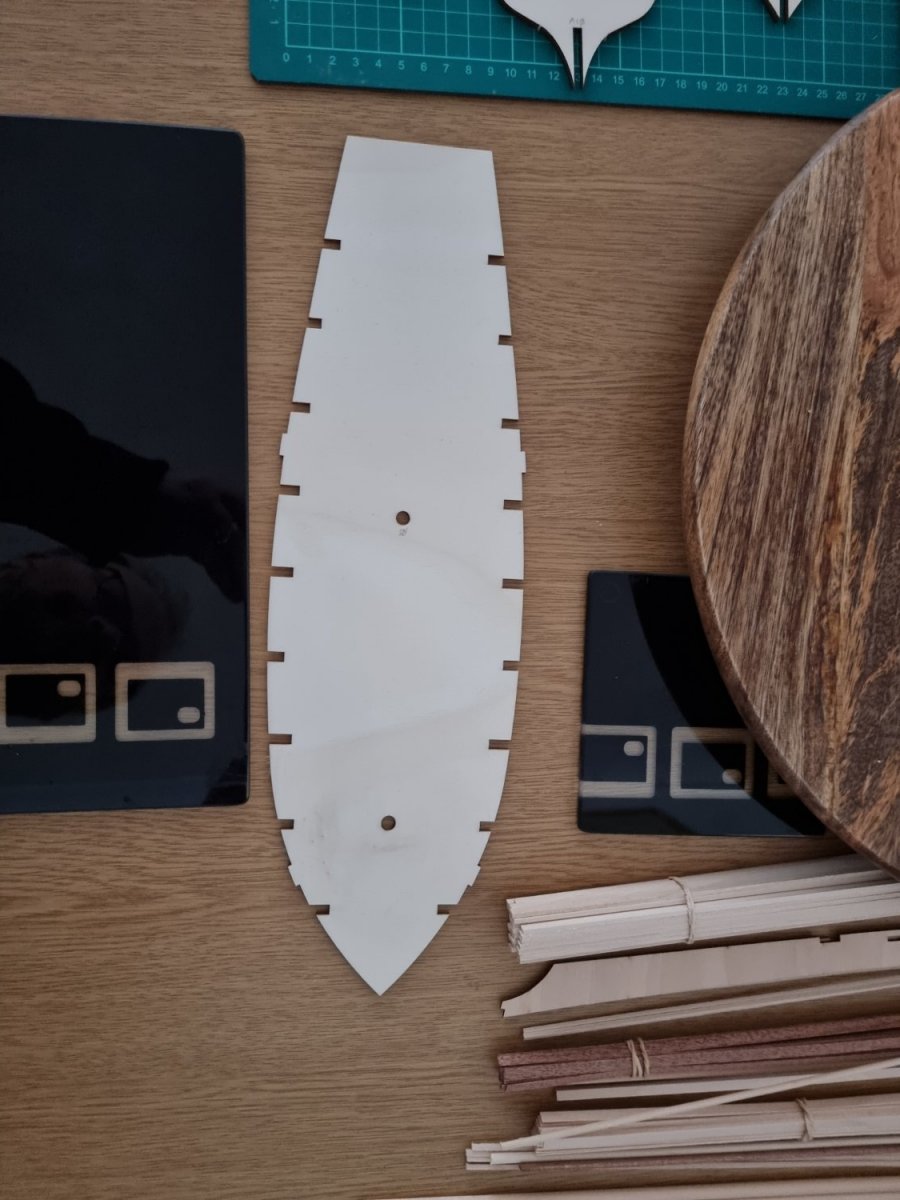
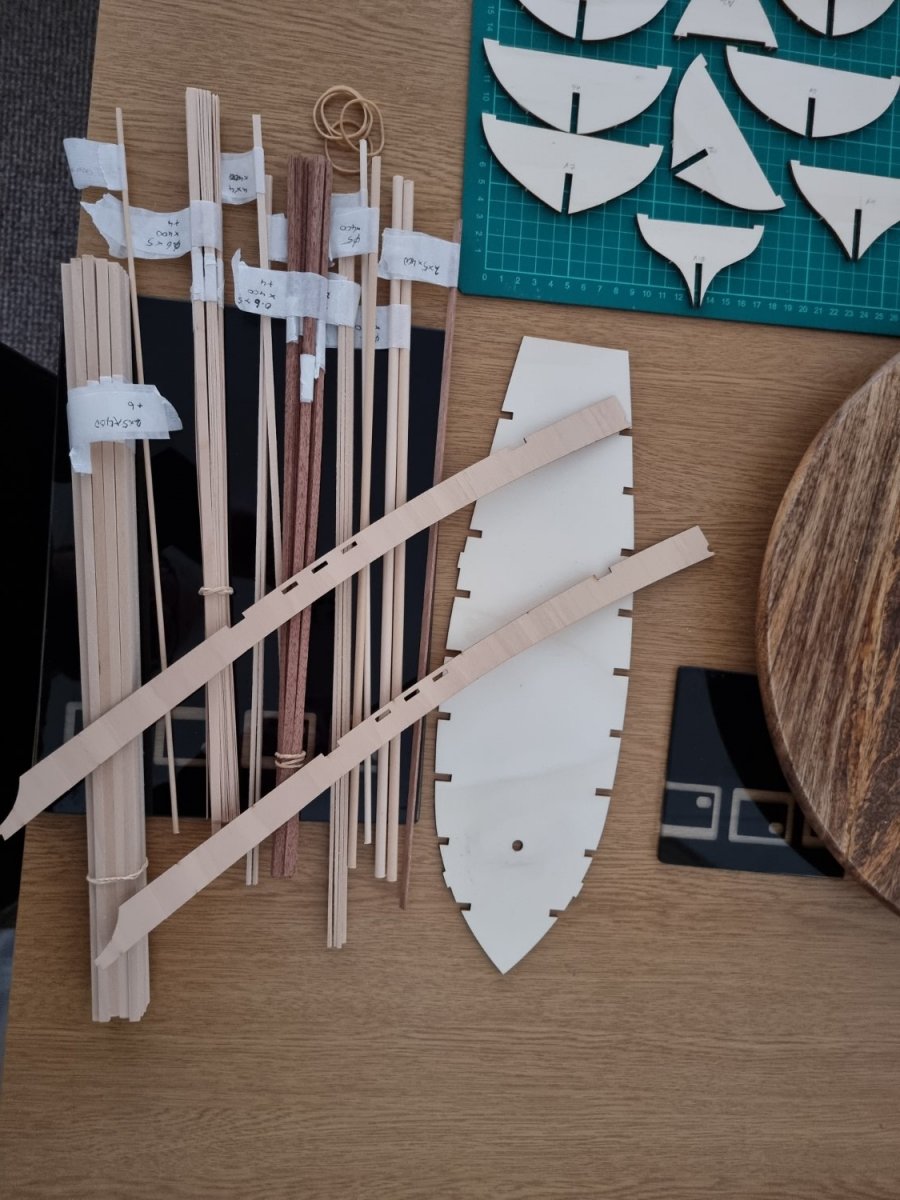
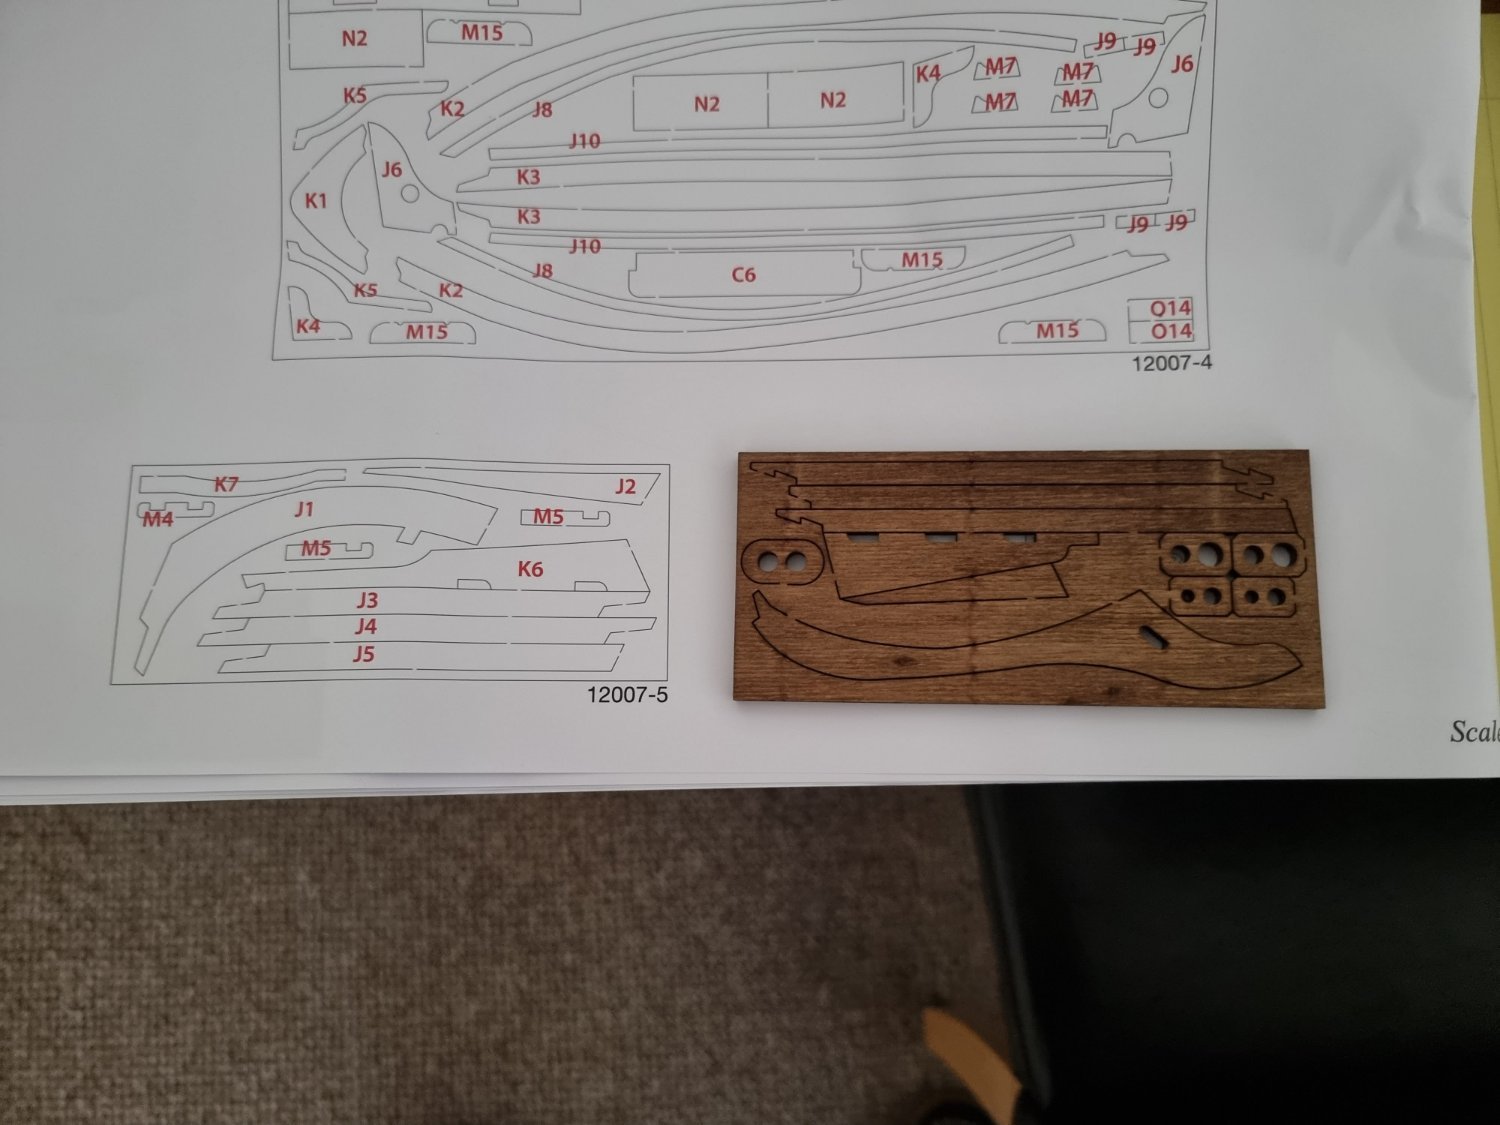
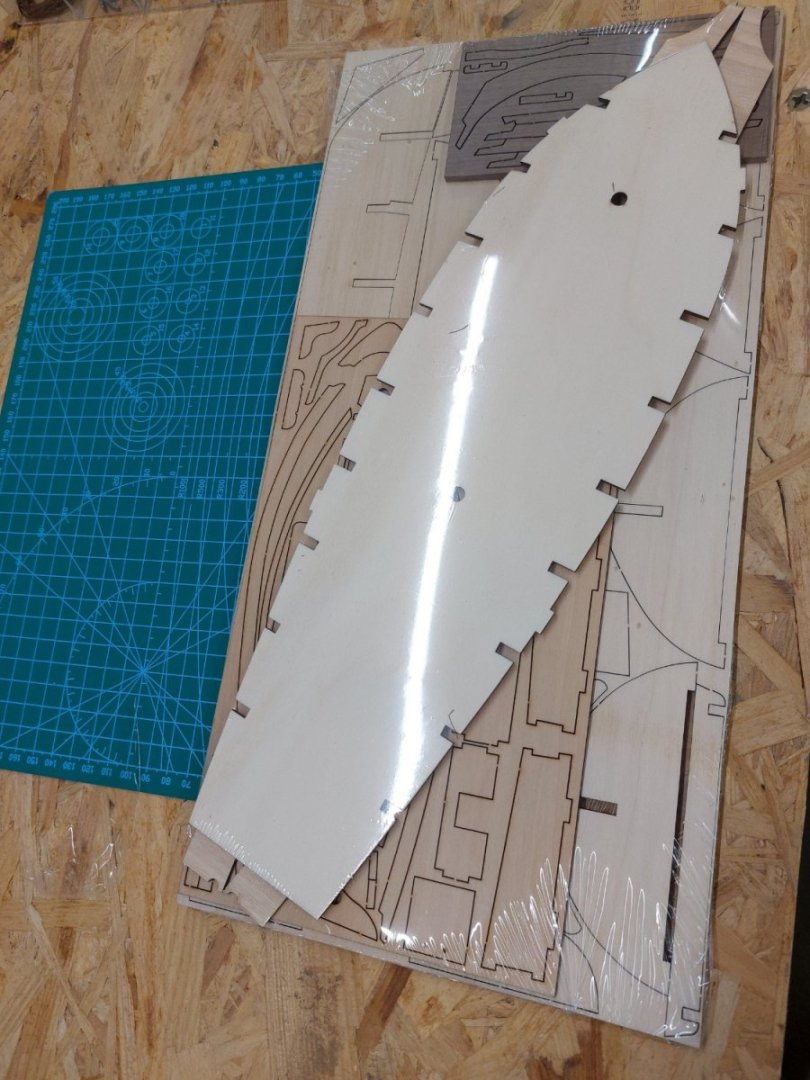
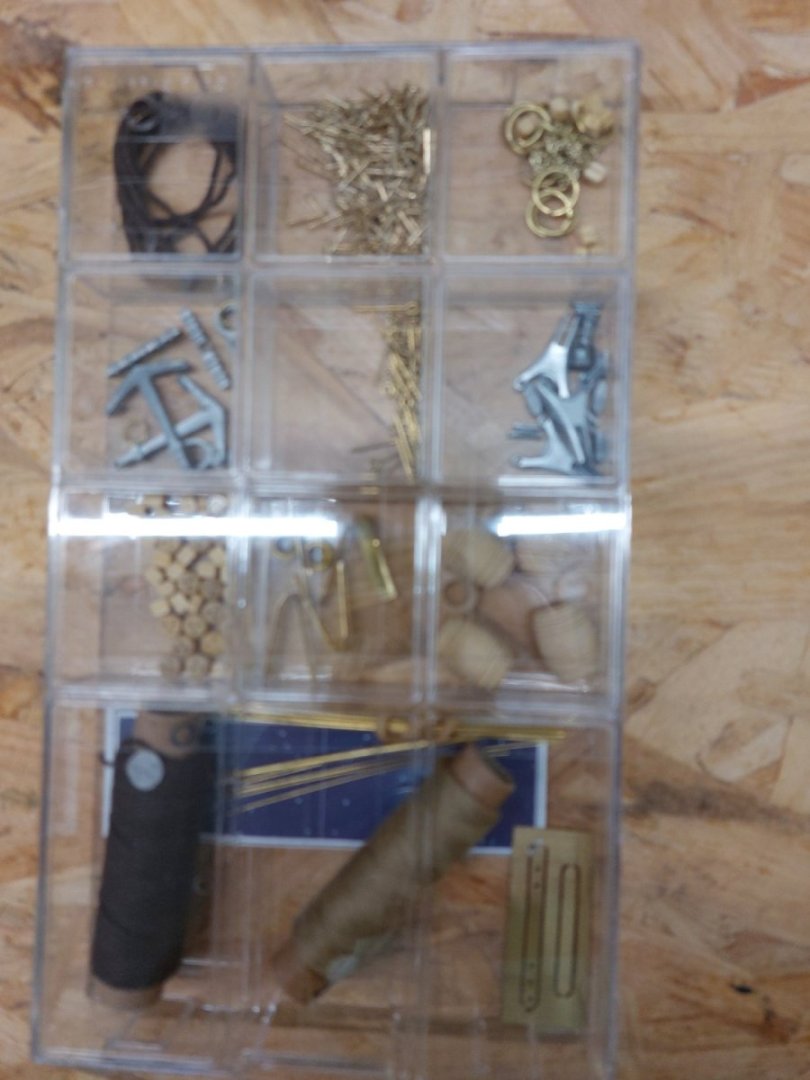
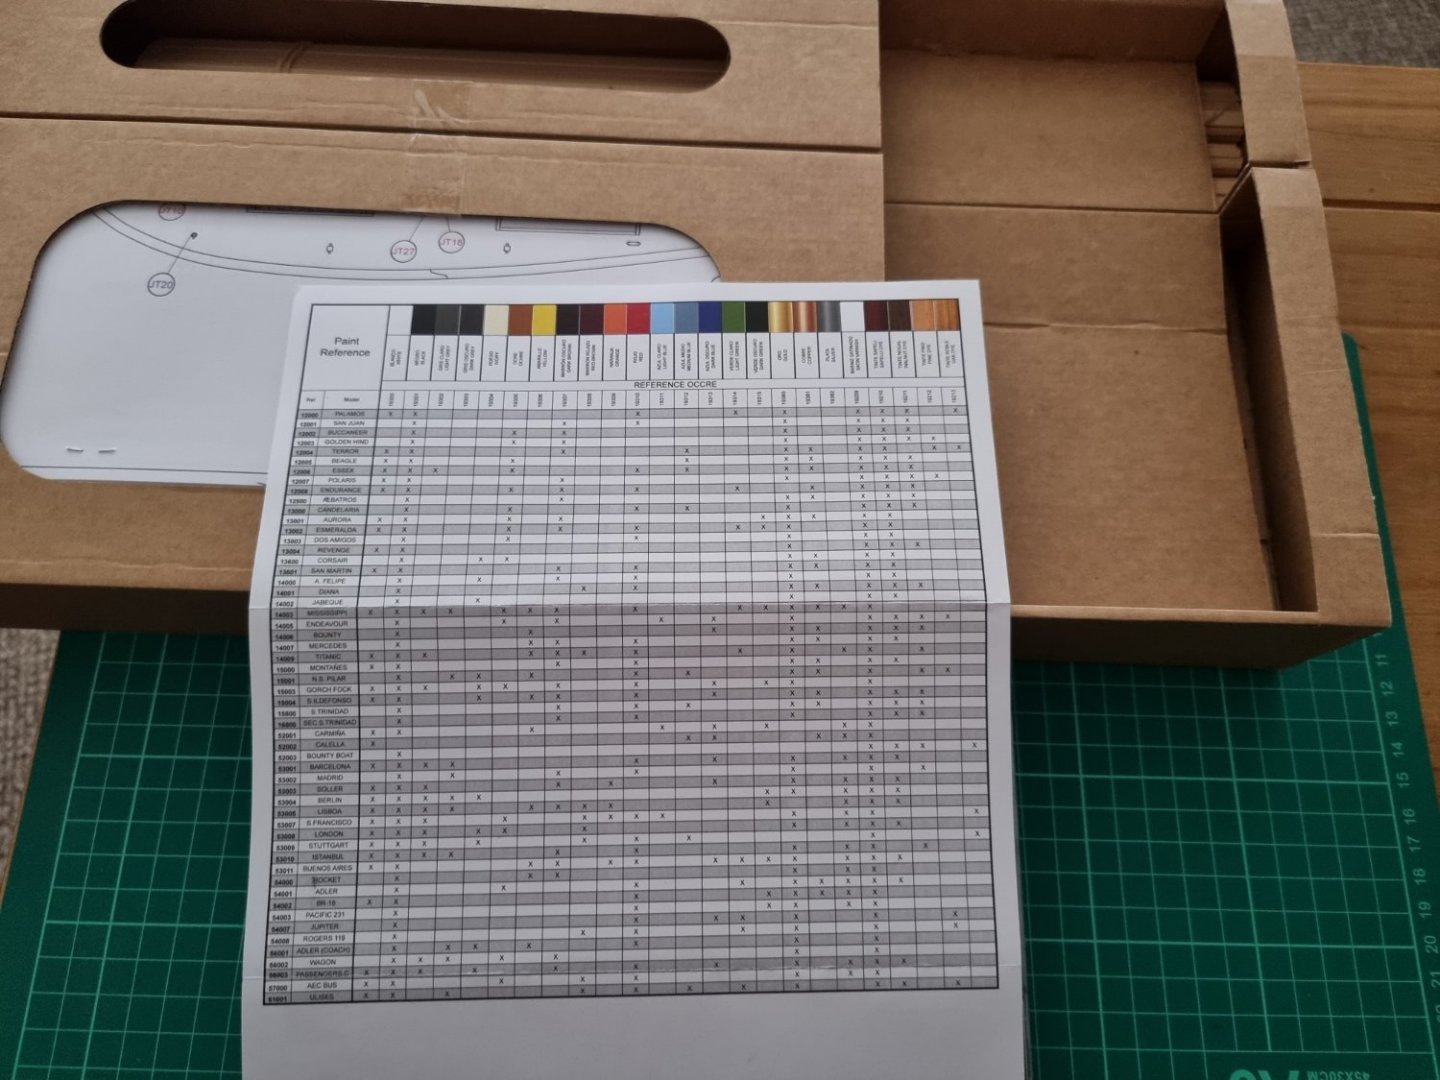
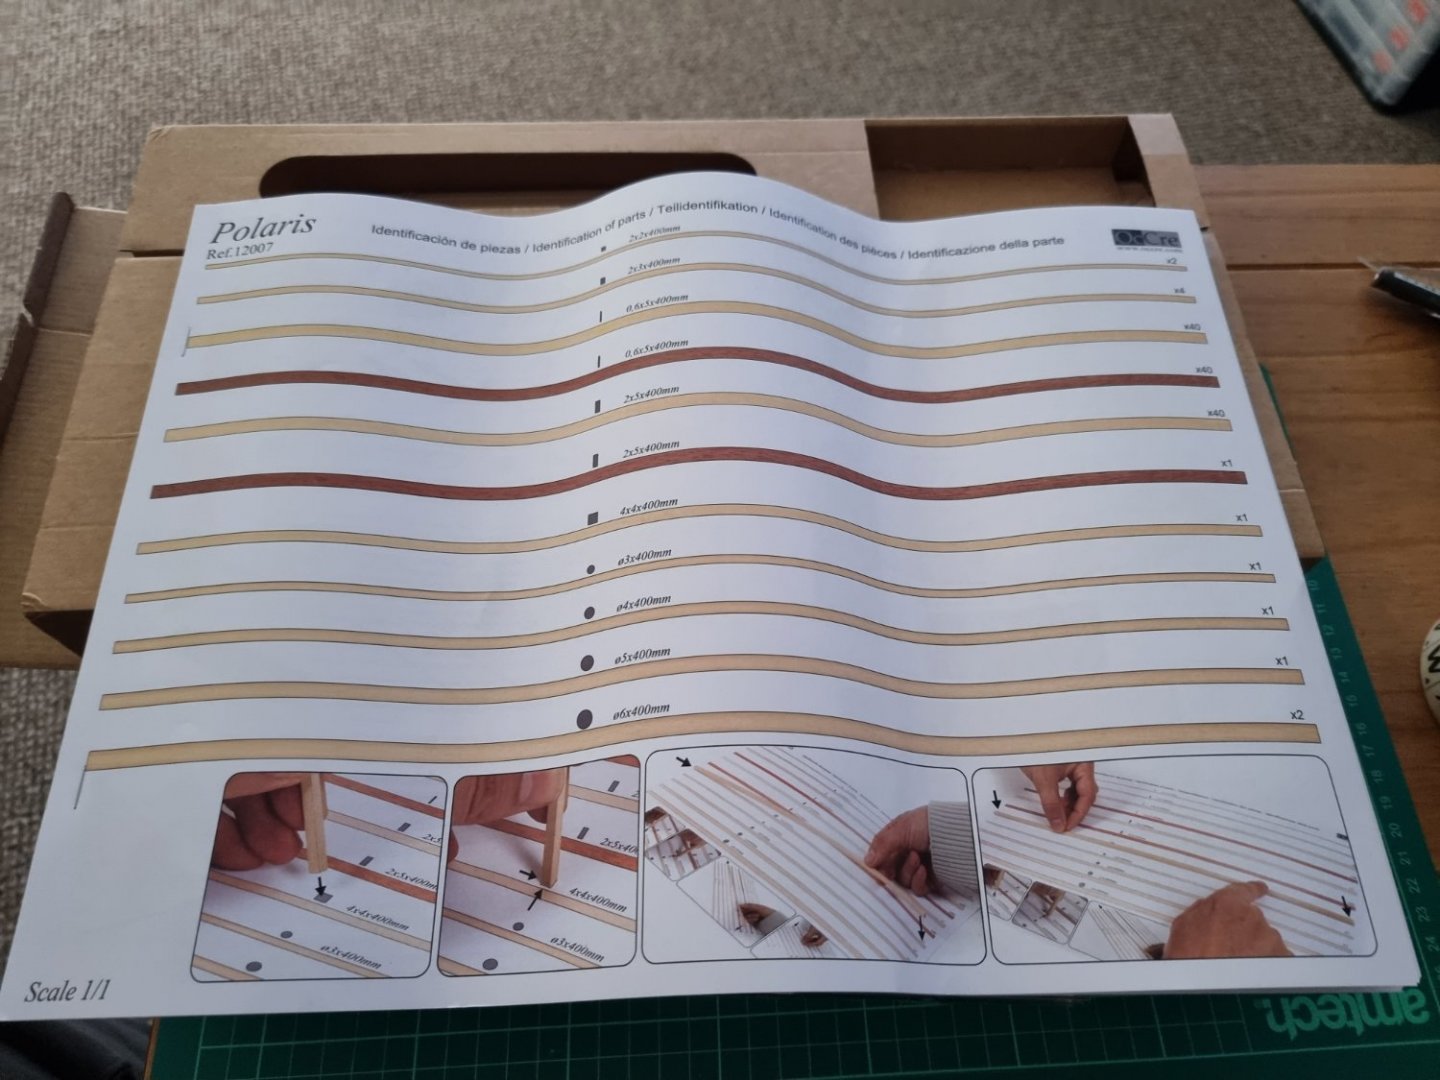
 There were tears before bedtime with this one. I think I need to start at the beginning. The kit arrived later than expected. It was almost 3 weeks after the order was placed. Being a first-time builder, I was of course, very excited and quite ready to begin, but sensibly saved it up for the weekend. Whilst this was quite a good idea it did cause me some isssue. I had spent the previous two weeks looking on OcCre's website and found the Instructional build videos helpful. As such, I took the first couple of hours making sure that every part that is listed in the instructions is there. I have to say they're generous and they have provided extra pieces, such as more planks than are needed for the Decking. So I checked this all very carefully, and whilst there were two bent pins, out of a total of 400 that are supposed to be there, there were 408 including the two bent ones. I don't feel hard done by at all. Here's some shots of the unboxing and part breakdown. I had labelled every plank and mast and spar but what I wasn't prepared for were the problems ahead.
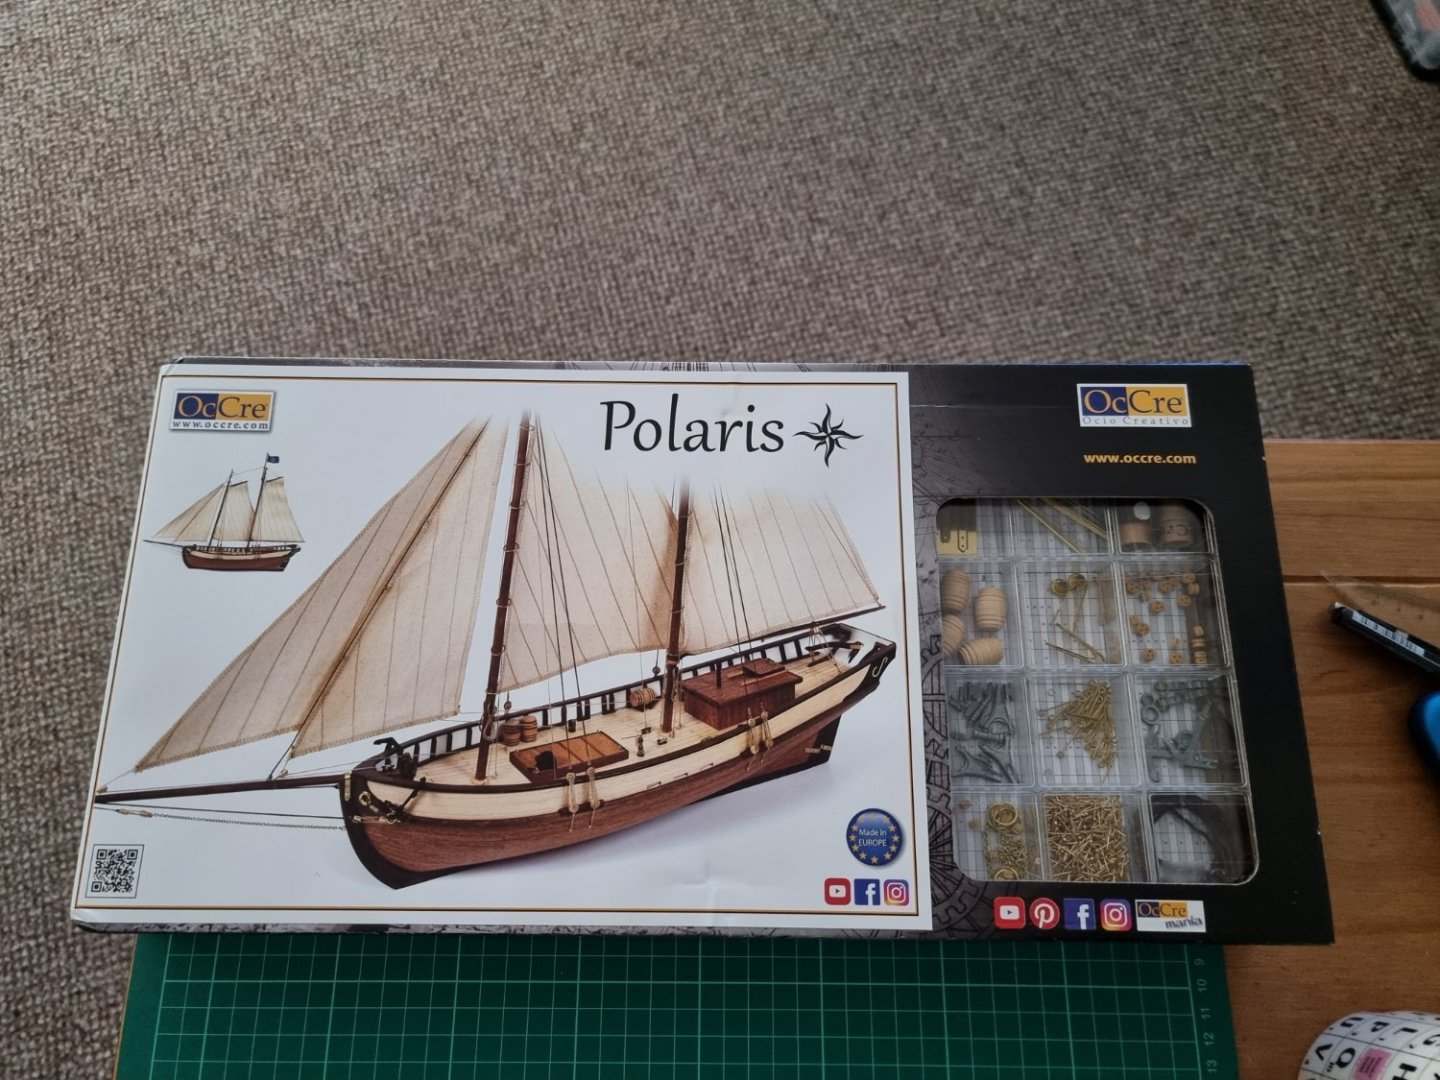


-
 Boa noite a todos, Hello everyone, i'm starting the Polaris, the first model ship in this hobby. I made my presentation some months ago and todat i decided to start working on this project. Step by step. There are many Polaris sailing in this forum and this one is going to be part of it hehe. I already made the first progress. In the last picture, nothing is glued. Only for the photo. 😎
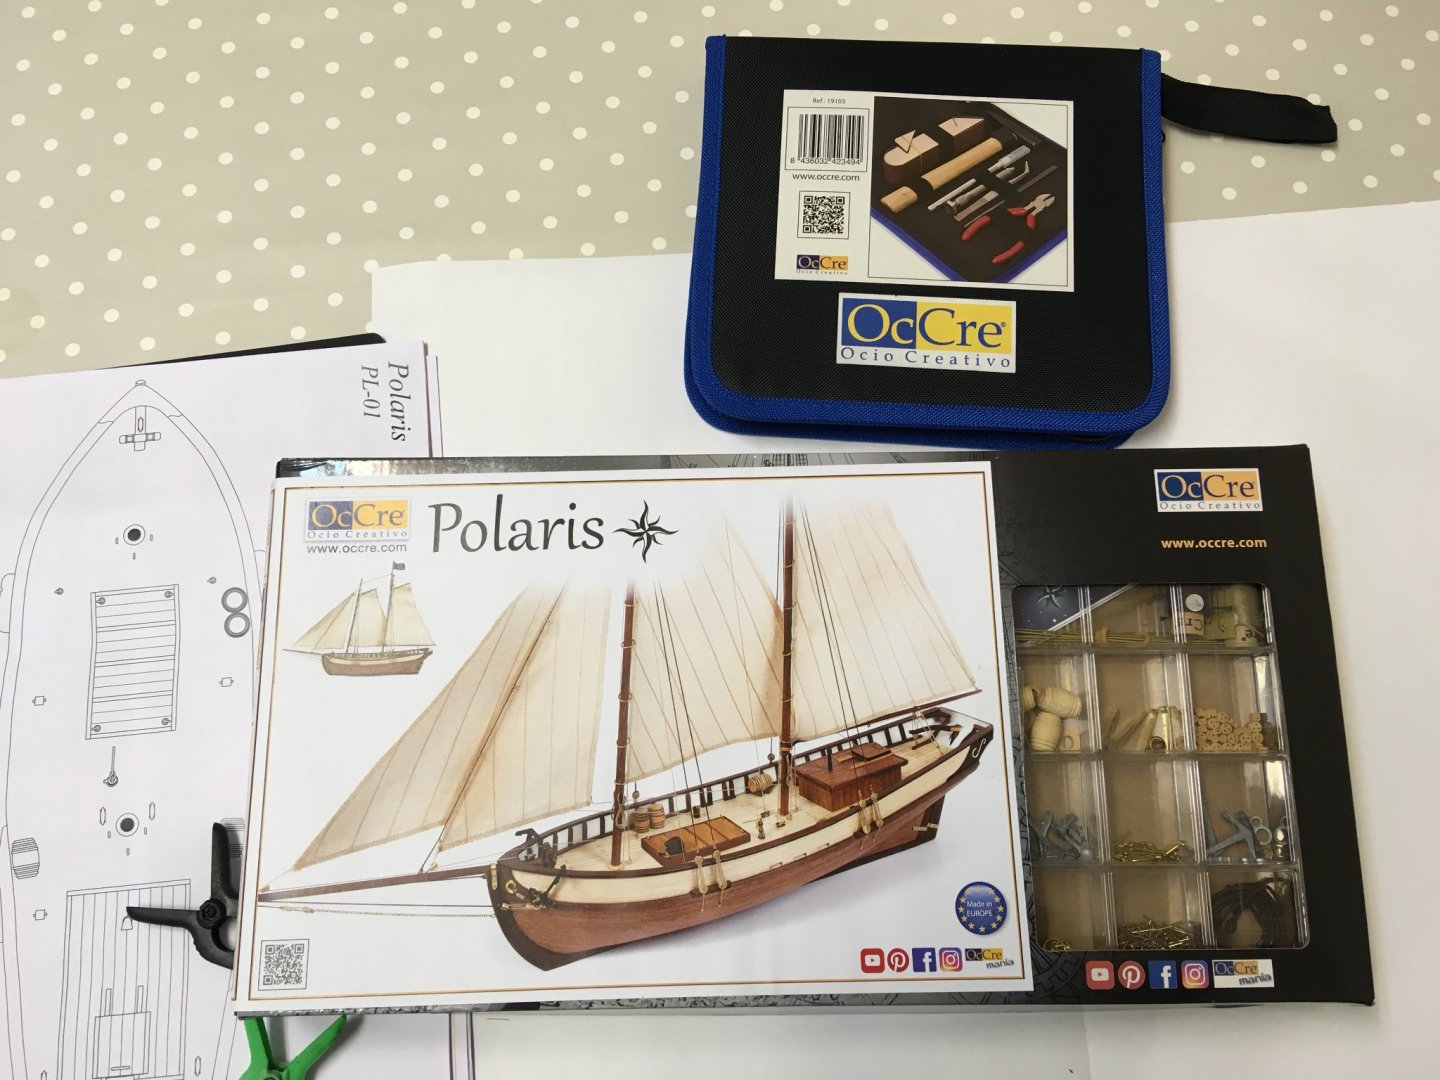

-
 Hello, after finishing Le Renard I decided to make my own version of popular Occre's Polaris schooner. Kit is really wonderful and allows for many modifications as for my information didn't represents any real ship but it's just more a generic schooner. Very cute schooner what should be added. My plan is as follow: - arming her with at least 10 guns with maybe 2 stern chase guns although I will must to modify her stern for gunports ( not many space for two guns ) Polaris is bigger than HMS Pickle which was armed with 8 carronades so 10-12 guns with slightly lower weight should be possible I think, - stacks of cannonballs near guns, - mounting lifeboat on deck, - rerigging ship into topsail schooner which will require some modifications in rigging, - some experiments with gratings, - possible other modifications. Did on XVIII-XIX century ships pirate/corsair/merchant raiders was practised hiding of guns/disguising of armament like on XX'th century both World Wars Armed Merchant cruisers from Germany or Entente/Allied Q-ships? I wonder about rotary carronade on the middle of the deck like I saw on few models ( it was not heavy mortar on bomb ships for sure ) and I wonder how logical it could be? Didn't such corsair/raider could be overweight due to this? Asking seriously. I made and glued skeleton of Polaris which was pleasurable as everything fit very good. I decided to change a little order and place deck to the skeleton first instead planking deck first. Some reinforcements near frames to keep strenghtened structure. Probably unnecesery but it didn't hurt. I made lines of false keel and frames for mounting deck and laying king plank.
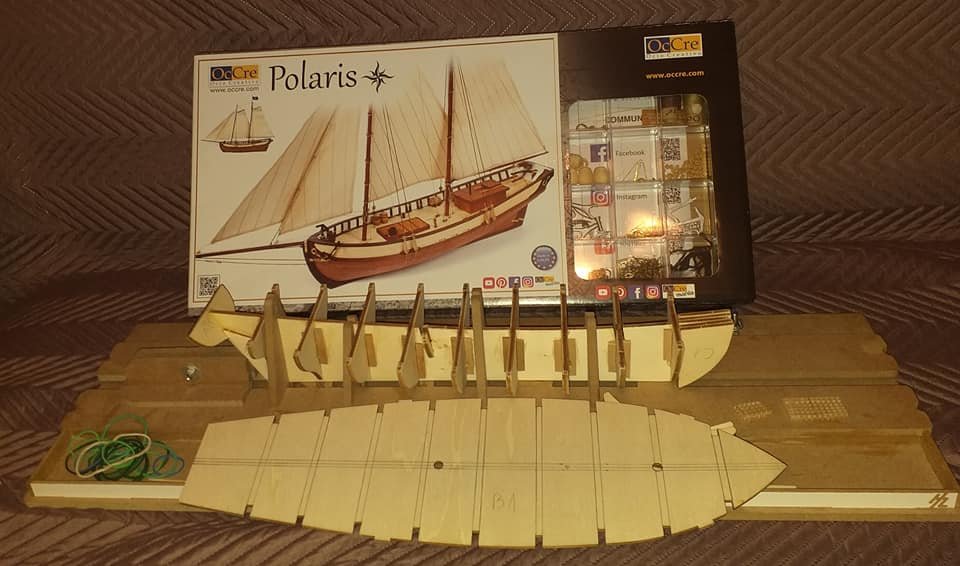
-
Hi to all. I have recently started on the Occ Cre Polaris as a first build. About 50 years ago I built a lot of Airfix and Revell plastic kits as a kid but wooden building is a new, daunting and fascinating challenge. As I’m waiting for a cataract operation I’m finding the rope work and blocks quite challenging even with an illuminated magnifier! I only discovered this site when most of the way through the build, so won’t be posting a log though intend to do so for the next one, which will probably be the Dusek Golden Hind. Thanks for all the tips that I have read so far and it is so good to come across a web community which encourages and doesn’t carp or criticise. best wishes to all Bob
-
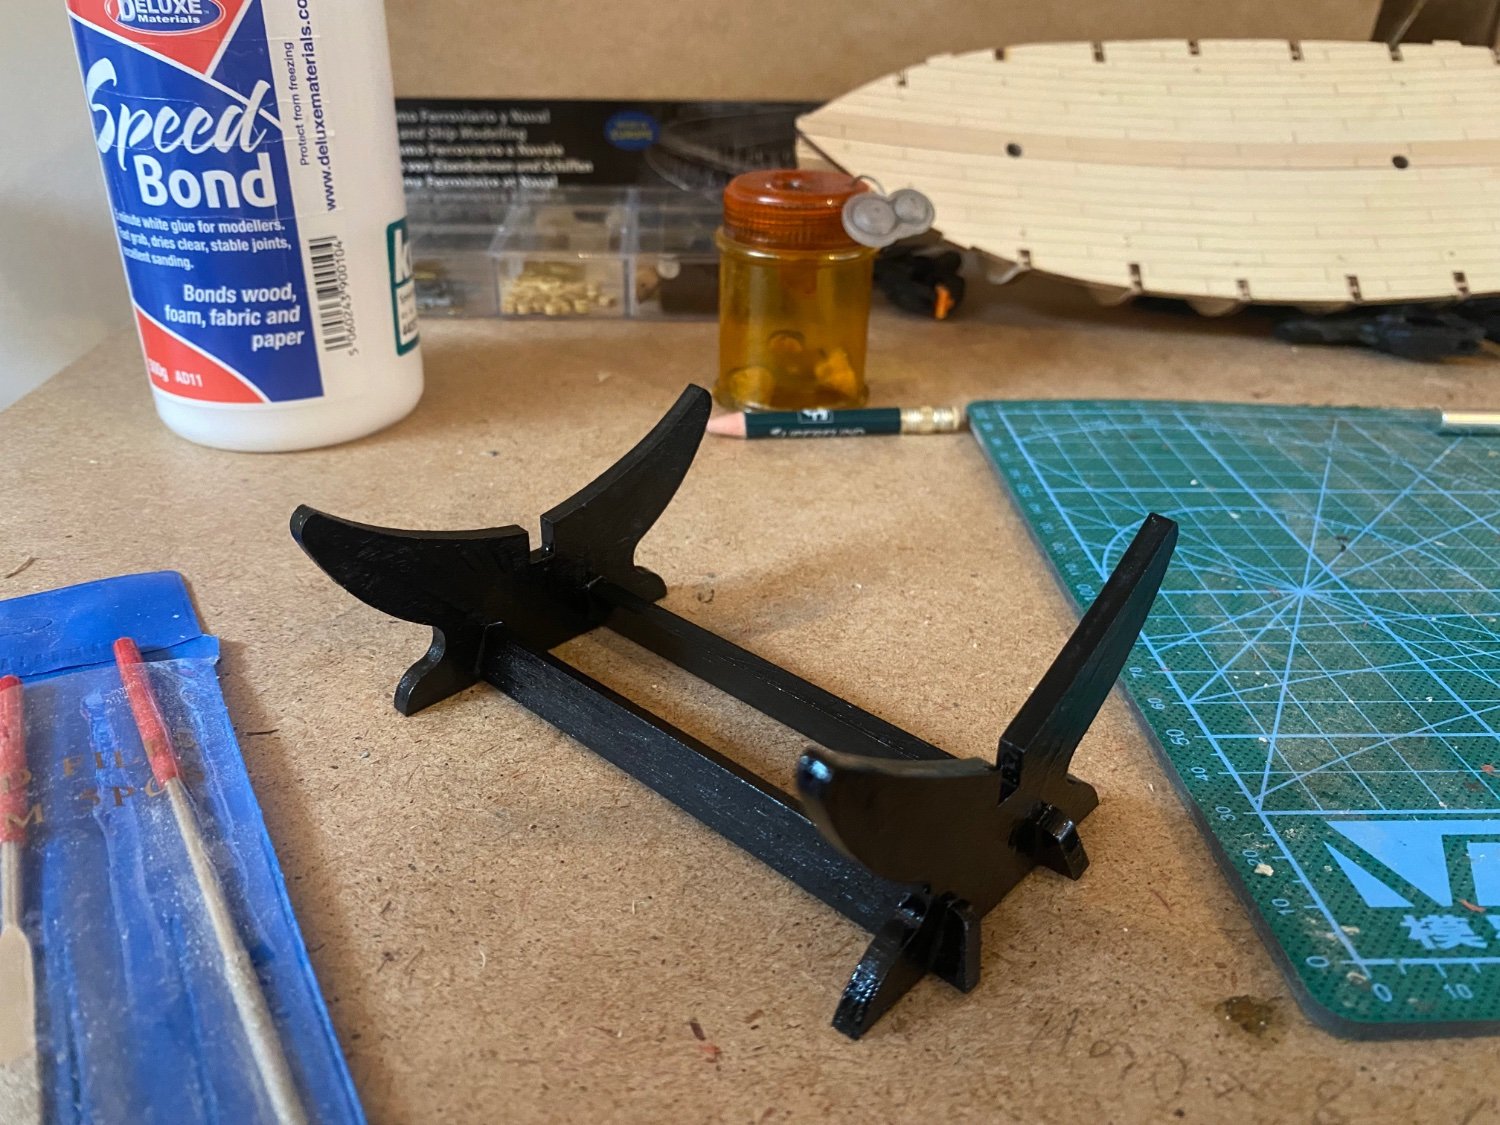
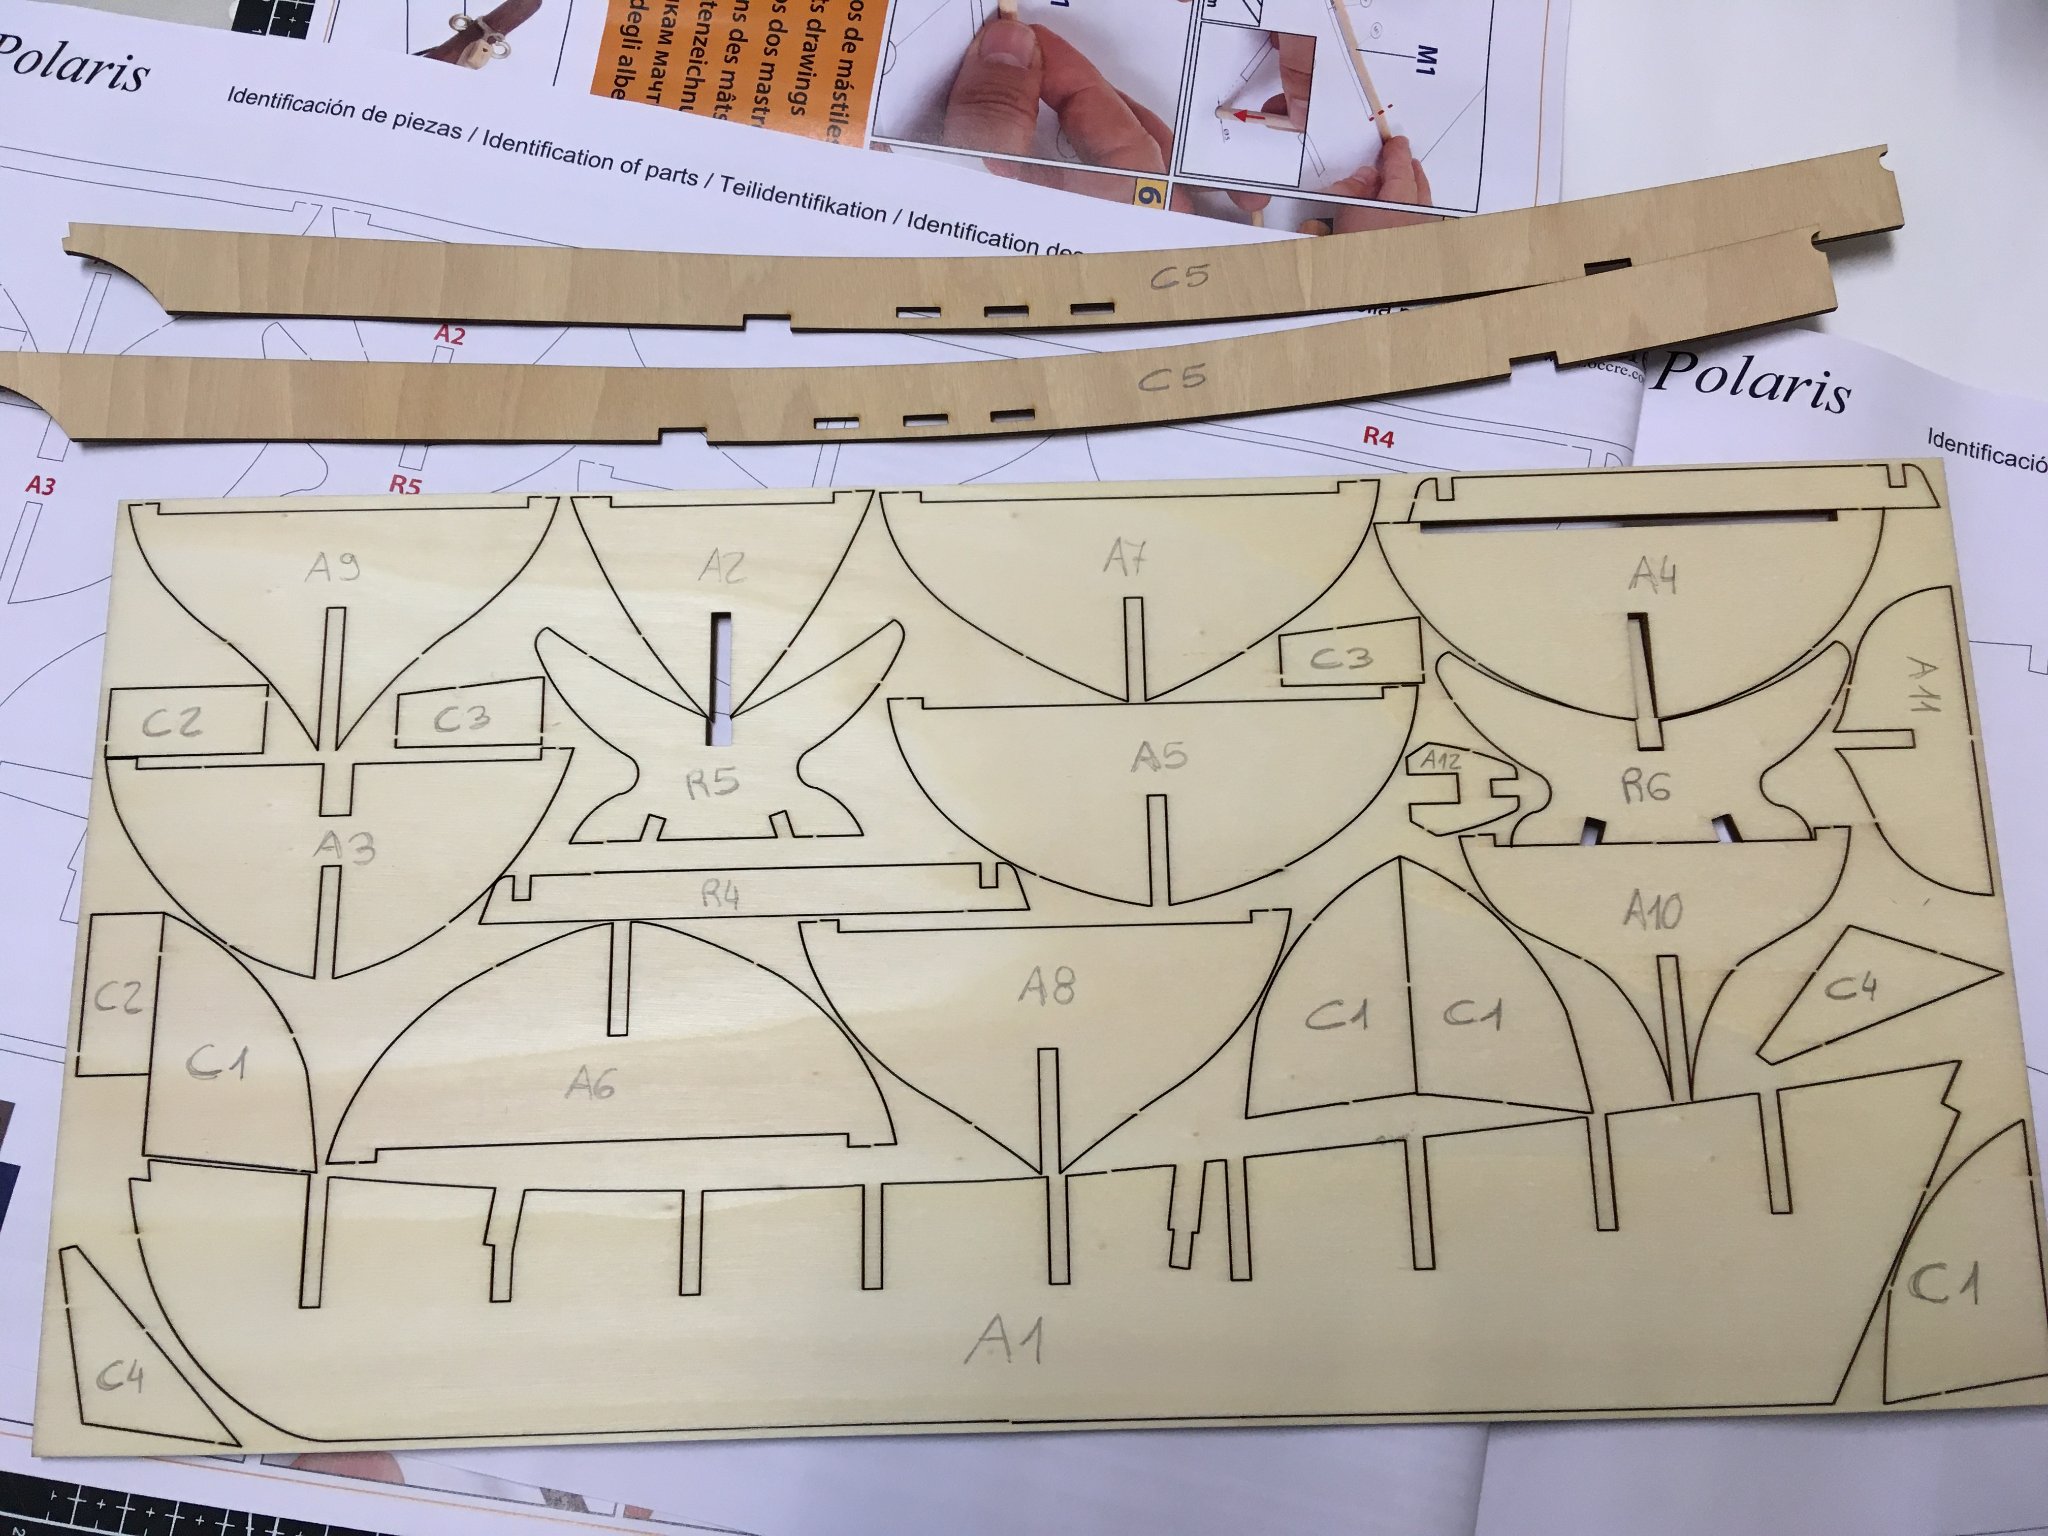
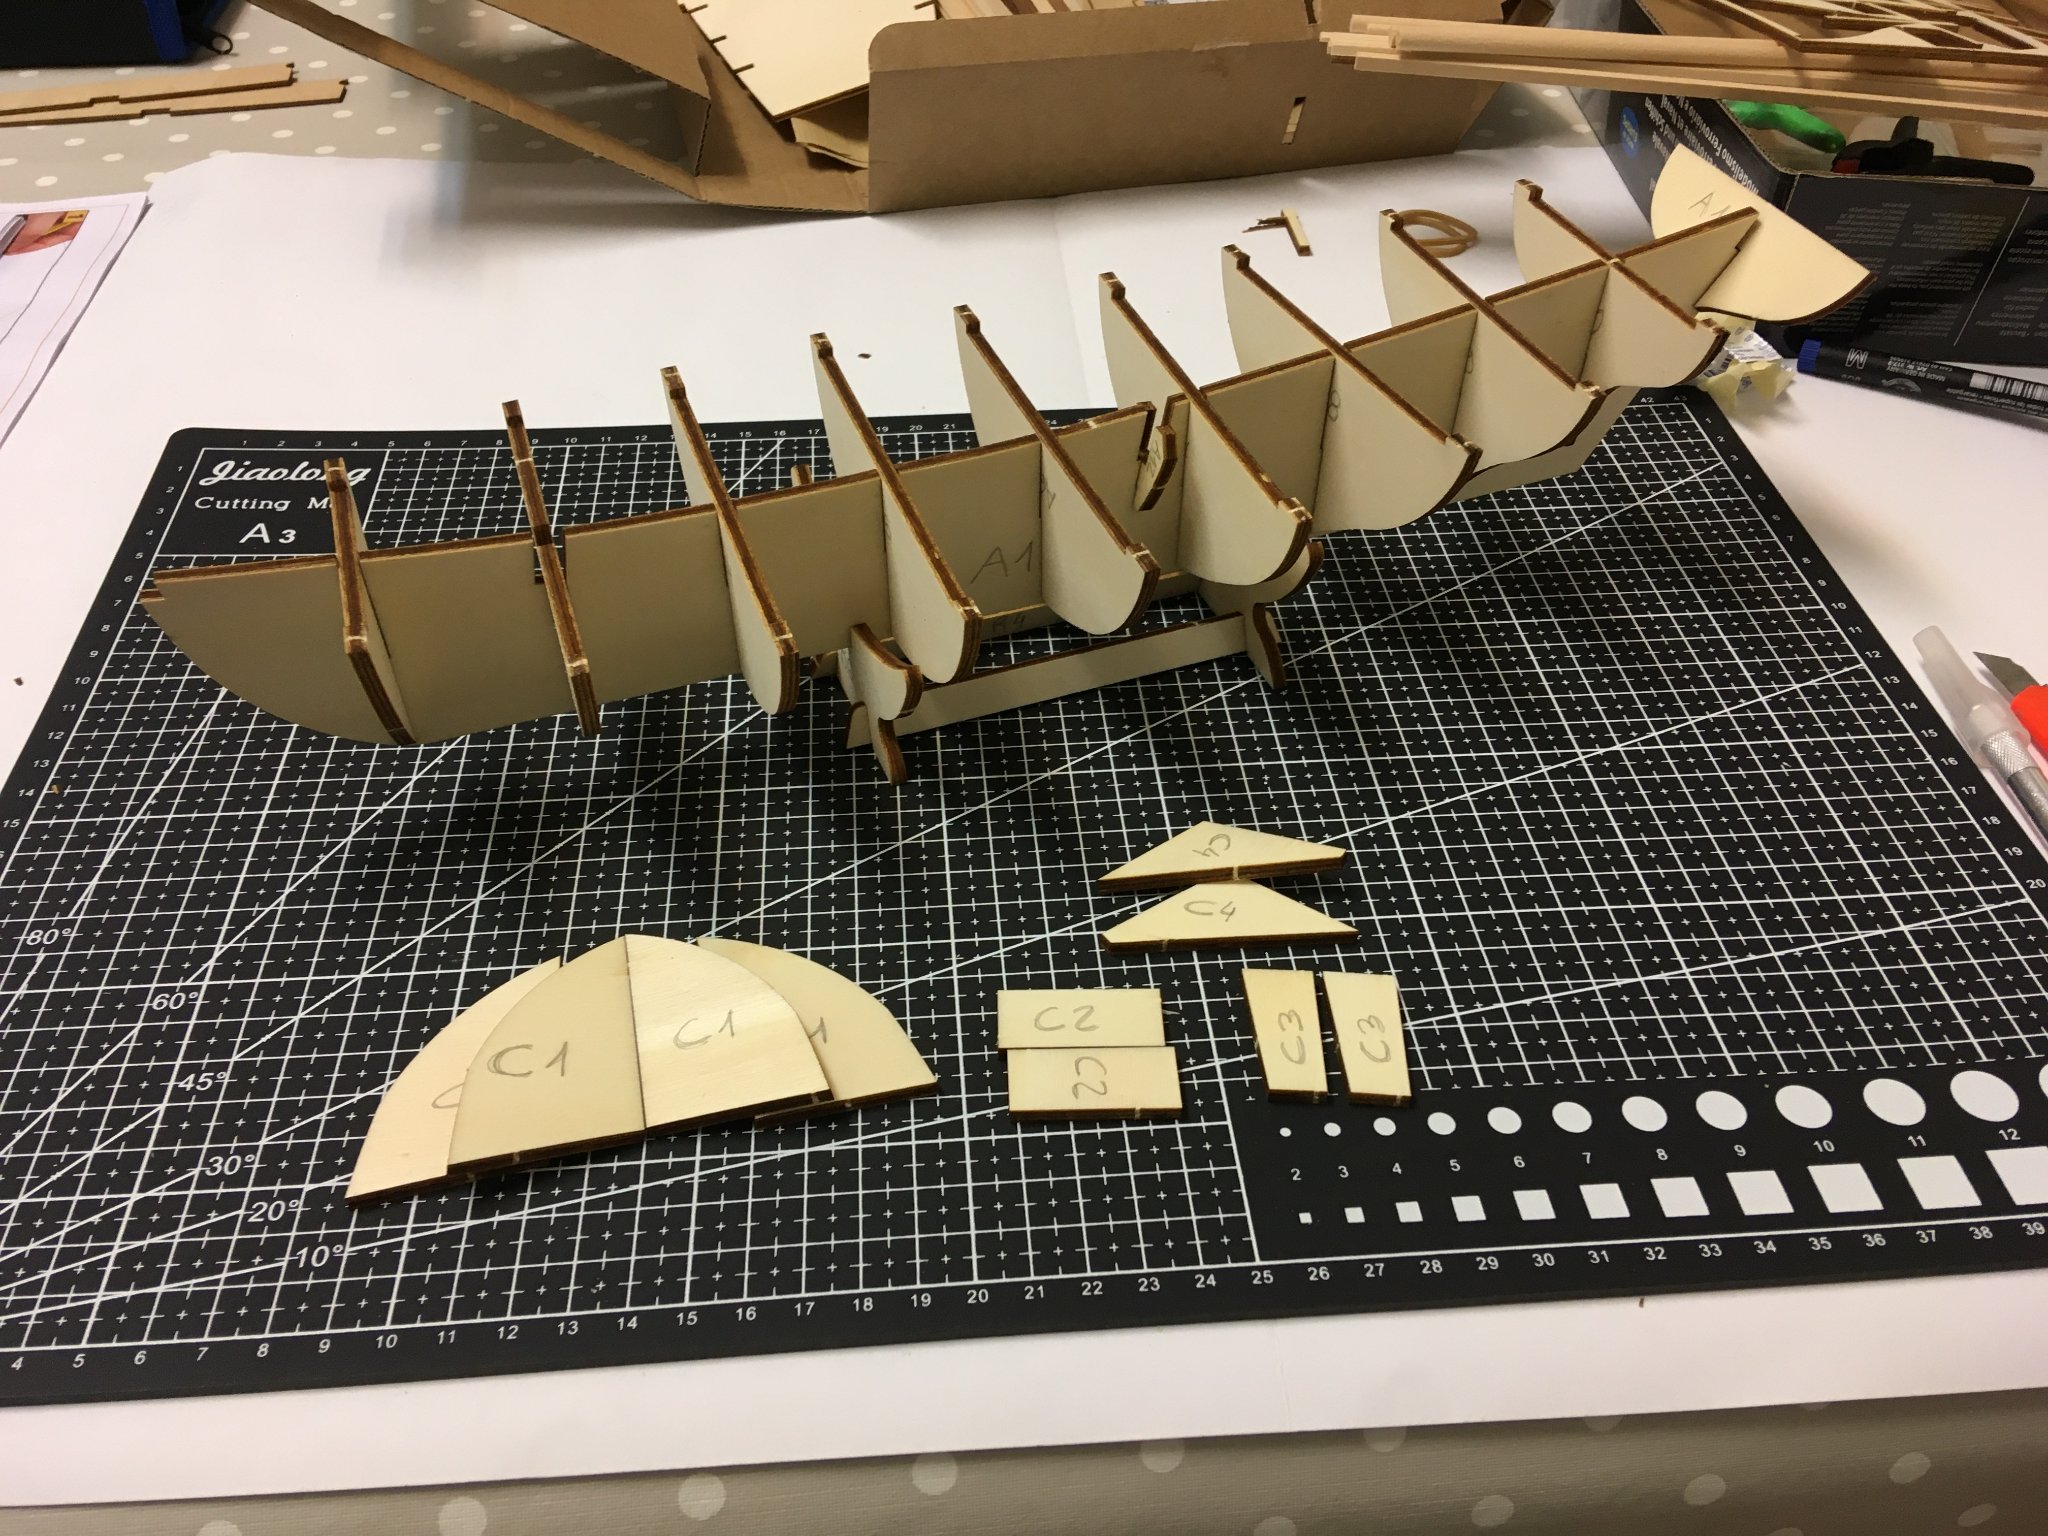
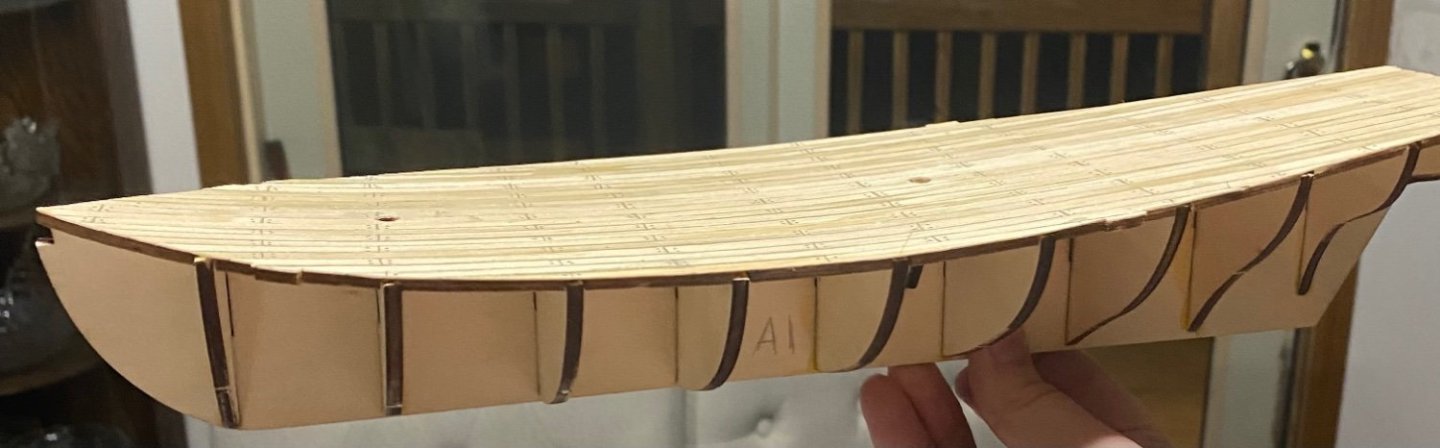
 FINALLY, ready to start my first build! As some of you know, my Polaris kit (and the Beagle kit, too!) were supplied with warped keels that I tried to straighten w/o success by using some MSW suggestions. I ended up ordering replacement keels from Occre; they were delivered yesterday, and, though much better than the originals, are not perfectly straight. The suggestion to cut my own keel was beyond my skill (and tool) set. I realize this is an inexpensive beginner's kit, so the quality is what you pay for, I guess. Meanwhile, with some friends' help, I made Doc Blake's keel clamp just to be building something ship-related, though I now realize it won't be much help after all the ribs are fixed. This is what the new false keel looks like; the wrong-way bend between ribs A7 and A8 doesn't seem like it will affect the structure as long as I take care to glue the ribs properly. I'm using Havelock's technique for clamping the ribs to the keel using small metal corner braces to keep the ribs square.


-
 I've started my first model ship kit. The Polaris seemed a good starter kit, all the build videos OcCre has sold me on this one. I'm building this on my time off, so updating may be slow in posting. The hull is started. Fitting the bulkheads to insure they were flush with the false keel, I put a witness mark on each so when gluing up they went in the same orientation as when fitted. As it turned out this was unnecessary as they were flush either way. Don't know if I got lucky or if this an indication as to the quality of the laser cutting. I will be using Titebond II on all non-visible parts.
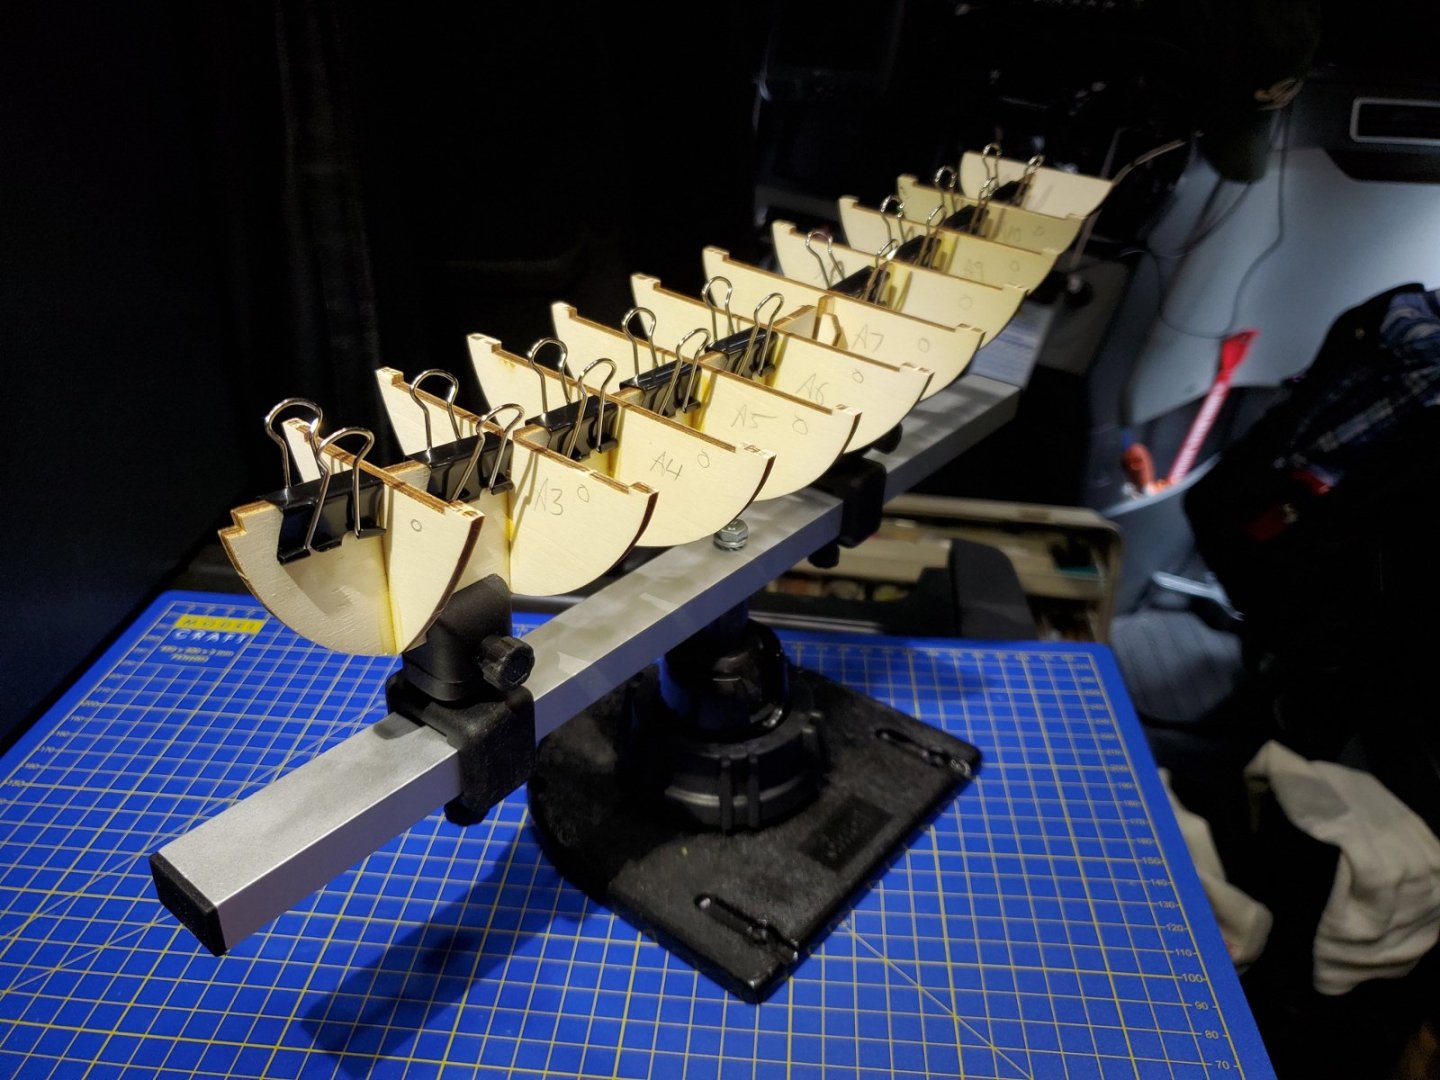
-
 So having joined Model Ship World almost a year ago, I finally have the time to document my first wooden ship model build. I have had experience in building plastic kits as well as modelling scenery. So I decided to give ship building a bash and to see what the outcome would be. As it turns out I have been rather enjoying the hobby, having put in a large amount of research prior to committing to a build. However, due to being in the Royal Navy, my modelling time is limited as to when I can get home and to find time to do some work. So far with being away and lockdown I have only managed to do part of the build, and my intention is to document my build here with the pics that I have taken thus far through the build (which started in April of this year!) After that I shall try and upload every few days to keep you all up to date with my build.
 -
Hi all I am a sound and projector designer and I was wondering if anyone out there has a model of Shackelton's ship The Endurance? We are doing a theatrical show next March and I'm starting on ideas, one of the ideas is using Frank Hurleys pics, see attached pic (1 there are about 7 PNG images here, when projecting they are moving slowing) (2 Stuck in the Ice) The new idea is using shadows, but I need a replica or something close, or boat plans, or close up pics, or a 3D model, anything at this point as my research on the net is coming up short. Thanks for reading J The ship was launched on 17 December 1912 and was initially christened Polaris A brief synopsis on the story... After the race to the South Pole ended in December 1911 with Roald Amundsen's conquest, Shackleton turned his attention to the crossing of Antarctica from sea to sea, via the pole. To this end he made preparations for what became the Imperial Trans-Antarctic Expedition, 1914–17. Disaster struck this expedition when its ship, Endurance, became trapped in pack ice and was slowly crushed before the shore parties could be landed.


-
- 1
-
-
- Endurance
- Shackelton
- (and 3 more)
.JPG.8c9d05c627edf60ad2b00c8ac5b9c6a3.JPG)
.JPG.db22e6df8fcacd851a340351145b1a3b.JPG)