Ray
-
Posts
404 -
Joined
-
Last visited
Content Type
Profiles
Forums
Gallery
Events
Everything posted by Ray
-
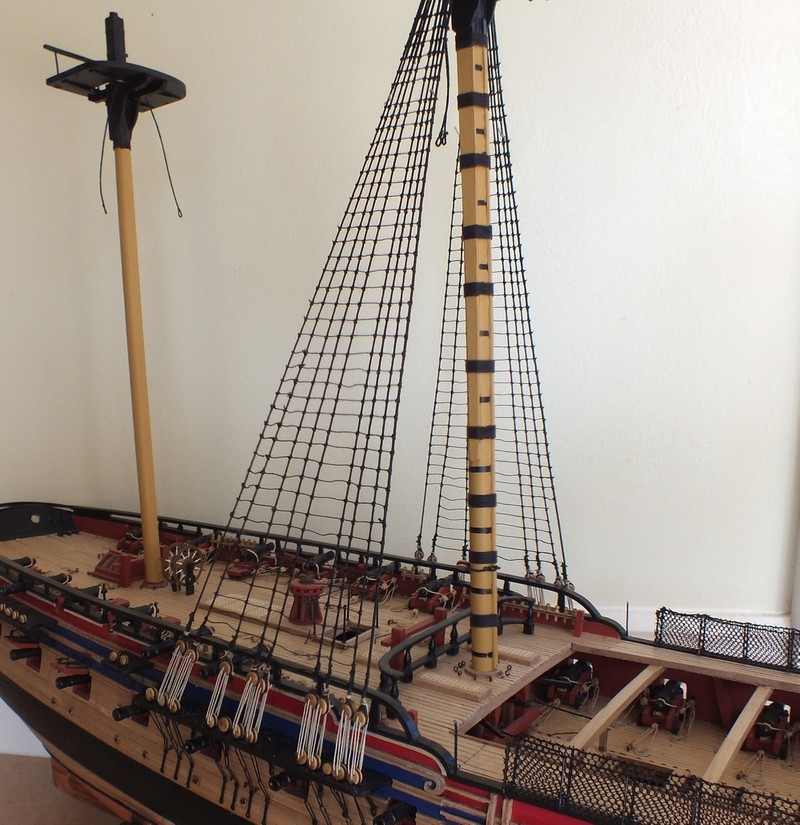
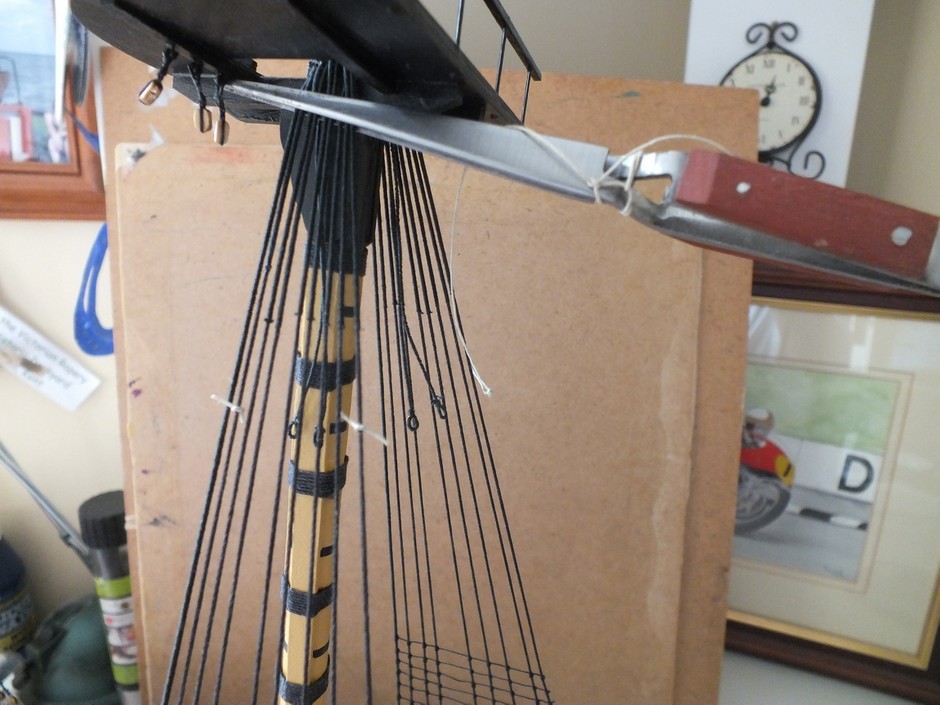
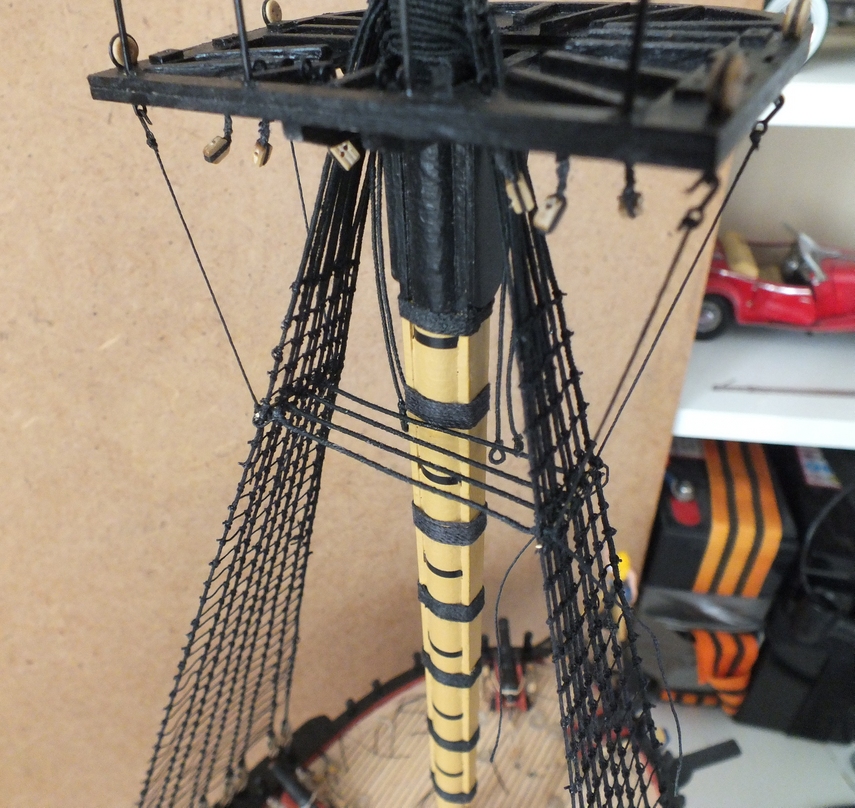
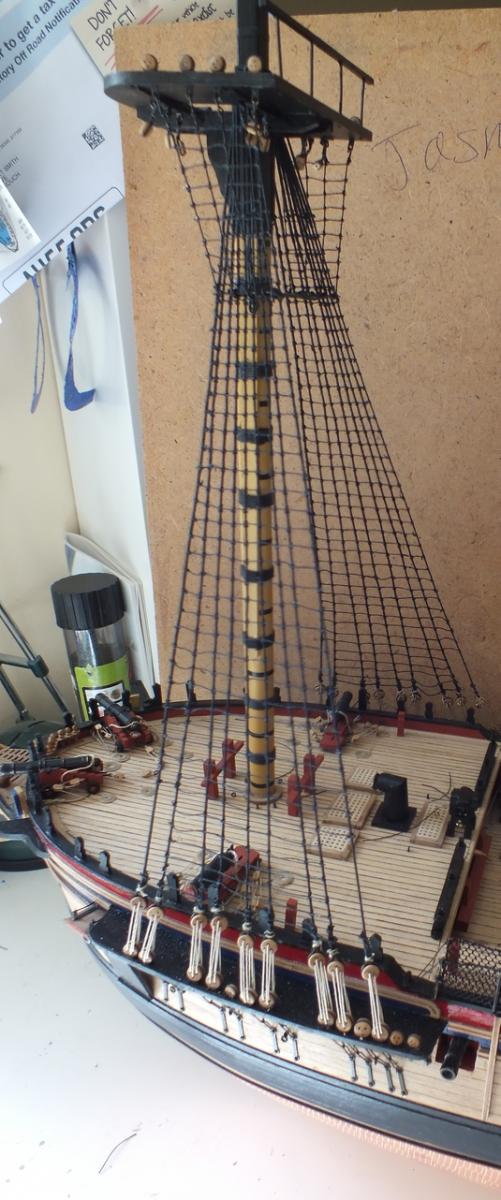
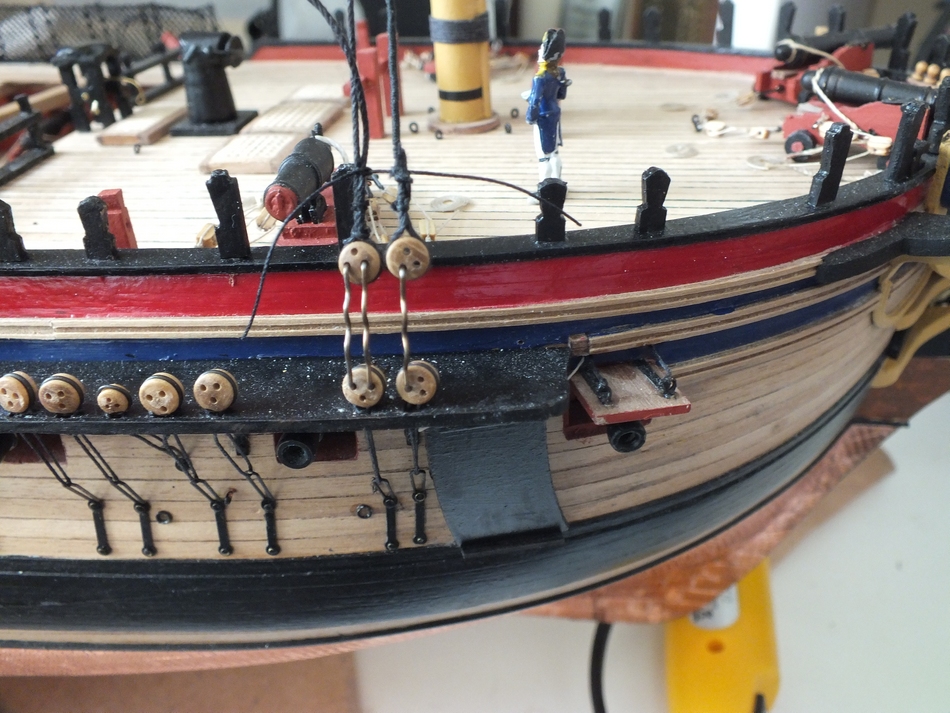
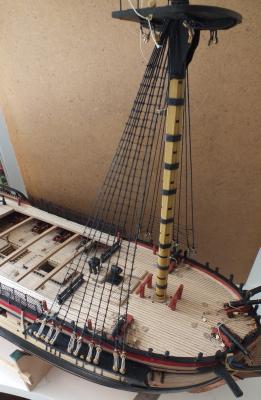
 Progress has been rather slow as of late due to holidays, and other pastimes, mainly selling two motorcycles, and buying one, plus ratline tying is a chore, the main lower mast shrouds,ratlines,catherpins, futtock staves and shrouds are now done. stave location marked ratlines done Lower maim mast done fore and main
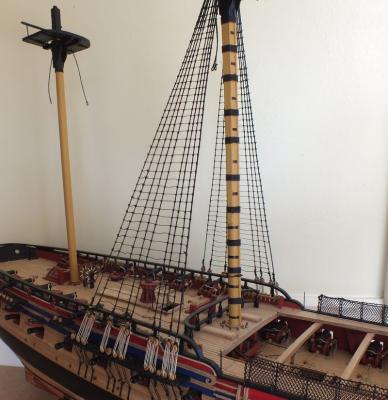


- 536 replies
-
- 18
-

-
- diana
- caldercraft
- (and 1 more)
-
Hi Jason I as noted in my log,I moved the gun port to clear the frame as they lined up from the side view, but then found it line up ok ish from the over head plan, better to move the port than lose the support of the bulkhead, one of the trials of this kit. I used maple for all the decking and it looks fine, I cannot understand why kit makes supply Tanganyika for decking it just is the wrong colour. Regards Ray
-
The catharpins have now been installed with the futtock staves,also the 3mm dead eyes to the top in the non kit plates the futtock shrouds were tied on and hooked into the plates and the rat lines tied on the the futtock shrouds,now just the main and mizzen lower masts to do. catharpins futtock shroud hooks futtock rigging finished lower mast


- 536 replies
-
- 10
-
-
- diana
- caldercraft
- (and 1 more)
-
Hi BE The kit instructions for catharpins just say use .5mm thread to tie each futtock stave to the next one and they act to keep the shrouds taught !! I have installed mine as Mobbsie mentioned above,with a fair amount of pva brushed on to make the pins quite stiff. Hope to add some photos later of them installed.
-
Thanks for all the ticks guys Mort all the hull planking was carried out using the supplied timber which was fine.
- 536 replies
-
- 1
-
-
- diana
- caldercraft
- (and 1 more)
-
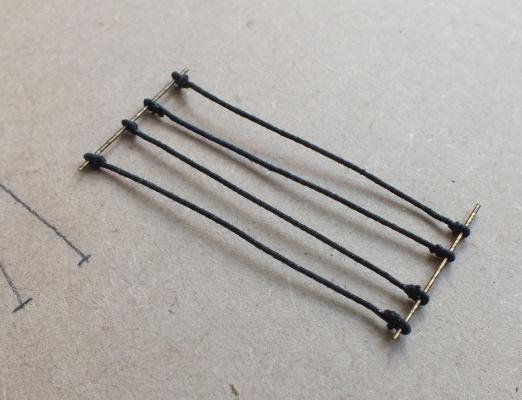
Catherpins Just a small update With the rat lines tied I turned my attention to the futtock staves and the catherpins, the staves were made from 1mm brass wire and the catharpins from lengths of serve rope with eyes made as previously described and stiffened with pva they will be tied to the shrouds and the wire cut to length painted matt black. Test fit for length All four made up

- 536 replies
-
- 14
-
-
- diana
- caldercraft
- (and 1 more)
-
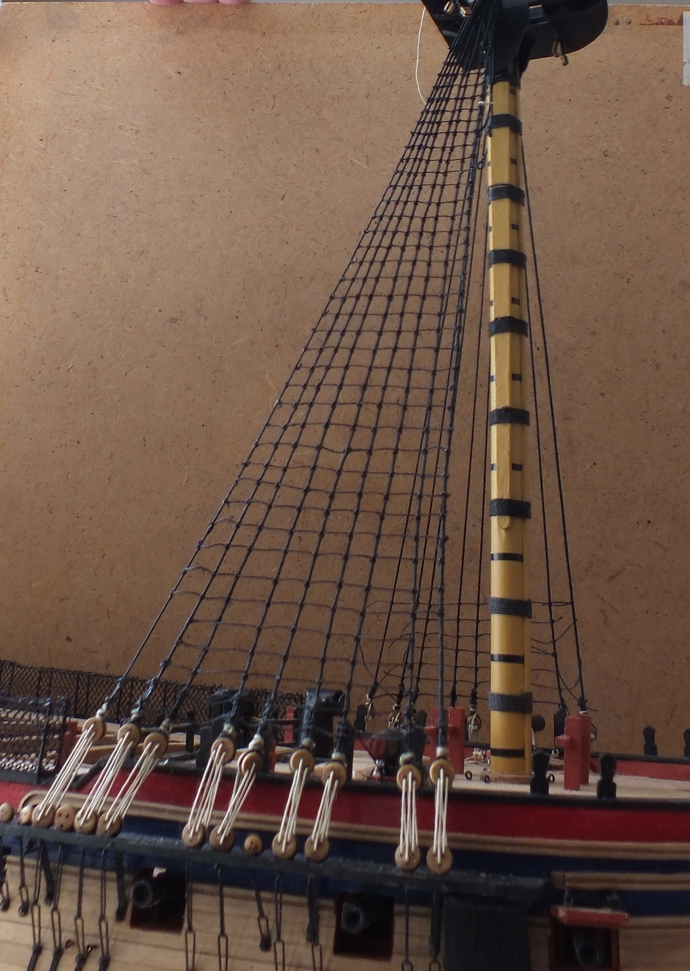
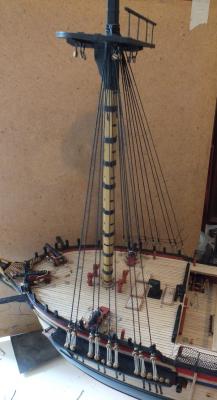
Now all the shrouds have been added to the fore mast I decided to tie the rat lines on this mast, and not when all three lower masts have had the shrouds rigged,as it would break up the dreaded rat line tying into sections.

- 536 replies
-
- 14
-
-
- diana
- caldercraft
- (and 1 more)
-
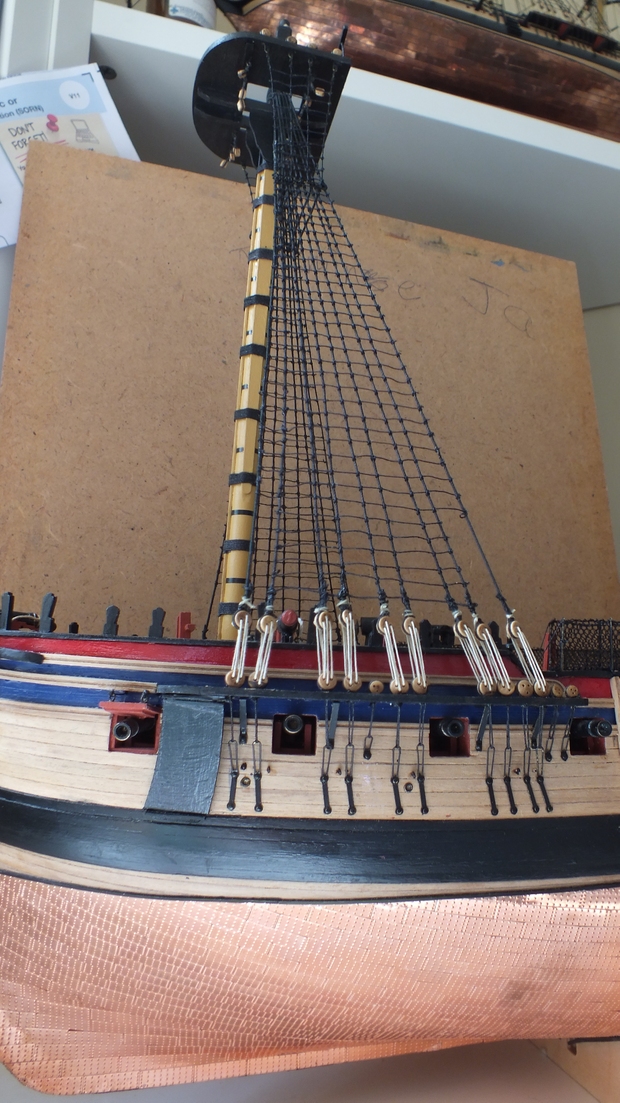
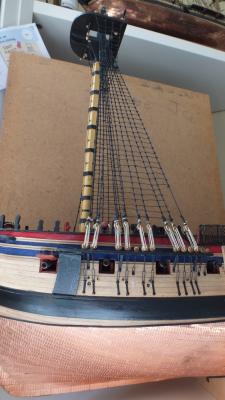
Fore Mast Shrouds The shrouds on the fore masts were made next, and the fore most shroud on either side is served right the way down to the dead eye I believe this was to strengthen it as it was liable to be chaffed by the sail,all the others were severed as shown in the rigging book about two thirds of the way down to the futtock stave,they ended up not all exactly the same length down,to achieve that I would still be doing them at Xmas. The dead eyes were added to the ends of the shrouds and rigged at this point.


- 536 replies
-
- 19
-
-
- diana
- caldercraft
- (and 1 more)
-
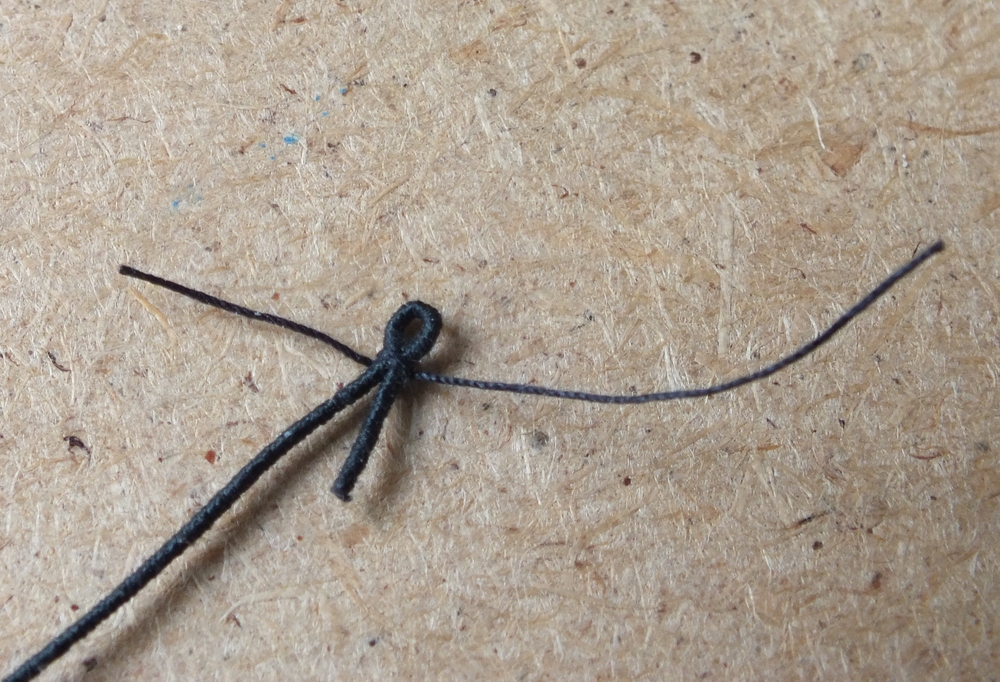
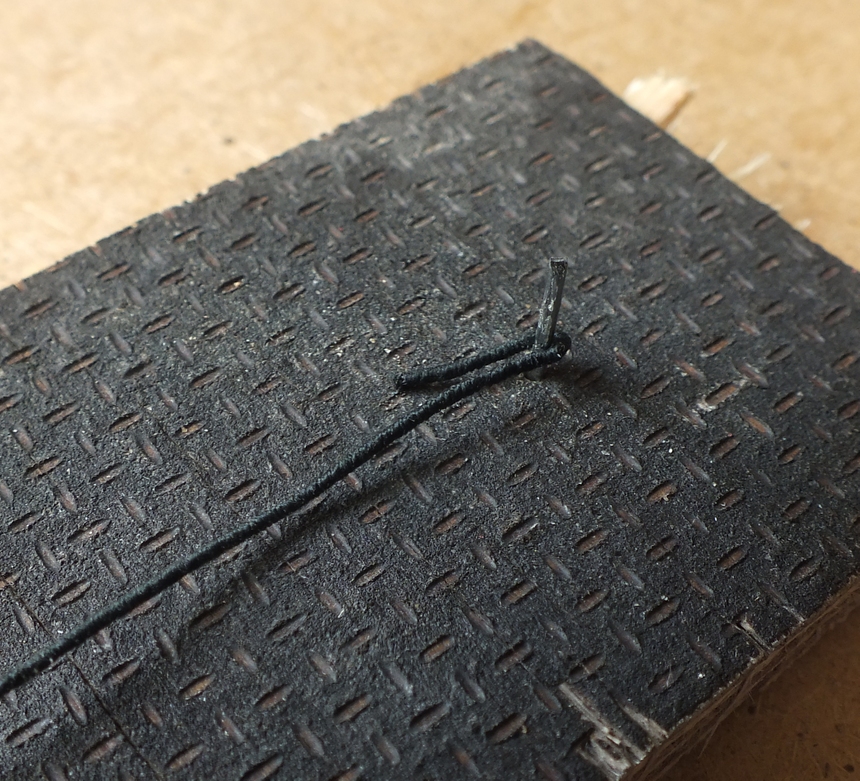
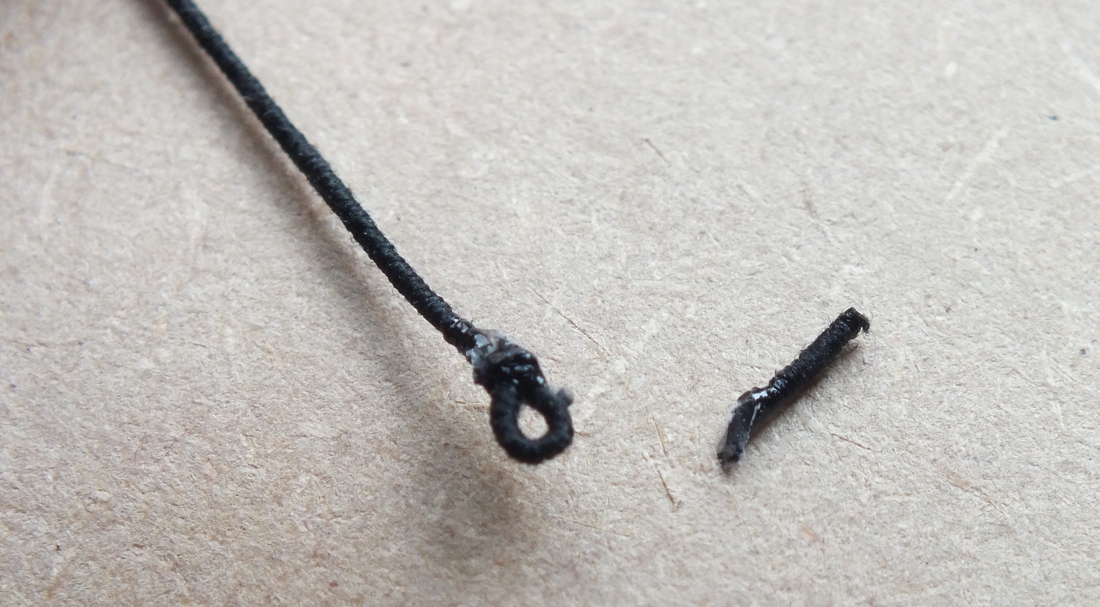
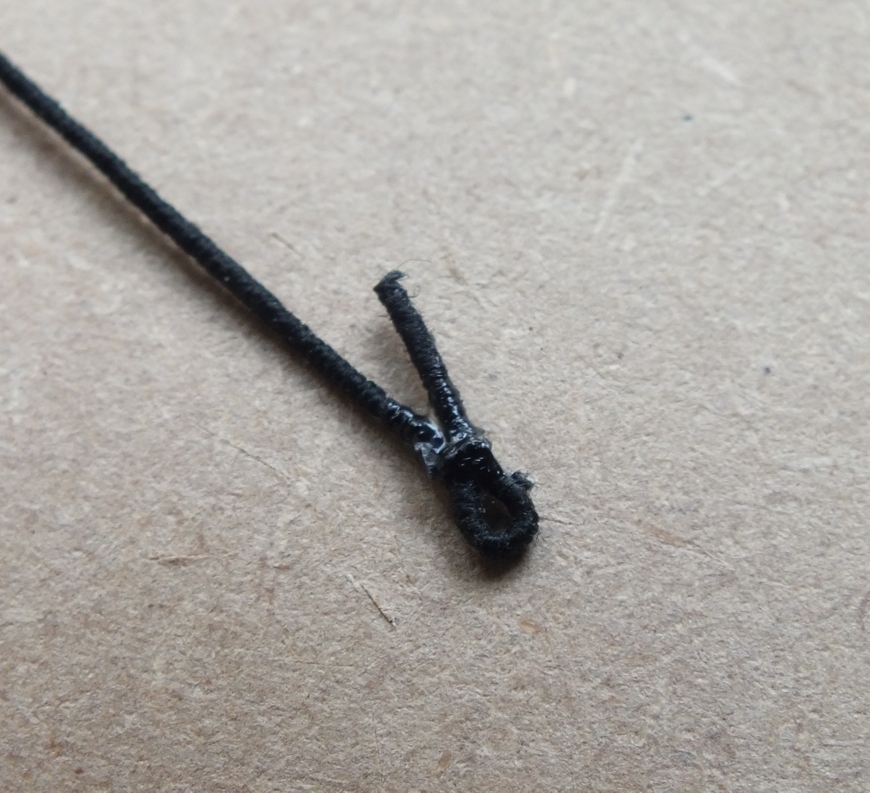
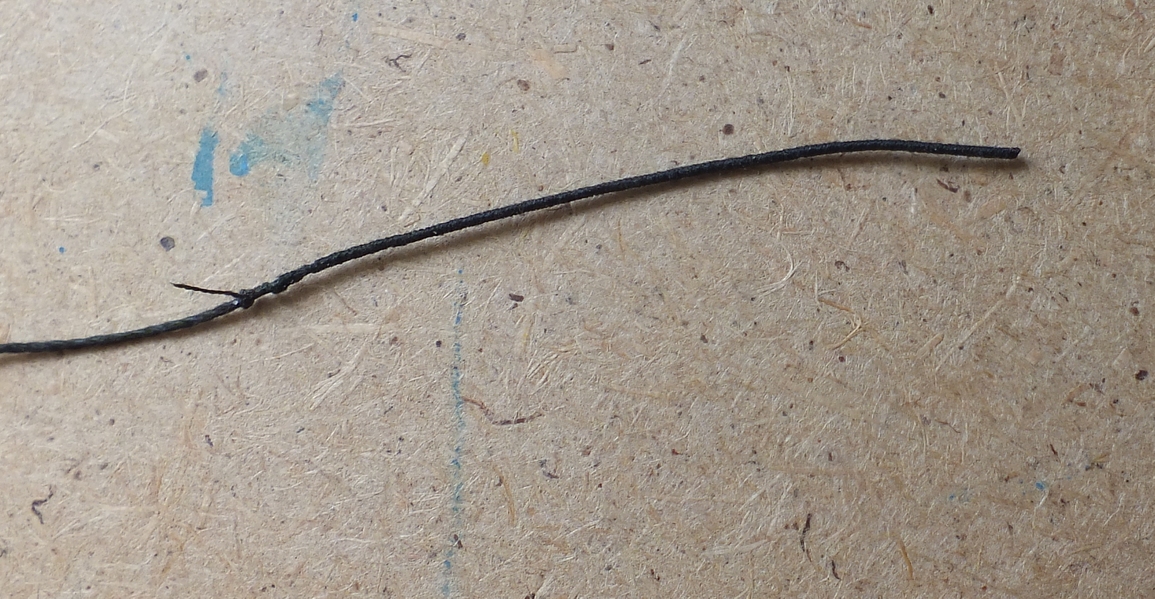
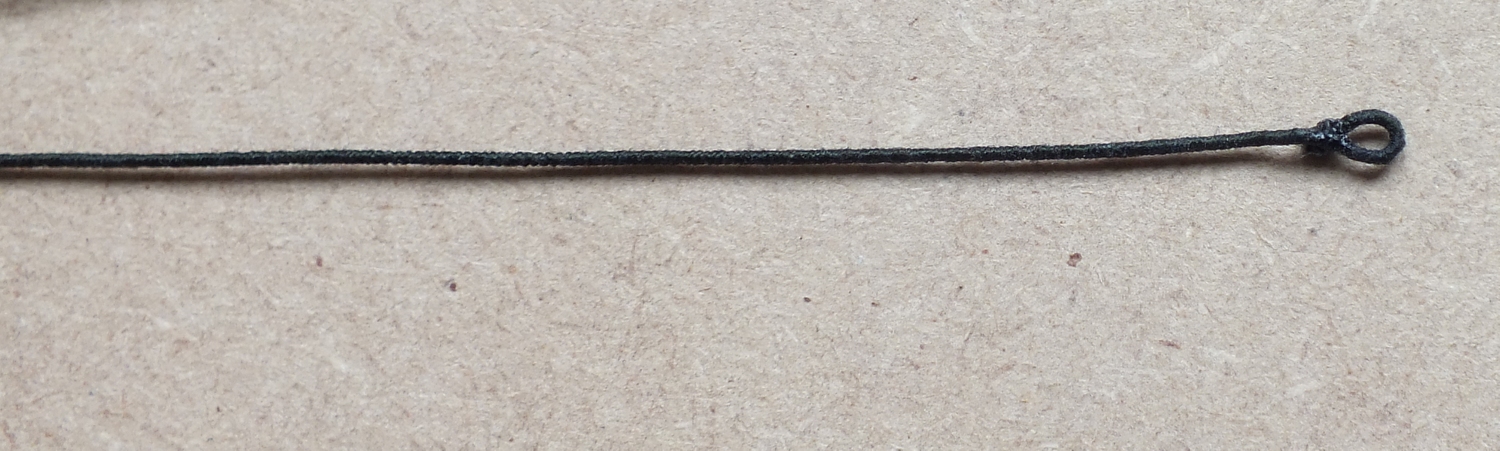
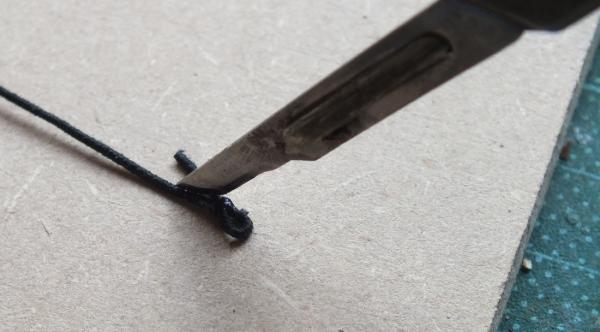
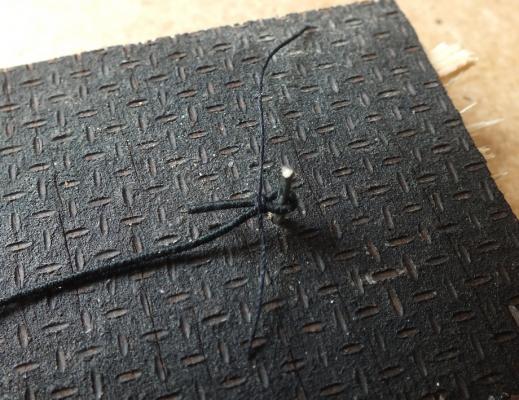
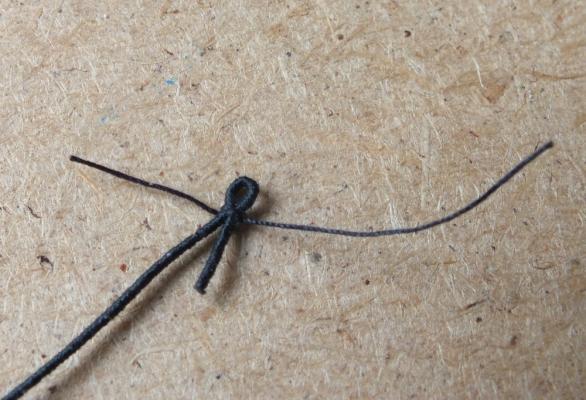
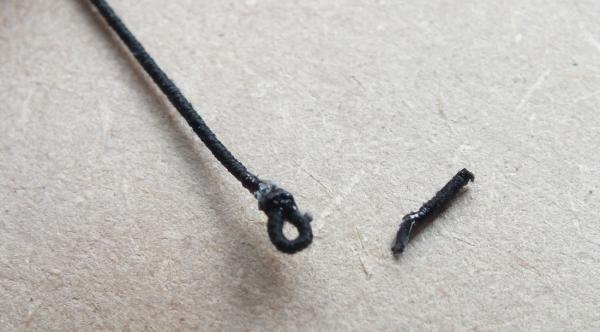
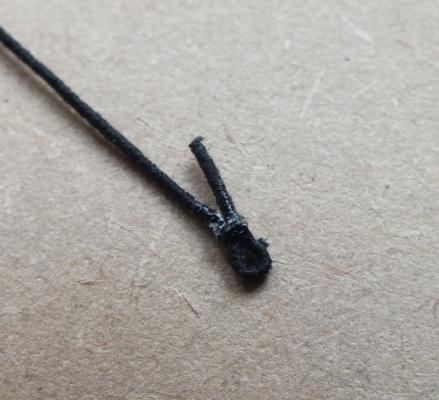
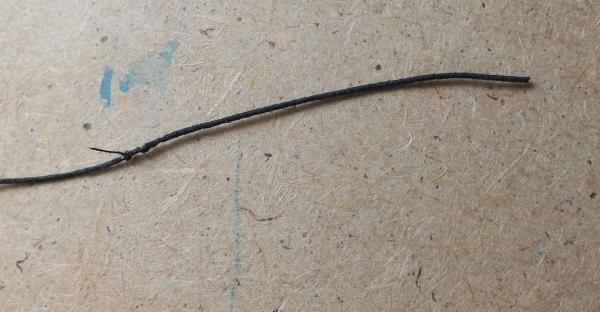
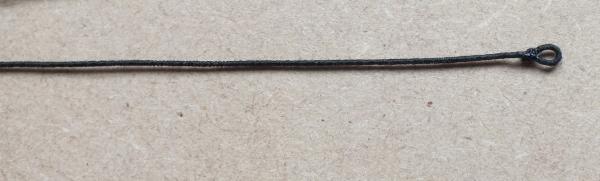
Thanks for all the ticks and comments guys Harvey detailed below is how I am making my served eyes, they may not be purist, as they are not spliced, but they work for me and look in my opinion small and neat. A length off tightly served rope. Eye formed around a suitable sized piece of round material Eye tied as below with back to back half granny knots, I use three to hold the eyes size and shape. A drop off gel super glue over the whole knot and allow to dry, I do not use as much gel as this normally but this amount shows up better the angled cut in the next step. Trim off knots and then cut return length at an angle with a scalpel Lastly I roll the eye joint with my fingerers . Job done.

- 536 replies
-
- 8
-
-
- diana
- caldercraft
- (and 1 more)
-
Thanks for the ticks and comments guys. working on the shrouds and will update soon, progress is a bit slow due to visits too, and from, the grand children,and work on my motorcycles.
-
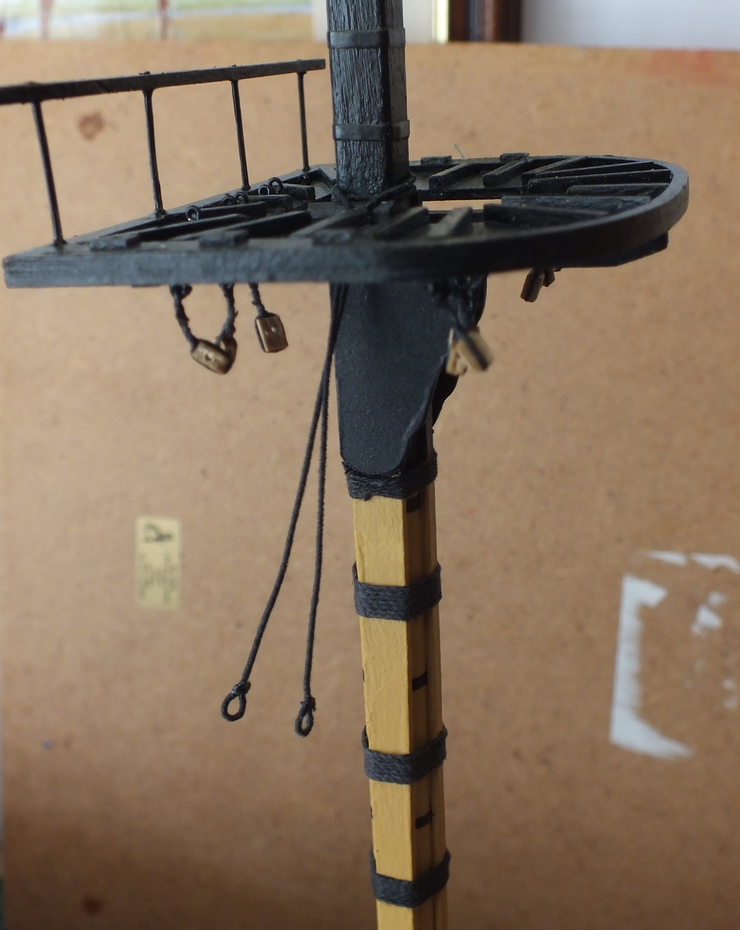
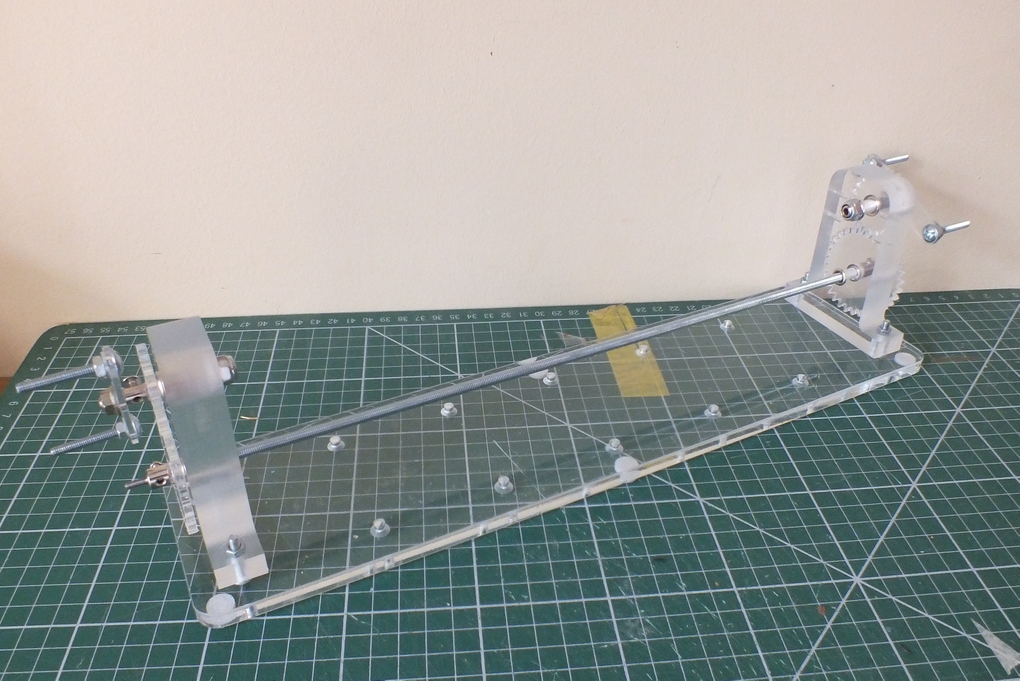
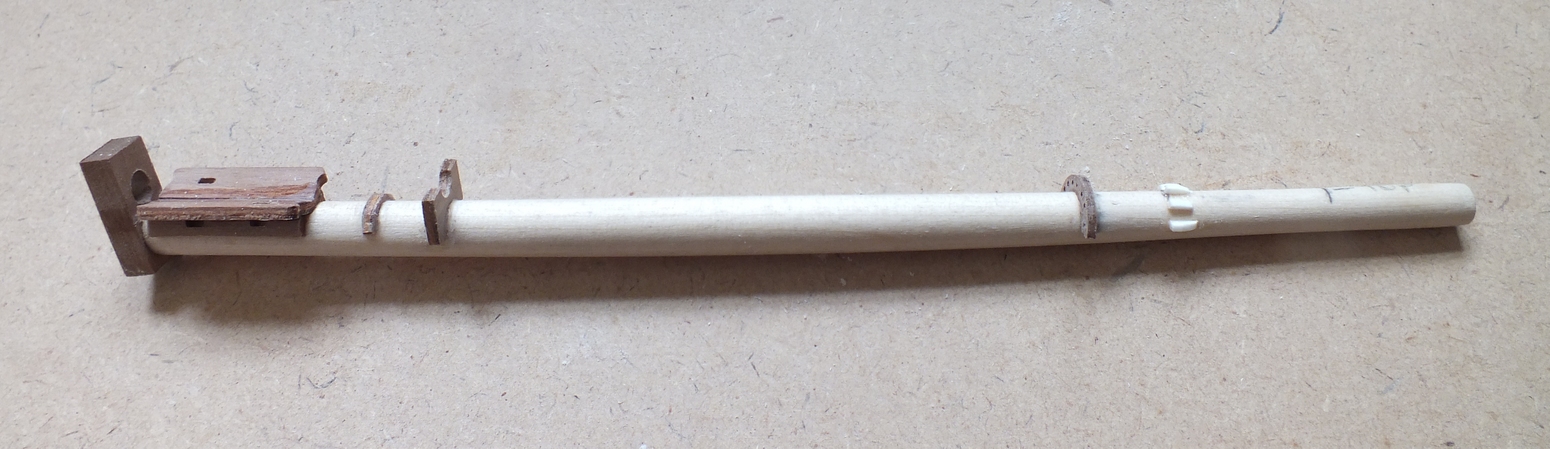
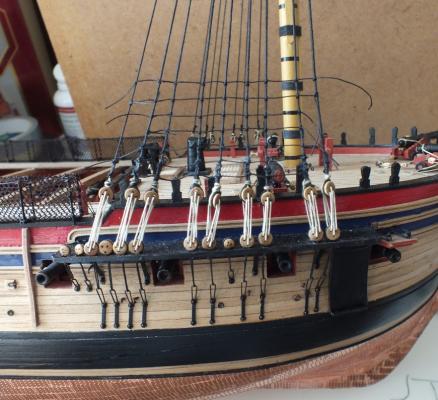
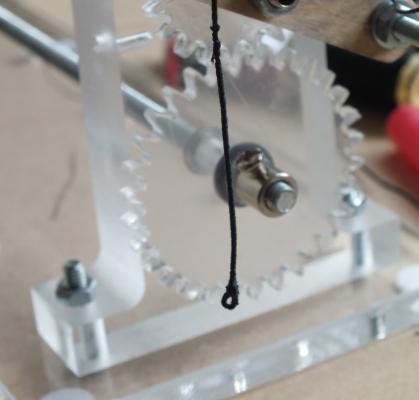
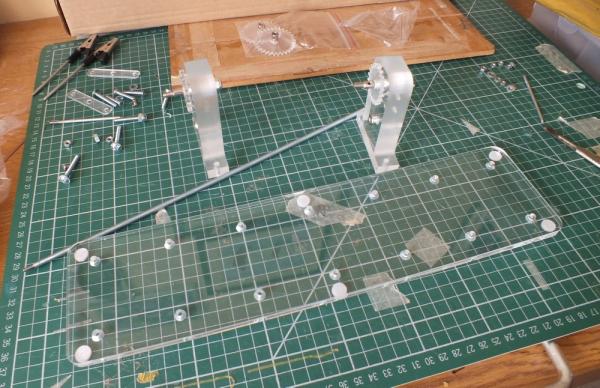
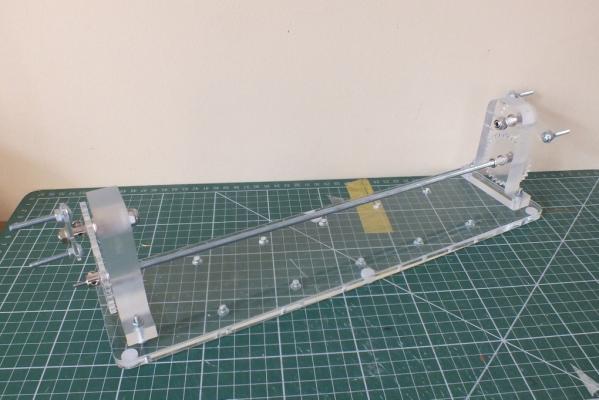
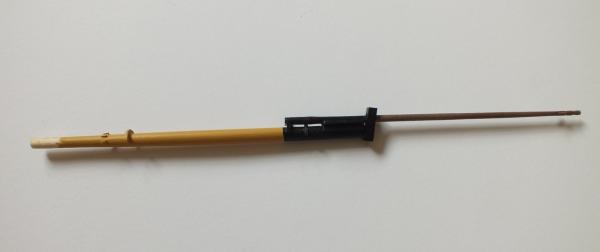
Rigging I must admit rigging is not my favourite part of ship modelling, rigging Diana will not be as daunting as rigging Pegasus was, as the rigging is very similar, and I will be able to use Pegasus as a guide, and something to jog the old memory bank. The main difference will be that I will be rigging the lower masts before adding the top masts,and I will be serving ropes as required. Serving machine , I assembled the serving machine and then did some practising to get the hang of it, so the rope is served and not wormed,I found the machine easy to get used to using, but it did tightened up a couple of times so I added flat washers between the posts and gears and a small amount of grease on the shafts it now turns very smoothly and has not tighten up. The Burton Pendants were made first from served rope and they have been added to the lower masts. Serving Machine Burton pendants fitted


- 536 replies
-
- 14
-
-
- diana
- caldercraft
- (and 1 more)
-
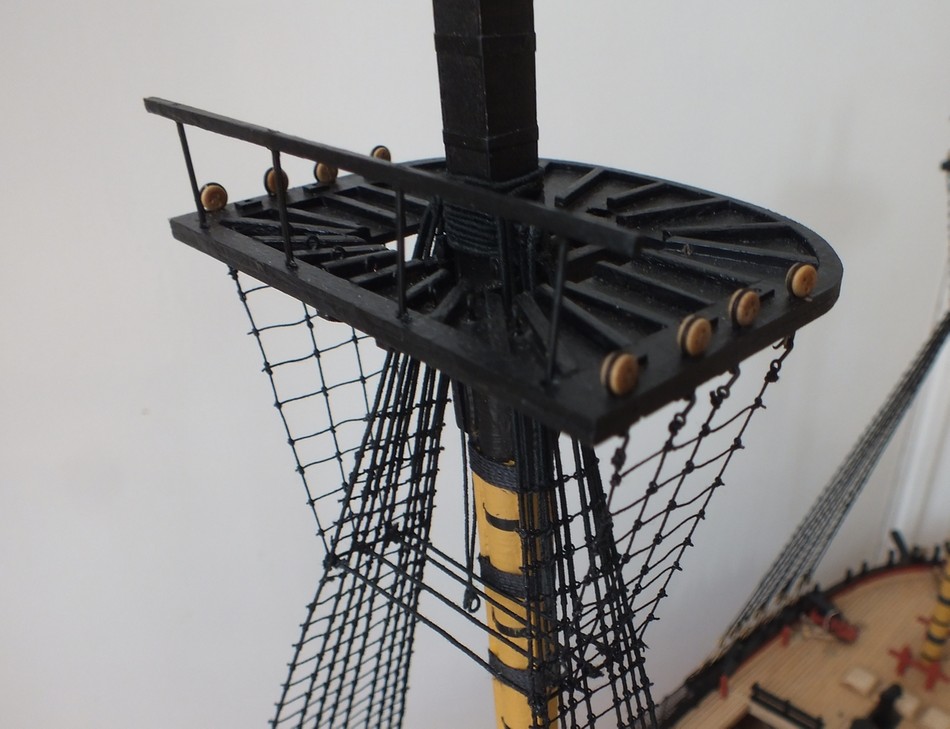
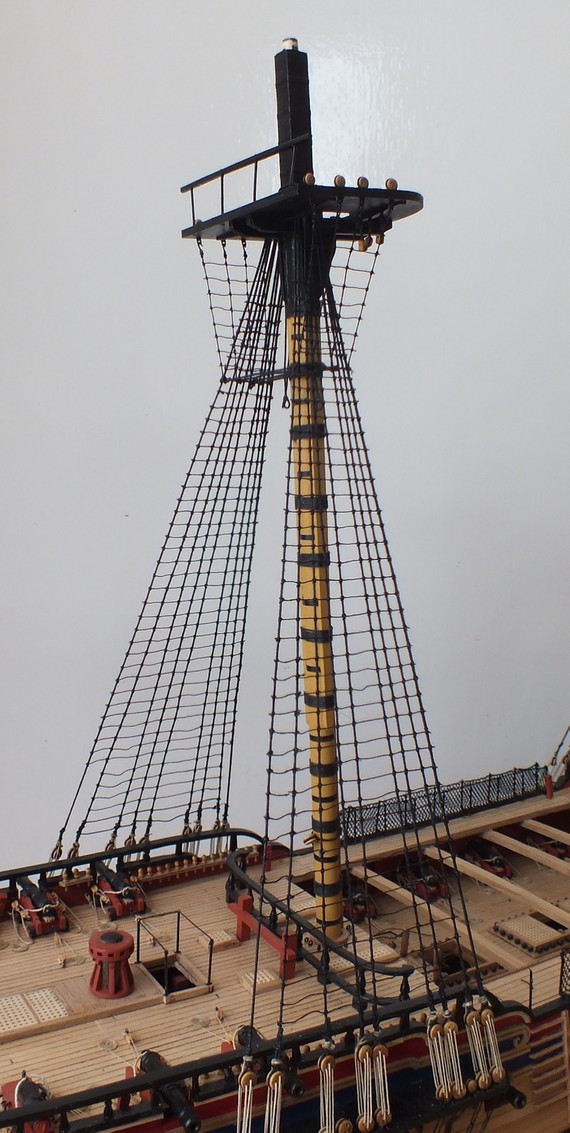
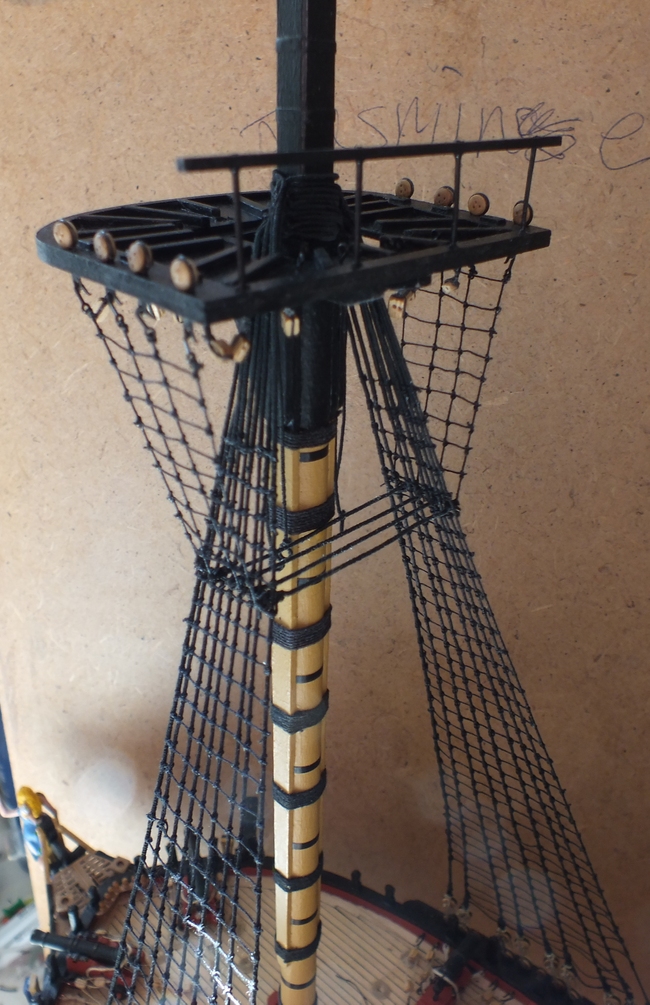
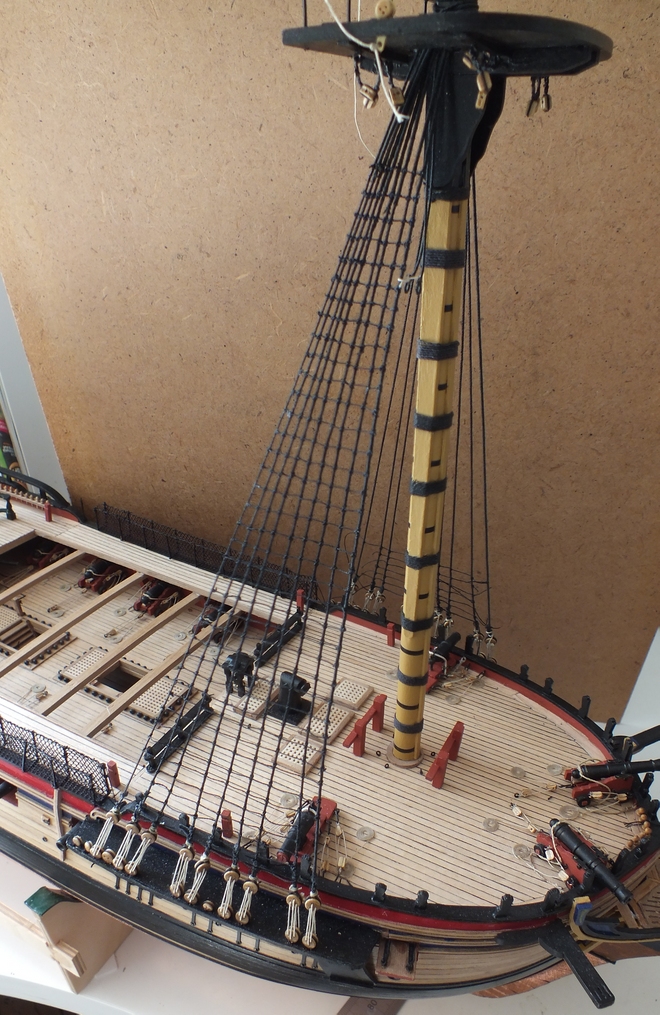
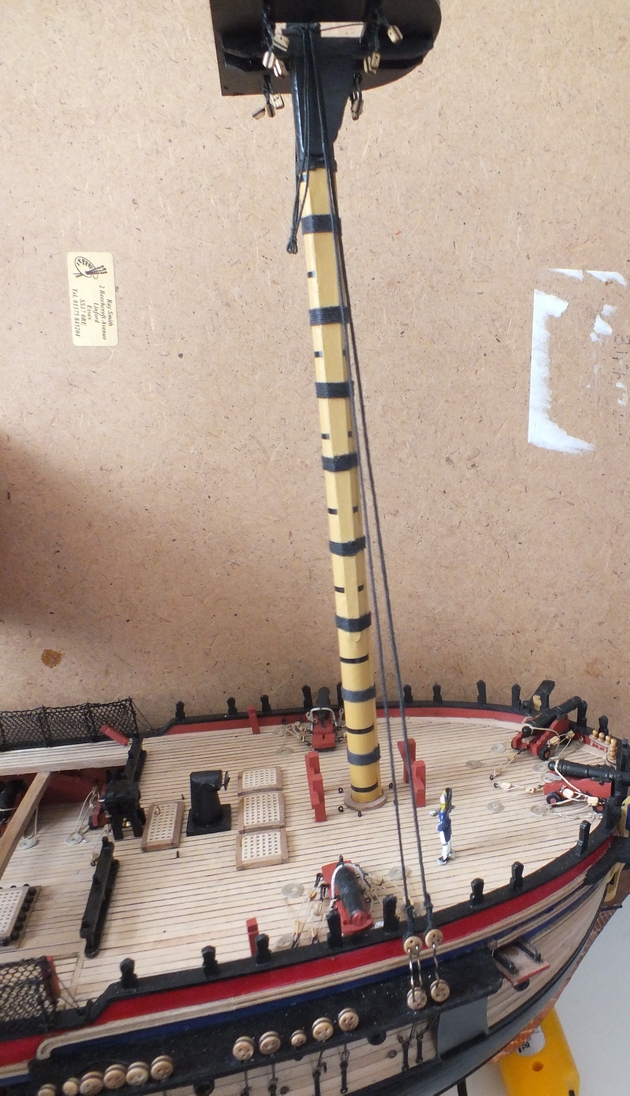
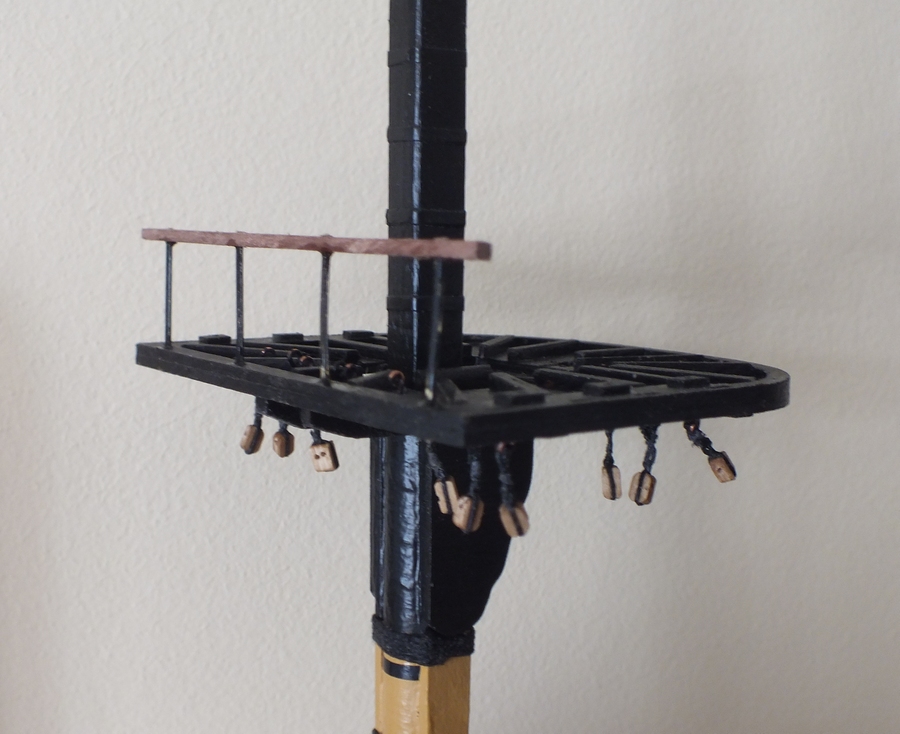
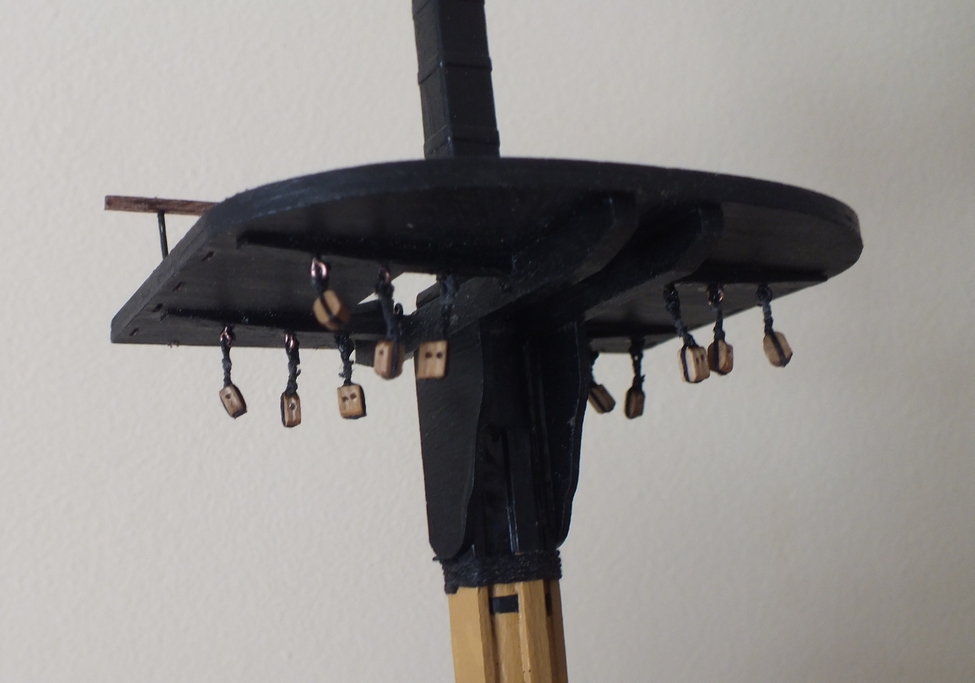
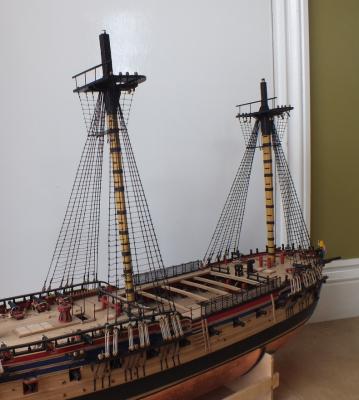
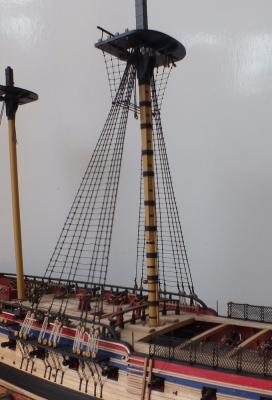
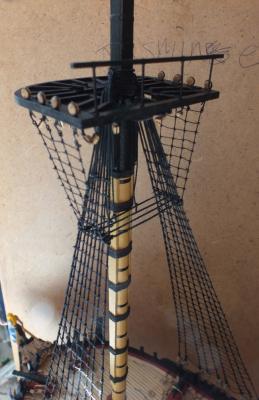
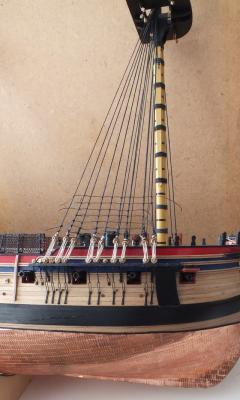
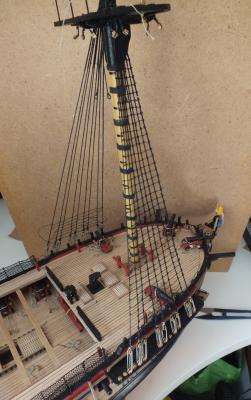
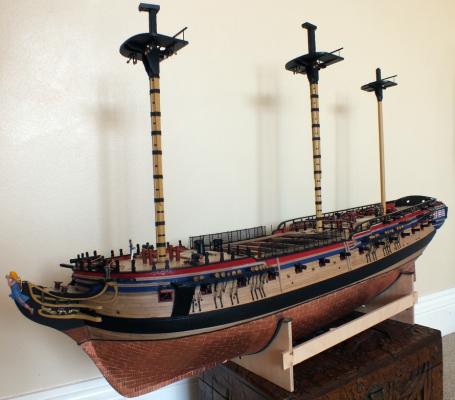
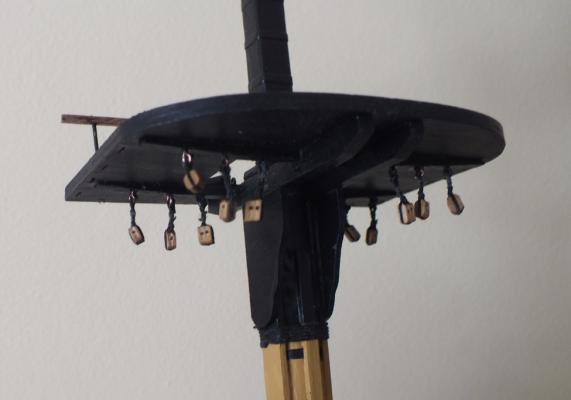
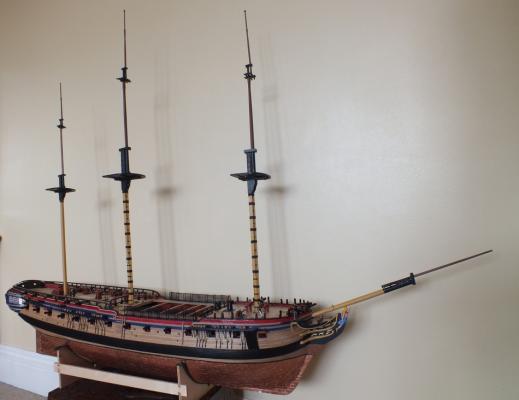
The tops have been fitted to the lower masts,and the lower masts have been stepped into the hull. Next I will add the shrouds to the lower masts, and then possibly tie the ratlines to each mast, as I go along, so as to break up the most tedious part of any build. Lower Masts


- 536 replies
-
- 16
-
-
- diana
- caldercraft
- (and 1 more)
-
Thanks for the comments guys Jason the stanchions were some spares, plus some from brass spruce, I think they look better than wood ones would do and they are more robust. Stepping the lower masts now.
-
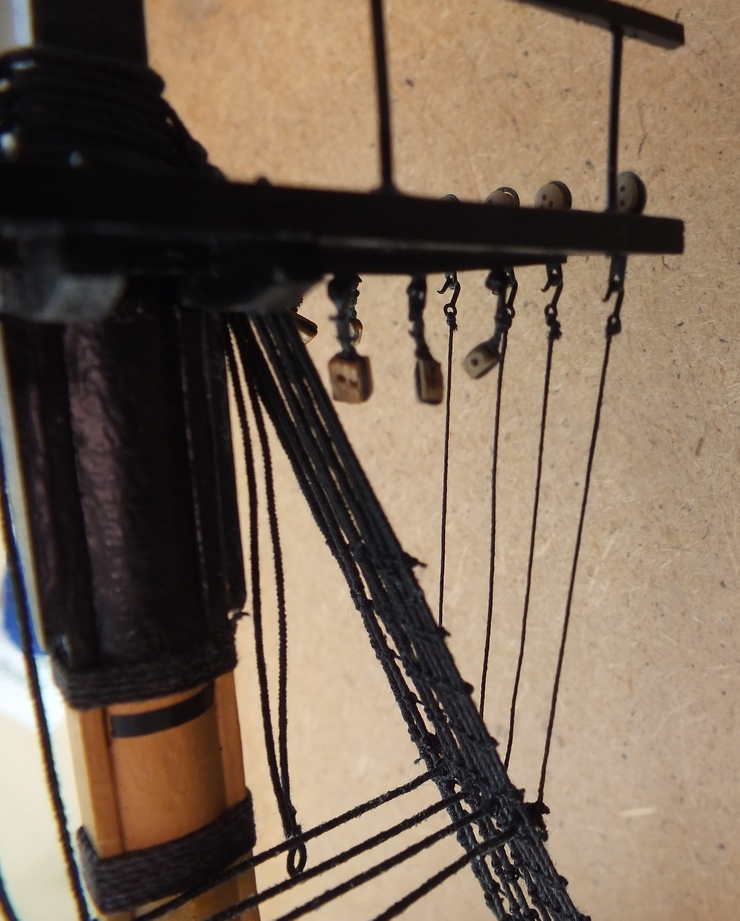
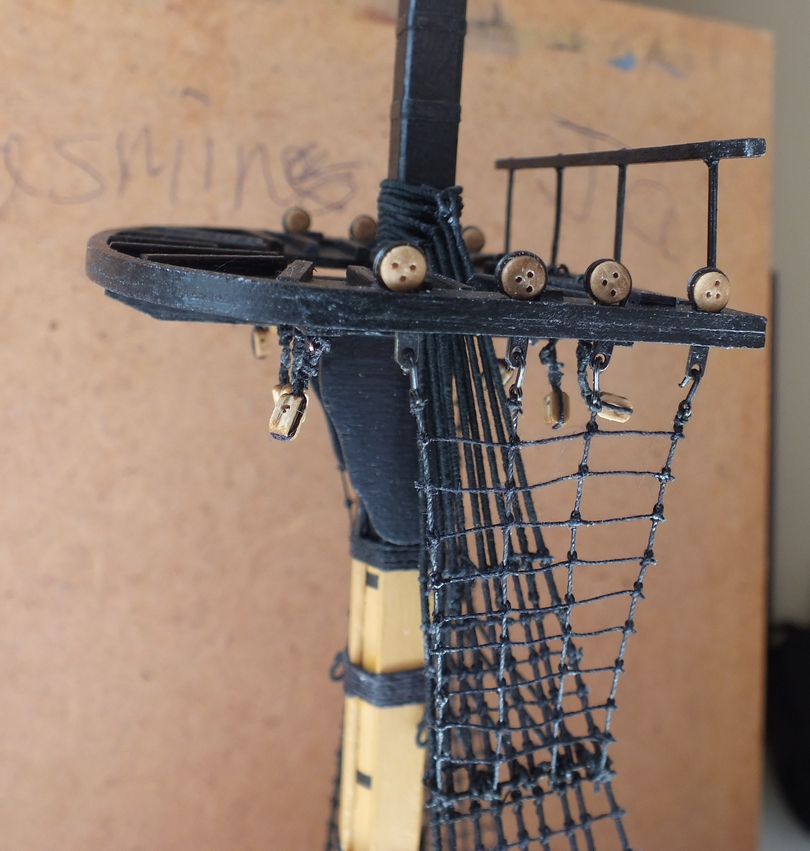
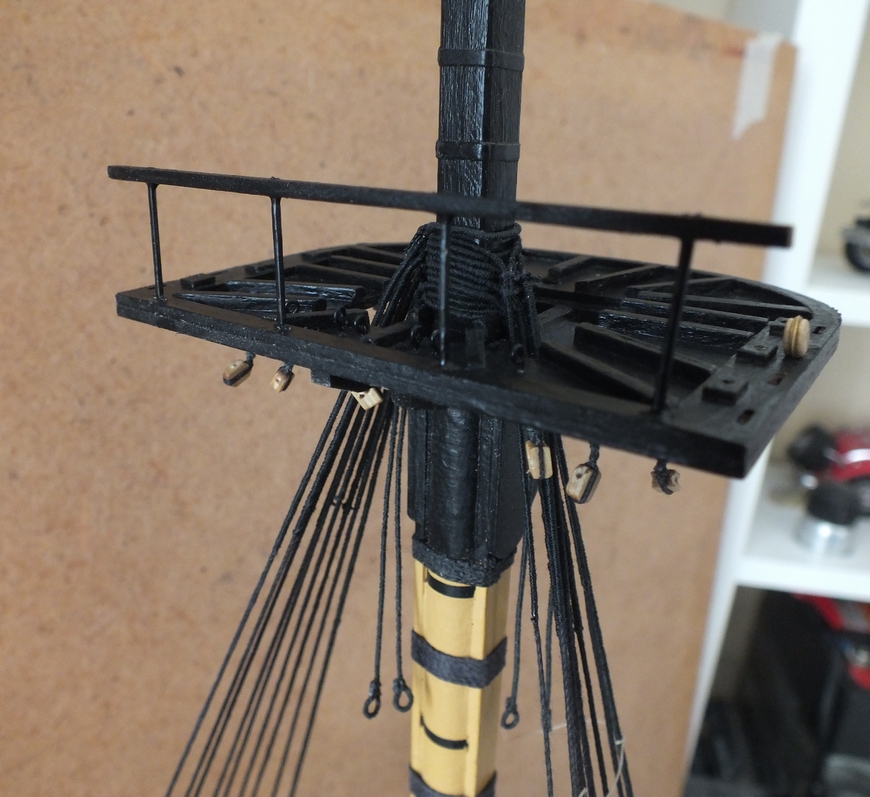
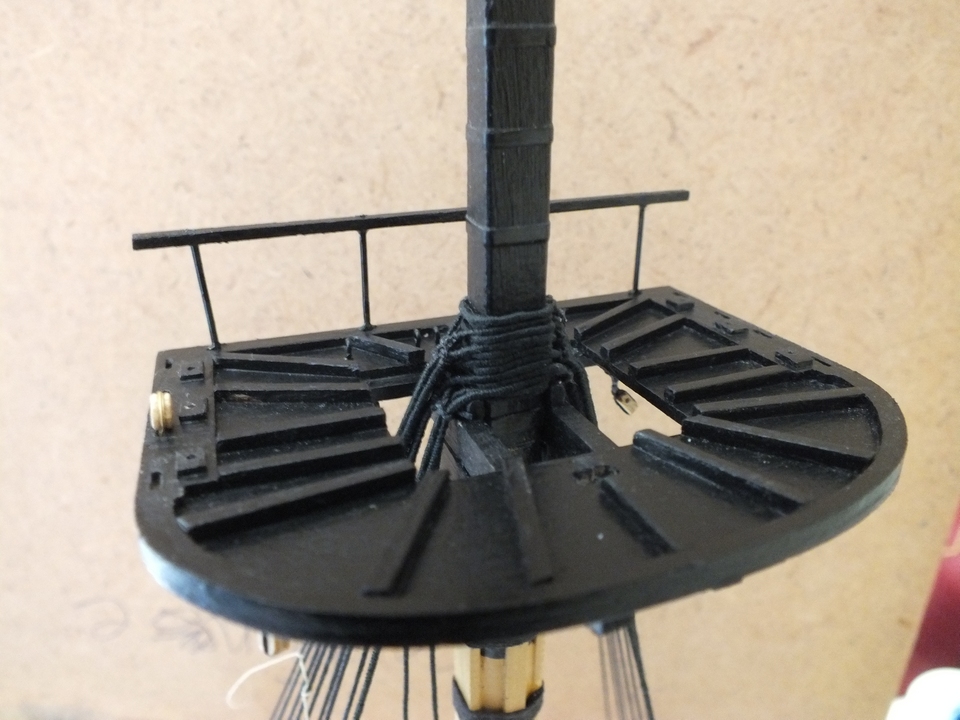
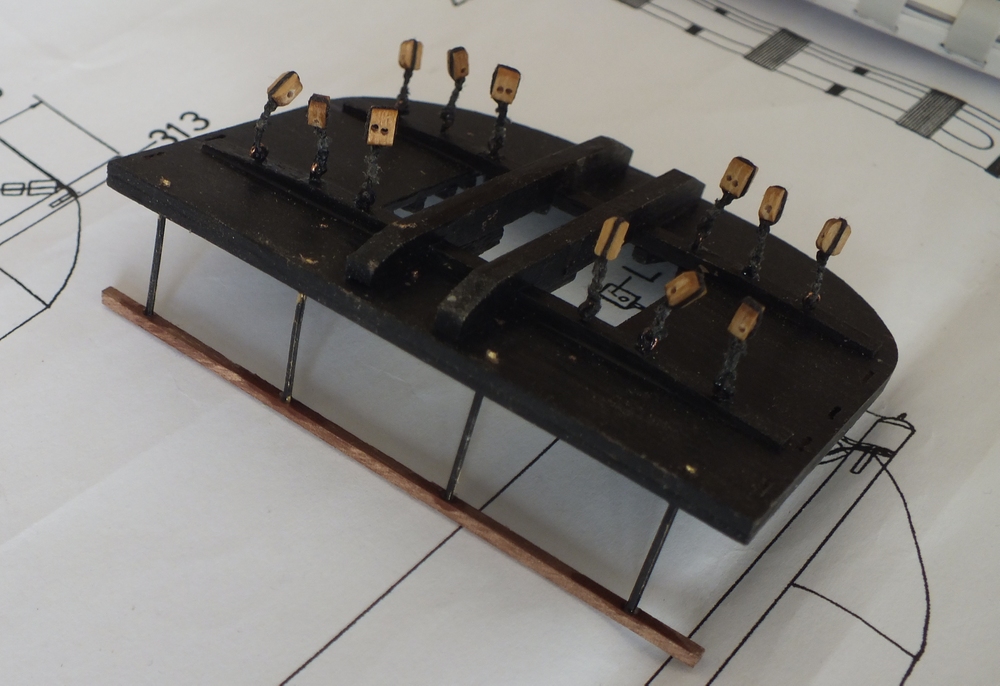
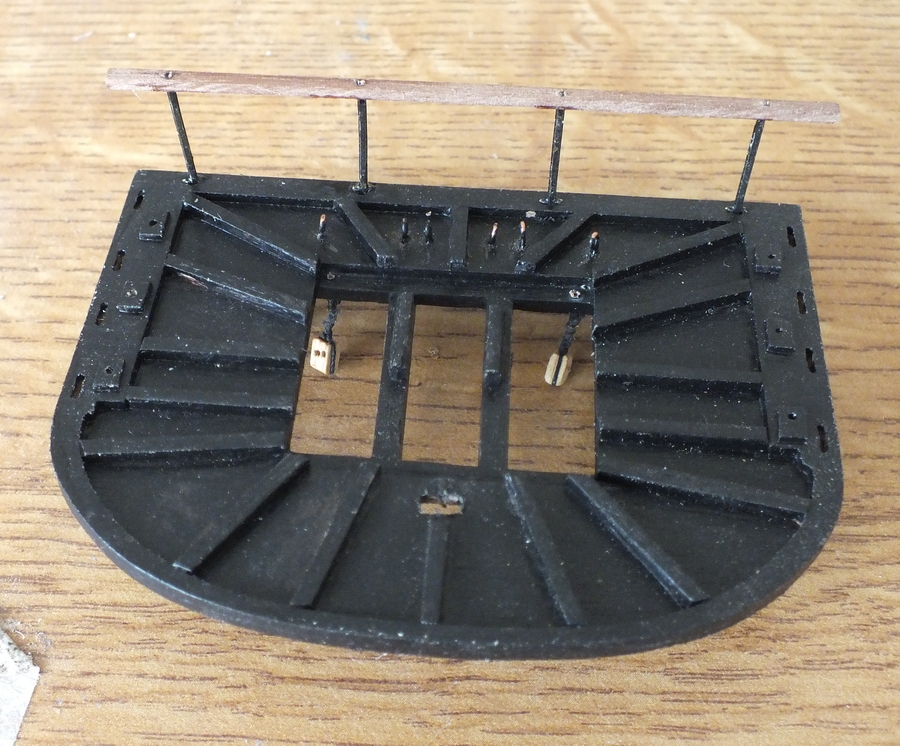
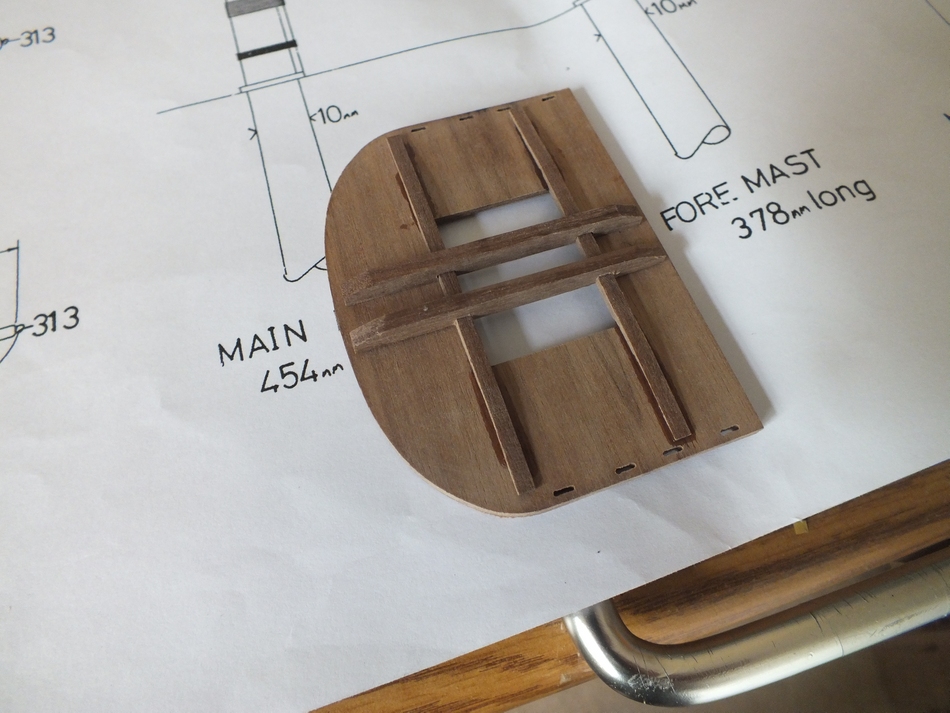
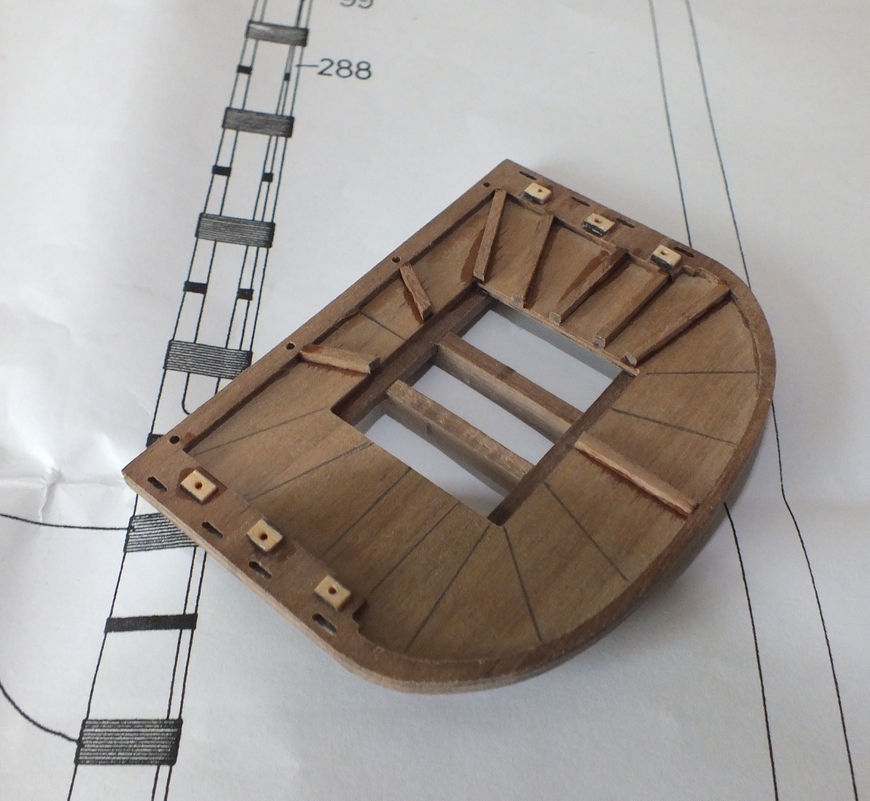
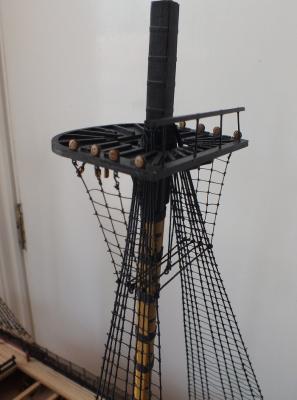
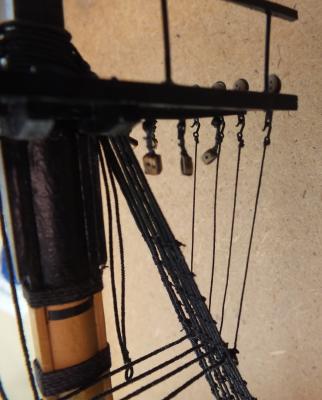
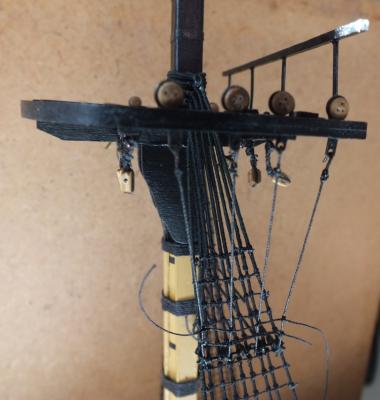
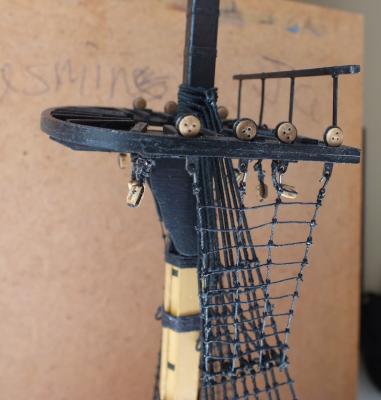
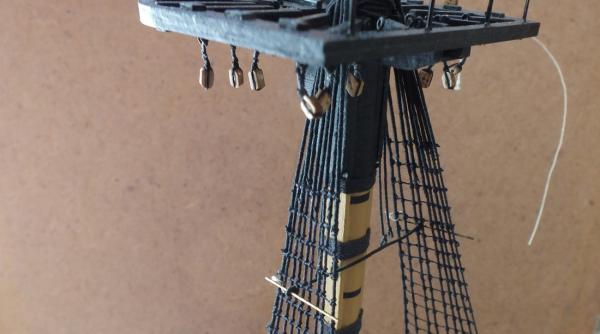
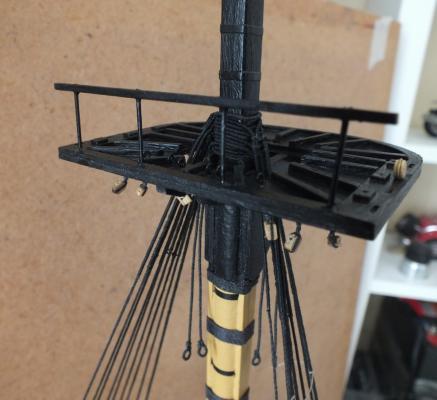
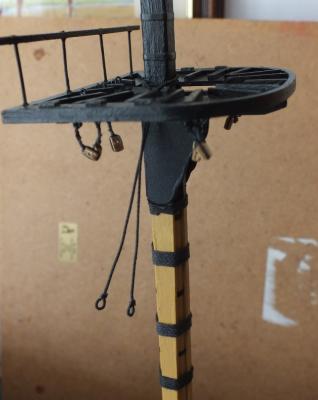
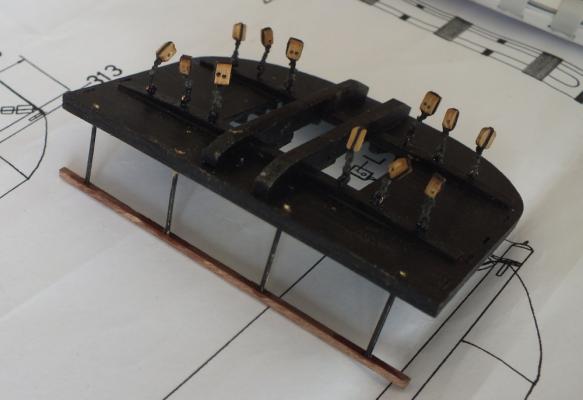
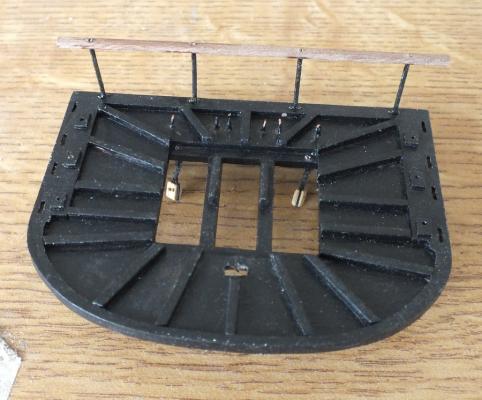
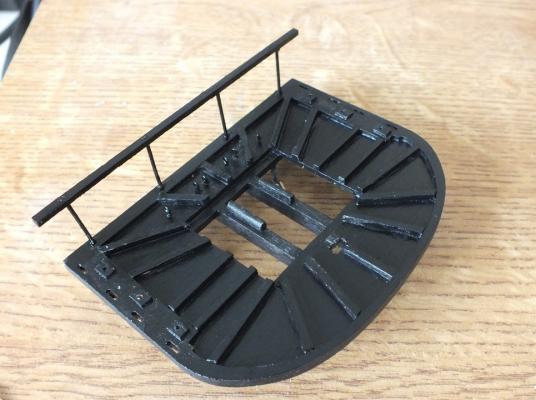
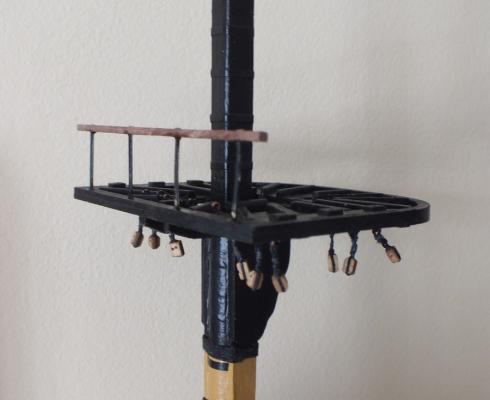
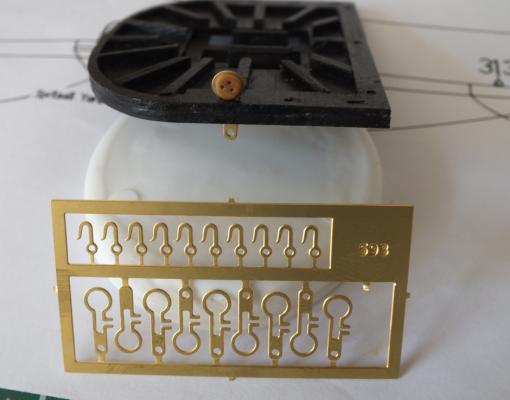
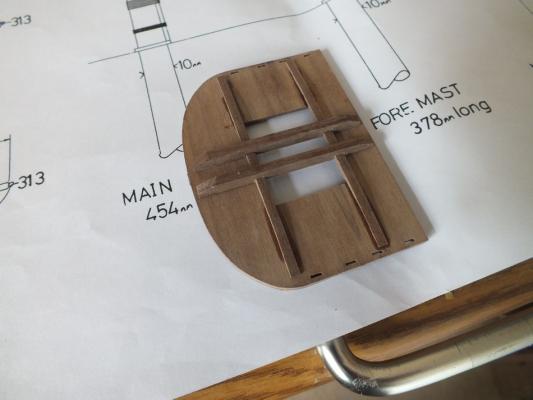
Tops The tops have been completed and the rear rails added (I might add netting later) the tops have also had the blocks added as required. I did not like the kit instruction as to making the futtock shroud plates ,that hold the 3mm dead eyes so I upgraded using Amati ones as shown in the photos, which also included brass hooks as well these match the drawing shown in Rigging Period Ship Models. Fore & mizzen tops Main top Top on lower mast Upgrade futtock plates

- 536 replies
-
- 12
-
-
- diana
- caldercraft
- (and 1 more)
-
Jason Glad to hear the keel issue has been sorted. The much promised 74 would be my next period build if it was available ( I think I will be to old by the time it is) My next build is HMS Tanatside a Hunt Class Destroyer a ship on which my father served during the D day landings at Omaha beach.
-
Great rigging Mobbsie photos look good, rigging is always difficult to photograph.
- 1,279 replies
-
- 1
-
-
- agamemnon
- caldercraft
- (and 1 more)
-
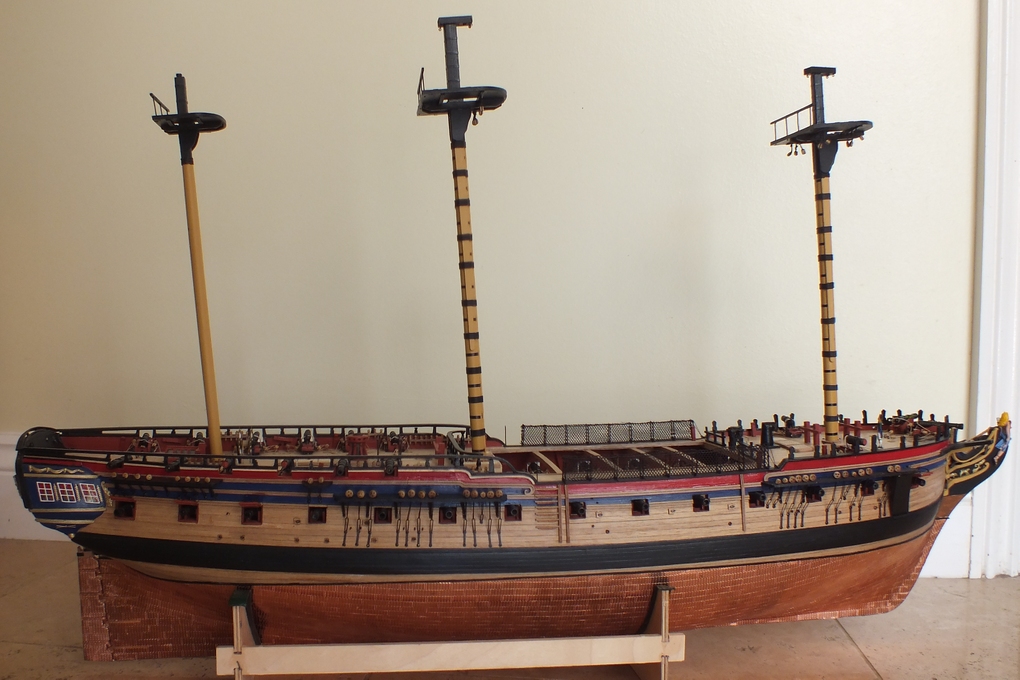
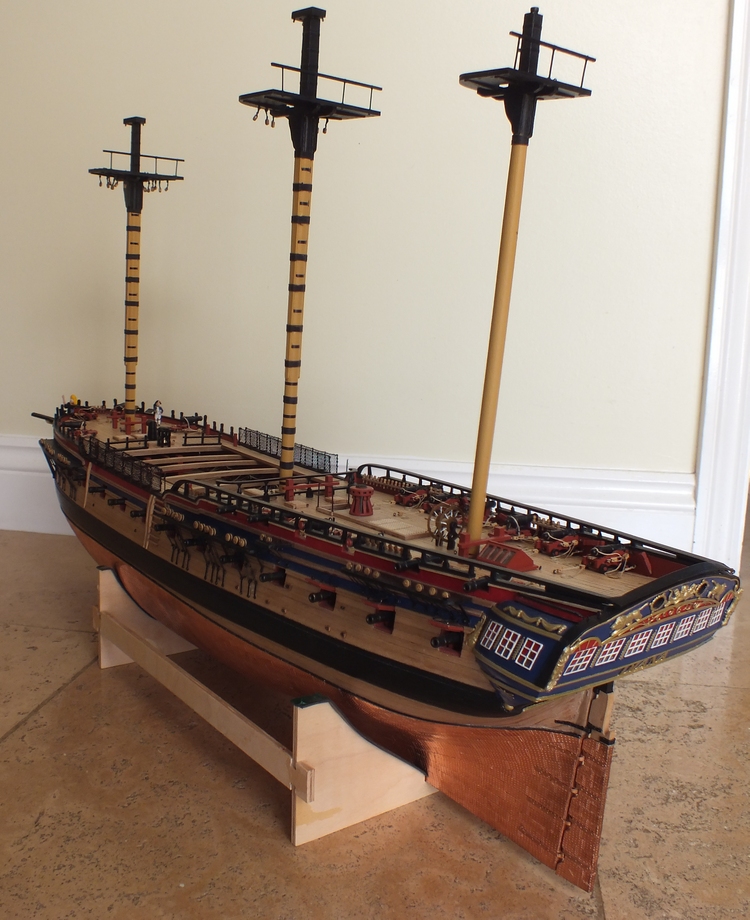
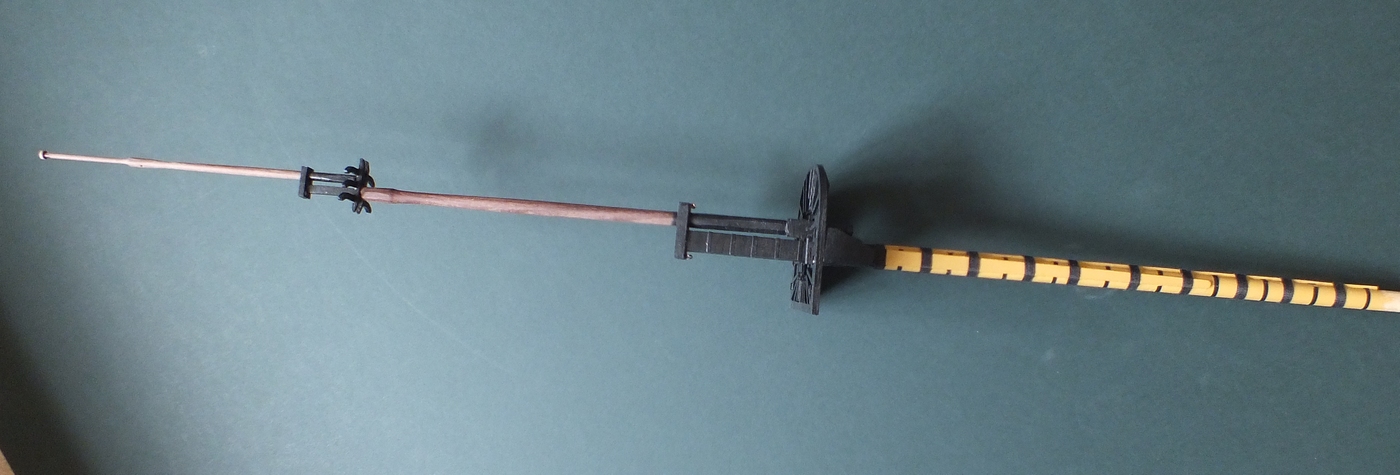
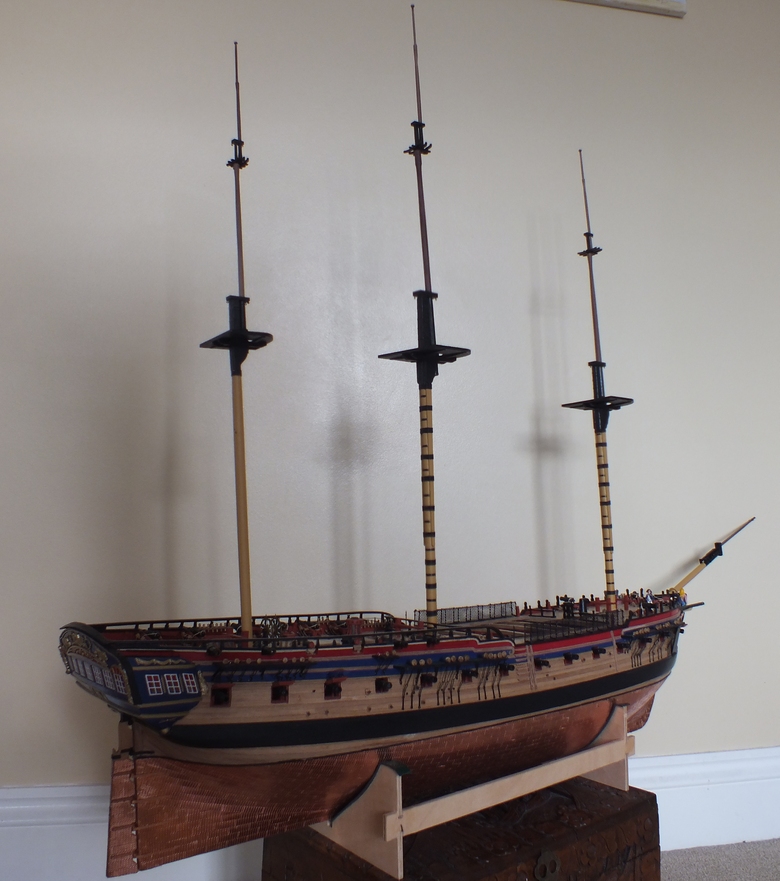
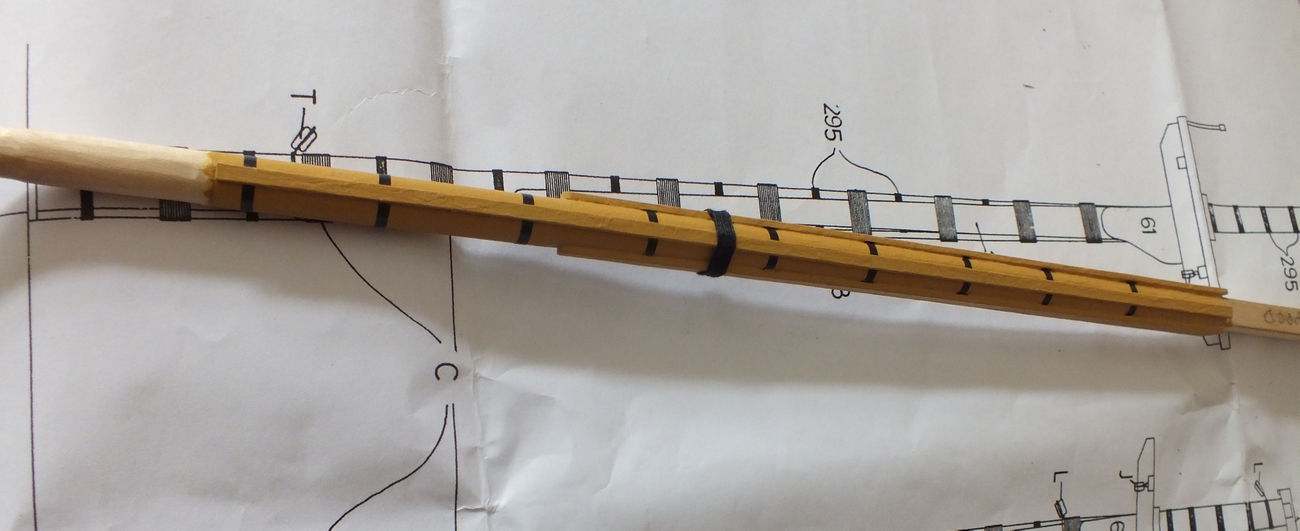
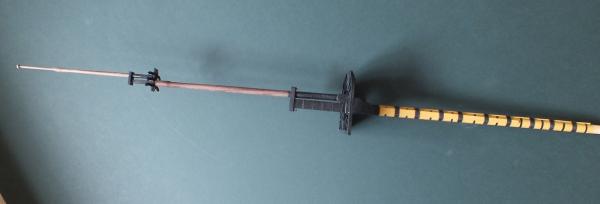
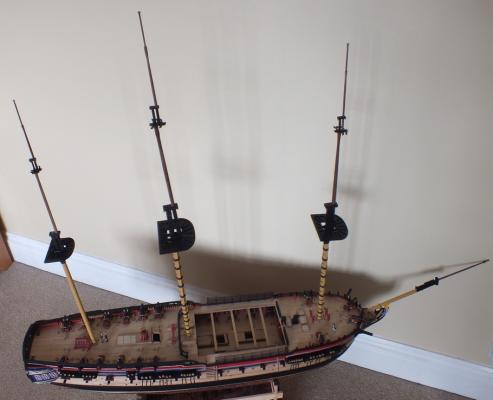
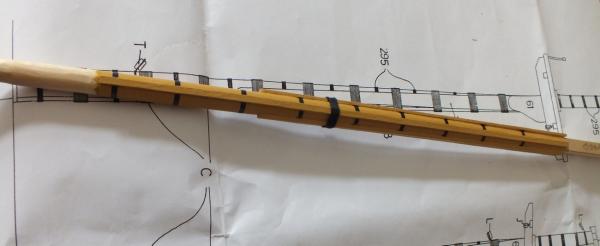
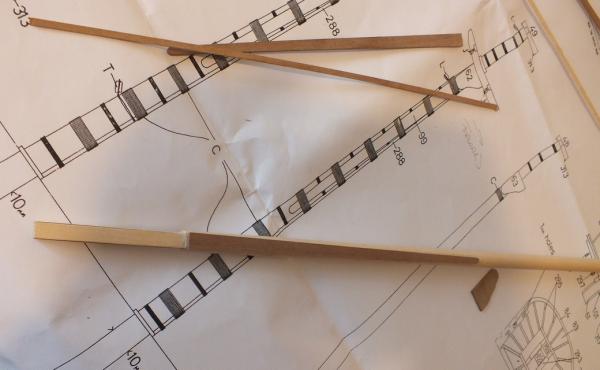
I have now completed making the rest of the mast parts,some differ from the plans as I have cross referenced them with AOTS Diana`s drawings, and I am going with the books drawings, for instance the fore mast, the top mast has no eight square section. All the sections were profiled in my umimat lathe, and all square or eight square sections filed ,some square sections were built up as required. As showed in the last photos the masts have been dry assembled (so if they look slightly out of line that’s the reason why).The lower masts and tops will be stepped into the hull next after the tops have all the required blocks fitted to them, and the rest of the mast parts held over for now, as I will next make and add the burton pendants and the shrouds to the lower masts before working up the masts. Masts Dry Fitted to Hull


- 536 replies
-
- 21
-
-
- diana
- caldercraft
- (and 1 more)
-
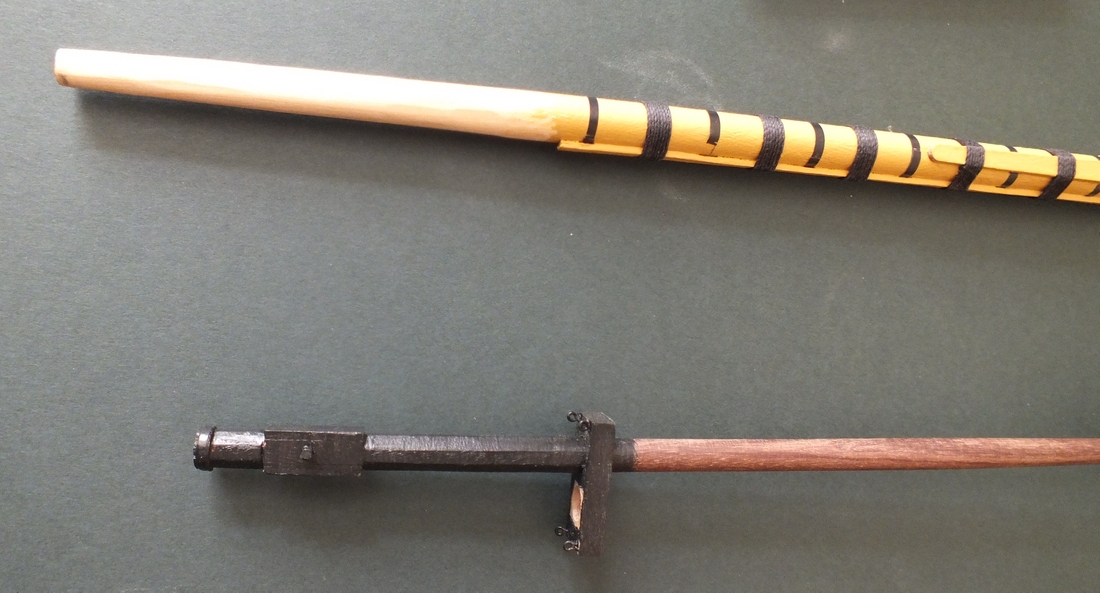
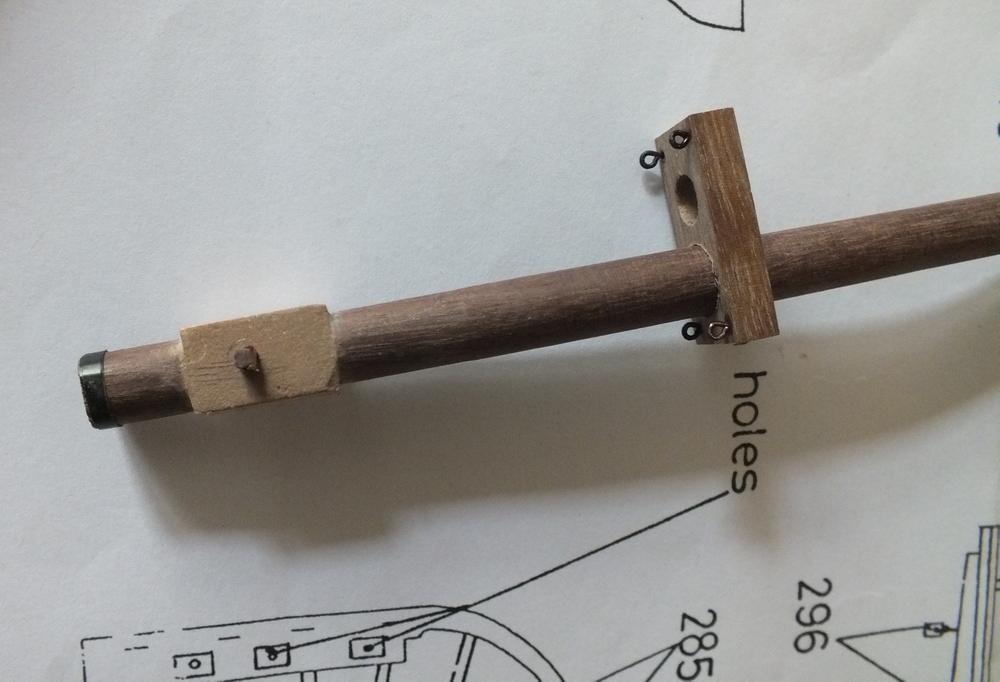
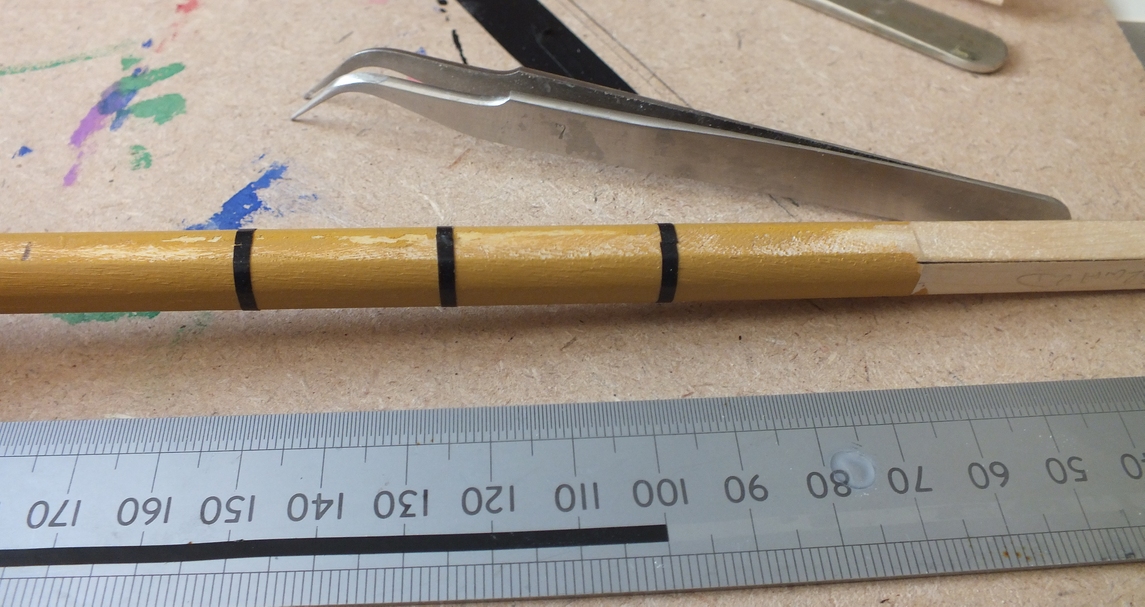
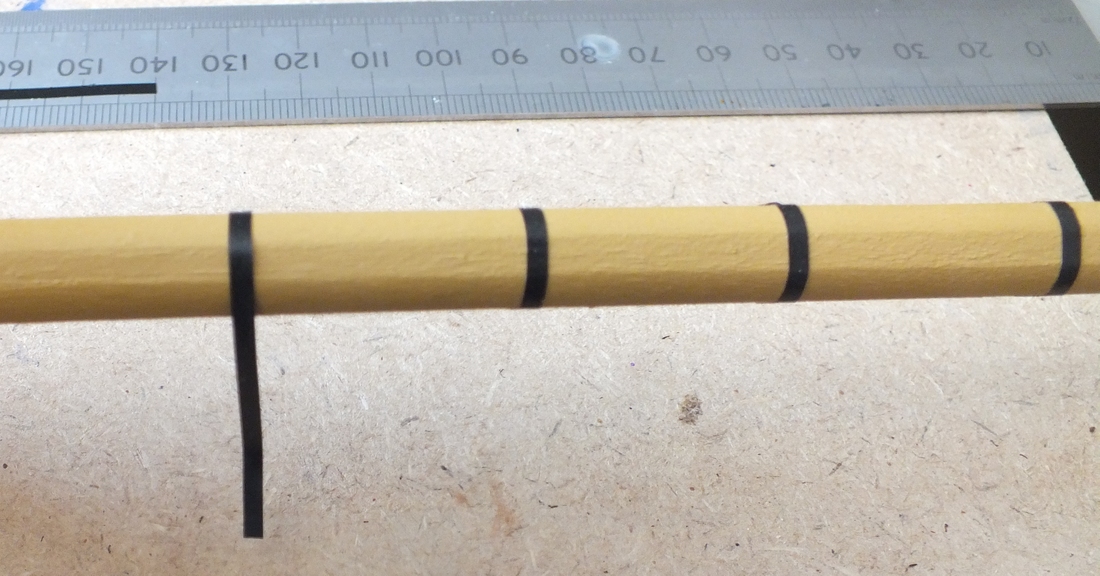
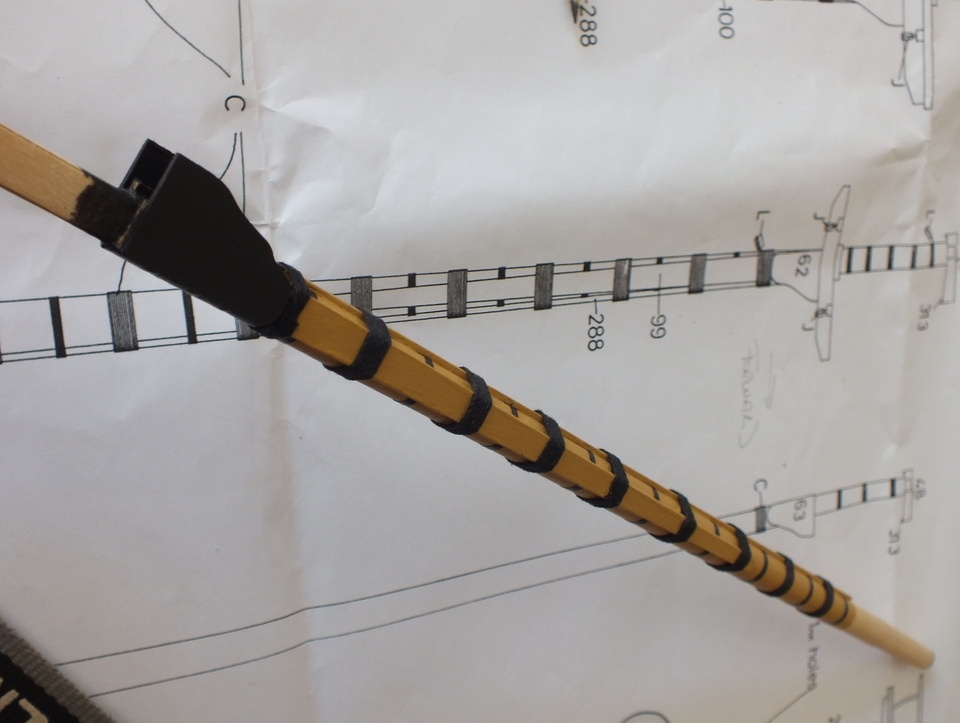
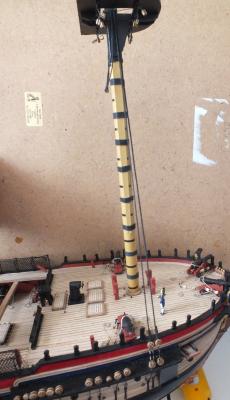
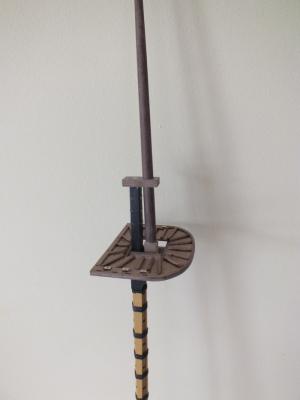
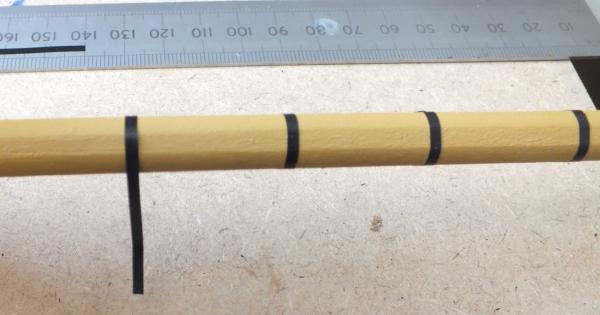
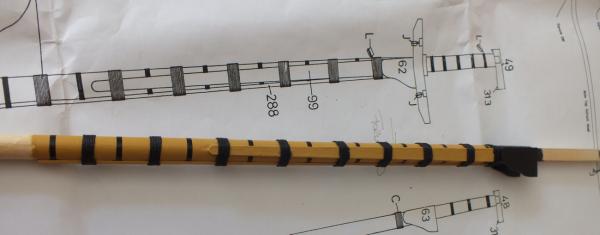
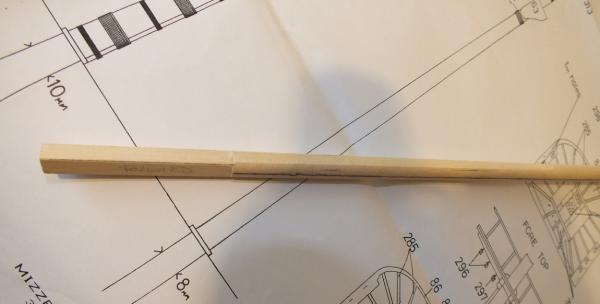
Lower masts The three lower masts were made up next profiling as necessary and the fore and main having the sides filed for the cheeks to be added, they were then painted and the metal bands added I used black plastic insulation tape as seen in the photos, the cheeks and front fish, were added and also the hounds and bibs which are in one piece they then had the wooling added and the bands to the top square section, I have also started making the tops. Tops


- 536 replies
-
- 17
-
-
- diana
- caldercraft
- (and 1 more)
-
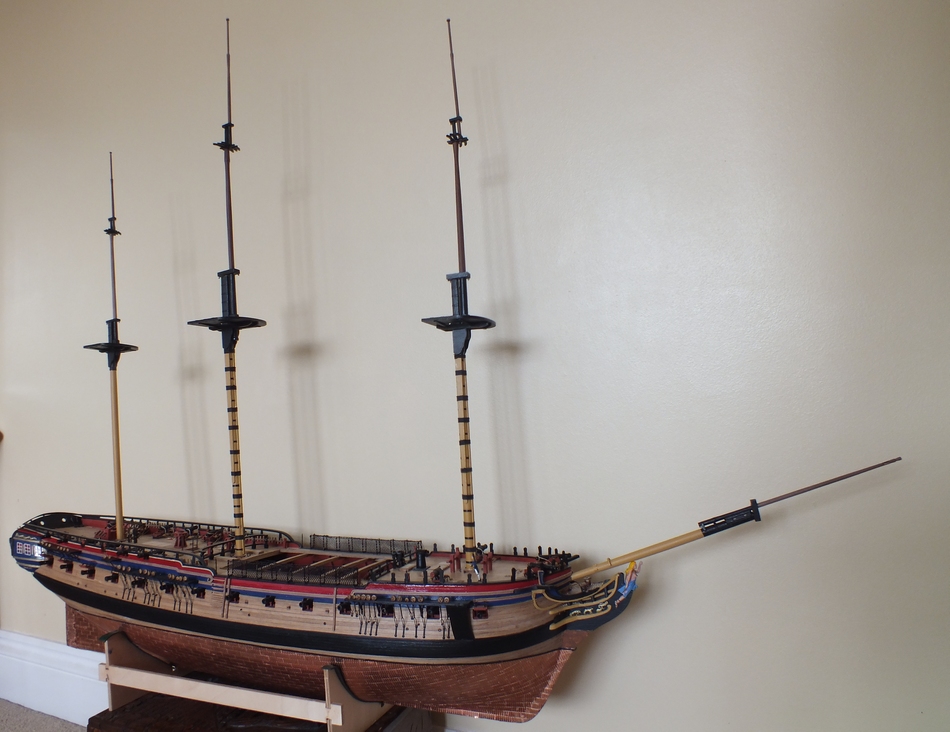
Hi Jason you are correct the hole for the bowsprit is very shallow I have in mind to drill the end and insert a length of say 2-3mm dia rod and drill into the bowsprit hole to make a stronger fixing.
- 536 replies
-
- 1
-
-
- diana
- caldercraft
- (and 1 more)
-
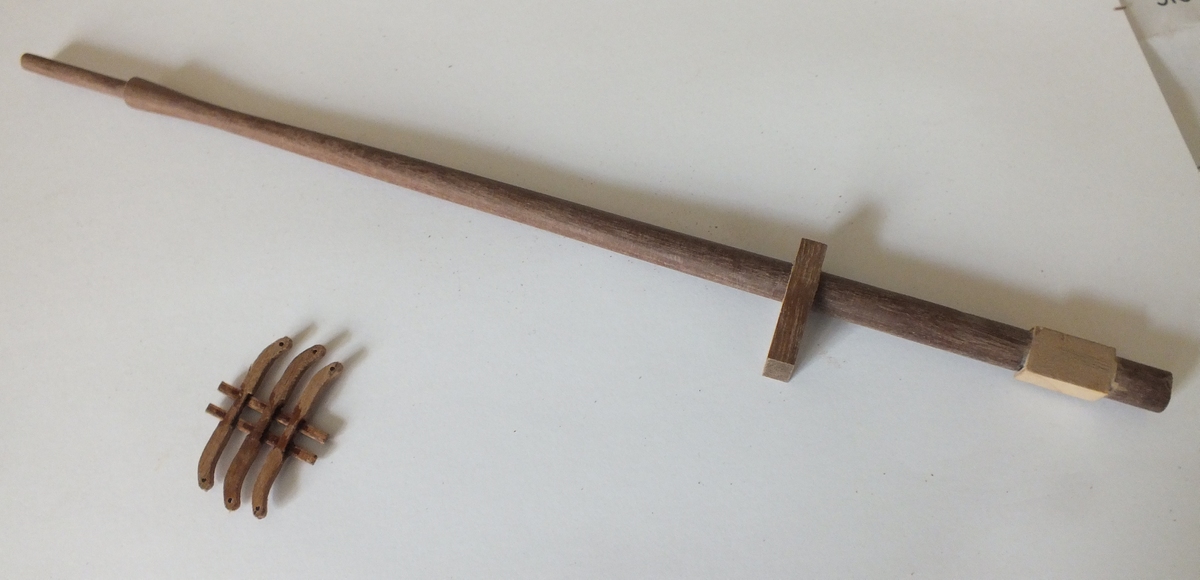
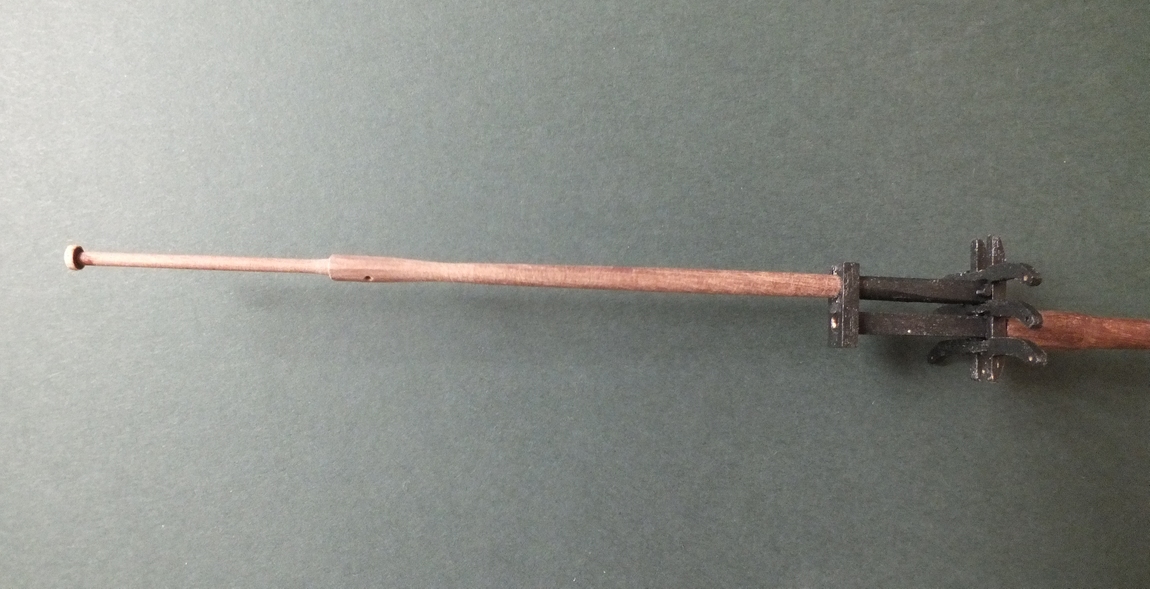
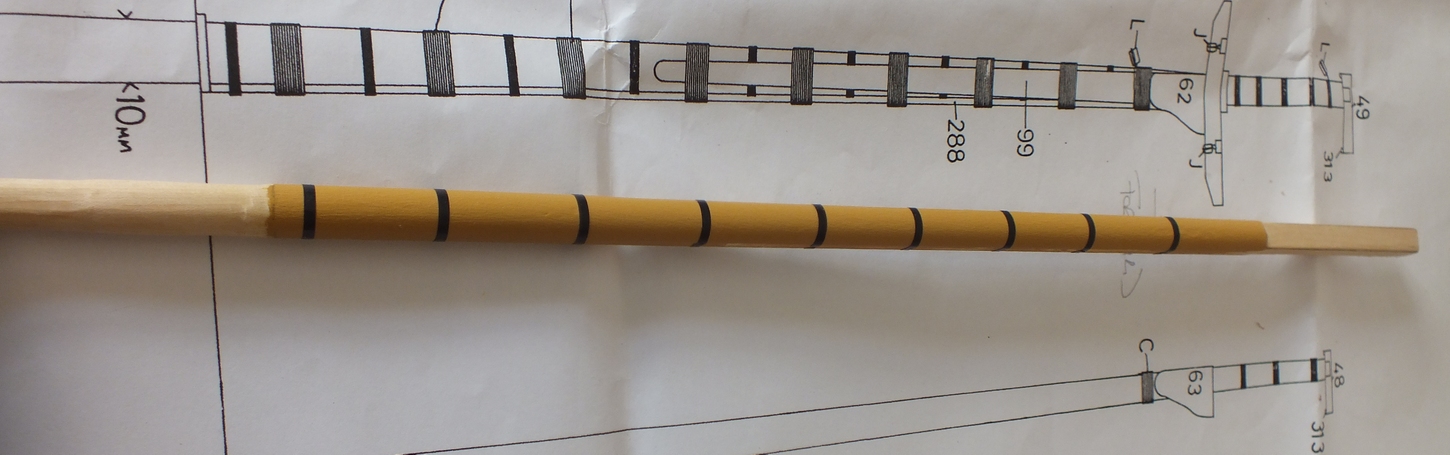
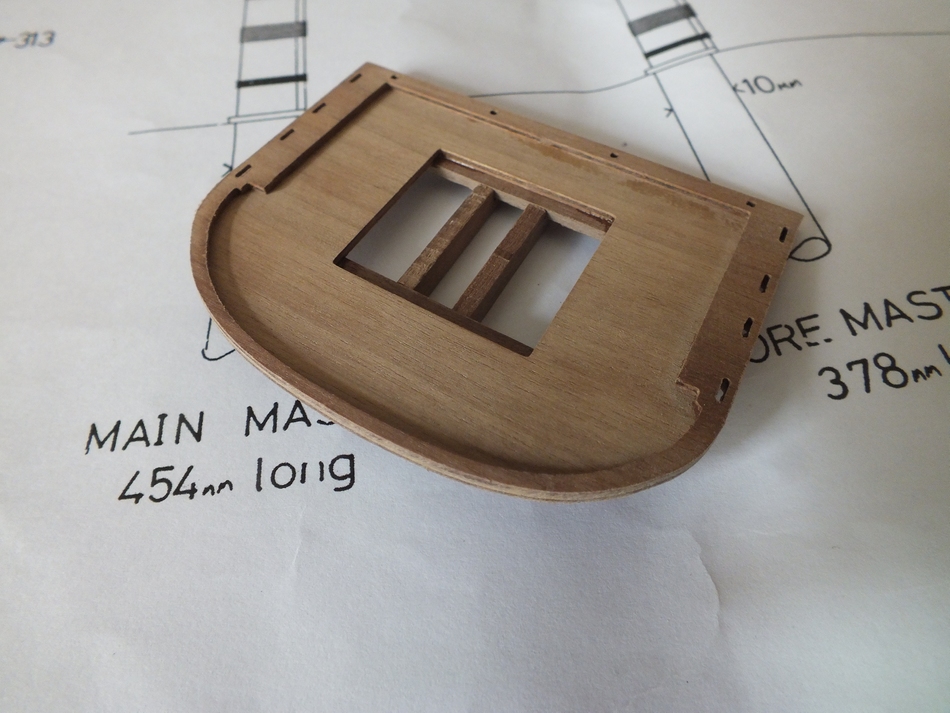
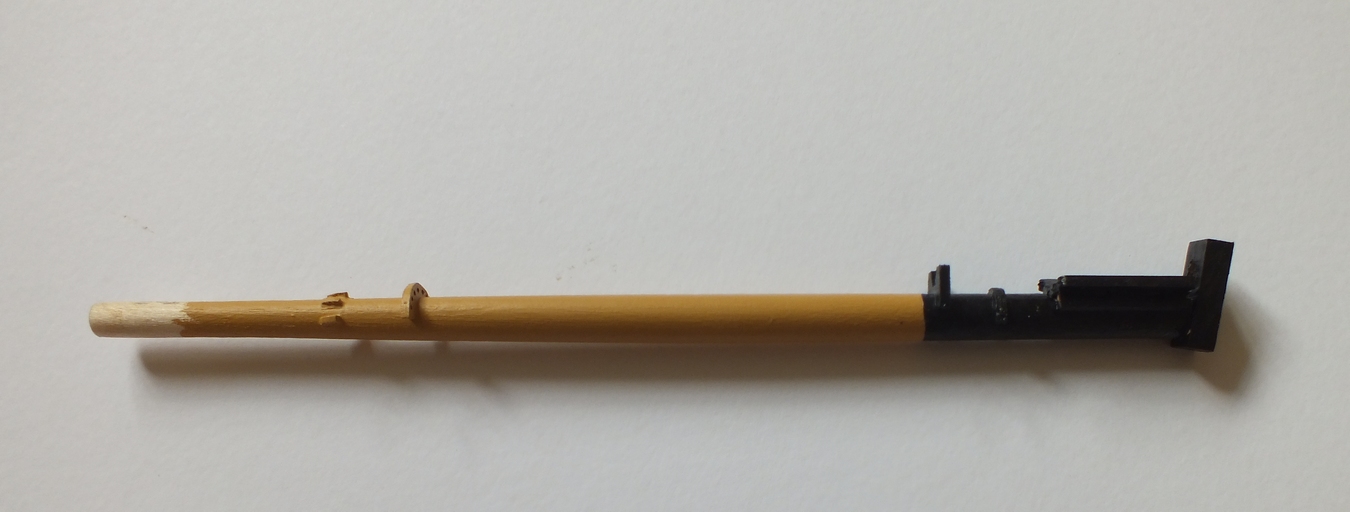
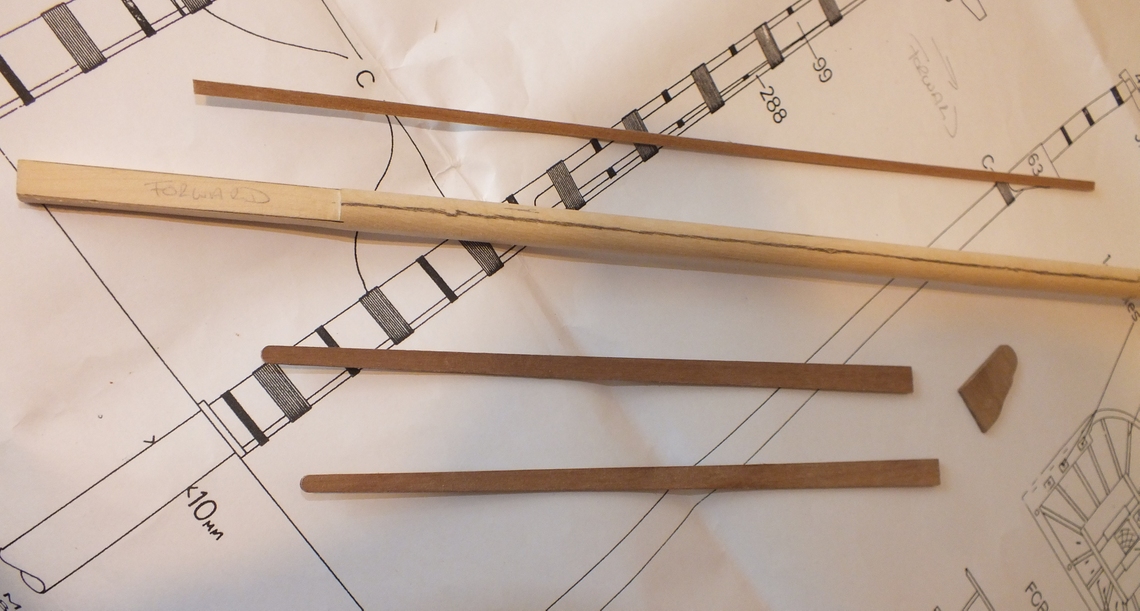
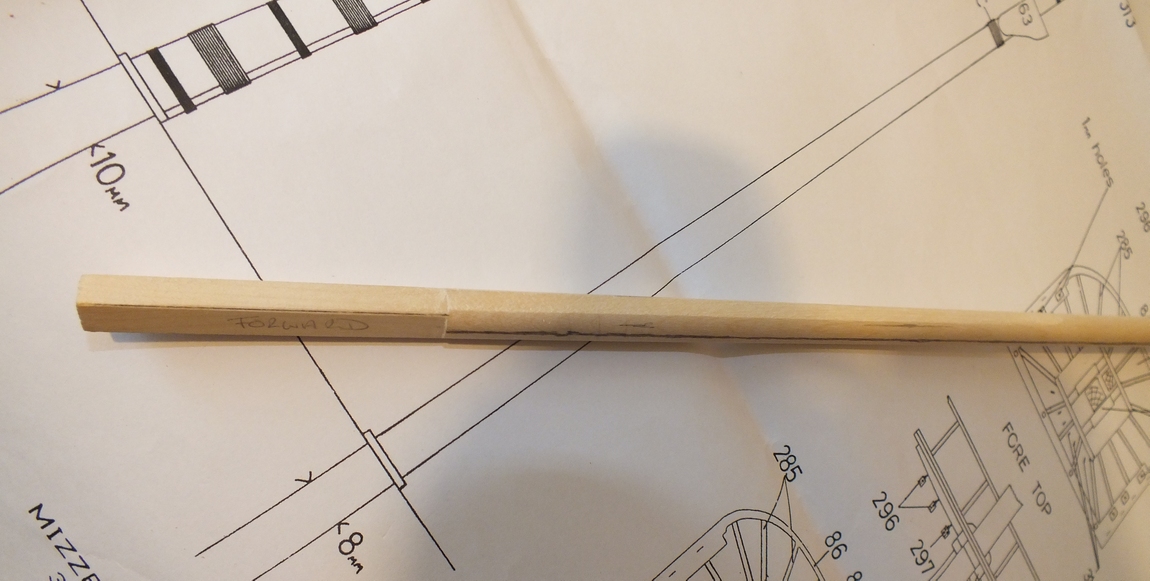
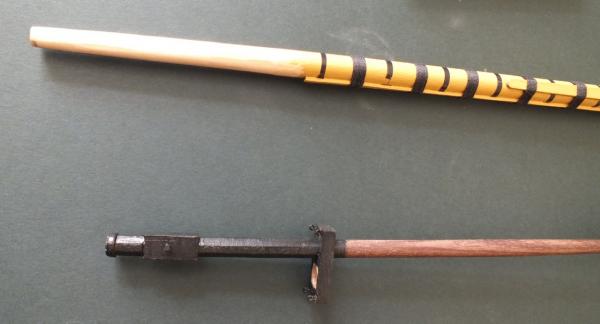
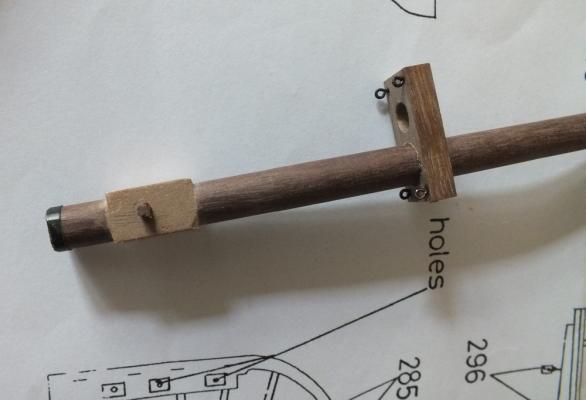
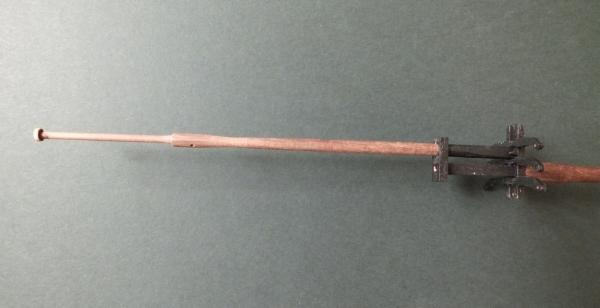
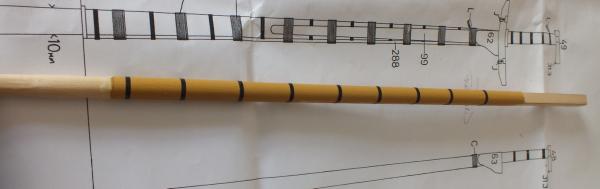
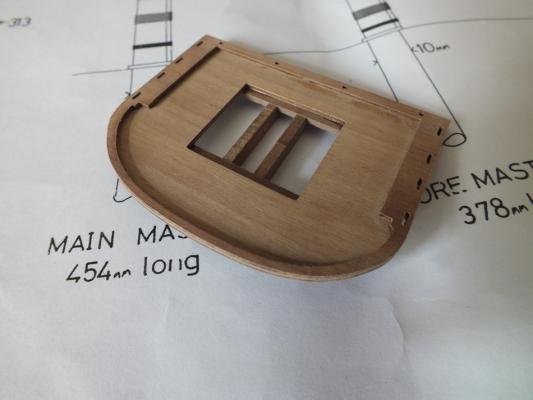
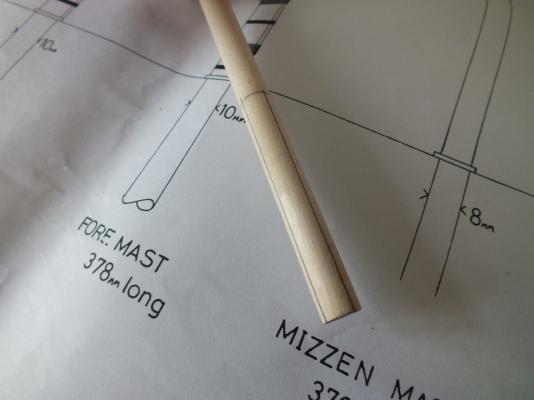
Not much progress as off late due to summer time,golf,fishing and two weeks holiday. The lower masts and bowsprit will be made from the kit supplied birch dowel and the rest from the walnut upgrade dowel. The masts The bowsprit was made first,the shape obtained by fitting the blank into my unimat lathe, and then profiled with files and various grades of sandpaper,diameters checked with a micrometer, the lower masts were made as well, I cross referenced the mast dimensions on the plans with those in Anatomy of the ship Diana so if my masts look different from the kit plans that is the reason, although the differences are mainly on the topmasts and the topgallant. The bowsprit has had the cleats ,saddles and bee parts added and painted yellow ochre lower masts just started. Bowsprit Masts started


- 536 replies
-
- 11
-
-
- diana
- caldercraft
- (and 1 more)
-
Hi Jason Glad they are sorting out the keel issue, John is the guy I have spoken too and has replaced parts for me, very good customer service, it just a pity the kit has not been updated, I have just found out there are no deadeye strops for the tops ( you are to make them from thread not an option in my opinion ) but they have them as Caldercraft fittings made in brass, so buy some or make them ?
-
Hi louis thick superglue is the way to go if it will help I did a HOW I tiled my Diana it is on my build log but just after the stern galleries were started, although these are Caldercraft tiles I built Pegasus and used the same method to tile her. Sorry I cannot send the information as a private message as I on holiday and am using my phone to add this reply, good luck Ray.
-
Hi nice start shaping the frames before fitting would have made life a bit easier later, I would recommend filling the first few frames and the last two with balsa to help with the bow and stern profile, fully rigging the cannons in place will be hard enough on a first build and I had to go down to 2mm blocks for the tackles so they do not just jam up, working gun tackle at this scale would be a first, plus if the guns are not fixed down gravity would play havoc when the build needed to be on its side for instance.
-
hi Jason Good luck with her, your summing of the kit up is correct, I also considered changing the copper tiles and it is a very costly update, and when done the supplied tiles look fairly good, and to change all the blocks plus the extras needed if the guns are to be rigged, is again a very costly upgrade. The building of snake has given you the experience needed for this build as I have found building Diana after Pegasus, as I think this is not a kit for the beginner. I look forward to updates.
-
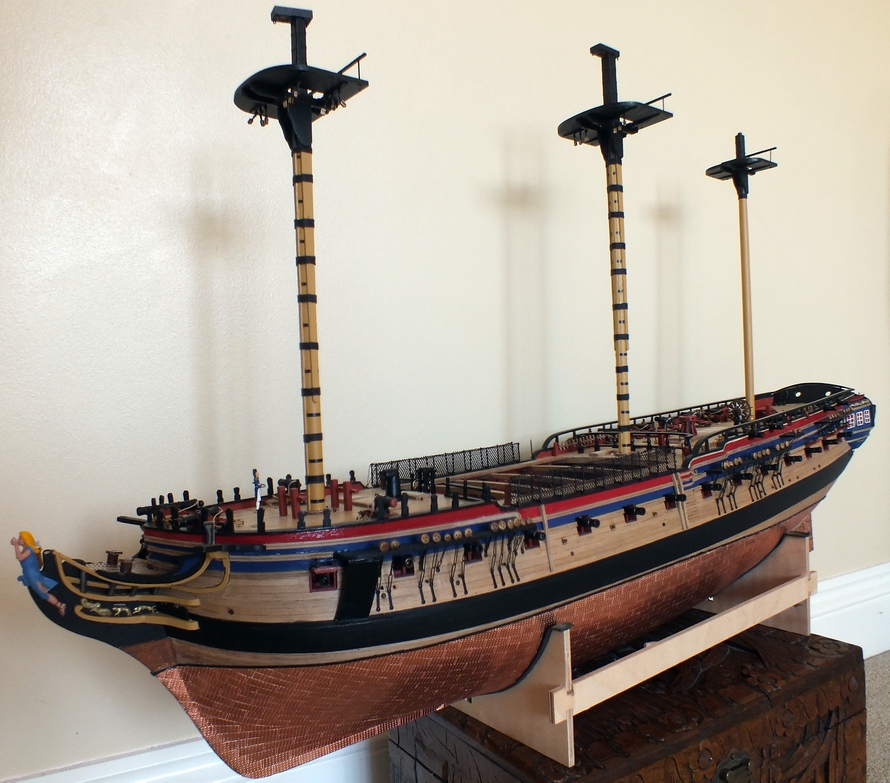
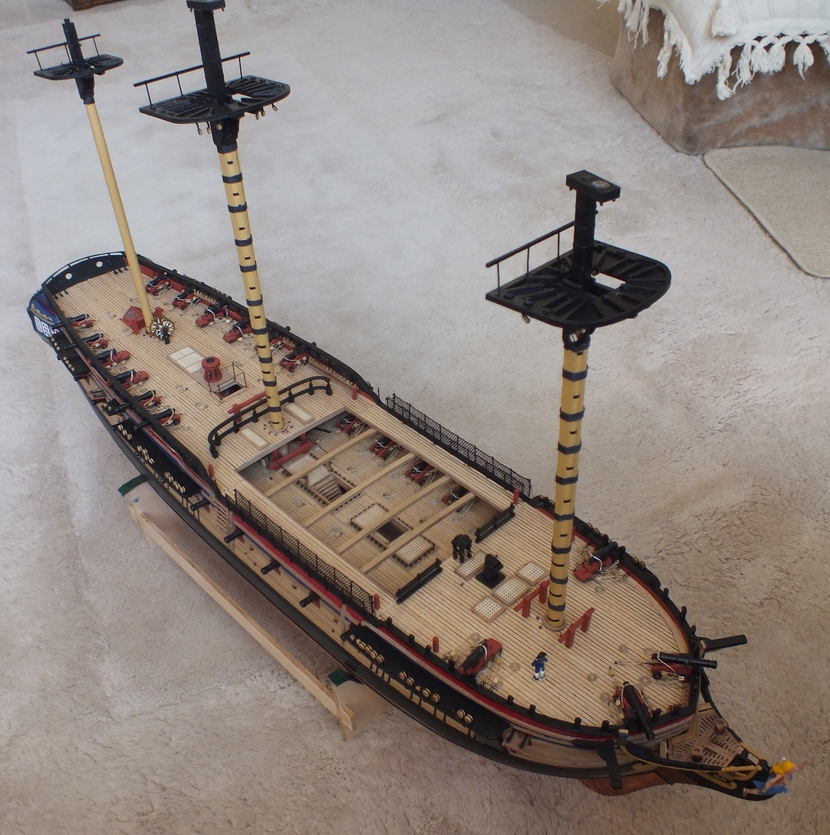
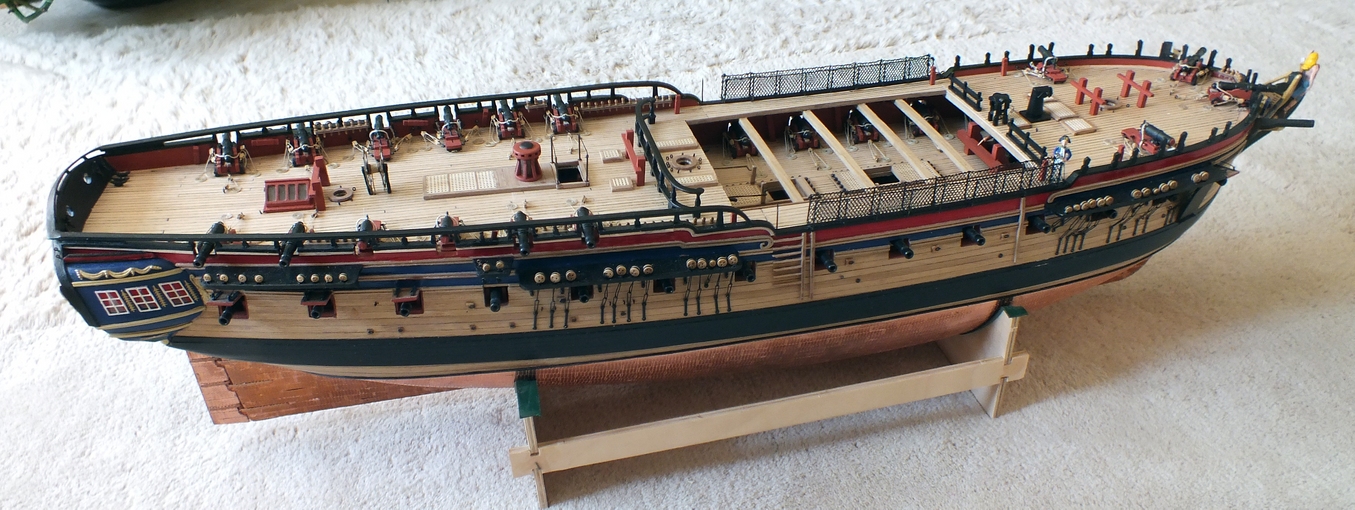
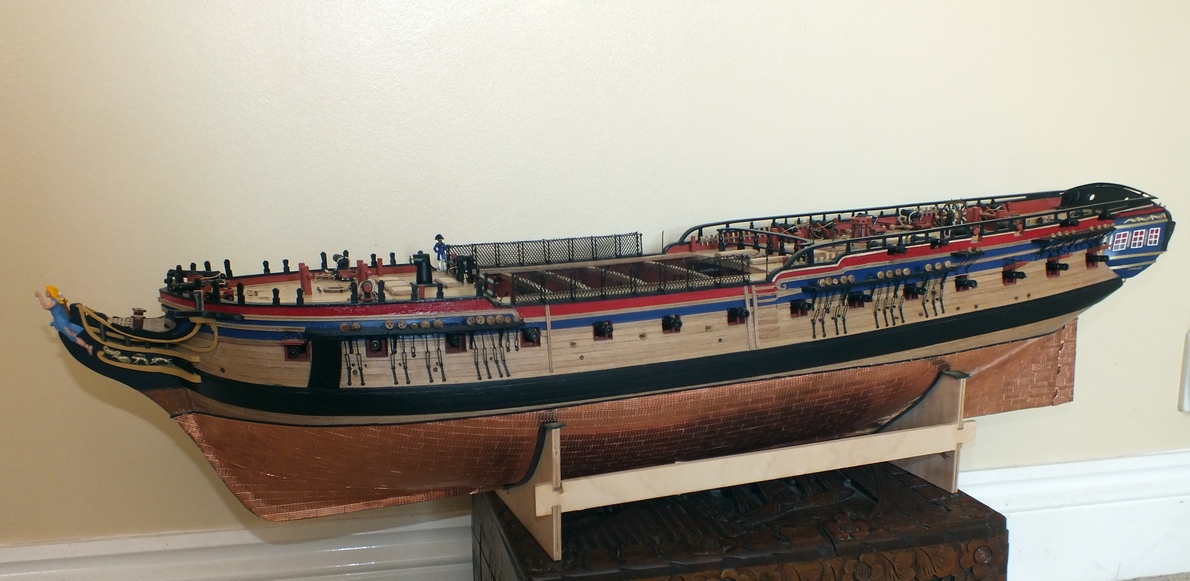
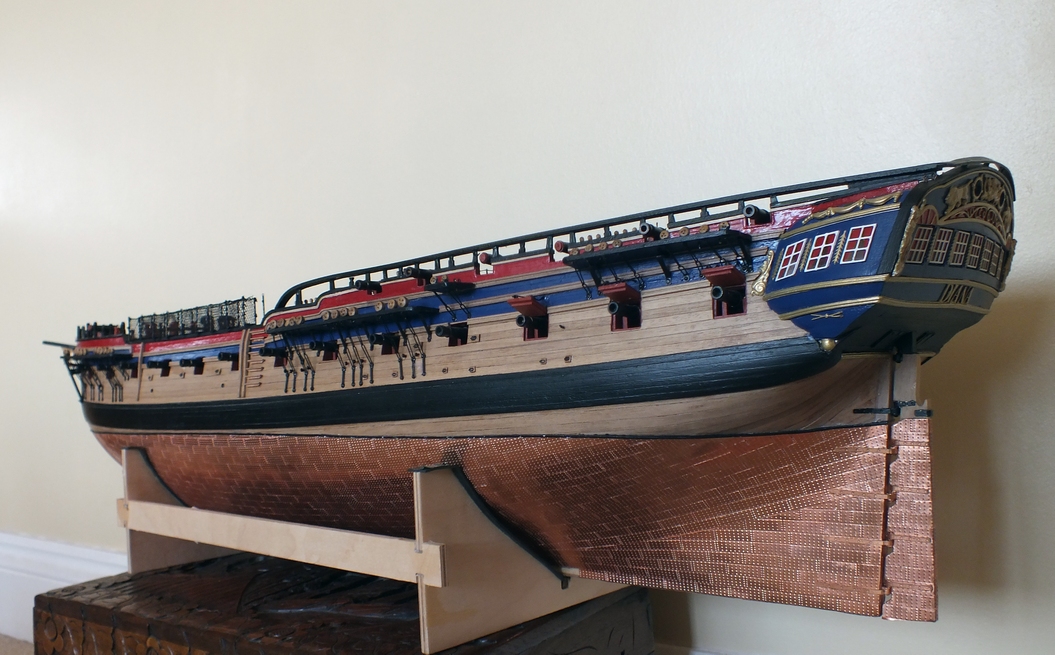
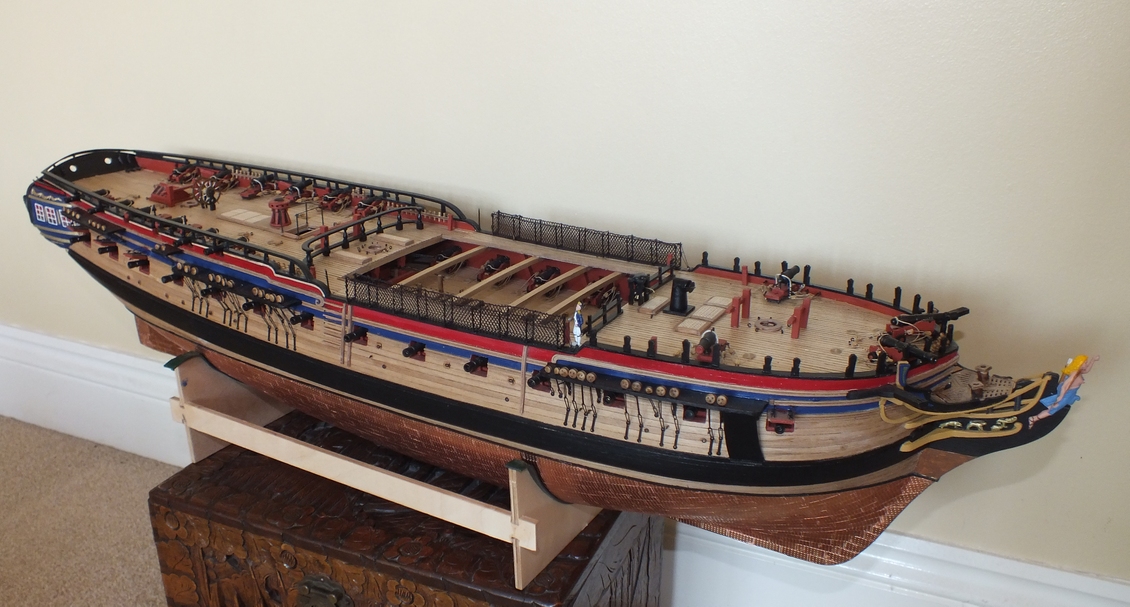
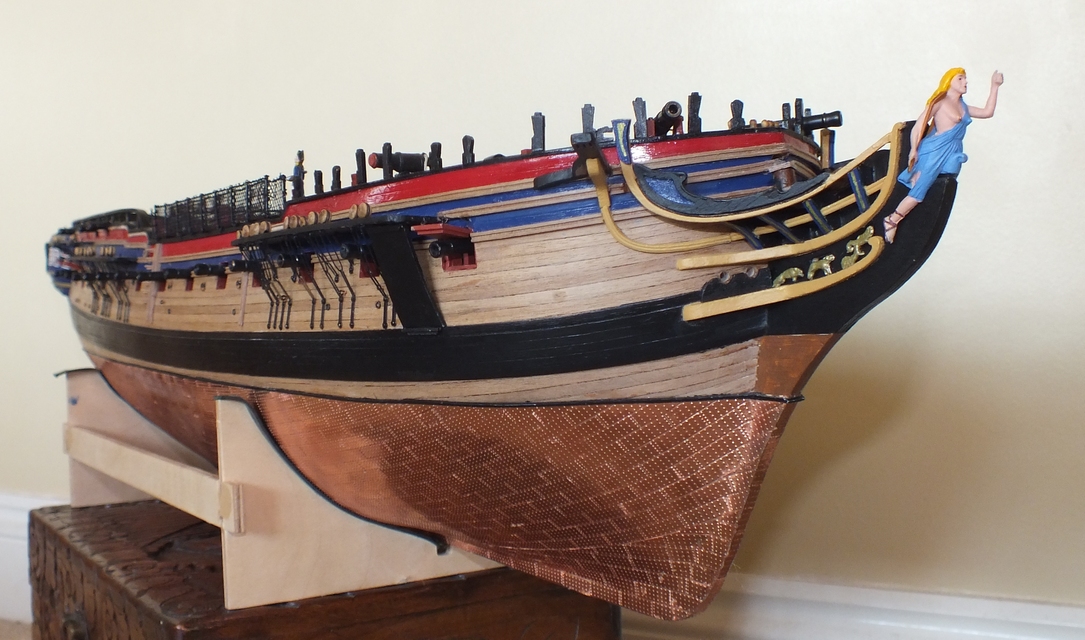
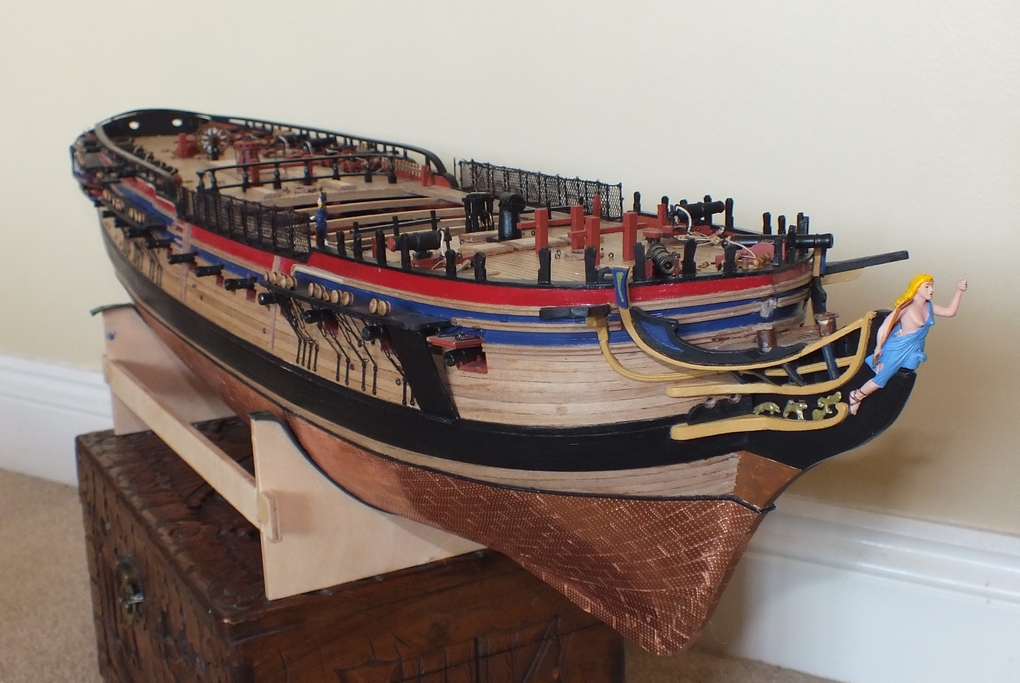
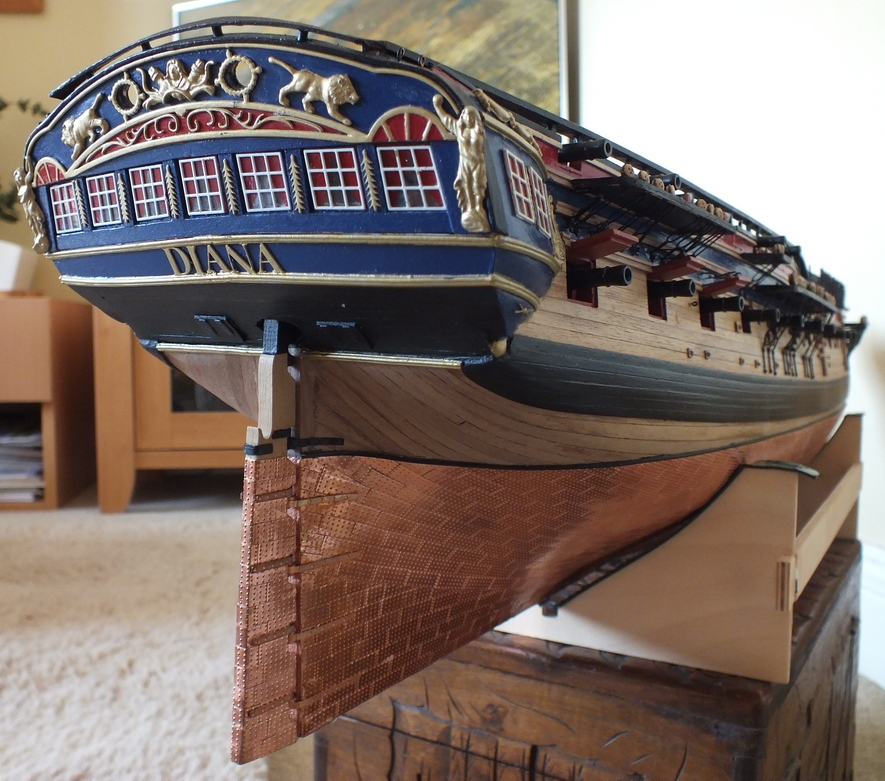
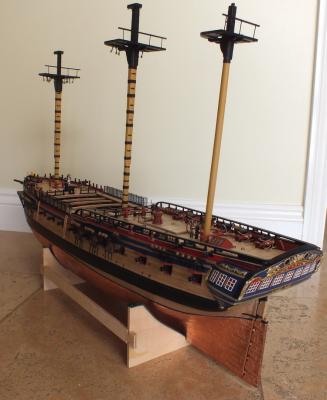
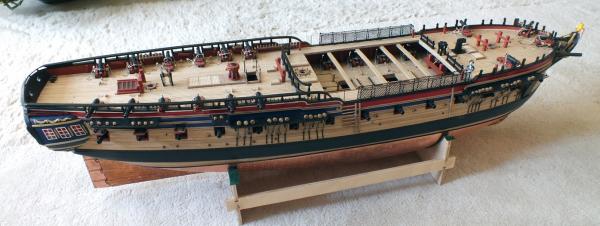
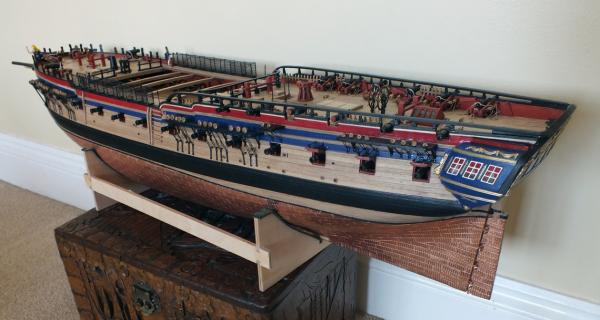
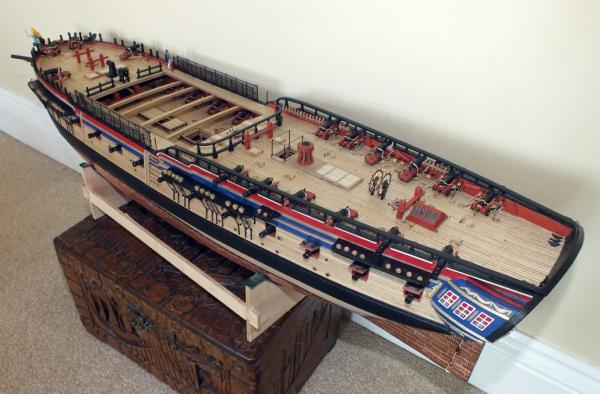
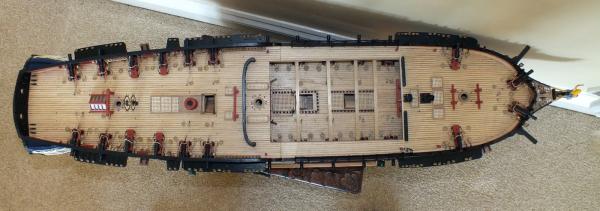
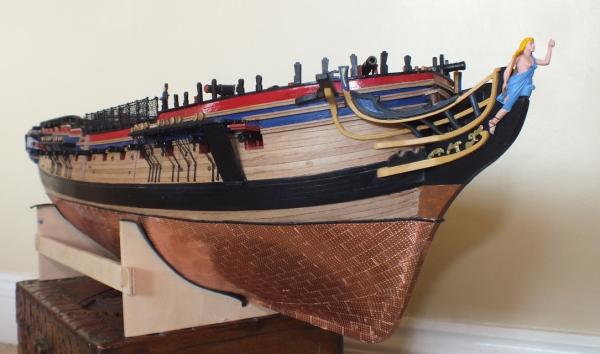
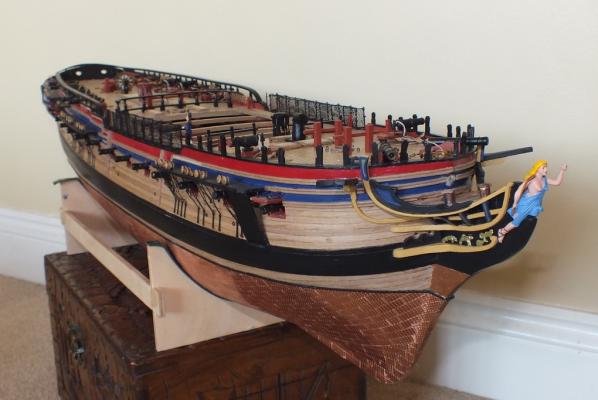
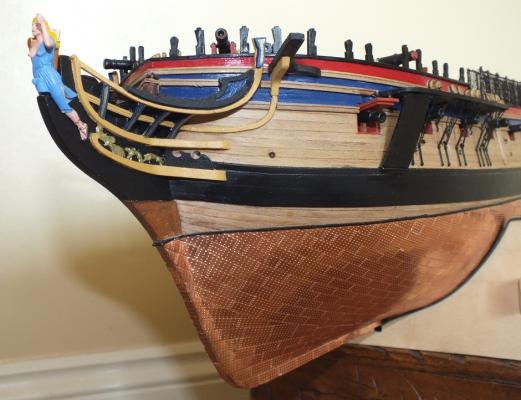
The hull is now finished and below are some photos. The next phase will be the masts and the rigging. SERVING this is one thing that has unoccupied my thoughts, serving the rope is one thing I want to do on Diana that I did not on Pegasus,so how to serve the parts of the rigging that require it, like the top part of the shrouds and the forward ones where the sails can rub according the Rigging Period Ship models by “Lennarth Petersson”. I have been reading through logs to try and find the technique needed to do said serving,and fairly quickly came to the conclusion that the only successful way would to be to use a machine,and the way forward would to be to buy one of Alex’s ones The Machine 2.0 an unforeseen cost at $100 or £62 delivered, but having upgraded the decks, and mast material, is the only way to go, so one was ordered from his website,it came in only a few days nearly as fast as ordering something from home,( I have yet to put it together) pay pal does have its uses . The other item just arrived is black Guterman polyester thread 6 spools for £6 on e bay, So mast making next and some serving practice. Mort I agree Cornwall model boats give a first class service I have bought all my upgrade materials and extra thread blocks & paint from them.


- 536 replies
-
- 20
-
-
- diana
- caldercraft
- (and 1 more)