Ray
-
Posts
404 -
Joined
-
Last visited
Content Type
Profiles
Forums
Gallery
Events
Everything posted by Ray
-
 Hi Guys thanks for the comments and Best Wishes to all for 2014 I am working away, on fitting the dead eyes into the strops and the links onto the hull, and the covers over the chain plate edges, it is quite a long job and not the most enjoyable so far, but I am about half way through, and will give a full update when both side are done, with my way of doing this part of the build and solutions to the problems I came across.
- 536 replies
-
- 1
-

-
- diana
- caldercraft
- (and 1 more)
-
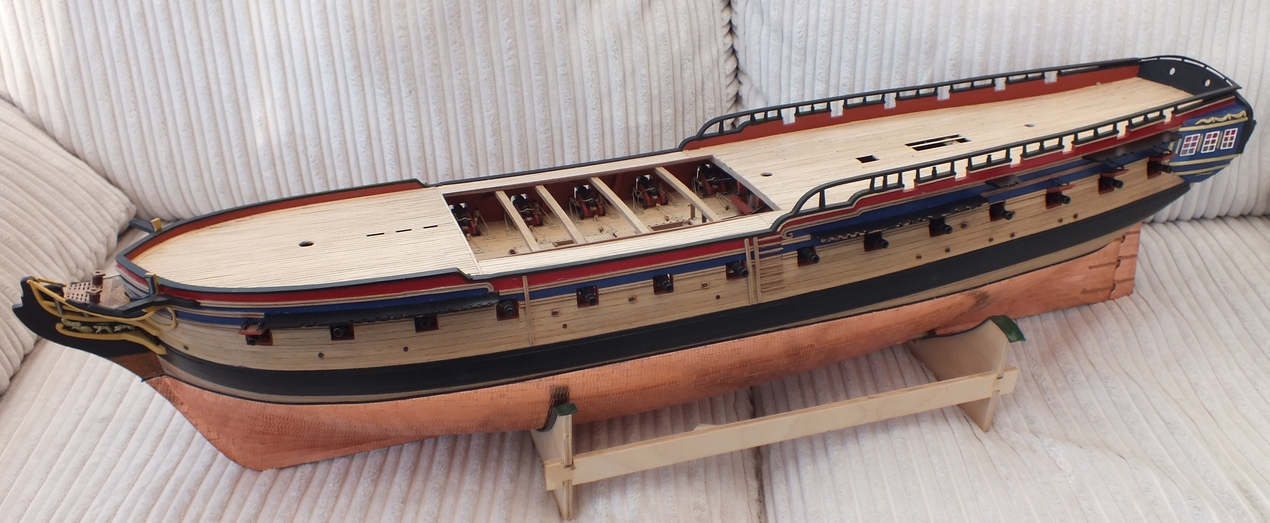
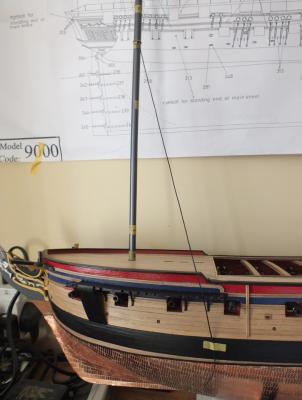
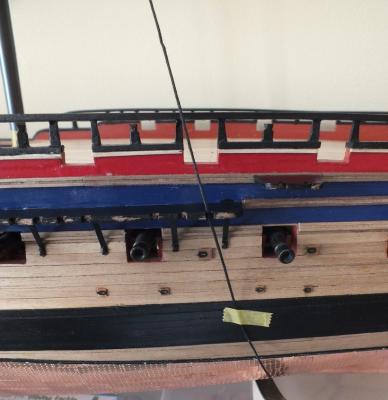
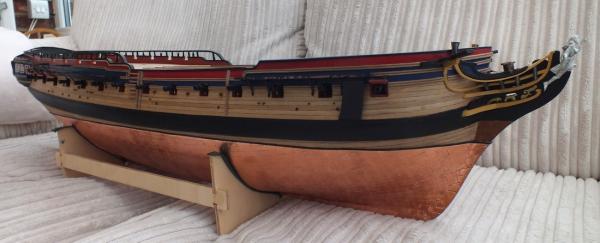
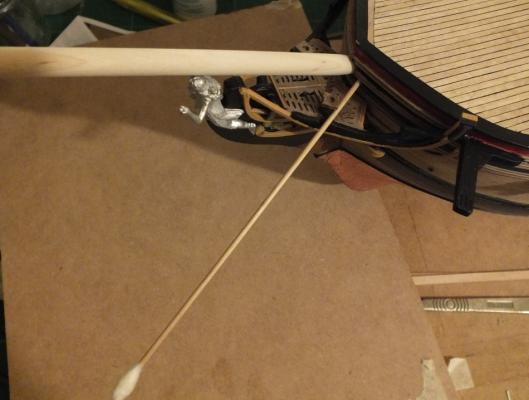
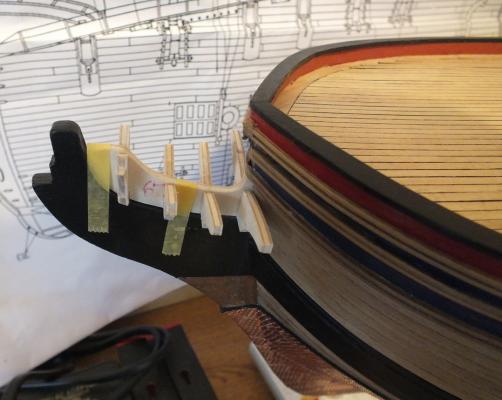
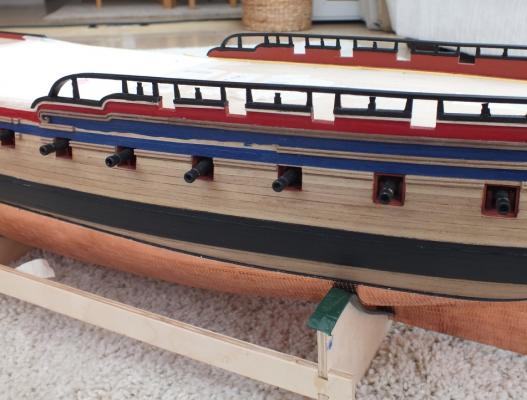
Just a small update not much progress as we before Xmas went on holiday, great cruise on the Queen Mary 2 what a superb ship, a 5 star floating hotel, so as it is a ship I have added a photo, and Xmas took over as well. I have made a start on adding the dead eyes and links but first the alignment. Dead-eye link alignment When I was looking into positioning the channels, making sure they did not allow the links from the dead-eyes to the hull interfere with the gun ports, I also looked at the path from the mast the stays took through the dead-eye links to the hull fixing point. I wanted to get that path straight, so I made a jig using an old length of carbon rod that fitted into all three mast holes and marked off the point where all the stays would come from on the rod with tape, and then ran a length of rigging cord from the stays starting point, through the notch in the channel, to the termination point of the link on the hull (as shown in the photos) so when the dead-eyes and when links are fitted they will flow in the right line from the mast.

- 536 replies
-
- 7
-
-
- diana
- caldercraft
- (and 1 more)
-
Hi Glen I am another one to add to your 2or3 followers, I followed your Pegasus log and used it as a reference when building my Pegasus. Great work on this build I look forward to the updates, your photos are as always excellent.
- 101 replies
-
- 1
-
-
- victory models
- amati
- (and 2 more)
-
Hi Christian She is looking great, I see you had the same problem as I did, and had to cut the slots for the gammonings after the grating had been made. I have just returned from holiday a great cruise on the Queen Mary 2, and Christmas is just ahead so my progress will also be slow, I am going to add the dead-eyes and chains next.
-
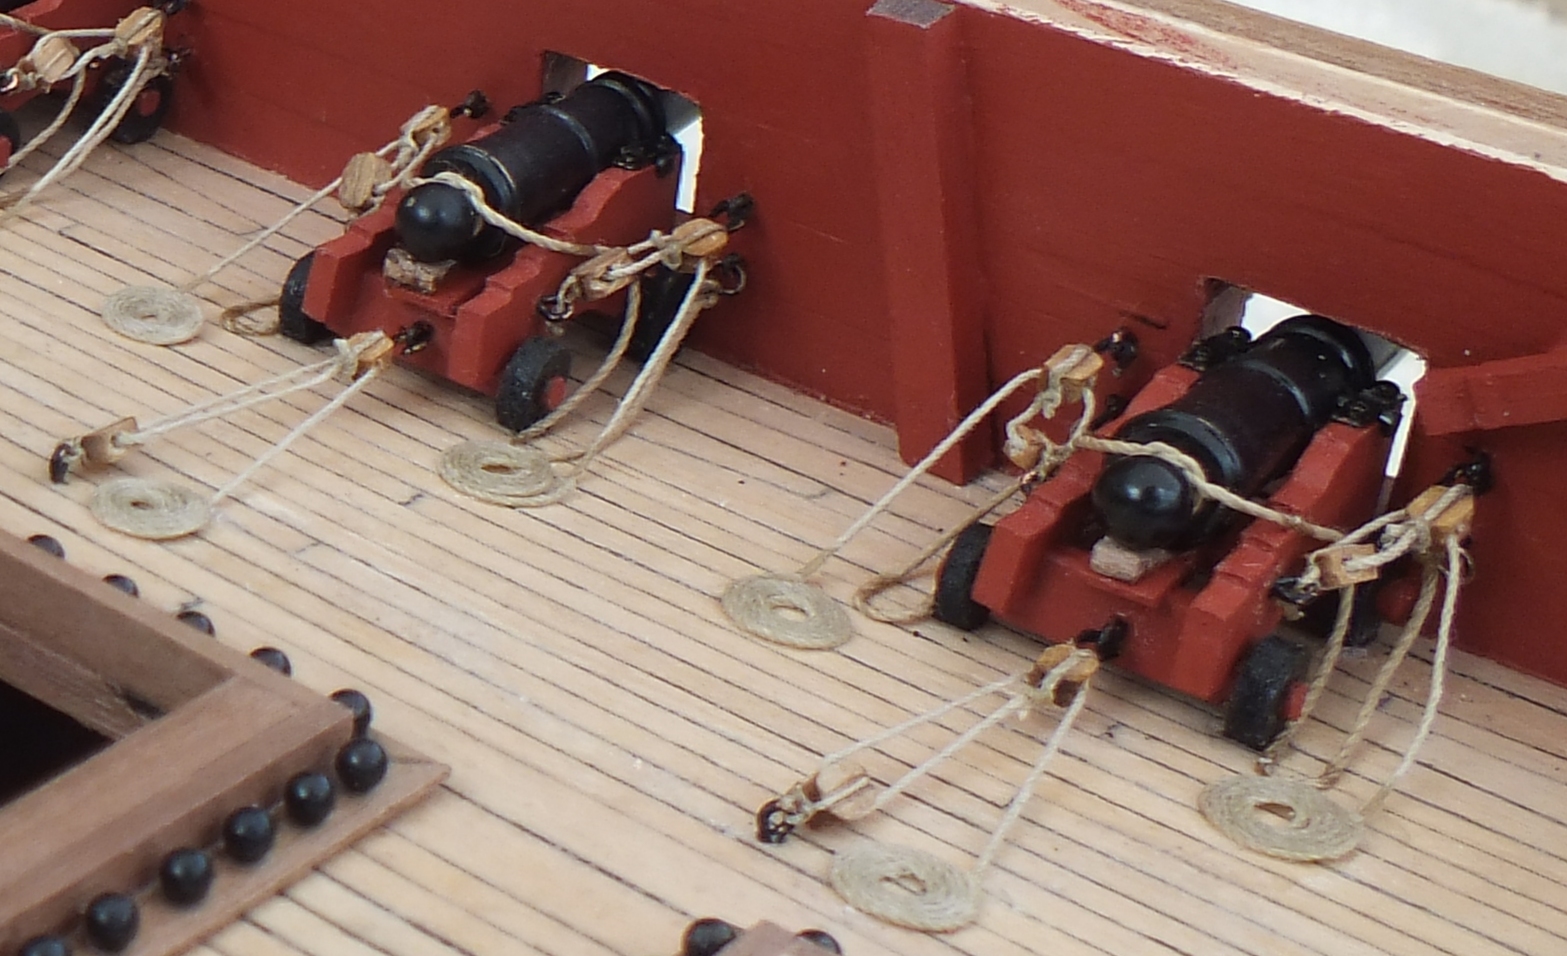
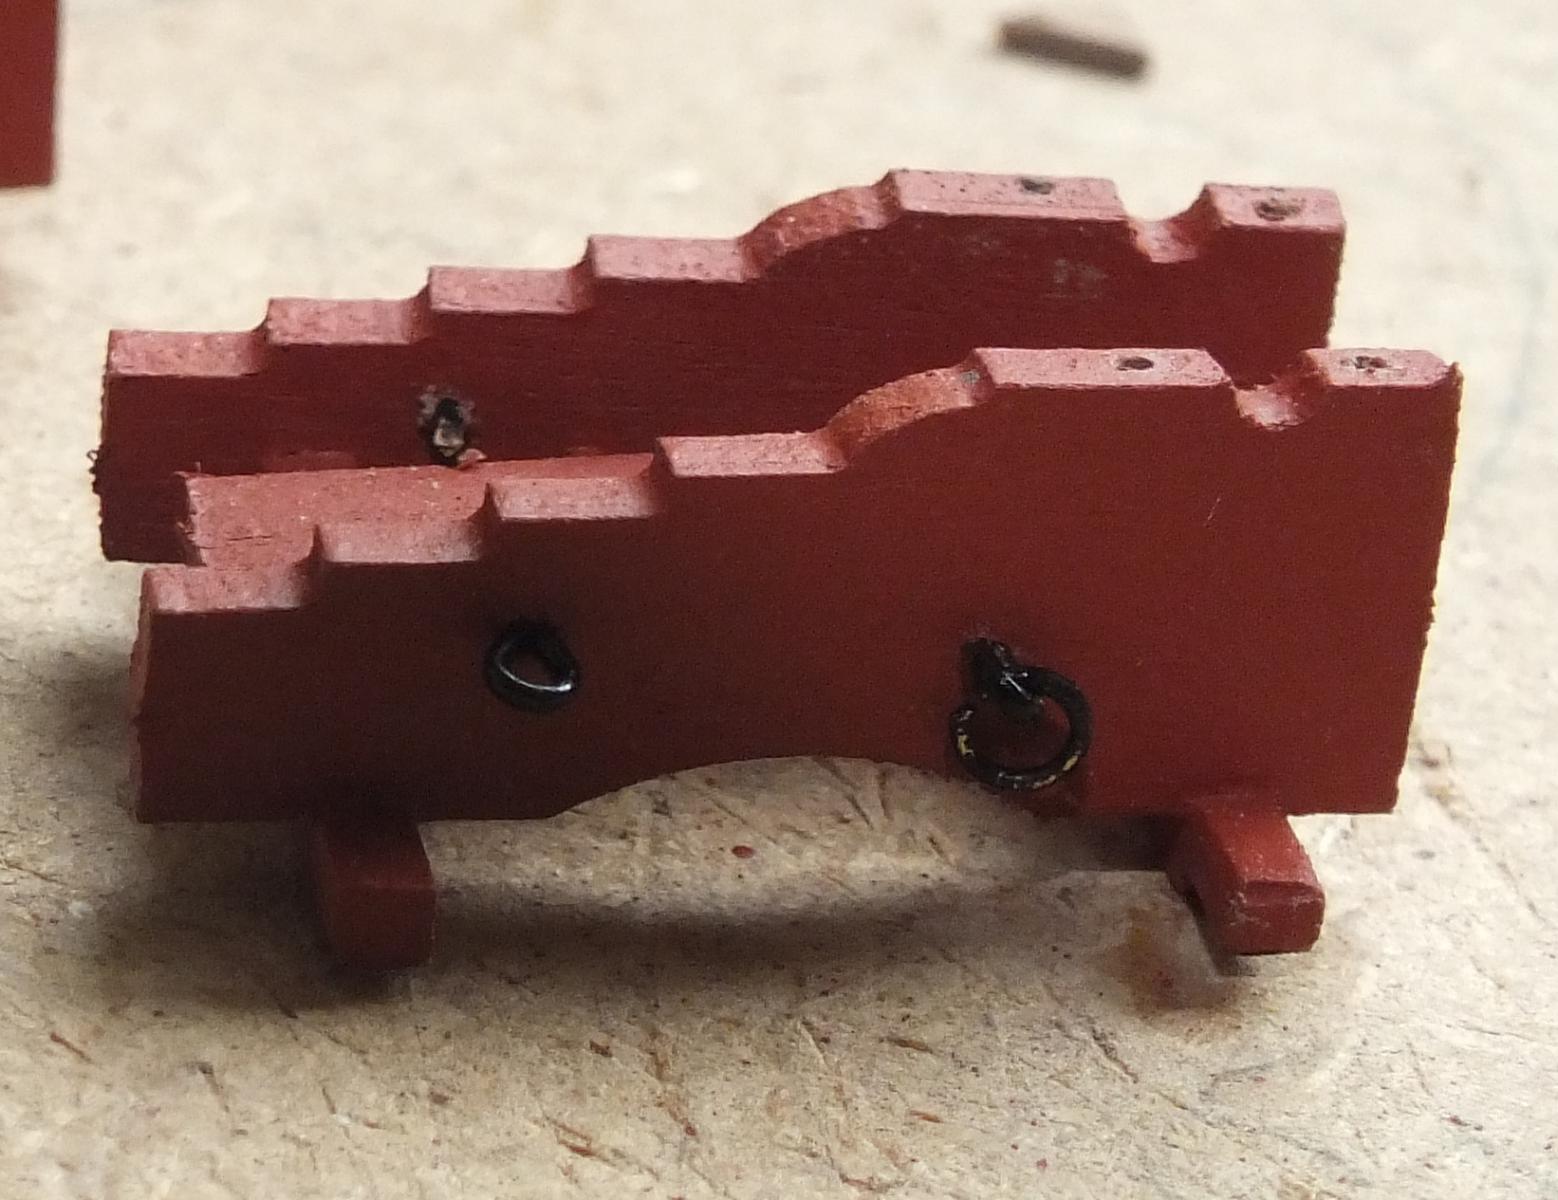
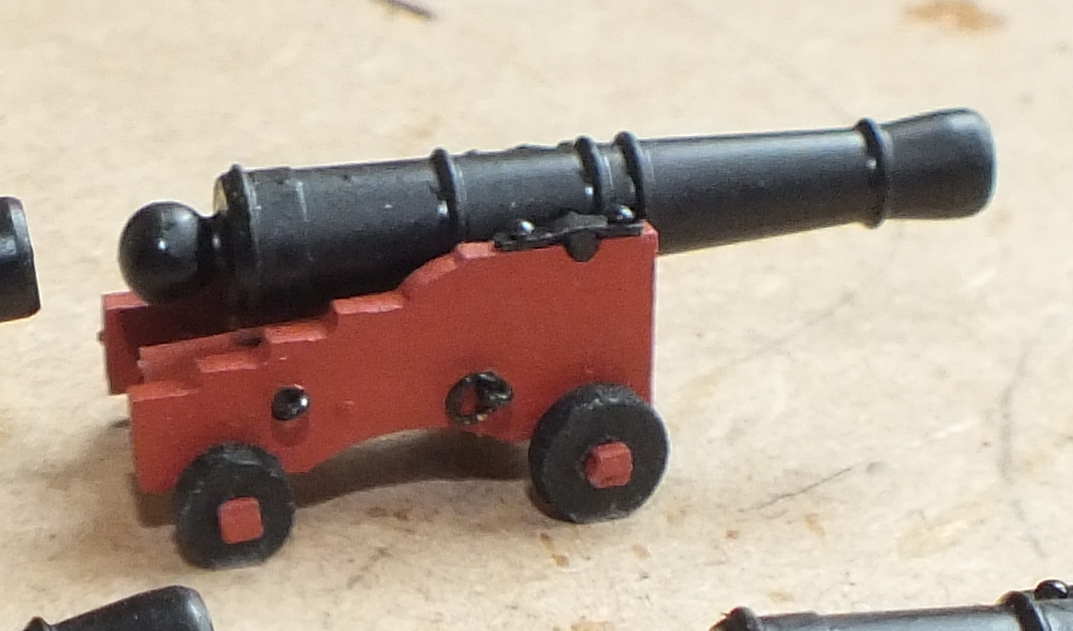
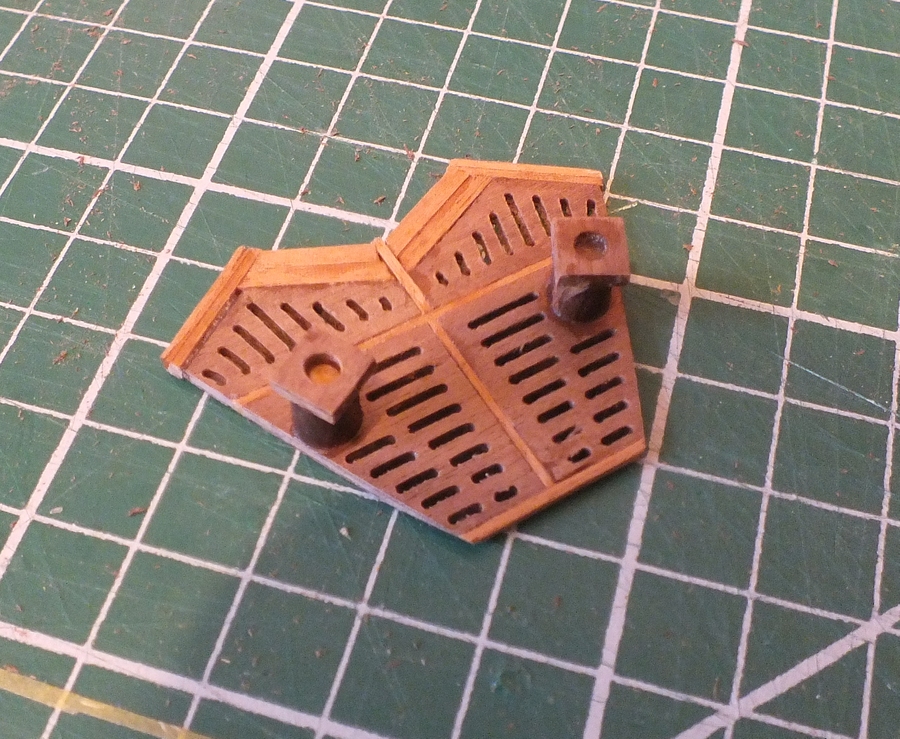
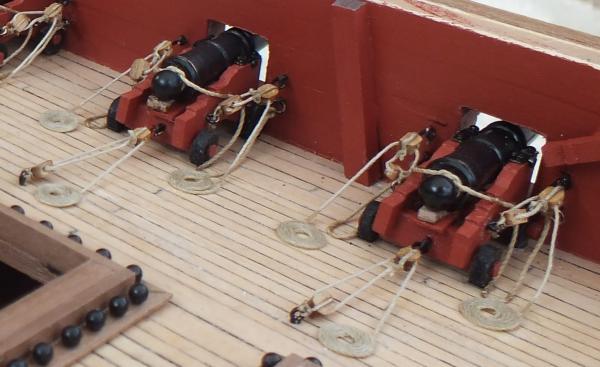
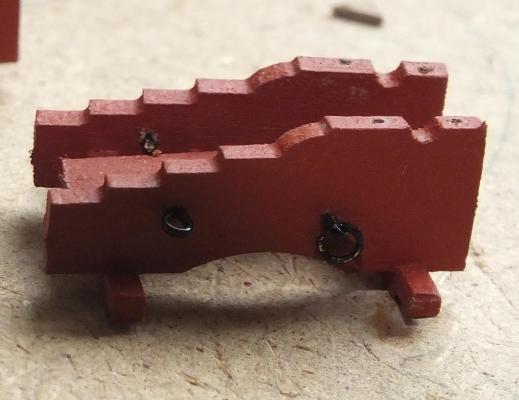
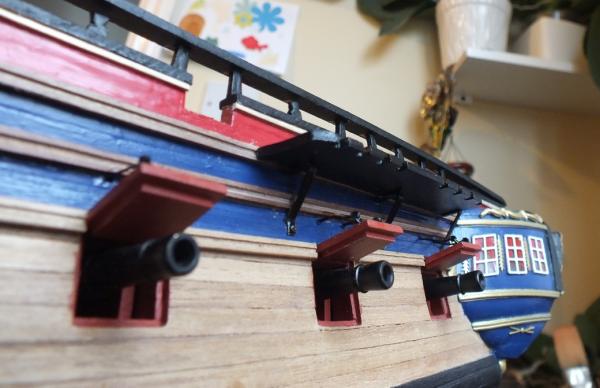
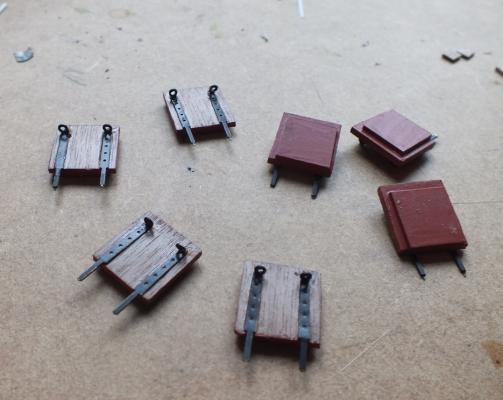
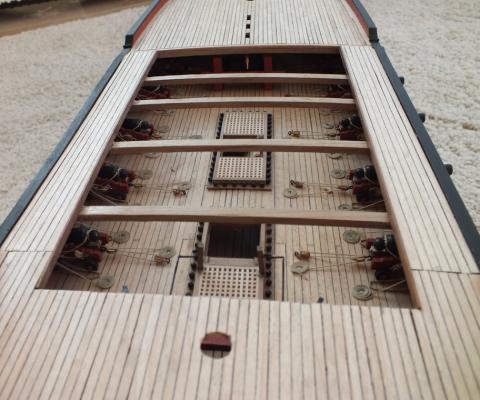
Hi Guys Christian Thanks, I have had a look at the lining boards and I think you are right, they are probably the wrong way round, so I have removed them reworked them and refitted. Bill To get the cannons to move up and down, when assembling them I glued the trunnion in the barrel and drilled down into the carriage and ten pinned the cap-square onto the carriage dry which allows the barrel to still move up and down. when I fitted the cannons to the deck I used very thick cyno and also rubbed the finished cannons on sand paper to give a small flat on the bottom of the wheels, to give a better contact-glueing area, plus I glued where the cannons touch on the inner bulwarks the last thing you want is one coming loose when the fore or quarter deck is on. Mobbsie The brackets under the mizzen channel are made from the brass/ sprue no problem to make, you would think that the price these kits are right number of parts would be included. A carriage with holes for the trunnion A cannon with trunninon and you can just see the sanded flats on the bottoms of the wheels

- 536 replies
-
- 5
-
-
- diana
- caldercraft
- (and 1 more)
-
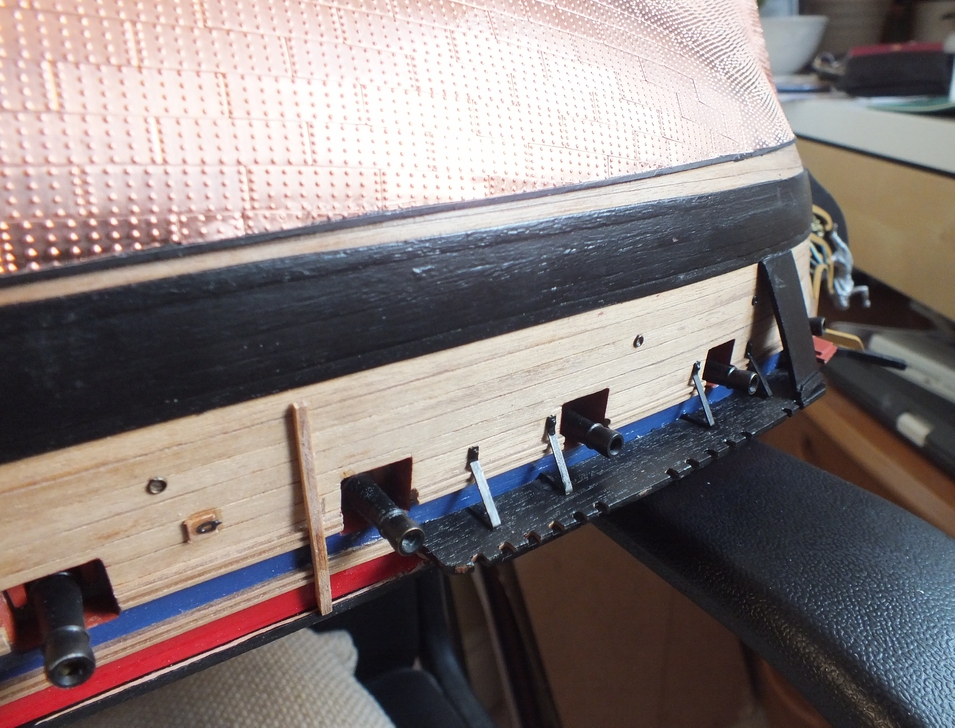
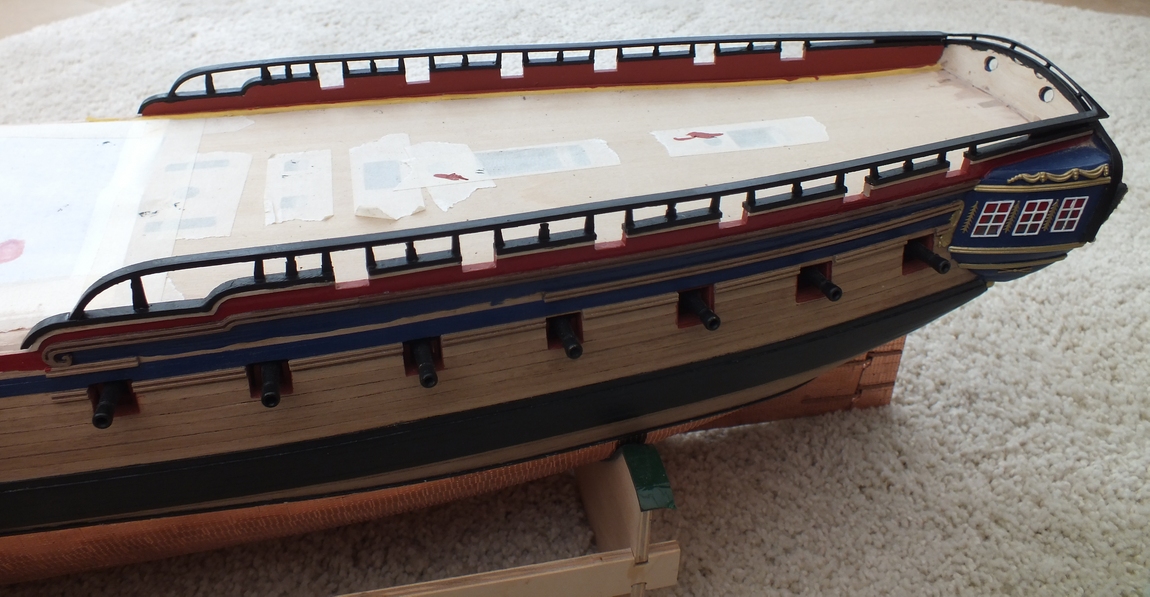
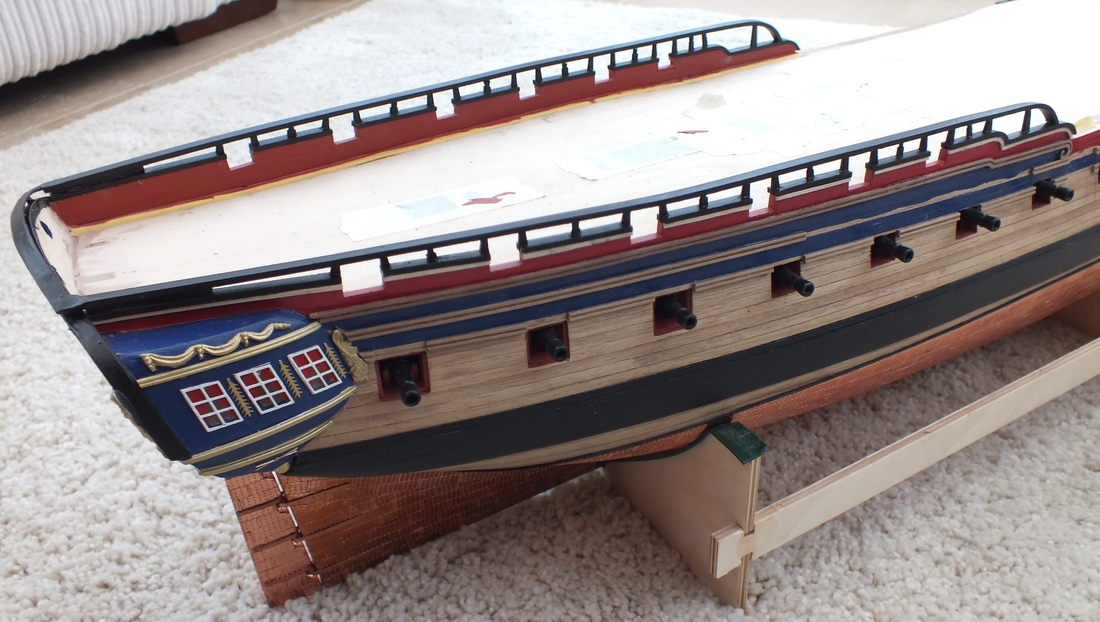
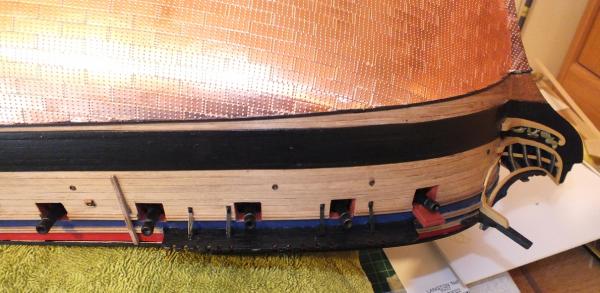
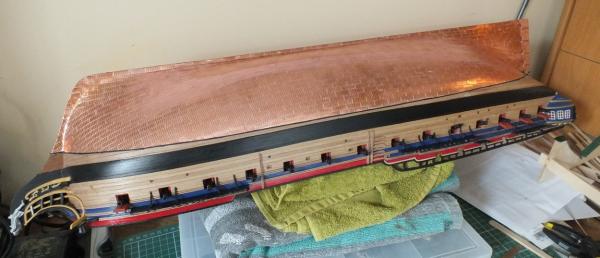
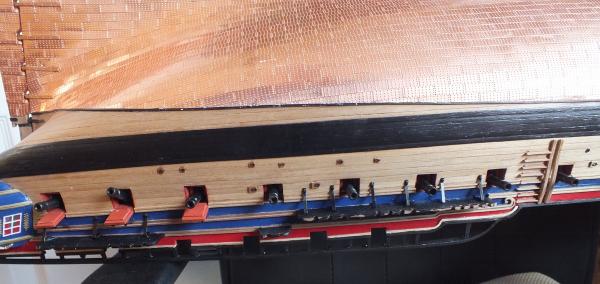
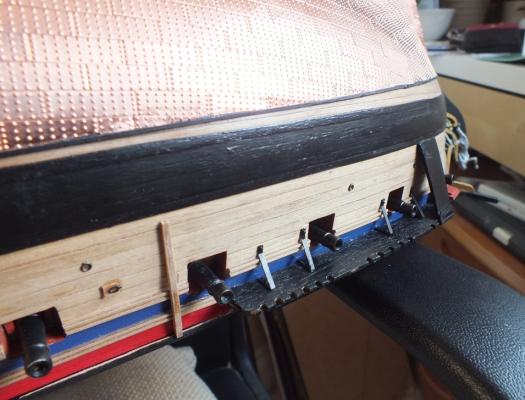
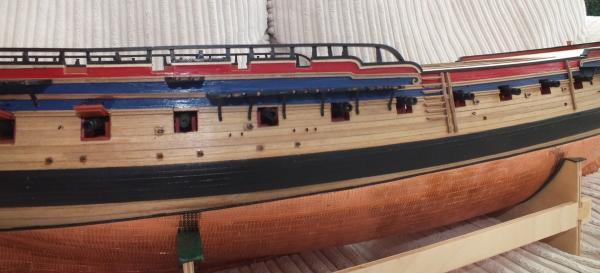
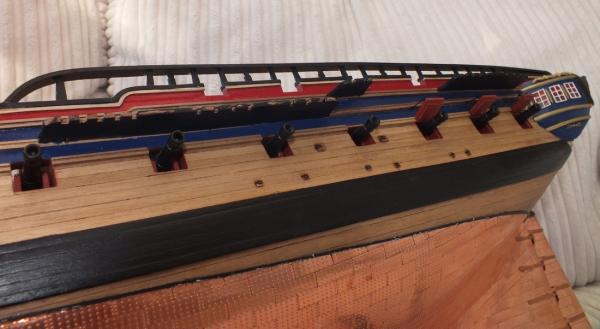
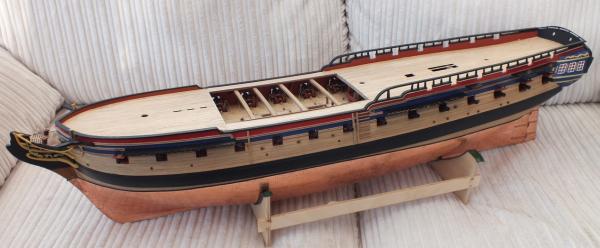
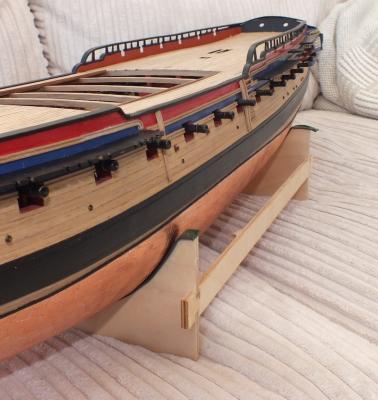
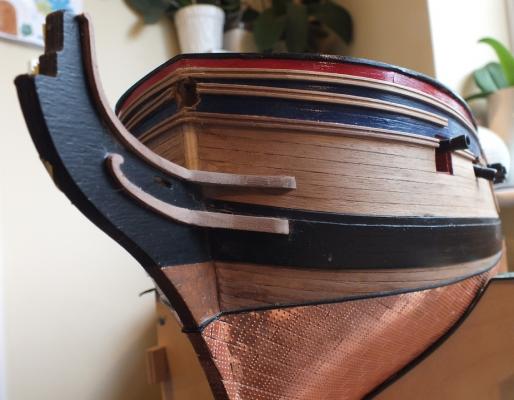
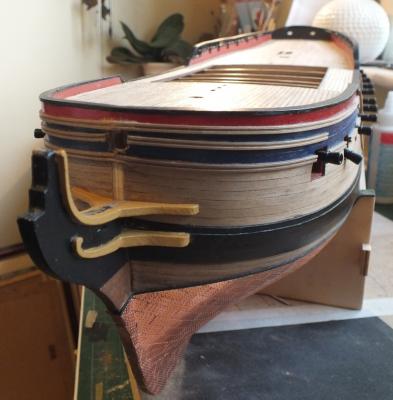
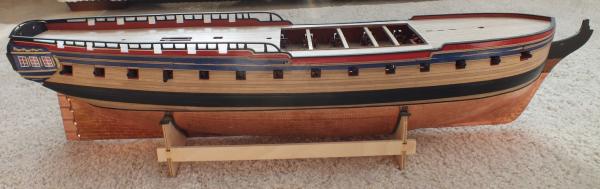
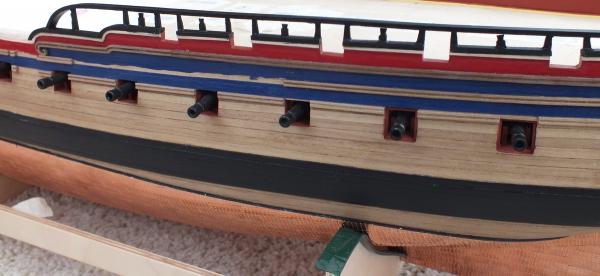
The channels, gun port lids, plus the oar ports and ventilation ports and the eye bolts have all now been fitted, plus the channel support brackets and the anchor lining boards I found the best way to work on her, was keel up, it gives much better access to the under sides of the channels, this would not be such a good idea if the deck fittings have been added. One problem I found was that parts no 258 the channel support brackets there are only 22 supplied, and the plans shows 26 and if there are ones behind the anchors you need 28 I will get around this by making the extras from the brass strip around the etched parts. This might be the last update for a bit as we are off on the QM2 for a holiday and Xmas is coming. Working upside down support brackets All the parts fitted to both sides
- 536 replies
-
- 8
-
-
- diana
- caldercraft
- (and 1 more)
-
Hi Mobbsie Nice masts, good idear to extend the lengths it will made threading the rigging much less hassle, it all gets a bit busy under the tops a bit later. Glad the build is back.
- 1,279 replies
-
- 1
-
-
- agamemnon
- caldercraft
- (and 1 more)
-
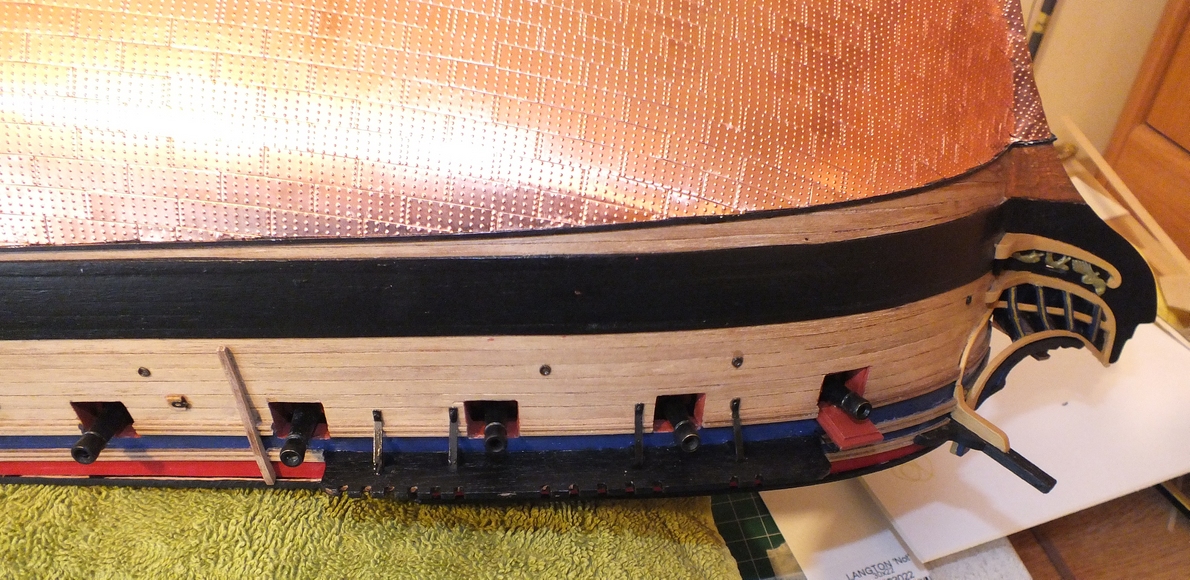
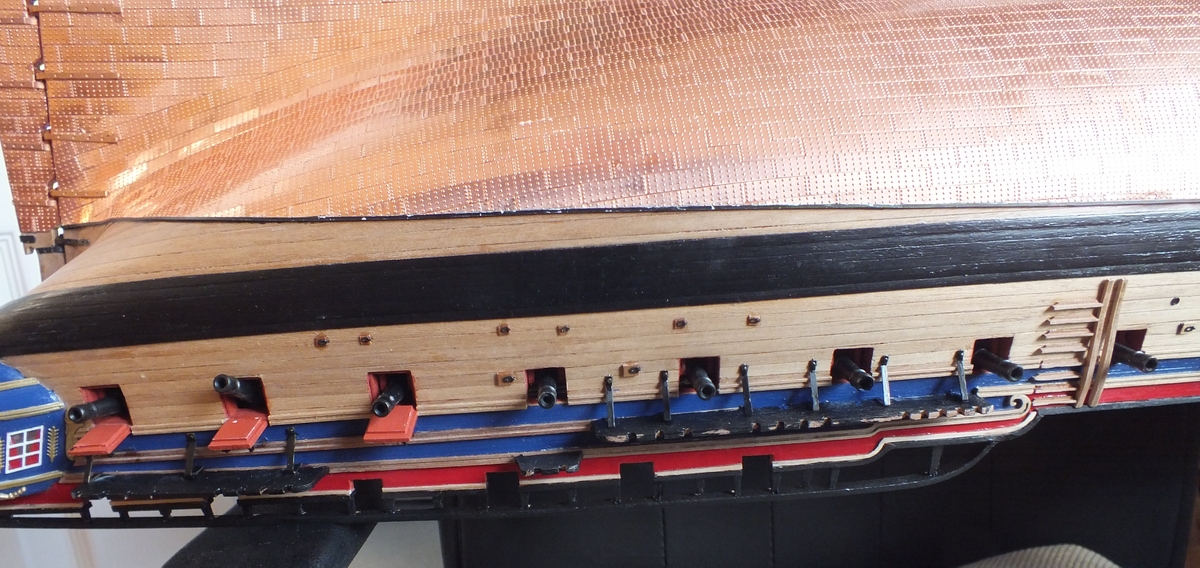
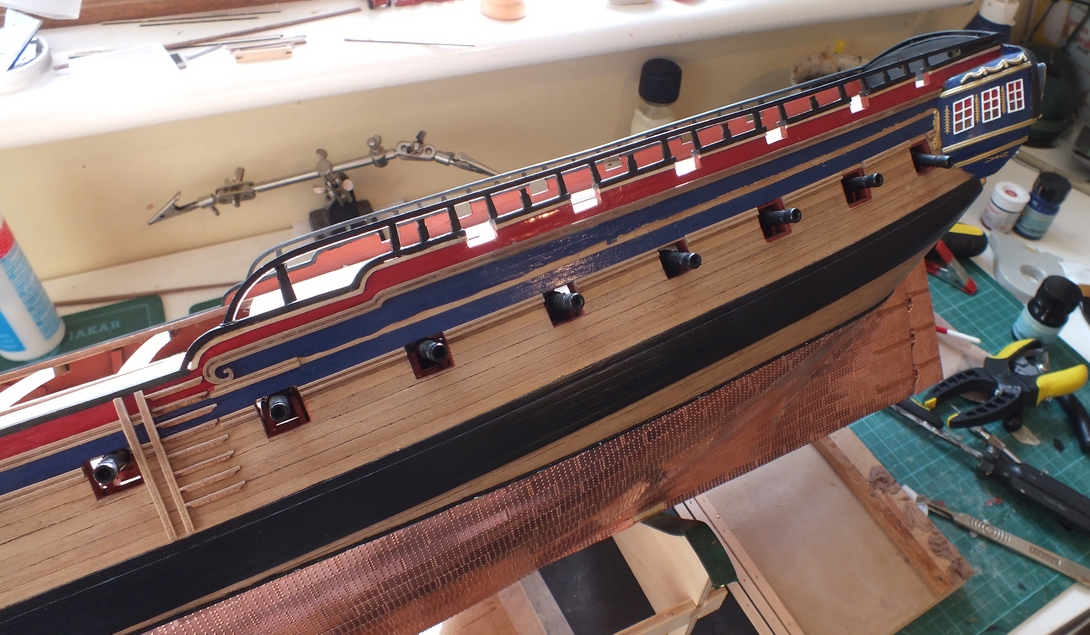
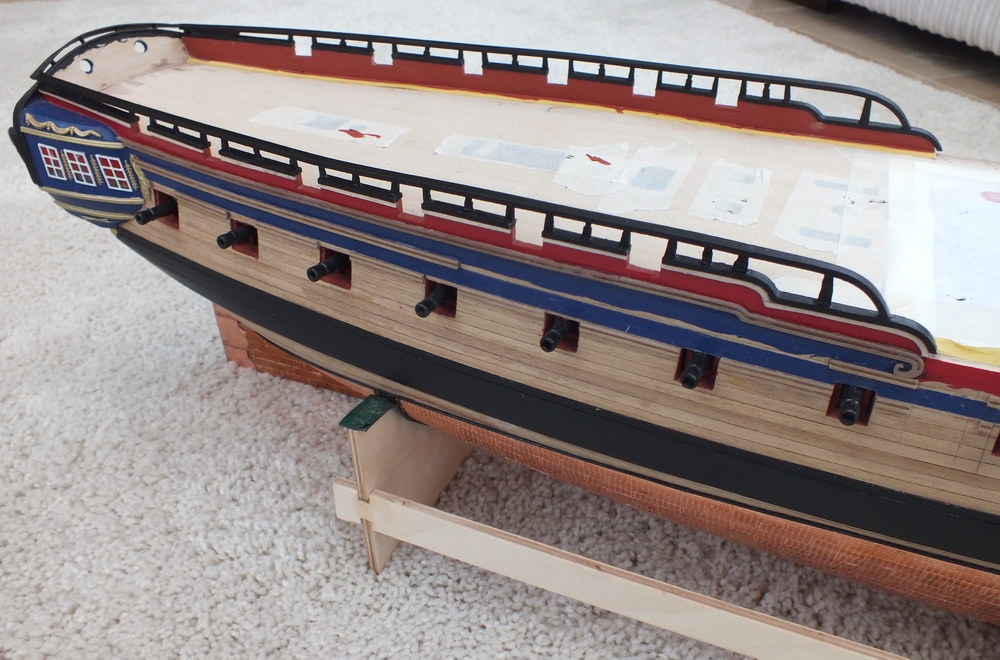
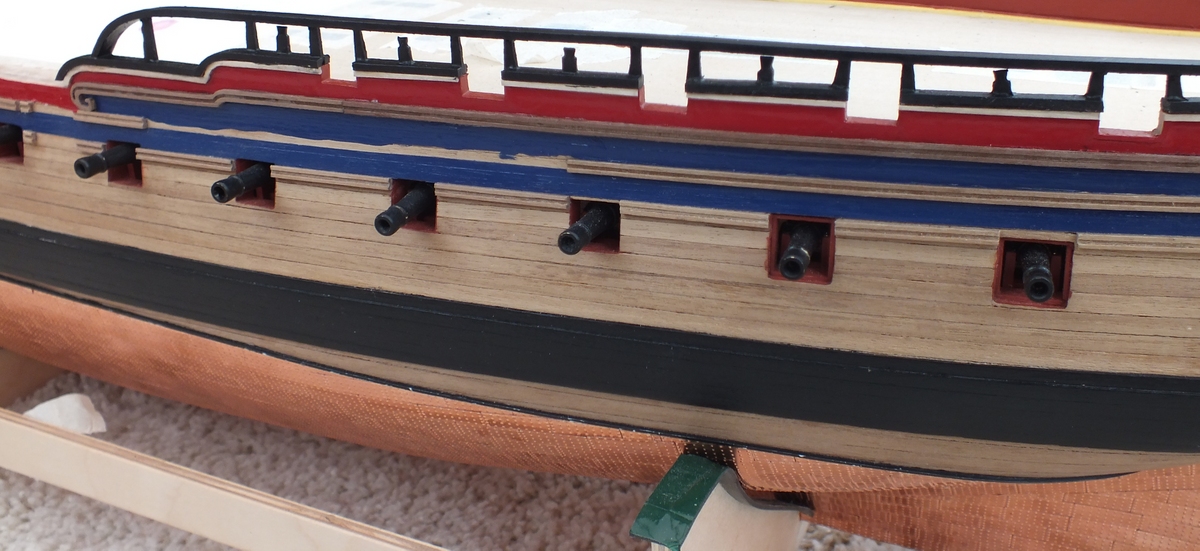
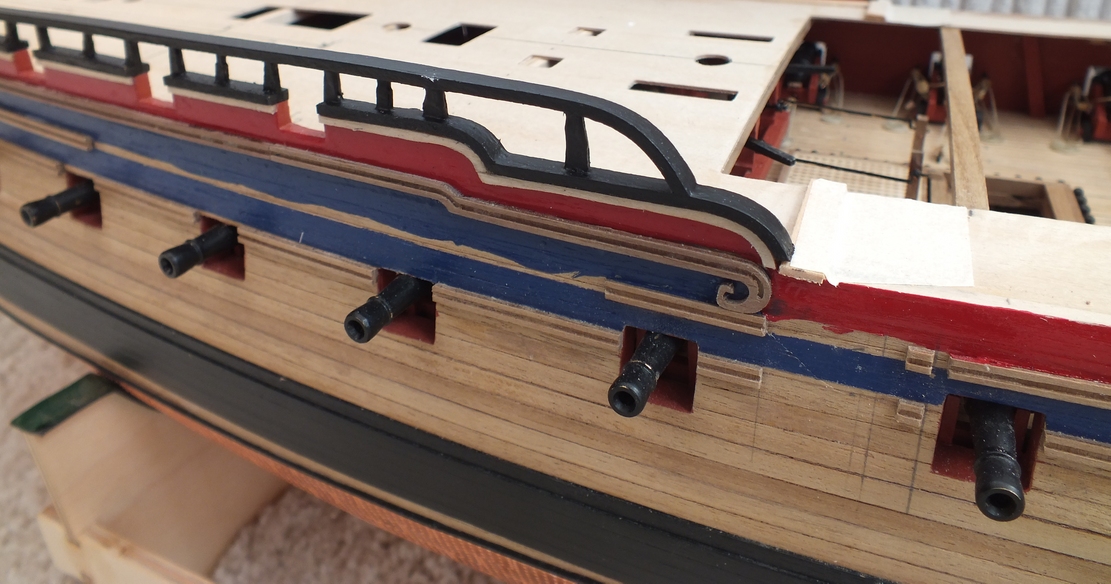
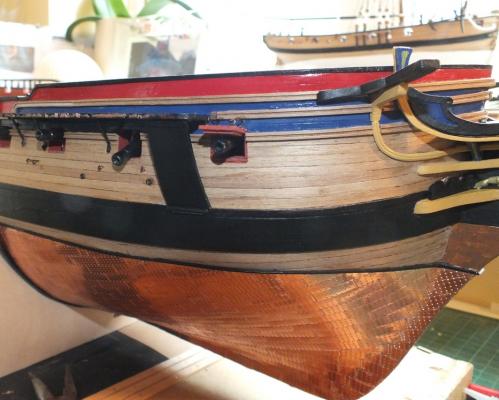
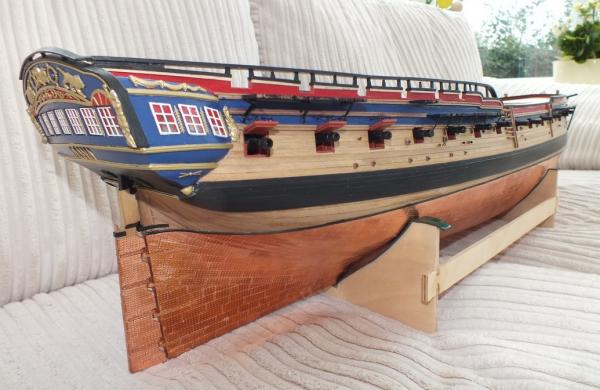
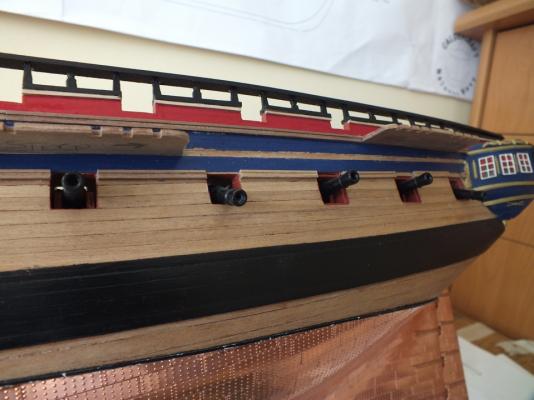
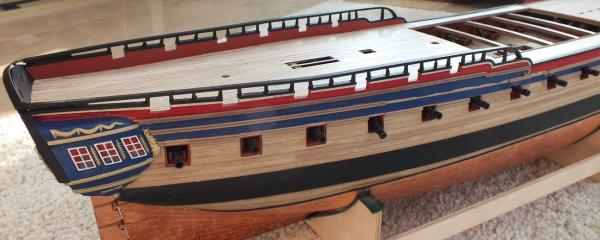
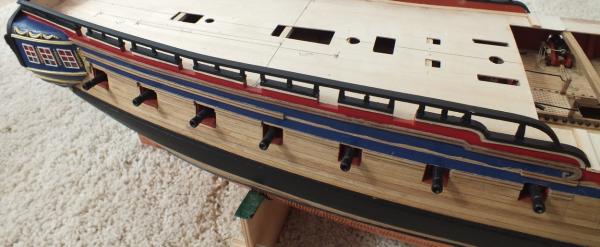
With the bow section now completed minus the stanchion rails and netting it was time to decided which part of the build to do next. The choice was to do the deck fittings or the sides, I decided to complete the ships sides details,I first looked at the position of the channels and chain plates to make sure they did not interfere with the gun ports the fore and main mast channels needed moving by about 5mm to allow the links from the dead eyes to run at the right angles with out passing over the gun ports, I had plenty of the slotted rail to replace the now short ones rather than infilling with small bits, the mizzen channel will sit above the gun ports on the main deck and on top of the rail. I also decided to make new gun port lids as seen in the photos, so far then I have fitted the channels drilling them and adding pins, plus fitted the oar ports and vents,one side done and about half way through the other. Rails removed Channels dry fitted New gun port lids First side done minus the support brackets


- 536 replies
-
- 8
-
-
- diana
- caldercraft
- (and 1 more)
-
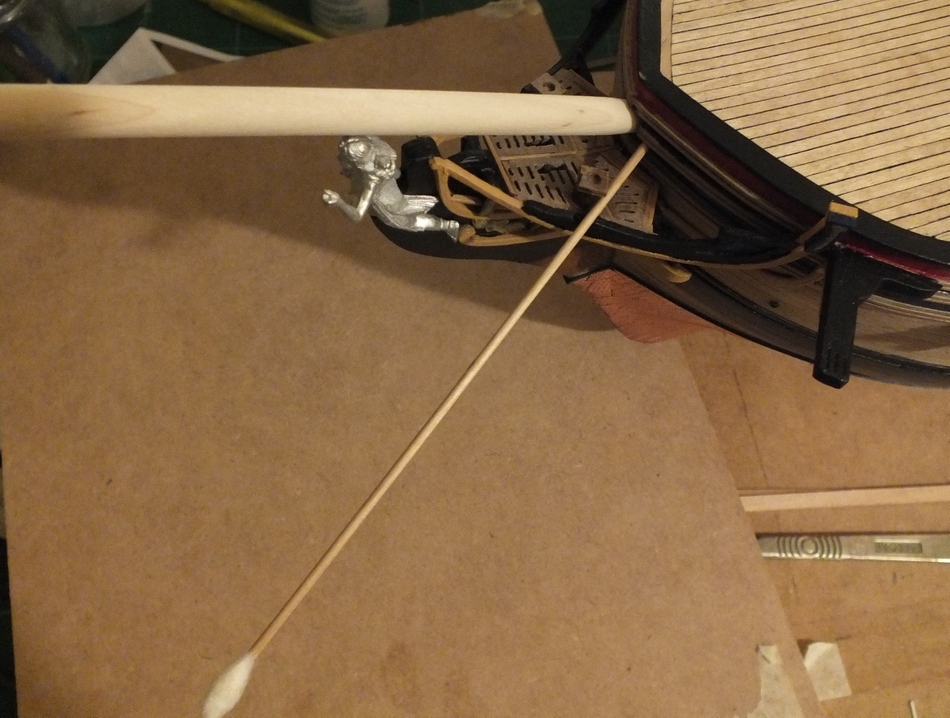
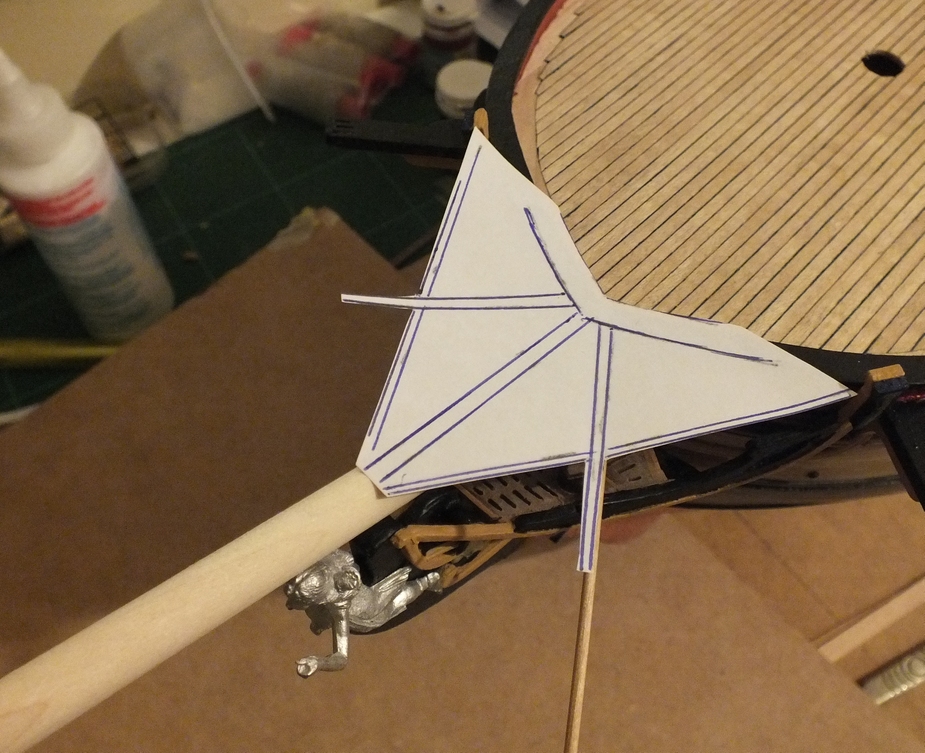
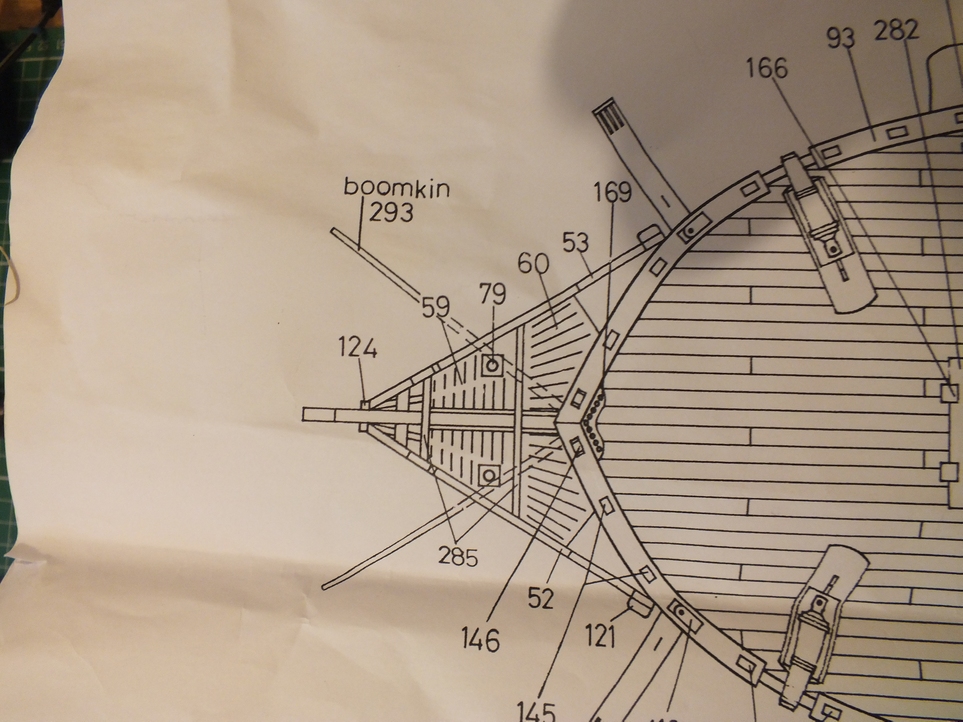
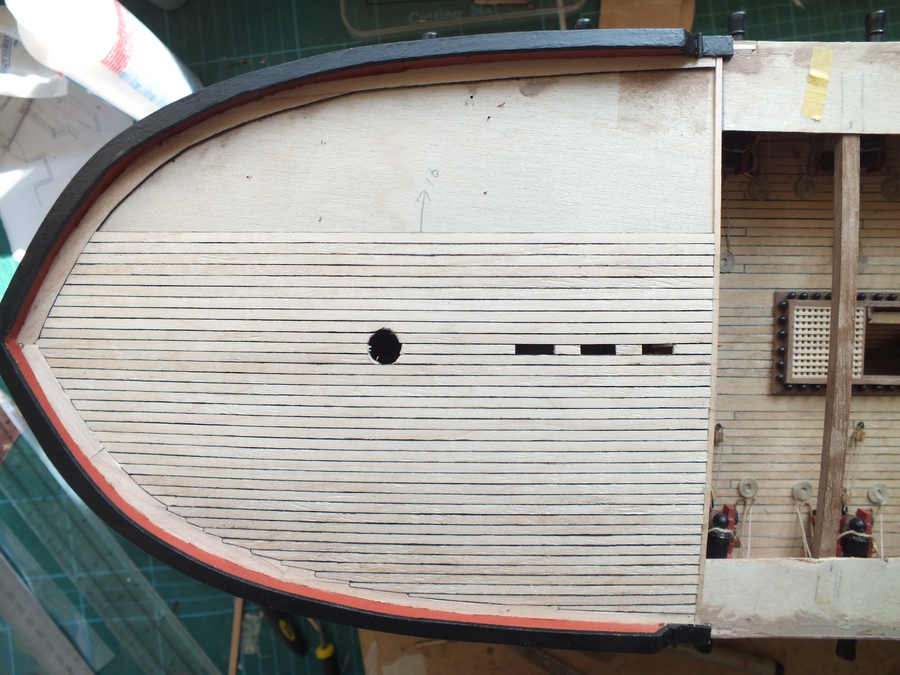
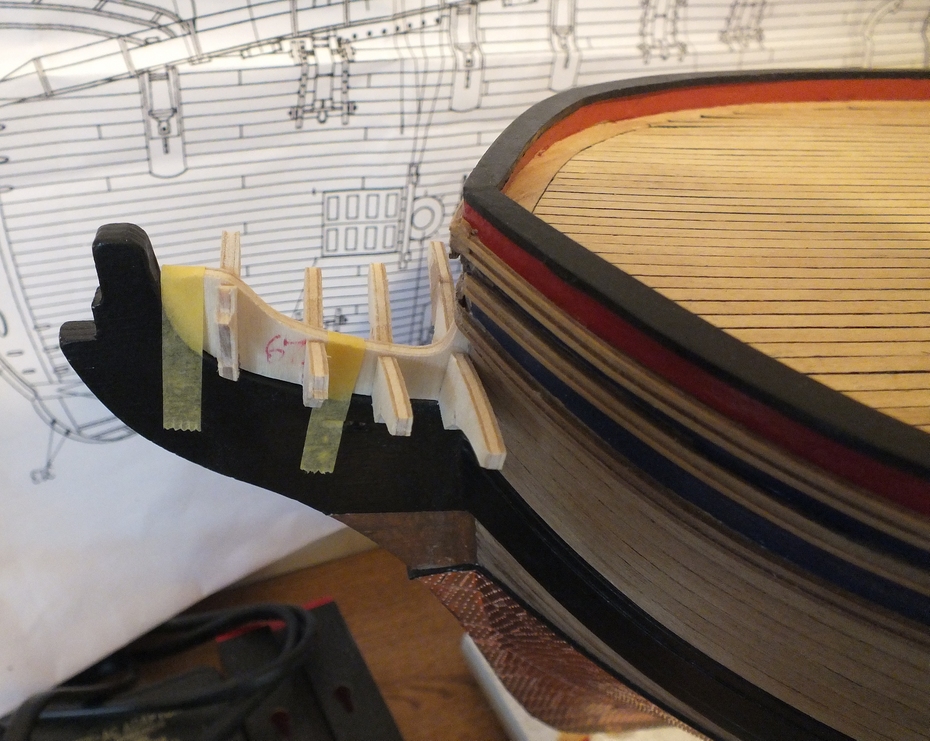
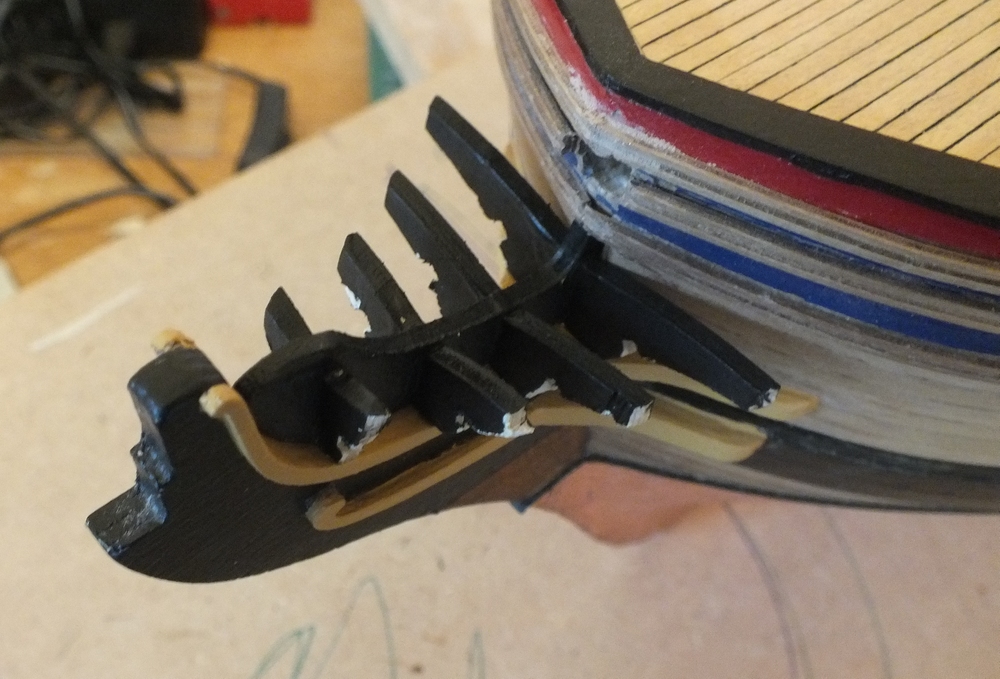
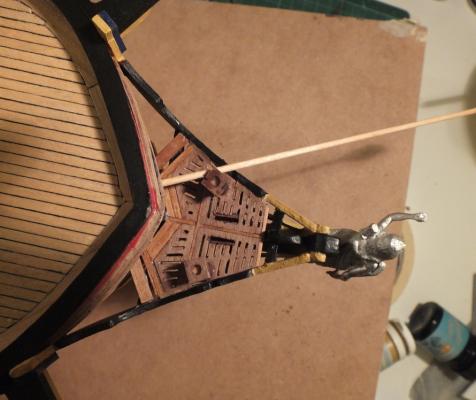
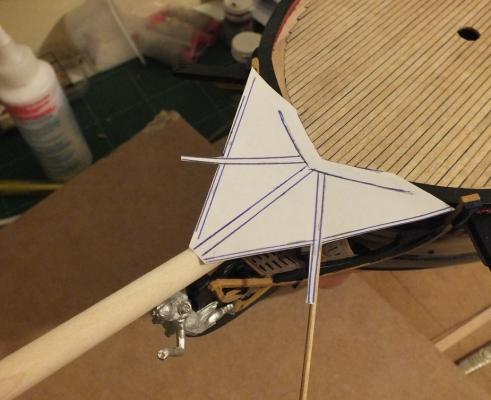
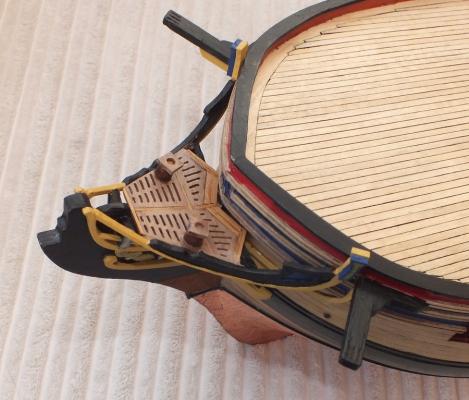
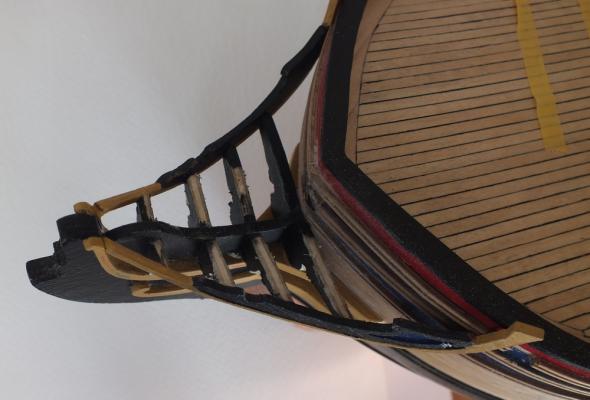
Hi Guys And B E and Christian Thanks for the interest and to B. E. I had completely overlooked the gammoning when sorting out the grating, as said it was altered to fit the space, which included trying to not have the boomkins pass right over the top of the seats of ease, the grating does not wrap right around the hull as shown in the photo of the plan, I have now added one more plank to extend the grating which I hope makes it look a little better. I have also cut away the grating to make two slots which will allow the gammoning. Back to the grating it has been a real pain to do, I now wish I had scratch built it, I originally moved the grating as far forward as I could to move the seats of ease out of the path of the boomkins, I have added some photos to illustrate this. Diana s boomkins also point down a quite an angle, much more than on Pegasus where there is also a large gap between the boomkins and the top of the rails. I sill might cut it all out and do it again !!! Plan Boomkin it will enter hull where the rail is Shows boomkin under a traced copy of the plan Shows the slots for the gammoning and the extra plank (varnish still wet)

- 536 replies
-
- 1
-
-
- diana
- caldercraft
- (and 1 more)
-
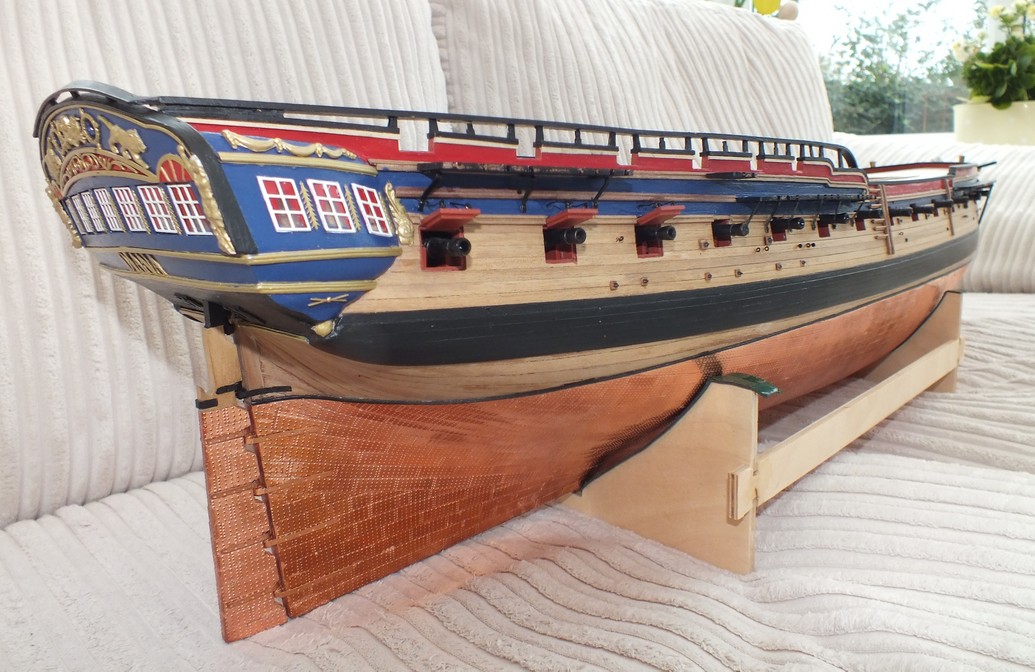
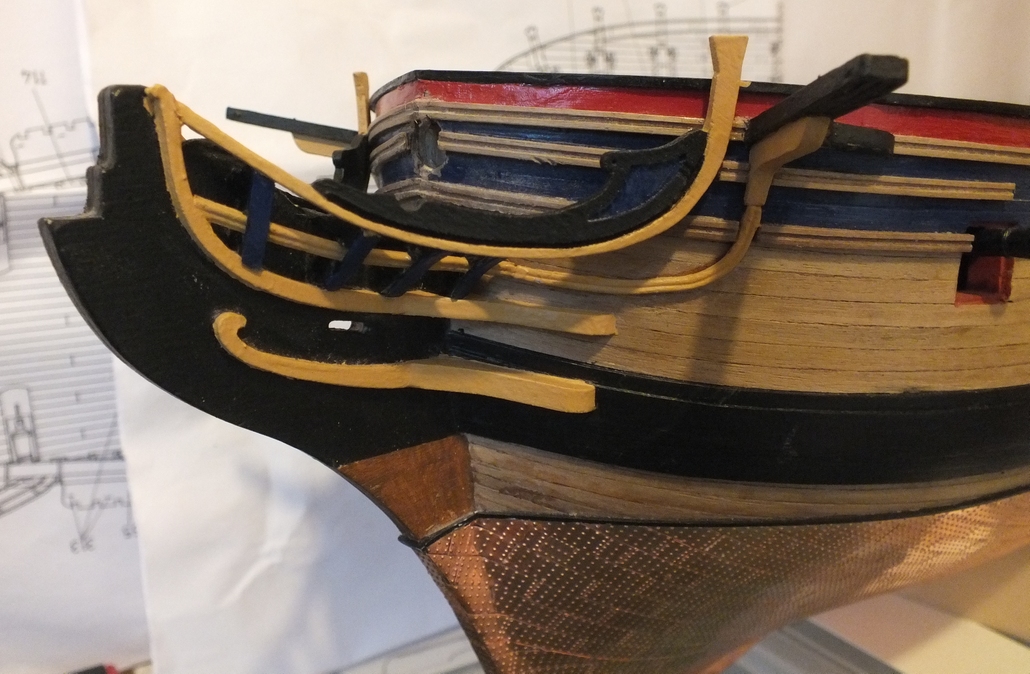
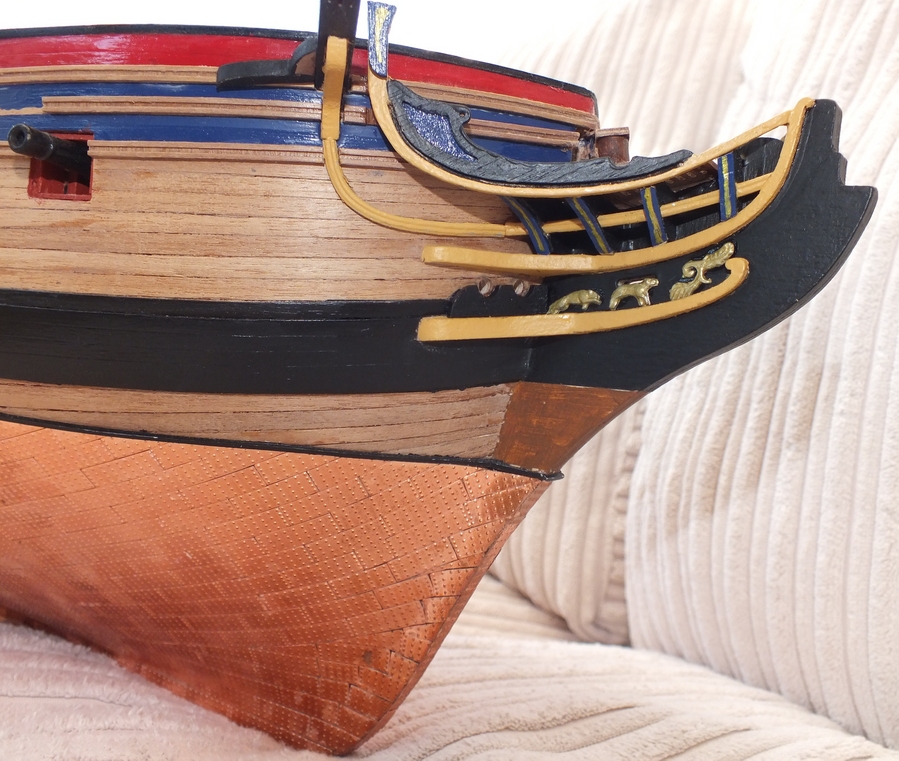
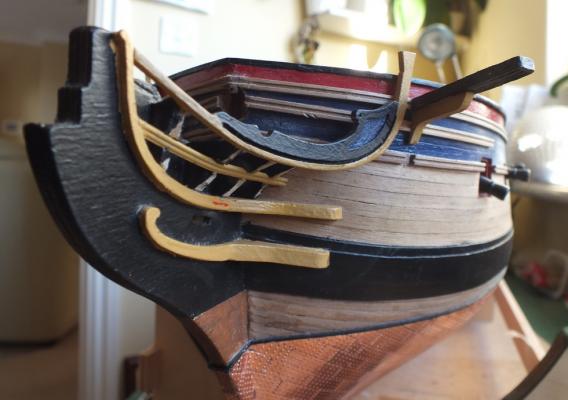
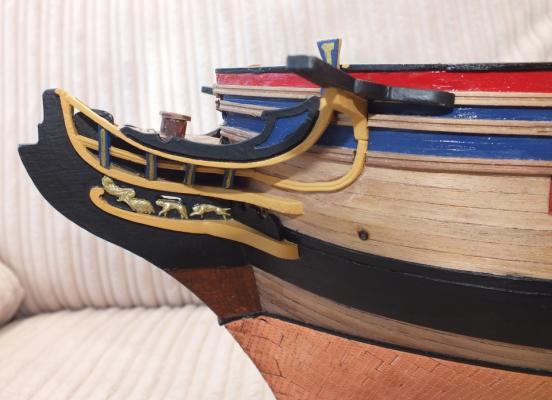
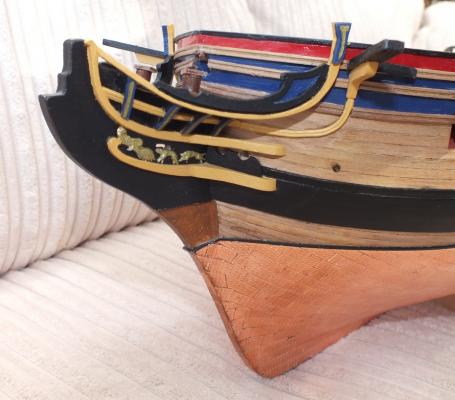
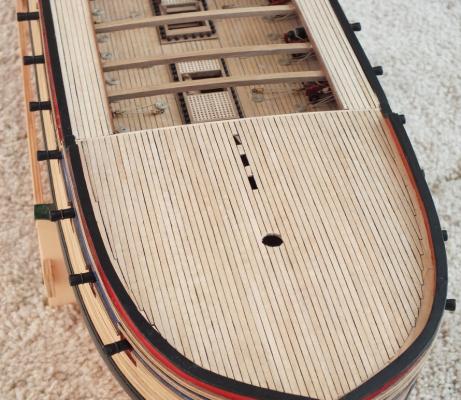
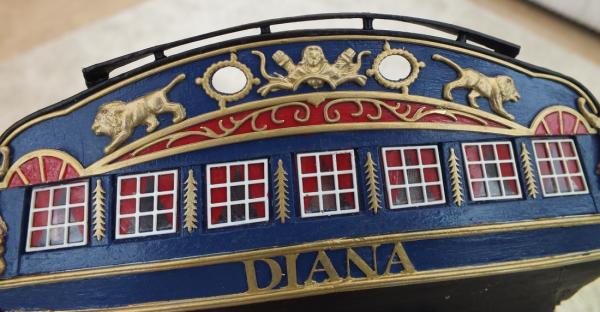
The bow Section continued I then taped the two parts of the grating together to see how it fitted in the space between the rails and the head timbers, it sat rather high so I cut and ground down the tops of the head timbers so that the gratings sat below the top of the main side rail. I then made the cat-heads as per the instructions, the cast decorative rails were then shaped and added, after painting, and I cut them off where they turned flat onto the hull. The cat-heads and their support timber were glued together and fixed to the hull using cyno, and a couple of pins, the second part of the cast strip was then shaped and joined to the cat-head support and the strip on the hull. I then made a pair off second support timbers as shown in The Anatomy of ships Diana and added them, and to finish off fitted the timber covers over the side of the timber heads where the cast rails run through them, the sides of the timber heads did need a bit of fettling to allow a neat finish to the covers. Lastly the whole job was painted and touched up where necessary. Decorative rail and timber covers fitted The grating was finished next, I made a frame to fit inside the space which did not match the plan, but the space, I added the seat`s of ease ( the use of these must have a bit tricky at night in a gale )and then fixed the assembly in place. I added a gold lines down the covering timbers (it looks much better in real life than the photos) a final paint touch up, and the gold painted decorations were added, the only thing left is the stanchion rail and netting which I will add later. The grating Ready for finishing off Bows finished


- 536 replies
-
- 11
-
-
- diana
- caldercraft
- (and 1 more)
-
Hi Guys thanks for the comments. Firstly Jotika/Cladercraft I e-mailed them and this is the guy who responded John Wright a Director johnwirght@jotika-ltd.com so this approach might be worth a try . Secondly head-rails, they are difficult to get our head around, but I found them not as difficult as on Pegasus, as that was my first time, building up a head rail bow section, and this time I could look back on how I did them on her. So I have tried to go through this part step by step to give a guide and will post the next part in a few days when I have sorted out the Photos (and taken the admiral Xmas shopping). Thirdly there is no problem with the cannons they all move up and down,handy if knocked or caught when moving her about,I must try and remember to set them all up before photos.
- 536 replies
-
- 1
-
-
- diana
- caldercraft
- (and 1 more)
-
How to do deck edging?
Ray replied to SpencerC's topic in Building, Framing, Planking and plating a ships hull and deck
Spencer I totally agree with Jim I did my Diana deck with this method, I use a scalpel handle with a new blade to cut and remove the part of the margin plank that's joggled into. Regards Ray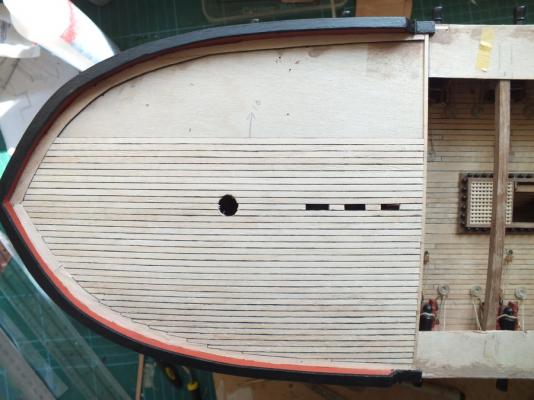
-
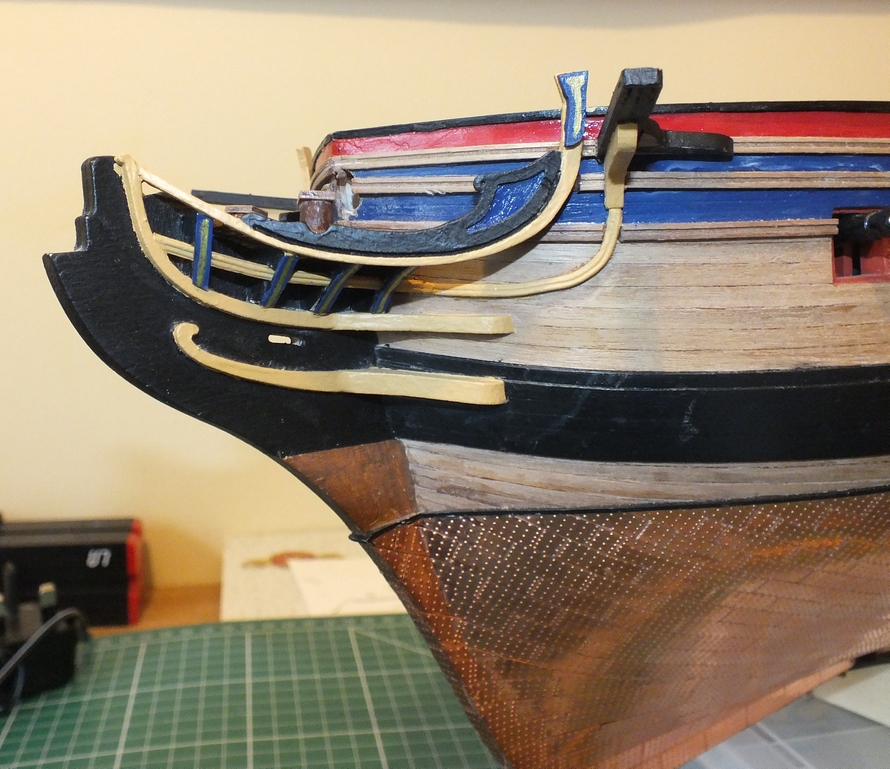
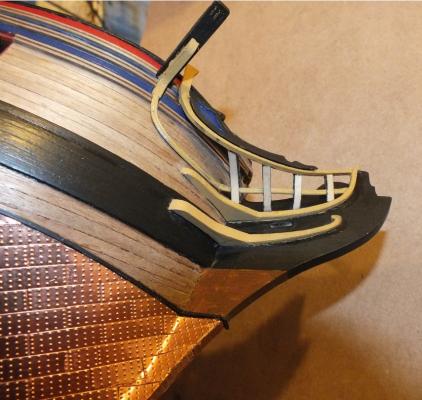
The bow Section Next I started on the head rails and all the bow details including the cat heads. The bow frame head timbers were dressed and glued together and the fit adjusted to the bow. The curved cheek rails were then fixed to the side of the bow frame together with the cheek blocks,the head timber assembly was bevelled as necessary to aline with the main rails and the bow frame, and the slots for the decorative strips were filed out the the assembly was then glued to the main bow frame after painting. I rememberer at this point that I only had three lengths of the decorative strip (340) which sits in the slots on the timber head and goes up to the bottom of the cat head and I would need four lengths I must have been one short as I had not wasted any around the stern, I e-mailed Jotika and they posted me two lengths the next day a very good service indeed. The main rails were painted and added I cut notches into the rails on the hull rather than filing the main rail sides to get a nice fit, so far so good. Next make the cat -heads and finish off.


- 536 replies
-
- 3
-
-
- diana
- caldercraft
- (and 1 more)
-
Hi Christian Great work and thanks for the info, I am working on the bow section at the moment and when its done am not sure if I will fit the chain plates and work on the sides or to fit out the decks, nice fix on the problem tight cord/thread will look better than crinkled wire. Best regards
-
Hi Mobbsie great work on the ships boats they look fab wise move not to fix them until after rigging but nice to see them in place. Diana is not much smaller that Aggie and storage is a problem I cannot have mine in cases and Diana will take the last space. I may build Aggie next alongside a (dog boat) a motor gun boat it will delay the storage/display problem but will compromise my building space time will tell.
- 1,279 replies
-
- 1
-
-
- agamemnon
- caldercraft
- (and 1 more)
-
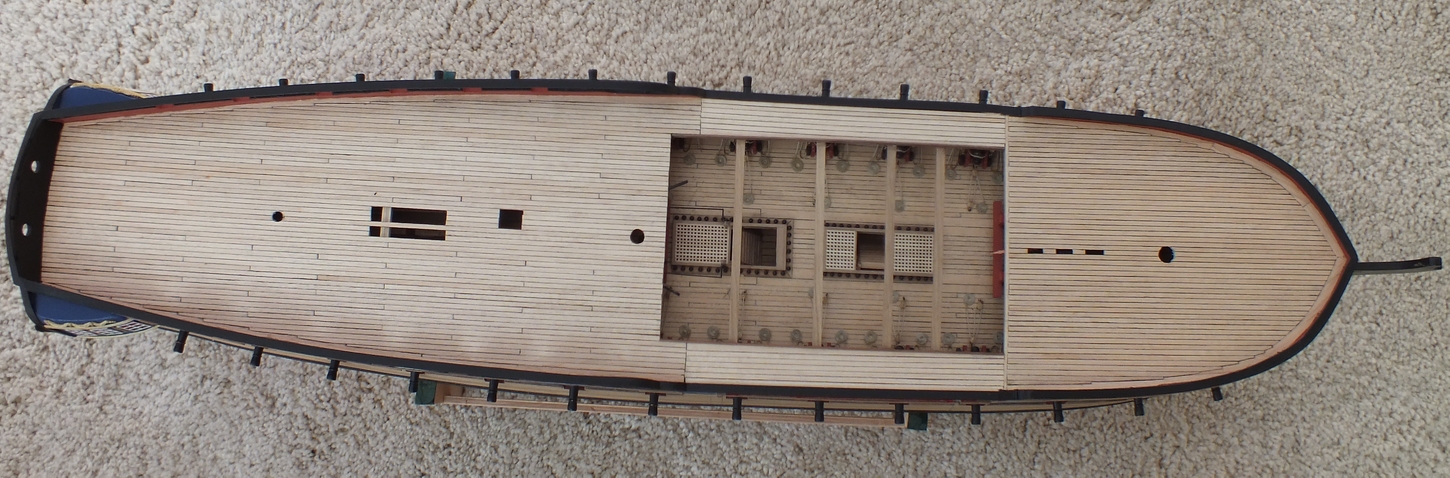
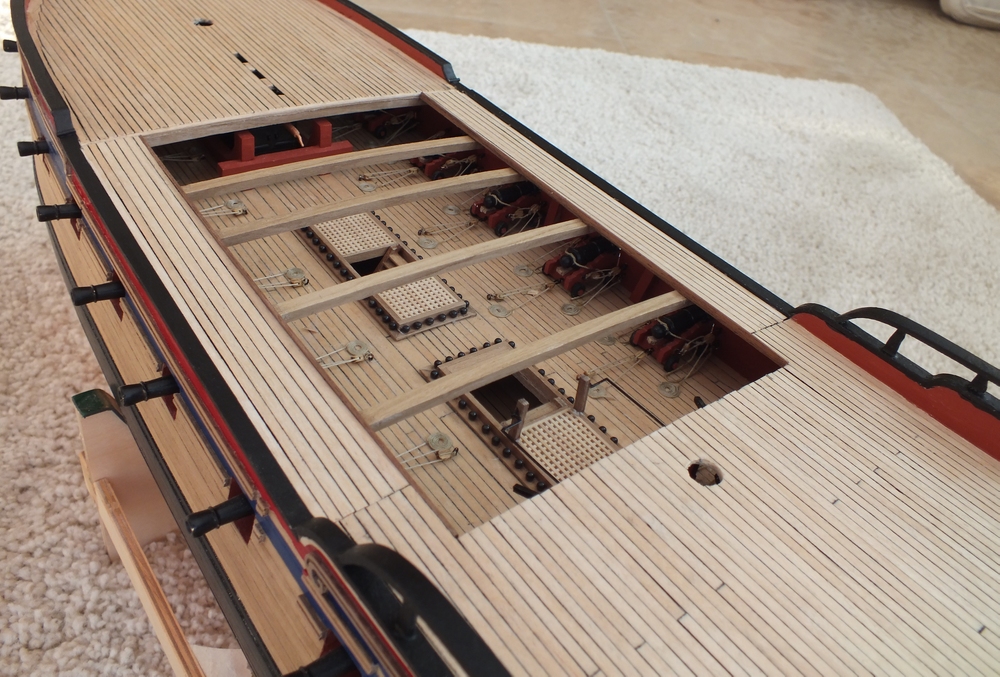
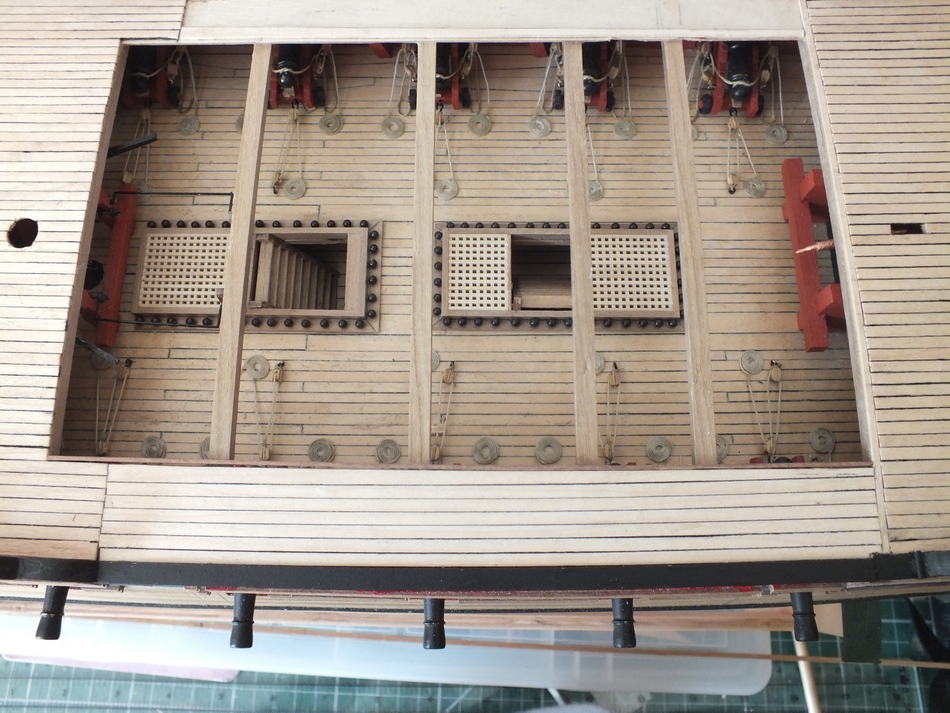
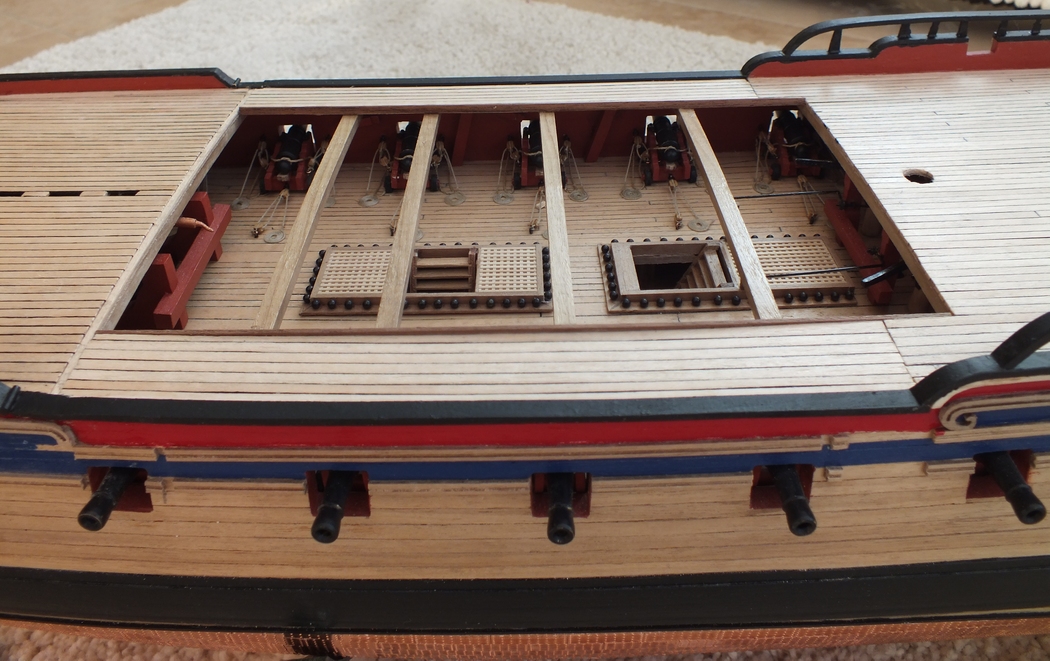
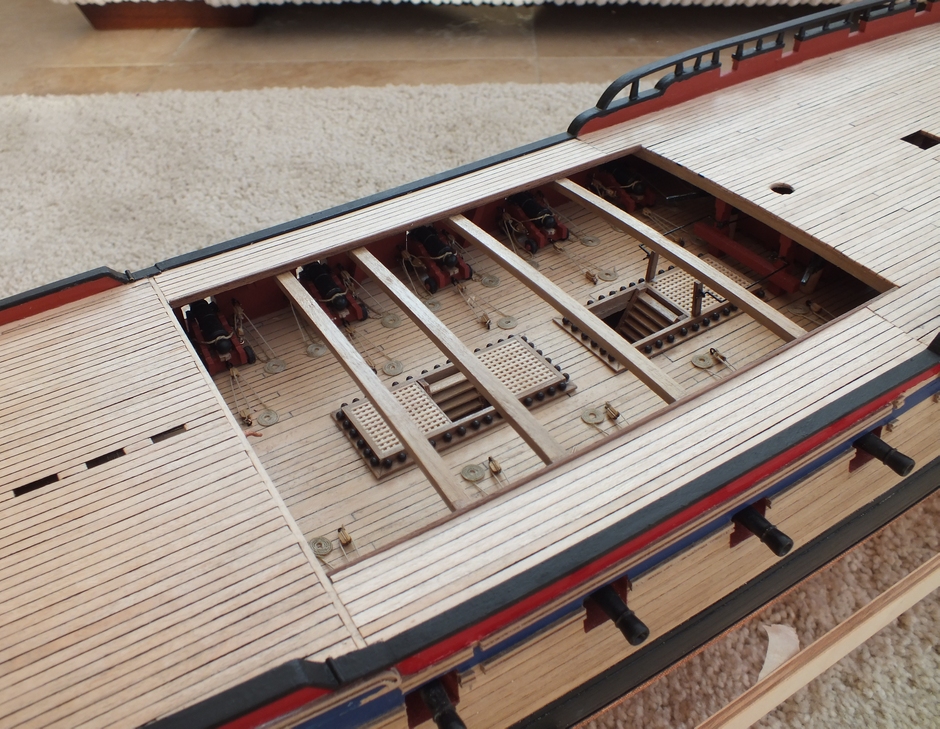
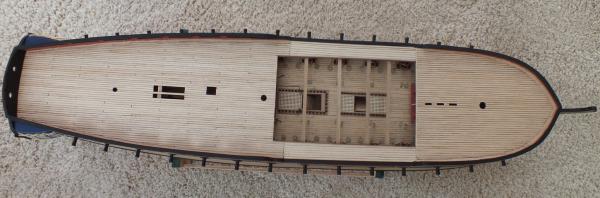
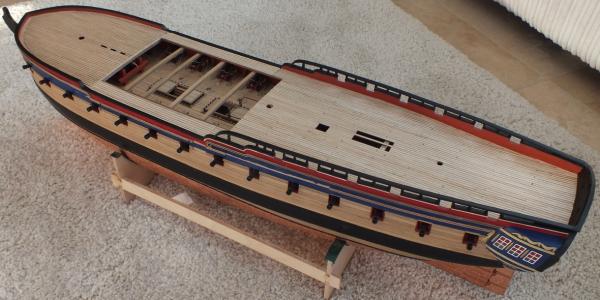
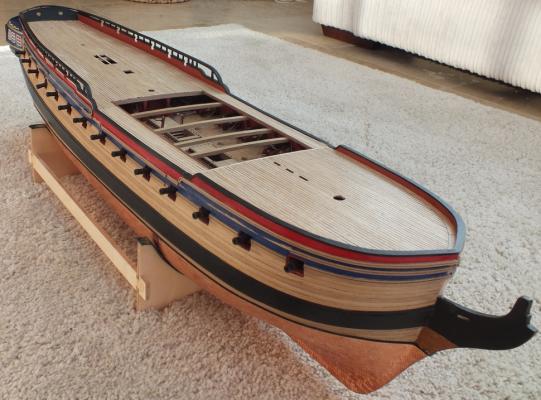
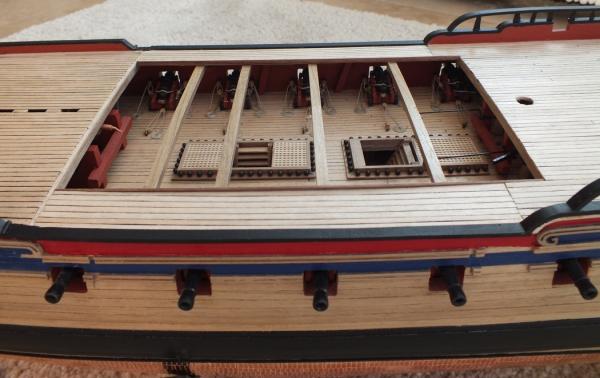
Below are some photos of the completed upper decks. Next I will finish a few bits on the sides such as the entry steps and then turn my attention to the bow and the cats heads.


- 536 replies
-
- 10
-
-
- diana
- caldercraft
- (and 1 more)
-
Hi Guys Christian, Floyd, polo, Alistair Thanks for the comments I will post some photos of the completed planking soon, its been a golf and fishing week, making the best of the weather. Paul , Joggling you need a waterway or margin plank to joggle into, and start where it starts to curve a lot and cut across about a third of the plank. If you GOOGLE joggle deck planking their are several descriptions of how to do it .
- 536 replies
-
- 1
-
-
- diana
- caldercraft
- (and 1 more)
-
Hi Guys Thanks for the comments Diana is coming along very well, nice that so many will use this build as a reference for future builds, lets hope there many of them, it is a great model a I am surprised that there are so few building her. Mobbsie we might be reversing projects as Aggie is the front runner for my next build.
-
Gangways The gangways have now also been planked and the 5x2mm beech has been used to make the rail which joins up the quarter and forecastle decks just the inner batten to add and varnish. One side done Both sides planked


- 536 replies
-
- 10
-
-
- diana
- caldercraft
- (and 1 more)
-
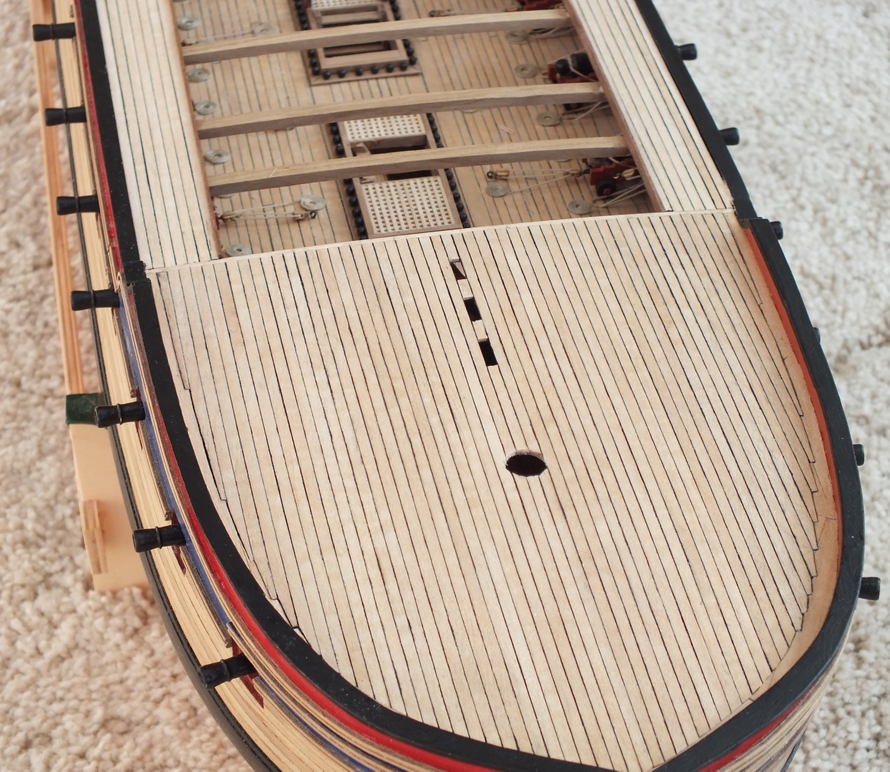
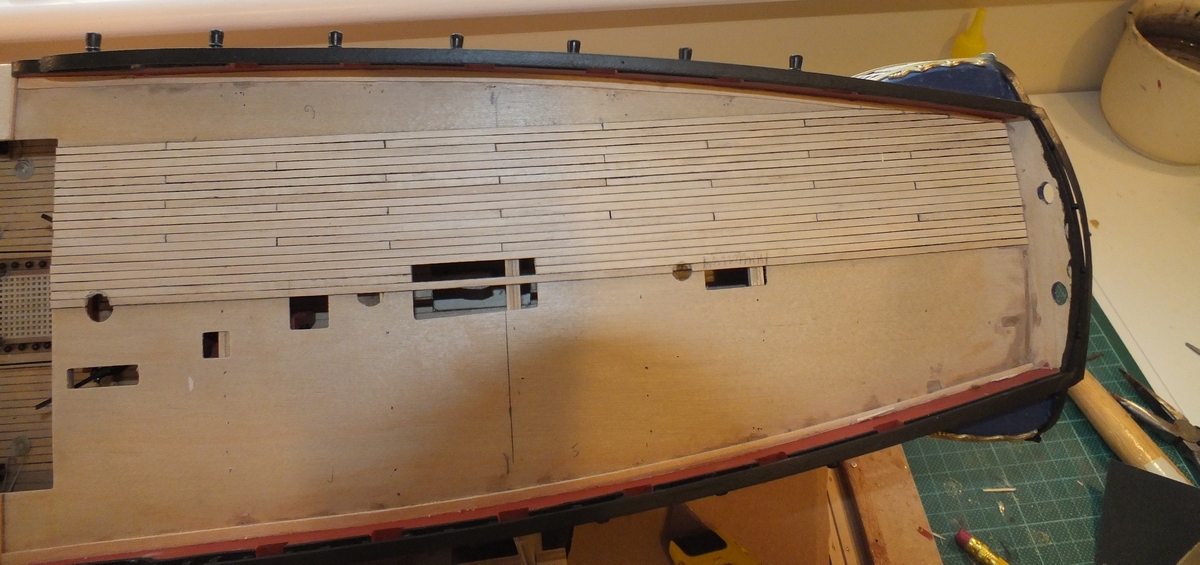
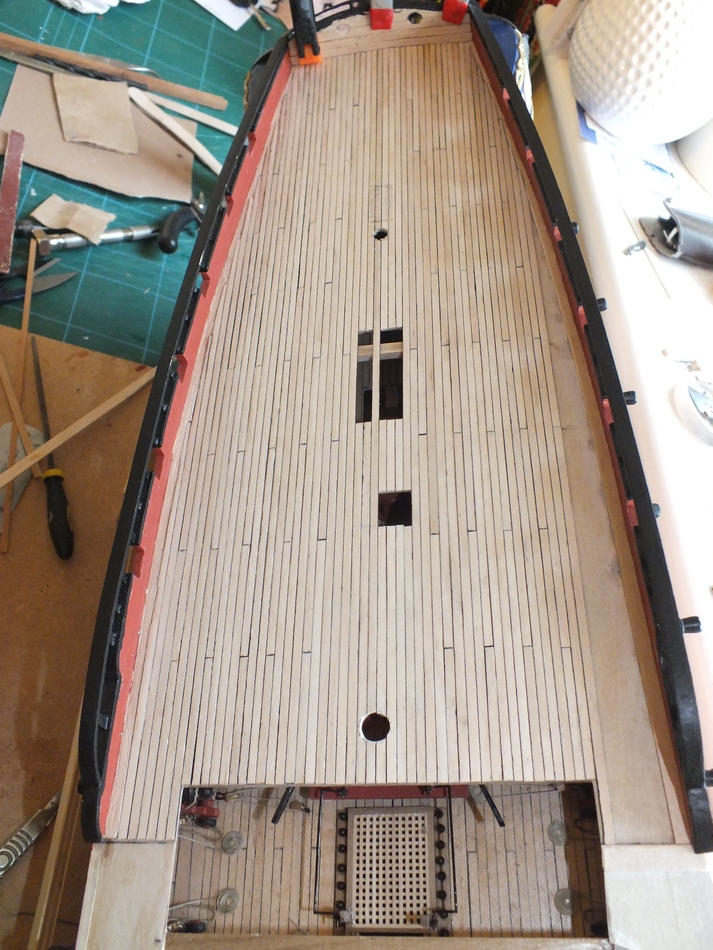
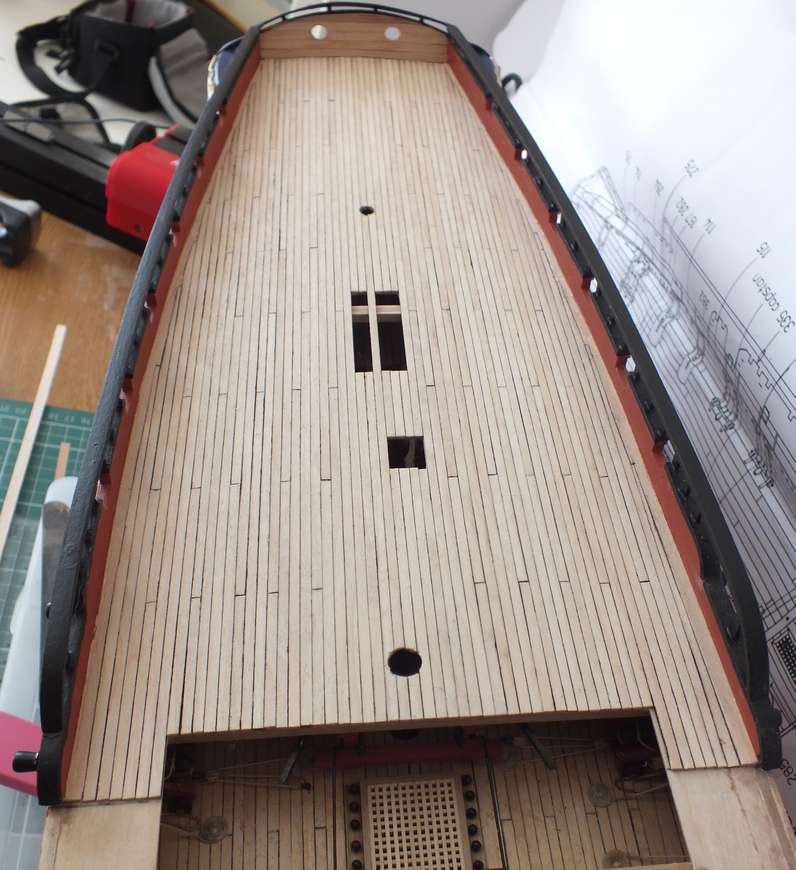
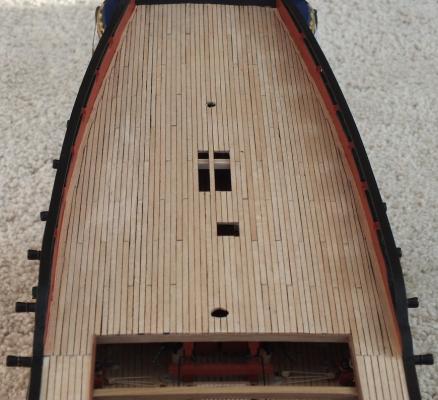
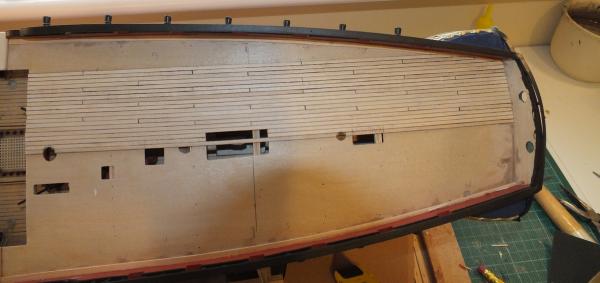
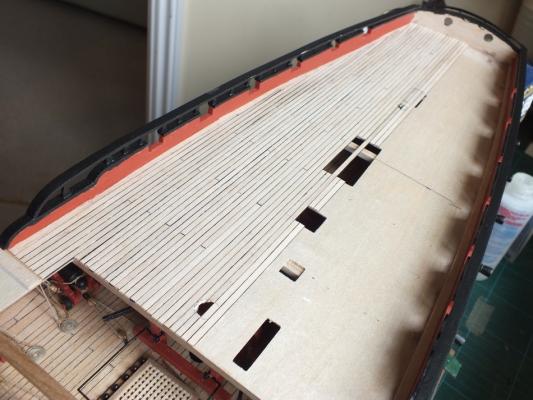
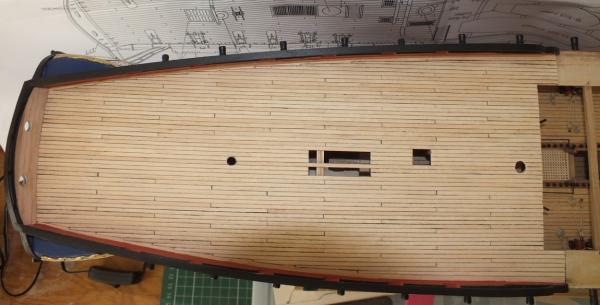
Quarter deck planking Next I have planked the quarter deck same method used as before and I joggled the planks as I did on the forecastle. Planking started Half way Nearly done Quarter deck planked


- 536 replies
-
- 12
-
-
- diana
- caldercraft
- (and 1 more)
-
Great build hard to belive its not a normal wooded kit most impressive
-
Great work Mobbsie good way of setting up the chains look forward to the pinnace updates.
- 1,279 replies
-
- 1
-
-
- agamemnon
- caldercraft
- (and 1 more)
-
This stove is a work of art it deserves its own diorama.
-
The quarter deck open rails have now been completed, and also, the top rail across the top of the stern has also been added, and some more of the the side decoration strips have been added, just a bit of paint touching up is required. Completed open quarter deck rails Stern rail


- 536 replies
-
- 14
-
-
- diana
- caldercraft
- (and 1 more)