HOLIDAY DONATION DRIVE - SUPPORT MSW - DO YOUR PART TO KEEP THIS GREAT FORUM GOING! (Only 13 donations so far - C'mon guys!)
×


Ray
-
Posts
404 -
Joined
-
Last visited
Content Type
Profiles
Forums
Gallery
Events
Everything posted by Ray
-
 Super work as always look forwards to the masts.
 -
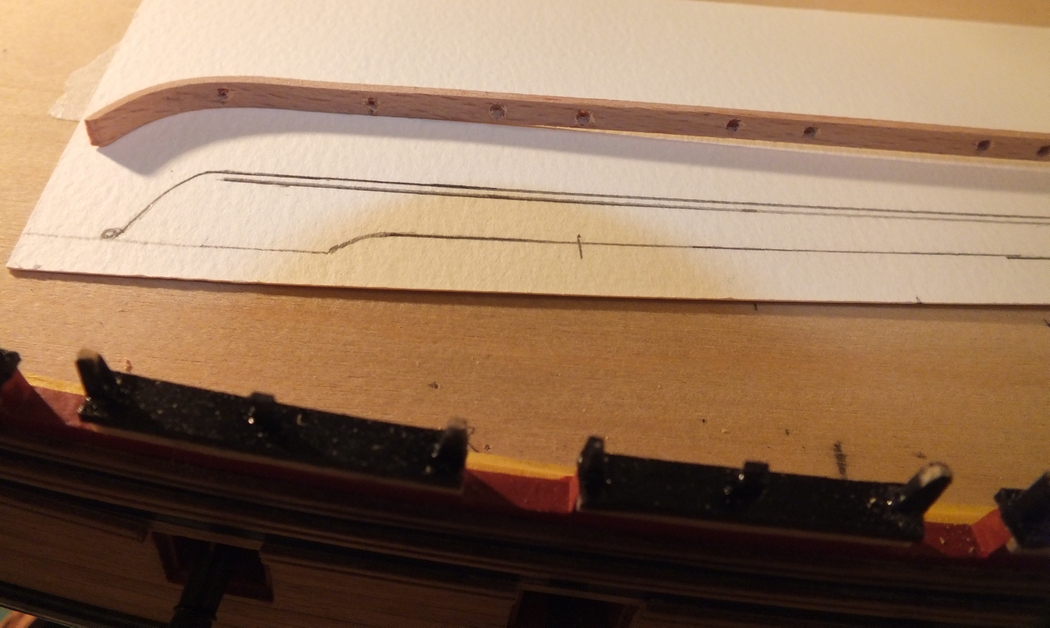
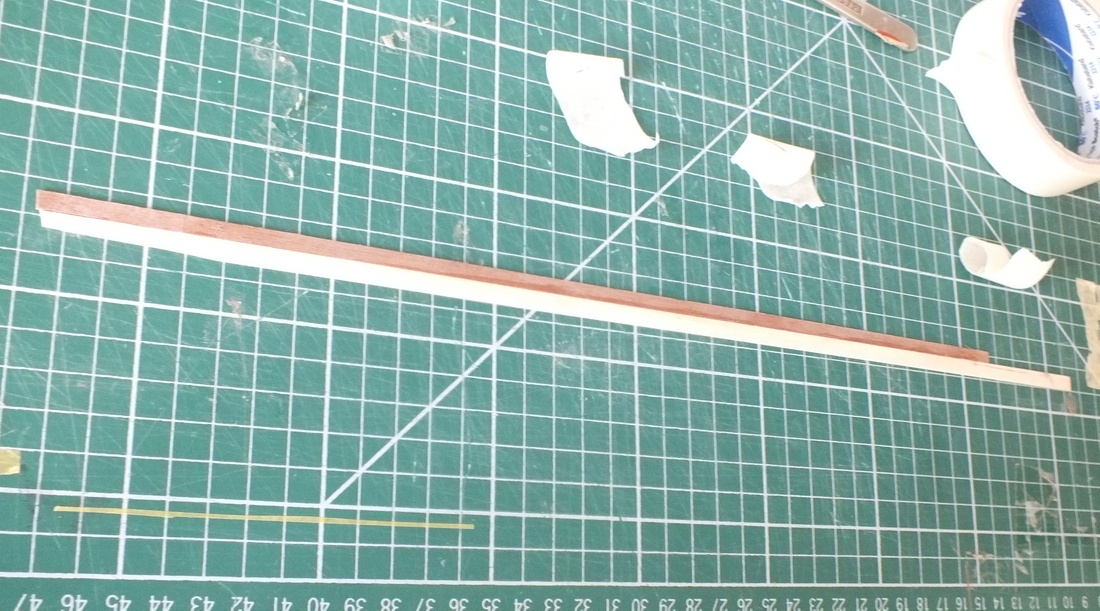
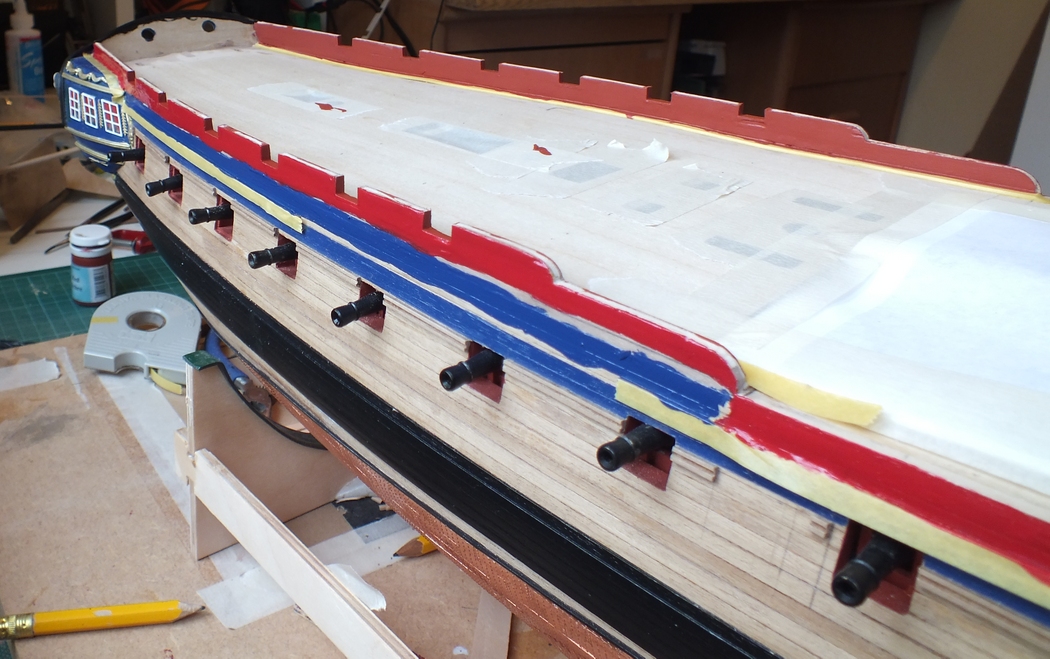
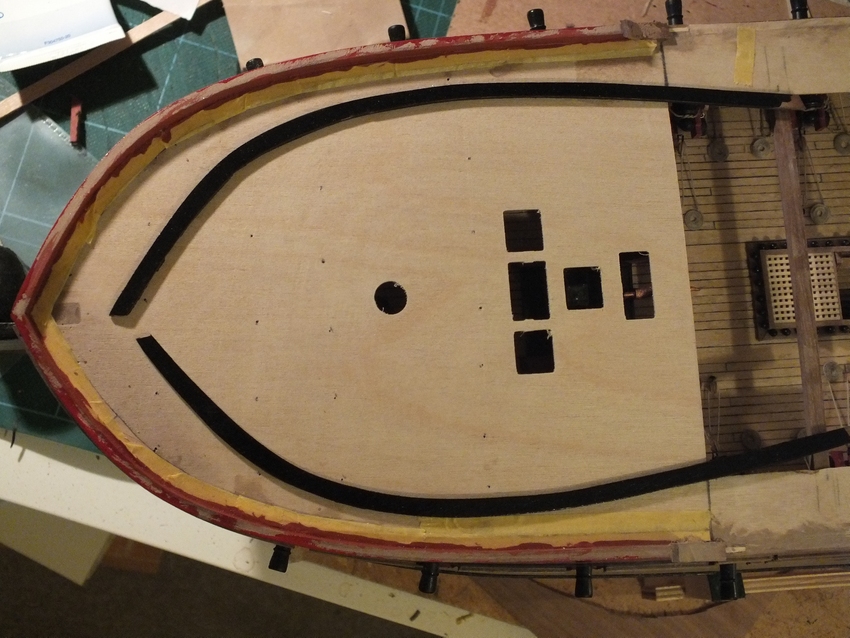
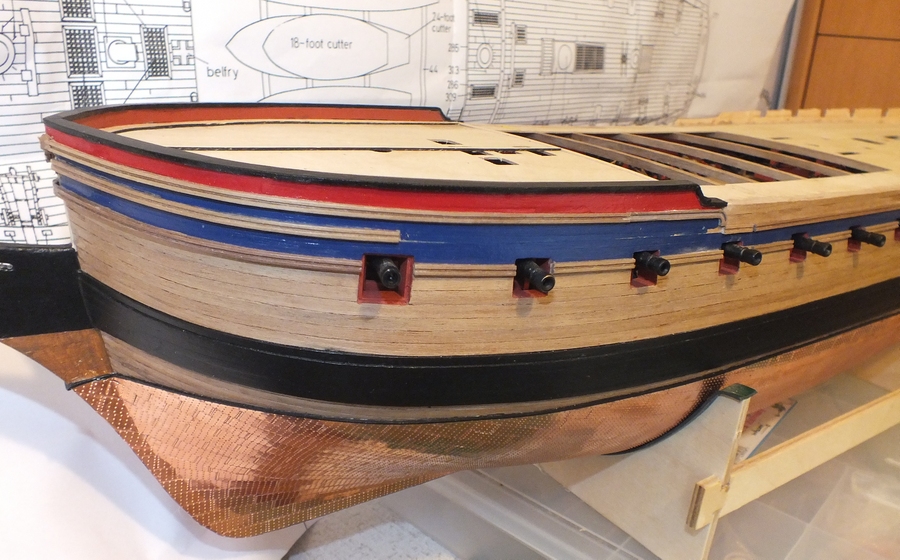
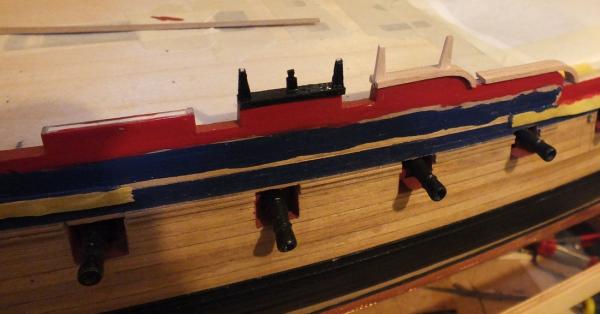
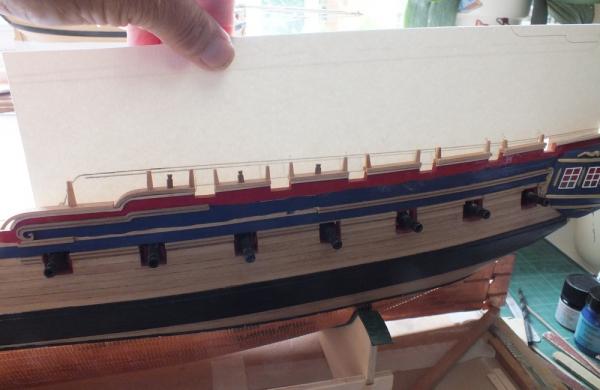
The quarter deck open rails I looked at the photos in my books and worked out a hight for the top rail, and then drew out a template, (see photo), which would give me good idea of what it would look like, I also used the template to cut out the uprights. Firstly I made a trim to go at the top of the bulwark and under the bottom rail. The bottom and top rails were made from 5x2mm beech which bends really well even after a short soak the uprights were fitted into slots in the bottom rail which when they were all made were painted and glued on, the top rail was bent to shape, and all the upright positions marked, the rail was then drilled to just under the breaking through point,and then cynoed onto the uprights, one down one to do. Rail profile drawn out trim added under bottom rail bottom rail bottom rail and uprights Top rail ready to fit Top rail fitted

- 536 replies
-
- 12
-

-
- diana
- caldercraft
- (and 1 more)
-
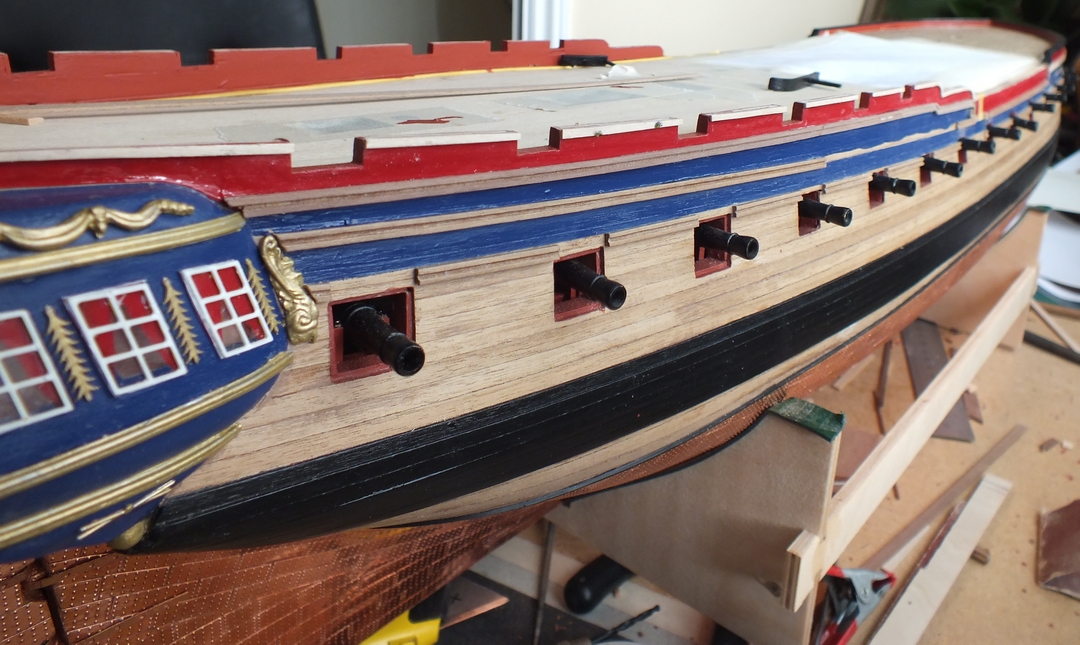
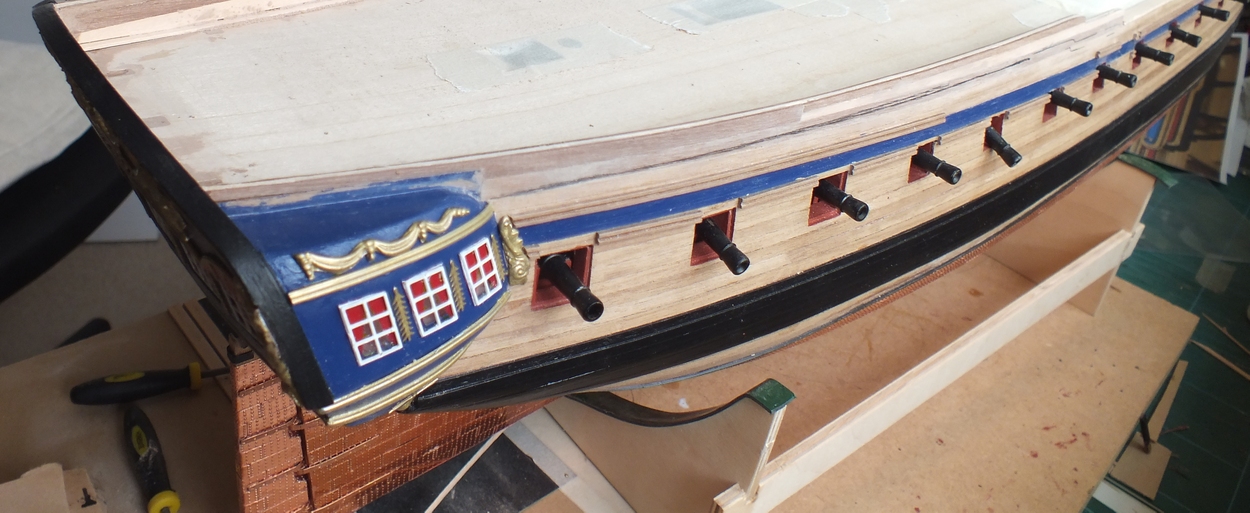
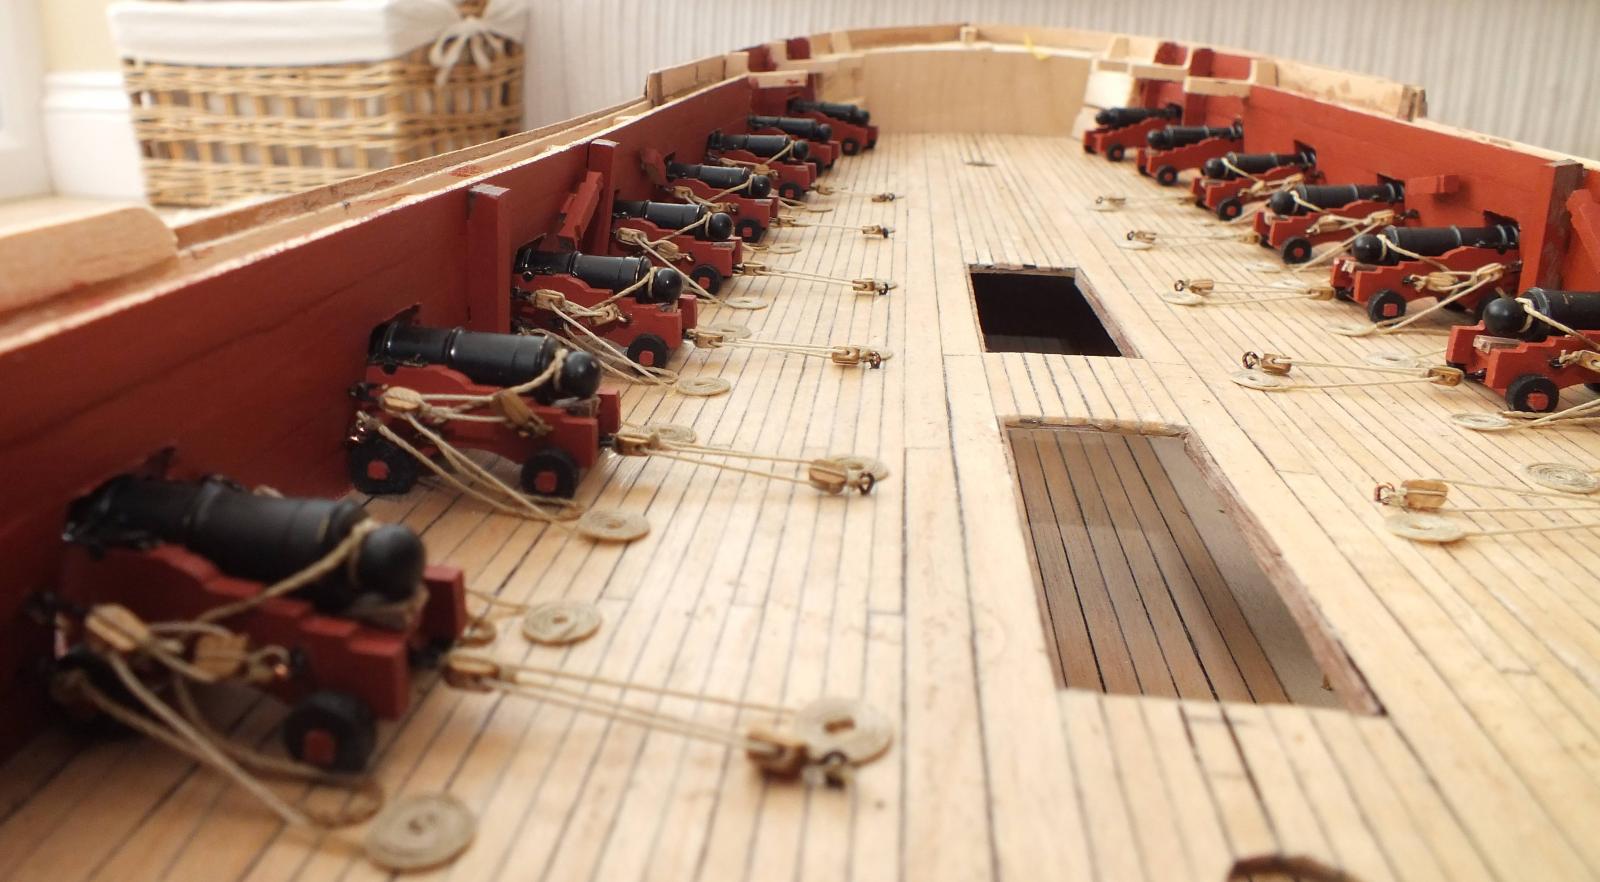
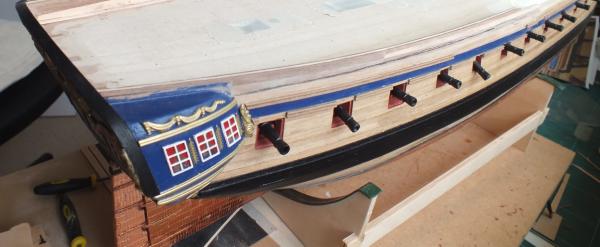
Hi Jason Good Question, I have been pondering this point, and your question has made me make the decision on how I will depict the armament. I have looked at other open rail models, most do not show any guns, and some show 9-pounders at all the gun ports on the quarter deck, and four, on the forecastle, but this gives her too many carriage guns. I consulted my books The Sailing Frigate A history in ship models (which backs up ) the information in The Anatomy of ship Diana,the book states that Diana received 32-pound carronades on the 23rd of February 1795, but she was only given six,not eight, the establishment requirement and she also did not lose any of her 9-pounders, and she most likely received the other two 32-pounders at the time of her refit in 1796. I will therefore arm Diana as in mid 1795 with four 32-pound carronades and eight 9-pound carriage guns on the quarter deck and two carronades on the forecastle with two 9-pounders as bow chasers. She would still have had an open rail quarter deck, as she did not have a refit until 1796, which logically would have been the first opportunity to fit solid quarter deck bulwarks.
- 536 replies
-
- 2
-
-
- diana
- caldercraft
- (and 1 more)
-
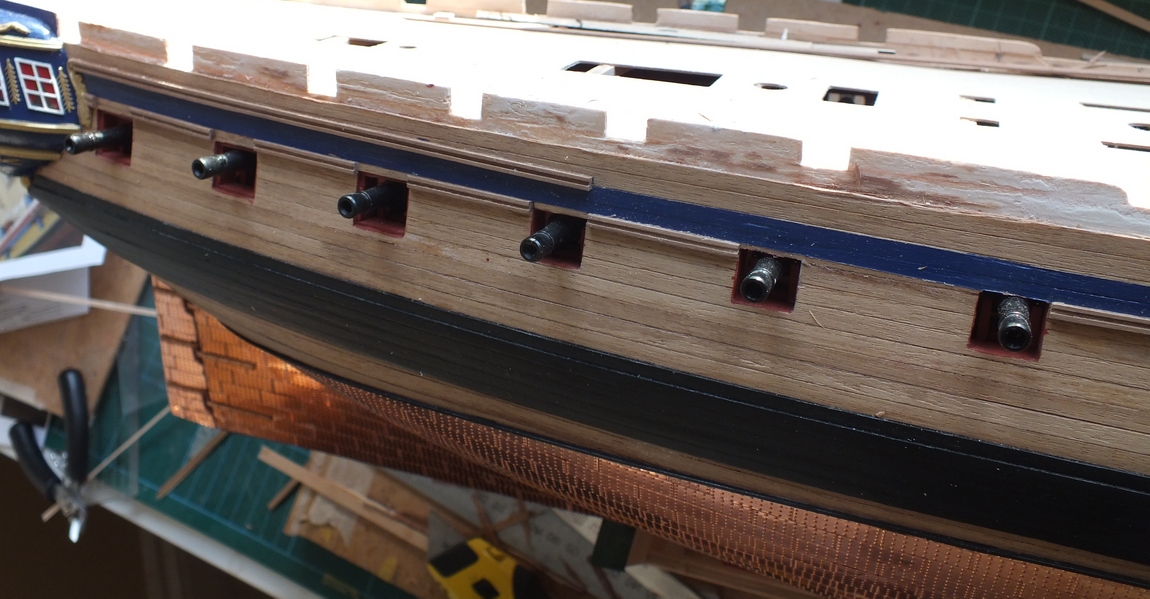
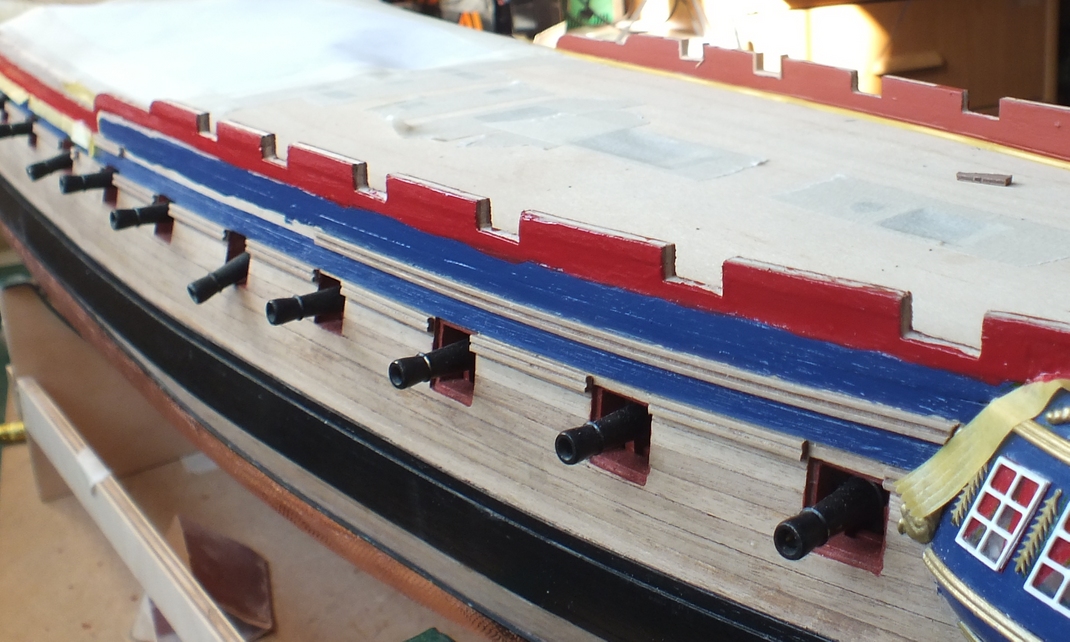
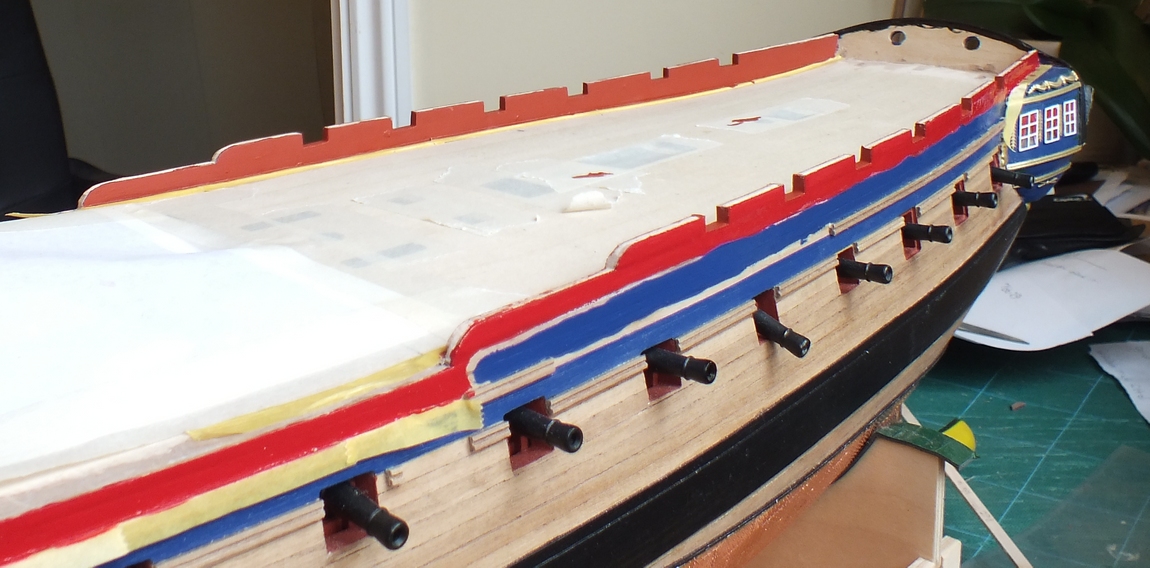
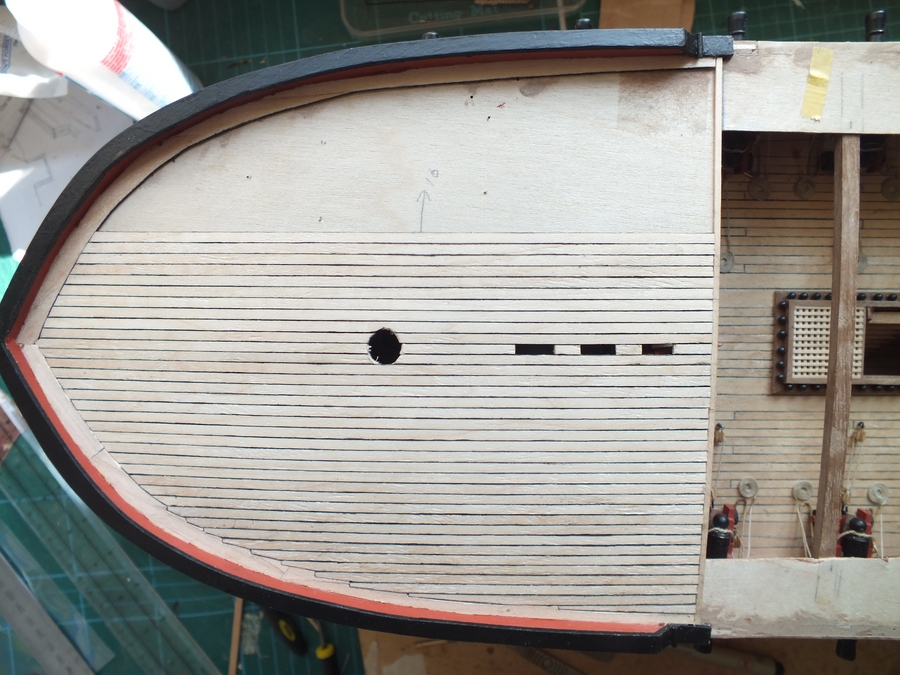
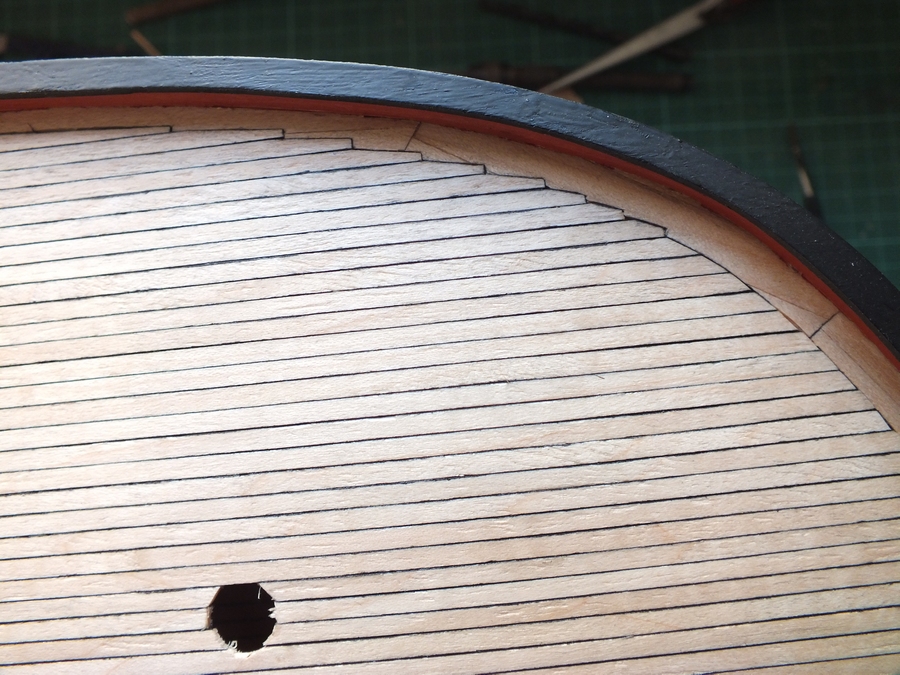
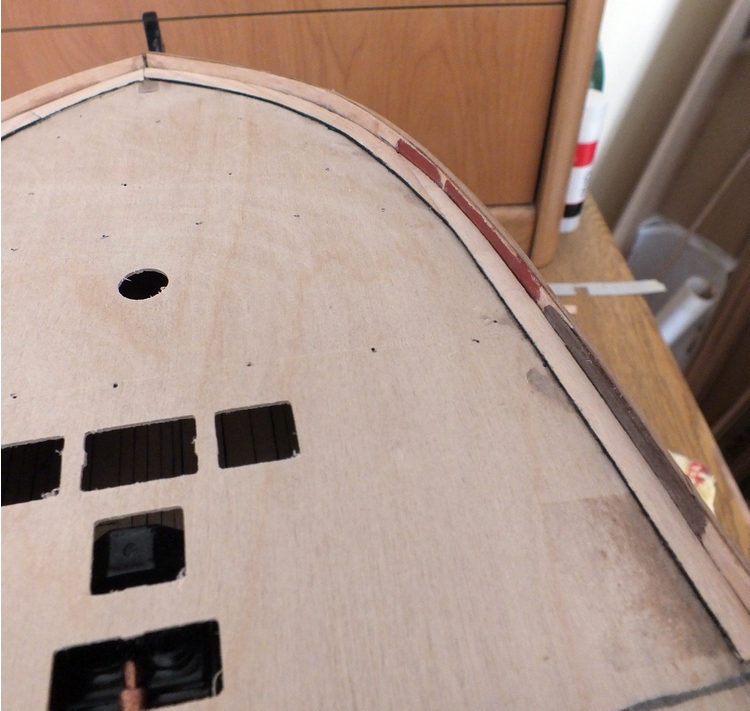
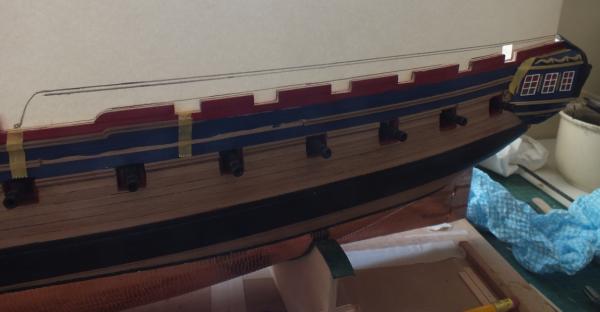
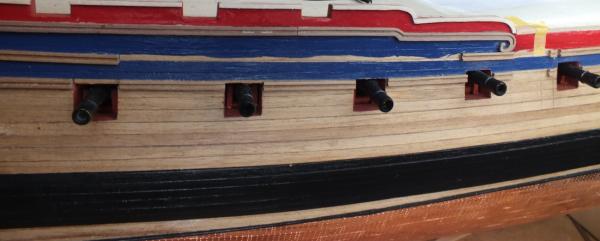
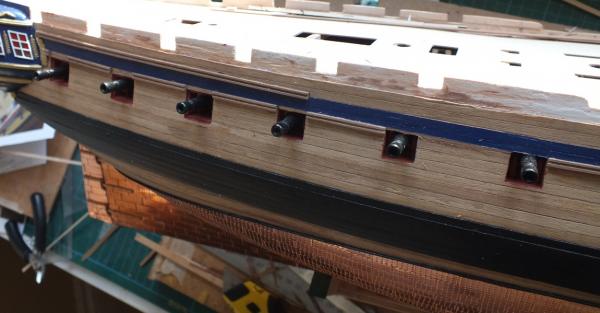
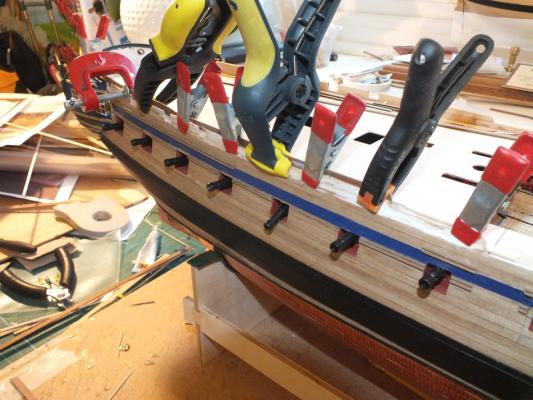
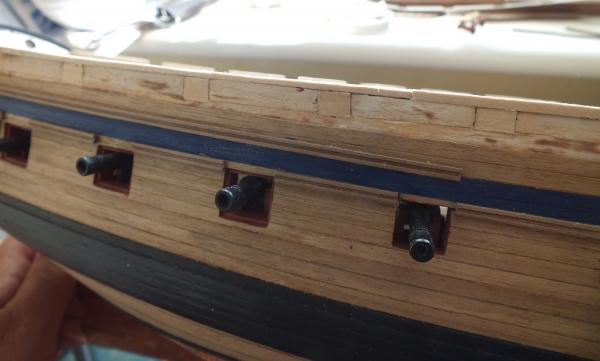
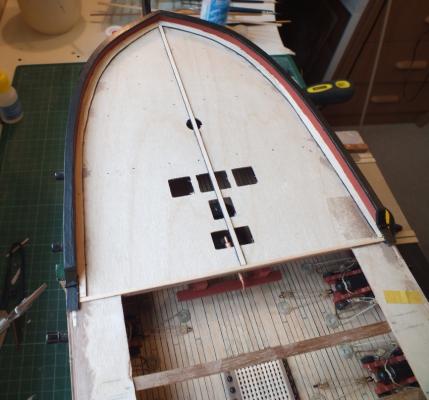
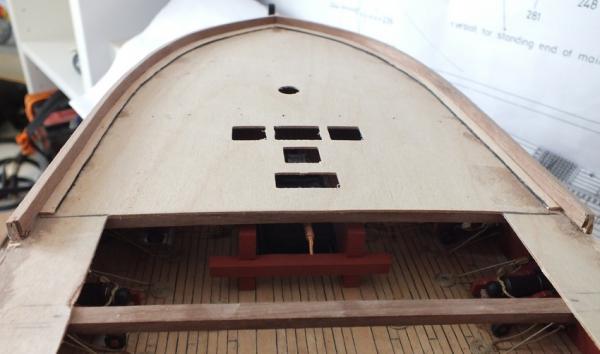
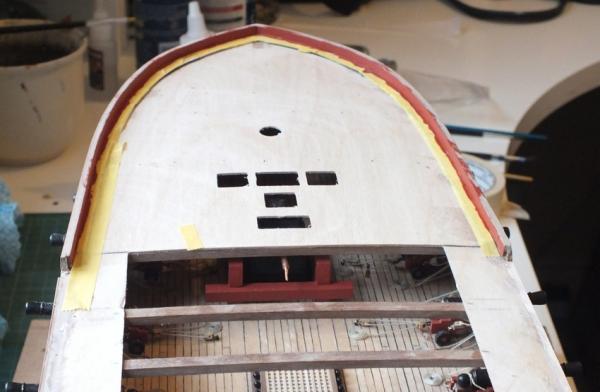
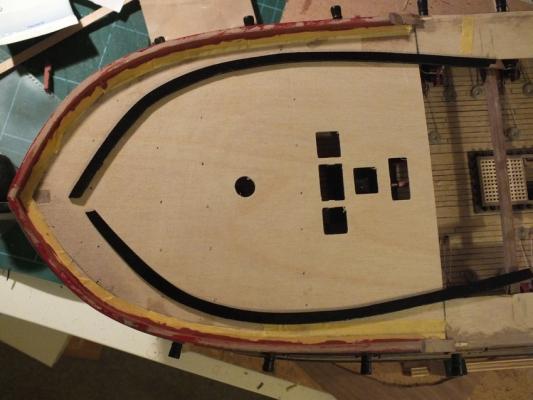
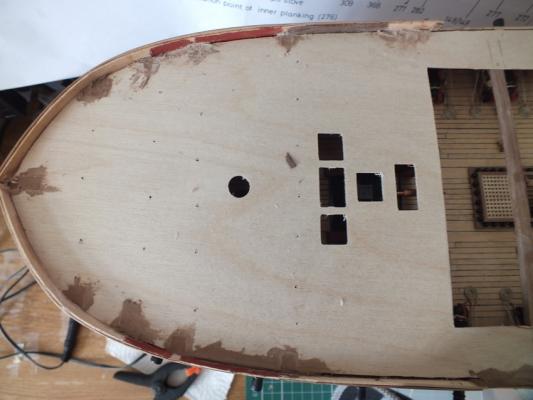
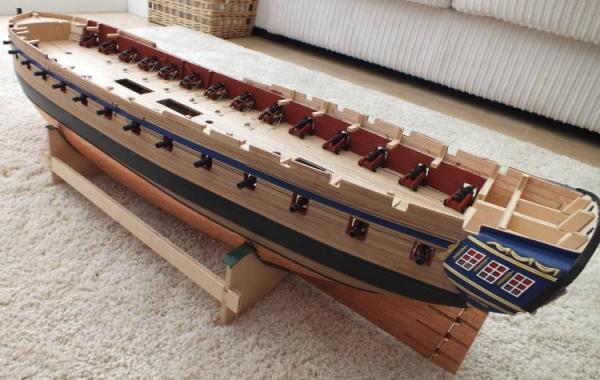
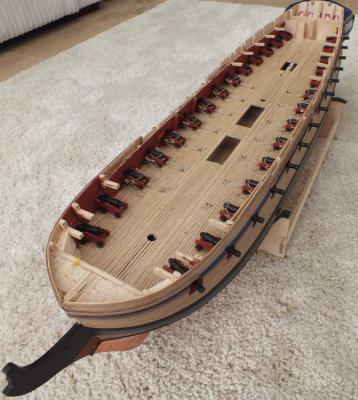
The quarter deck The forecastle deck now completed I now turned my attention to the quarterdeck ,this is were I change from the kit version, to the as built in 1794 Diana with the open rails, and only 9 pounders. Firstly I cut out and fitted the waterways, I then discovered the gun ports were all wrong, the bottom of the ports were to low as was the hight of the bulwark when a cannon was offered up to the port, Please note this problem only applies to the 1794 version not the kit version. My solution was to remove firstly the outer hull planks, glue together two planks and plank the inner bulwark covering the old ports,then extend up the middle planking row and fill in the old ports,and lastly re-plank the outer hull,and when both side had been done I cut out the gun ports using a cannon to get the correct heights,I would highly recommend anyone building Diana to this spec build the bulwarks above the deck and do not cut out the gun ports until you reach this point. The ports were cut 1mm oversize to allow them to be lined. next I painted the outer hull and inner bulwark, the open rail is the next job. Quarter deck waterway Removing old planking New planking Fitting inside plank Rebuilding bulwark rebuilt bulwark Re-cutting gun ports New bulwarks completed


- 536 replies
-
- 5
-
-
- diana
- caldercraft
- (and 1 more)
-
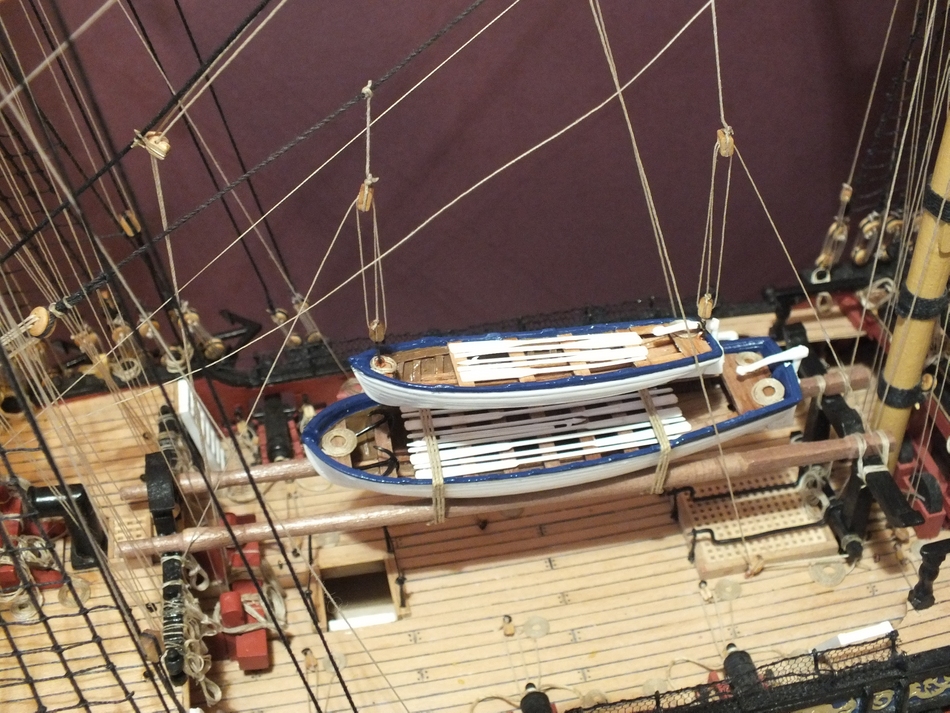
Hi Peter I have added two photos the way I stowed the boats on my Pegasus no need for chocks on the smaller boat.

- 431 replies
-
- 3
-
-
- pegasus
- victory models
- (and 1 more)
-
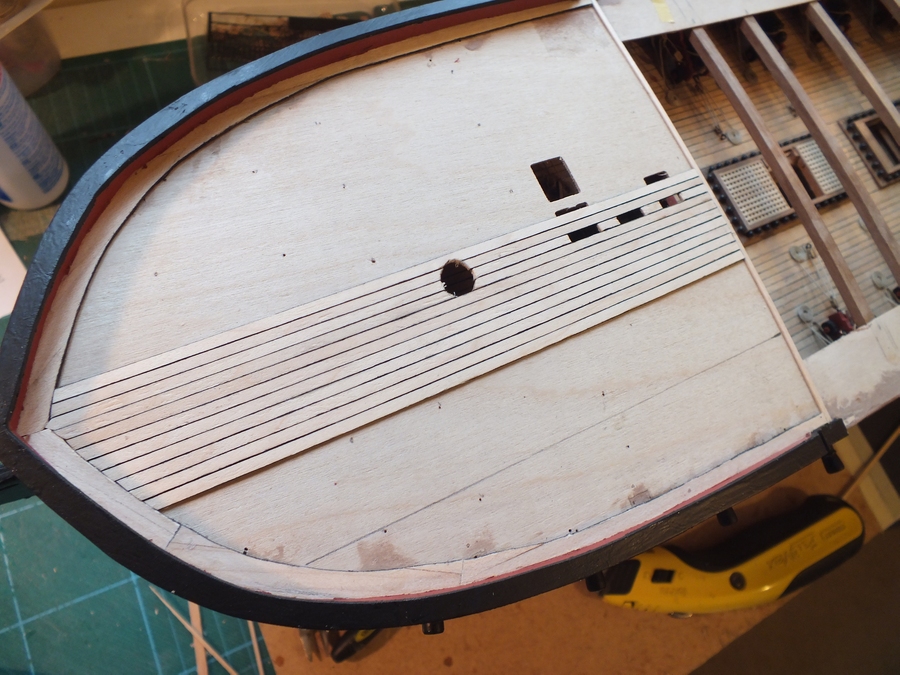
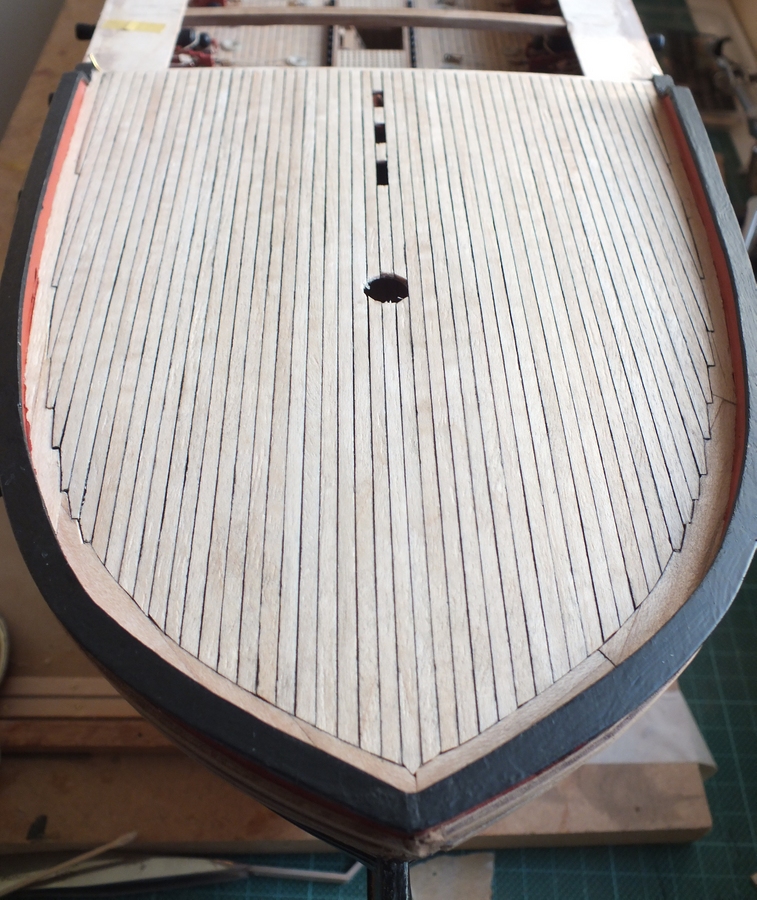
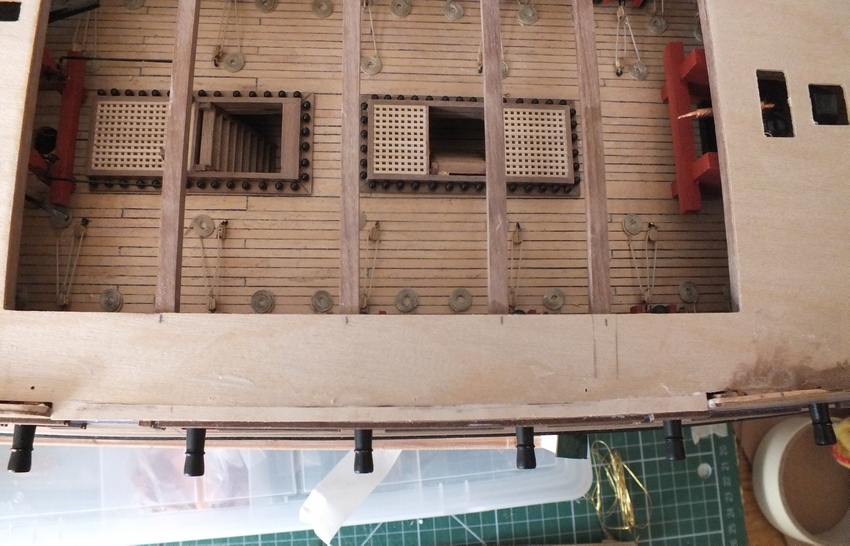
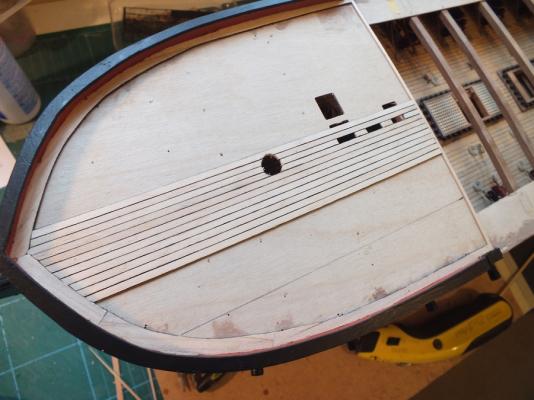
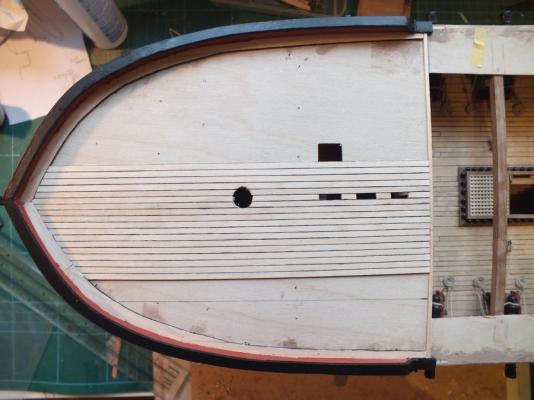
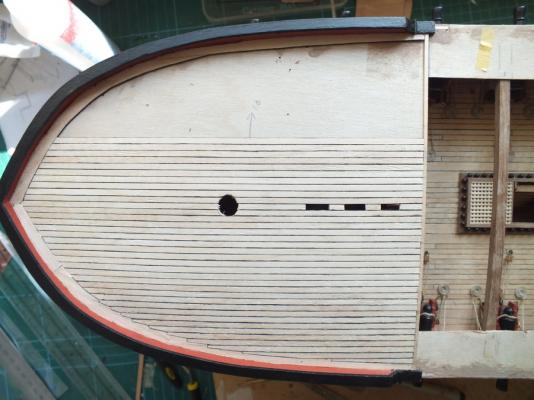
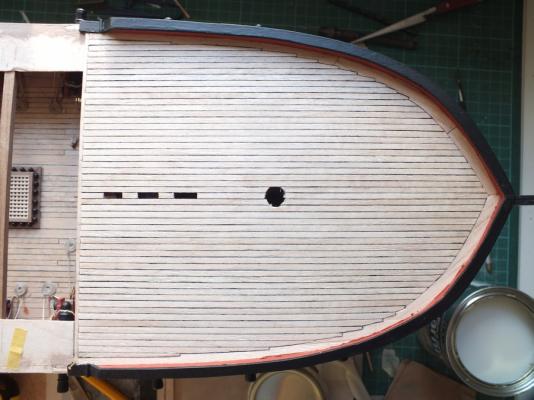
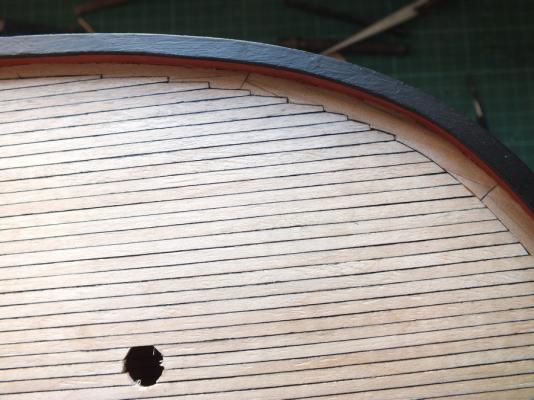
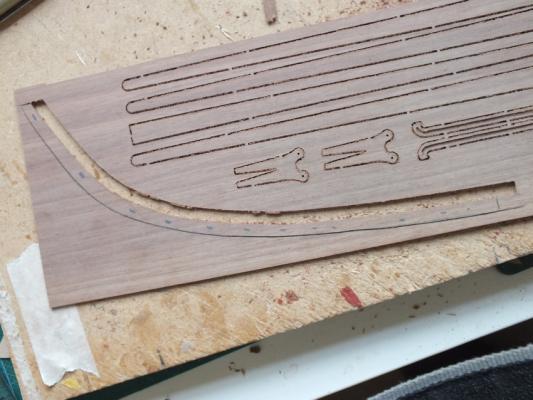
Forecastle deck planking The deck was planked in the same manner as the gun deck using the maple planking and blackening the sides, I joggled the planks from the position as shown in The anatomy of ships Diana, the effect is much better than just tapering the planking but you do need the waterway to do it, I planked over the cutter-ways in the deck and will add the fittings over them, there are no joints as the plank lengths are to short where there are no fittings. First plank down A few rows down Just more than half done Joggled planks Deck completed and varnished

- 536 replies
-
- 13
-
-
- diana
- caldercraft
- (and 1 more)
-
Hi Glen Nice to see you back again your Pegasus was one of the reasons I built her myself. Nice work on Vanguard, and as you say so far this is the foundation for what is to come, and to me the shape looks spot on, and the jigsaw gun ports very well lined up, I look forward to more updates.
- 101 replies
-
- 1
-
-
- victory models
- amati
- (and 2 more)
-
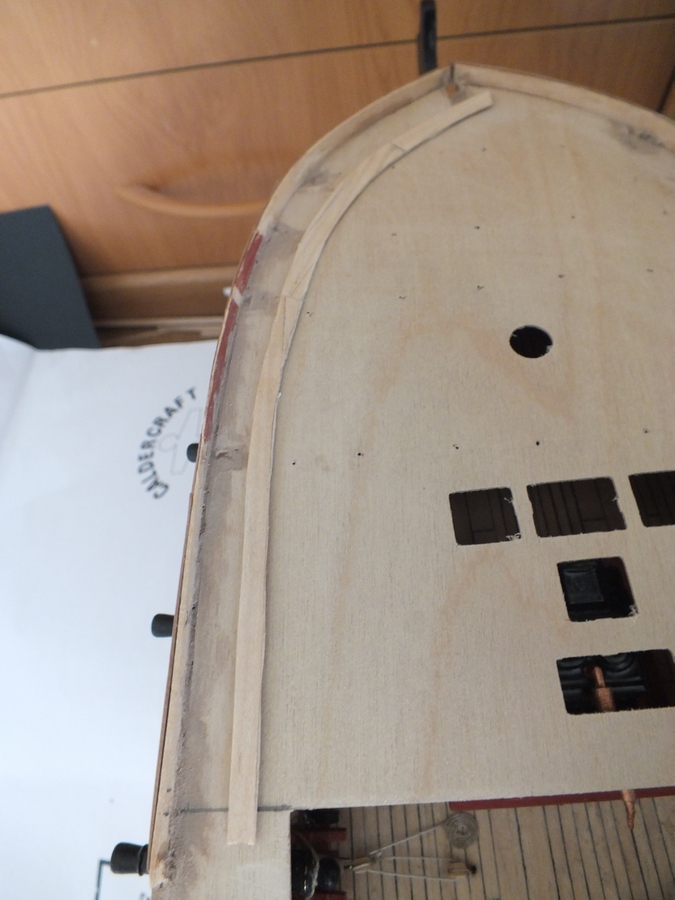
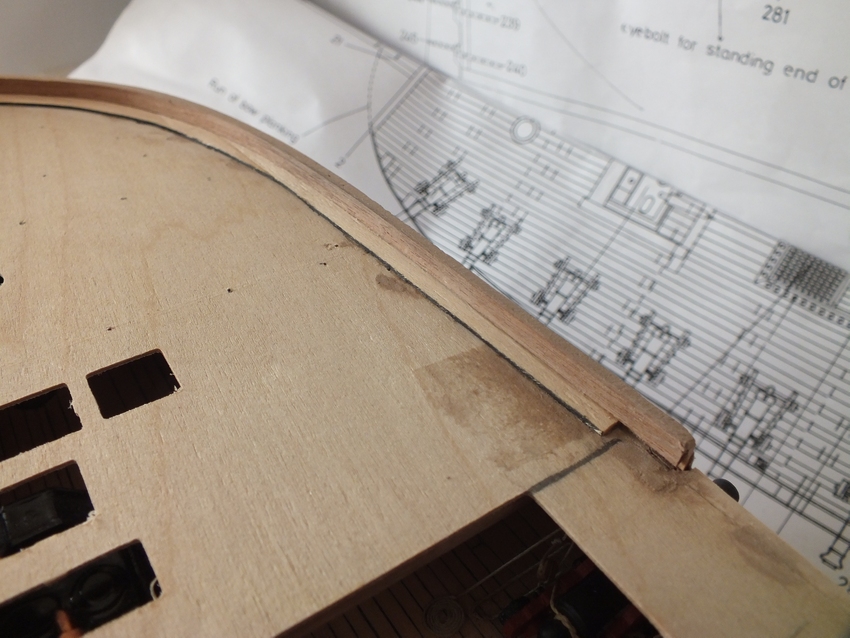
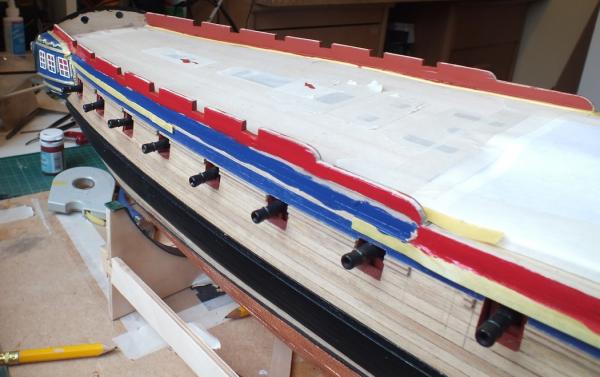
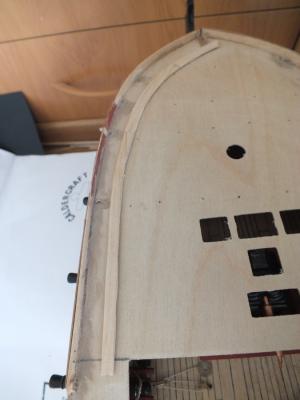
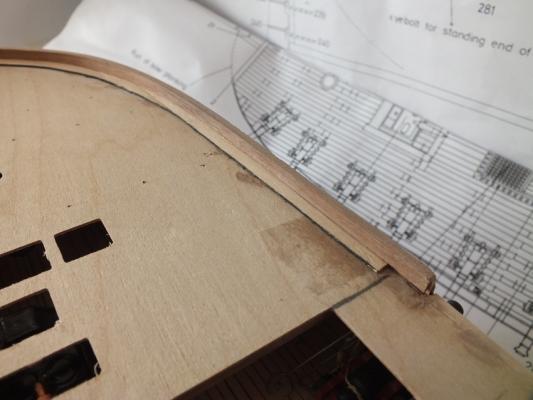
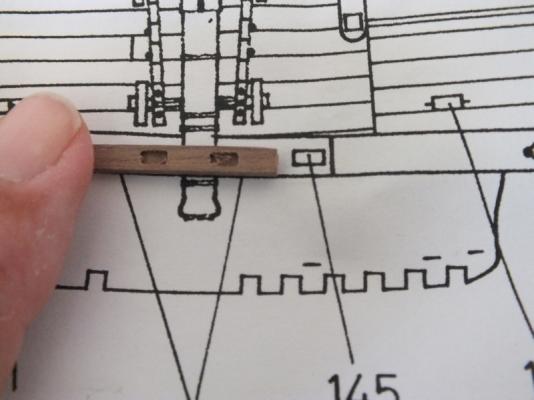
Firstly thanks for the comments guys The forecastle bulwarks These were the next job,I decided to lay the waterway down first and add the inner bulwark planking over it, this way should give a nice edge better than cutting the waterway to fit the curve. The waterway was made up from 6mm deck planks glued together and cut them to the bulwark shape,if they look a bit wide this is to allow the deck planking to be joggled into them. I laid them both sides and then planked the inner bulwark did a bit of filling on the top and filed them both square. I then removed the capping rails from the sheet offered them up to the bulwarks and they were only just as wide with no overhang !! so I checked the bible and all the capping rails show an overhang, I laid the rail over the plan and they are about 3mm to narrow (see photo) so using the rail I marked and cut out two new wider ones from the ply sheet they came from, I did not cut the location slots, I will do them later, they were first painted, and then glued in place with thick cyno and repainted. Waterway Waterways fitted Bulwark planked Undersize rail New rail marked out Ready for rail to be fitted New rails made and ready to fit Forecastle bulwark and rails completed


- 536 replies
-
- 5
-
-
- diana
- caldercraft
- (and 1 more)
-
Hi Andy coming along very nicely always a good idear to leave as much access as posible it all gets a bit crowded later.
-
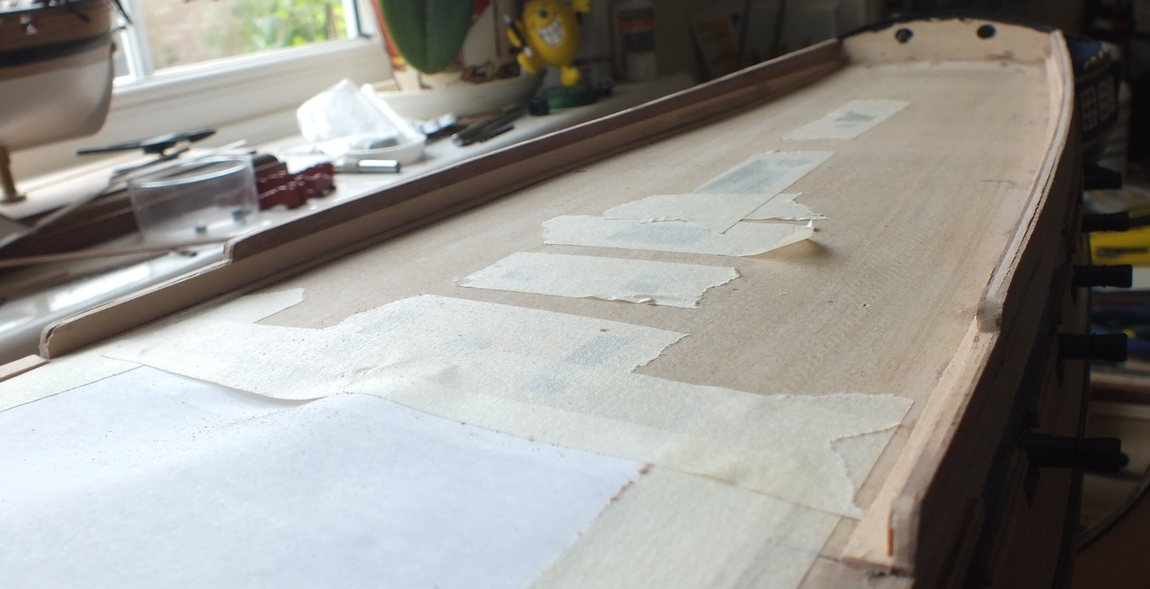
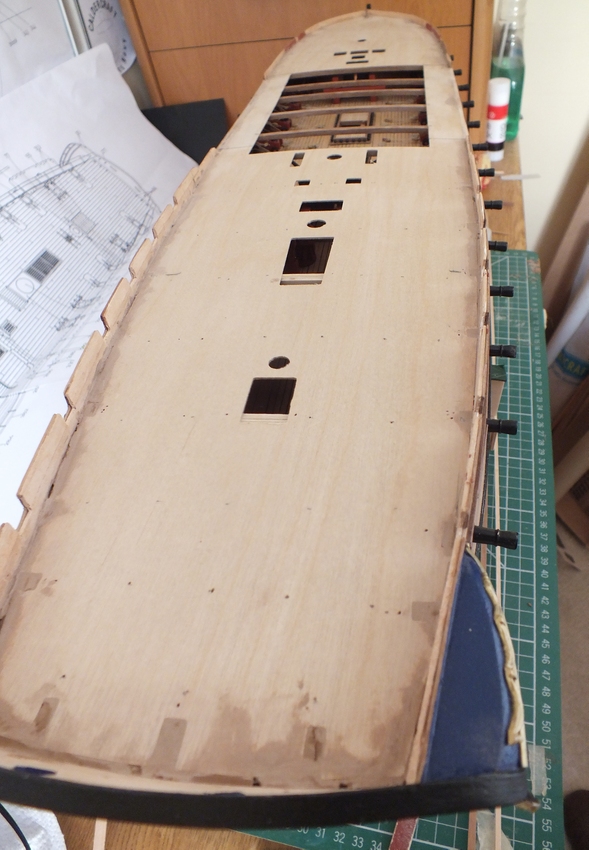
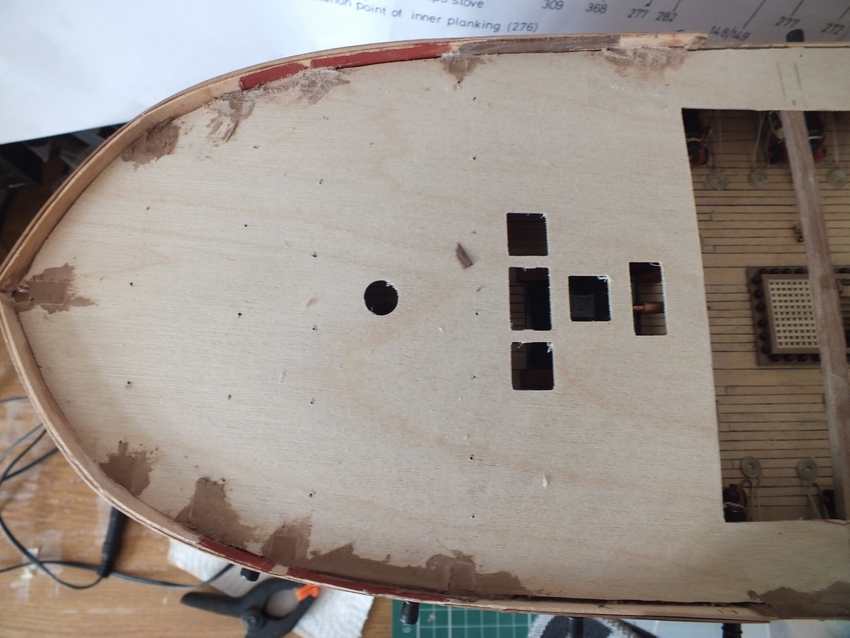
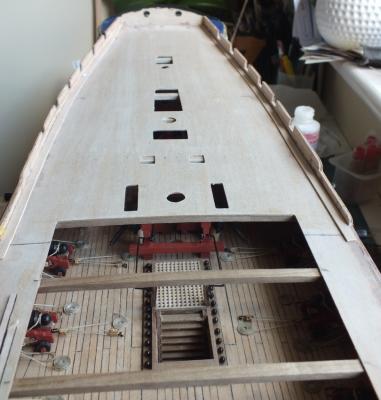
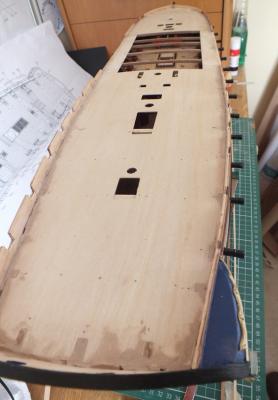
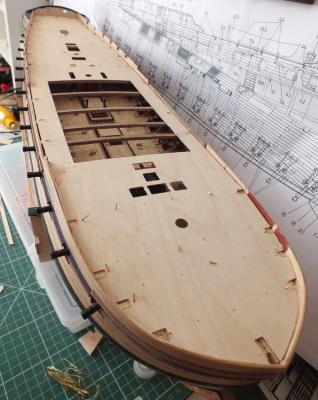
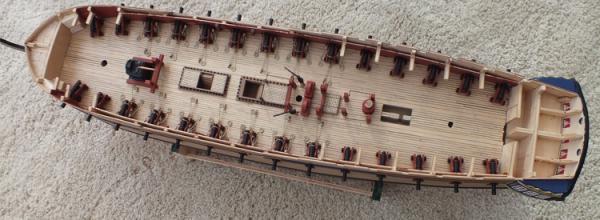
Top decks With the the gun, deck guns, and fittings completed the next part of the build is fit the top decks, all be it they are in one sheet, the quarter deck, the gangway and the forecastle. The first part was to fit the beams between the gangways, the beams were fixed to under side of the ply deck and slots cut into the inner bulwark to allow the deck to fit I considered this better than shortening the beams. Then all the other beams were fixed to the frames. Next I snapped off the top of the frame stubs and dressed them level, the ply deck was trial fitted to ensure it went down on all the beams OK and the levels and cambers were correct a few slight adjustments were made. The deck was then ready to fit, I normally use Speed Bond PVA but in this case you need a longer drying time so I used a std PVA as it takes a fair bit of time to apply the PVA and place, and pin the deck down. With the deck now fitted I then decided to fill the gaps around the edges and were the frame stubs had been removed, the edges at the gangways had gaps around 2-3 mm as showed in the photos these had a ply filler added, you will not notice this from side on as it will be painted. Deck beams added Beams fitted stubs removed glued and pinned started filling gangway gap deck fitted and filled gap filled


- 536 replies
-
- 9
-
-
- diana
- caldercraft
- (and 1 more)
-
Hi Polo Glad to here your hand has mended well and you can continue with your build thanks for your comments. Keep well. Ray
-
Hi tree nails at this scale would need to be so small you most likley would not see them, I think any scale above 1/48 are better of without them I have scale planked my Diana deck and at 1/64 the planks are very narrow, coppering the bottom would be the right choice, but at the end of the day its the builders choice. Good luck with the build nice to see something different.
-
Hi guys Andy you are right I used this method on Pegasus and these photos are from that log, its a bit tricky to get them started but once you have done a few you get the feel for it.
- 536 replies
-
- 1
-
-
- diana
- caldercraft
- (and 1 more)
-
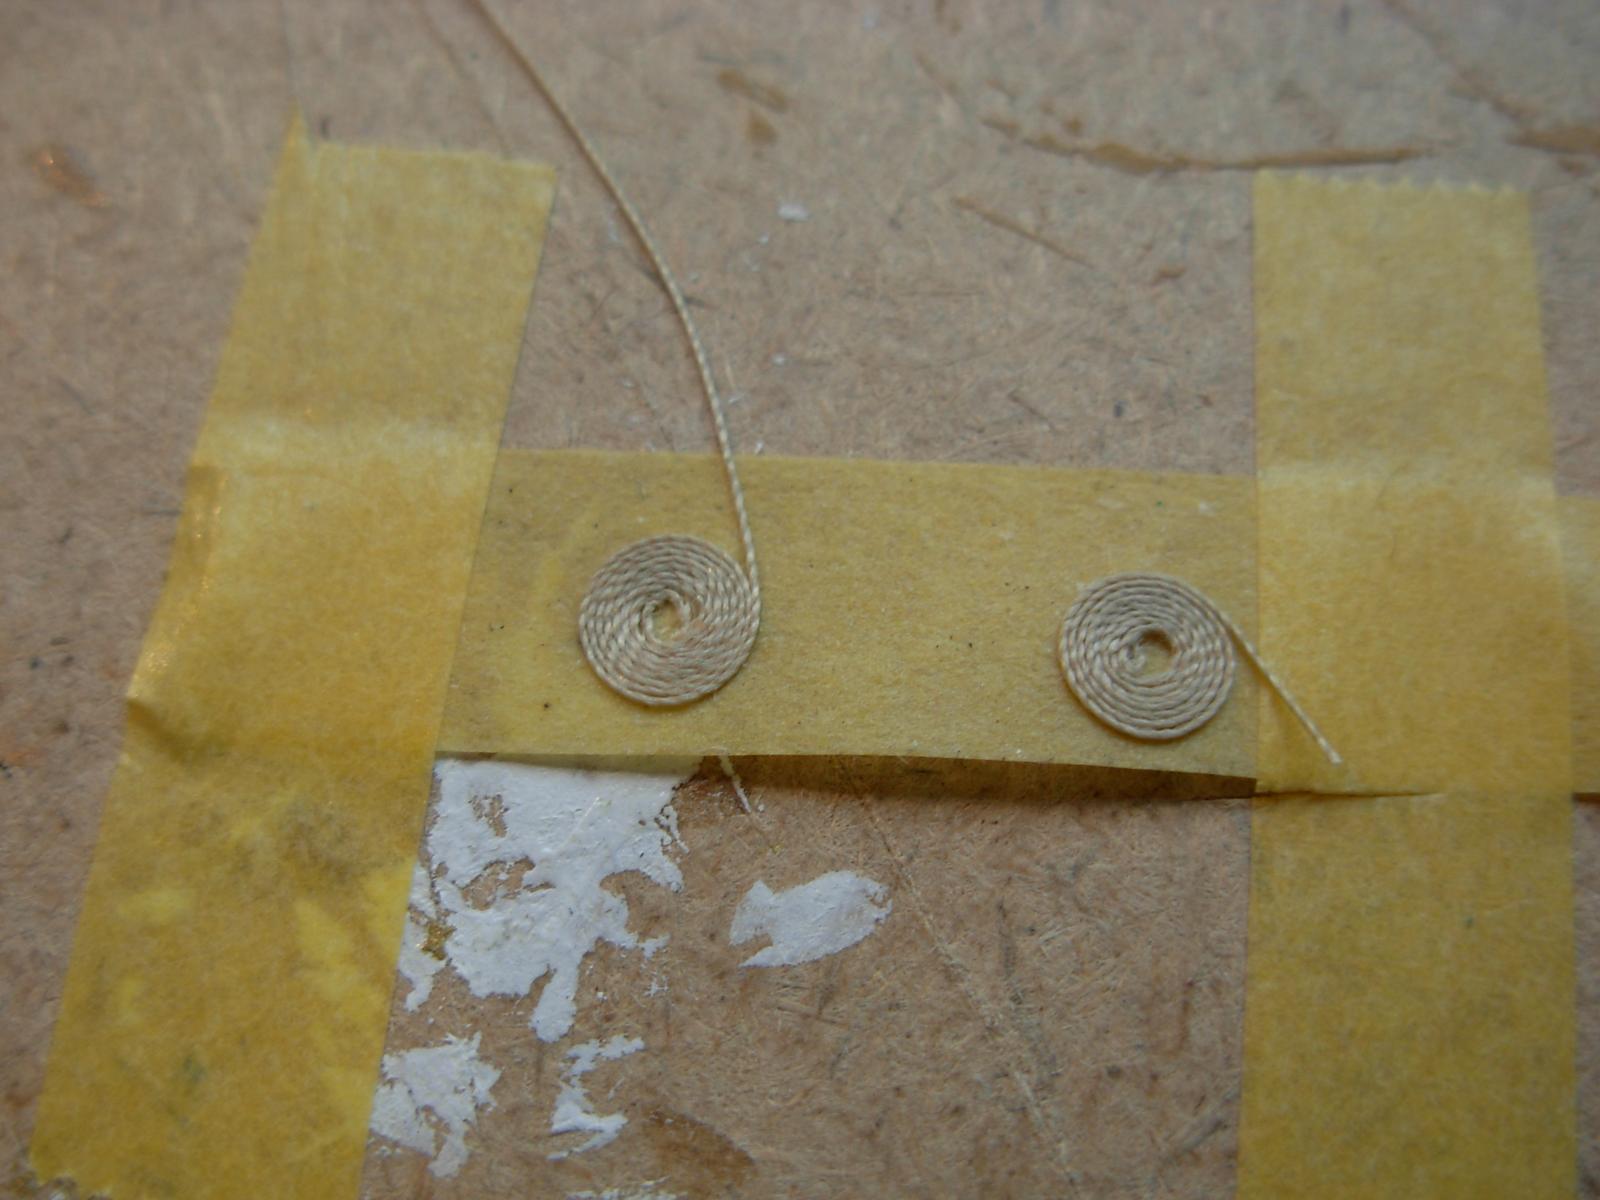
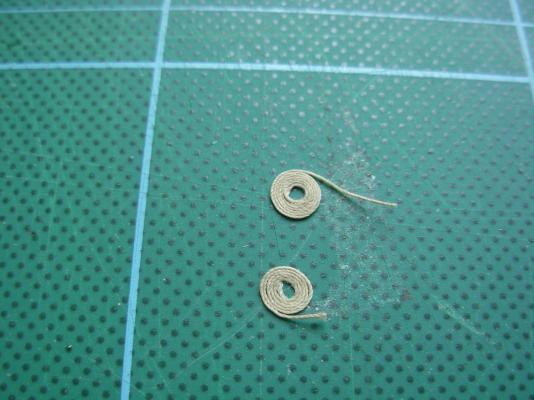
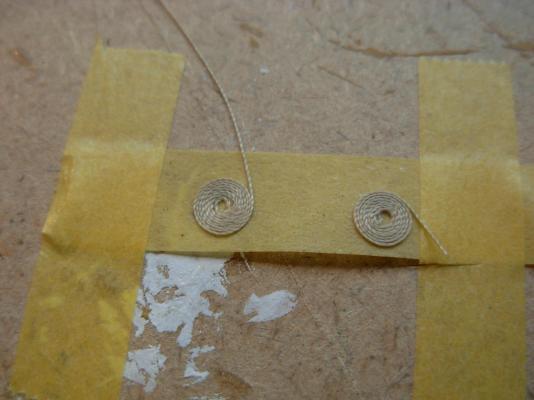
Hi Andy Rope coils I tape down some masking tape sticky side up, and just start the coil with a small loop, holding the rope with my finger and wind it, around it, pushing it down to keep it sticking to the tape, it takes a bit of practice and sometimes two or three goes to get started, as getting it to stick to the tape is the trick, only use the tape once, when you are happy with the coils brush them with dilute pva and leave till dry then slice of the tape. Hope this helps I have added some photos. After pva treatment and dry
- 536 replies
-
- 4
-
-
- diana
- caldercraft
- (and 1 more)
-
Thanks for all your comments guys, Diana now seems to rightly be on quite a few build lists . I see were I am now as the end of a chapter, and the top decks the next one, and do far so good.
-
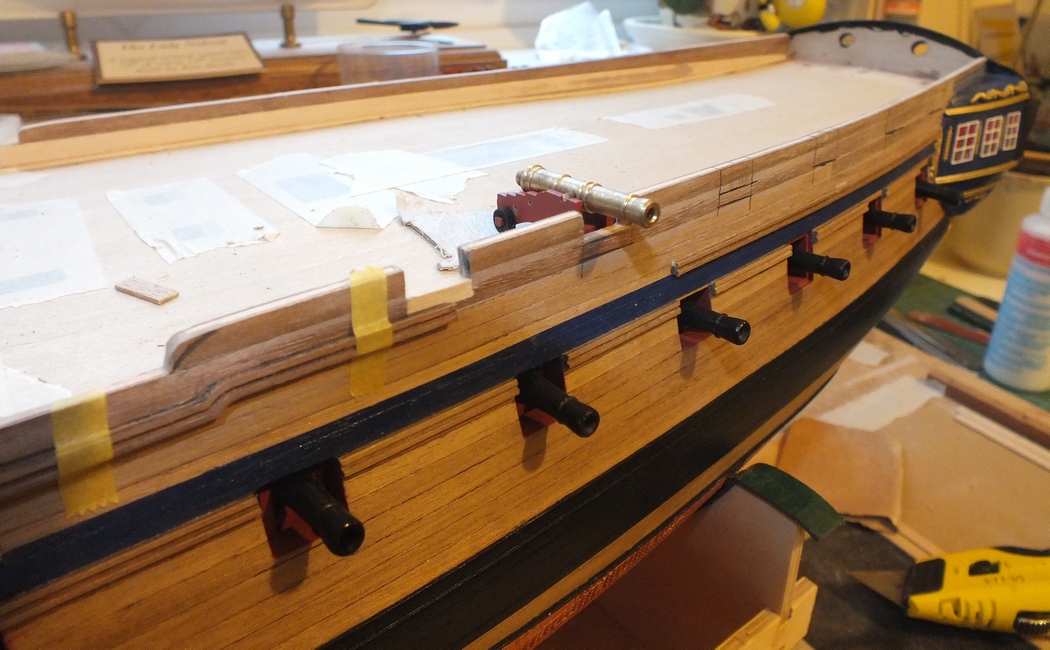
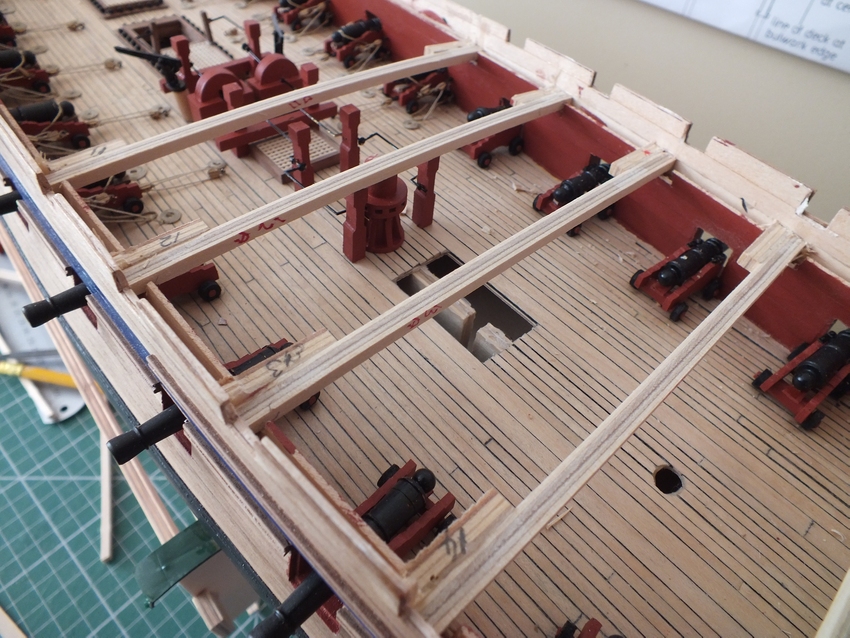
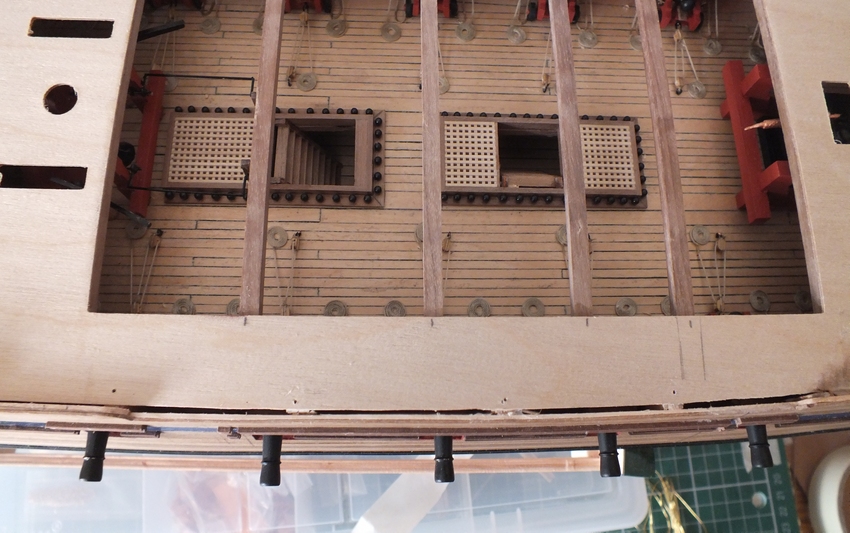
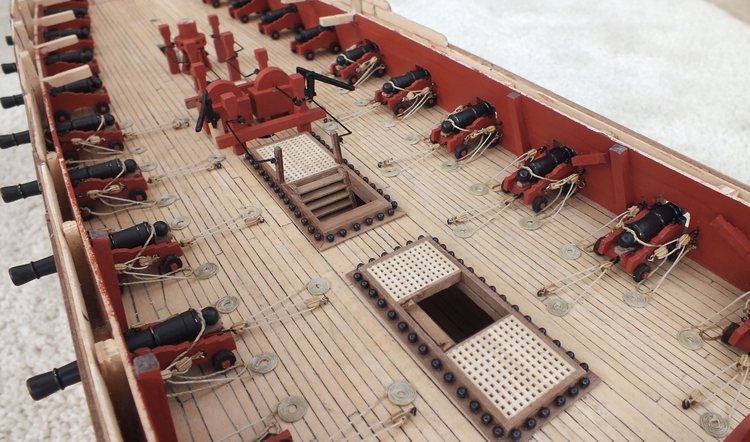
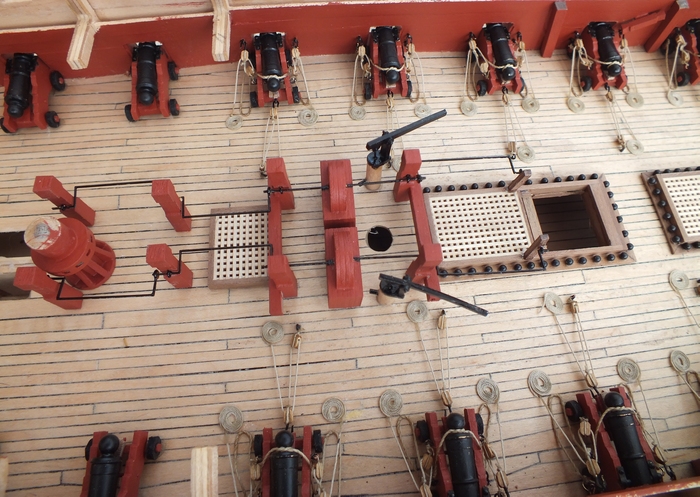
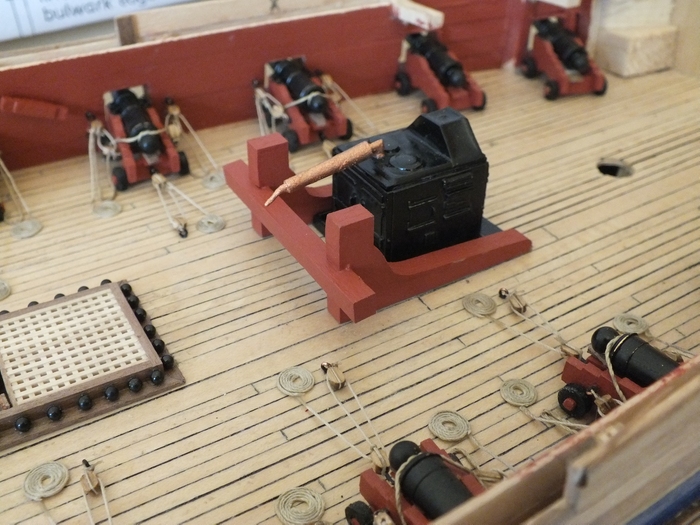
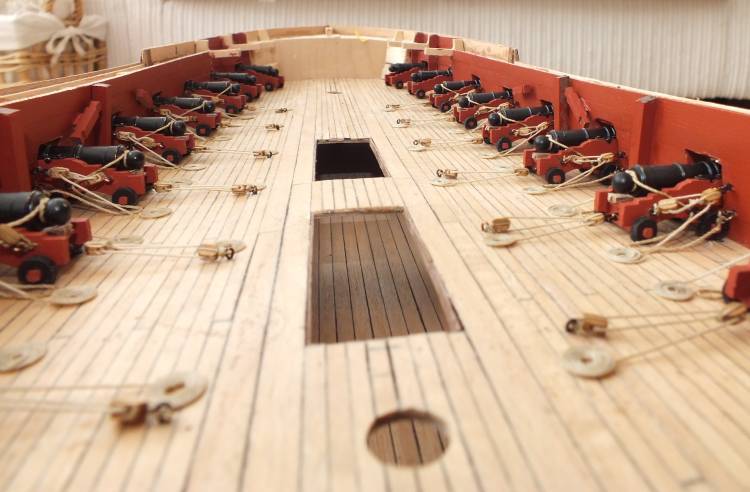
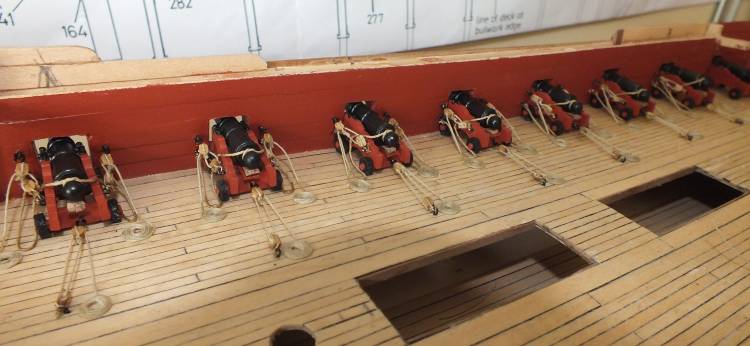
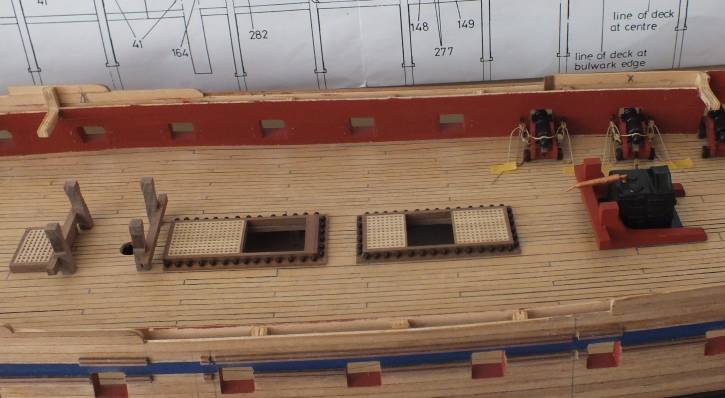
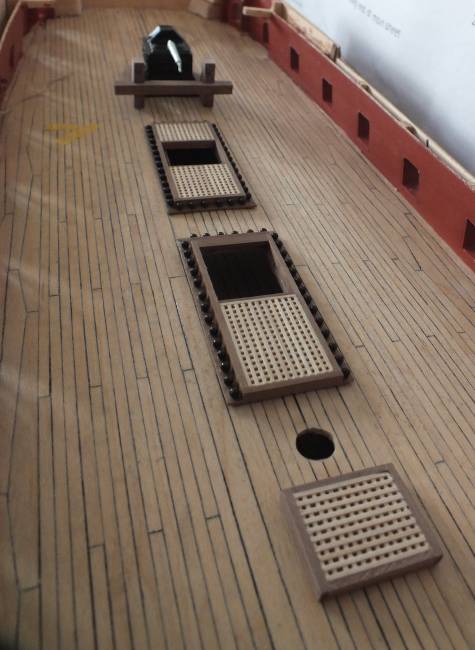
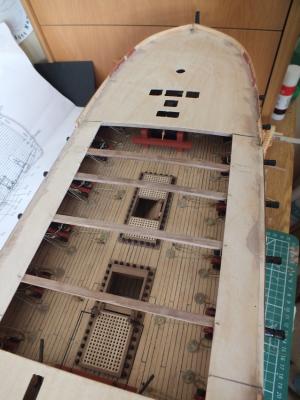
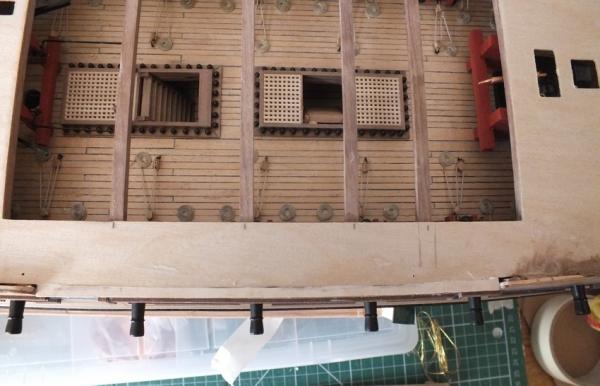
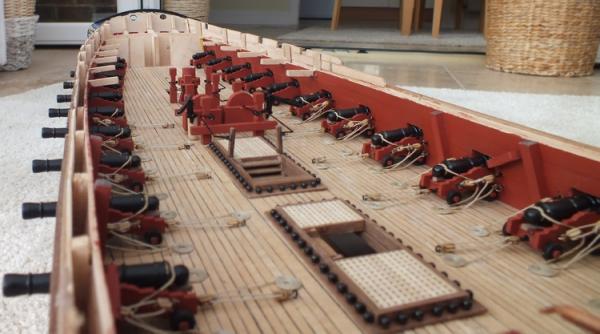
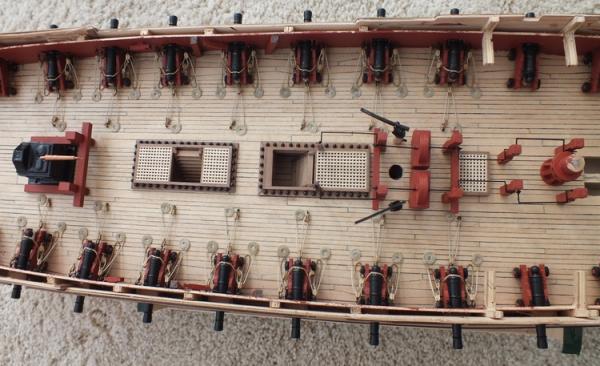
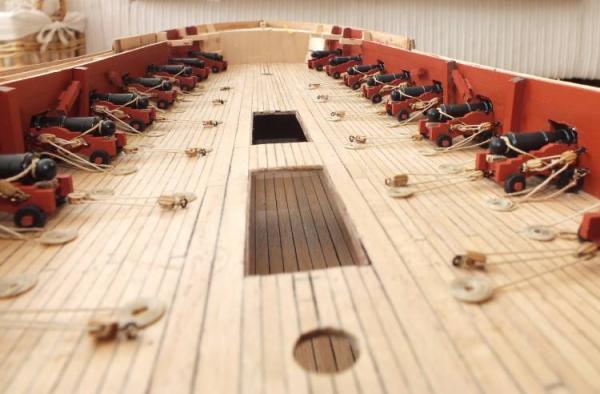
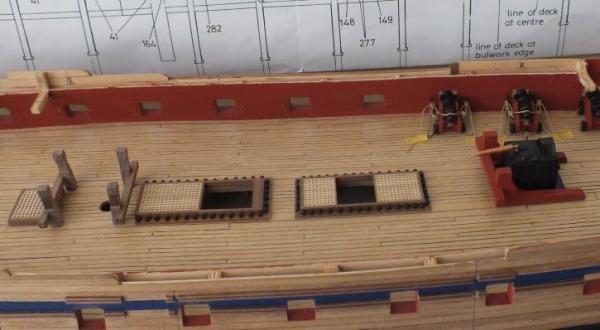
Deck fittings Now that all the main deck guns are in place I finished of the rest of the gun deck fittings. The stove looks very good as do the capstan and pumps in some ways its a pity most of these items will be hidden, when the top deck goes on,all the fitting made up well, the only tricky bit is the pump handles which I made up and fitted as the other components were fitted to the deck,these and the other parts had brass pins glued into the bottom of them and a .7mm hole drilled into the deck to receive them,and finally they were fixed in place with cyno. Looking down the deck Looking up the deck looking down on the deck view up the deck down on the deck


- 536 replies
-
- 11
-
-
- diana
- caldercraft
- (and 1 more)
-
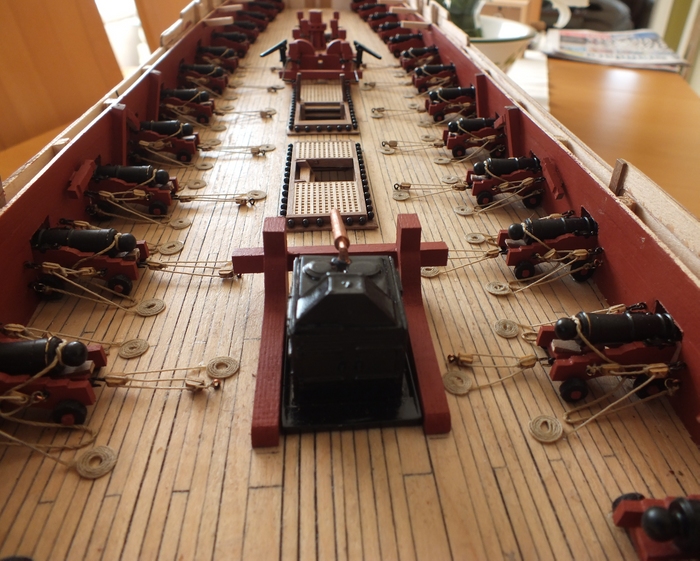
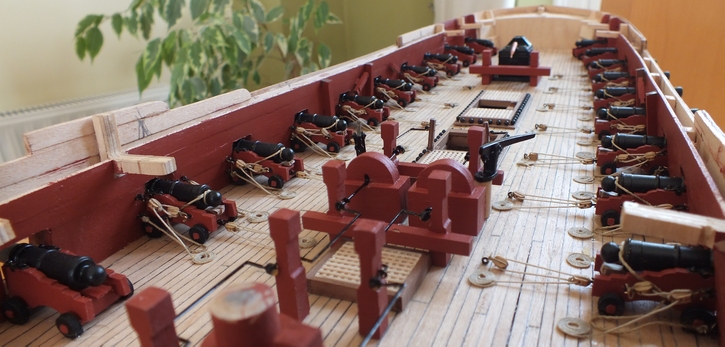
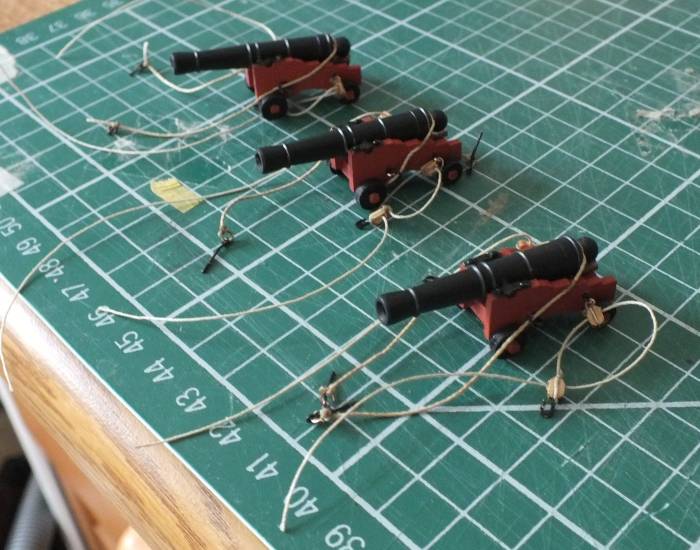
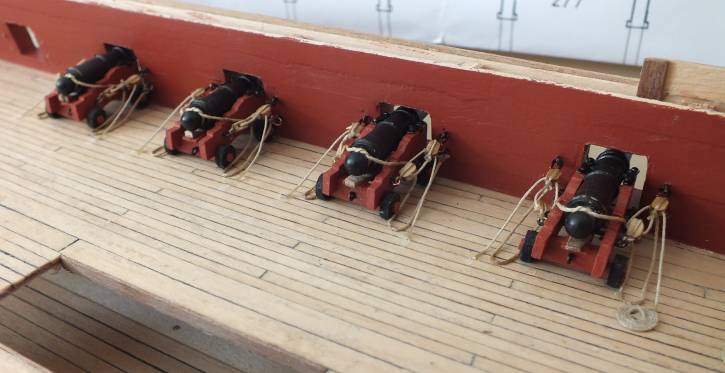
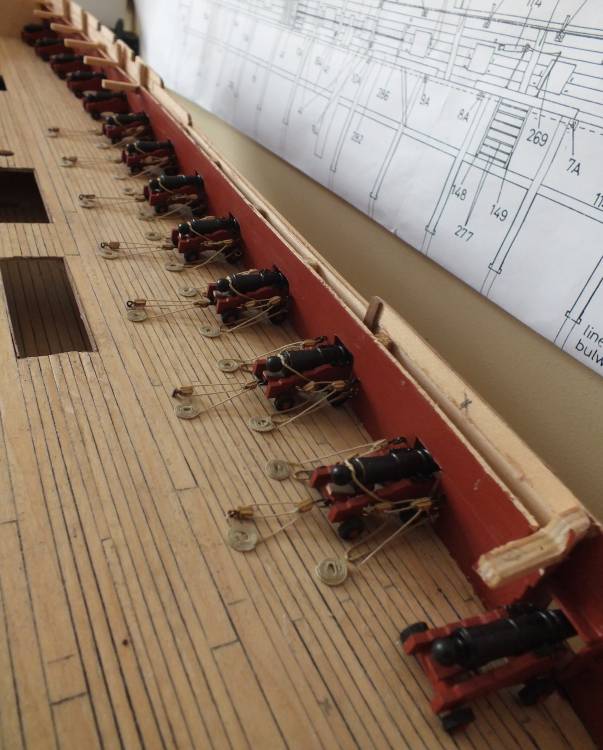
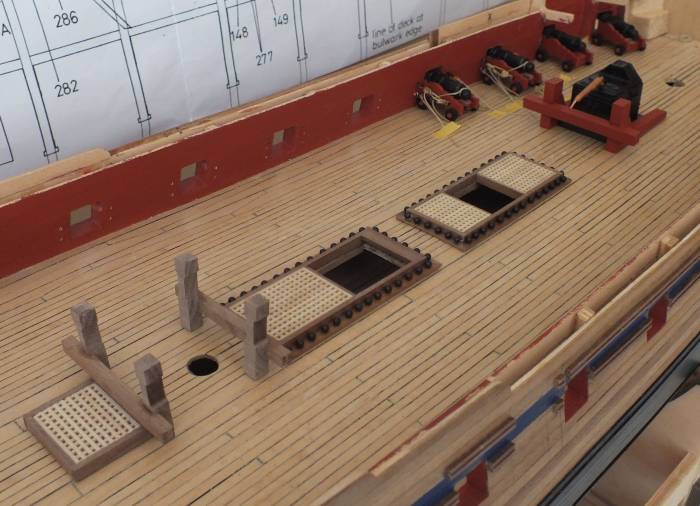
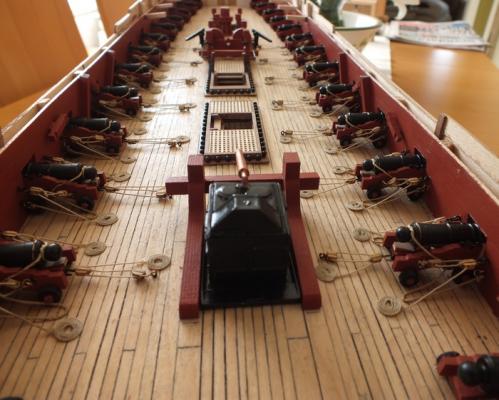
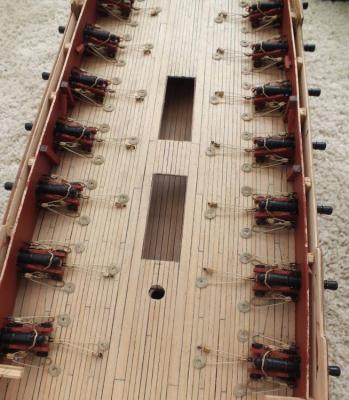
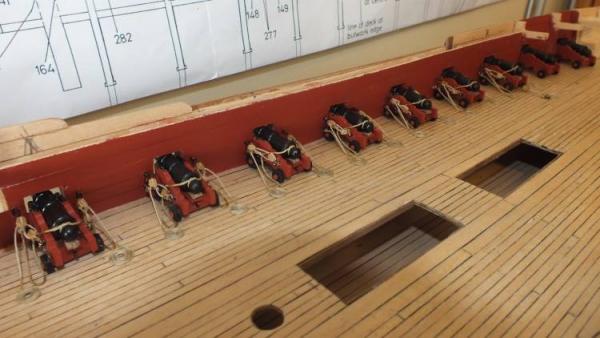
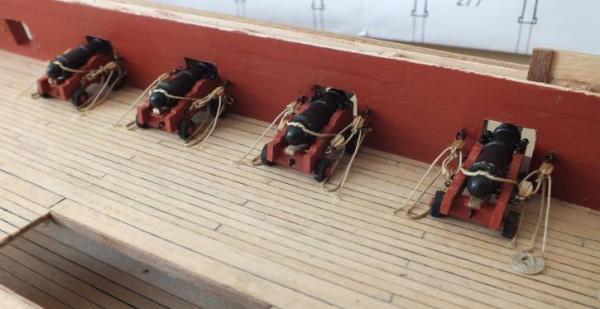
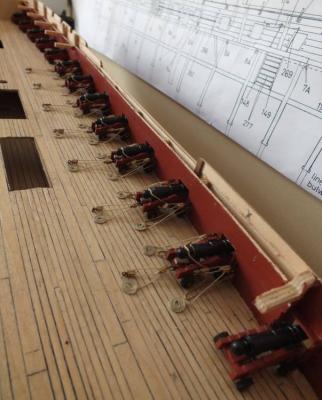
Guns fully mounted All the guns have now been fitted and the ones that can be seen have been fully rigged. Next job to finish the gun deck fittings.


- 536 replies
-
- 9
-
-
- diana
- caldercraft
- (and 1 more)
-
Hi Mobbsie nice job on the netting it is a very tricky job to get right.
- 1,279 replies
-
- 1
-
-
- agamemnon
- caldercraft
- (and 1 more)
-
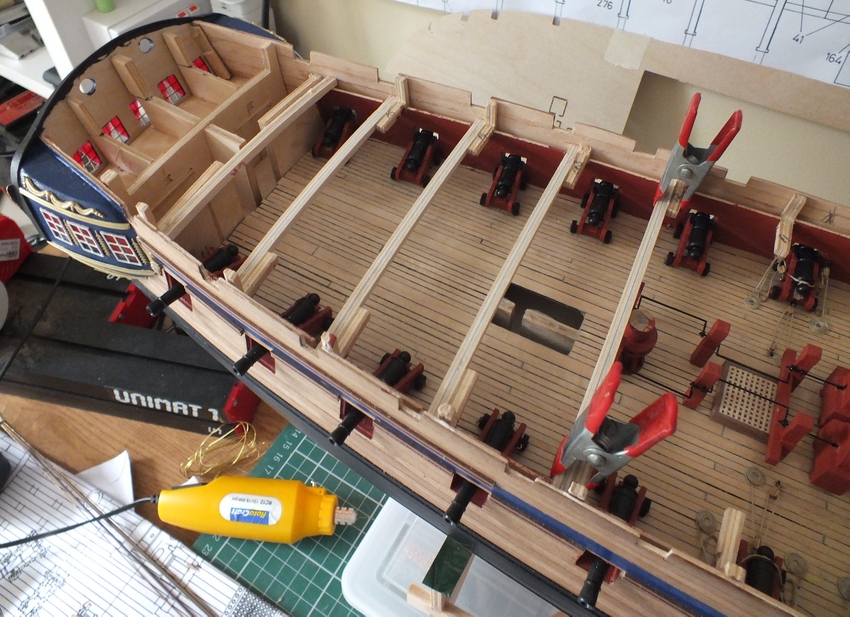
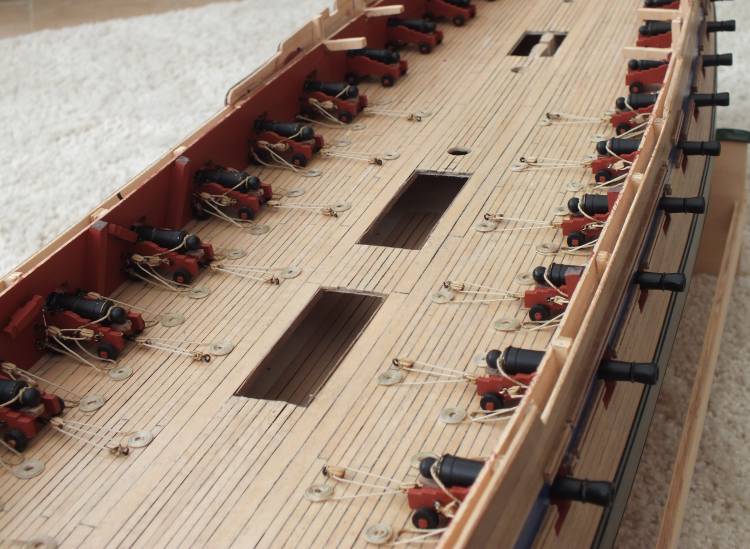
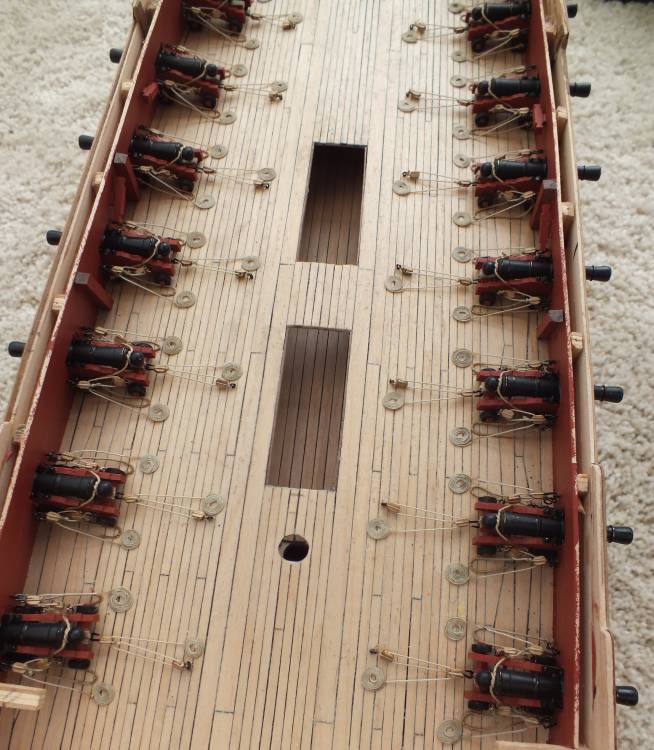
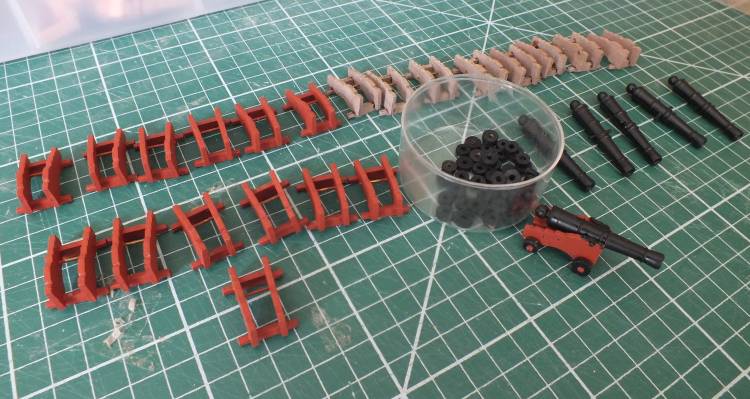
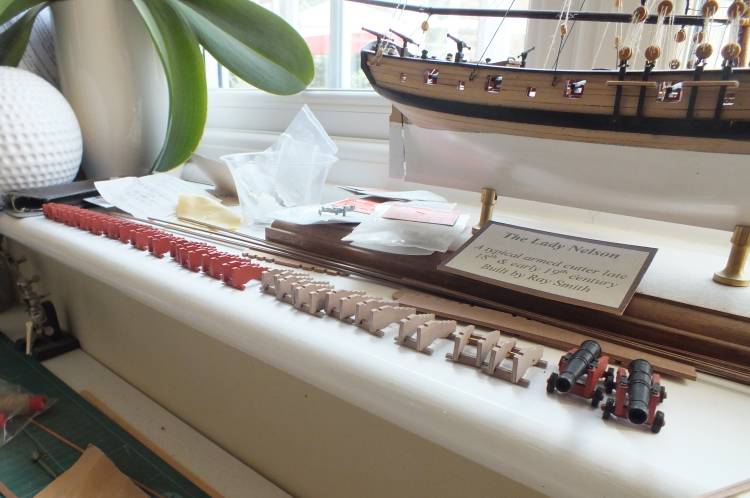
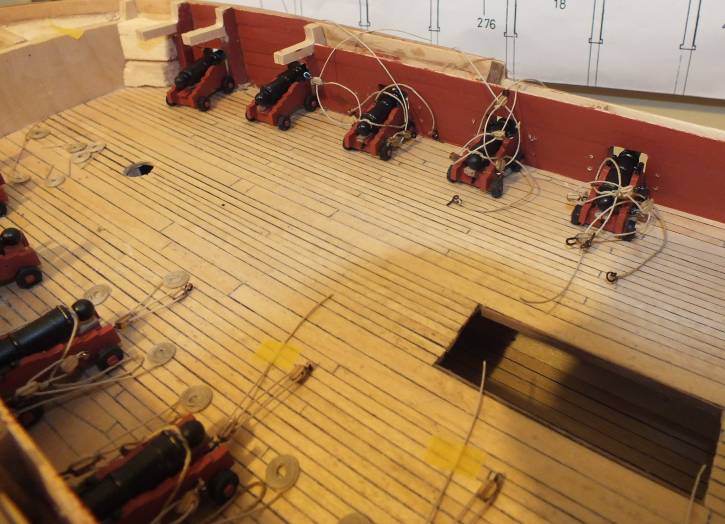
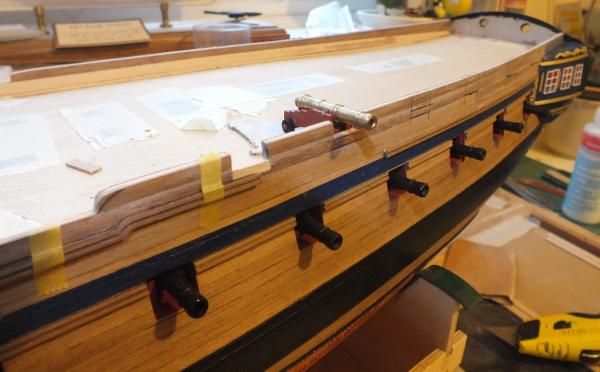
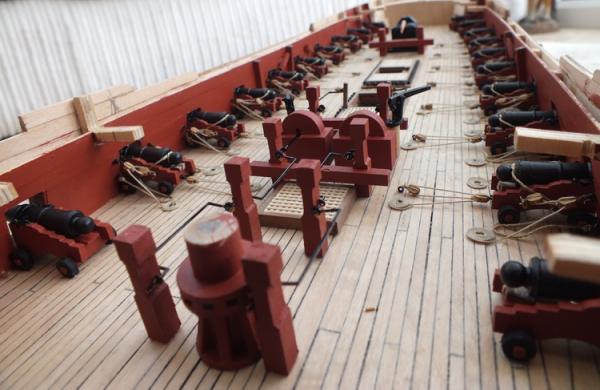
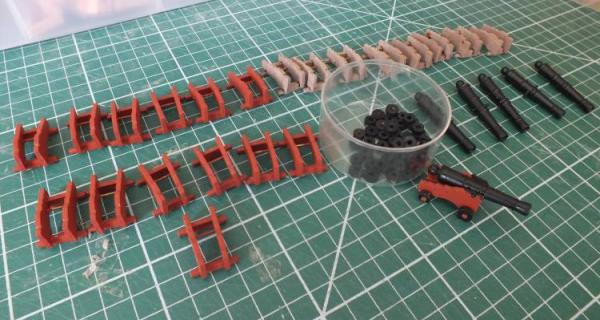
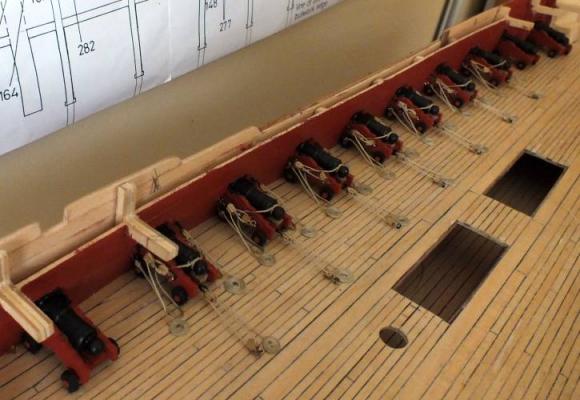
Half of the main deck guns are now fitted and the ones that can be seen are fully rigged, I used my normal method for making the rope coils, and lightly rubbed the completed gun on sand paper to give a slight flat on the bottom of the wheels to give a larger gluing area, then fix them with a generous amount of thick cyno, the last thing you want is to later knock one loose when the top deck is on. Guns being made up carriges, barrels and wheels Rigged ready to fit Being fitted Next stage Next stage Starting second side First side done


- 536 replies
-
- 12
-
-
- diana
- caldercraft
- (and 1 more)
-
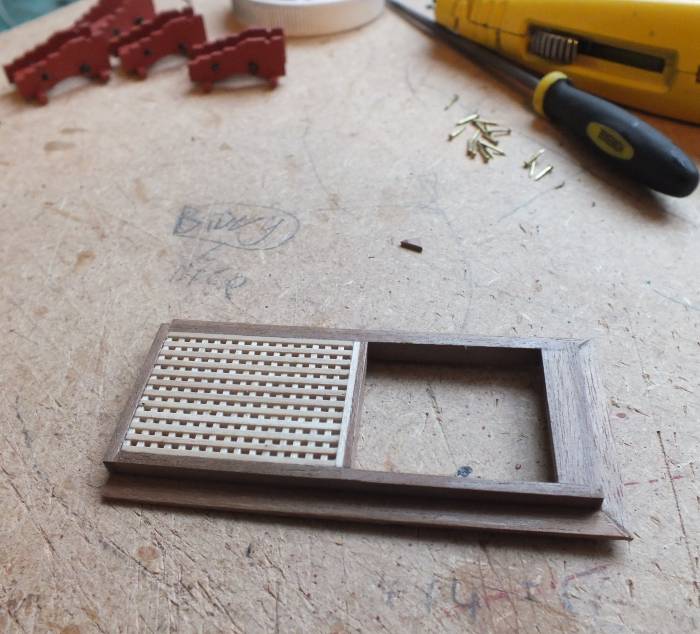
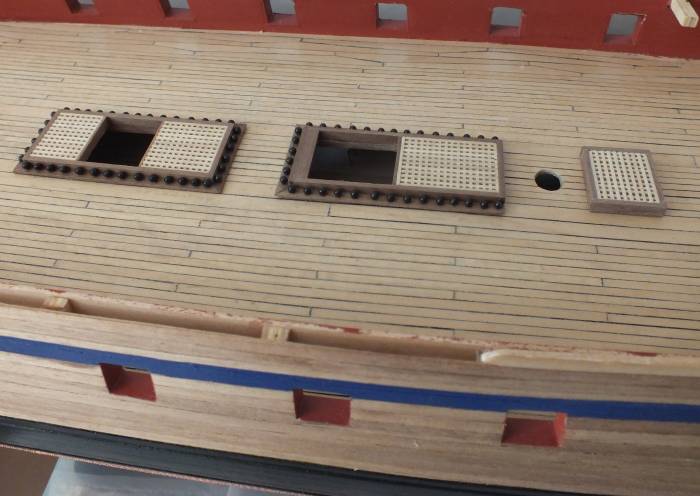
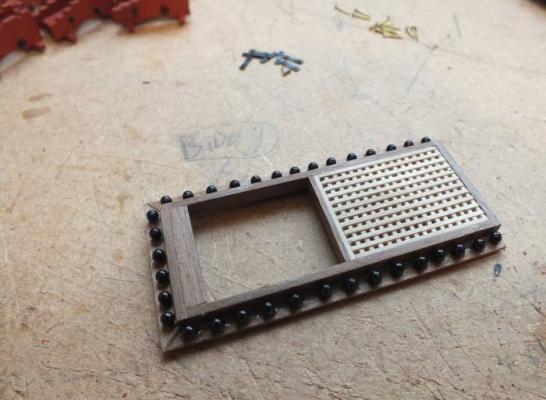
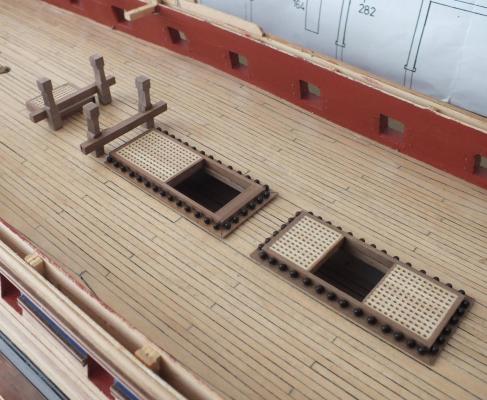
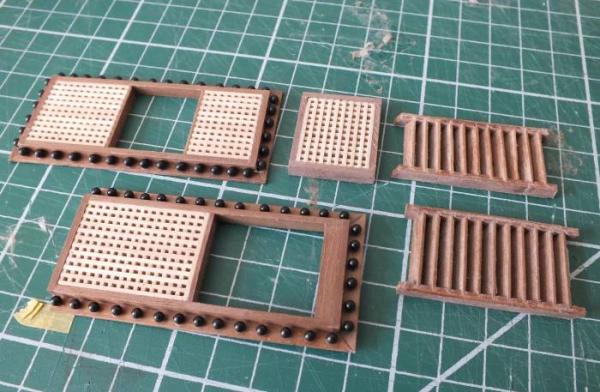
Deck FittingsAt the same time as making up the main deck guns and rigging them I also started making some of the deck fittings, hatches, bits, ladders and the stove the photos below show the progress. The first hatch The first hatch finished Hatches and ladders Hatches test fitted Stove added The fittings and the guns


- 536 replies
-
- 9
-
-
- diana
- caldercraft
- (and 1 more)
-
Hi Mobbsie she is coming along very well the gun decks and the netting look rearly good, look forward to more updates.
- 1,279 replies
-
- 1
-
-
- agamemnon
- caldercraft
- (and 1 more)
-
Hi Gary My kit did not have anything missing, my main gripe with the kit is the quality of some materials not as good as other kits I have built, but she still makes up to a very nice model, the deck planking is as in the book I would think all ships would be planked the same, kits just do not go in for quite that much detail. I can walk 9 holes ok and play 18 if I have a ride in a buggy ( I did walk 18 two weeks ago but it was to much) I will try again in a week or so.
-
Hi Gary You can find the book at amazon but it can be quite expensive, I obtained my copy on ebay and it is a 1st early edition the later one is the same plus a set of plans, with ebay it is a matter of waiting till one comes along and how much someone will pay plus where you are in the world. I have tried to point out the good and bad parts of the kit as I have progressed, there are issues with some of the mast/ spar drawings /sizes as mentioned in previous posts, I have planked the gun deck as in the book not as per the kit but the kit planking is as most kits are. I covered the gun port problem and the mistake I made between the two where the entery steps are. Back to rigging the main deck guns, nearly all done.