HOLIDAY DONATION DRIVE - SUPPORT MSW - DO YOUR PART TO KEEP THIS GREAT FORUM GOING! (Only 13 donations so far - C'mon guys!)
×


Ray
-
Posts
404 -
Joined
-
Last visited
Content Type
Profiles
Forums
Gallery
Events
Everything posted by Ray
-
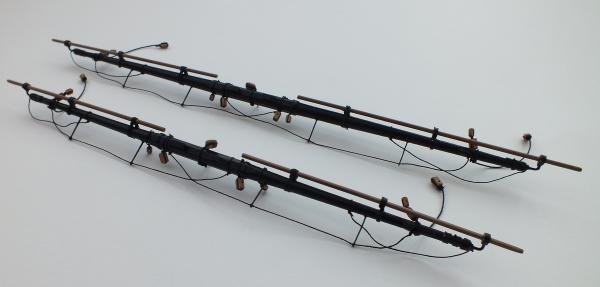
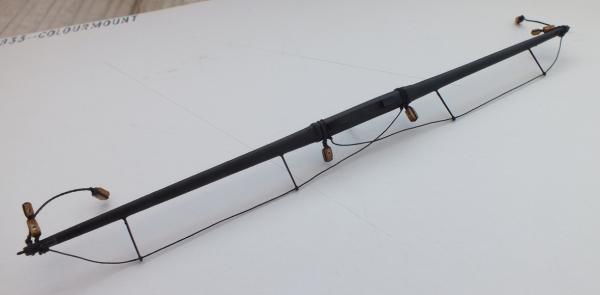
 Many thanks for all the ticks and comments guys. B.E The booms are smaller than in the plans, as I am a great believer that something should look right, also I use slightly smaller dia threads for rigging sometimes as well, as again no one spots if something is slightly undersize but most can spot something that is oversize.
 -
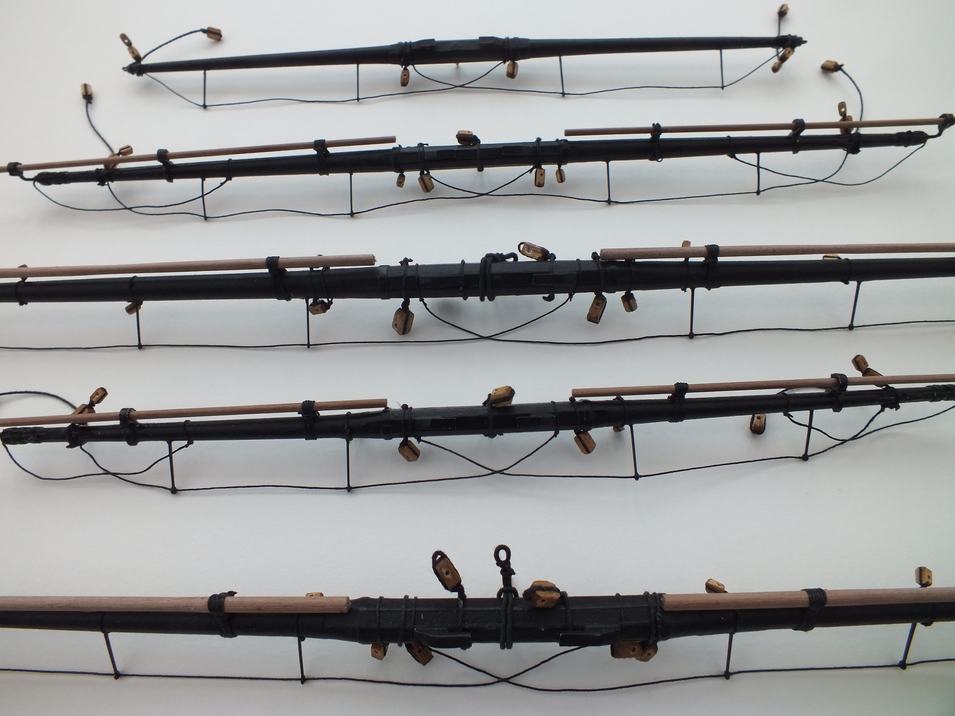
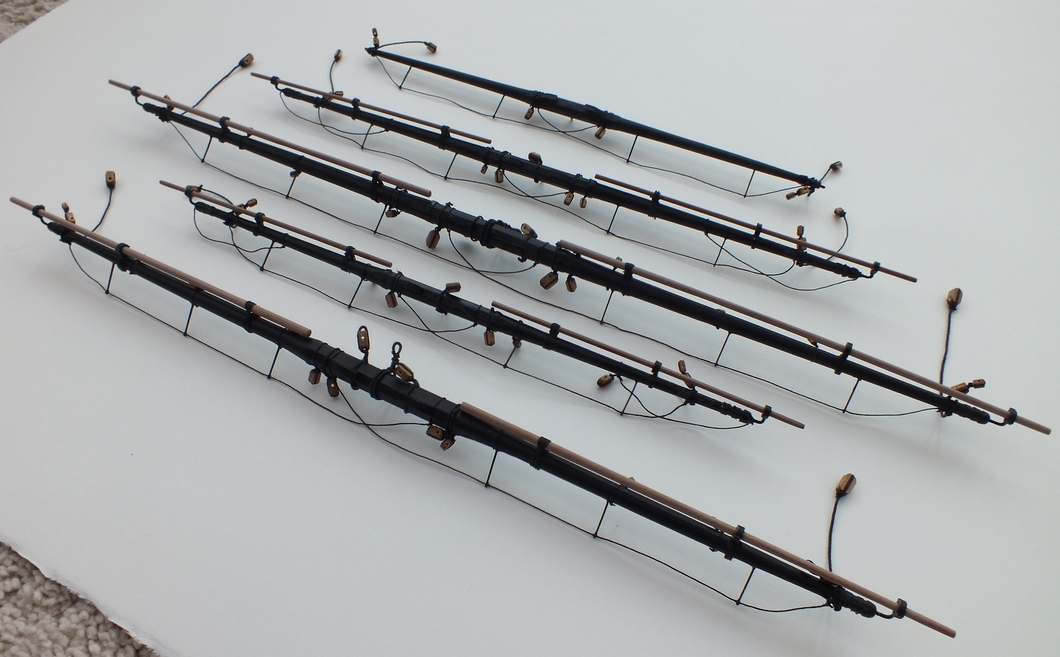
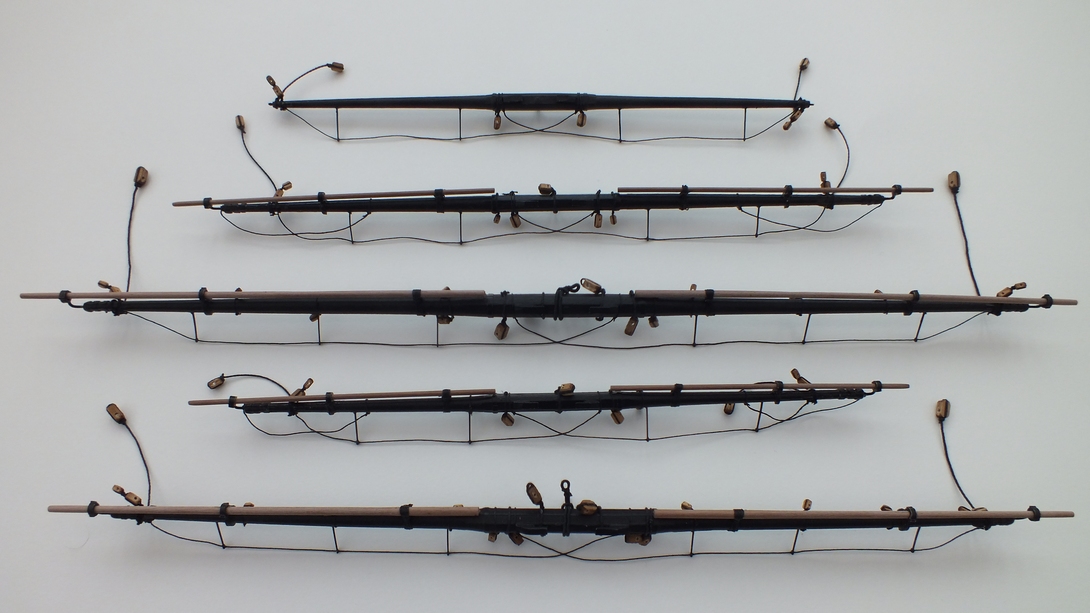
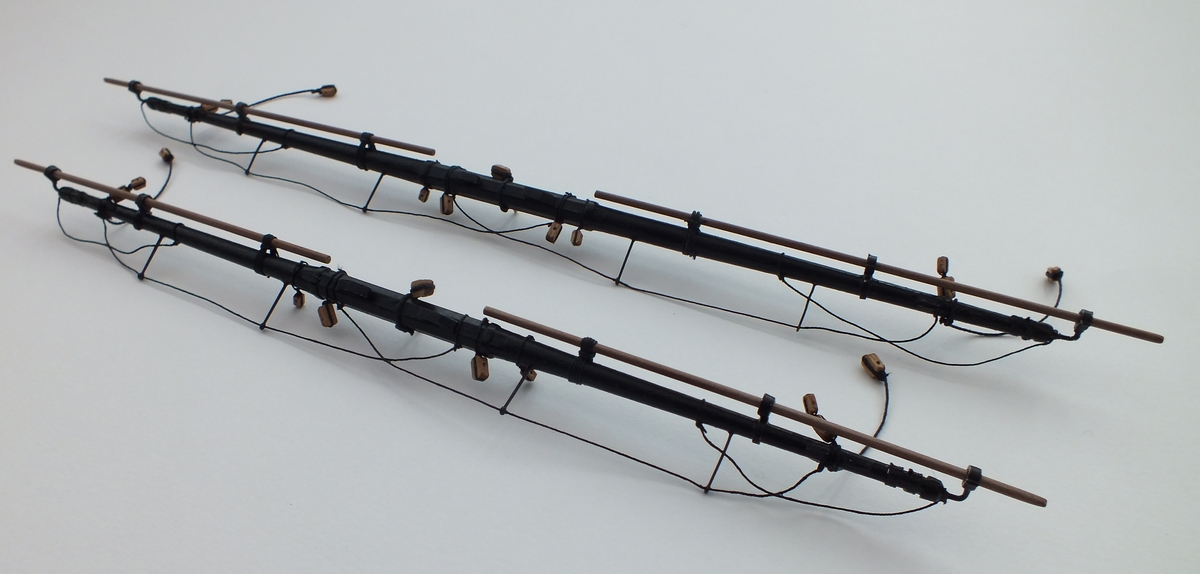
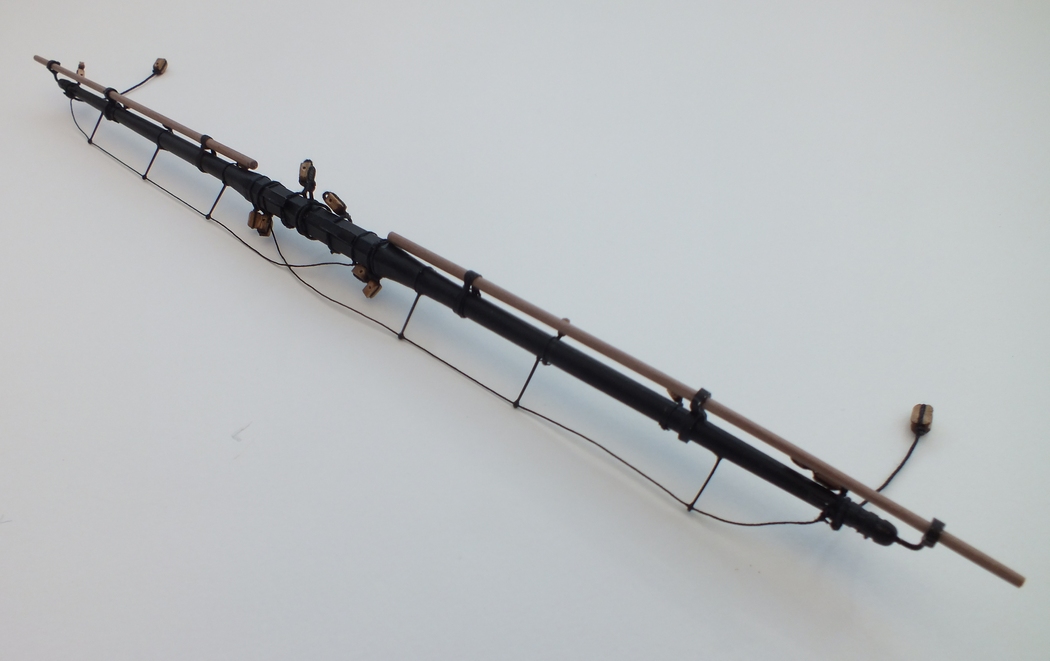
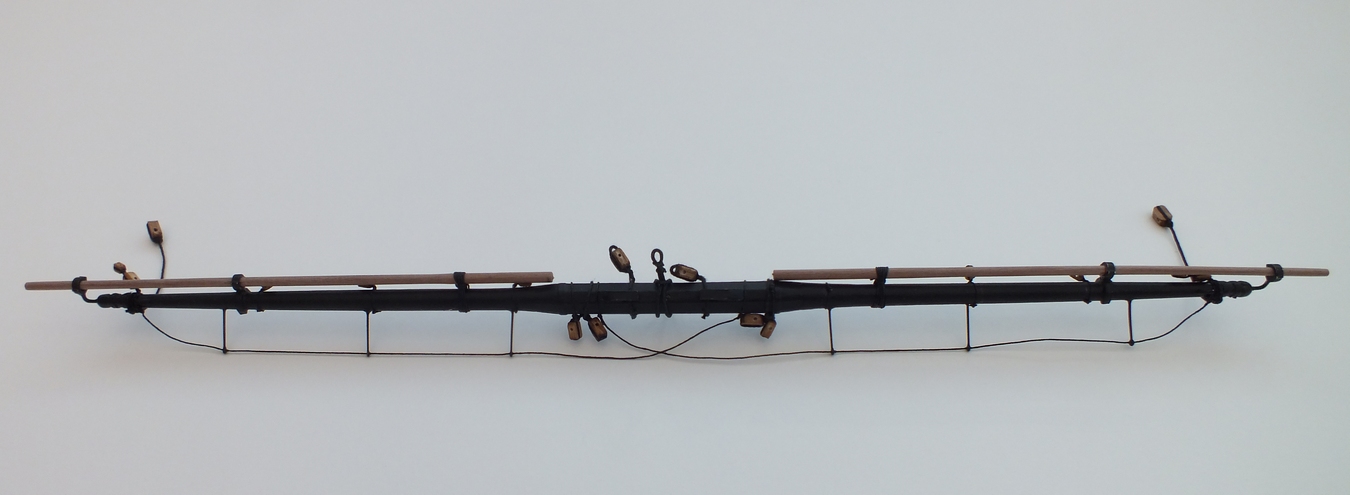
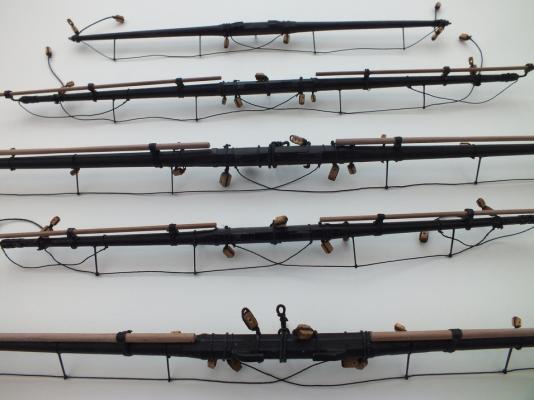
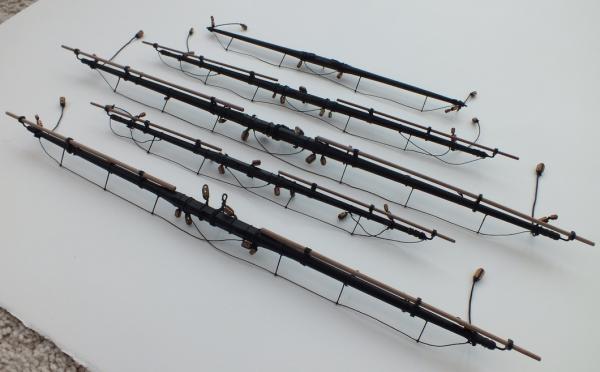
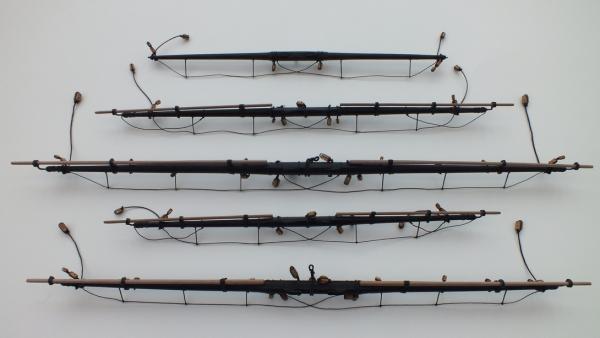
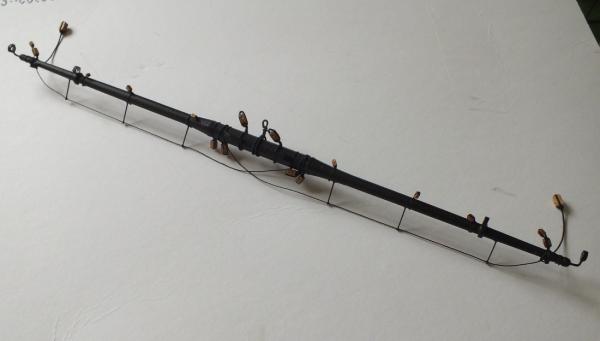
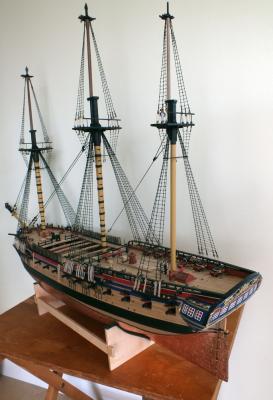
All the main and lower yards with stun sail booms and the mizzen cross jack are now finished, I will next take some photos with them on the masts. Stanchions used for the stirrups Completed yards Stun sail booms

- 536 replies
-
- 12
-

-
- diana
- caldercraft
- (and 1 more)
-
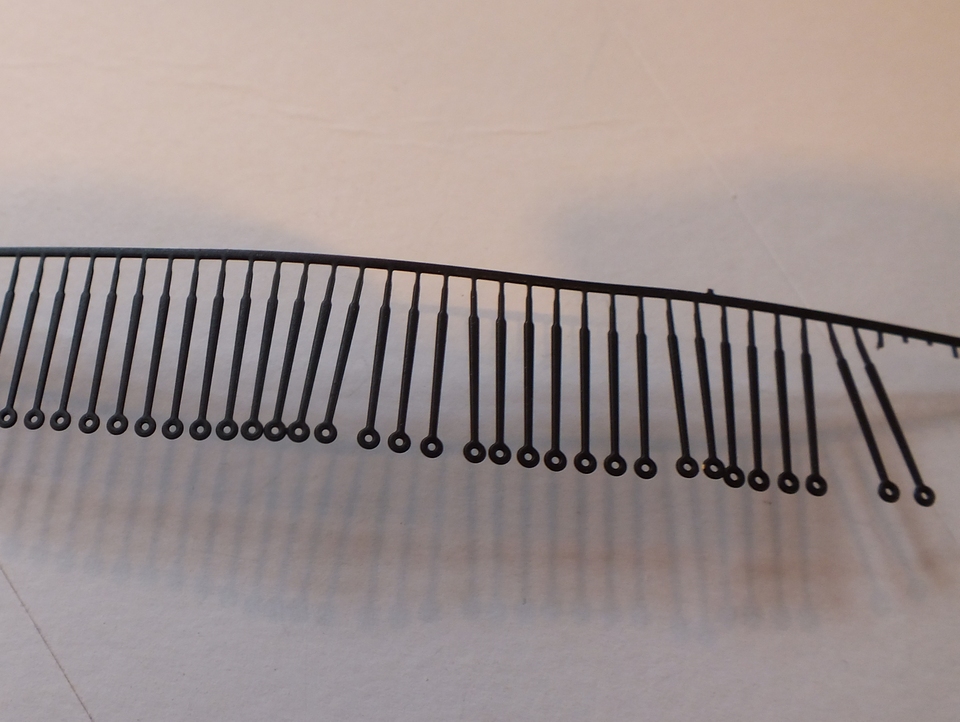
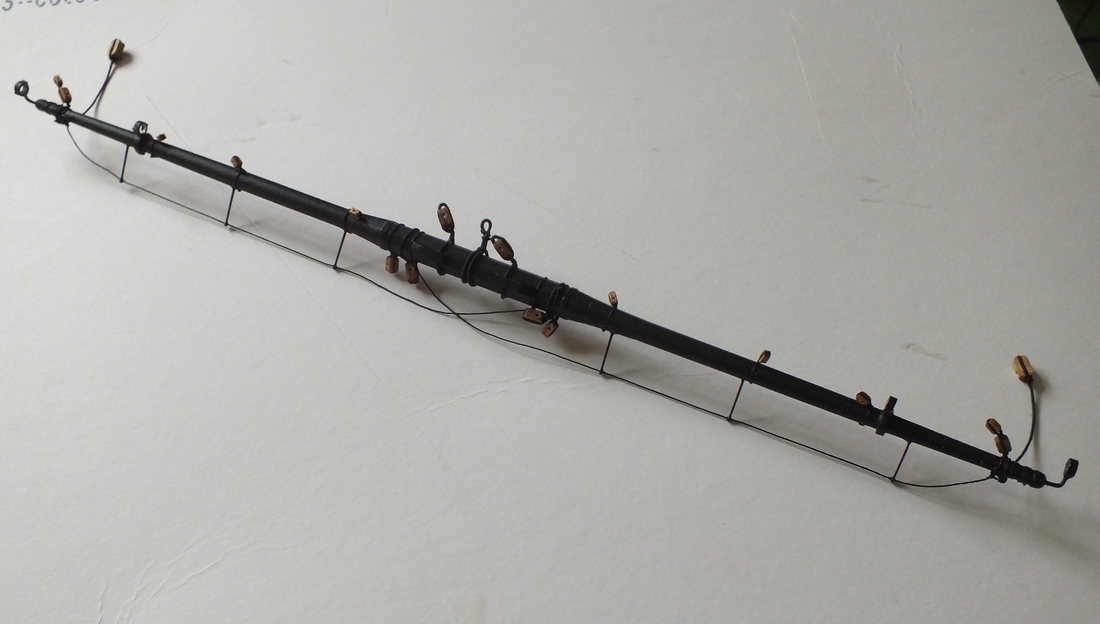
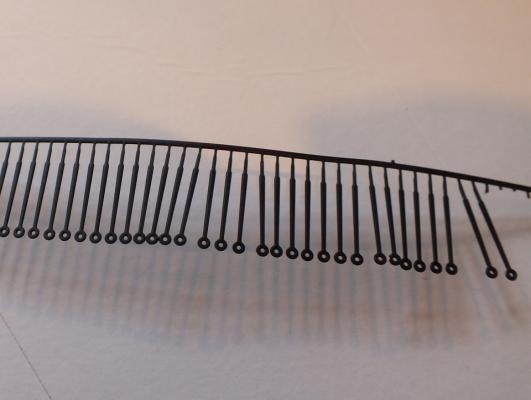
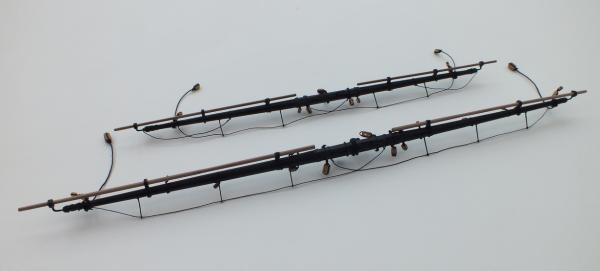
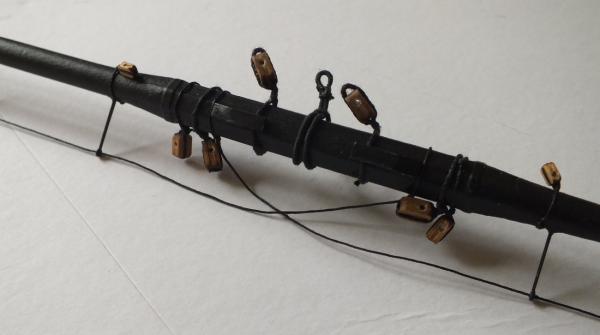
Next two coats of dull black paint was applied to the yard before all the blocks and rigging tackle was added. The lower main yard also had the yard slings added, also the slings with a block to support it made and added to the tops , all the lifting tackle blocks were also fixed to the yard finishing with the pendant lines and blocks, lastly the stirrups and foot-ropes completed the yards, the stirrups were made by using stanchions left over from the quarter deck conversion they looked better than my bent wire test stirrups. Lastly the stun-sail booms were made and fitted and lashed down,I must say there is a considerable amount of work, and time and effort, that goes into each yard and I am very pleased with the results. The main yard and cross-jack are done, now its back to the others. Cross-jack pinned to mast Main yard with some blocks Main yard fully rigged without stun-sail booms Main yard sling Finished main yard
- 536 replies
-
- 19
-
-
- diana
- caldercraft
- (and 1 more)
-
Chris I had the same problem as Jason with low points and made note of it in my build log, so well worth checking out.

-
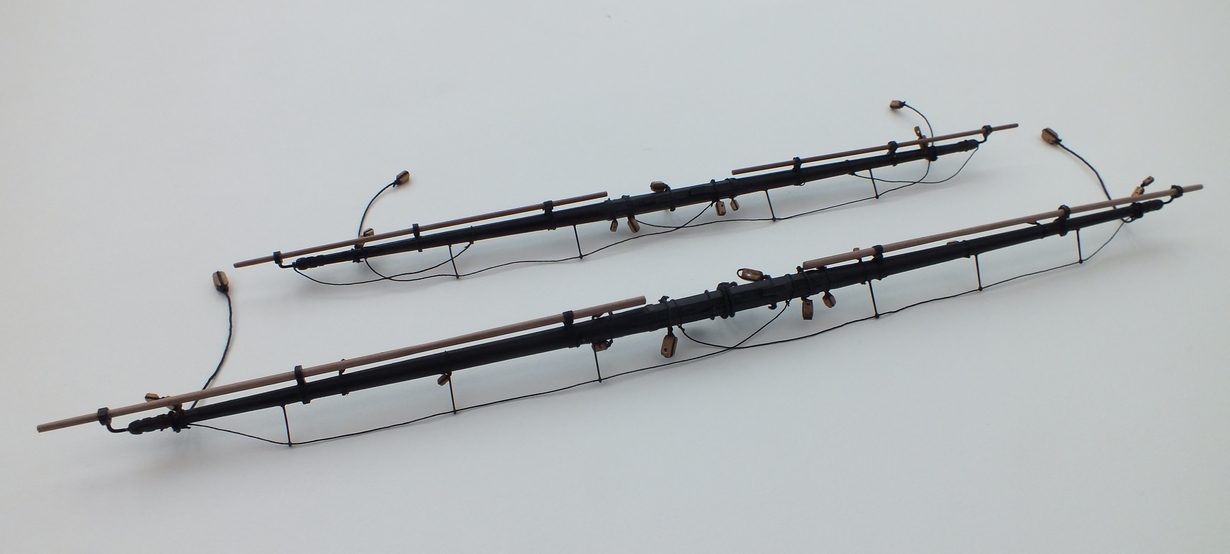
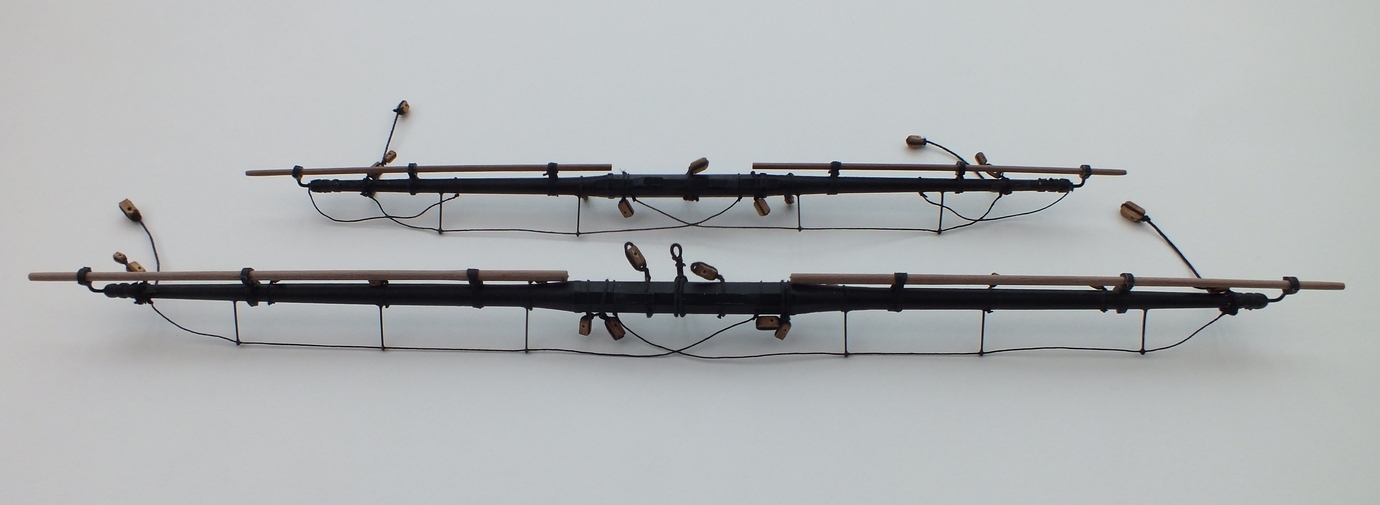
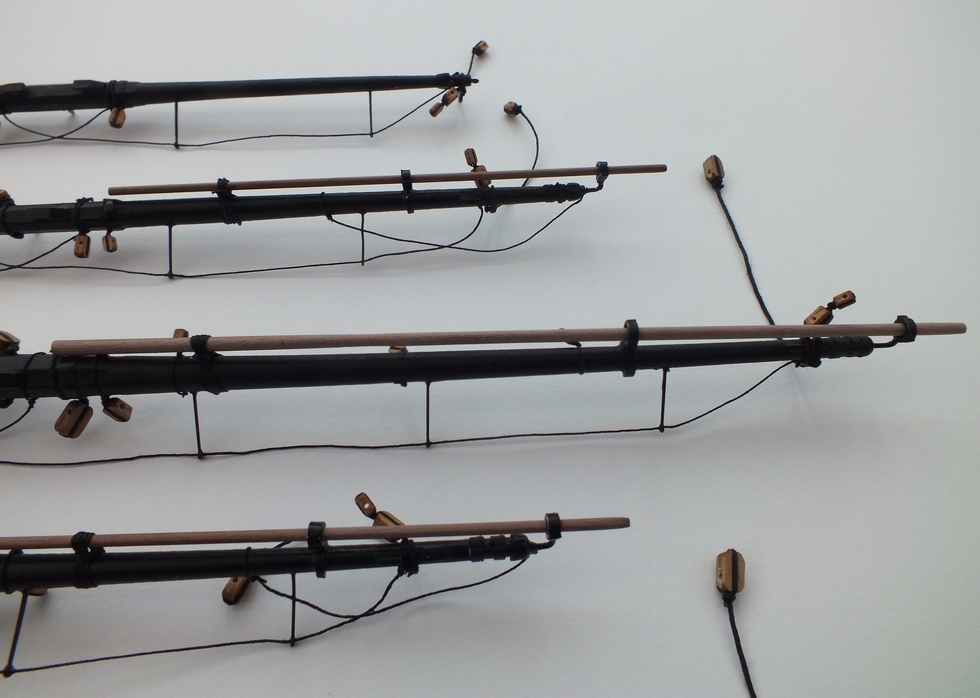
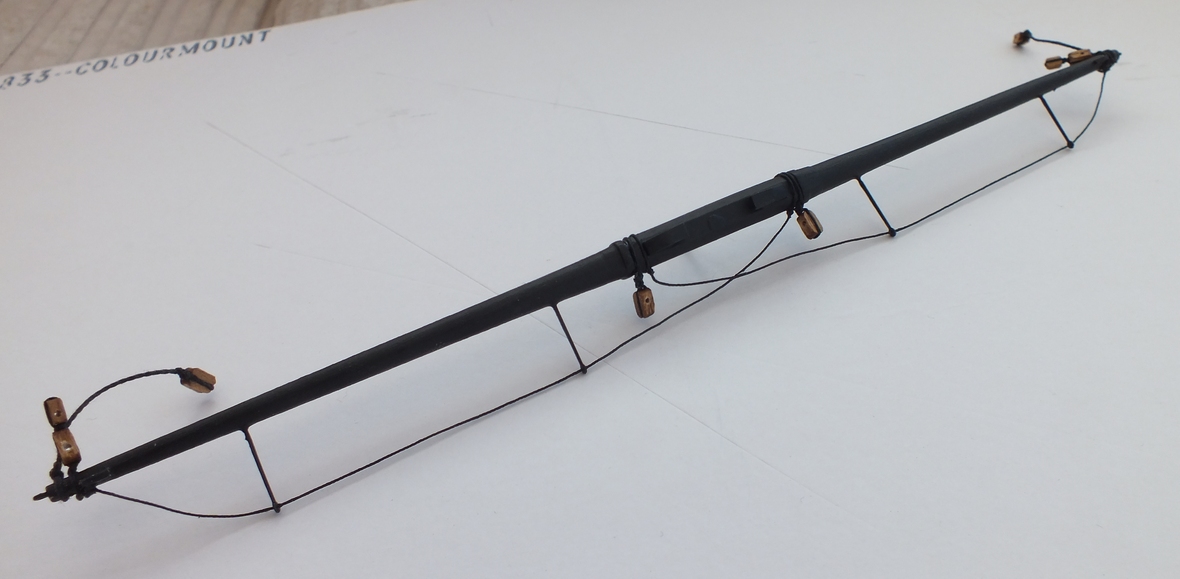
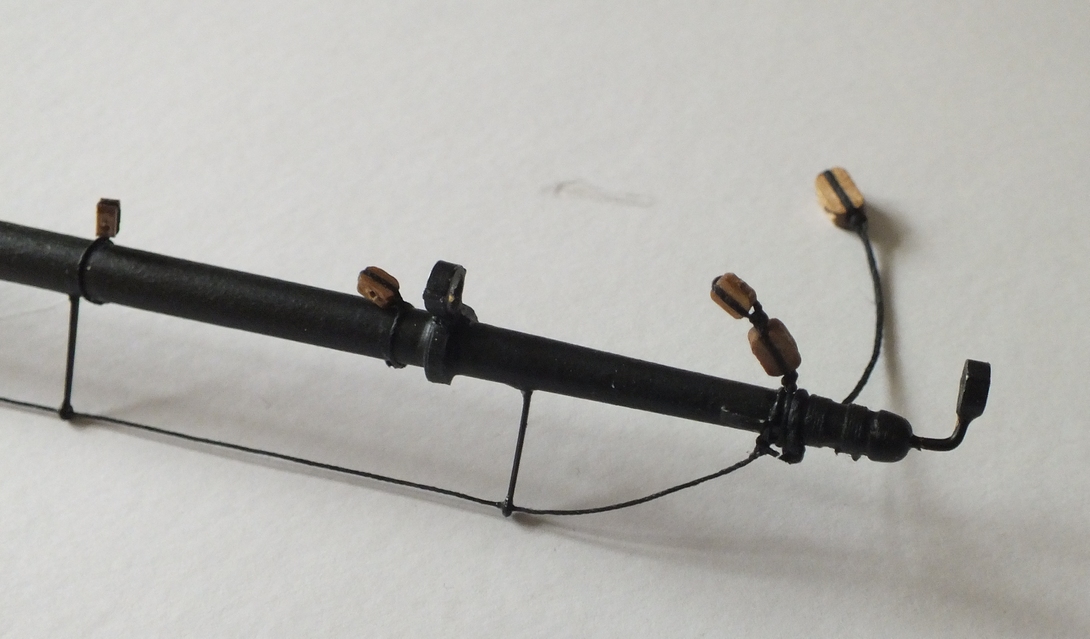
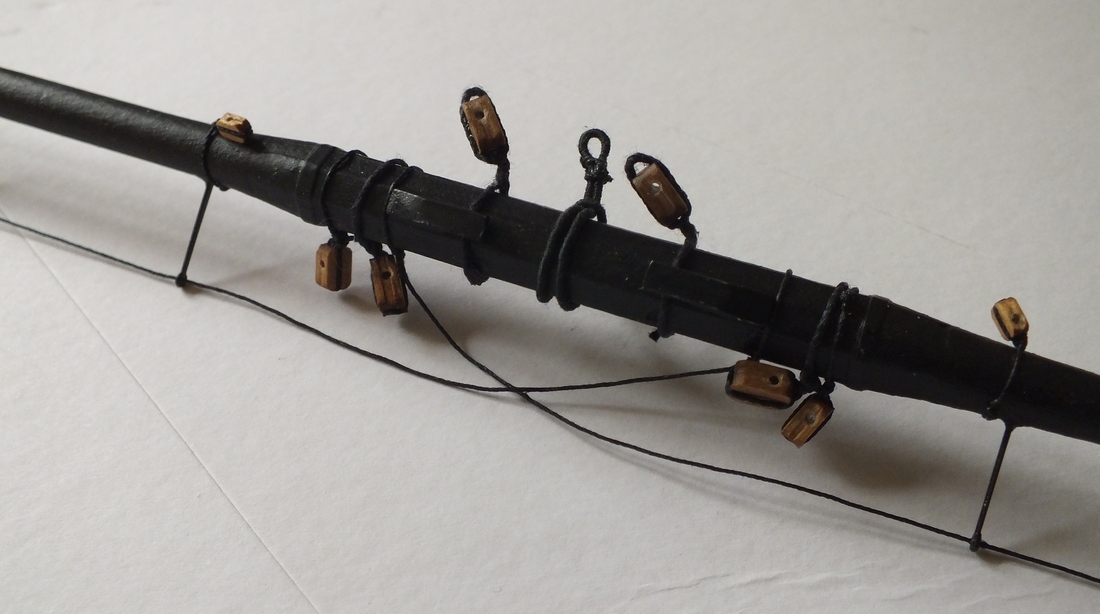
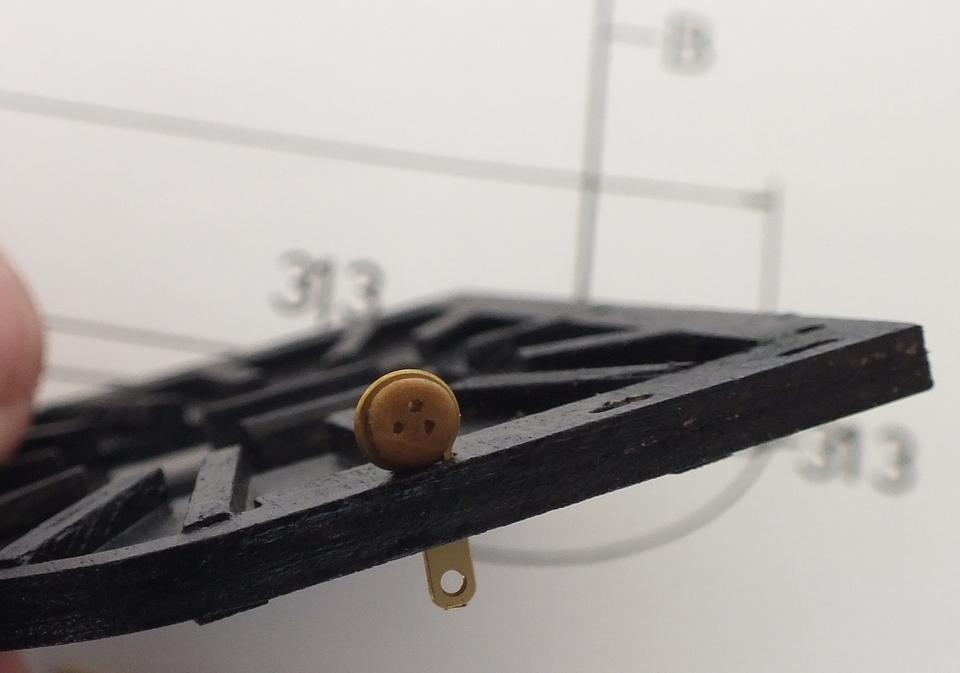
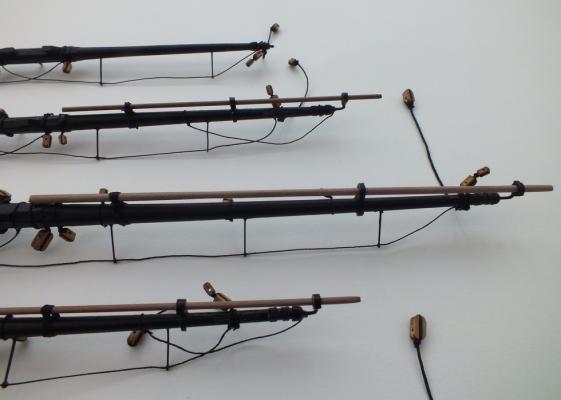
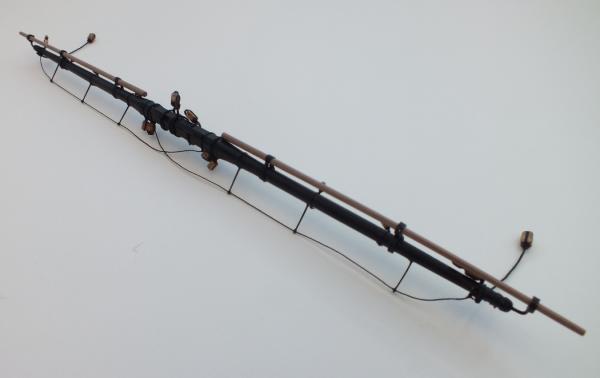
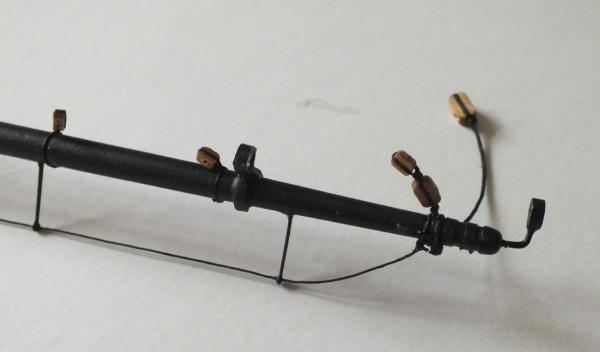
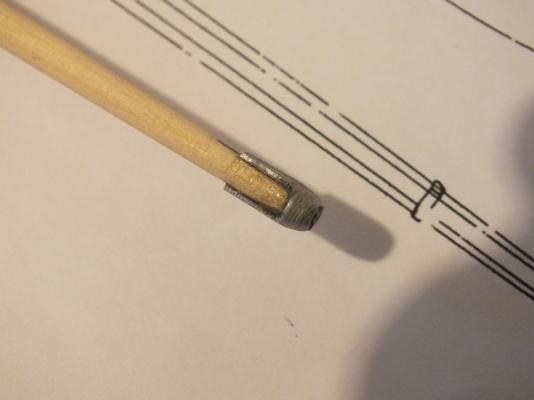
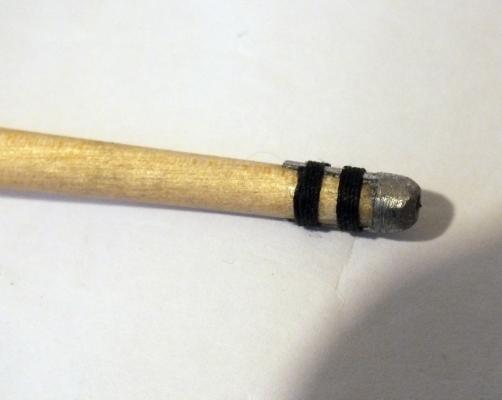
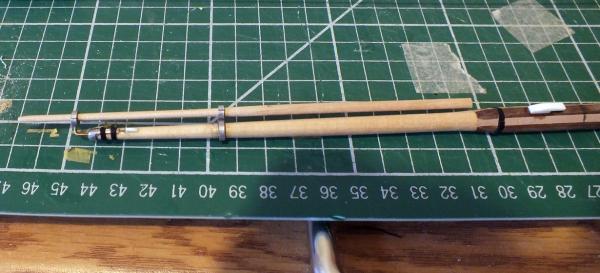
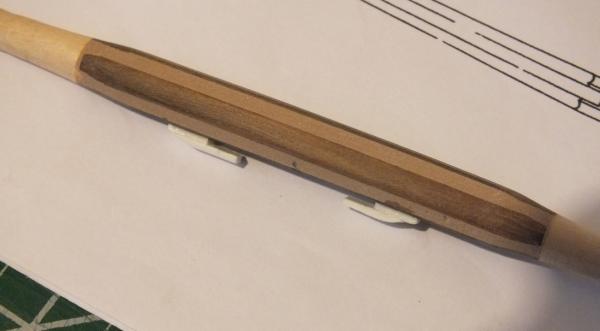
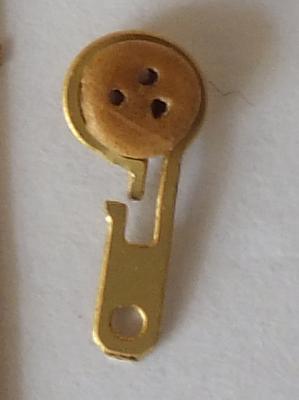
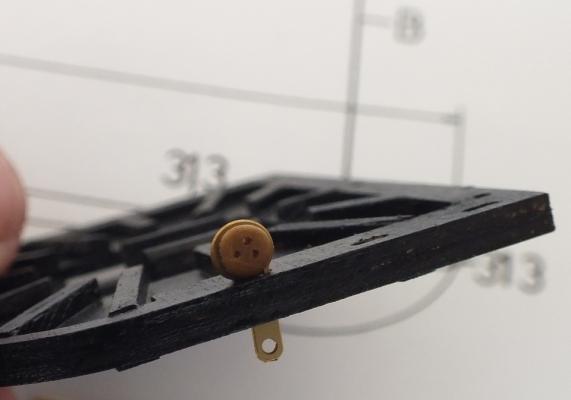
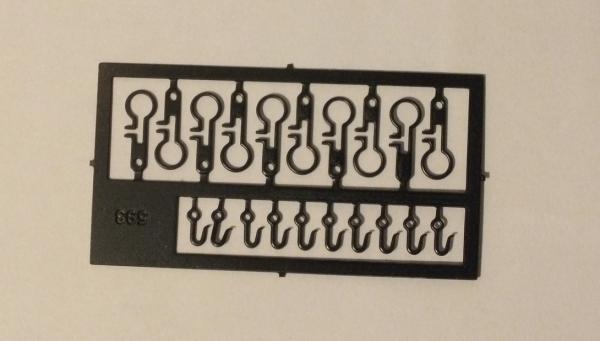
Part 2 The yards with the stun-sails booms have domed end brackets with legs, these do require some fettling, I first thinned the legs both inside and outside as they are way to thick to start with,they were glued to the end of the yard, and reshaped (see photos) I then added the rope lashings, I then made a dummy stun sail boom ( the real ones will made from hard wood dowel) to allow the brackets to be aligned, next the mid yard boom brackets were fixed to the yard in conjunction with the outer boom brackets which are not yet glued in, both brackets were set up so that the the rear edge of the boom is over the front edge of the yard which allows the 3mm blocks to be added later, and for them to be in the centre of the top of the yard. I then drilled a hole to the rear of the yard at the centre and added a 1-2mm pin to allow the yard to be fitted to the mast. Yard end bracket as supplied After rework Yard brackets on with dummy boom All brackets and cleats added

- 536 replies
-
- 14
-
-
- diana
- caldercraft
- (and 1 more)
-
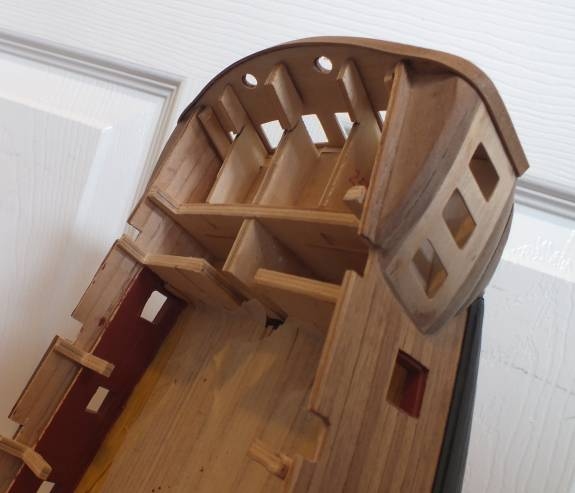
Hi Chris. It looks like you have only bevelled the lower part of the frames the upper parts will need bevelling as well, I would also highly recommend filling between the first few frames bow and stern with balsa, this helps to get the overall shape and makes planking easier. Also check the transom is right it is very tricky as the other Diana builders have found. Good luck with her she is a great project.
-
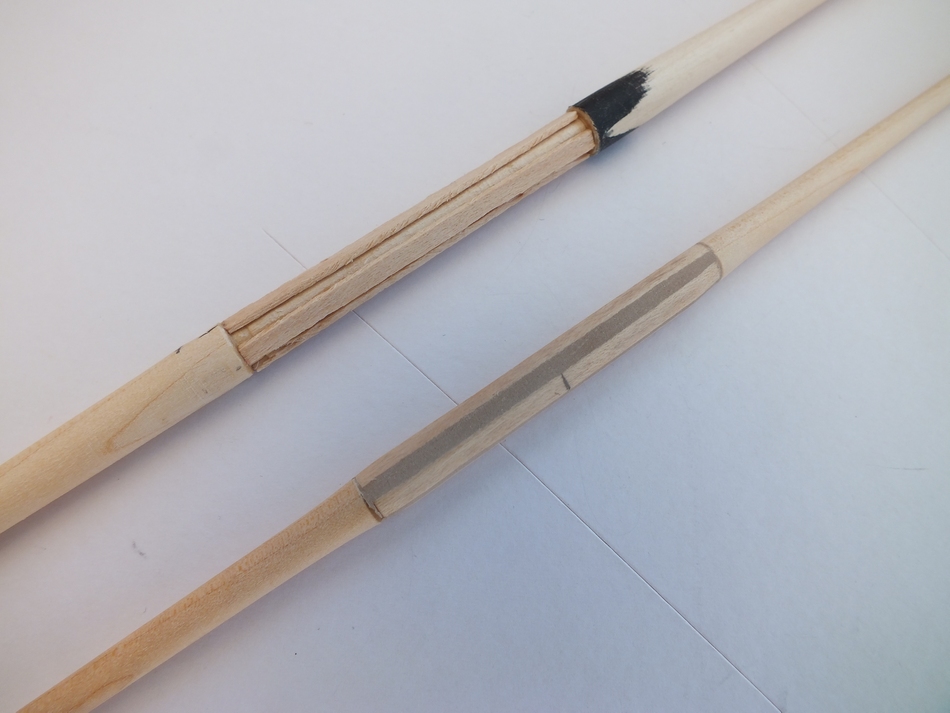
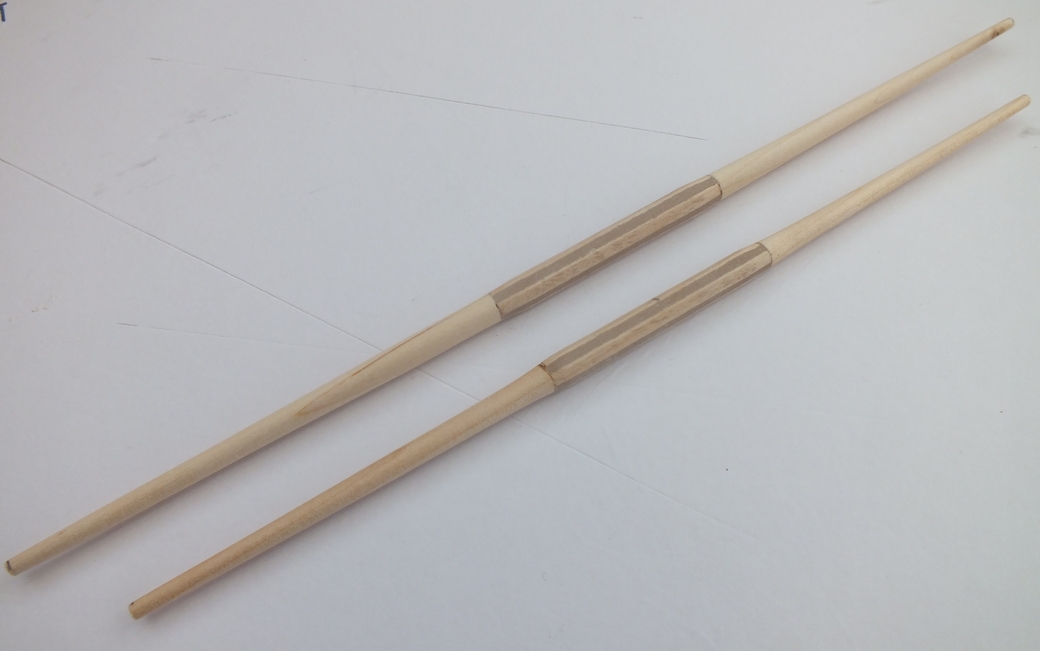
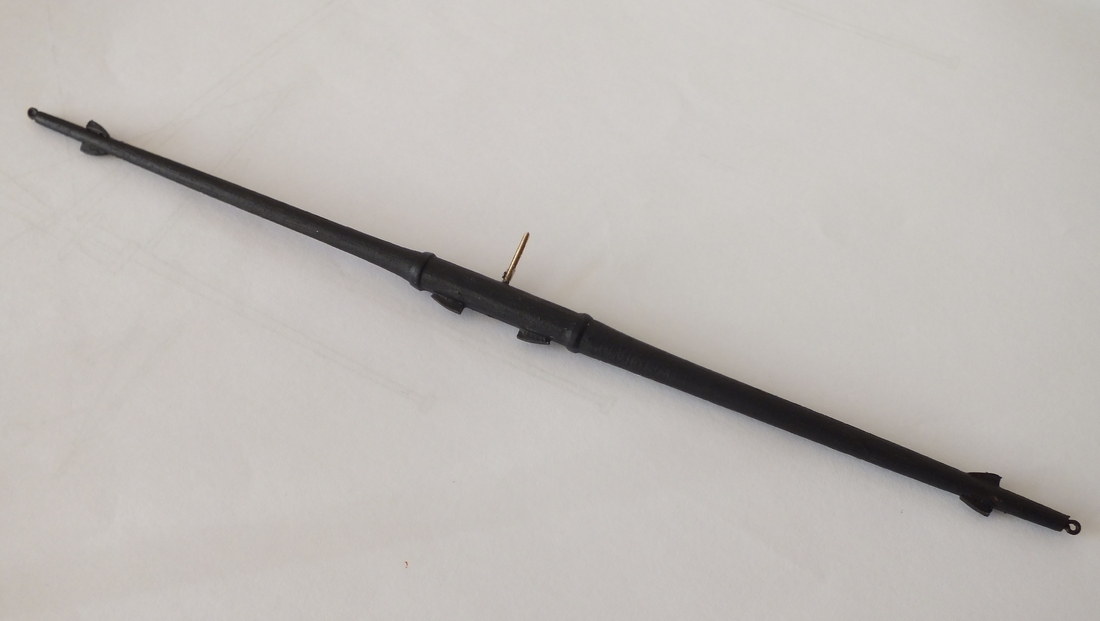
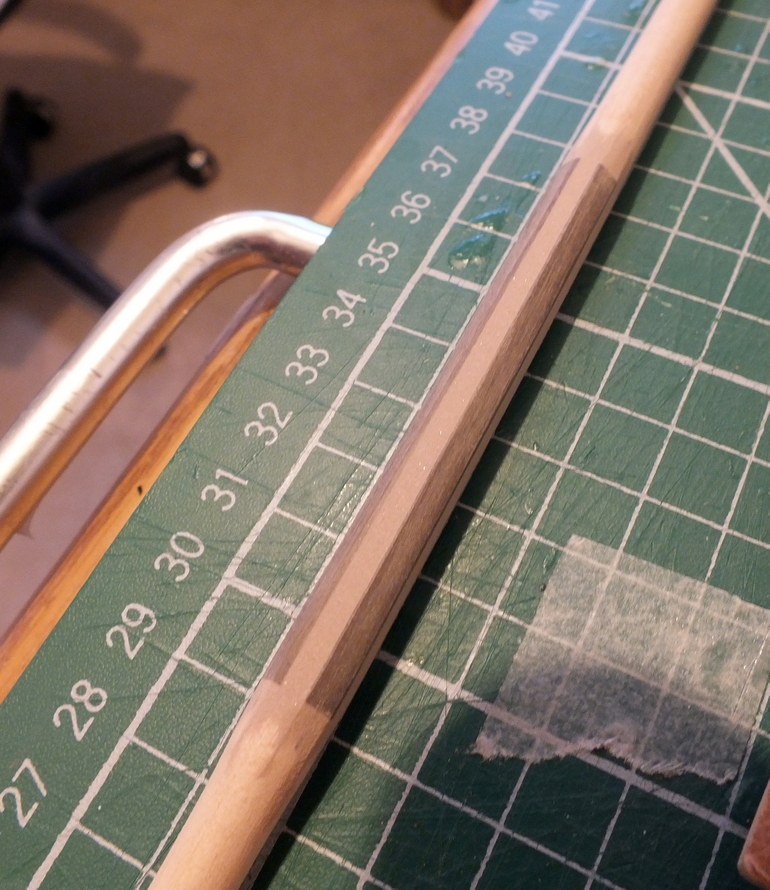
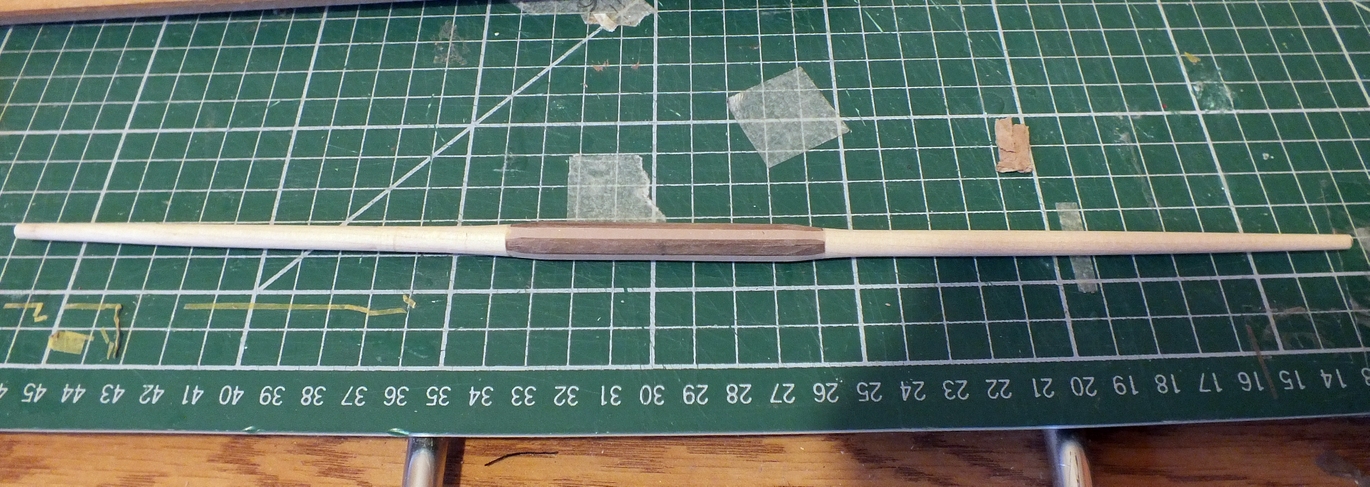
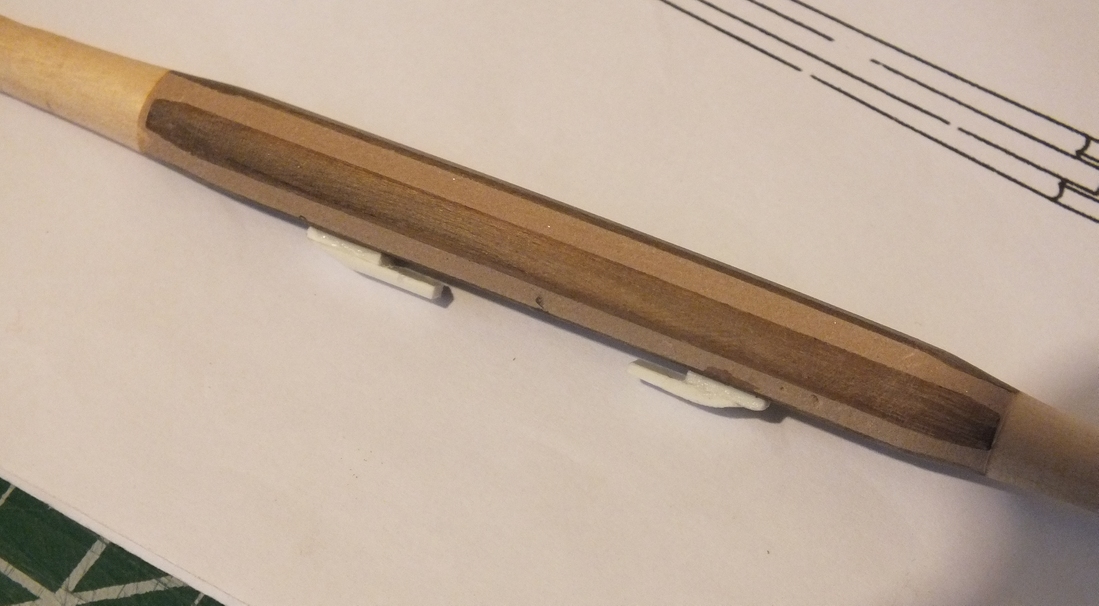
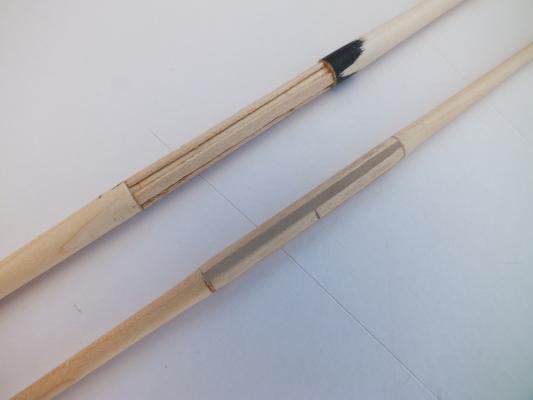
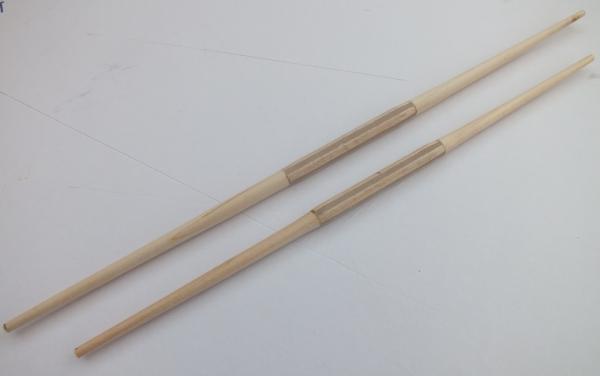
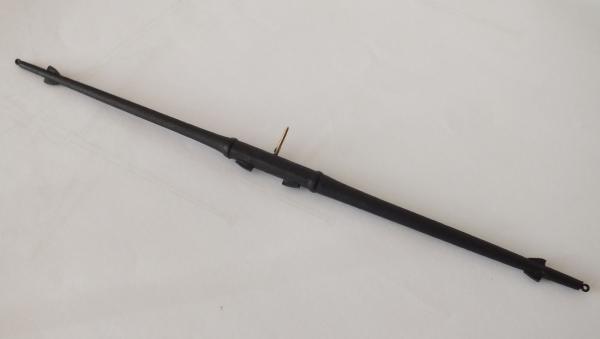
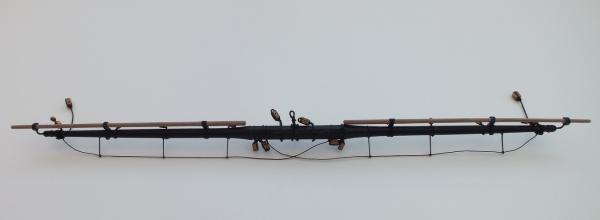
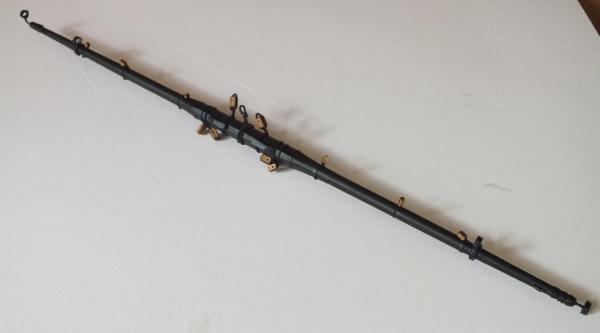
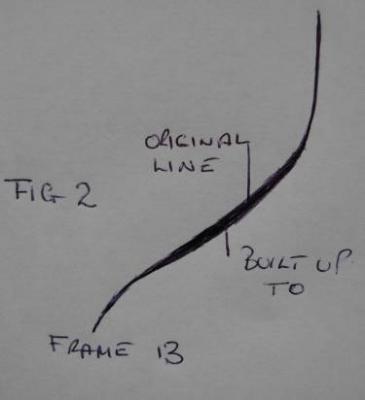
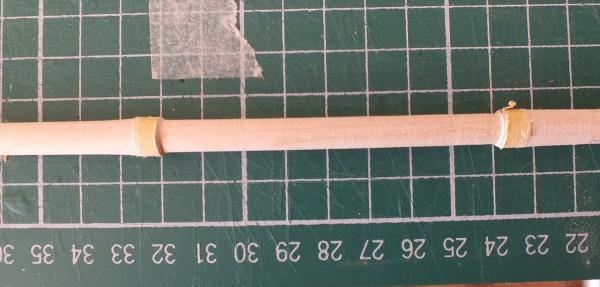
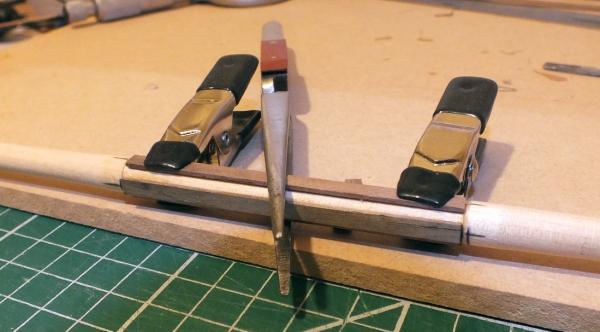
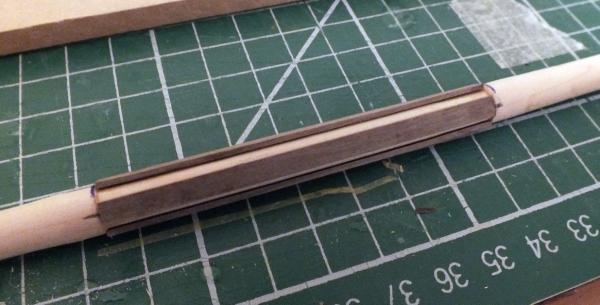
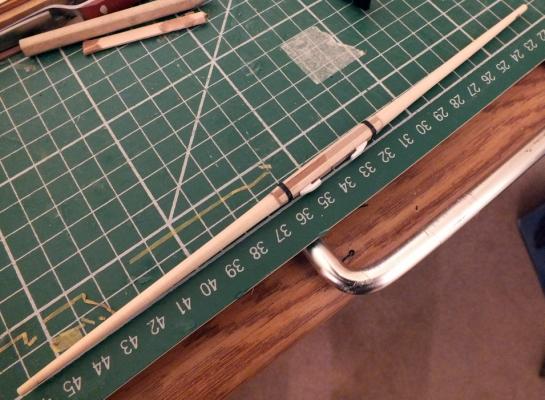
The Yards Part 1 The yards,the larger yards have octagonal center sections, and the ones I made when building Pegasus I thought were only just about acceptable, and the way I made those was to file the octagon shape from the dowel. I decided to try a different method for Diana s yards,the two yard sizes, at the large diameter point, are 8mm & 6mm, I tried my new method on a mock up yard in 8mm which proved successful so this is how they were made. I cut the dowel over length by 20mm, I then ran some tape around the dowel at the ends of the center section,then started to reduce the out ends ( mainly to allow the dowel to go into the small lathe further) I the reduced the center section down from 8mm to 6.8mm, and then I laid in four 4mm x 1mm wood strips top & bottom and both sides,then when dry filled in the gaps with wood filler,when the filler was dry I filed clean the wood strips, and then filed the filled gaps so that all sides where the same width,this gives a really nice octagonal center section and at 8.5mm just .5mm over size I can live with that. The next step was to shape and tapper the yard from the octagonal section to the ends in my model lathe, then I cut off the 10mm over length each end to give a nice square end. I made all the yard cleats from ABS plastic adding them as oversized bits and filing to shape when dry. I then added some tape around the octagonal part to simulate the iron bands. Reduced center Building up the center Center now octagonal With cleat and band


- 536 replies
-
- 23
-
-
- diana
- caldercraft
- (and 1 more)
-
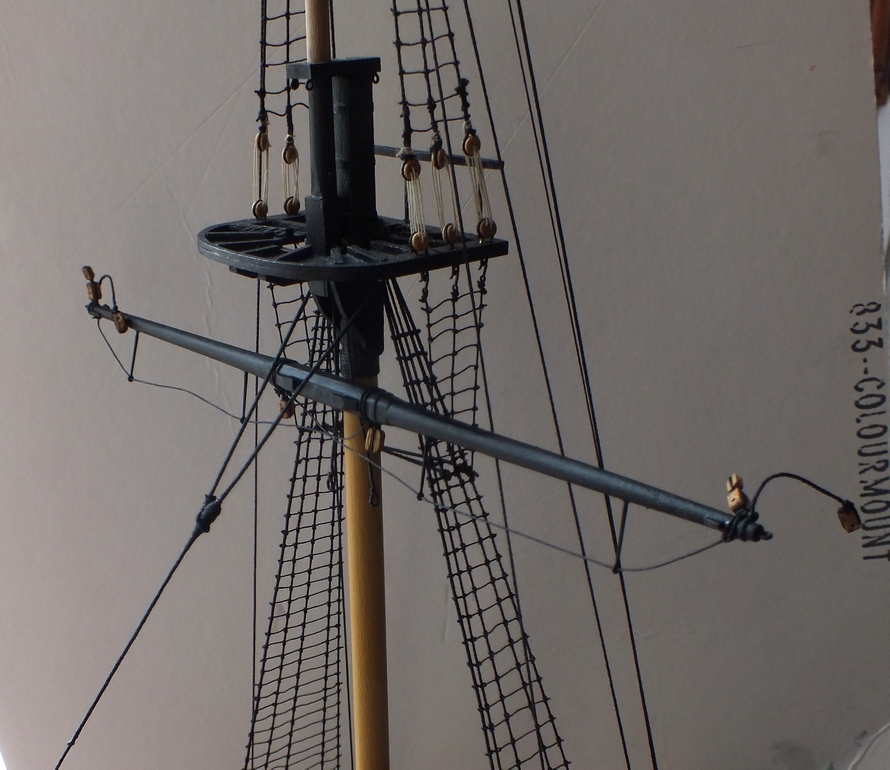
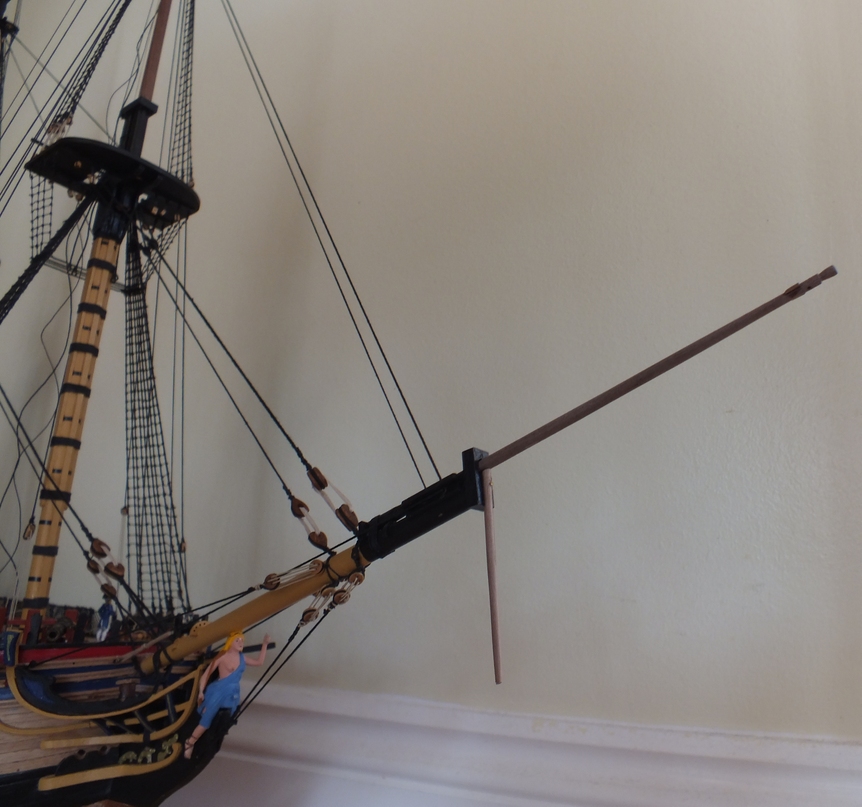
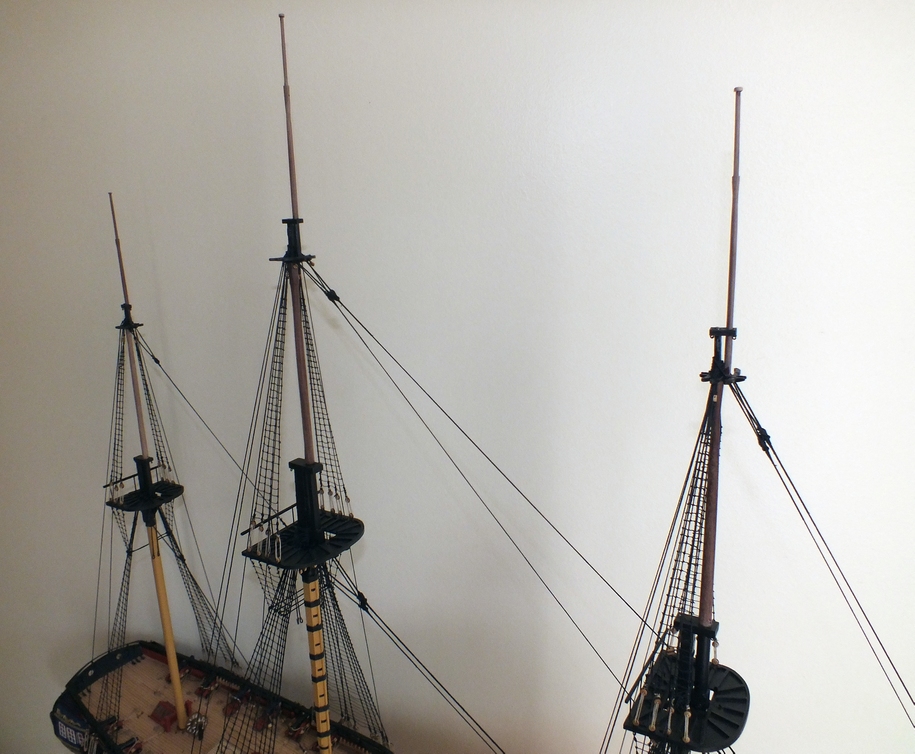
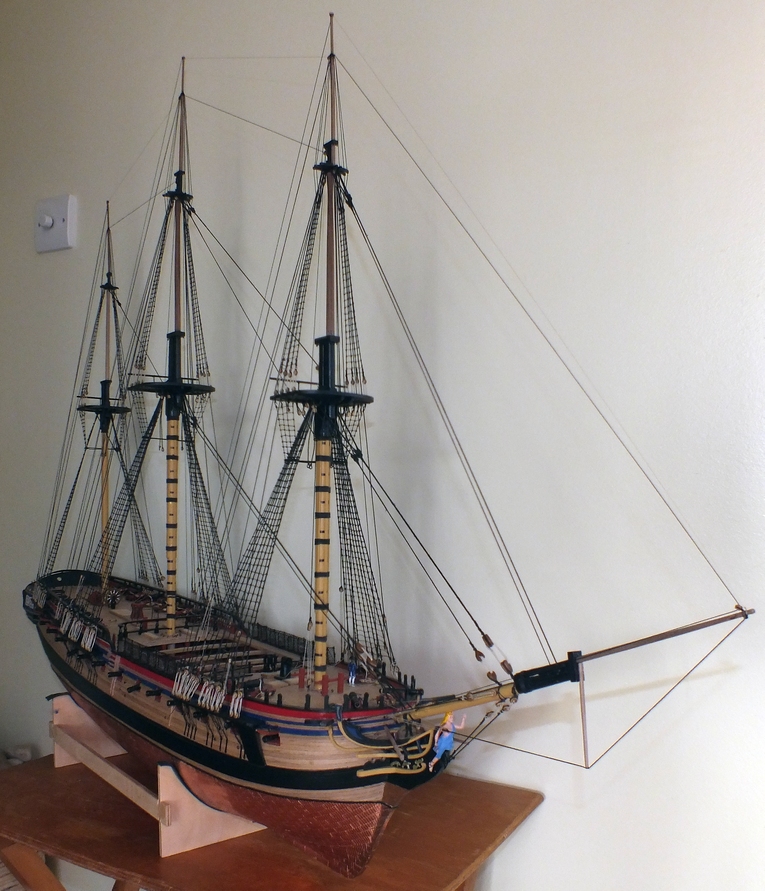
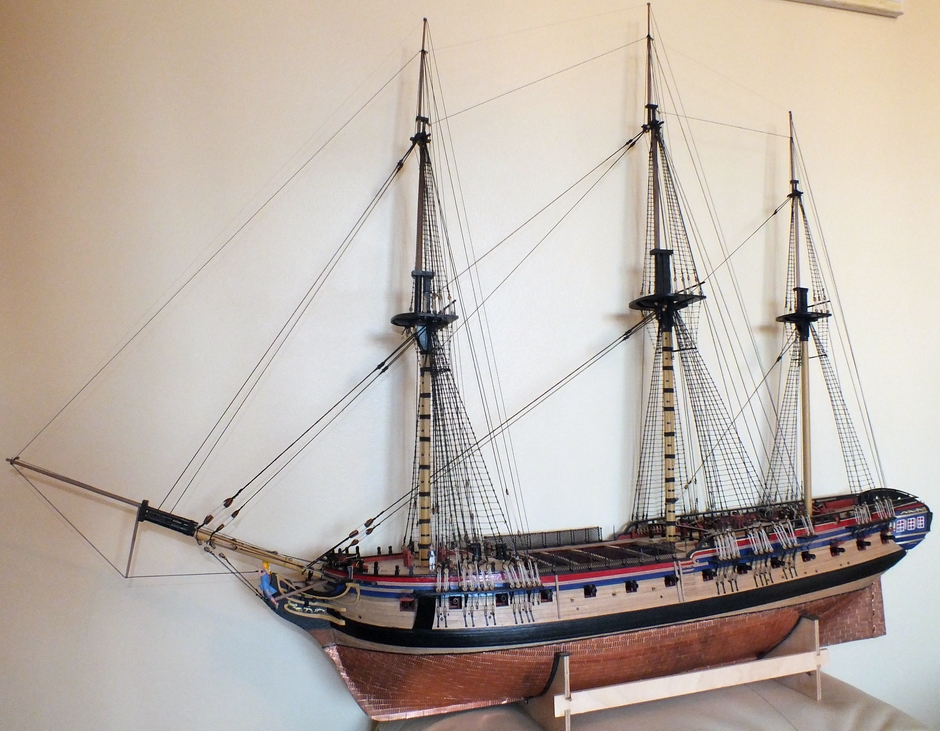
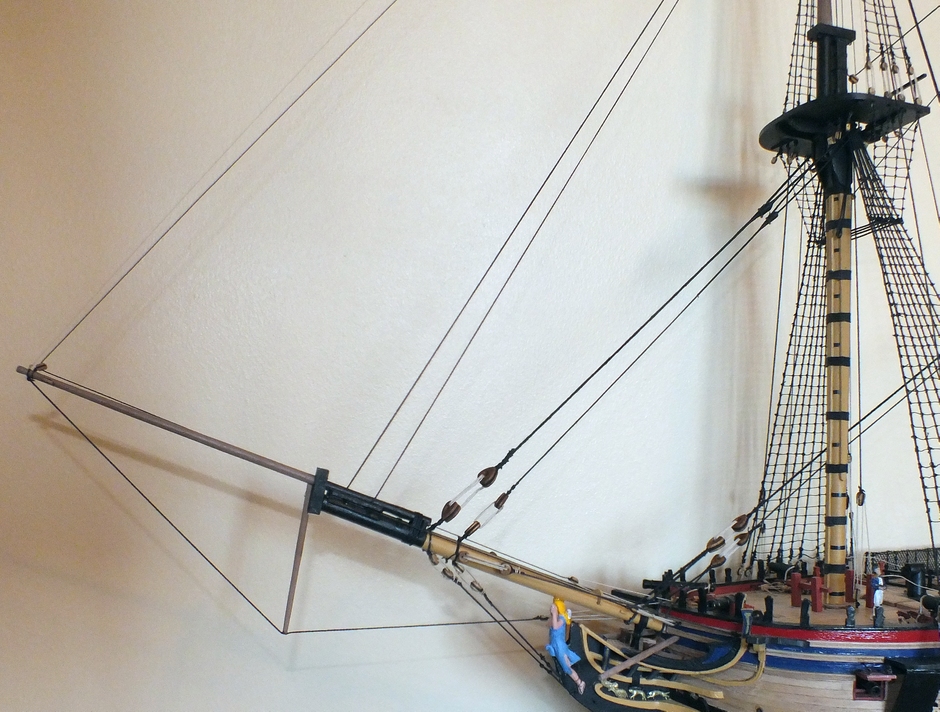
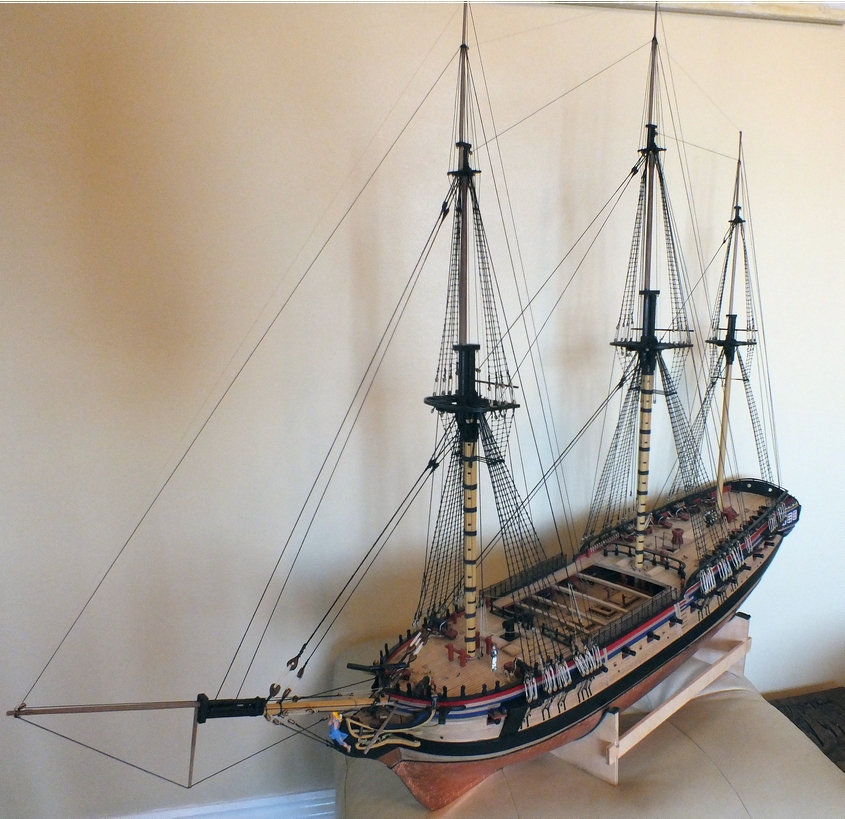
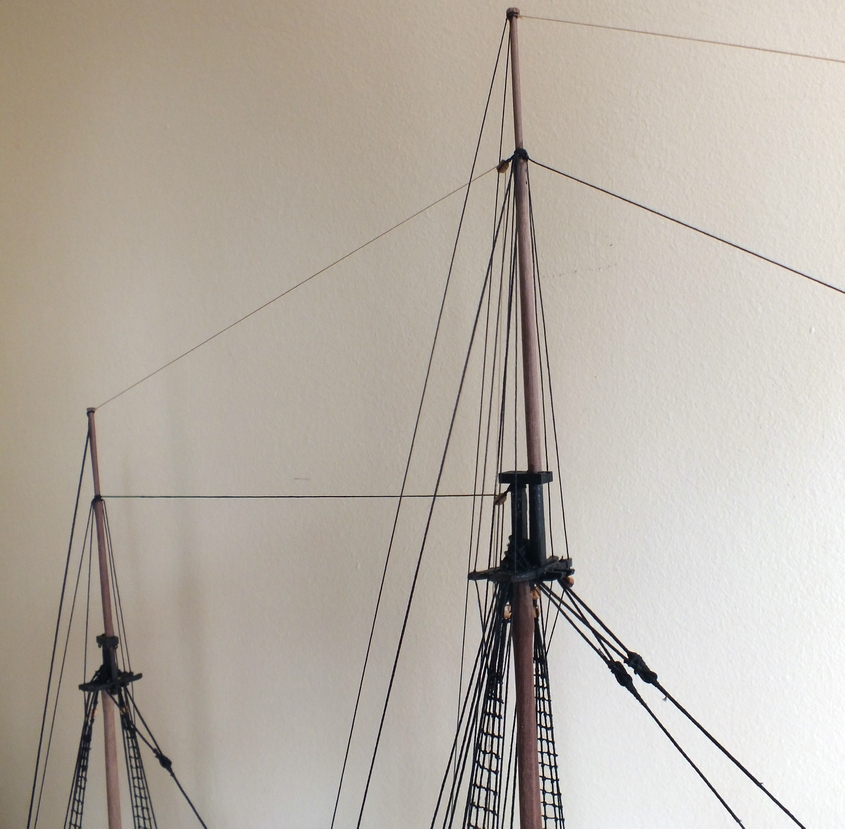
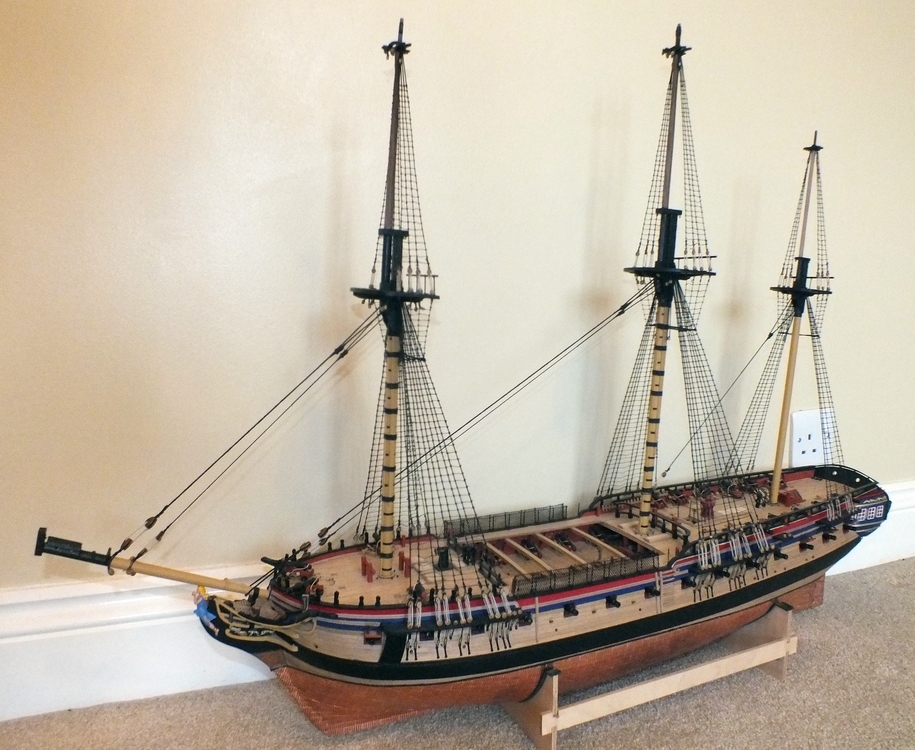
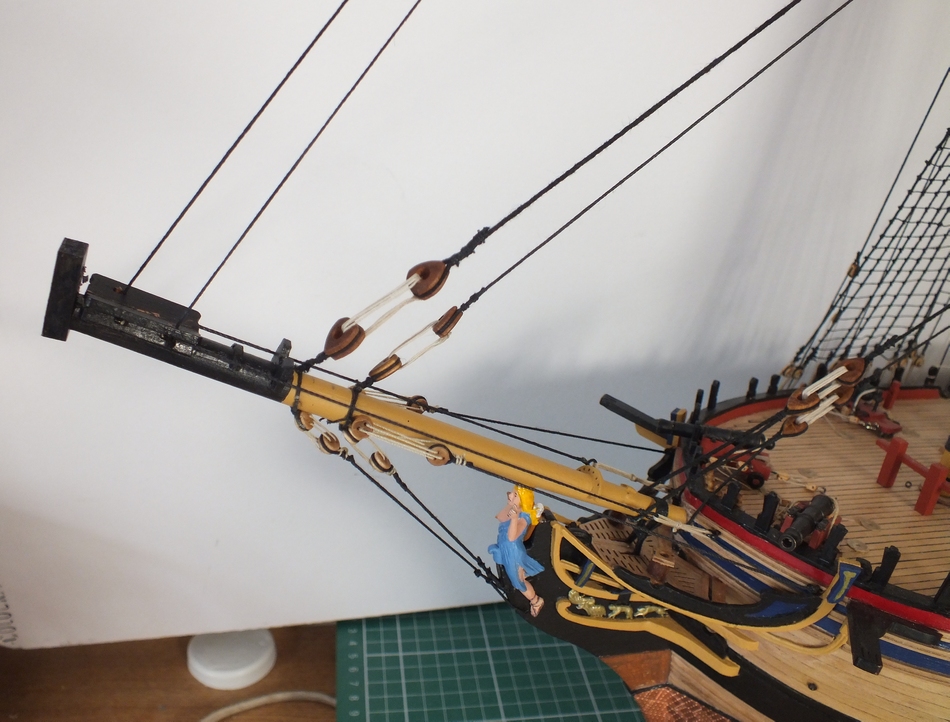
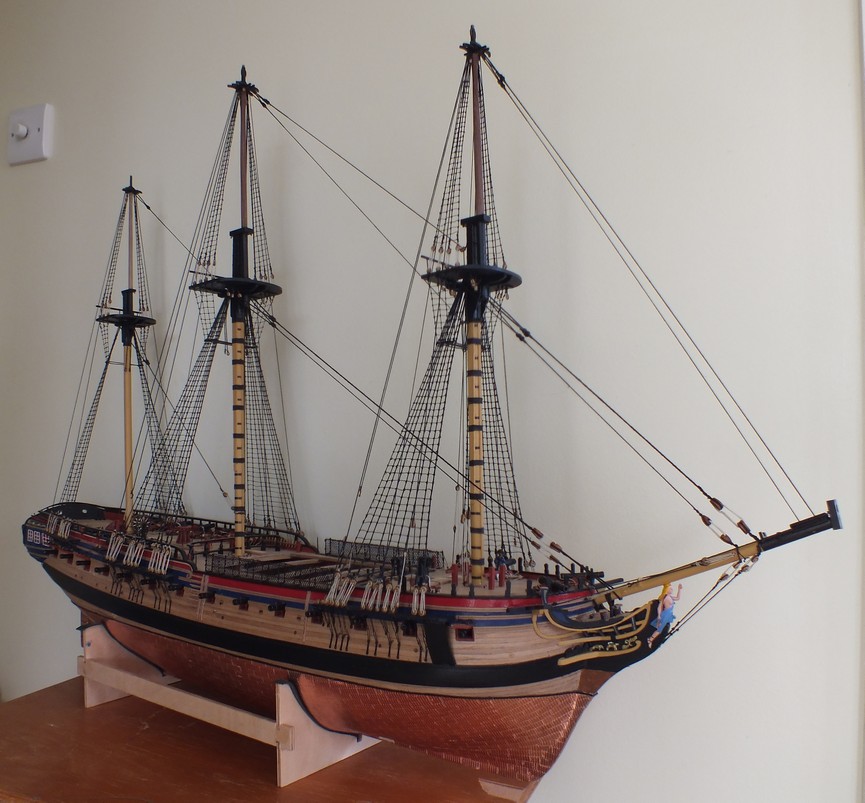
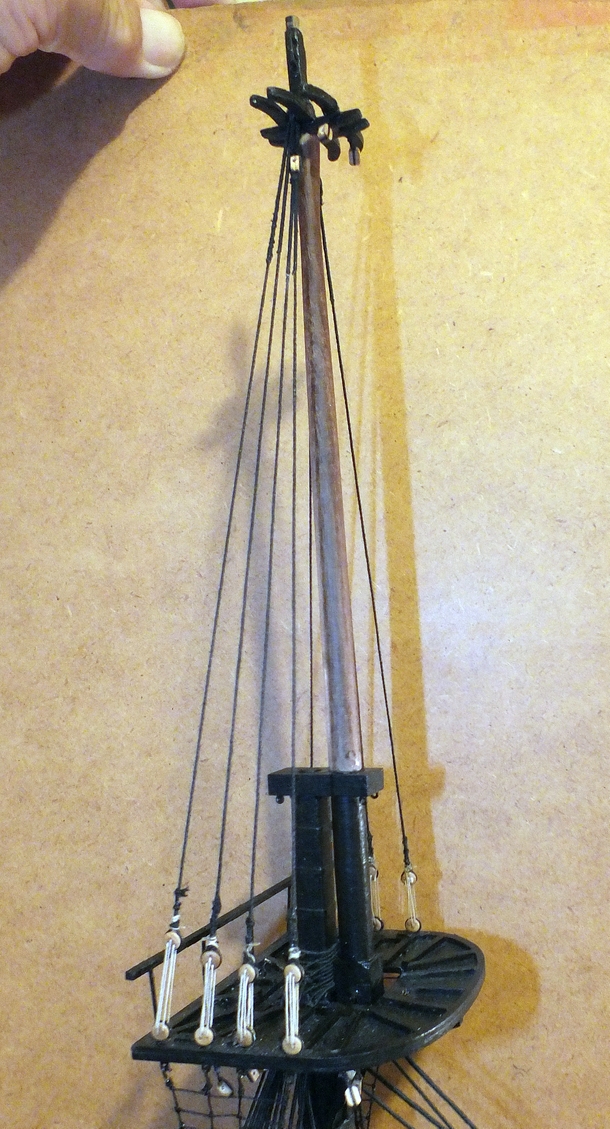
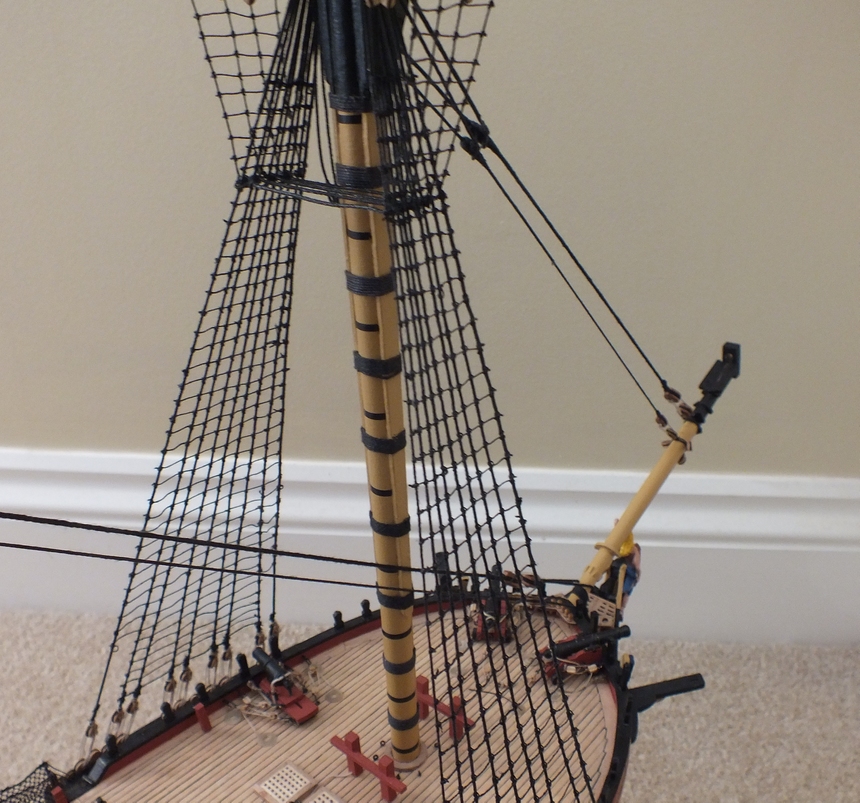
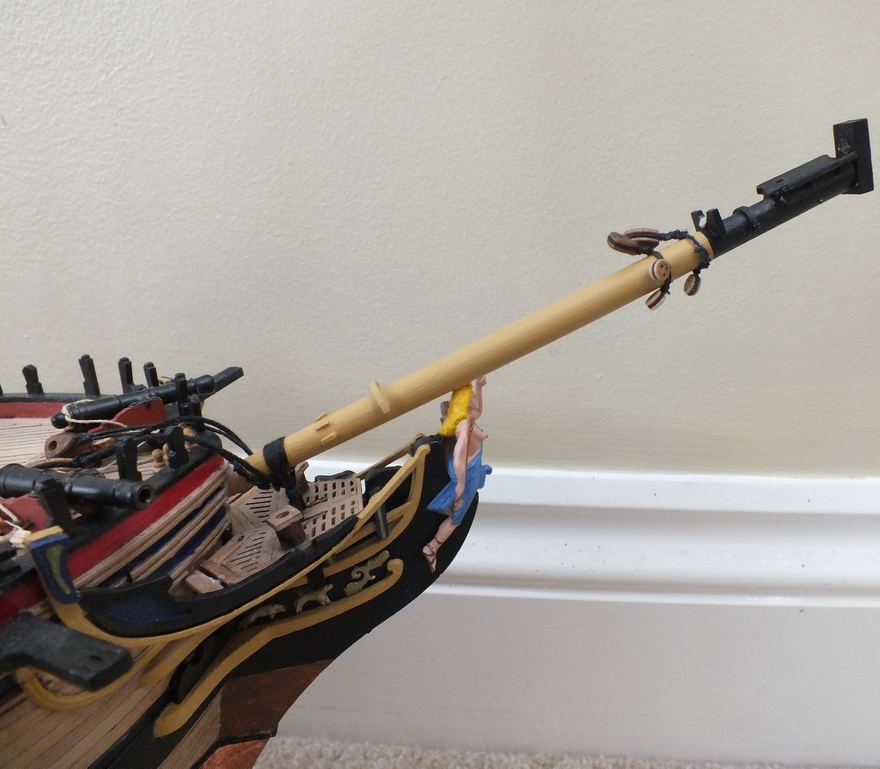
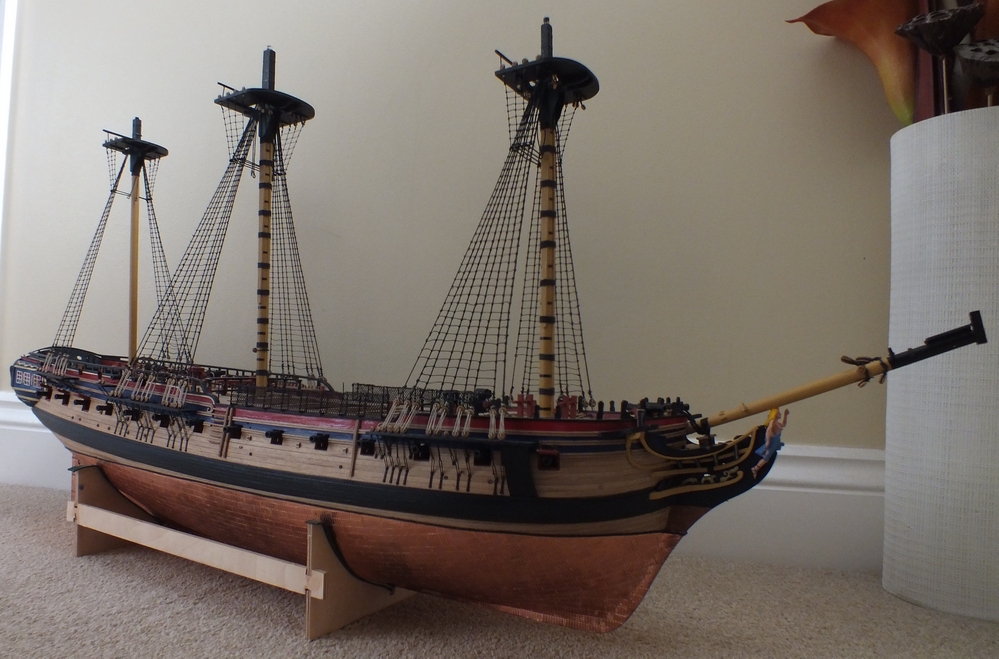
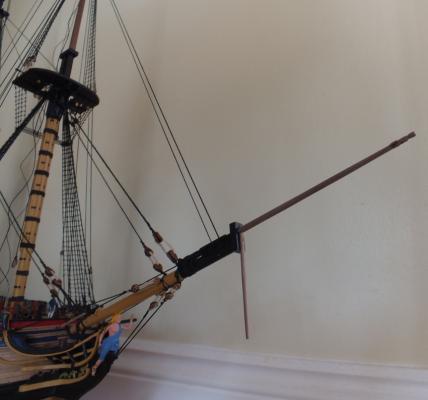
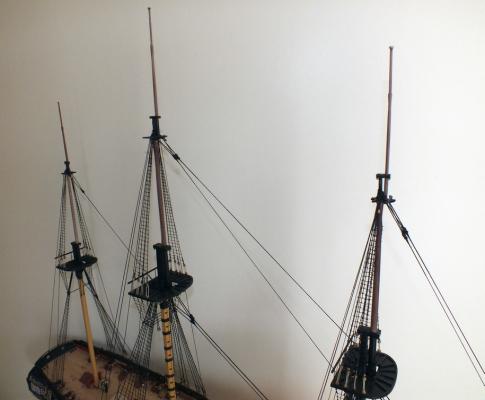
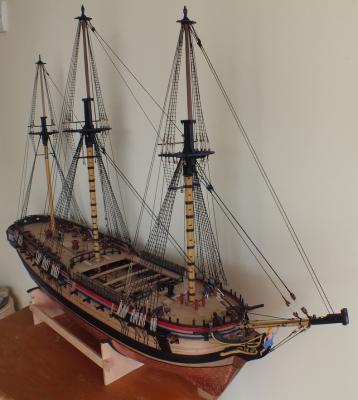
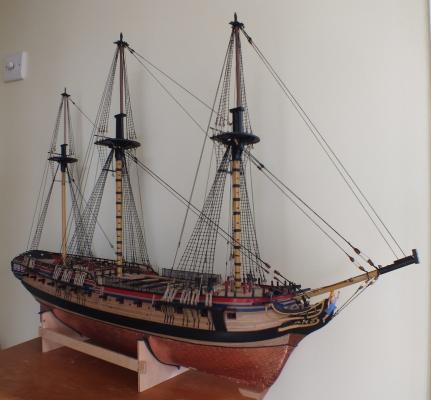
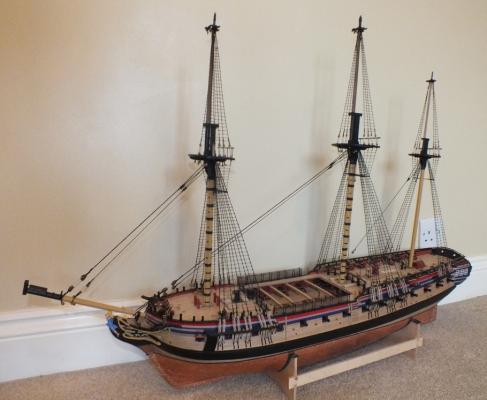
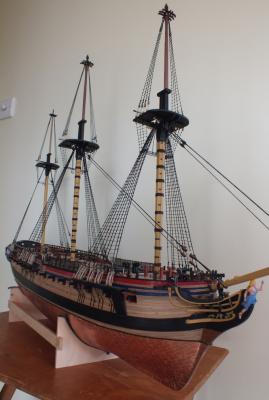
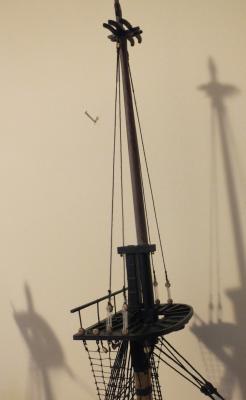
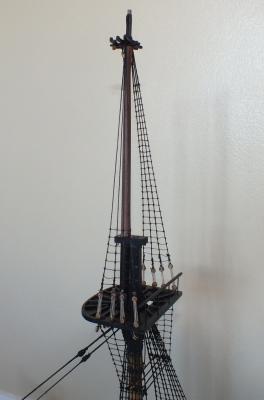
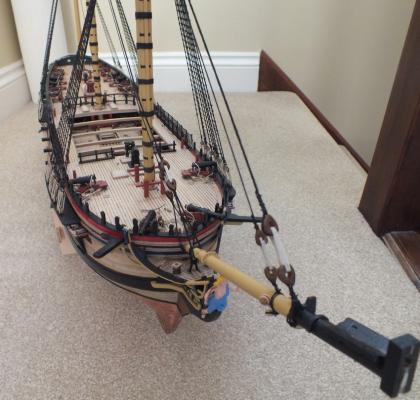
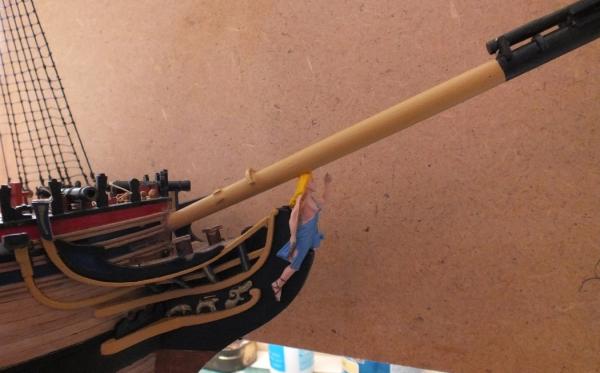
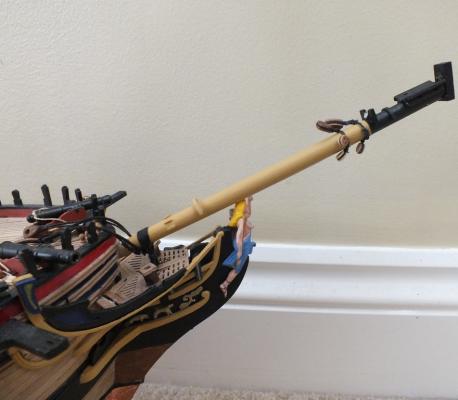
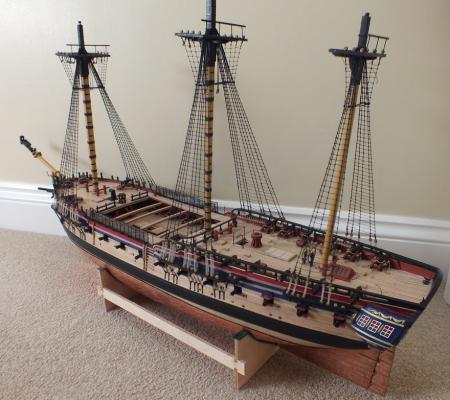
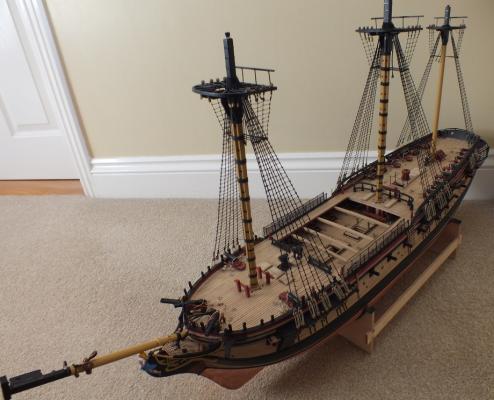
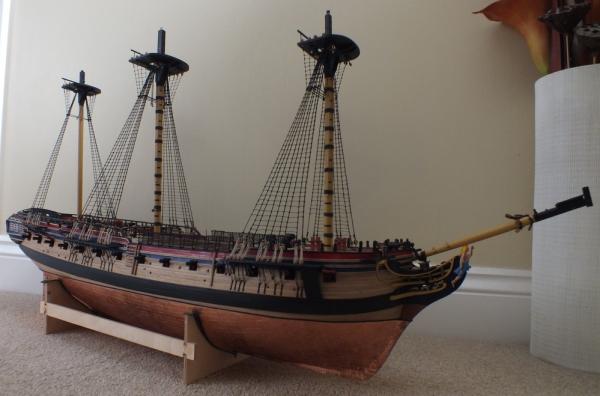
The completion of the standing rigging The top gallant masts were added next,plus the jib boom and martingale and then rest of the standing rigging has been done. Top gallants fitted Jib boom & Martingale fitted Standing Rigging


- 536 replies
-
- 20
-
-
- diana
- caldercraft
- (and 1 more)
-
Standing Rigging With all the shrouds and ratlines tied I decided to add as much of the standing rigging as possible before the topgallants masts went on. Again another small issue not enough 5mm dead eyes, to complete all the back stays to the main mast, so some extras were ordered, there are 88 supplied, which I admit I did not count, but I still counted up 90 needed, and at this point I am 6 short, I may have dropped and lost a couple, but who does not, I also think there should be a few spares built into the kit. Next the main and preventer stays to all three topmasts were made up and added, this did meant that bowsprit needed to be fitted, which has the down side of making it more difficult to turn her round, side to side, when adding rigging to each side. One aspect, I have been having difficult with, is using the rigging plans, so far I have found that some rigging rope runs overlay others, some of the runs I cannot even work out how they start or how they terminate, maybe it is just me, but, I did not have this problem rigging Pegasus, as a result this promoted me to dig out the Pegasus rigging plans and(in conjunction with Peterssons book), and as Pegasus is a ship rigged Sloop, her and Diana should be rigged nearly the same, so I am using both sets of standing rigging plans, and where I cannot, be sure, or work out, were the rigging runs on Diana s plans go, I will rig her as per Pegasus, this should be OK as naval rigging practices were most likely standard on all ships.


- 536 replies
-
- 14
-
-
- diana
- caldercraft
- (and 1 more)
-
Great concept really enjoyed this project would love to see another one.
-
Hi Guys Many thanks for all the ticks and the many nice comments. I think "The Fleet" will have to wait for a Three Decker to arrive before taking o the French
- 536 replies
-
- 2
-
-
- diana
- caldercraft
- (and 1 more)
-
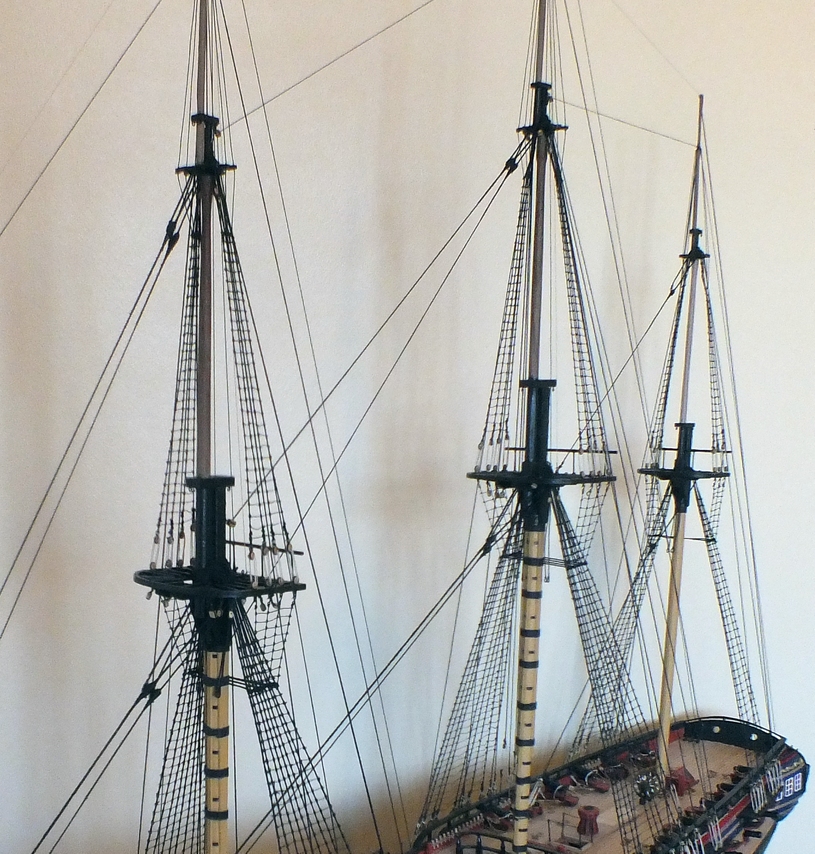
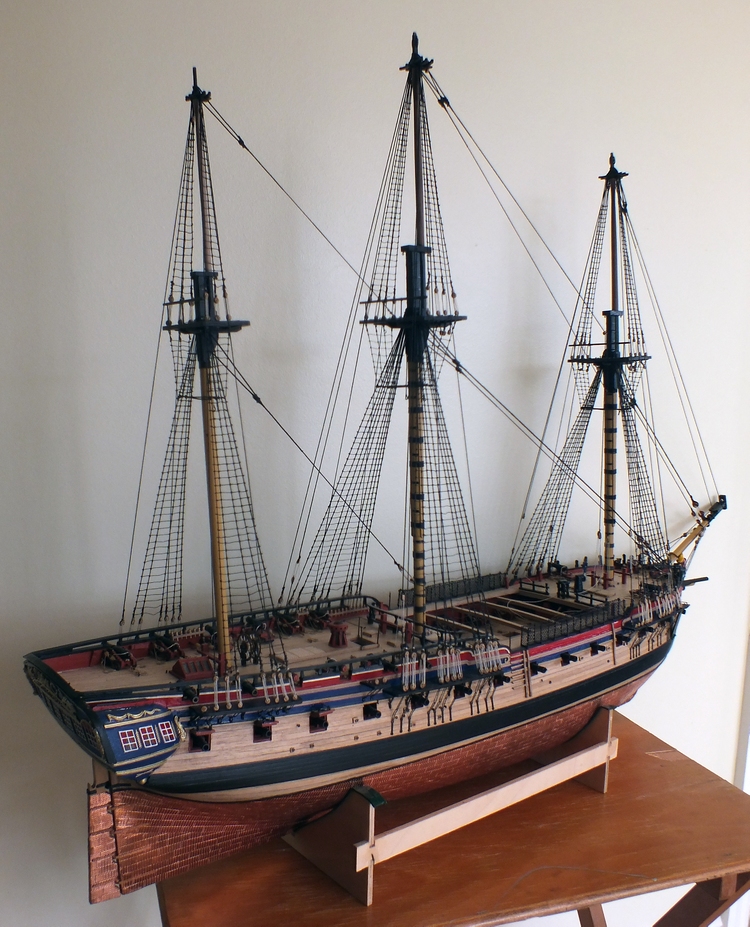
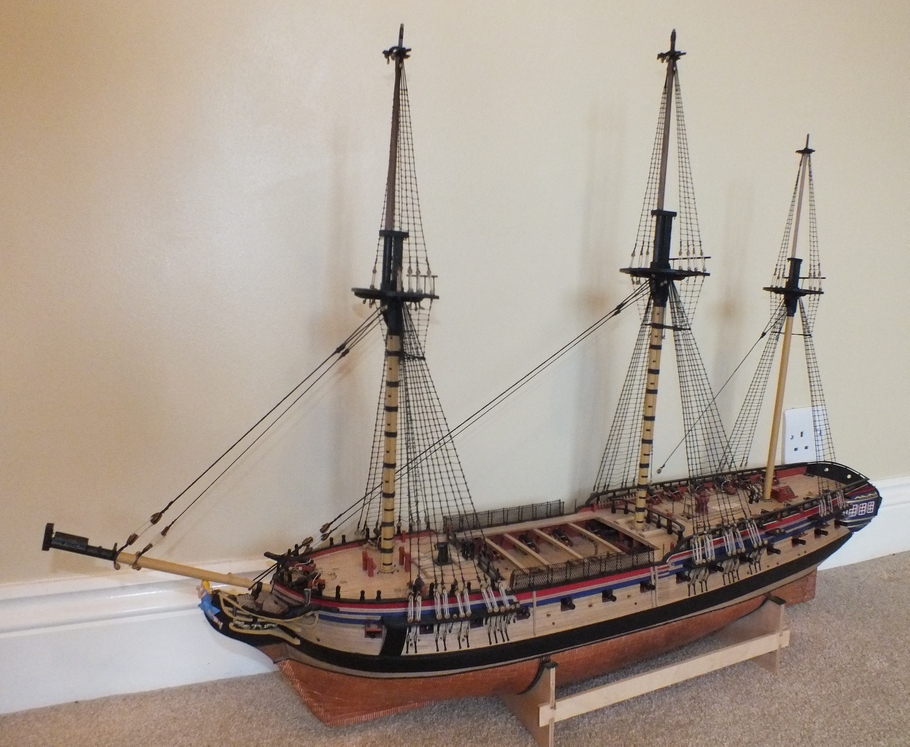
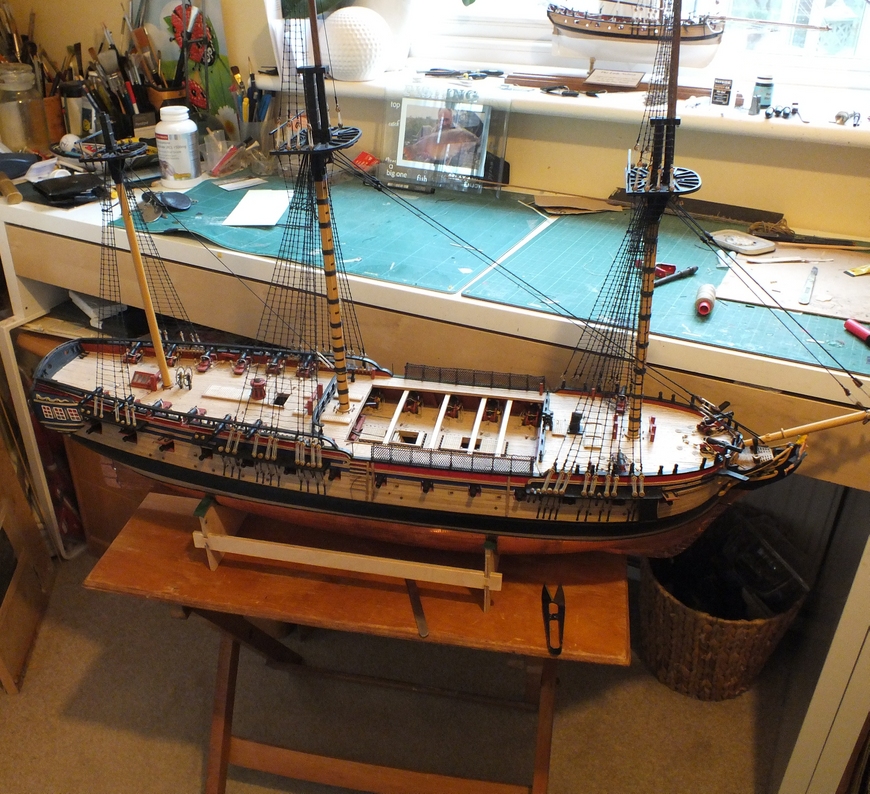
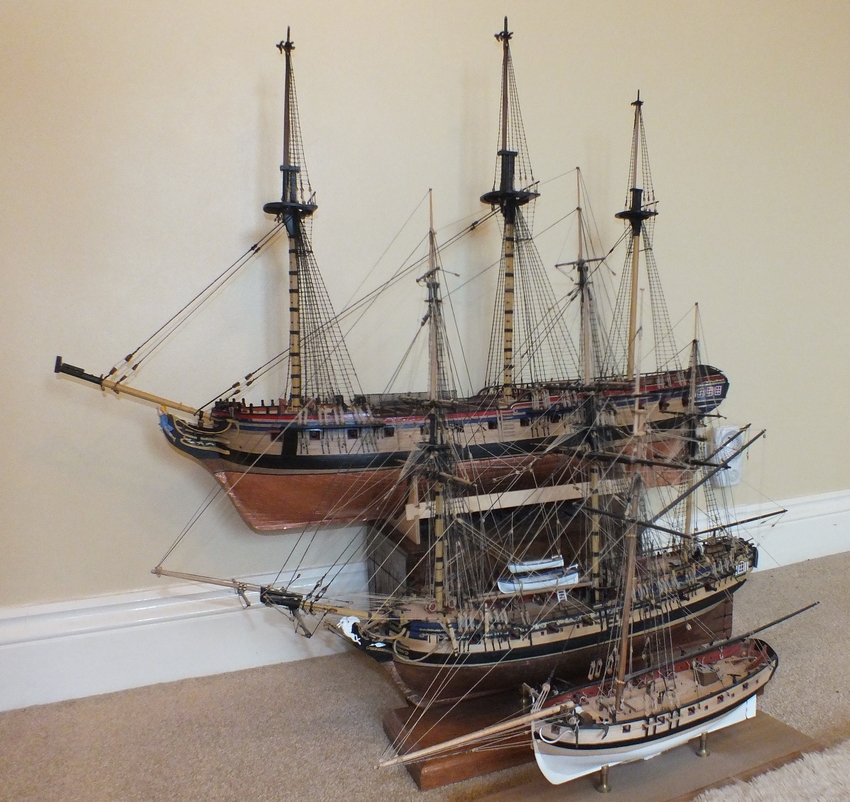
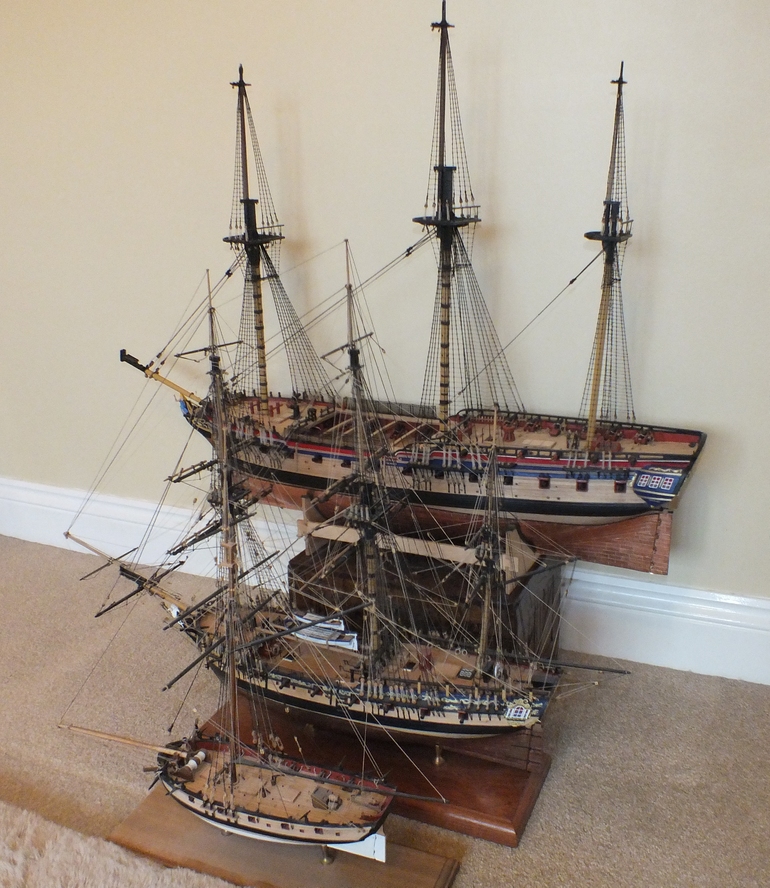
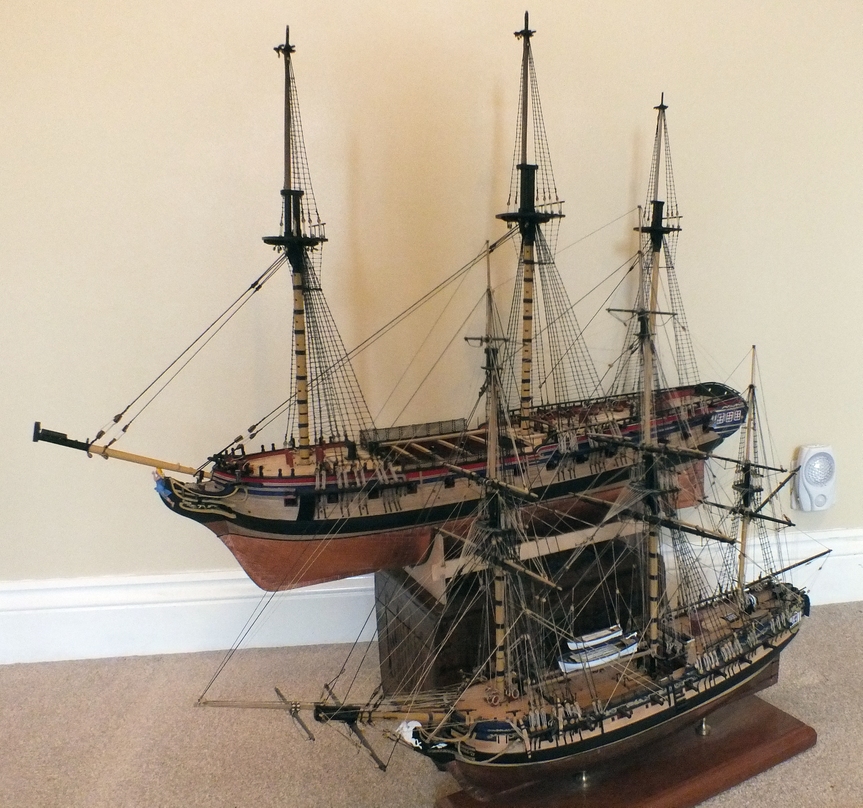
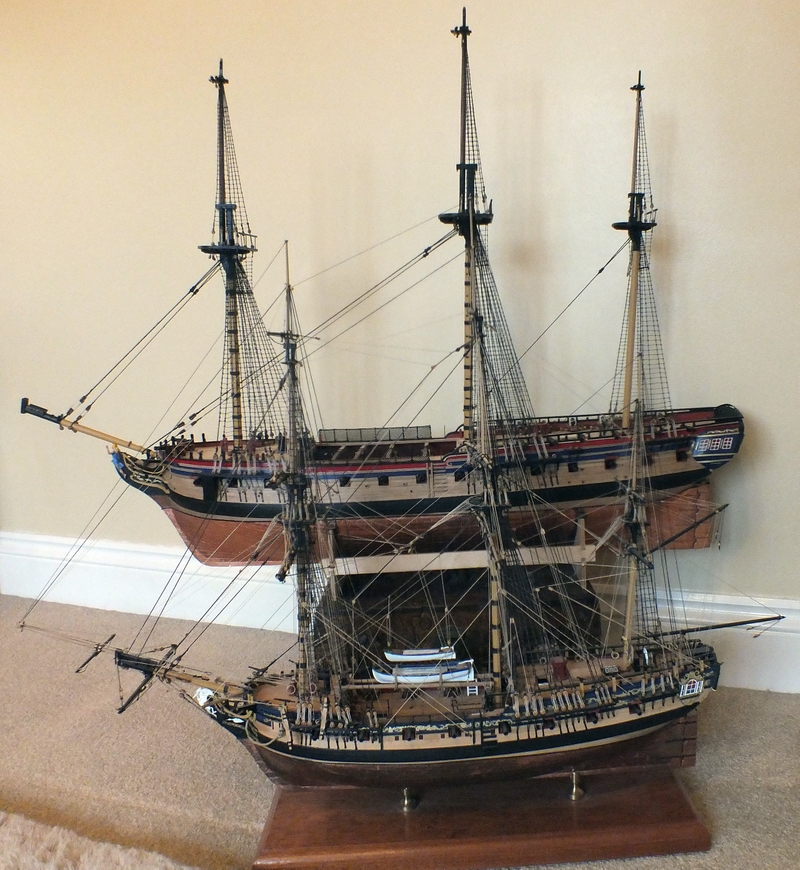
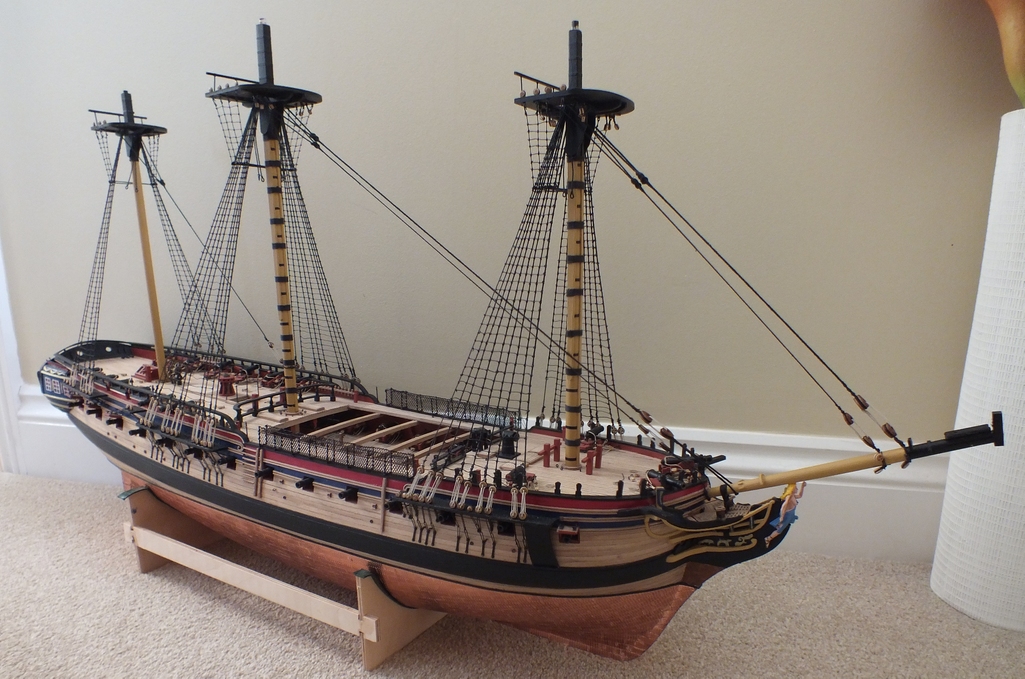
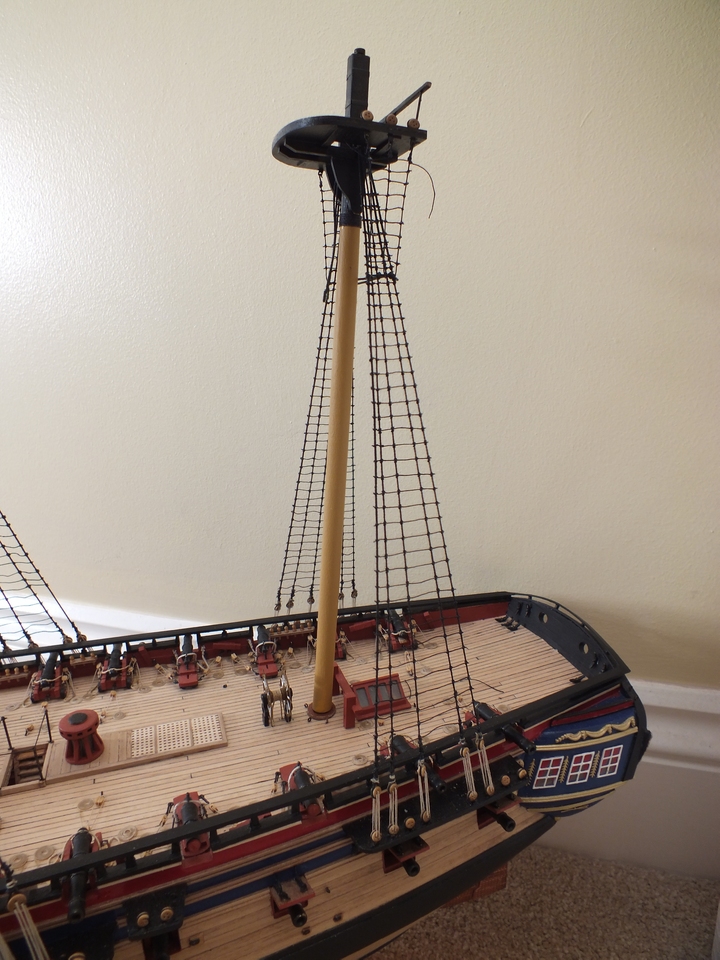
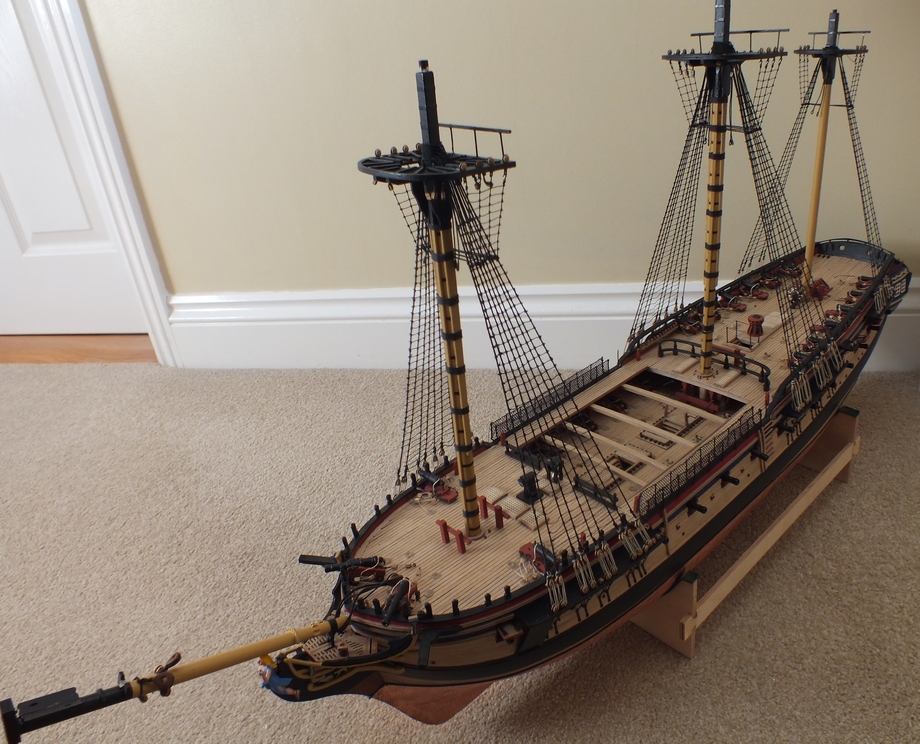
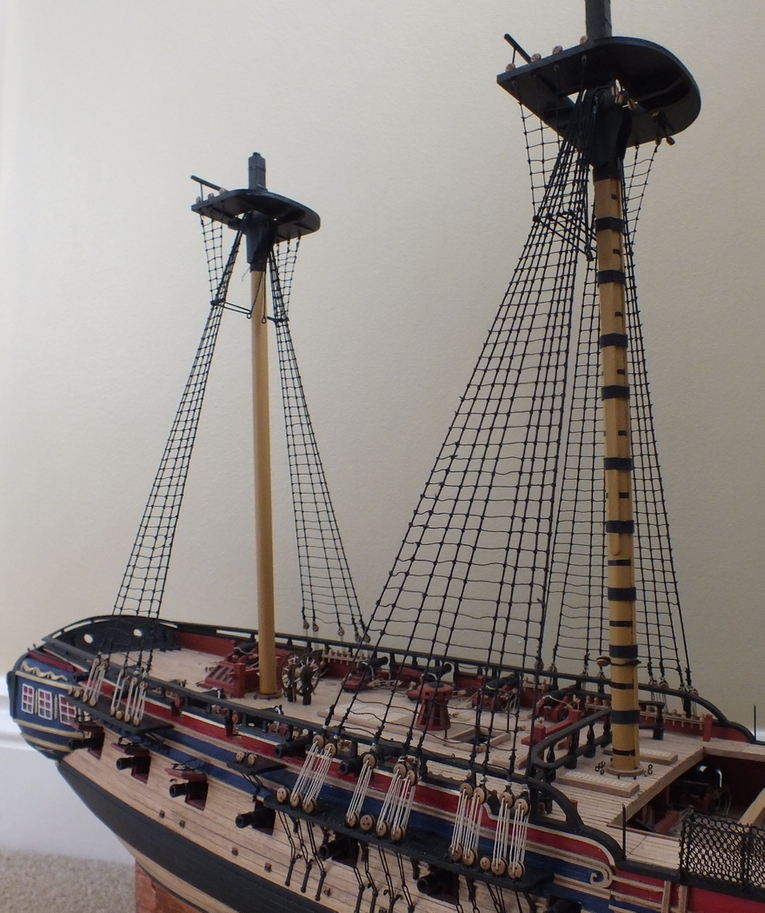
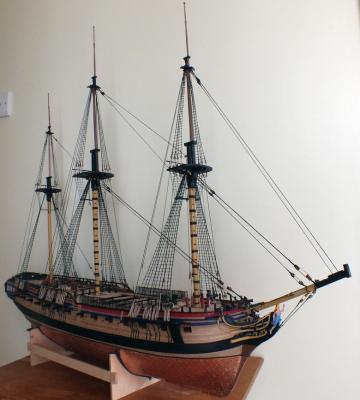
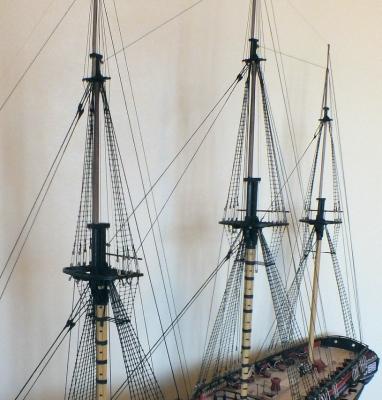
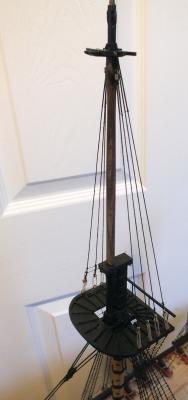
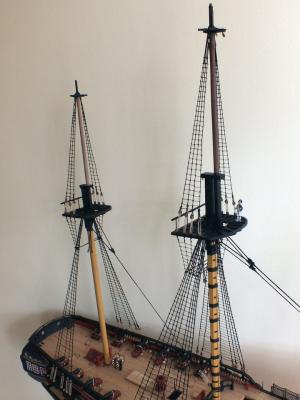
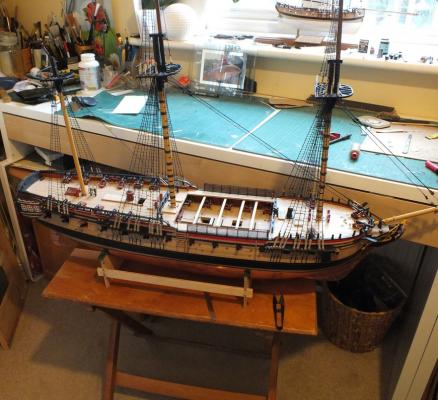
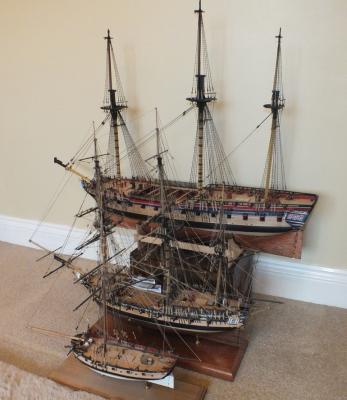
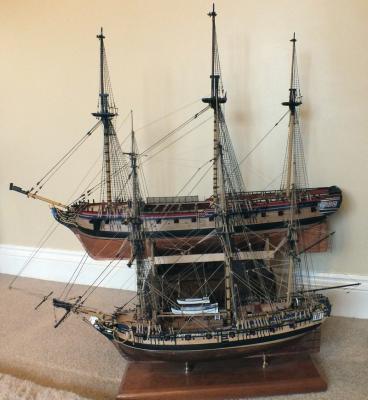
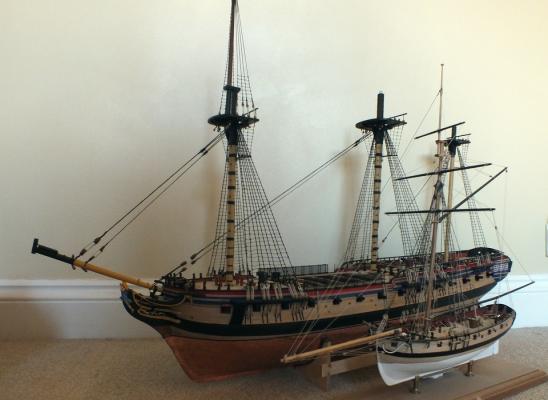
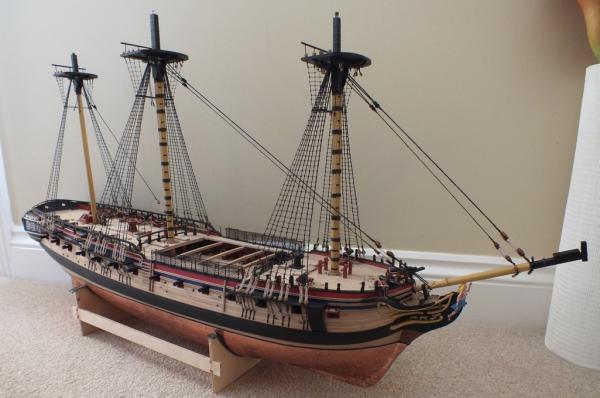
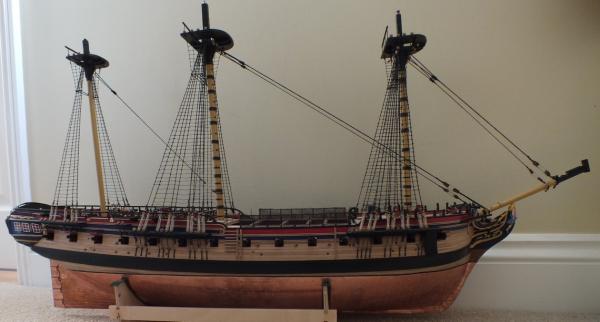
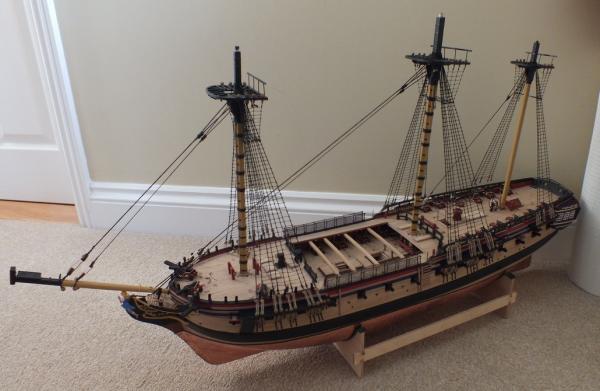
The main and mizzen top masts are now in place, and have all their shrouds and ratlines added, phew, I am glad they are all finished and that I split it up this way, as it did make the ratlines a lot less tedious to tie,I will now most likely add as much of the standing rigging that I can before fitting the tagallants masts. I have also included some photos of Diana with Pegasus and The lady Nelson. Firstly a lower fold down table I used to bring the rigging to a better level to work at Main and mizzen masts Completed ratlines Some photos of Diana with Pegasus And some with The Lady Nelson as well


- 536 replies
-
- 27
-
-
- diana
- caldercraft
- (and 1 more)
-
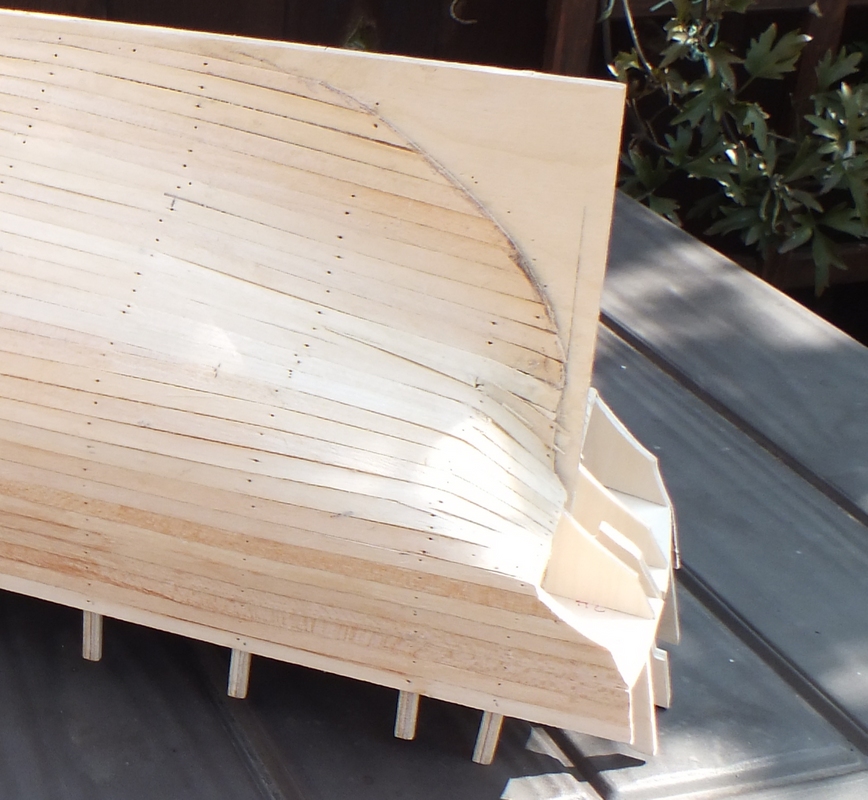
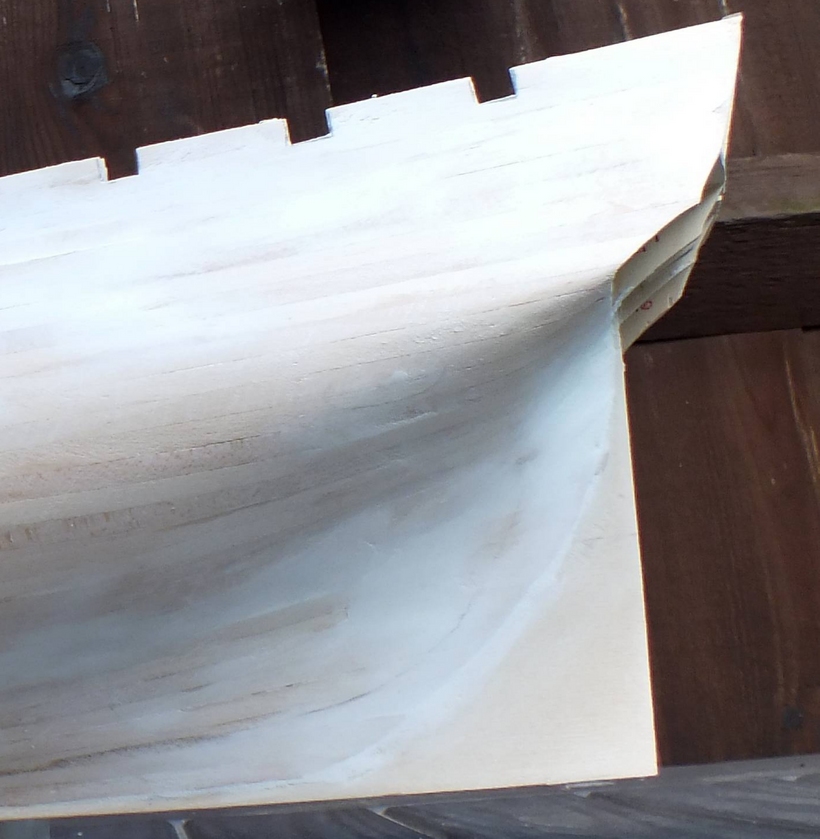
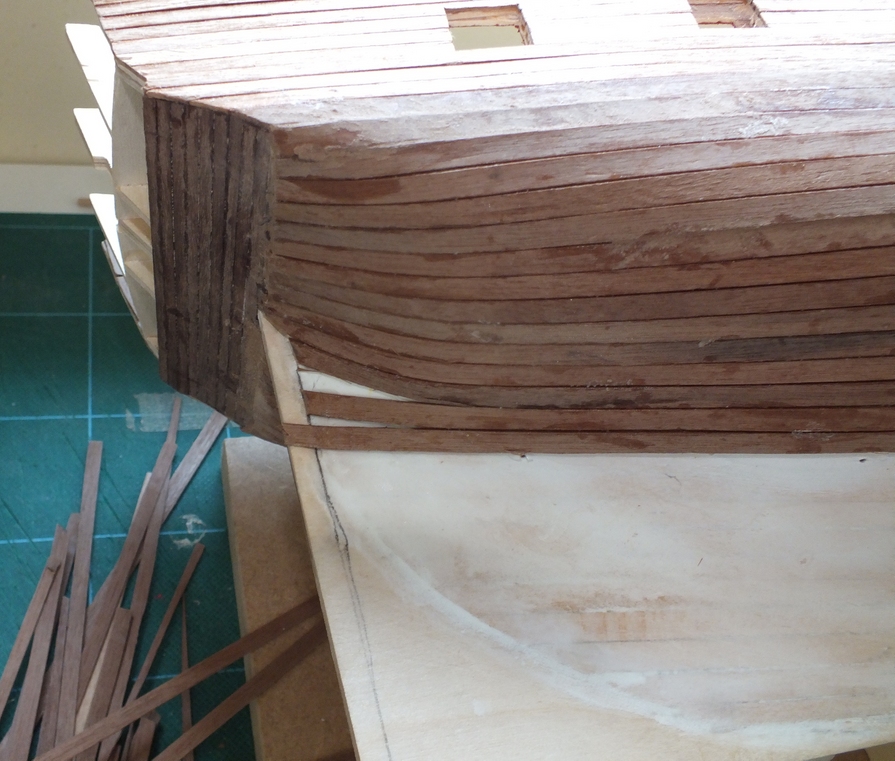
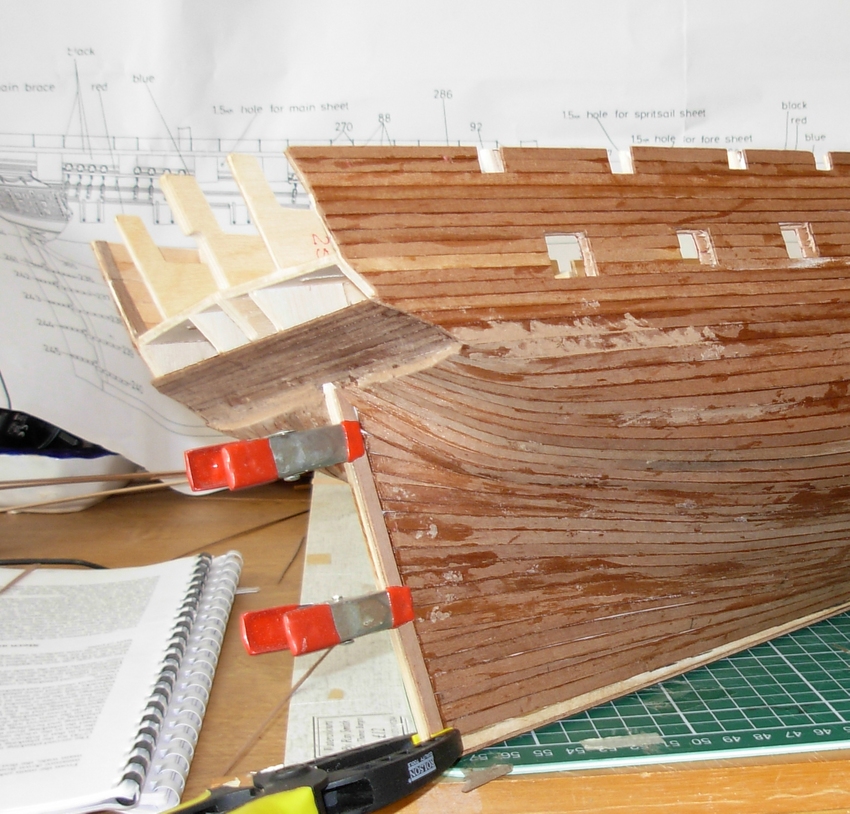
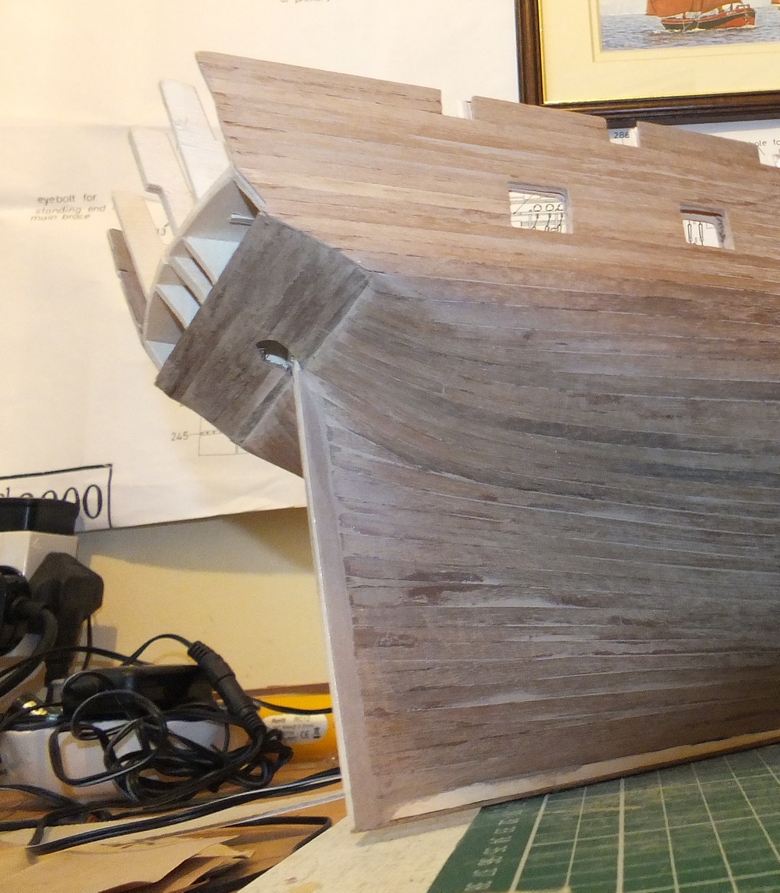
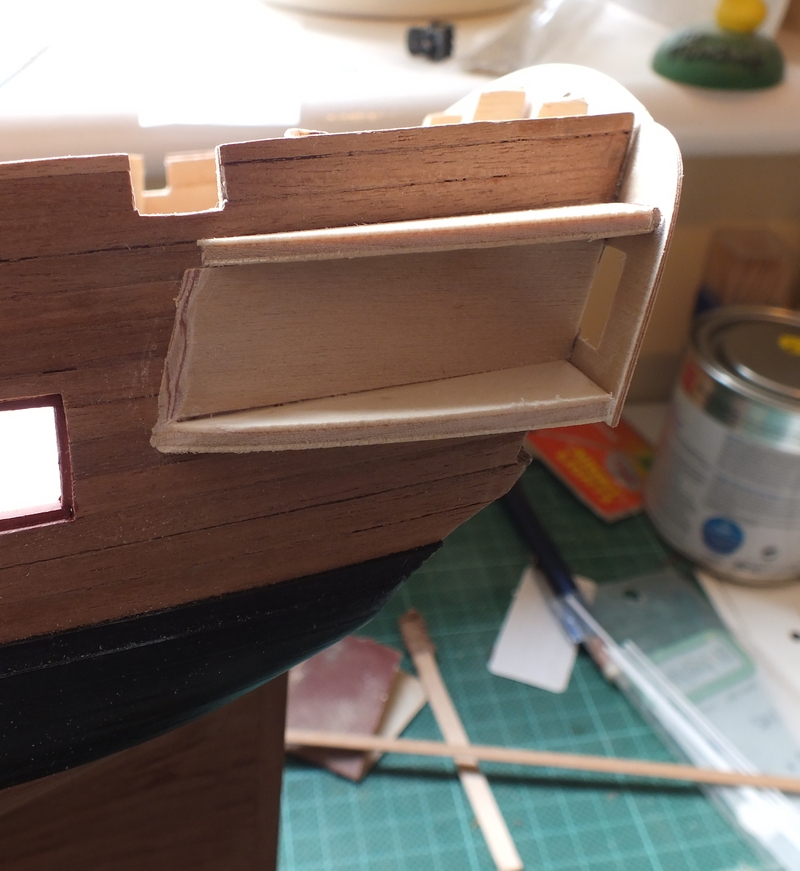
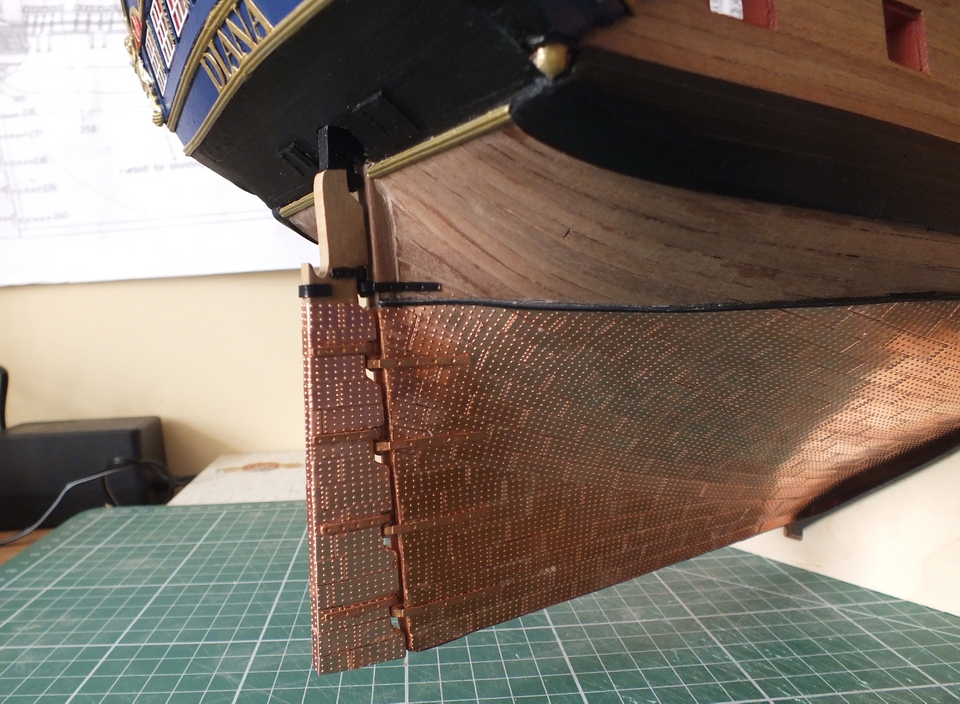
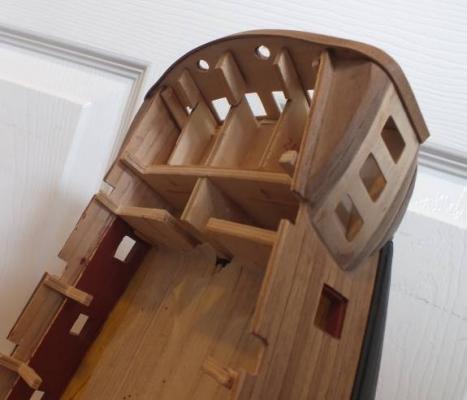
Hi Jason I have added some photos of my Diana`s stern from point you are up to now, then forward to where the stern is nearly completed, there are a lot more steps from where you are now to that point, but part you are most apprehensive over is covered up by the stern galleries and cabin. I hope these photos help, I also found it difficult to get my head around this stern but I think it turned out OK. First planking sanded and filled second planking going on all on and filled completed and sanded galleries and cabin going over planking shows finished stern
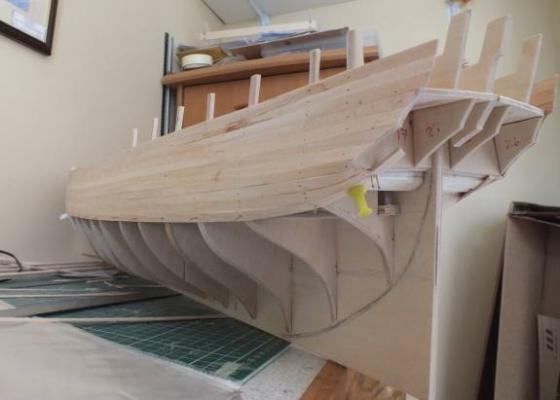

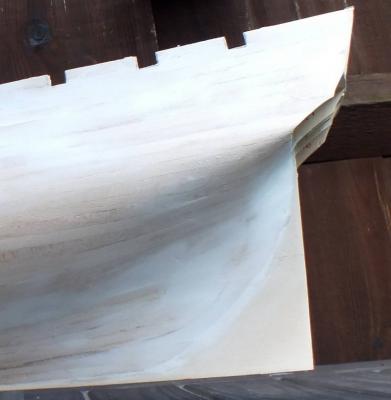
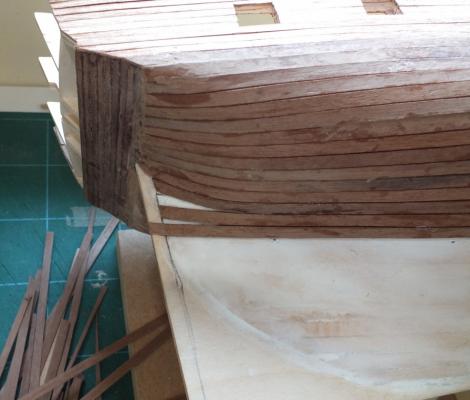
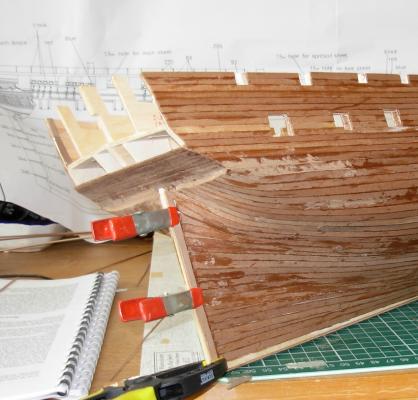


-
Thanks for the comments and ticks guys. Brian they are both 1/64 in my next update I will try a photo of Diana with Pegasus as they are both 1/64 , I would love to build a kit at the same scale of a 50 gun ship, a ship like HMS Leopard but none exist a big hole in the market in my humble opinion.
-
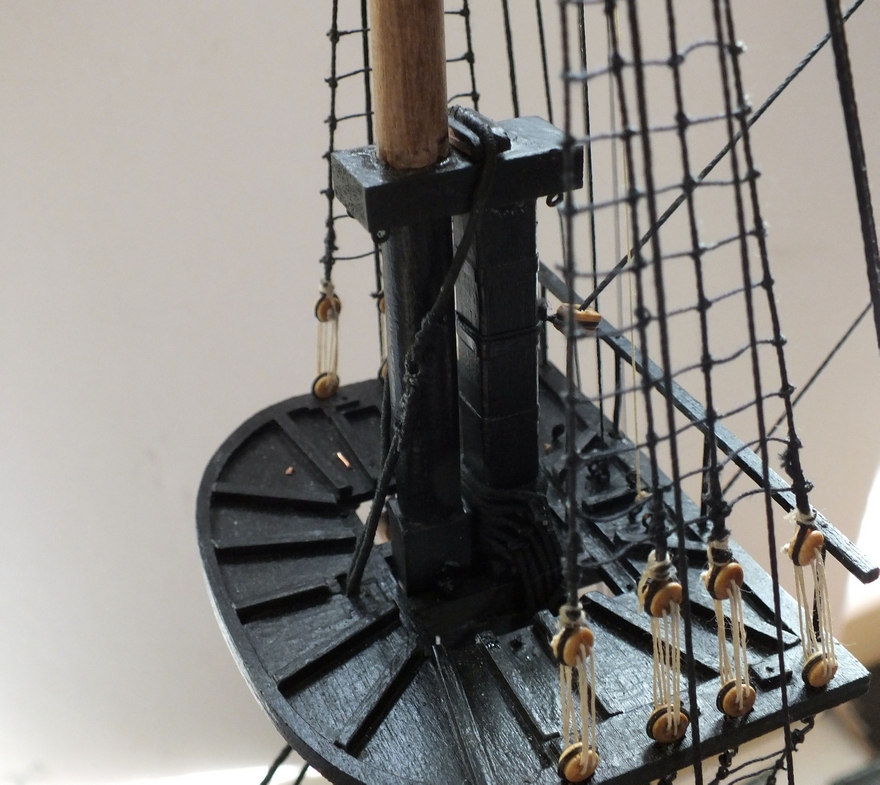
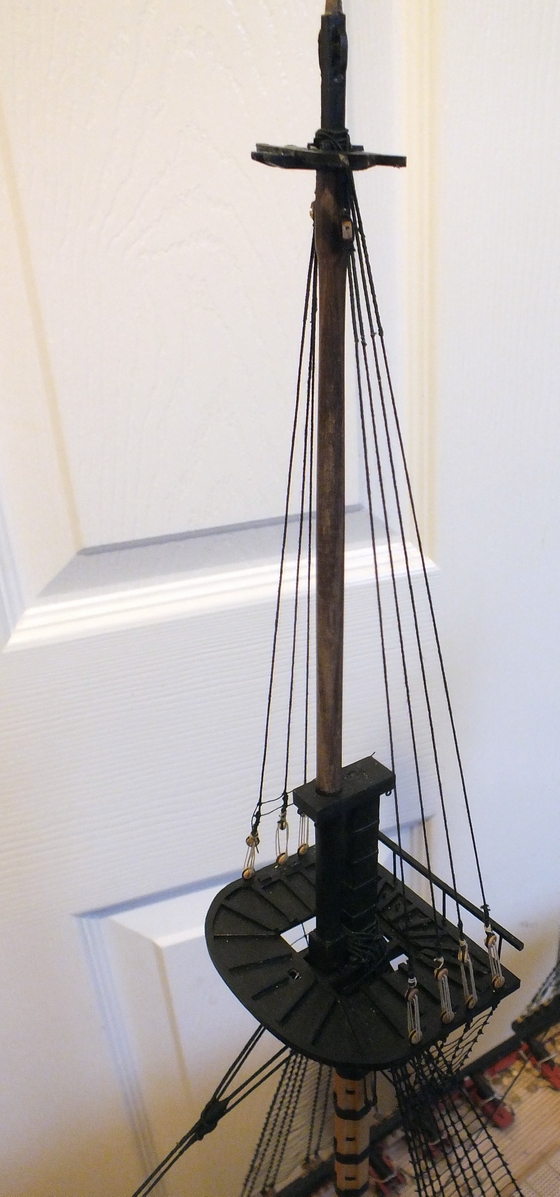
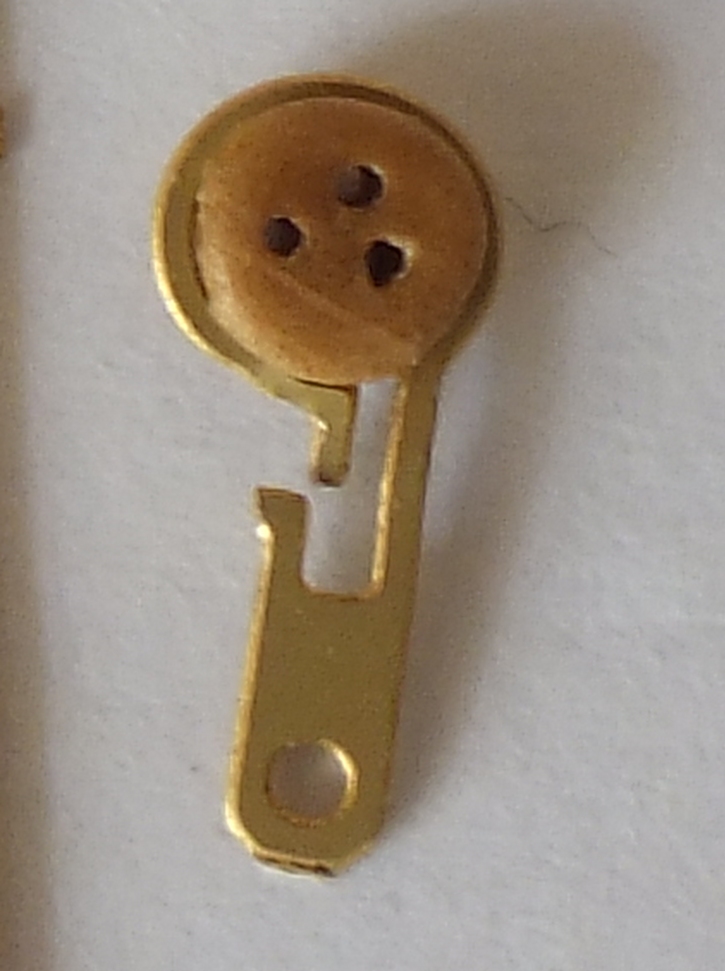
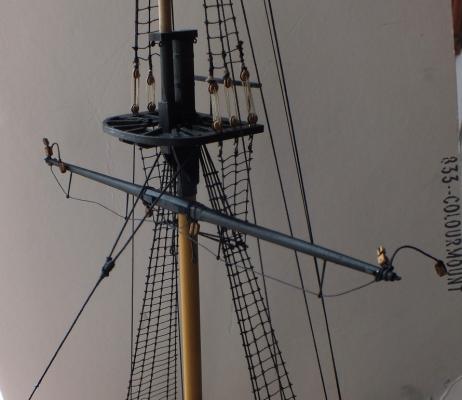
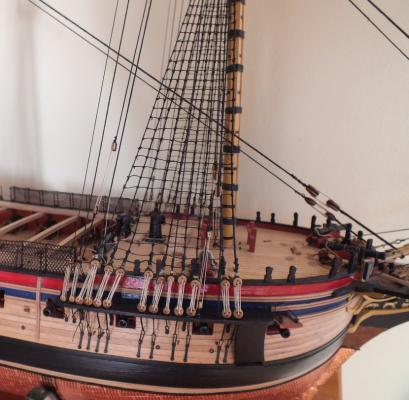
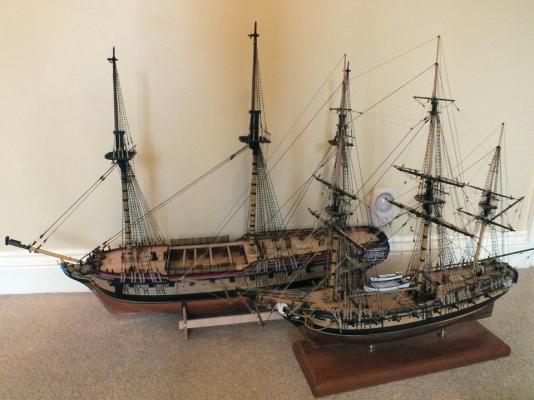
Top mast was fitted to the fore mast next, and the shrouds and ratlines have been added. One tip I do have, which I seem to have omitted to mention in my earlier posts on the shrouds and ratlines, is that, most kit manufacturers instructions for ratlines, recommend using .25mm, or which ever size natural thread and then stain it black (a very messy option in my opinion) there reasoning’s being that black thread is to stiff to use well Caldercraft thread is quite stiff, but I always use Amiti which is no stiffer than natural colour thread. The main and mizzen next. Shroud with 3mm block Shrouds Shrouds And ratlines with Lady Nelson shows how big Diana is


- 536 replies
-
- 21
-
-
- diana
- caldercraft
- (and 1 more)
-
Thanks for the comments and ticks guys Stergois The lower masts were fixed into the hull with fast drying PVA which gives some wiggle room time and care was taken to ensure they were at 90 deg across the deck.
- 536 replies
-
- 1
-
-
- diana
- caldercraft
- (and 1 more)
-
Great finish to the journey Mobbsie with a super case I have to display mine ships without cases due to lack of room Diana will have a shelf in the spare bedroom/computer room. One day you may return to the light side Be good best regards Ray
- 1,279 replies
-
- 1
-
-
- agamemnon
- caldercraft
- (and 1 more)
-
All the lower mast stays have been completed, time to turn my attention to the top masts.
- 536 replies
-
- 20
-
-
- diana
- caldercraft
- (and 1 more)
-
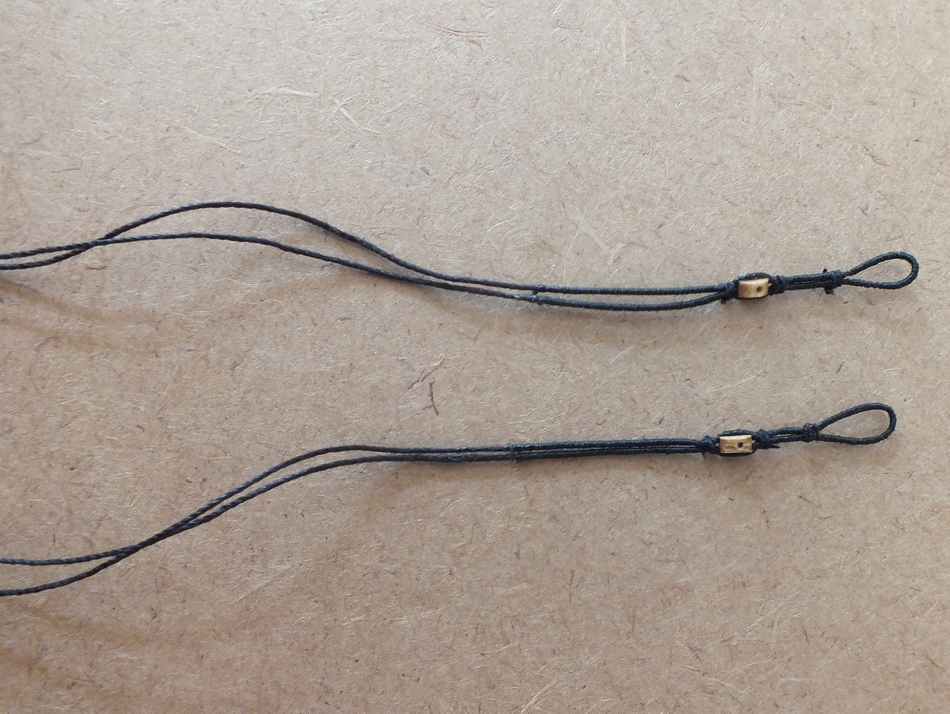
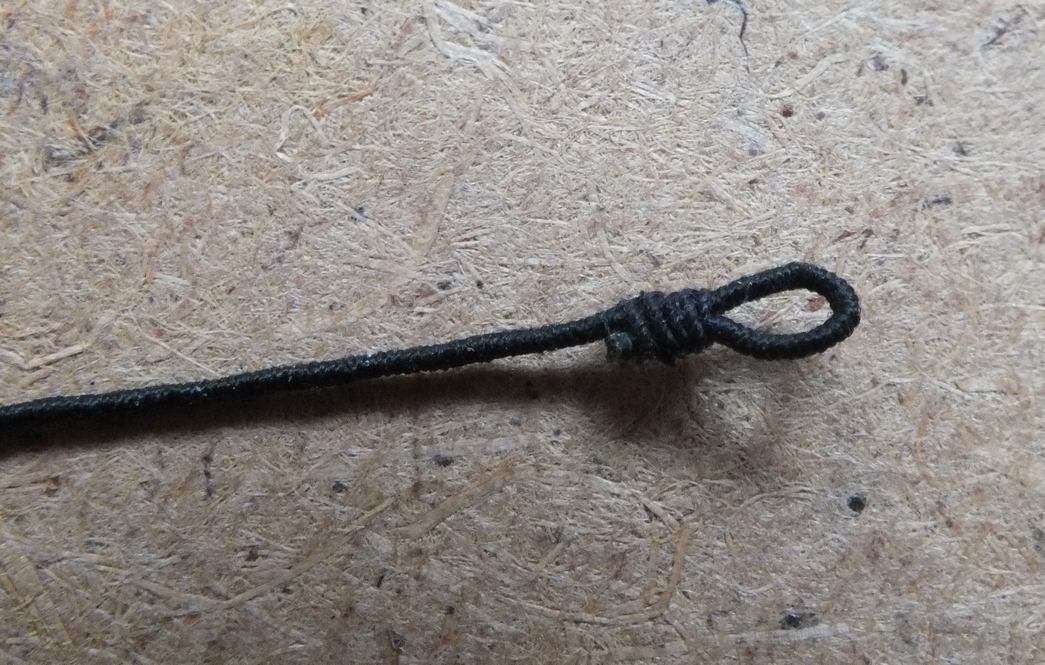
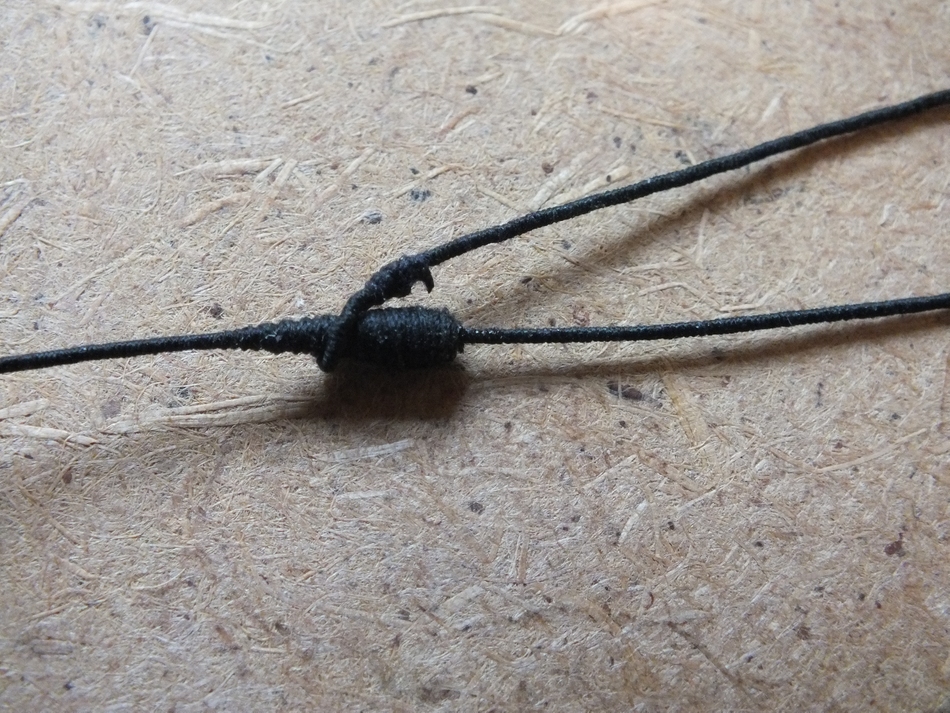
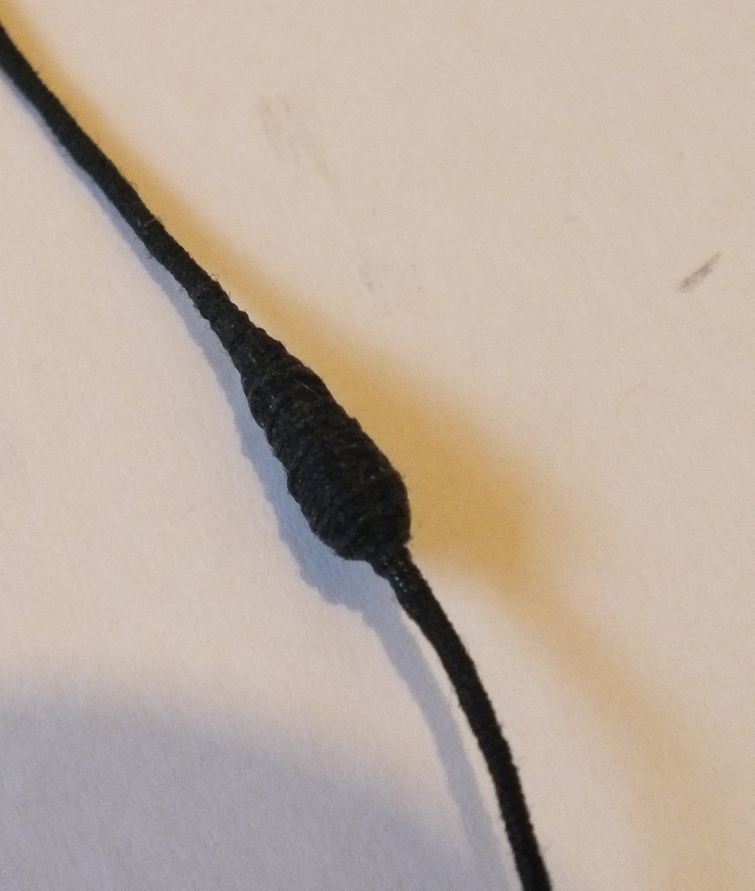
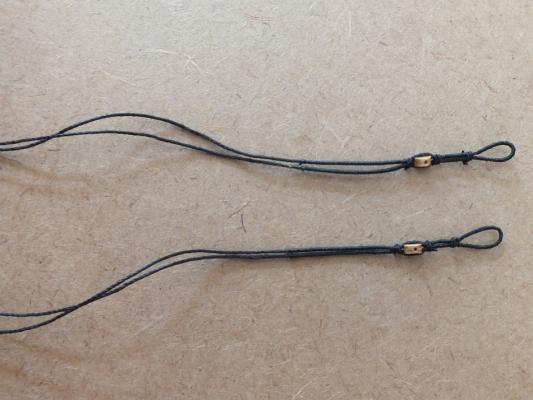
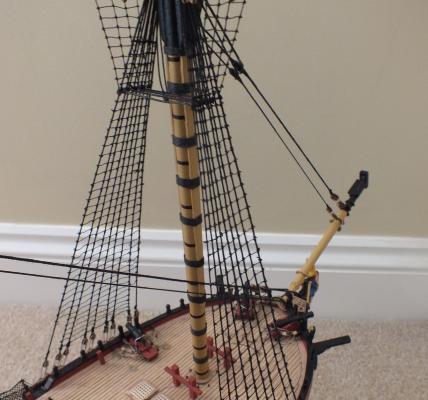
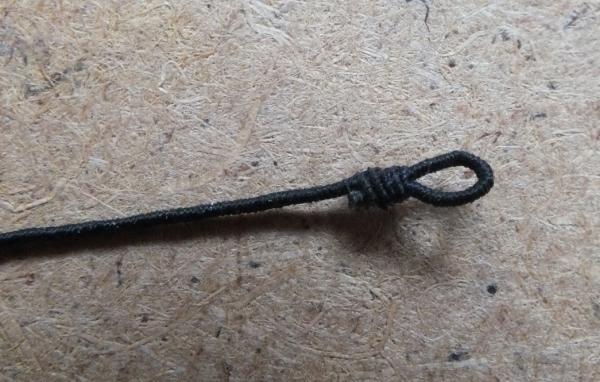
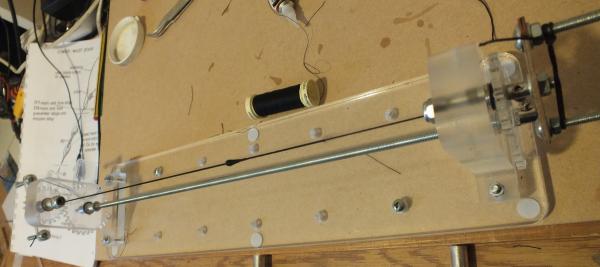
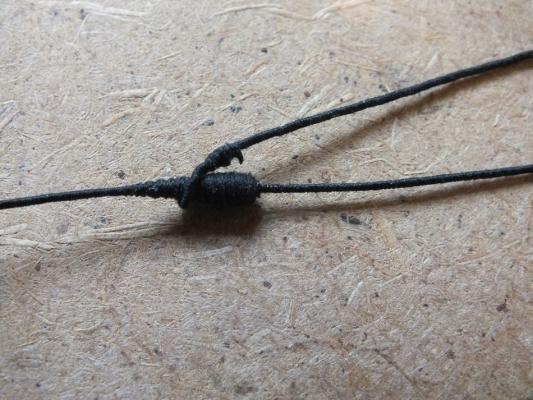
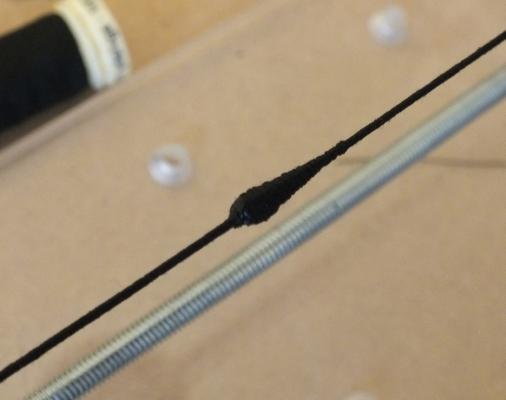
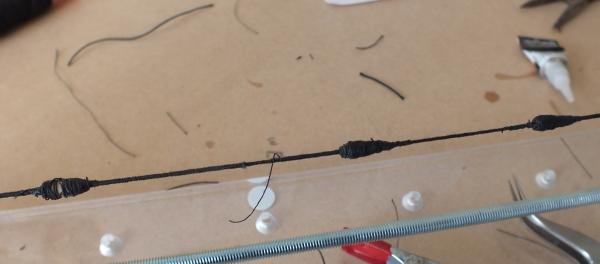
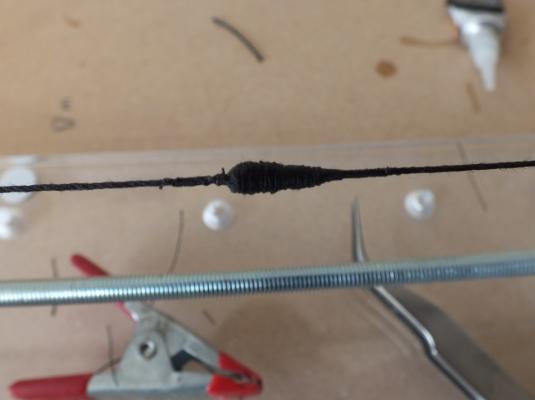
Mouse making method After trying out several methods I found just building up layers of serving gave the best results with a dilute coat of PVA to set the mouse after finishing the tail, I then continued to the end of the serving from the tail end, I then served the other end i.e. from the beginning to the head of the mouse, the stay was completed by adding the loop at the end. Mouse on machine mouse made stay loop mouse & loop

- 536 replies
-
- 12
-
-
- diana
- caldercraft
- (and 1 more)
-
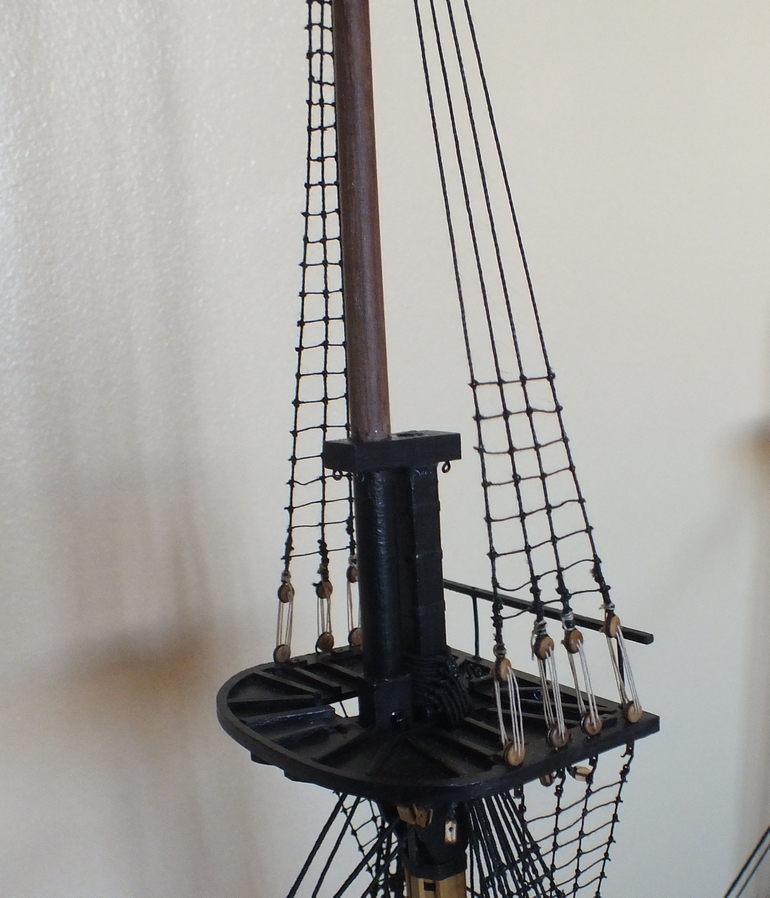
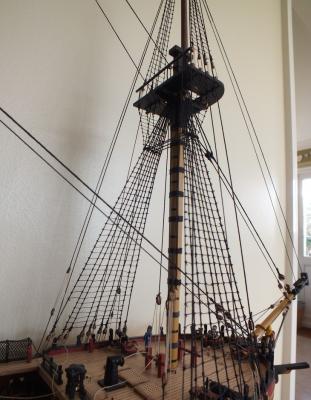
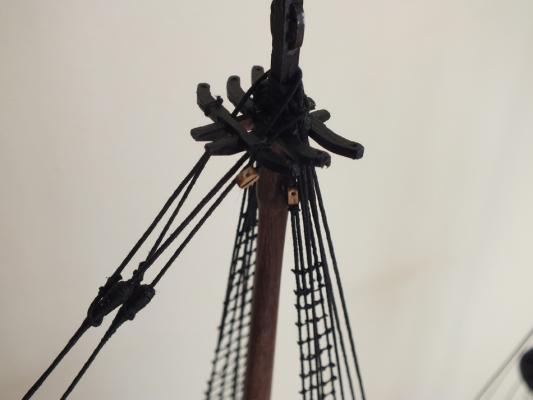
The lower mast shrouds, ratlines, futtock shrouds, and the catharpins have been completed, also the main part of the bowsprit has been set onto the hull and rigged plus the gammoning has been done, also the rigging at the bow, for the main stay and the preventer stay. I am now in the process of making the stays,the mouse being the most awkward part to make,I tried tapering some wooded dowel drilling and threading them onto the rope but found serving over them did not work out well, so I am making them by tying thread around the rope, thick first and tapering with thinner rope, coating with PVA and serving,and then serving again when the whole stay is served,they are much smoother that they look in the photos.


- 536 replies
-
- 19
-
-
- diana
- caldercraft
- (and 1 more)
-
Hi Stergios I used a plain overhand knot tied four times, tied one side and then the other, with a small dab of super glue to set the knot.
-
Stergios I am newish to serving but have found doing the foremost shrouds on Diana fairly easy to do, I start with just an overhand knot and a dab of super glue and after a few turns say 5mm in length roll it in my fingers, and finish the same way, if you need to stop hang a clip/clamp on the thread and try to keep the thread being served fairly taught, this might not be textbook but it works for me. Good luck
- 1,144 replies
-
- 1
-
-
- snake
- caldercraft
- (and 1 more)
-
HI Mobbsie The Destroyer is a Deans Marine kit which is 1/96 890mm long it can be built for radio control, but I will build it as a static model, I now have the kit and I am tempted to build it and complete Diana afterwards, The reason I am building HMS Tanatside Is my father served on her when she supported the landings at Omaha Beach.
- 1,279 replies
-
- 2
-
-
- agamemnon
- caldercraft
- (and 1 more)
-
Well done Mobbsie she looks absolutely stunning love the stand I think Diana could end up on a Mobbsie stand I totally see your end off build thoughts I will have a completely different next build a WW11 Hunt Class Destroyer.
- 1,279 replies
-
- 1
-
-
- agamemnon
- caldercraft
- (and 1 more)
-
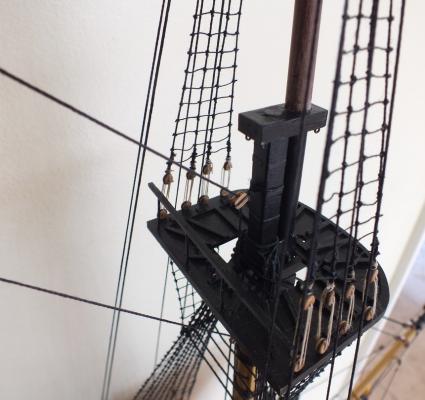
Hi Guys thanks for the ticks Jason I did not make the futtock strops as per the instructions I bought Amati 3mm deadeye futtock strops and hooks much better and very cheap. Some photos below. Painted matt black
- 536 replies
-
- 14
-
-
- diana
- caldercraft
- (and 1 more)