HOLIDAY DONATION DRIVE - SUPPORT MSW - DO YOUR PART TO KEEP THIS GREAT FORUM GOING! (Only 13 donations so far - C'mon guys!)
×


Ray
-
Posts
404 -
Joined
-
Last visited
Content Type
Profiles
Forums
Gallery
Events
Everything posted by Ray
-
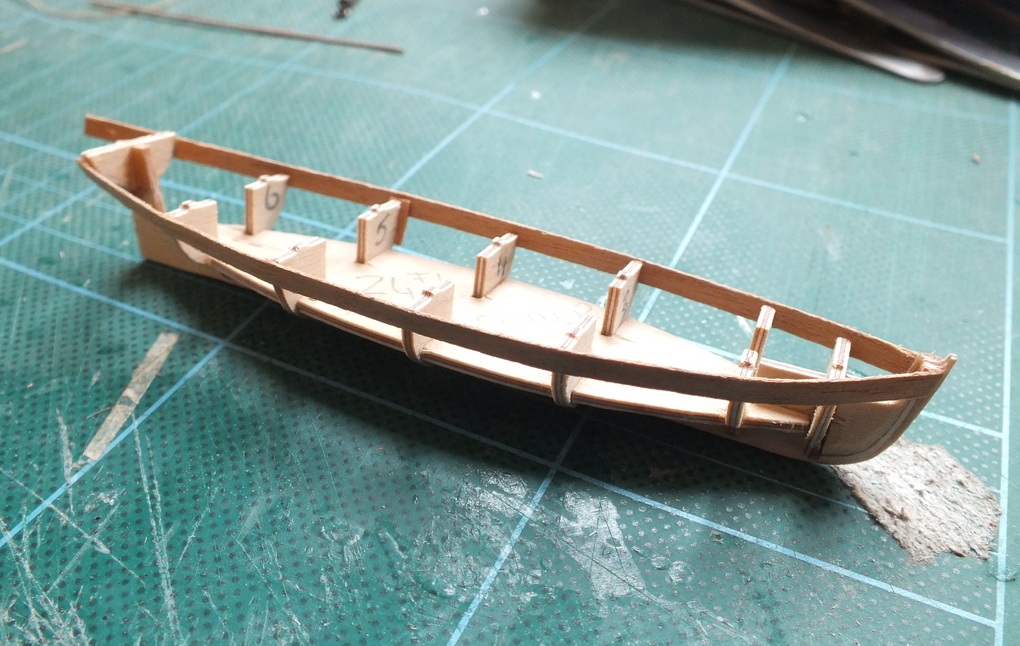
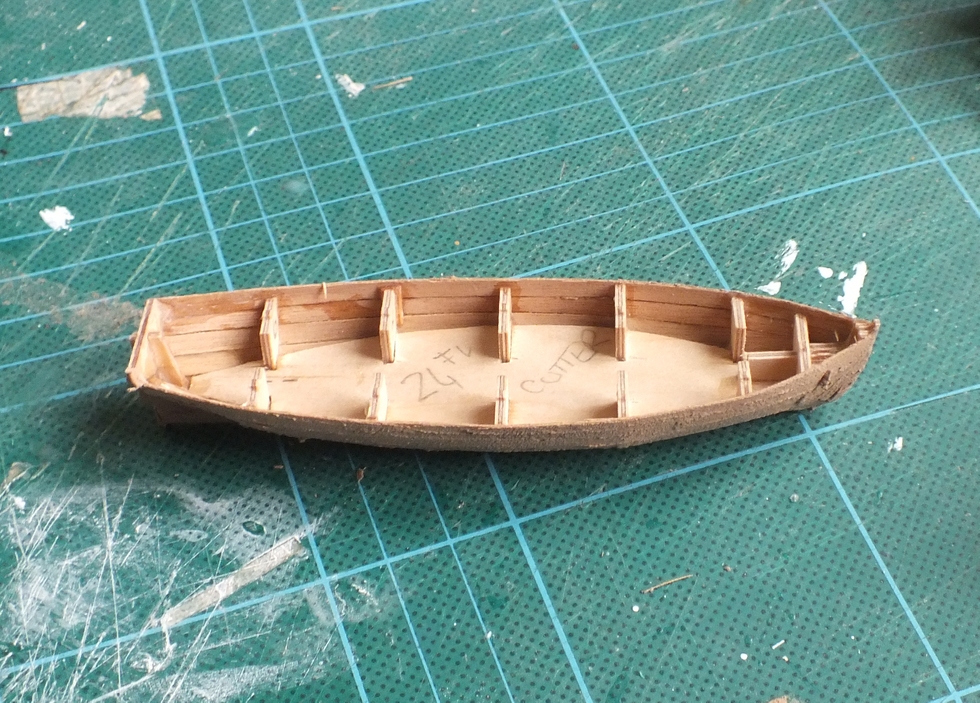
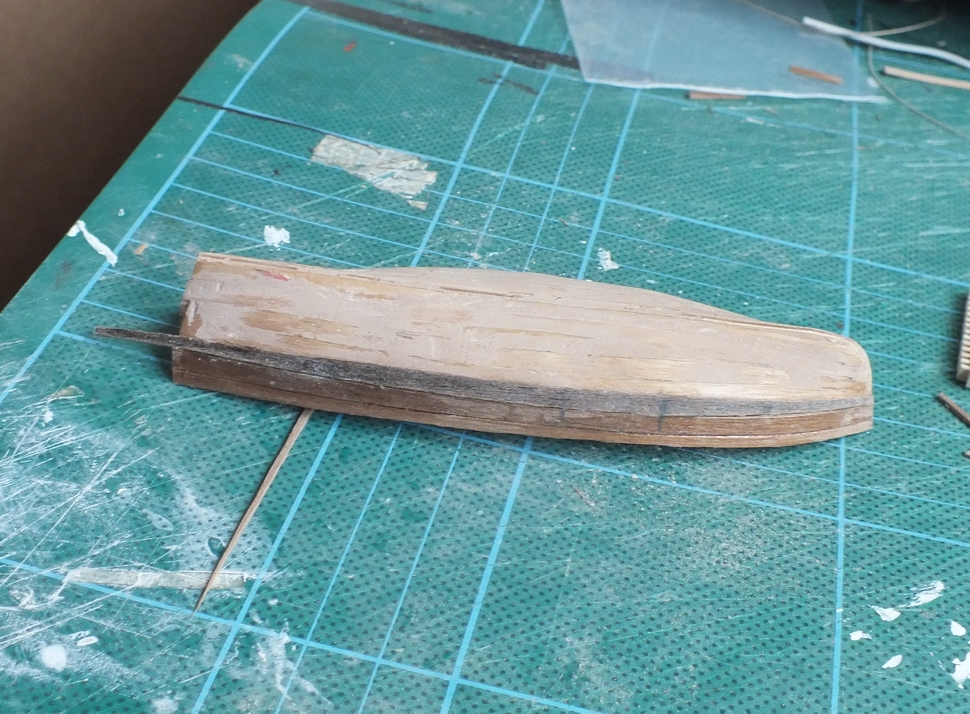
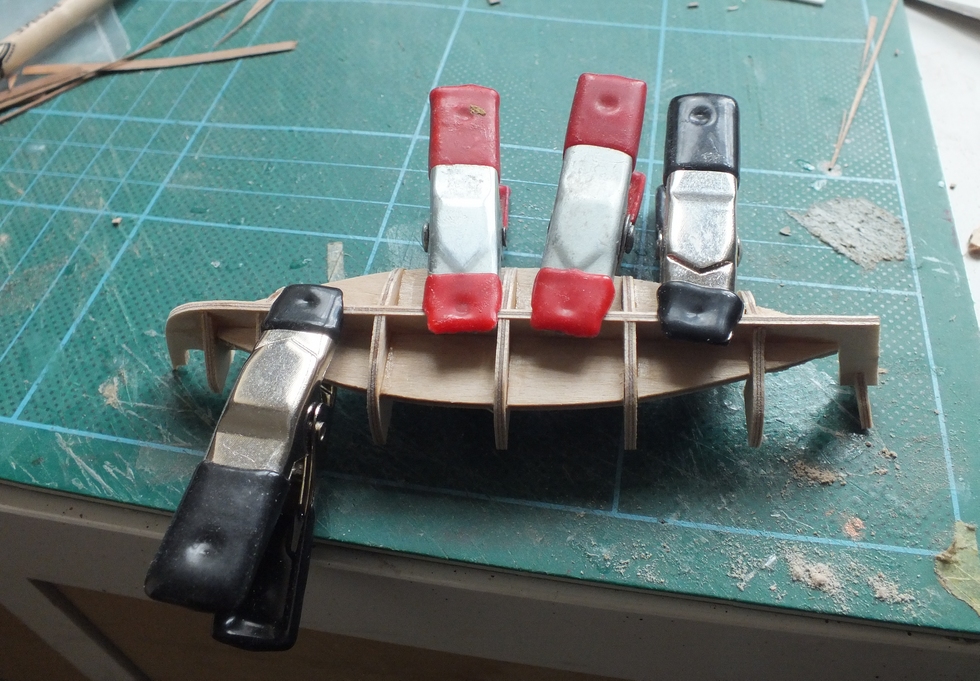
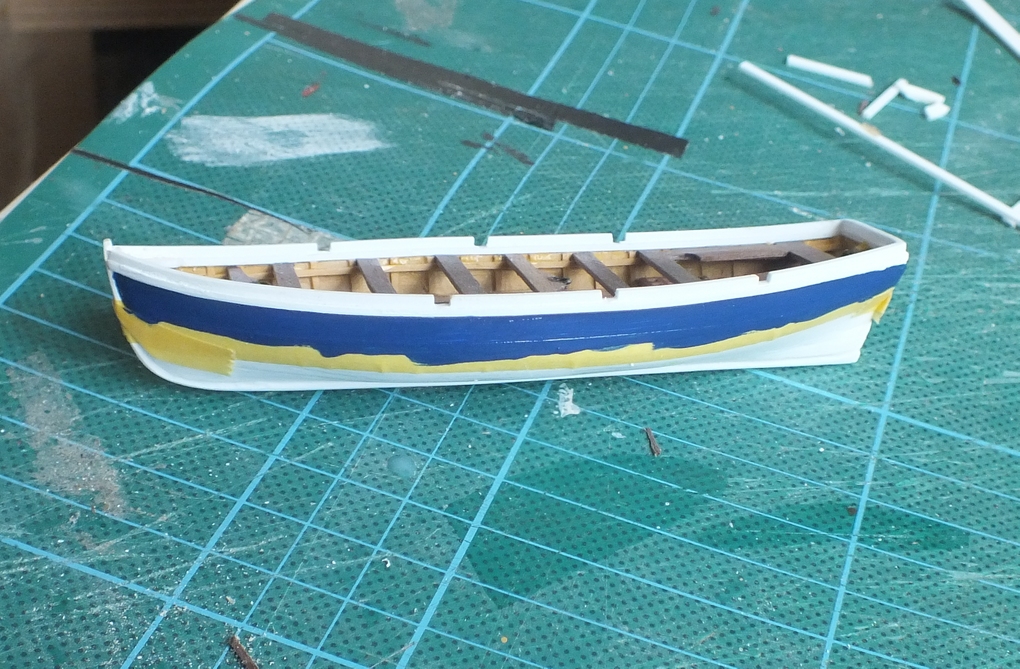
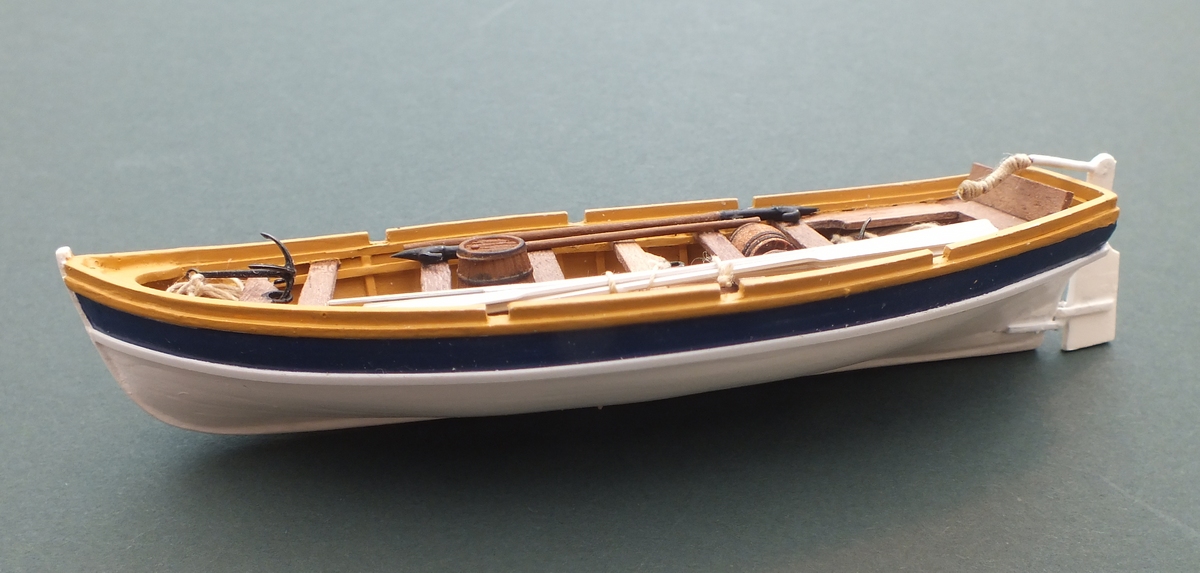
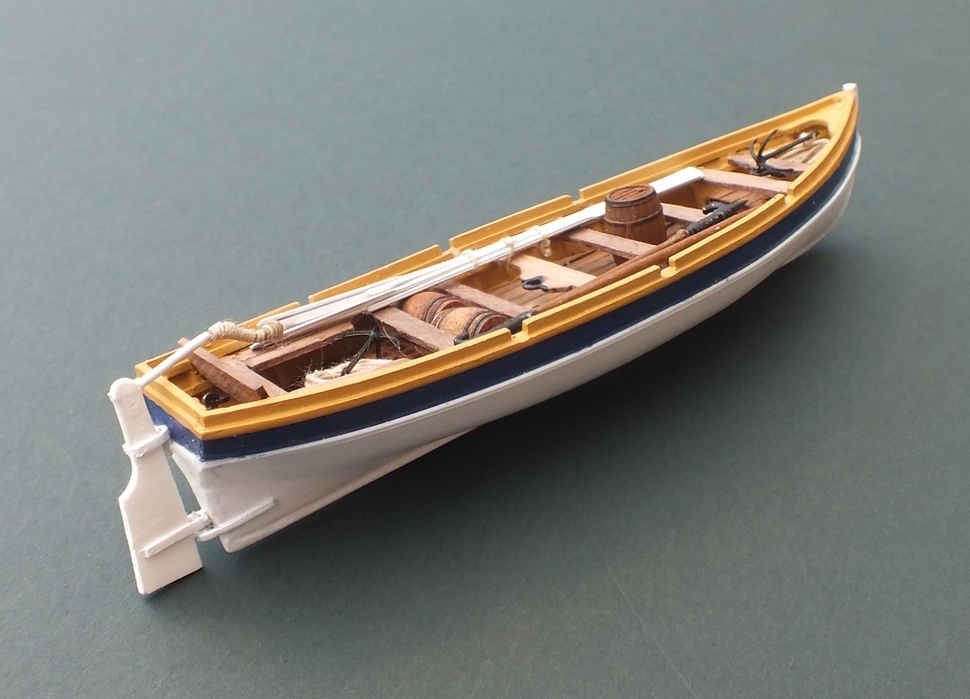
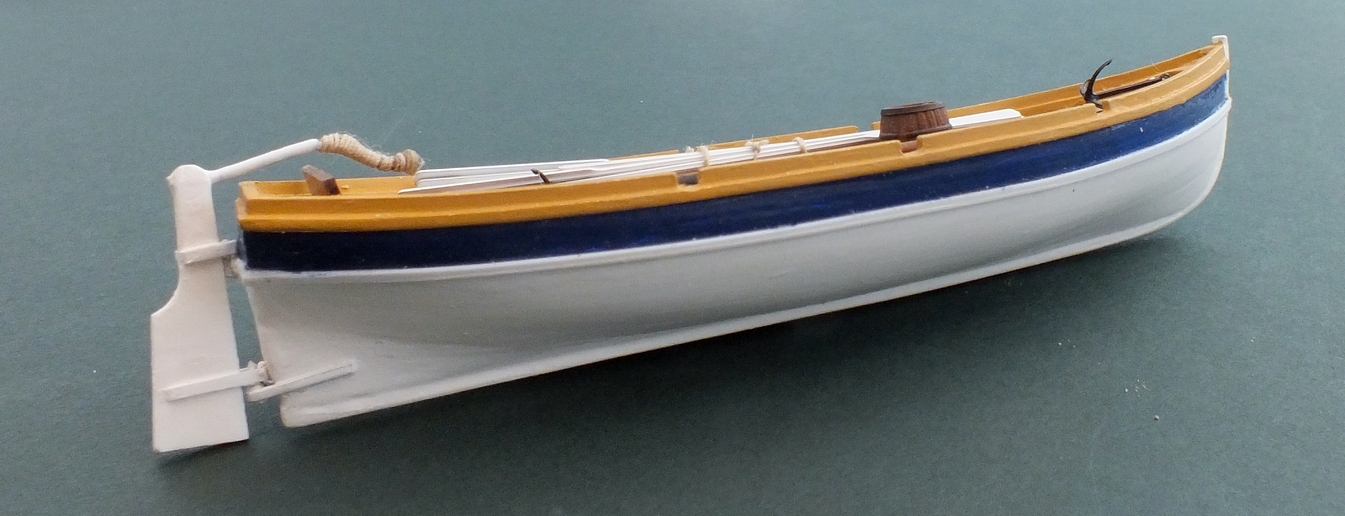
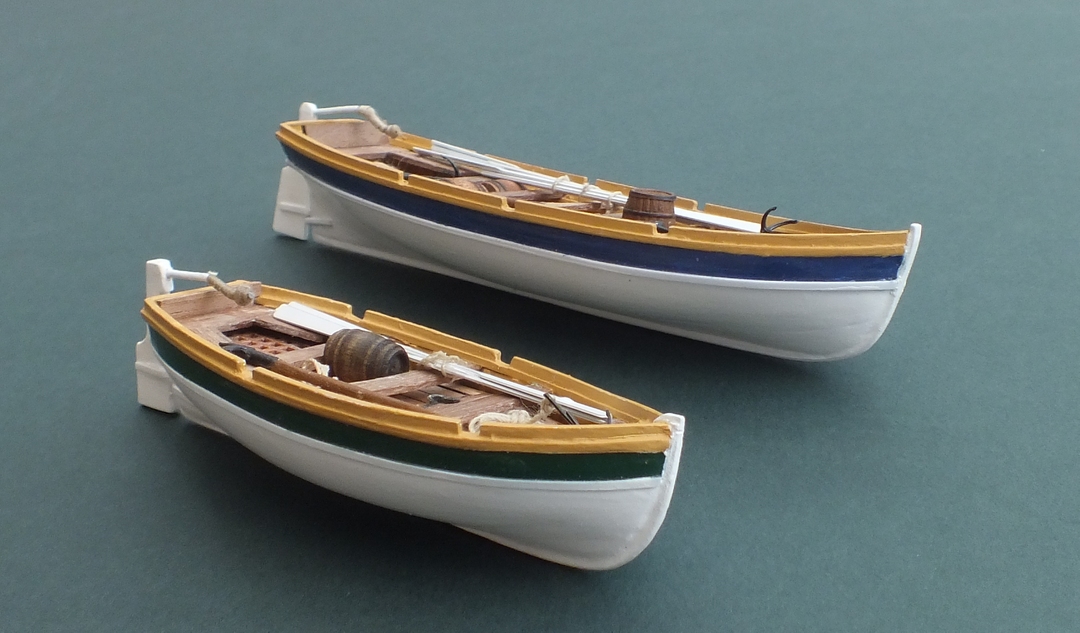
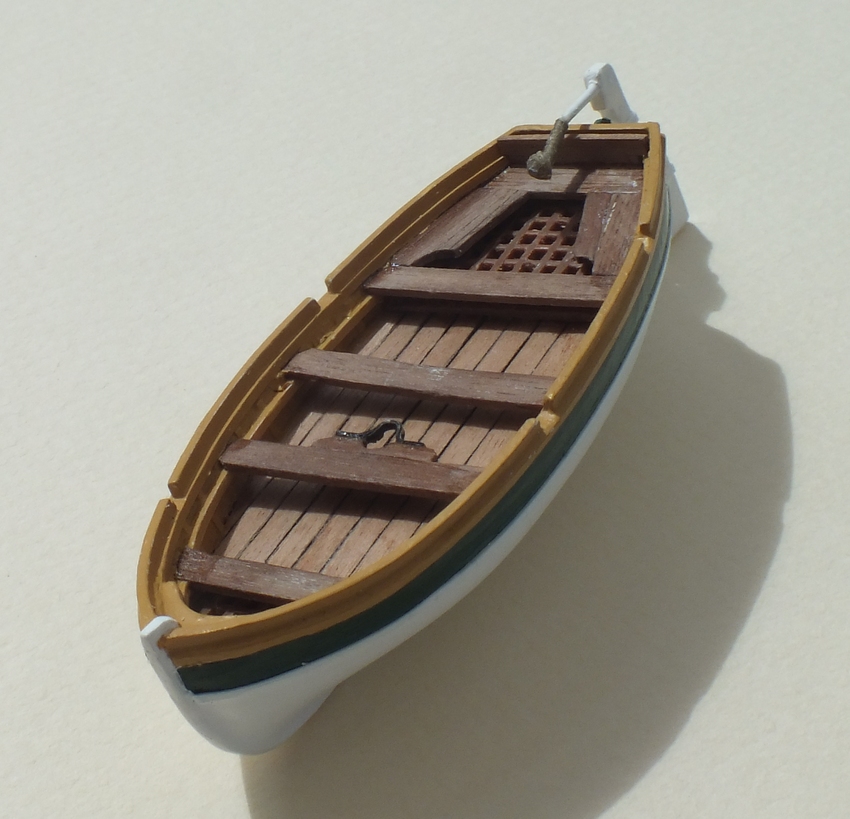
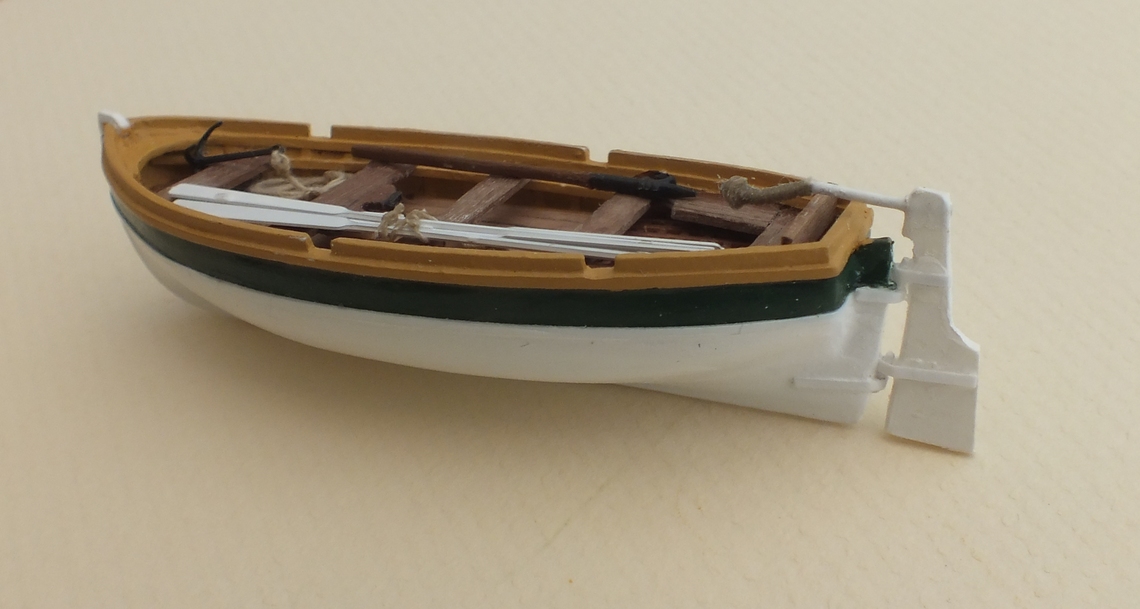
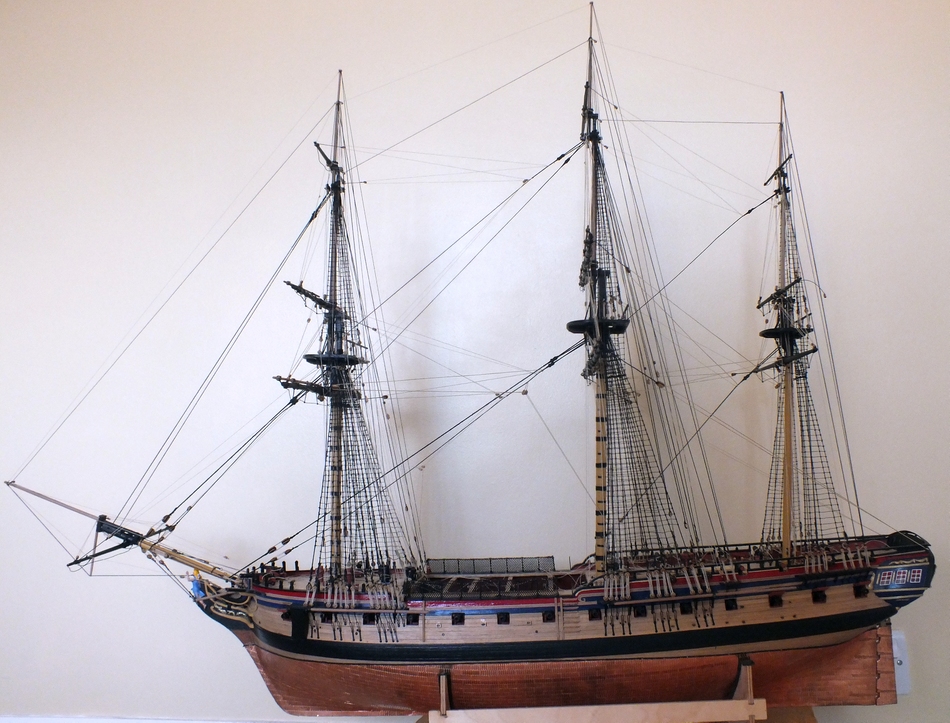
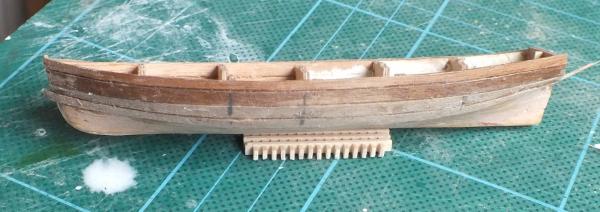
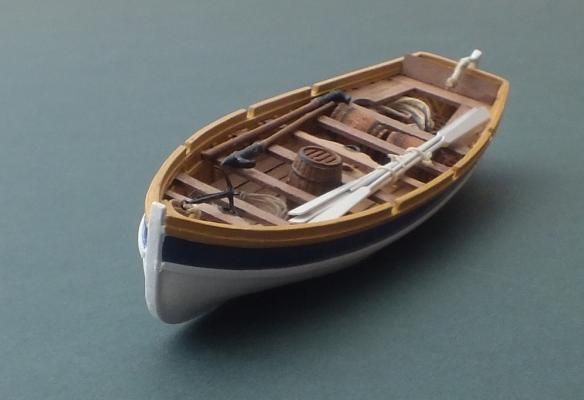
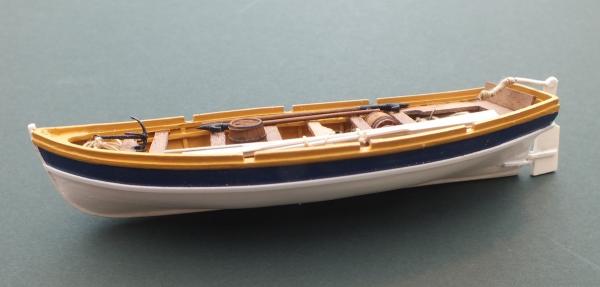
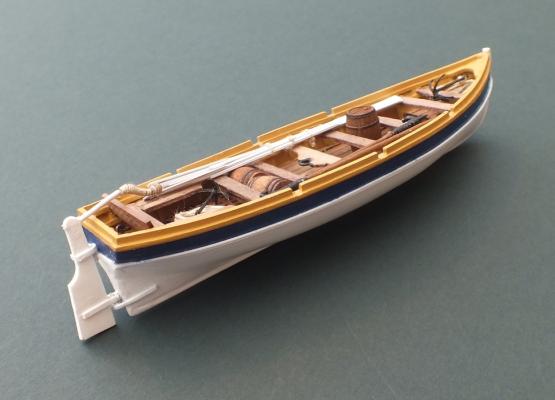
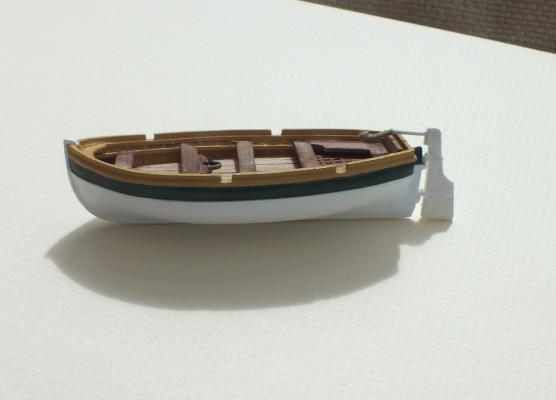
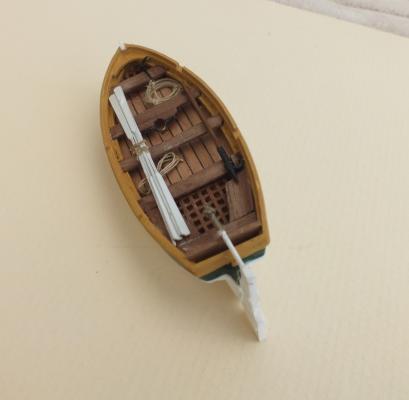
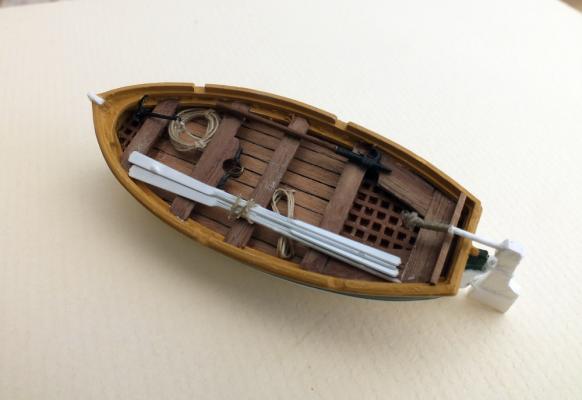
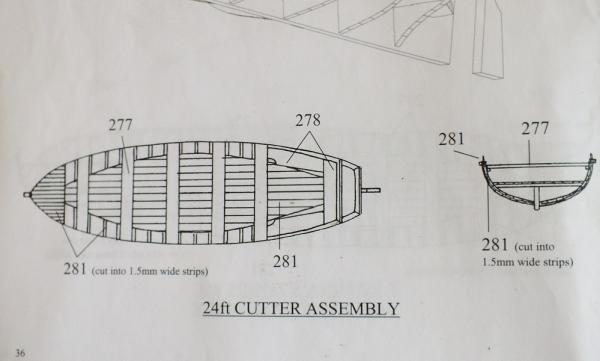
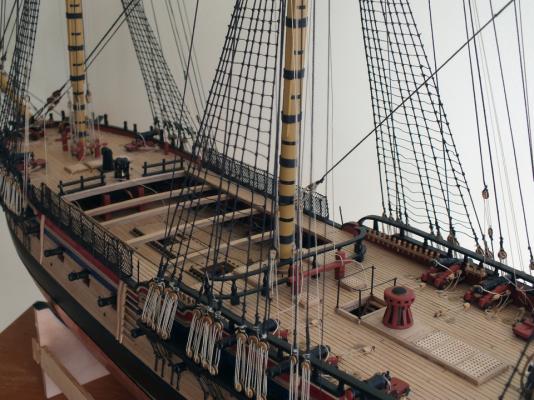
 Ships boats 2 The next boat to be built was the 24ft cutter, which was built the same as the 18ft one again it was a mini build and again towards the end I have started the next boat. I am also very pleased how the boat has turned out and looks nice with the blue painted band, and quite workman like with added oars,anchors,ropes,boat hooks,and barrels. Frames and keel clamped 1st plank 1st planking and filler 2nd planking planking done and false keel added inside hull prepared deck & grating inside painted inside fitted out wash strake & rowlocks painting tiller Completed cutter Both 18ft and 24ft cutters


- 536 replies
-
- 23
-

-
- diana
- caldercraft
- (and 1 more)
-
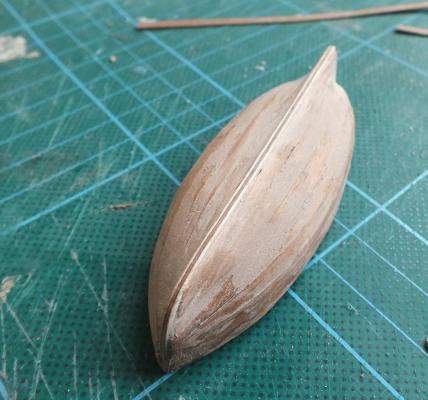
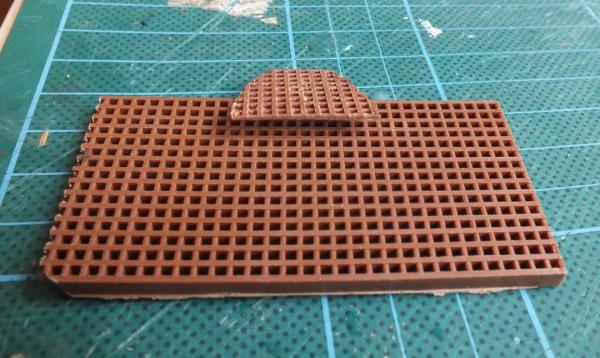
Hi guys thanks for the coments and ticks. Nils the other boats in the shipyard are a 24ft cutter which is nearly finished (photos soon), a 26ft launch and a 32ft pinace. Mort the gratings are Amiti A4328 100x40mm hole size 1.5 mm to my mind they look very good at this scale as mentioned in the log they are too thick but with care can be thined down. I obtained mine from Cornwall Model Boats.
- 536 replies
-
- 2
-
-
- diana
- caldercraft
- (and 1 more)
-
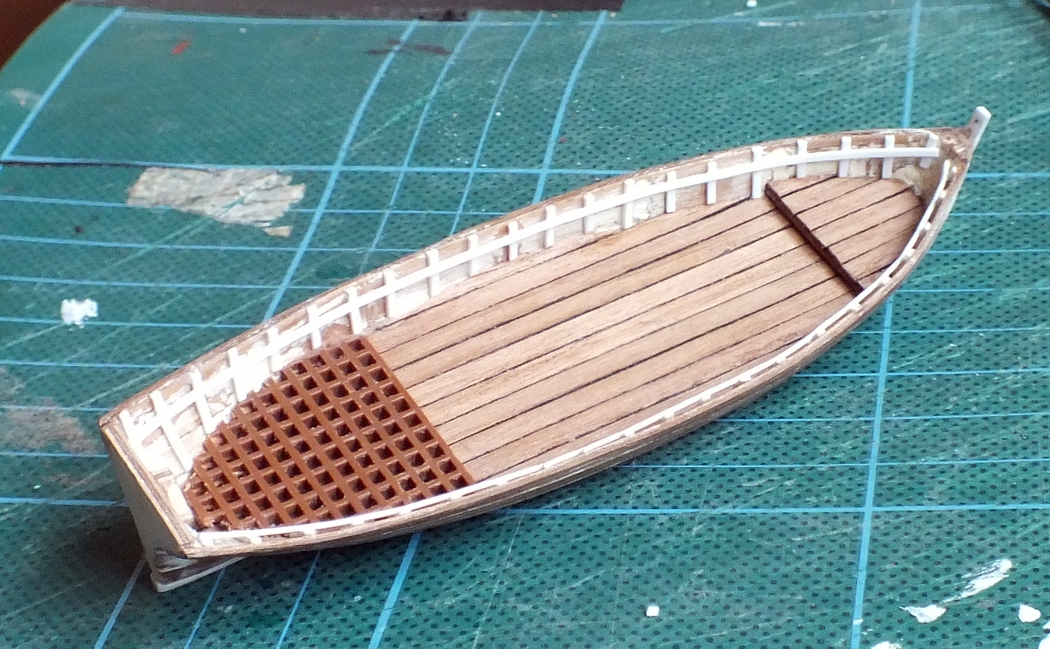
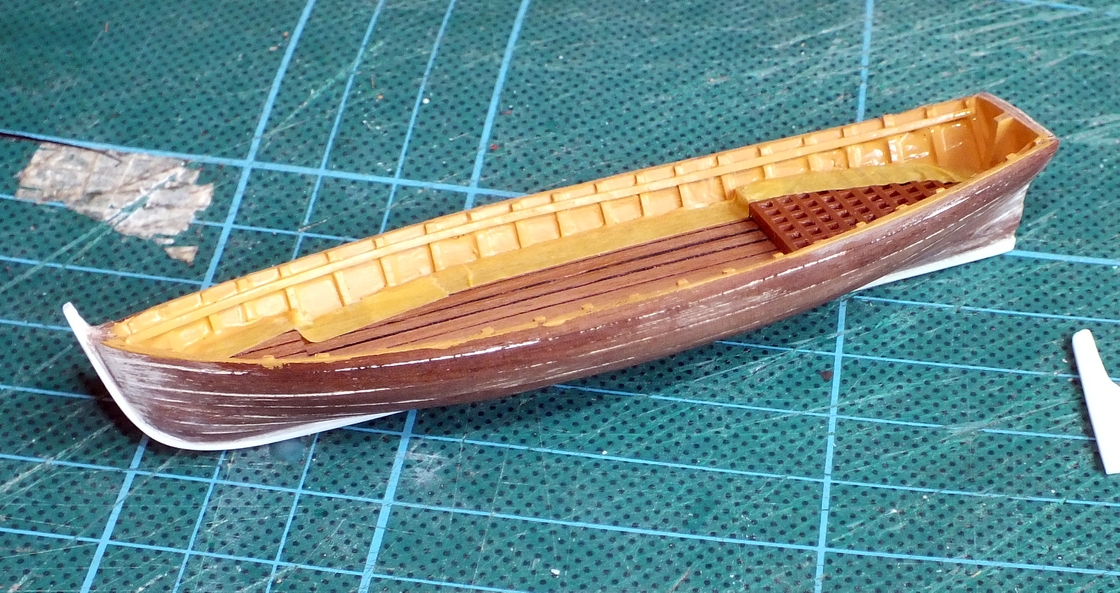
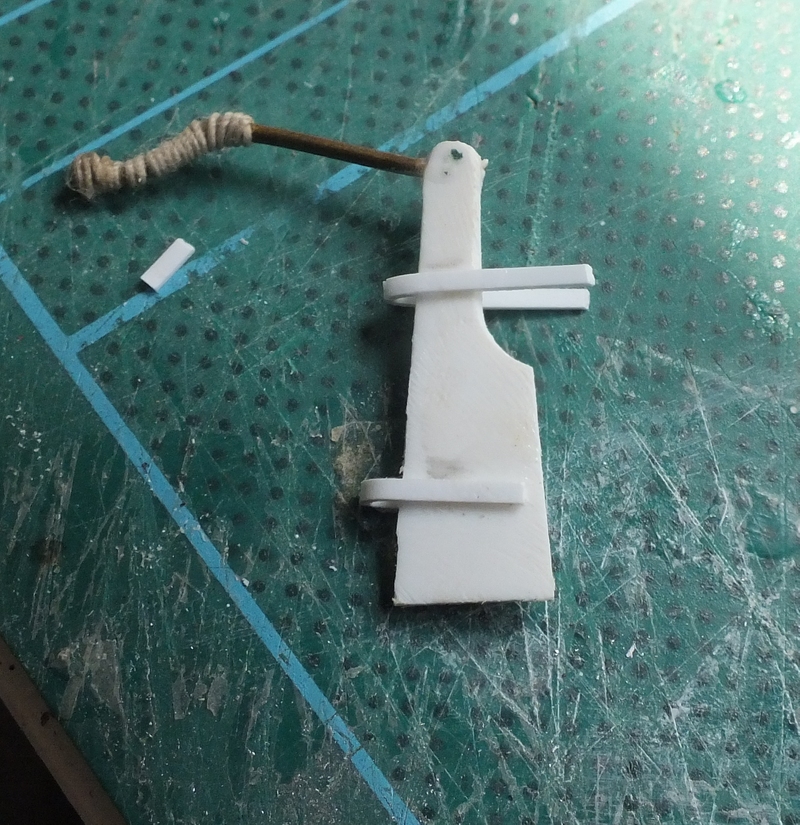
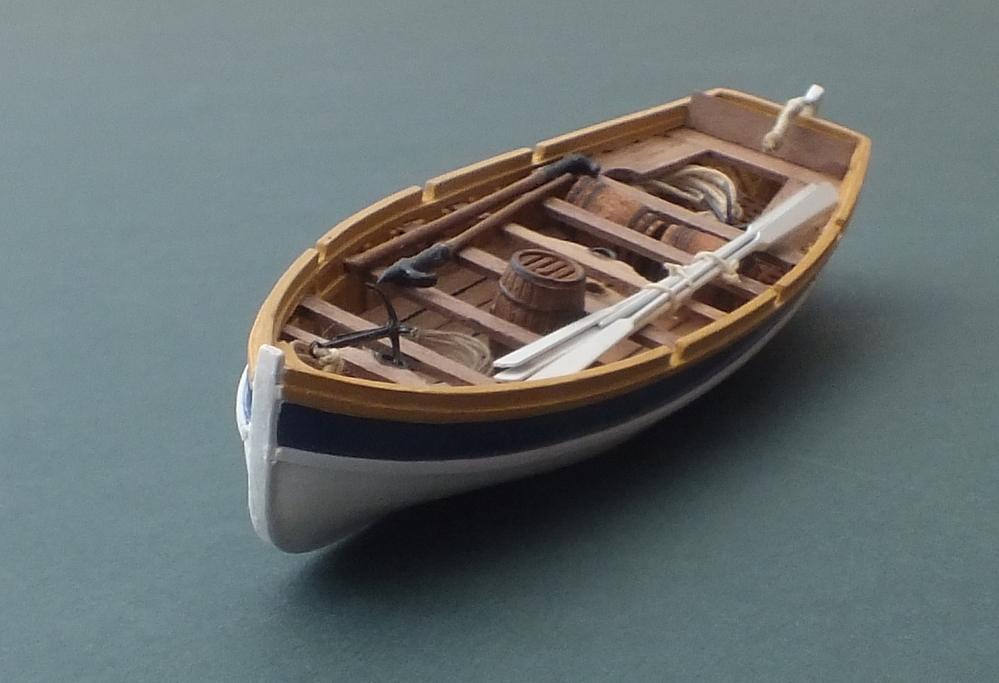
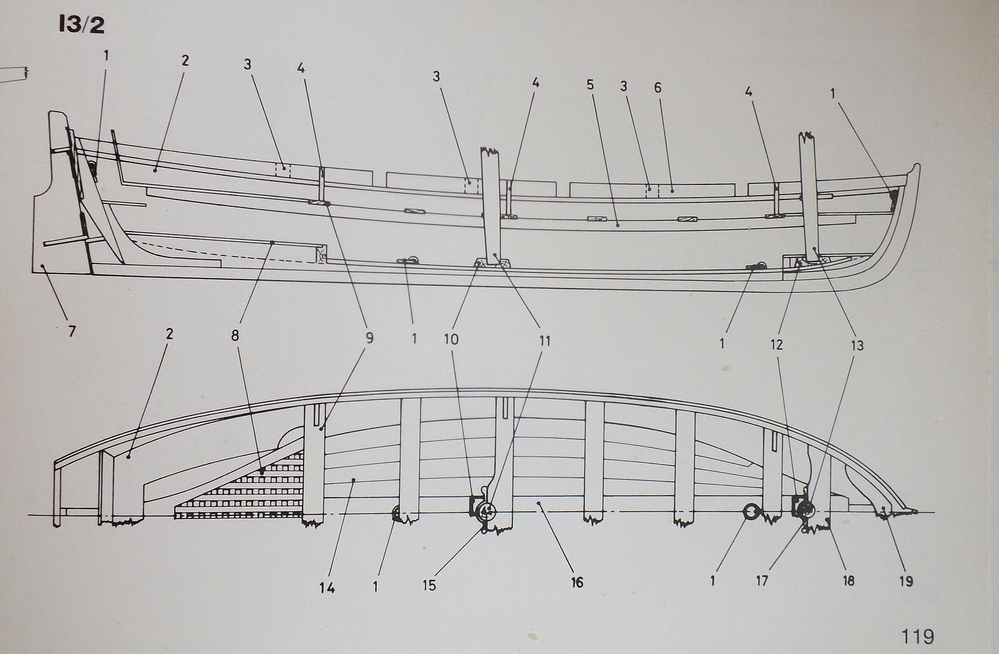
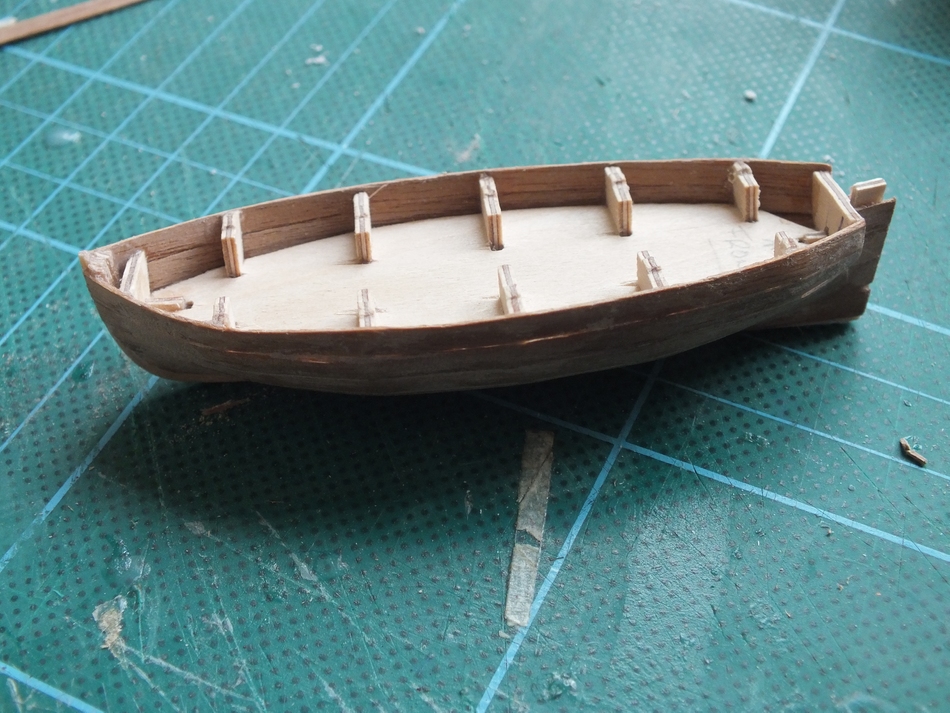
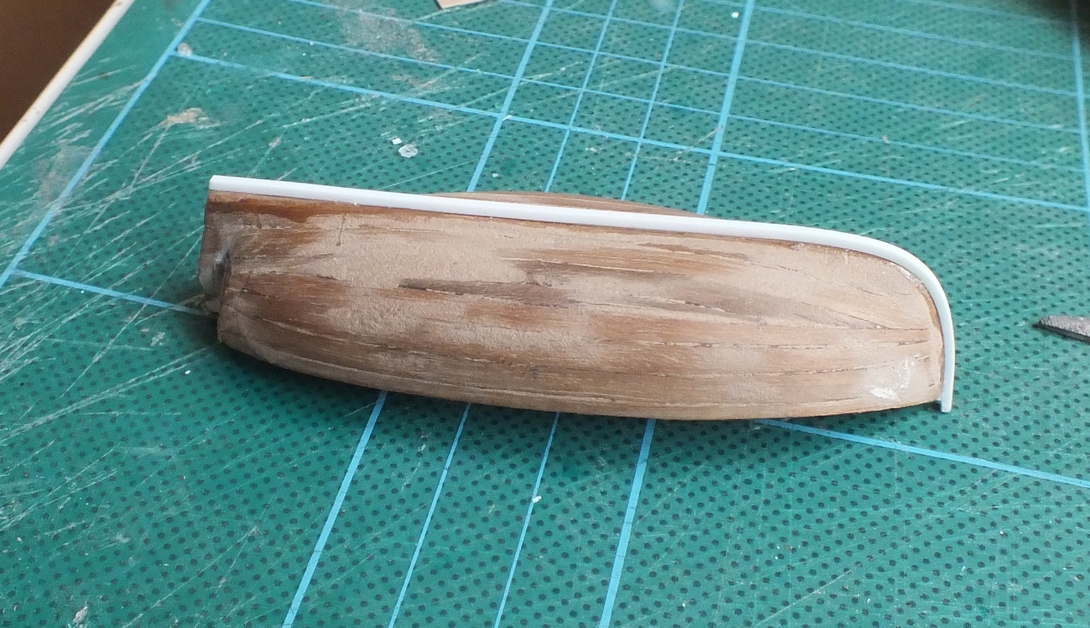
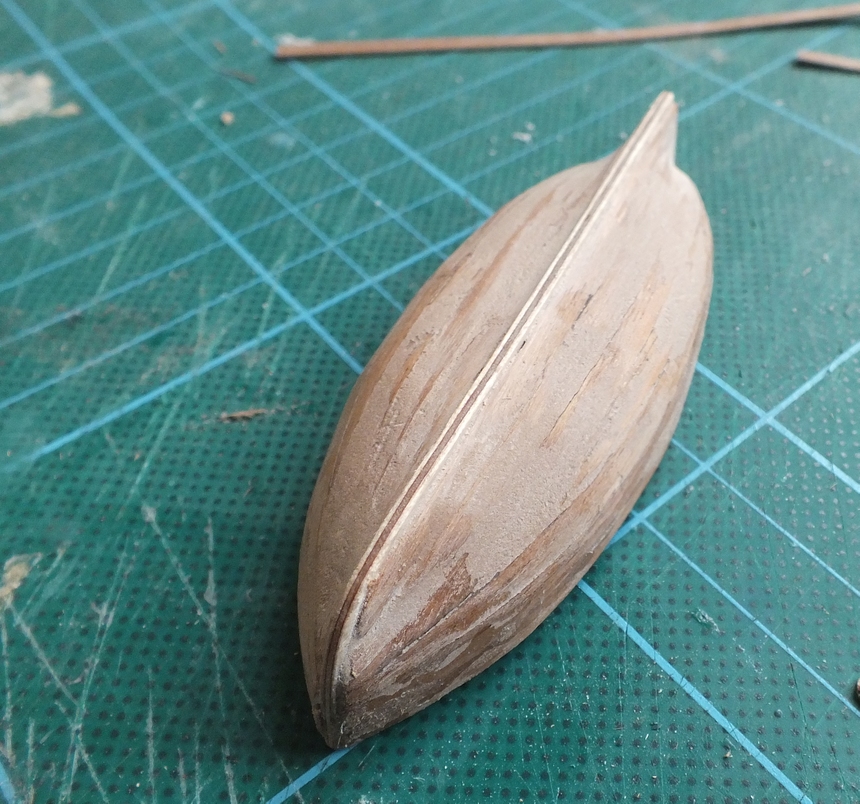
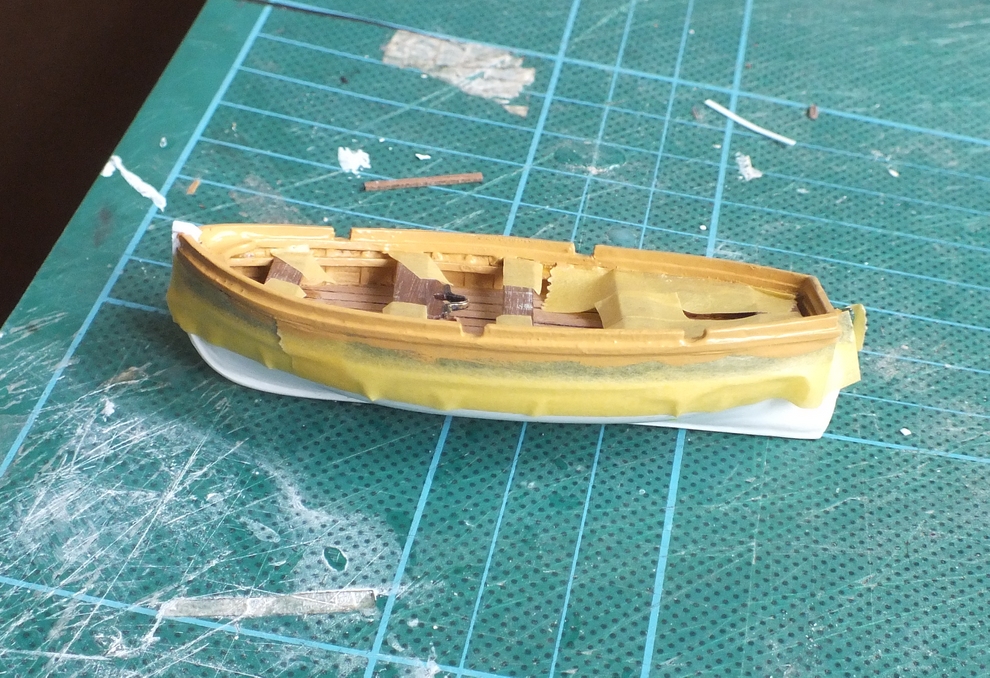
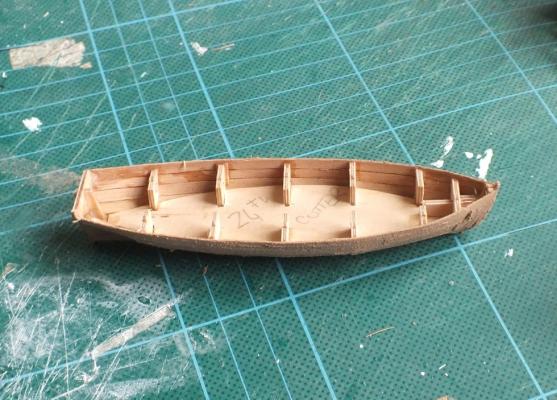
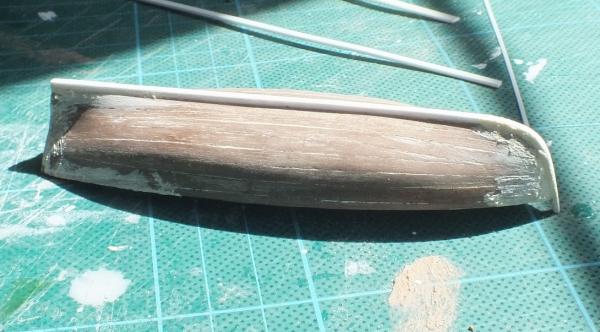
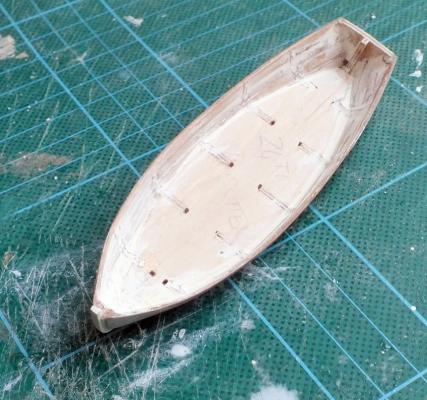
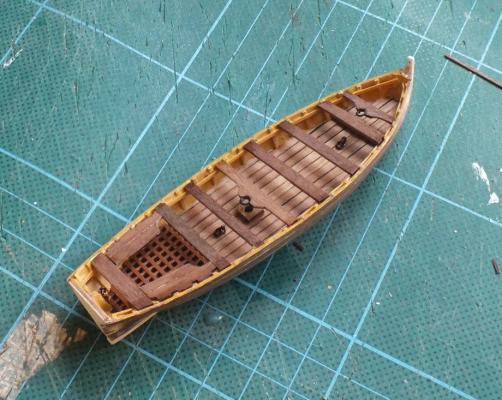
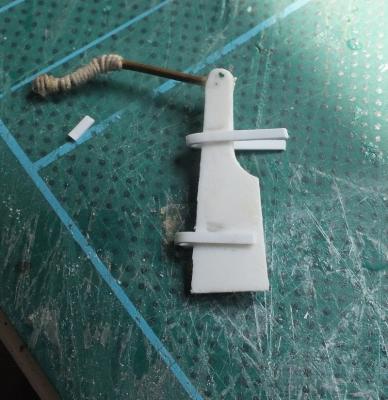
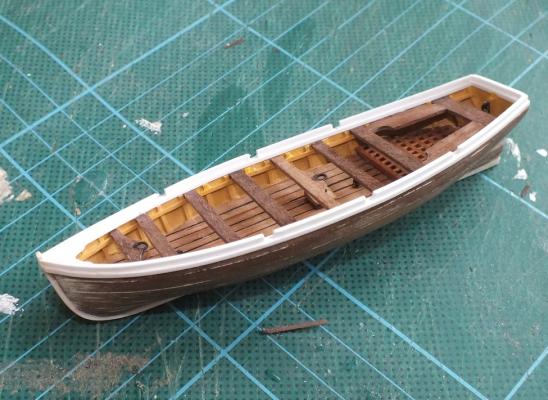
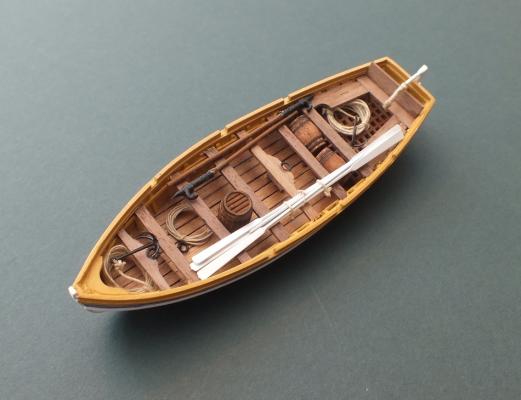
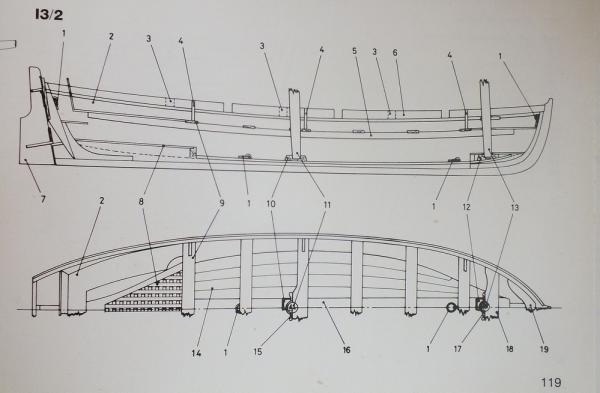
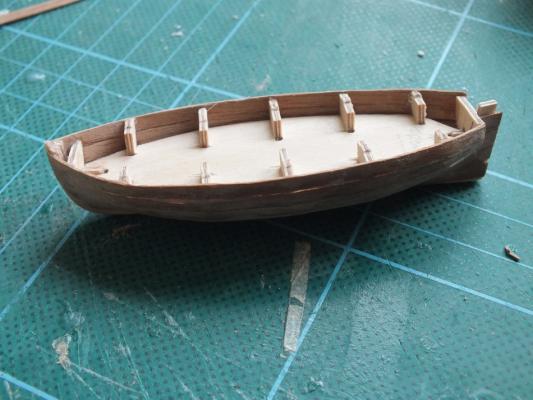
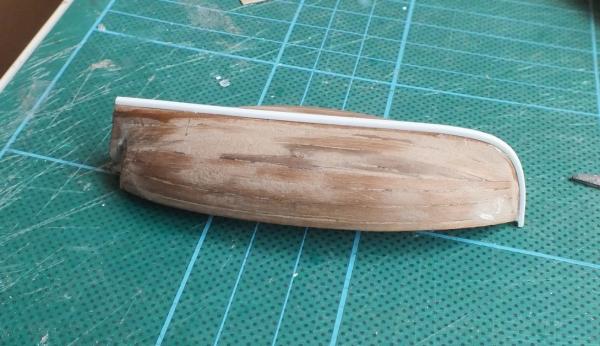
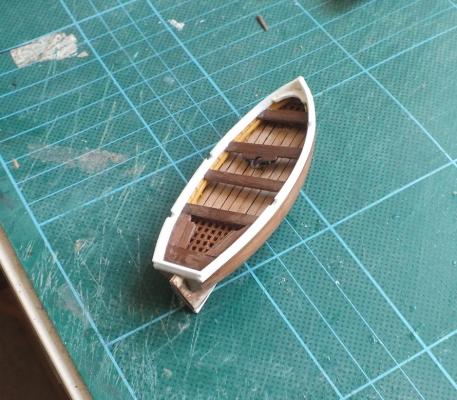
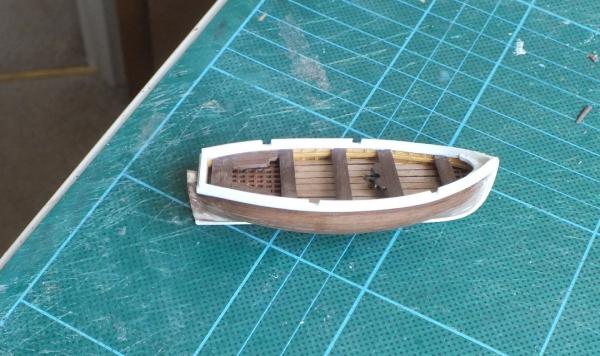
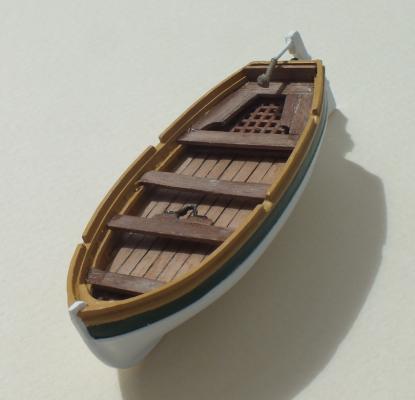
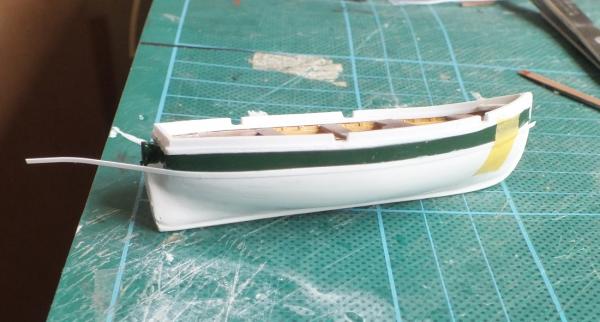
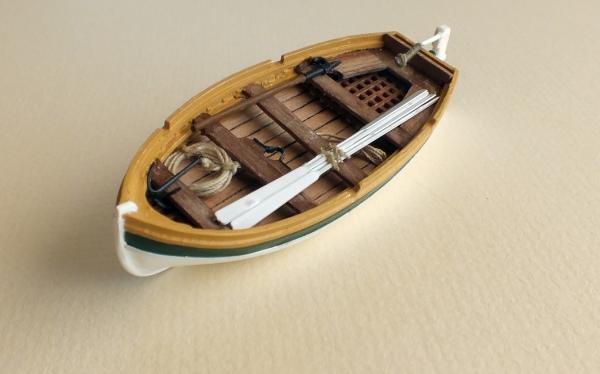
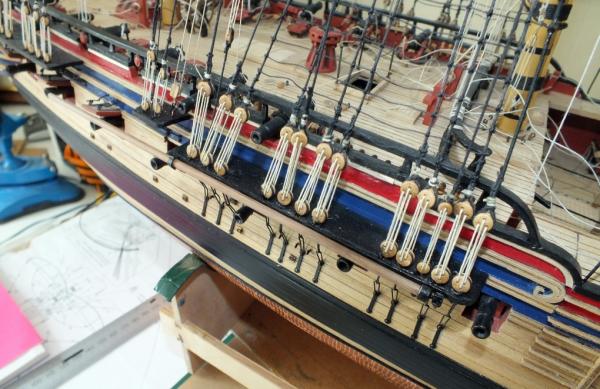
Ships boats I decided the next job was to build the four ships' boats,I started with the smallest one, the 18ft cutter, this was to be my first real build of a ships boat, as the ships boats on Pegasus were hulls I fitted out. Again the kit drawings are a bit basic, so using the boat kit as a starting point, I built the boats adding detail from The Anatomy of ship Diana s drawings, off the ships boats and will hopefully, using the experience gained on the first one built, be able to build, the others even more closely to the books boats. ( below is a photo of the the kit plan for the 24ft cutter and the plan from the book) The cutter hull build went OK double planked with some 4mm x .5mm timber I already had, I made sure to overlap the joints of the first planking with the second planking to add strength (after a little bit of filler to the the first planking), the frame tabs were then broken off and the hull sanded inside and out with only a tiny amount of filling required, I then planked the bottom inside, the A O S Diana shows fore and aft gratings, so some wooded packs, and a plastic moulded one were ordered, they were both way too thick, so I cut the shape for the aft one from the plastic grating, and then reduced its thickness, and it looks fairly good,next the internal frames were added using plastic strip and painted yellow ochre, and the the seats added, the wash strake next, again from plastic, and the row-locks were then filed out. The tiller was again made from plastic sheet with the hinges added and lastly the tiller arm, the outer hull was then painted, on the 18ft cutter a green band waqs painted, and the rest of the hull satin white. Lastly the anchor, boat hooks, ropes and oars were added for effect, overall I am pleased with this cutter and hope to improve my small boat building on the other three, and I have made a start on the next boat whilst waiting for coats of paint to dry on this one. Kit plan and the plan in A N O S Diana ( these are the 22ft cutter) first planking 2nd planking keel added grating wash strake thwarts & grating Painting tiller Completed no fittings Completed cutter fitted out


- 536 replies
-
- 22
-
-
- diana
- caldercraft
- (and 1 more)
-
Thanks for the many ticks and comments guys, I have been working on the ships boats they are turning out to be little mini builds on there own, so I will update the log soon and go through the builds rather than just one update on them all.
- 536 replies
-
- 1
-
-
- diana
- caldercraft
- (and 1 more)
-
Hi Nice planking David glad you found my method of use. Jerry the top and butt deck planking was used on the lower gun decks to strengthen them where the cannons are, I described in my build, a method I worked out to lay the top and butt pattern the planking looks great when done as you can see from David`s it is a bit fiddly but well worth the effort.
-
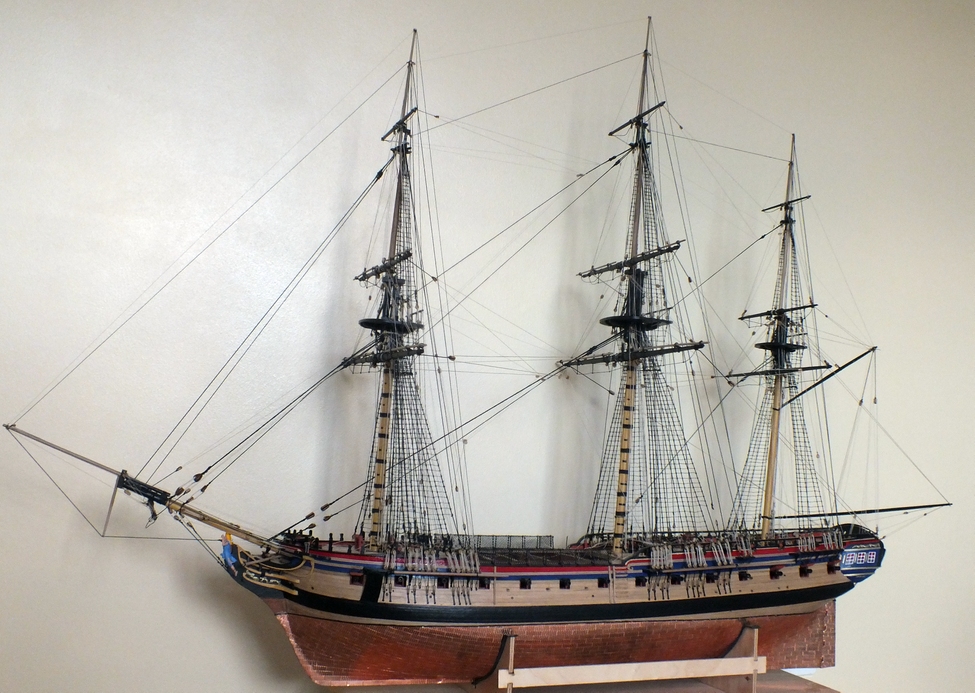
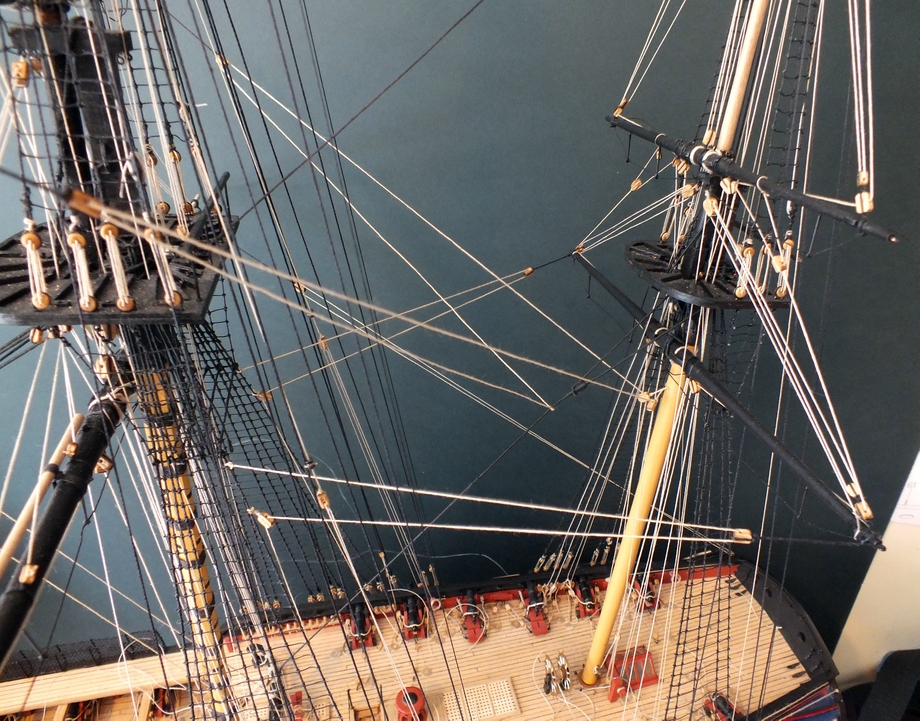
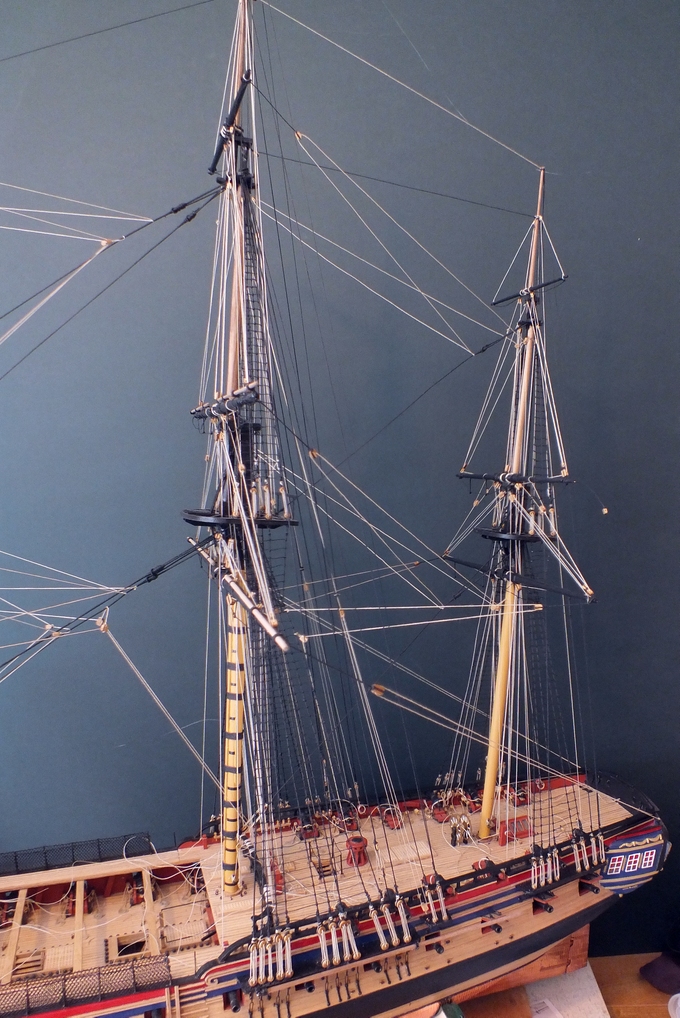
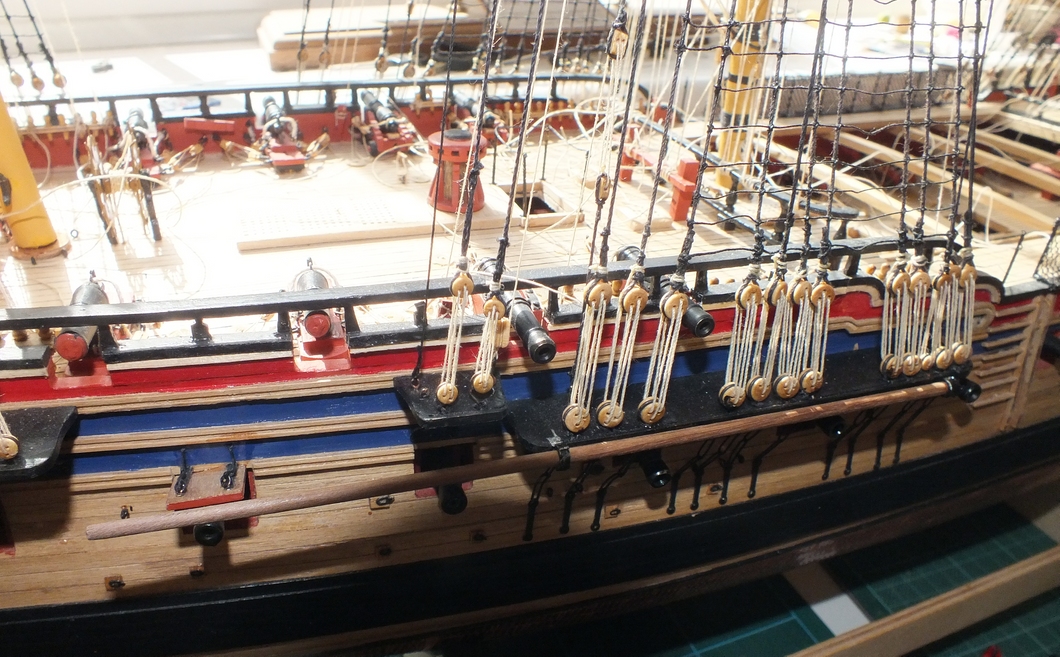
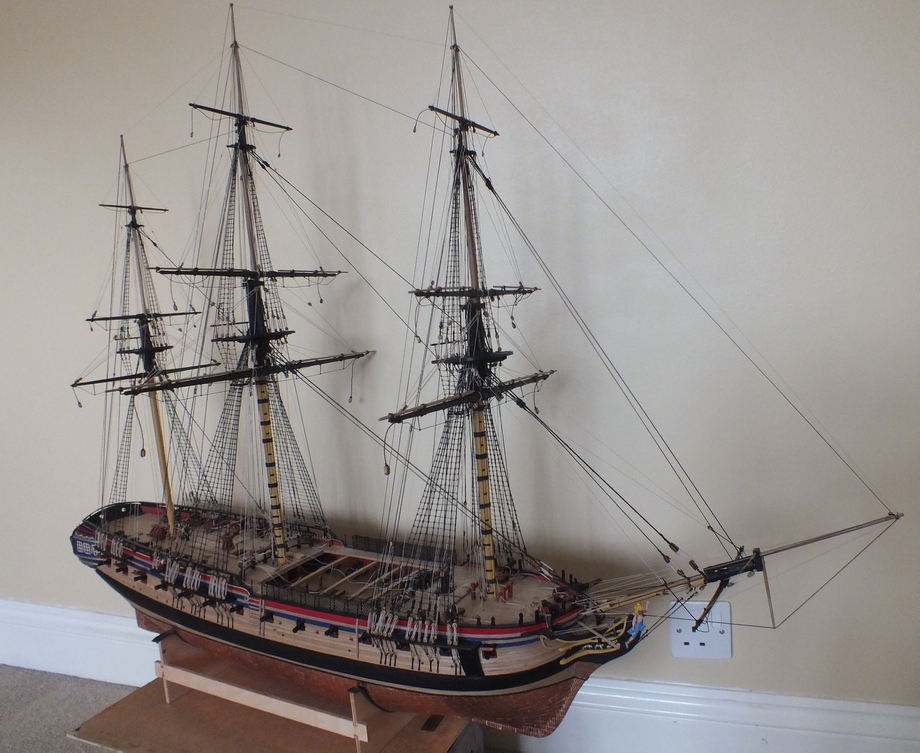
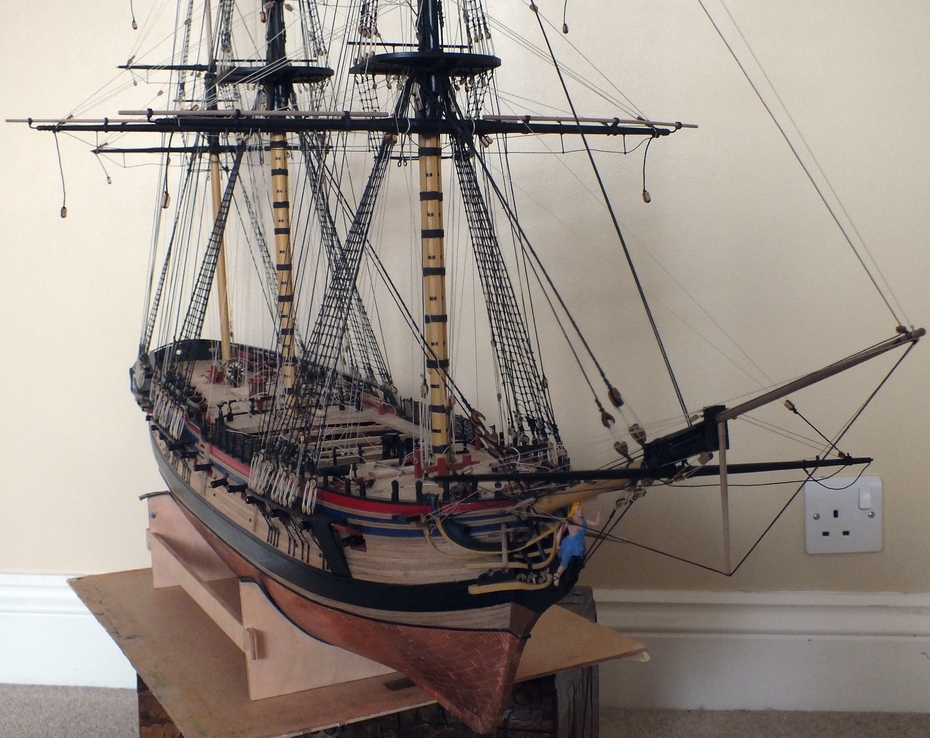
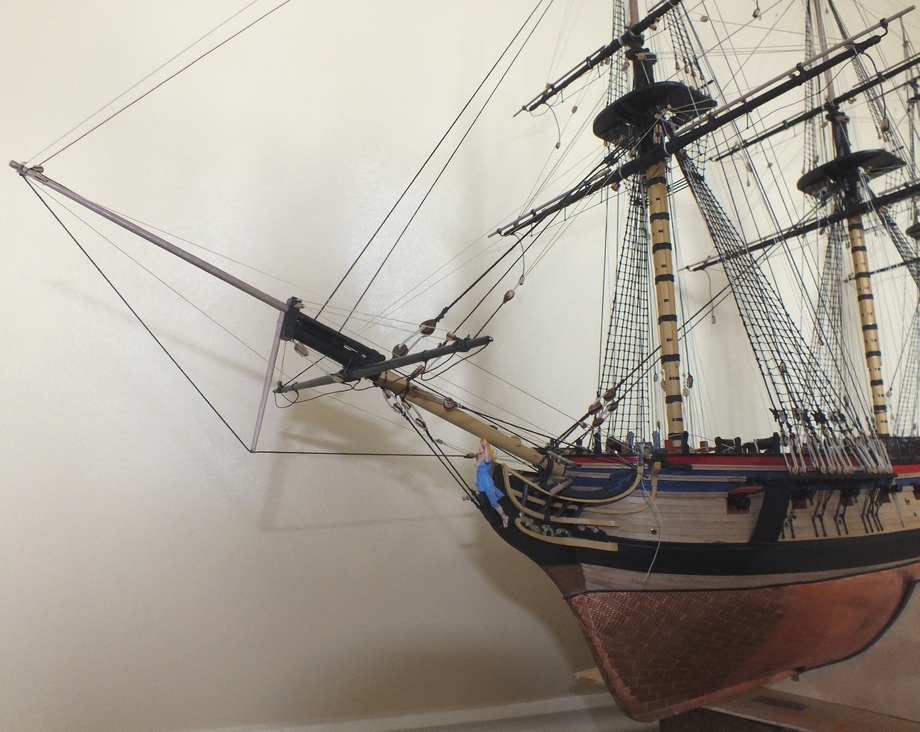
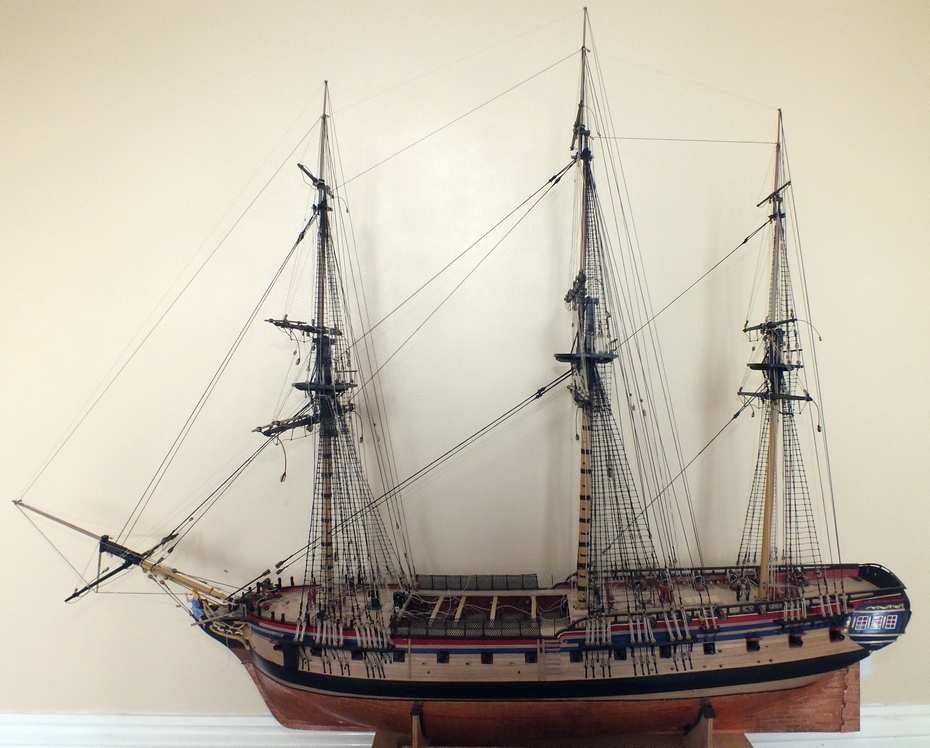
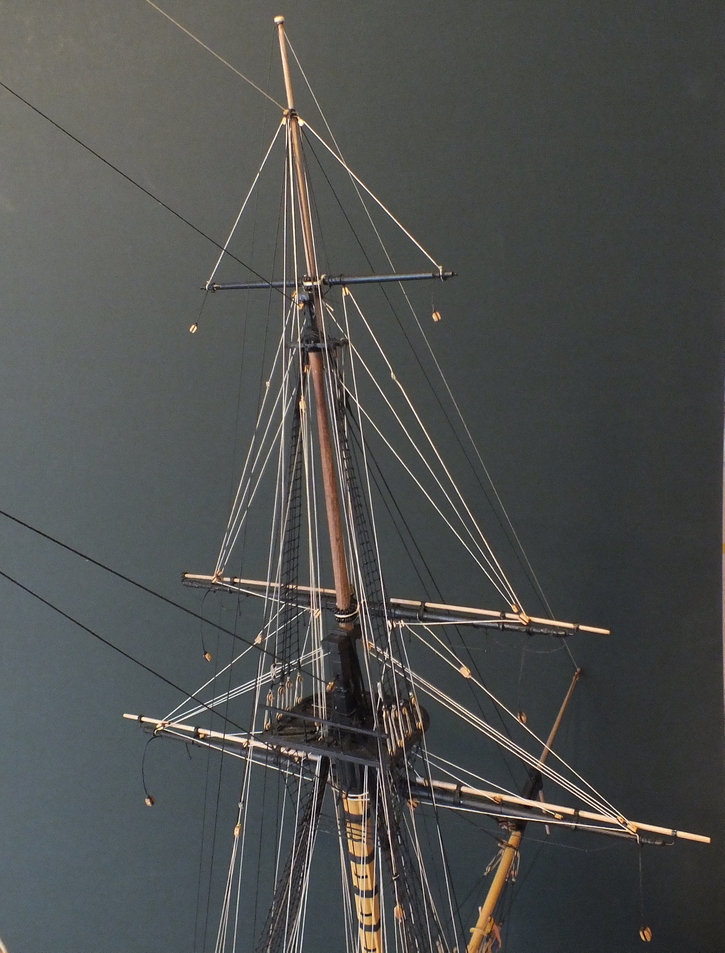
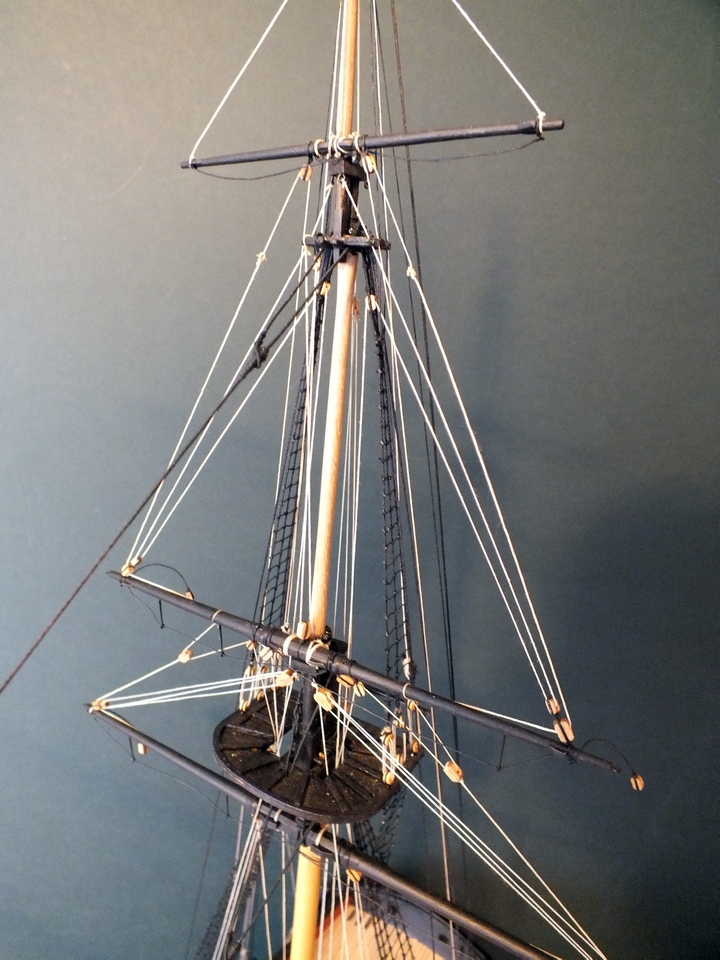
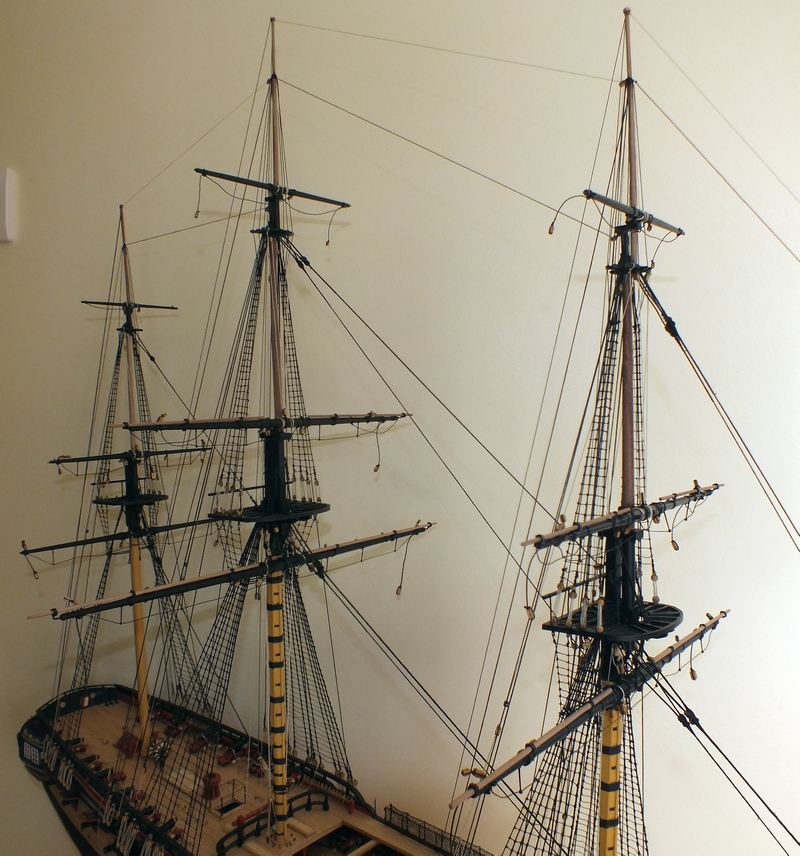
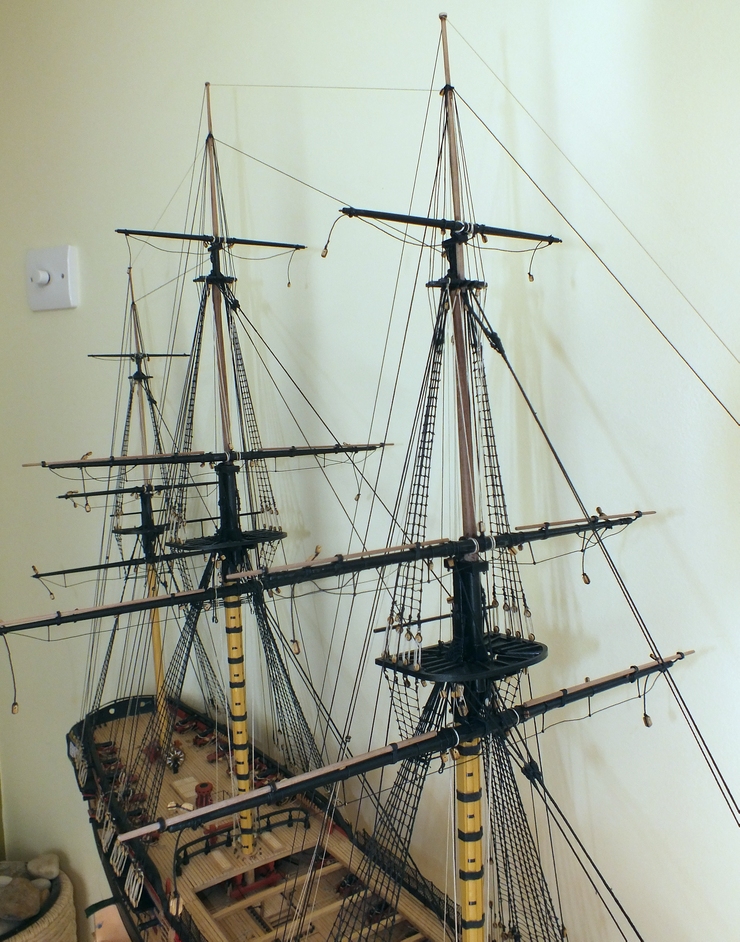
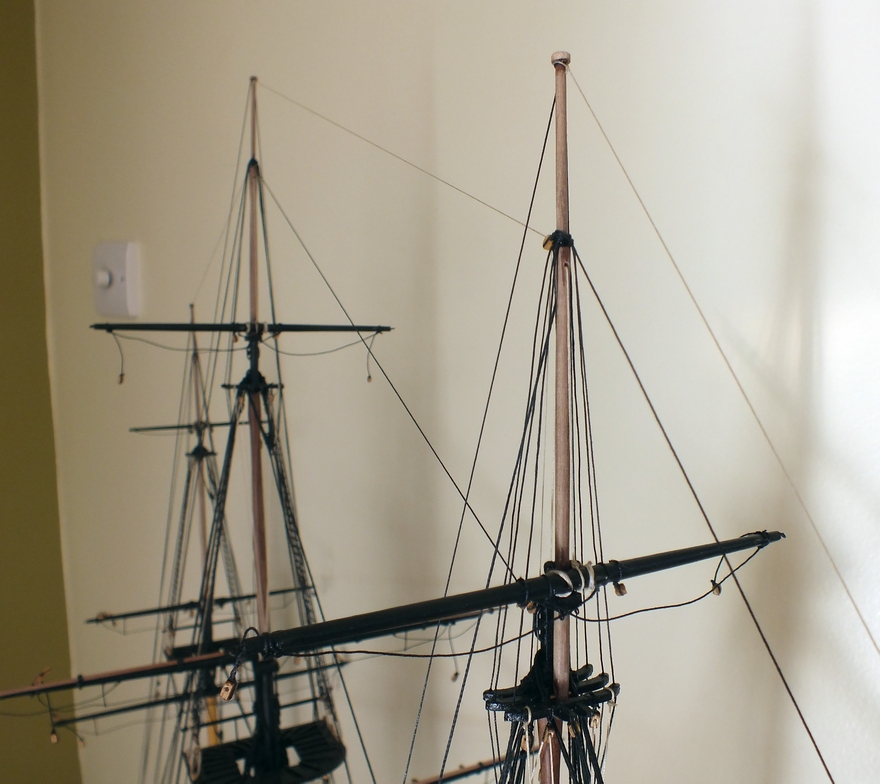
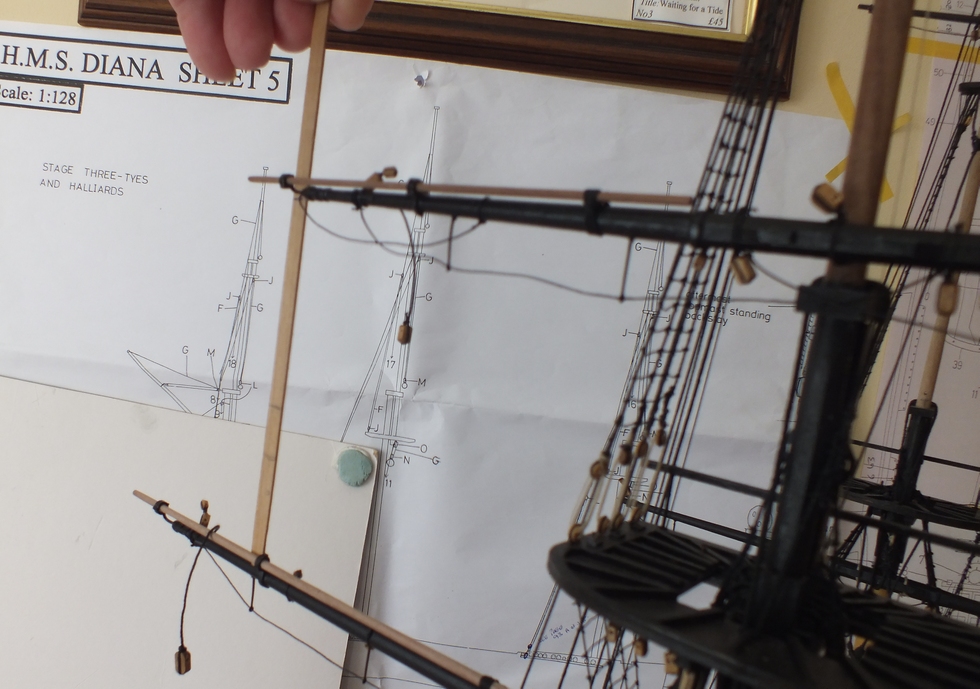
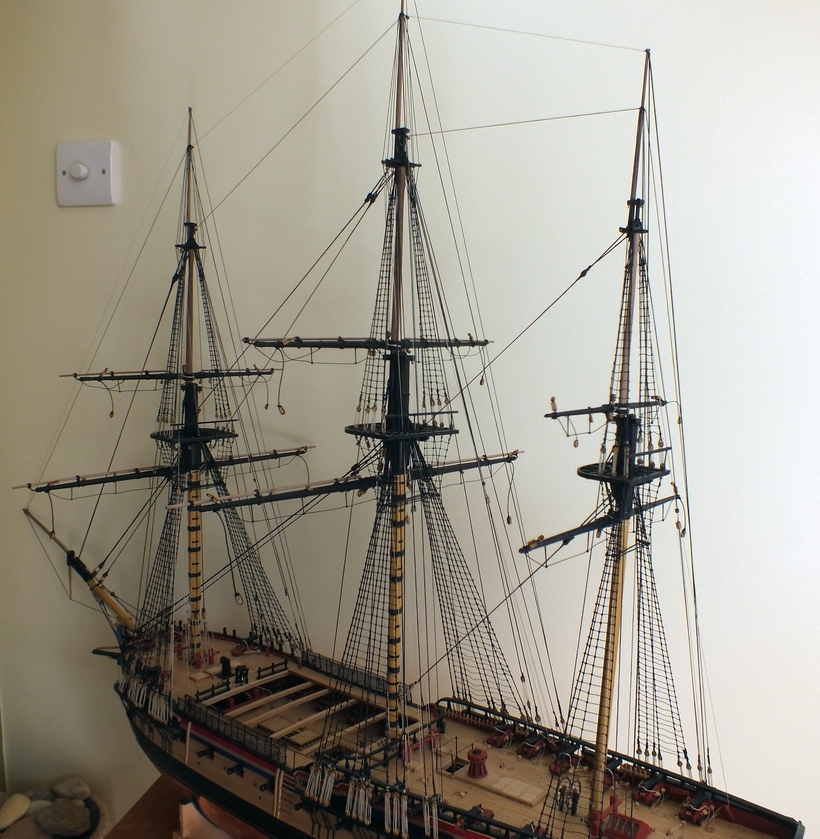
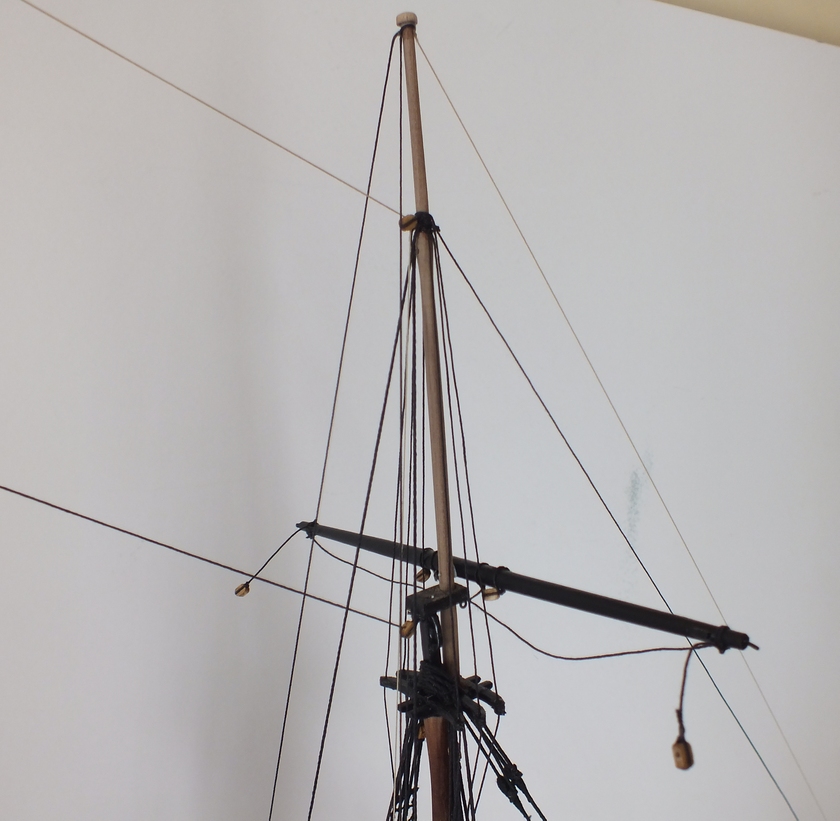
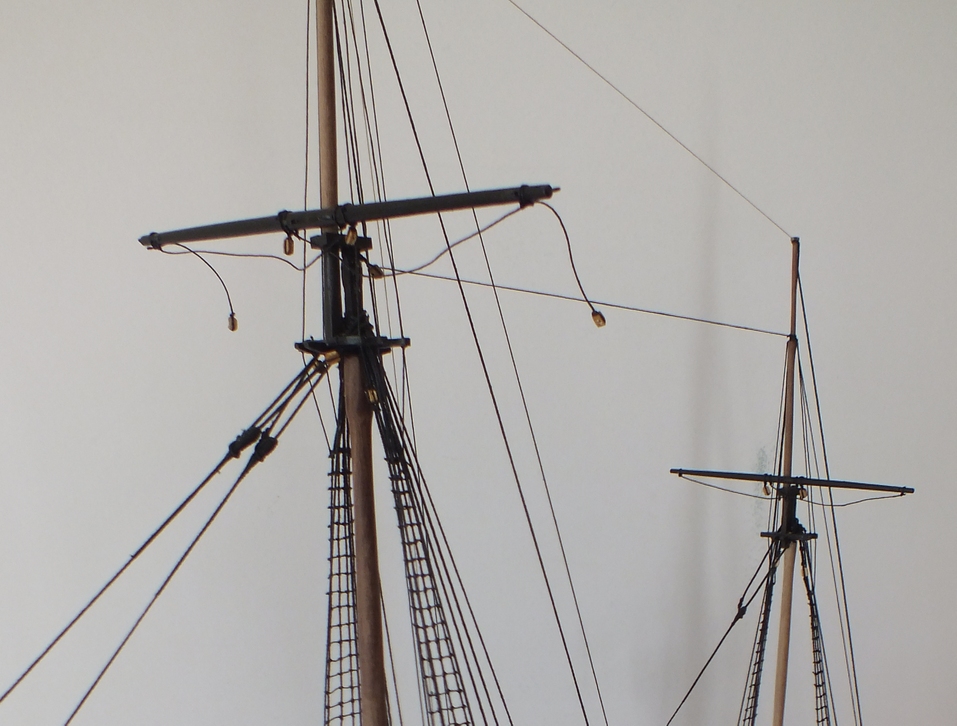
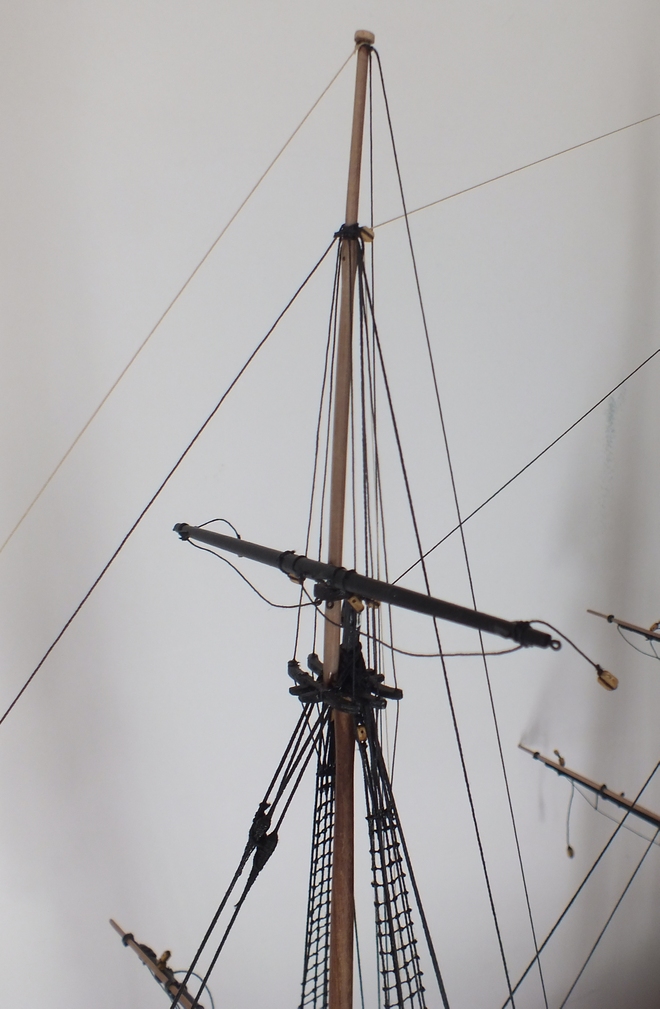
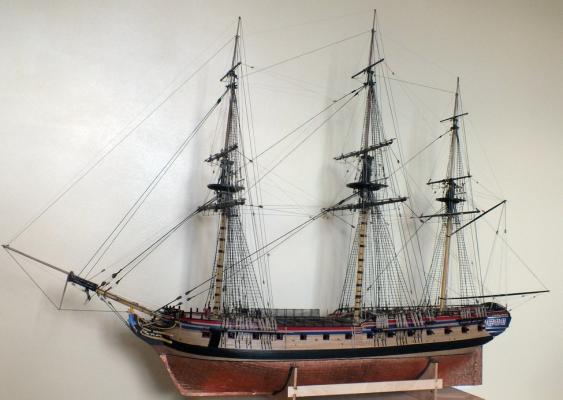
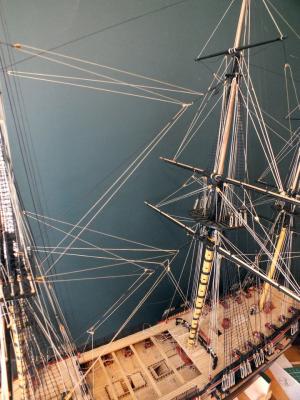
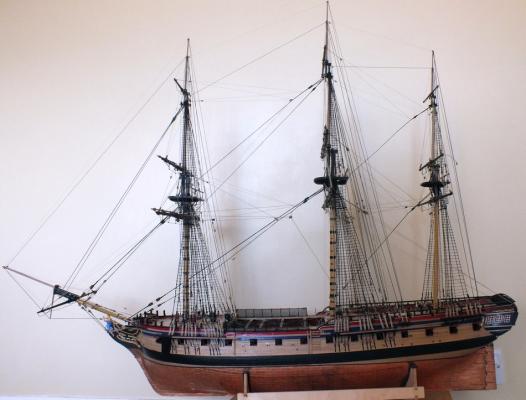
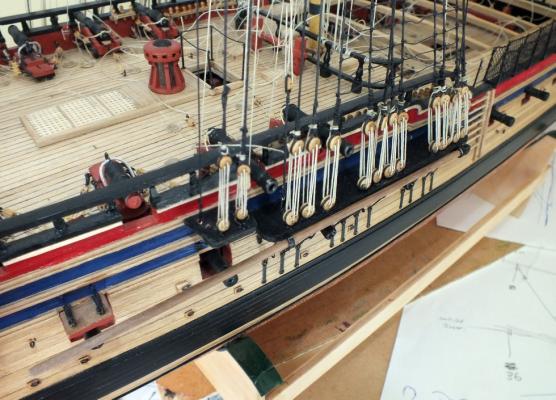
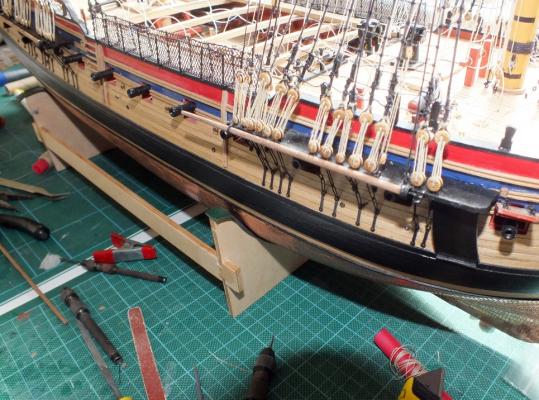
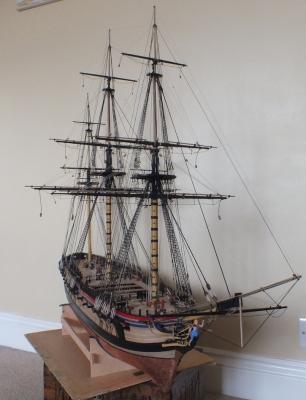
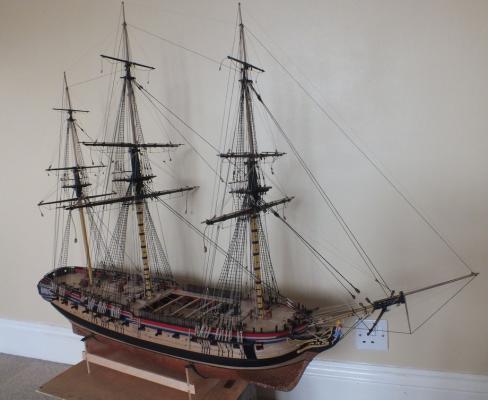
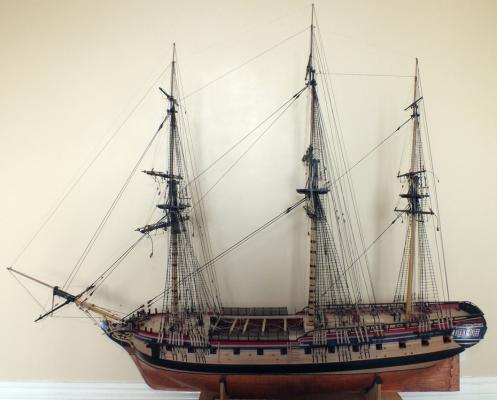
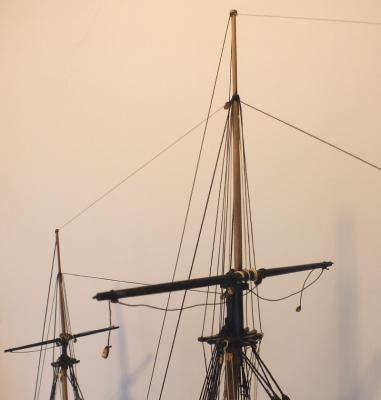
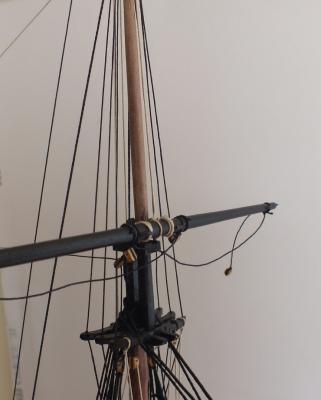
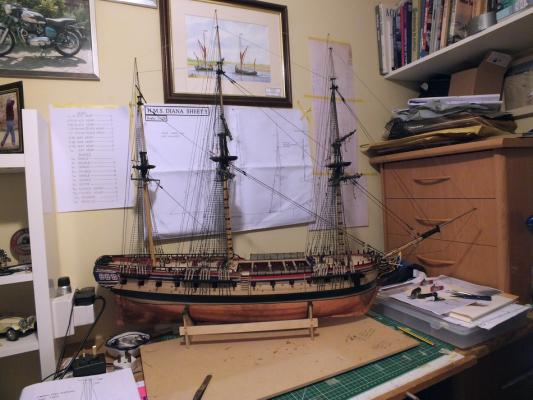
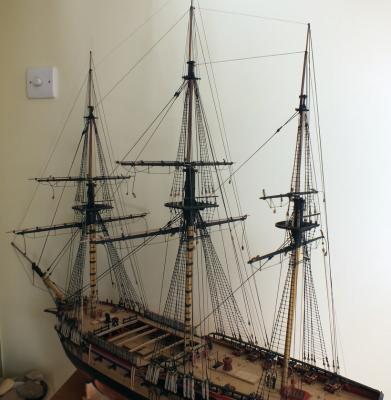
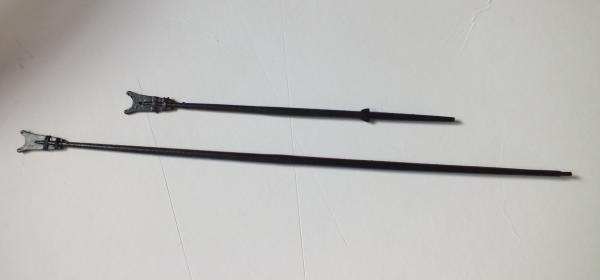
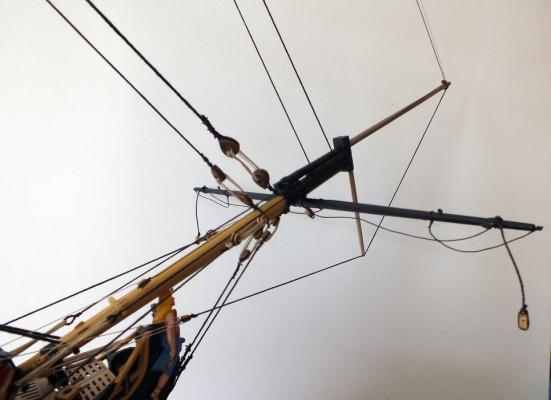
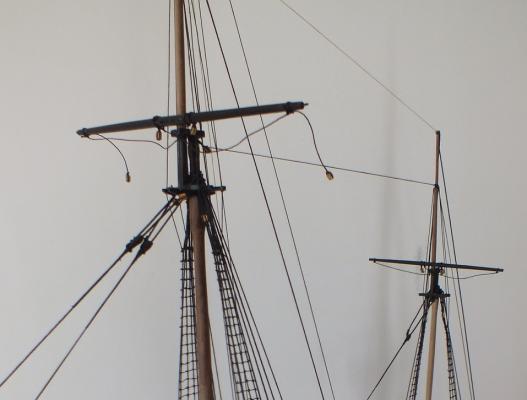
Gaff & Booms Time to add the Spanker boom and the Gaff boom,again the supplied rigging drawings are sketchy and difficult to follow,so I decided to rig the booms as per L Petersons R P S M which is my rigging bible I highly recommend this book which can be purchased for around £25.The booms are now both rigged and the last of the braces which rig into the booms have also been added. One thing that will to be attended to is re-tensioning some of the rigging, but I will do this when the rigging is completed,the only rigging remaining are the tac sheets,and then just the dummy rope coils and a few odds and ends. Next job ships boats or the stand. Diana as she is now starting to look the real deal


- 536 replies
-
- 26
-
-
- diana
- caldercraft
- (and 1 more)
-
Hi David they are about the same as I had, I made a sanding jig a pinned down piece of sandpaper and two wooded 1mm x5mm also pinned down with a gap so you can just slide the planking up and down you can then get a workable edge, and with the plank edges black marked they look good when laided.
-
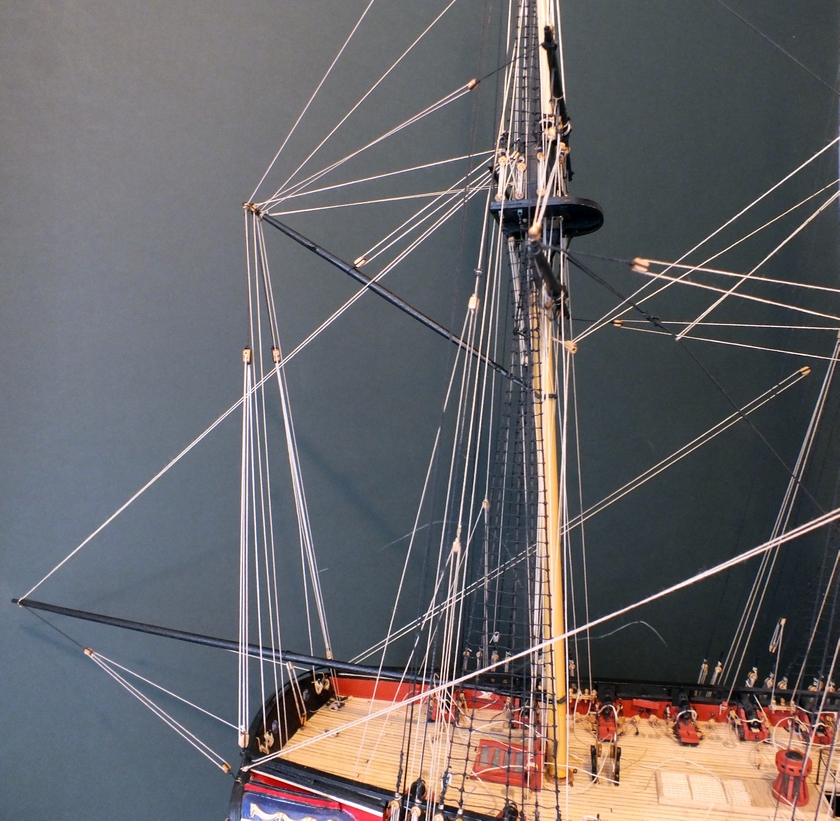
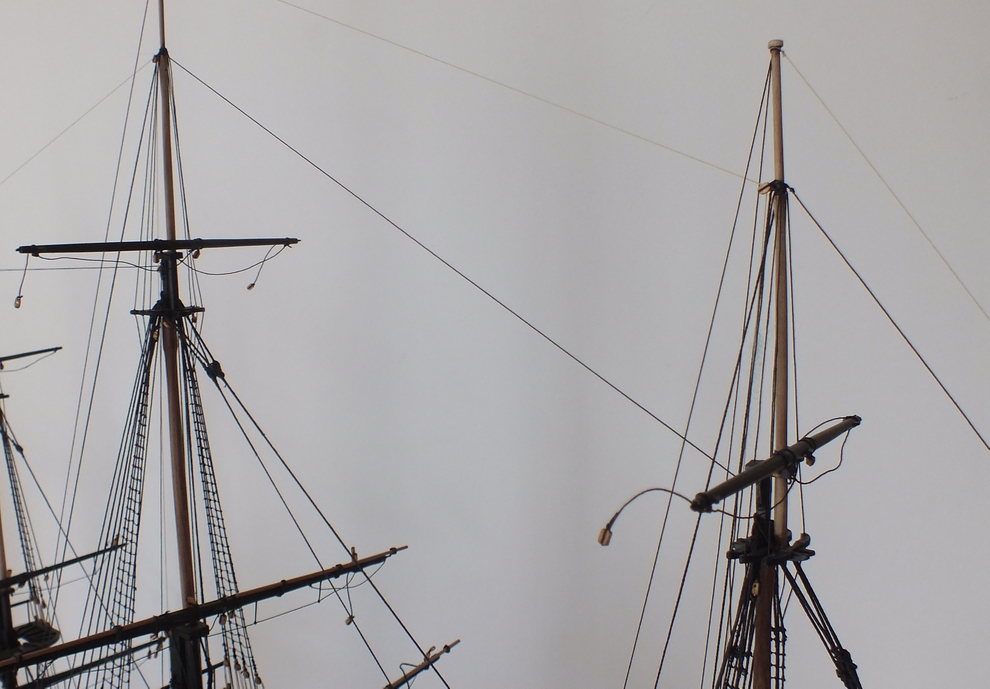
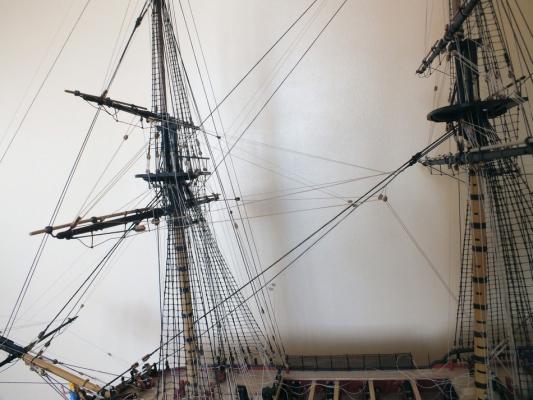
Braces The braces were rigged next the fore main braces were rigged as per Pegasus and R P S M which runs through blocks fixed the the rear of the top not blocks around the lower mast. The rest of the braces other than those from the mizzen rigged to the gaff have also been added.


- 536 replies
-
- 15
-
-
- diana
- caldercraft
- (and 1 more)
-
Hi David Nice to see your start of the kit. It should have cannon ball in it, and yes the deck planks are rubbish and so is the dowel, I replaced both, the only kit dowel used was on the lower masts the rest was replaced with walnut, some castings needed some work, I did find Jotica replaced some poor items and some castings missing without any trouble. Look forward to Diana`s progress, two and a half two three years is a reasonable build time I will be in that time frame myself most rigging done now.
-
hi Tim Just found this build great detail and building guide after my HMS Diana is finished my next build is a ww2 Hunt class destroyer look forward to more updates.
-
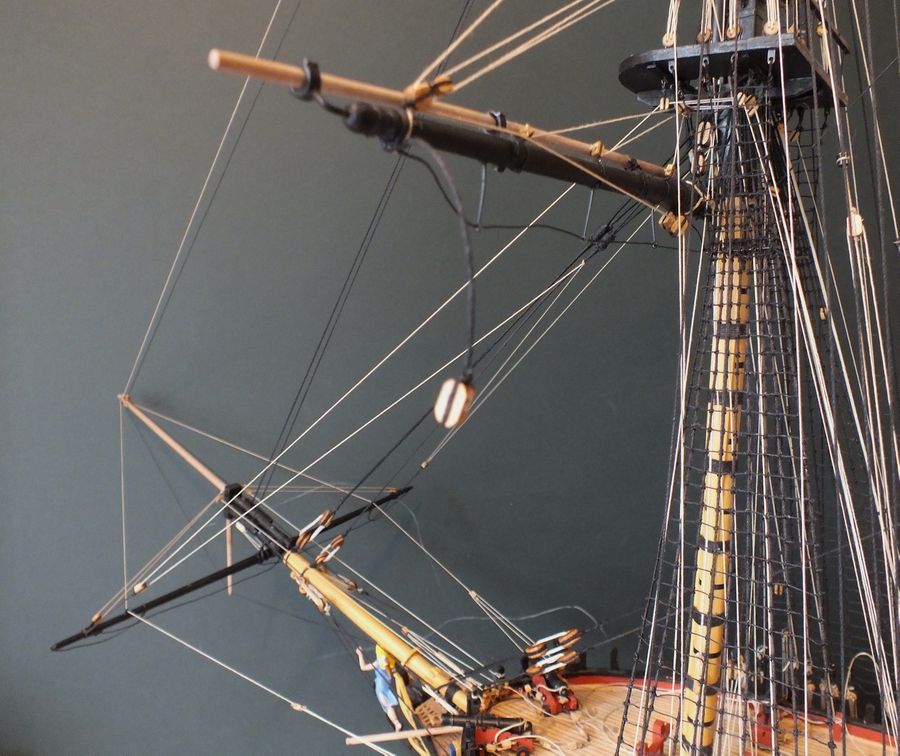
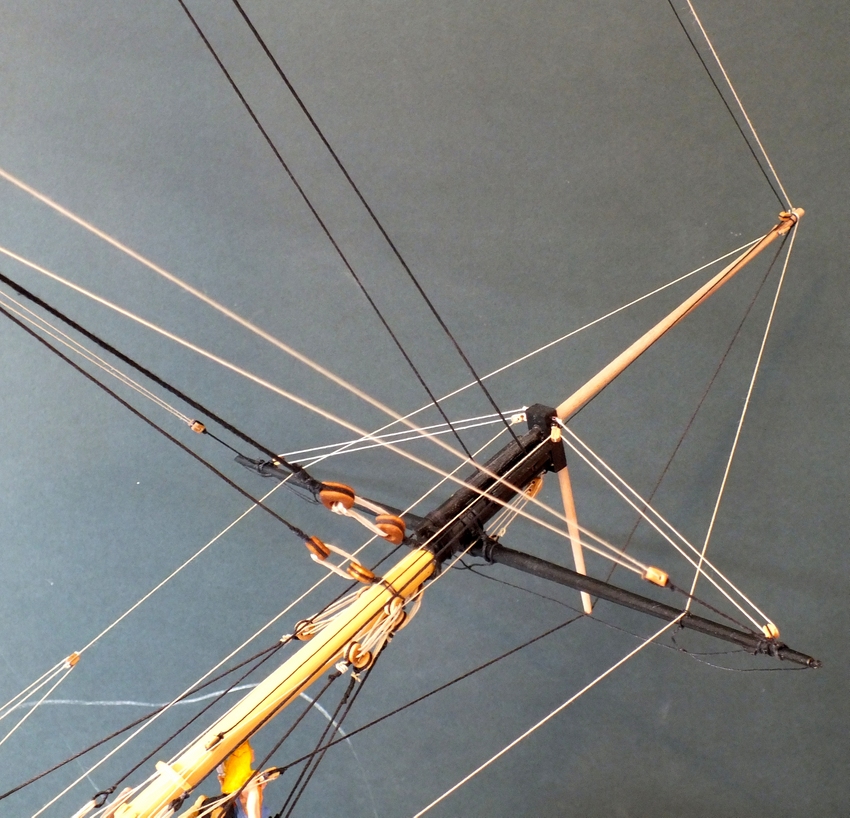
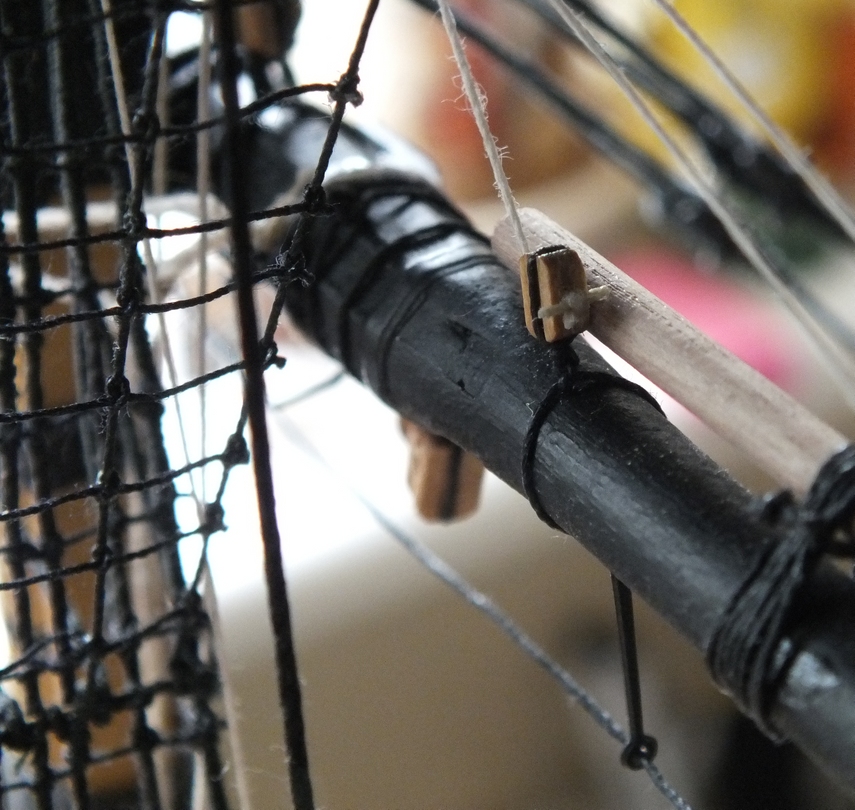
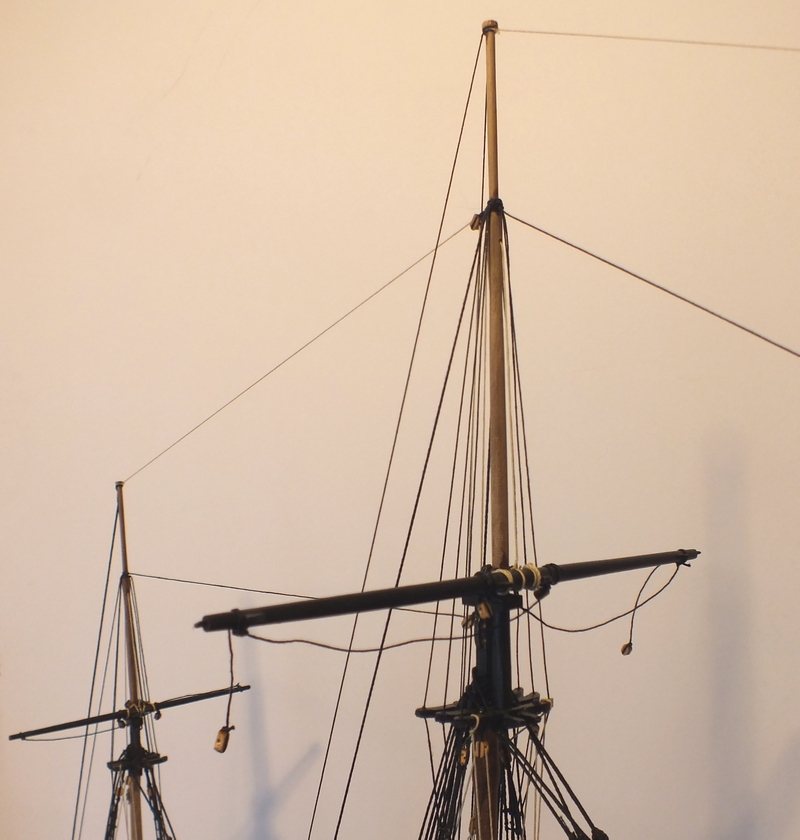
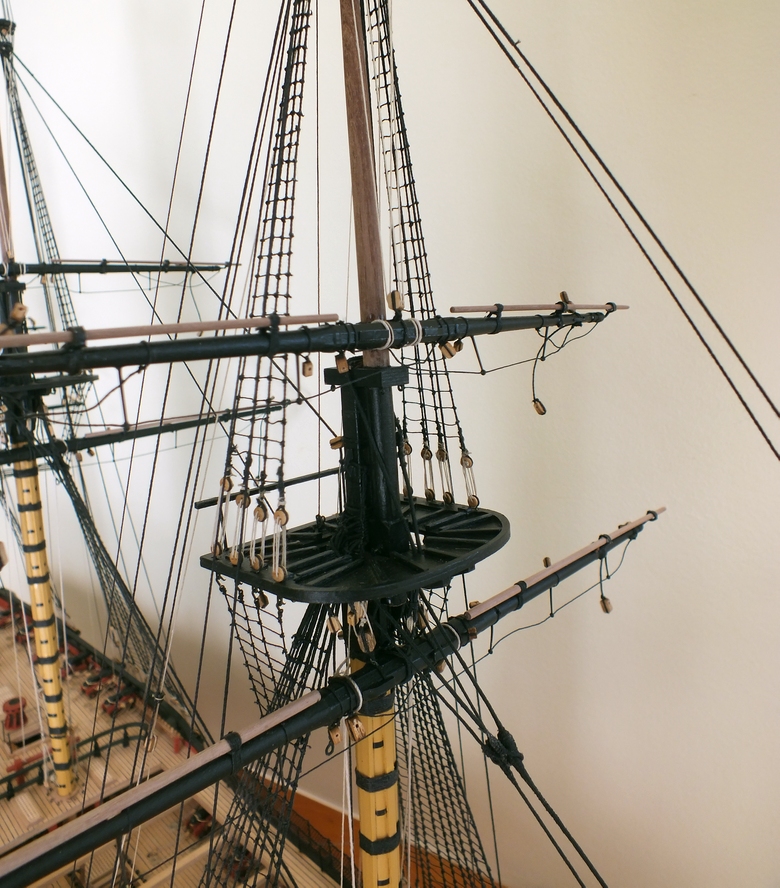
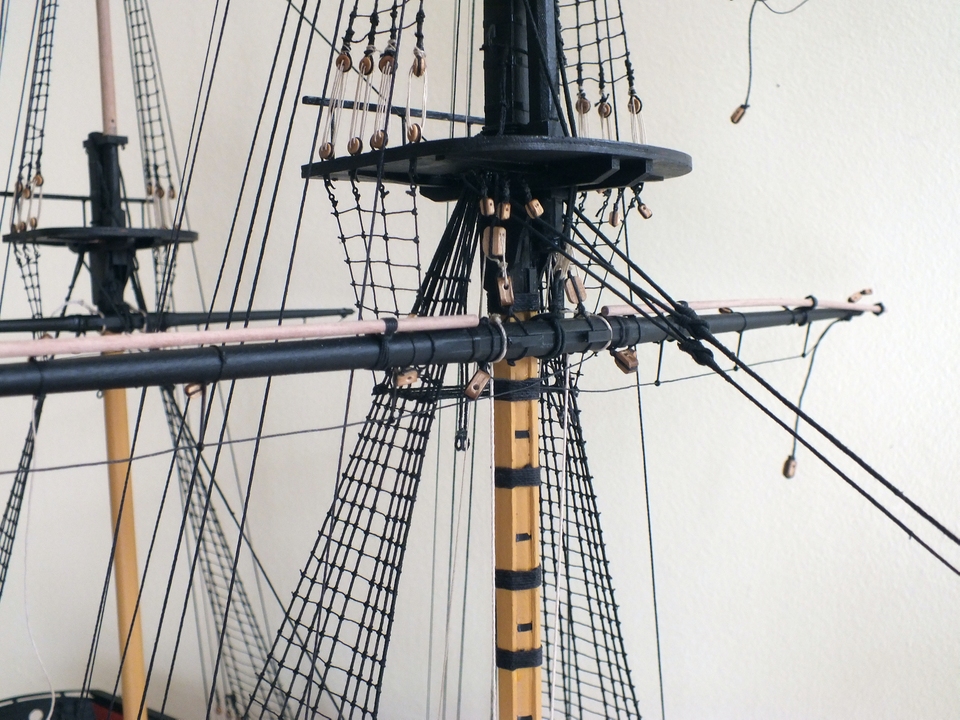
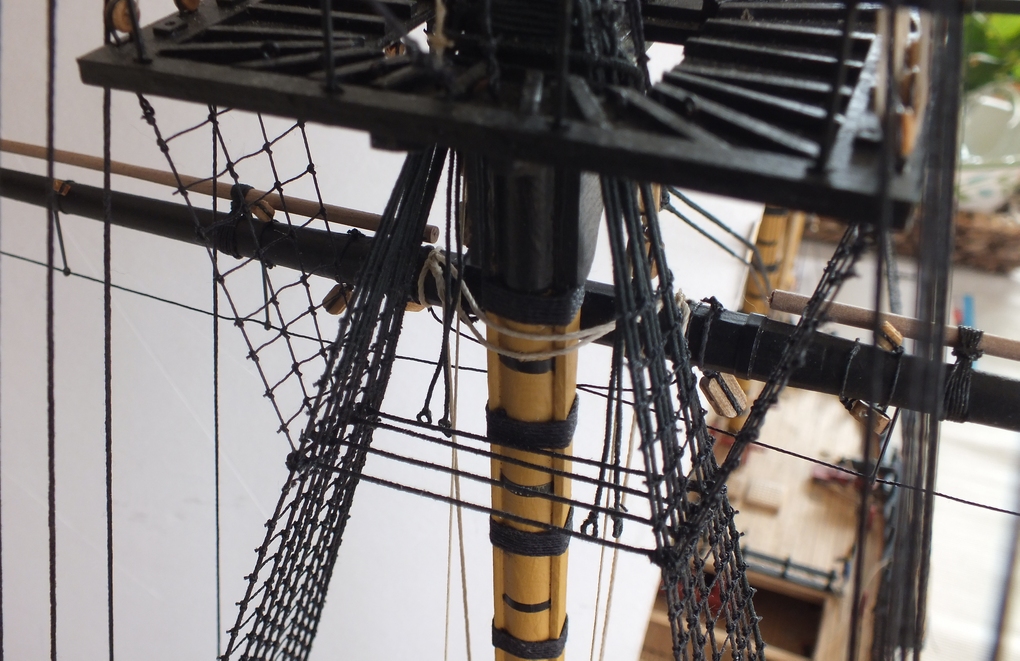
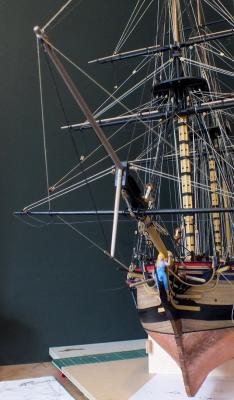
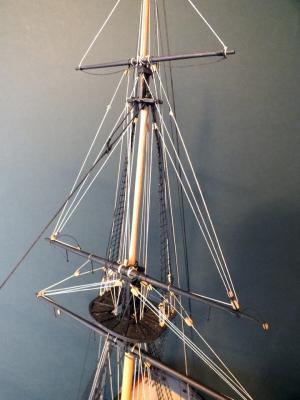
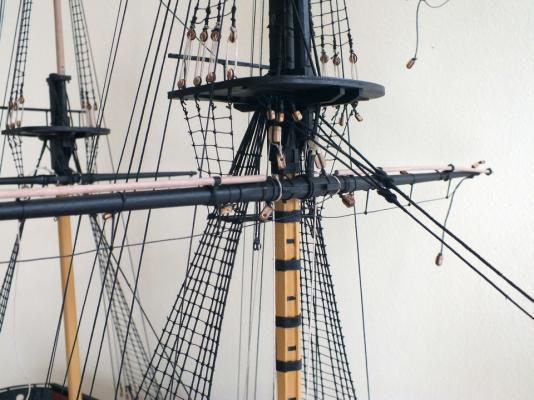
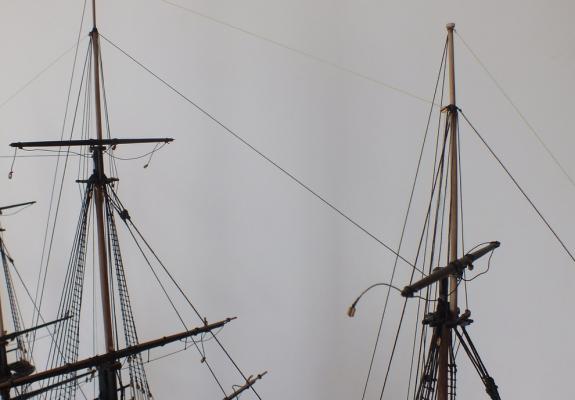
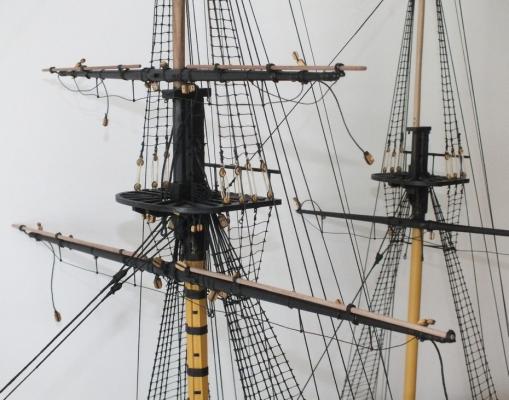
Lower stun sail booms One other outstanding job was to make and add the lower stun sail booms, the plans and instructions are rather sketchy on these, so a look at the box photos sorted out the main mast ones,but it does not show them fitted to the fore mast but they must have been fitted and a look in R P S M shows them hooked into the hull,the kit supplies enough brackets for four booms so I just lined up the fore mast ones with the yard, and added them the same as the main mast one.

- 536 replies
-
- 15
-
-
- diana
- caldercraft
- (and 1 more)
-
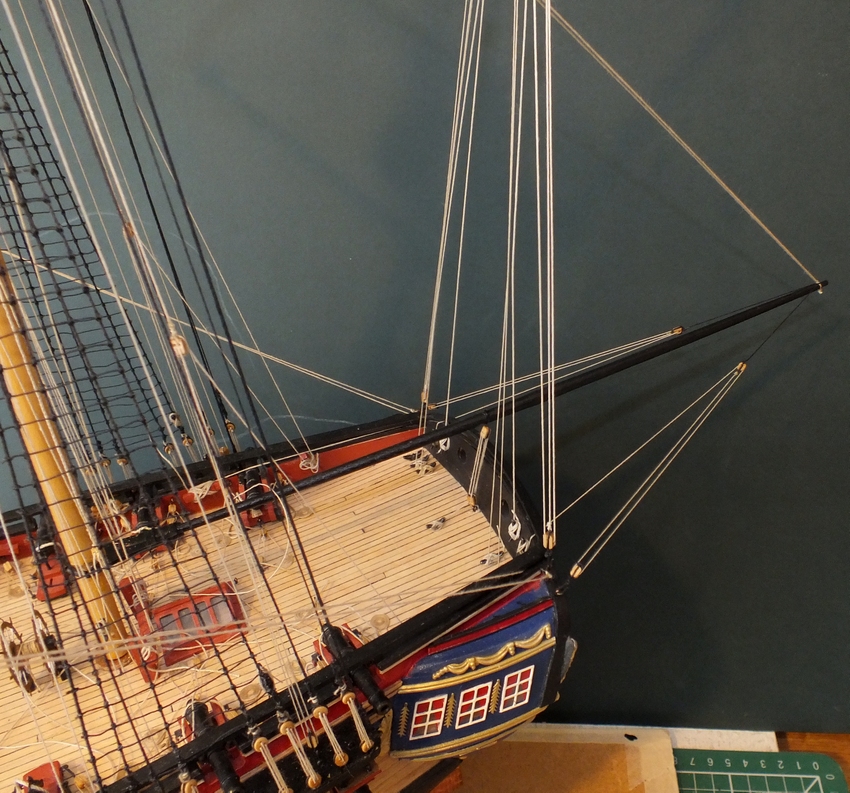
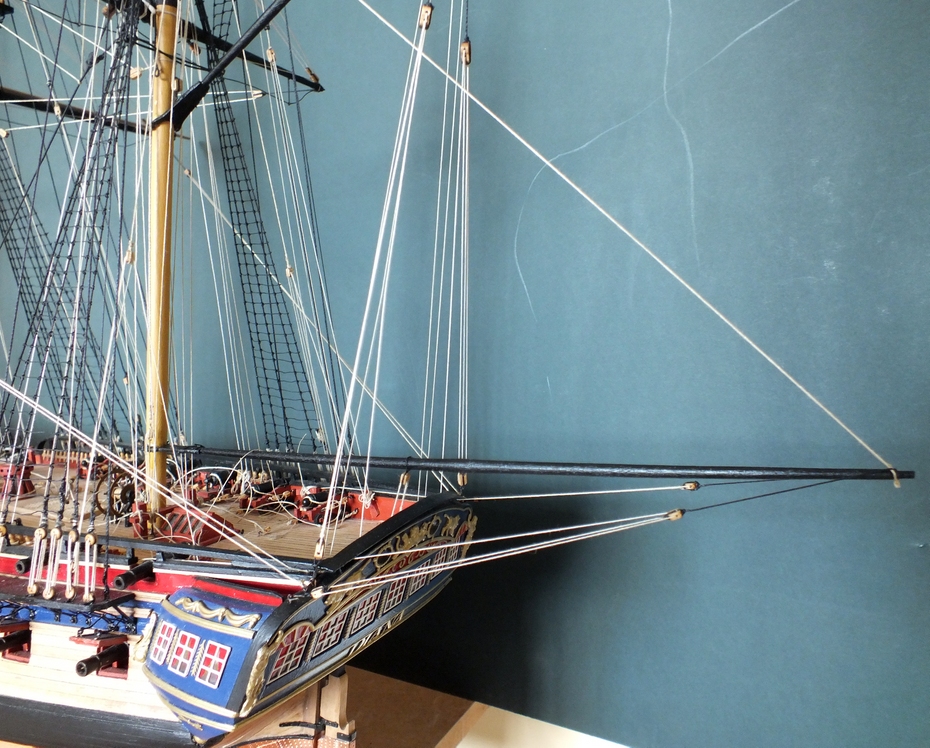
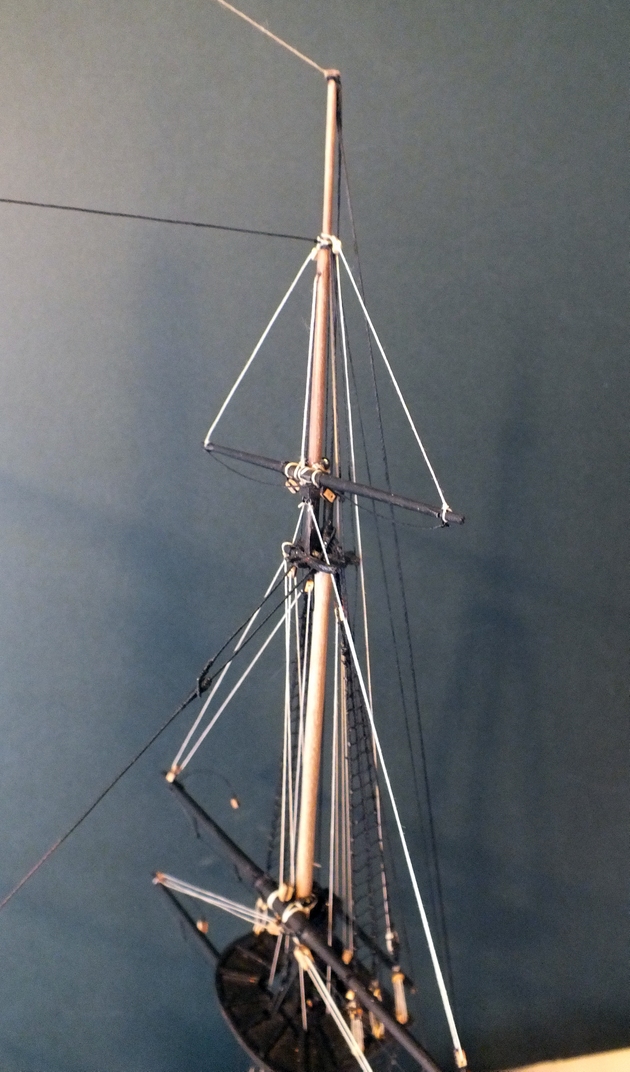
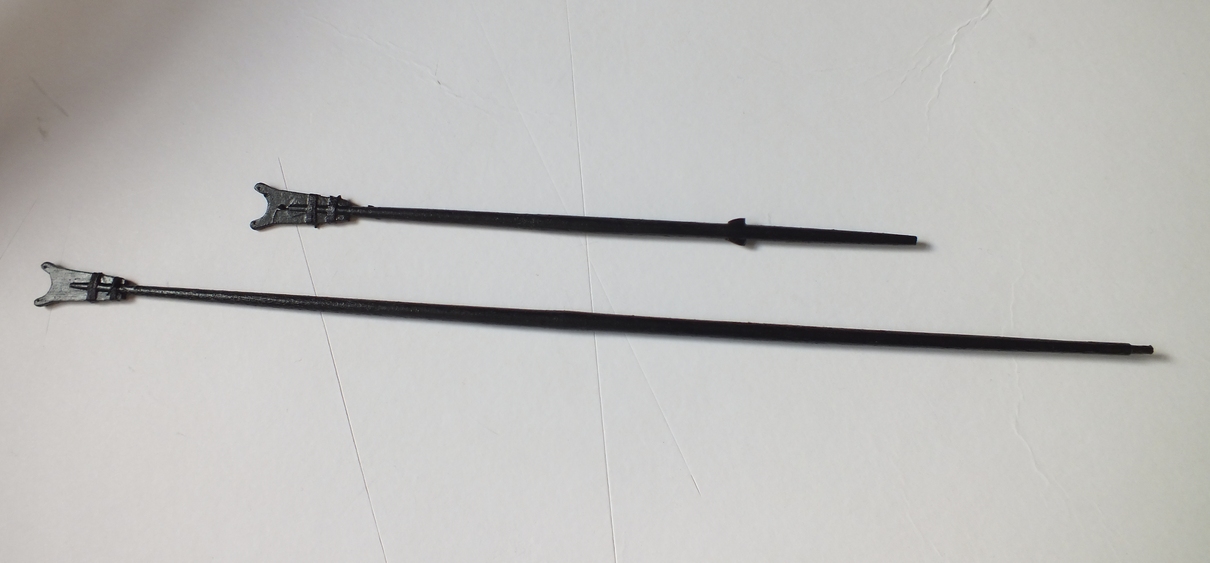
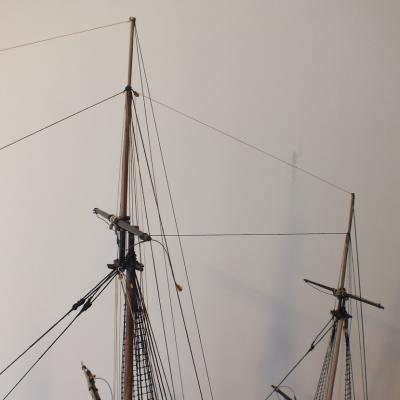
Spritsail Yard I decided the next job would be to fit and rig the spritsail yard,this has now been completed with photos below. My next job will be to add the fore ,main and mizzen braces, again leaving the gaffs and the the tac sheets for access, also at some point soon I will make up the ships boats,most likely after the braces.

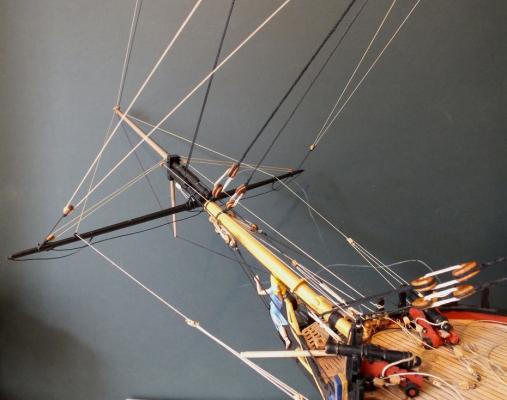


- 536 replies
-
- 15
-
-
- diana
- caldercraft
- (and 1 more)
-
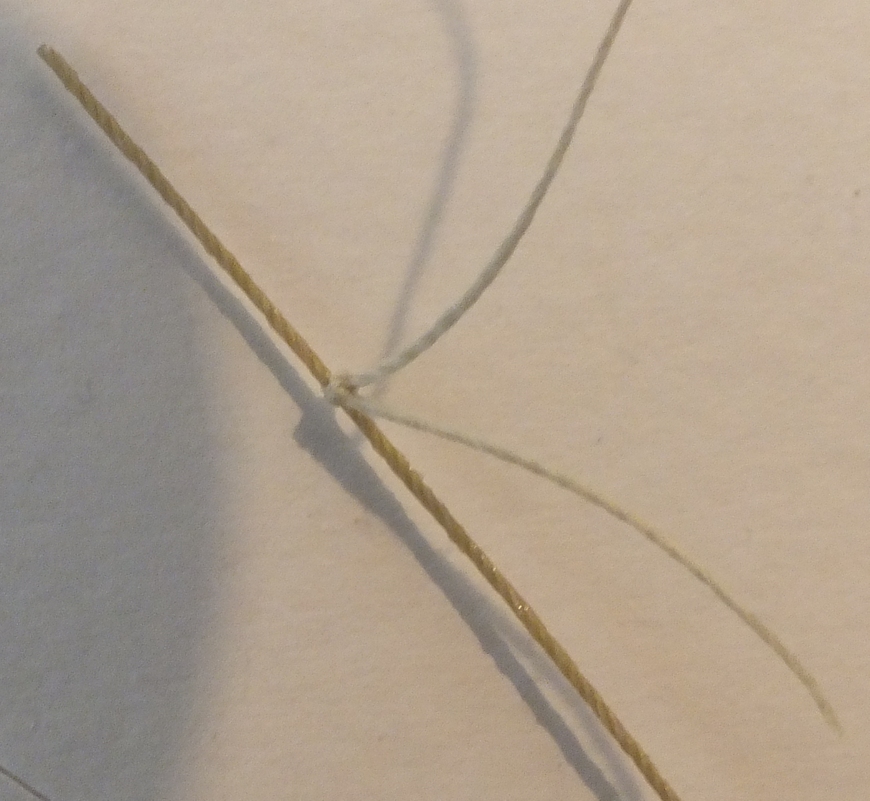
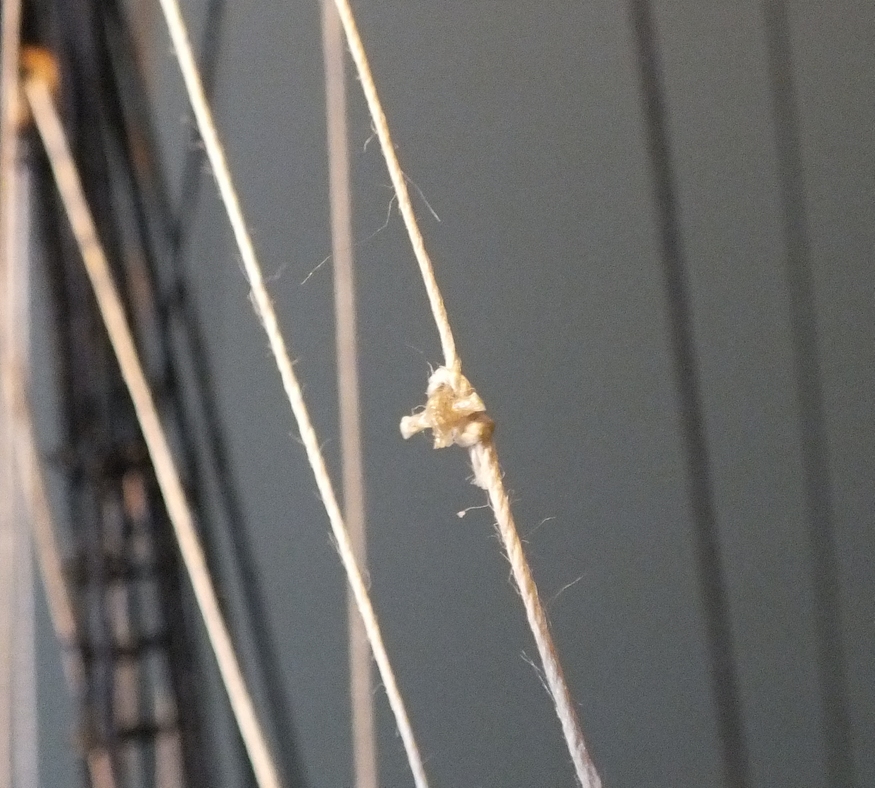
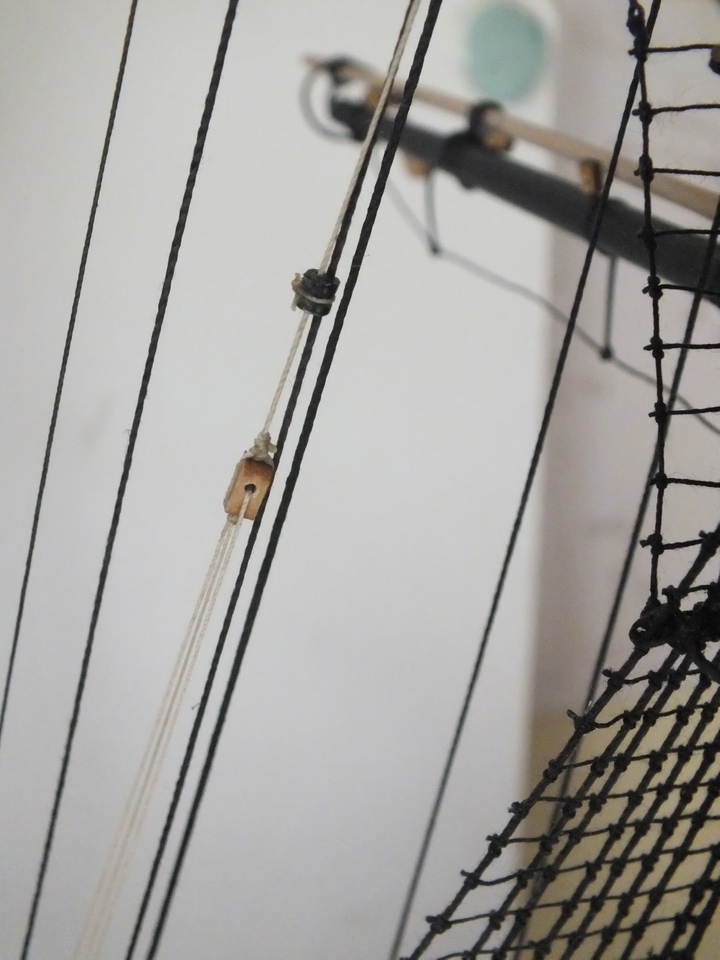
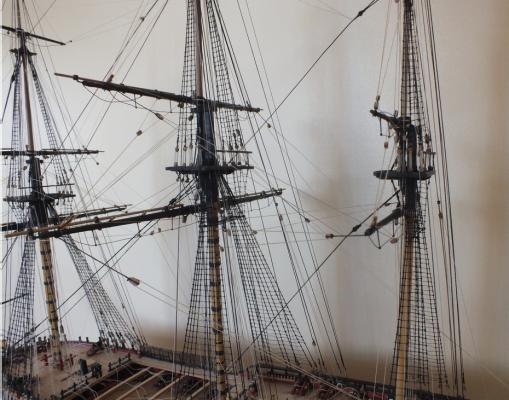
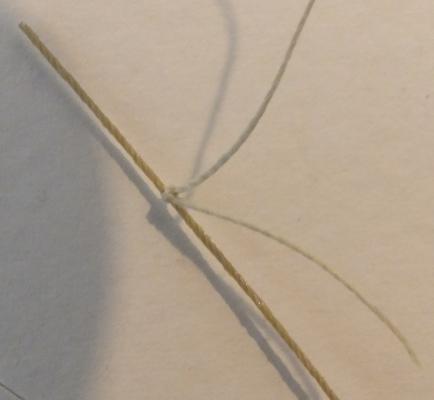
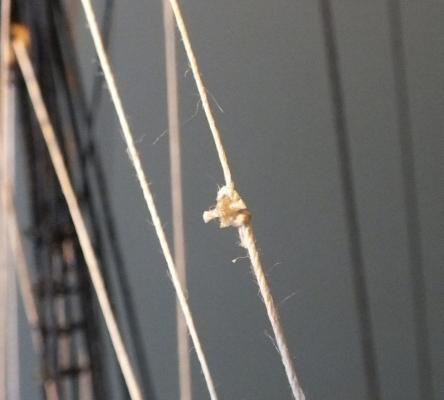
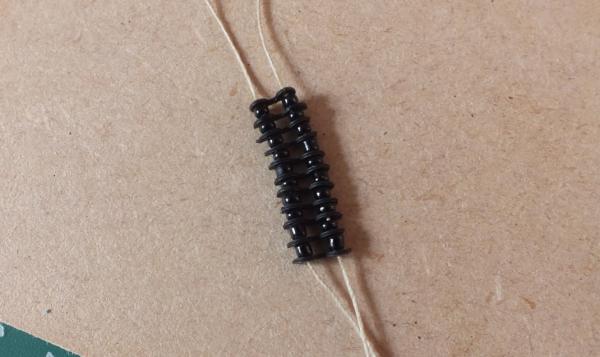
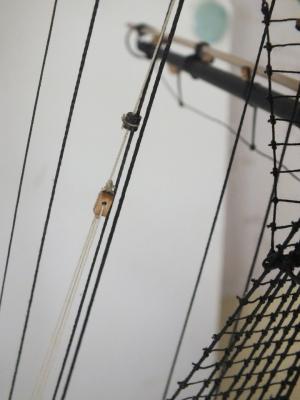
Progress has been a bit slow mainly due to having a bout of flu which laid me up for over two weeks. The first photos show the tac toggles some start at a block and some go through a rope loop. The next part of the rigging was to add the leechlines and the buntlines to the fore & main yards and the crossjack,I then added the cluelines and sheets to all three masts,I am not adding the tac sheets for the moment to give access, the next decision, is wether to add the braces before the gaffs and the spritsail yard are fitted as some braces are rigged to the gaffs its is still a mater of turning space. Tac toggle in the making Toggle through rope loop Toggle through a block Fore main yard Main yard Main & Mizzen Mizzen


- 536 replies
-
- 15
-
-
- diana
- caldercraft
- (and 1 more)
-
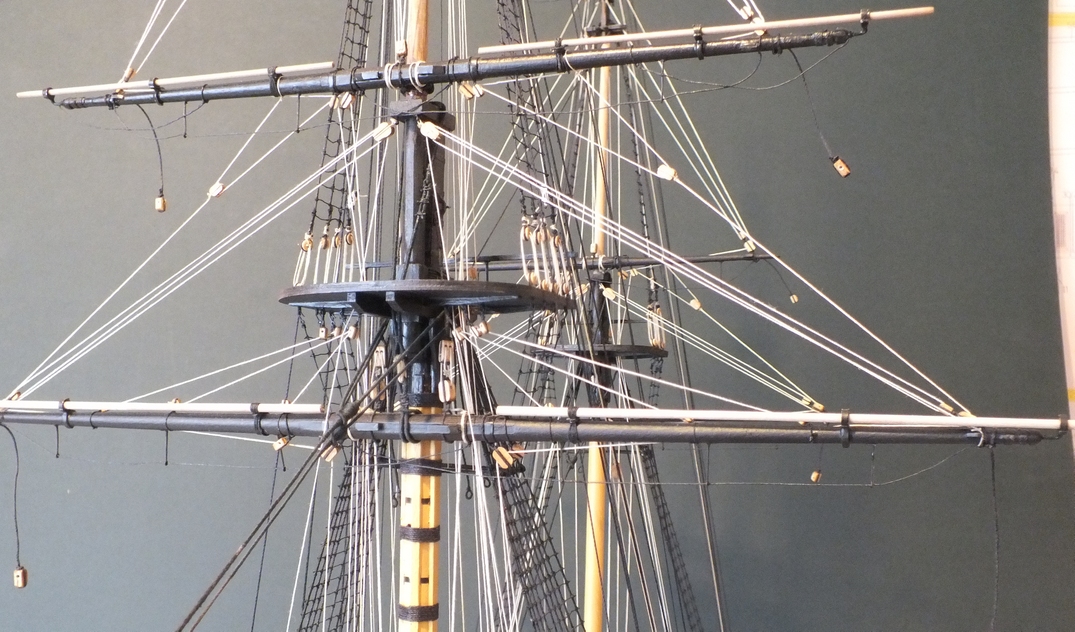
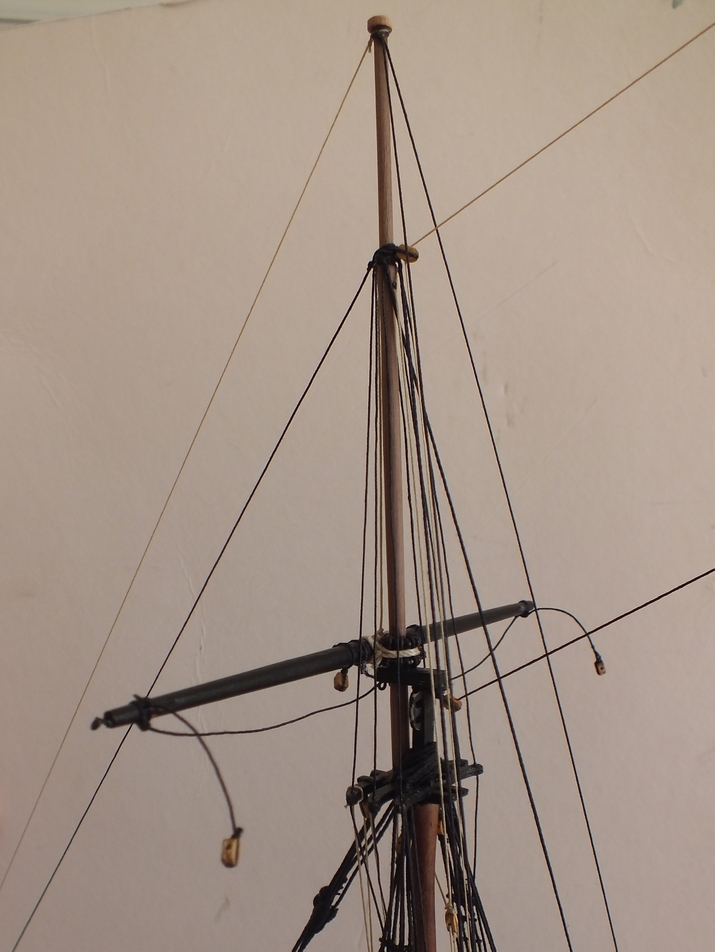
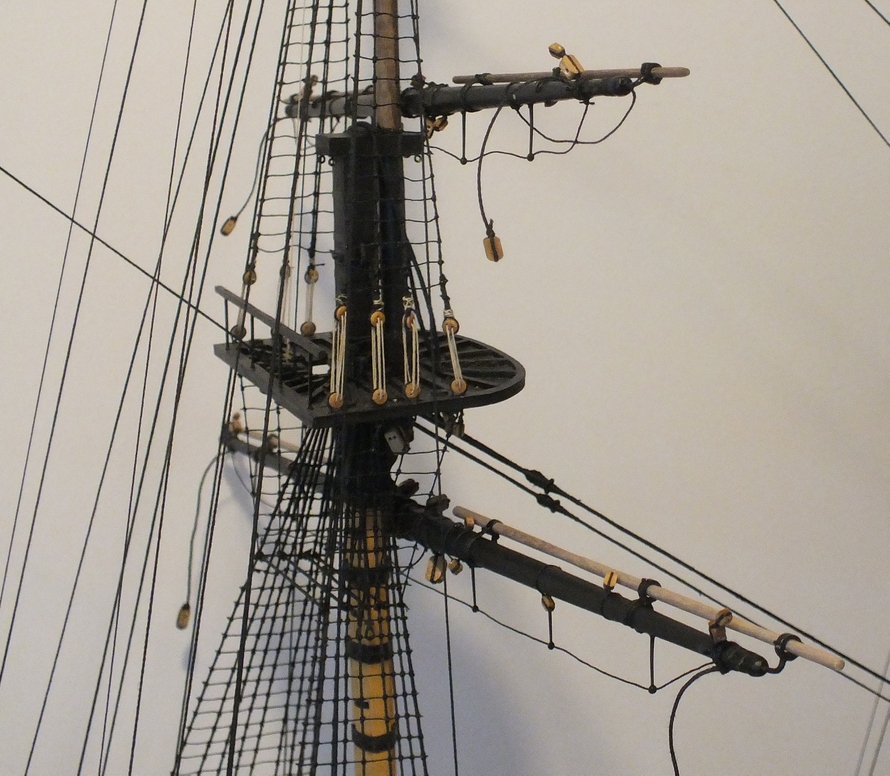
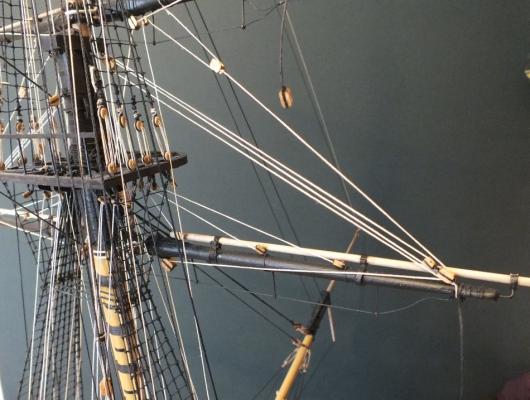
Just a small update The next rigging job to be completed has been all the yard lifts,the topgallant lifts were belayed to the cleats tied to the shrouds. Mizzen lift Main & mizzen lifts Main yard lift

- 536 replies
-
- 12
-
-
- diana
- caldercraft
- (and 1 more)
-
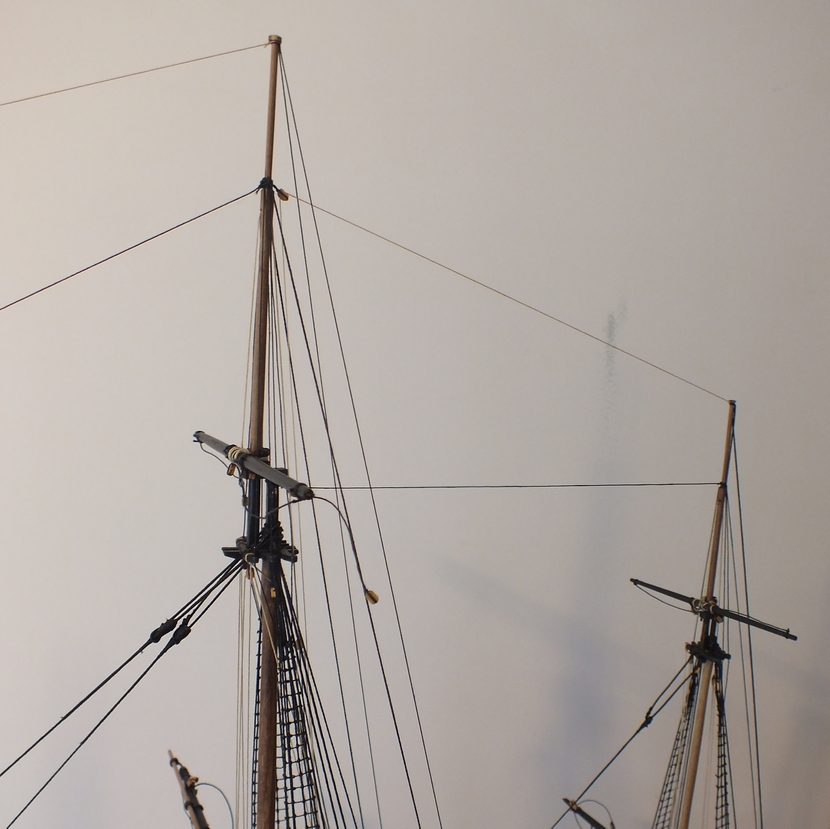
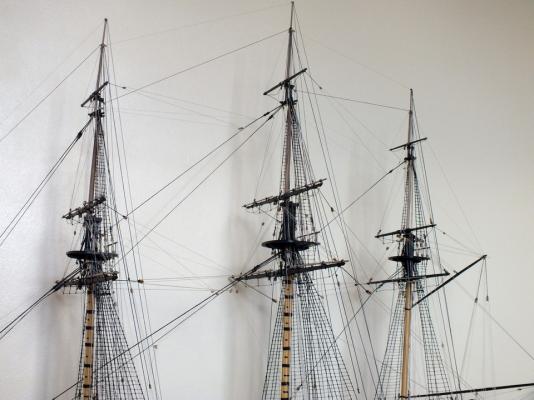
Thanks for the many likes and positive comments, the photos are getting harder now the rigging is taking place, taking photos of the rigging is more problematical, close-ups are ok but when showing a rigging run, it is hard to get all the run in, and in the longer shots the runs are hard to see, and not just looking like mass of ropes,but as the photos seem popular I will try to keep them coming. Part 3 Lastly the topgallant yards have been fitted to the mast in the same way as the topsail yards. The Parallels definitely go on better when tacked to the mast.


- 536 replies
-
- 8
-
-
- diana
- caldercraft
- (and 1 more)
-
Jason Another Diana problem sorted I was lucky as I mentioned, in my log, that I saw the problem as well, and as in my log remarked the port positions before I cut them and hope they are in about the right place, you have described problem and the solution better than I did, as in the end I went slightly towards what looks right. Just wait until you get to the rigging plans !!! I am spending a lot of time looking at Pegasus and the Pegasus rigging plans.
-
They must have changed the guns when I built my Lady Nelson the guns were brass and wooden build up trucks, sounds like plastic guns are a step backwards in quality ???.
-
Hi Bryan All our builds are learning curves and if they are not fun we would not build our second or third model.
-
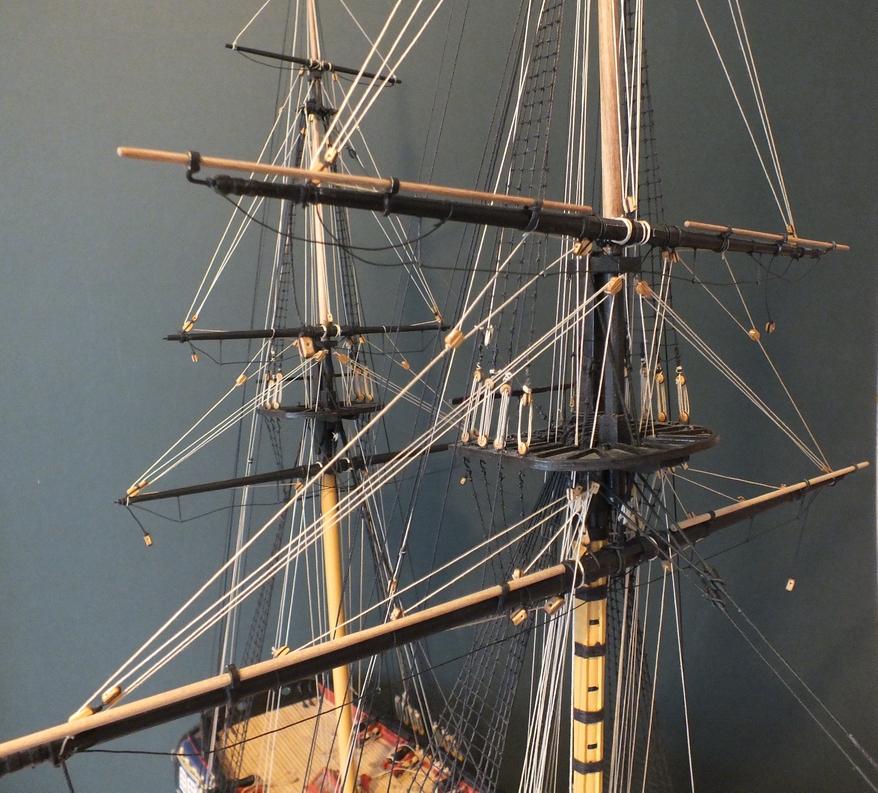
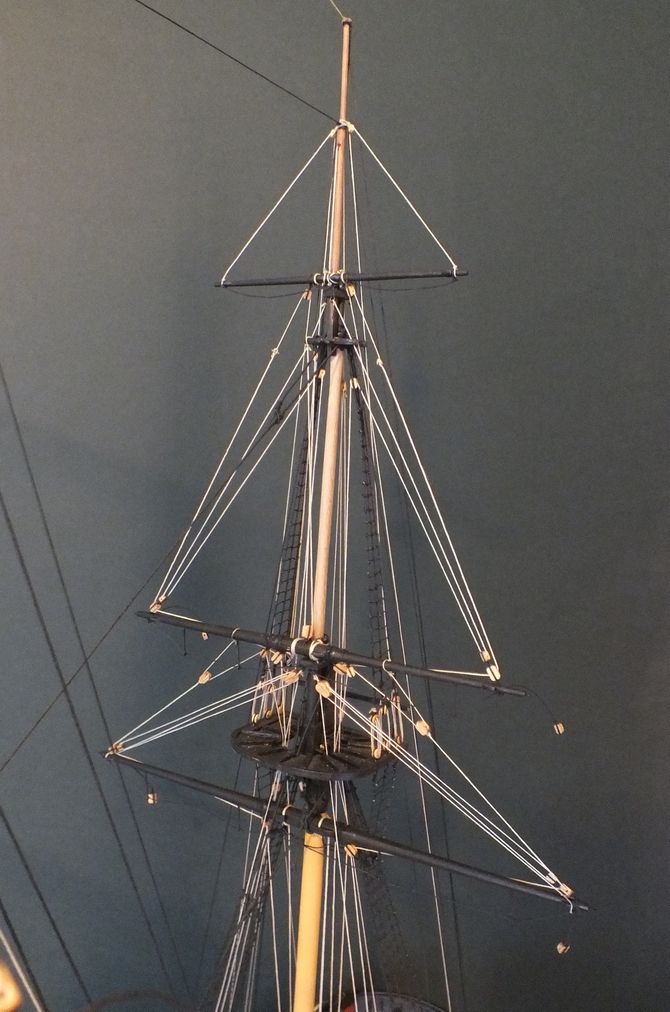
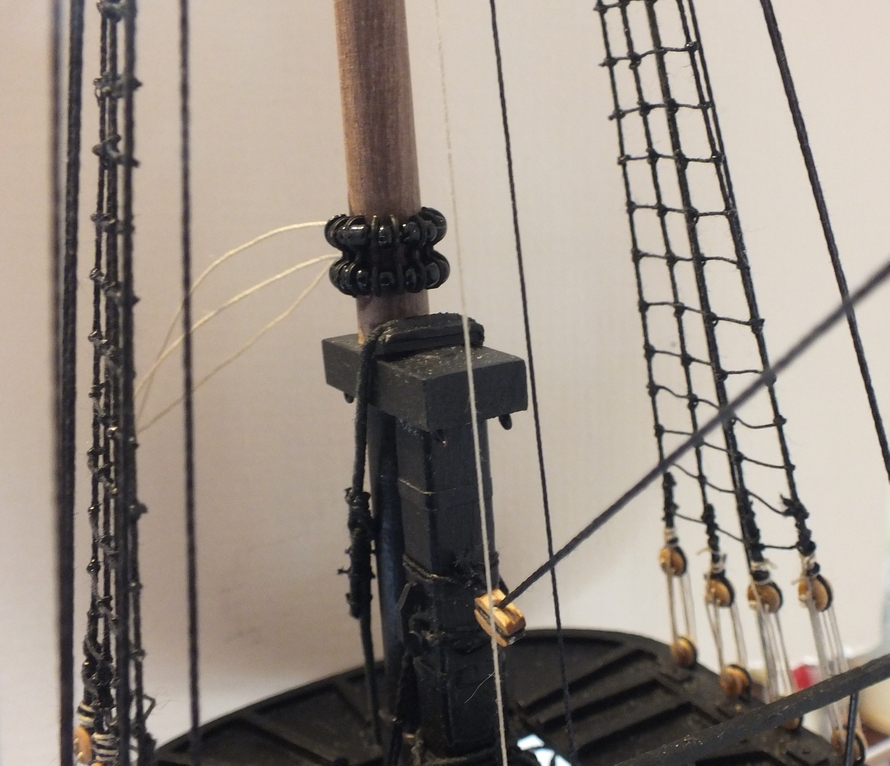
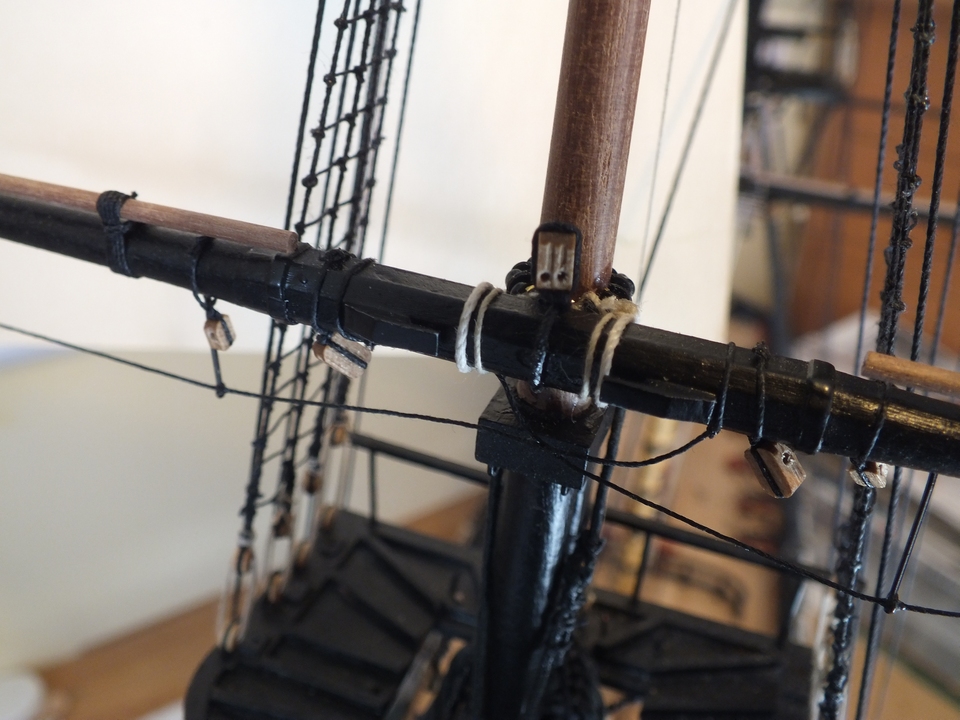
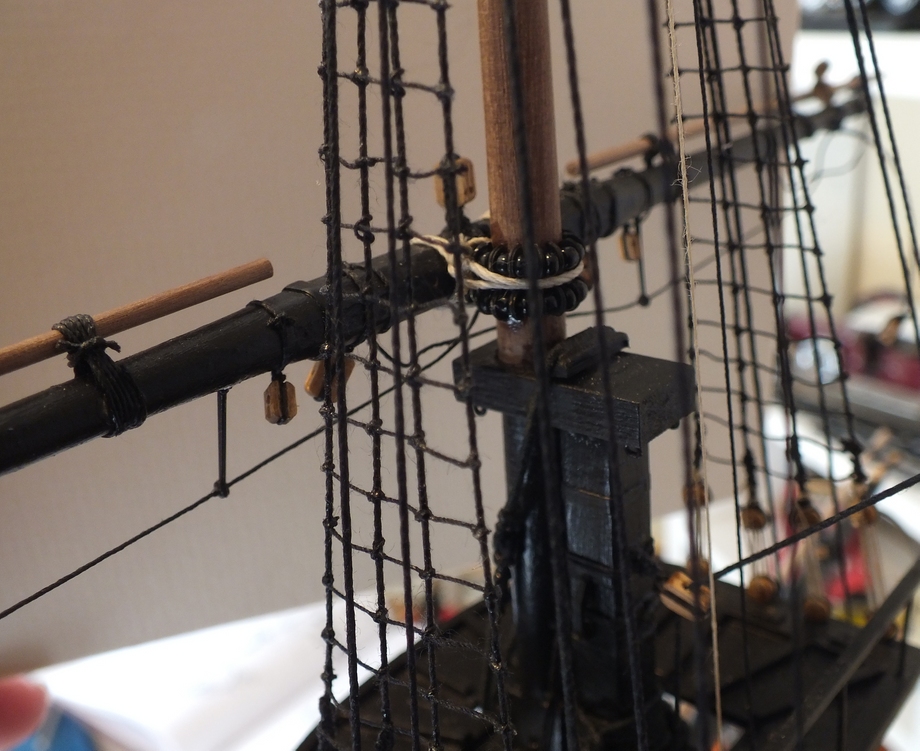
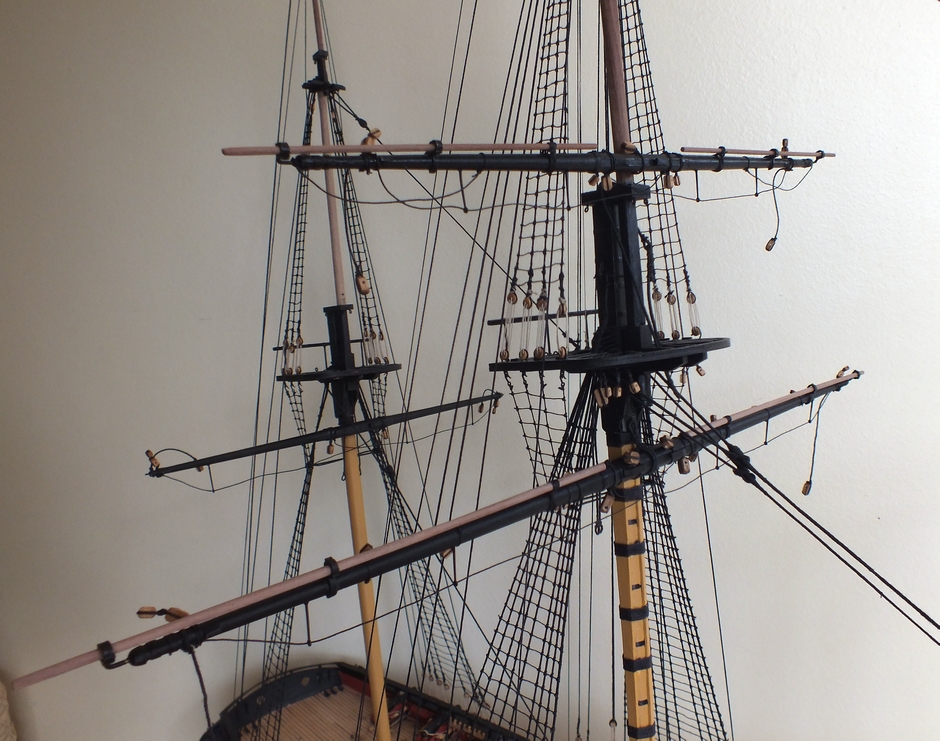
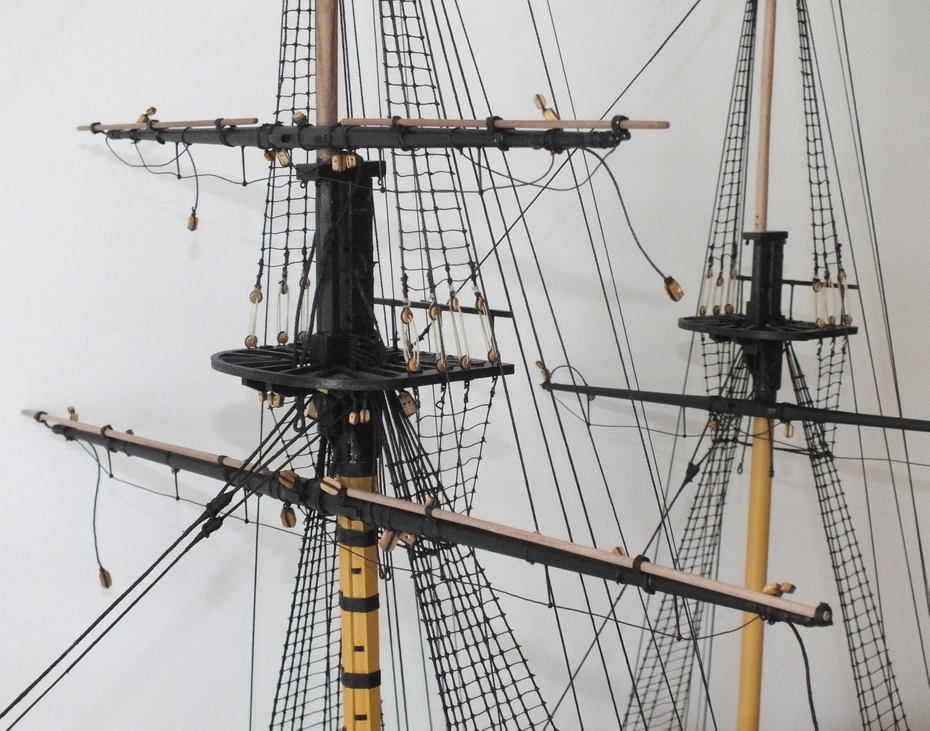
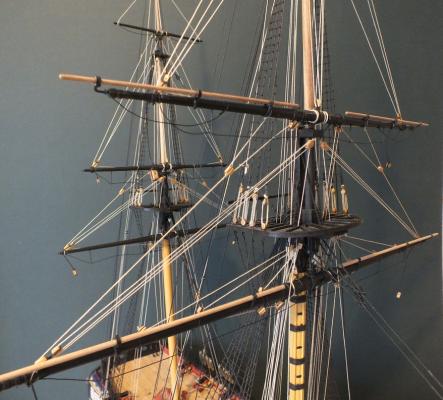
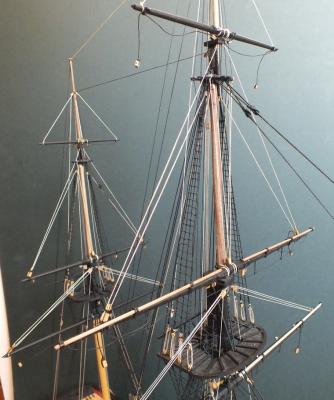
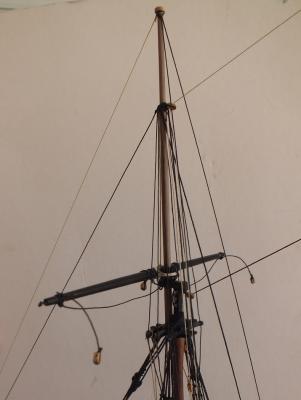
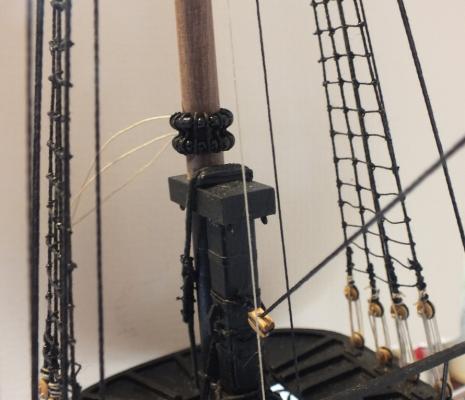
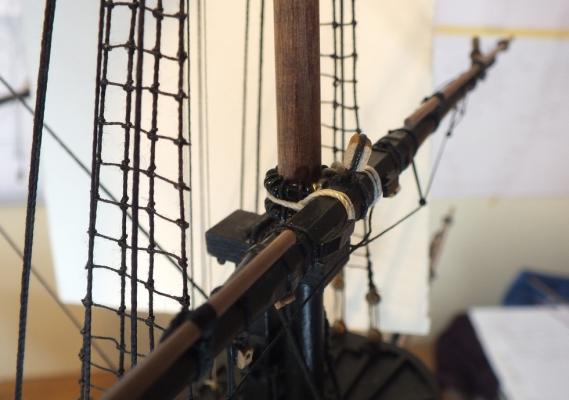
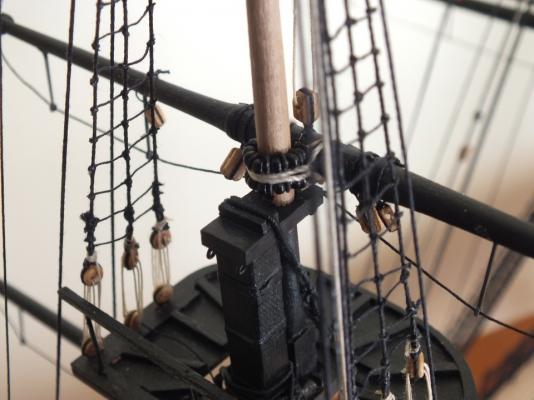
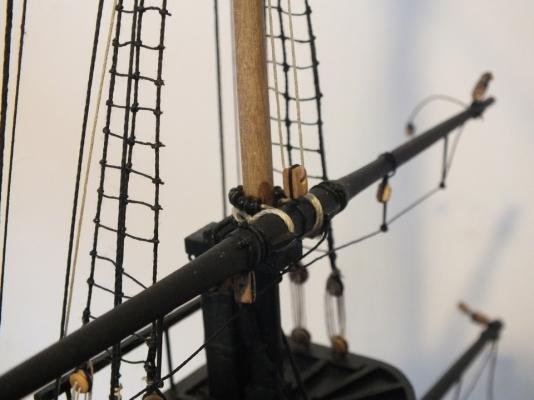
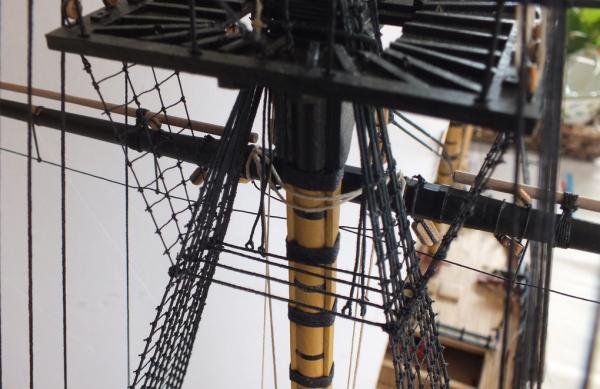
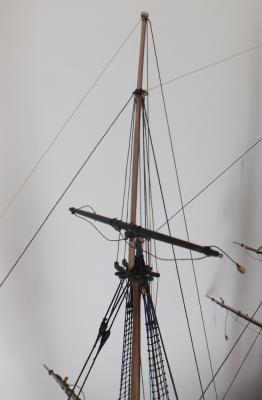
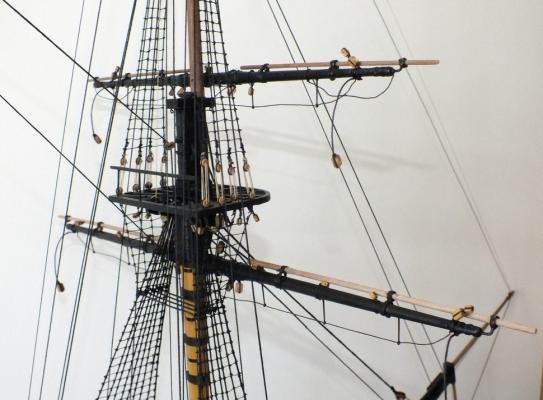
Part 2 The topsail yards were next to be added to the masts these are connected to the mast with the Parral, I assembled them adding the ribs and trucks until the Paarral went around the mast ,I remember they were a real pain to fit and rig on Pegasus when I left them lose on the strings so this time I added a spot of glue at each end, I then tac glued them to the mast, after trying a fair few times to rig the without doing this, then with them held in place like this, the yard was glue in place, setting it horizontal to the yard below and checking it was also square viewed from above. The Parral`s rigging was then fixed around the yard. The tyes and halliard rigging was added with the trucks tied to the after most topsail mast standing back stay. The first photo shows why I have not yet added the gaffs and will leave off for as long as possible,limited room. Parral Halliards Yard hight


- 536 replies
-
- 13
-
-
- diana
- caldercraft
- (and 1 more)
-
Thanks for the ticks and comments guys. Jason Firstly I still have a long way to go most likely many weeks or months on the rigging which will include all the rope coils, which took a time to do on Pegasus, there are also the ships boats to build, which I may build and use as a break from the rigging at some point. Secondly my next build will be something completely different,it will be a WW2 Hunt Class Destroyer a Deans Marine kit built as a static model. My reason for building the Destroyer are two fold one she was the favourite ship my father served on, he served on her a the time of the D Day landings at Omaha Beach, she was one of the destroyers that closed the beach to 800 yards to silence the shore guns that were decimating the US troops landing that day. Secondly it will be nice to build something different. HMS Tanatside

- 536 replies
-
- 11
-
-
- diana
- caldercraft
- (and 1 more)
-
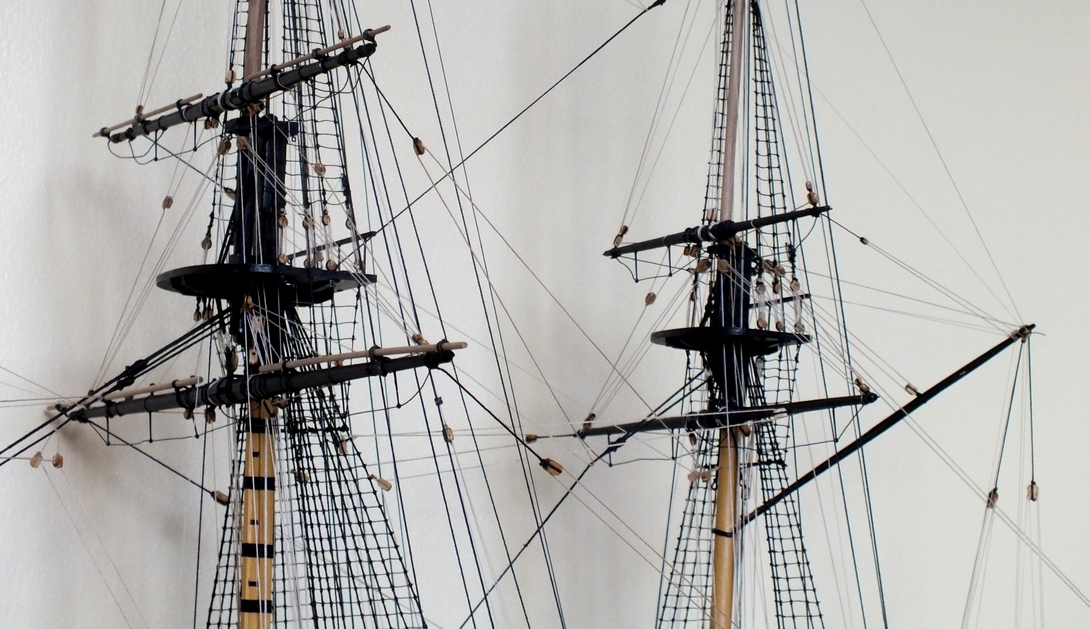
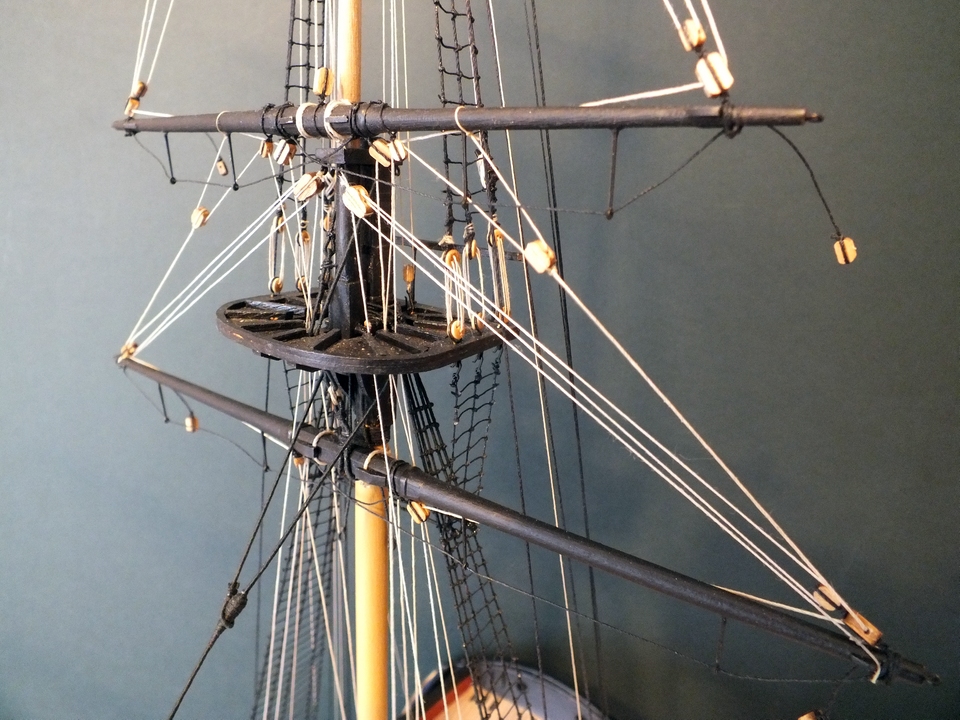
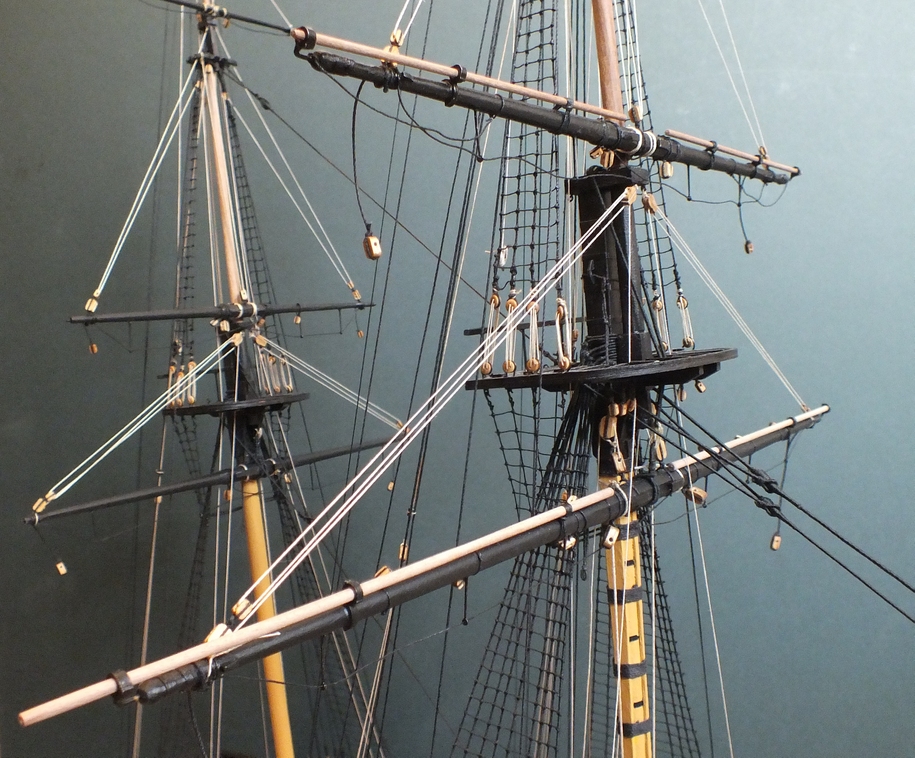
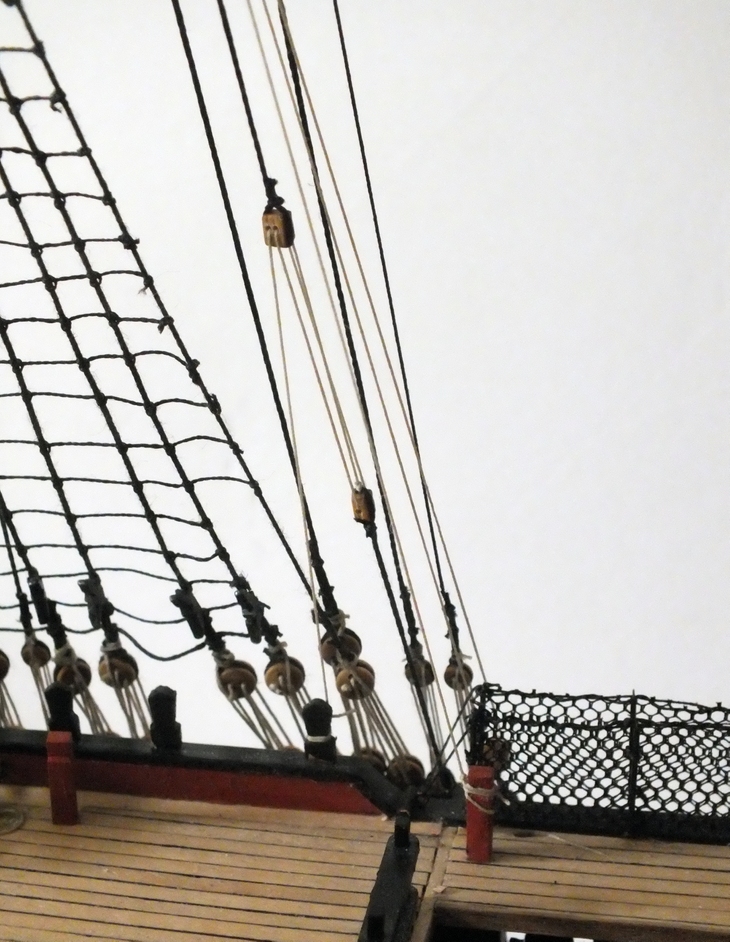
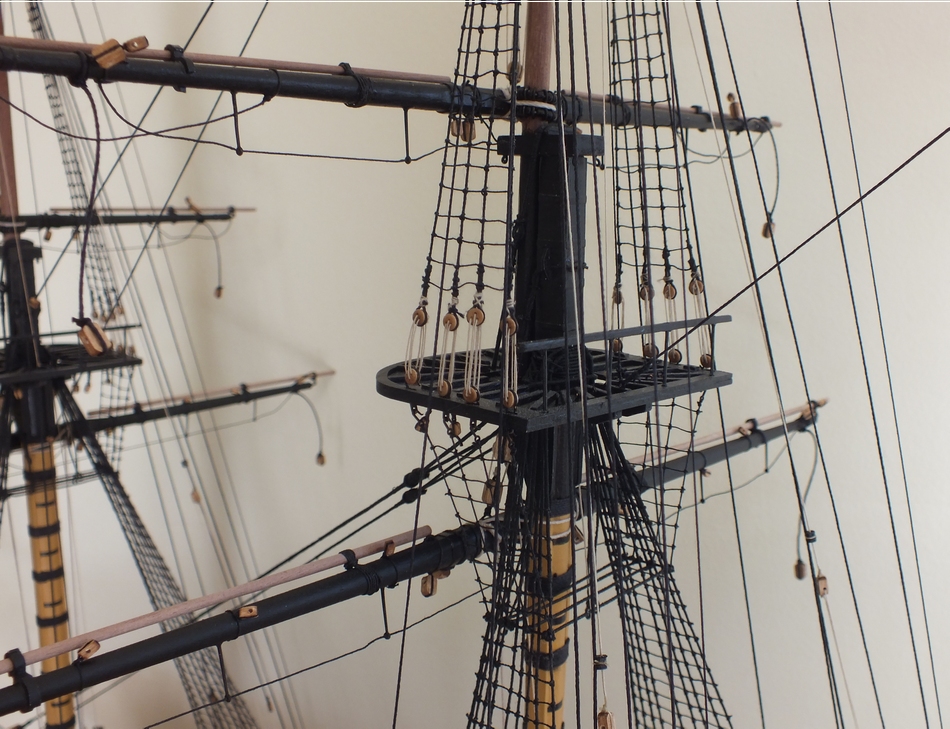
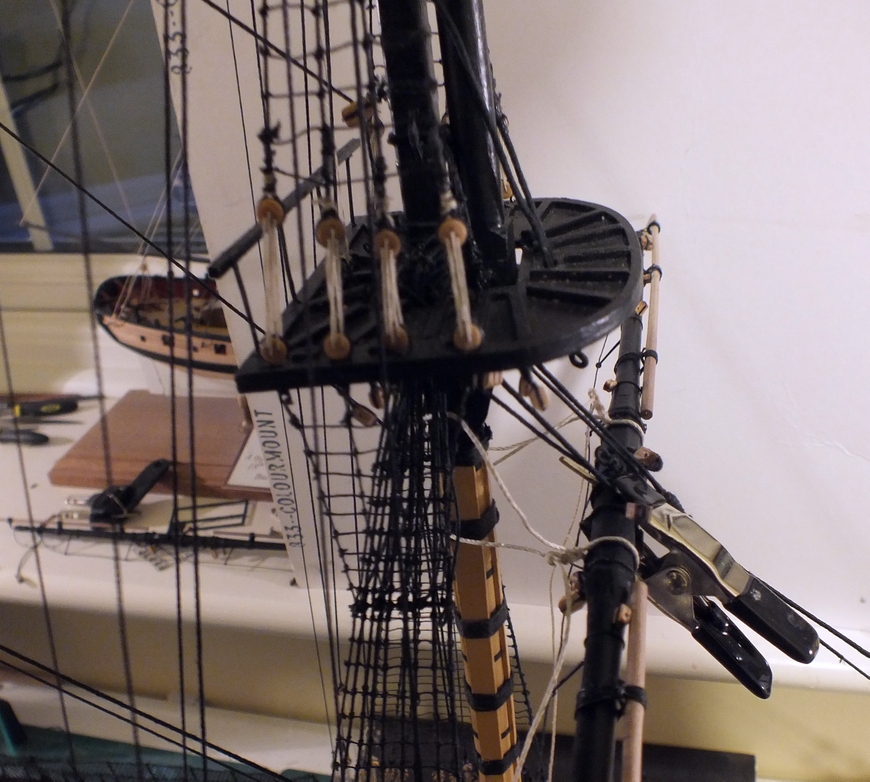
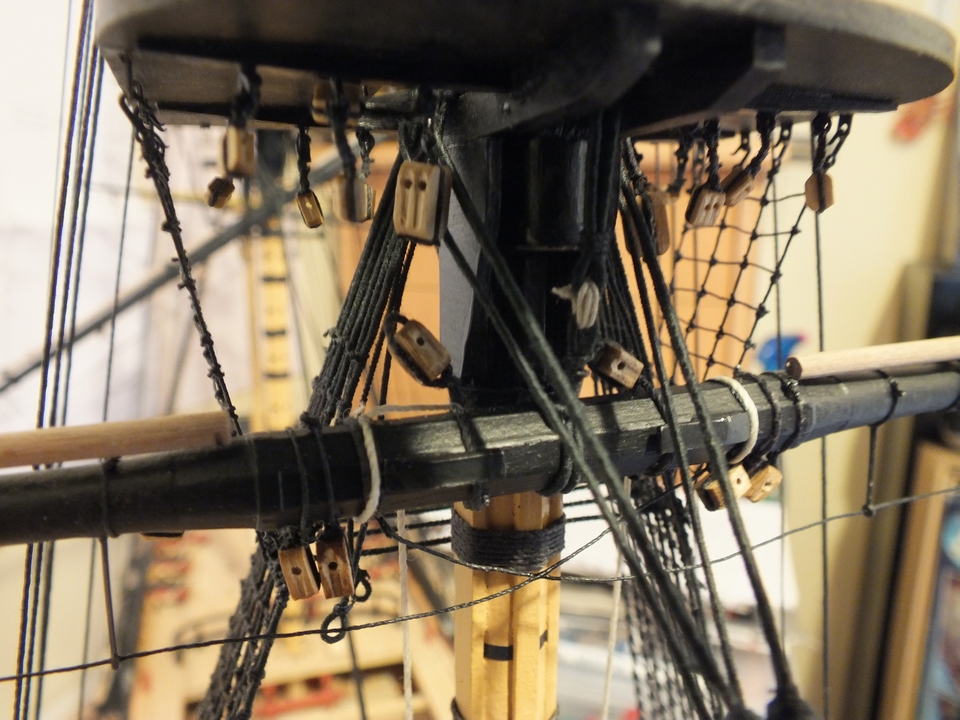
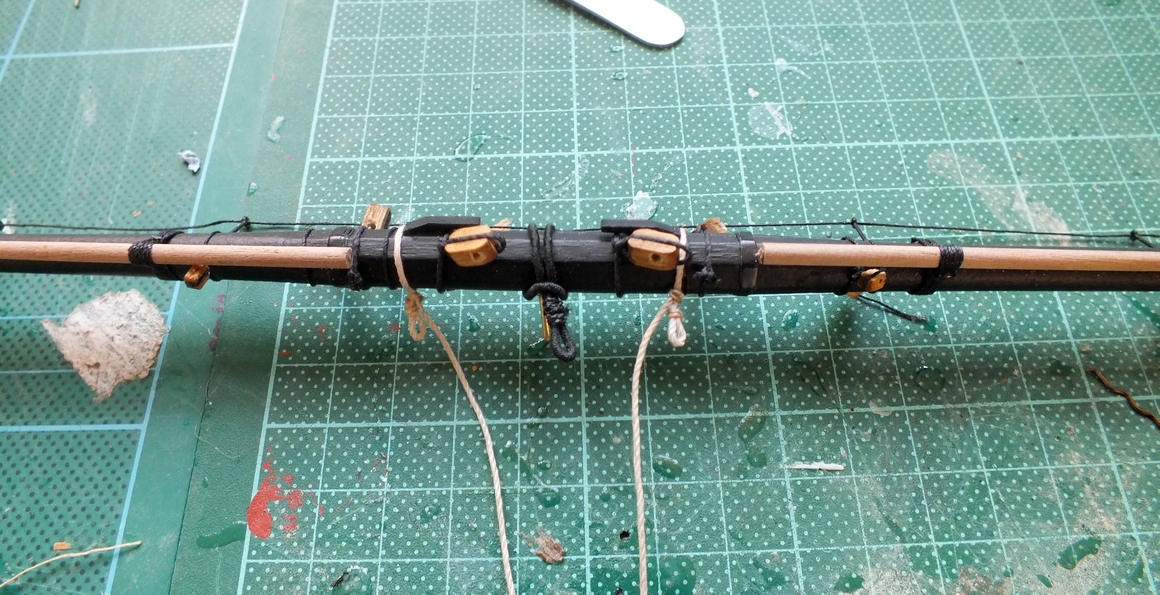
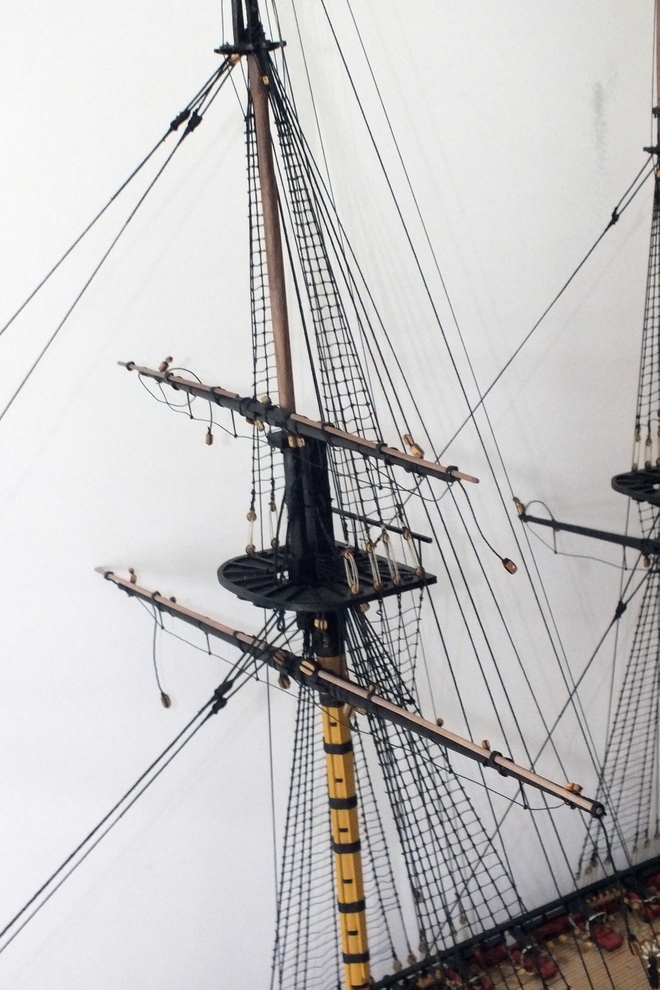
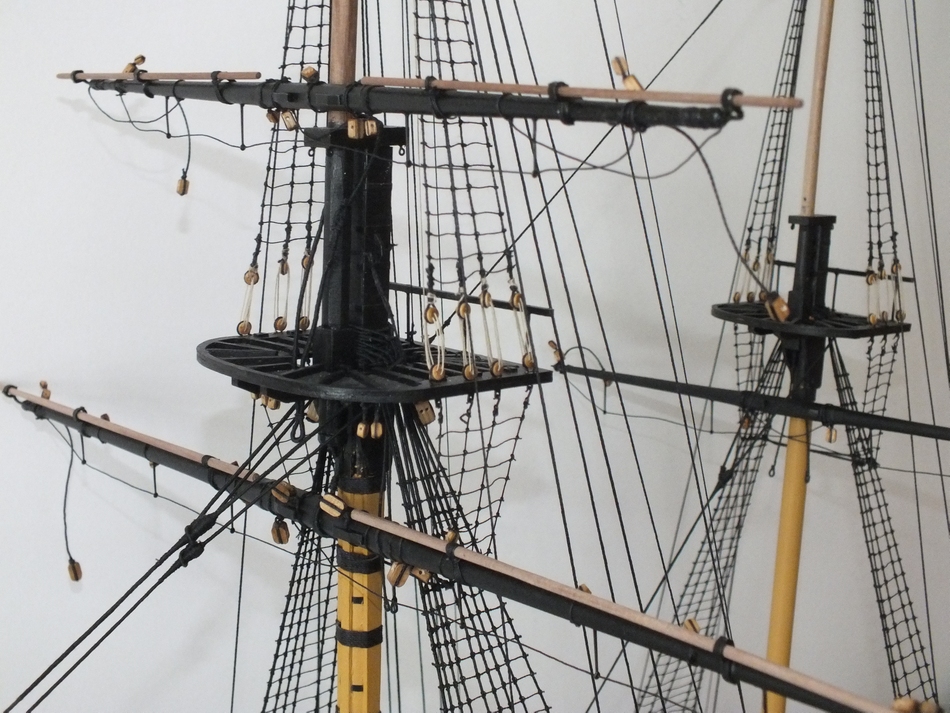
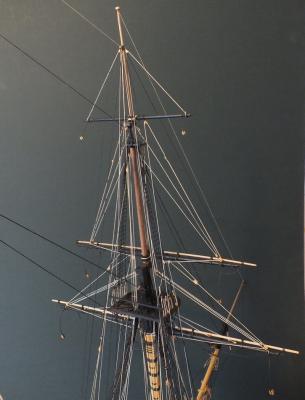
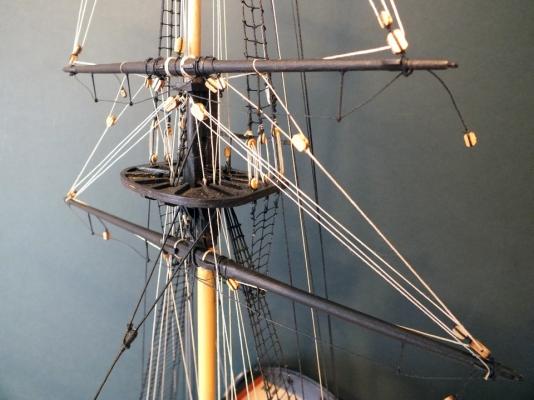
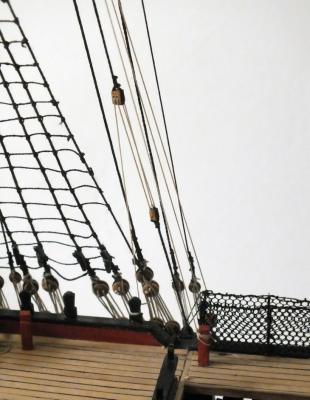
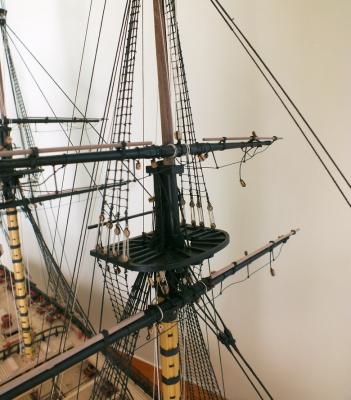
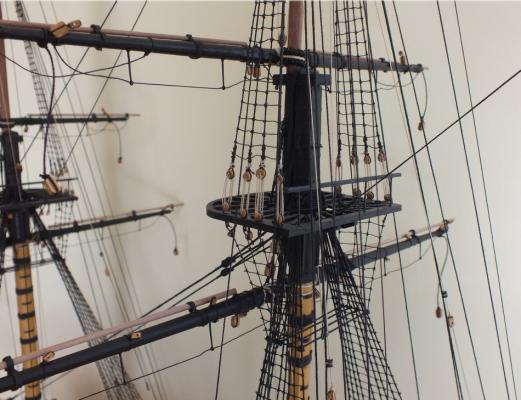
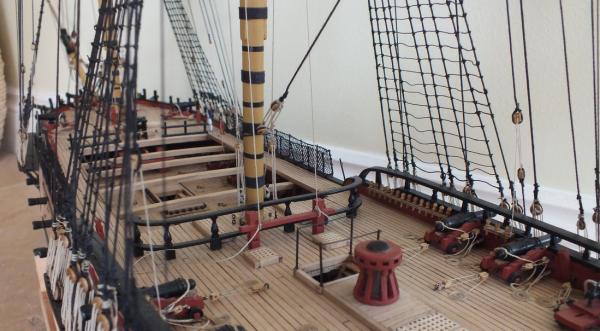
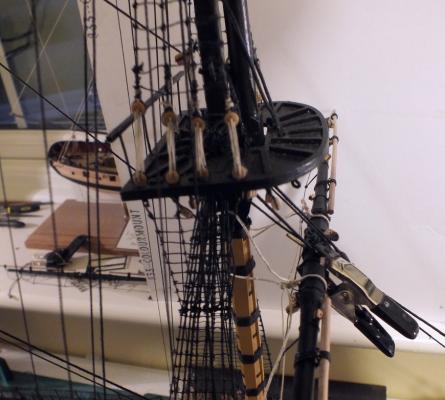
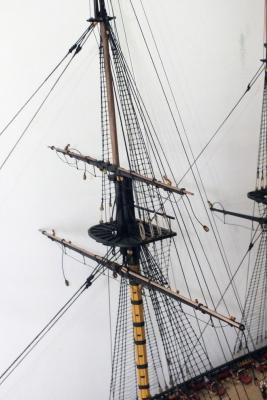
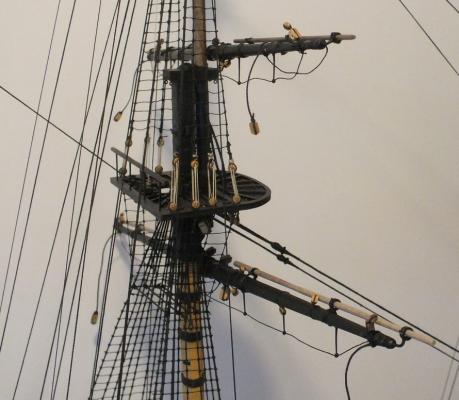
Running rigging Part 1 The last job before the running rigging was to add the shroud cleats. The yards, I added the two main yards first and then the cross-jack, I first made and fixed the Truss Pendants to the yards,I then fixed the yard to the mast held in by the pin, then tied the jeers, then after making sure the yard was horizontal and square cynoed the yard into the mast,and after giving it time to set,set up the blocks and tackle to complete the rigging of the Truss Pendants and the the main slings. fitting the yard to the mast truss pendants and jeers Main yards rigged Deck view


- 536 replies
-
- 21
-
-
- diana
- caldercraft
- (and 1 more)
-
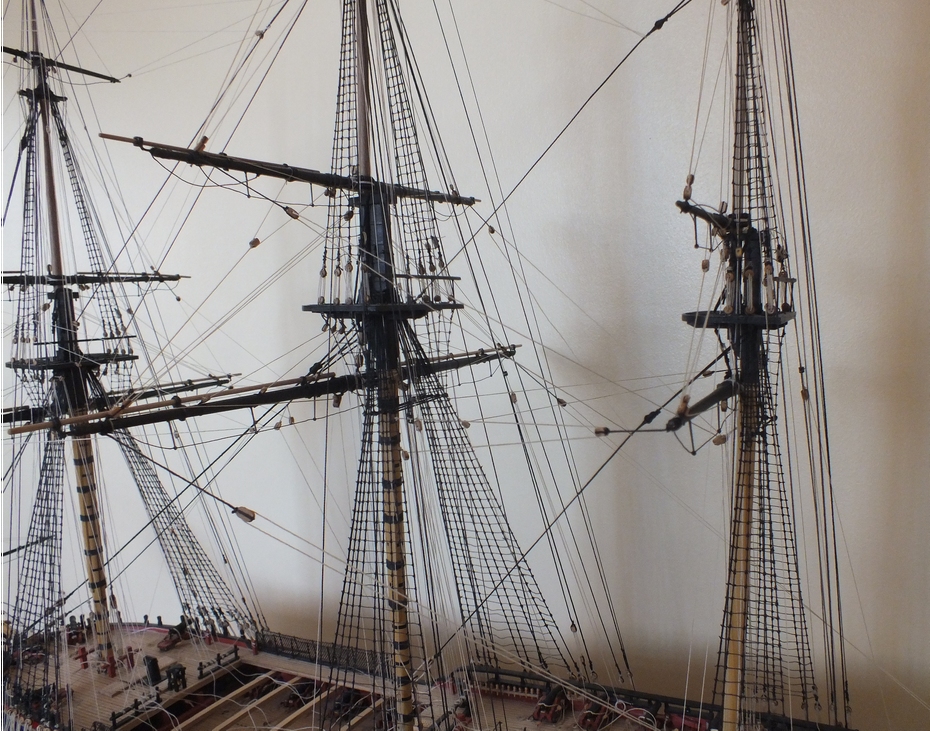
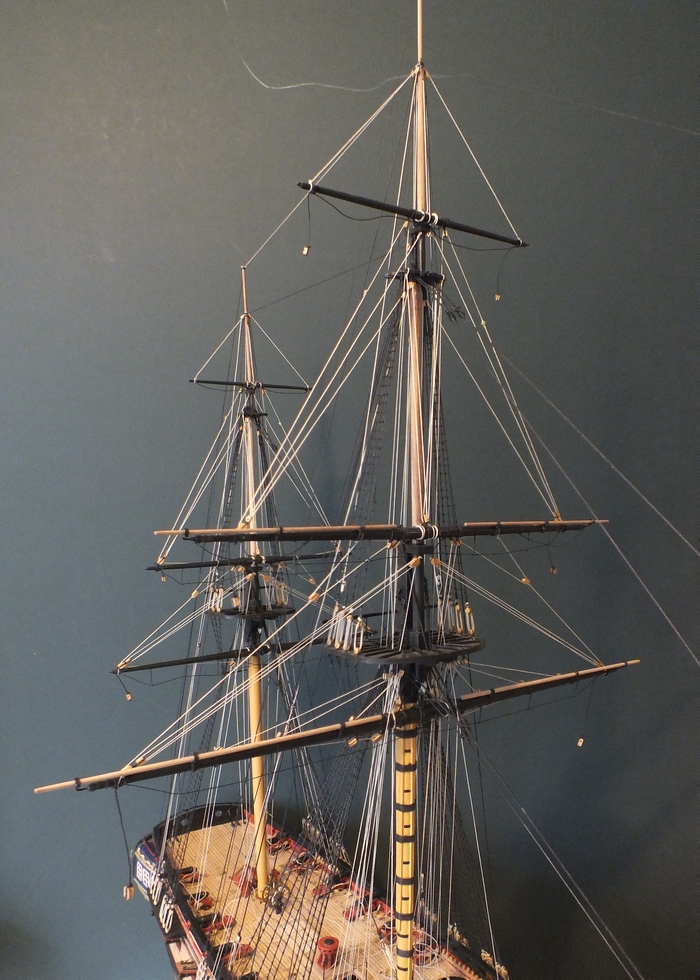
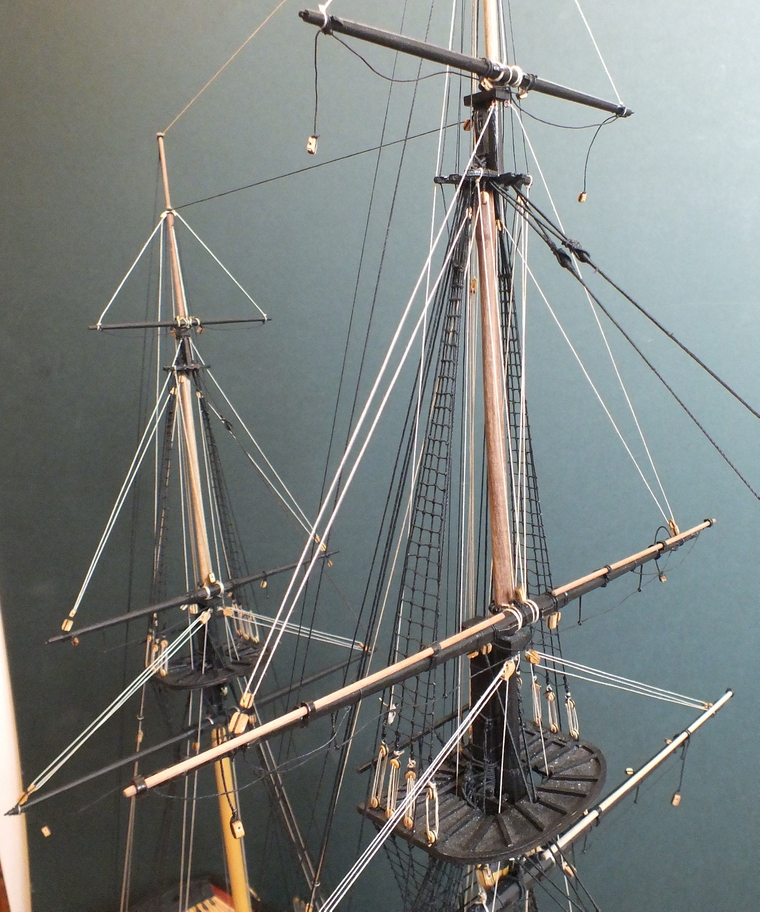
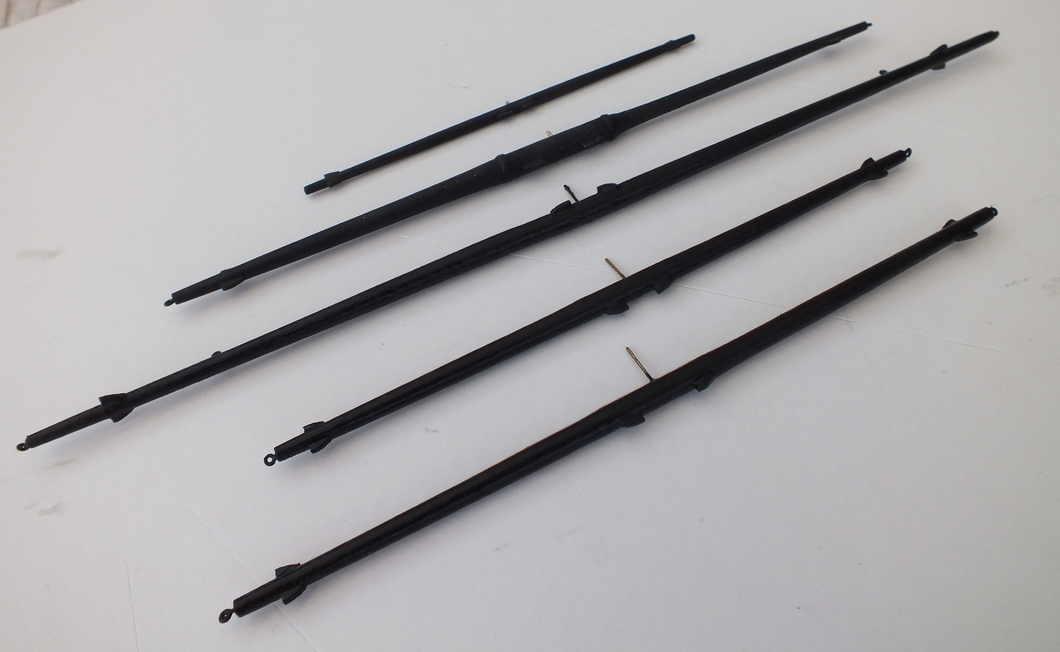
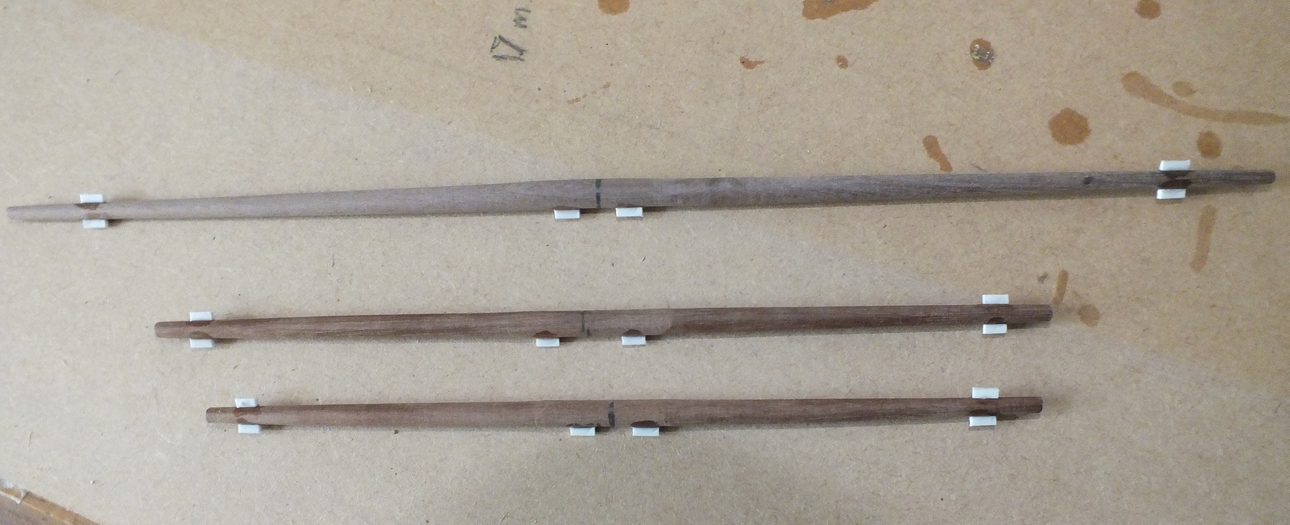
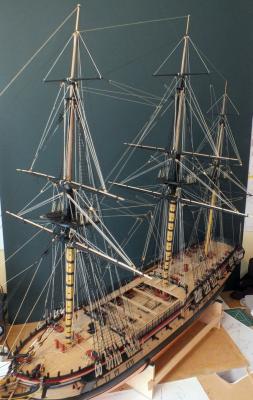
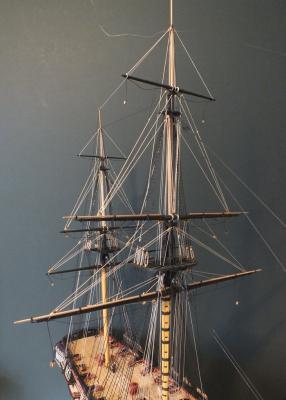
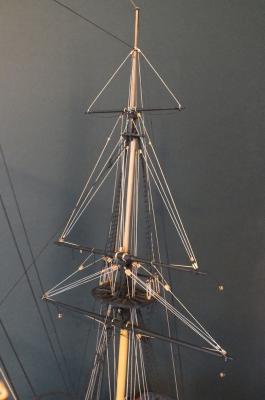
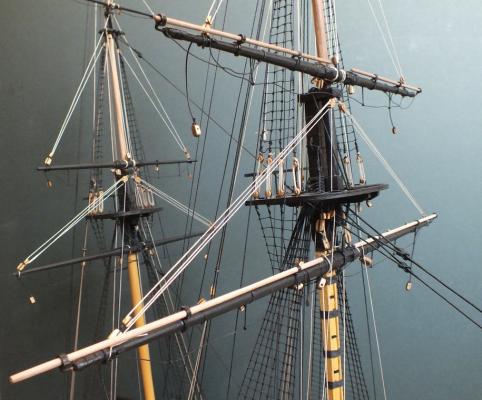
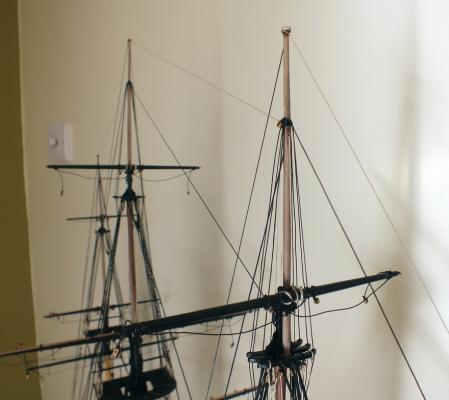
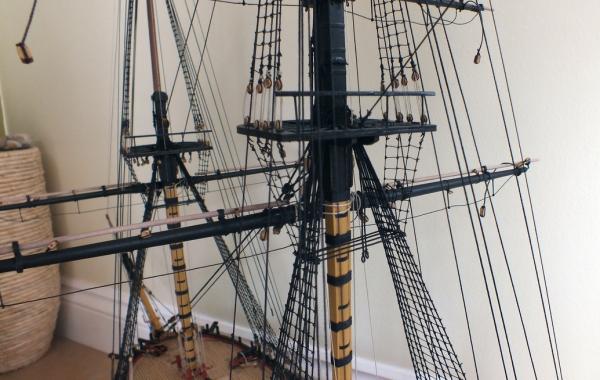
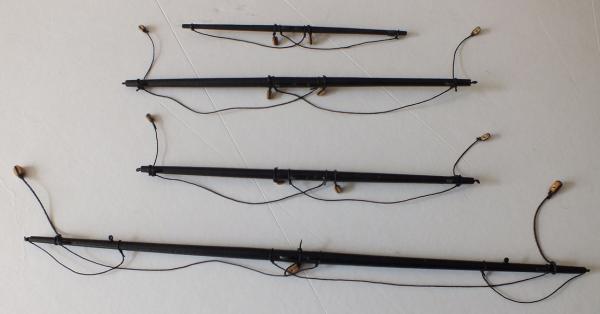
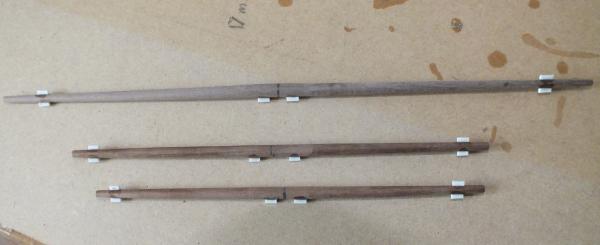
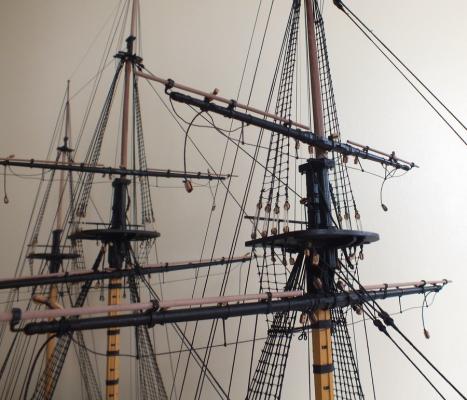
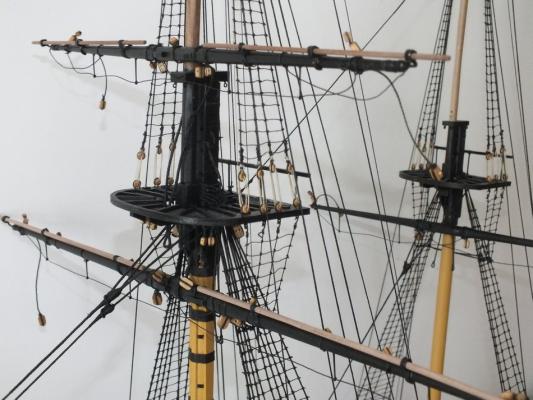
The rest of the yards and the sprit-sail yard have now been made up and rigged, they were a bit of a doddle after the lower ones, I have also made the two gaffs but I will leave them off for as long as possible to allow turning her from side to side to gain access, when adding the yards and rigging,as she is getting longer. Again the yards are only in the pin holes. Top yards Top yards made up before rigging Gaffs Top yards completed Yards on masts

- 536 replies
-
- 14
-
-
- diana
- caldercraft
- (and 1 more)
-
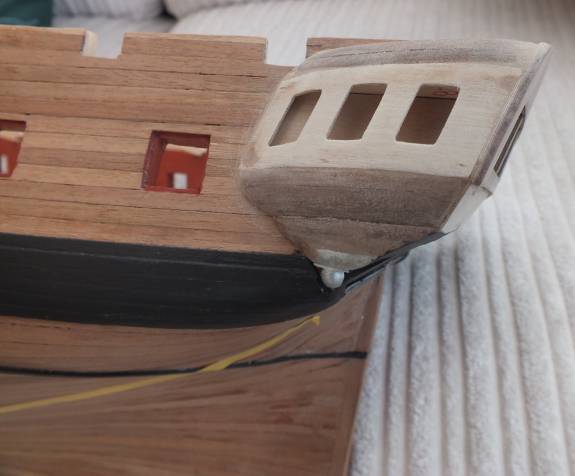
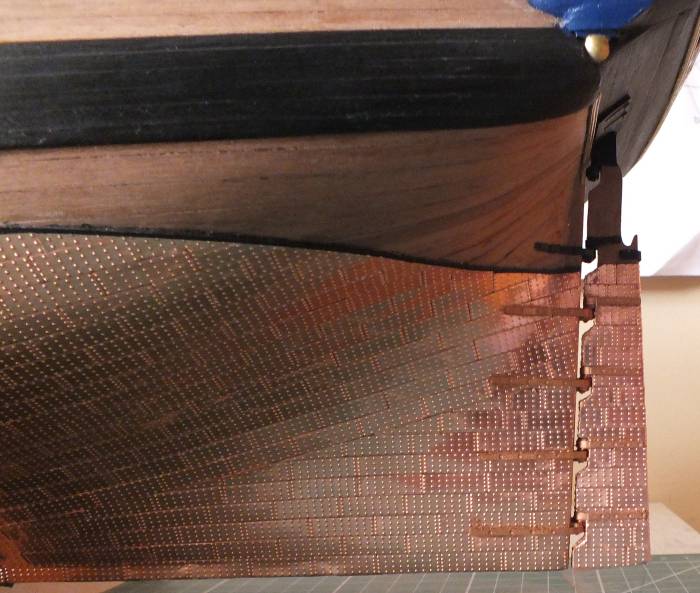
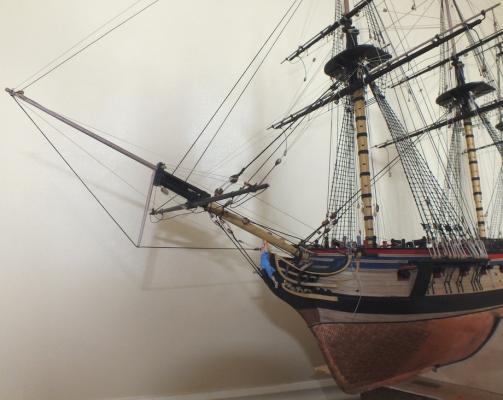
Hi Jason looks like you are trying to solve another of Diana`s alignment issues, bare it mind it fits over the second planking, I have built a different version so lined up the top of the stern facia with the top of the bulwark in my open rail set up, you can adjust the side galleries above and below with the filler sections, and fill if needed as they are painted, again I did all this work after the second planking the hull, and after adding the wale, and I also added a vertical plank to the edge of the keel and finished the second planking to this. I have added a photo of the rudder fitted as well this also shows how my one sits plus just how much its covered by the coppering, I think this build is no where as straight forward as it first looks and only a few of us have attempted to resolve the issues it throws up, my attempt may not be totally correct but at least I think it looks right. keep up the good work she does keep the brain cells working. best regards Ray


-
Hi Christian It will be great to have back in the shipyard again, hope the move into the new house goes well, so your Diana build can restart.
- 536 replies
-
- 1
-
-
- diana
- caldercraft
- (and 1 more)
-
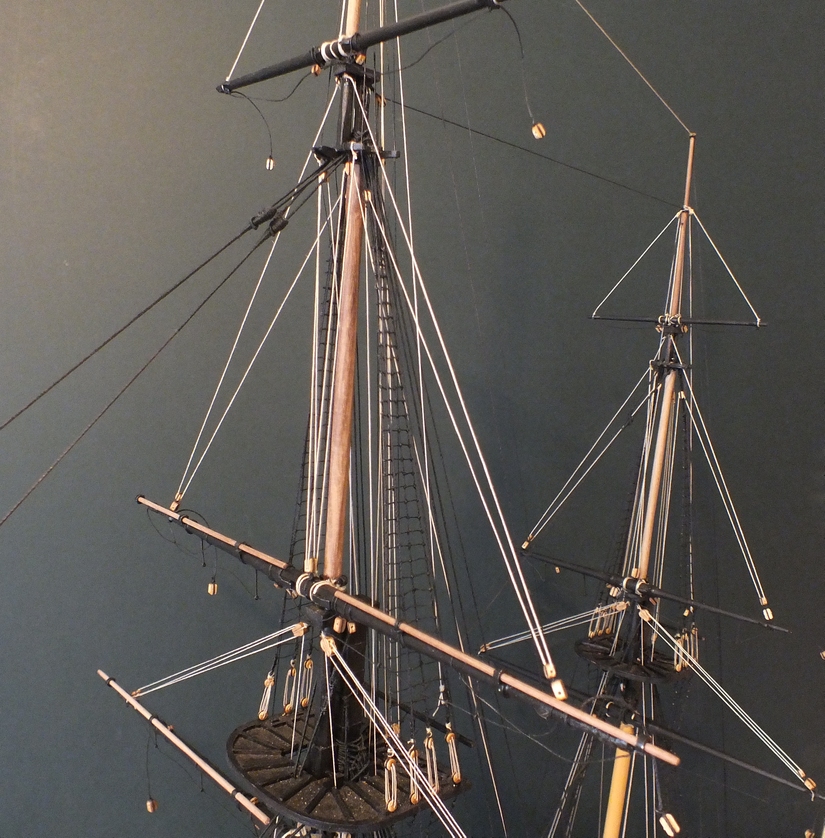
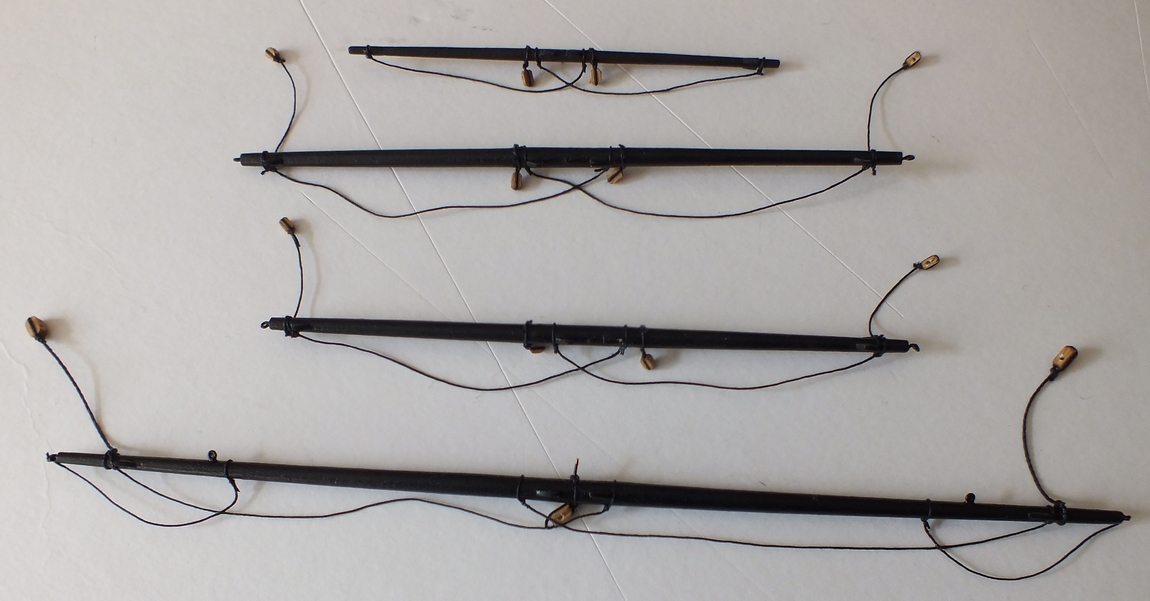
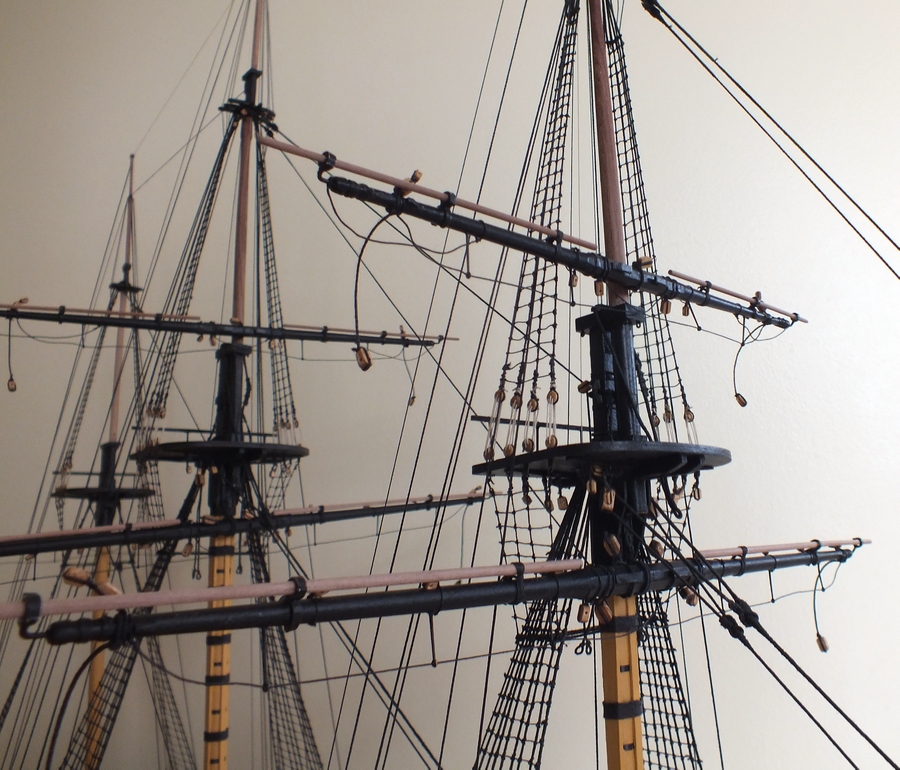
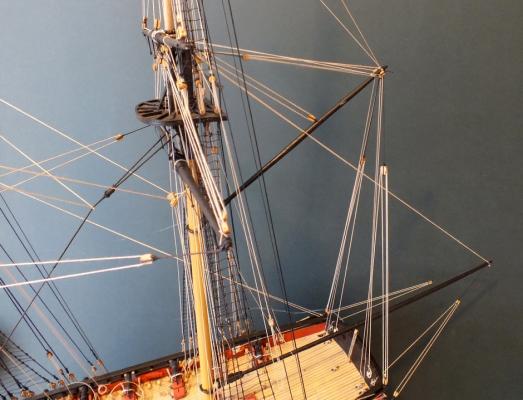
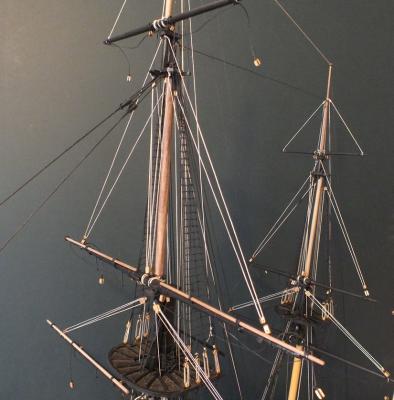
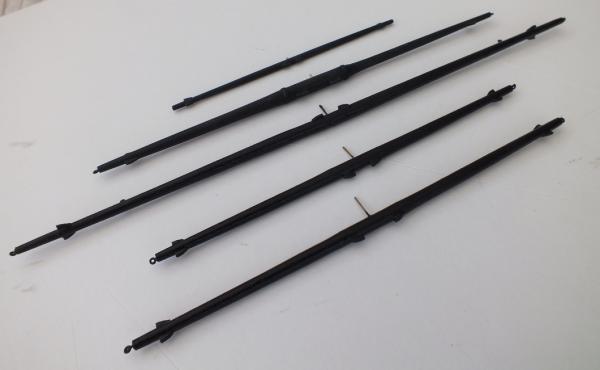
Some photos below showing the yards, with stun-sail booms, on the masts, not fixed just in the pin holes. Next job make the remainder of the yards and gaff booms.

- 536 replies
-
- 25
-
-
- diana
- caldercraft
- (and 1 more)