HOLIDAY DONATION DRIVE - SUPPORT MSW - DO YOUR PART TO KEEP THIS GREAT FORUM GOING! (Only 13 donations so far - C'mon guys!)
×


Ray
-
Posts
404 -
Joined
-
Last visited
Content Type
Profiles
Forums
Gallery
Events
Everything posted by Ray
-
 Super work Len the blocks look to be the best there are.
 -
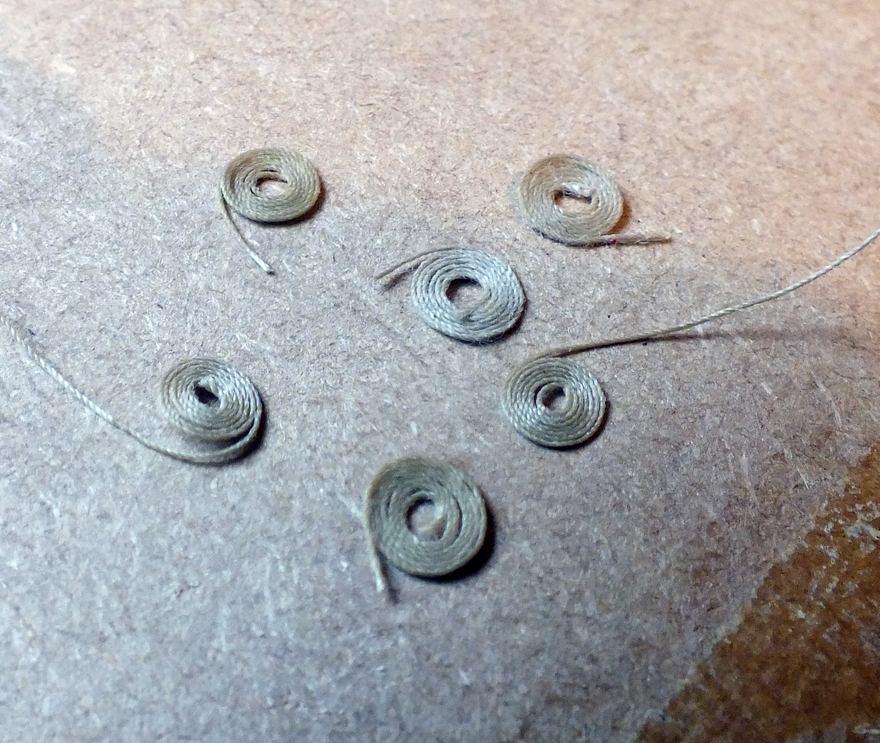
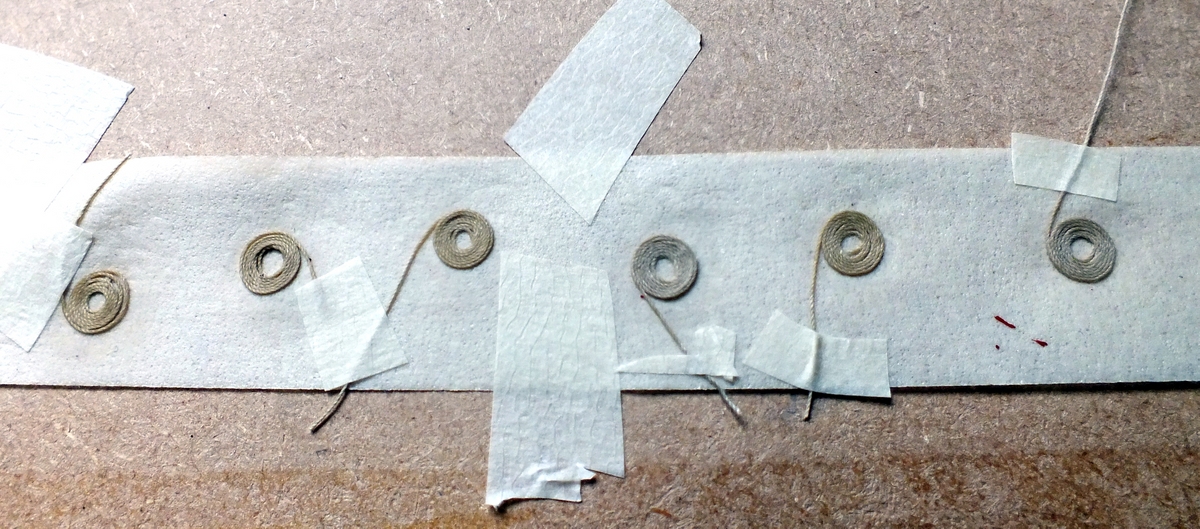
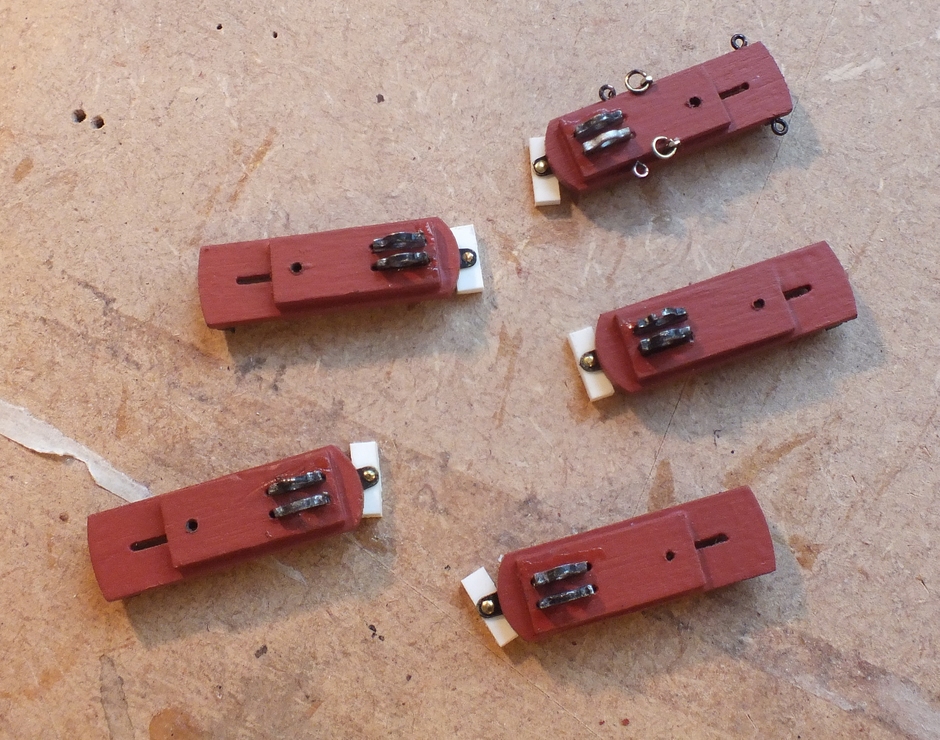
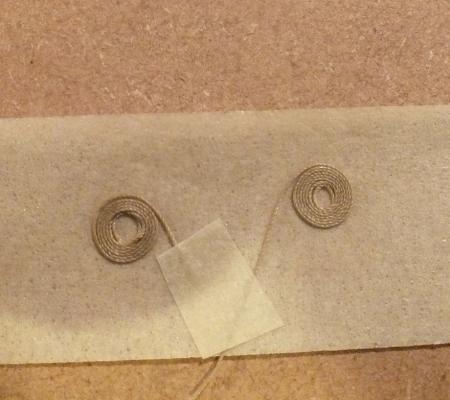
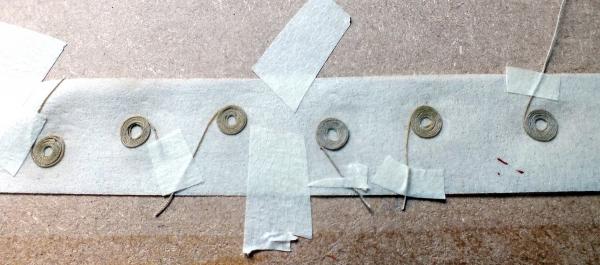
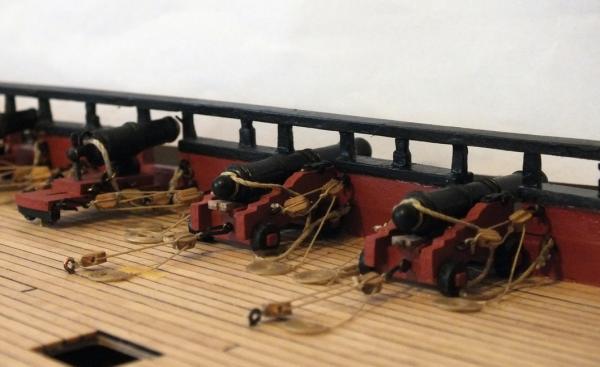
Hi guys Flemish Coils Yes Mobbsie the Flemish coils are a real pain, but they do give best look to rigging the guns in my opinion, I have added a few photos of how I make them, and I wish I could find a more efficient way of doing them. This way works but is slow and tiresome, sometimes it takes several goes to get one started,I lay out the masking tape sticky side up and just stick the rope down wrapping it around the starting loop under my finger and when done paint them over with diluted pva and remove when dry. Two coils a strip of coils A batch done

- 536 replies
-
- 9
-

-
- diana
- caldercraft
- (and 1 more)
-
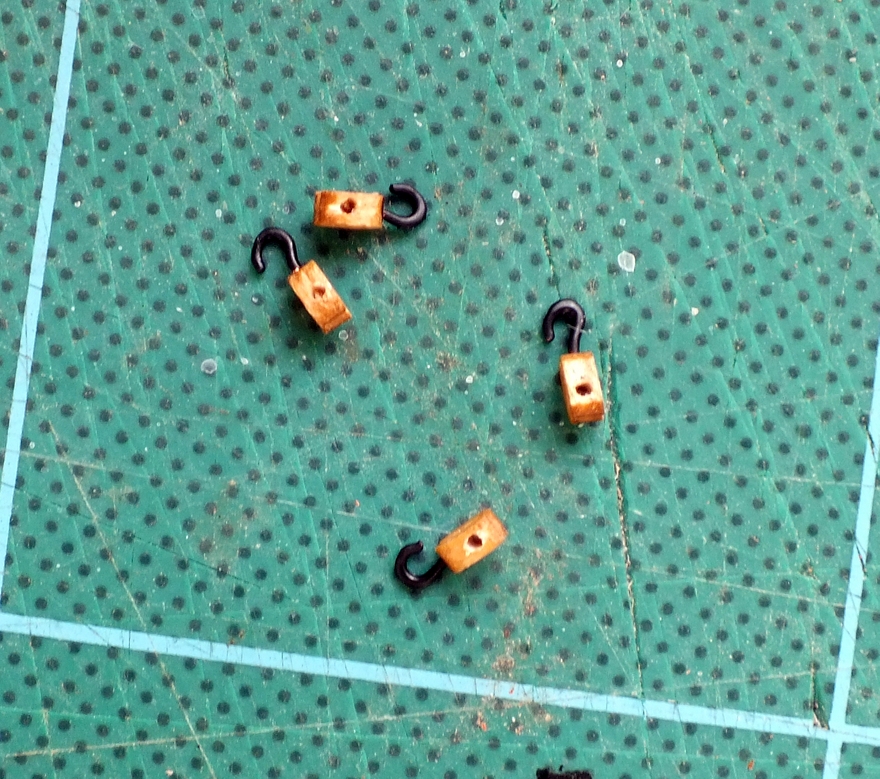
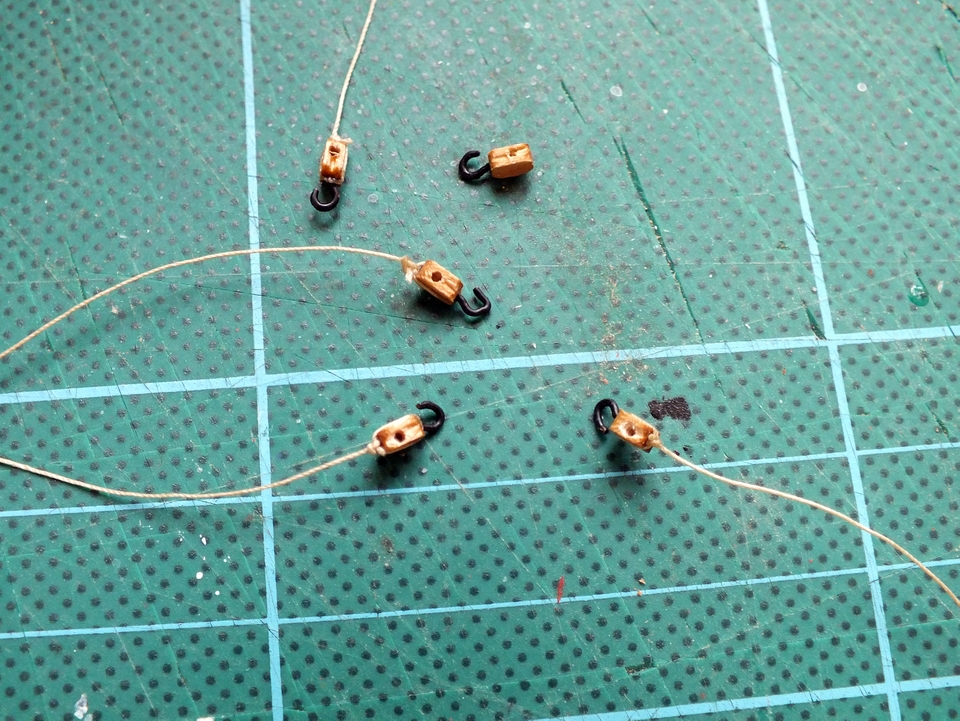
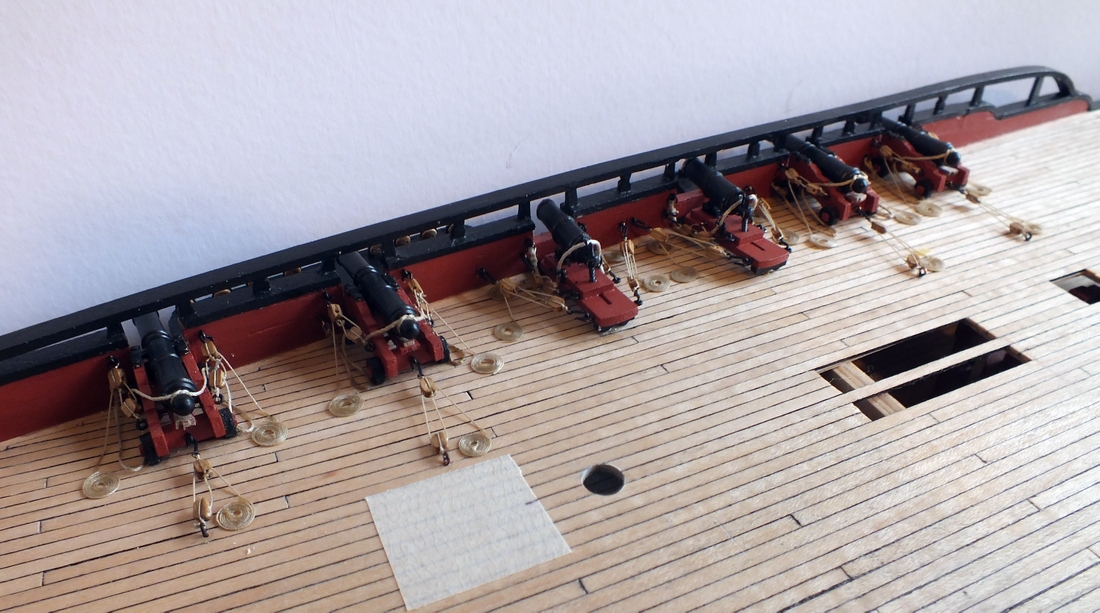
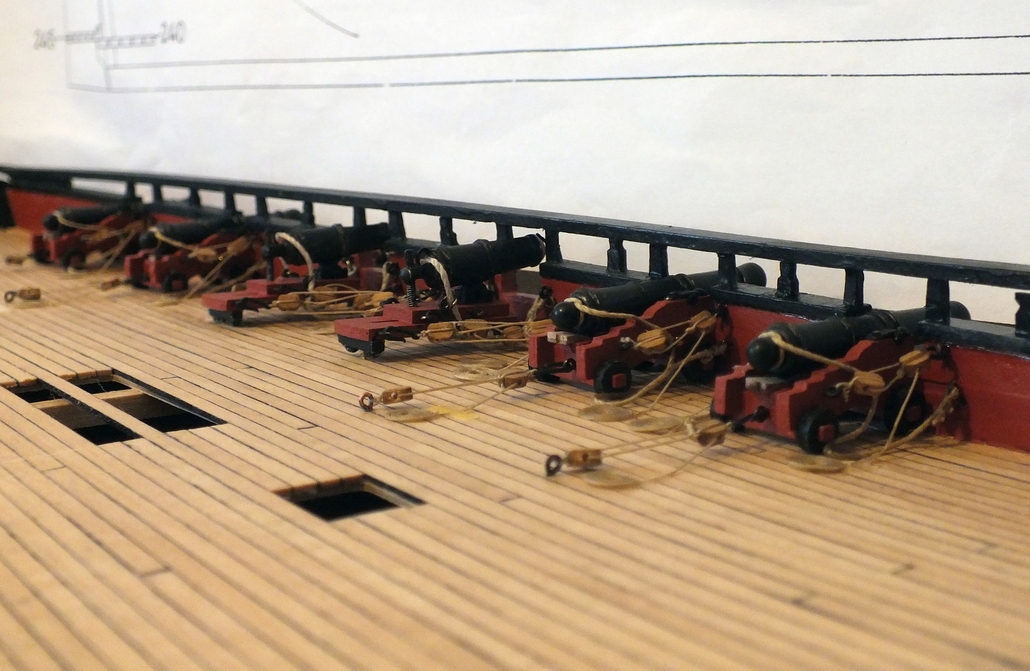
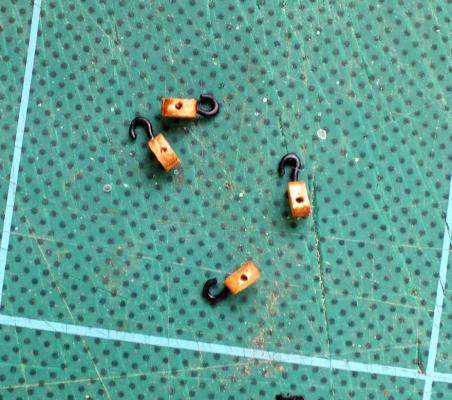
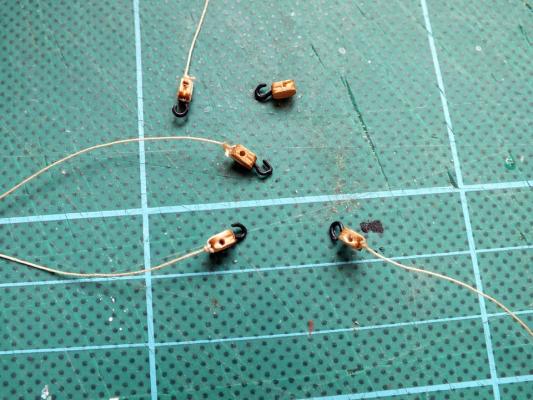
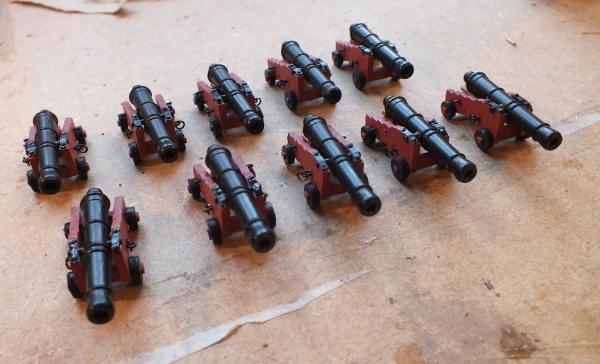
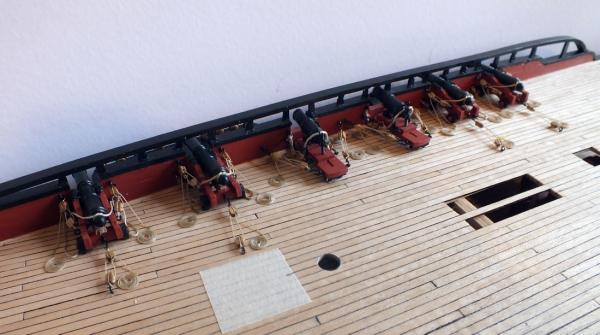
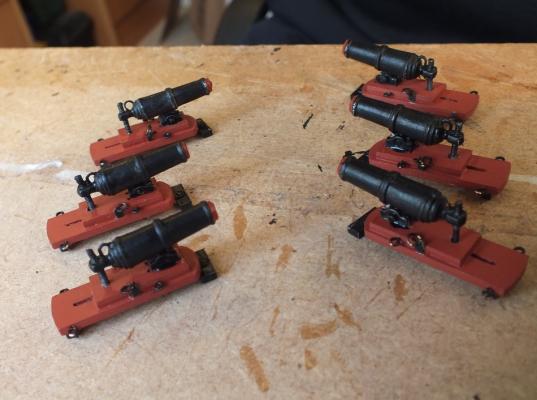
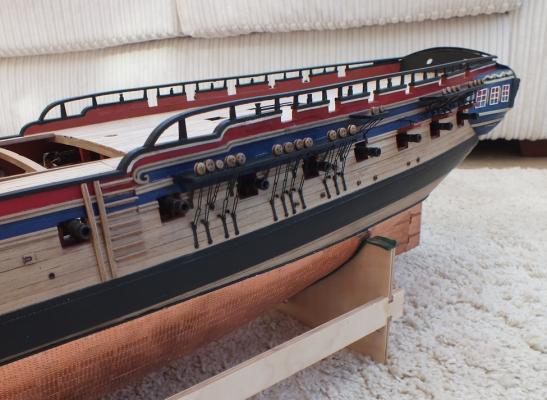
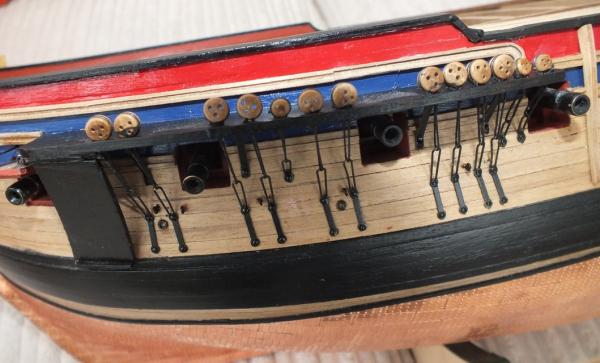
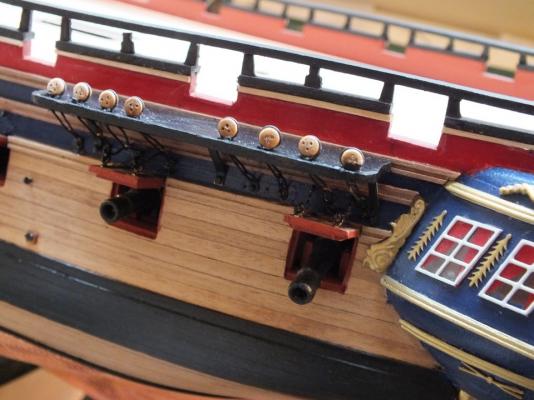
Quarter Deck 9 Pounders The nine pound carriage guns were made up the same way as the eighteen pounders were, and added to the quarterdeck, I have added a couple of photos of the blocks with hooks fitted I make these like this to give as much space between the rigging blocks as possible, they just have a .7mm hole drilled in the end and an opened up and cut down copper eyelet inserted. Cannon rigging blocks Cannons made up Starting to fit First one done All done one side


- 536 replies
-
- 16
-
-
- diana
- caldercraft
- (and 1 more)
-
Hi Rigging looks great, hope your health issues are behind you now. Best regards
- 1,279 replies
-
- 1
-
-
- agamemnon
- caldercraft
- (and 1 more)
-
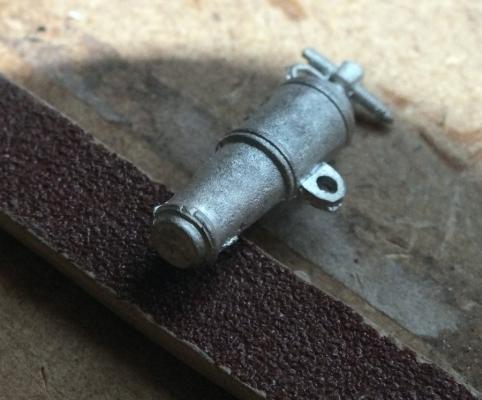
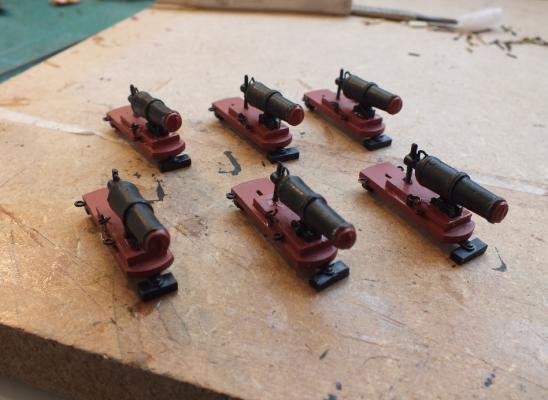
Hi Mobbsie The stops in the carronades were part of the moulding I just painted the ends red so as to highlight them. I have added a photo of the original casting of one of the two I will not use. Carronade as supplied in kit.
- 536 replies
-
- 2
-
-
- diana
- caldercraft
- (and 1 more)
-
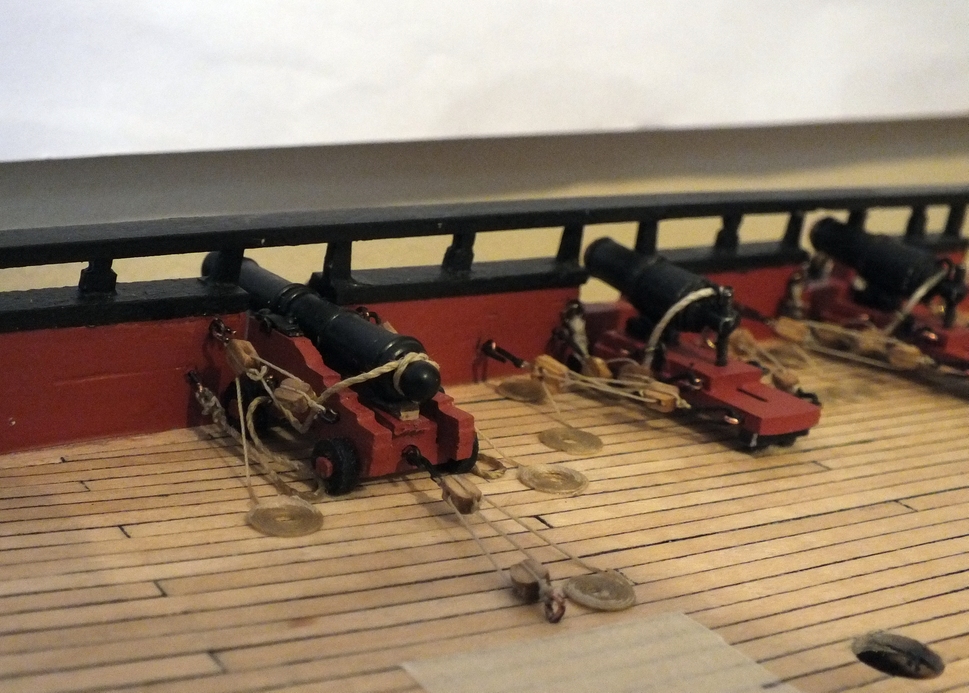
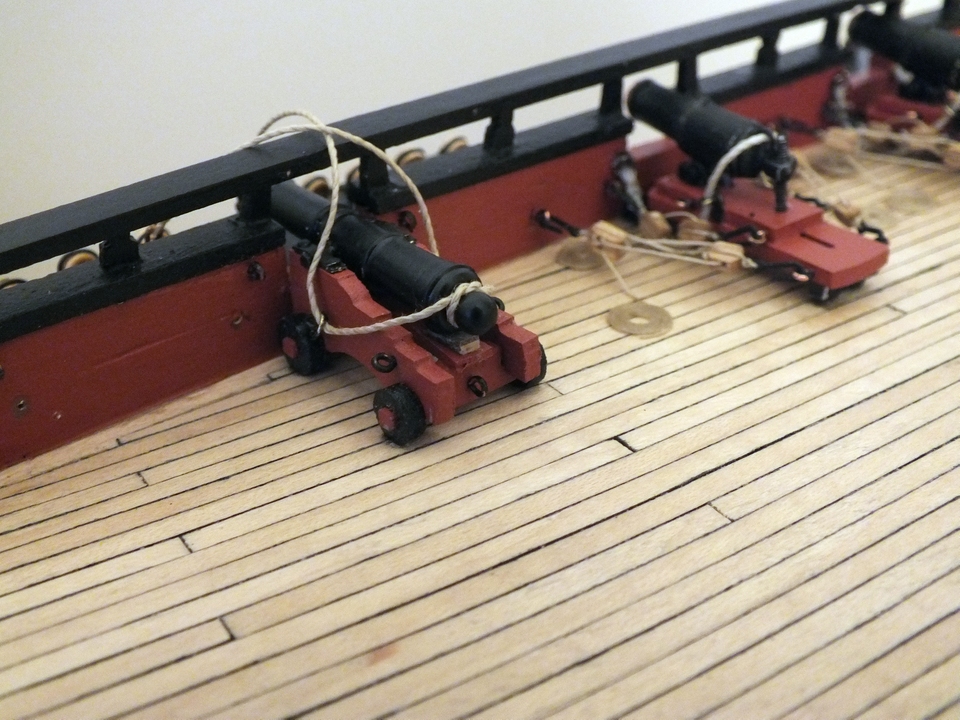
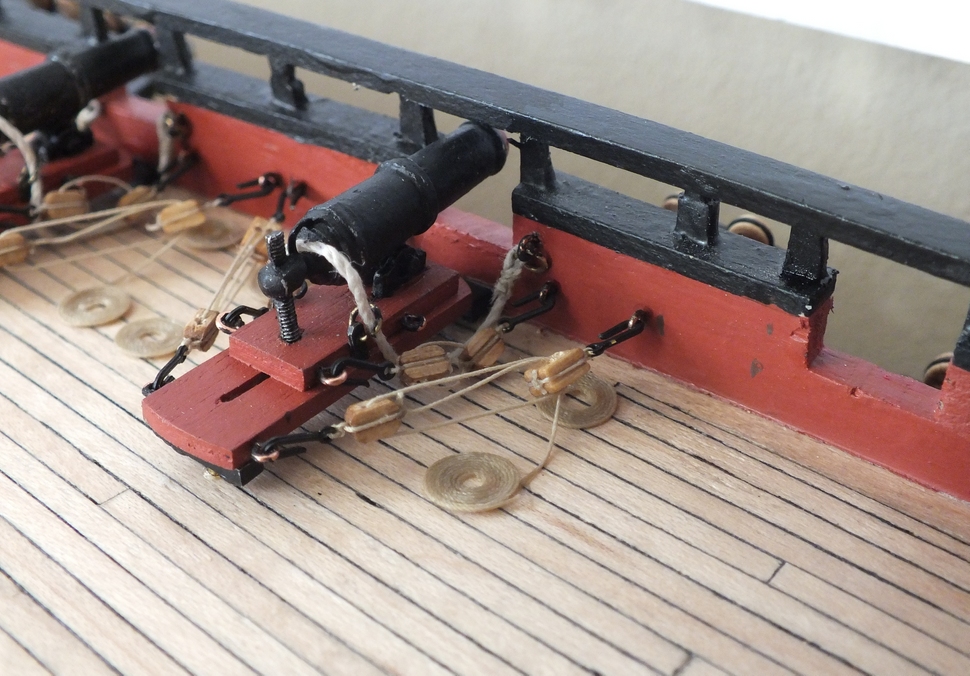
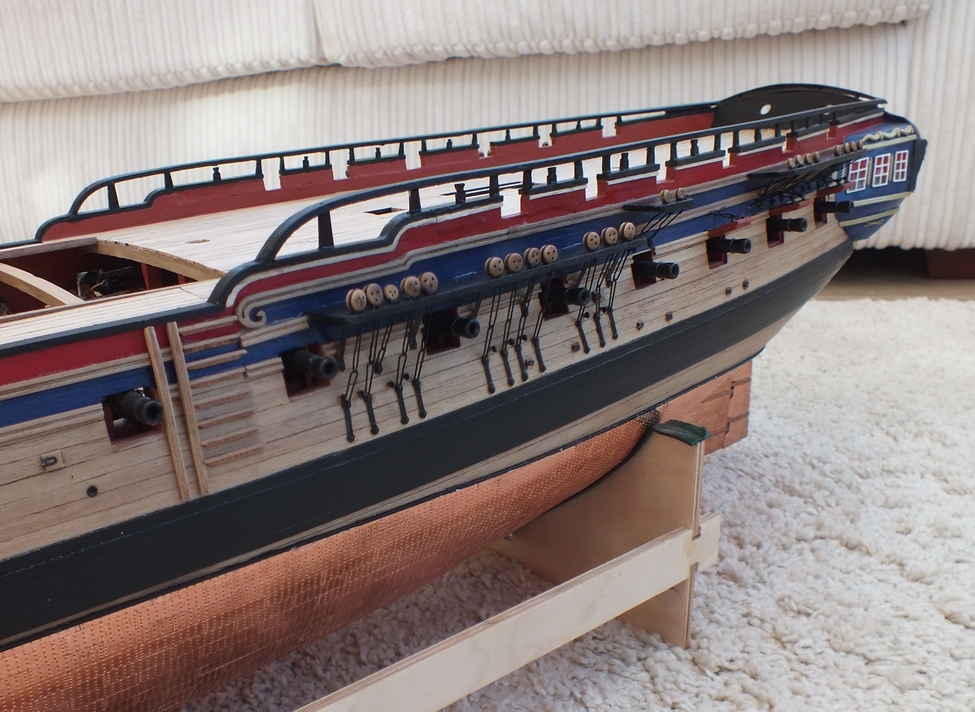
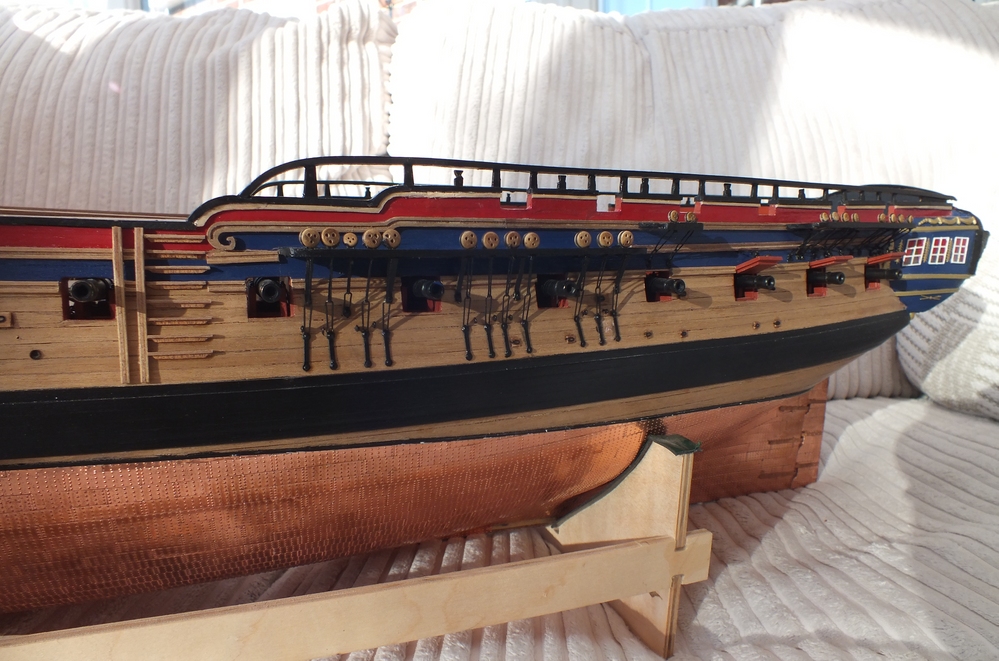
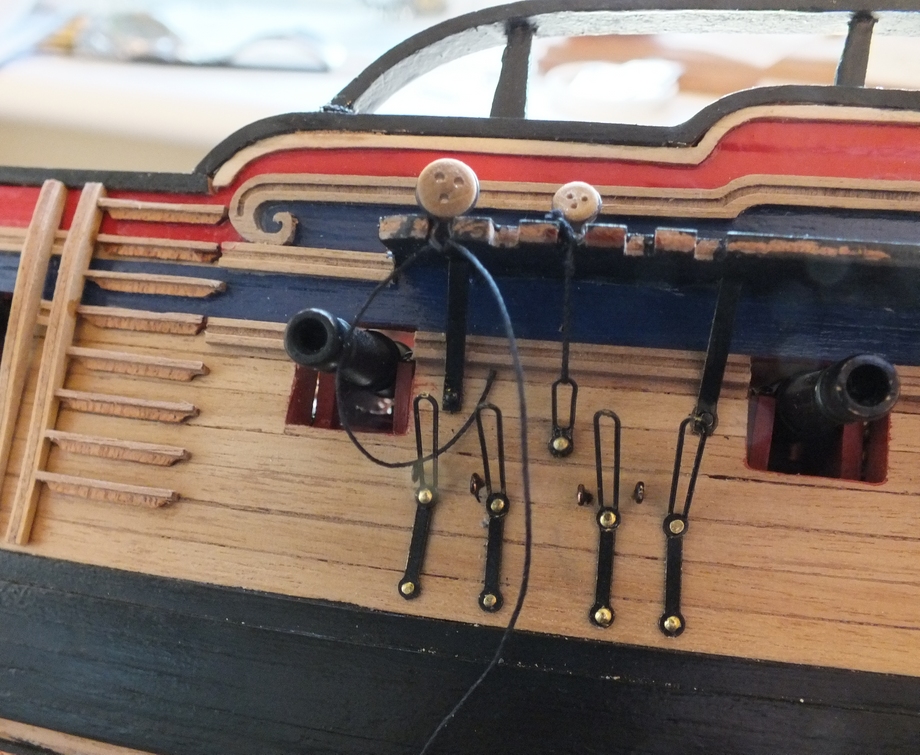
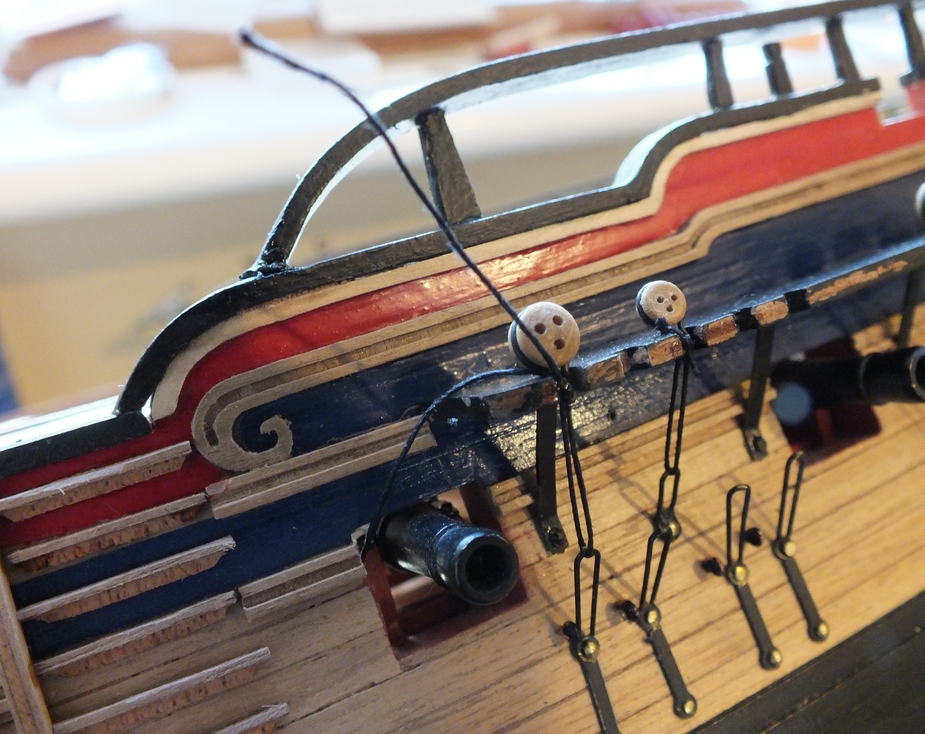
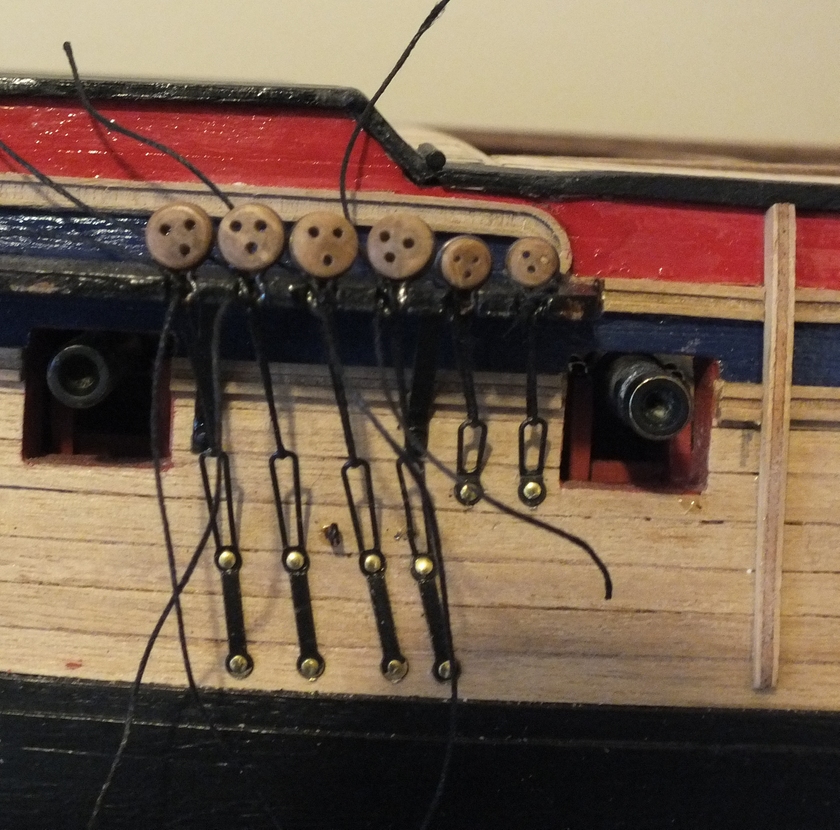
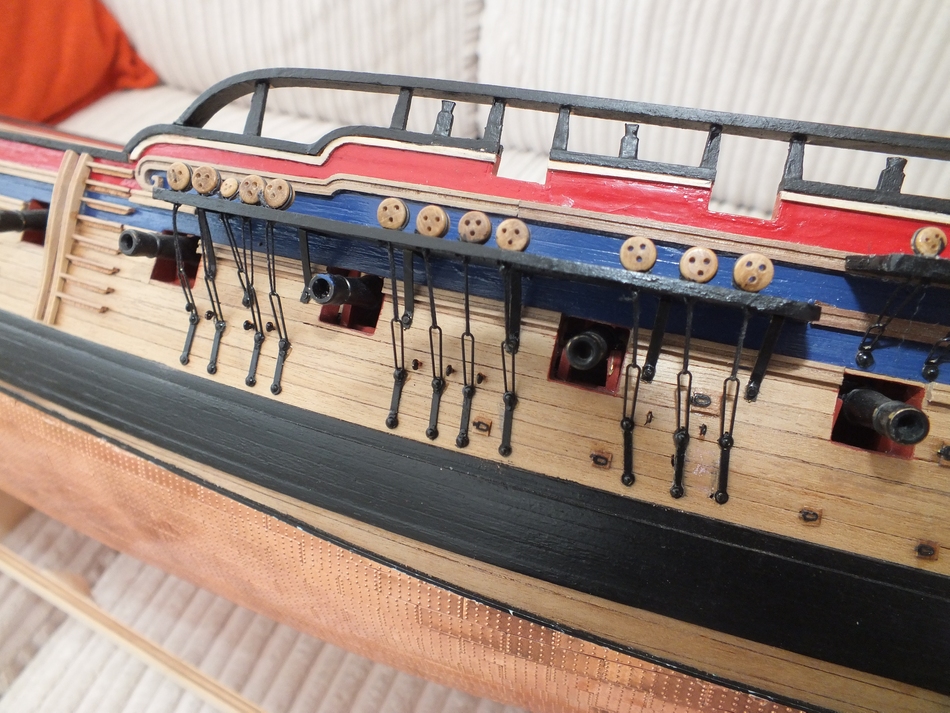
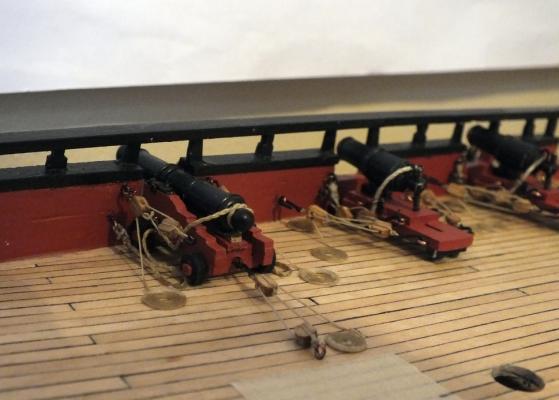
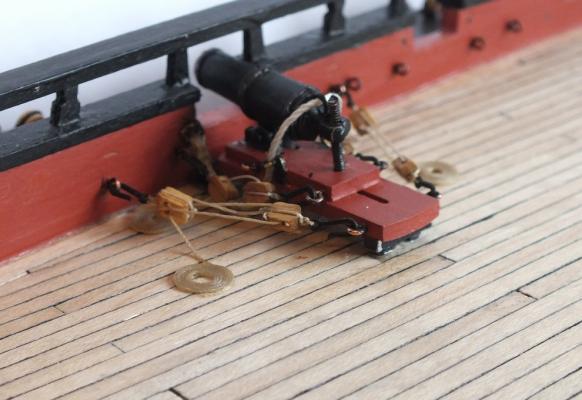
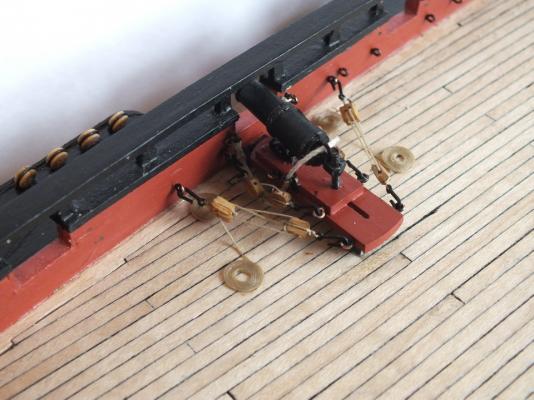
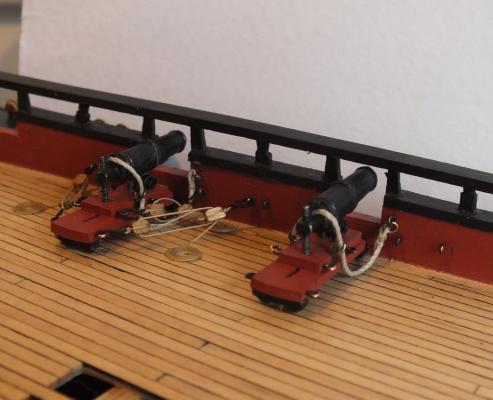
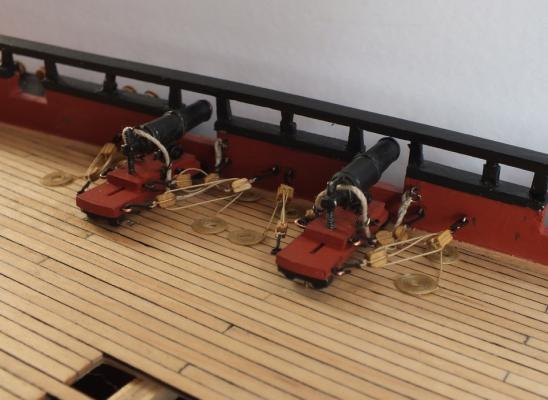
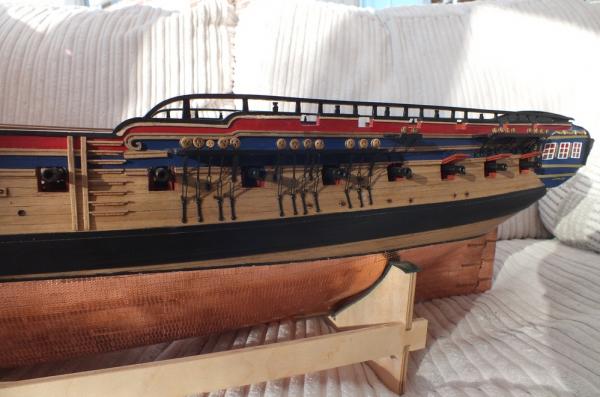
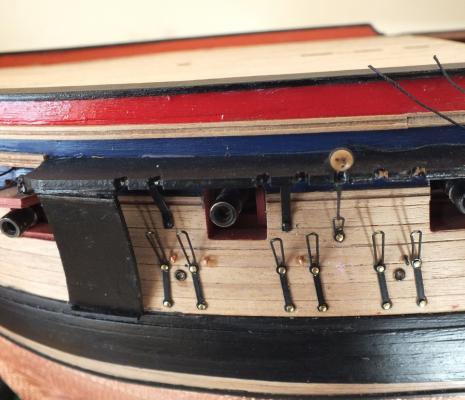
Carronades The first photos show the first carronade fully rigged, next photos show the stages in which they have been rigged, I tied up all the tackles first and then just hooked them on and set them up, glued down the end of the rope and added the rope coils, they look a bit shiny in the photos but not in real life,they just need the paint touching up on the hooks and eyes, next I will add the nine pounders to complete the deck guns on one side of the quarter deck. The first one being set up The first Carronade rigged The second one being rigged


- 536 replies
-
- 13
-
-
- diana
- caldercraft
- (and 1 more)
-
What a super build, just awesome plate and rivet detail.
- 113 replies
-
- 1
-
-
- heinrich kayser
- steamship
- (and 1 more)
-
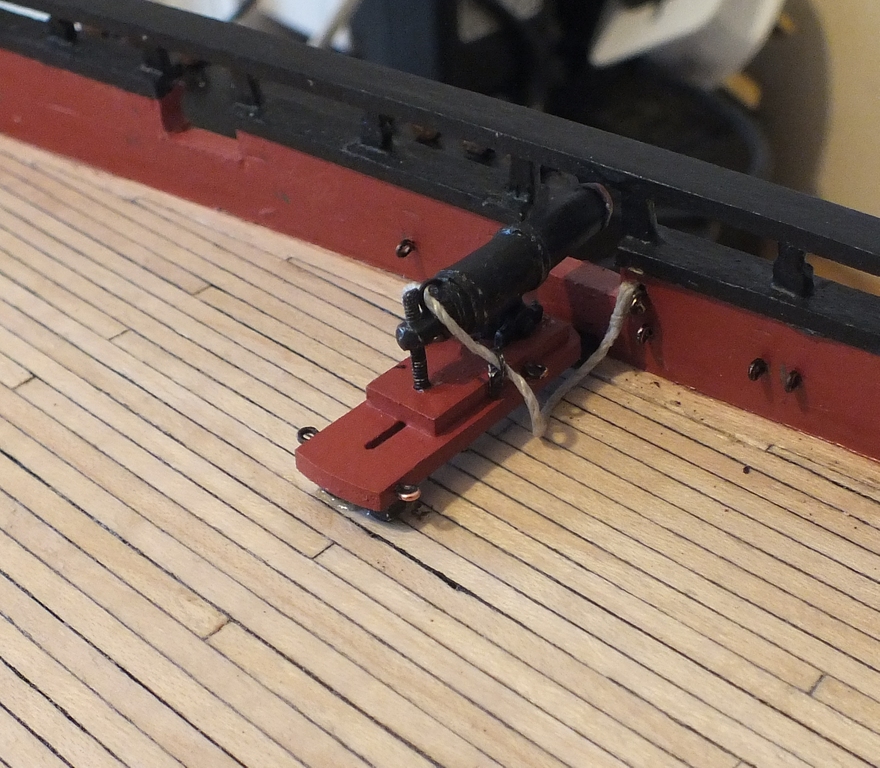
Hi B E Thanks for the endorsement you are a font of knowledge I researched the front fixing, it as best I could, the plans shown them fitted through the gun port sill. I am going to arrange the guns on the quarterdeck with the two caronades in the middle and two nine pounders either side, and on the foredeck two nine pounders will be set up as bow chasers and the last two caronades in the last forward side gun position.
-
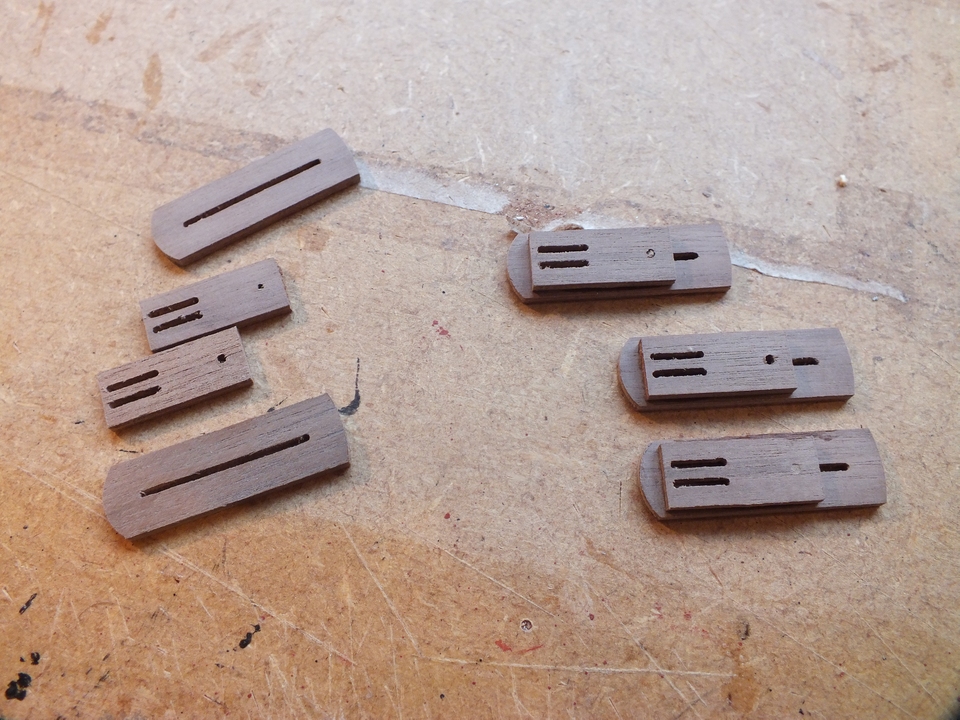
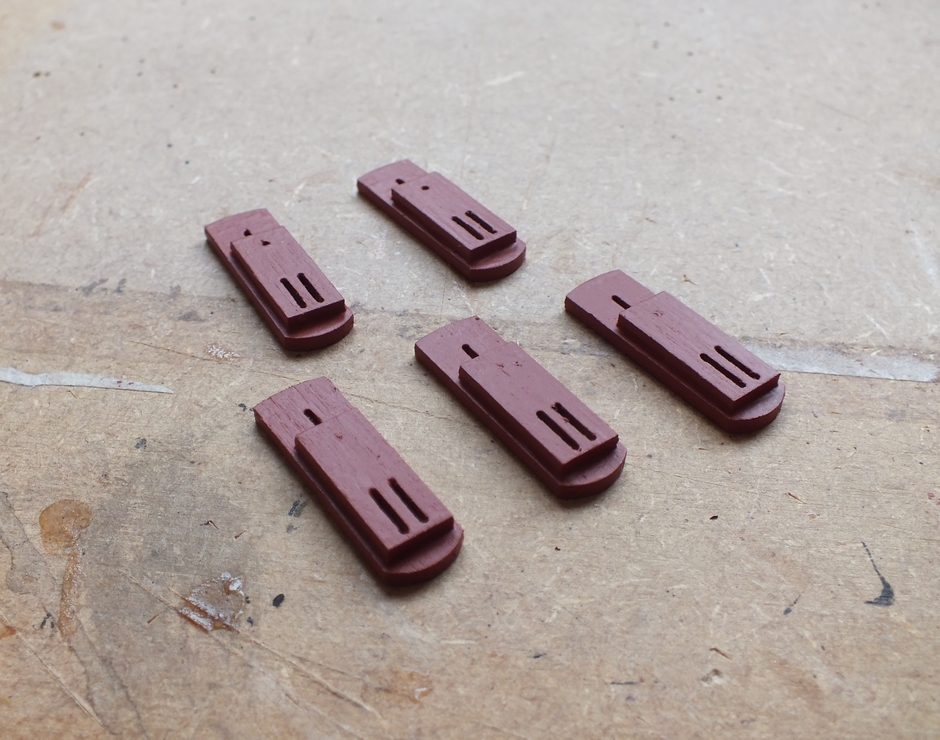
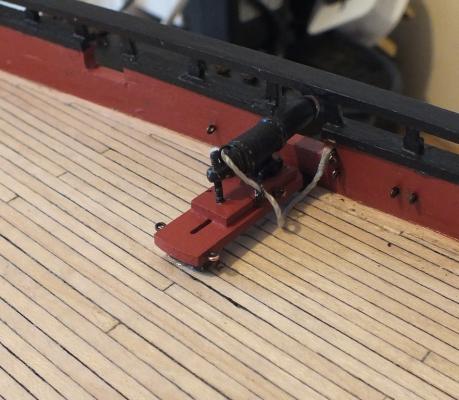
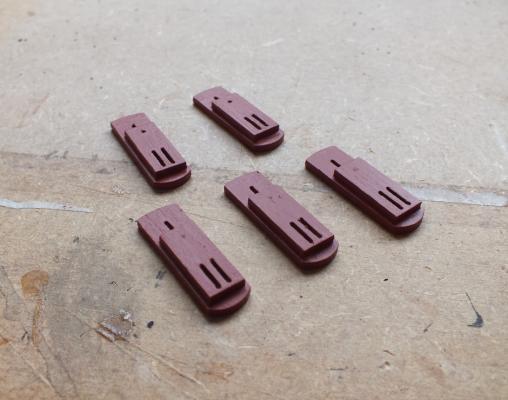
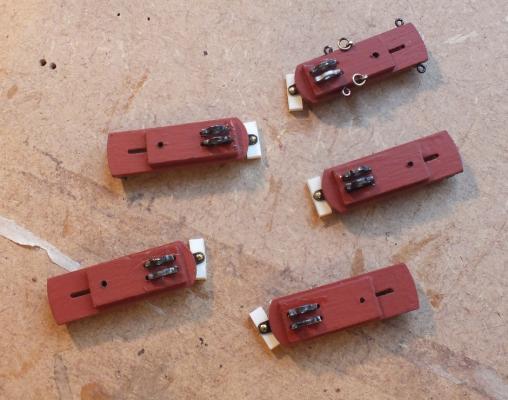
The nine pound carriage guns were made up in the same way as were the eighteen pounders. The caronades were made up in stages as shown in the photos, I first looked for the tackle arrangement and used the one that seems most common, the issue was the fixing of the front carriage pin it shows it pinned through the bulwark on the bottom of the gun port, the problem with this would be, in lowering the bottom of the port to keep the cartridge level, it would be to low and look wrong, so I looked at every photo of caronades I could find, on models, and as mounted on H M S Victory, and most had the front swivel pin going through a block mounted on the deck in front of the port, so that is how I built mine.I am just starting to rig them in place. Carriage parts assembling carriages Carriages built up minus barrels and some rigging eyes Extra rigging brackets from spruce and 3mm rings Made up and painted On deck working out how the rigging will run


- 536 replies
-
- 9
-
-
- diana
- caldercraft
- (and 1 more)
-
Hi Mihai Pegasus makes up into a super model and is great quality there is also plenty of help and very good adivce here if you need it.
- 64 replies
-
- 1
-
-
- pegasus
- victory models
- (and 1 more)
-
Thanks for the comments guys and the like button responses the rework although a pain did come out as good as it possibly could have done, I am one starting on the two upper deck fittings starting with the cannons and caronades, much more fun, I will update the build on the guns in a few days.
-
Hi great work on the ratlines they look very nicely tensioned and even .
- 1,279 replies
-
- 1
-
-
- agamemnon
- caldercraft
- (and 1 more)
-
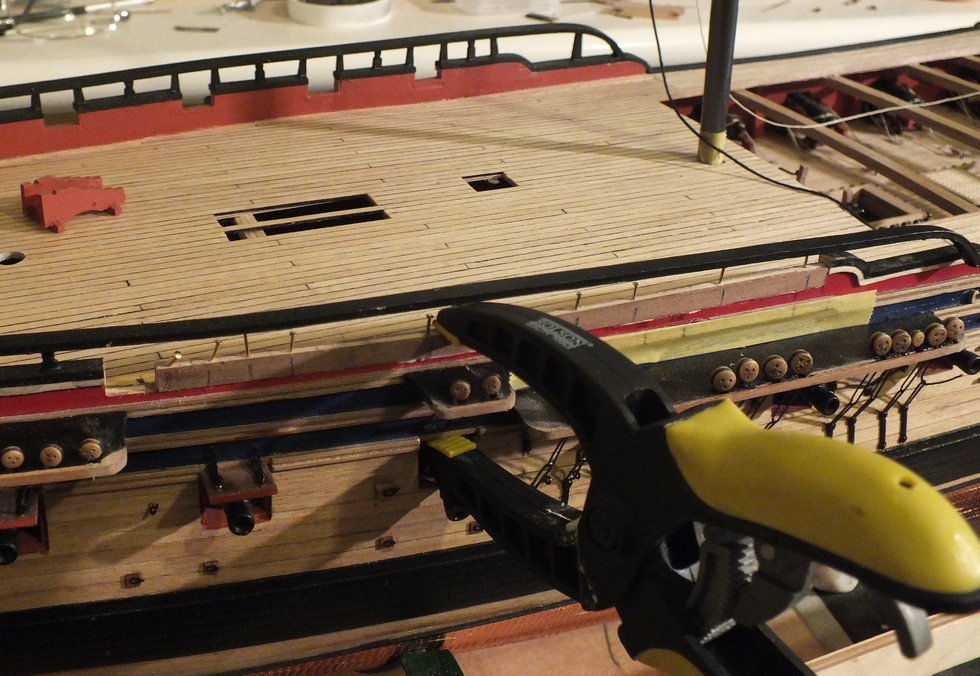
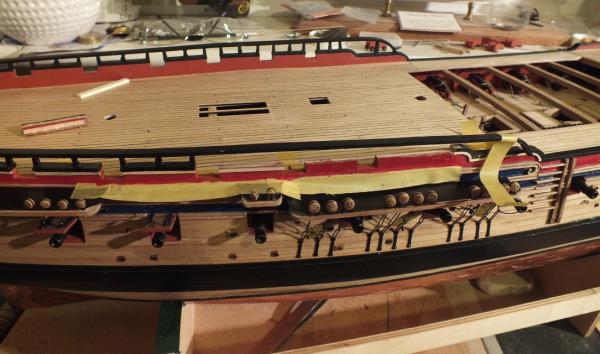
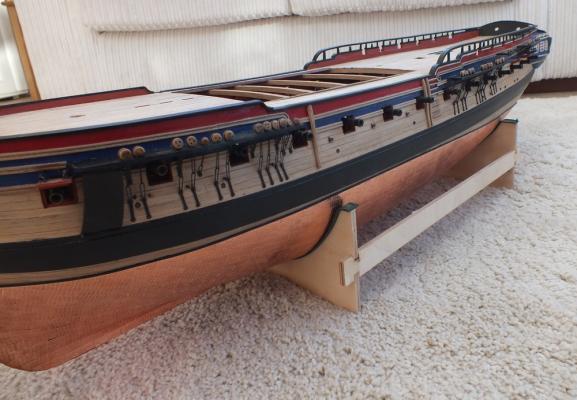
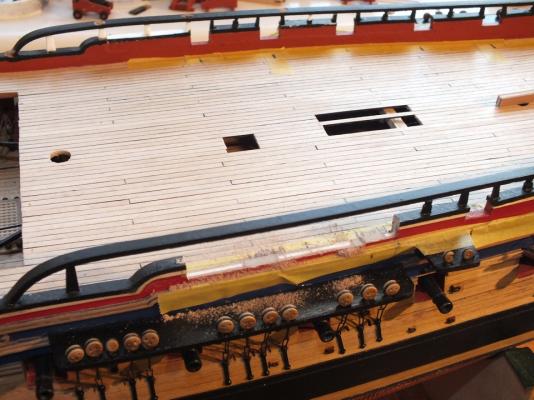
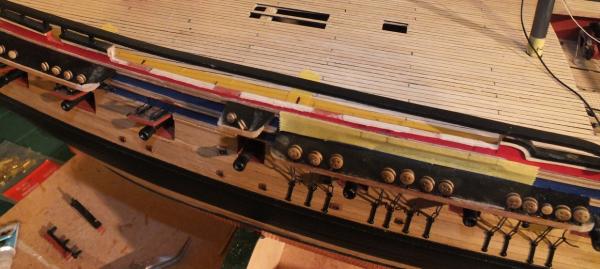
Reworked quarter deck gun ports I first cut out the bulwark as necessary and laminated some wood to the right thickness, and the glued and pinned it on to the cut out section, I then re-cut the gun ports and added the rails, and the trim and when all done repainted, I did one side first, and then the other, a real pain to do but it had to be done, I could not have left it as it was as it would have botherd me. Over all the repair is not to bad and when the cannons are fitted and rigged you will not see it, if you did not know it was there,and the one good thing was the beech top rail did not break so that looks as good as before and its the part that the eye catches.Also all the channels, dead eyes and links are now complete and painted. Next the fore and quarter deck fittings and guns. Second side cut out Laminated insert New gun ports cut out Rework completed Reworked gun ports and finished channels and dead eye linkage

- 536 replies
-
- 10
-
-
- diana
- caldercraft
- (and 1 more)
-
Hi Mobbsie we all make mistakes I should know I have just spent two weeks sorting one out, the good thing is its done and we will not look back wish we had done it. Good luck with the ratlines the most tedious part of any build.
- 1,279 replies
-
- 1
-
-
- agamemnon
- caldercraft
- (and 1 more)
-
Thanks guys I am now well on the way to rebuilding the bulwarks and rails, one good thing so far is the main beech wood top rail has remained in one peice. This has been one of those things you must do, for if you did not you would always regret it later.
- 536 replies
-
- 1
-
-
- diana
- caldercraft
- (and 1 more)
-
Thanks guys I am now well on the way to rebuilding the bulwarks and rails, one good thing so far is the main beech wood top rail has remained in one peice. This has been one of those things you must do, for if you did not you would always regret it later.
- 536 replies
-
- 2
-
-
- diana
- caldercraft
- (and 1 more)
-
Hi Vince The contents of the box look good should be as interesting ship and build.
-
Hi seize them through the eyelet and then fix the eyelet into the bulkhead a good pair of tweezers helps.
-
Thanks for the comments guys BE I have given the thread one coat already and will give it another one. Christian. I might have been wiser in covering up the knots but not in other matters as below will demon strait Major Quarter Deck gun port problem When all the dead eye to hull linkage had been completed it showed up a major problem,I suppose I had seen it coming but like the ostrich had my head in the sand. The problem, some of the quarter deck gun ports did not line up with the gaps in-between the shrouds ( you cannot have the 9 pounders shooting through them) when I did the ports, I spaced them out neatly but did not look forward enough, to see this problem. I looked at ways of poking the guns through the rigging but in the end had to bite the bullet or in this case cannon ball ! Cut out part of the quarter bulwarks and reposition the gun ports, thats where I am now as photos show old bulwark cut out, a real pain as I expect when it remade will not be as good as when first done. Cutting out the quarter deck bulwark and rails. One side cut out ready for re-work


-
Jan The sculpey ornamentation work is a bout as good as it gets.
-
Andy nice work sometimes the styrene is nice to work with and a bit more forgiving than wood, the mesh should look good.
- 382 replies
-
- 1
-
-
- stadacona
- sylvan scale models
- (and 1 more)
-
Great work Len, the stern detail looks spot on, and I think we all have to make small adjustments, and the point being they were only small. Coppering, one thing I would say is that with this type of tiles you can overlap, and they look ok I did this on Pegasus, and it gives a better look than trying to fit in cut wedge shaped ones.
- 101 replies
-
- 1
-
-
- victory models
- amati
- (and 2 more)
-
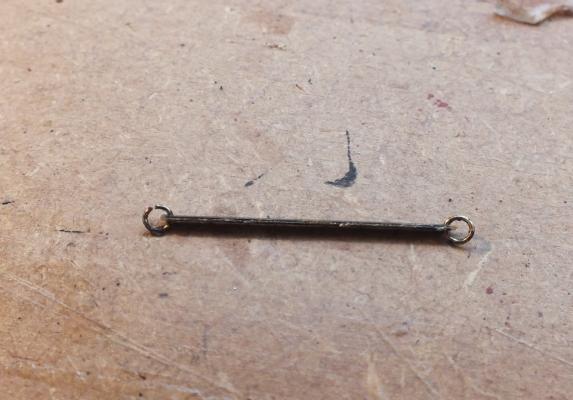
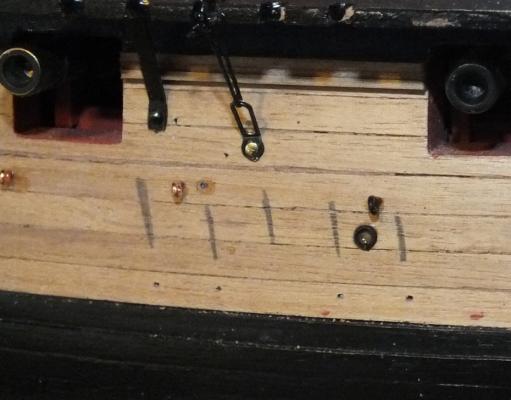
Dead-Eyes and links On dry fitting the 5mm dead eye into the strop it left a gap in the bottom of the strop, and I thought this will be tricky to connect the first link too, so I glued up the gap and made a metal link 13mm long ,to join the dead eye to the link that is pinned to the hull, I was not that pleased with the result but did find that when the dead eye in the strop is pushed into the slot in the channel it closes up the gap in the bottom of the strop,so I fitted the two links that are pinned to the hull, the preventor link and the toe link and then added the metal link, the middle link made from .5mm wire but the tension was not right so I tried joining the links with .5mm black thread which gives a nice tight linkage and with the knot tied in the channel notch it will not be seen when the covering timber goes on. One thing I would have done differently would have been to fit the 3mm dead eyes and links on the mizzen channel before the gun port lids the lids made it a real pain to fit the links and quite a few naughty words were uttered. The photos below show step by step my way of doing the linkage on this kit, I must say that I much preferred the strops and linkage in the Victory kits, also the kit comes with two toe links short but an email to Jotika quickley brought the parts in the post. Linkage positions marked on hull side Preventor and toe link added .5mm thread through strop Knott making middle link tied Middle links ready for trimming Fore mast --Main mast & mizzen linkage completed


- 536 replies
-
- 7
-
-
- diana
- caldercraft
- (and 1 more)
-
Hi Great work on the cannons the cast ones on Fly are horrid the Pegasus one are much better I cannot see why they have two different sets, your ones are now better than the wooded Pegasus ones. Great detail in the cabin, its a pity you can not see much of the detail very well once completed, still I did that with the top and but deck on my Diana. Also the wale does needs continuing to the bow, a length of decoration goes over that bit.
-
Hi Michel looks very interesting and similar to larger frigates I for one look forward to updates and lots of photos to see how the build develops.