-
Posts
461 -
Joined
-
Last visited
Content Type
Profiles
Forums
Gallery
Events
Posts posted by Chasseur
-
-
Dave,
you are a very talented guy. I have no doubts you'll do justice to the build.
A very cool shot of the sailors furling sails. She must have a crew of over a hundred men.
Jeff
-
Thanks Patrick I appreciate your encouragement and enthusiasm!
Jeff
-
Best laid plans and intentions do change. Life got in the way of this modeller until today. I got back into the saddle and rode no where.
 I am sure some of you can relate. Today I finally got to sit down in the Man Cave and slowly push forward. I finished the hull templates, traced the port side view of the hull with my new illuminator I built - (illuminator article will be in the next journal of S.I.B.A.A.) glued port side to the hull blank, and then started to saw from the top down to the bottom of the topside deck. I made lots of lines on the top view deck plan to saw into; to make carving the deck sheer easy.
Above is the Port Side sheer plan traced with the illuminator!
Above you can see where I traced a bunch of lines so I can saw down to the deck sheer.
Next step is to saw down to the mark on the sheer and slice off the slivers. I am itching to get going on this project and I think I am all caught up on the 'Honey Do jobs' around the house.
Jeff
-
Gents here is a printable PDF doc.
Igor I'll email you the word doc per your request ... Jeff
- captainbob, IgorSky and dgbot
-
 3
3
-
Yeah Dave I thought about that. I'll have to do it tomorrow at work as my PC here at home has low budget software.
Jeff
-
Igor and fellow modellers. I tried to attach the article by Capt. E. Armitage McCann; A Mystifying Bottle Stopper and other hints for ship model makers but the software spit it back at me. The file size is under the limit but it doesn't like a word doc. I'll try another means.

Also thanks again Igor for the link to his other article. Greatly appreciated ... Jeff
-
-
I thought it was about time to make a post and update my build. 2015 came in fast and furious. Work has been exceedingly busy which is a good thing. As well my wife wanted some much needed renovations to transpire so I had to pick up the "Big Boy Tools" and go to work on our house. Also I finished painting a bedroom for my Mom. There is a season for everything and sometimes one can get so immersed in a project that perspective can get cloudy.
As well both of my boys winter beaters broke down which had me pulling some wrenches while they were in the middle of writing exams for university courses et al. So no hobbies whatsoever for January and February :-(
I had spent the later part of last week and today pondering a small paint booth for the man cave. There are ready made units to buy on the net but quit pricy and shipping is a killer these days. Seeing ships in bottles are small and I and my boys want to build some model cars I'll design something small but efficient. One hurdle I have to overcome is I have no outside window in my man cave henceforth I have to plumb some ducting through a wall into the garage and then out the side wall to evacuate the nasty fumes from enamels and thinners. I still like the finishing results from enamels and they tend to be toxic so ventilation is not an option. I am pretty close to a design I want to move forward with.
Regarding my build I came across an interesting article written in Popular Science Monthly by Capt. E. Armitage McCann entitled: A mystifying bottle stopper and other hints for ship model makers. Mr. McCann wrote the article as the magazine was sponsoring a SIB contest and they asked Armitage if he would share some tips on bottle stoppers and making sails for ships in bottles. As well the winner of the contest was Charles V. Nielsen of New Jersey whose models demand attention from the avid builder. Mr. Nielson uses high grade window shade cloth to make sails from. BTW did I mention this article was printed in 1932?
Today is March 1st and I think I can finally say there is a strong possibility I can get back into the man cave within a few days and start back into the Preussen SIB. I have to finish the rest of the hull templates and then I'll be ready to start carving the hull. I have everything I need just have to get some time to have at it. Also I have a couple weeks off in April in which some serious hobby time Lord willing will take place. I am looking forward to it and will post some progress in the next couple of weeks as I get back into it.
I am back in the saddle, Yippee Ky Yay!
.... Jeff
-
Not really my chart says 20 TPI for hard/soft wood 1/8" thickness or more.
Jeff
-
I have an el cheapo Delta scroll saw that I have owned for almost 20 years and I get the same sort of outcome your experiencing basically blade deflection. You also have to be careful how tight you set your blade as well otherwise she'll snap! One thing I found which might help you is the use of the spiral blades you can buy. These blades allow tight turns and the trick is to go slow and not force it.
Another thing if you have the patience is to do the old "Woodright Trick" and make up a miniature coping saw that will take scroll saw blades. Sure it's not as fast but you get the real feel of the wood as you cut it.
The trick with any hand saw is let the blade do the work and never force it. I knew a carpenter who could cut 3/4" plywood with a hand saw better than any guy with a skill saw. I marveled at how he was so accurate. He said it's all in the wrist action, speed of stroke, know your wood, and of course a sharp saw. Try the spiral blades they work well!
Jeff
-
-
-
Awesome work *Michael*
 You rock my friend!
 -
Hi Al,
I have lots of info however thanks just the same for thinking about me .... Jeff
-
Wow you remind me of the work my father in law used to do when he was younger. I can relate to your comments about the cold weather and the occasional brain fart!
"Sucks to get old as my father in law would say." Oh well a little humility goes a long way and the project is definitely first rate.
I checked out the videos and that was very informative.
Keep up the great work!
Blessings .... Jeff
-
Thanks Michael,
Happy New Year to you and yours as well!
let's hope it's a good one ... Jeff
-
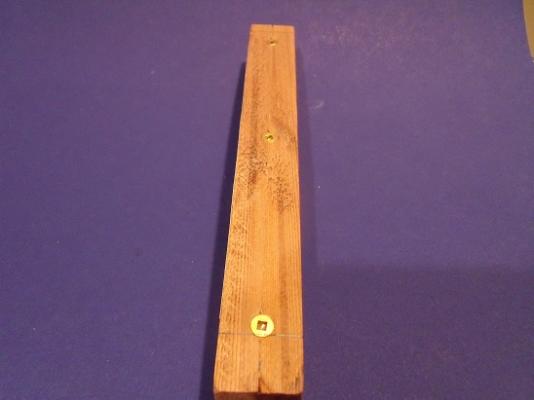
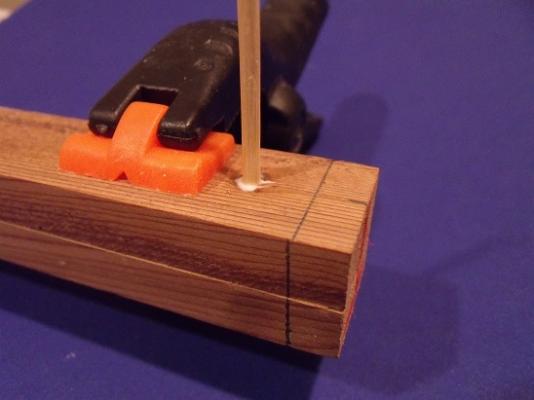
Christmas came and went and the new year is upon us. I figured it was time to start laying out the hull to carve from the red cedar blocks I had cut up and quartered. I initially glued the top and bottom sections together first then they are screwed to each other with 3 brass screws to start.
The next step was to pull the two end brass screw's out and replace them with some wooden dowels as I'll be carving and shaping in this area soon. Round tooth picks work well here.
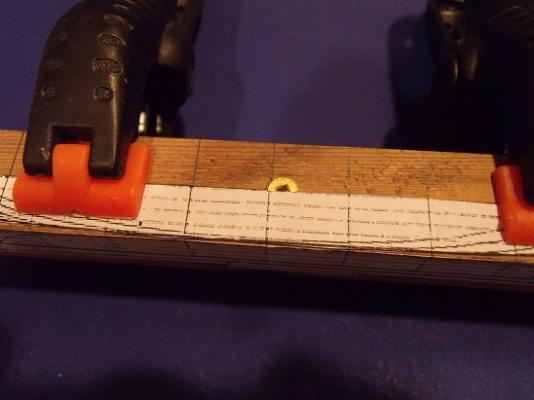
I also decided to start laying out the hull lines onto the blocks. The first step here is; to start from the outside and work in by tracing out the lines on the wood, cut off the outer line on the template, then trace the next line, cut off, and so forth. Works well!
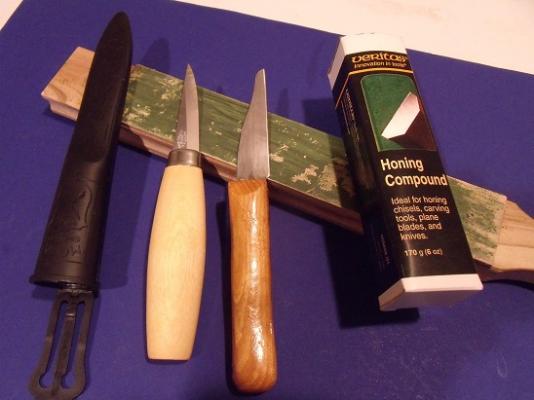
Next I needed to make a trip to Lee Valley and score some tools. I had some Christmas money to spend so off I went to may favorite candy store. I picked up a leather strop, Veritas compound, a Frost carving knife etc. The Frost knife on the left is from Sweden and is deadly sharp! I love Swedish tools they rock! I sharpened my old shaping knife on the right and I got the edge almost as good as the Frost knife. Still learning how to sharpen as it's truly a skill you do not learn over night.
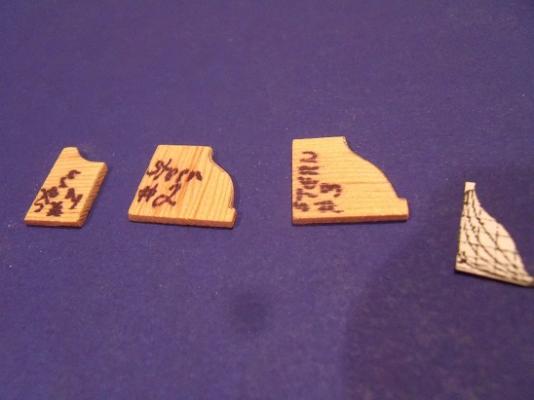
I then started to lay out, then cut out, my hull templates starting with the stern section. These are made from some thin fir wood. More to make!
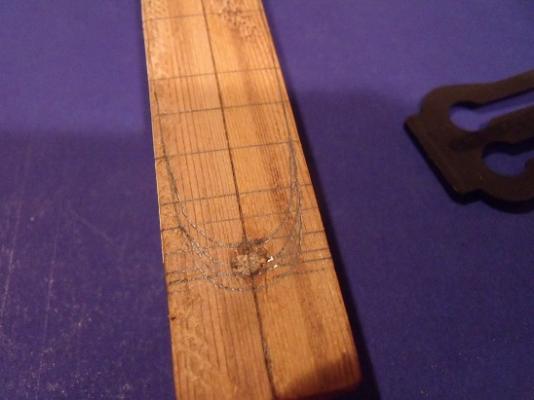
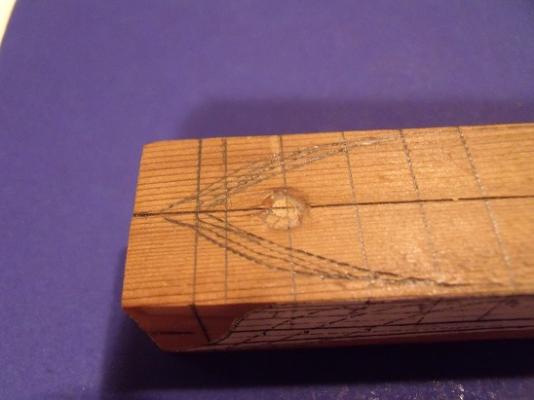
The next two pictures show me starting to transfer the bottom sheer and hull lines so I know where to remove material as I get ready to carve it down and shape it. Also what I learned from Clive Monk and Lloyd McCaffery's book is the the blocks quartered give a natural center beam and water line which works excellent when laying out the sheer. When I go to attach the bottom and top part of the hull together I'll insert a 0.005" piece of plastic sheet in between to give me a superb joint. This will also help me to separate the black and white paint colors on the hull and get a sharp delineation between the two. One thing about modeling at this small scale is every little flaw is noticeable when photographing at the micro level.
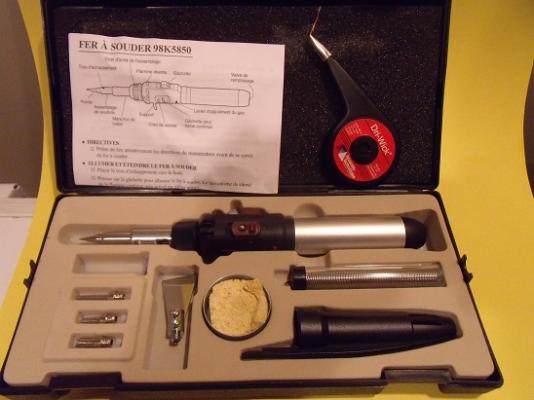
Finally is a shot of my new soldering kit. Another candy store purchase from Lee Valley. I also scored a wick as well. Torch is butane fired and the kit gives me an assortment of tips for the fine detail work I will get into on the masts and spars etc.
So there you have it. I slowly move forward.
I am having fun and learning as I go.
P.S. still tweaking my white cap techniques as well.
Jeff
- Mirabell61, Omega1234, IgorSky and 4 others
-
 7
7
-
-
Gents,
Thanks to all of you for your encouragement! Just received an email from Thanasis and he has tracked down the Greek modeller which goes by the name of Captain Nemo. When I get a chance I'll mock up the wave crests and ... if to my liking then the final carving will begin. Then onto the fabrication of the hull as I have to get everything fitting right before installation of the seas.
Jeff
-
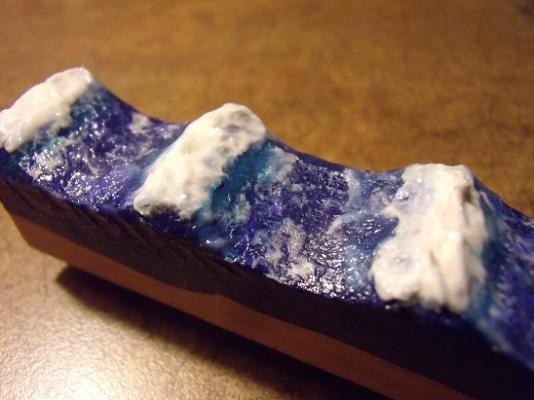
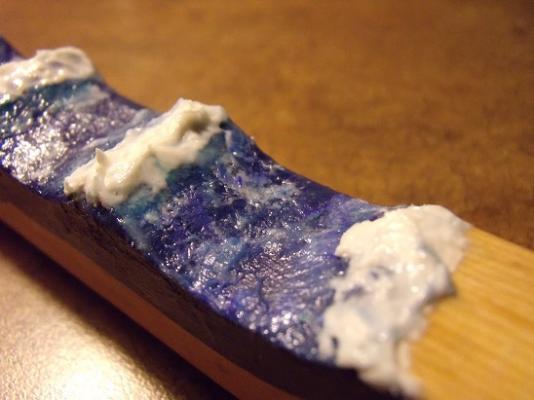
Today I had a chance to get back at my seas technique and try out the new mediums I purchased. I was thoroughly impressed with my purchases of the modelling paste, gel, and acrylic paints. All of the products were a dream to use. I am extremely close to carving my 4 pieces, installing the location magnets and finishing them off. I also stumbled on another technique by a Greek modeller from the country of Greece. Everything I did today worked well. I just have to tweak my white caps on the top of the waves.The aforementioned need a bit more work.
IMHO I nailed the foam effect perfectly as you can see from the picture above. Also I found out the paste makes excellent foam by dry brushing it on. Yeah!

I am just waiting for a reply from the Greek modeller on how he did his wave crests and I should be in business. I am really looking forward to perfecting this technique as it will add realism to the ship model.
Stay tuned ... Jeff
-
-
Hey Michael that sounds very tempting. I'll see what the library says. If they say it will take a long time then I'll definitely take you up on your offer. I'll PM you when I know one way or the other!
Thanks for your generosity .... Jeff
-
Things were going good until last Monday when I unfortunately came down with a sinus infection and sore throat. I ended up flat on my back for three days to recover from this dreaded virus going around at work and in our community. So in-between deep sleep and trying to eat a bit I managed to go onto the Internet and do some more research as advised by; David B. and Carl AKA COG. As well, I got Camarata's book coming to me via an inter-library loan.
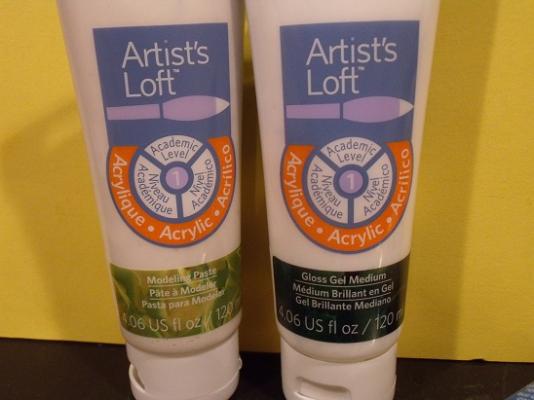
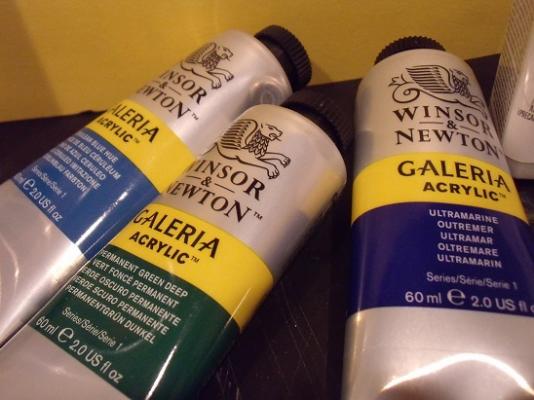
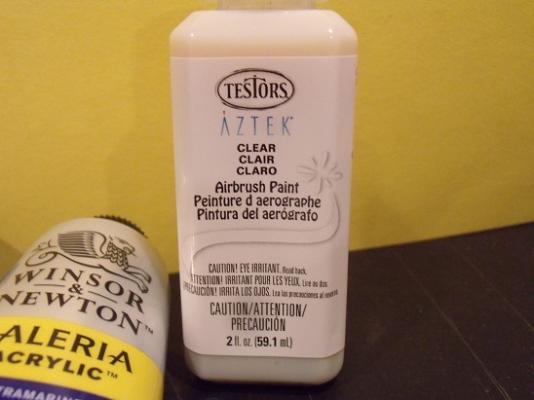
What kept coming back to me was to develop my own artistic style and use modeling past in conjunction with gloss gel medium. Greg Alvey on his website was a great inspiration to; (his alternate method) of using the aforementioned with acrylic pigments. So once I recovered I headed back to work last Friday. On the way home a pit stop to Michael's was in order to pick up the following; modeling paste, gloss gel medium, cerulean blue, green deep, ultramarine blue, and some airbrush clear coat. Please see the following pics:
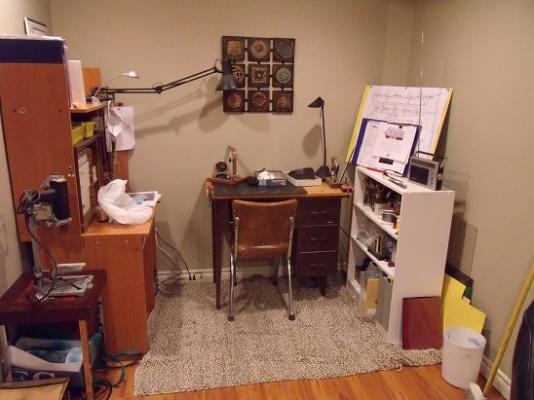
Also my man cave was an absolute disaster. I have the complete interior for a 1973 Nova SS in it, car parts, tires, etc. I took 4 hours yesterday to completely clean my cave and reorganize everything. I also turfed some stuff I really don't need anymore and... some stuff I'll give away to bless others. So a little blessing in disguise to re-assess where I have come from regarding the modeling of the seas and where I eventually want to end up. I am shooting for seas that will look to scale somewhat, add a little folk art into it, and add a touch of my own artistic style!
It's so nice to have the cave in order and I took advice from a jeweler to have my work space elevated to save on the back while modelling. I used an old sewing machine stand with some timber screwed on top to get a better working height ergonomically. So now I'll be working on attempt number six with the hope of establishing a nice looking sea which will complement the clipper hull and give the appearance of this majestic ship cruising the ocean blue.
So there you have it. A bit of a lull however... a few lessons learned and Rome wasn't built in a day.
Jeff

- IgorSky, Piet, Salty Sea Dog and 1 other
-
 4
4
-
Thanks COG I'll check it out ... Jeff


ESMERALDA by molasses - 1/640 - BOTTLE - Chilean Navy Training Ship
in - Build logs for subjects built 1901 - Present Day
Posted
Excellent detail at this scale Dave. I forgot about your mini clothes pins for holders. I really do need to make myself some! The white lady is coming along nicely.
Jeff