

Chasseur
-
Posts
461 -
Joined
-
Last visited
Content Type
Profiles
Forums
Gallery
Events
Posts posted by Chasseur
-
-
-
-
Very realistic and talk about a time saver! Ingenious to say the least ... Jeff
- Mirabell61 and mtaylor
-
 2
2
-
-
-
Al,
Blessings on your retirement and I pray you enjoy it and keep in good health. I still have 6 years to go before I can pull the pin.
I have an old Delta single speed and the thing is a tank, rattle trap, however it does the job for what I need. I wish I had a variable speed one though.
Sounds like your set ... Jeff
-
-
-
-
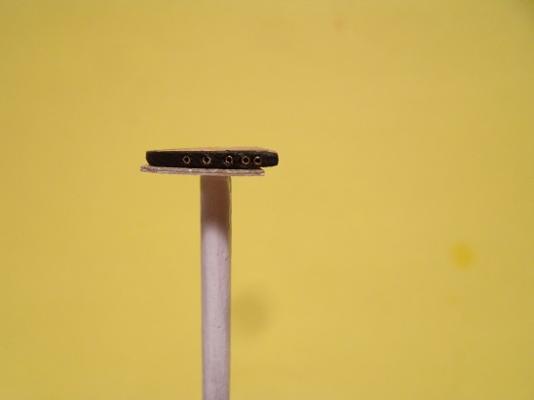
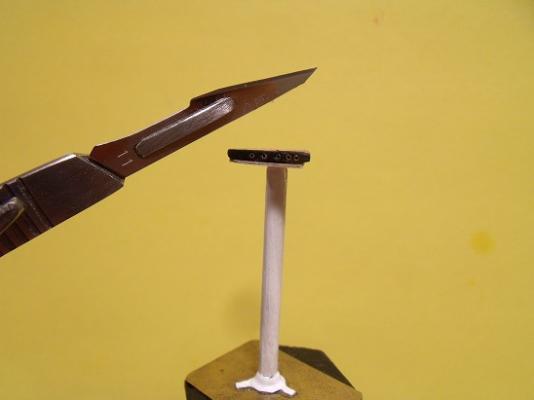
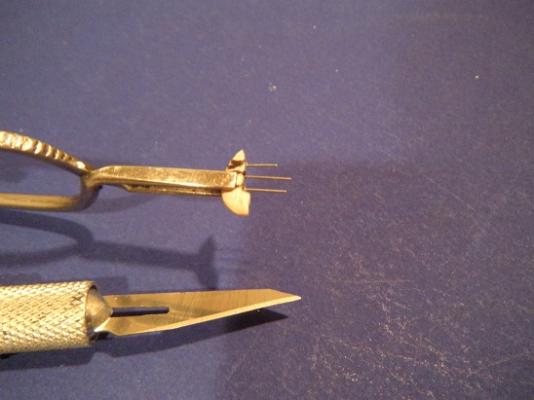
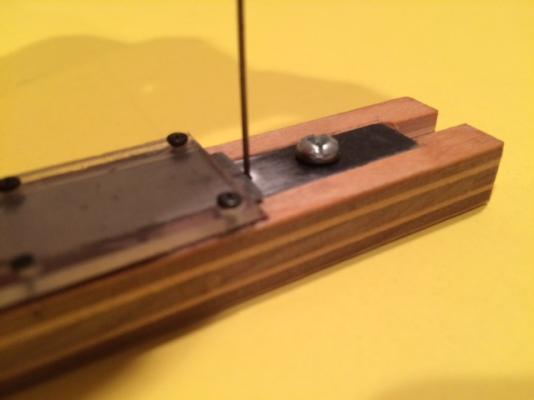
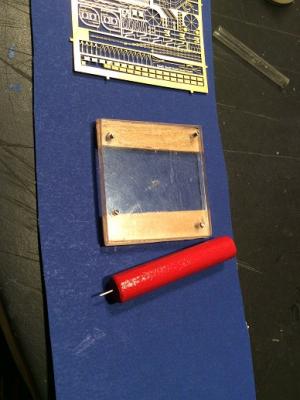
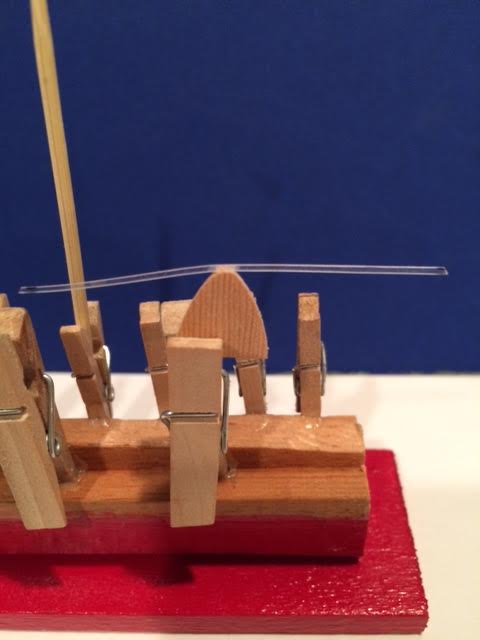
I had a chance to get into the Man Cave and work on the forecastle area where there are 5 portholes. In behind this area there are crew quarters on the original ship. This piece will be glued onto the upper hull piece after all of the detail work is completed. On top of this piece goes some decking, hand railing, anchors, bollards etc.
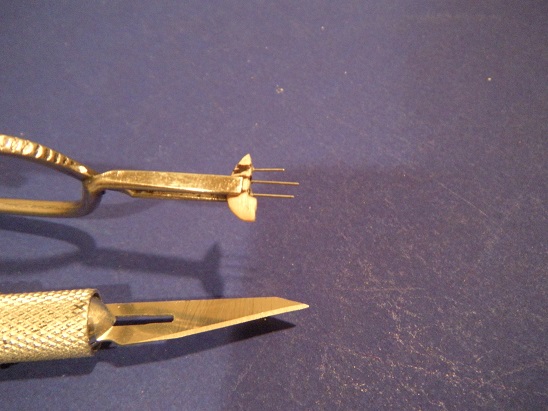
I had to make a special little tool to hold the small pieces of brass tubing to file up and install. It worked well and I achieved a fairly accurate scale look.
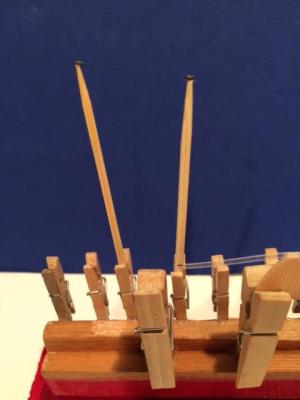
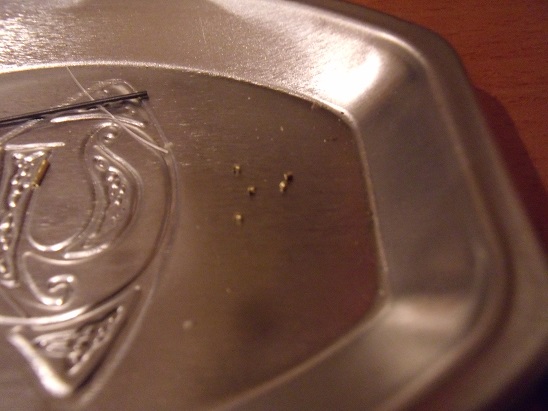
First picture shows a template loosely glued on so I could prick punch the locations on where to drill. Pretty fussy work at this scale and caffeine intake has to be watched during this process.

Second picture shows ten pieces cut from the tubing with my handy dandy tubing cutter!
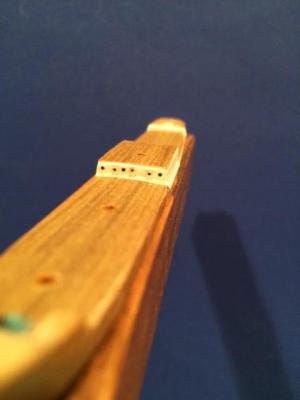
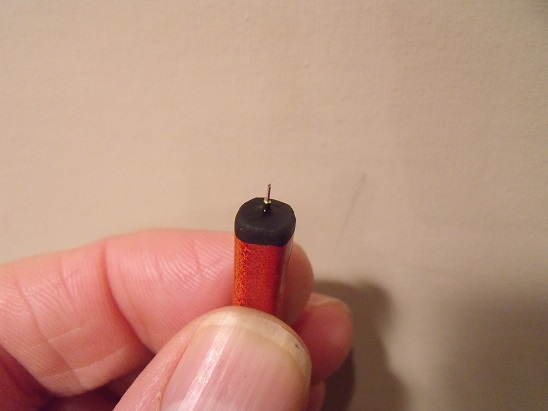
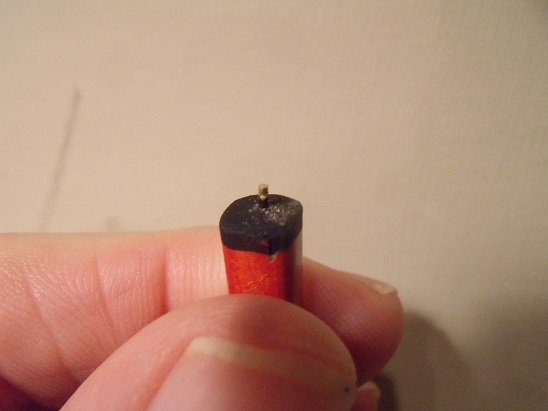
Third and fourth pictures show my little tool I made and a piece of brass tubing being filed and ready to install.

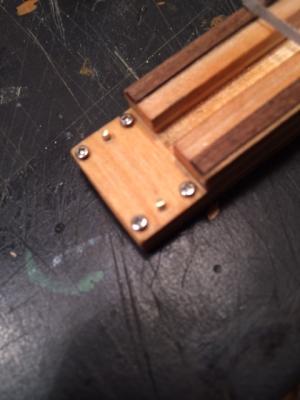
Fifth and sixth pictures show the port holes installed and finished with one coat of flat black for starters.
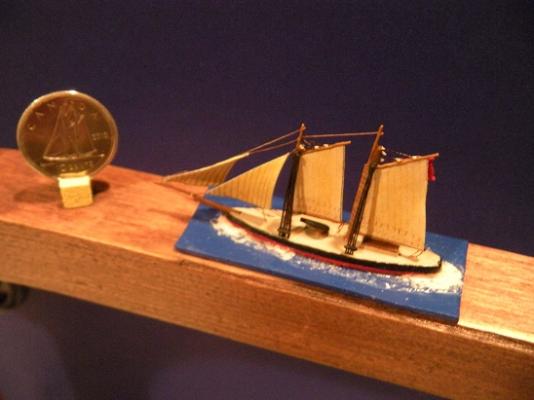
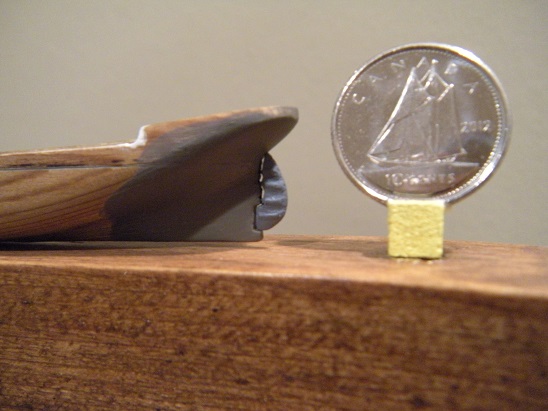
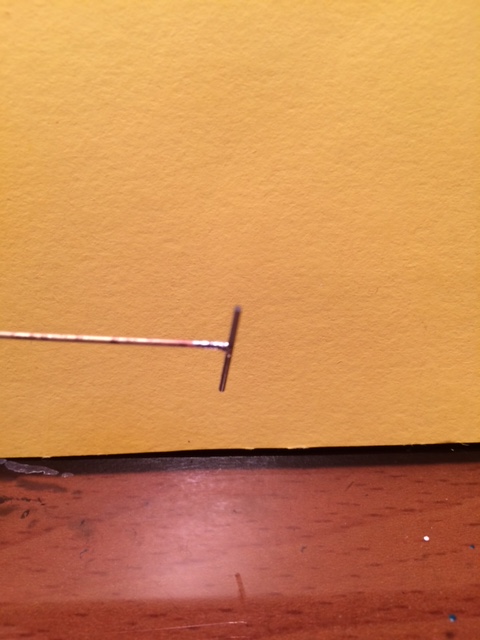
The #11 scalpel blade shows the scale dimension I’m working at … Jeff
-
-
@ David
Believe me in my warped mind I thought about hinges .... however as Cog noted too small to see however the top part has to be paired down a touch where it enters the stern section to keep things accurate.
There was a gent on the Internet who put it all into perspective and I quote:
When working on miniatures each part of the miniature is a model on to its own. I like his thinking ... Jeff
-
I had a chance to work up the stern and fix a rudder to it today!

I have to tweak the top part of the rudder.
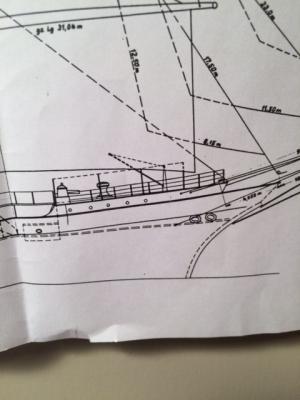
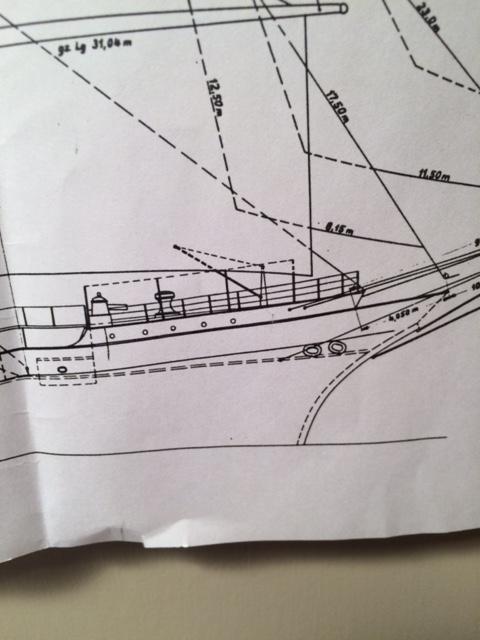
Thanks to Jo Conrad I received some accurate pics so a little adjustment is in order!
Jeff
- JesseLee, Omega1234, captainbob and 12 others
-
15
-
-
-
-
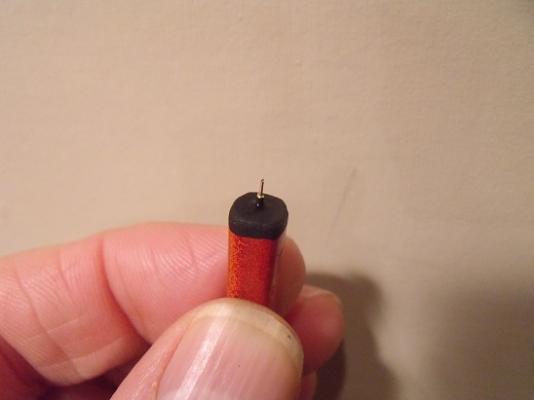
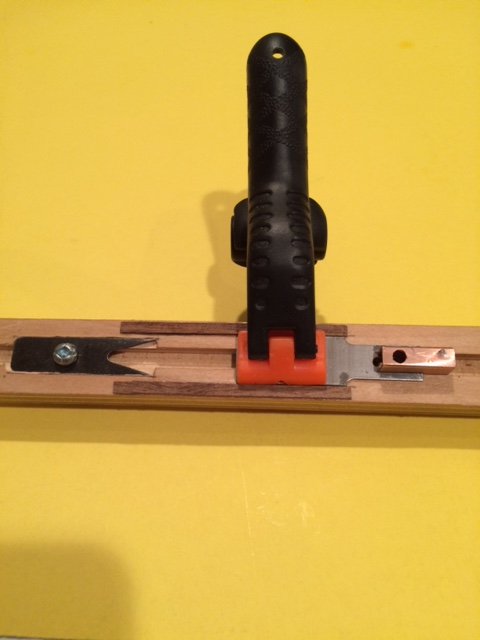
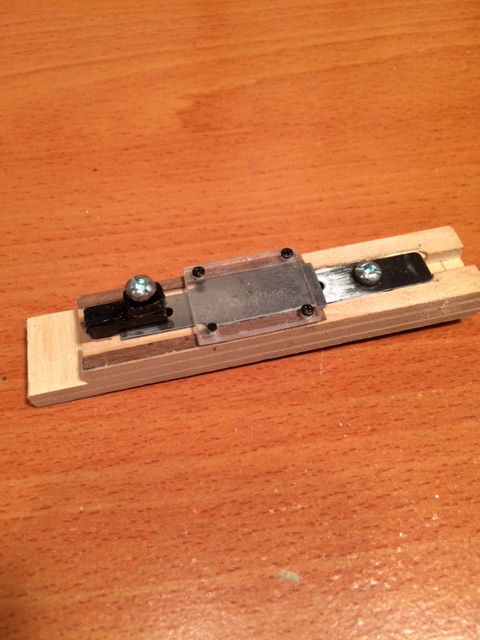
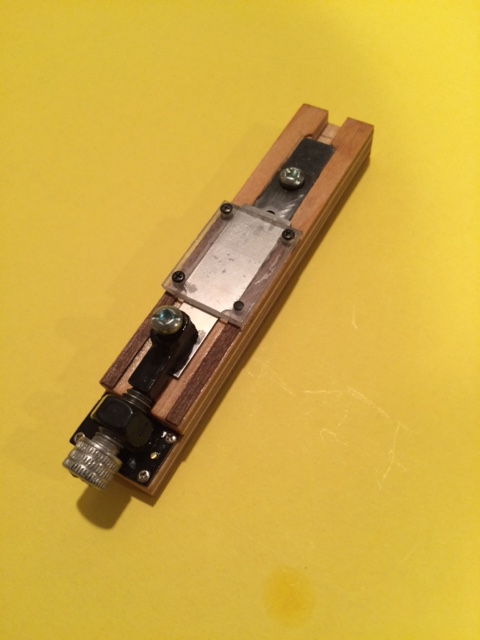
In order to get ‘some scale port holes’ small enough and to add some realism to the Preussen I set upon this little project to make myself a small bore tubing cutter. As a bonus it can nip off spars and masts as well.
I have to commend Igor Sky as his post here on Model Ship World got this project rolling as he was struggling with the same issue in trying to cut small piping without crushing it. The following photos show the process of installing the blade assembly, blade cover, piping receiver, and thumb screw assembly to put some pressure on the piping when cutting it off.
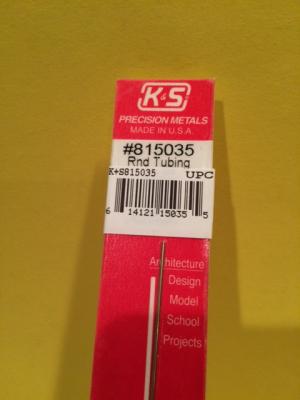
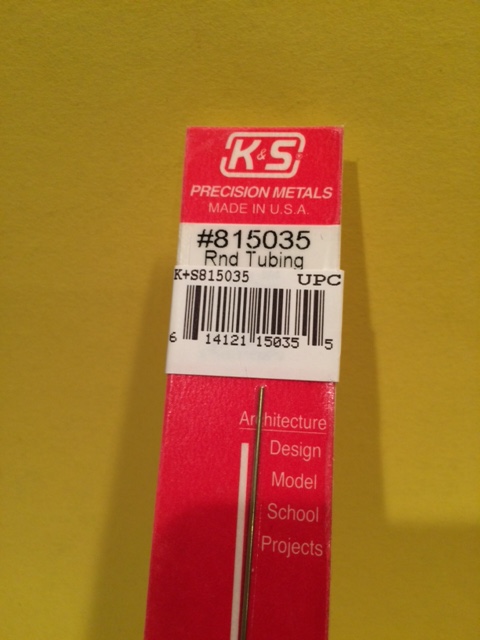
The candidate for the project is 1/32” brass piping purchased from K and S out of the USA. Also I had one small piece left from my Father in Laws aeroplane modelling days to play with as well. The small screws came from an old smart phone that cratered on my eldest son. Smart phones are a treasure trove for small scale project’s as the shapes are miniature and square to the earth!
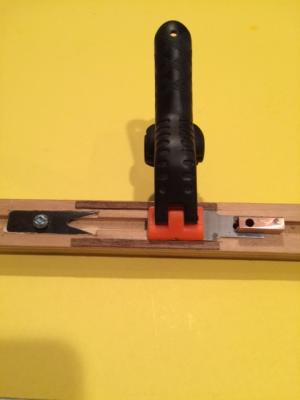

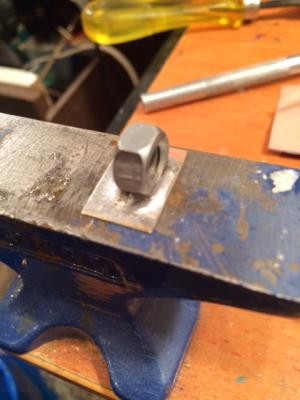
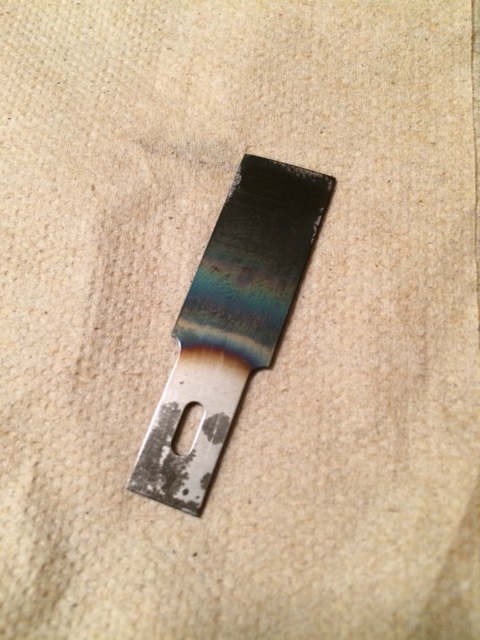
I also had to heat the cutting blade cherry red then dip it in some motor oil to temper and harden it. In order for the tubing not to slip out of my grip a ‘Tee Handle’ was soldered on so I could cut the piping off. I made the blade cover removable by removing three screws and then quickly swinging it out of the way to change up blades as I go.


So there you have it a nice little tool to aid in the build of small scale port holes ... Jeff
-
-
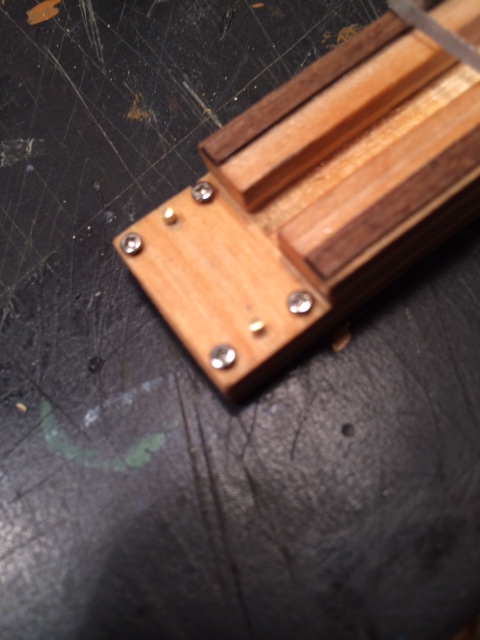
Yesterday I had a chance to get back to the Preussen SIB. First picture is a little holder I made to hold small part(s) while I work on them and then paint them up accordingly. The holder can go into my mechanical arm as well for ergonomic reasons when working on the bench.

Second photo is another holder I made for painting and this photo shows two scratch built chicken coups less paint on top of the two tooth pics . These coups are located beside the anchor winch on deck just underneath two ladders that head up to the forecastle. The coups will be painted brown and some straw color. BTW those two chicken coups you see measured 1 mm X 1.5 mm.
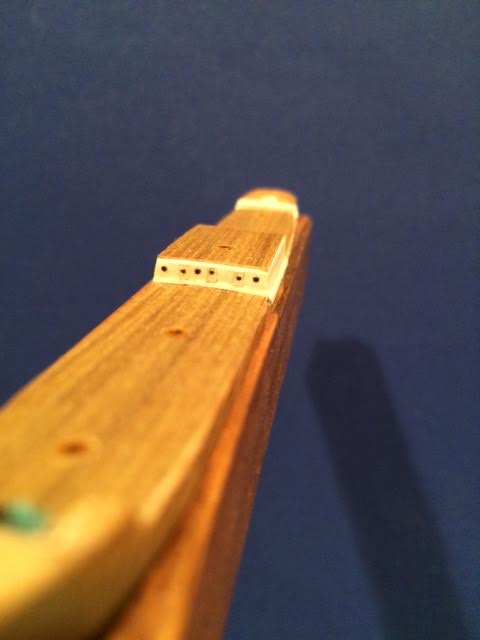
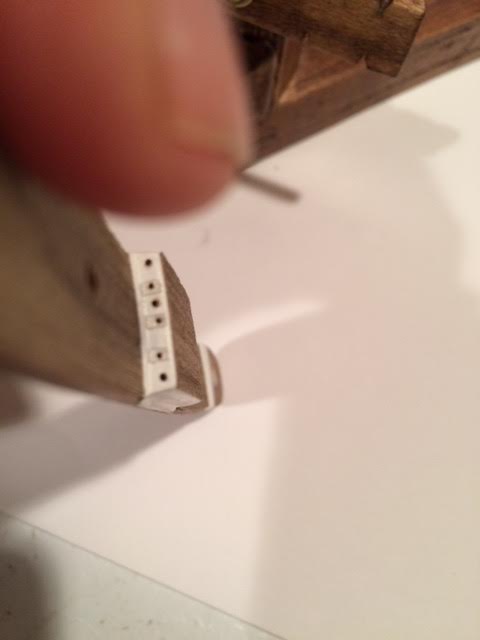
Next picture shows a piece of thin plastic I will eventually punch port holes into to show the portholes that are located in the forward bunk area underneath the forecastle deck adjacent anchor winch. Portholes will be 0.2 mm in diameter. This piece will be glued on after all of the detail work is done.

Next two shots show the forward entrances to the area underneath the mizzen mast. There are 3 man hatches and each hatch has a 0.2 mm porthole modeled and the other three are bigger windows at 0.5 mm in diameter. First shot picked up some yellow light from the deck and looks weird. Second photo shows it more clearly against a white background. Not bad for an I Phone. If you look really closely I even modeled the base board underneath the hatches that lies against the wall and deck.

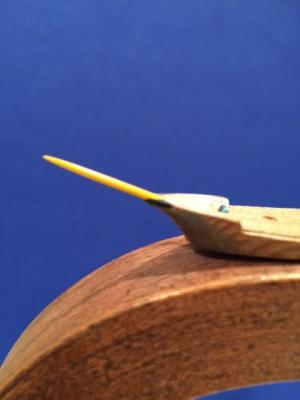
Last but not least ‘a close up shot of the bowsprit inserted into the hull.’ This is going to get really interesting as… at this scale I have to drill holes in it for jibs et al. Also… there are metal fittings for rigging from the sprit to the hull. She’s going to be dicey at this scale however I think I can pull it off.
- avsjerome2003, dgbot, mtaylor and 6 others
-
9
-
-
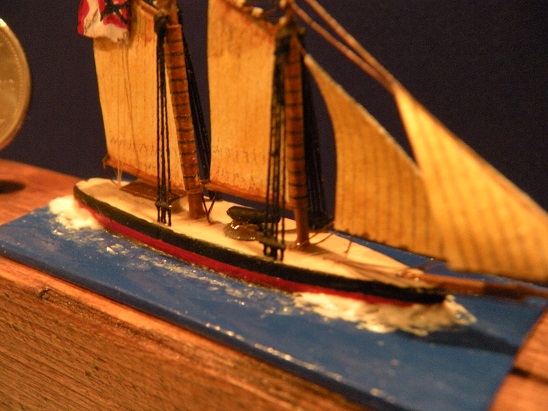
It seems we both like Blockade Runners.
Jeff
- uss frolick and mtaylor
-
2
-
Thanks Guys
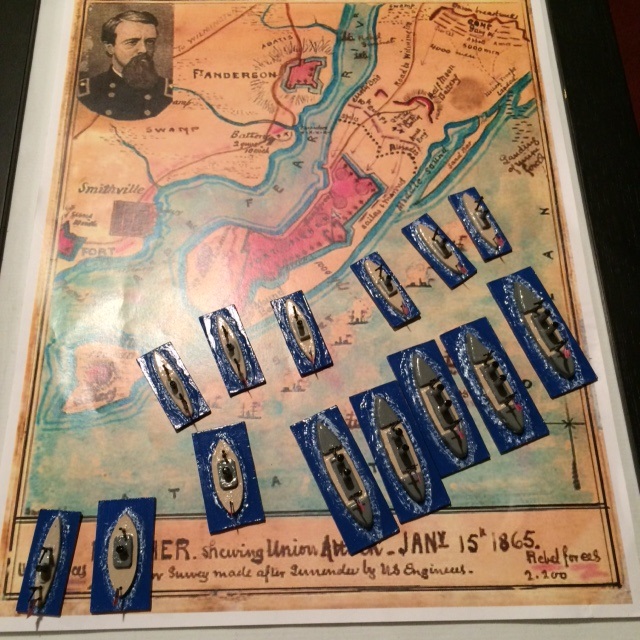
Patrick .... the board game is something I have been thinking about for awhile. I'll put the build logs here however not sure how much to put as at this scale it's not very exciting. Yes I am building individual ships and I converted some other ships for the Union Fleet. See below... Blockade outside of Fort Fisher...
Eventually I'll build more detailed models for the Union Fleet once I flesh out all of the details et al of the board game...Jeff


-
Board Game Blockade Runner
CSS Savannah – Gun Boat
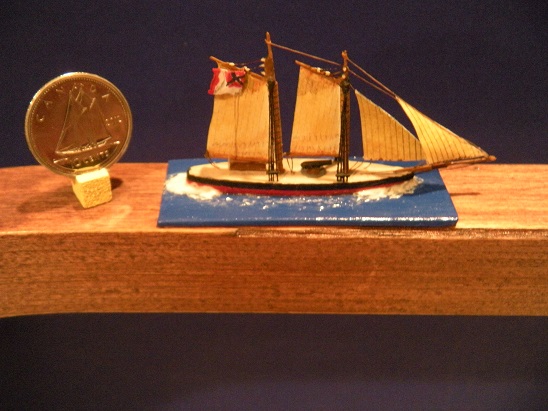
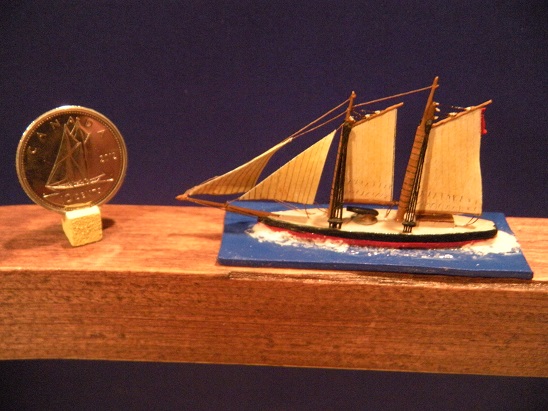
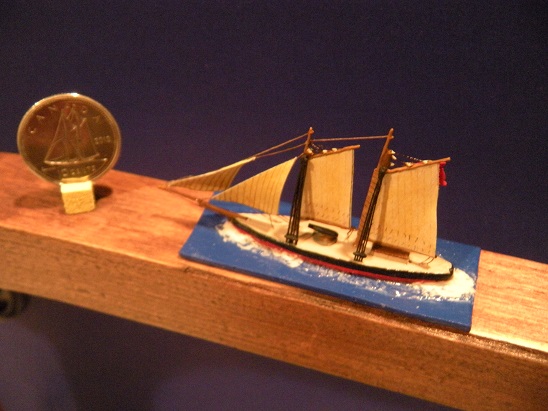
I had a chance to start working on my board game over Christmas. It’s amazing how fiddly working at such a small scale can be. Sometimes; I‘d cut a part only to have it blow away, fly away, or fall someplace on the floor.
The first ship to carry the name Savannah, this fifty-three-ton schooner was converted to an Atlantic Coast privateer after hostilities began in 1861. The ship was lightly armed with single eighteen-pounder cannon, of War of 1812 (1812-15) vintage, which had been converted into a rifled gun. The privateer Savannah took one merchant ship as a prize of war before being captured by the brigadier USS Perry after two weeks of service.
Displacement: 53 Tons. Dimensions: 56 ft. long
Crew of 20


Being this ship is a board game marker; I took a lot of liberty with the rigging, scale and color scheme. I also chose not to put any gunwales on and left a lot of the deck furniture off as well.
This ship is a wild card in my game and is used to lure the Union blockade ships off of their post so the South can get their runners out to seas for necessary supplies etc.
Jeff
-
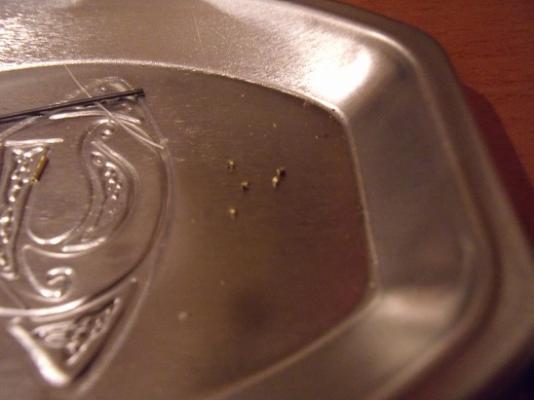
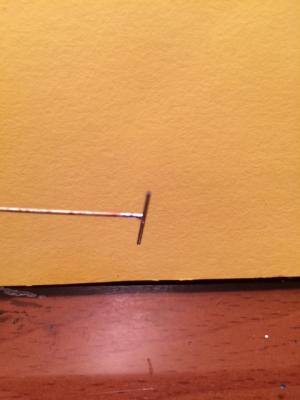
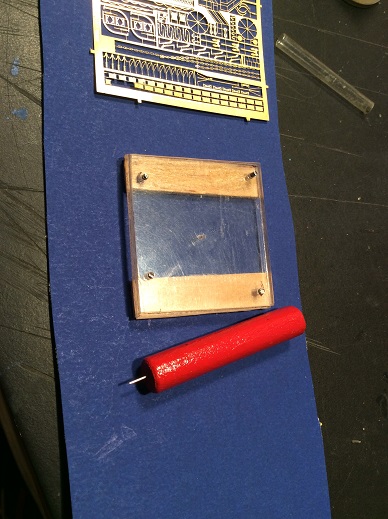
Today was a big win for me. I hummed and hawed about purchasing the tool from RP Toolz for $134 CDN funds. I just couldn’t justify paying that kind of dough for punching out small plastic discs. So being the frugal guy that I am I made my own to experiment with? To my pleasant surprise it turned out well. I used a piece of stick pin for my first size of .5 mm or about .020” in diameter and installed it into a piece of wooden doweling.
Then I cut two pieces of thin Plexiglas and pinned them in place with some piano wire. I drilled a .5 mm hole in the middle. I put a couple of pieces of Popsicle sticks underneath and glued them in place. I punched 5 pieces out of 0.10” clear styrene and painted them flat black to represent portholes on the Preussen as a trial. Acrylic paint was used.
Also to my surprise I flipped the discs over and I get a shiny glass looking appearance with the flat black on the backside to show some depth. It’s hard to see in the photograph but it’s there.
Note those dots you see are half a millimetre in diameter. I used my iPad to magnify it so you can make them out. If you look just below the dots you can just make out where I punched them out of the styrene. Look closely … Jeff

- captainbob, jimsib, Omega1234 and 6 others
-
9


Great Republic 1853 by rwiederrich - FINISHED - four masted extreme clipper
in - Build logs for subjects built 1851 - 1900
Posted
I guess it's all in the eye of the beholder. When I built the USS Constitution 20 years ago I just used the plates they supplied with the kit. They were individual pieces of wood painted green. After I installed them all I spray painted the plates a canned copper color. Once it dried a bit of the green leached through and it looked pretty realistic. I never bothered with the nail effect however I never knew you could buy copper tape until Rob posted his attempts.
Here is my 2 cents worth. Build your model the way you want it. Ignore some of the critics unless you plan on entering it into a competition otherwise do what you like.
Rob I am inpressed with your style of building. You use what you have and model to the best of your ability. Nobody can fault you for that and I like what I see so far. Looking forward to more posts ... Jeff