HOLIDAY DONATION DRIVE - SUPPORT MSW - DO YOUR PART TO KEEP THIS GREAT FORUM GOING!
×


Cap'n Rat Fink
-
Posts
829 -
Joined
Content Type
Profiles
Forums
Gallery
Events
Everything posted by Cap'n Rat Fink
-
 the next installment....i have now started the construction or bebuild of the ships furniture. A lot of these privateers had a simple companionway to get to the hold. Others wood have a trunk cabin just for the simple reason to provide more head room for the crew. So since this my personel privateer schooner. i have decoed to add a trunk cabin to privide comfort for my crew members. A total od 12 pictures being added...
 -
Ok on this installment I have reach the making and the installing of the rudder. The installation of the rudder has always been a big pain for me on any boat. You will the original and the new more acurate rudder for my privateer. Now when I installed the rudder, I decided not to take a drill and drill thru the deck. I built this boat 13yrs ago. I was just not sure if it was going to break thru where I wanted it to... I also added the sweeps, plus I framed them in... take my friends
-
At this point the hull has been painted. After masking the hull off. I painted the hull completely white. Once dried and done with the white color, i masked off the white and painted the portion of the hull that will be black. On the inside of the bulwarks I brush painted a portion black. The rest was left unpainted. I liked the look of the a portion of the sapaley painted and the rest bare. You will also see the finished painted cannons. you will also notice how you can see the strake lines which i left on purpose for a more authentic look. i really do not enjoy painting because i do not think i am very good at. plus when the paint is drying i must wait the alloted time for it to dry, which is something i do not much care for. i like modeling at my pace, but in this case the paint is in control of the pace..... questions and remarks are very much welcomed....
-
Thanks for stopping by! I am having a bit of fun with it. I will make it work. If i can't fix it i will scratch build it. here is where i am to date!
-
any remarks and question very much welcomed...BFN
-
update on my lady kathrine on this labor day weekend....
-
a little progress on my Privateer.....
-
Thank you very much Gene, I forgot to update this thread last night. So I am adding the pic's now........
-
hello "Lady Kathrine" update on my bashing of mamoli's black prince. which is no more....
-
Well I have a little update. I am trying to explain my progress with remarks on the pictures themselves. but please if you have any remarks or questions are welcome....
-
a few more pic's for your enjoyment I hope....
-
REVIVING AN OL BUILD LOG FROM MSW 1.0.... Hello my friends, I have a little time tonight to let you all know that I will be re-doing my Black Prince from Mamoli. I built her per the plans about 13yrs ago. I was not a novice back then. I was the blind leading the blind novice. Well when we built our new home about 10 yrs ago it was never seen again, until now. I found it in my shed. I had thought I had chucked it in the trash years ago. Right then n there I made it right, because when I did find it I chucked it in the trash can next to my shed. I was going to though some other stuff on top of it that wood of crushed it, but I realized it was my birthday gift given to me from my wife. I decided right then n there I could not do it. So I pulled it out of the trash can and here we are the both of us. Me n my Black Prince. Well with the help of Russ n John(Jim Lad) I find out that the Black Prince was a Sloop not a Schooner. With suggestions from Russ I purchased Chapelle's Book Search for Speed. So now I will be converting my Black Prince to a 1812 schooner renamed, but of course...."KATHRINE". my lovely wives name. Well this is not Sept. or Oct. I was not going to start the re-do of the Black Prince till then. But my spirits have been a little low lately. So I decided to start one of my projects to hopefully perk me up and get on with life. So i will be using Chapelle's book "The Search for Speed Under Sail". Since so many of these Privateers were built out right or merchants that were converted over to a Privateer. I have been working over Chapter 4 again and again. At this point I still have not decided what sail plan I will be using, but that is still a bit away from that point. So first I will do the clean up. Then I will remove the original bulwarks completely. Per the directions all that was needed was two stracks. But it was not enough. The guns did not sit properly at the gunports. I will re-plank the deck using limewood. Hopefully using the correct trunnel pattern for the era. Using teal oil for the finish. The bulwarks will be re-built with Sapaley. I will stick with the 4 cannons only. But I will be adding sweeps. I will add the new caprail using scarf-joints. The color sheme will be flat white below the water line. Flat black above the water line, flat black caprail, and a portion of the inside bulwarks flat black. The rest of the Sapaley will be exposed. Making a few test samples it should look preety good. As for the furniture the bits will be boxwood. I may be using a combination of gratings and hatches. I will re-build the binnacle. Add bilge pumps. Rig the 1:57 scale cannons. Eliminate the howse holes and go with catheads and timber heads. Re-do the rudder completely. I will also add a trunk cabin and a skylite.... Right now the sails will be partially furled or at full sail. Not sure as of yet. So I will make it my own.... The "lady kathrine"....named for my wife. She only uses one "E". So let the fun begin.....
-
Hello All, I have started modeling again. It's not like I haven't had time. But have been wood working and bee box building. Having fun. But getting back to modeling now. I am getting back to my re-build of my Lady Kathrine, my Echo Cross Section, and now the Hannah. Been studying up on all the chapters Bob has supplied with the kit. It also included 2 cd's with very detailed pic's on the build. I am considering rigging the ship since I have all the info I need for the model. It will be given to my oldest daughter Victoria. The reason is simple. Her 2 very best friends are named Hannah. I will be getting very detail on my progress, because that is just my way. It is to help others, plus if someone sees I am doing something wrong, Please let me know. I will be starting the build board tomorrow. I will not be posting pictures as regularly as I use to, because my spare time goes in different directions with 3 kids at home. But i will post a lot of pictures and explanations of my build progress. Thanks for stopping by....
- 201 replies
-
- 11
-

-
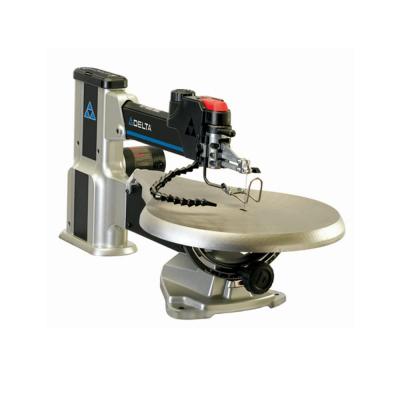
scroll saw choice
Cap'n Rat Fink replied to hamilton's topic in Modeling tools and Workshop Equipment
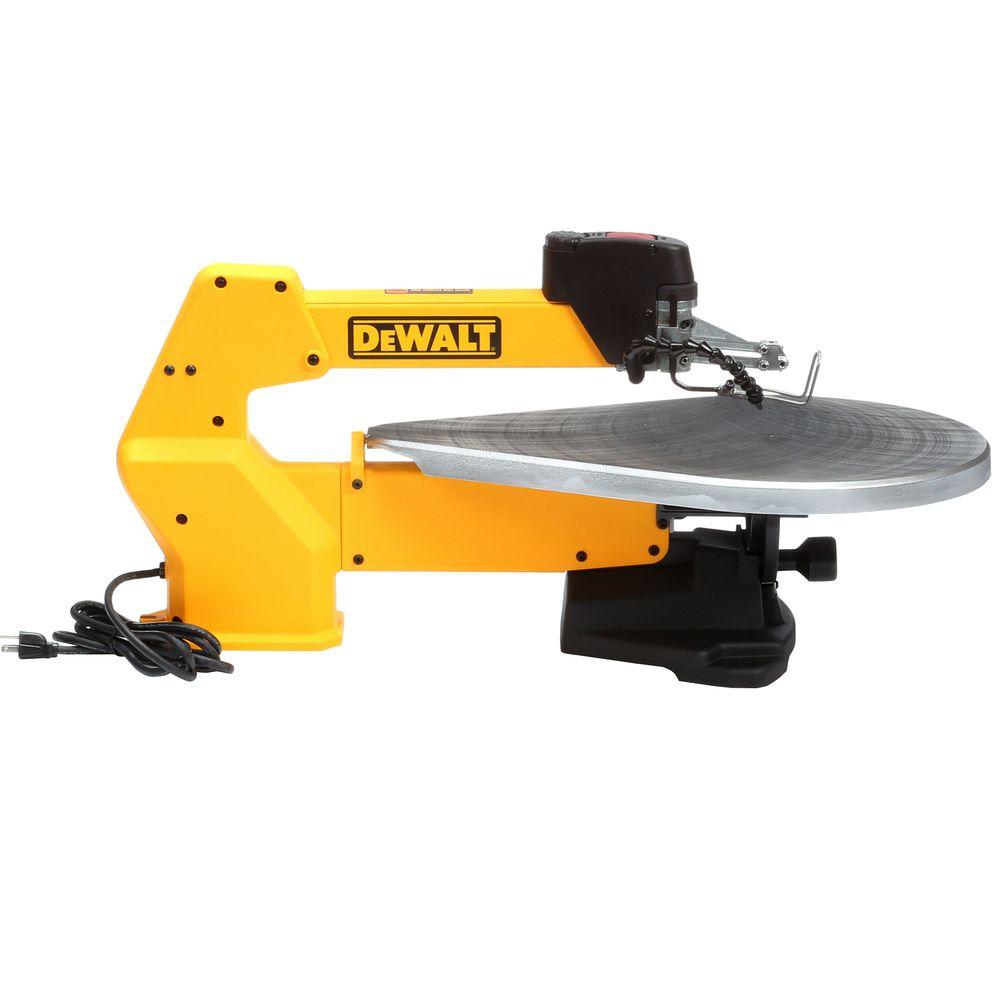
Hamilton, You mentioned Home Depot. They carry the Dewalt 788 20in. saw. Just under 500.00. But they also carry the 20in. Delta saw. For a little more then 100.00 less. If you delve into a little more research you find that Dewalt and Delta scroll saws are made from the same manufacturer. So for me I went with the Delta. A damn good machine. My buddy has the Dewalt. Performance to both of us was the same. We could not tell the difference. If there is, it's not much. If you take a close look they have a lot of similarities. I think Delta is a Oakland Raiders fan so they go with silver n black. good luck mario
-
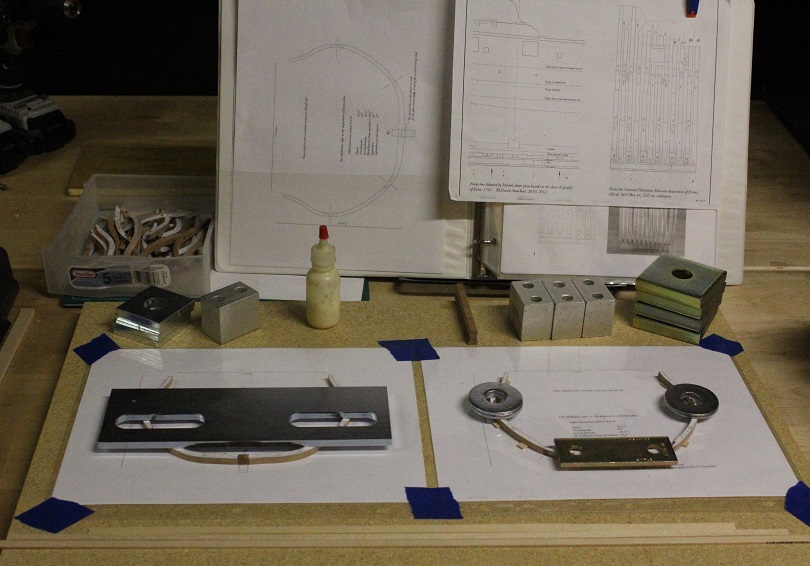
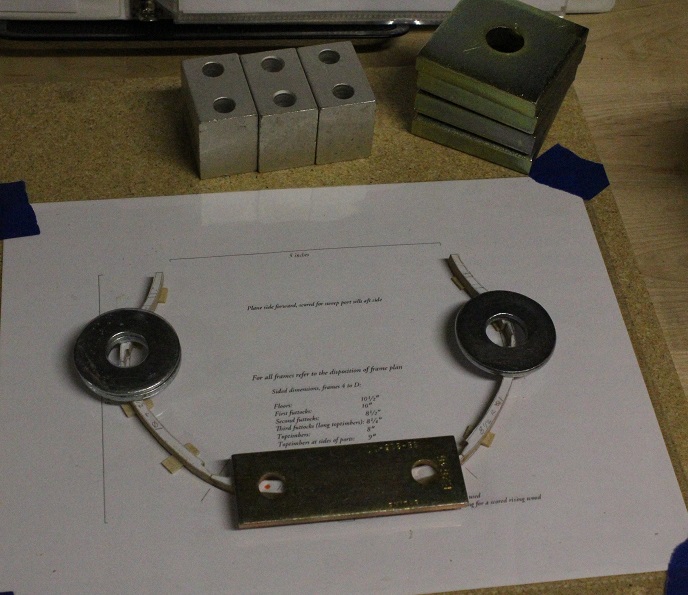
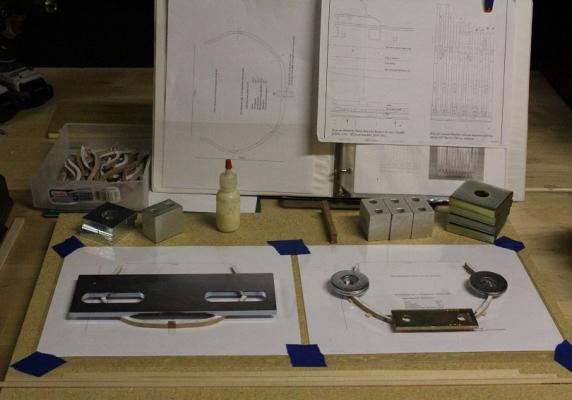
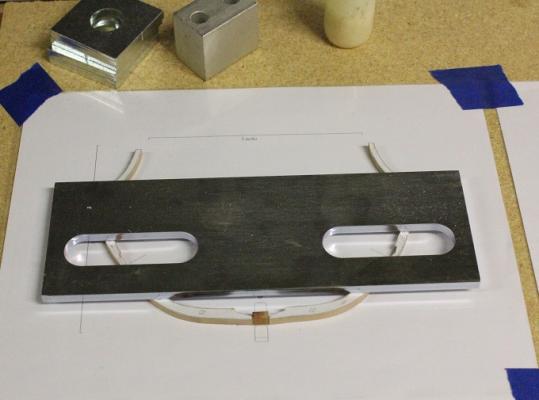
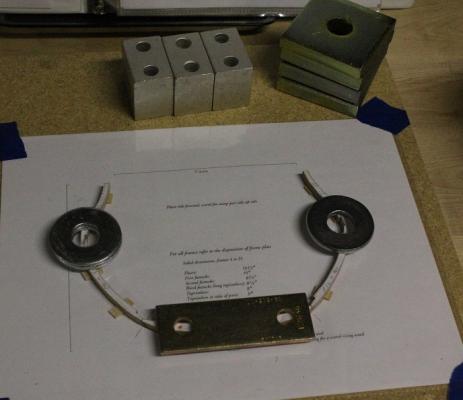
I will tell you, busy raising kids and hitting the teen and pre-teen ages really keeps parents busy. So thinking I was going to be able to mess with this model on a more daily bases. HAHA! I think I fooled myself. But finally was able to get back at it again. Hope to keep on going on a more steady bases. We'll see.... I have an assortment of small weights that will assist me with the construction of the frames. But with the 2nd go around on this cross section I decided to search for weights with holes in them. WHY??? It made sense to me, that while I placed a weight to keep the frame from moving as it dried, I could also see the joint drying thru the holes in the weights. Just in case the joint went out of alignment in anyway. So I will get back to you when all the frames are together with the chocks Have fun.... Mario
-
VandaLay Hold it Plus
Cap'n Rat Fink replied to Nirvana's topic in Modeling tools and Workshop Equipment
Nice review Dr. Per. I purchased the drill press plus. It is very nice for all the really small projects that need drilling. I also join in on your review on the owner. A very nice man. Every time I called he did not answer. But it was not long before I received a return call. He is very helpful with any questions you have on his tools. So if anybody is interested in his tools. I recommend you give him a call if you are considering a purchase. He is a very nice man who will work with you in any of your needs. May I correct only one thing on your review Dr. He actually lives in Running Springs Ca. A mountain community in the San Bernardino County. I only live about 40 mins from him. He does have family in my town of Apple Valley. So we be neighbors. Mario This is what I have purchased from him. I liked because my multi speed dremel w/w well with it. Plus I can upgrade if i want to.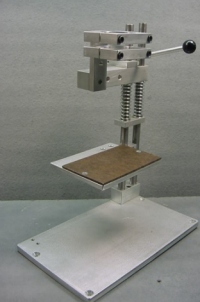
- 19 replies
-
- 4
-
-
- VandaLay
- Industries
- (and 6 more)
-
How Realistic Can One Make Sails?
Cap'n Rat Fink replied to Julie Mo's topic in Masting, rigging and sails
Hi Julie, Me thinks this is what you are talking about. If so, you can get all the info you need here. http://www.shipmodeling.ca/aaplandusite.html It is Model Ship Building for Dummies. I am not calling you a Dummy. That is the name of the site. The gentleman passed away, But his family still runs it. For a small fee you are a member for life. The gentleman has some great stuff. very talented. Mario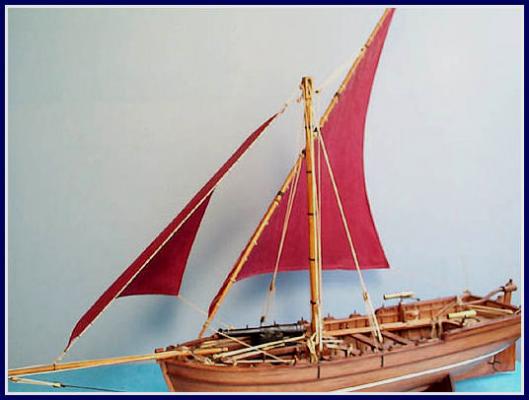
- 100 replies
-
- 11
-
-
Thanks Frank, It has been a long journey to get back. Mario
-
Jim, Yeah Paul Sellers is cool. But I am a big fan of Uncle Si too. HAHA! Mario
-
Mark, Brian, Grant, Ken, Thanks for your kind words. I thank all of you for the LIKES also. Was able to cut out some of the frames yesterday and may have time today to do a few more. Then I will be putting together the build board. Have a nice day... Mario
-
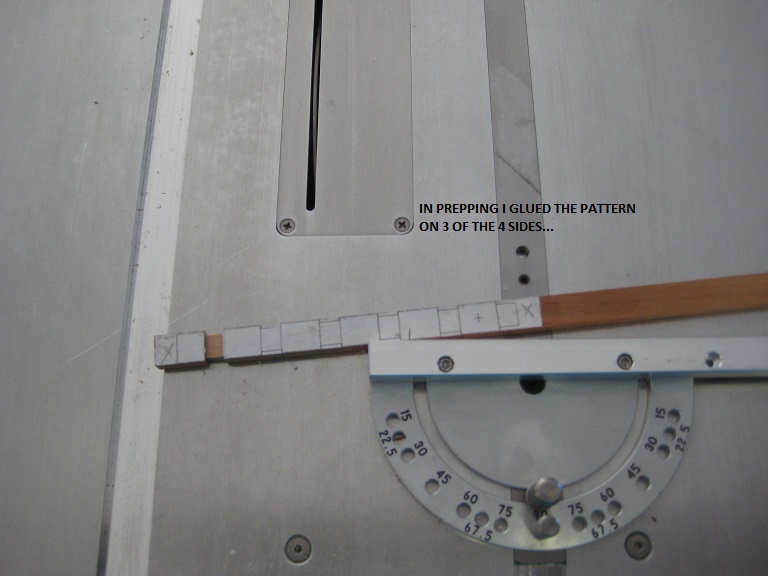
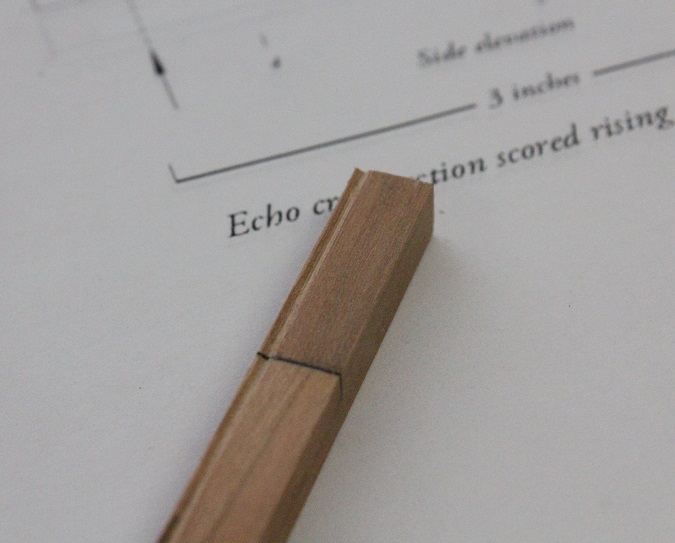
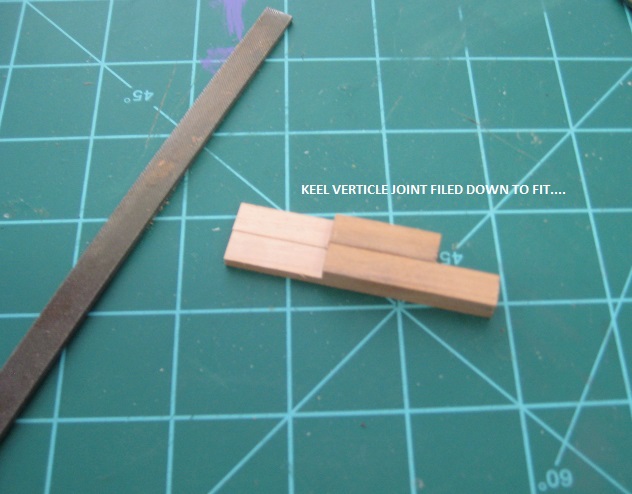
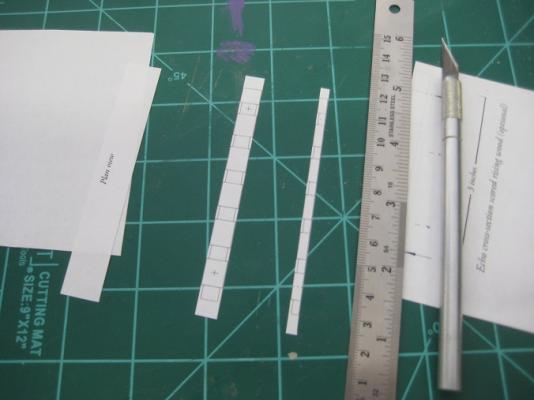
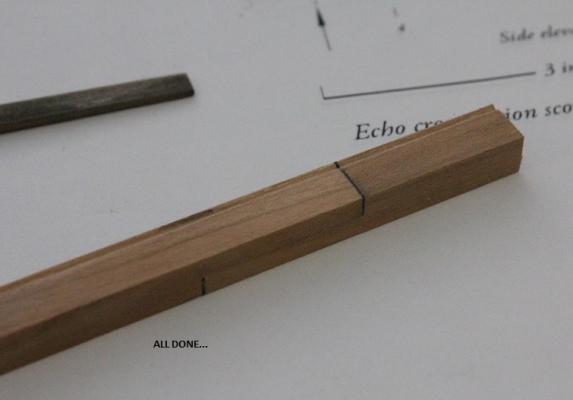
9 more photos.... When I was 18 I started working with a master Cabinet and Furniture maker. He taught me how to handle power tools, but just as much time if not more on how to w/w hand tools. In David’s A. instructions he recommends to use a very sharp pencil. I do this at times. But I also use a carpenters knife which enables me to get a very accurate mark or lines when marking out dimensions. Then I just use my pencil to fill in the knife mark to see it better if need be. I used a knife when marking out the rabbet, since it was a very small area. The blade was just thinner and easier to mark out with. I strictly use my knife when doing dovetails. Which I do all by hand tools only. Like my ex boss use to say. There is nothing like good sharp chisels and hand saws. If you google Paul Sellers he reminds me a lot of my ex boss. Just watch a few of his videos. Good to be back… Mario


-
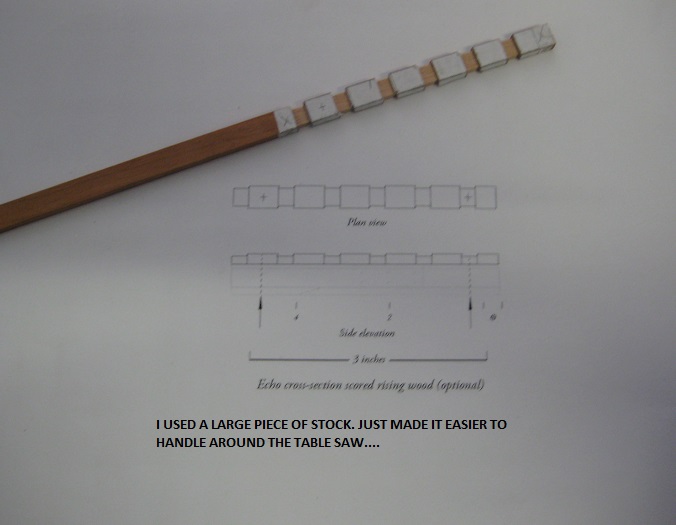
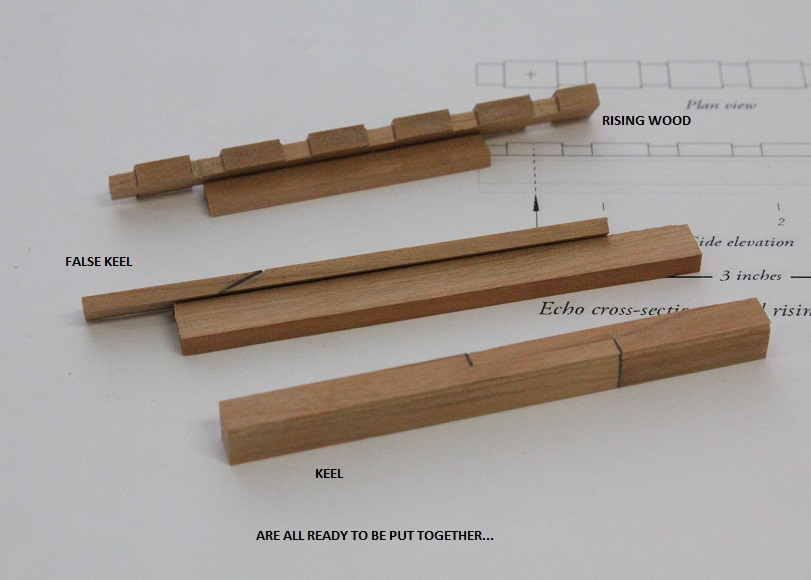
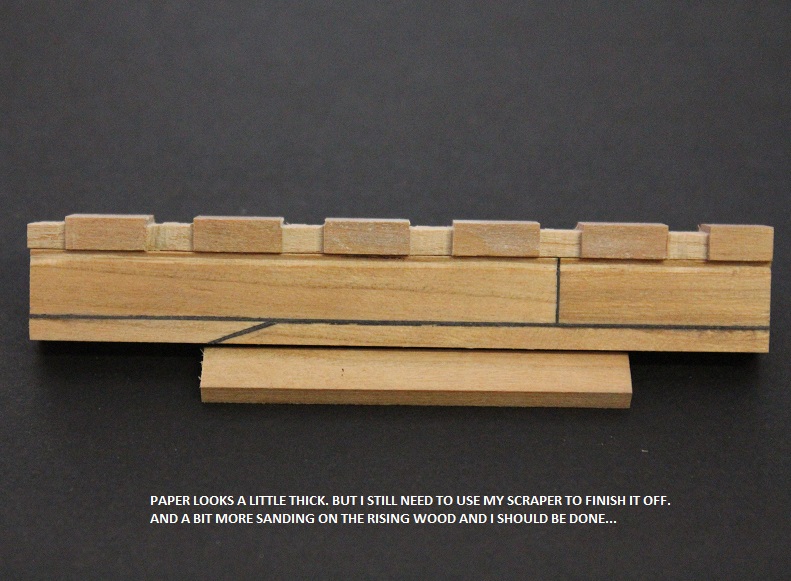
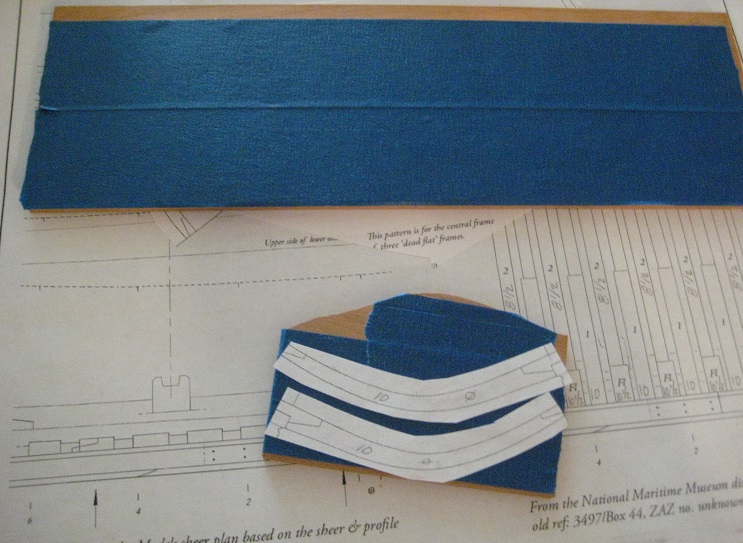
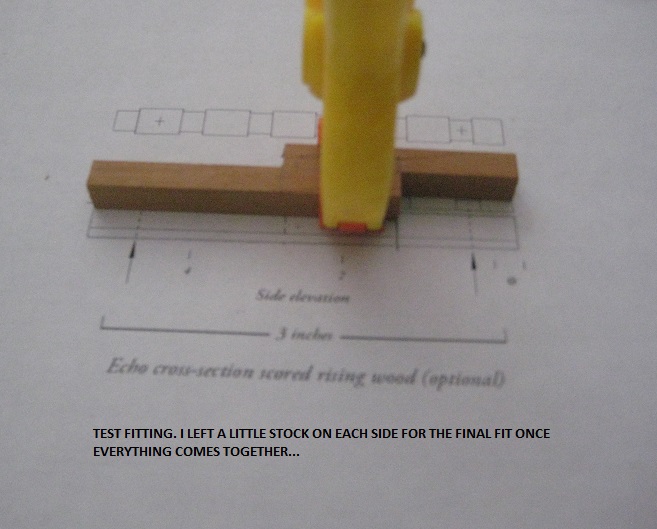
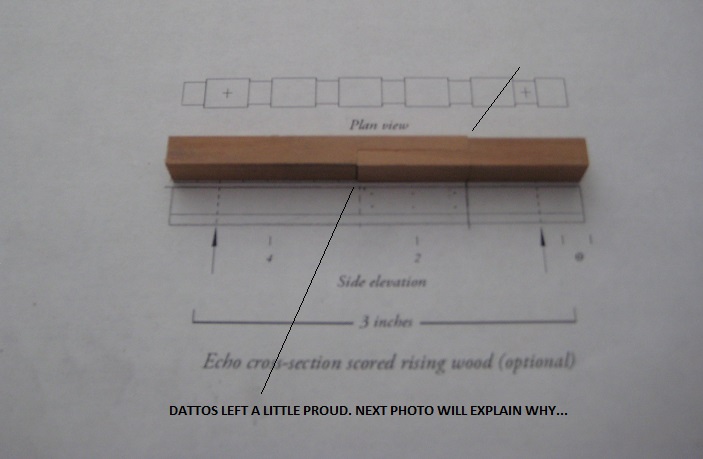
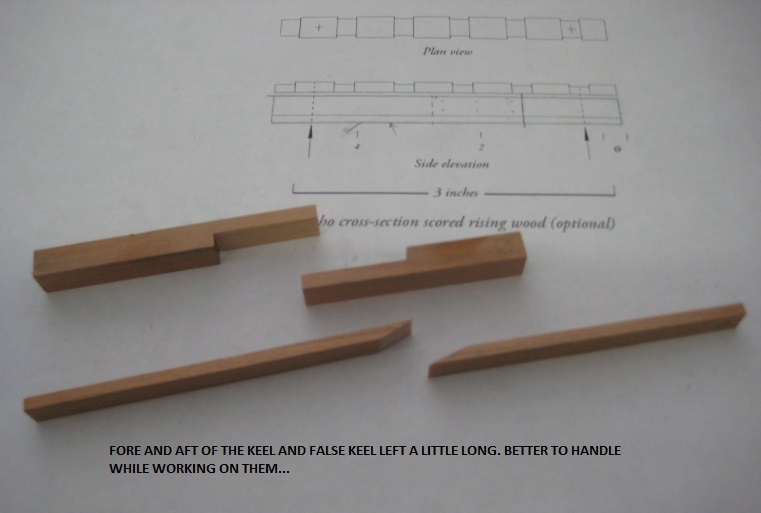
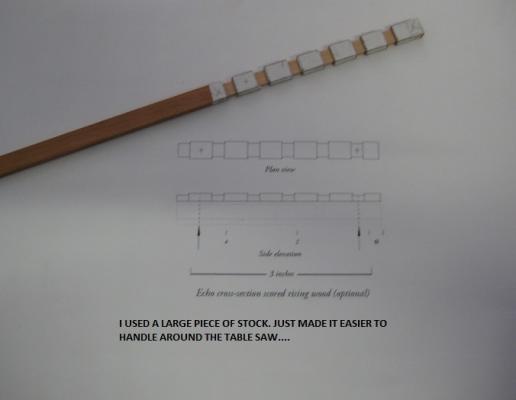
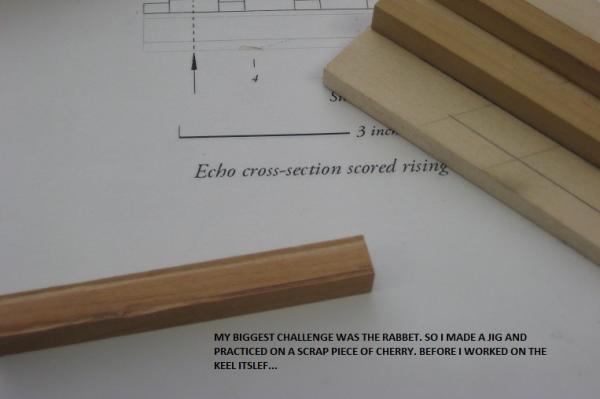
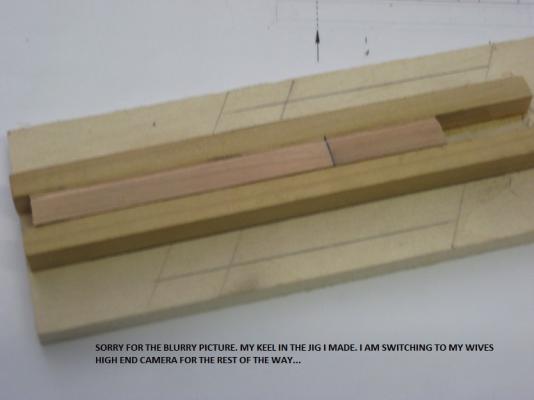
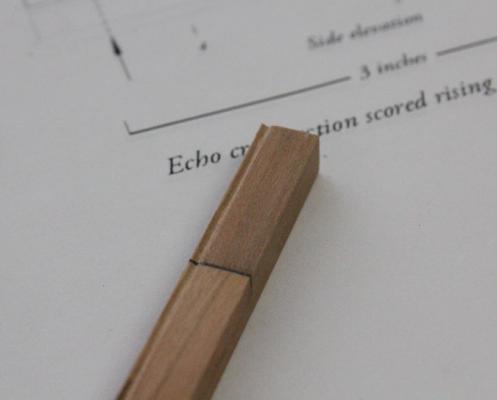
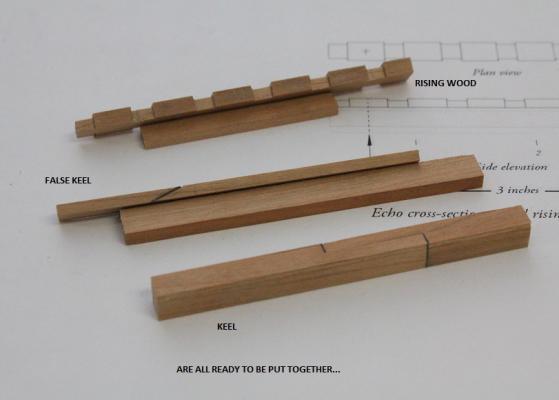
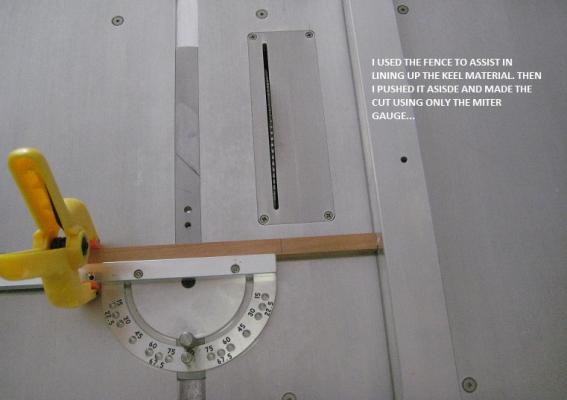
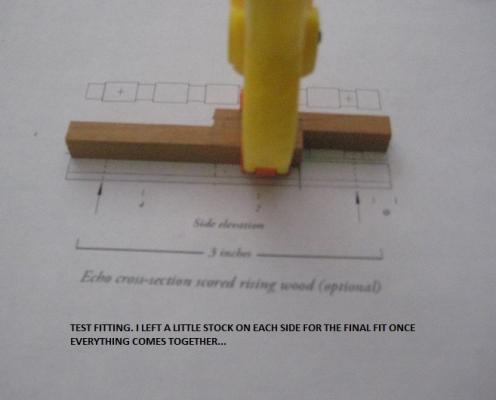
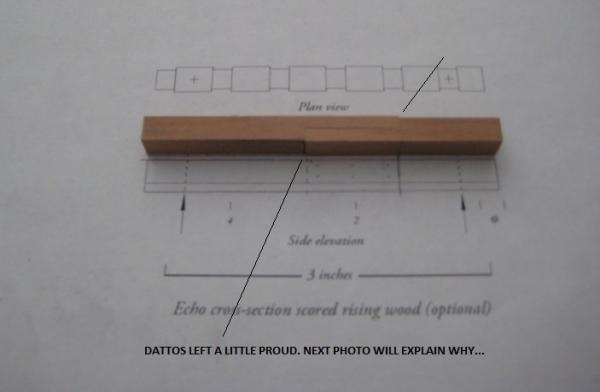
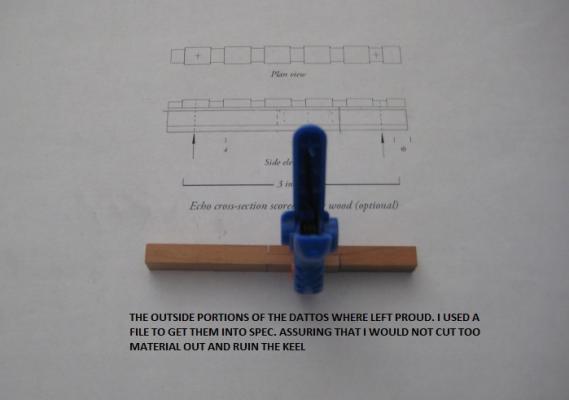
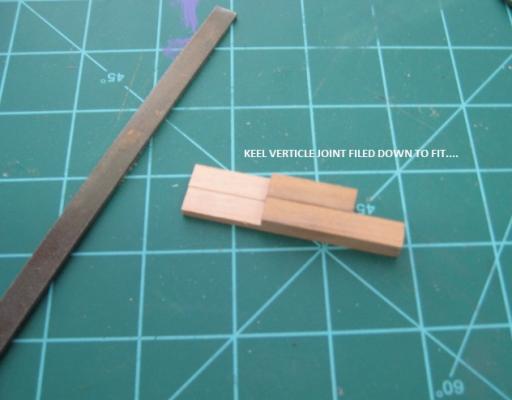
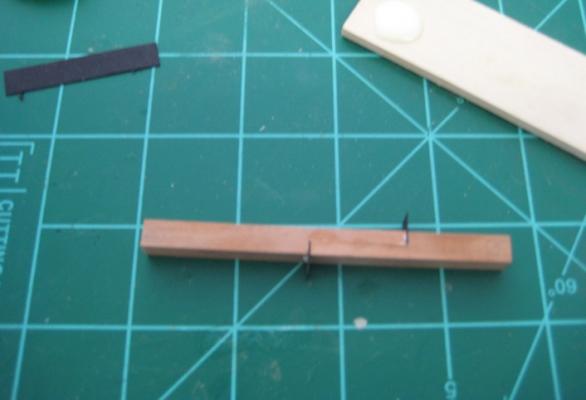
Hi All, Had a busy day in the shop, and with a few week of vacation time moving quickly will have a lot more time in the shop....... Well with the help of David and Greg from Admiralty Models I am back at it again with the Echo Cross Section. Long story short. I was well on my way to completing this cross section. When our house cat killed it. I decided to rebuild. But work really got in the way. Can’t believe it, but it’s 2 yrs later and now I am back at it. I left off at putting the frames on the Keel when things went south. So I do not plan on getting too detailed until I get to that point again. I started out by re-reading the instructions and trying to get my head into it. I had to re-read 3 different times before I understood what to do. Man when you don’t do this for a while you do get rusty. Now I have a full blown wood shop in my garage. Not just for models, but for wood turning and furniture making. So after reading I cut out all the fore and aft frames and glued to material. Then I went ahead and built the keel, false keel and rising wood assembly. My next move will be the build board and working on the frames. I just hope my job does not get too much in the way. 19 photos total Good to be back…. Mario


-
Came out just beautiful! The African Mahogany is a pain to w/w. But comes out looking very nice. Mario
-
Lathe - ZHOUYU Model Z20002
Cap'n Rat Fink replied to t5956ws's topic in Modeling tools and Workshop Equipment
Bill as Mark says. Metel is a whole different animal. But as you mention plastic and wood I gave you my opinion. I also turn pens. Both wood and acrylic. So both lathes will handle what you suggested with no problem. Mario -
Lathe - ZHOUYU Model Z20002
Cap'n Rat Fink replied to t5956ws's topic in Modeling tools and Workshop Equipment
Here are my suggestions Bill... Two very nice machines. I bought the Excelsior. Hope this helps you out. Mario