Cap'n Rat Fink
-
Posts
829 -
Joined
Content Type
Profiles
Forums
Gallery
Events
Everything posted by Cap'n Rat Fink
-
 Stephan, Why don't you get a few scraps together and test paint it. But I'm thinking you won't be seeing any black. On my BWL I left the deck natural. She is coming along nicely. Mario
 -
Great Progress Cathead! Mario
-
Maryo, She is coming along nicely. I used a wipe on poly with a satin finish for mine. You can see it here. http://modelshipworld.com/index.php/gallery/album/195-dingy-124-midwest-modelsdioramateleman/ Mario
-
Hey Denis, I saw your hello on Mark's Log. So I thought I'd say hello to you here on yours. Been very busy Buddy. It took me 2 months to finally read through your log here. Just not visiting too much. When I do can't stay on line too long. Your Trawler Looks great and man they can get complicated with all they have on deck. Looks great. Trying to get my garage shop built. Spending $$$ lots on the shop. But work takes it toll on me. At work right now and taking a break. I'm the emergency on call. When I go home today it will be 25.5 hrs straight. SO BE WARNED DENIS I SHALL RETURN. IT'S GETTING CLOSER. TAKE CARE MY FRIEND. Mario
- 956 replies
-
- 7
-

-
- andrea gail
- trawler
- (and 1 more)
-
Coming along nicely Maryo. Mario
-
Nice going Don, The Midwest crapping Skiff makes a nice model. I scratch built my skiff using Howard Chapelle book. Have fun. Mario
-
Richard, I had a lot of fun building this little boat. Great choice, have fun. Mario
-
Very beautiful model. Nicely done! Congrats Captain..... Mario
- 625 replies
-
- 4
-
-
- bounty launch
- model shipways
- (and 1 more)
-
Very nice progress Maryo, I had a lot fun building mine. Mario
-
Hakan, WOW made out of OAK! Boy you got your work cut out for you. Have you thought of using a steam humidifier, hose, and a plastic bag. You stick your plank into the bag. Connect your humidifier to the bag using the hose. seal the bag real good. But at the other end make sure you have a opening that will let the steam escape. But also making sure it does not escape too quickly so it will soften the plank. Check the plank as it softens up, once pliable use gloves so you won't burn yourself. Turn off humidifier, clamp the plank plastic bag and all to your form. Turn on humidifier, let it steam a bit more. Then turn off humidifier, but leaving the plank clamped in place. Once cool take plank out of bag and it should form up pretty close to what you want. It should not be a struggle to glue in place. That is what I would do Hakan. Plus you can use the humidifier if you a bit of a congestion in the lungs there Hakan. LOL! Oh yeah no frames You would use a STRONGBACK to plank. Check out my build logs for the Bounty Launch and Galilee Boat. Have fun my friend. Mario
-
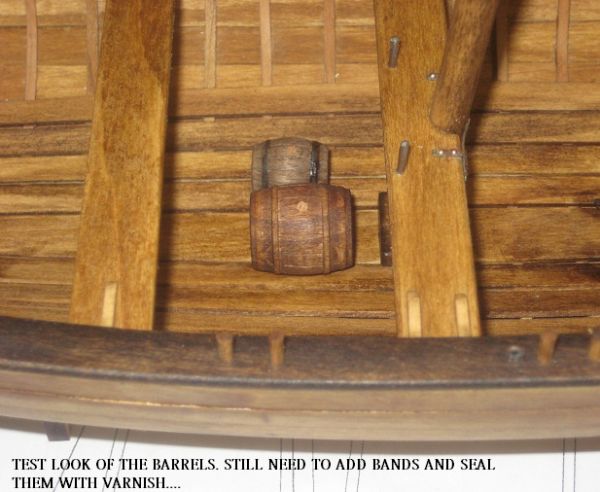
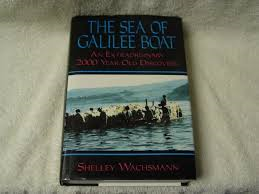
Hakan, I been out all day. Just got home. My apologies i did not see this in the morning before I left. That is a nice practicum. Yes I agree with you there. My planks were at 3.175mm (1/8inch). Since i built at 1/24 scale. I remember seeing Webber's practicum. The author of "The Sea of Galilee Boat" Shelly Wachsmann was the nautical archaeologist on site during the excavation of the boat. He had Professor Richard "Dick" Steffy at that time known to be one of the best authorites on ancient boats. I left out the ceilings because when Steffy inspected the boat he never found any evidence of ceilings in the boat. Plus the frames were never attached to the keel. I have plenty of diagrams of the boat from the boat. If you need anything Hakan I can PM you. I will keep a better watch on your progress my friend. This gentleman here built his close to your scale right here.It might have some information you can use... http://www.jesusboat.com/jesusboat-archive/building-a-model-of-the-jesus-boat Mario
-
Hekk, This is a nice little model. I scratch built a crabbing Skiff. By following Howard Chapelle's book. You will enjoy this one. Mario
-
Hey Hakan, Thanks brother. If you need any info I kept a lot of mine. Don't know if you have that book. But the author was the onsite archaeologist when they unearthed the wreck. Plus it has a lot of input from the brothers who found the boat. I know you Hakan, you like to get things a correct as possible. It will be a joy to watch your progress buddy. Mario
-
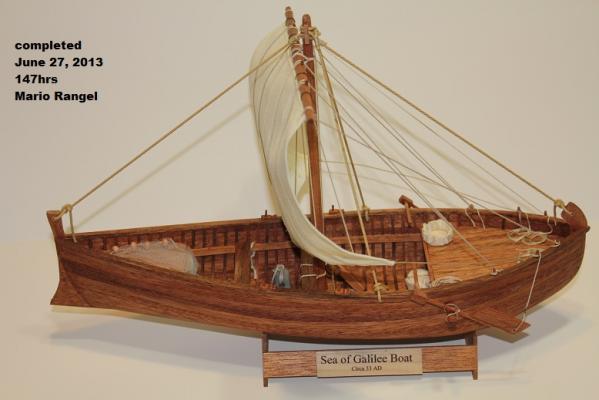
Hello Hakan, Nice to see you building again. I built 2 of these boats. One for my home, the other went to our church. Have fun I will be watching. This is the 1/24 scale model and the book I used almost extensively plus versus in the bible.
-
Nice Carving Tools/ Wood Chisels
Cap'n Rat Fink replied to Cap'n Rat Fink's topic in Modeling tools and Workshop Equipment
Thanks Bob, I just handles to make my super micro as you suggest. These would be used for models. Hi Mark, Yes i have been to both sites and others. I am considering those. Just trying to get feedback from others who have used them. Jack, i do love those your are mentioning here. I'm getting the feedback i want so far. I do plan on spending a few hundred on each chisels and carving. In the long run it pays off with the good stuff. I plan to purchase sets, and then add to the set when i need certain ones. -
Hello All, As I slowly get my shop together, I am also looking into tools needed for my wood working. I am not looking for top of the line tools. Top of the line tools too me is for professionals that do this for a living. (YOU KNOW....MAKING MONEY). I am strictly a hobbyist. A lot of you know who I am from my build logs. But I not only do model ships. But I am also into furniture making, Black Power weapon making, pen making, and wood turning. I am also venturing into Acoustic as well as Electric Guitar making. Since my son is a musician. So I am finally starting to put my shop together and getting it stocked. I am looking at midrange in price tools. So I have been checking out chisels and carving tools. I do love the German, Japanese, and Swiss made tools. I will go with those if need be. I am from Southern California, USA. I would like to support the workers of America. Like to give our USA made tools first consideration. (but I will go to other countries quality of tools if it boils down to that.) My present stuff is old and getting old.er(LIKE ME!!!) I will keep it to let my little ones practice and learn from those. But it is time for a new upgrade. I know I might be opening a can of worms. Because CHEAP, MID-RANGE, and TOP of the LINE tool pricing varies differently my craftsman to craftsman. SO ANY ADVISE AND/OR RECOMMENDATIONS WOULD BE VERY HELPFUL! To assist me in my decision making. With a lot of you having these tools and used them, it would be nice to get feedback. So ladies and Gentleman I am awaiting your feedback. And Thank you for taking a little time out of your day to assist me. God Bless Mario
-
Steve, Good Luck Steve with the surgery. I hope rehap includes building models to get the arm back in shape there. Nice progress on the launch Sir. mario
- 625 replies
-
- 3
-
-
- bounty launch
- model shipways
- (and 1 more)
-
Gary, Looks great. Your carriages are coming along nicely. One question I have. Looking at your figures. Did they have ear protection back in them there days? Mario
-
WORKSHOP CHAIR
Cap'n Rat Fink replied to Cap'n Rat Fink's topic in Modeling tools and Workshop Equipment
thank you all for your feedback. -
Hello Fellow Modelers, iI have been on hiatus from modeling. Work and other things. But i have made head way to get back to it. I am building my garage modeling/wood shop. I just completed my new floor. I am looking at shop chairs. preferably with armrests. It will be a standing and sitting shop. i am making my benches to accommdate both. You all have any ideas pictures or web sites. Like to see all options. I thank you for your time and ideas. Mario
-
Cathead, Does it look bad? Do you think it will effect your planned re-staining? Would the gap get bigger if I dig it out? These are question I would ask myself. Mario
-
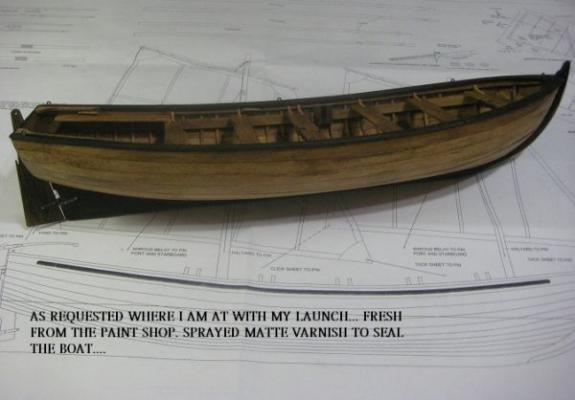
Cathead, My process was totally opposite of your process. I decided to stain after the hull was plank. The reason for this is because glue does not adhere very well to stain. I did have a few small gaps. I do not dilute my white glue. I just squirt a little where the gap is and let stand a bit till tacky. Then I sand a bit which in turn seals the small gap. With the glue thick it tends not to seep thru into the inside of the hull. If it does and it has at times. it was very little. But this rarely happens because I leave the thickness of the glue alone. I do not thin it. This is what works for me. The stain was not effected by the glue in anyway. I used a combo of Golden Oak and Dark Walnut to get the look I wanted. Here is a couple of pictures for you. I pulled them from my build log. YOUR DOING A GREAT JOB ON YOUR LAUNCH!!!

- 83 replies
-
- 4
-
-
- bounty launch
- model shipways
- (and 1 more)
-
CA adhesive, which one do you use?
Cap'n Rat Fink replied to Modeler12's topic in Masting, rigging and sails
Jay, I prefer Loctite. Better price. I use the gel and thin. I have use M.E. Zap. Don't care for them what so ever. More expensive and don't work to good for me. Mario