


jonny.amy
-
Posts
346 -
Joined
-
Last visited
Content Type
Profiles
Forums
Gallery
Events
Posts posted by jonny.amy
-
-
Mikeaidanh (Mike),
Thanks for stopping by. I hope my build inspires you to get get cracking with you Sherbourne.
Mcpwilk (other Mike),
I hadn't considered the clinker hull (because I was sure I would be able to get thin enoung Basswood), but due to the fact I can only buy 2mm thick basswood, I will think about it! If I went down the easier Carvel planking route I would want to thin the basswood strips by 1mm, but the model does lend itself to a Clinker hull.
Any Ideas of how I can rabet each plank to make the clinker/shiplap shape?
Cheers
Jonny
-
Thanks Ken,
I've made quite a lot of progress so far - before this weekend, I had been dipping in and out of the kit for a few weeks, and had done things like cut the rabet line, buid up and fit the false keel, and faired the bulkheads to the required andgles.
This past weekend I got the topside formers on the model and the false deck and decided to "put the first few planks on"...... I got the hull planked by 8pm last night! The size of the model means it's an absolute joy to work on.
Any way I'll do a photo update tomorrow as I've got a bit of sanding to do tonight!
Cheers
Jonny
-
Hi All,
This is my thrid kit build on MSW, and I'm taking on the HM Cutter Sherbourne from Jokita/Caldercraft. This will be my second "proper kit buid" on here as I started the Mantura/Sergal HMS President kit, and gave up on it due to the lack of decent intsructions and plans included in with the kit.
My darling girlfriend (known as the Admiral) exceeded all expectations and bought me this kit for our anniversary in March. As you can all imagine, I was very very happy with this, and ended up maxing out the credit card on designer handbag(s) for her!

So why start now?! In the last month or so, I have finished my build of HM Mortar Vessel Convulsion from Caldercraft, and was planning on joining a few other members on here to start a goup build of Sherbourne, but the Tennancy on my flat is up at the begining of August, so I was feeling a bit dubious about transporting the kit if we (the Admiral) decided we should move on to another property. Fingers crossed that won't be the case, but this is almost a preemptive strike to ensure the model is as safe as possible IF we do decide to move. Fingers crossed that we don't - I like our little flat!
If you're interested in my Convulsion build, then click the link below.
So a kit bash? Because this is a special kit for me, I'd decided to make it is a little different! The main differences in the build from the kit will be:
- Replace Walnut planking layer with Basswood
- Replace Wales with Ebony Strips (if available)
- Treenailing of outer hull planking (to water line)
- Treenailing the Deck & Edge Planks
- Addition of Fife Rail around the Mast
- Rigging of sails (including all running rigging)
- Addition of Ships Boat
- Crew Figures (5 sailors max. 3 officers max.)
- Possible rebuild of the windless
- Replace White Metal cannon stock with Brass (white metal castings are terrible).
So I'm about to buy the Basswood from Hobbycarft here in the UK, as they seem to be the cheapest source of Basswood strips I could find online.
I will be using the book "Super - Detailing the Cutter Sherbourne: a guide to building the Caldercraft kit" by George Bandurek as my guide for the Kit Bash.
I hope you all enjoy my journey in to the unkown of Kit Bashing, and tag along if you fancy it!
Cheers
Jonny
-
-
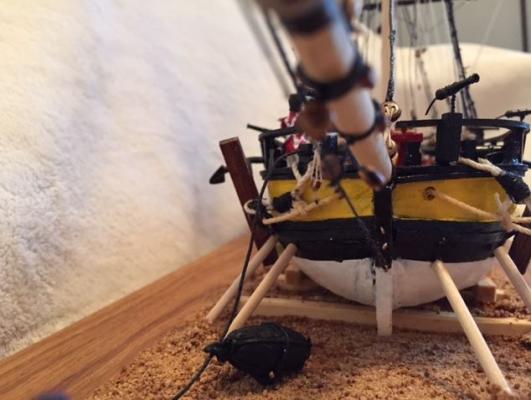
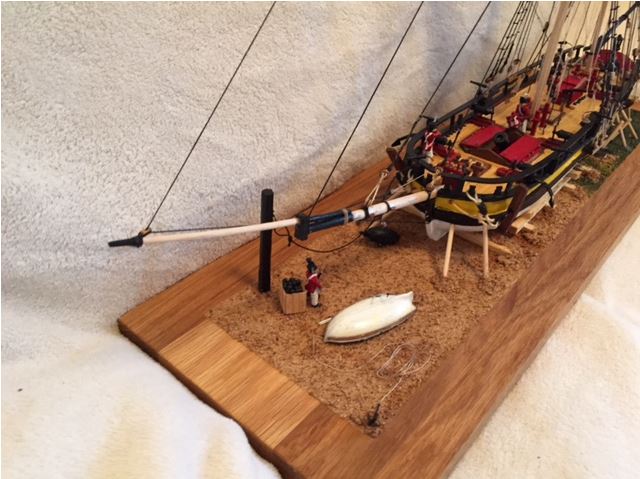
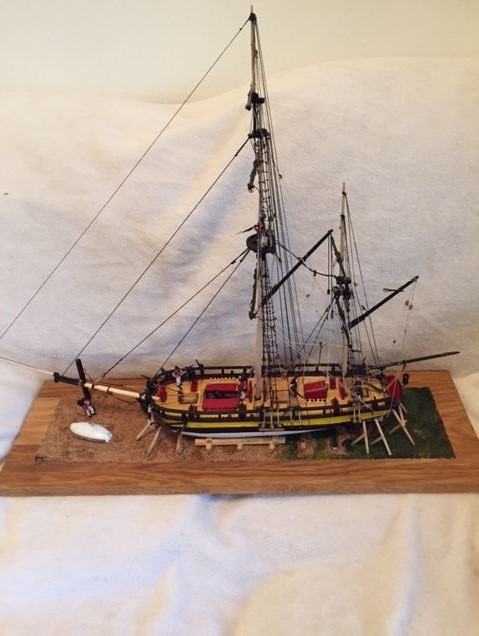
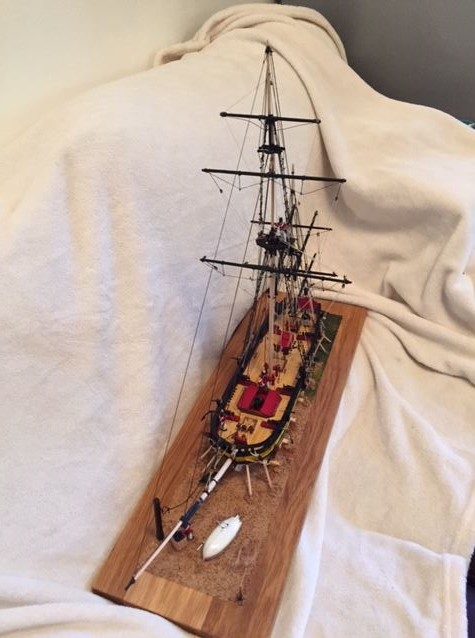
Thanks Ben,
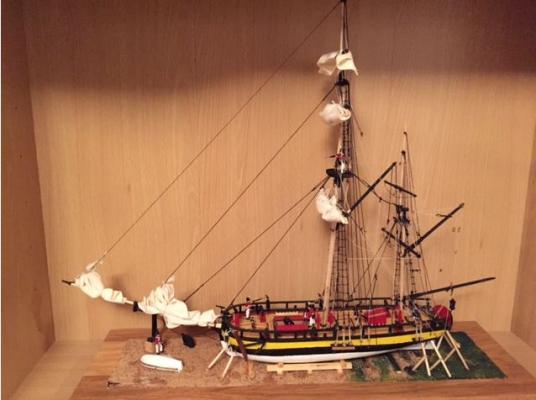
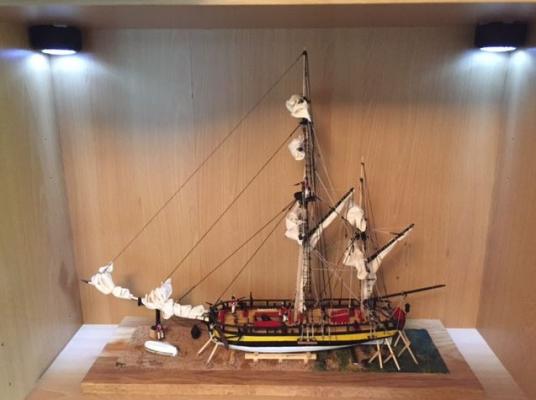
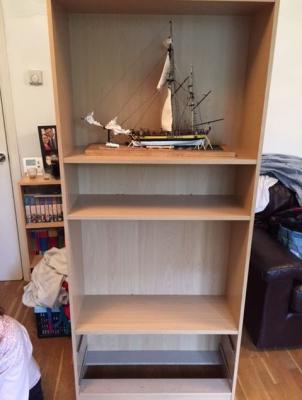
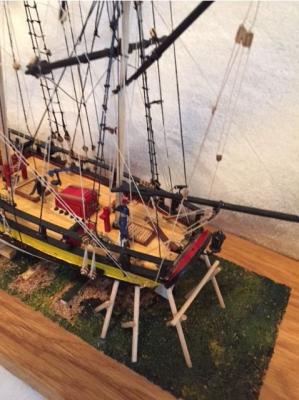
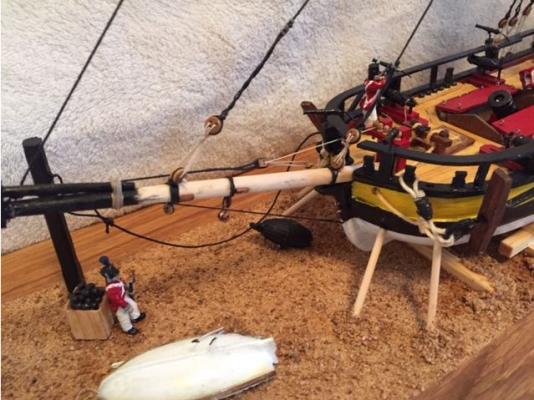
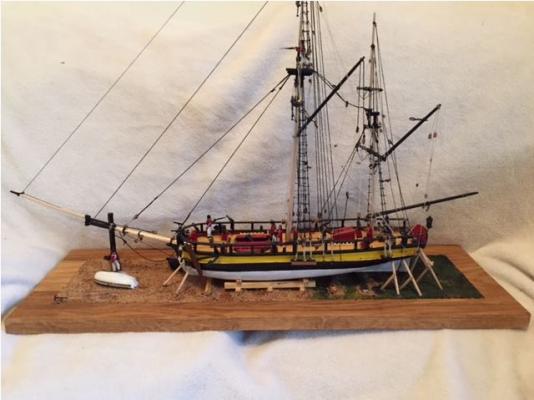
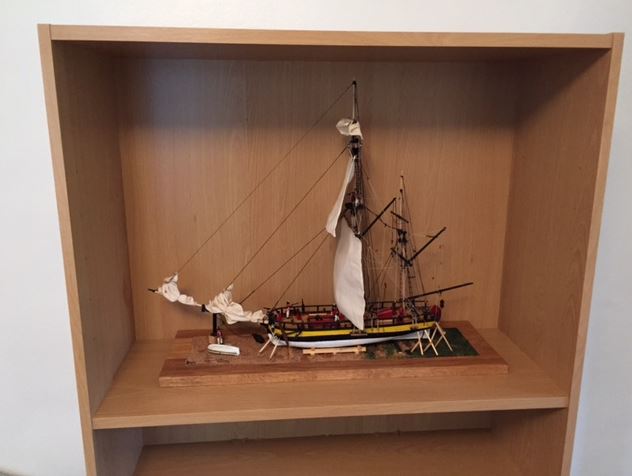
I wanted to do something different, and I managed to make something different with (in all honesty) very little effort. My intentions were to build a glass case for the model, but the price soon started to sky-rocket, so I went down for a different approach to displaying the model. Hence, the whole "shored-up" theme.... All I have to do know is find some glass for the front and maybe glue a black and white chart to the back of the board? I'll see what I can do, like most of the guys on here, I'm ship building on strict budget!
Cheers
Jonny
-
-
Hi Guys,
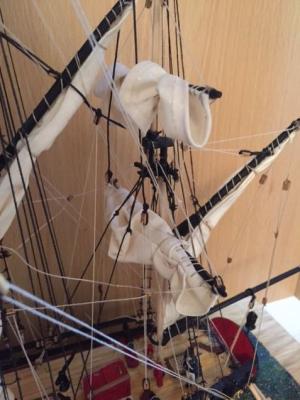
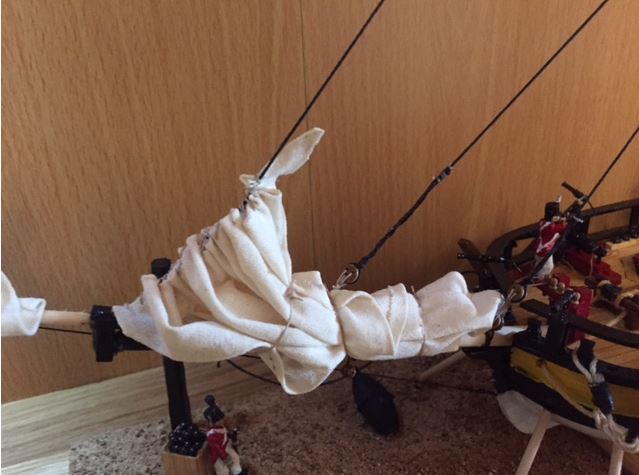
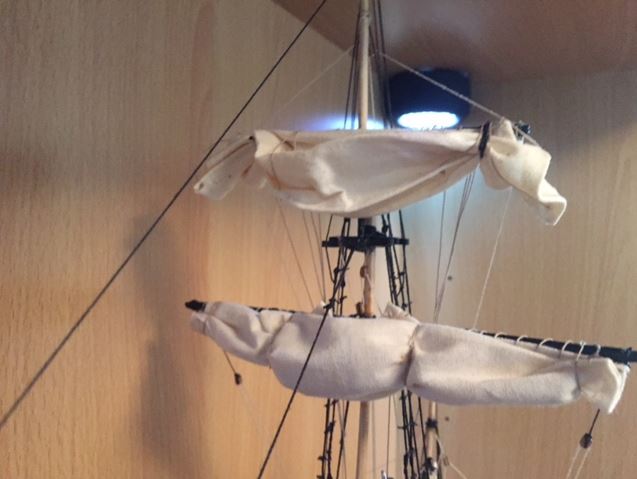
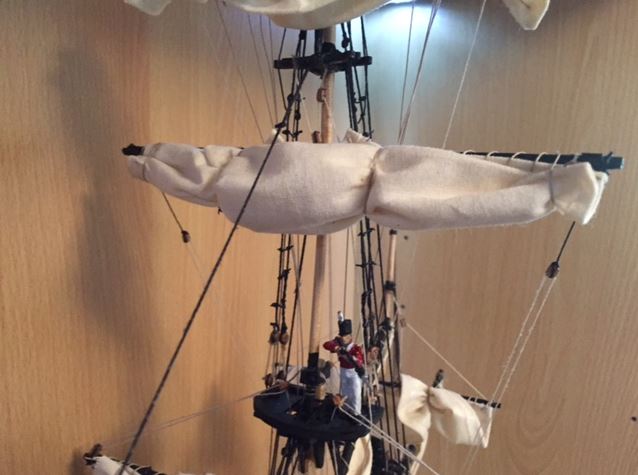
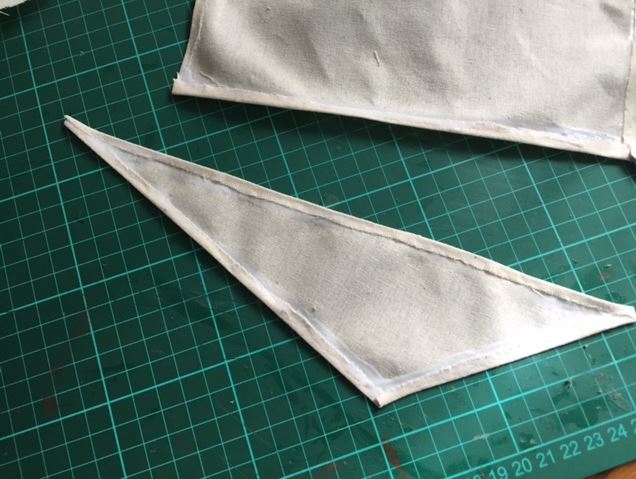
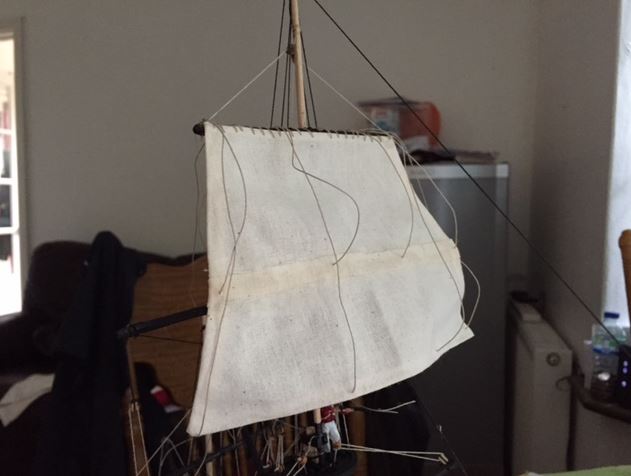
Photo update time for sail making!!!
So my original thoughts during the "conception" of the sails were along the lines of building "proper" sails, with all reeflines, bolt ropes and panels sewn together like the real sails would have been. I've done my fair share of sail making in the past (lots of blown out spinnakers whilst sailing, my father is an ex-sailmaker so it's been a skill past on to me), but.... I've never hand stitched a sail (apart from sacraficial stitches to hold patches together) so I was a bit dubious of the qaulity of the sails if I ventured down this route.
So my decision to glue the sails together was an easy one to make. The next decision came on which material to use.... light canvas, cotton or a heavy linen? Talking to the sweing guru (the Admiral) she suggested I use Curtain Backing for the sails as it is a fairly coarse weave cotton material that has little stretch! And she was bang on the money! I went to my local haberdashery and found curtain liner/backing for £4.00 per metre, and a big pot of fabric glue!
Once I got back home I did my usual half-ar$ed job of tidying up the flat (as I was requested by the Admiral) and then set about making sails.
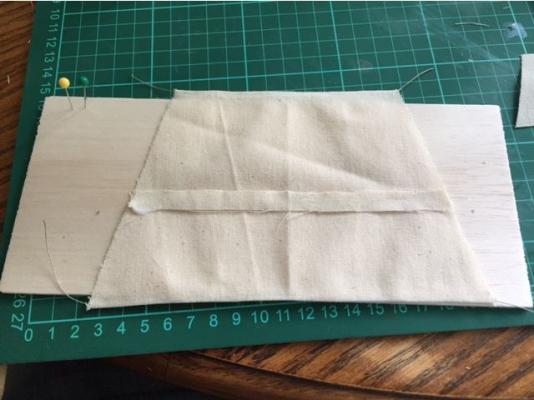
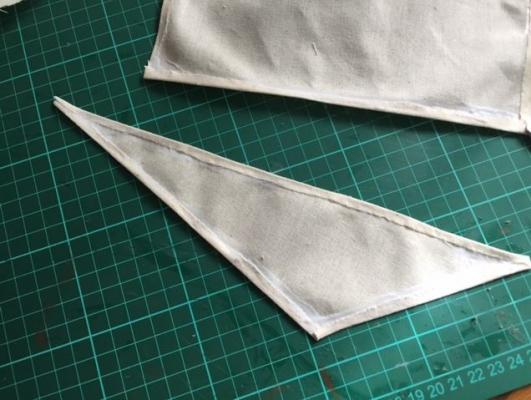
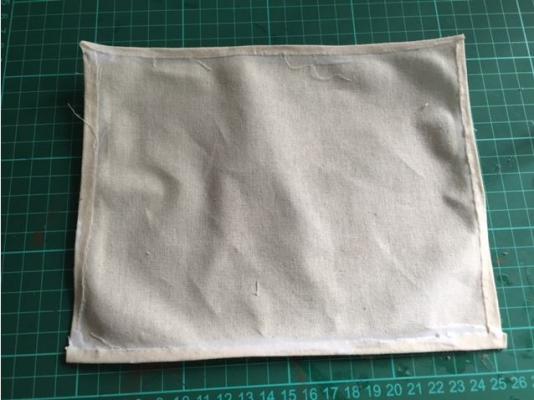
My process:
- Measure the spar lengths and distances between them.
- Draw out the shape of the sail with a black biro pen, making sure the lines are straight and at least 5mm has been left all the way around the sail. This will give the effect of Bolt Ropes etc. inside the sail.
- Apply a bead glue around the perimeter of the sail.
- Fold over the 5mm flap all the way around the sail. Smooth the folded seam down with your finger, and apply more glue to the overlap of fabrics.
- Leave on radiator to dry for 3 hours.
- Trim the corners of the sails to be as cleen as possible.
- Leave for another 2 or 3 hours for glue to completely harden.
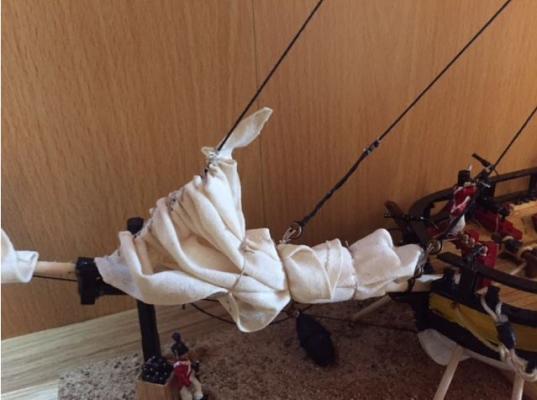
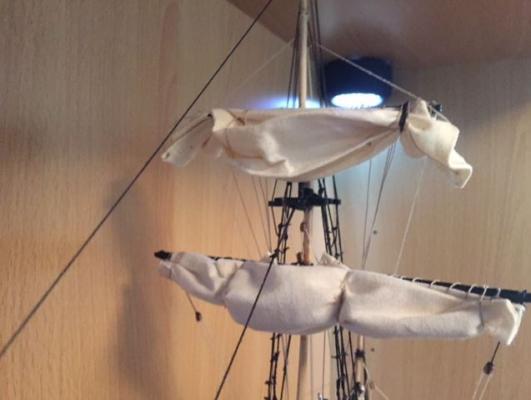
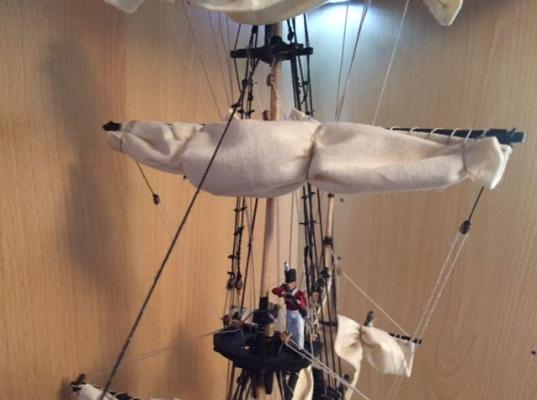
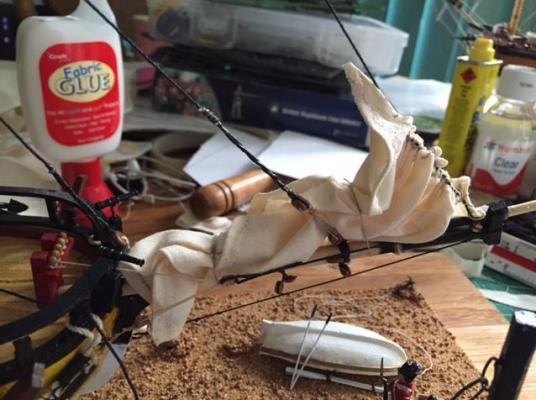
- Stitch on to spars using spare natural coloured thread.
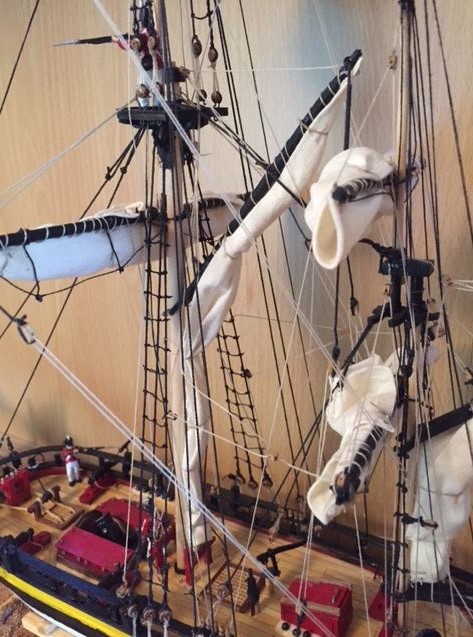
- Using spare natural coloured thread push a needle through the bottom two corners of the sail to act as buntlines (add more bunt lines if you want, but makes the furling process a bit fiddly).


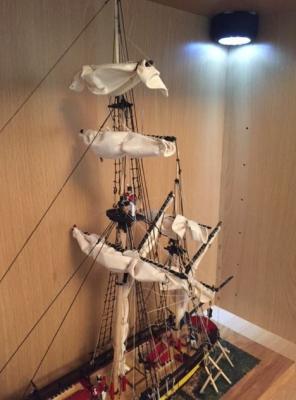
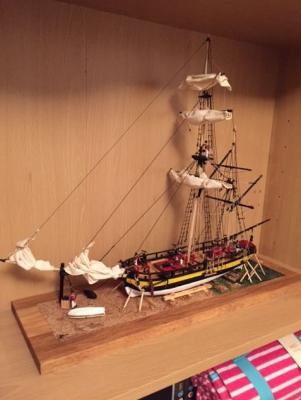
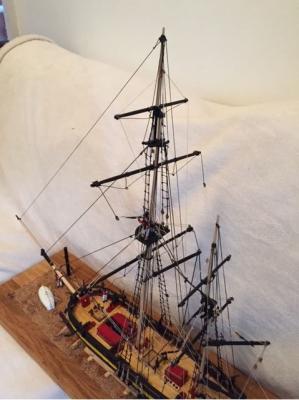
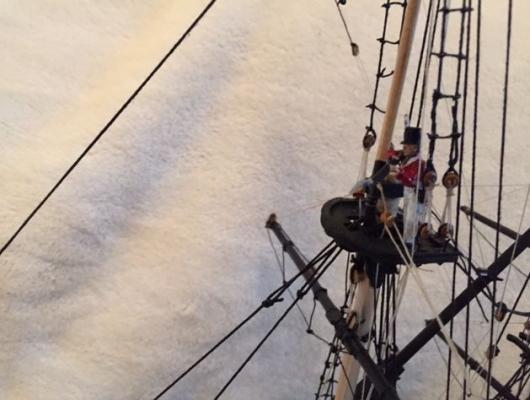
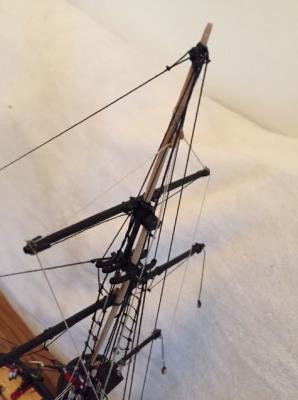
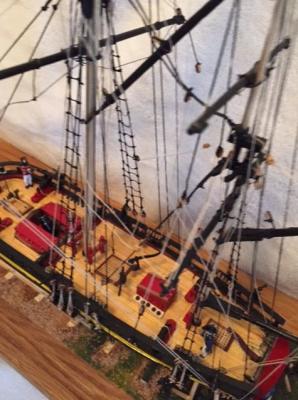
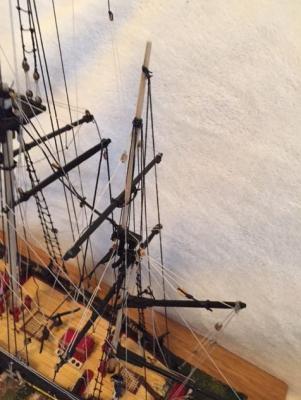
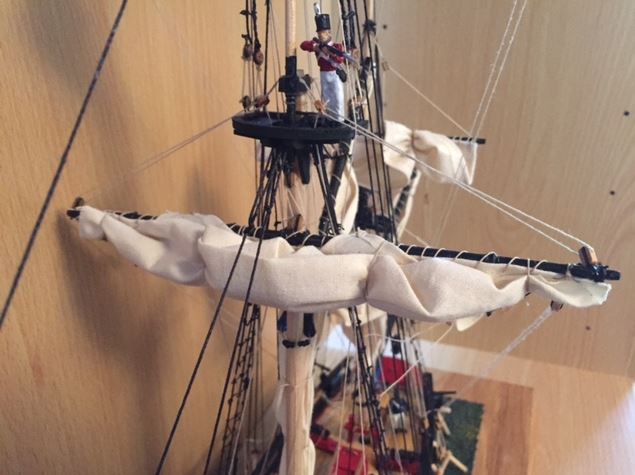
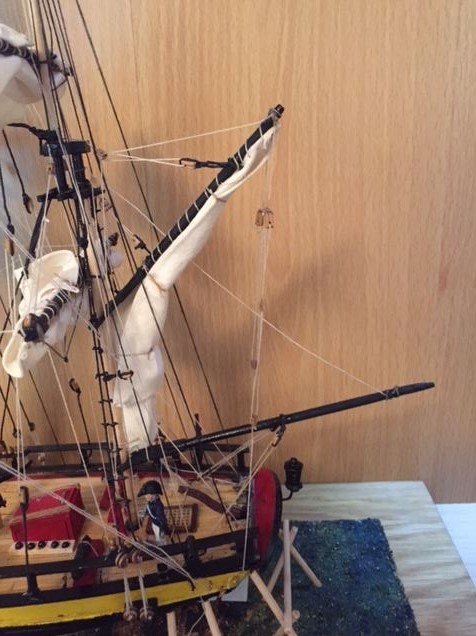
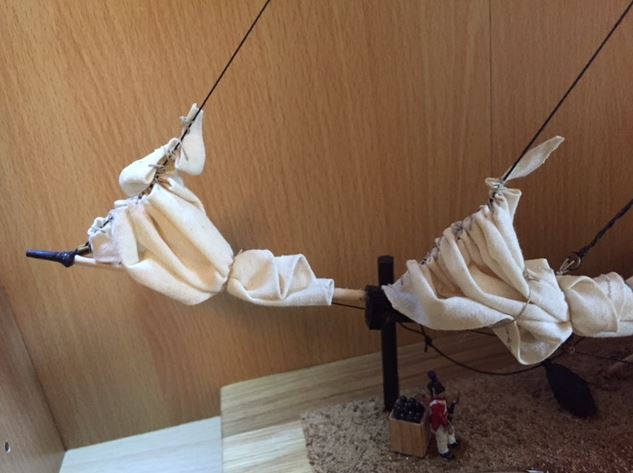
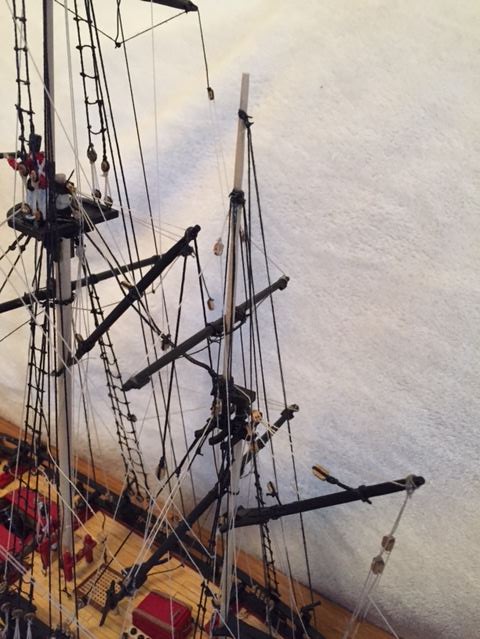
The following photos are of all the sails in place on the model!
Hope you enjoy....


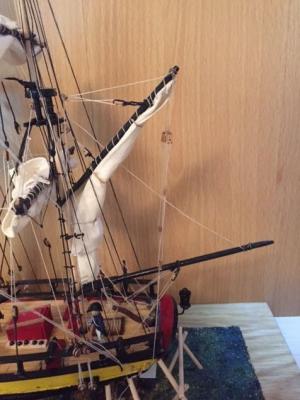
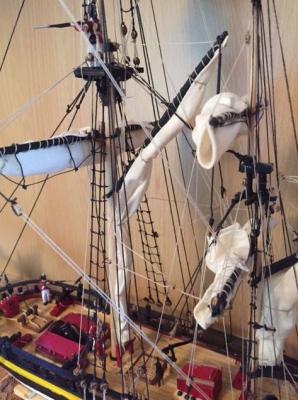
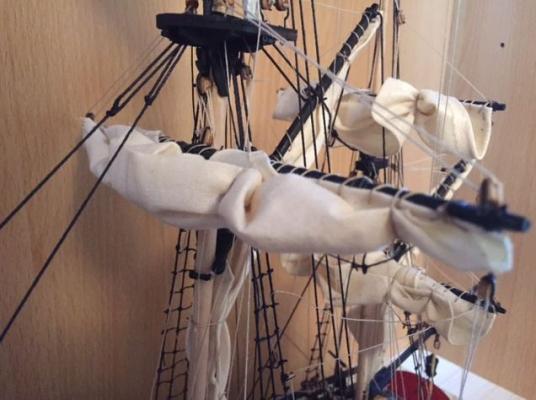


Cheers
Jonny


- DavidM, egkb, GrandpaPhil and 2 others
-
 5
5
-
Morning all,
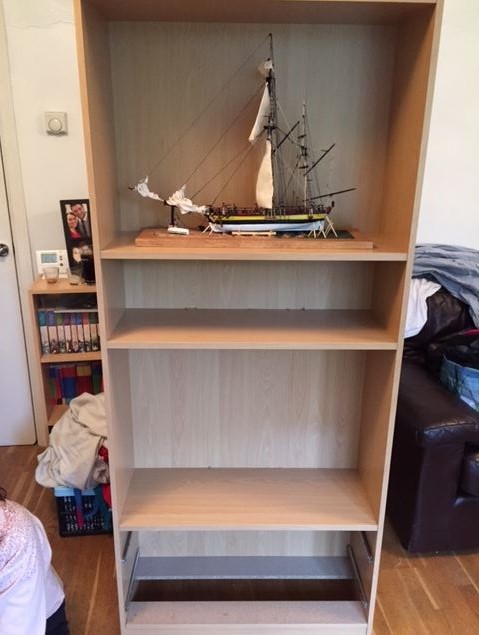
I'll get some photo's of the sails tonight and post them on here! The Admiral decided that she wants Sherbourne to go on the mantlepiece once it's started (bled on, sworn at, and eventually finished), so I bought a flat pack cabinet and assembled that to house Convulsion. I had a dig around in my box of tricks, and managed to find a pair of Glasing Hinges, so at some point I'll finish off the model with a glass door on the front of cabinet!
I'll make a spare sail tonight to show you simple process of building them.
Cheers
Jonny
-
So it's my day off today, and I've spent the day building sails for Convulsion.
So far I have one headsail "hanked" on and furled on to the Bowsprit. I've cut and glued the main top, main sail, main gaff, and jib fabric to the right sizes, and I'm just waiting on them to dry before furling and tying on to the yards and spars.
Cheers
Jonny
-
John,
I will be following your build with great interest! My next build will be a Sherbourne kit bash (once Eamonn hurries up and finishes his Ballahoo!), and I've decided to scrap the Walnut from the kit and replace it with strips of Basswood for the second layer of planking (available from Hobbycraft, mostly online). I'll also be adding edge beams to the deck planking, and adding a few additional details to the deck layout. I'm also considering rigging furled sails on the spars.
What are your intentions with the kit, any bashing going on?
Cheers
Jonny
-
I have seen Dee_Dee's stuff on here, and I think it's great, but I fancy a bit of a challenge....
I'm thinking about building the English Pinnace desgined by Chuck and produced by Model Shipways, as it would be a plank on frame kit, and would be fairly interesting, but with this discovery of Basswood available at Hobbycraft I might take the plunge and build my own POF sratch build of a similar vessel?
http://www.cornwallmodelboats.co.uk/acatalog/model-shipways-english-pinnace-MS1458.html
Let me know what you guys think....
Cheers
Jonny
-
Now that I've got a while to wait before the Sherbourne Group Build, can anyone suggest a good kit to build in the mean time?
Requirements are that it should be sub £60.00 ($100.00), and a quick build? I quite fancy doing a waterline model? Any suggestions?
Cheers
Jonny
-
Hahaha Eamonn my days of long flowing locks are gone! I had long beautiful straight hair just past my shoulders until halfway through Secondary School (I played in a heavy rock band) and thought it was a good look, until some punk (and I use that word instead of another 4 letter word of choice) decided to cut a big chunk of my hair off with a Stanley knife in the middle of the classroom!
No exaggeration, he left a patch about the size of a £2 coin less an inch away from my scalp.... unfortunately at that age, having long hair made myself a target for the b*stards in life! He left the english classroom with a black eye and fat lip, and I left with a clump of hair. He later got arrested for having a knife on his person in school.
I've cut it short even since then! So I'll utilise the Miss's equipment to give it ago!
-
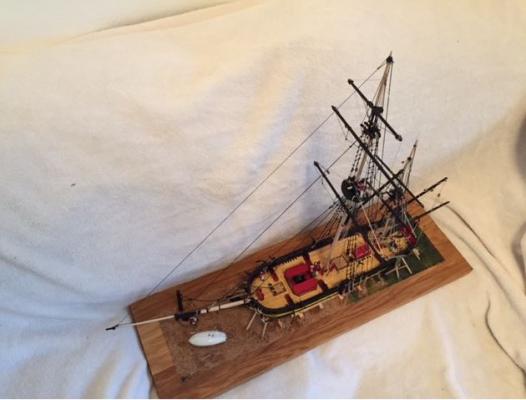
E - I'll dig out the video tonight, I'm intrigued to see how he's edge bending without soaking the wood first! And yes, it's a great feeling to finish a model off like this!! Like I said earlier, I have a few little bit's I want to finish off (like putting in all the belaying pins, and adding a few sailors to the model), but it feels great to be over the biggest hurdle, which has been the rigging. I now have a greater understanding of it, and I'll be buying some new reading material for Sherbourne.
Ian - Thanks for the kind words! I thought it was a novel way of displaying the model without spending silly amounts of money on a display case. Even building my own case was in excess of £150!!!
Cheers
Jonny
-
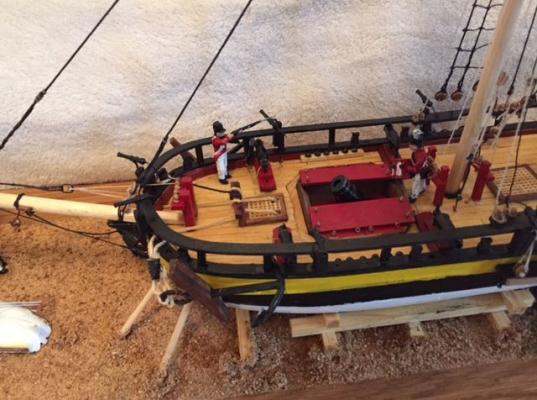
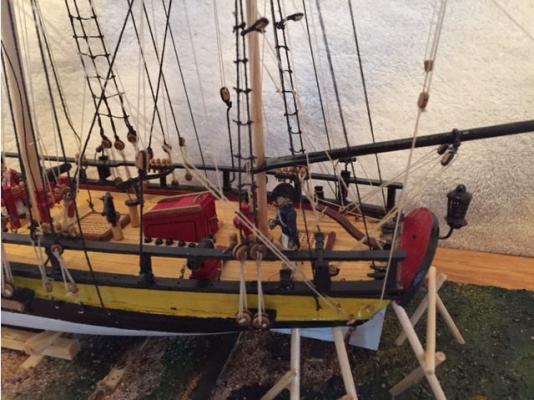
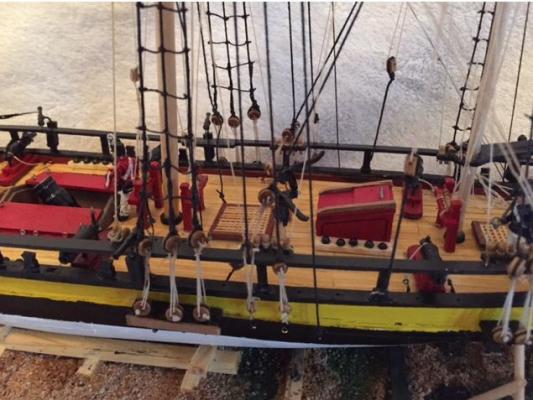
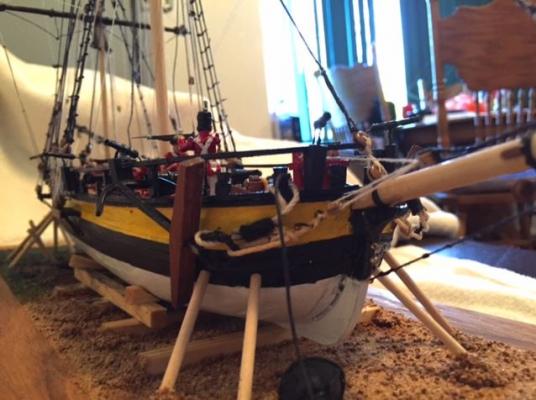
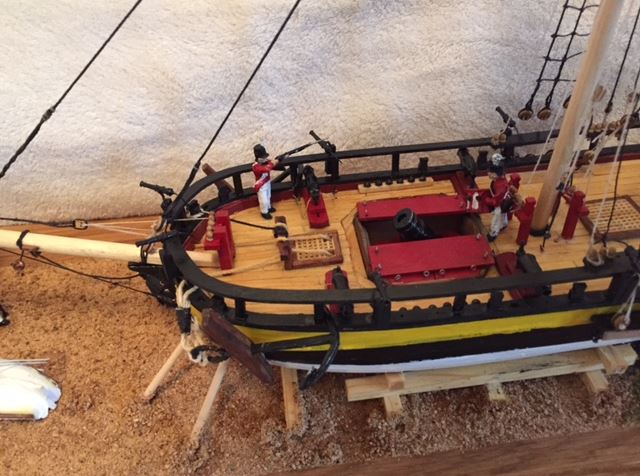
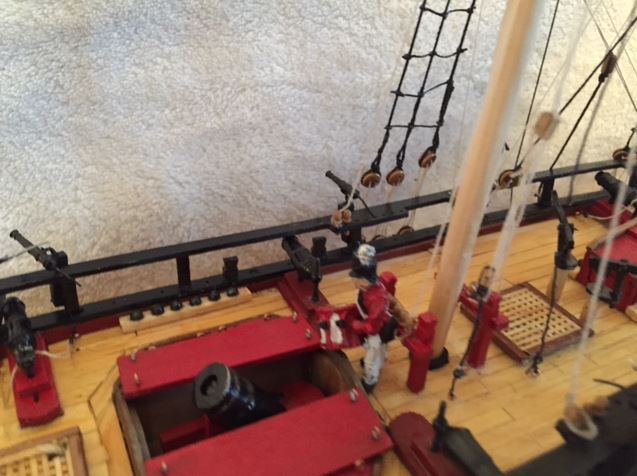
Photo Update on Convulsion!
The model is mostly complete now - just slight changes and additions I will make over time now.
I noticed on Saturday that the model had surcome to some sun damage (it's pretty much in the sunlight all day as our living/dining room is South facing), so I bought a beginners airbrushing set and clear varnish capable of going through the airbrush. I sprayed the model with the varnish on Sunday and left to dry over night.
The following series of photo's are as of Monday night, when the crew figures were glued in place.
I hope you enjoy.....


I think for now I will keep the build log open on HM Mortar Vessel Convulsion until such a time when I am completely finished. You never know what the future will bring....
Cheers
Jonny
-
I found my lot of Bass wood in the Bargain Bin at Hobbycraft, but it is available online.
The Admiral had some money burning a hole in her pocket from her birthday a feww weekends back, so she suggested we take a drive to Woking and have a look around the new Hobbycraft store they opened up recently. All I wanted from there was a set of French Curves, and I ended walking out with £25 worth of Basswood in various sizes, French Curves and a bottle of clear varnish suitable for Airbrushes!
http://www.hobbycraft.co.uk/basswood-01-x-05-cm-5-pack/569080-1000
http://www.hobbycraft.co.uk/basswood-03-x-07-cm-5-pack/569081-1000
http://www.hobbycraft.co.uk/advancedsearchresults.aspx?query=basswood&resultsPerPage=100
I'll have a look at Chuck's video, because the edge bending I've done so far needs so tidying up, especially round the bow. I started off soaking the basswood strips in hot water (the Admirals bath whilst she was faffing about with a face mask and lighting candles - so romantic) for about 5 minutes. Then I used a strip of old Balsa as my forming board, drew round the outside edges of the false deck and pinned the basswood to the balsa board. I had to resoak the Starboard side plank as it dried out very quickly. I left them pinned down for 24 hours, and they've retained their shape, but they have rippled in various places due to the grain of the timber not being impregnanted with enough water.
I've got another 3 lengths of the basswood that I'll try different bending techniques with, but I spoke with my Dad last night, and he suggested making a steambox out of copper pipe, and a compression fitting on one end. I'm looking in to that as that will make the basswood really supple and easy to bend.
Now that've found the Basswood online in pre-cut lengths and widths, I'll look in to replacing the whole deck with basswood.
I'll be posting photo's of Convulsion later on, I just need to do some final editing.
Cheers
Jonny
-
Ok, that sounds good to me. I've got bits and bobs out of the packaging and I've checked the kit over and cut the rabbet line on the keel. I won't go any further with the model! Although I have looked into edge bending some new basswood I found at Hobbycraft, and I'll be using that as edge planks/waterways for the decking.
I've also built a new building frame, so my framing will be straight and true!
I'll post new photos of Convulsion tomorrow!
Cheers
Jonny
-
E - I'll be getting ready to start Sherbourne soon, when are you starting?
-
Hi guys,
I finally got back to my build yesterday, and tied the final rat lines on Convulsion. I feel like the overall model is finished, pretty much, although I'm waiting on payday to buy some more crew figures from CMB to act as sailors on board rather than just having the Marines currently.
I will post Pictures tomorrow after I've taken a few artistic shots tonight!!
I've thought about certain things I can bring forward on to my Sherbourne build. My lessons learnt from Convulsion are as follows:
1 - Stick to a Plan of Action - do not deviate from the POA
2 - Avoid breakages - invest in a keel clamp or use modellers vice to hold model (no swan diving off the dining room table)
3 - Tie the rat lines prior to running all the running rigging.
4 - Avoid paint fiascos by masking up properly. Invest in airbrush set for better painting.
5 - Don't get bogged down in the finer details, come back to those later.
6 - Don't procrastinate when decking, and only use CA or superglue when 100% happy with result.
7 - Cut a deeper rabbet line. Makes the planking run smoother. Not so much of an issue on Convulsion, but due to the hull shape on Sherbourne, it's a must.
8 - build a framing -jig, nothing fancy, just a jig to keep the frames 100% square whilst the glue dries. This is very important!!
As I say, I'll take some nice photos tonight, and post them first thing in the morning.
Cheers
Jonny
-
Morning Everyone,
Again, apologies for the extended radio silence, it's been very busy at work! I've been pulling 15 hour shifts to pick up the slack after the redundancies were made a few weeks back. And today is my first day off in ages, and guess where I am!! That's right at work, waiting for my car to pass its MOT and then it's back to it catching up on work!
Tonight I plan to finish off the rat lines, but it depends what time I get out of here today!
Cheers
Jobny
-
Hi Chaps,
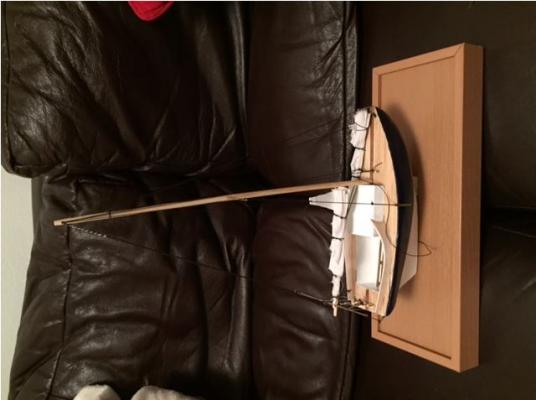
Thanks for the kind words! I just about made the deadline! I wanted to put toe rails around the edge of the deck (especially on the bow), but I couldn't get it done in time! Next time I'm down there I might add them to the model, but I'm more or less happy with it!
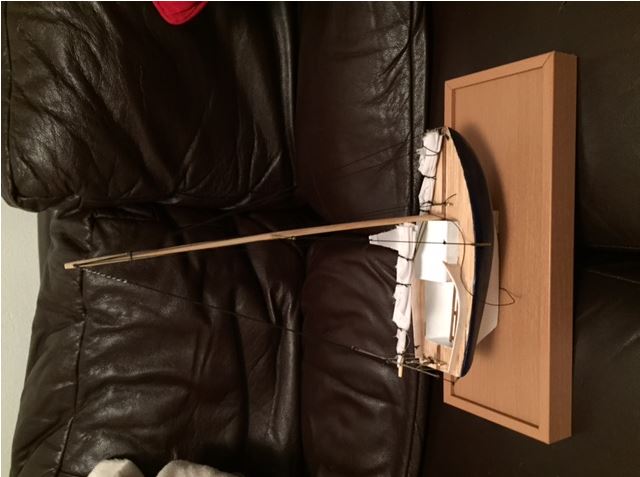
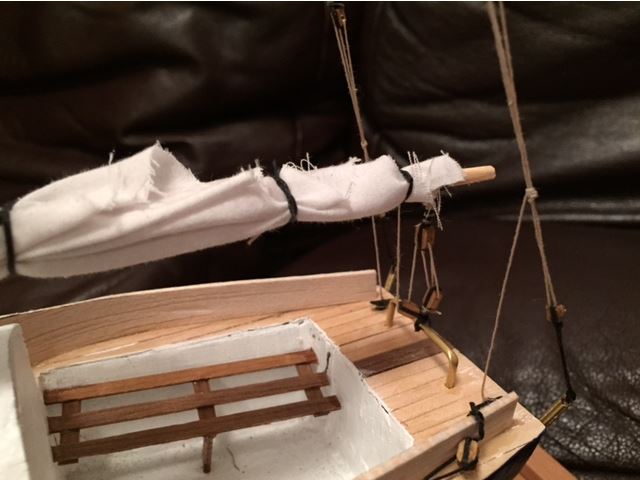
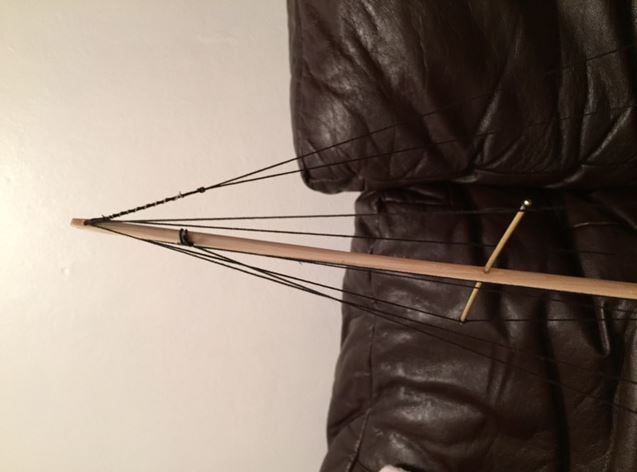
Turns out, the yacht is a near identical copy of the first yacht my grandfather built, "Karina Jo", so mum has decided to share the same name. I believe she's getting a name plate made up at the local locksmiths before she jets off on holiday!
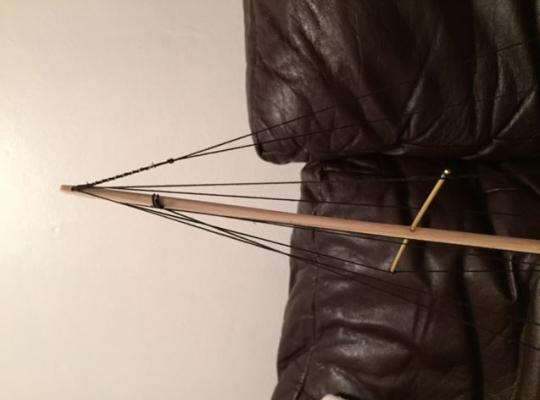
I rigged the model with running backstays, which wasn't in keeping with the original design, but from my experience with yachts, is that with the rig so far forward, and the boom being so long, a standard backstay would have been to clumbersome through tacks, catching the boom and snagging on the mainsail. Of course, a modern yacht of this size could probably avoid using a backstay, as main to genoa area ratios are very close (on most boats, the genoa is 110% the size of the main), but on this yacht the genoa would be as little as 70% the size of the main sail, which means the rig is further forward on the model, and the main sail has a longer foot. Therefore giving greater sail area in the main, and elongating the boom, meaning running backstays are required for tensioning the rig under power.
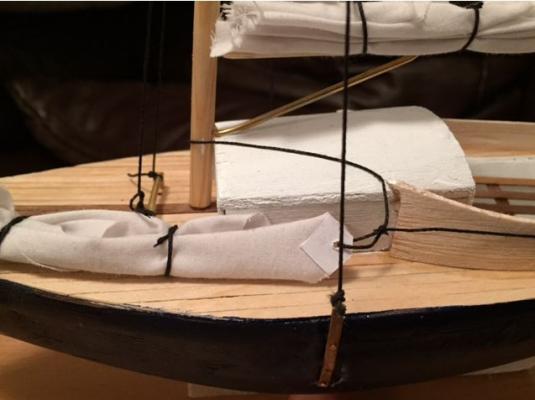
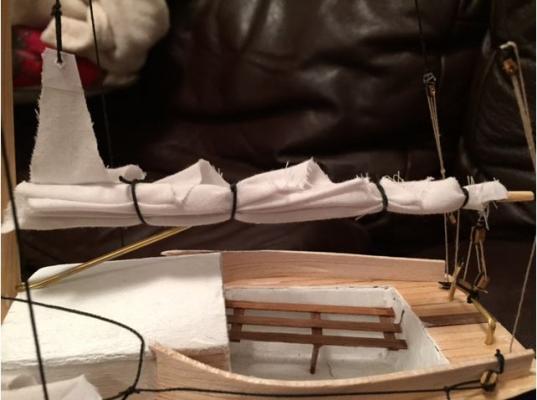
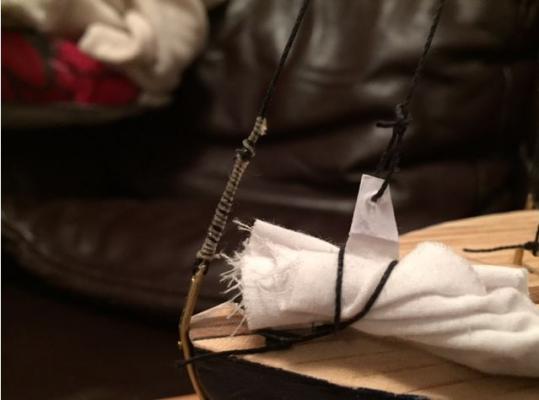
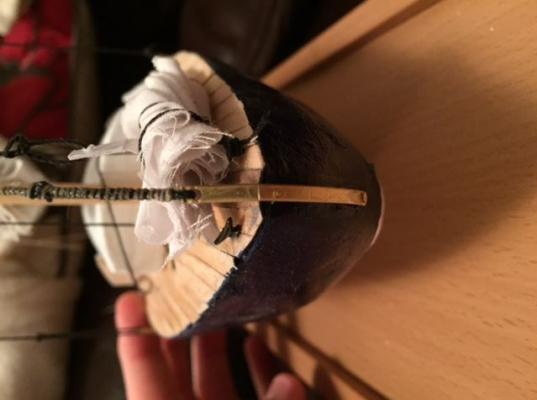
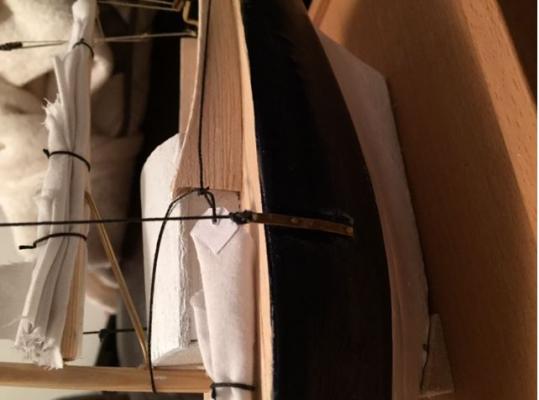
Eamonn - those are tiny bowlines on the main and jib halyards!! The "sail cloth" was made with an old work shirt and the head, clew and tack on each sail were made by gluing white card to either side and drilling through with a 1.8mm DIA drill bit. The sails were flaked over a spare length of 6mm dowel, and flakes superglued on top of the previous! Then I transferred the "sail" to the boom and bow, and tied them down.
Once again, thanks for all the kind words, it's really appreciated! I found this project to be a bit of a pain in the ar$e due to the fact I was limited on time. But I'm glad I've finished it, but I'll be happy to get back on to Convulsion now, tying ratlines is a breeze compared to this project!
Cheers
Jonny
-
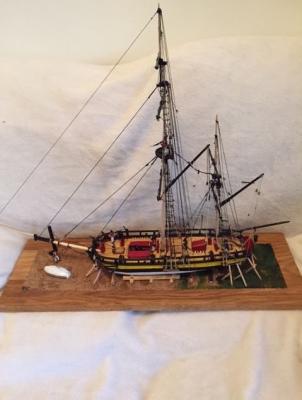
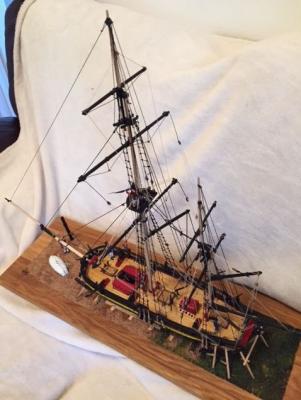
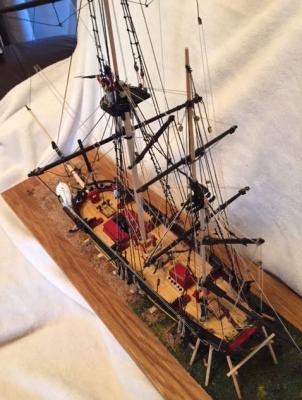
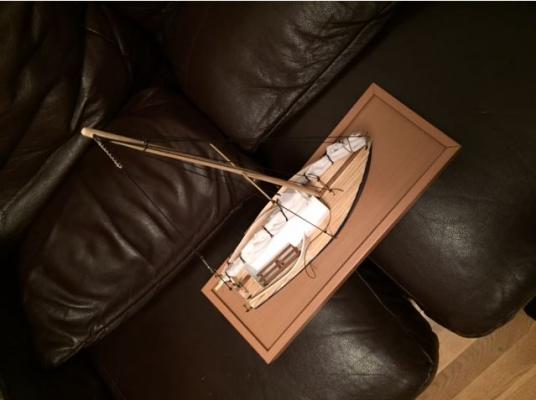
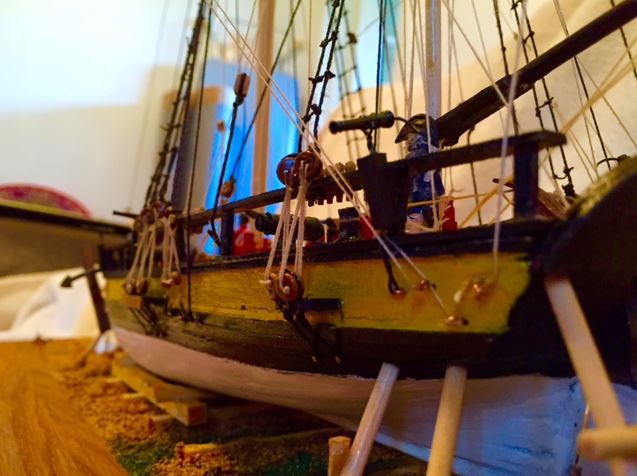
Hi Guys,
This is a mostly pictorial update on progress.
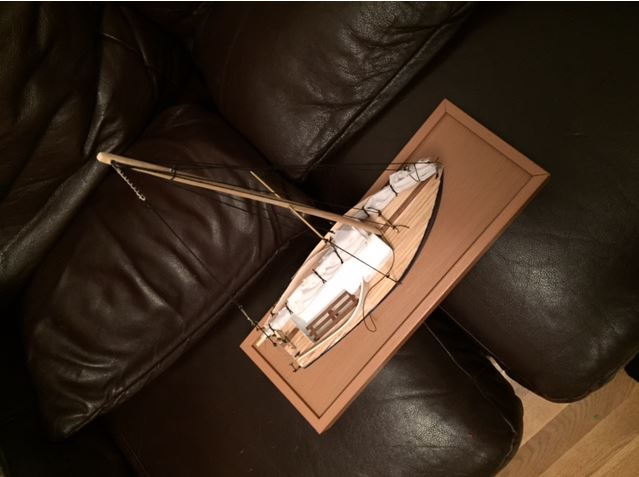
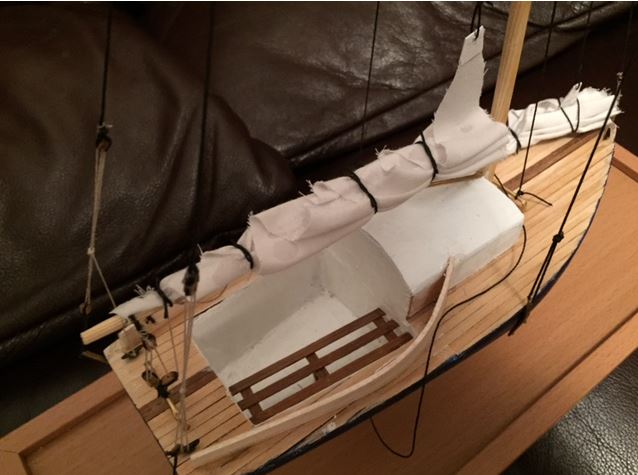
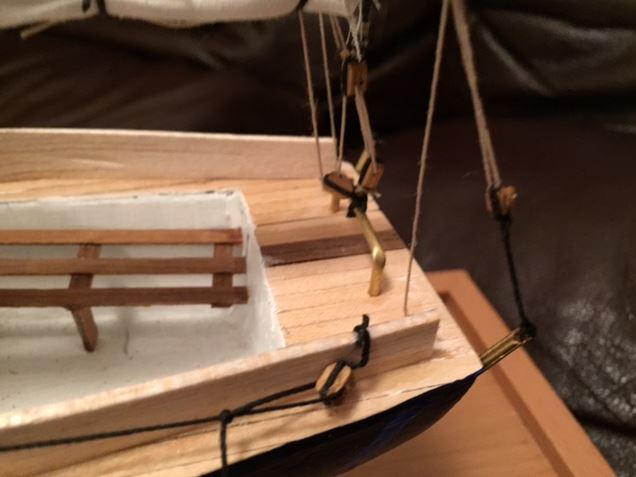
I've pretty much finished off the model now, there are a few odds and sods I want to clear up before handing the model over! I'm not going away with work now, so I've got a bit more time to work on the model. I thought about leaving the model as a "bare poles" model due to the fact I couldn't get canvas that was light enough for the sails at the local haberdashery, so I decided to cut up an old work shirt from a company I didn't work for any longer! It worked wonders!
These photo's were taken earlier in the week, so things like the cockpit benches have been finshed off! Any way, I hope you enjoy!


Cheers,
Jonny
- mikegerber, michael mott, Omega1234 and 4 others
-
7
-
Hi guys,
Sorry for the radio silence over the last few days, I've spent most of my long easter weekend seeing family, and doing general maintainence around the house, and before I knew it, it was back to work on Tuesday. Work isn't exactly a pleasure at the moment either, our client has decided to sack off 150 people off the project (mostly contractors), but it means I'm doing the work of 3 people now and it's just me and my boss as the 2 other designers on our team didn't make the cut...... So busy times ahead for me!
I need time with Convulsion, I need to de-stress with some ratline tying! Hahaha
Cheers
Jonny
-
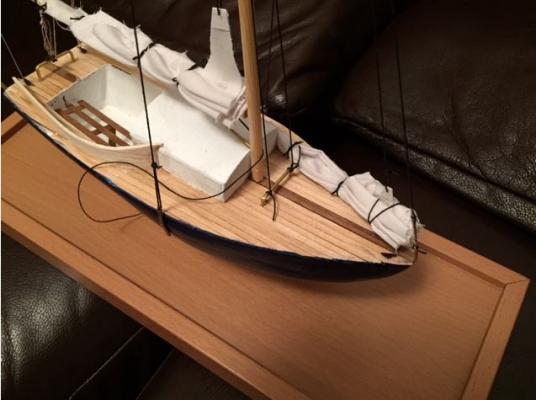
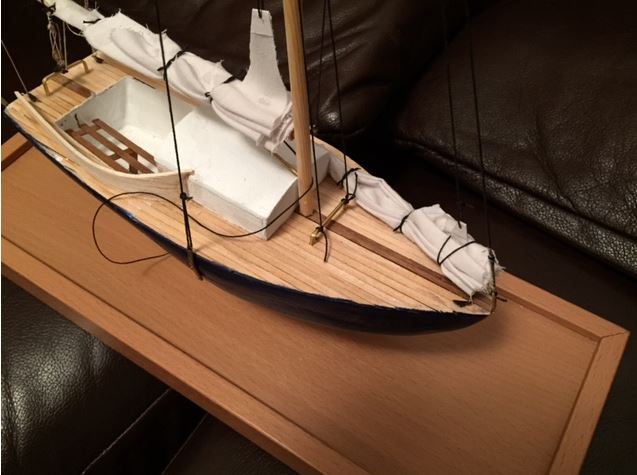
Just a quick update, I've finished the deck planking on the yacht, and I've built up the pilot house.
I've been busy seeing family all day, so no progress today, but I'll be having a crafts day with the Admiral tomorrow (she like drawing and painting), so I'll get the deck fittings and furniture fitted and painted tomorrow!
Cheers,
Jonny


HM Cutter Sherbourne by jonny.amy - FINISHED - Caldercraft - Scale 1:64 - Kit Bash
in - Kit build logs for subjects built from 1751 - 1800
Posted · Edited by jonny.amy
These are the profiles of the planking that I would have to achieve....
Shiplap Lapstrake
Clinker lapstrake
Anybody have a suggestion on how to get that profile without the use of large power tools (as mentioned earlier, I'm in a large 1 bedroom flat with my girlfriend, but there is little space for useful power tools like routers).
Cheers
Jonny