popeye2sea
-
Posts
1,934 -
Joined
-
Last visited
Content Type
Profiles
Forums
Gallery
Events
Everything posted by popeye2sea
-
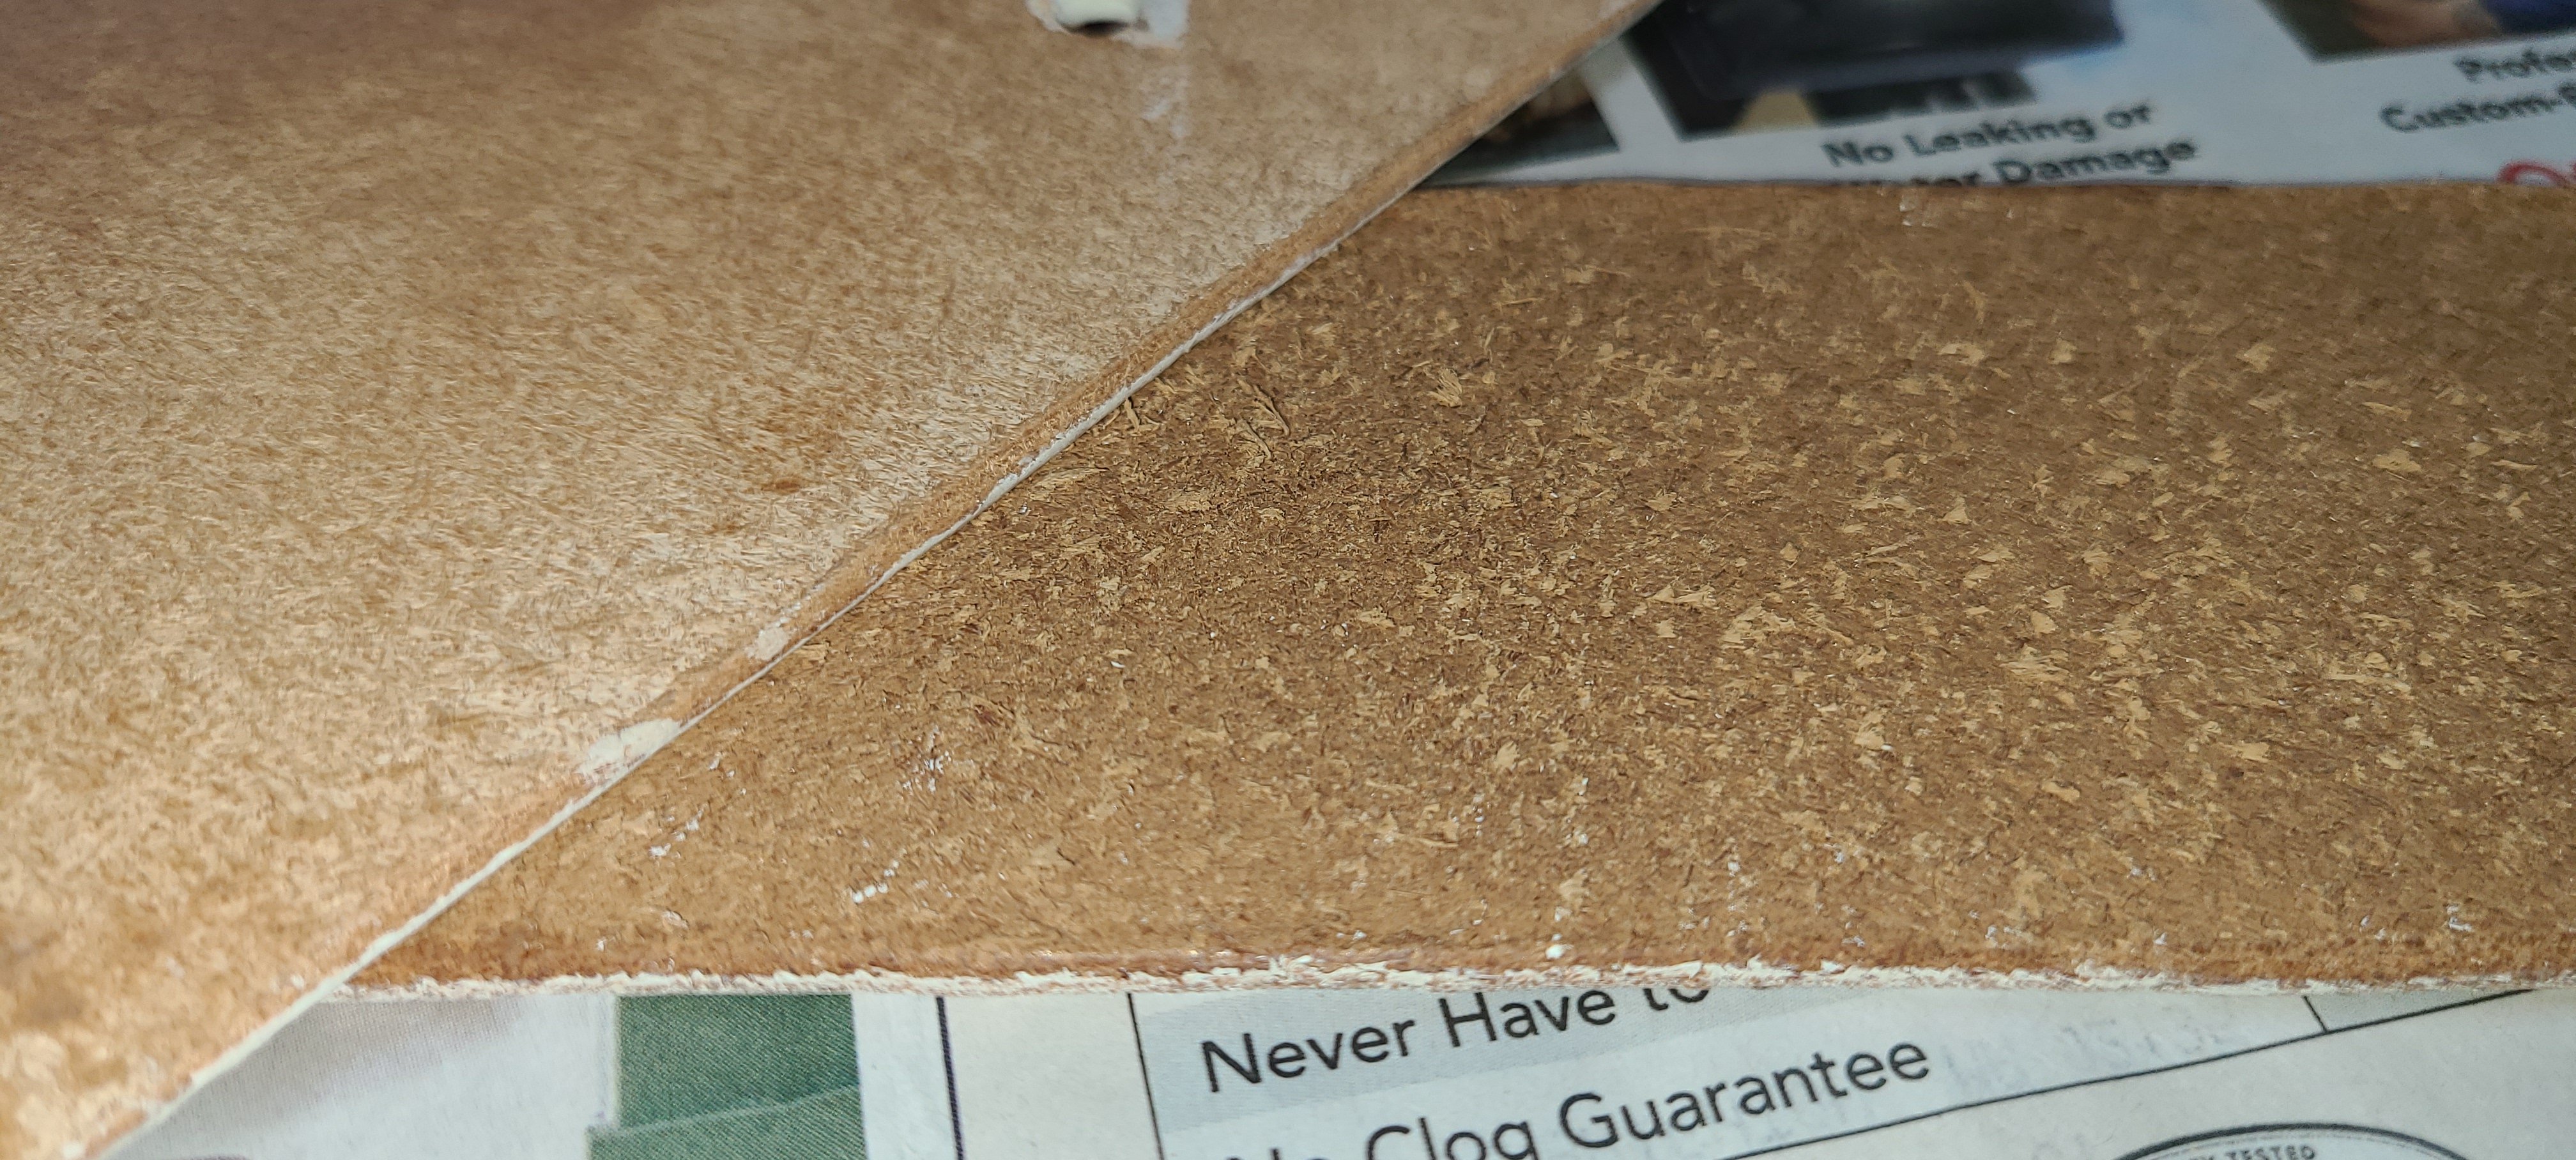
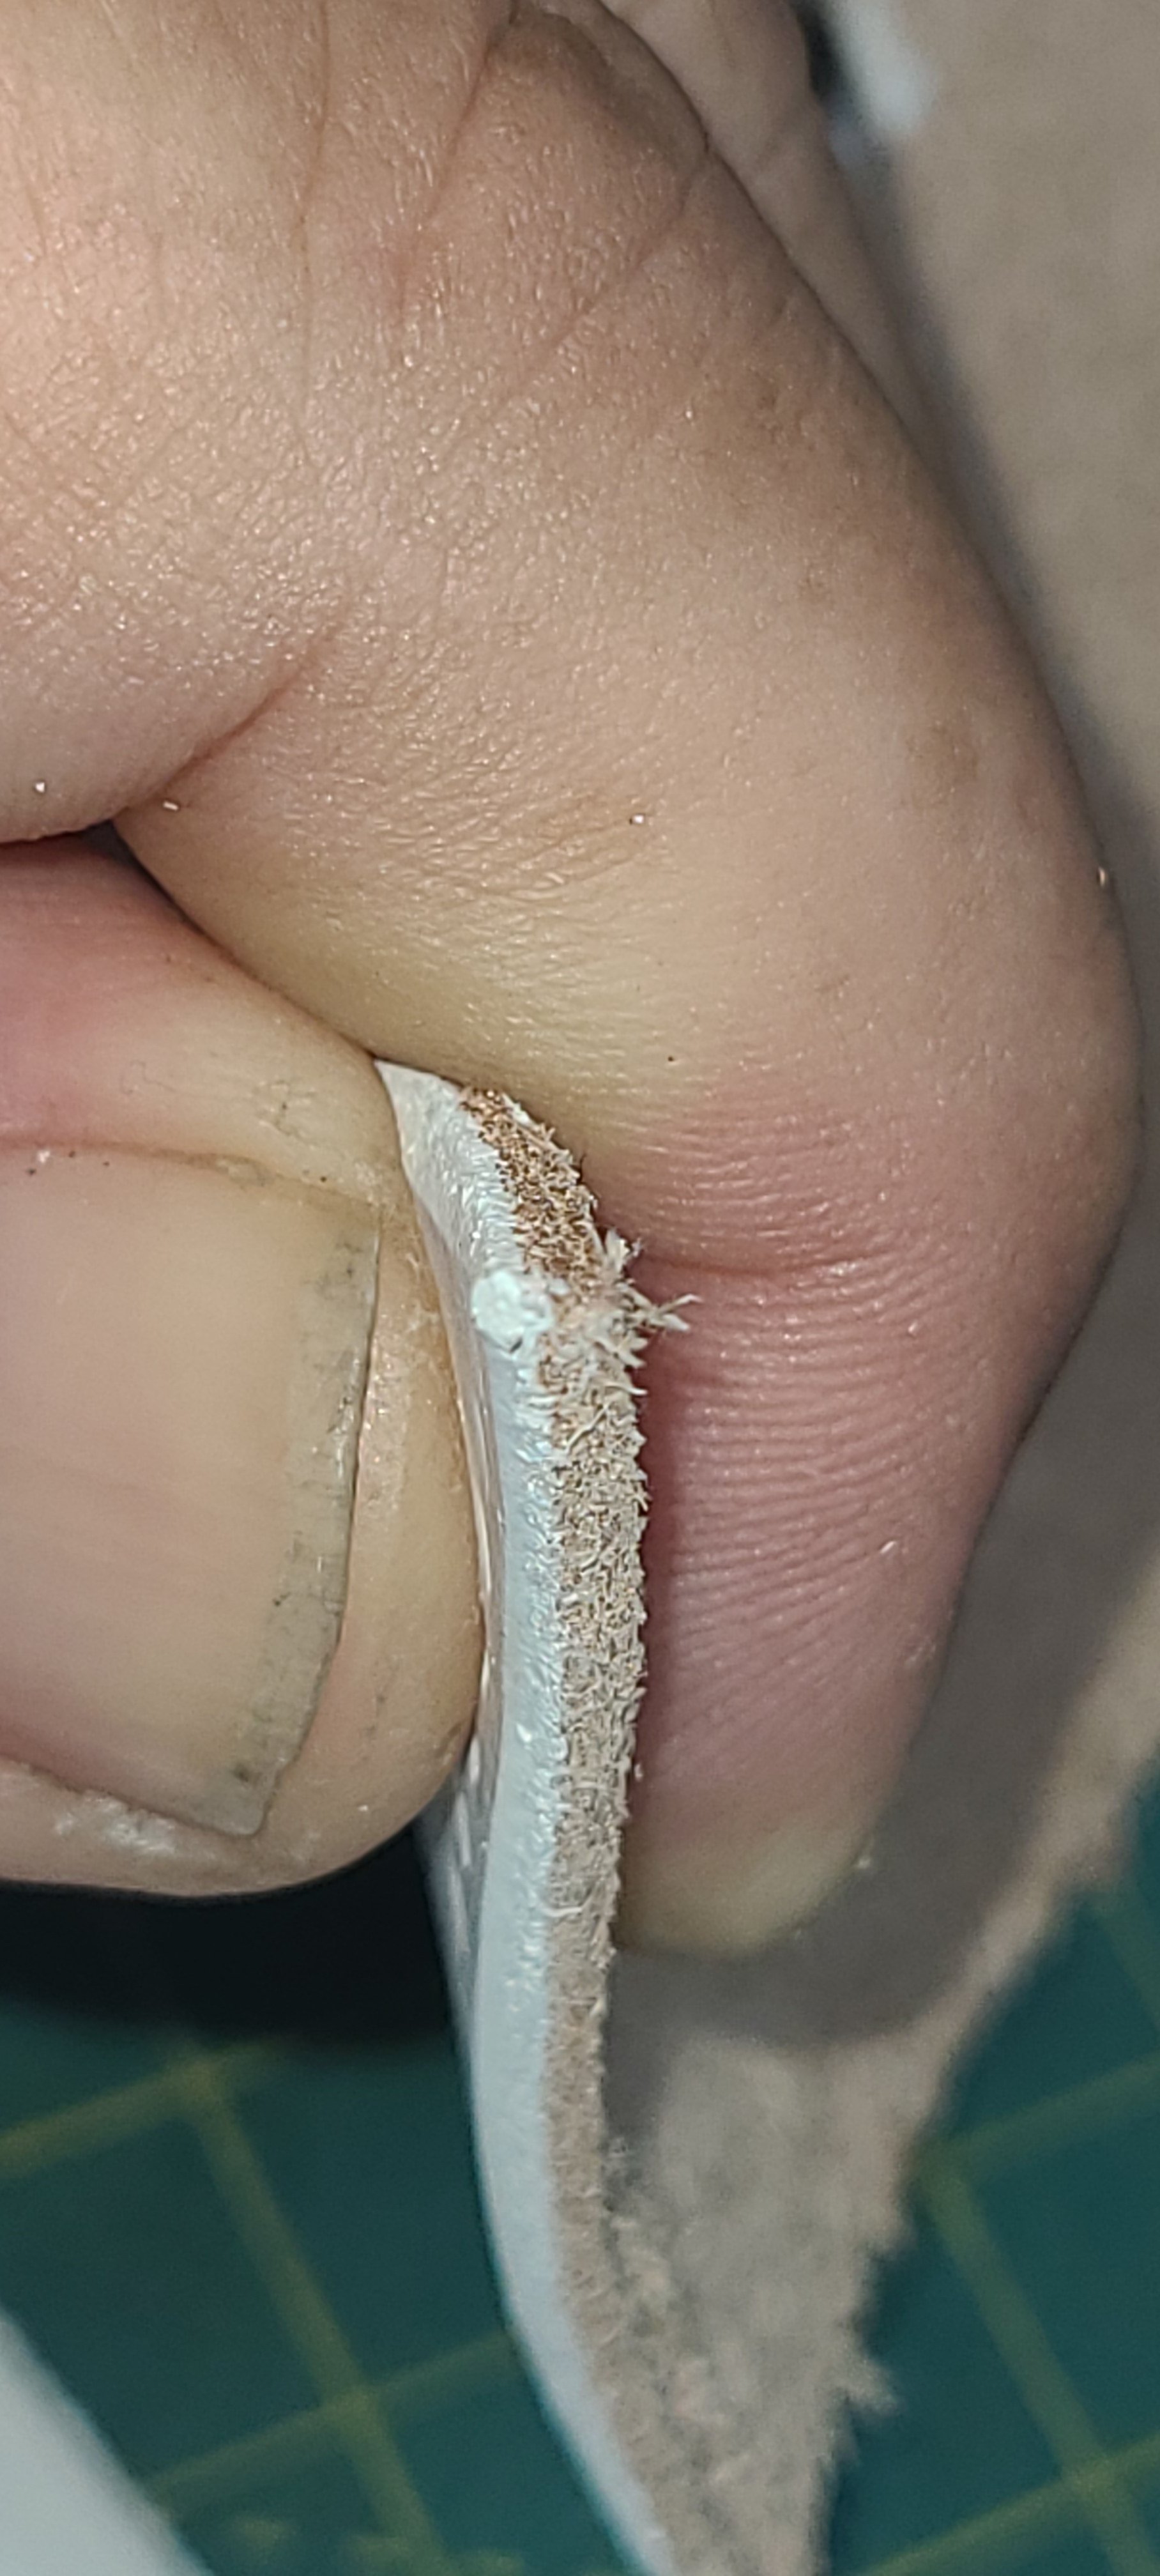
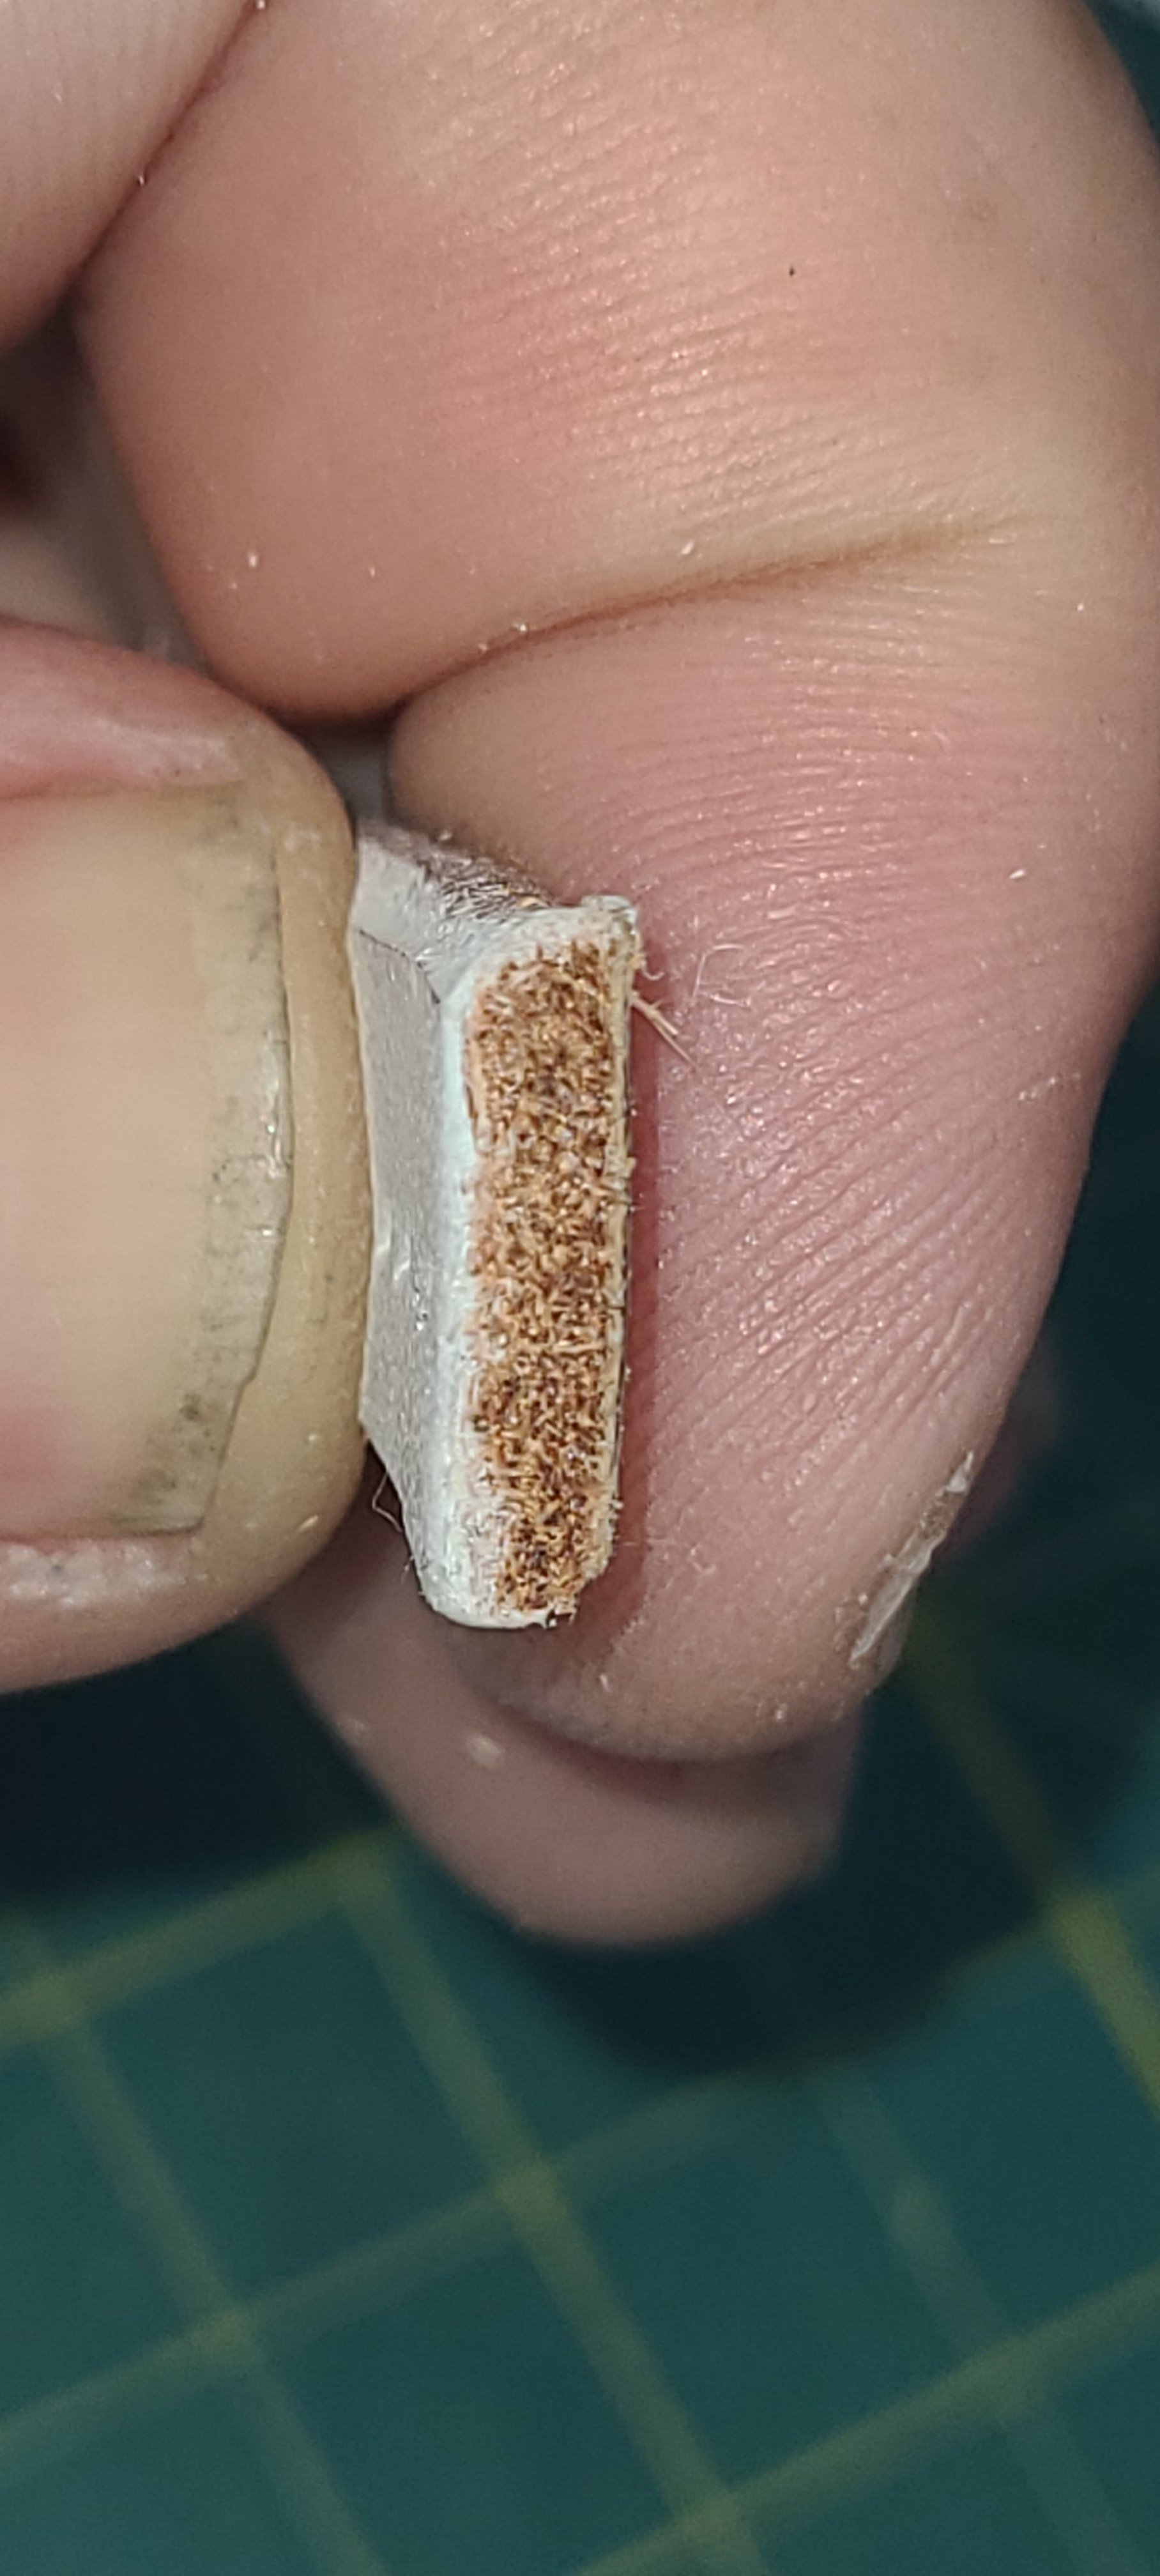
 More progress on finishing the edges and backs. The edges round over and polish up nicely with the burnishing burr mounted on the drill. I am moving on to the backs of the pieces. The nap of the flesh side of the leather needs to be knocked down and polished and a coat of dye applied. I don't need it to be super finely finished because it will be on the inside of all the cross belts when worn. It just needs to be whiter instead of raw leather. Below are the items used to accomplish this part. Tokonole Burnishing Gum, a thin spreader, and a wood burnishing tool In this second photo, you can better see how much the nap is knocked down. The piece on top is finished ready for white dye. Next step is dying the backs white followed by white edge coat, and the pieces will be almost ready for assembly. Regards, Henry
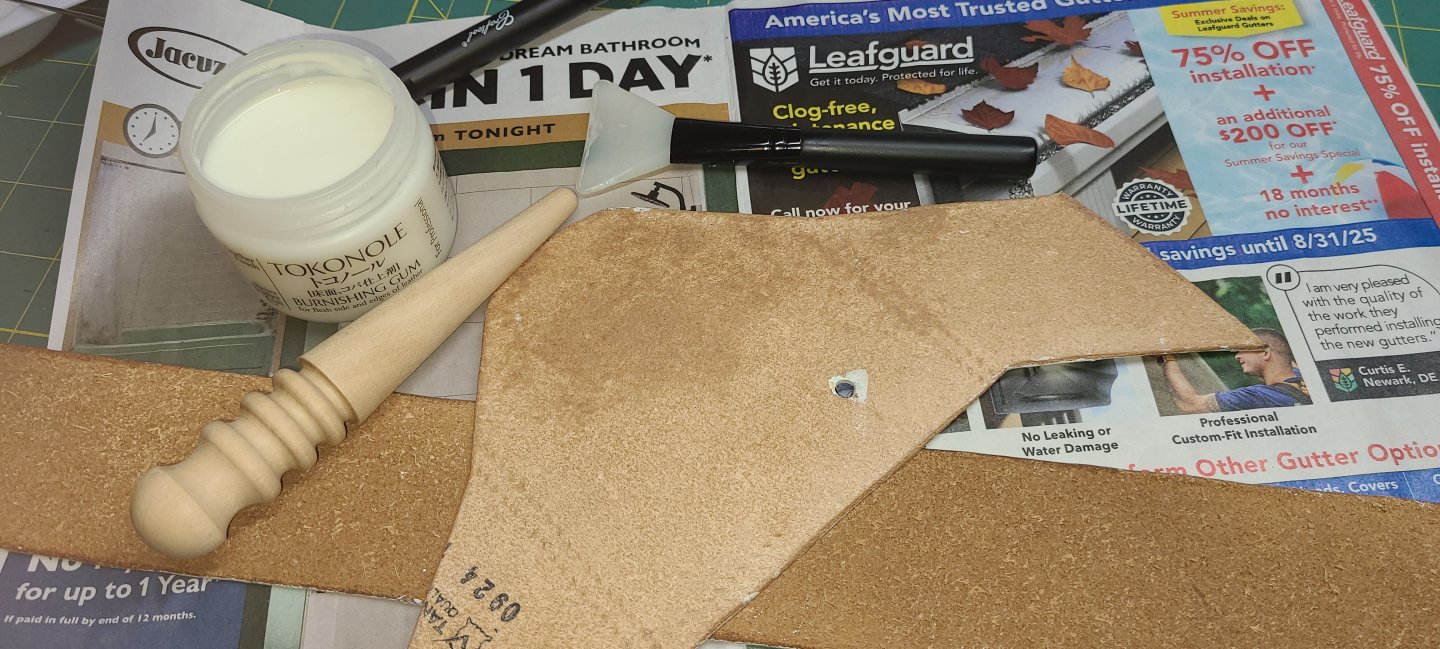

-
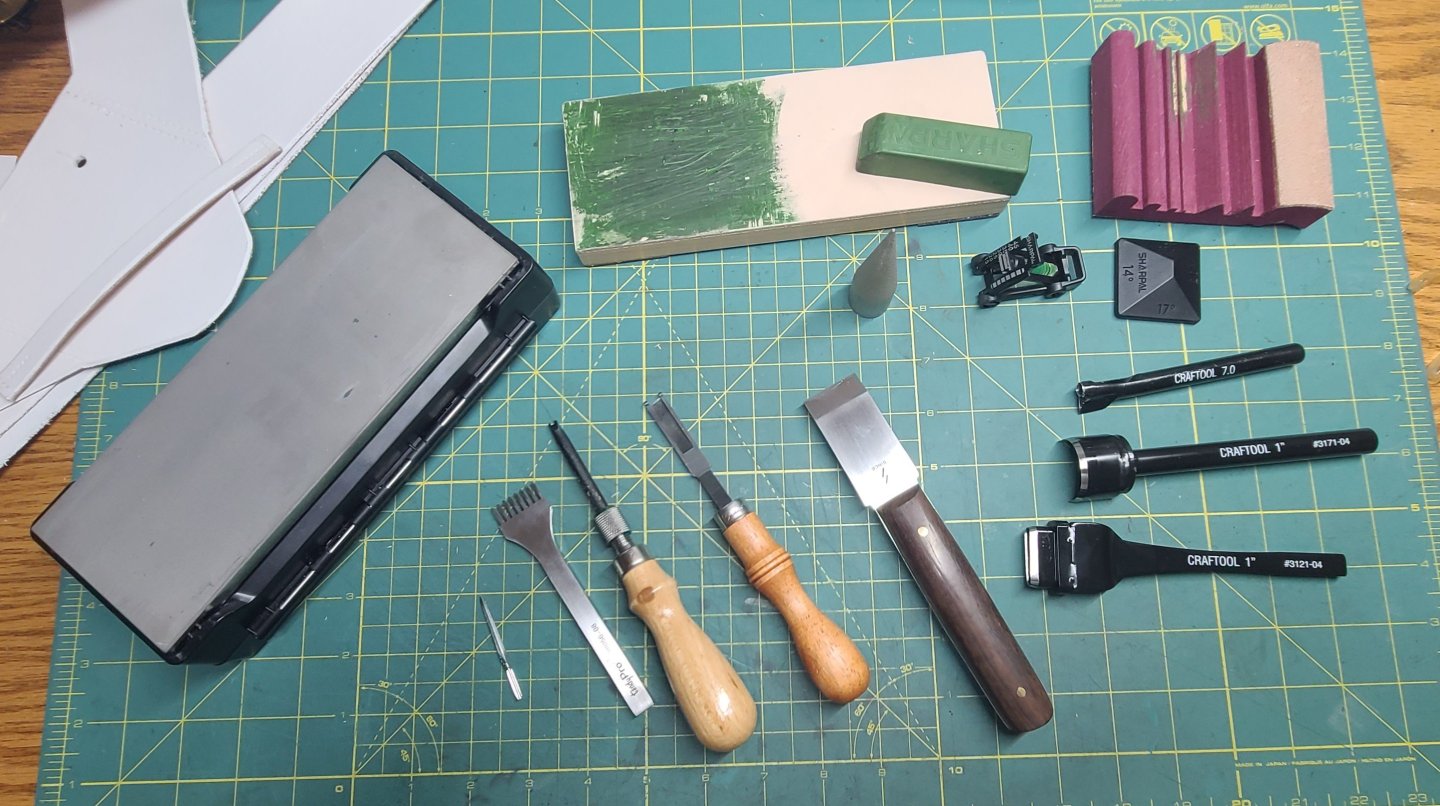
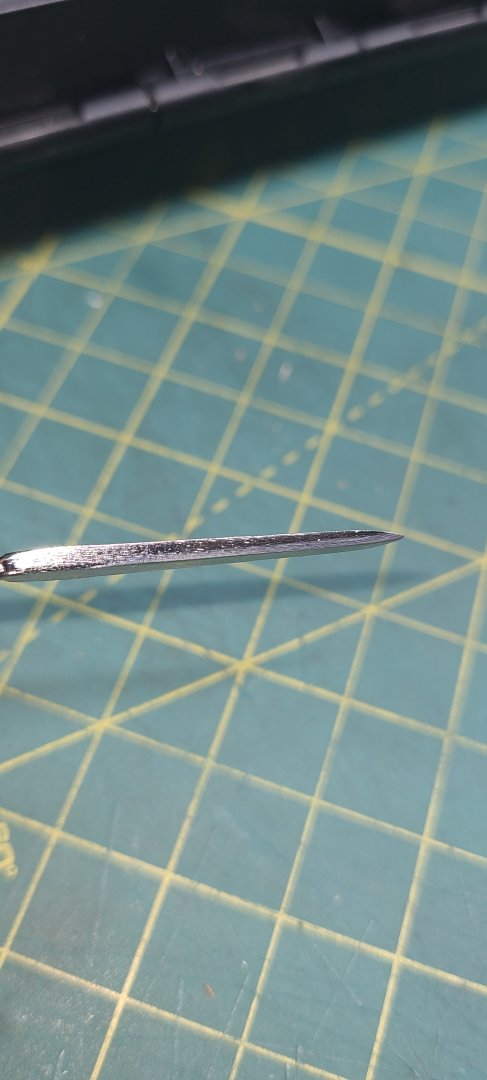
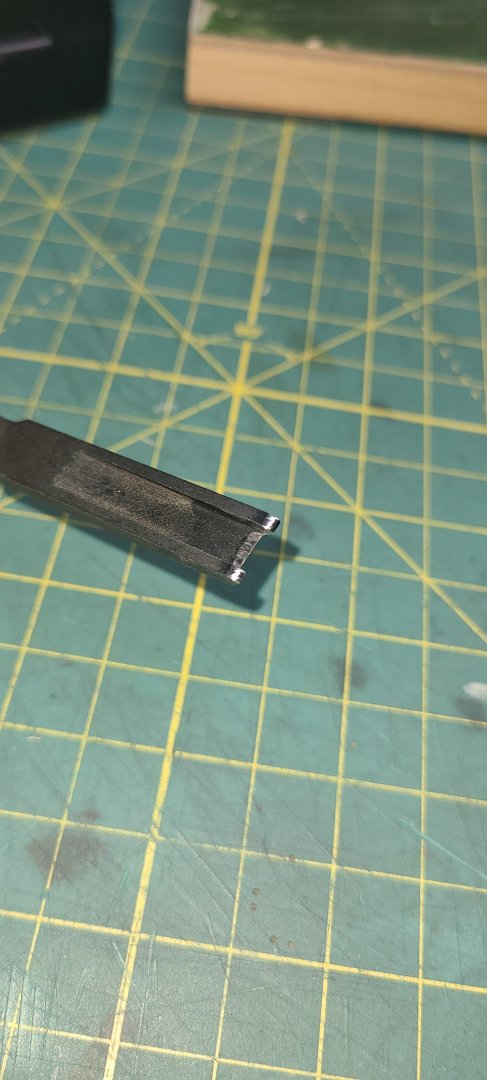
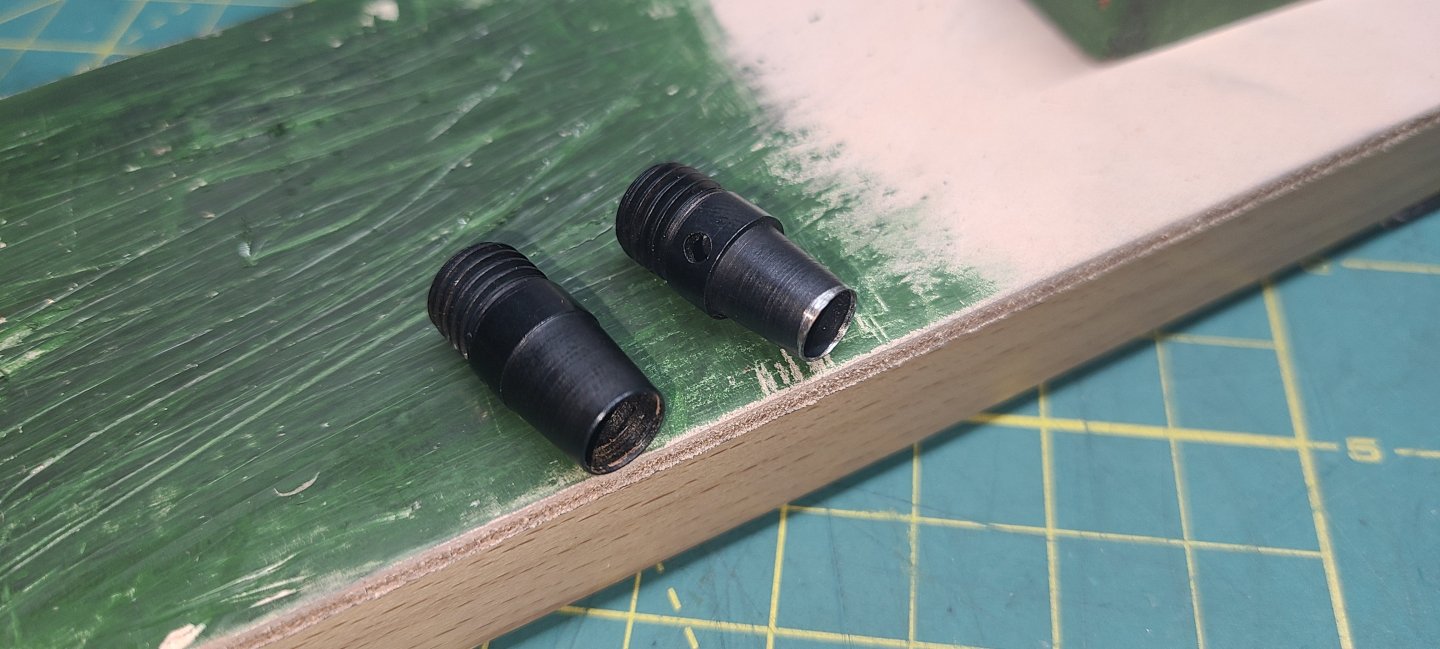
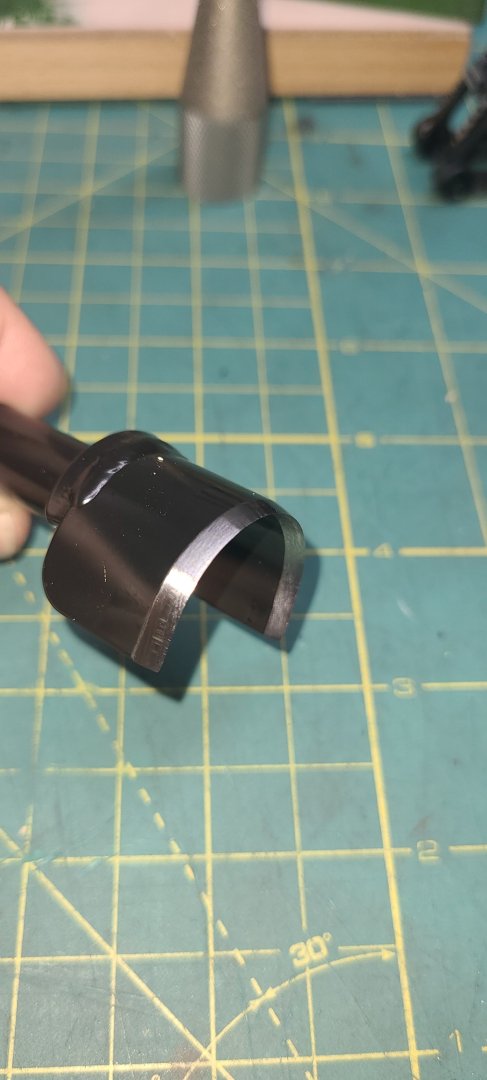
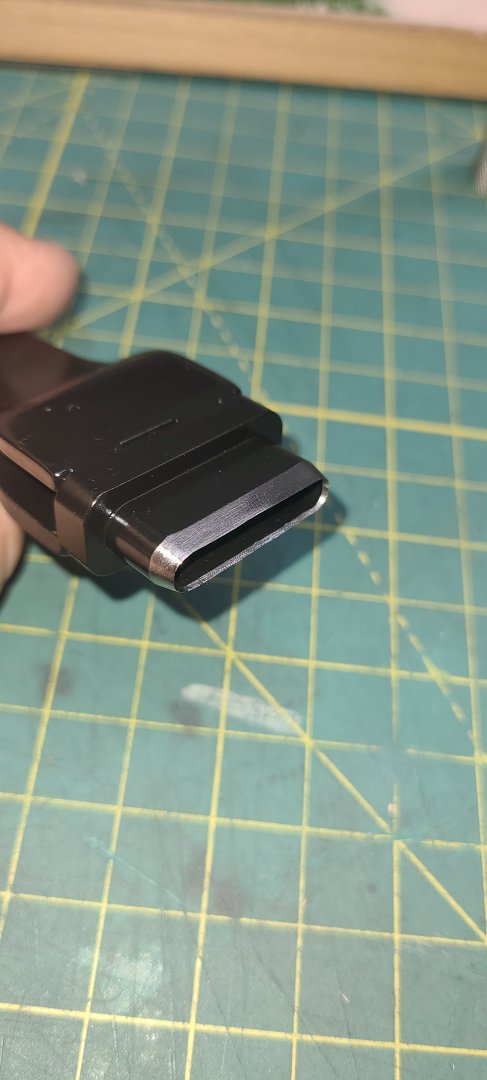
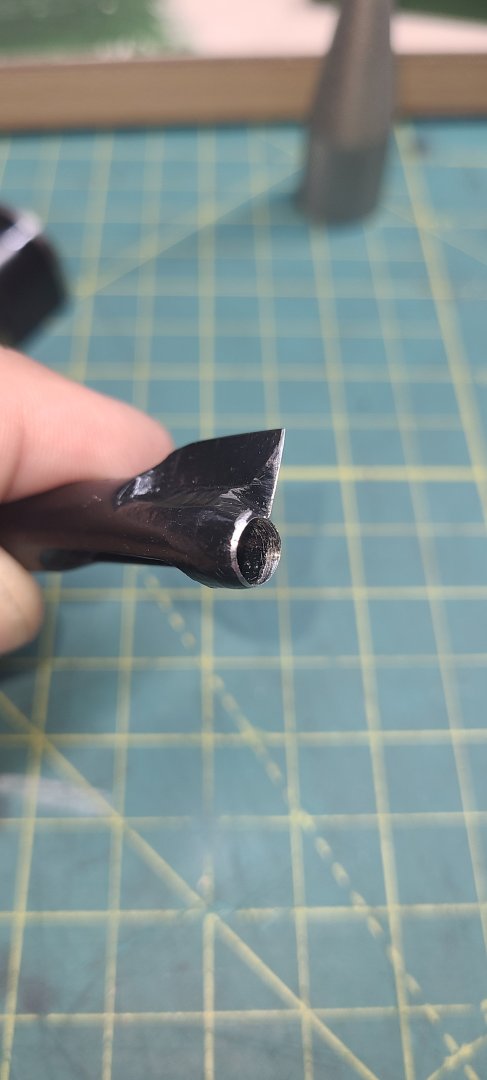
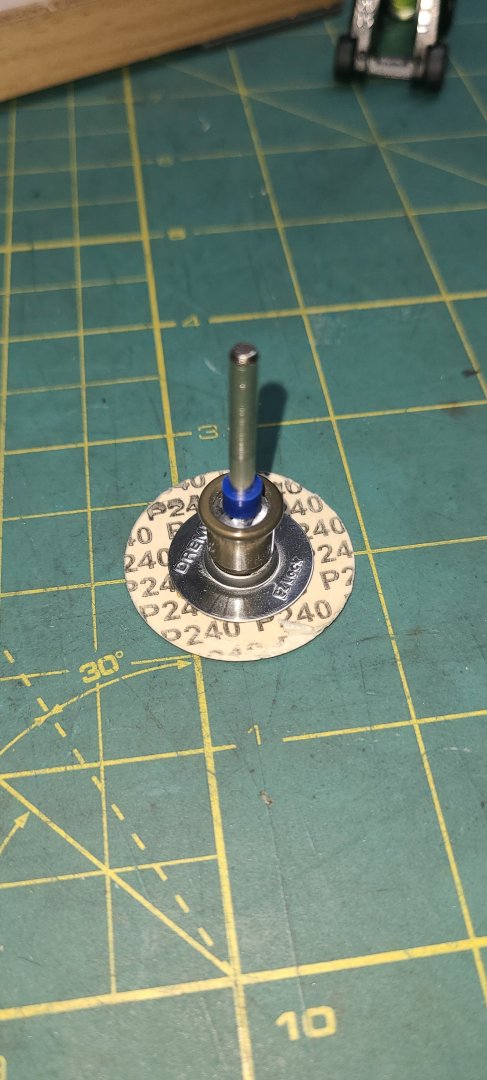
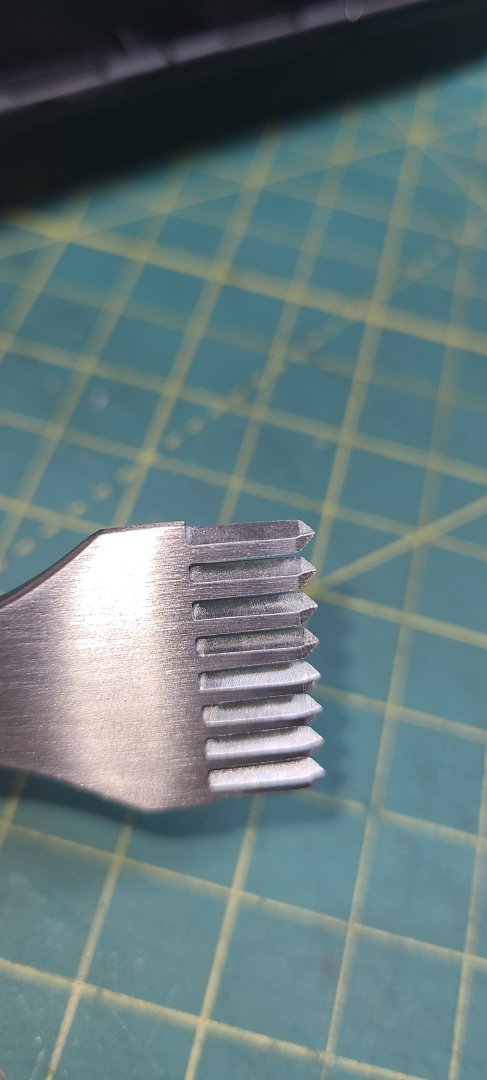
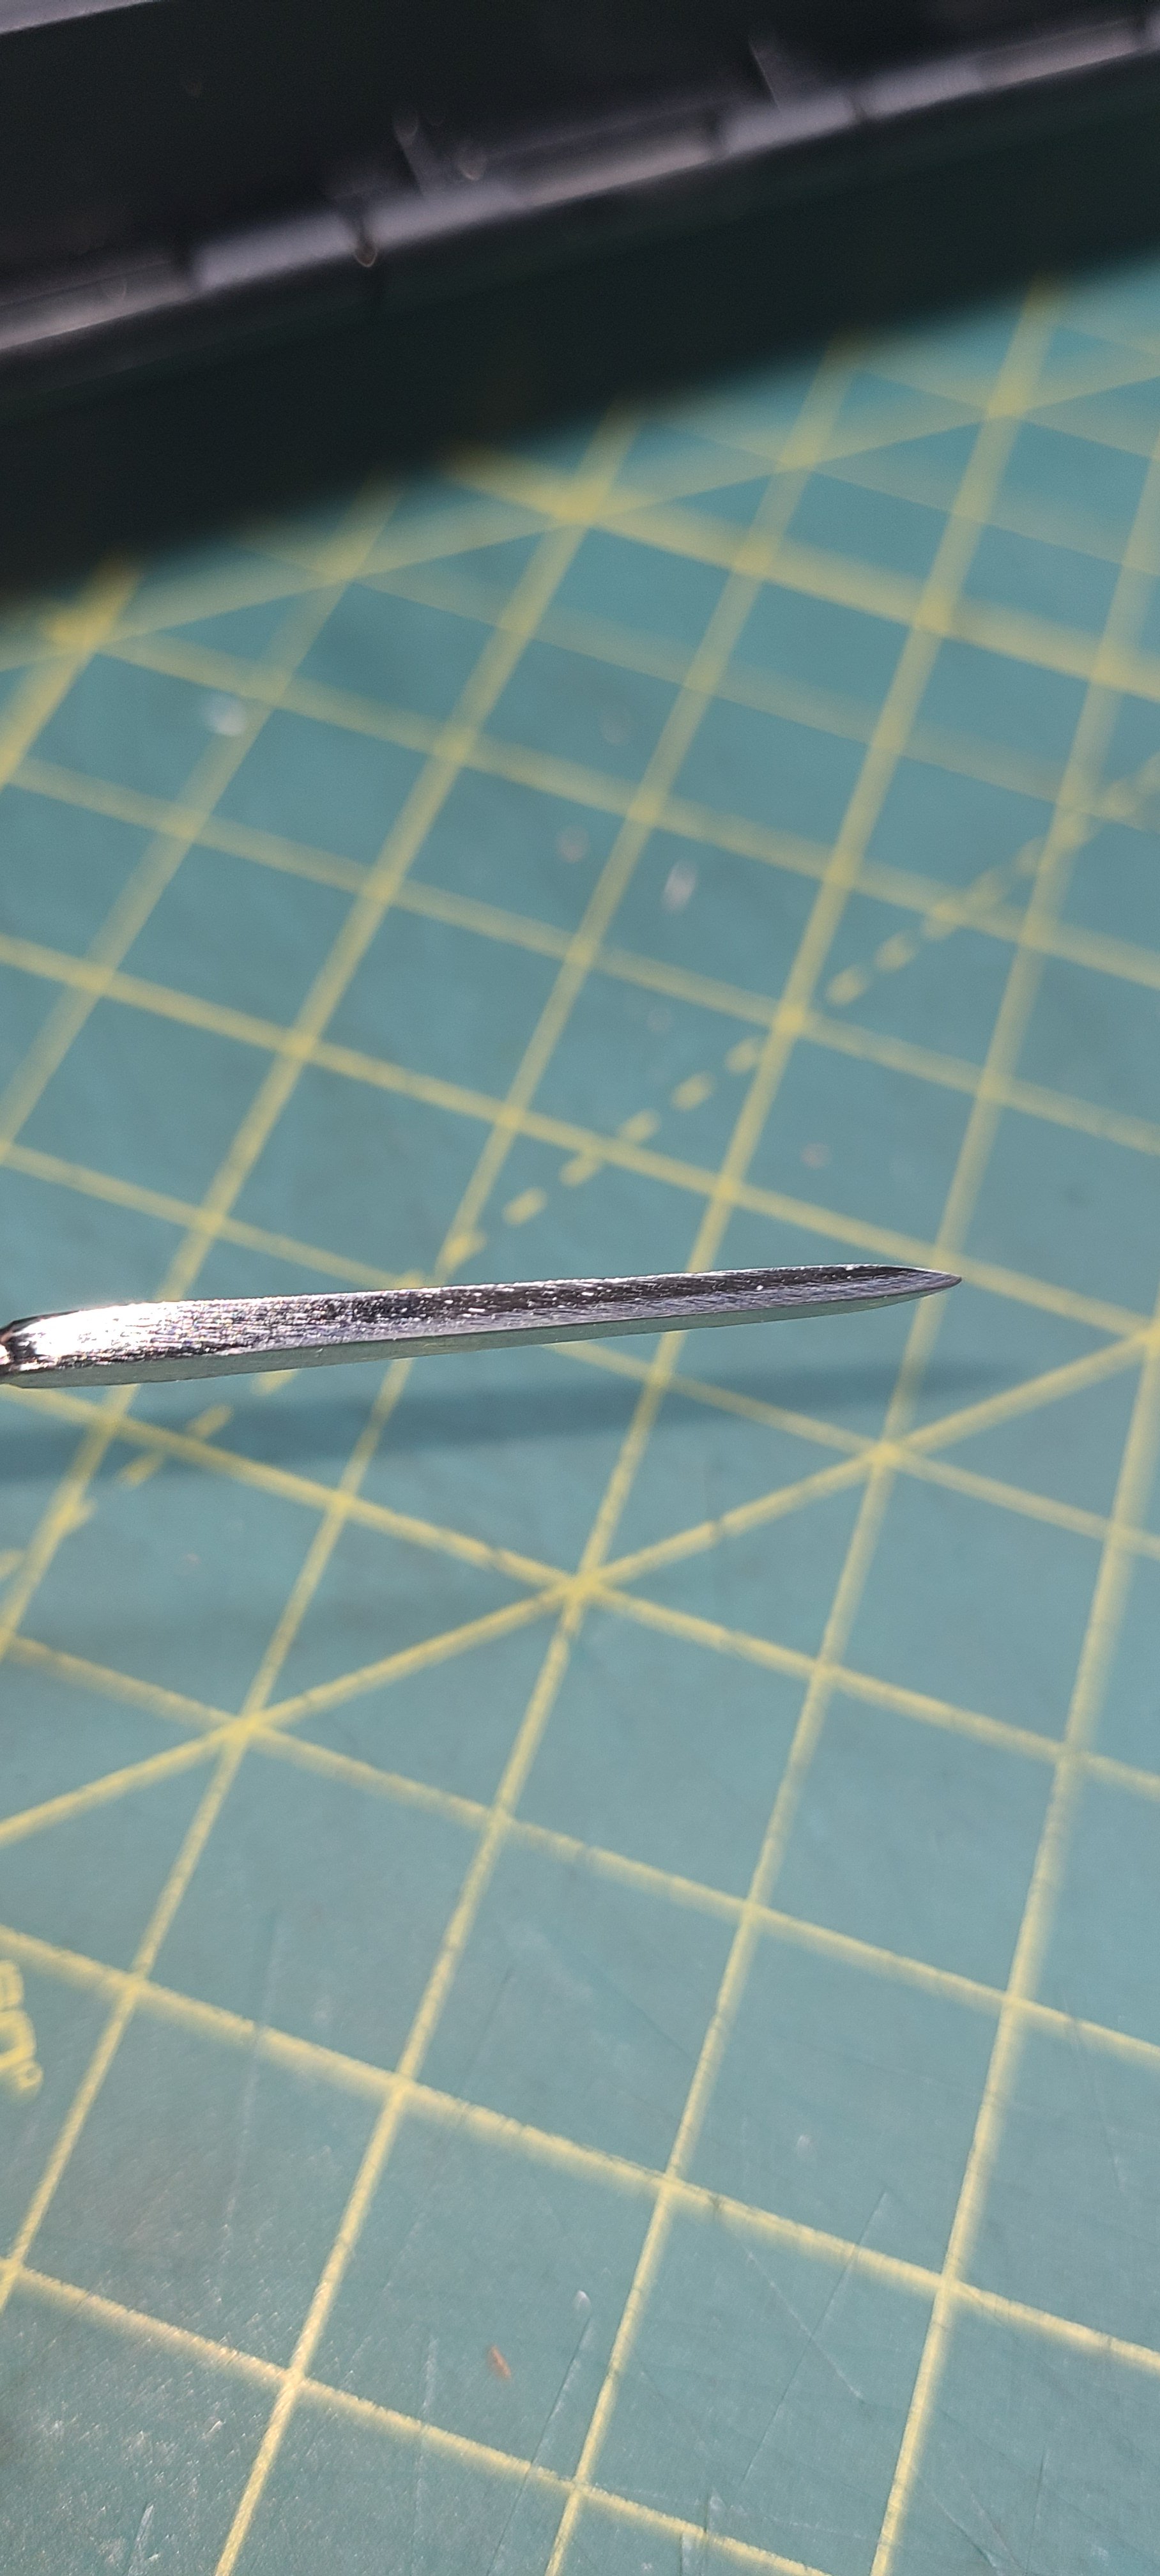
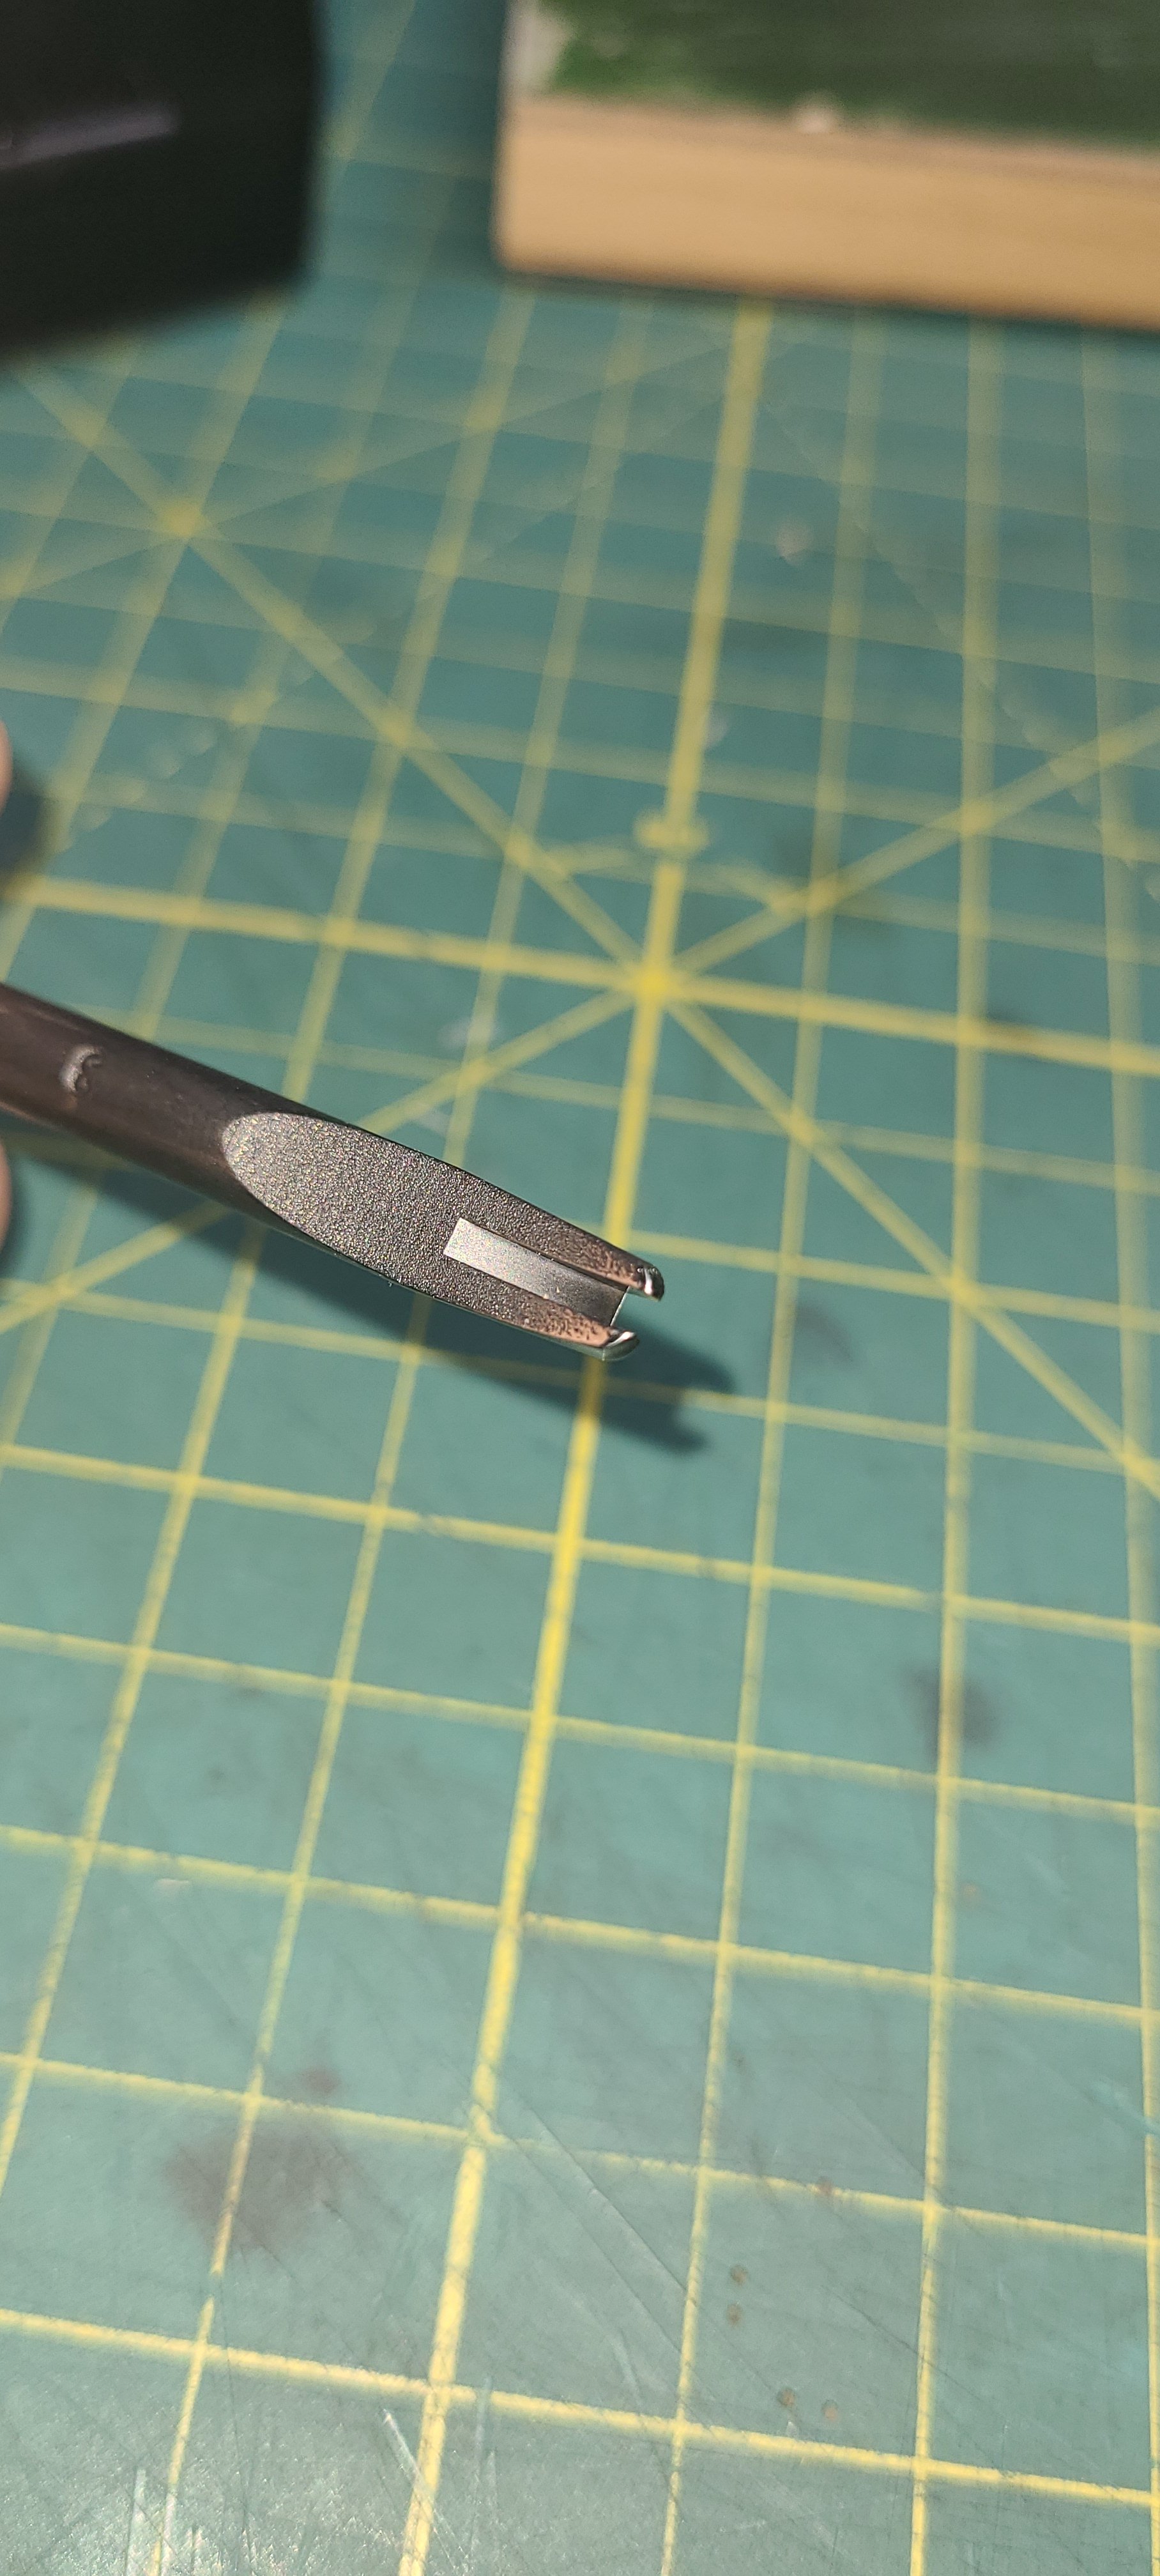
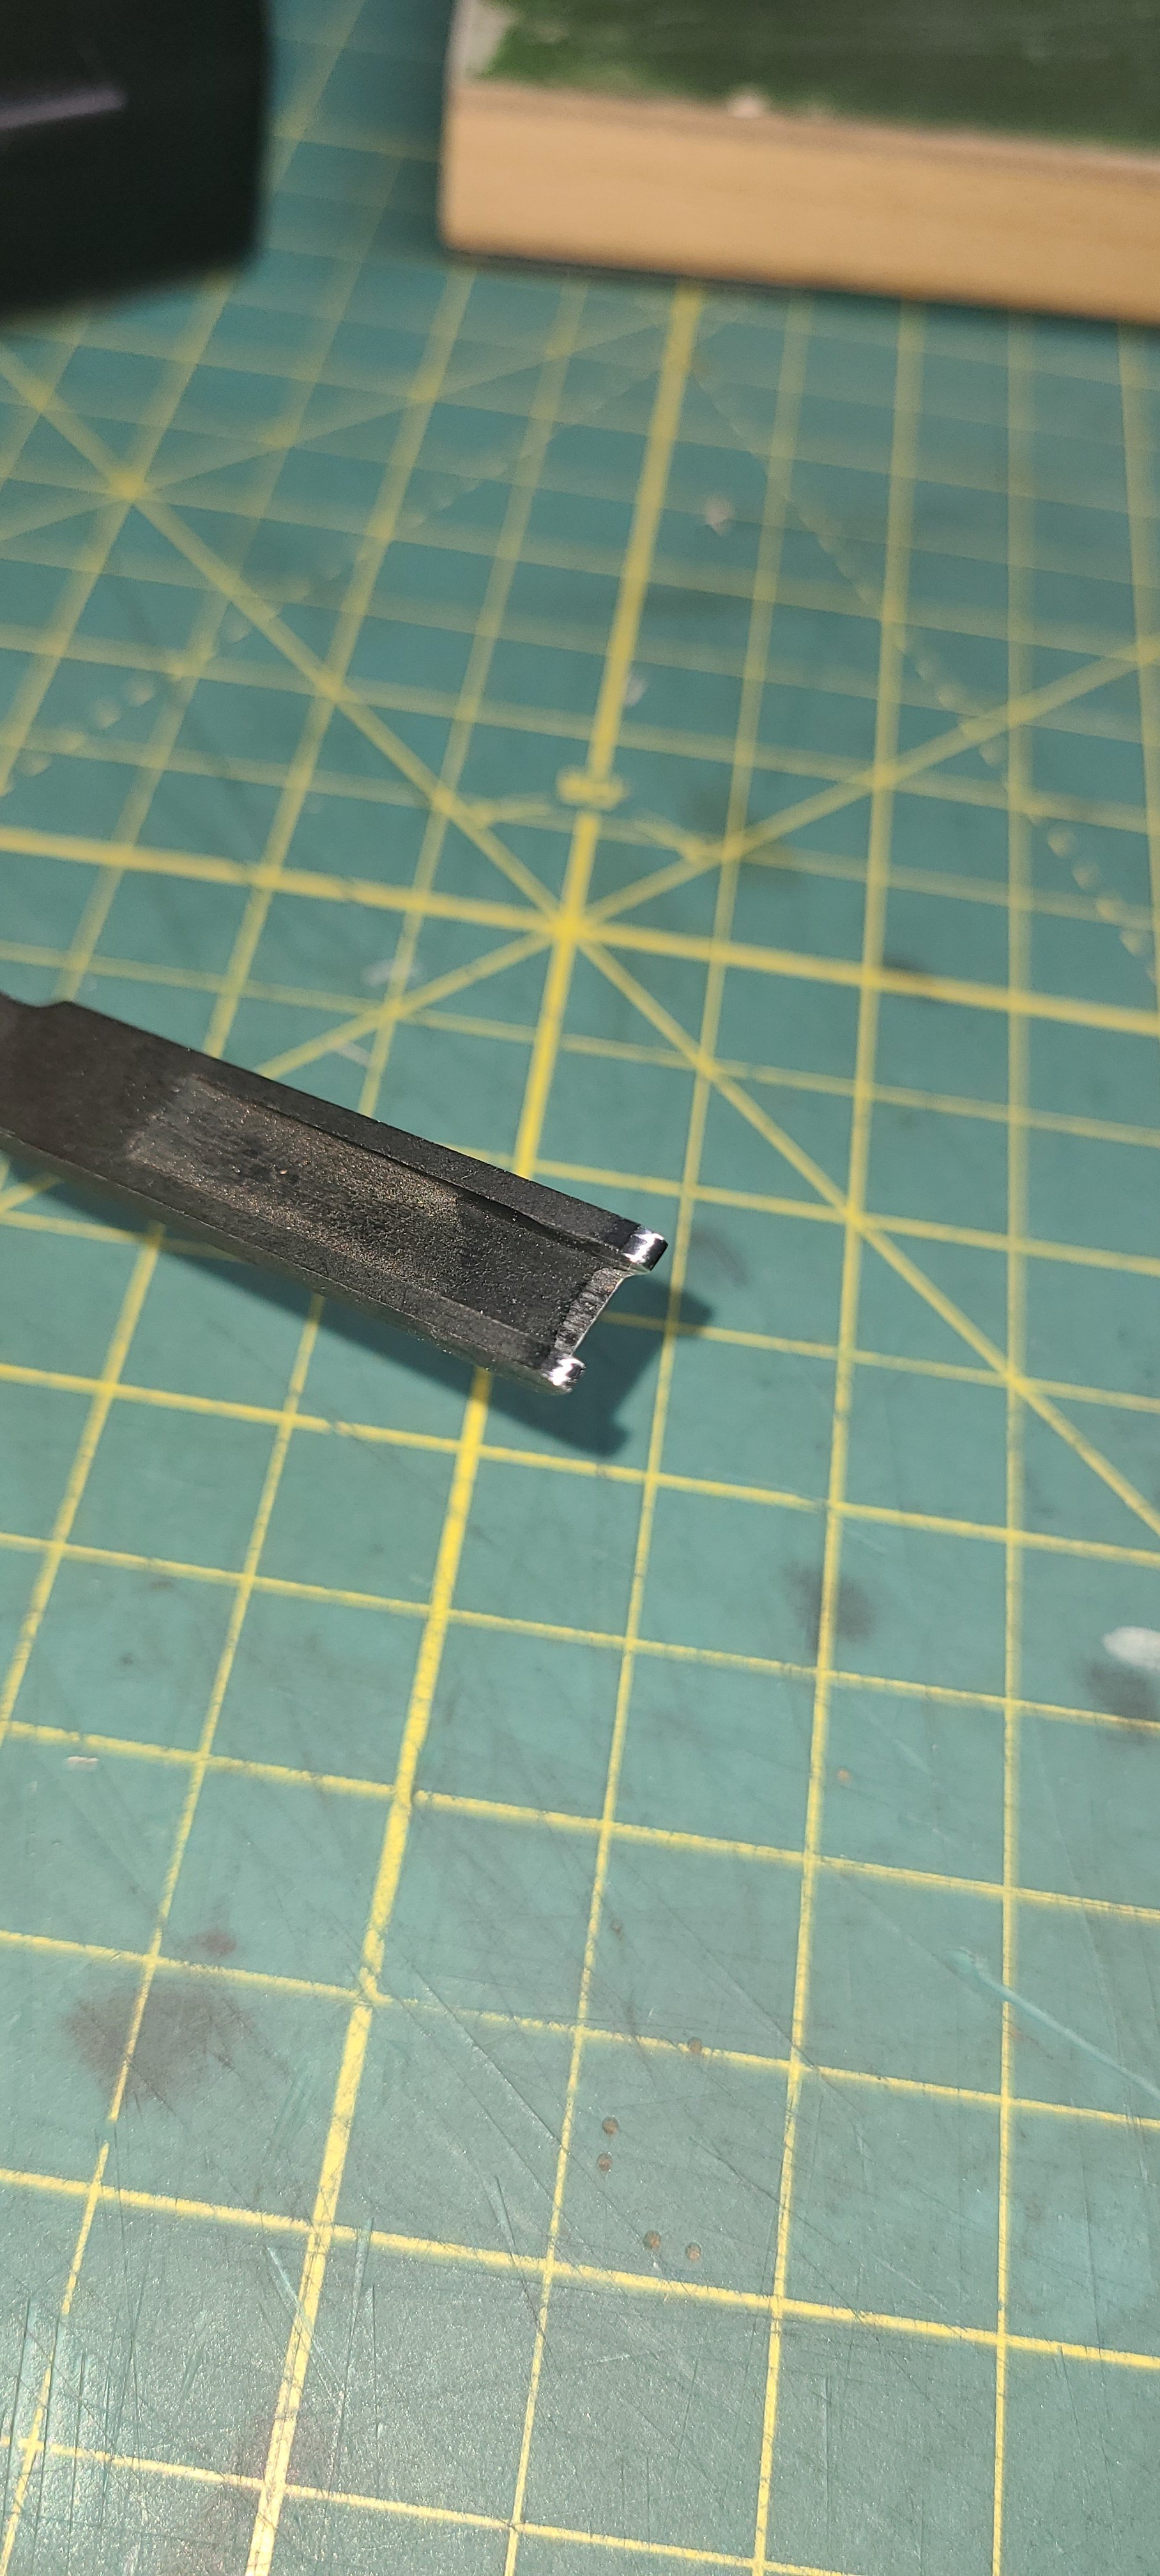
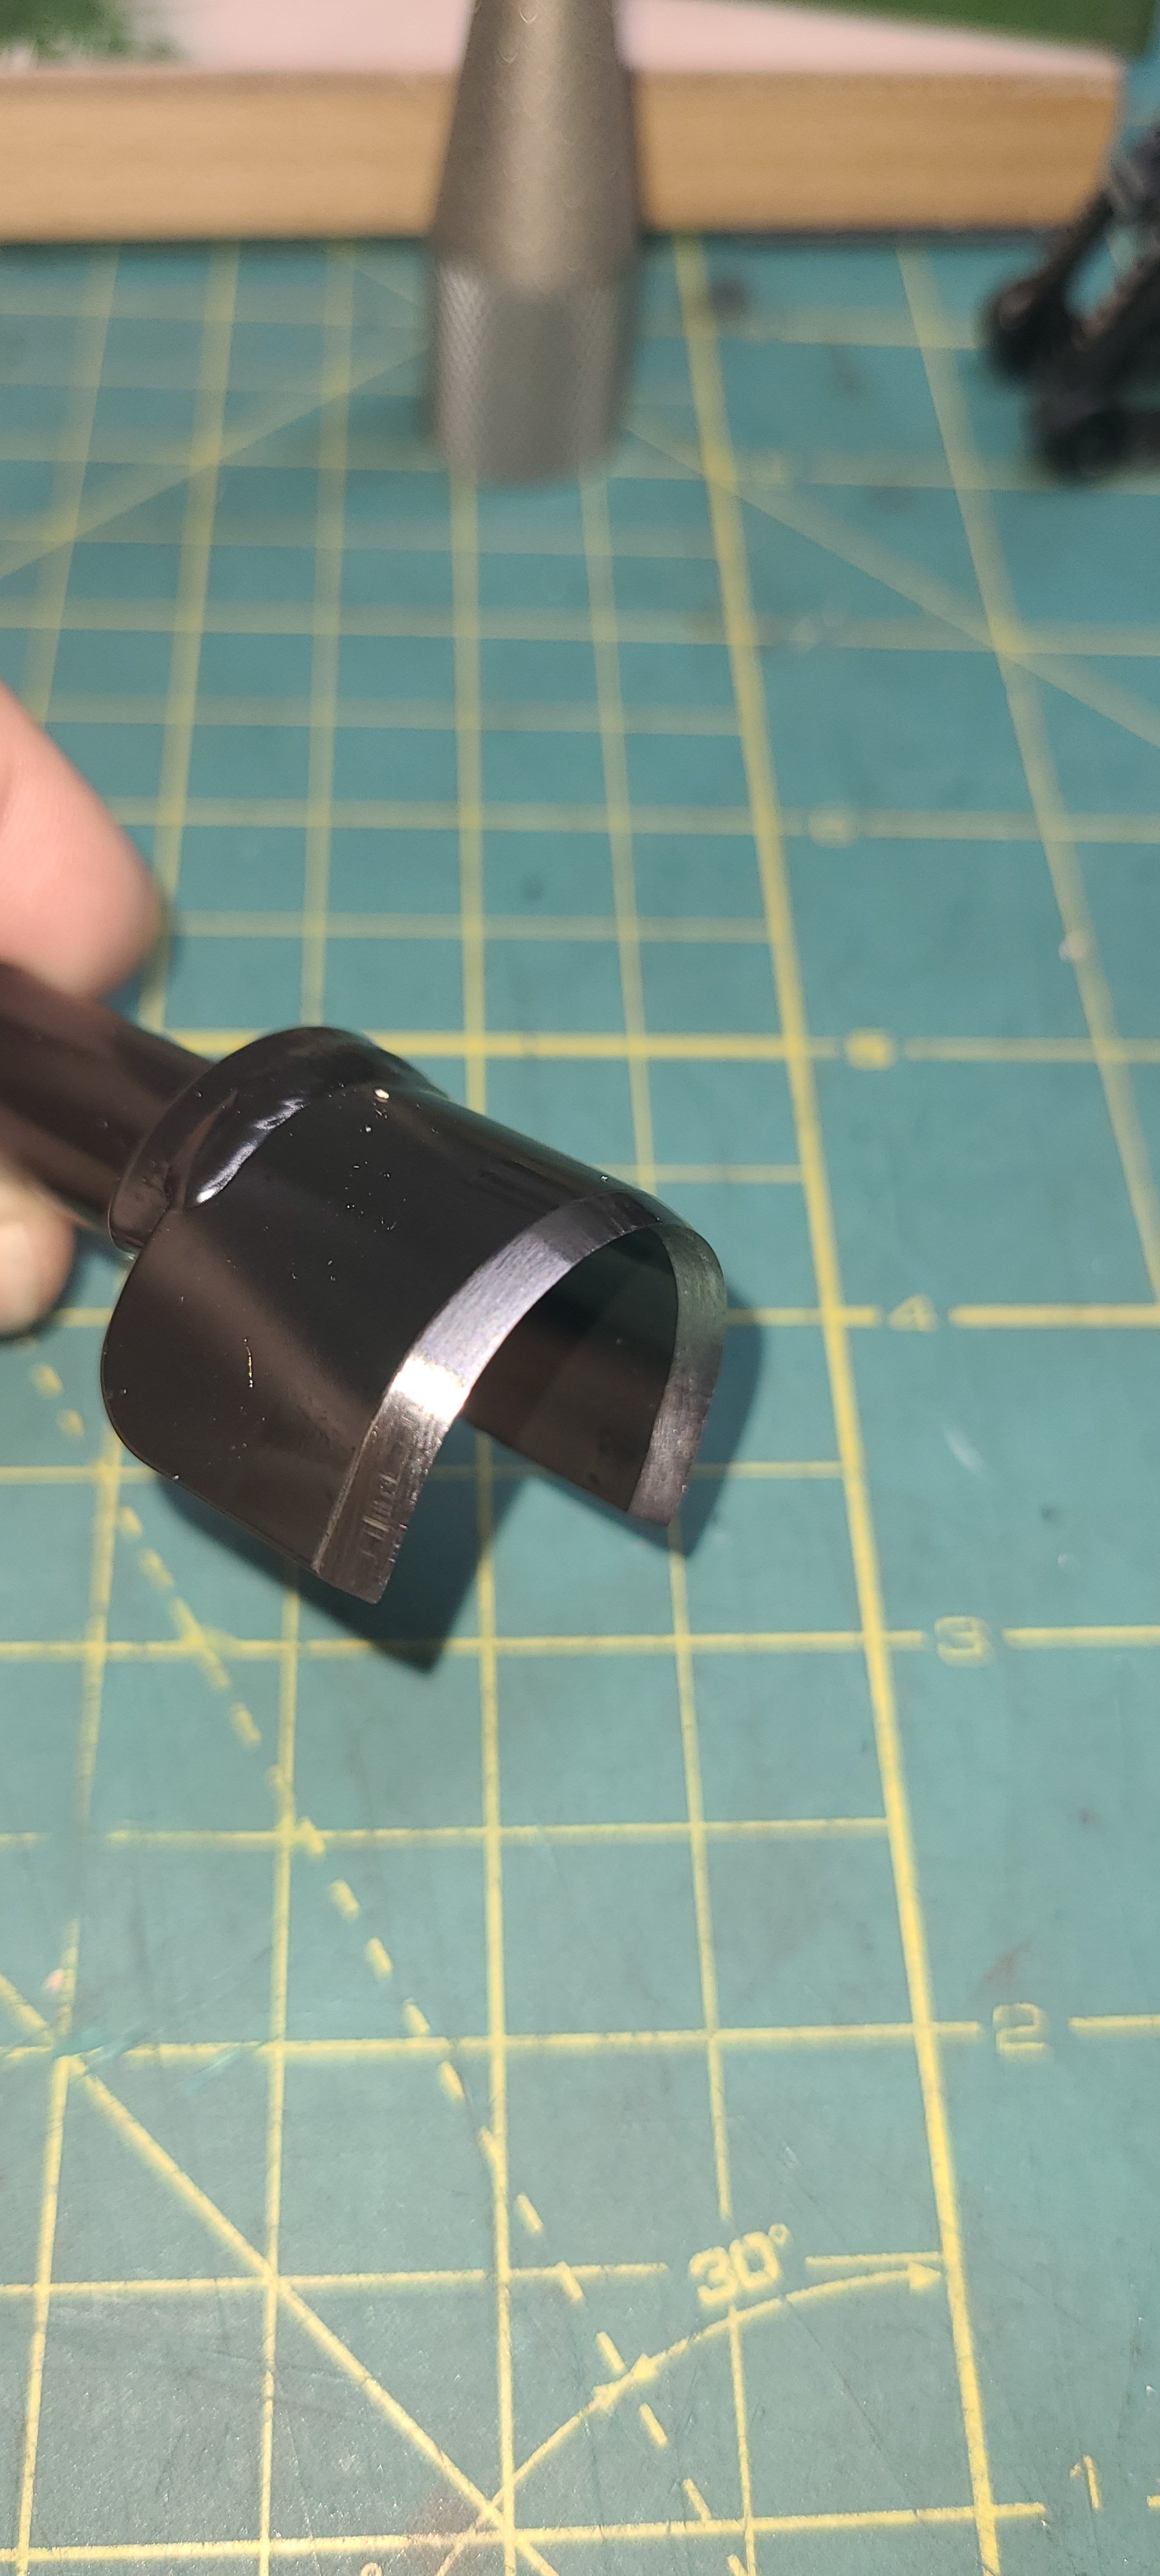
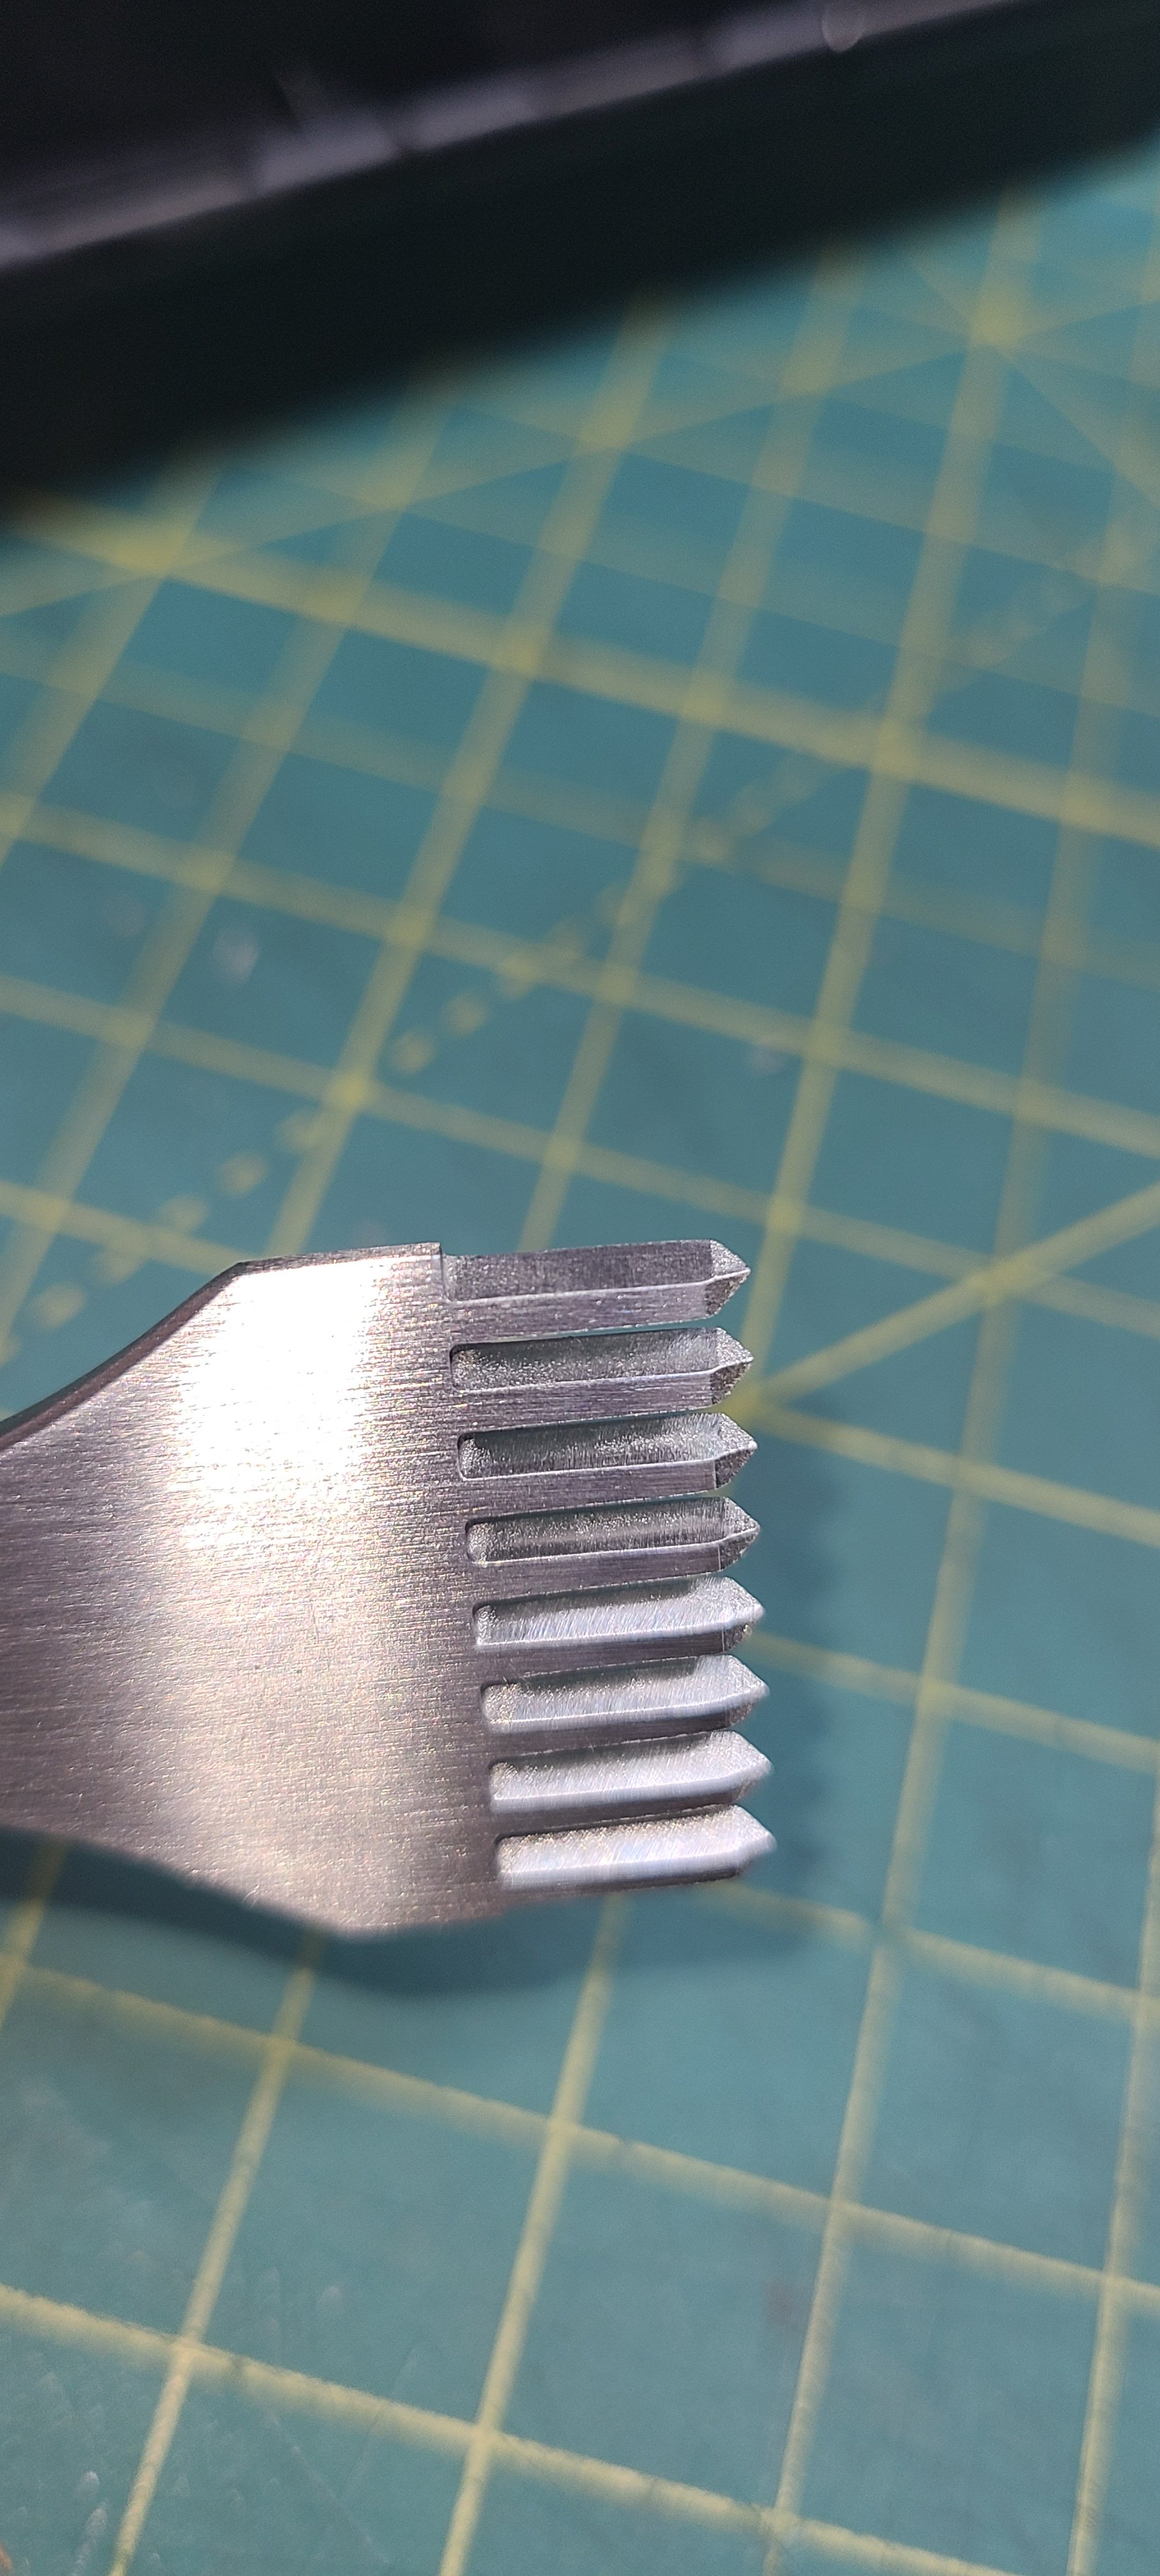
I promised you a short piece on sharpening, Here are some of the tools that need to be extremely sharp in order to get a clean cut when tooling leather, The other items across the top of the picture are the sharpening tools. The black box on the left holds a diamond grit sharpening stone with two sides; course 325 grit and Extra fine 1200 grit. I would prefer to have an additional intermediate grit, but I have not ordered that yet. I have been using the 1200 grit to keep my tools sharp. The 325 grit is really useful to put a fresh edge on a tool. It can remove a lot of metal. Next to it is a leather strop that has been charged with a polishing compound. I use this frequently between every few cuts to maintain a keen edge. In front of and to the right of the strop are a couple of gauges that can be used to keep the tool at the proper angle when honing the edge. The multi grooved tool at far right can be charge with polishing compound to hone the inside edges of curved and pointed gouges. Finally, the cone shaped item in front of the strop is a diamond grit round tool sharpener. The cone is hollow with diamond grit on the inside face also so that one can sharpen the inside and outside edges of round punches. Some of the tools are fairly straight forward to sharpen. Once you get the hang of keeping the correct angle the flat knives and tools are easy. What you are trying to achieve is the apex of the blade being centered and straight across the whole blade. When you get that right you will start to form a burr along the edge. The burr is essentially the sharp edge being tapered down to a microscopically fine point. You then knock the burr off by stropping and you are left with a very fine edge. The benefit to keeping your tools razor sharp will be very obvious as soon as you try to use a dull tool. You can still get the job done but it is going to require a whole lot more effort and your cuts will not be as clean, You are also asking for injury because as your effort goes up so does the risk of slipping and sending the tool where you do not want it to go (your hand). Here are some close ups of the above tools. This diamond awl has not been sharpened yet. I can almost guarantee that your tools will not be sharp enough straight from the manufacturer. This one is not bad but a few passes on stone and strop will polish the faces and make it push through and then pull out of the thickest leather easily. The edge beveler and the French edger are sharpened on their flat outside edges on the stone. The inside bevel is honed on the grooved honing block. The round punches are sharpened with the diamond grit cone. The sharpening cone is pushed up into the punch and rotated to sharpen the inside face of the punch and conversely, the punch is inserted into the hollow of the sharpening cone to put an edge on the outside face of the punch. The punch on the left is right from the factory while the punch on the right is after my sharpening. The most difficult tools to sharpen are the unusual shaped punches. The round end punches are not so bad, but getting inside the oblong punch is not easy. And the compound faces of the buttonhole punch are a bit difficult. You can see where I could not quite get to the round part where it butts up against the straight section. There is actually a good size nick in the blade there that I may have to do some more heavy grinding to get out. That is where the 325 grit diamond stone will come in handy. Finally we get to the diamond stitching punches. These tools make the line of stitching holes for saddle stitching leather pieces together. The problem with sharpening these is that the blades are only 3mm from tip to tip. Thankfully, you don't really have to sharpen them as much as polish up the faces in order to make them not get stuck in the leather. For these stitching irons I use a 240 grit sanding disk chucked into my Foredom drill handpiece that is held in the bench mount. The 240 grit is probably too aggressive but it is what I have on hand. I introduce the stitching iron to the disk at a relatively low speed with a very light touch to just polish the face. You don't want to change the shape of the blades. You can see, if you look closely, that the fourth blade from the top, I did just that. It is no longer perfectly even from end to end. It will not really affect the work, but I was highly annoyed when I did it. There you have it. Sharpening your tools is well worth the effort. It makes the crafting so much more enjoyable. Regards, Henry

-
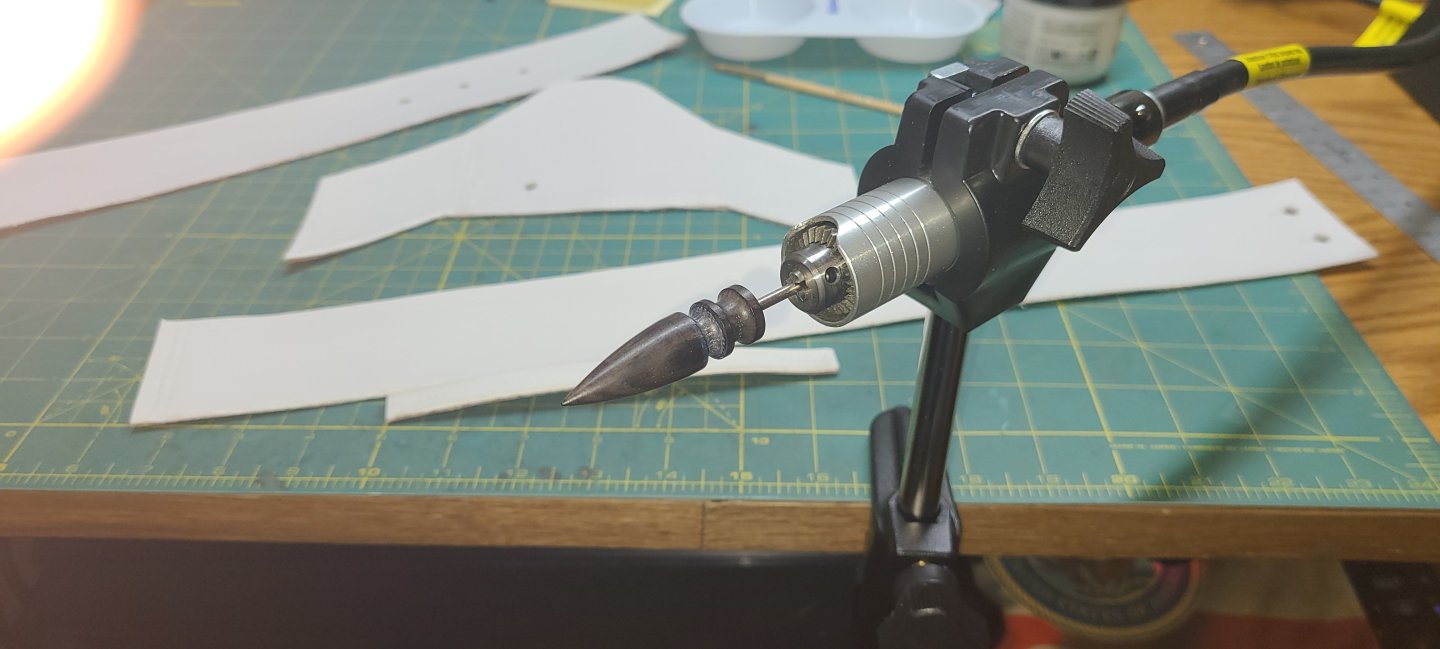
Now that the fronts of the pieces are done and the leather has been re-moisturized with neats foot oil, it is time to start finishing the edges and backs. I set up my Foredom drill handpiece with a wooden burnishing tool. The desktop mount is a brand new acquisition. I found that setting the tool up in the drill press mount was a bit awkward. The first pass through the burnisher is with the edge wetted with a little water. This starts to shape and round over the edges. The next passes are done after applying a gum compound called Tokonole. It is a Japanese burnishing gum. A light coat of the Tokonole is applied to the edges and allowed to partially dry before burnishing. The result is a smooth, rounded edge, ready for a white edge coat. You can see the contrast with the raw rough edge in the pictures below. Now that I am looking at that last picture, I can see that I am not quite done. Another pass through the burnisher is due. Regards, Henry


-
Need help with building a Strap for topgallant shrouds
popeye2sea replied to Y.T.'s topic in Masting, rigging and sails
I usually put the "assembled" strap back over the hooks of the serving machine, but your right, the final service must be put on by hand. Regards, Henry -
Need help with building a Strap for topgallant shrouds
popeye2sea replied to Y.T.'s topic in Masting, rigging and sails
If you have a serving machine that will allow you to set it up with hooks, there is a simple process that will produce a good looking strap. Set the distance between the hooks to twice the length of what your finished strap will be. Start with a looped end of thread over one hook and take a few turns around both hooks to build up the thickness of the strap. Make sure there is plenty of extra length for the serving. Put a half hitch or two near one of the hooks such that there will remain a small eye around the hook. Proceed to serve over the line between the hooks. When you reach the opposite hook, throw another half hitch to secure the line. Again make sure there is plenty of length of line left over. Your going to use this to finish serving over the eyes at the ends. Take your strap off the hooks. Bring the two ends together and lash the two eyes together end to end. Finally, continue the service over the two lashed eyes, meeting up with where you first started serving. Finish by tucking the end under the last few turns and cutting close. Regards, Henry -
You should shoot for Sep. 19th timeframe. I can make it worth the trip with a Constitution turnaround cruise. Gregg will be there, also. Regards, Henry
-
Message me with your visit dates. Perhaps we can meet up for a private tour of the ship. Or, if your plans coincide, the ship is doing a turnaround cruise in the harbor on Sep. 19. I will get you on board. Regards, Henry
-
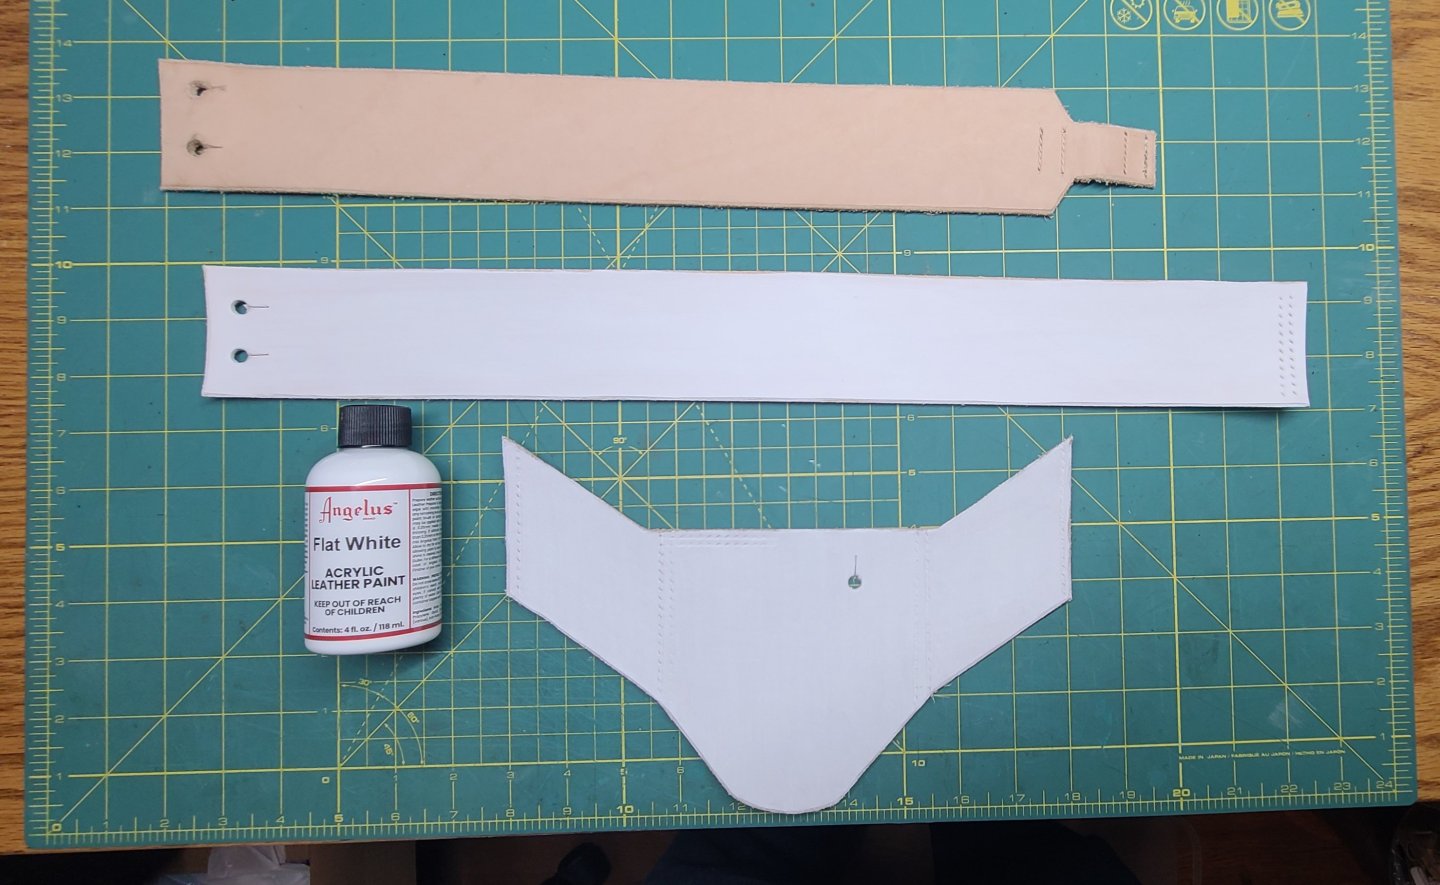
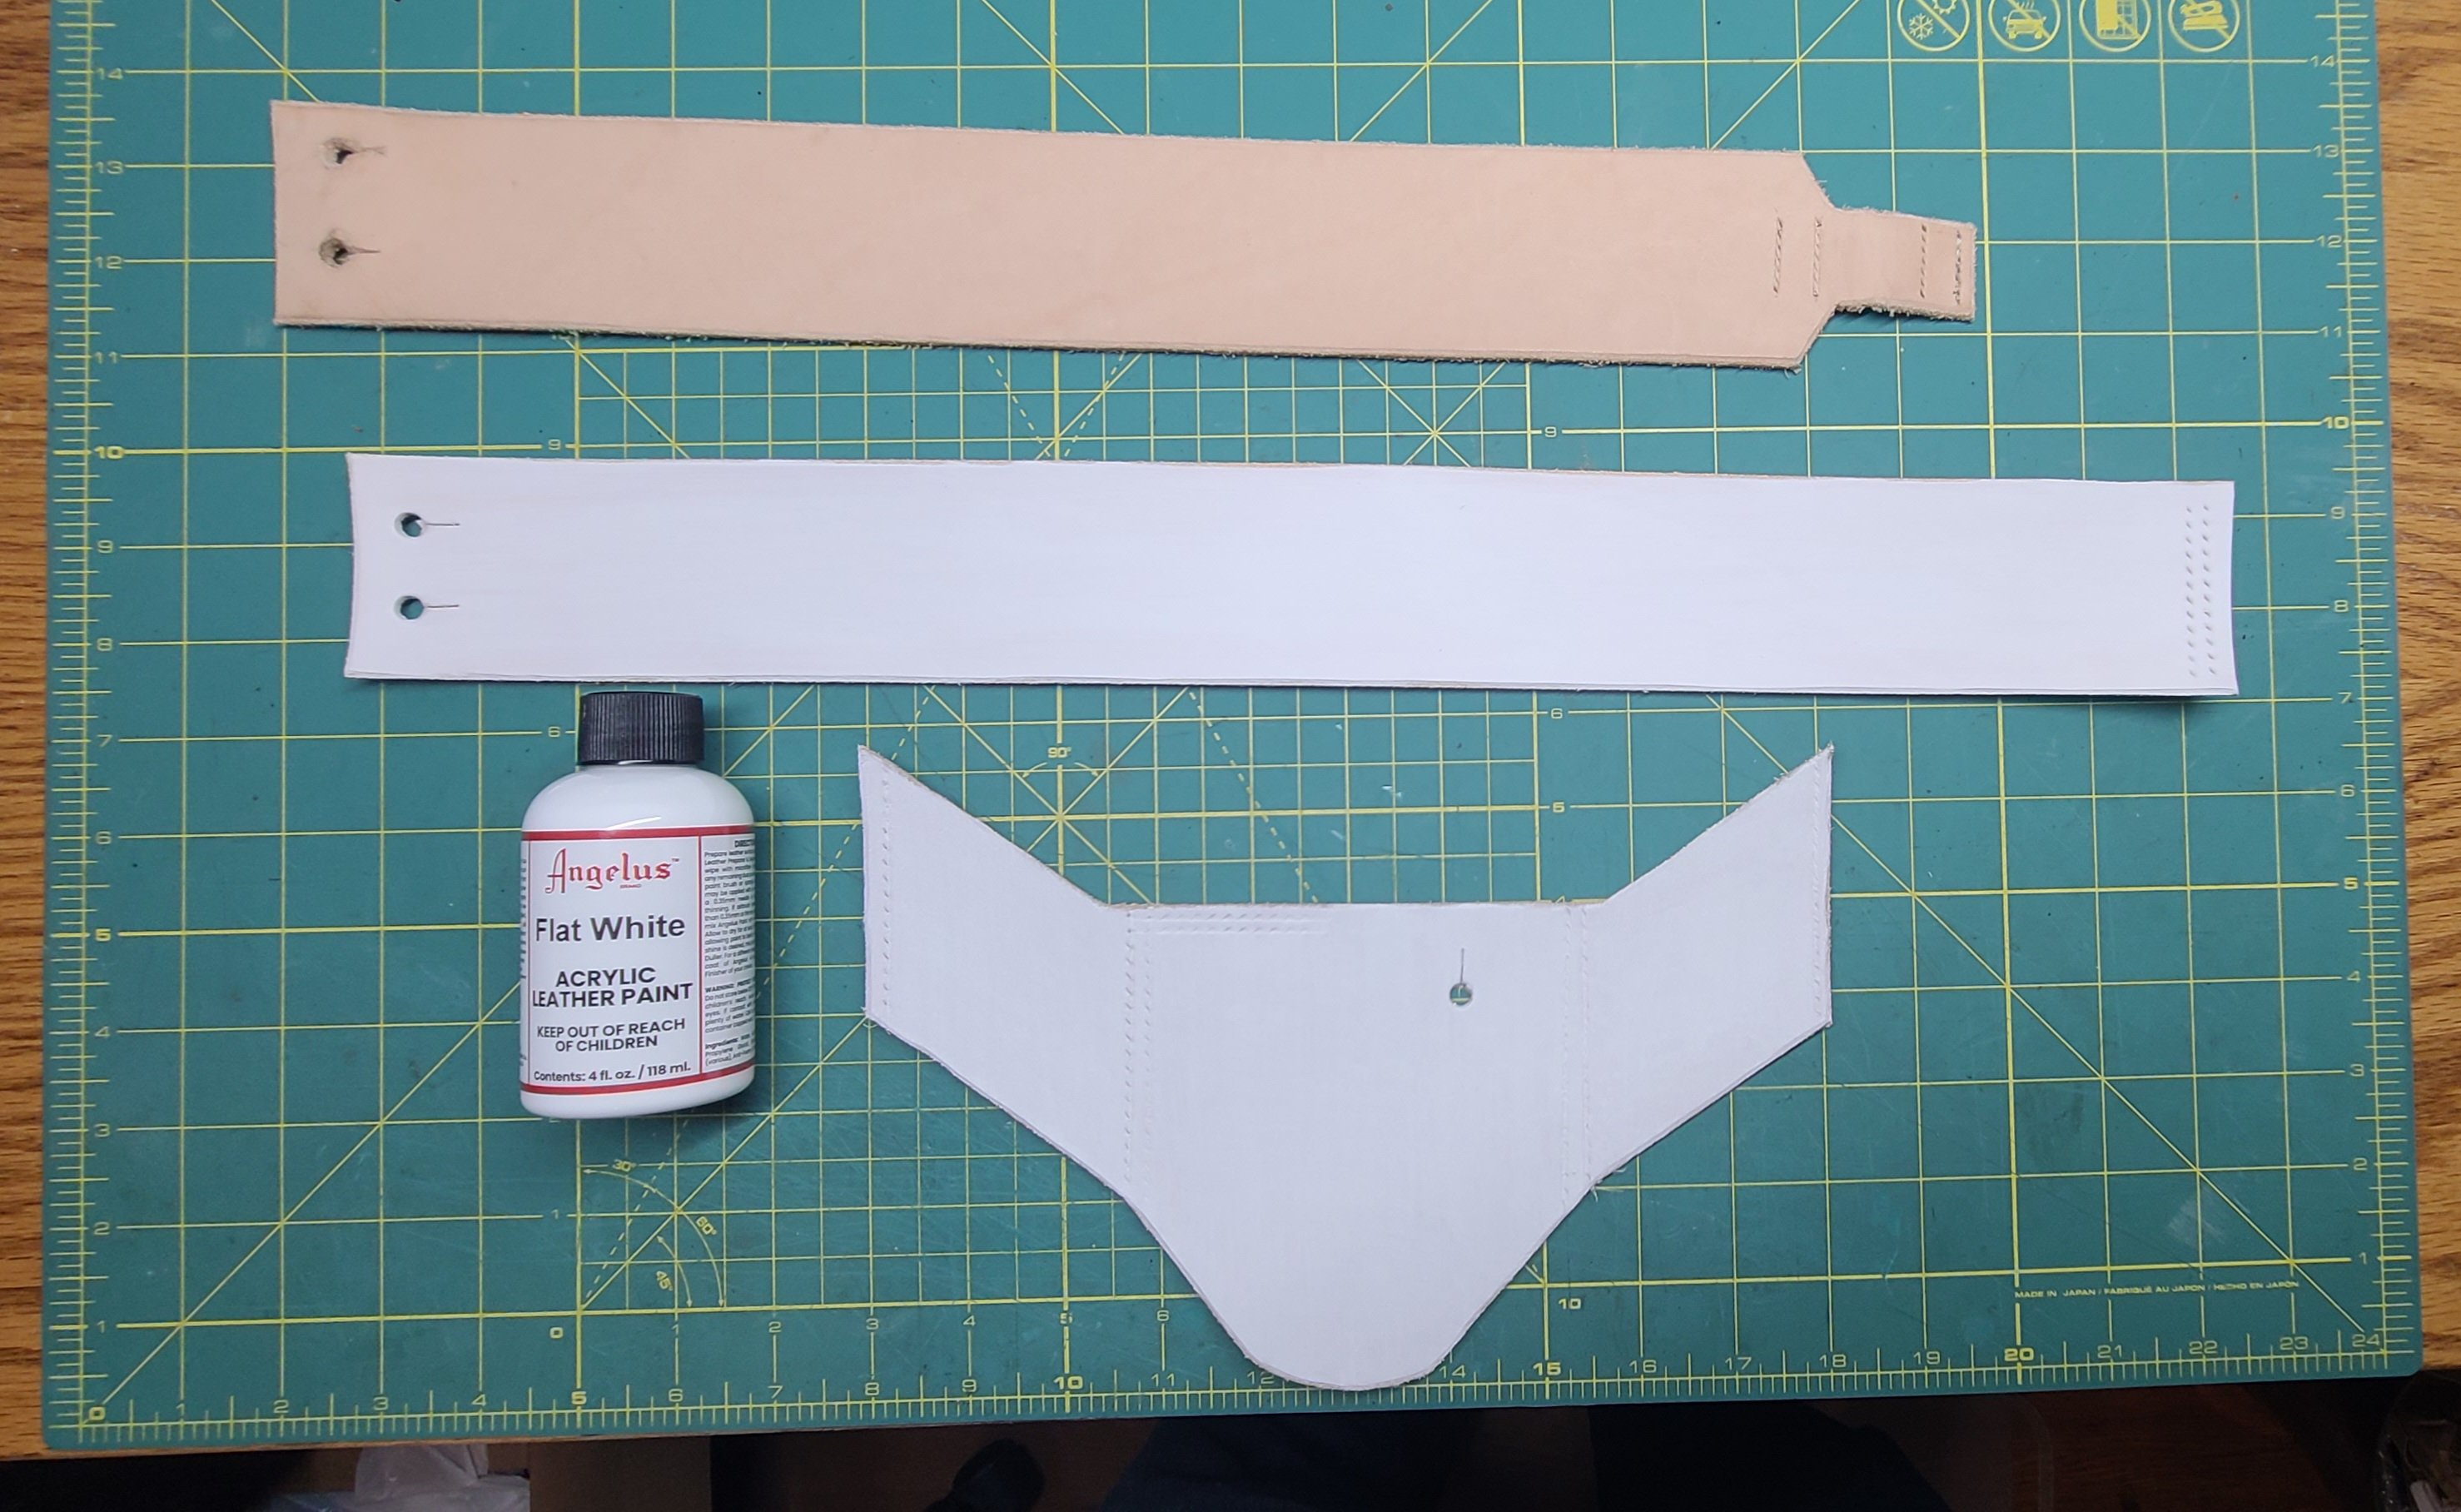
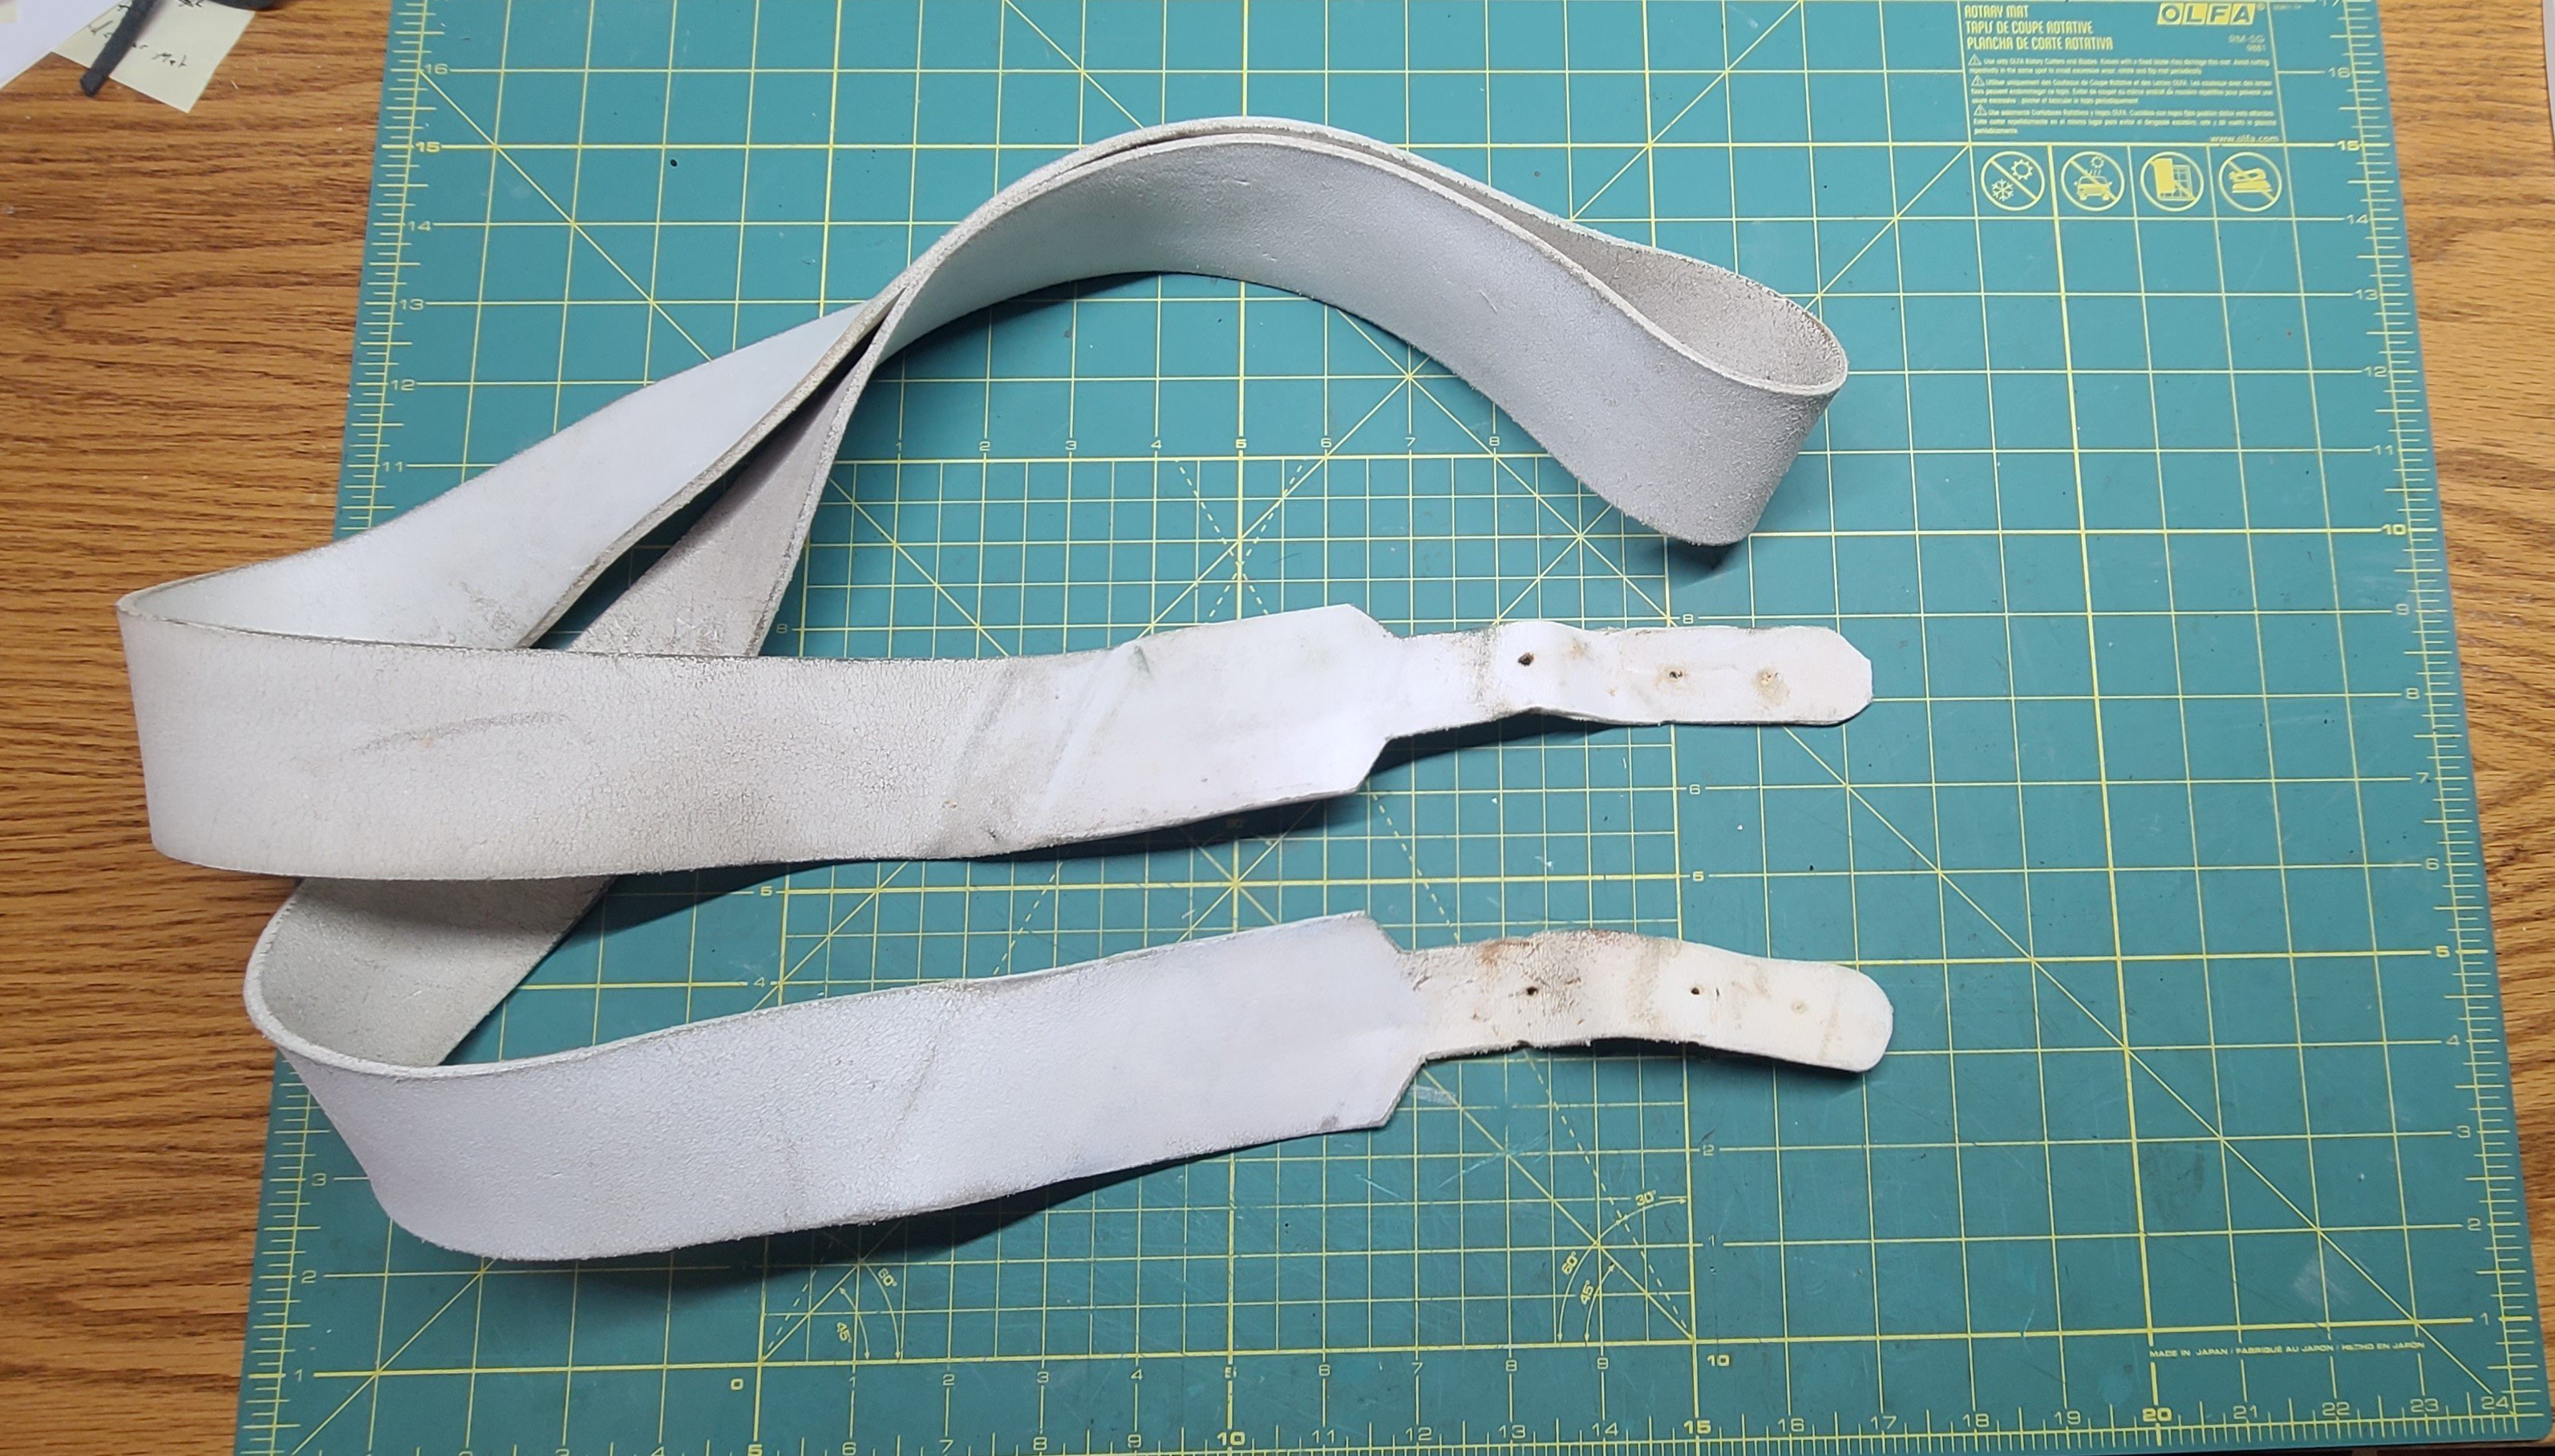
I finished dying the leather white. It took 4 coats of white dye to get the coverage I want. The first coat was 50:50 water with increasing concentrations of dye applied in the later coats. The final coat was close to 100% dye. Now that the leather is white there are still a few more steps before I can start stitching up the pieces. The water based acrylic really dries out the leather. You can see in the picture where the edges of the leather have curled. The next step is to get some moisture back into the leather by applying neatsfoot oil. Neat is an Old English word for cattle. The oil is literally rendered from cows feet. Since the acrylic dye essentially seals the top of the leather the neatsfoot oil is applied on the flesh side (back) of the leather. After the neatsfoot oil has been applied, I apply a topcoat satin finish over the dye to further seal and protect the dyed leather. Next, if the piece needs more moisture I will do another application of neatsfoot oil before starting on finishing the edges and the back of the pieces. Regards, Henry
-
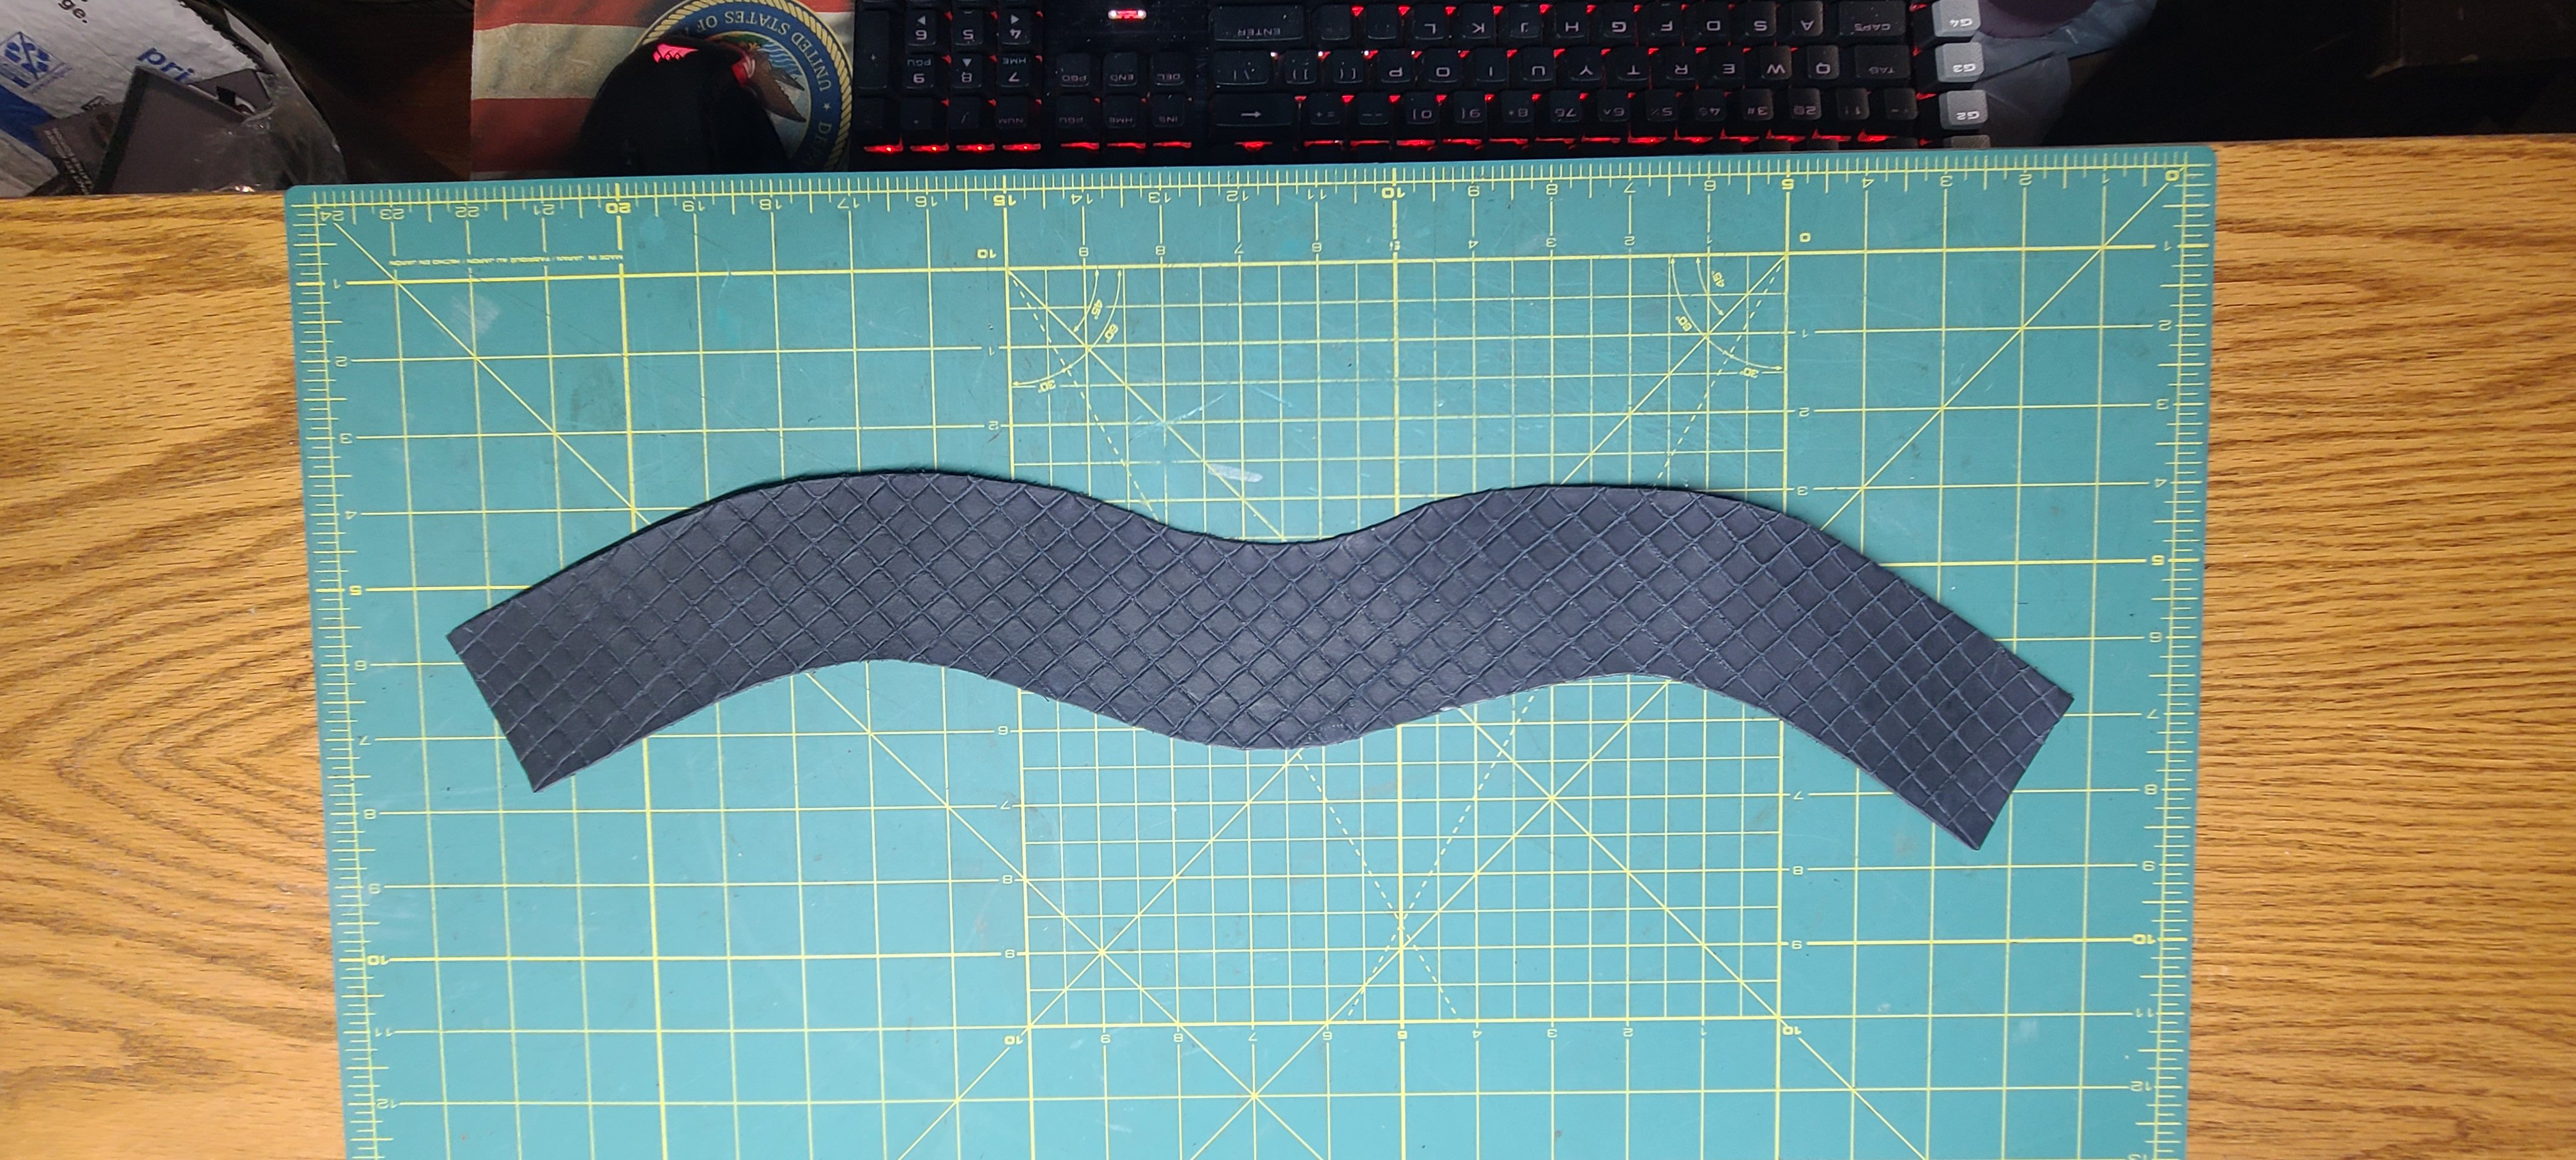
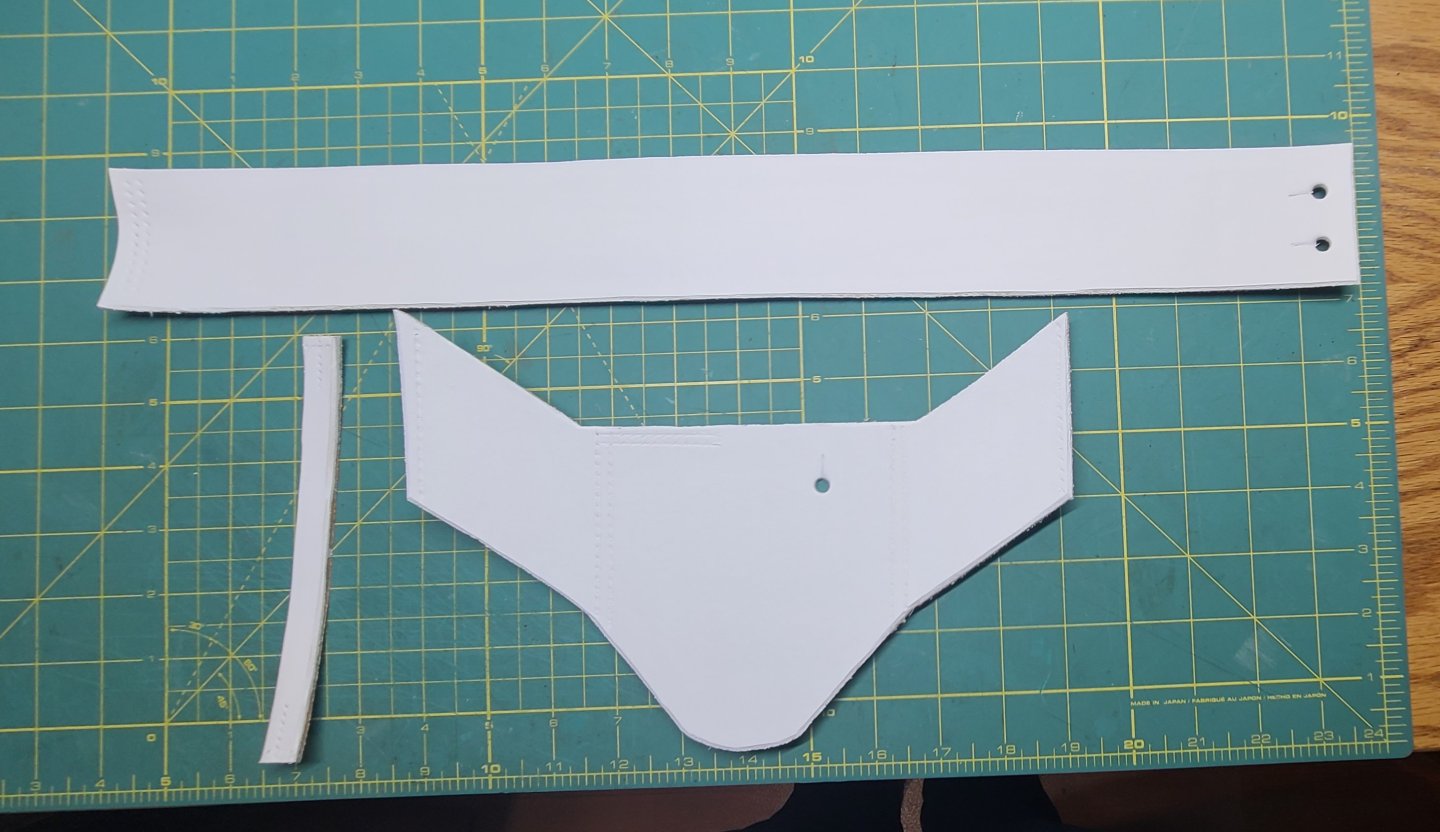
First cuts. First up is to cut 2 1/4" strips of leather from the veg tan sides. Using a long straight edge I squared up one side of the hide. Then it is a simple process of setting 2.25 inches on the strip cutter and running it down the trued up edge. I was able to get enough strips for 6 sets of cross belts. Next is to punch all of the holes according to the patterns. Using an edging tool I knocked off the corners of all the edges so that they can later be burnished to a smooth rounded surface. The grooving tool is then employed to prepare the stitching lines and then the stitching irons are used to punch the holes for the saddle stitching that holds everything together. After all the tooling is done it is time for the dye. I am using Angelus Brand flat white acrylic leather paint. As I have mentioned previously, I do not know of anyone who is currently making a true leather dye in white. First step in preparing for the dye is to go over the leather with isopropyl alcohol. This cleans the leather and also raises the grain a bit so that the dye adheres better. Next, I started applying the first coat which is about a 50:50 mix of dye with water. Apparently the water allows the paint to penetrate the leather a bit so there is less tendency for it to crack and flake off. This will be repeated for a few coats with gradually increasing concentrations of dye/water. The idea is to build up multiple thin coats of dye to create a more flexible robust surface. It is always better to lay down the dye in thin coats rather than one thick coat. Below is after two coats of white dye. It is hard to se in this picture but you can still see the natural color of the leather through the white. It is going to take a few more coats to get the depth of color that I want. The top piece is actually from the officers sword belt, which I have just started to cut. I also need to start cutting the pieces for the cartouche box and making the pattern for the neck stock. All of that cross-hatching ought to be fun. I may have to buy a new tool for that in order to get consistent depth grooves for the cross-hatching. Notice, also, that the button holes punched in the top belt are what happens when you don't keep your tools sharpened. There is a big difference in how clean the holes are from the bottom two pieces. I will post something about how to keep these tools sharp, soon. Regards, Henry
-
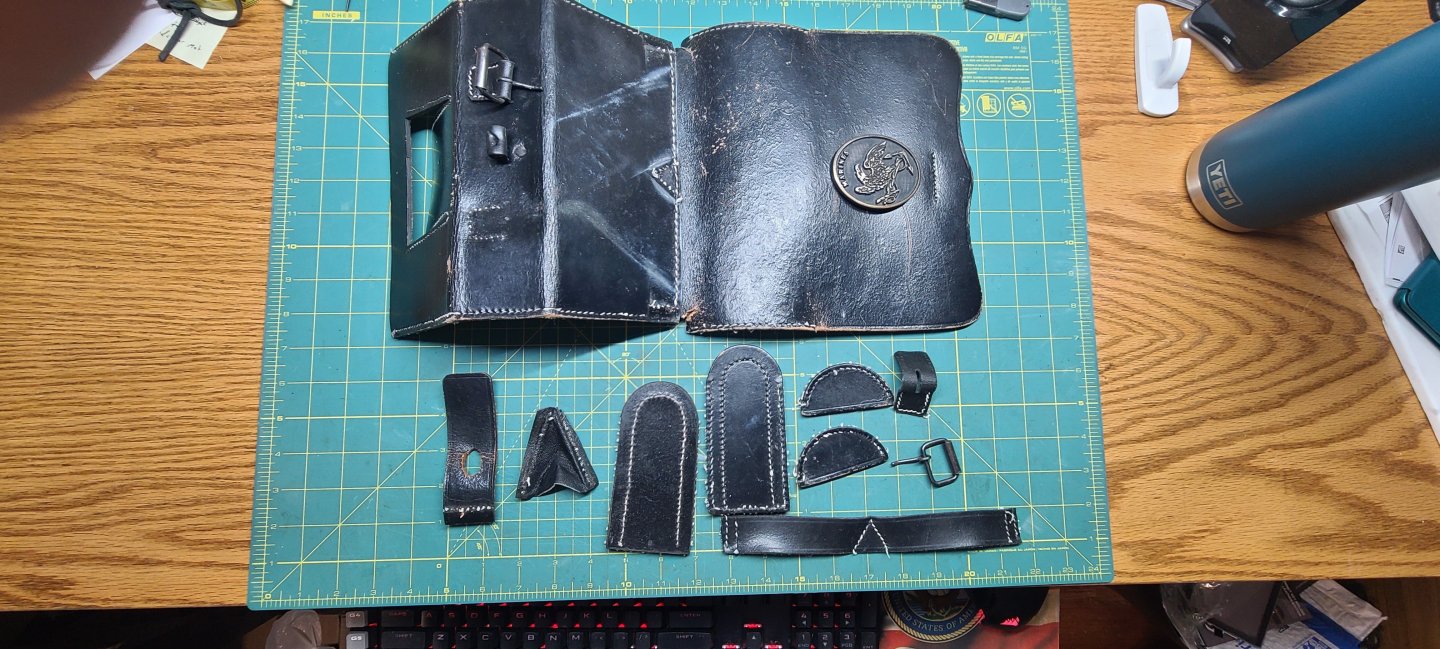
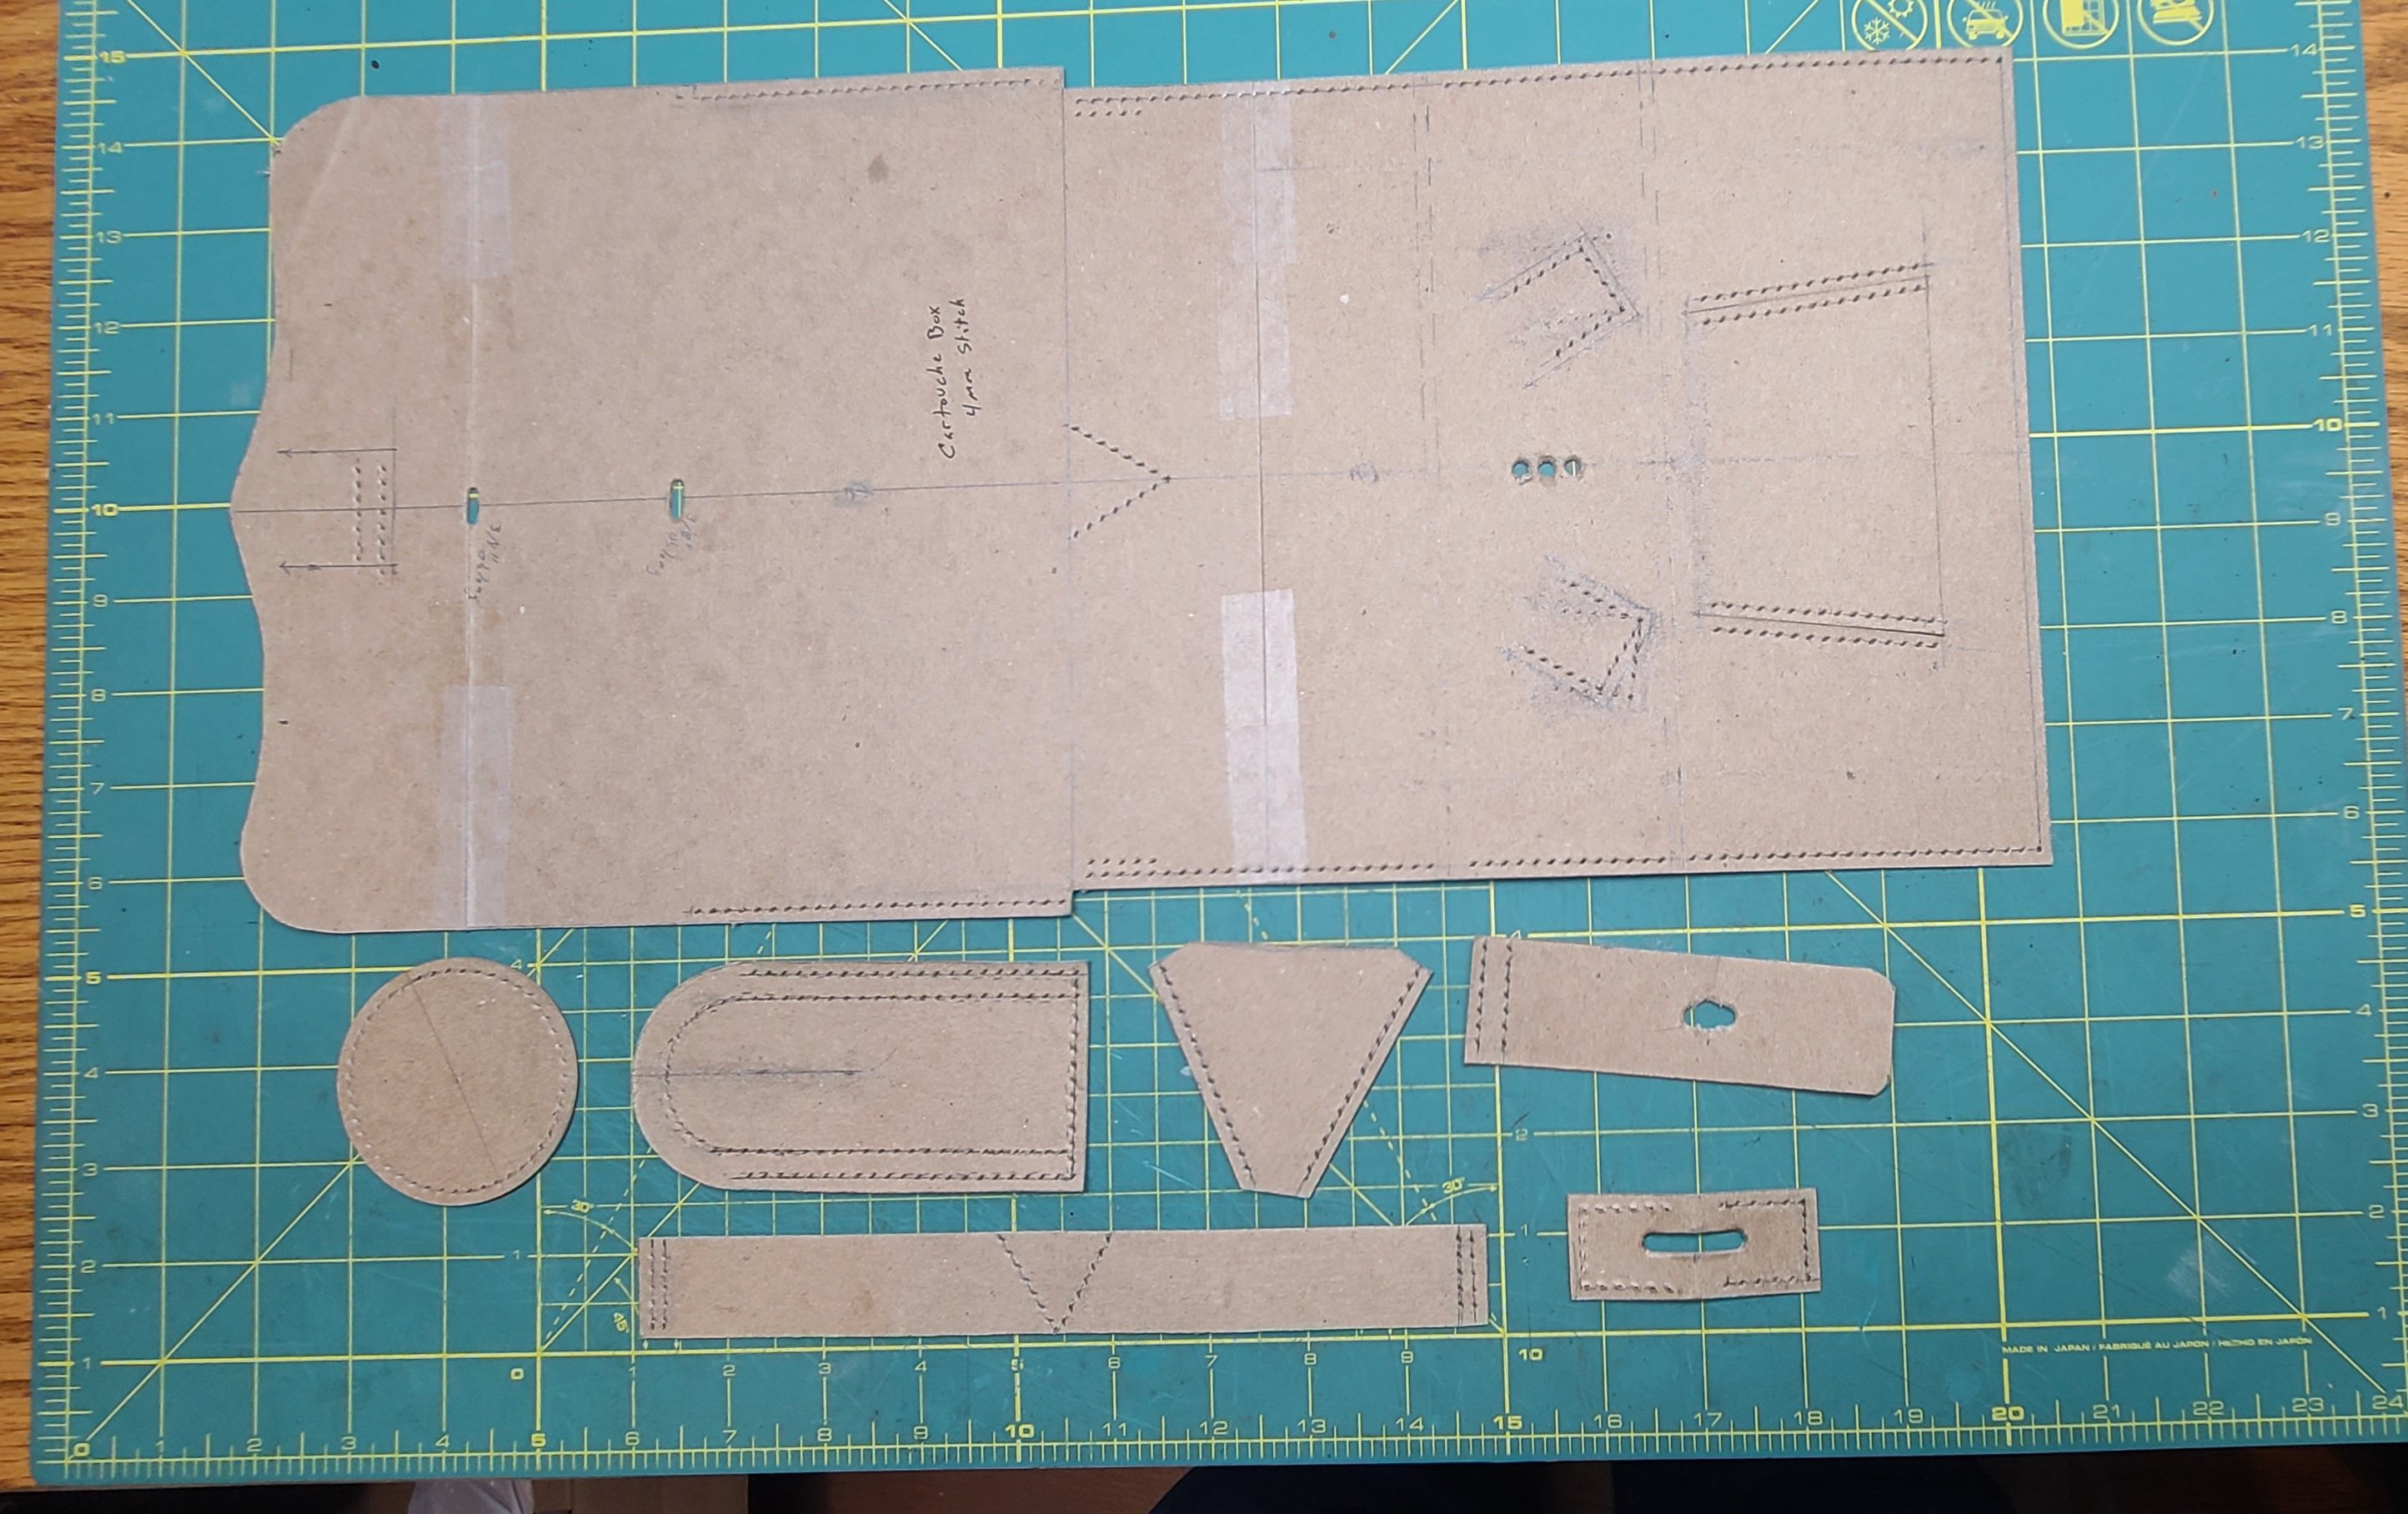
Here is the pattern for the cartouche box. It's fairly complicated. The box itself is made in one piece and will be grooved and folded along the dashed lines (right side) to form the bottom of the box. The angled rectangles take the straps for the cross belt buckles. The v-shaped stitching at center holds the cross belt keeper ( the long rectangle at bottom of picture). The two oblong holes take the marine emblem plate for the cover. There is a closure strap at the cover end (decorative curved left side). The leather toggle that will hold the cover closed is not shown. That will be fastened through the three small holes to the right. The trapezoid shaped flap cutout on the right is to access the tray that will be inside the box. Your supposed to be able to access that tray while the box is closed to get at spare flints and the like. At the bottom are the various pieces that get stitched on to the main body piece. The circle (will be two half circles when finished) form the side walls of the cover. The domed rectangle is the side walls of the main box. The triangular piece with the trimmed off corners will be gussets for the access flap. The last two items are the closure strap and the buckle straps Regards, Henry

-
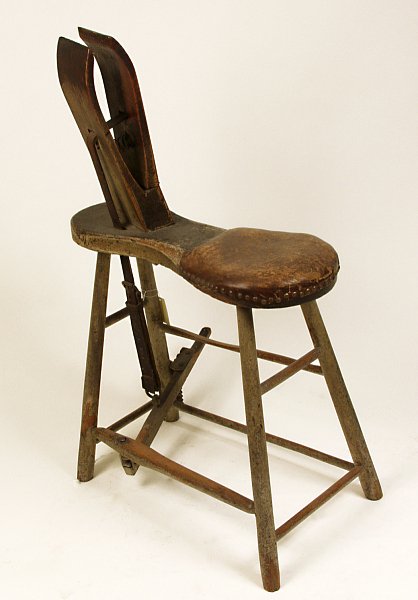
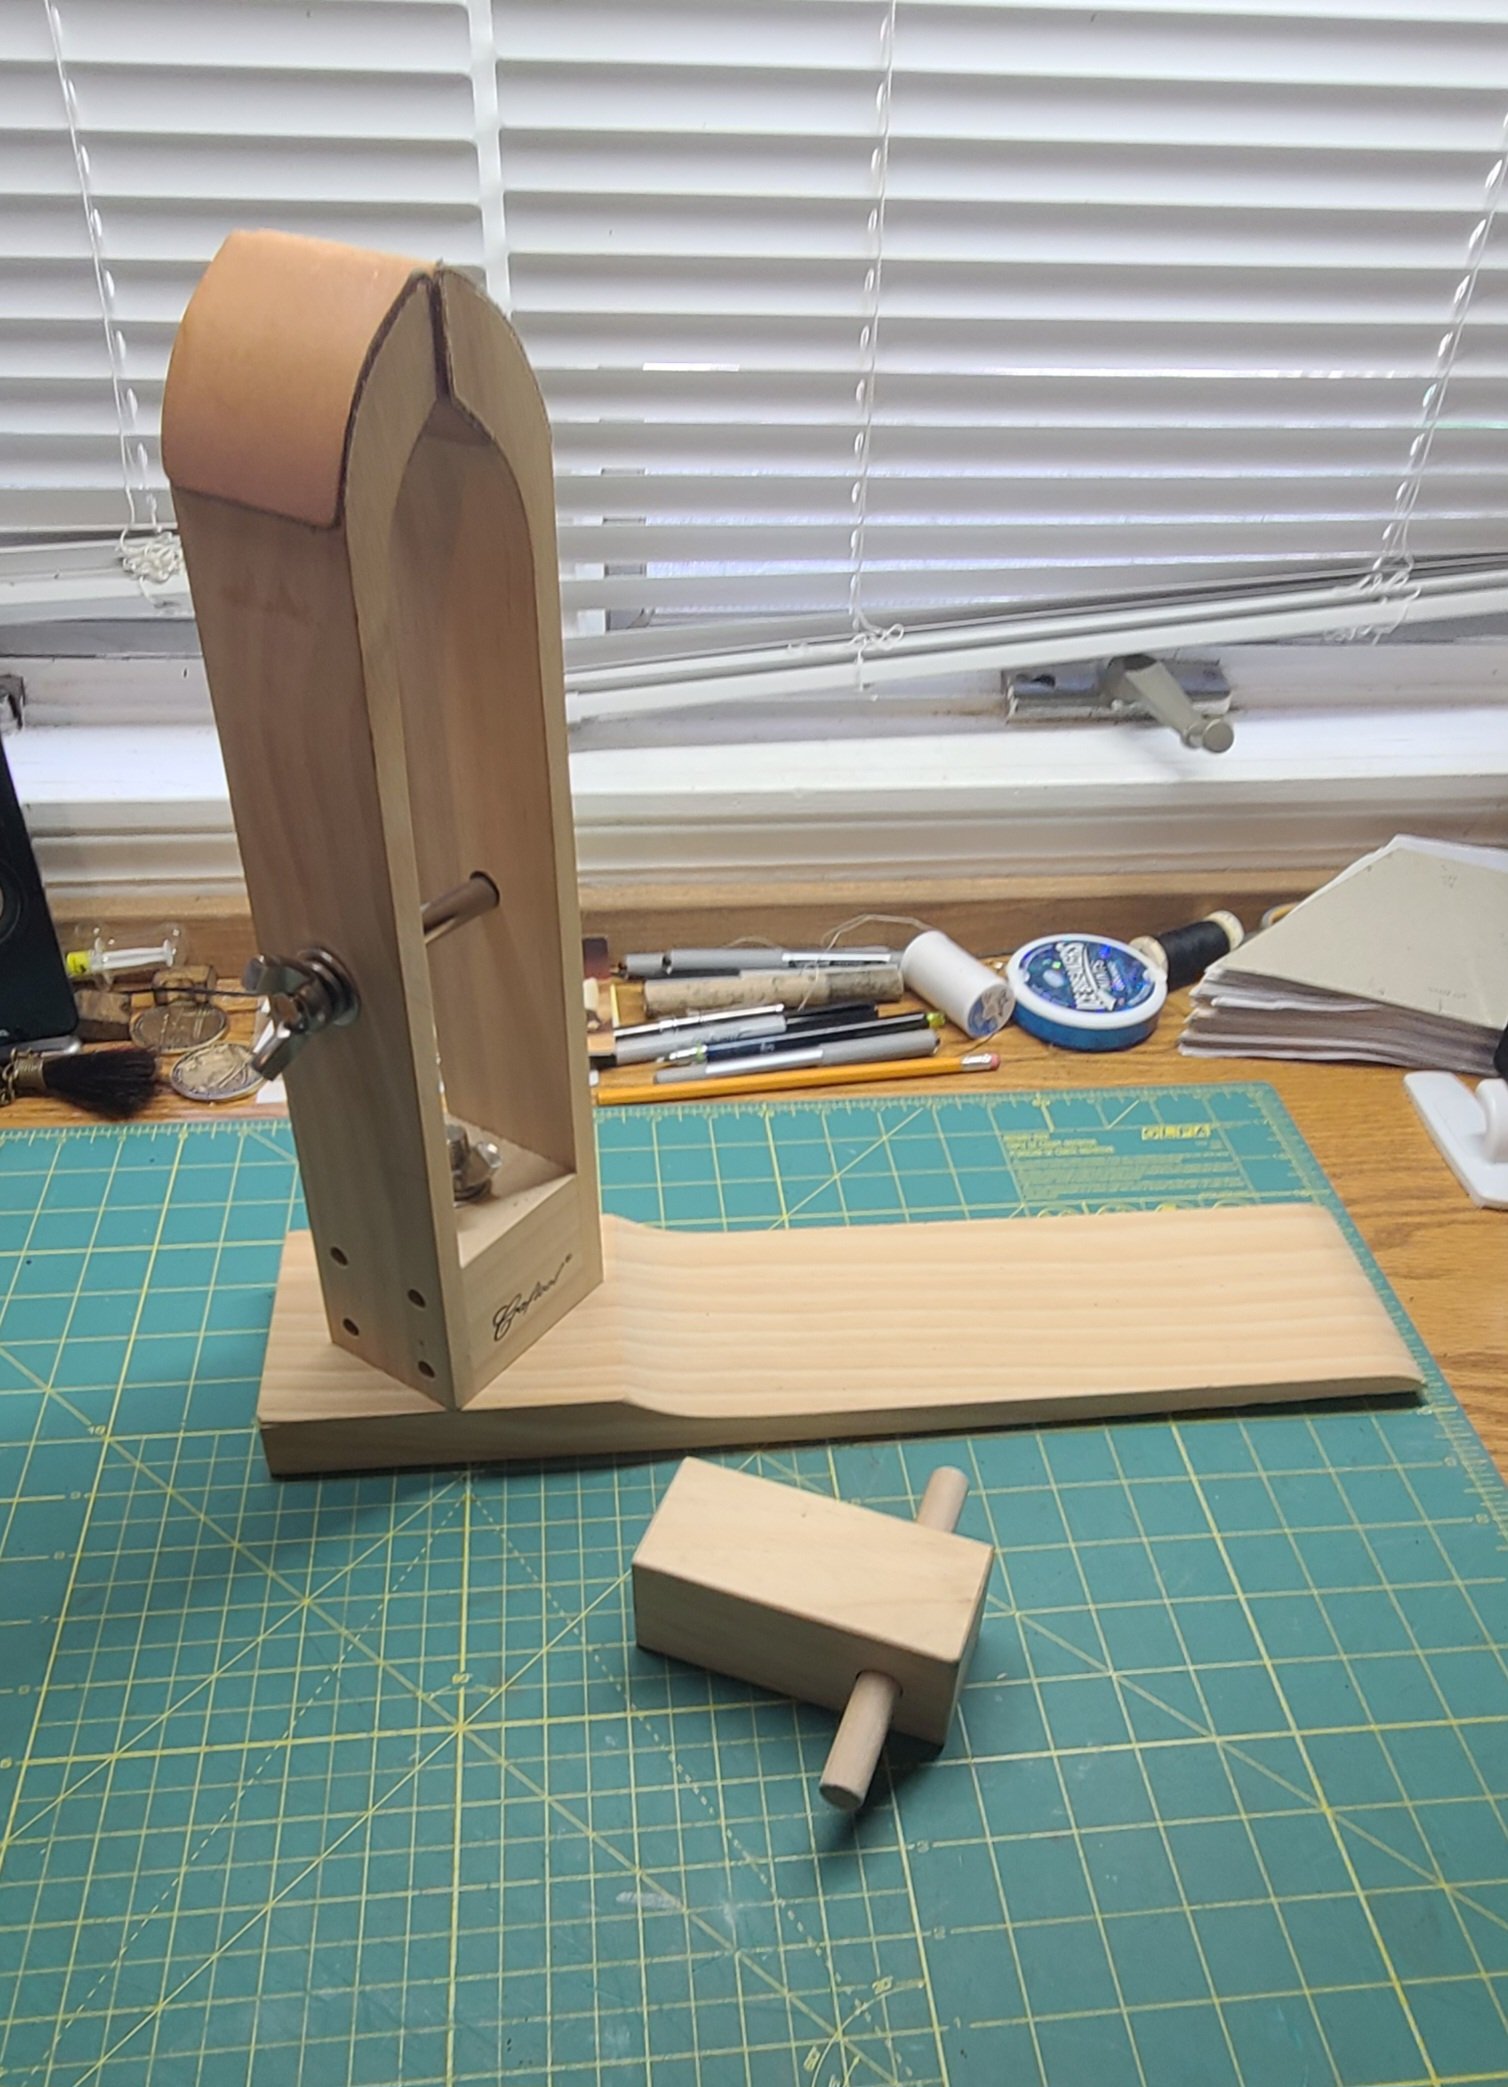
Anyone ever heard of a stitching pony? I only learned what it is when I got into leatherwork. Back in the day carpenters would use a clamping or shaving horse. The carpenter would sit on it and the clamp was operated by a foot treadle. Leather workers have a similar bench called a stitching horse. I purchased a stitching pony. The difference between a horse and a pony is size. A stitching pony is tucked under one thigh. The wooden block is a wedge to open the jaws of the clamp. The jaws are leathered so as not to mar the surface of your work. Regards, Henry


-
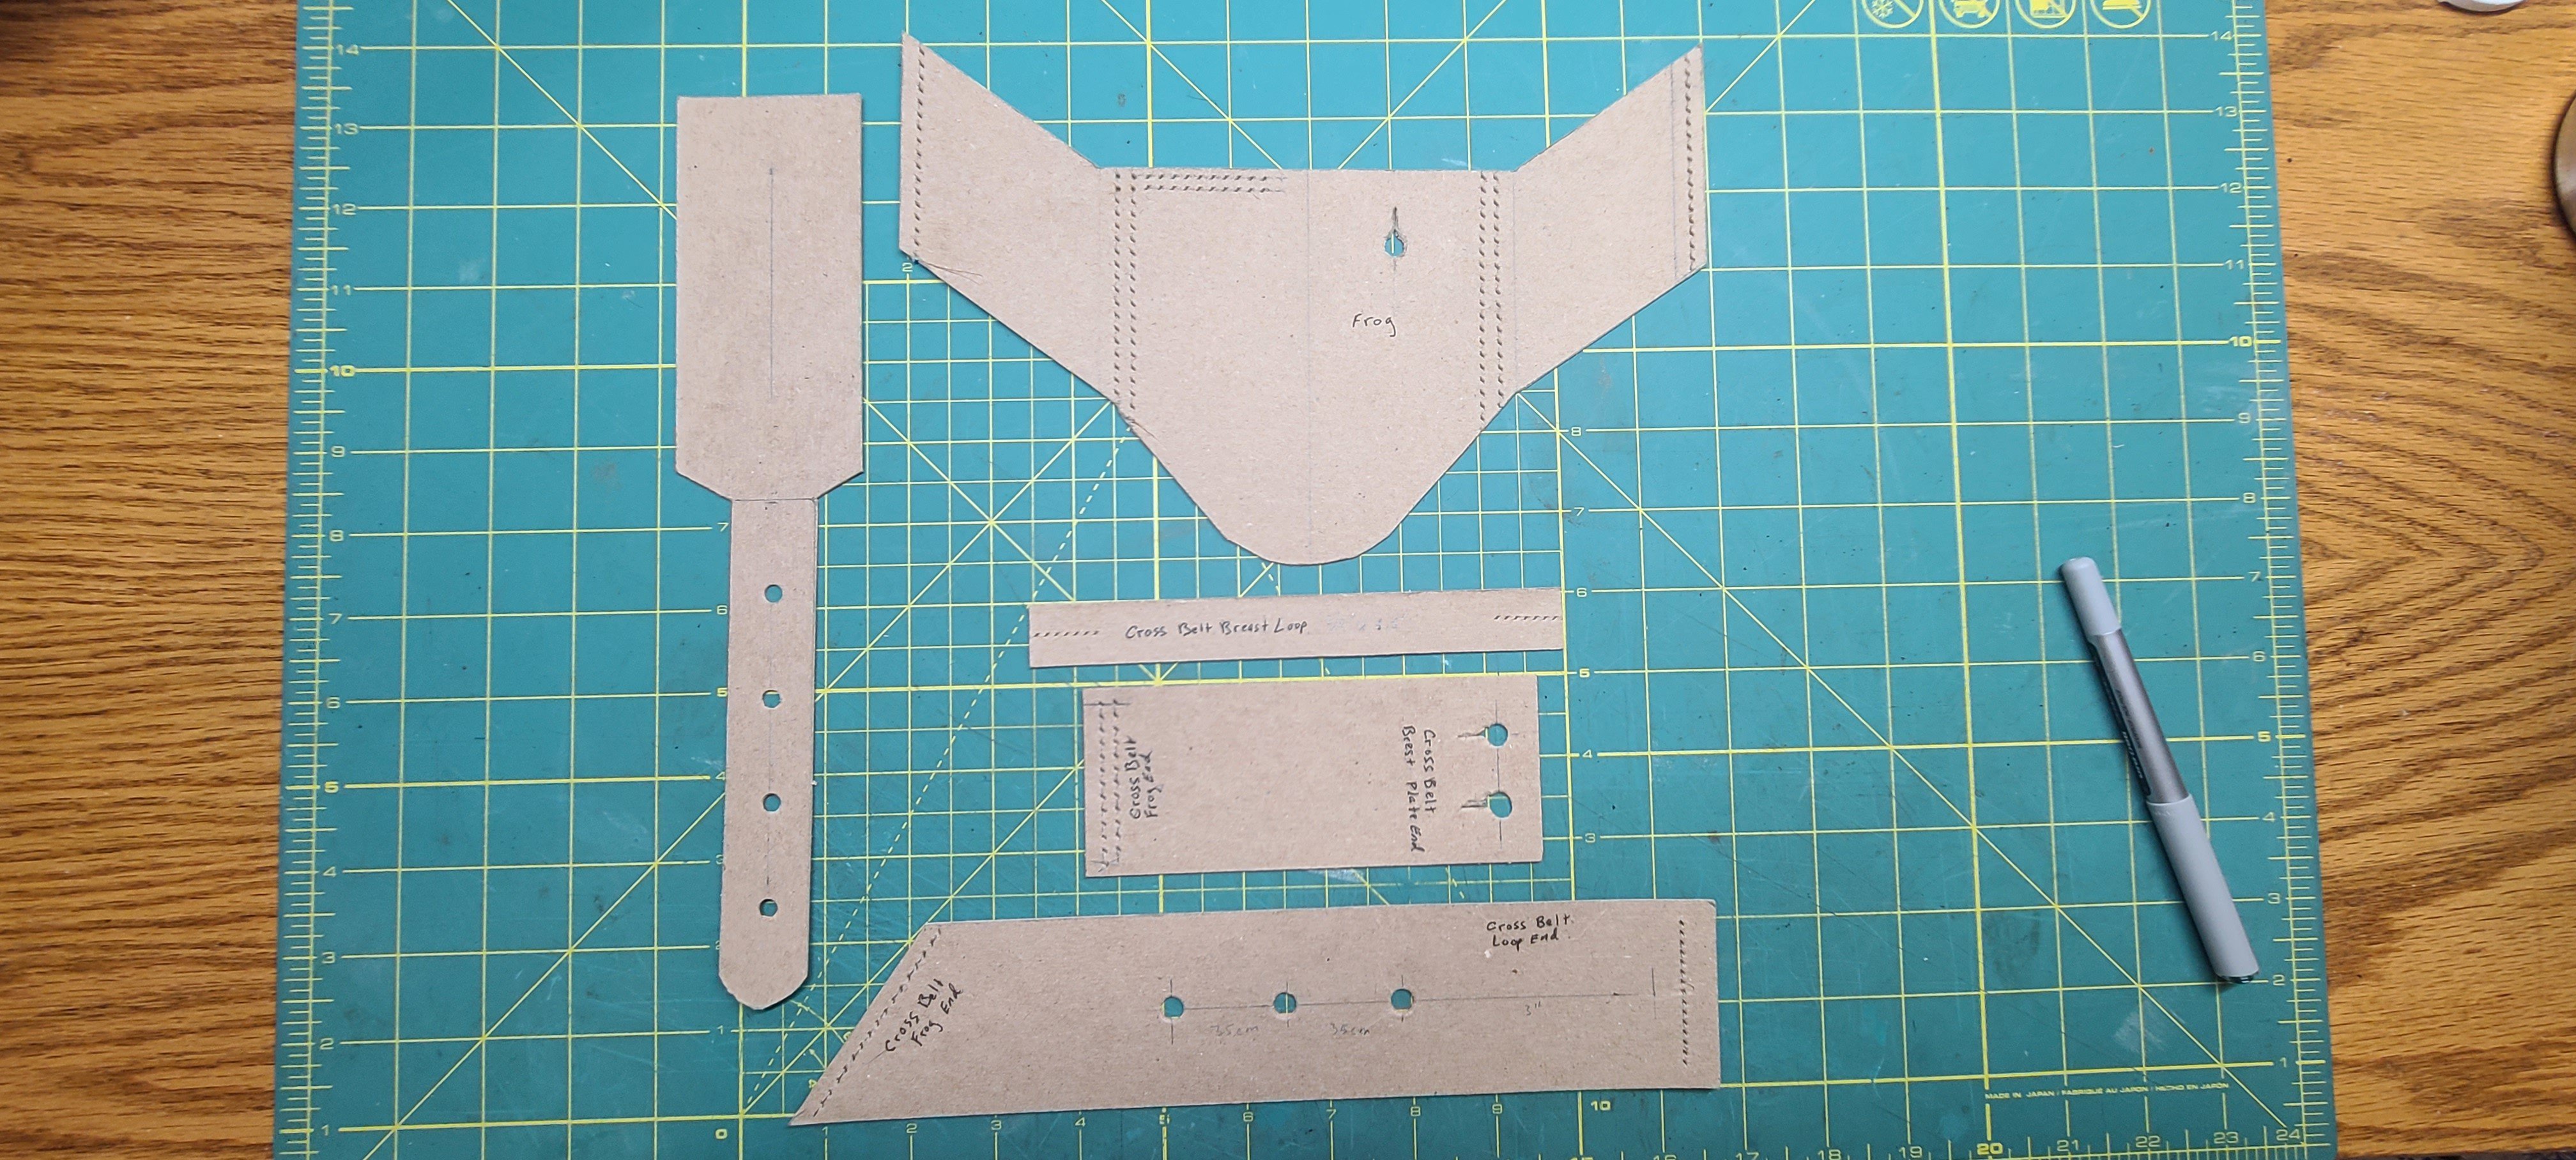
Patterning the cross belts. The cross belt patterns are pretty straightforward. After taking all the measurements off of the originals I lay them out and mark off the locations of all the punch holes. Round holes for the length adjustment, button holes for the breast plate and scabbard, and diamond shaped stitching holes. Regards, Henry

-
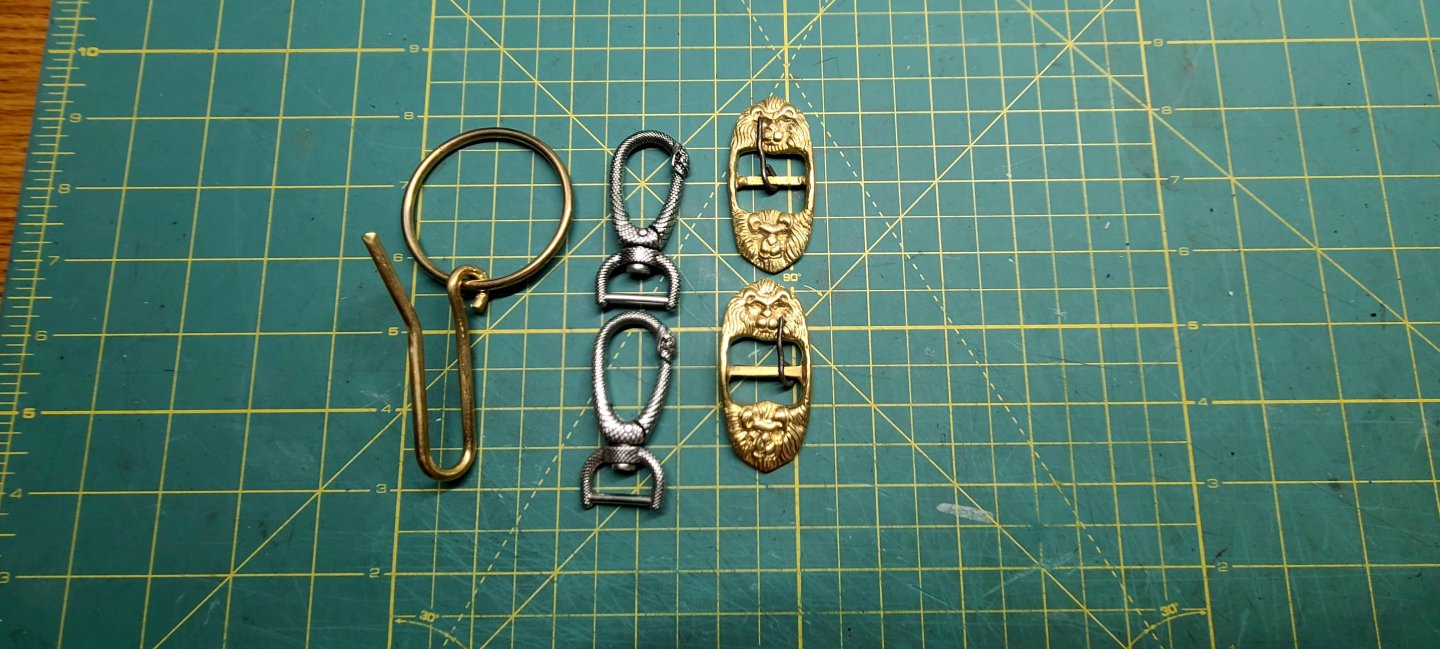
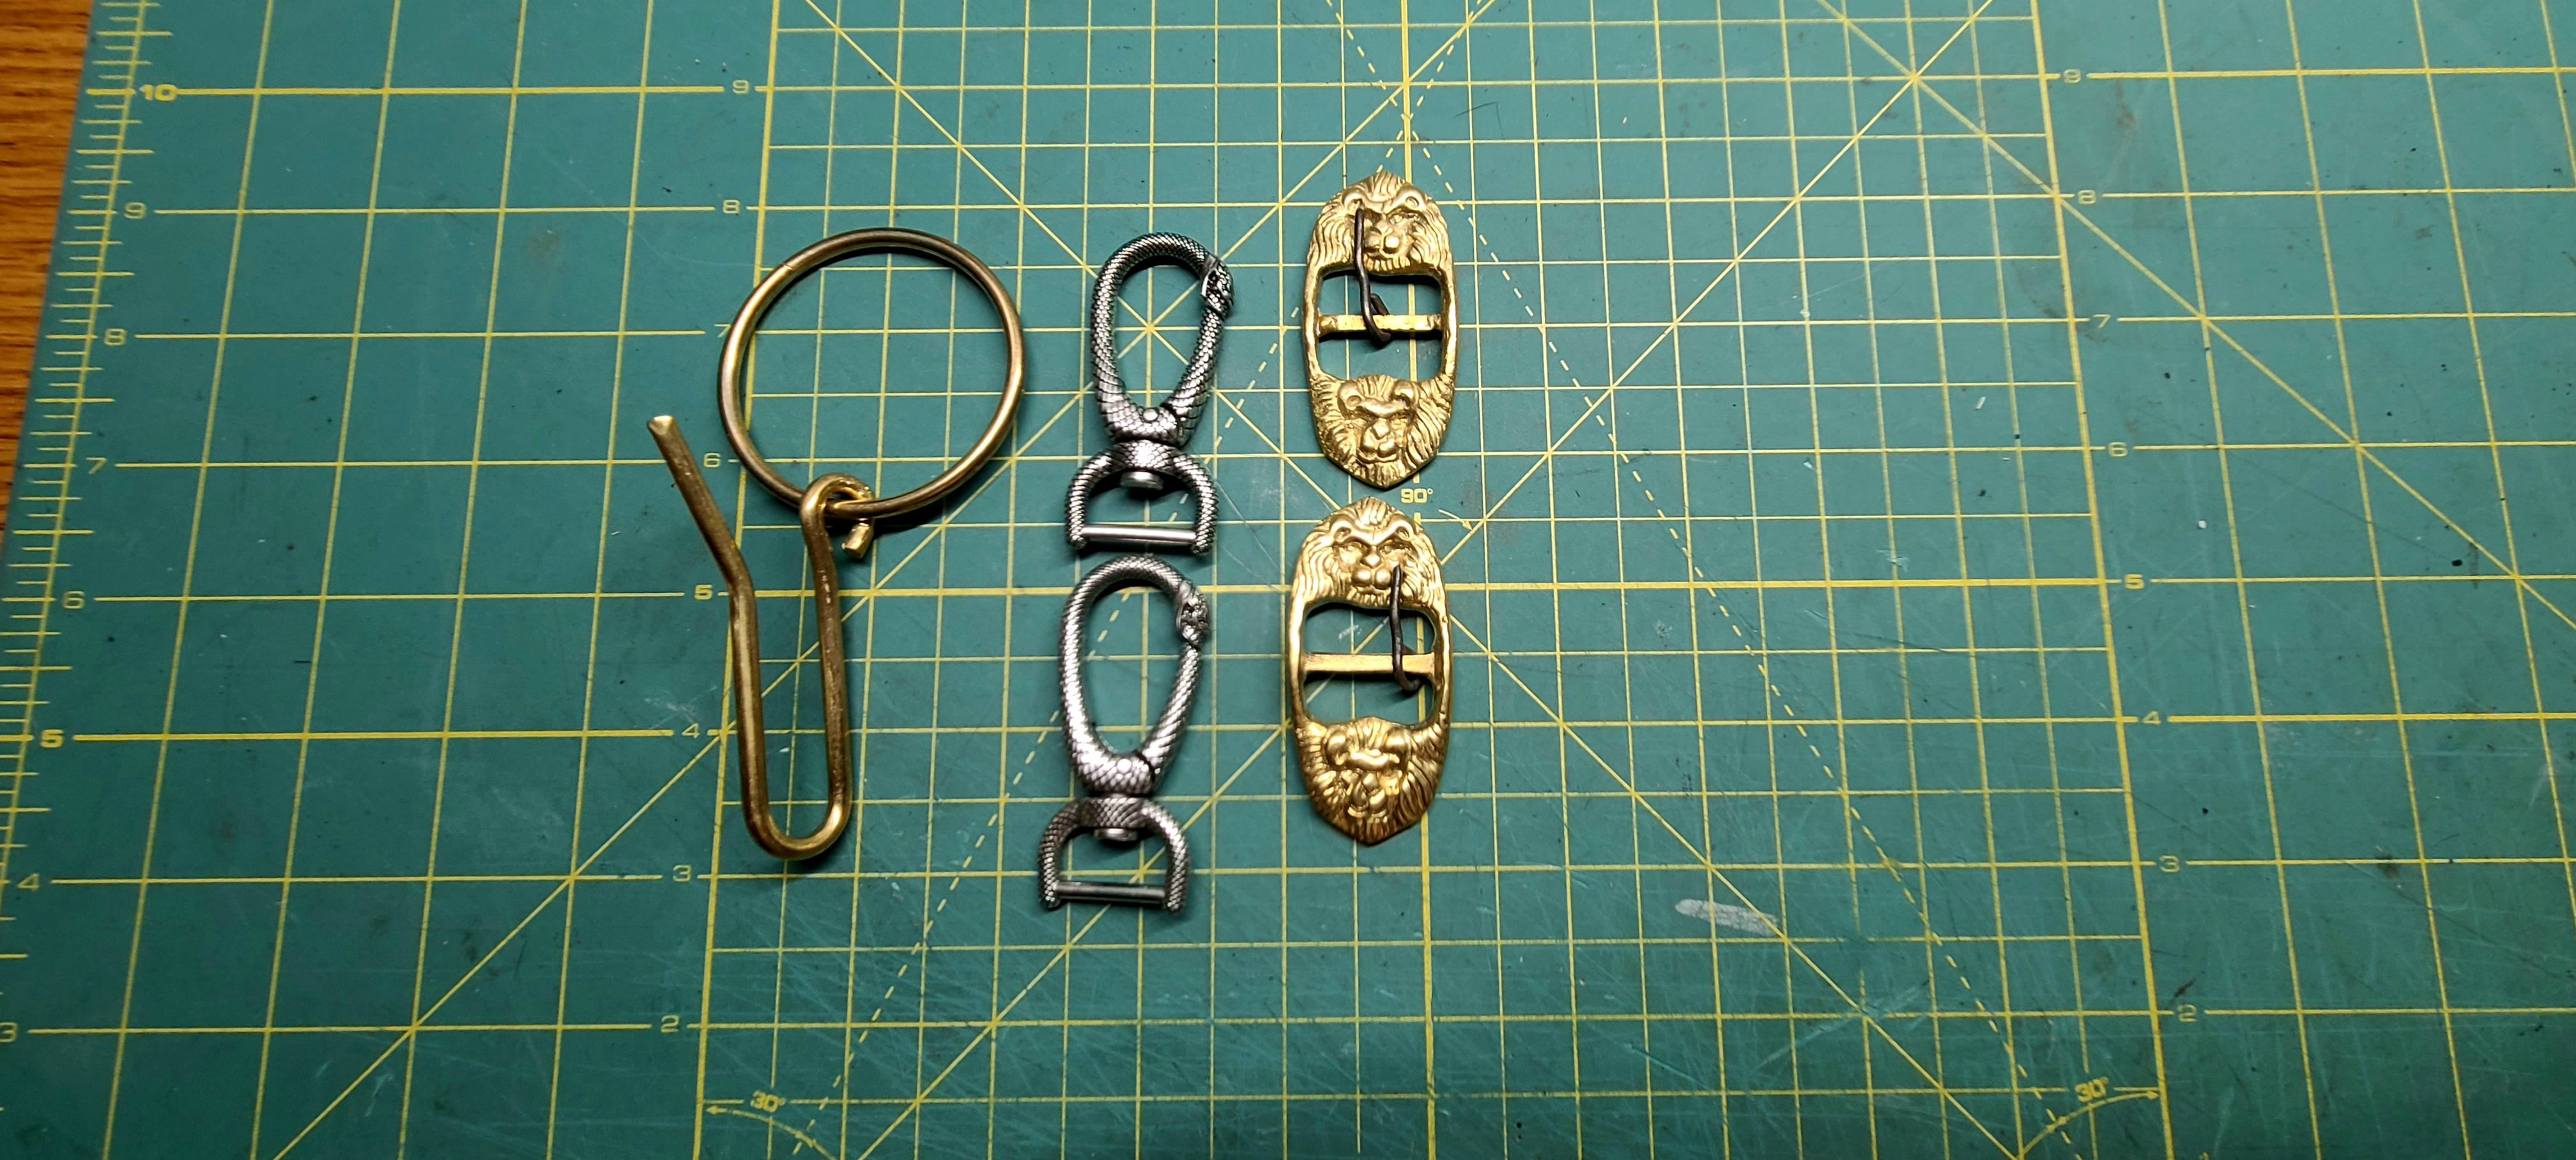
I had to search a few different places to find the hardware to make the Sword baldric and slings. These are the items I finally settled on to design the baldric around. Basically, the two halves of the shoulder cross belt and the front and rear sword sling all attach to the large ring which will sit at my left hip. The hanger hooks will attach at the end of the slings and the sling length will be adjusted by the buckles, The large hook on the ring is to hang the sword from while walking so that the sword hangs more vertically. The two pieces were purchased separately and I opened the small eye to get it on the large ring. The sword scabbard has two loops for the hanger straps to hook in to. They are carved to look like infinity snakes with the snake swallowing its own tail. I happened to find these snap hooks that are also styled as infinity snakes and they match quite well except the hooks are silver color and the loops on the scabbard are gold. I may just live with the difference, or I might find a way to plate the hooks sometime down the road. The sling buckles are brass lion heads. All in all, some very cool finds. Regards, Henry
-
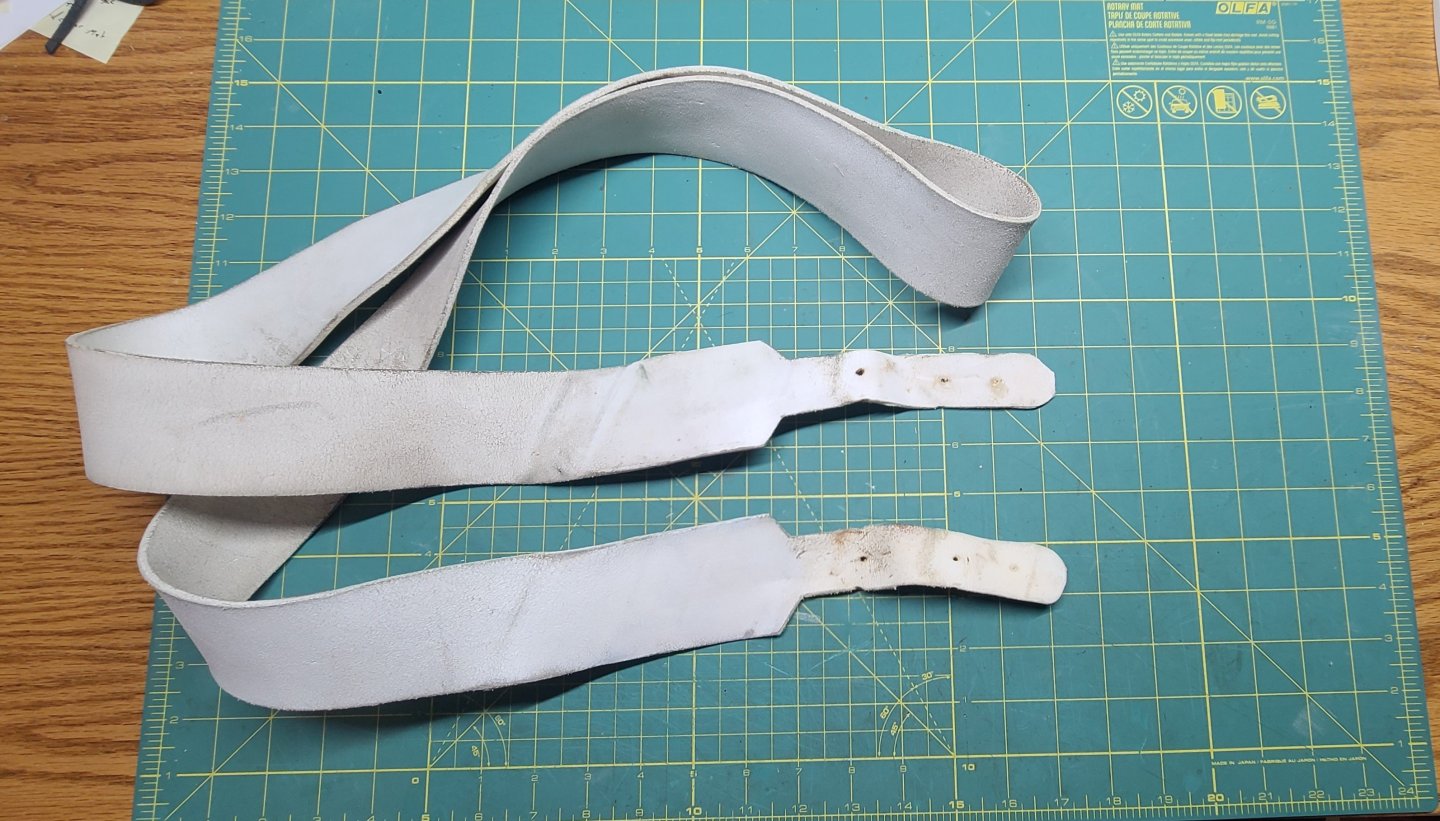
The first step in making the patterns is to pull apart one of the existing items. I do not have a picture of the sergeants baldric pulled apart because after I made the pattern I had to put it back together to wear it aboard Constitution last weekend. But, you can see how it is stitched together. The cross belt halves are stitched on to the frog that holds the sword and bayonet scabbard. Since the Captains sword is a new item I will have to design the pattern pieces myself. Regards, Henry
.thumb.jpg.59d2c5ddbbd234604a3153a687224c67.jpg)
-
Tandy recommends the Angelis flat white dye for this type of application. But the product is technically an acrylic not a real dye. It is the same stuff you would use to dye a pair of shoes white. Apparently no-one makes a real white dye anymore. Regards, Henry
-
Pipe clay was used to keep the white leather white. We also use black ball (animal fat + lamp black) to make shoe leather black and slightly water resistant, as well as brick dust mixed with oil to polish brightwork like brass, buttons, and musket barrels. Dying leather white is certainly a challenge. Companies don't even make a real leather dye any more. They all use an acrylic white paint now. The brand I am using is Angelis and it is taking multiple thin coats to produce a flexible surface that will resist cracking with wear. Regards, Henry
-
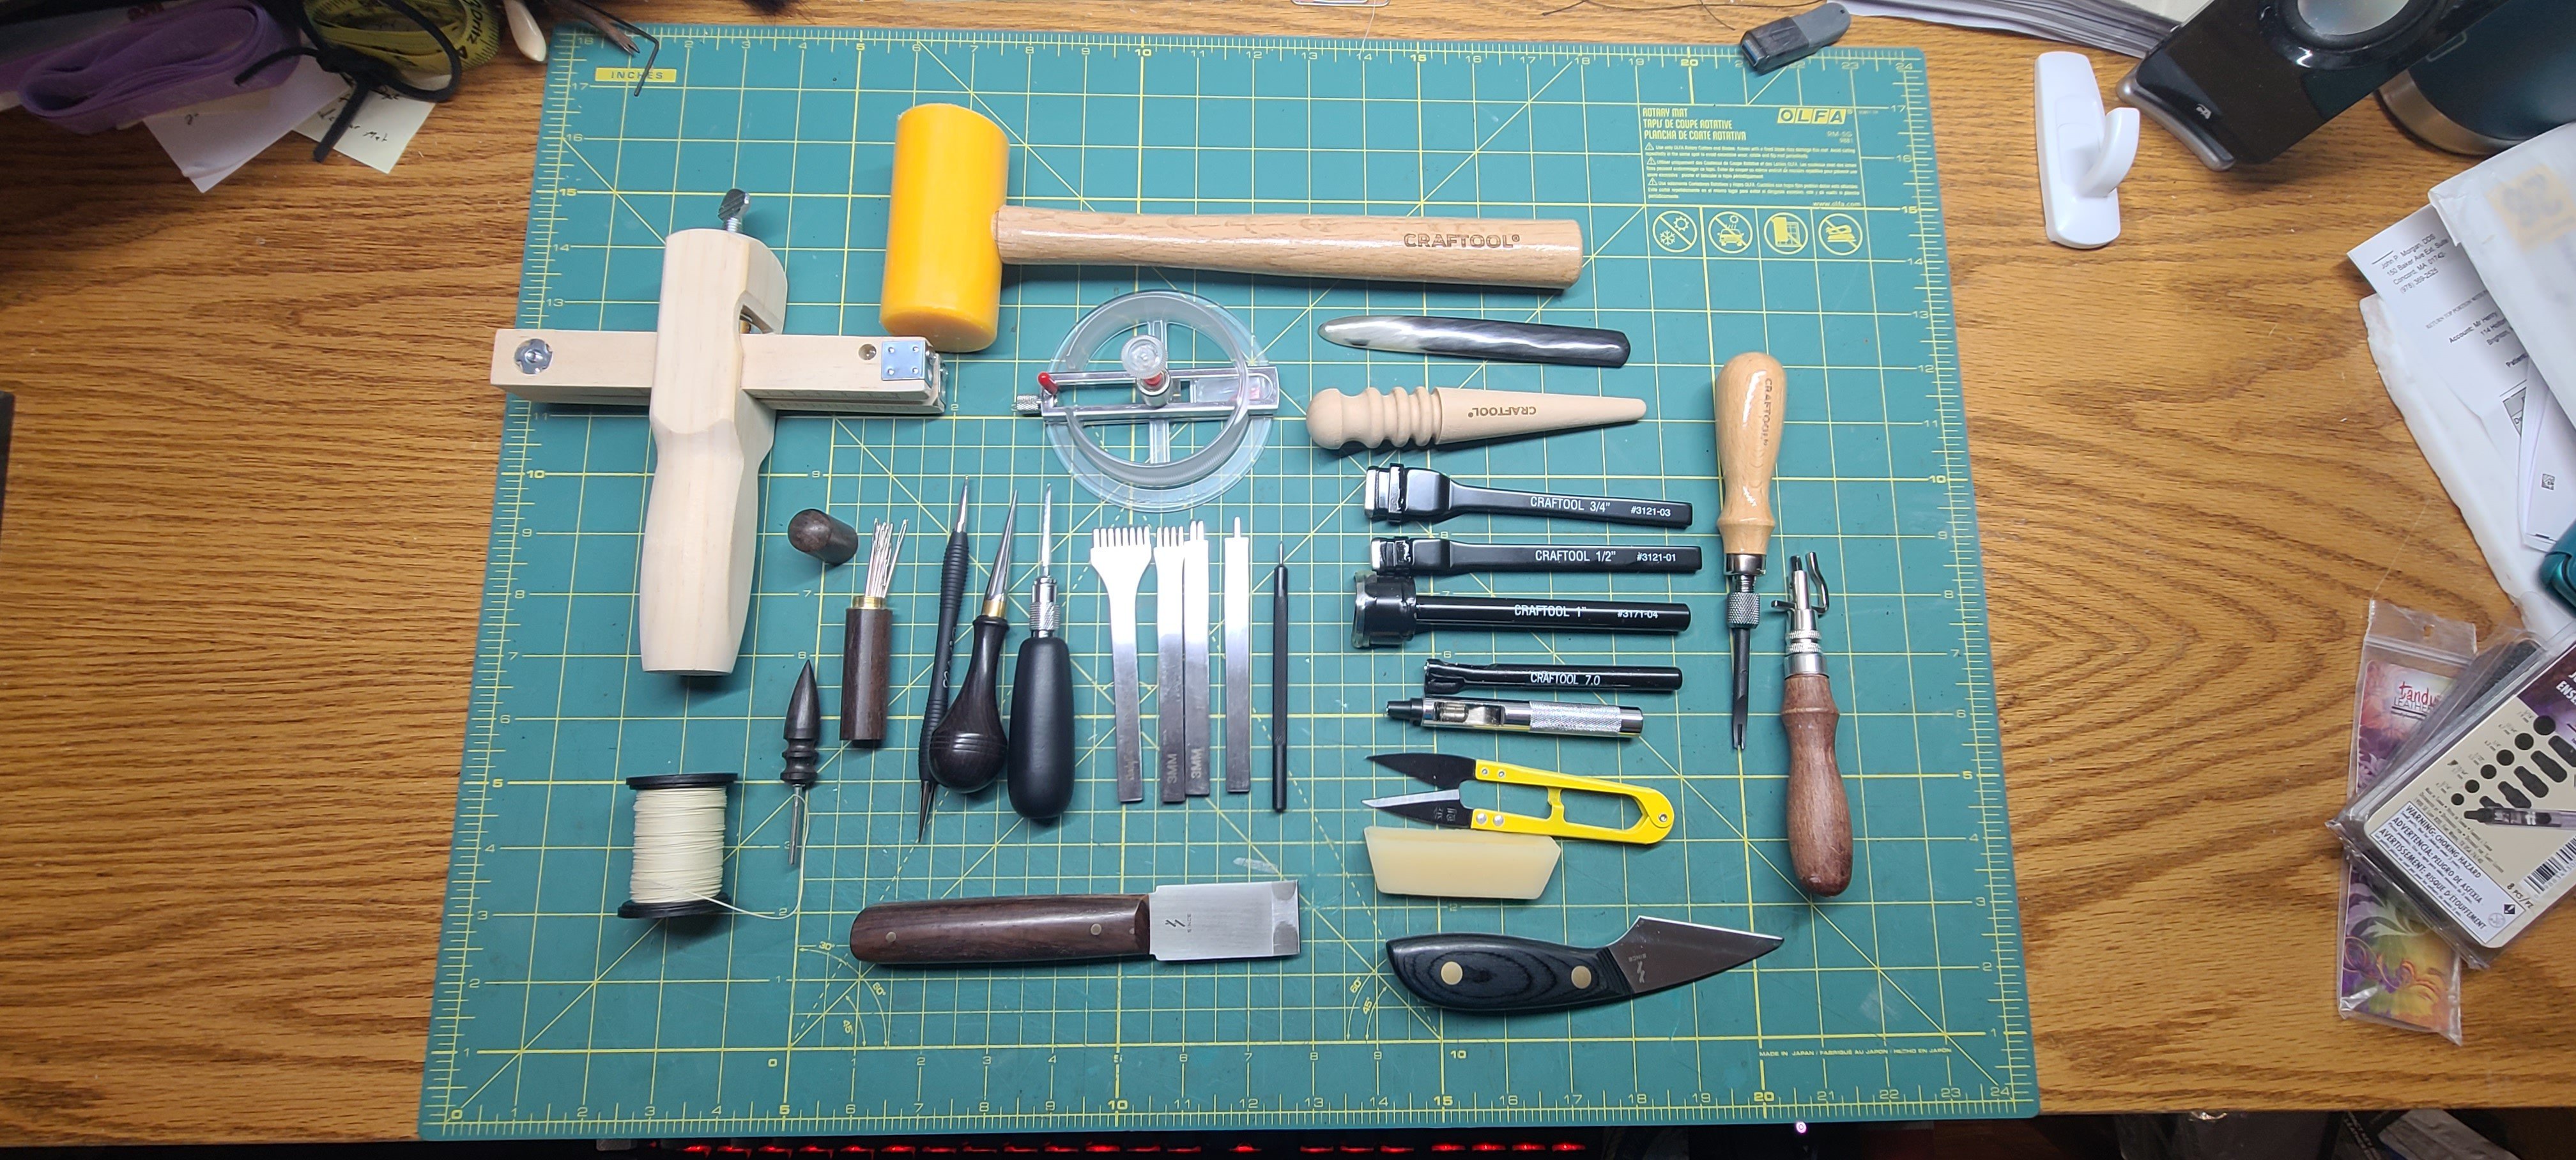
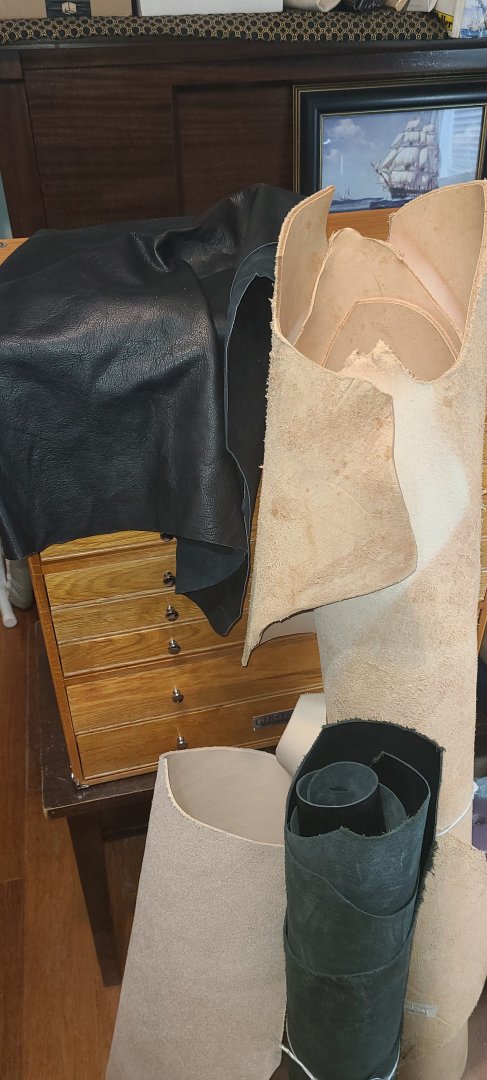
Some of the tools I have purchased for this project. The t-shaped, wooden tool on the left is a strip cutter. There a various sized stitching irons, stitching awls, hole punches, end punches. Also shown are edging and burnishing tools, stitching needles and thread, and the tool on the right with the harp shaped extension is a stitch grooving tool. It is used to allow the leather stitching to end up flush with the finished leather surface and not get abraded or cut. I purchase vegetable tanned leather for these projects. Depending on the item, I will get it either dyed or natural. All of the items we use are either black or white. Already dyed black leather is easy to find, but getting white leather can be a problem. Leather is purchased by the cut and the weight (thickness) You can get whole sides, half sides, single or double shoulders, bellies, backs, or panels. Leather weight is by the ounce, for example an 8 to 9 oz. single shoulder. But I always have trouble figuring out what thickness that is going to be, which is what I am really interested in. So, you can also convert that weight to an average thickness in millimeters. In the picture below are a half side of 8-9 oz. (on the right), a single shoulder of 5-6 oz natural, a half shoulder of black dyed 5-6 oz, and a black dyed 3-4 oz. panel. The natural half shoulder will be cut into strips, etc. for the cross belts for the marines, while the black leather will go into the various parts of the cartouche boxes. The 9 oz. half side will be patterned out and then dyed black and will form the bulk of the cartouche boxes. Regards, Henry

-
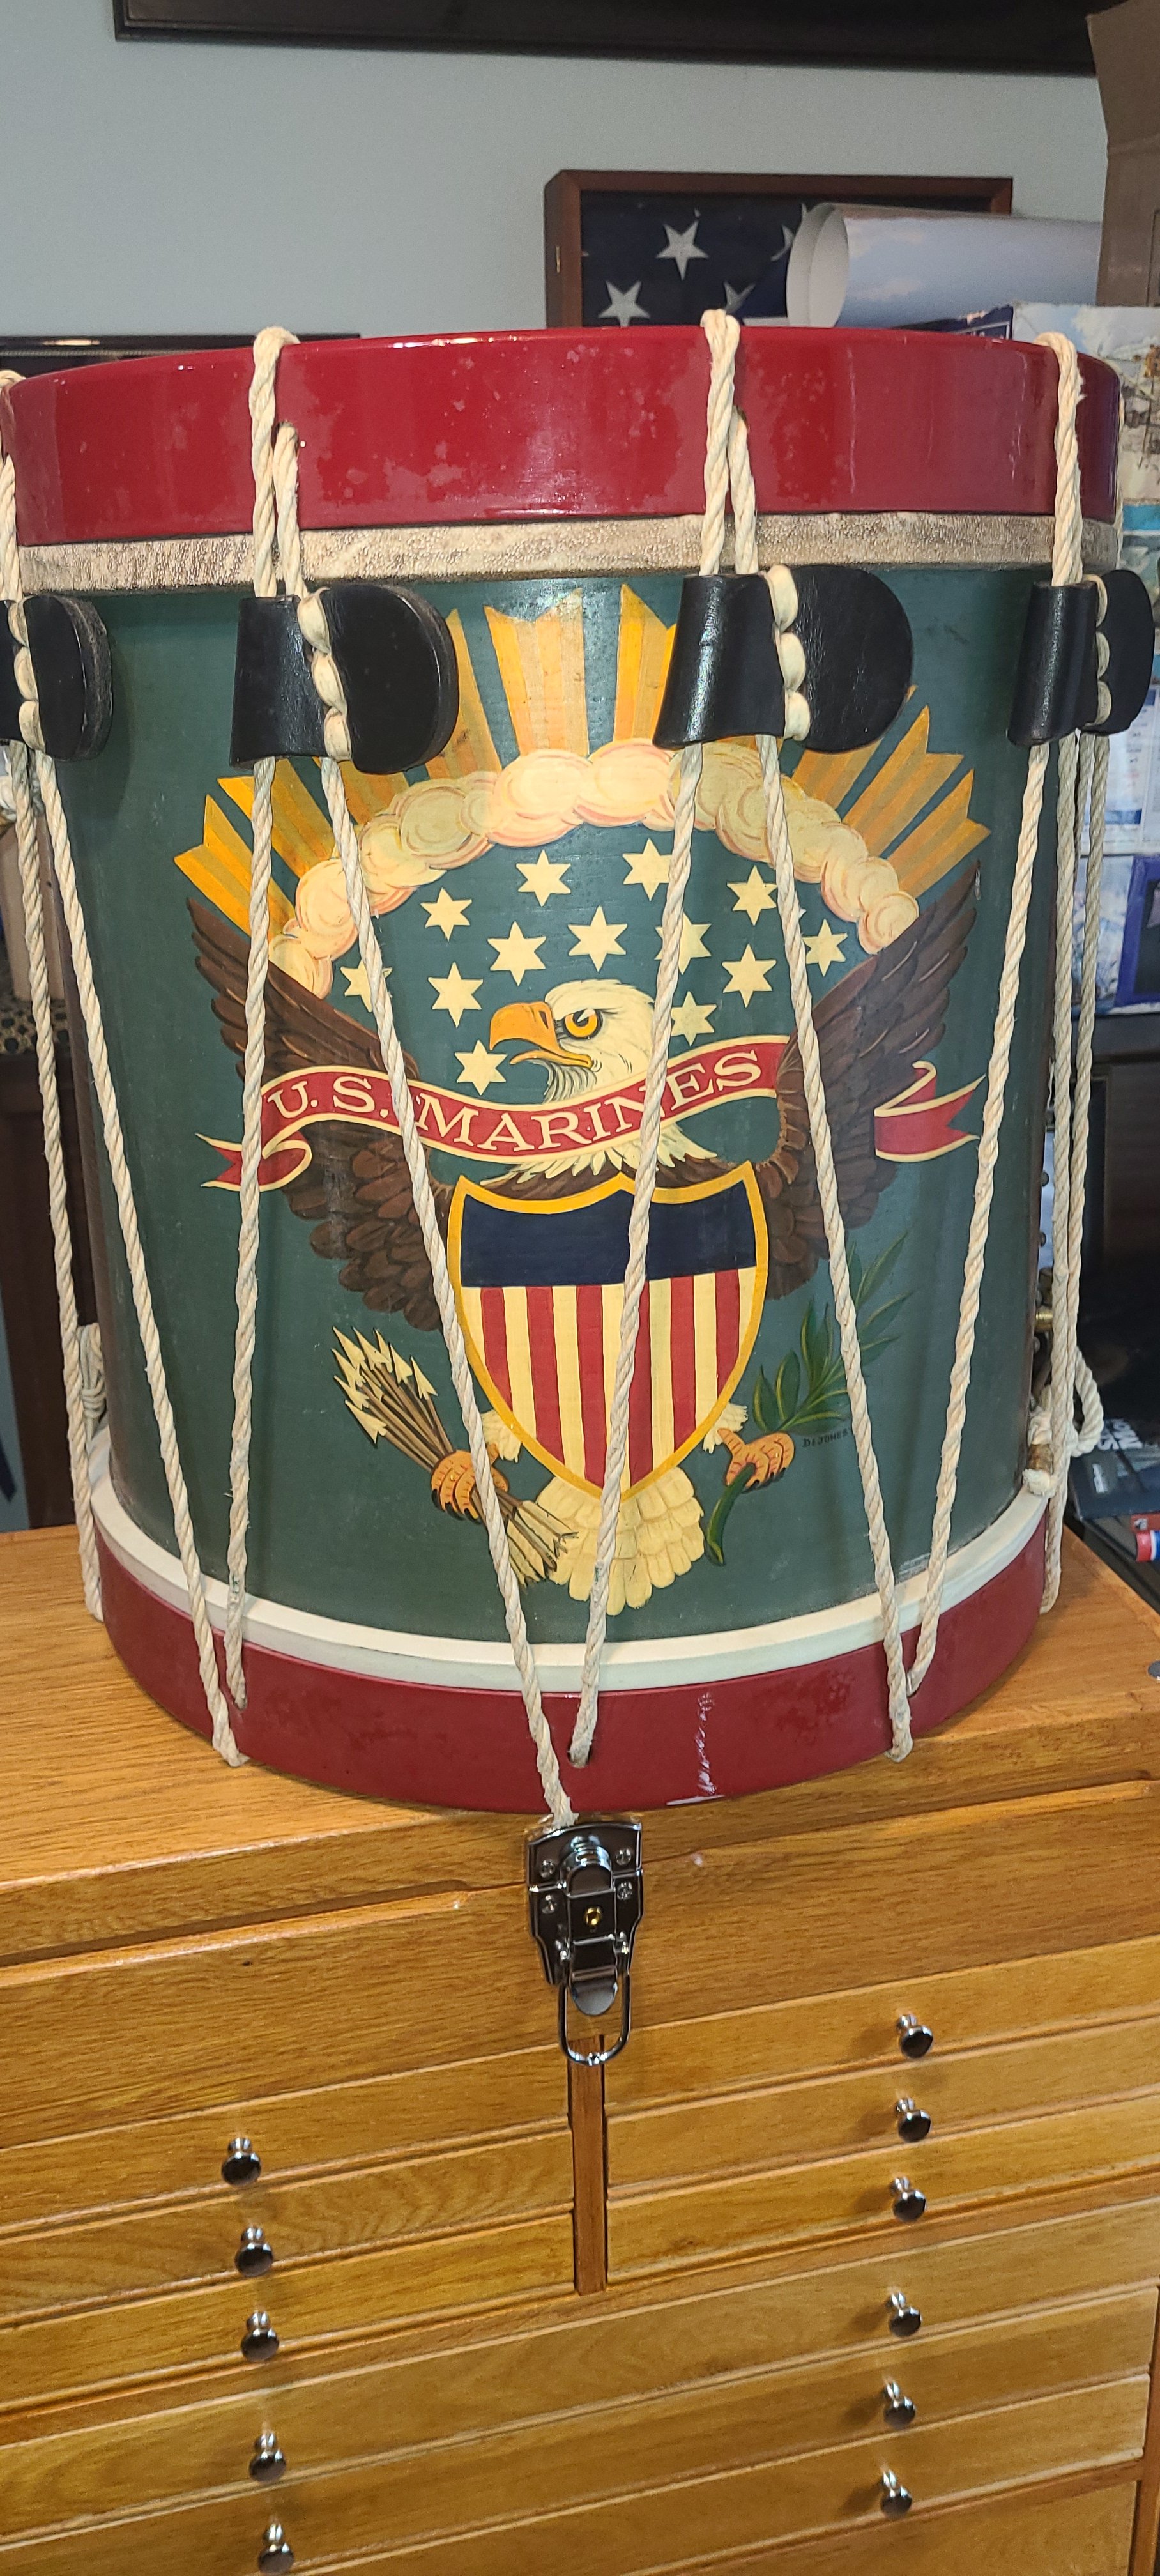
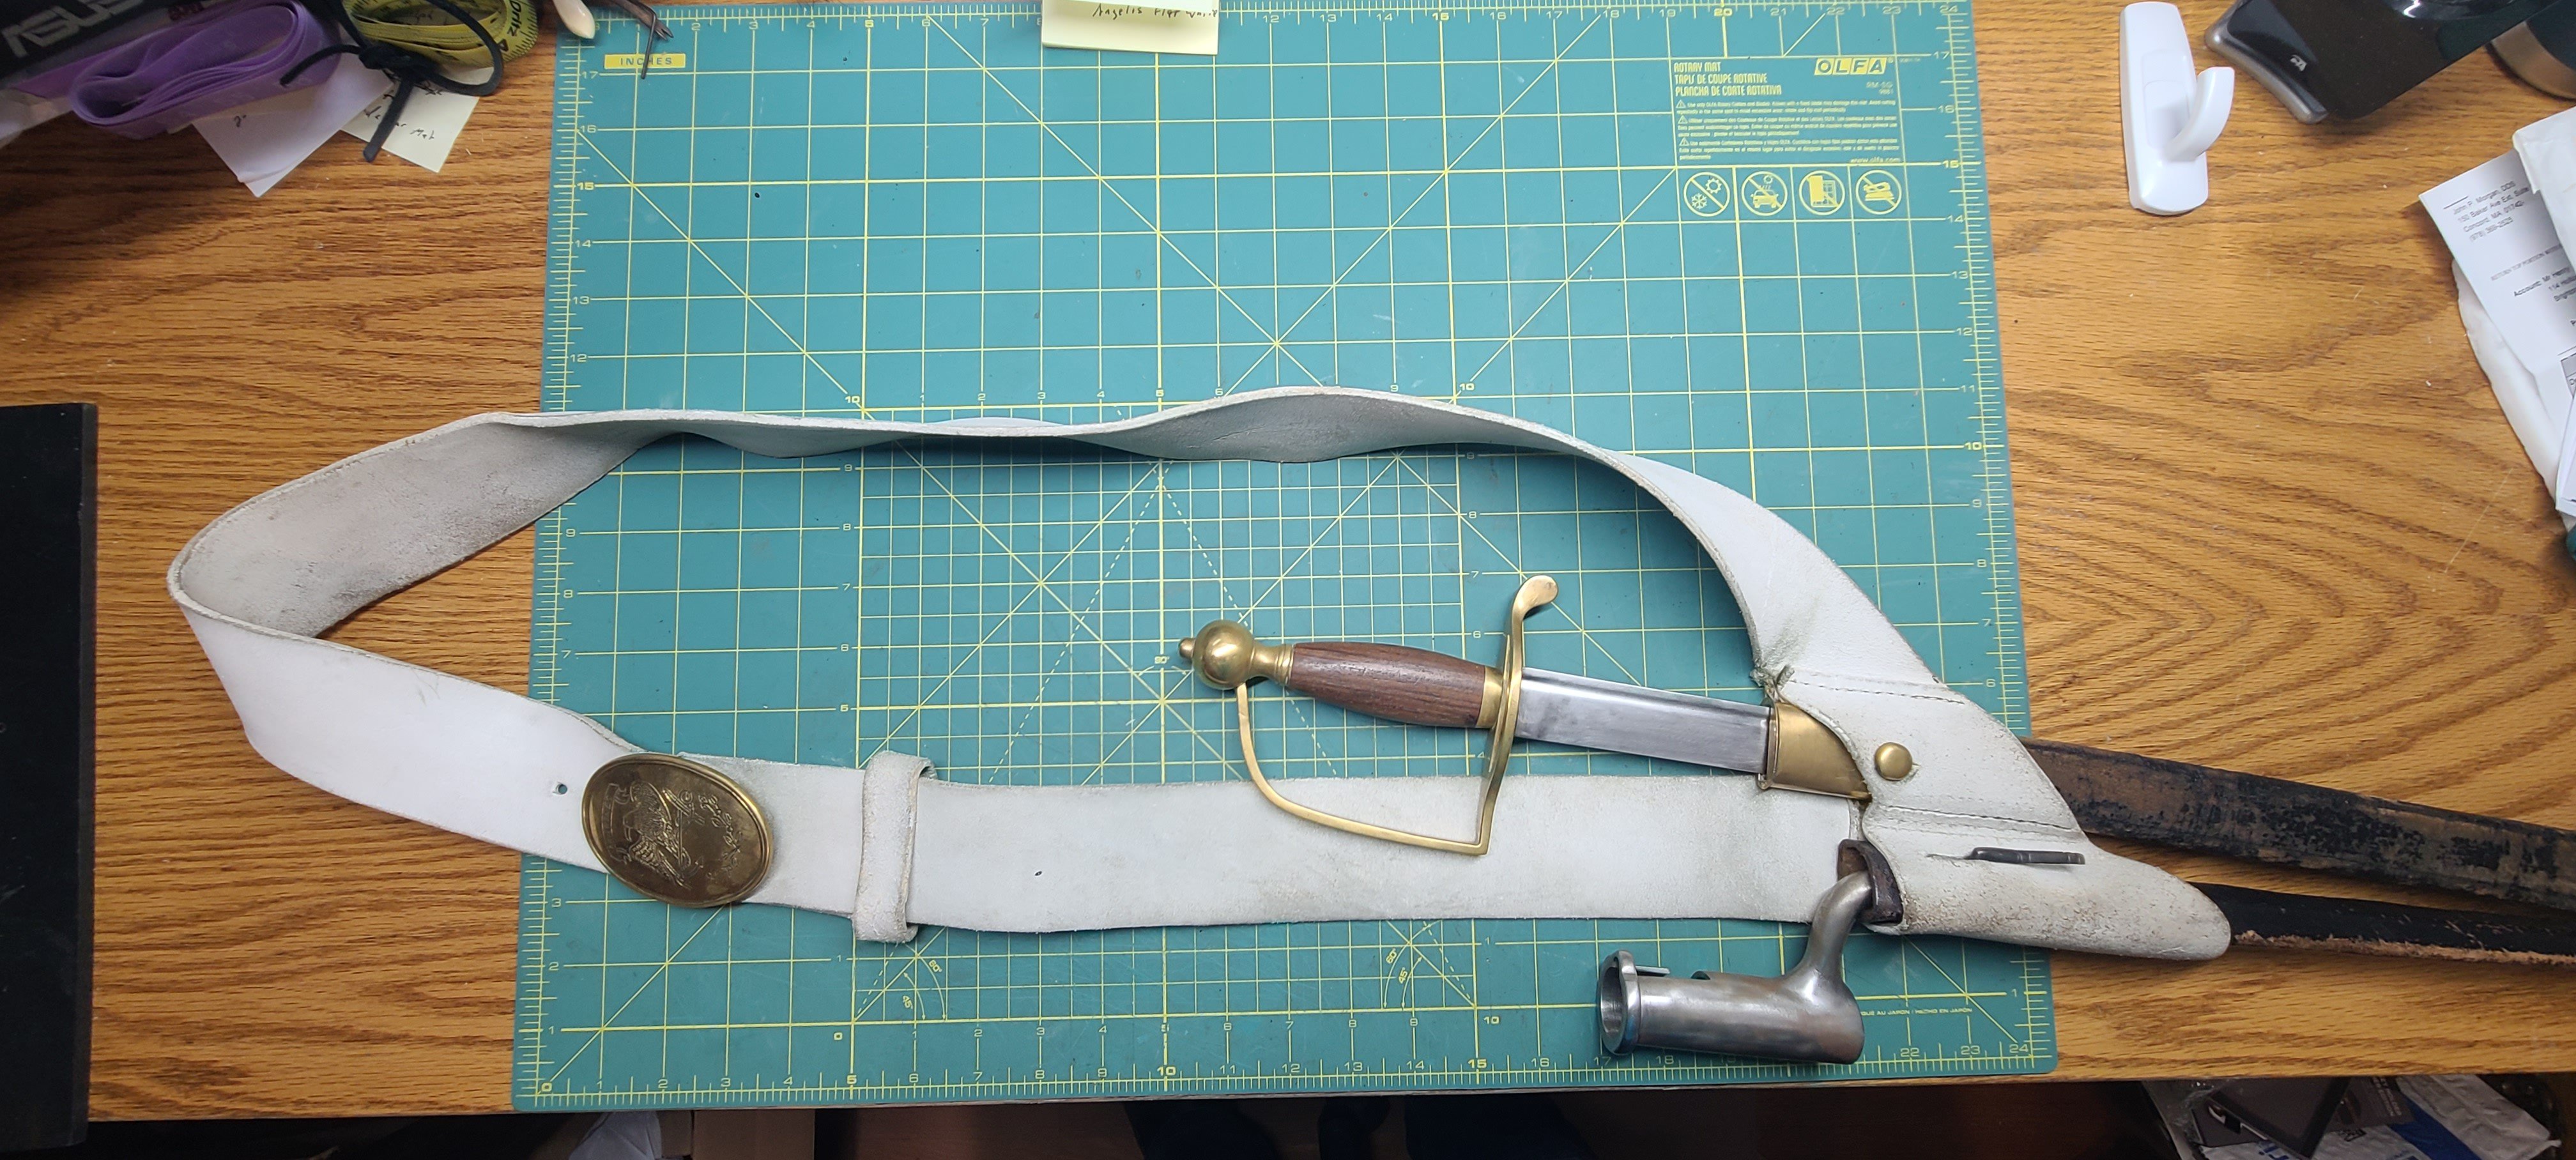
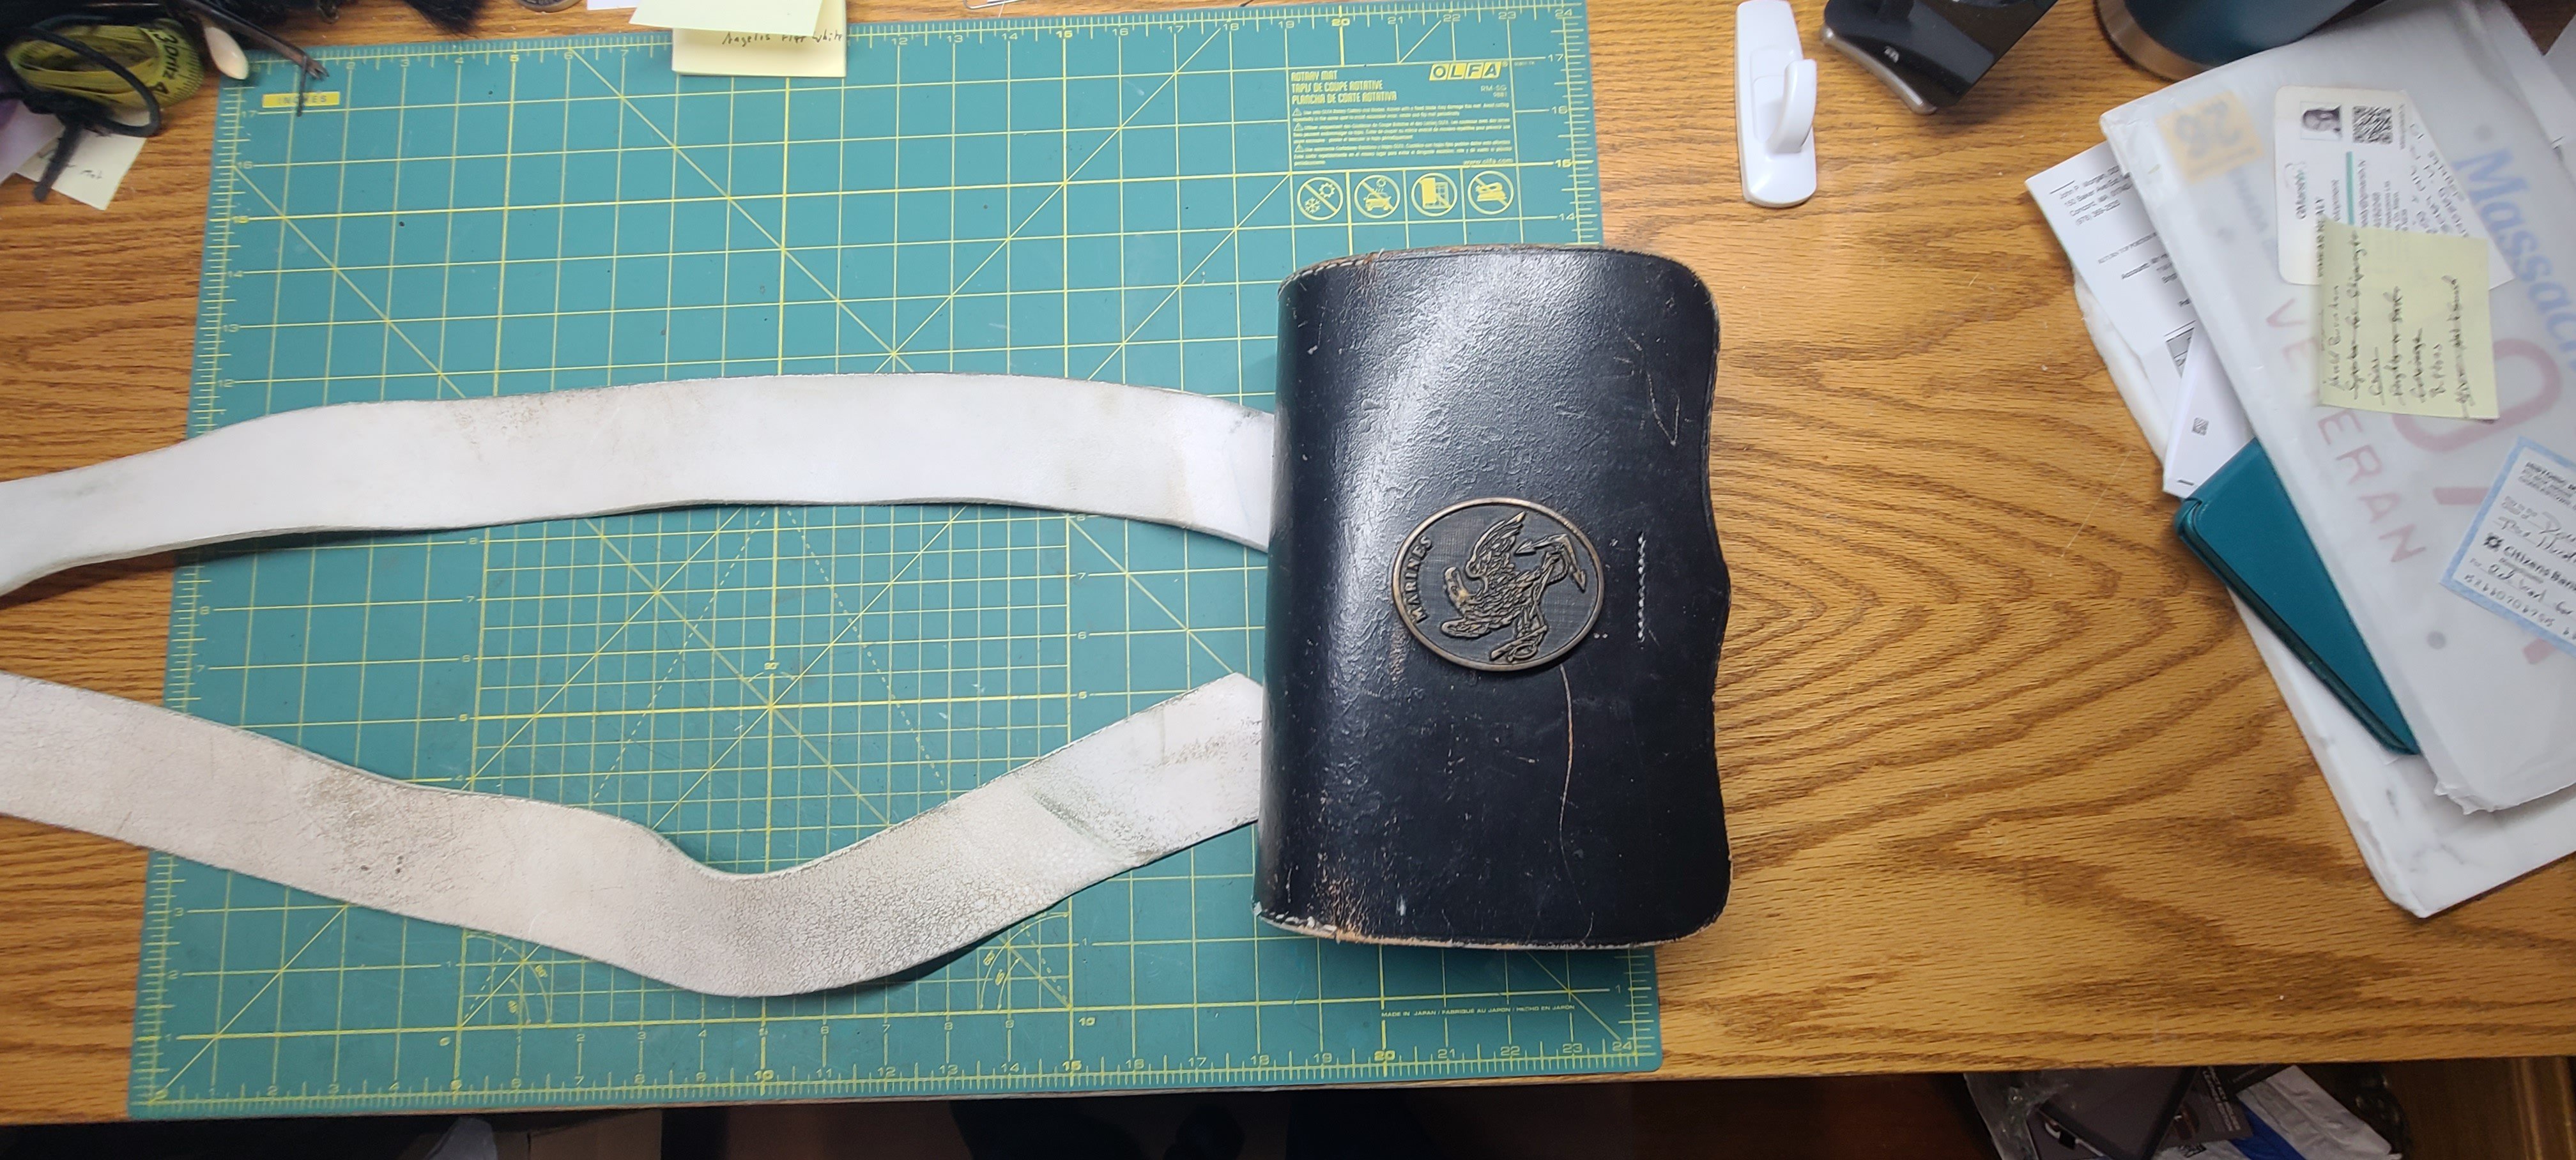
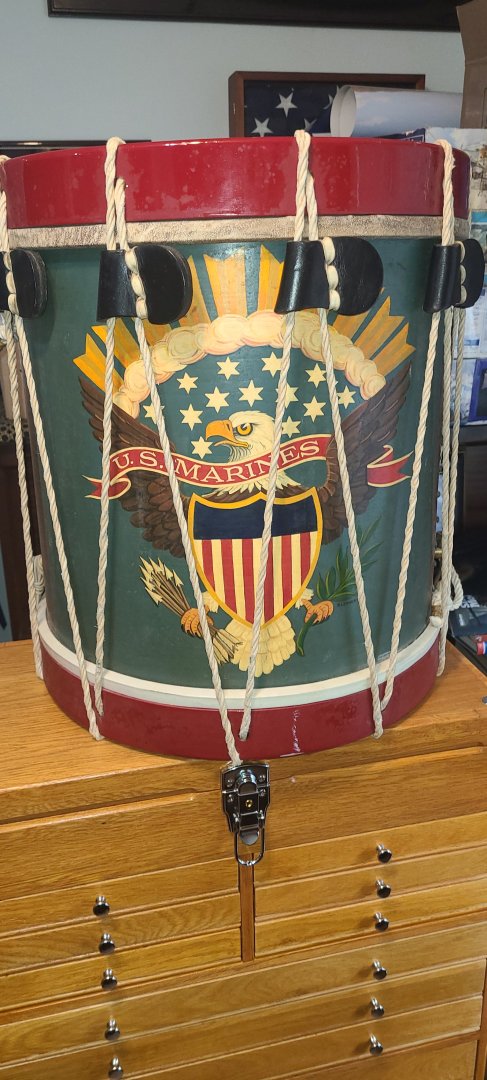
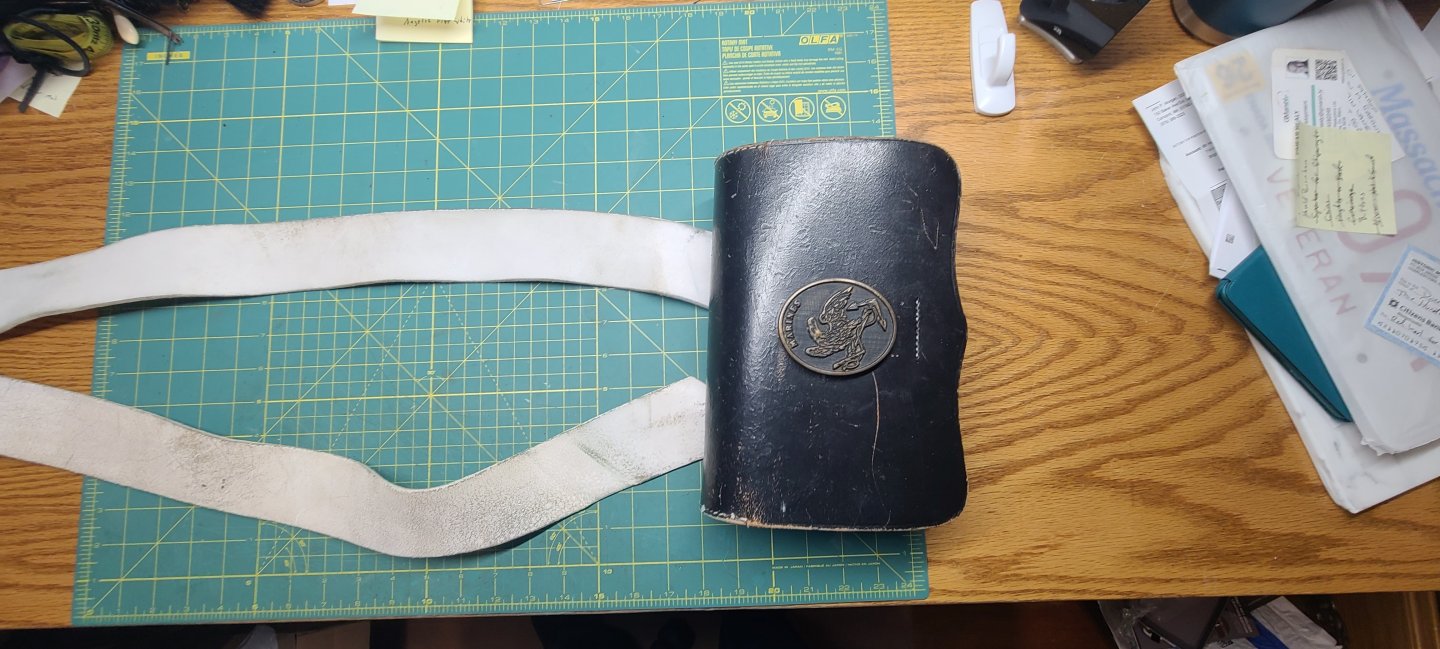
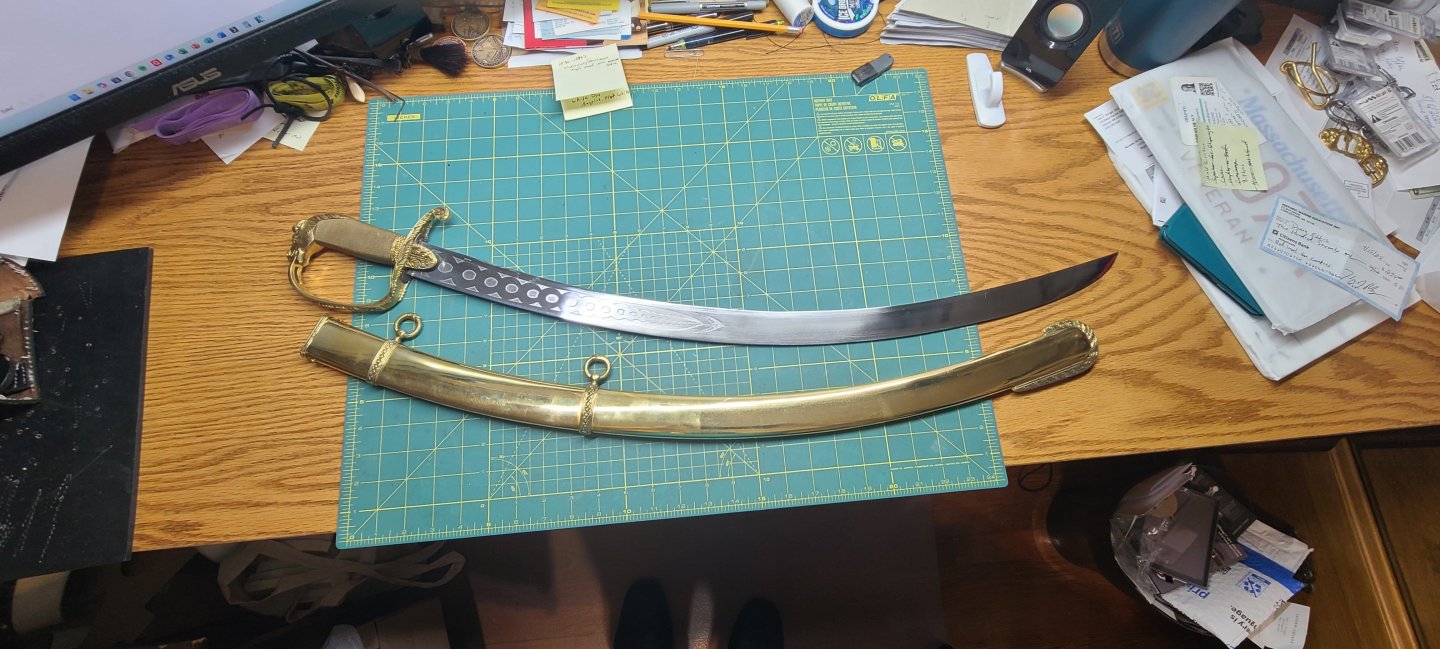
As some of you may already know, I run a non-profit corporation that serves aboard the USS Constitution as its Marine Detachment. We recently had some new members join and I need to stock up on some new equipage for them. In addition, I will now be portraying the Captain of the Marine Guard, so I need to make a new baldric and sword hangers for my officers sword. I also need to make a shoulder hanger for our snare drum. The pictures show the items I need to replicate. This won't be so much a build log as much as a little taste of something I have yet to see here on the forums. The first item is a baldric, also known as a shoulder belt, to carry the bayonet. The one in the picture is for the sergeant and has a double frog to carry both a bayonet and a sword. The other enlisted ranks would only have a bayonet. The next item is a cartouche box. This holds 26 rounds of ammunition for the musket in paper cartridges. Here is the neck stock. This is where the US Marines get the name "leatherneck". Contrary to popular belief, the neck stock is not designed, or capable of, stopping sword cuts. It is there simply to keep your head erect and improve your military bearing, so you can't do what is termed in the modern military, "eyeball the deck." Next up is the snare drum carried by our musics. "Musics" is the word used back then to refer to the drummer and fifer, or musicians, assigned to every company. Finally, here is my new officers sword. The regulations of the period did not specify the sword that an marine officer could wear, except that it have a gilt (non-leather) scabbard. This is a Georgian period, horse head saber. It would have been worn by a gentleman of means due to it being more elaborate than the average sword of the period. Since I am portraying a more senior officer, Captain, I thought it appropriate. Next steps are to create patterns for the pieces and source the leather. I have also started to acquire the leather working tools needed for the project. The new Gerstner tool chest a recently acquired will house these new tools so that I can keep them organized and separate from the rest of the tools in my very small workspace. Regards, Henry


-
Gregg, Thanks for the reply. I just attempted to download that specific PDF in the post. Clicking on the hyperlink does nothing. Not even an attempt to retrieve the file. I am wondering if a recent upgrade to chrome may have changed some security setting on my PC, but I can not find anything that works to reverse the problem. I even tried after disabling security features completely. Regards, Henry
-
Perhaps I am missing something obvious, but I can no longer download .pdf files attached to posts. I am currently using Chrome. Regards,
-
Shrouds were well stretched while preparing them for serving in the riggers loft, so I don't know if there would be a lot of movement in them after they are set up on the ship. Regards, Henry
-
I have no gripes about your gripes. They look good. Regards, Henry
- 301 replies
-
- 5
-

-
- Constitution
- Bluejacket Shipcrafters
- (and 1 more)
-
A couple of points: US Navy ships (or any Naval vessel) would rarely dock. They would normally anchor off (reduced the potential for desertion). When a ship did dock, the side chosen to be alongside the quay would be determined by the purpose or the job to be done while docked. At anchor, the angle that a ship assumes to the wind is dependent on both the wind and the current, with the bow pointing generally up-wind and against the current. Set your flags flying however floats your boat. Regards, Henry
- 301 replies
-
- 6
-

-

-
- Constitution
- Bluejacket Shipcrafters
- (and 1 more)
-
A steam trunk is the compartment through which the smoke stack passes. In modern ships it often contains blower motors for ventilation and exhaust and would often have a hatch for access. A steamer trunk is a type of valise for travel items on longer voyages. Victory probably has a rudimentary steam trunk around the galley smoke stack to keep the heat from the beams. Regards, Henry
-
Marc, I have a spreadsheet that I have partially completed that details and elaborates on all of the rigging. It is still a work in progress (Life, right?), but I can send it to you. I will also send the finished product when done. Regards, Henry
- 2,695 replies
-
- 3
-
-
-
- heller
- soleil royal
- (and 9 more)


.jpg.40048b598593b776e57674cfc2b34d4b.jpg)