


JPett
-
Posts
881 -
Joined
-
Last visited
Content Type
Profiles
Forums
Gallery
Events
Posts posted by JPett
-
-
Ahoy Shihawk

I have two builds, actually three. I like going between different builds. Theses kits take a long time and I find a break from one build lets me come back to it with a better attitude. Especially if I am starting to stagnant. I have one main build and then at least one side build. There is a big difference between taking a break and quitting. It also is not for everyone.
As for the sanding, look at some of the manufacturer's pictures of completed kits. Many are shown with minimum sanding. I think it is a good look. I sanded the crap out my Rattlesnake build and it looks more and more like a plastic kit every day. What I have learned is to sand the wood then wet it to raise the grain, once dry I hit it with the wipe on poly. A little late for the Ratt but she still looks good.
-
Ahoy Spiff
Trumpeter kits and Dragon kits are very different. Trumpeter uses considerably more parts where as Dragon minimizes the quantity. I have enjoyed building both kits but the Trumpeter kits do tend to be slightly harder to build. They are however easier to detail.
PS> Trumpeter will also be releasing a 1:200 Missouri.
http://www.trumpeter-china.com/a/en/product/ship/1_200_Series/2013/1006/2514.html
-
Ahoy Bill
I like to think we have a relationship with our models. We always love them in the beginning, but as time goes by our love is tested, along with our patience, our nerves and finally our sanity. I find the similarities amusing.
-
Ahoy Shihawk
Just to confuse the matter a bit more there is painting bare wood or pre-treated wood. And let us not forget sanding it smooth or leaving it rough when not painting. Simply put there are a lot of options.
-
Ahoy Mates
I like the brass
As a newbie I can see where they allow a small amount of adjustment to get all the ports in a proper line
They also add a little class to what is a really display piece
-
Ahoy Anthony
http://modelshipworld.com/index.php?/topic/2843-index-of-helpful-links/?p=78215
I have one link for barrels
-
-
Ahoy Russ
That is one heck of a "redo"
Beautiful work. I am sure I speak for many others when I say "Thanks for taking the time to post".
Looking forward to your next project.
-
Ahoy John
I completely agree and knowing your limitations shows wisdom.
There is no such thing as perfect ship. Knowing when to fight or "picking your battles" is key to victory or completing a kit. If it helps I have deducted about 100 scale points from my build. Although there is something to be said/learned fixing mistakes, damaging a build to make something scale is just wrong in my book.
If you do this same thing on your next build, well now that's a horse of a different color.
- popeye the sailor and texxn5
-
 2
2
-
Ahoy Michael
Don't sweat it, embrace it
Your build is too good. You really have taken this kit to a new level and that is all I see
-
Ahoy Andy
I have had very good luck with the Zona brand saws and their miter box.
http://www.zonatool.net/35-550.html
http://www.zonatool.net/37-240.html
There is a package that includes both a saw and miter box but it is the 24t blade. I find the 42t blade works best for our needs.
I just position a piece of wood between the wood and the miter box wall to get any angle I need. Always cut on top of another pieces of wood too.
-
Ahoy NMBrook
The higher end Dremel and Proxxon offerings are designed for some side loading. Not quite what one might need when milling a piece of 3/4" steel but enough to last years on small pieces of hardwood in a mill configuration. I am also sure there is some deflection which to date I can not measure but for the hobbyist on a budget I highly recommend this set up over a full on mill.
-
Ahoy Mates
Here is a link to upgrade the Micro-Mark Milling Machine and some others
http://littlemachineshop.com/products/product_view.php?ProductID=2560&category=
Tkay11: I don't have a tach on my Dremel but don't find much difference in the speed range when milling. I think once you go over 5K it is irrelevant. I do find the higher speeds will burn the wood faster. As for the "X" axis that was another reason I went with the Vanda Lay.
-
Ahoy Dragzz
For model shipbuilding I find a Dremel mounted in a drill press with an XY table sufficient for most milling needs
Here is a link to my set up
http://modelshipworld.com/index.php?/topic/1643-x-y-attachment-for-dremel/?p=54766
The problem I found when I did my research was that most mills require an upgrade to achieve the speeds needed to mill at the scale that we require. This was not a problem for the Dremel. This scale also does not require the power that most mills provide.
Proxxon also makes a hobby mill http://www.proxxontools.com/store/pc/viewPrd.asp?idproduct=63&idcategory=31
Blue Ensign has had very good success with this product.
These will be my next purchases
Dividing attachment
http://www.proxxontools.com/store/pc/viewPrd.asp?idproduct=66&idcategory=31
Z axis fine adjustment
http://vanda-layindustries.com/html/mill_accessories.html
The extras needed to mill can easily exceed the cost of the mill. Another item to consider. One day I may own a full sized mill but when that day comes I will take the experience learned with my set up to make that purchase. Good luck with whatever path you choose
-
Ahoy shihawk
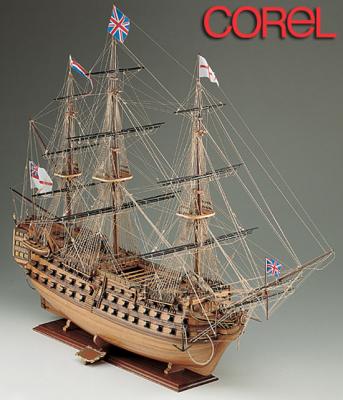
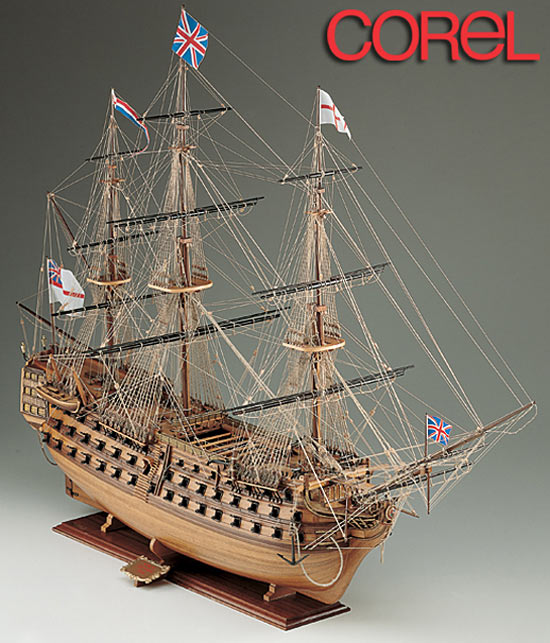
It is a tough call but I believe this image shows it can be done
-
Ahoy Michael
Very impressive work. You should be very proud. She is beautiful
-
Ahoy Chuck
I believe what you are seeing is that when modeling at smaller scales reducing contrast is key to producing a more realistic effect. Muting colors is commonly used by plastic modelers and I see no reason why it would not apply to wooden ships.
-
-
Ahoy Bill
Might I recommend one of these for your side build. They can be a quick introduction to the many the aspects of shipbuilding and make a great looking display piece.
http://www.modelexpo-online.com/product.asp?ITEMNO=MV32W
http://www.modelexpo-online.com/product.asp?ITEMNO=SM24W
Looking forward to the grand opening of the C.W. Hime Shipyard
-
Ahoy Mates
I have found this link very helpful.
The technic they show for simulating wood is simple and effective
-
-
Ahoy Andy
I like Augie's idea
And second his comments on your build. It is really starting to look great.
The only thing I would add would be to take some measurements before you get to the hull. This way if you needed to you could take 1/64th or even a 1/128th off a few planks so as not to have to resort to a sawdust filler. Cut little strips of paper to fit between the planks and the hull and measure those. Lie them across the beams, you can even mark the beams for each plank.
-
Ahoy Buck
"my condolences on your family's loss" I am truly sorry to hear this news.
As for the building.
Might I suggest you get some reading material for your Wasa build. It is a very research heavy build you know. Perhaps you could start carving the figures. This should prove to be a great distraction until you can get your family settled and start on this next chapter and your next build

God bless and God speed
-
Ahoy Divarty
Looking good. Nice solution for the eyebolts. After this one you will be ready for a ship in a bottle
Mind the inspector. For whatever reason some of them like to chew on the wood.
Bismarck by Kevin - FINISHED - Trumpeter - 1/200 - PLASTIC
in - Kit build logs for subjects built from 1901 - Present Day
Posted
Ahoy Kevin
Can I ask what you have to bend your PE. I have the Mission Models Etch Mate 3C and I would not recommend it. If you don't have one get one made of metal, not plastic like mine. I highly recommend the Tamiya PE File however. I also noticed that you may not be scuffing your PE. This is very important if you plan on painting it. Do it before you remove the PE from the sheet.
Looking forward to your progress