


JPett
-
Posts
881 -
Joined
-
Last visited
Content Type
Profiles
Forums
Gallery
Events
Posts posted by JPett
-
-
Ahoy Mates

Here is a link to my current set up if you did not see it already
http://modelshipworld.com/index.php/topic/1643-x-y-attachment-for-dremel/?p=54766
I will do a review of the Z axis once i get it and put a few hours on it
Until them "happy milling"
-
Ahoy Mates
Just a follow up
I just ordered the "Z" axis for my Vanda Lay Drill Press Plus.
http://vanda-layindustries.com/html/mill_accessories.html
I find myself doing a lot more milling then drilling on my build
After using this product I can highly recommend it for the closet hobbyist as a small mill/drill
Larry at Vanda Lay Industries is a great guy to deal with. He has informed me that all new Drill Press Plus units now ship with my suggestion and should be as smooth as mine. He is shipping me out parts so I can upgrade mine to factory spec. No charge of course

-
Ahoy Spiderpig
The Rotary power tool opens a whole new world for the model shipbuilder
http://modelshipworld.com/index.php/topic/1643-x-y-attachment-for-dremel/?p=54766
-
Ahoy JerseyCity Frankie
As someone who has painted many plastic models using an airbrush I would recommend getting a few cheap kits and practicing "alot"
Just like these wooden ships there is a lot to learn and for newbies the curve can be pretty steep. Mistakes are costly too.
Here is the link I use to compare prices. I always try to shop local and use this to check sale prices.
http://www.chicagoairbrushsupply.com/
The Neo is in my opinion the best "CHEAP' brush out there, It is also the cheapest model I would recommend. Hobby Lobby carries them and the coupon makes them reasonable. Also check Craig s list for used. Tons of great deals. I now own a silent Badger Million Air which is the Mercedes of compressors for the hobbyist. I paid a buck and a quarter for it ($125.)
PS: Paints are a matter of preference and you should buy one each from the top vendors and find yours. Compressors are a whole another thing. You really want one with a tank if possible. Also: Develop a routine to clean your brush. This can make or break you.
And
If you do fall back on the cans, the Tamiya primer is one of the best. Some even decant it for their airbrushes
-
-
-
Ahoy Mates
Well I guess i better eat my crow before it gets cold
Augie: Sir, Rear Admiral "Sir", please except my most humble apology.
What was I thinking, Sjors, himself another Rear Admiral make a wise crack in someones log, I am ashamed. I don't know what came over me to think someone of his good standing in the community would stoop to that. I am truly sorry and please except my apology. I really did think he was jerking my chain. From this point on I will always believe everything Sjors says.
Disclaimer: No Moose, fish or RC airplanes were misrepresented, used or in anyway injured during the making of this apology. And it did not snow.
Well that's done
Dragzz; thx again, I am really looking forward to planking
Neptune: Thank you. Any information you might have on this kit would be much appreciated. It has taken me a while to get used to Corel's instructions. It seems to be based mostly on the pictures and not on the text. Considering the kit is shipped globally I find this interesting.
Sjors: I think I am starting to see too

Michael: Thanks for dropping by. I would not be here if it weren't for you
Back to the build

Well we looked at the plans, looked at the rear fillers, looked at some more plans, repeated this a few more times and then built this. I found it in Lawrence's log (Canoe21) and can see how it will have many uses for this build.
I think I will be doing the fillers very slowly and one stage at a time. I will try to post my progress and steps to aide others. The waters a little deep on this one for me. Please do not hold your breath.

- Salty Sea Dog, Harvey, mtaylor and 4 others
-
 7
7
-
Hi Mark
I will second Nigel's response. While is is a very good read for the newbie it does not answer many of the questions you had and will have as you get into planking
There are some excellent and very knowledgeable responses here. As a newbie or someone who has just finished planking his first hull I remember asking myself many of these same questions. My response may or may not help.
The belts not only break up the job in more manageable chunks but prevent your planking from wondering. A small error in the first plank might start a wave or other undesirable effect in all your planks. It can actually compound and grow with each plank. Better that you do groups and stop this. Not one after the other but one "to" the other. These restarts will keep your planking in check. The small corrections needed within a belt will be lost in the overall job. Yes that last plank that you will need to fit between the two belts will be one of the hardest.
The belts also force you to taper your planks correctly. On some ships you will need to combine two planks into one (drop plank) or add a filler. The belts will help you see this early on. There is a rule for how much you should taper a plank and its not to a point so you can shoe horn it in. There is another for the width.
This is what I used
Well after I tried it my way and failed. I did substitute battens for the string chuck uses but the whole fan thing and marking off the width of each plank in each belt on every bulkhead is the only reason I was able to finish my hull and why I was happy with the result.
Here is a link to my instructions and the belts.
http://www.modelexpo-online.com/images/docs/MS2028/MS2028_Rattlesnake-Instructions-Complete.pdf
Figure 6 page 10. There is a ton of info on planking too. Its a good "FREE" read for anyone new.
PS: Spiling or cutting planks from a sheet is not that hard to do. You will know if you need to do it when you find yourself bending planks in both directions.
-
Ahoy Mates
Thanks for the likes and comments.
Mark: Thanks for stopping by, It is a great past time.There was a little too much going on for me at that time. It should always be fun.
Kenneth: "lol" I really had a good laugh in your comment.
Dragzz: Thanks for the help. Your log leads the way . Keep up the great work.
Augie: I am a bit amused by your comment. Please do't tell me you are drinking the Kool Aide Sjors is serving.
Back to the build:
Well there was a mishap in the shipyard which has my first love at anchor. She will be OK but I need to let her dry for a few days. This will also let me formulate my correction.. It seems isopropyl alcohol is not a good choice to remove a misguided dab of paint on a surface coated with WOP over another painted surface, OOPS. Nothing is damaged that some time will not correct but she needs to sit until the chemical reaction stops. The good news is I actually liked one outcome of this so much i might make some additional changes to the finish. Truth be told though, I was looking forward to posting elsewhere today.
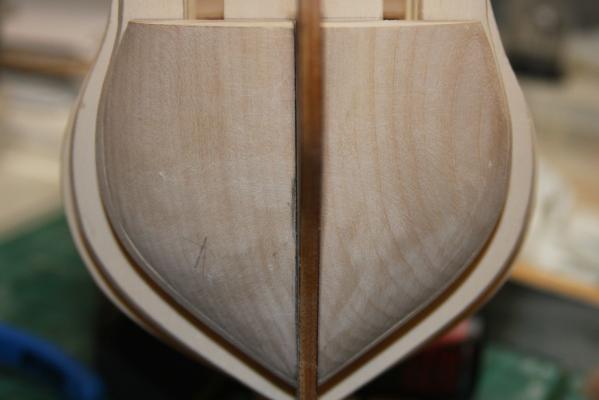
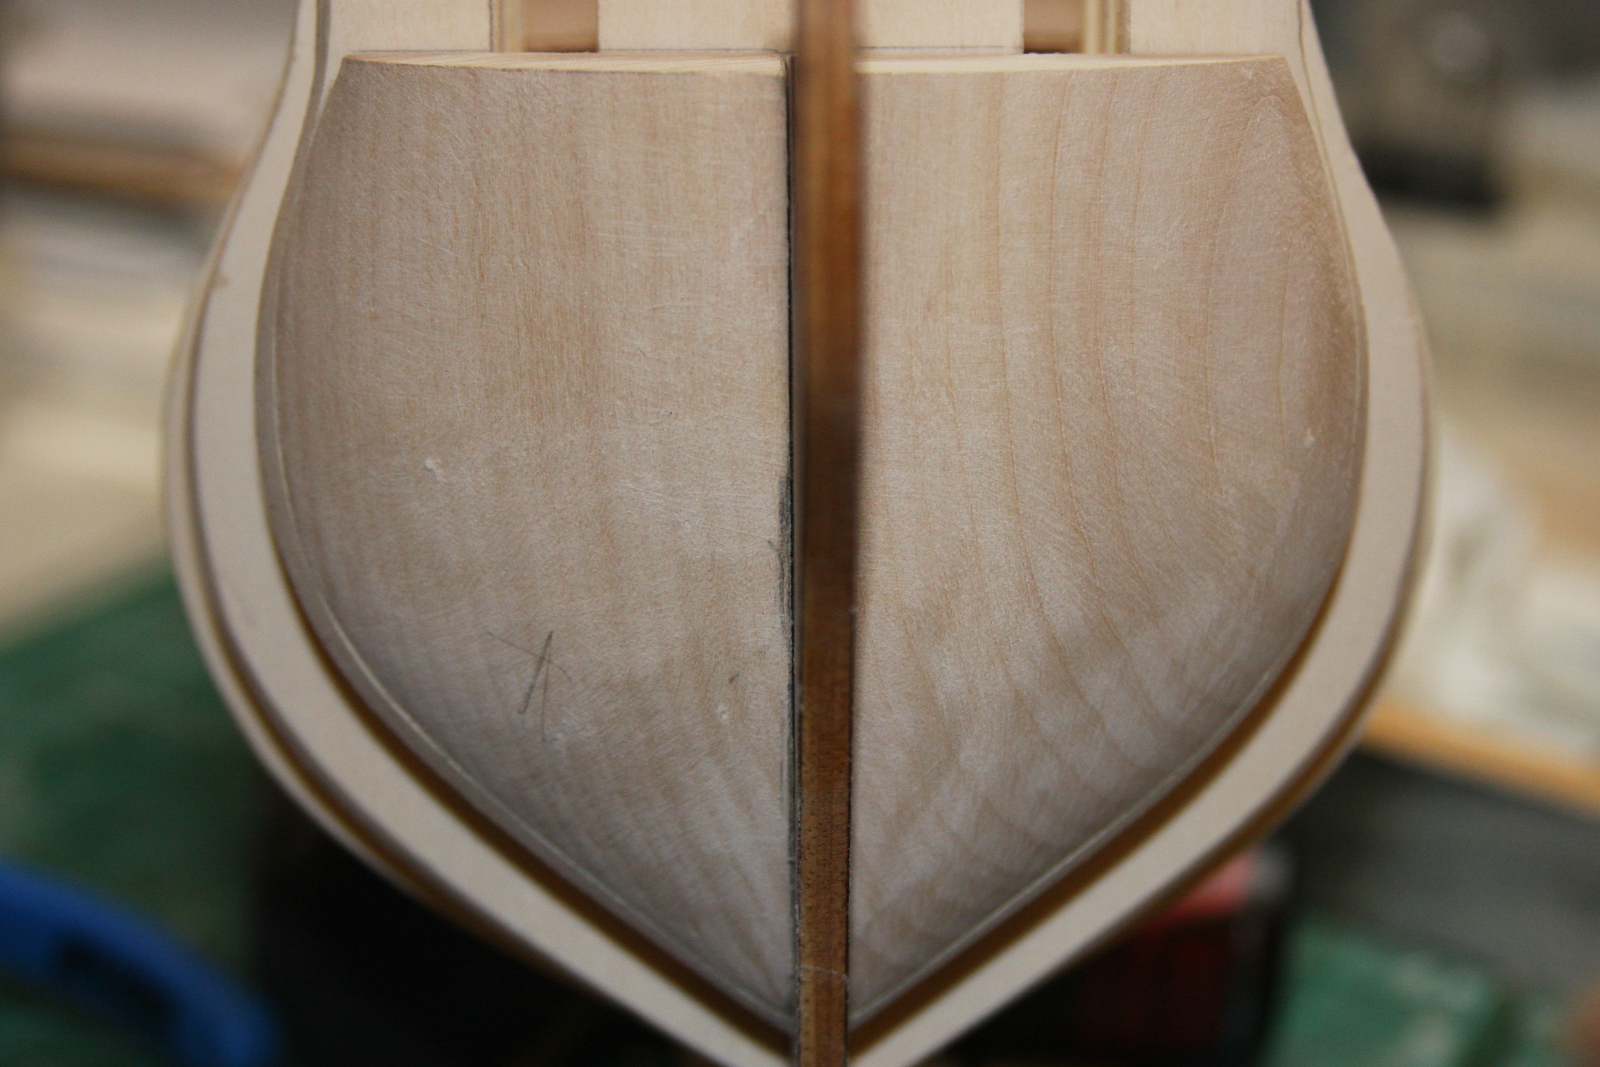
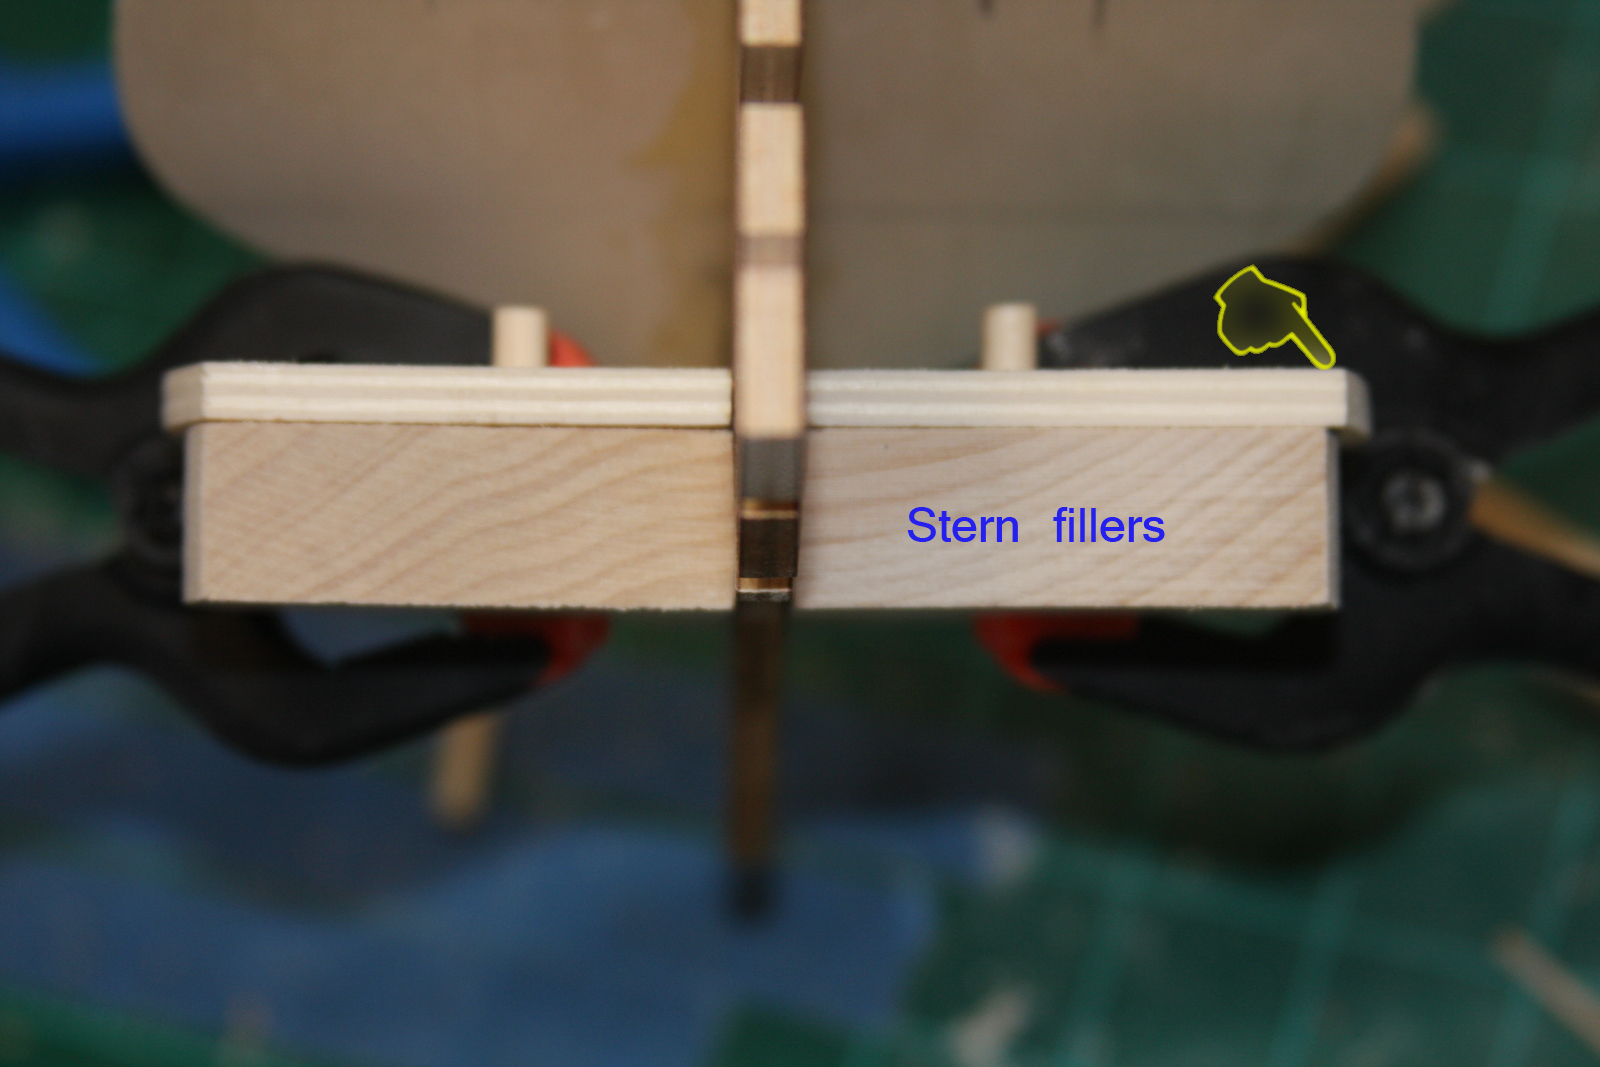
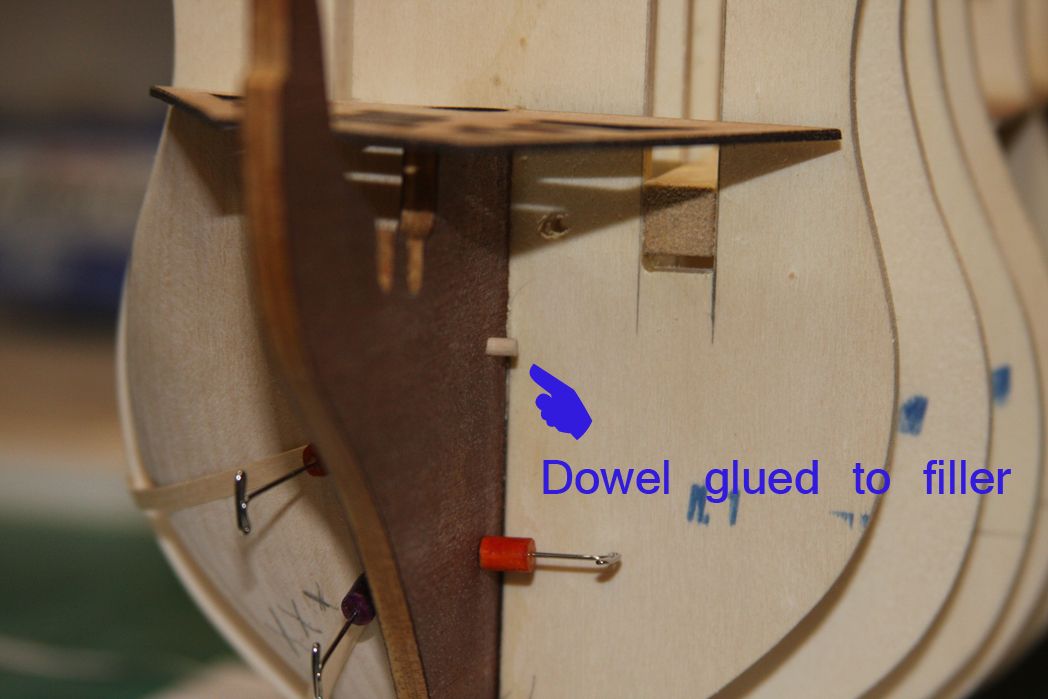
But such is the life of a model shipbuilder with two kits . The bow fillers are as done as I think they should be before permanently gluing them on the hull and the final hull fairing. Making them removable worked very well for me. I did have to upgrade the dowel. The toothpick could not handle the two of them. I will give myself a few days to mull this over, and of course look at them a few hundred times to confirm this. For now I am working on the stern fillers. They have also been mounted with a dowel and are now removable. I see another night sleeping with the plans as I try to confirm how to shape them which currently has me baffled.
After mounting them I immediately saw a problem, Or I think I do: I am not sure, but there is a 1/16" difference in the top of bulkhead 13 (figures). I am not sure whether I want to just sand it away or put some 1/16" strip wood on the other side and then sand a 1/32 off each side. I confirmed it is the bulkhead. My concern is how much is going on back here and my complete ignorance of "how much is going on back there" . She's got a hell of a booty. My guess is this happened when i fitted the bulkhead. Even if it was Corel I should have caught this when I fitted that bulkhead. My Bow fillers were asymmetrical out of the box, and I did catch and correct that. I'm learning
 .
. My question is; I do no know if this small amount will really make any difference after two layers of planking. There is wood soaking as I type this "lol" and because how much is tied to this measurement I do not know. A mock up here is no small project.
What do you guys think as more experienced kit builders.
1) Your overreacting, After its sanded you won't ever see it
2) No, OMG fix it before the world ends, Cats are playing with dogs, it could possibly lead to world peace and solve global warming
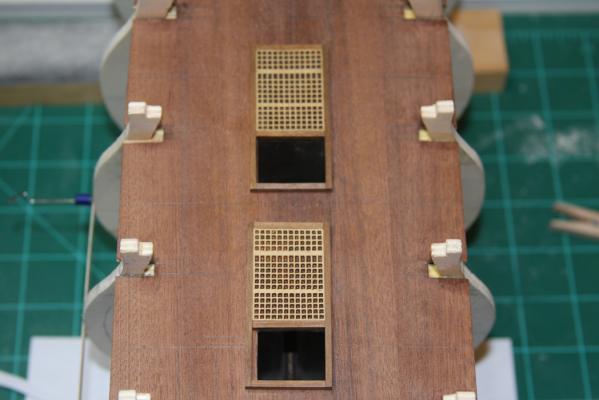
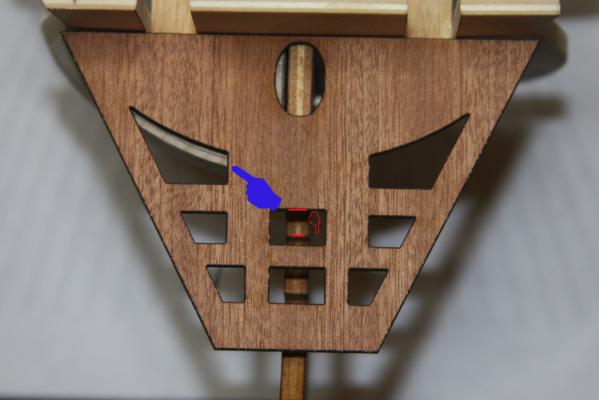
PS: I touched up the grates. Its amazing what you see in your pics.

-
Ahoy Nick
Beautiful work
I really like your approach to this kit
I have the Corel Vic as a back burner project and am currently trying to formulate a plan to plank this beast. The instruction have you completing both layers of planking and then go back and cut out the ports. I don't think my skills are up to that.
I saw you used a plank on the first layer as the line for the sills. Was this in the instructions or just your genius. Also on your second layer are you tinting that wood or is that just the natural color.
Many thanks for posting.
-
Ahoy Dragzz
Looks like your off to a good start
I am following this log and although it is a different ship it is a Corel kit and I am finding much insight here
http://modelshipworld.com/index.php/topic/6357-le-mirage-by-fnick-corel-wood-175/?p=184737
He has just completed his second planking doing the ports just as you are planning to
-
-
-
Ahoy Dragzz
Your ports look great, I see that; that it is the way the Caldercraft Vic is done. Although they have that nice cheater sheet with the ports already cut out. It might just be the best way to do this kit.. Corel's take on this is a little unnerving.
Thankfully I have your log to follow. Thanks for posting
-
AHoy Dragzz
I think that looks much better. They really seem to have a nice flow. The million dollar question is "Do they all line up with your #31's" Sorry I couldn't resist
I just realized you are working on the first layer of planking too. Will you be cutting these out now or are you just marking them for later.
-
Ahoy Kenneth
Wow
Very impressive work, I am blown away.
-
Ahoy Mates
Lawrence: I believe it is a cheap knock off of an X-Acto #18 Chiseling blade that comes in the assortment pack. I do have X-Acto #17 Lightweight Chiseling Blade which is just a little thinner. The key is control. I find I have much more cutting straight down into the wood as compared to from the side as you would using "that kind what the doctors are using" .
Augie:It is always a pleasure to have a Rear Admiral aboard. Seeing how nice your deck came out had nothing to do with me ripping mine off. Really absolutely nothing
Dragzz: I really like the Vic. I am not sure if it is because I have slightly more knowledge then I had when I started the Ratt or if its the challenge.
Sjors: If that's balsa, my kit sat on the shelf for a very long time. The wood fossilized
Thx for the likes and replies
Back to the build
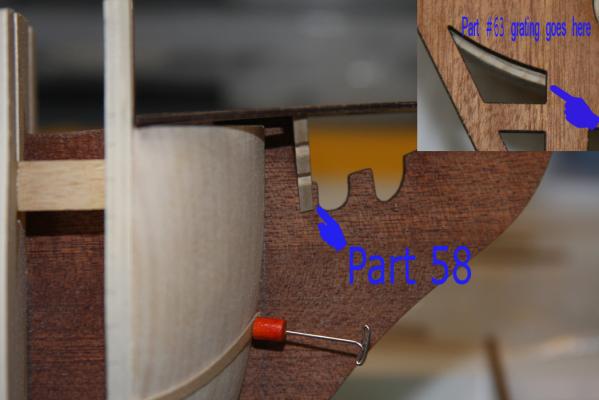
Well I figured out the problem with the bow fillers and how far forward they go and P#25 sits. I sat in bed last night, re-reading the "little book" and going over the plans. Today I spread them all over the house and pulled some parts to do mock ups so i could to figure this out and finish my fillers. I really am a visual learner. I forgot to mention that I peel away a few layers of the cardboard before I sand the mystery parts out too. See my last post
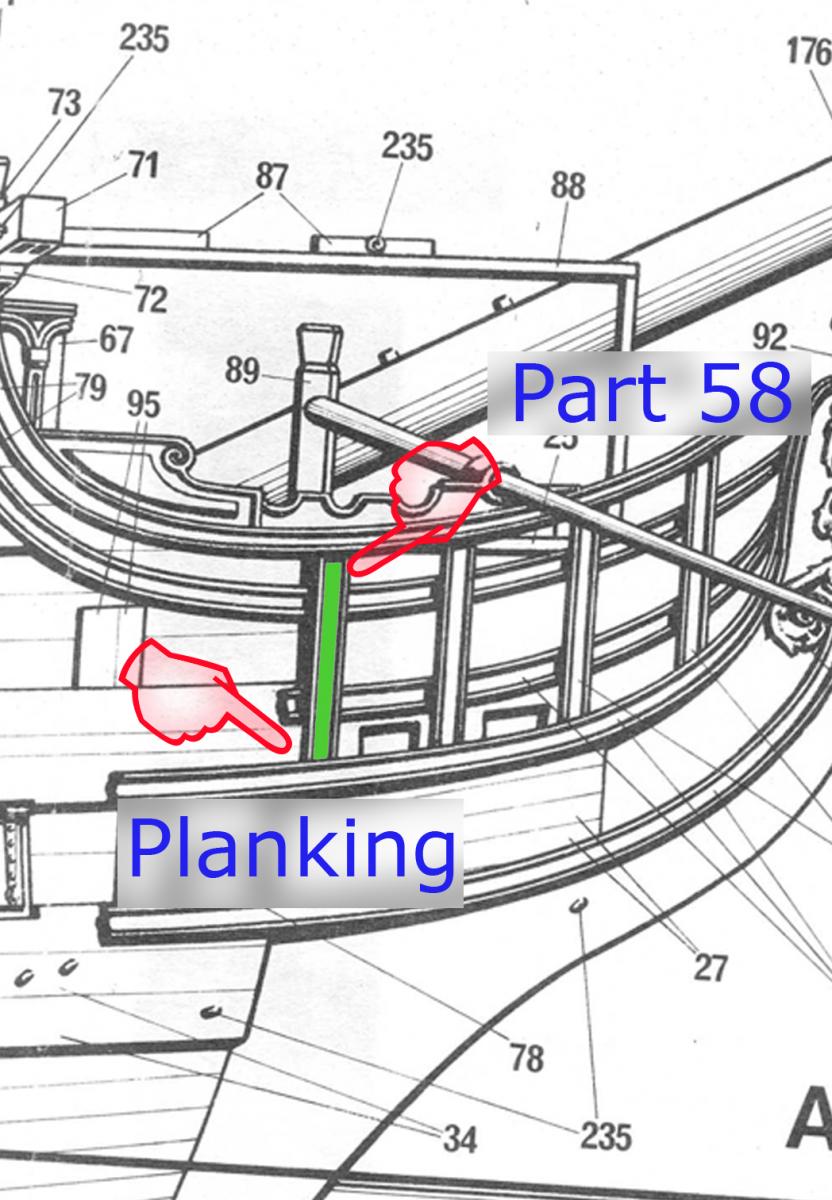
It seems that the planking does extend into the grating and P#25 does butt up to B1 The planking actually butts right up against the support (P#58) too and completely covers the bottom of first grating P#63. This is where I was confused. I actually thought the grating would be unobstructed. The cryptic little book wins again. It was right there on Sheet 2 image A just like it said "lol"

-
Ahoy Jon
Yea I think its safe to say "your hooked"
It really looks much better, Congratz
Sometimes it pays to put the shipyard in reverse. -
Ahoy Mates
Well it has been a while since my last update but we are back in the shipyard making sawdust on all three fronts. As I have some unresolved issues there may be some long pauses in my future posts. No worries as it is all good. I have decided to post here first.
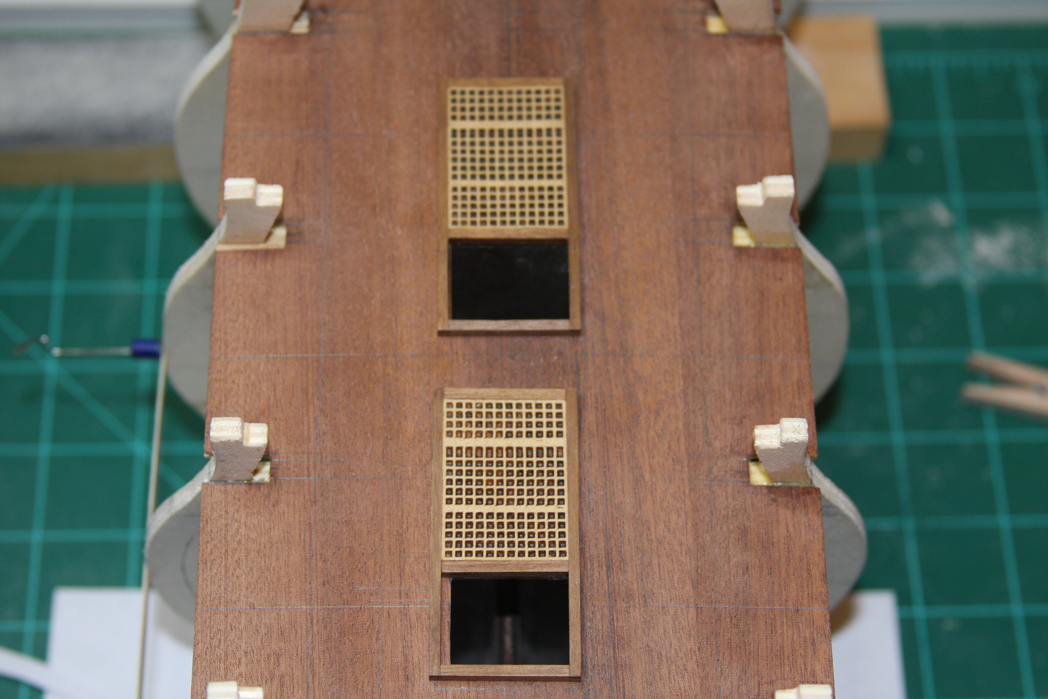
I started to plank the deck as per the manual and then decided it might not be such a good idea. I didn't like how it was coming along either. I also made the Grating/Coamings using the supplied "mystery wood". It was very easy to work with and I may or may not use these. The kit comes with both the wood to make the grating and the pressed "mystery wood" grating. The mystery wood is easy to remove by just sanding the bottom of the sheet until it is paper thin and then cutting free the part. Same as resin parts. Cutting"big" around the part first, simplifies this.
I put the project in reverse because after beginning to plank the deck (P#20) as per the instructions. which would then have me install the upper deck supports (p#28) and then the upper deck (P#18) they very calmly let you know that the gunwale section of a bulkhead will need to be removed under the upper deck (P#18) to facilitate a cannon. I have decided for me it might be easier to do the first layer of planking from the wales to the upper deck, without the upper deck installed as I have seen on other builds by other manufacturers; then address B7. I may even plank the entire ship before I deal with this. Not sure yet. I would be interested in any opinions or previous solutions to this, Thank you
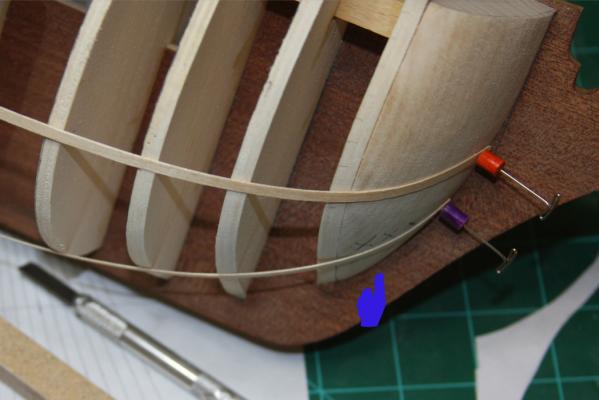
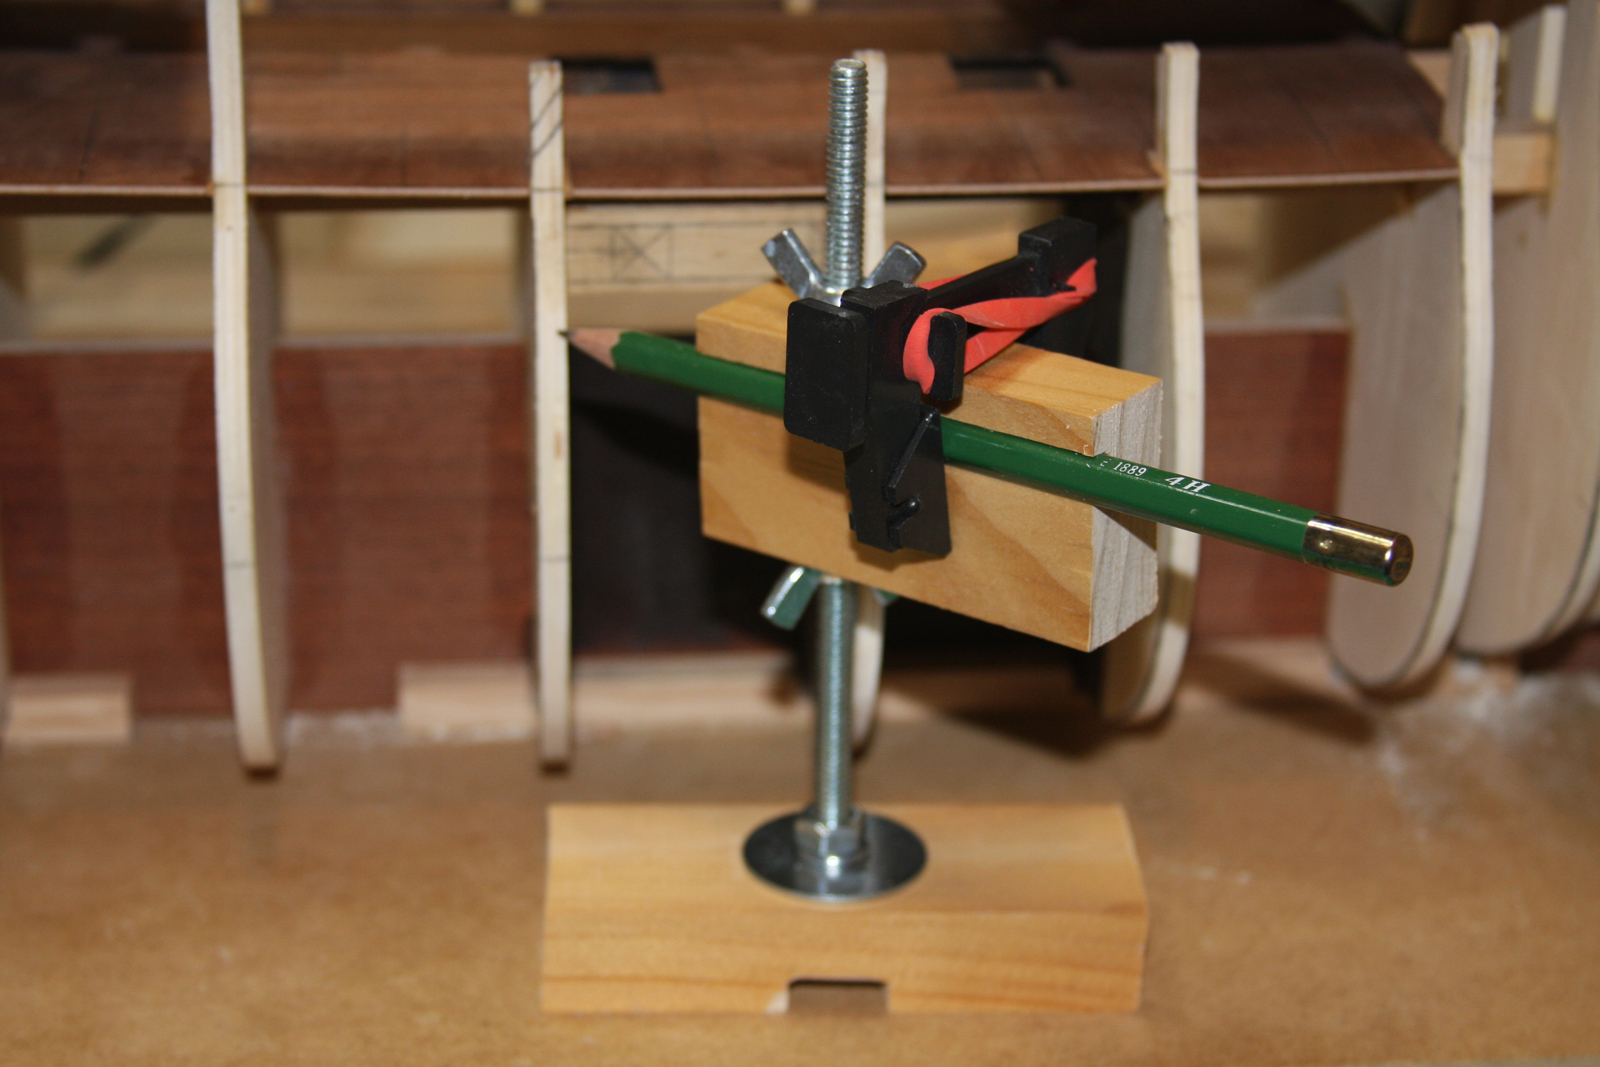
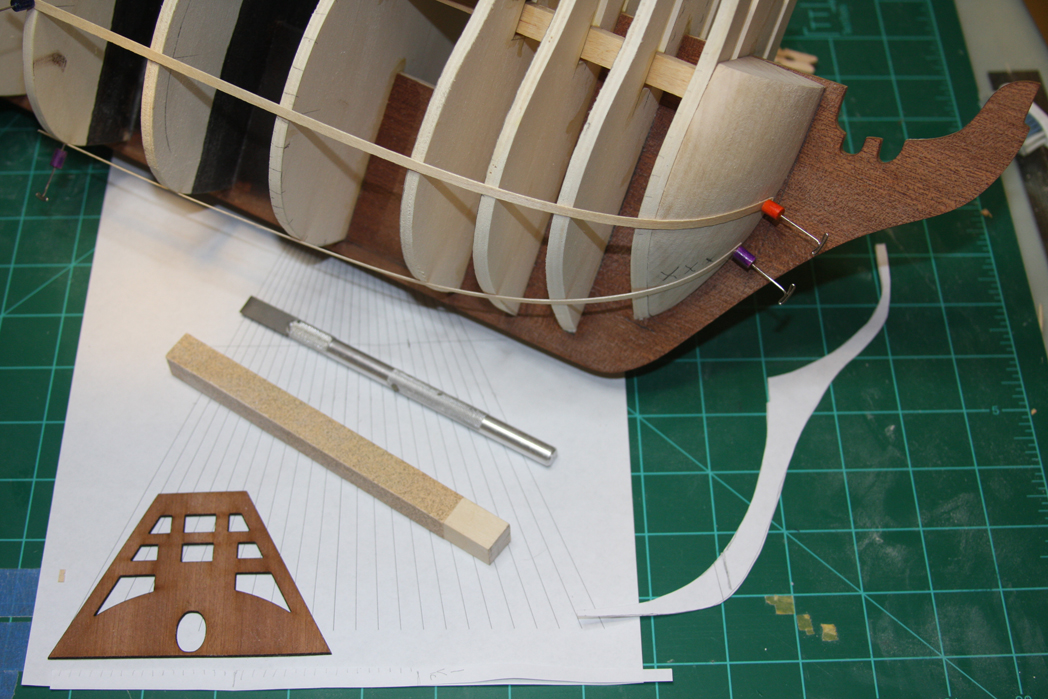
With this in mind I started on the bow fillers. Corel supplies excellent wood for this kit and the fillers are no exception. Compared to the basswood used on my last outing these are more like carving stone with my meager hand tools. I also installed a dowel in the filler so that it could be securely mounted to the hull for tuning and then removed for more aggressive wood removal. Speaking of aggressive wood removal I have highlighted the corners of the bulkheads to help me with my heavy handed approach to sanding. Me over-sanding ??? I know "say it isn't so".I see now I might have to sand through my line in a few areas on the bulkheads but only just a tiny bit to get the battens to lie flat. Were learning
I used Chucks planking fan to mark off belts so that I could properly position battens to check my work on the fillers. I just used a fictional plank width to start with to get a plank count. Then I only marked every forth plank on B5, measured B1 and transferred my plank count there for the fan. I use a pencil to mark high areas that cause the battens to rise and then sand away until I erase the marks. Slow but sure. In hindsight I would have probably been best to get an actual plank width as I will only be repeating this "for real" when I start to plank. Live and learn.
For the basic outline of these fillers I made paper templates taken from Sheet 2 images A and B. I also used P#25 beak-head platform as called for "cryptically" in the instructions. I have an issue with this part and its final home. I can find nothing showing anything that would push this part forward to a position that aligns the grating with the cut outs on the stem as shown on the plans. This position makes sense as it would align it so that the finished second layer of planking is either directly under the curve or just ahead of it. The pic shows the bow filler ahead of the curve with P#25 contacting B1 which must be wrong. The curve is correct but the part needs to go forward. For now it is just another mystery.
One more thing. In the second pic there is a hobby knife with a flat blade. It only took me about 500 hours to find that this tool is so much better then the standard blade for accurately cutting the strip wood commonly used for ship modeling. it has become an indispensable tool for me.


-
Ahoy Frank
Plastic modelers are also another great resource and they have a ton of online tutorials. The Warhammer crowd is one of the best for small detail and creating color depth and highlights.
You would need to treat your wood with something like the WOP I mentioned to apply these but truth be told the best way to learn to paint is to "just do it". Get some supplies and some scrap wood and have a party. It is actually more important that you start with the right paints which can actually be one of the hardest parts if your new. Once you start you will be able to ask questions that pertain to the problem that you are seeing and the community will be able to respond.
-
Ahoy Dragzz
The plans are a 2 dimensional representation of a 3D object. The square ports show this as a slight distortion when they approach the bow, although the part is actually the exact same one used for all ports they all do not look exactly the same on the plans. This means the measurements from the plans must be applied in the same way as they are taken from them. Along a straight line running parallel to the hull, not to the hull itself. I hope that wasn't too confusing
-
Ahoy Dragzz
Humanity reared its ugly head, hows that "lol"
All is good ATM and I am back in the shipyard, Sawdust is such a happy thing to have around. Should have posts in both logs shortly
As for the gun-ports I will gladly let you bask in that glory.
My plan for now is to plank the hull then attach another piece of planking to the hull. Maybe pinning it where I am certain there will be a port. On this "batten" I will have the port locations which I will transfer to the hull. Then drill a small hole for a jig that will be used to mark the ports. I like using jigs for consistency. I am doing the gun-ports on my Ratt and constantly trying to apply what I am learning there. Either way the one thing I learned from my Ratt is that the ports need to follow a line. Although stills are level and and the ports follow the deck they as a group still flow. My gunport jig might also be slightly smaller then needed so there will be room to fudge. I have to see how much fudging can be done with that cast port "thingy" included with the kit.
This could all change after I see what you do
I am on ' Take 6" with the Ratt ports but am very happy with where I am. A little tired of ports however. Not as tired as you will shortly be
As for your question regarding removing the parts from those sheets: "That pressed stuff". I did some experimenting with the grating for the main deck. You can make them with real wood or the pressed wood. The kit comes with both.
I cut "big" around the part and then placed the part on a flat surface with some sand paper, Then sanded the bottom until the excess got really thin. Once it got paper thin I cut it off with my razor knife. It is the same way I remove vacuumed formed plastic parts. For me it worked just fine. I will PM you picks of my 'test grates" if you would like, They came out really well, so well I might just use them. Or I will post them in my log, "either way".
-
-
Ahoy Frank
My bad
I have updated my post
They are Winsor & Newton Artisan Water Mixable Oil Colors
Very sorry about that.


Airbrush recommendation for newbie sprayer.
in Painting, finishing and weathering products and techniques
Posted
Ahoy Mates
Passche makes a moisture trap that connects "inline" for 12 bucks. Hobby lobby sells the Iwata for 30 and with the coupon its 18.
http://www.chicagoairbrushsupply.com/paindrmotr.html
http://www.chicagoairbrushsupply.com/paindrmotr.html
My first "hobby compressor" did not come with one, the Million Air did, but regardless,. It is a must have for the hobbyist as a small discharge from the compressor equals a big mess on your kit or a work stoppage because the brush is spitting. A good airbrush cleaning kit would be second on that list as the flow of paint from an airbrush is too easily fouled. This is especially true if you plan to paint with acrylics.