
Marcus.K.
-
Posts
231 -
Joined
-
Last visited
Reputation Activity
-

 Marcus.K. reacted to Harvey Golden in Flag with ship name reversed on one side?
Originally published 1857. Higher-res image here: https://www.eldreds.com/auction-lot/print-private-signals-of-the-whaling-vessels-c._EFE4B748D8 My wife's family's flag is on it-- one of the Howlands.
-
 Marcus.K. reacted to Bob Cleek in Flag with ship name reversed on one side?
It's just a short drive from Mystic Seaport in the town of New Bedford a couple of blocks from the waterfront. It's not in a real "touristy" area, or wasn't when I was last there years ago. New Bedford is, or was, still a working waterfront back then. If whaling is your thing and you're in the area, take the ferry from Hyannis to Nantucket and check out the whaling museum there. It's a very good one as well.
-
 Marcus.K. got a reaction from mtaylor in Flag with ship name reversed on one side?
Question is raised via e-mail... I´ll let you know whenever I get an answer!
I marked the most important statement 😀 - and whenever I will be in New England: this for sure is one of the oh-so-many places I will visit!
-
 Marcus.K. got a reaction from Scottish Guy in Flag with ship name reversed on one side?
Question is raised via e-mail... I´ll let you know whenever I get an answer!
I marked the most important statement 😀 - and whenever I will be in New England: this for sure is one of the oh-so-many places I will visit!
-
Marcus.K. reacted to VitusBering in Cutty Sark by VitusBering - Revell - 1:96 - PLASTIC - Redux
The standing rigging is as done as it can get for now.
The ship is balanced on the stands, they're not glued to the hull nor are standoffs permanently attached, this is just a test to see if I like the color.
Yard sling chains are installed, will be trimmed to length when the yards are attached.
Now I'll start work on the yards. They need lots of stuff like jackstays, Flemish horses, footropes, a variety of blocks and pulleys, etc.
-
Marcus.K. got a reaction from mtaylor in Flag with ship name reversed on one side?
Thanks Bob, for that very intersting insights.
Any idea about the year that New Bedford Flags Signal Flag "Poster" was done?
-
 Marcus.K. got a reaction from thibaultron in Flag with ship name reversed on one side?
Thanks Bob, for that very intersting insights.
Any idea about the year that New Bedford Flags Signal Flag "Poster" was done?
-
Marcus.K. reacted to James H in 5 Cylinder Radial Engine (TECHING) - EngineDIY
Here is the main event! The model is actually quite large and weighty, and we haven't finished yet. The ejector rods and sleeves are now to be fitted. This is done one cylinder at a time, and needs to the rocker arms to be lifted to allow the ejector rods to sit.
The base is now fitted, and a spacer mounted between the base and engine. Once fitted, the battery charger port, switch and motor cables are threaded into the base. The cables are then plugged into a control board, along with a battery pack. The circuit is then screwed into the base and a cover fitted to hide it all. The kit also includes a USB charging cable too (not shown).
COMPLETE!
And here is a video I made of my review build.
The instruction manual is clearly illustrated and the average builder should find zero difficulty in following each stage.
Conclusion
I didn't know what to expect before seeing this kit in the flesh, and I was very pleasantly surprised. I'd had a hankering for building something like this for a while, but I suspect the mixed reviews I'd seen were from cheap copies. This kit very much surpasses my expectations in presentation, quality, and also the final result. This model took me about 5hrs to complete, but that's also because I was setting up photos of each stage. I think it's fair to say that the manufacturer expectation of about 3hrs is reasonably accurate. The instructions are very easy to follow and should present no problems, even to a beginner who has no sort of modelling or engineering experience. All parts fit perfectly together with no issue. The only things I would criticise are the hex keys which are a little soft and round off easily, making tightening the screws hard. Also, there is no lube in this kit any longer, so you will need to source your own. In all, a fantastic kit.
My sincere thanks to EngineDIY for sending out this kit for review on Model Ship World. Whilst not marine-related, I'm more than sure you'd really enjoy this one. To buy direct, click the link in the header of this topic.
-
 Marcus.K. reacted to James H in 5 Cylinder Radial Engine (TECHING) - EngineDIY
If you see any black flecks as are visible here, these are just some debris from the foam trays. Parts with this are just blown clear before assembly. Here are the cam and gear which are simply fastened with four small screws.
The cam drive gears are now selected and assembled as shown. You'll notice the mounting pins are machined to accept the gears. The gears must also be fitted in the orientation shown in the manual.
Yes, you see that correctly....a metallic red prop! Whilst I understand that it's better to include a machined metal prop as there won't be any balance issues, I might well have selected a different colour to anodise it. Still, this is a display model and it does looks strangely attractive when fitted. Here you see the prop and the front crankcase with the bearing, collar and prop hub parts.
Now it's onto the rocker arm assemblies. It's here you'll find the only plastic parts of the engine, seen here in black. The quality is still excellent and these parts aren't at all fragile.
We turn our attention to the five cylinder head assemblies. Lots of screws to use here and you can see the exhaust ports and valves here. The valves do actually work too.
The rocker arms are now fitted to the top of the valve assemblies, and little reproduction spark plugs added. You could choose to paint the insulators in white, but I opted to leave in natural metal.
The cylinder blocks themselves are now fitted to the completed cylinder heads.
-
Marcus.K. got a reaction from Scottish Guy in Flag with ship name reversed on one side?
Thanks Bob, for that very intersting insights.
Any idea about the year that New Bedford Flags Signal Flag "Poster" was done?
-
Marcus.K. reacted to Bob Cleek in Flag with ship name reversed on one side?
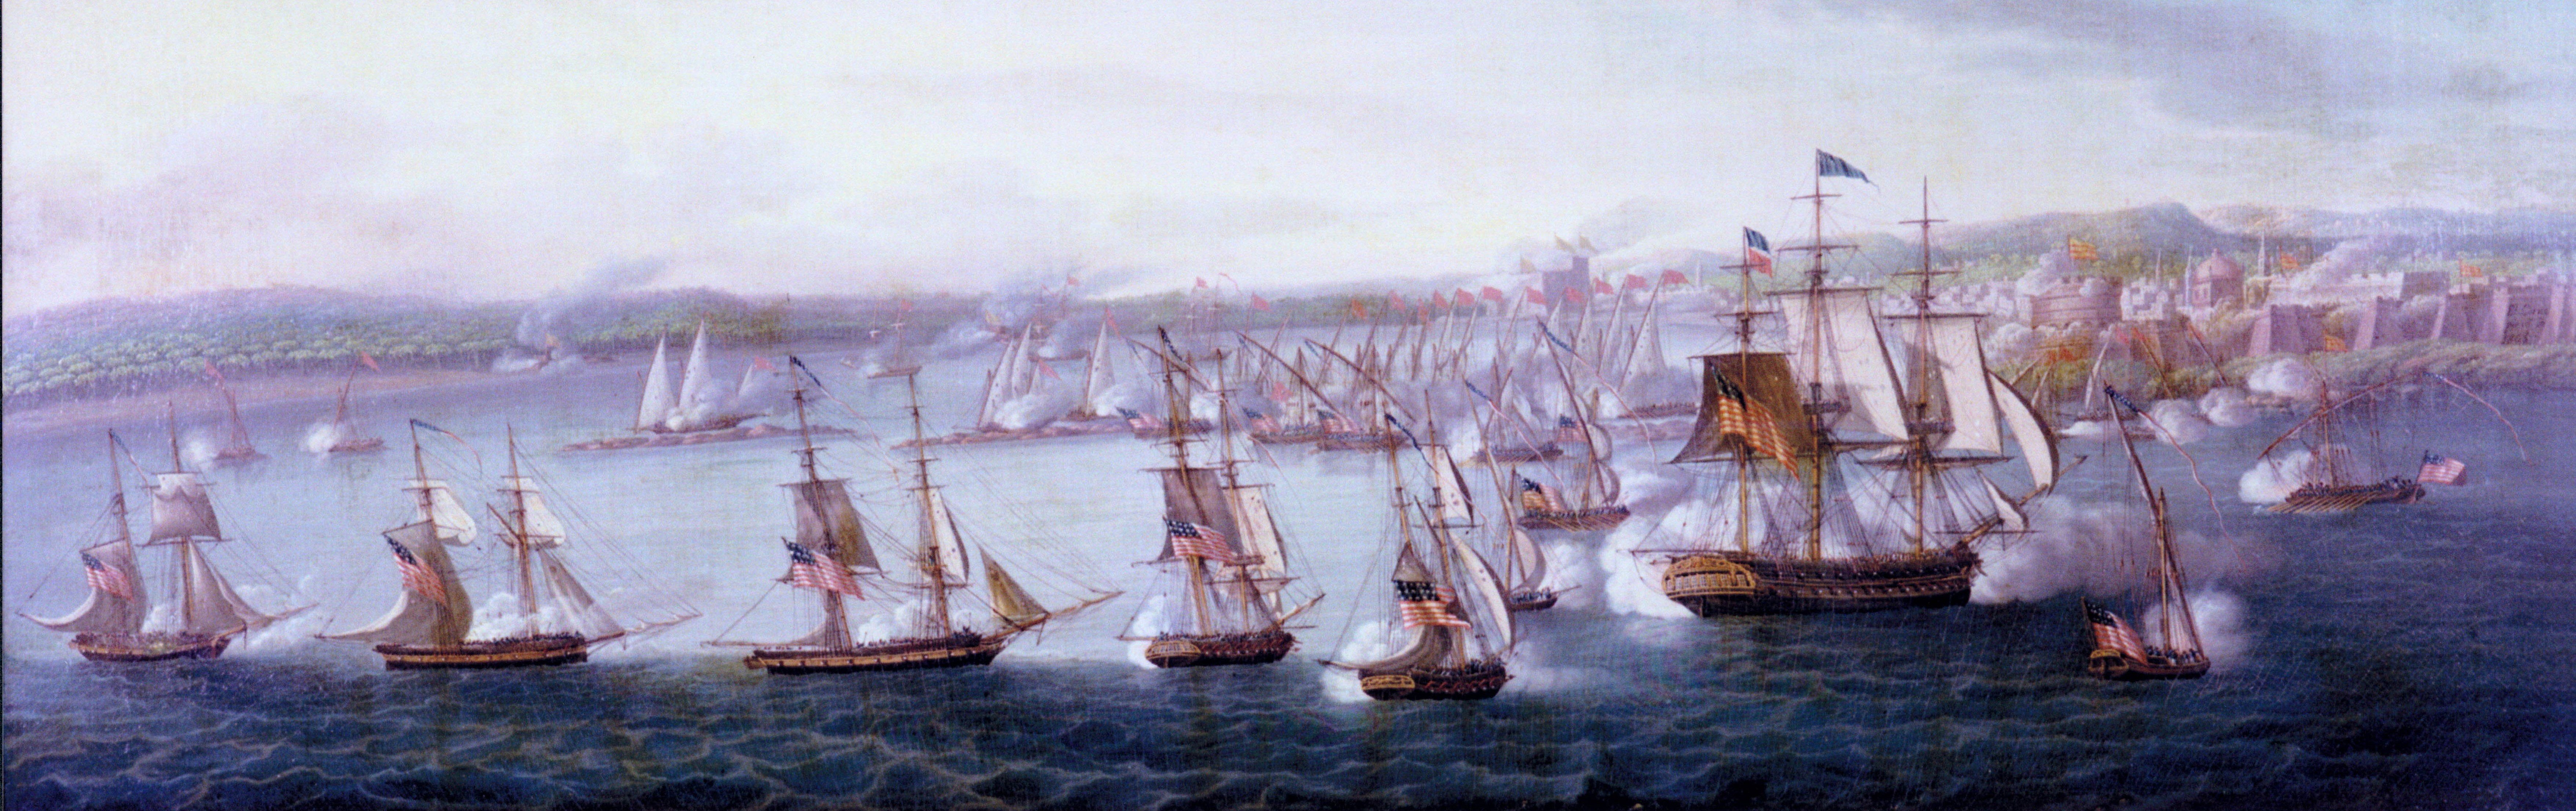
Pennants used to identify individual vessels, be they naval, merchant, or pleasure craft, were commonly carried prior to the wider use of code signals (flags) to indicate the code (usually "five level" - five letters and or numbers) assigned to the vessel by navies, marine insurance companies, and national documentation agencies.
Pennants were rarely opaque with lettering on both sides. Actually, in practice, it was much easier at a distance to identify a signal that wasn't opaque because the sun would shine both on it or behind and through it. If a pennant or signal were opaque, its "shaded side" would appear black at a distance. Additionally, there are advantages to a pennant or signal being made of light cloth which will readily "fly," in light air. In fact, when a square-rigged vessel is running downwind, her signals, ensigns, and pennants on the ship moving at close to the speed of the wind itself, would cause the signals, pennants, and ensigns to "hang limp" and be difficult to see at any distance.
Even today, when racing sailboats routinely show "sail numbers" on their sails to identify themselves, the numbers must appear reversed on the "back side" and no attempt is made to overcome this. The international racing rules require that sail number and class logo, if appropriate, must be shown on both sides of the mainsail in that case each side of the sail will have the number shown "in the right direction." There are very specific universal regulations for the placement of sail numbers on racing yachts which specifically dictate how the obverse and reverse lettering must be applied to a vessel's sails. (See: TRRS | Identification on sails (racingrulesofsailing.org) Today, adhesive-backed numbers and letters are applied to synthetic fabric sails. In earlier times, the letters and numbers were cut out and appliqued to the sail.
In earlier times, several systems, other than identification code signals, were in common use and these are what we commonly see on contemporary paintings. The two primary signals used were a large flag or pennant with the vessel's name on it, or the owner's name, or company name, on it, or a logo of some sort. The latter were usually called "house flags" which designated the identity of the owner of the vessel. When steam power came on the scene, these owner's "house flags" were supplemented by painting the funnels of the steam ships with the colors and logos of the owners' house flags as well.
House flag chart from the 1930's or so:
The house flags and ship name pennants we see in the contemporary paintings serve to identify the vessel in the painting, but in order to fully appreciate the purpose of "naming pennants" and house flags, it has to be understood that until radio communications came into being (first Marconi transmission at sea by RMS Lucania in 1901 and first continuous radio communication with land during an Atlantic crossing ... RMS Lucania in 1903.) there was no way for a ship owner to know much of anything about their vessel until it returned home which, in the case of whaling vessels could be two or three years. Shipping companies, marine insurers, and maritime shipping companies, among others, had a desperate need for news about their ships, but they could only know the fate of their ships, crew, and cargo (though not necessarily in that order!) when the ship showed up. Ships at sea would hail each other when they ran into one another at sea: "What ship? What port?" and sometimes get word back to owners that their ship was seen, on the Pacific whaling grounds, for instance, months or even years earlier, but there was no way to know what was going on with a ship until she returned to her home port. Businesses ashore were desperate to know the fate of ships and shipments and being the first to learn of a particular ship's arrival in port gave a businessman a particular advantage in making investments, commodities trades, purchases, and sales. This was especially true in the United States before the construction of the transcontinental telegraph system owing to the immense size of the nation "from sea to shining sea." For example, in San Francisco, which was for a time shortly after the discovery of gold, isolated from communications with the East Coast, things as simple as newspapers would arrive only by ship and when they did, the race was on to get in line to read the "news of the world." An organization called the "Merchants' Exchange" was created to operate a semaphore telegraph system from Point Lobos at the farthest west point of the San Francisco Península to what came to be called "Telegraph Hill" to communicate the identity of ships arriving off the Golden Gate often many hours before they actually docked and to make East Coast newspapers and other information sources available to local subscribers. On the East Coast, seaport homes had their famous "widows' walks" where the ship captain's wives would look for their husband's ship in the offing to know whether he'd ever return, and they'd know by the house flag which ship was which.
Yes. That's a good description of the device used to set pennants and house flags "flying." The device is called a "pig stick" as it is a short stick similar to what a pig farmer would use to herd his pigs. A pig stick has a wire or wooden "auxiliary stick" from which the flag or pennant is flown independent of the main stick. This device, pictured below, prevents the signal or pennant from wrapping around the "pig stick" and fouling on the pole or otherwise becoming unreadable.
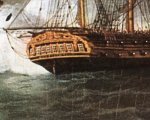
The middle two paintings of ships posted above show those two ships simultaneously flying a "name pennant" from the maintop, a "house flag" from the foremast top, and a "five level code" (likely assigned by Lloyds Insurers.) identifying the vessel in a commonly redundant fashion at that time.
-
 Marcus.K. reacted to Harvey Golden in Flag with ship name reversed on one side?
I can't tell if "Otto" is forwards or backwards.
-
 Marcus.K. got a reaction from Bill Morrison in Le Superbe by algeciras1801 - Heller - 1/150 - PLASTIC - Converted to HMS Belleisle
Oh wow, I have to follow this build. The Heller kit of Glorieux found luckily ist way via a not very motivated bit in the big bay.. So I first planned to use it as a test and learn build until I noticed the Beauty of those 74s by a El Supremo years ago. So ist still waiting for the time of real start to build models.. not just visiting others reports.
Love your one !! Looking Forward to see more.
-
Marcus.K. reacted to archjofo in La Créole 1827 by archjofo - Scale 1/48 - French corvette
Hello,
A while back, I captured some general shots of the model. It remains under a dust cover while I´m outfitting the yards. Regrettably, I don't have any recent pictures available right now.
-
Marcus.K. reacted to Jason Builder in Paddle to the Sea by Jason Builder - Solid Wood - from 1941 children's book of same name
Notes on deviation from original design:
I set out to build an accurate reconstruction of the model from the book, I think I will succeed and fail in various ways.
1. Dimensions and accuracy of shape, form and color: I believe I will be very accurate in these areas. I watched the movie clip above of the ship provided by Navyshooter, and I see three thwarts in the model used in the movie, and I fully respect that model, but I do not see three thwarts anywhere in the book, so I will stick with two. Each interpreter of a model must make their own decisions, and whoever made that model for the movie did an outstanding job in my view.
2. Materials:
a. All wooden parts in the book : pine. All wooden parts in my model: Pine.
b. Lead ballast in the book: Tin/Bismuth in my model....a deviation for safety purposes
c. "tin" rudder in the book, I will use a piece of aluminum, a deviation for long term corrosion purposes.
d. "Enamel" paints in the book, I will use same.
3. Tools: from Chapter 1 in the book , I see a hatchet and two different knives for carving the model. I used a table saw and planer to form the pine blank, and I used a bandsaw to cut out blanks for the various pieces as shown in my photos.....maybe I should have used a hand jigsaw which would have been doable. I did only use knives and chisels for carving, no dremels.
4. Construction: It is not clear from the book how the model was exactly constructed, but the impression I get from the early pages is that the boy carved it out of a single piece of pine. I made my hull from a piece of pine and am making the thwarts, packs, and man, from separate pieces which I am gluing to the model. This may be inaccurate, but! I submit the illustration from the 2nd page of chapter 26 to support my decision to make the man from a separate piece of wood with the grain vertical along the upright plane of the man. For copyright purposes I will not post the illustrations here. The illustration supports that the boy built the model with the man made from a separate piece of wood with vertical grain perpendicular to the grain of the hull. I will use wooden pegs to attach the perpendicular-grained pieces of the man and the canoe.
-
Marcus.K. reacted to Jason Builder in Paddle to the Sea by Jason Builder - Solid Wood - from 1941 children's book of same name
Goedenavond vrienden,
Tonight was a special night because I got to light a burner, melt metal, and do my best to pour it into my model! At the point I was at in carving the hull and installing the rest of the pieces permanently, I figured I better pour the metal into the ballast slot in the bottom of the hull in case it went haywire and wrecked it.
Micromark Type 280 model casting metal. tin/bismuth alloy with no lead or cadmium (I know a deviation from the lead used by the boy in the book). Melting temp 280degF. I bought two 1 7/8" pucks to melt down but only needed one.
I melted the metal down in a tiny pan, which unfortunately had no spout for pouring. It worked well for melting the metal. I have a heavy pot and ladle for melting lead but did not want to contaminate this "toy" with lead. A simple camp stove was used to melt this low temp model casting metal; it melted quicker than you'd fry bacon. The "camp stove" is not the cleanest in the world as this is the stove I use to melt and make beeswax candles, not for cooking, so there is too much wax residue in the basin of the stove which I need to clean up. Back to model making....I will need to remember this handy alloy for future projects.
But now, to back up a bit, before melting the metal, I levelled the hull in a vise in both directions.
Then, with the metal melted, I walked as quickly as I could, the 20 feet from stove to overturned hull. In that time the hot metal formed a semi-solid skin on it's surface which I had to overcome when pouring, and which caused an overflow over the cavity intended for the pouring of the metal. This is visible in the photo. After this initial spilling of the milk, the pour went perfectly and I will be able to remove the metal from the overflow spill. All told, it would be better to use a deeper melting pot with a spout for this task.
Now I will wait for this to cool and I will file and sand off the metal and all will be well. I had a fire extinguisher at my side during this step.
-
Marcus.K. reacted to Jason Builder in Paddle to the Sea by Jason Builder - Solid Wood - from 1941 children's book of same name
Hi Everyone!
Got around to some sanding, carving the packs at the bow and stern, and made/installed the thwarts. Continues to be a very fun project.
-
Marcus.K. reacted to kirill4 in Cutty Sark by Bruma - Revell - 1:96 - PLASTIC
Good day,
Dear Bruma,
I have a few pictures of Fl.Cloud model, maybe You will find some idea for configuration / positioning sails on your model... as far as I could see, on this model ,choosed the case when both tacks and sheets of main/ lower courses looks tight at the same time...?!
And position of the yards looks similar to your model yards position...on your model maybe You shown some" excessive "bellies" of lower sails?
Agree ,on the model, it looks "strange" if try to 100% tight and secure fore tack on the cathead...but when compare to Campbell drawings everything should be ok...
hm,strange... are the geometry of the kit model ,such as length of the yards,masts positions, size of the sails mutch the dimensions on the Campbells drawings of KS ?
maybe on the kit model yards shorter than it should be?
Or angle of the yards turn is not sufficient?
At least, maybe there is sence to choose compromise variant when and yards sharp turned but and sails corner positioned in such way when both tacks and sheets looks tight?
-
Marcus.K. reacted to Jason Builder in Paddle to the Sea by Jason Builder - Solid Wood - from 1941 children's book of same name
Thanks so much for the responses and for sharing your connections to the Paddle to the Sea story!!
Tonight I continued some carving.
I laid out and then carved the recess for the ballast.
I have alot of lead left from past projects wherein I would melt lead and use it in projects. Considering the known health/brain damage risks we now know from lead exposure, I will make a variation from the originally described Paddle to the Sea. I will use low temp model casting metal from Micromark, type 208. I will melt this metal and fill this cavity.
These Flexcut carving chisels are awesome!!!
I am also using my Helle knife:
Hull after rough carving:
Another amazing tool for wordworking, is the SHINTO RASP" pictured below. Amazing, efficient, tool with two different aggressiveness faces.
-
Marcus.K. reacted to NavyShooter in Paddle to the Sea by Jason Builder - Solid Wood - from 1941 children's book of same name
The movie:
-
Marcus.K. reacted to Roger Pellett in Paddle to the Sea by Jason Builder - Solid Wood - from 1941 children's book of same name
What a great project!
I too grew up reading Paddle to the Sea. I loved the book. 35 years ago I was fortunate to be given the opportunity to move from the Ohio Valley to accept a new job in the Great Lakes region and I accepted it in a heartbeat. I can just barely see a tiny sliver of Lake Superior from a window on the second story of my house. I also made sure that my children grew up with the book too.
Did you know that there is a Paddle to the Sea movie too? Here in Duluth the Army Corps of Engineers runs a nice museum dealing with Lake Superior. During the summer tourist season they show movies about the lakes in a conference room. Visiting with my two kids and my granddaughters the announcement came over the speaker that there had been a special request from a family visiting to show Paddle to the Sea. My daughter had made the request. The movie while beautifully filmed cannot reproduce the 1940's picture of the industrial lakes that Holling does with his book.
Roger
-
Marcus.K. reacted to Jason Builder in Paddle to the Sea by Jason Builder - Solid Wood - from 1941 children's book of same name
The pictures of the model clearly show a shallow recess in the interior of the canoe. Here I am carving that recess.
And here is the current rough carved status:
-
Marcus.K. reacted to Jason Builder in Paddle to the Sea by Jason Builder - Solid Wood - from 1941 children's book of same name
Hi!
Starting on the paddler himself. Also of pine.
With the blank cut out on the bandsaw, I started rough carving the figure.
-
Marcus.K. reacted to Jason Builder in Paddle to the Sea by Jason Builder - Solid Wood - from 1941 children's book of same name
Hi Everyone,
The book states the model was made from a piece of pine, so here is my raw material, scrap 2x4 from the shop:
The 2x4 is not quite thick enough, so I sawed and planed two blocks which I will glue together to make the hull blank.
Here is the hull blank glued together , and cut and planed to finished length, width , height. I made some paper templates of the plan view and profile shapes of the hull. Tracing the profile here.
Profile cut using the bandsaw:
Tracing on the plan view shape:
Here is the blank cut out on the bandsaw.....all carving from here on out:
-
Marcus.K. reacted to Jason Builder in Paddle to the Sea by Jason Builder - Solid Wood - from 1941 children's book of same name
Greetings!
And now I return to the dreams of adventure of my youth! "Paddle to the Sea" is a childrens' book, written and illustrated by Holling Clancy Holling, and published in 1941. It tells the tale of the voyage of a small carved wooden canoe and it's paddler as they follow the currents of the Great Lakes, from Nipigon country out to the Atlantic Ocean. A Native American boy carves the canoe and it's stoic captain, paints it, and places it in the snow, high in the hills over Lake Nipigon. When the snow melts, it takes "Paddle to the Sea" with it, and the book tells the story of all the people, machines, technology, animals and natural wonders that the little canoe models seas on it's epic journey through the Great Lakes to the Atlantic. I loved the book as a boy, and I still have the book. I live in Wisconsin, not far from Lake Michigan, and the book has always been special to me. As a boy I thought how cool it would be to make this canoe and paddler model......now I have decided to do it! Below is documented my best attempt at building as close to accurate a model as possible of the actual "Paddle to the Sea" canoe model from the book.
Making the drawings: There are illustrations throughout the book of Paddle to the Sea, and there are also good clues as to materials, dimensions, and finish. The book tells of the young Native American boy in Nipigon Country (North shore of Lake Superior, around Lake Nipigon), who take "many days" whittling a "piece of pine" into a "canoe one foot long". It also advises of a rudder made of tin and lead ballast. The book also advises "oil paints" were used to paint it, along the with words carved into the bottom of the hull , "Please put me back in water, I am Paddle to the Sea". Starting with the known length of 12", I scaled other dimensions from the many pictures in the book and calculated the various dimensions. Then I took those dimensions and created a life-size, to-scale, color drawing of the model, which I will use to take dimensions from as I build the model.