HOLIDAY DONATION DRIVE - SUPPORT MSW - DO YOUR PART TO KEEP THIS GREAT FORUM GOING! (Only 24 donations so far out of 49,000 members - C'mon guys!)
×


steamschooner
-
Posts
369 -
Joined
-
Last visited
Content Type
Profiles
Forums
Gallery
Events
Everything posted by steamschooner
-
 Thanks Nils, I am happy with the cast iron look, now to add all the shiney stuff
- 208 replies
-
- 3
-

-
- john cudahy
- finished
- (and 1 more)
-
Mark, Thanks I will try that the next time I post pictures. David B, Thanks for stopping by
- 208 replies
-
- 2
-
-
- john cudahy
- finished
- (and 1 more)
-
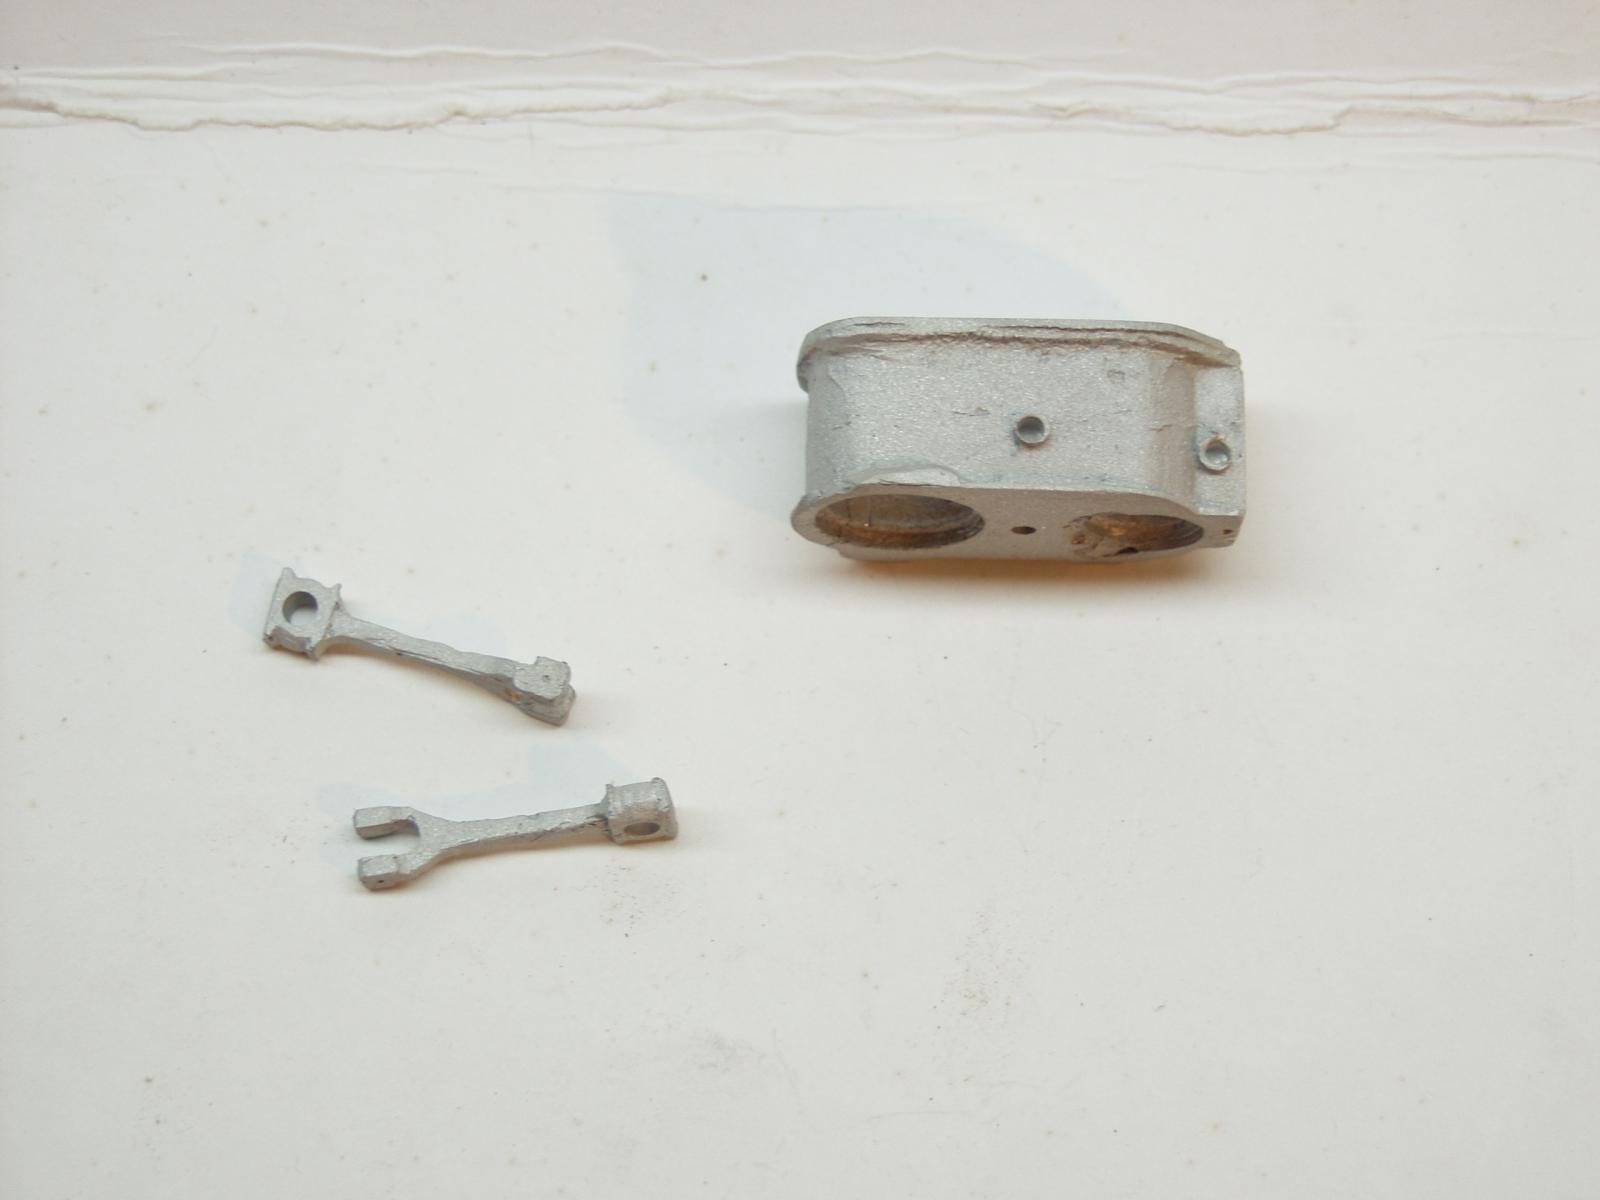
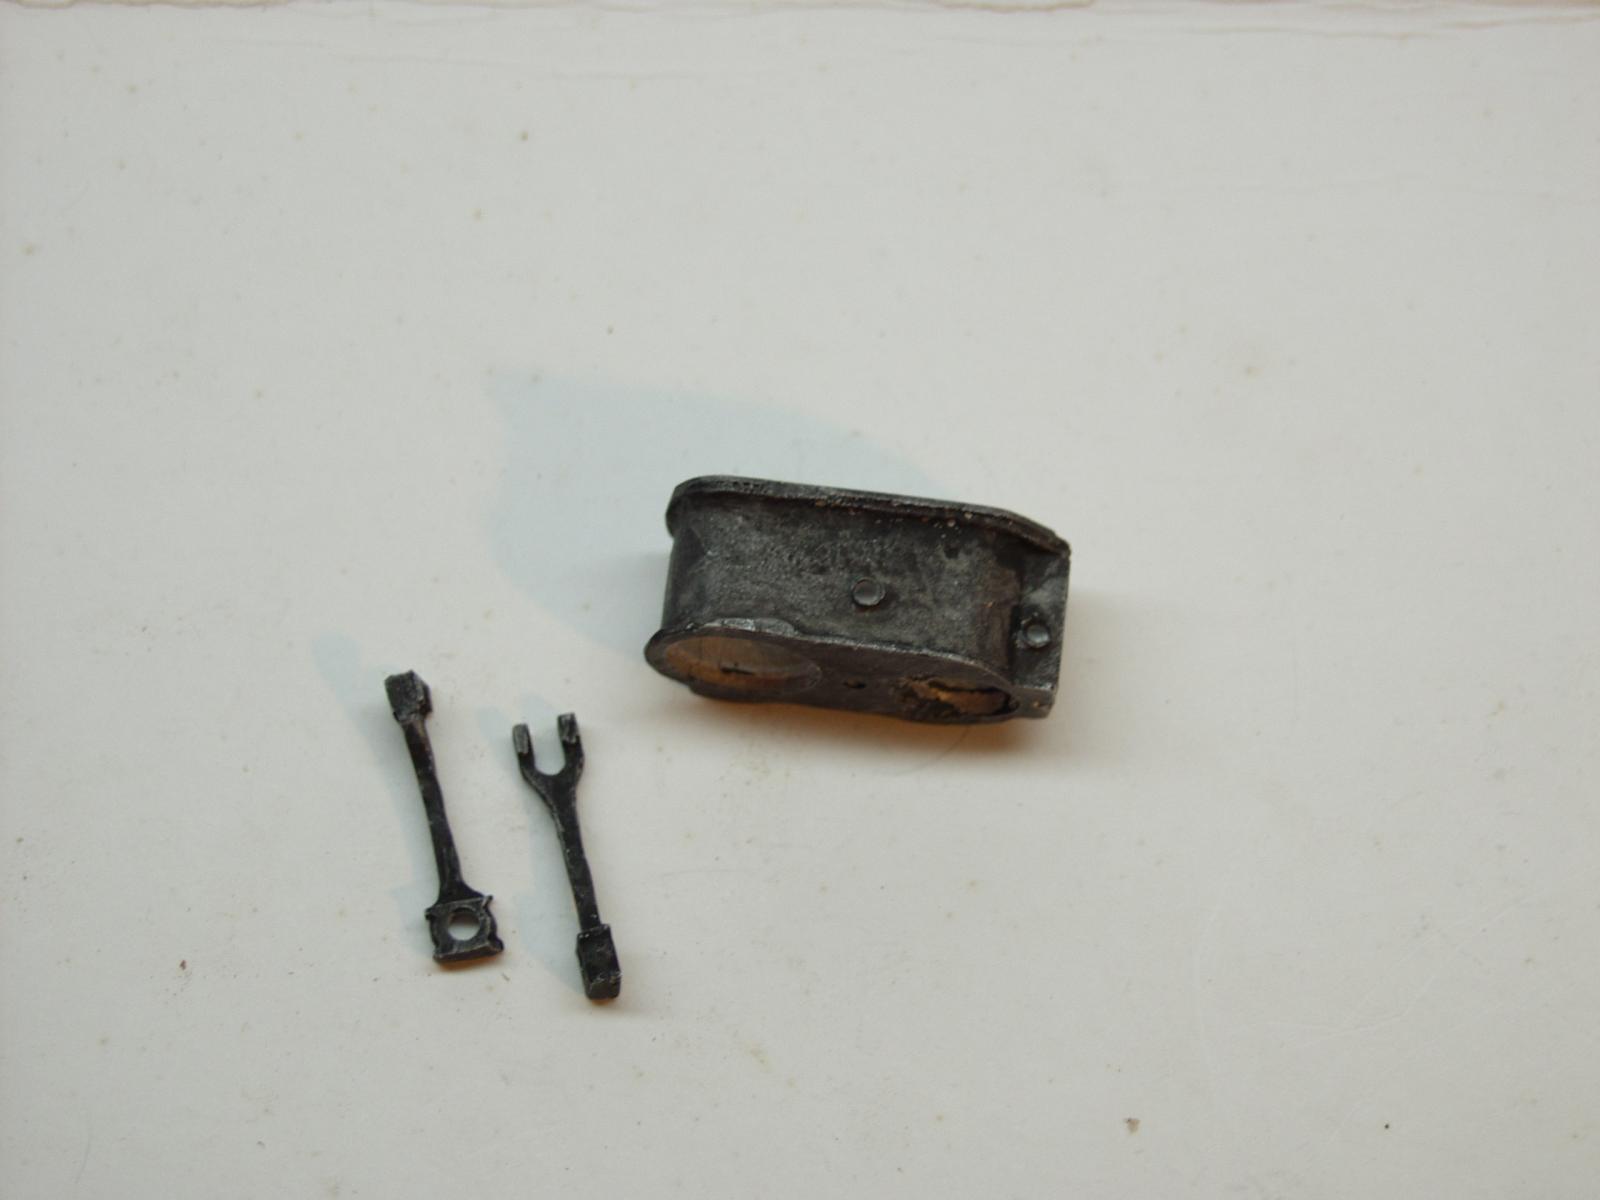
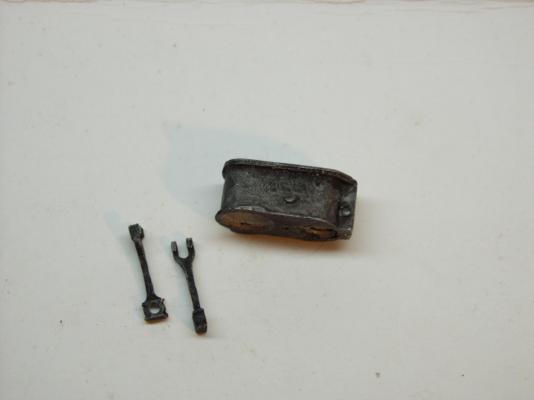
After getting a good cast for the steam engine block I cleaned it up a bit. Flattening the top and bottom sides and filing away flash from the mold i had what you see in the middle picture Third picture is of the engine block after it was sand blasted to give it a cast iron look. First picture is of the engine block after treating it with india ink They did not show up in the order I loaded them but you can see the different steps I've taken.


- 208 replies
-
- 11
-
-
- john cudahy
- finished
- (and 1 more)
-
Nils , Looks like we share the same "B" day have a great day.. Following your build and love what you are doing keep up the great work.
- 2,625 replies
-
- 2
-
-
- kaiser wilhelm der grosse
- passenger steamer
- (and 1 more)
-
Bob, I use a product from Castaldo which is a vulcanizing rubber for the molds. The metal is a low temp alloy called cerrocast ,no lead, tin and bismuth mix. Whats nice about it is that parts that do not turn out right can be put back in the melt pot and reused. I am still learning things every time I cast.
- 208 replies
-
- 5
-
-
- john cudahy
- finished
- (and 1 more)
-
Well after several tries and some errors I managed to get a good cast with the steam engine block. Still needs to be cleaned up some more. I than like to sand blast the parts to get that cast iron look . Parts will then be coated with black india ink.


- 208 replies
-
- 12
-
-
- john cudahy
- finished
- (and 1 more)
-
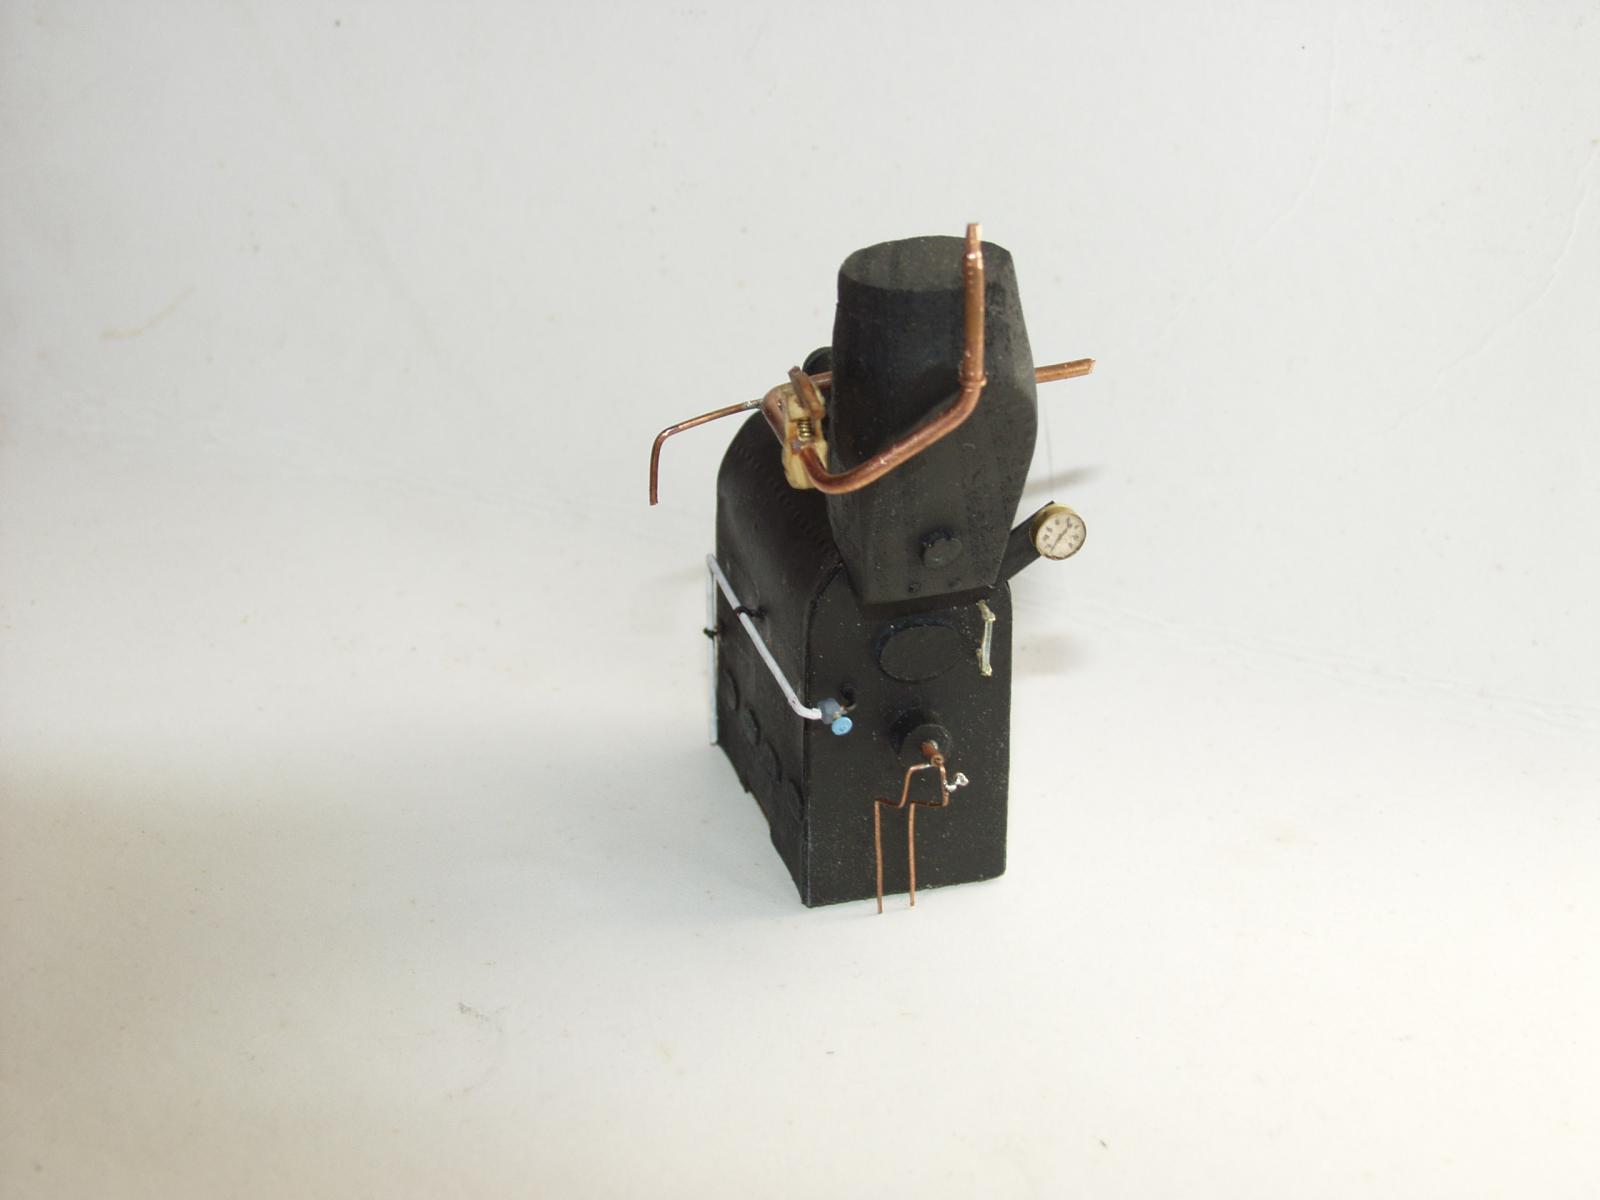
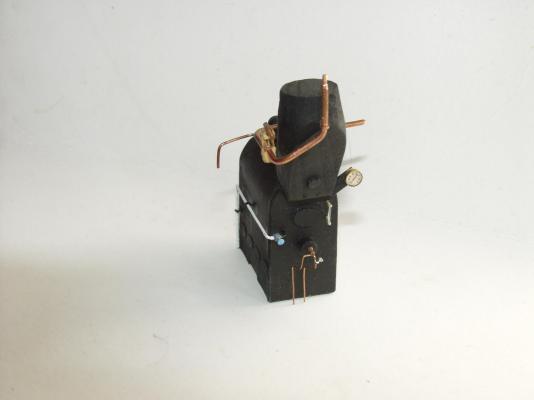
Well I have been getting a few minutes here and there to work on my model. This is what I have gotten done on the boiler at this time.

- 208 replies
-
- 14
-
-
- john cudahy
- finished
- (and 1 more)
-
Thanks everyone, having fun with these little details.
- 208 replies
-
- 2
-
-
- john cudahy
- finished
- (and 1 more)
-
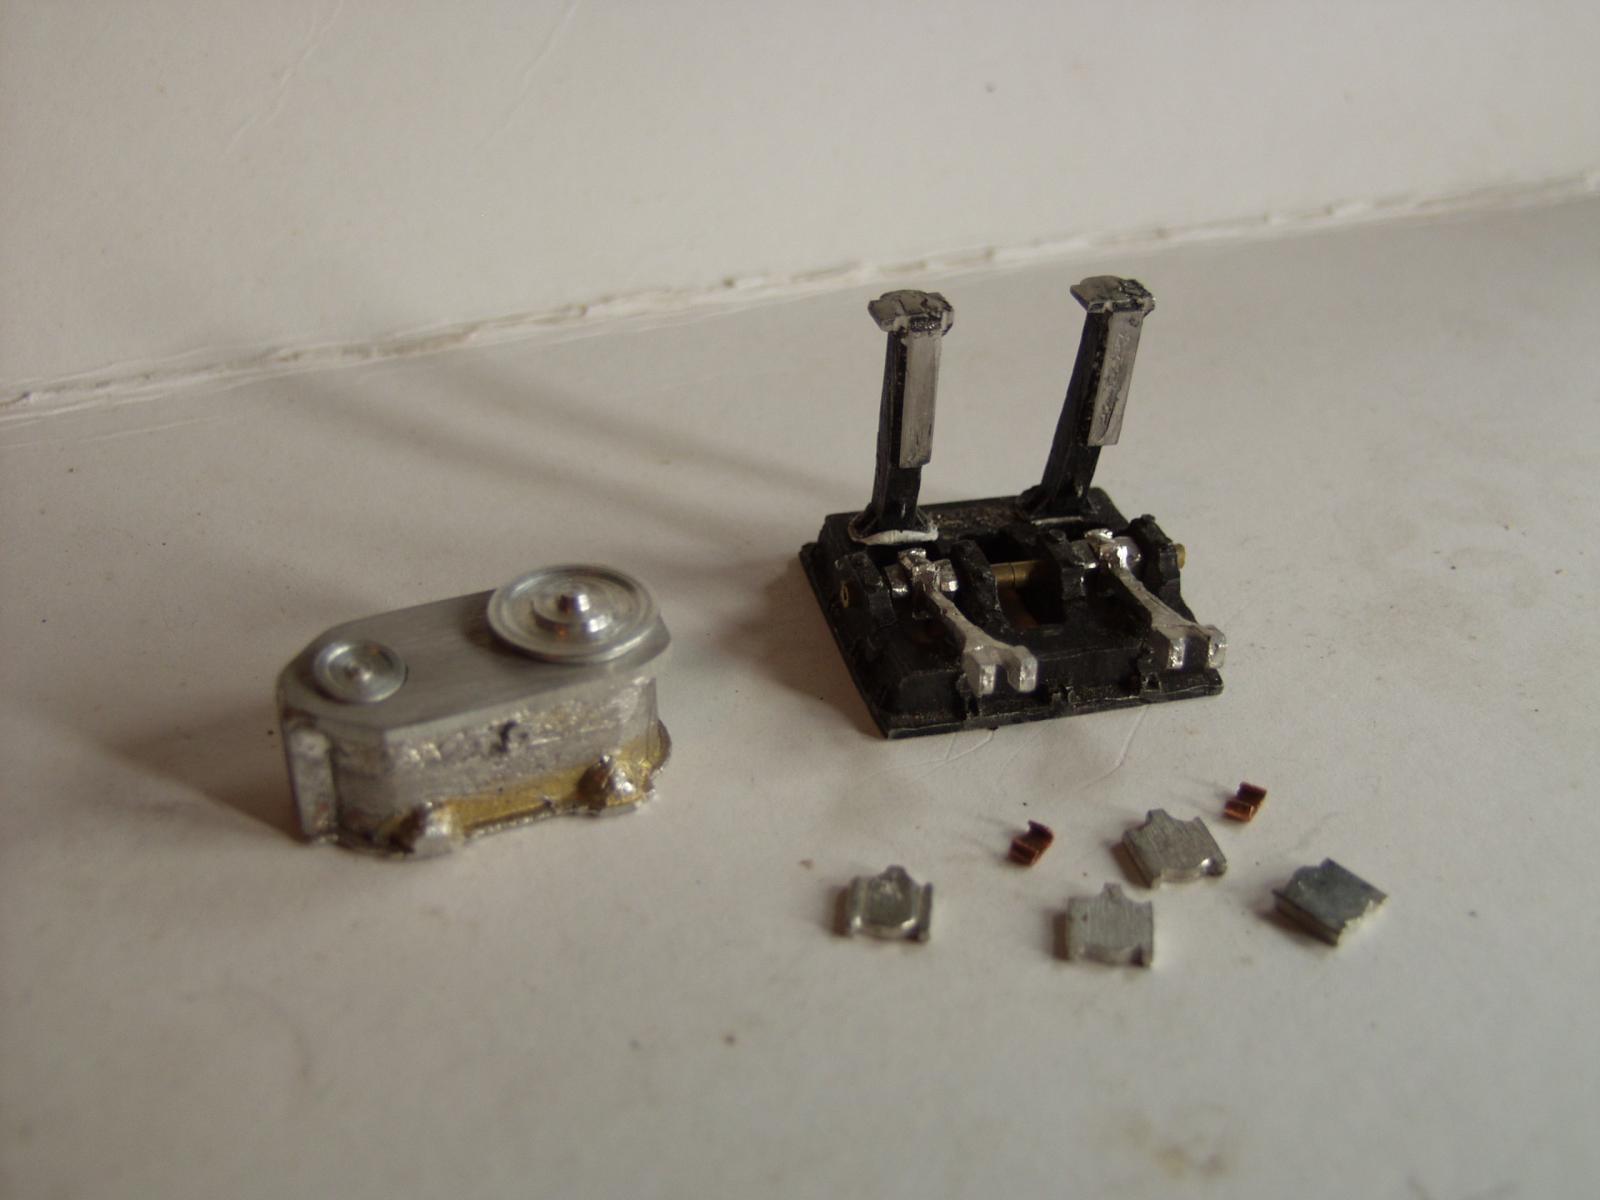
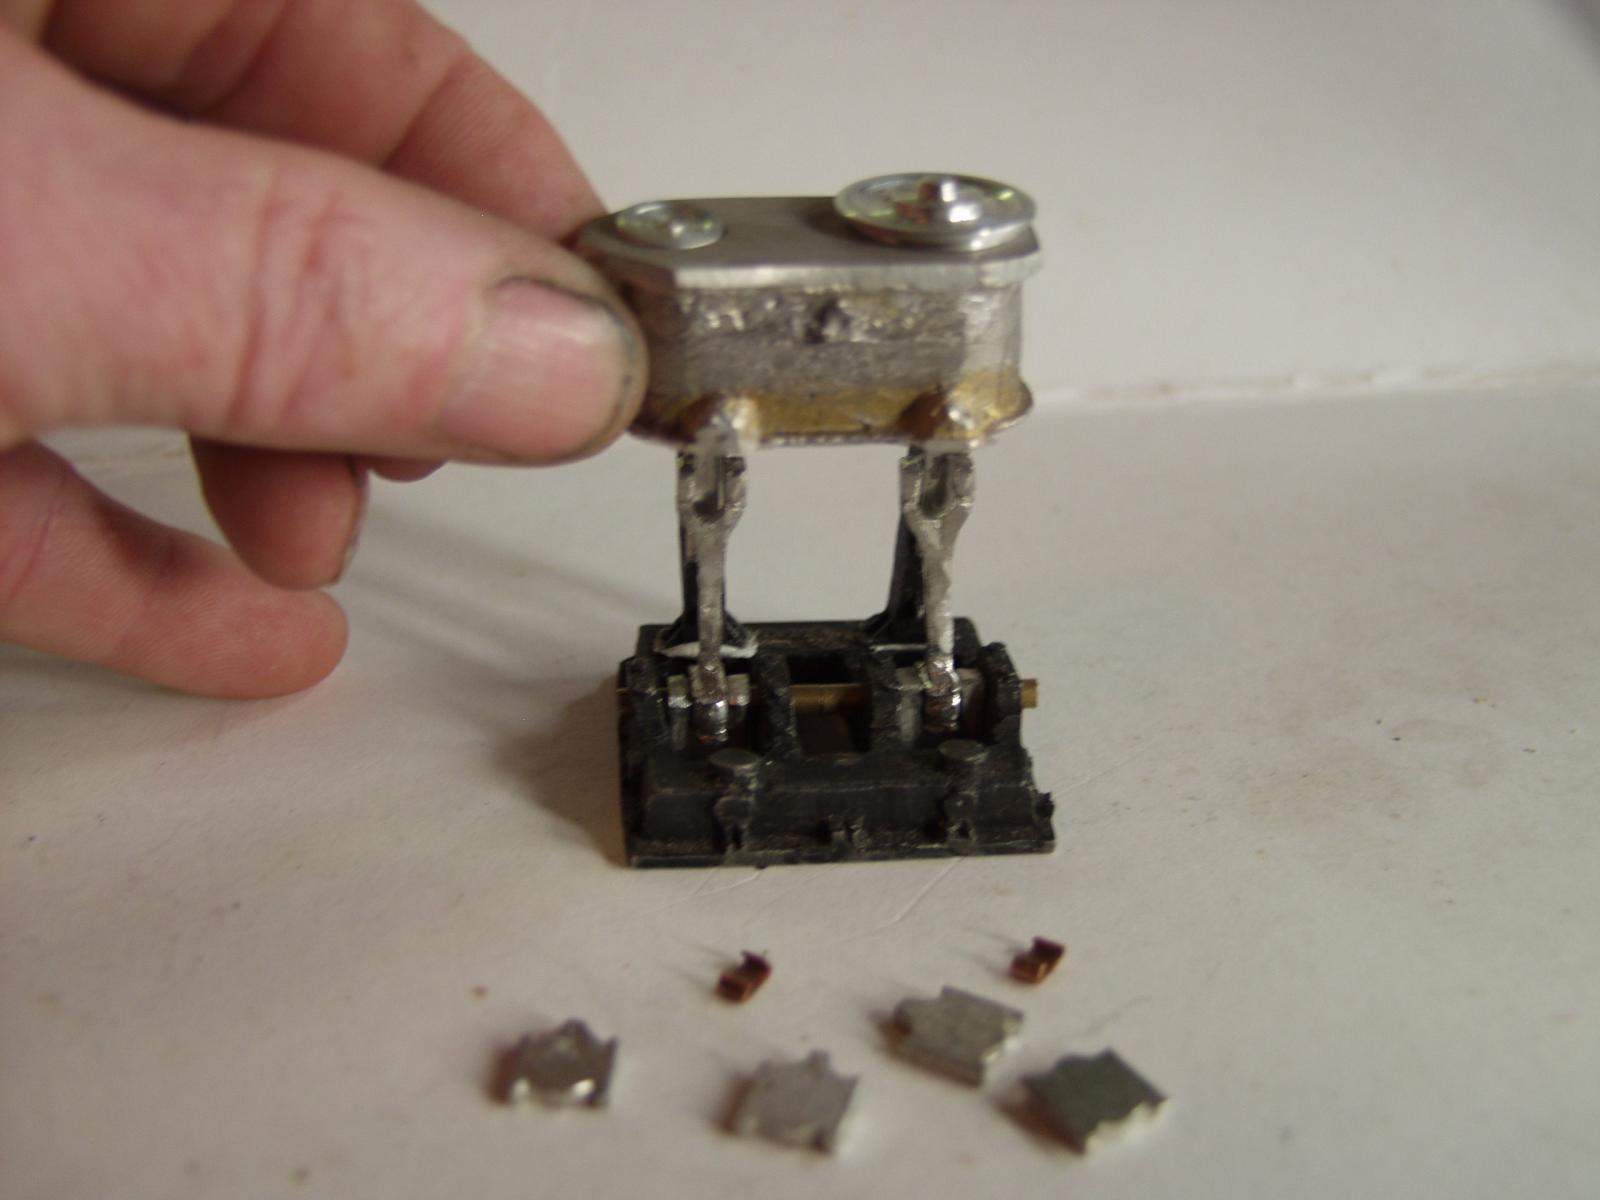
Well I have managed to get a little more done on my engine room gear.
- 208 replies
-
- 12
-
-
- john cudahy
- finished
- (and 1 more)
-
Nice looking boiler, I am sure the engines will turn out great as well. As i side note have you read: "The Western River Steamboat" structure and machinery 1811 to 1860 A thesis by Adam Isaac Kane. It's a PDF file of about 190 pgs. Interesting reading. Steve
-
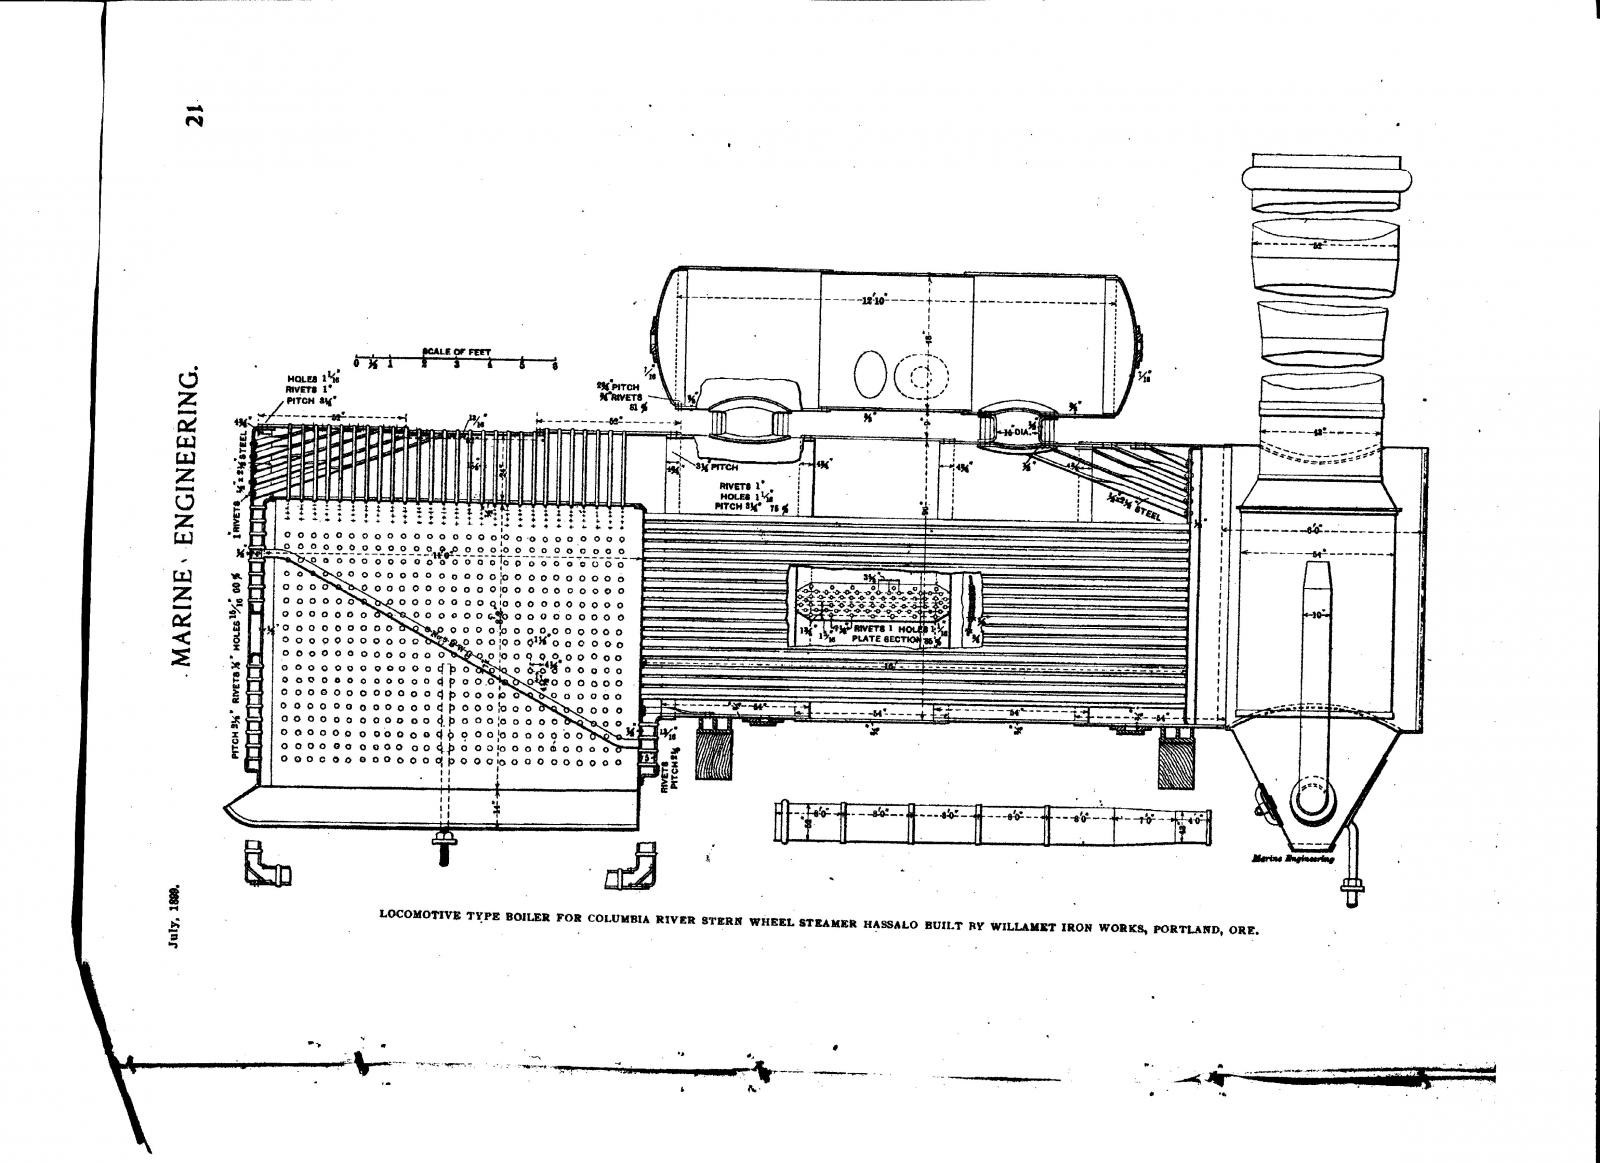
Yes, as I said earlier I thought the line drawing I posted was "to new" for what you are building. Looks like they( the boiler ) could be a model subject in themselves.
-
Cathead, Picture a steam locomotive with out the cab or any of the wheels, just the boiler. As you can see from the line drawing it looks like a locomotive without a few things. Steve

-
The drawings I have are for a 1889 stern wheeler so they maybe a little "to new". They would give you the basic shapes and sizes. The boiler is of the locomotive type which I believe were the norm. Steve
-
Do you have detailed drawings of the machinery? I have been following your build and it's looking real good. I have been collecting info to build a west coast sternwheeler at some time. Something of local interest of which only a few pictures remain. I have some line drawings of boilers and sternwheel engines if you have the need. Steve
-
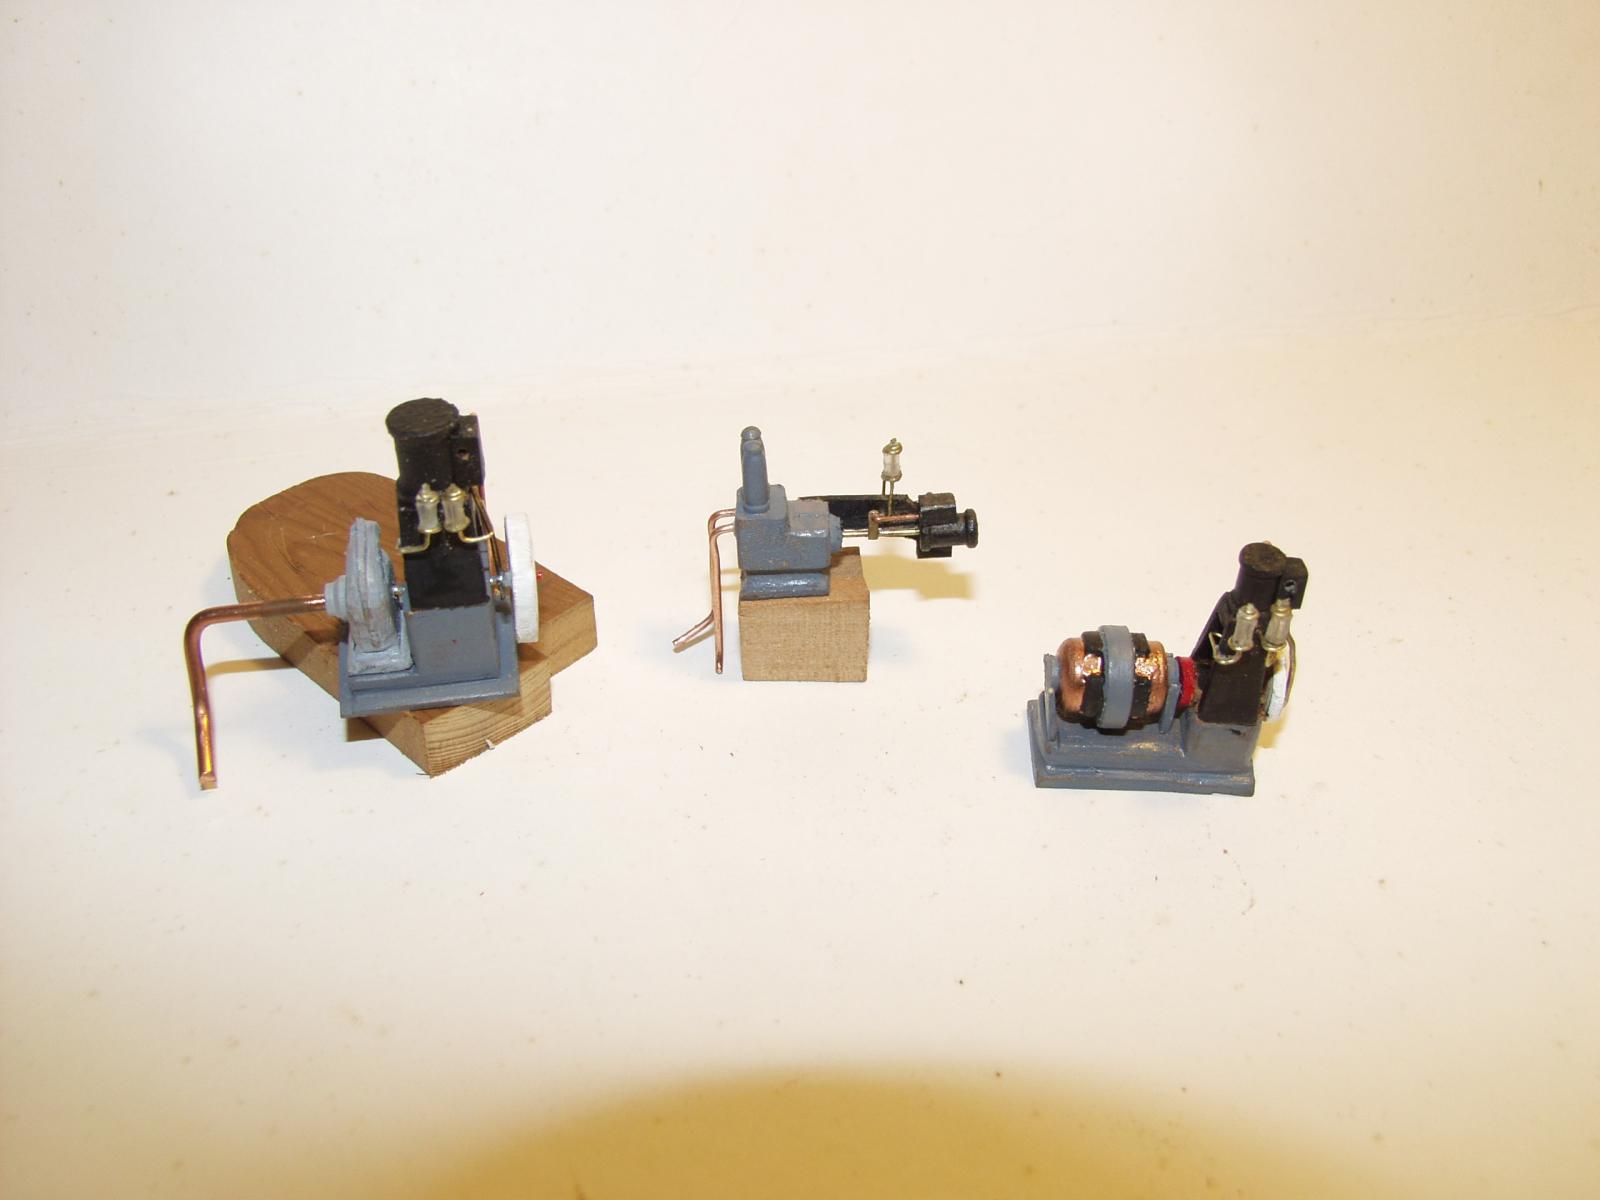
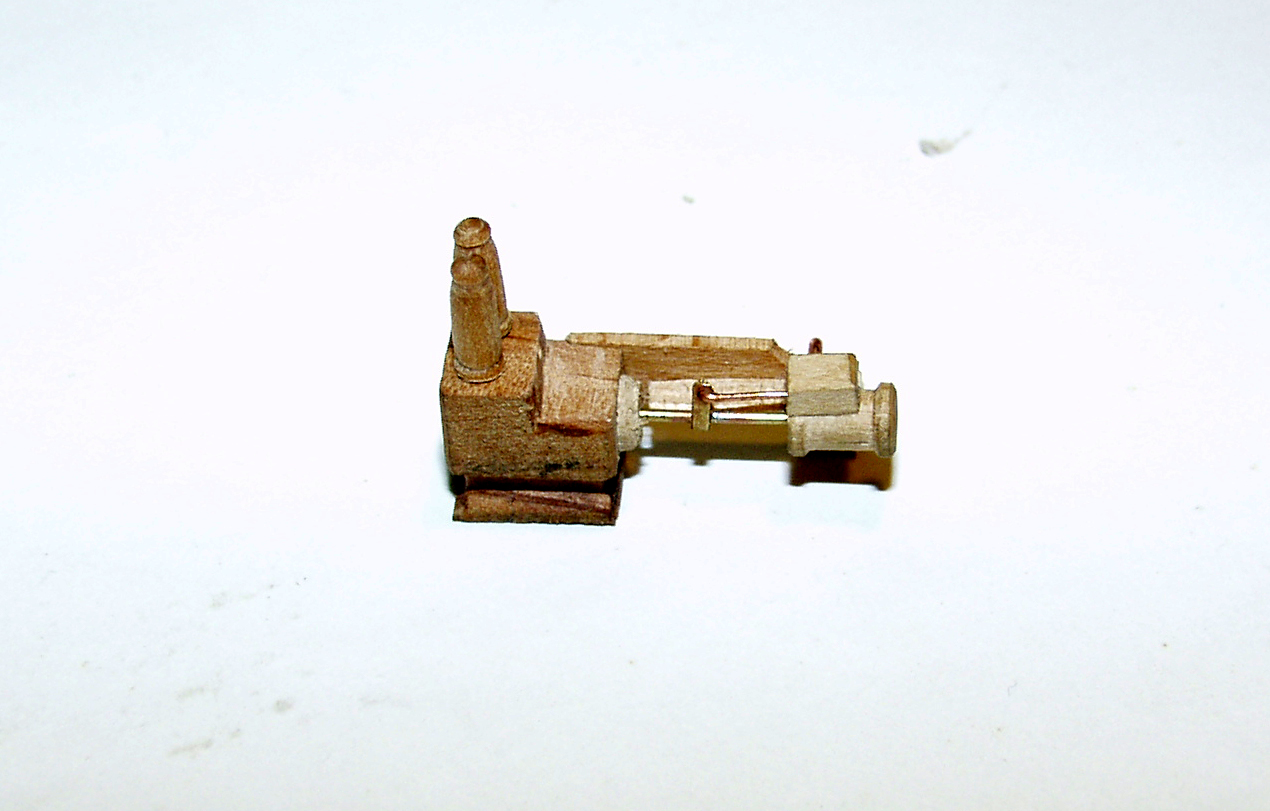
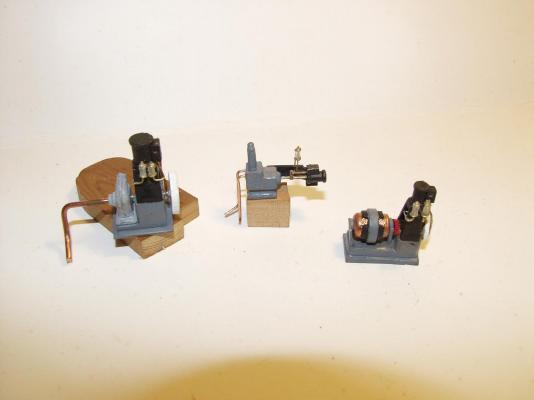
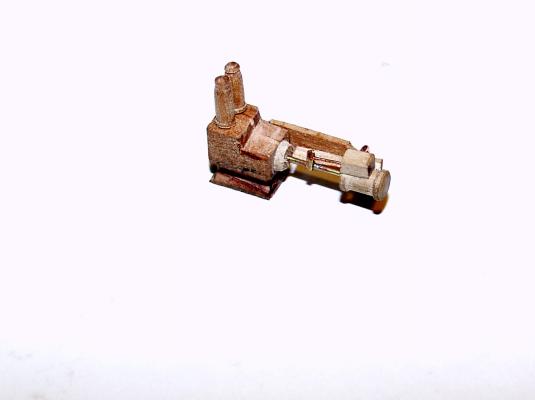
Here's a couple of shots of my water feed pump. It will get painted and have small wire running to it to act as steam supply piping. Wire will also be used to show water inlet and water outlets.

- 208 replies
-
- 13
-
-
- john cudahy
- finished
- (and 1 more)
-
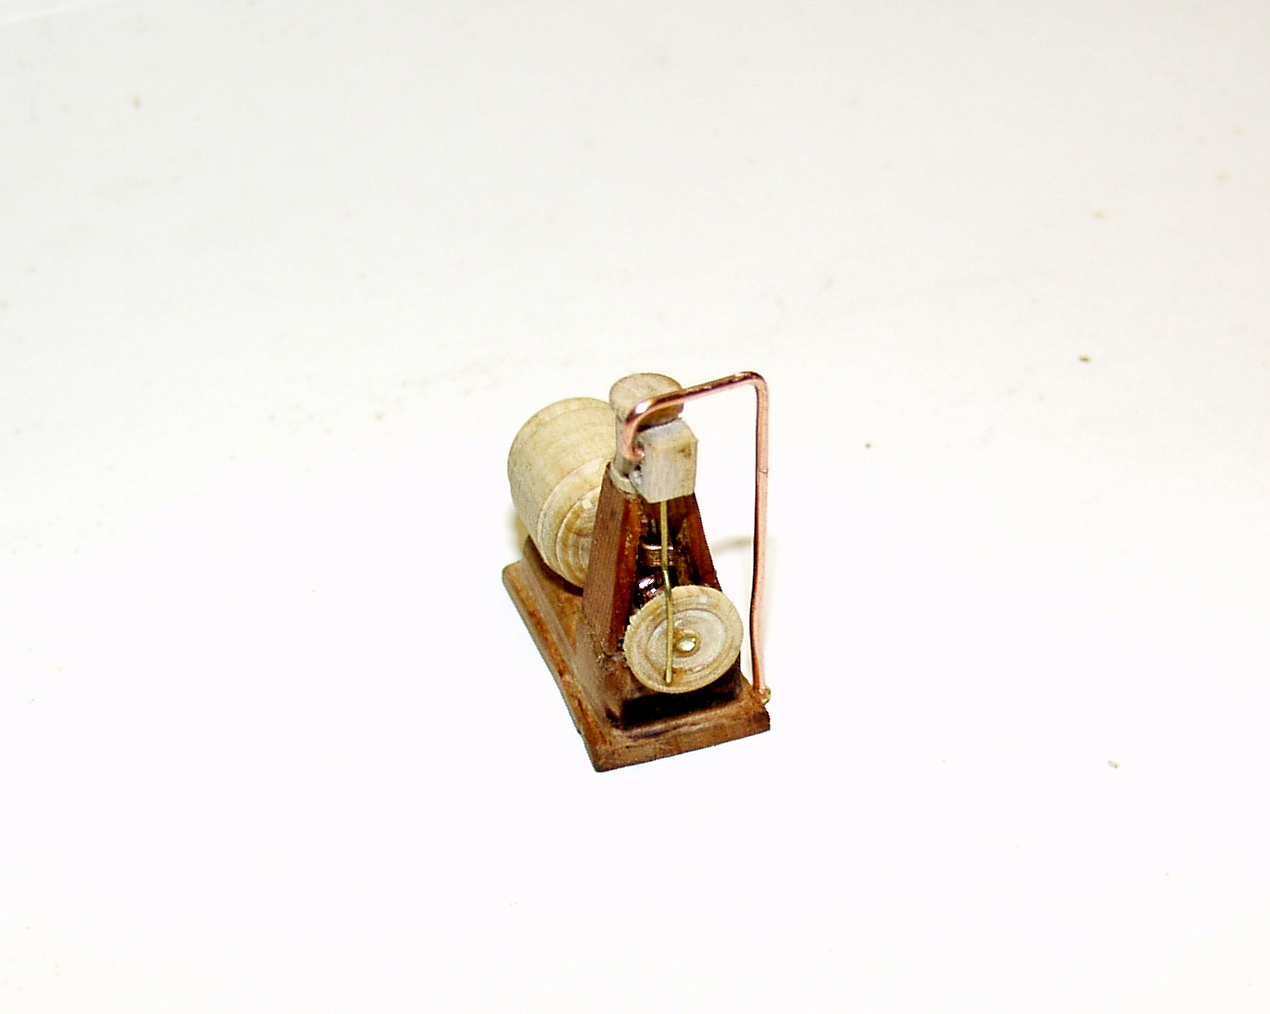
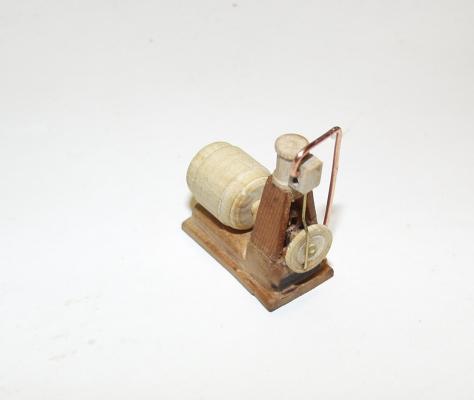
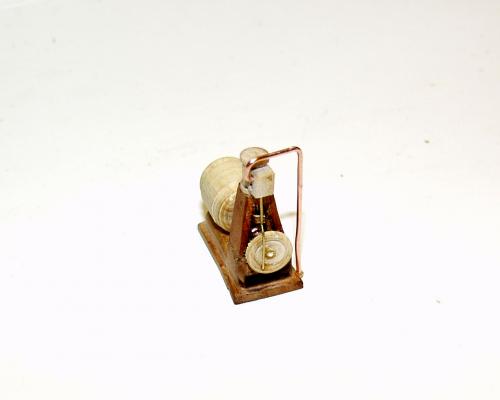
Here are a couple of shots of my generator motor. I know it's some what simplified but it was fun to build. All the machinery will get painted and after installing I will run small wire to them as supply piping.
- 208 replies
-
- 12
-
-
- john cudahy
- finished
- (and 1 more)
-
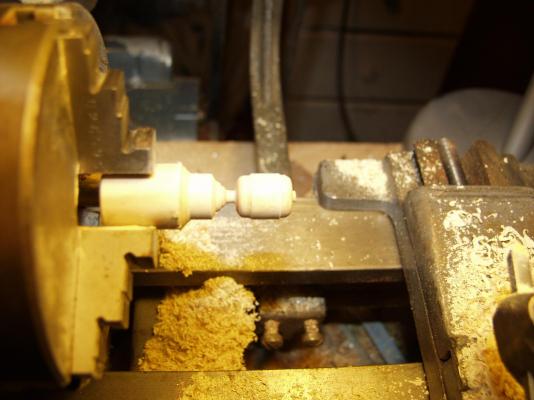
Thanks everyone for the visits and the likes. One thing I enjoy about model building is turning things on the lathe. This is a shot of the dynamo that I turned for my project. I need to work on getting better pictures of all the small parts.Now where is that camera instruction booklet?` Steve
- 208 replies
-
- 6
-
-
- john cudahy
- finished
- (and 1 more)
-
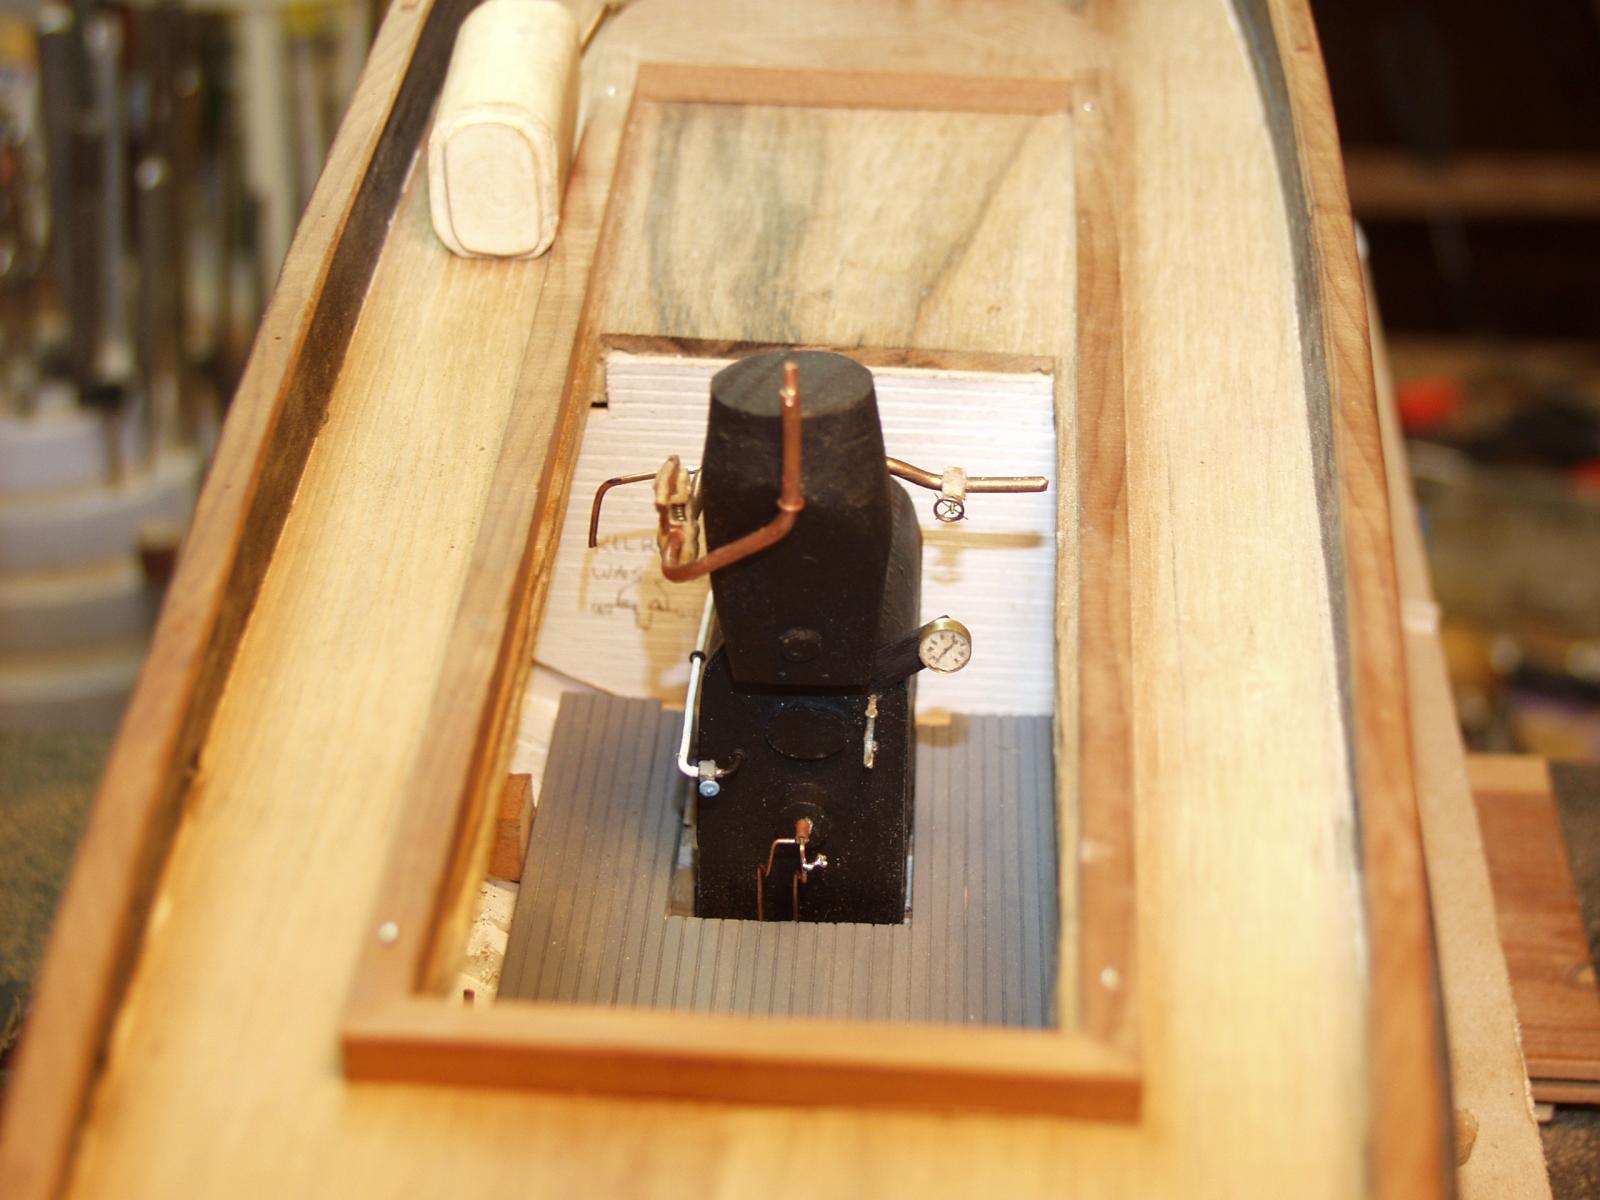
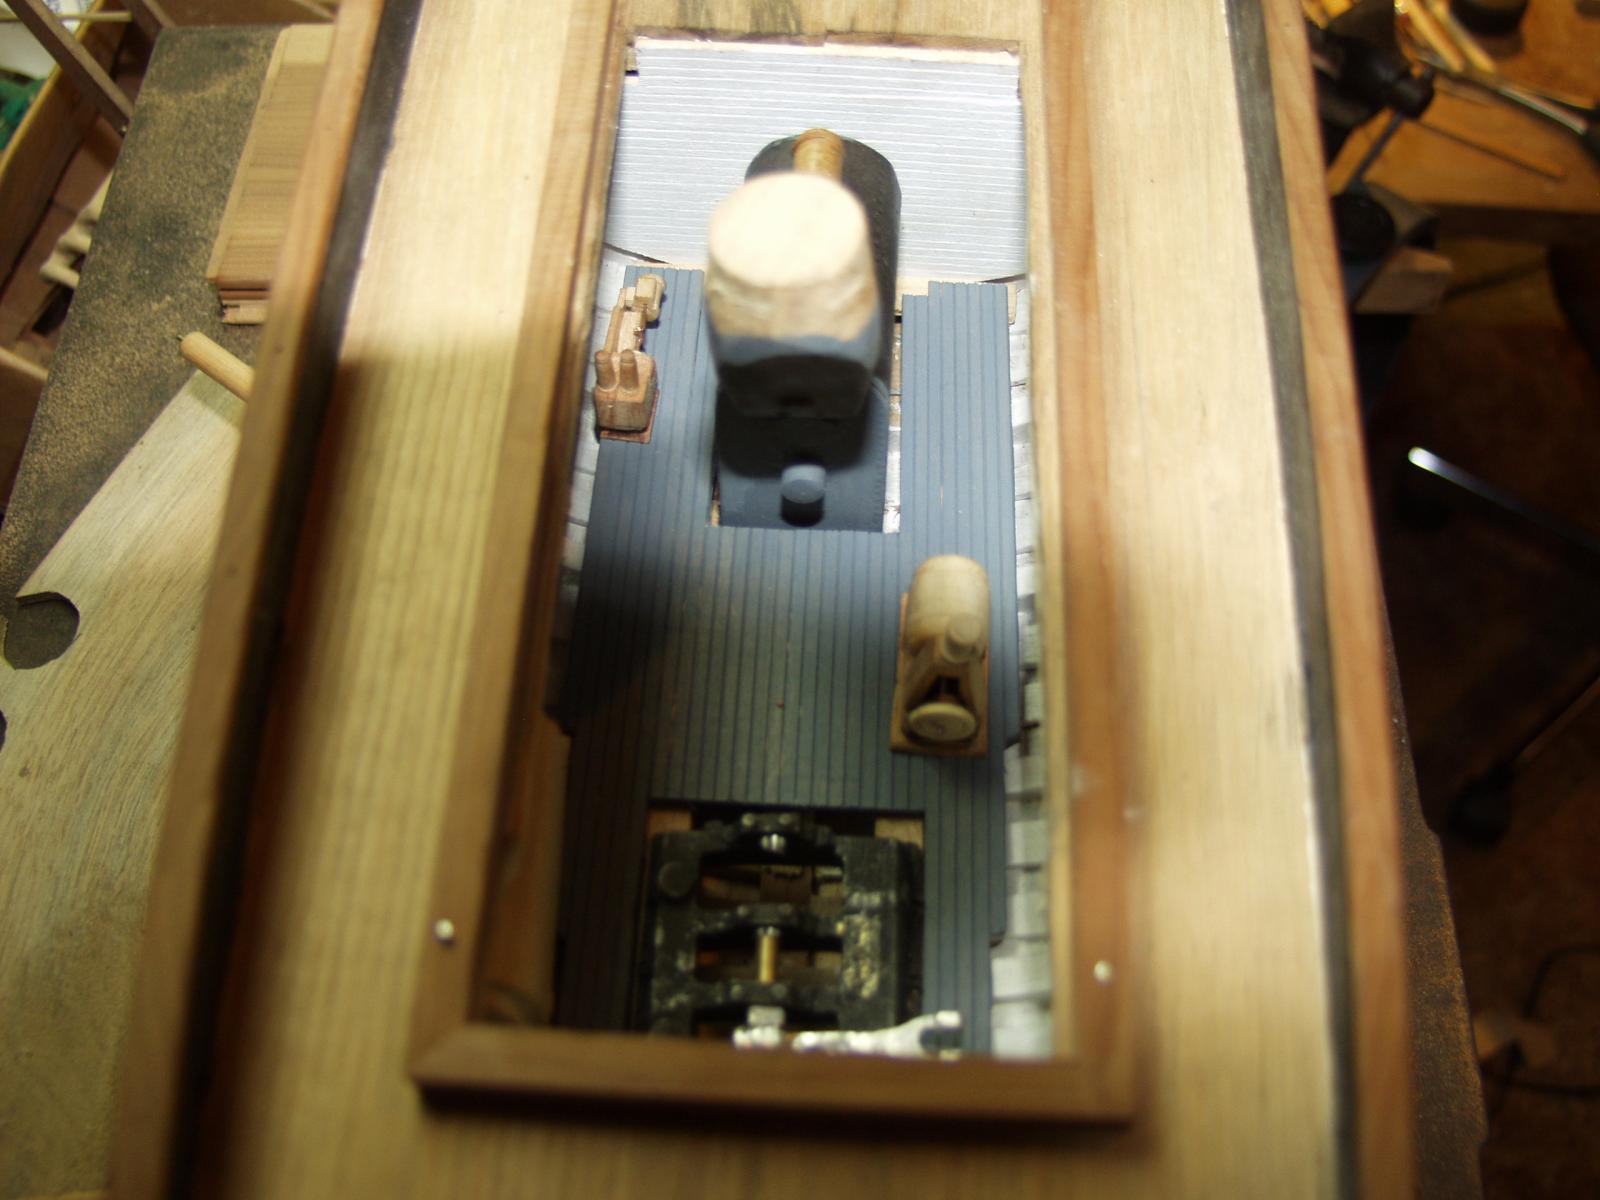
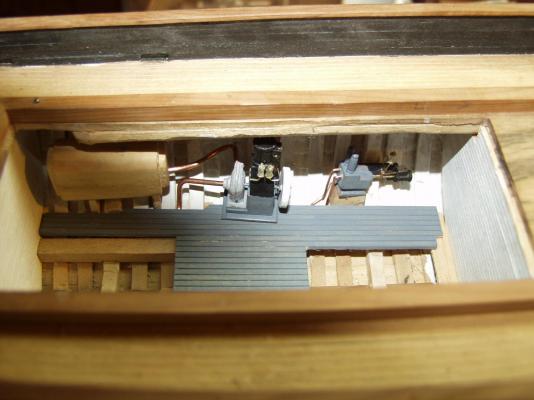
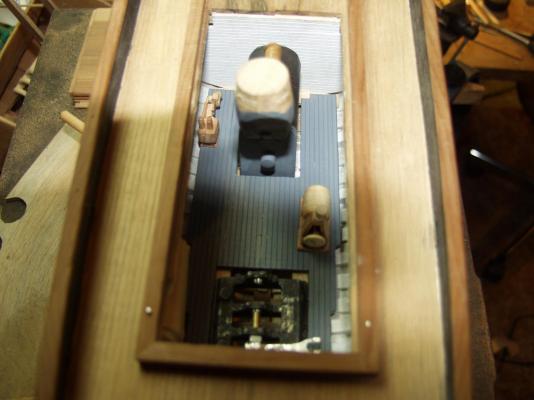
Well I got to spend sometime in the boat yard. I have got the engine room deck in place and am figuring out where the rest will go. When done there will be a boiler, the compound steam engine, feed pump. dynamo engine, Condenser tank, and two water pumps. Why I do not know since most of it will never be seen once the cabin is in place.
- 208 replies
-
- 12
-
-
- john cudahy
- finished
- (and 1 more)
-
A really good source for rigging details can be found in " The Rigging of West Coast Barkentines & Schooners" by Ron Cleveland. Highly detailed drawings including loading rigs. Don't think it was ever published but the San Francisco Maritme Museum has the original. May be available from some libraries. Steve
-
Been slowly working on engine and boiler ( non working ) so haven't had much to post. That and it seems life in general gets in the way of spending much time modeling.
-
SS Vinal Haven by TBlack - FINISHED
steamschooner replied to TBlack's topic in - Build logs for subjects built 1851 - 1900
She's lookin very good, Tom -
Piet, Been lurking on your build. You are doing a great job.. Years ago there was a outfit called "Small Parts Inc" in Florida that had all kinds of things a model builder could use. I think it was bought out by Amazon and is now called "Amazon supply" They carry different metals, small nuts and bolts, and other things one can use. They are not like the old "Small Parts Inc" but may still be useful. Steve
-
SS Vinal Haven by TBlack - FINISHED
steamschooner replied to TBlack's topic in - Build logs for subjects built 1851 - 1900
Tom, I have taken small dia/gauge brass or copper wire and made a ring the size of the stack. Than soldered it to the top of stack and than shaped it with files while turning in lathe. As for bands I have used different gauge brass/copper wire and run it thur a friends roller. It will flatten the wire to different widths depending on how much the bead roller is tightened down per pass. Your project is looking very good. -
Hey, Pete. Your lobster smack is looking real good. You have come along ways grasshopper... Hope to see you at a meeting. Steve
-
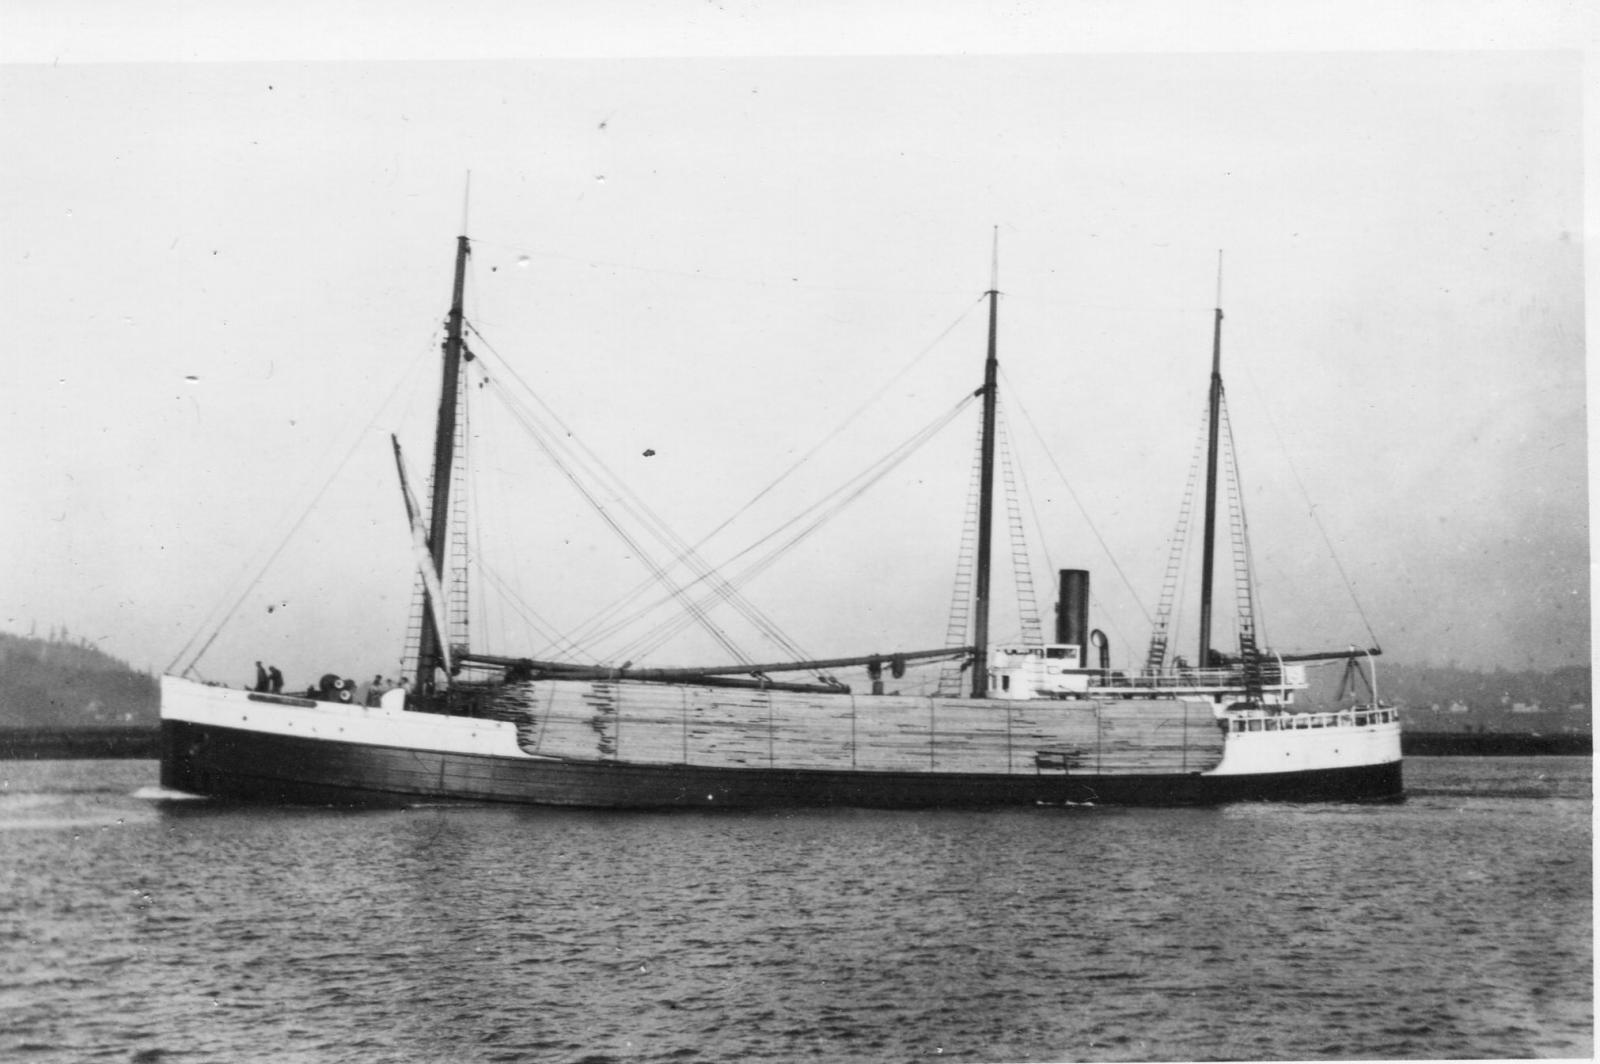
Here on the West side, This was a bulk carrier (of lumber ) which ship builders started building about 1880 up to about 1923 before going to steel ships. This one dates from about 1909.