HOLIDAY DONATION DRIVE - SUPPORT MSW - DO YOUR PART TO KEEP THIS GREAT FORUM GOING! (Only 24 donations so far out of 49,000 members - C'mon guys!)
×


steamschooner
-
Posts
369 -
Joined
-
Last visited
Content Type
Profiles
Forums
Gallery
Events
Everything posted by steamschooner
-
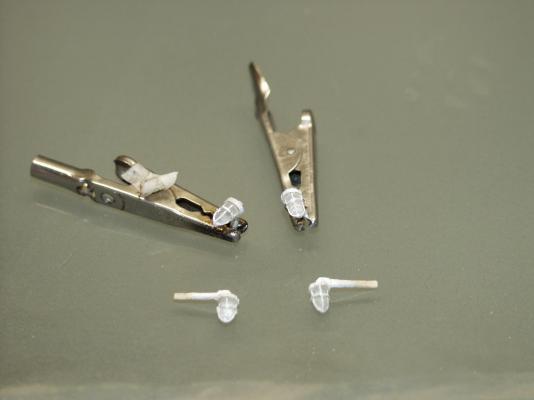
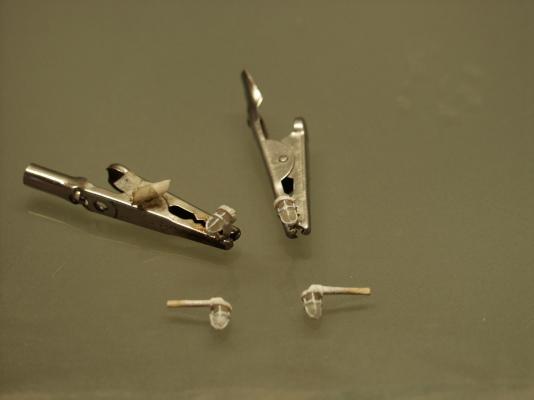
 Been busy in the shipyard , while I need to trim shackle pins and clean up metal blocks yet, nothing glued down.
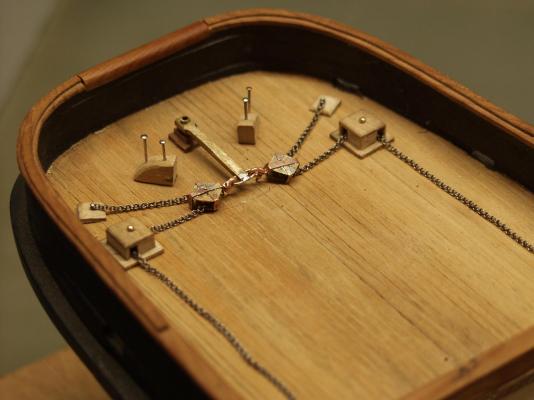

- 208 replies
-
- 12
-

-
- john cudahy
- finished
- (and 1 more)
-
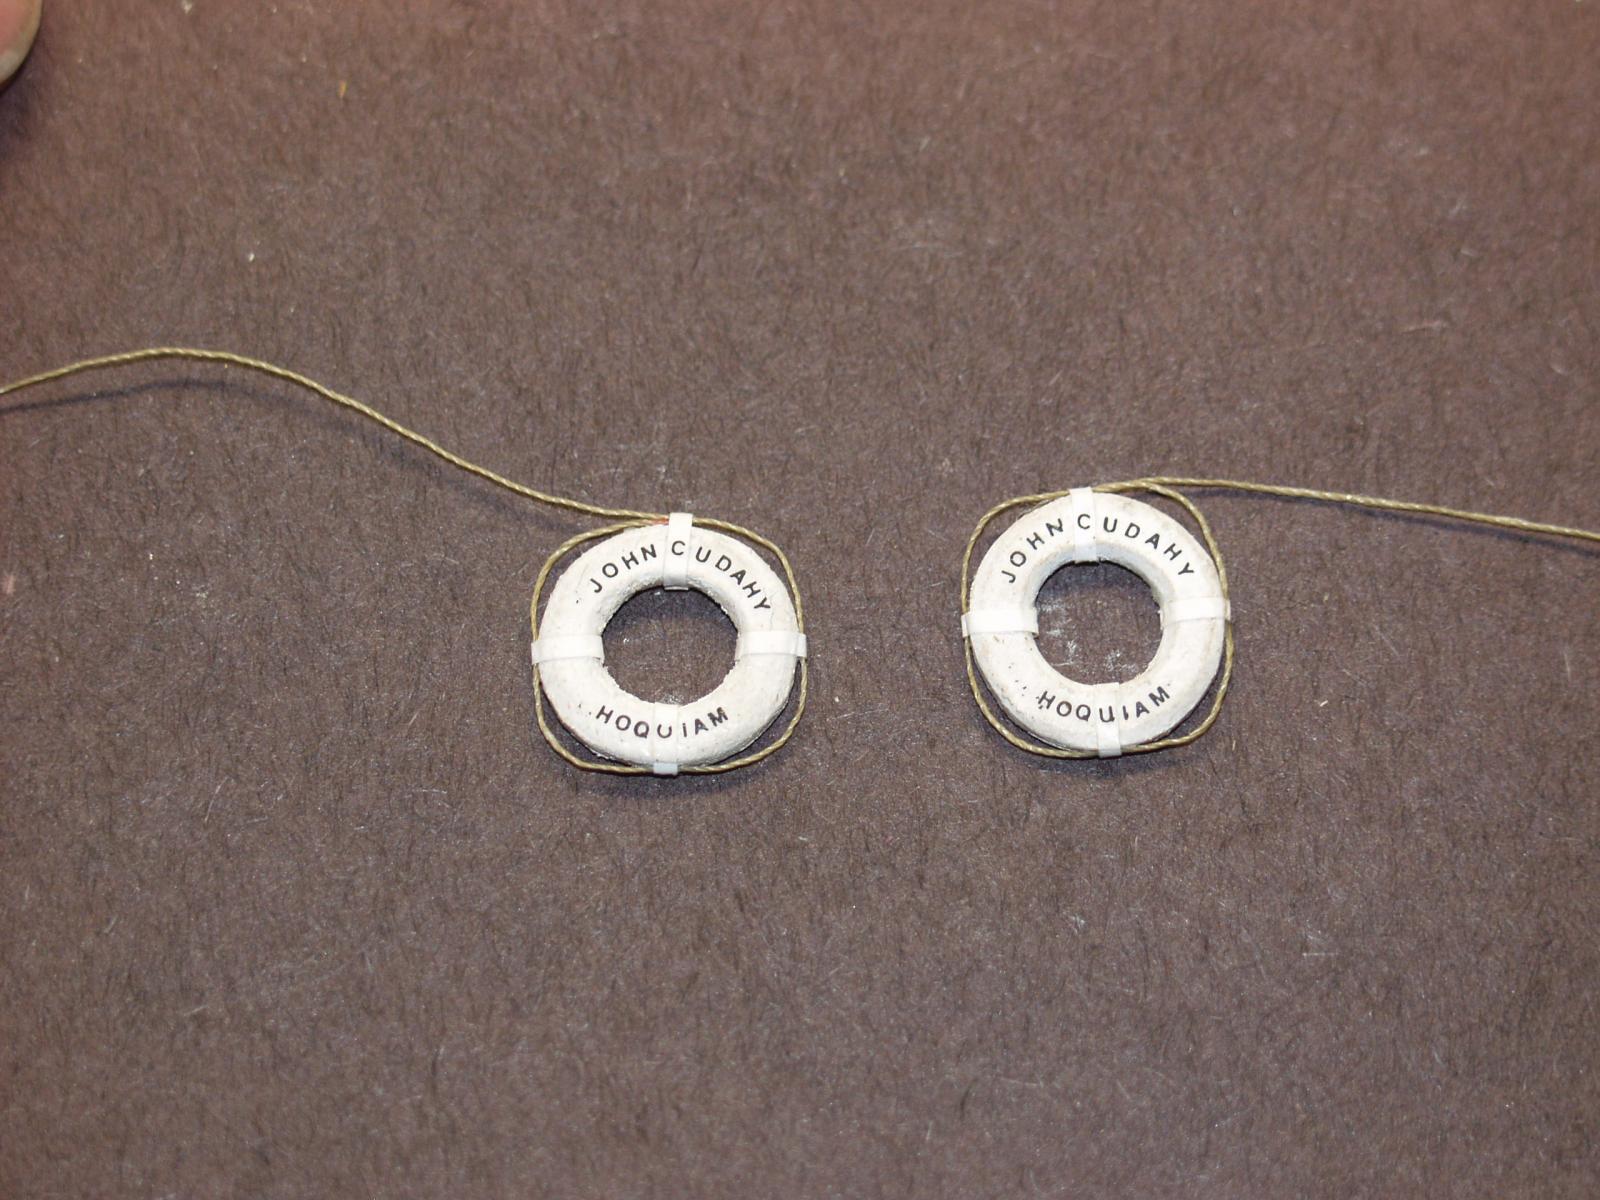
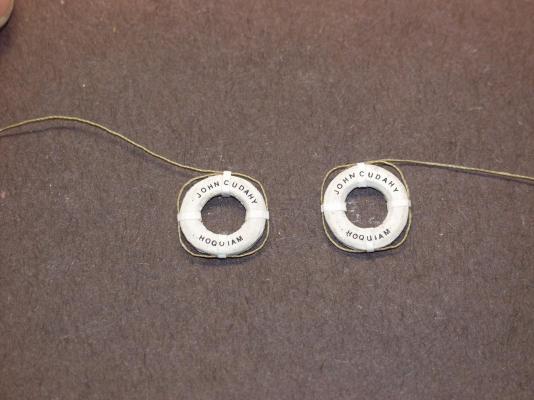
John, I will describe how I made mine: determine the outside diameter which will give you the inside hole size.( what looks good ) start with woodstock of the correct thickness of lifering. Drill the center hole in the wood sheet then mark out outside diameter Cut out lifering slightly over size. Shape the lifering with files leaving a flat face on both sides.so you have a area to apply lettering.Paint lifering. Select the line to use as handles. Mark out ring as to where the line is to be attached. Glue the end of the line at one mark . I used thin strips of paper for the bands that hold the lines in place.work your way around the ring. I overlap my paper on the inside of ring. Paint straps or not. Apply lettering ( dry transfer ) Clear coat to protect lettering. hope this helps
- 208 replies
-
- 2
-
-
- john cudahy
- finished
- (and 1 more)
-
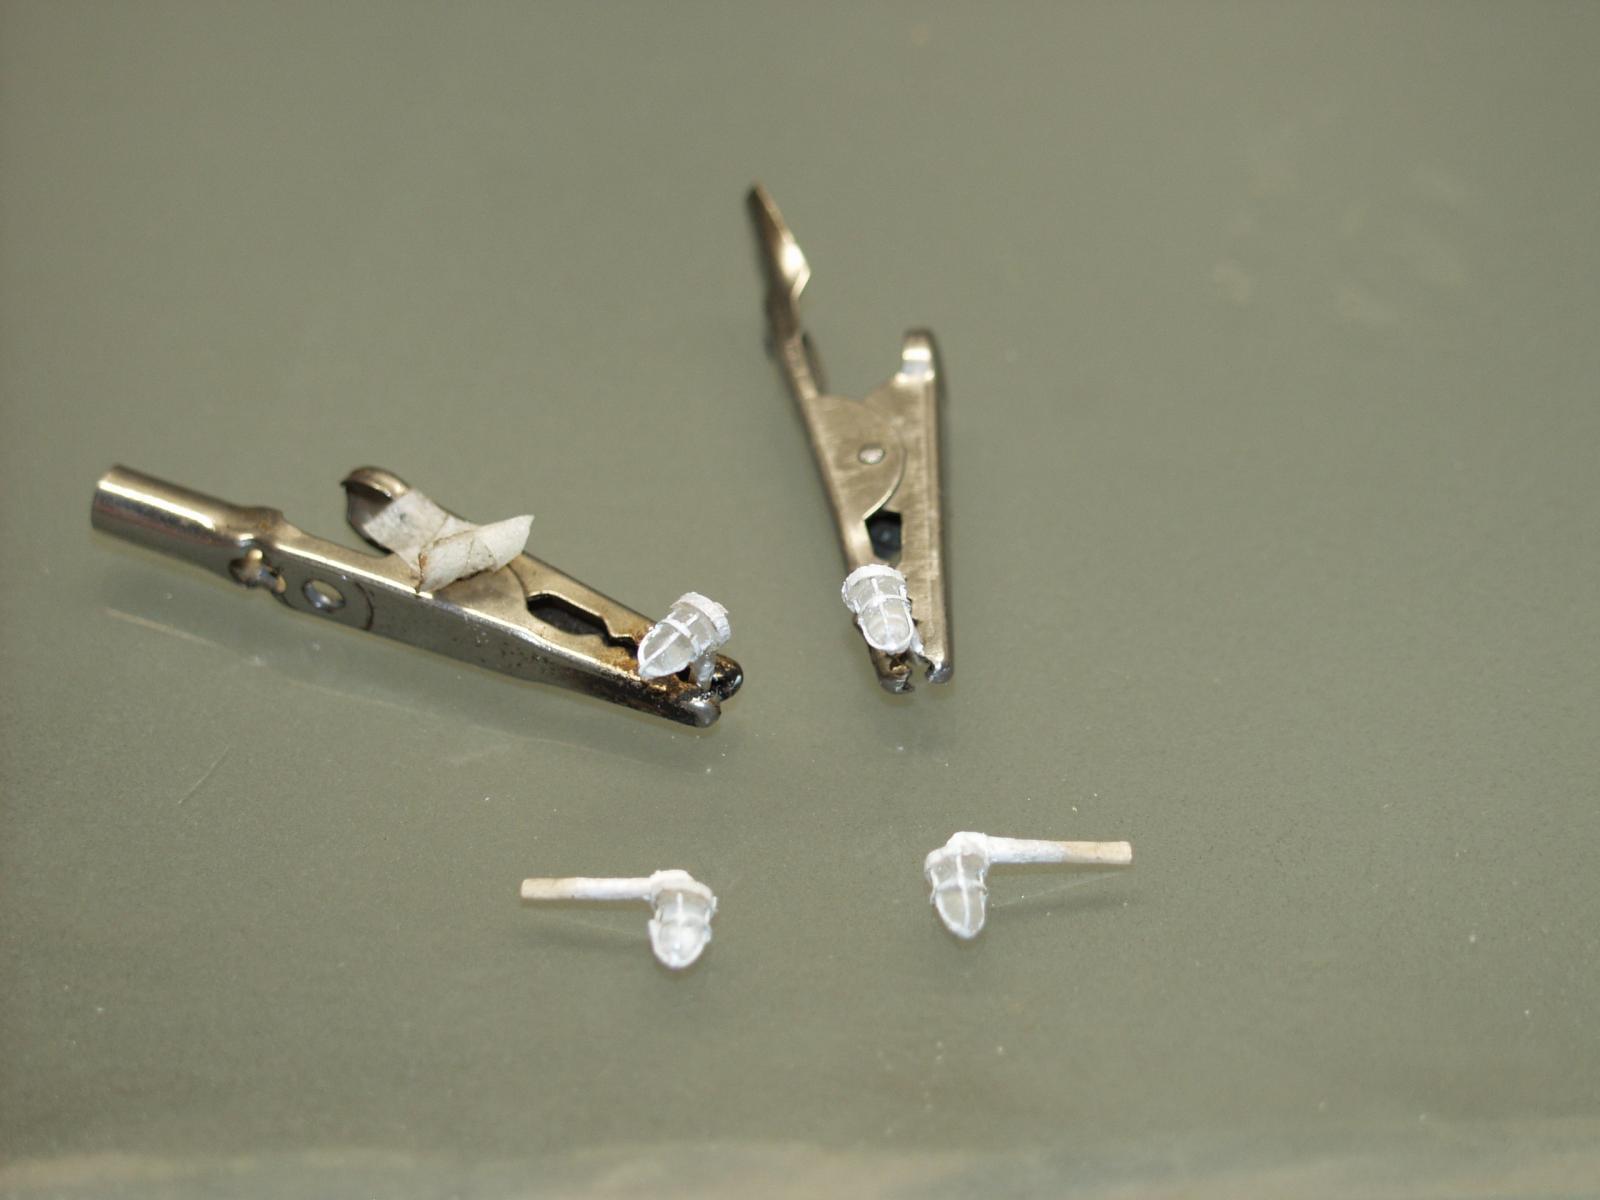
Joe, The lights are made up from plexiglass turned to shape ( using files ) Than glued to a wood base. Four holes evenly spaced around the light were than drilled and "U" shaped small wire was inserted into the holes and glued. A piece of flatten wire is than wrapped around light and glued in place. The light is than cut from the wood base and a squared wood mounting piece added. mounting piece is than shaped and the whole thing painted. That's the easy version.
- 208 replies
-
- 3
-
-
- john cudahy
- finished
- (and 1 more)
-
Patrick, The letters are dry transfer with a clear coat so they less likely to get damaged. Marty G. Thanks for stopping by
- 208 replies
-
- 2
-
-
- john cudahy
- finished
- (and 1 more)
-
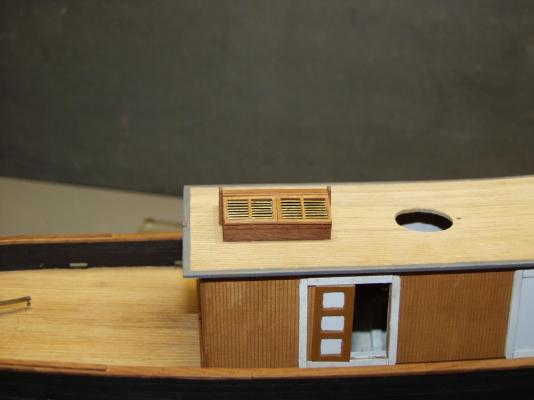
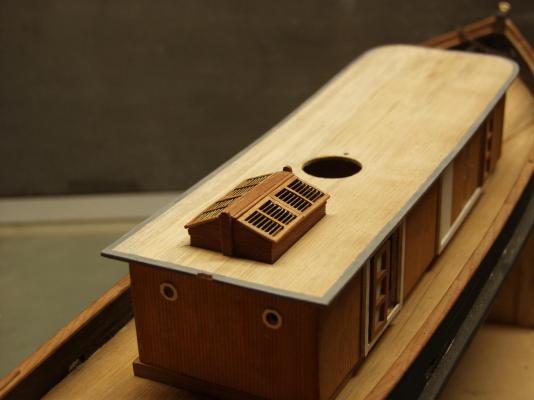
I have gotten a little more done, these are attempt number 2 might do better on number three but these will do. These are cabin/deck lights.
- 208 replies
-
- 6
-
-
- john cudahy
- finished
- (and 1 more)
-
I am thinking oh my gosh he's going to have to cut the bottoms of the paddle wheels off on the waterline model!
-
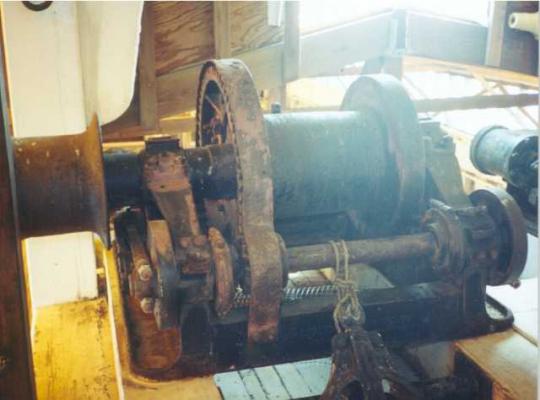
Nils, The winch is looking great! It's a good thing there are fewer of them than cowl vents
- 2,625 replies
-
- 3
-
-
- kaiser wilhelm der grosse
- passenger steamer
- (and 1 more)
-
Well now if I fall overboard while working on the Cudahy someone can throw me one of these.
- 208 replies
-
- 6
-
-
- john cudahy
- finished
- (and 1 more)
-
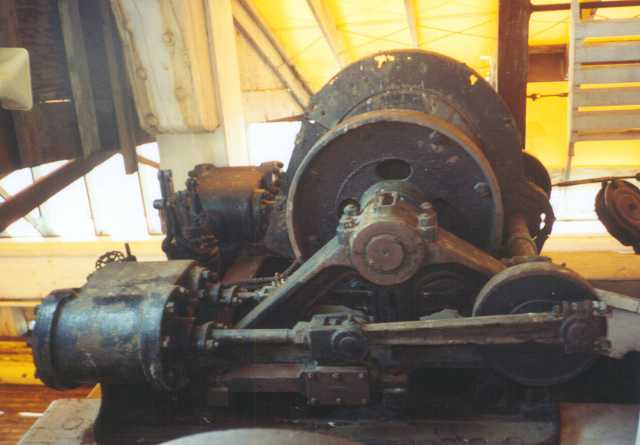
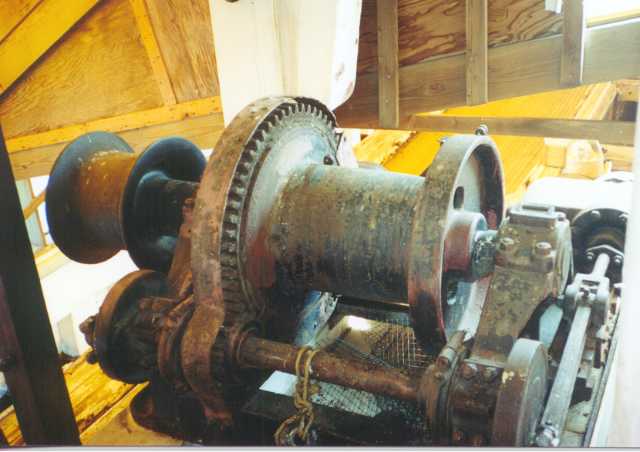
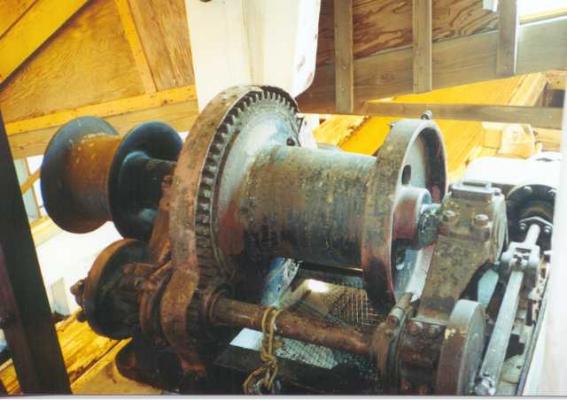
Nils, here are some pictures of the winches on the steamschooner Wapama. I don't know if they will help but they are good study material. Steve

- 2,625 replies
-
- 11
-
-
- kaiser wilhelm der grosse
- passenger steamer
- (and 1 more)
-
Bob, it is coming along....slowly David B Thanks for stopping by.
- 208 replies
-
- 2
-
-
- john cudahy
- finished
- (and 1 more)
-
John, Thanks for stopping by The rest of you thanks for the likes
- 208 replies
-
- 2
-
-
- john cudahy
- finished
- (and 1 more)
-
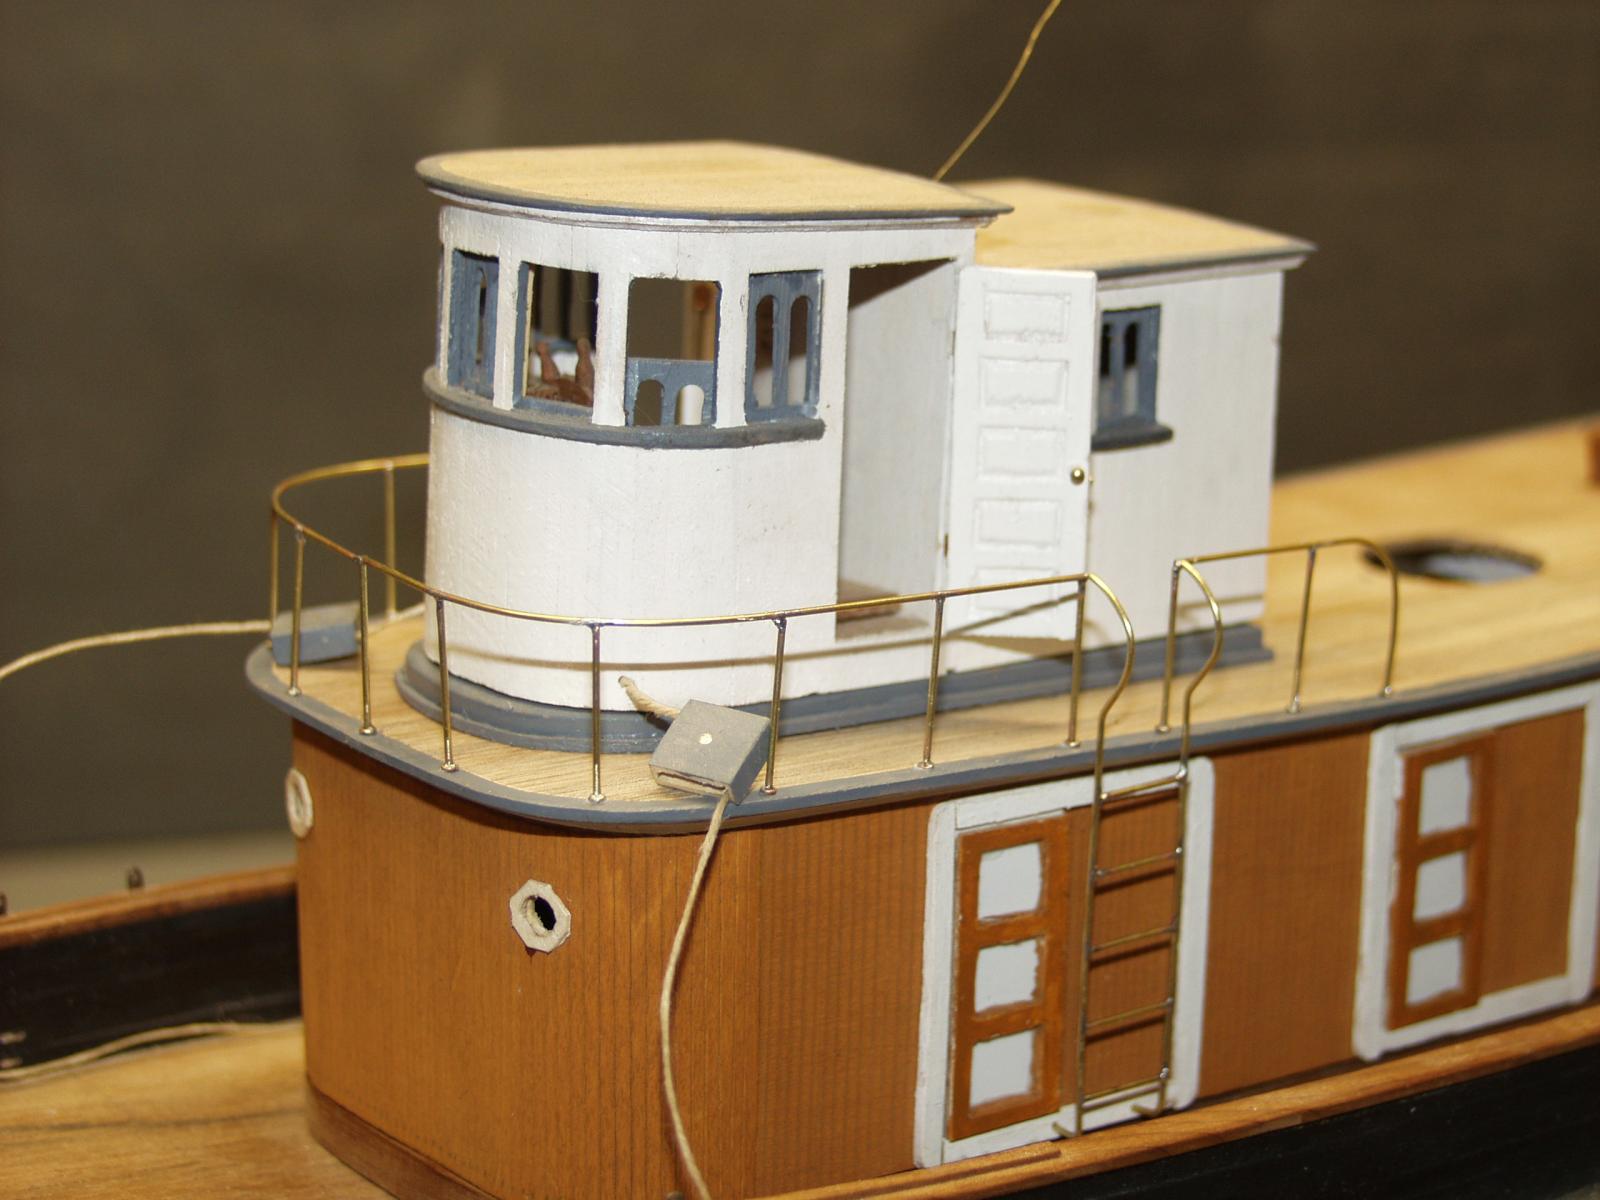
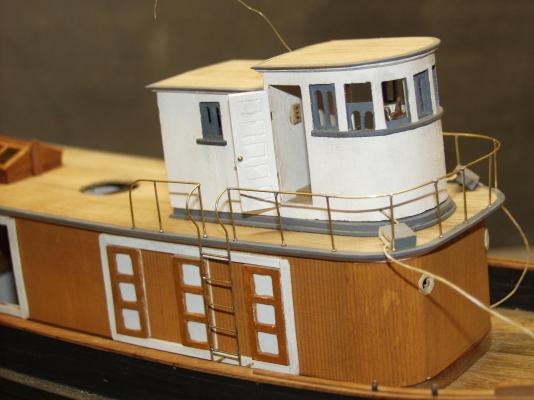
Well it's a good thing I recently had my hair cut short or I would have pulled it all out. Just finished making railings and ladders. Have a little clean up and some paint and I am calling it good.

- 208 replies
-
- 6
-
-
- john cudahy
- finished
- (and 1 more)
-
Nils, Great looking deck! With that companionway the only way on to that deck it must have been a real pain for the deck hands to work that deck. I also wonder about the three sets of bollards but no chocks to lead lines past the rails. Not nick picking just wondering how it all worked on the real thing.
- 2,625 replies
-
- 4
-
-
- kaiser wilhelm der grosse
- passenger steamer
- (and 1 more)
-
Thanks, Patrick Those skido's of yours would have been more than I could handle. They look great! John thanks for looking in and glad things are looking better for you and the misses Seems I have been spending more time rebuilding the shipyard than working on my project. I will soon have things more to my liking and can get back to my project.
- 208 replies
-
- 2
-
-
- john cudahy
- finished
- (and 1 more)
-
http://mirc.sc.edu/islandora/object/usc%3A29874 Steam boat parade on the Ohio in 1929
-
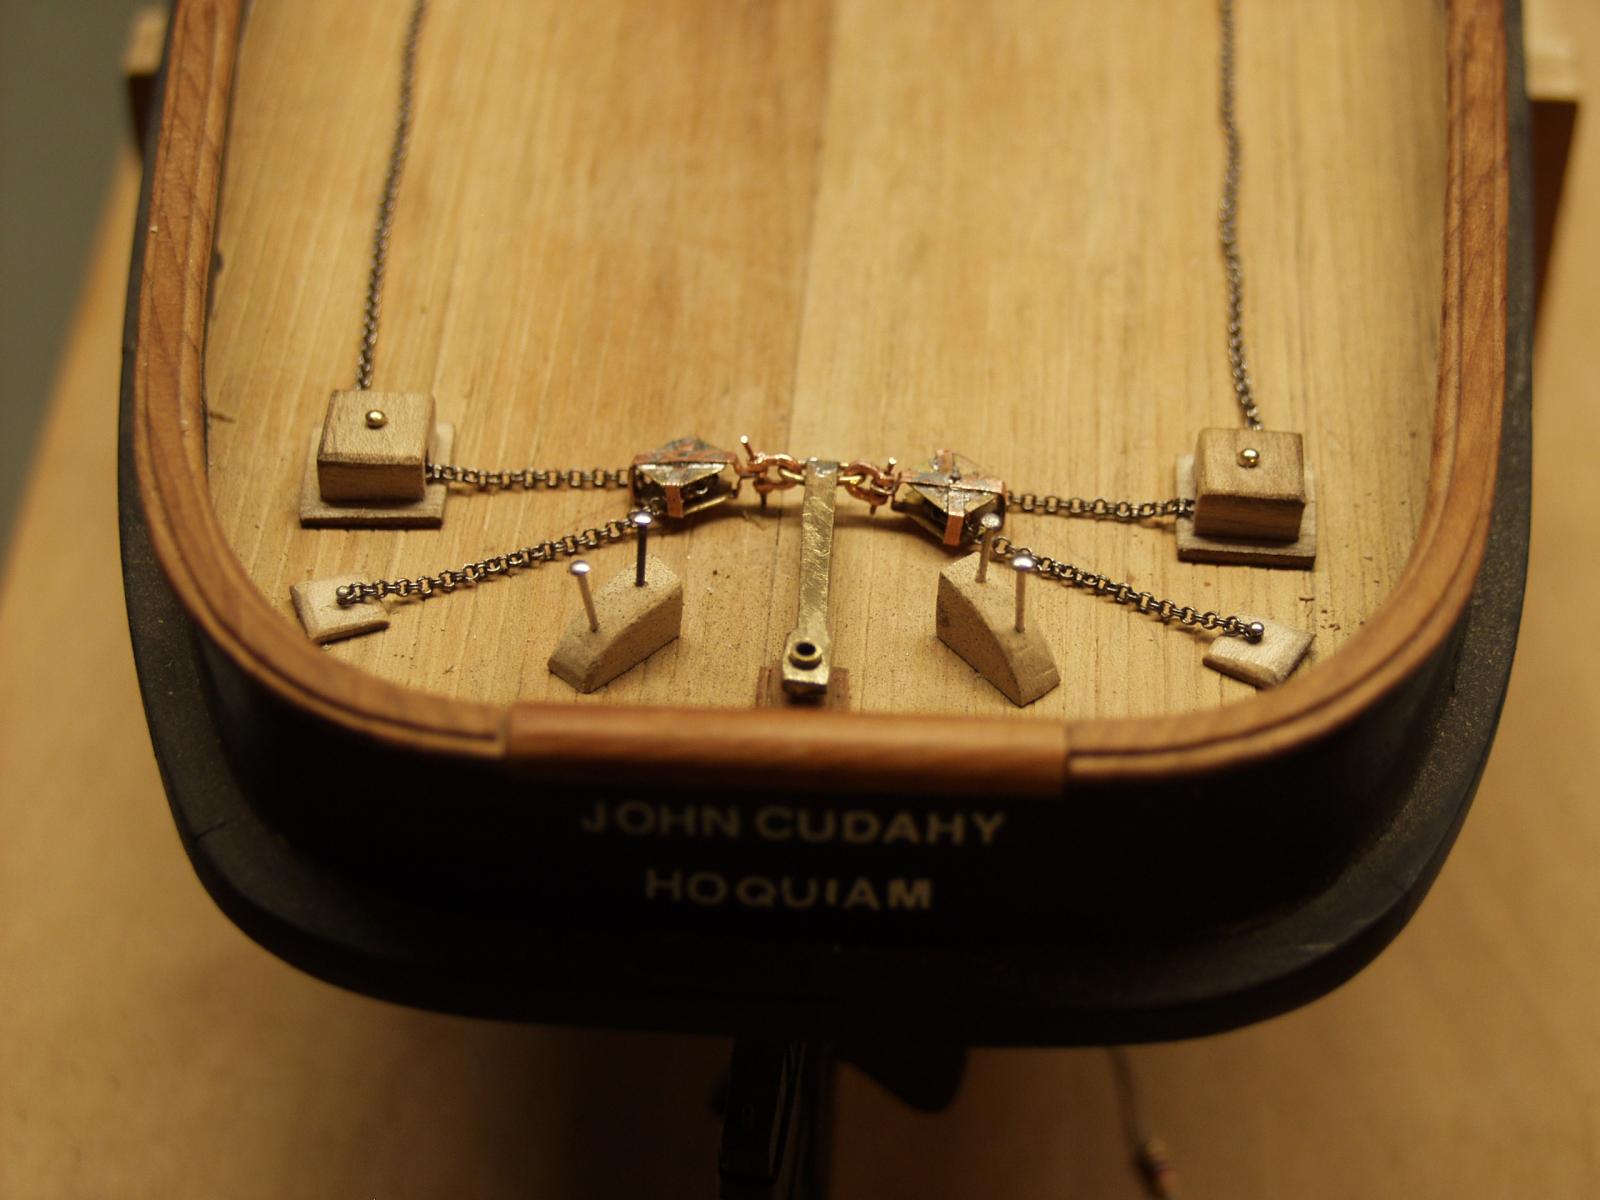
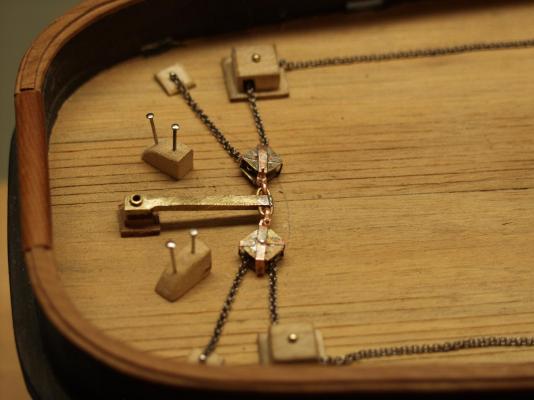
Well I have gotten a little more done. Getting all the brass bars in their holes on both ends was fun
- 208 replies
-
- 7
-
-
- john cudahy
- finished
- (and 1 more)
-
Nice looking cowl vents, Nils and you only have to do this how many times?
- 2,625 replies
-
- 4
-
-
- kaiser wilhelm der grosse
- passenger steamer
- (and 1 more)
-
Thanks, Patrick & Nils, I had to show that I am still working on her. Slowly ....
- 208 replies
-
- 2
-
-
- john cudahy
- finished
- (and 1 more)