HOLIDAY DONATION DRIVE - SUPPORT MSW - DO YOUR PART TO KEEP THIS GREAT FORUM GOING! (Only 13 donations so far - C'mon guys!)
×


Moonbug
-
Posts
1,028 -
Joined
-
Last visited
Content Type
Profiles
Forums
Gallery
Events
Everything posted by Moonbug
-
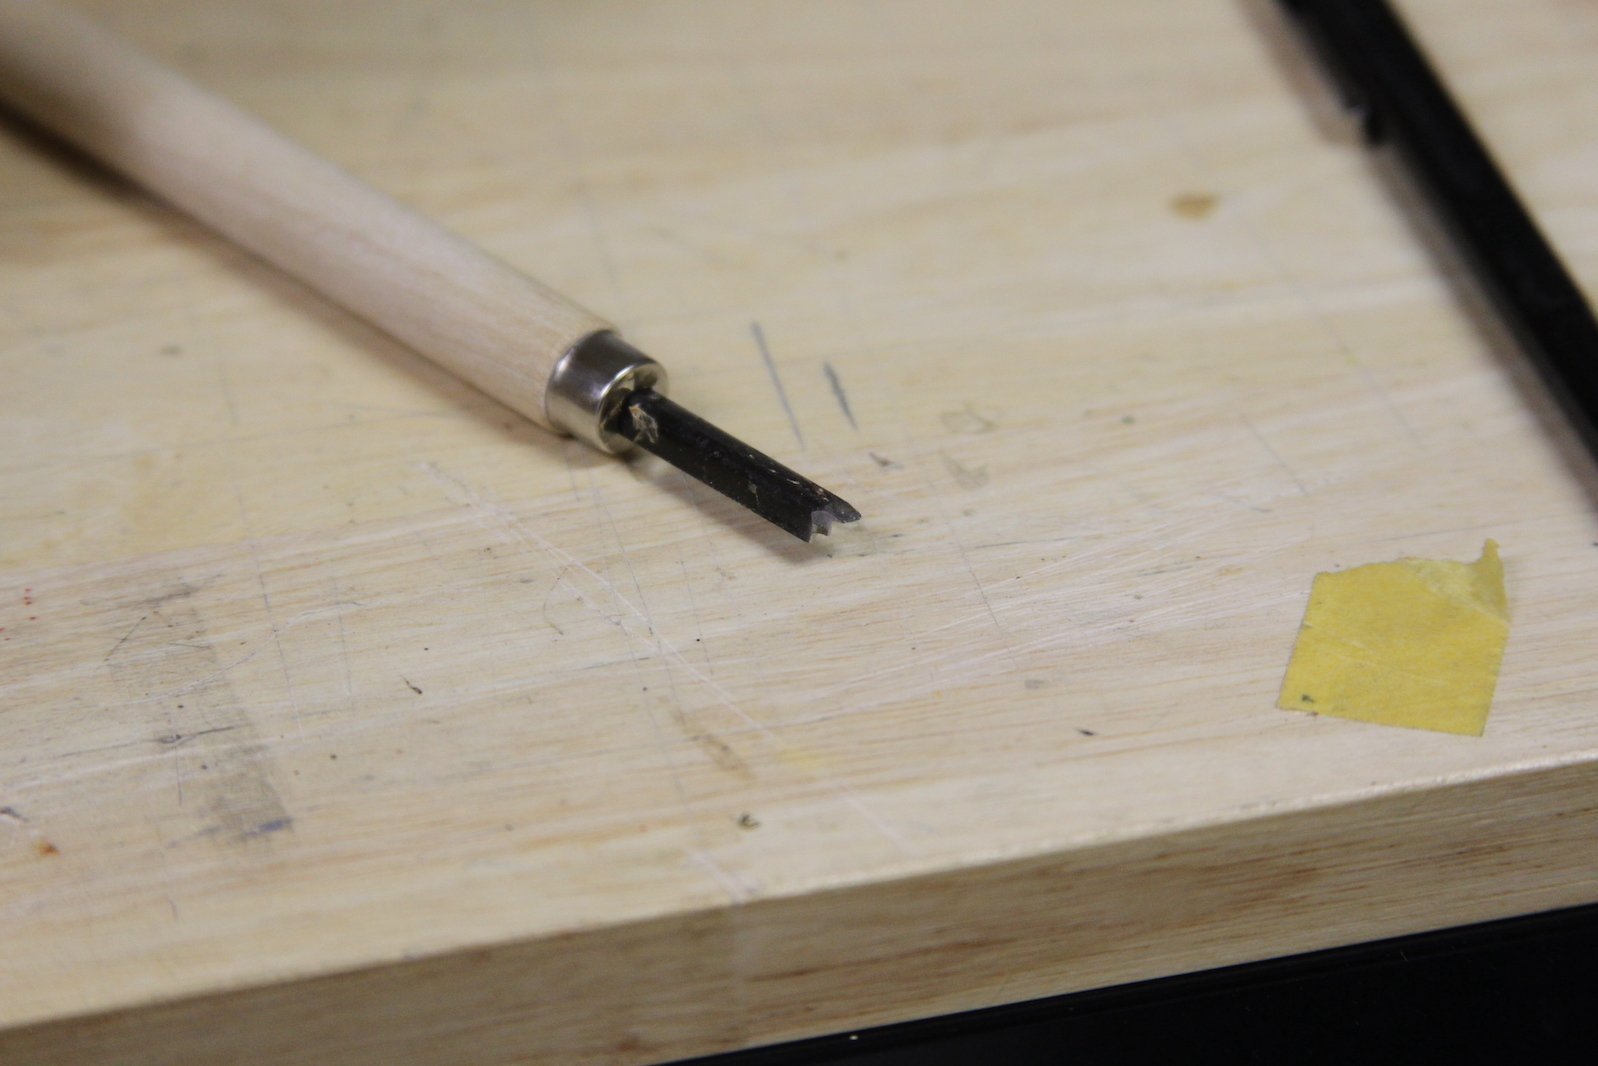
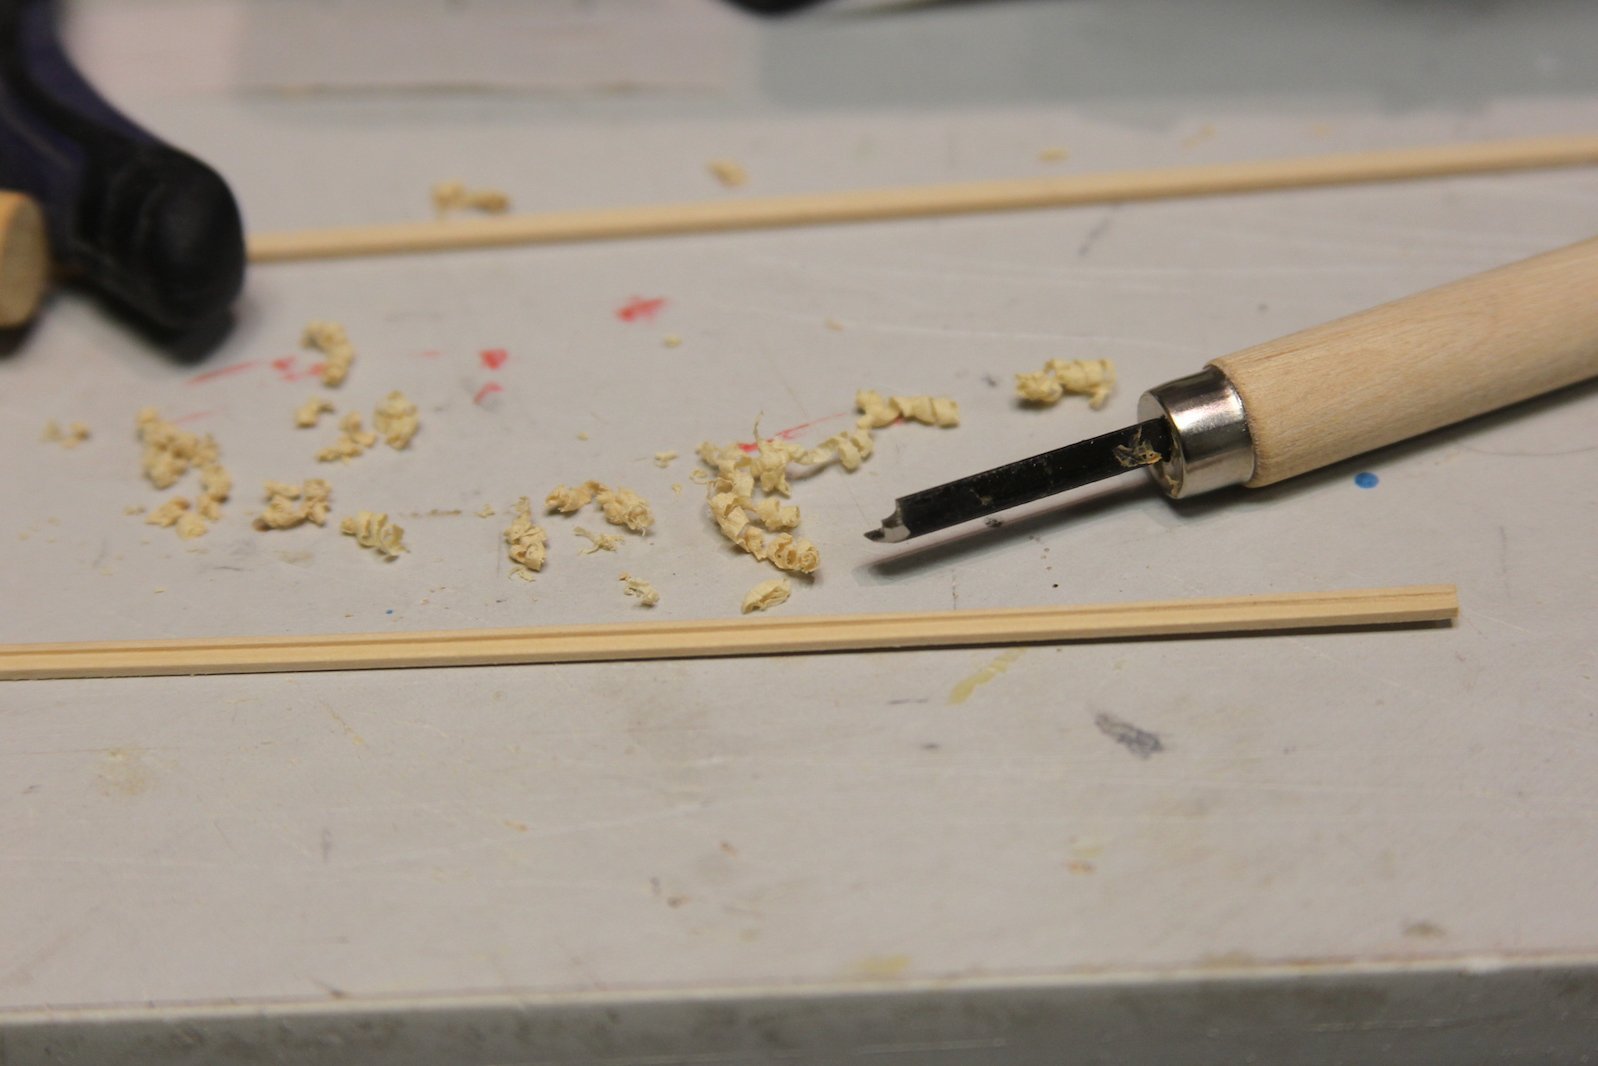
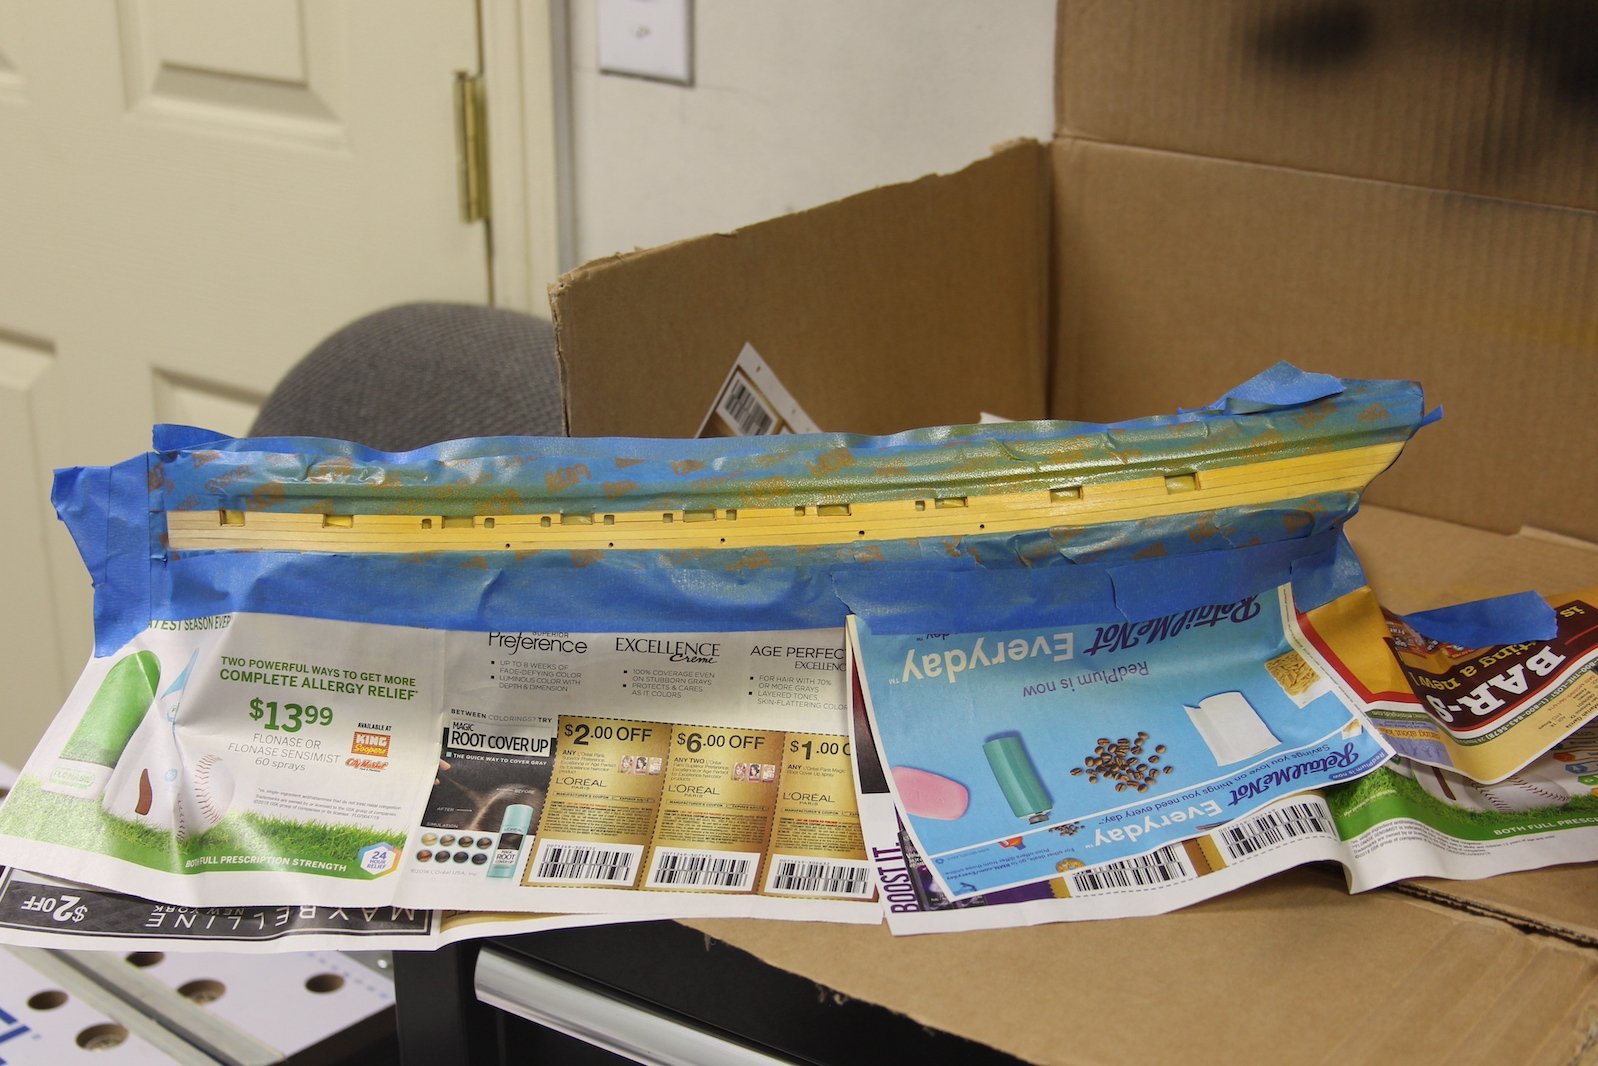
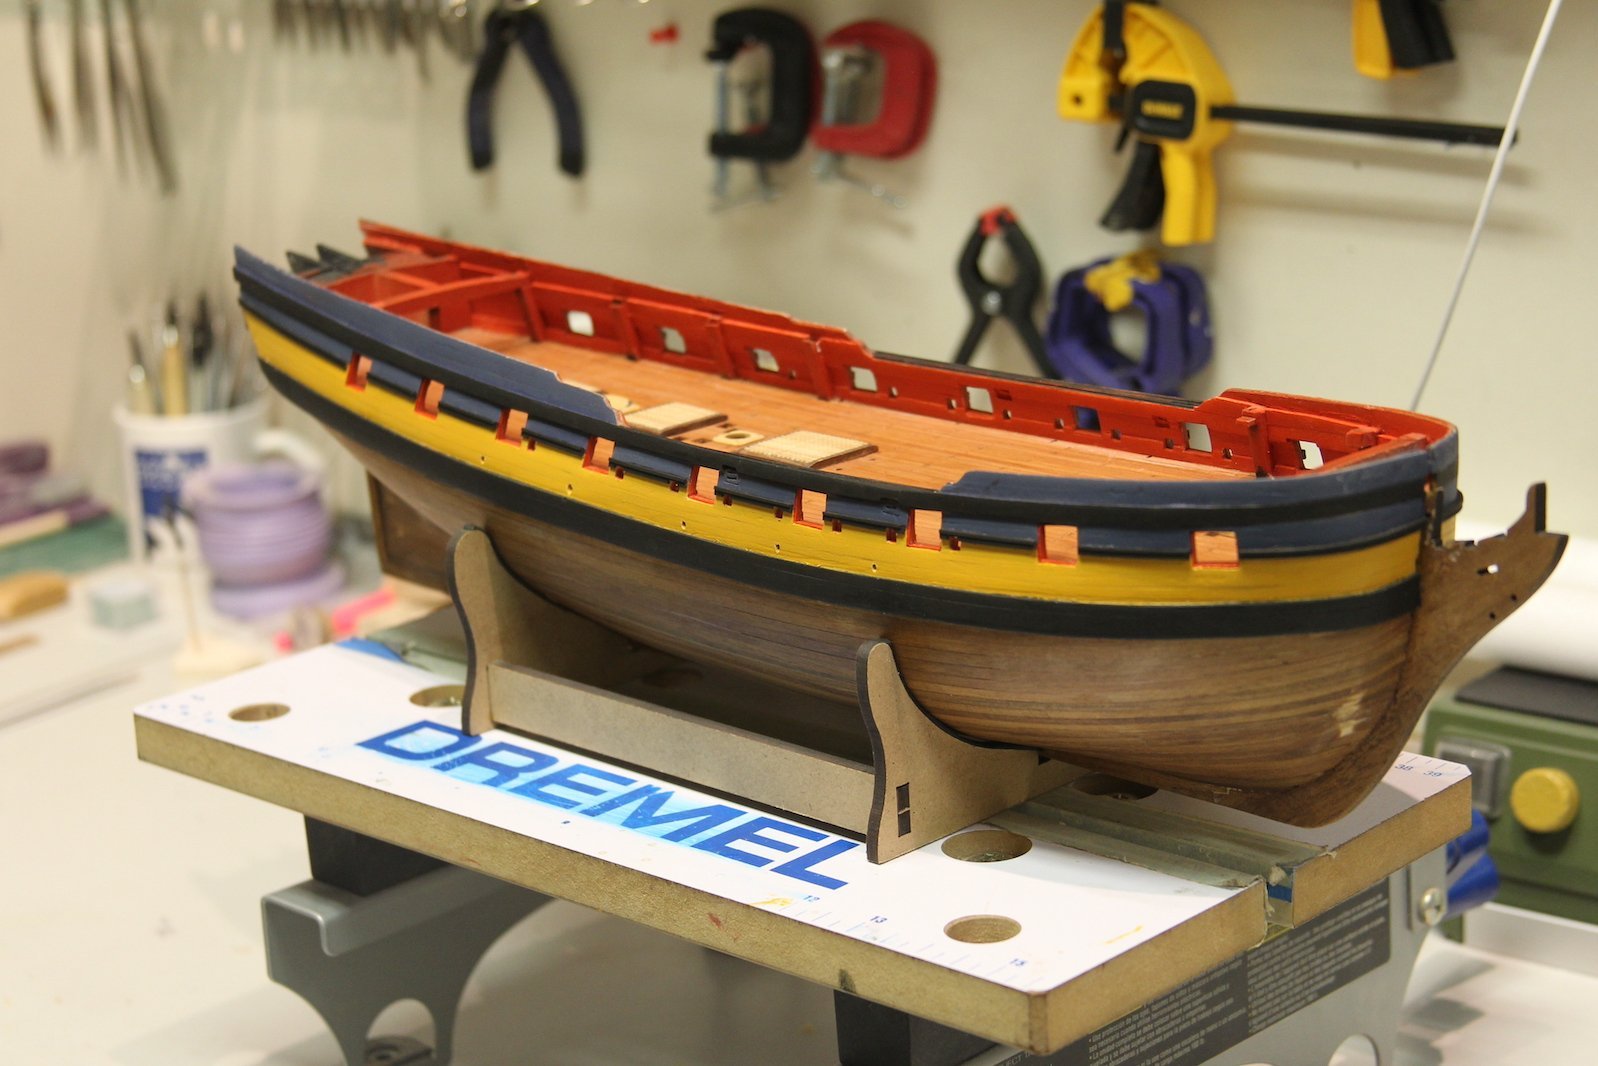
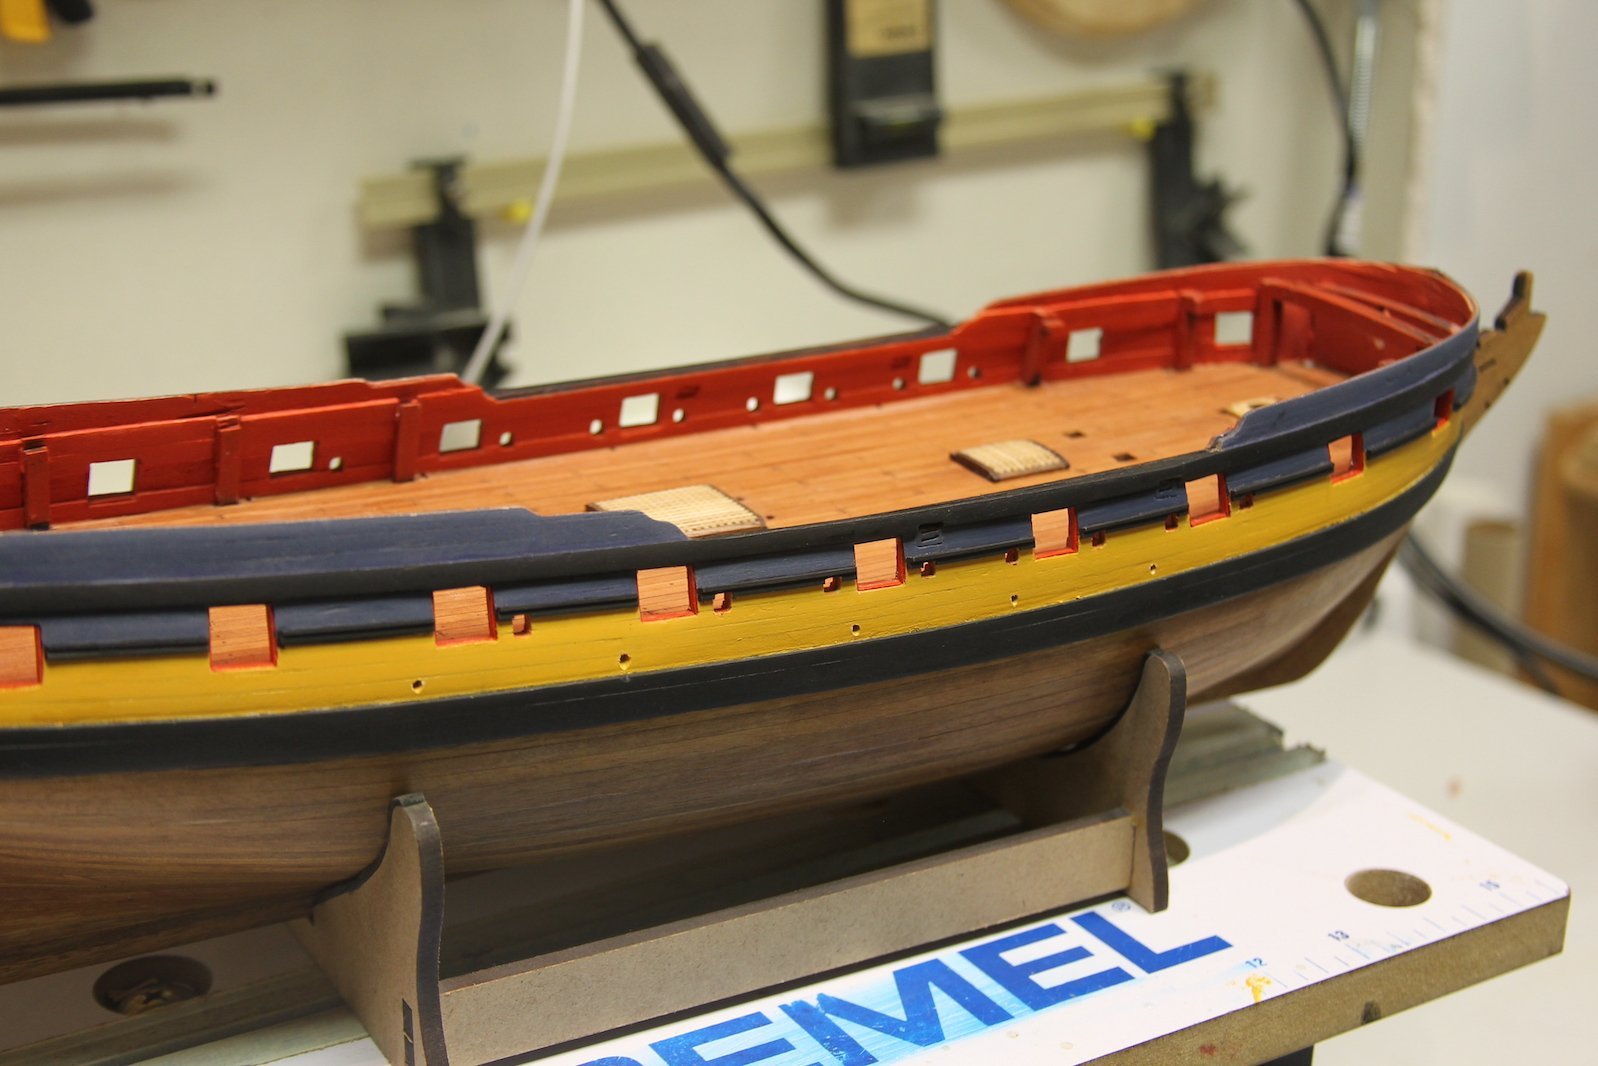
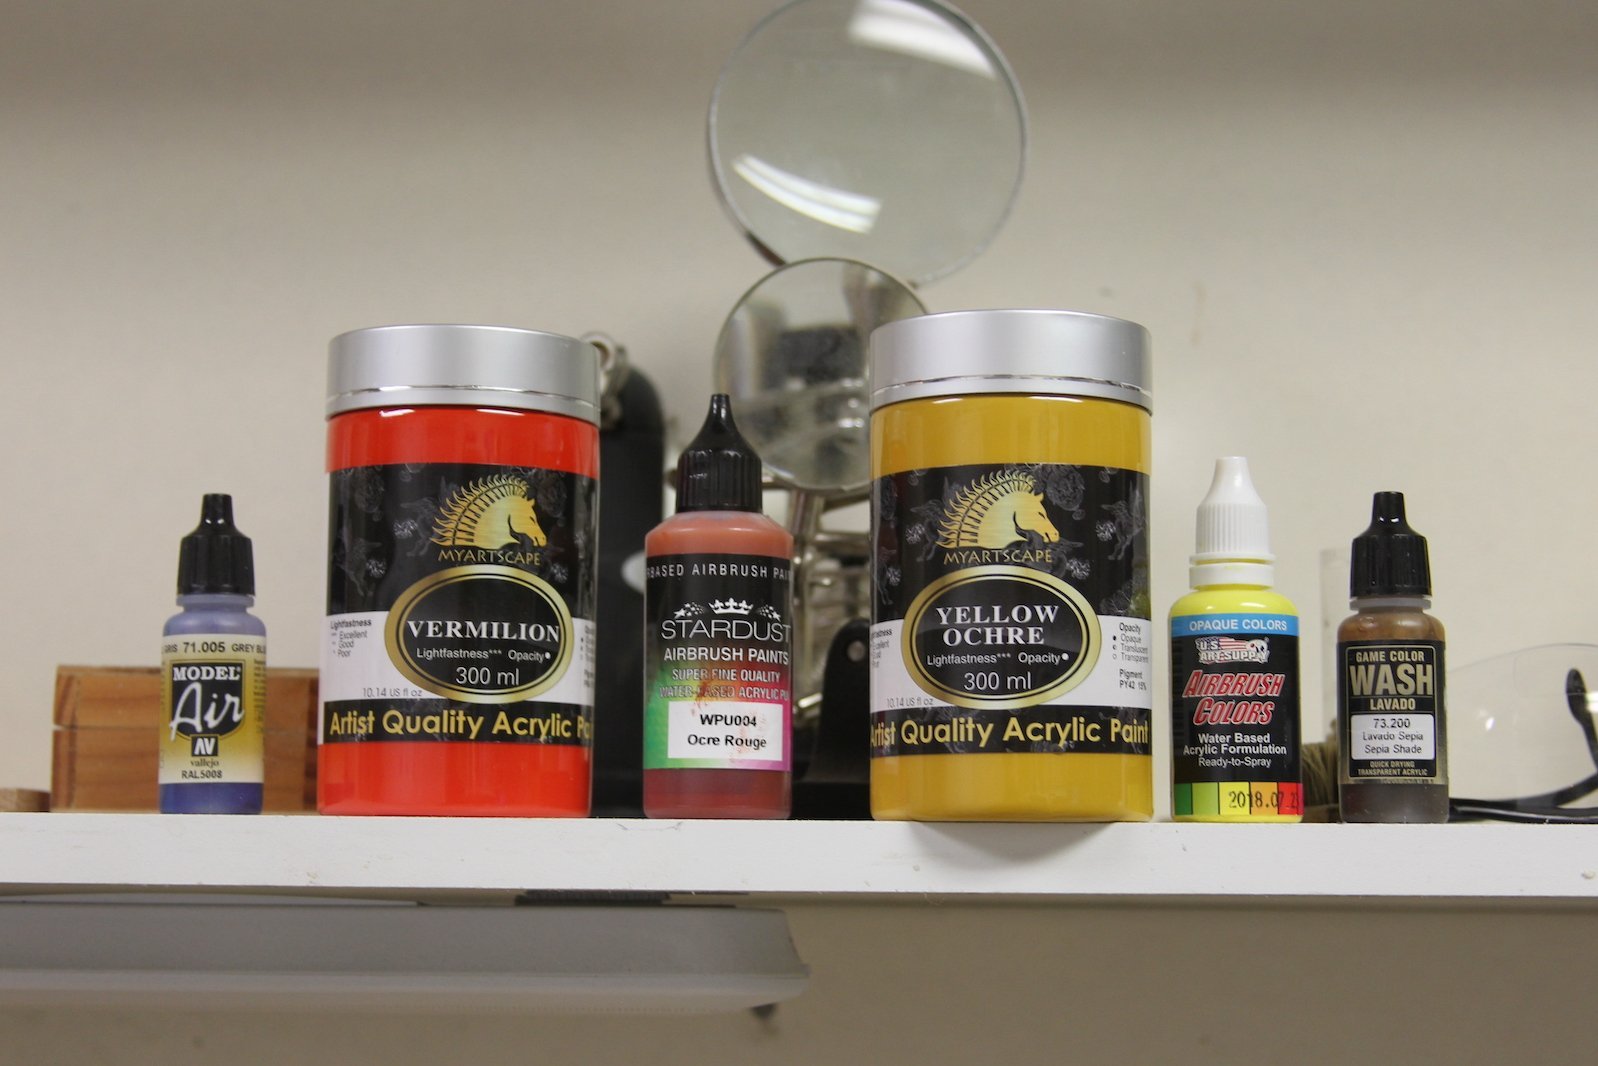
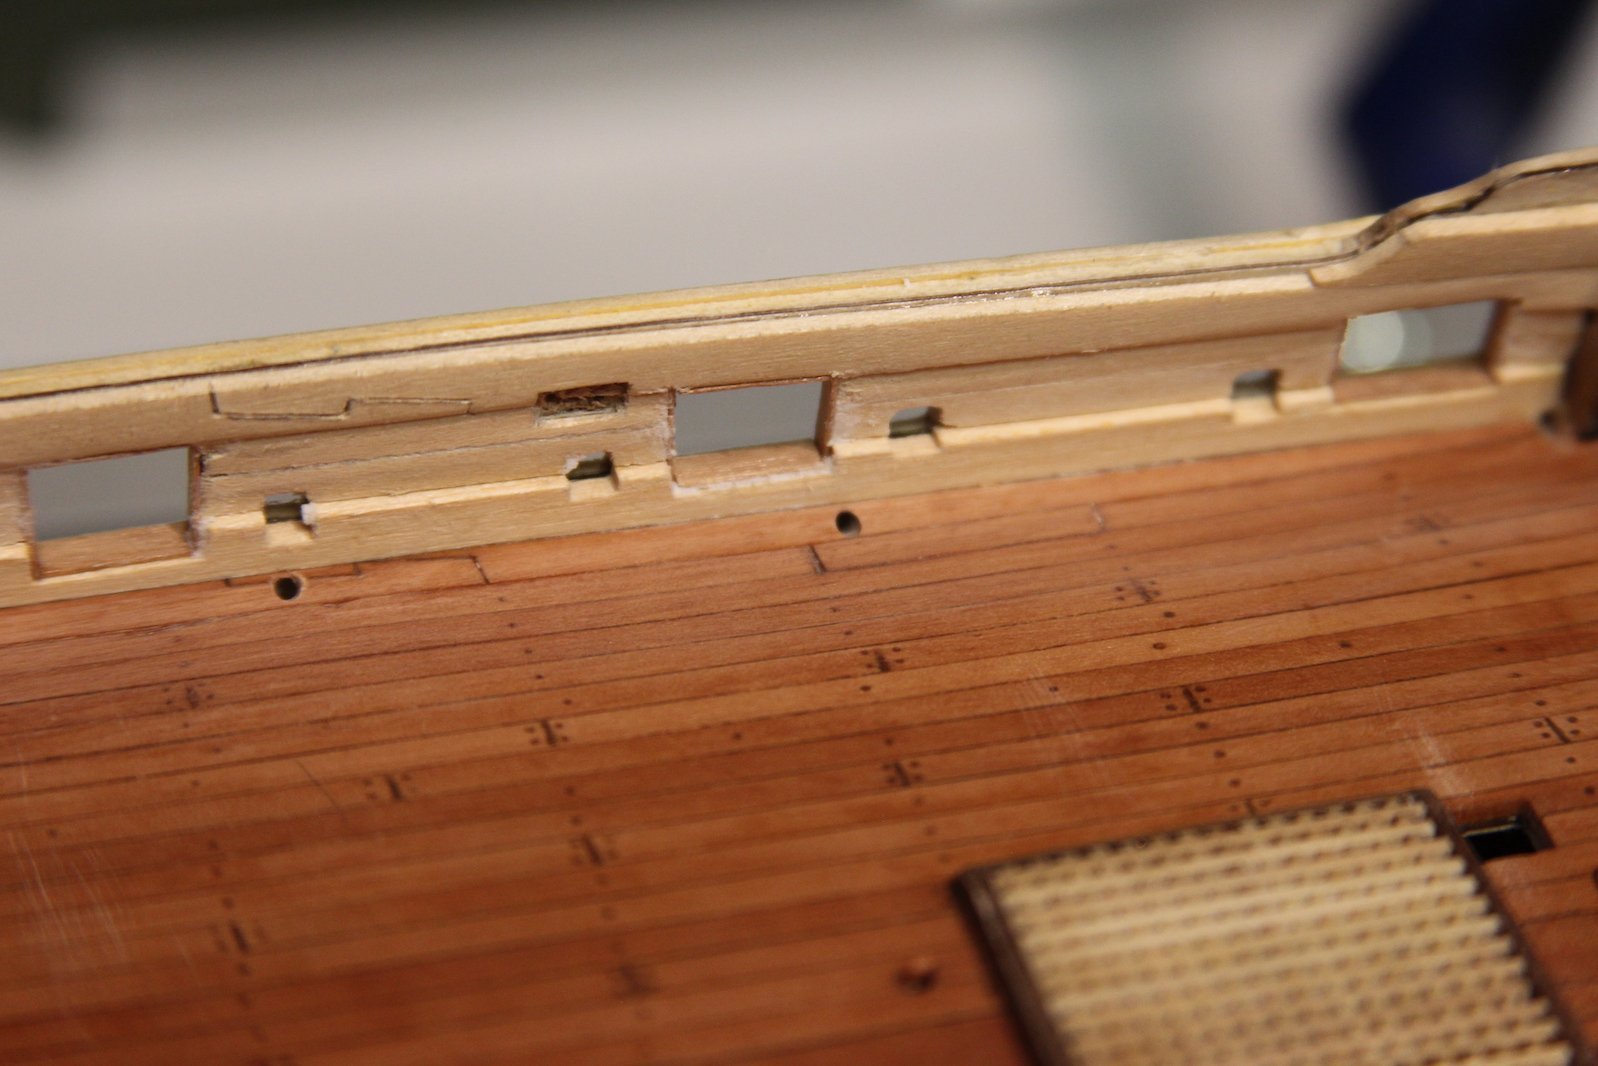
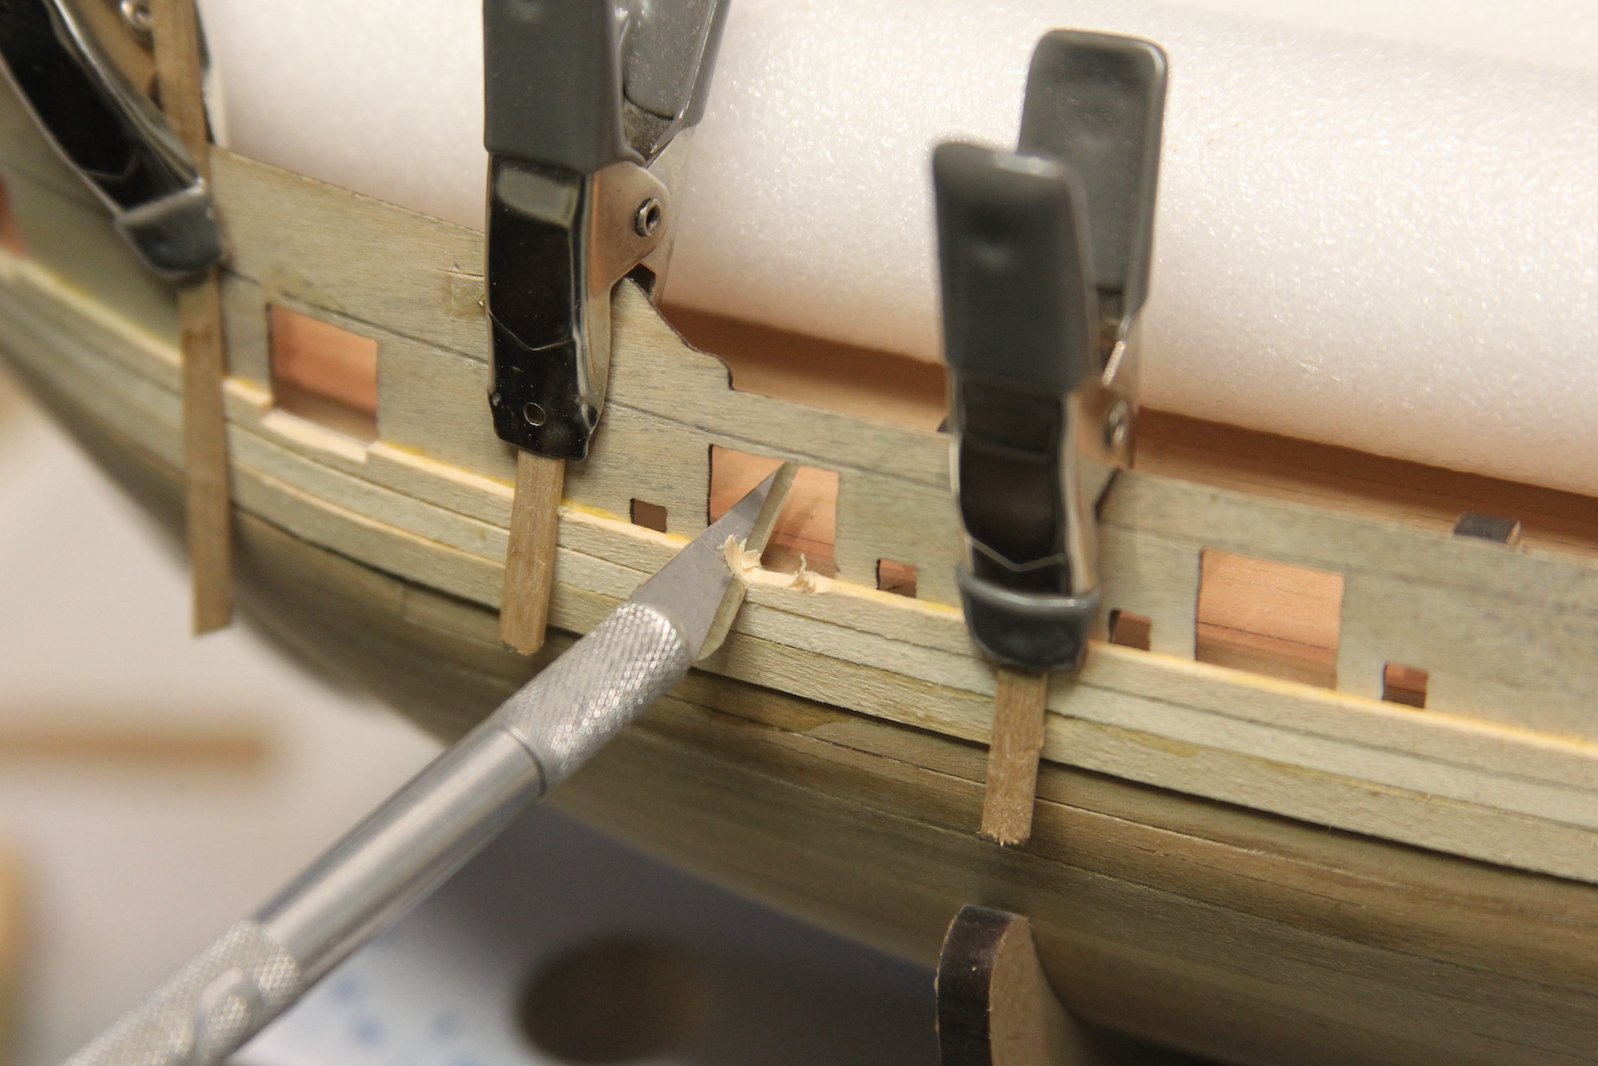
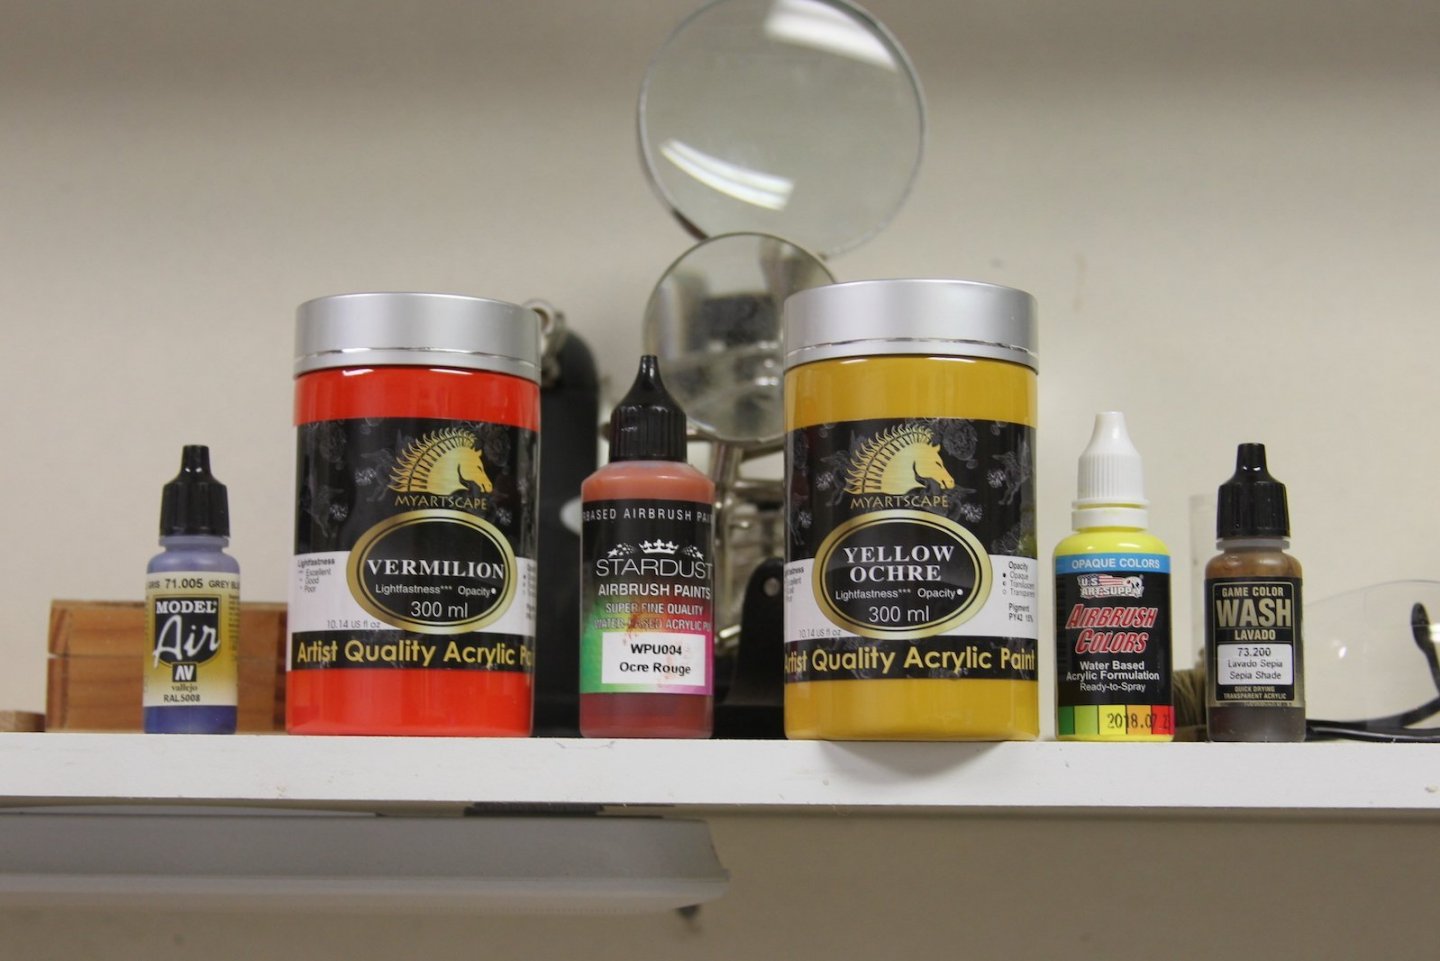
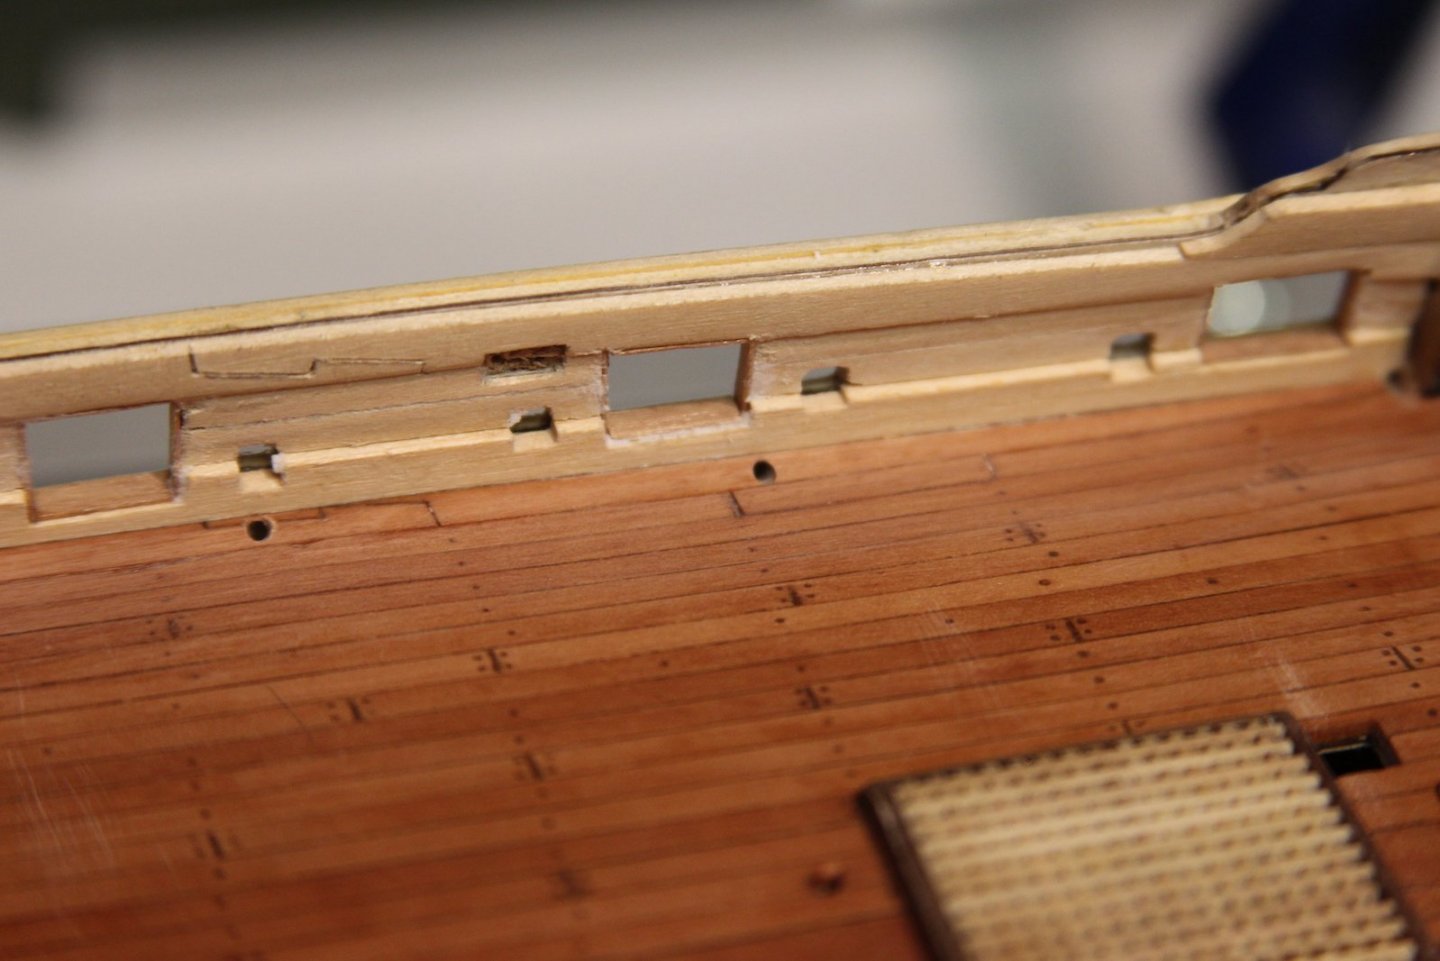
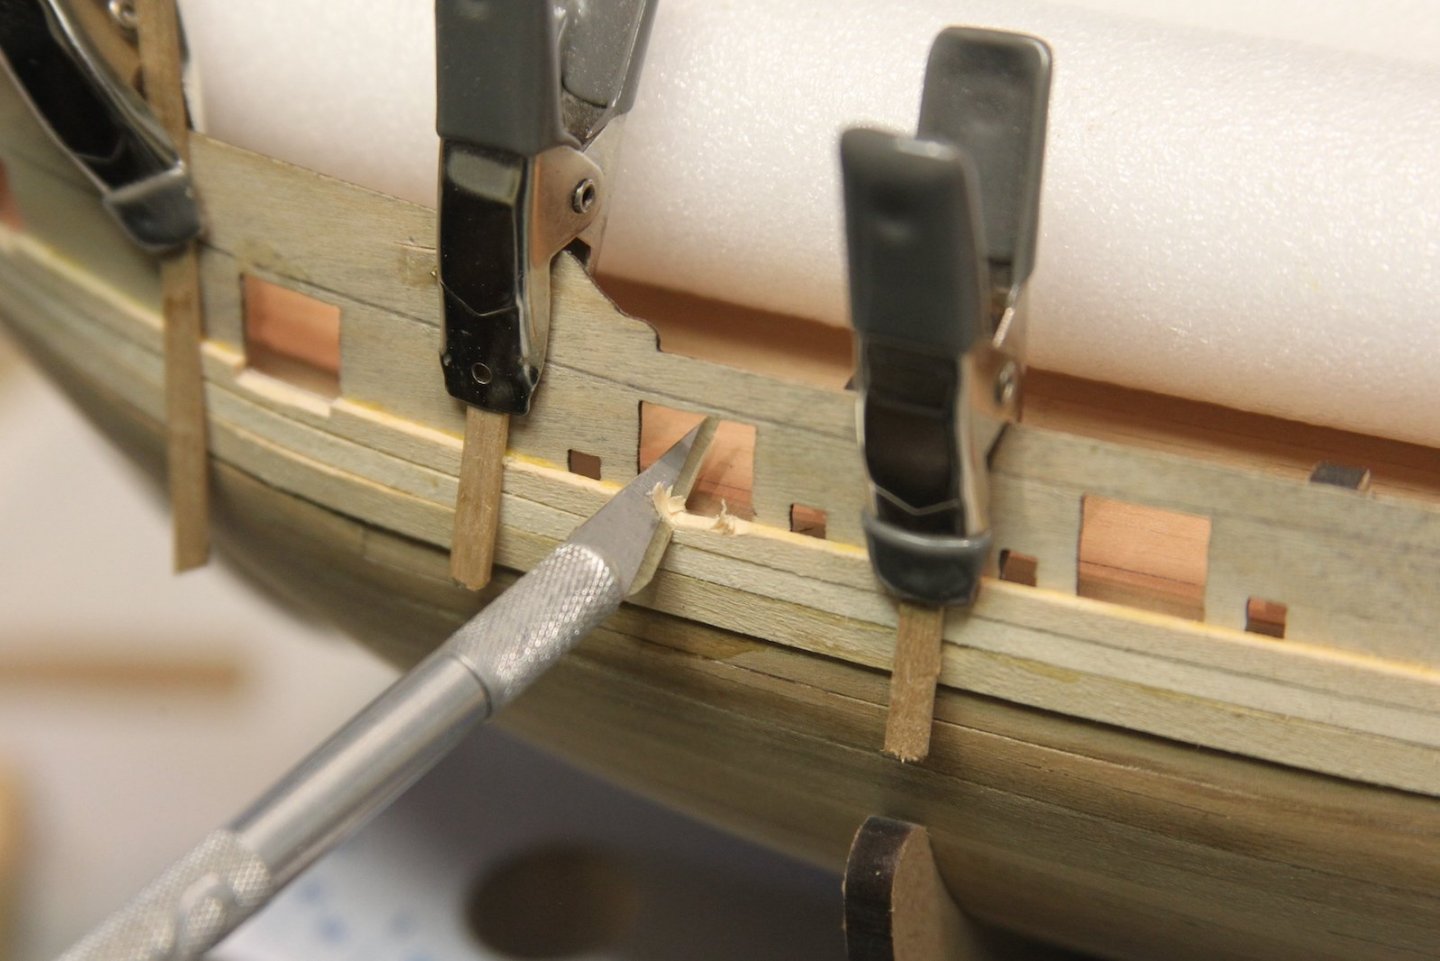
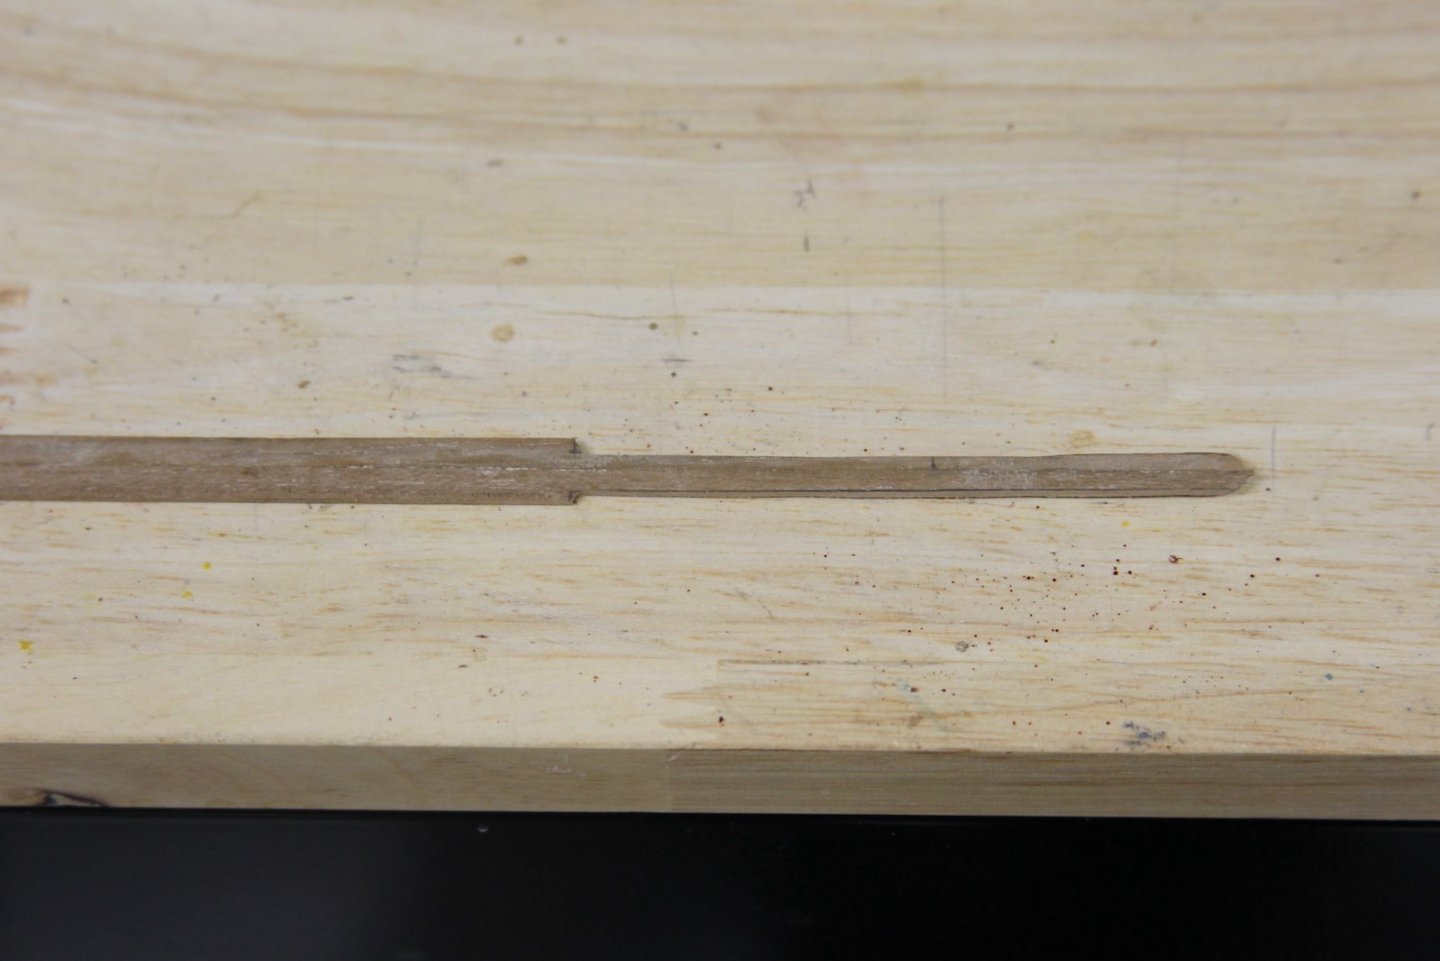
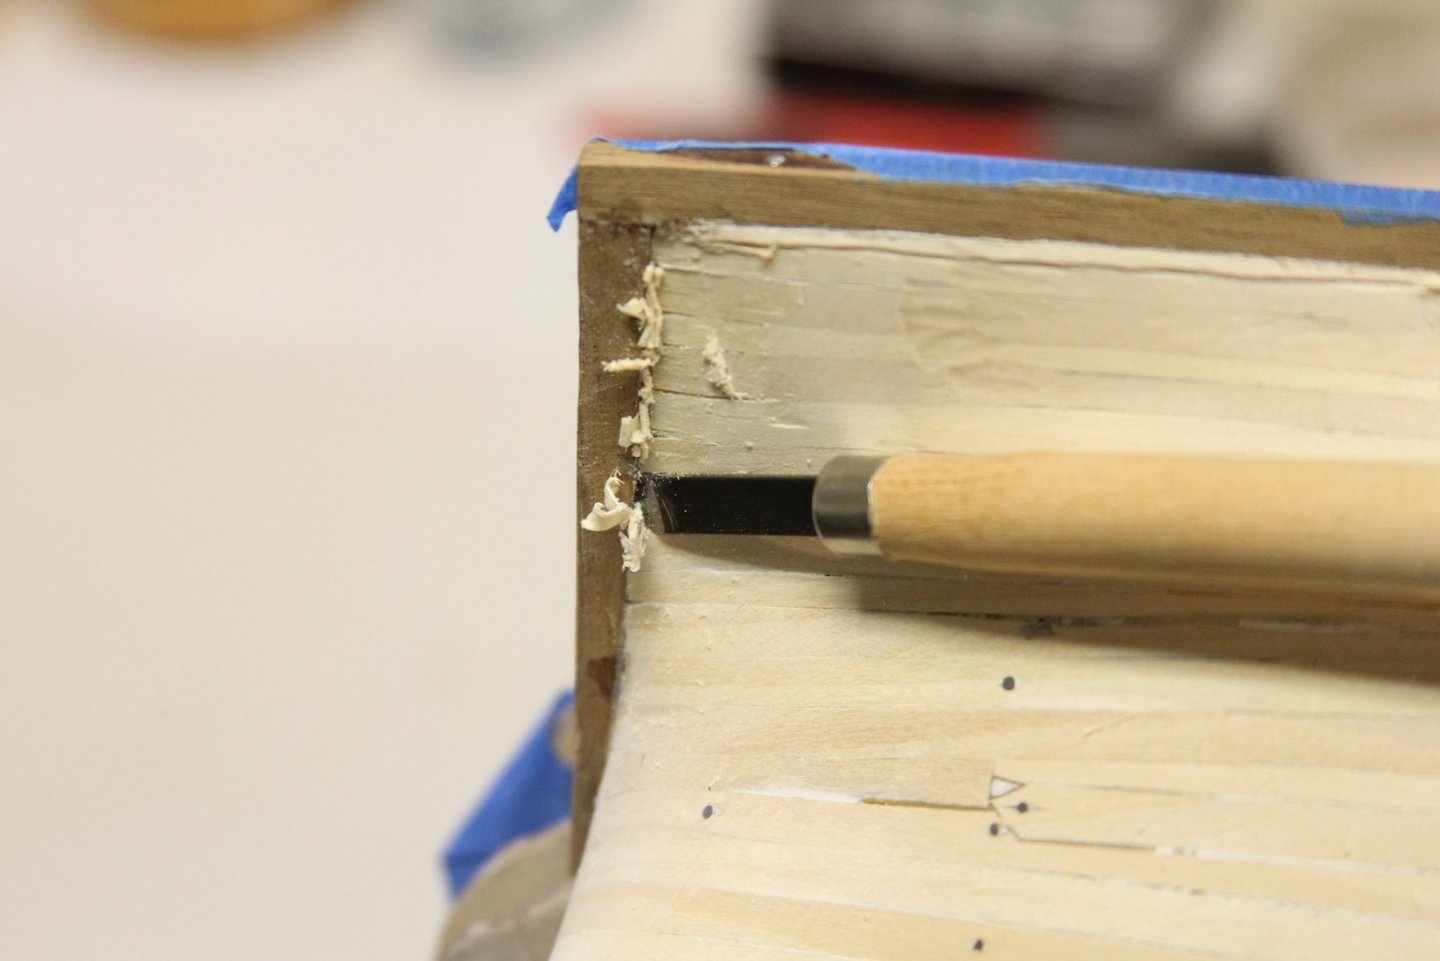
 One of the things that I really enjoy about this forum and interacting with all you fine builders - is the plethora of ideas when it comes to home-made tools and techniques. Here's my version of a scribe tool for rails and strips - a 90 degree angle chisel with the edge filed off. The 90 degree end get butted up against the side of the wood strip to keep the line even. I did need to compromise a little bit with the location of this particular strip; which after reading some of the other build logs is not uncommon. Apparently it's tough to get enough room to later attach the frieze, so I lowered this strip and instead notched out the tops of the sweep ports into it. Still looks pretty clean. From there it was about eight to ten hours of painting. First I masked each section off and hit light even coats with the airbrush to get the lines that I wanted, then I went through the entire ship touching up by hand. I've included my array of color choices: The Yellow is thinned down with a little brightness added to the yellow ochre. The Vermillion red is toned down with a nice earthy ochre, and the blue is Vallejo's blue grey. I'm still experimenting, but the sepia wash will be used to give the frieze texture after it's painted yellow ochre.


- 419 replies
-
- 14
-

-
- Victory Models
- Pegasus
- (and 2 more)
-
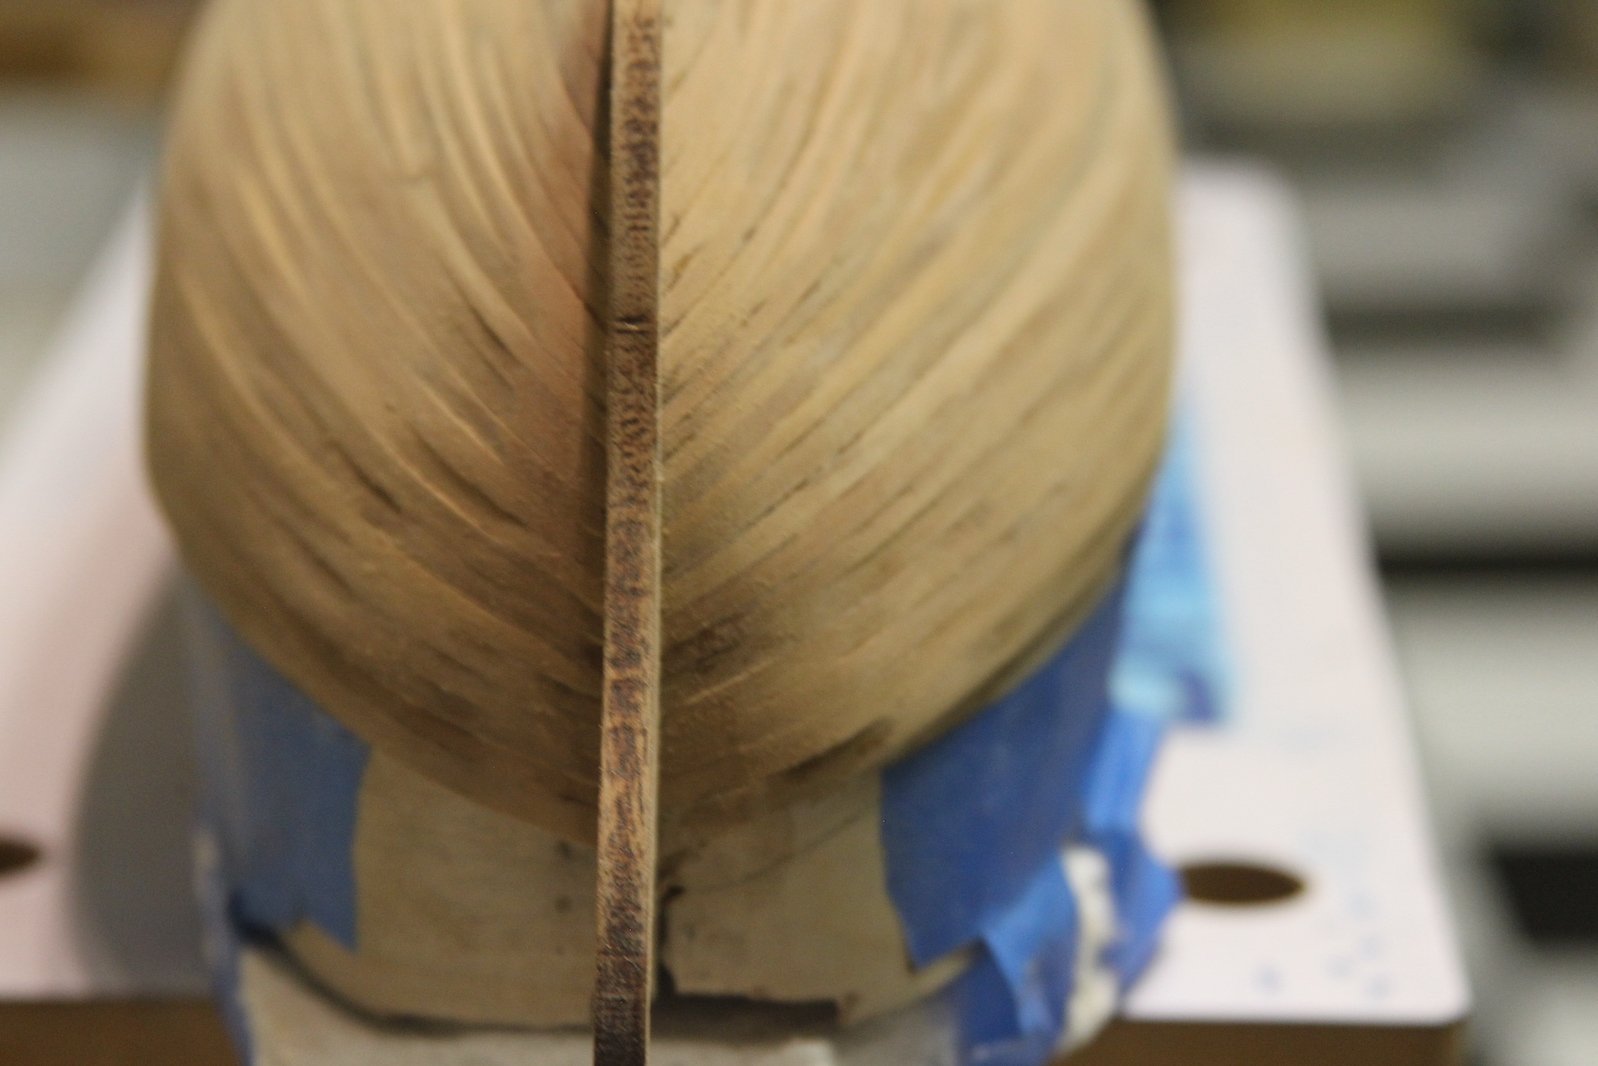
Just a short post about a small, but anxiety-ridden process for me - the scuppers. I measured them out and drilled the angle through from the black strake to the deck. Got almost all of them right on too! Most are 1.5mm and the pump dale scuppers at 2 mm. I have decided not to 'fill' the scupper holes with a simulated lining like some folks have. I tried it on a couple with a couple different things and I couldn't really get it to not look like a**. So I'm going with a cleaner, slightly less historically accurate angle of having them natural holes. Maybe I'll fill them later if I can find a nice tube that looks legit.

- 419 replies
-
- 7
-
-
- Victory Models
- Pegasus
- (and 2 more)
-
Thanks Andrew - that's an interesting idea, I'll have to give that a shot.
- 419 replies
-
- 2
-
-
- Victory Models
- Pegasus
- (and 2 more)
-
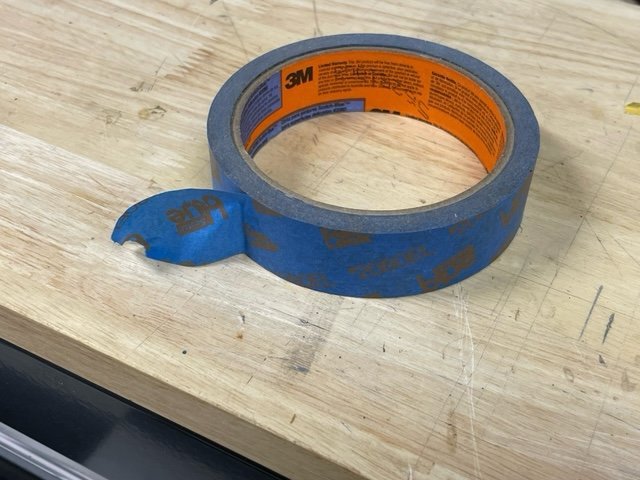
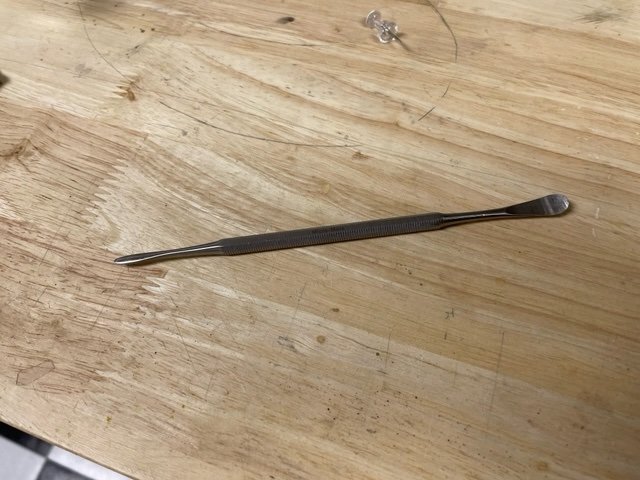
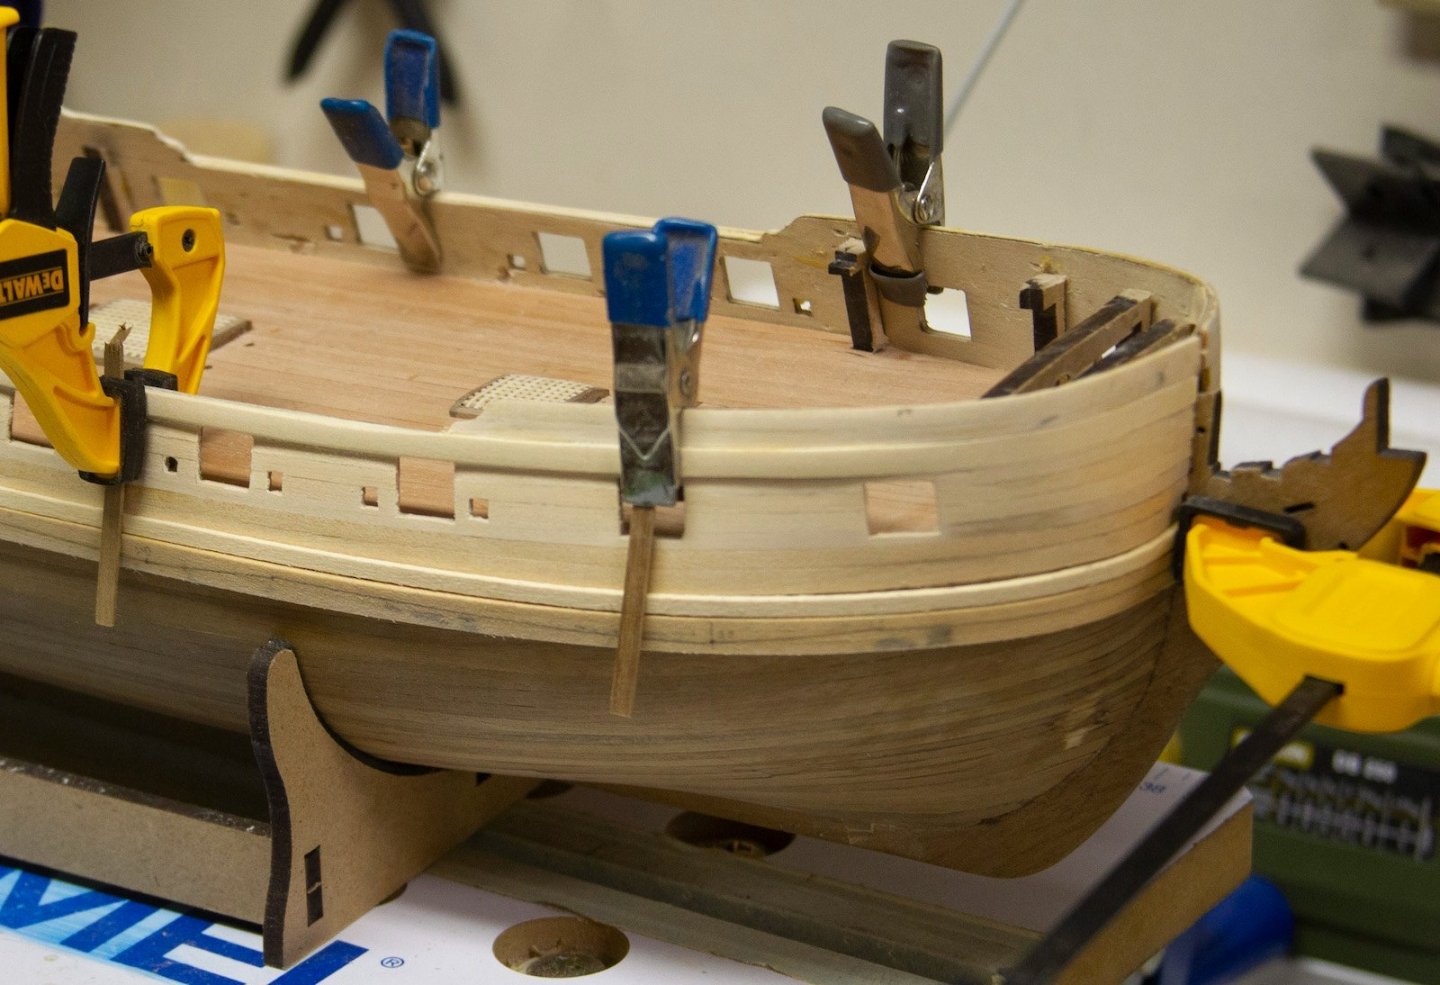
Thanks @mtaylor - Very true, the trick of course being how to mitigate the apparent sin. Hey Pete - great question of course and there seem to be as many personal techniques as there are people. But, for me it comes down to two key things: the type of tape and several light coats. Tape: The type of masking tape is crucial for me - the thinner the better. Tamiya modeler's tape works pretty well for most applications and comes in a variety of sizes. But, my favorite is this stuff that some companies call "Frog" tape. It's much thinner than traditional masking tape and feels more plastic-y than paper. It's meant for house painting, but I find it works well on wood. It is more difficult to tear - but I cut with scissors. This also allows you to create small curves. I prefer to cut the curves necessary. A couple other things that go along with it - I use this weird tool I found a long time ago to rub along the edge several times to get the edge seal very, very tight. The edge of a spoon also works well. The trick is to be able to press down the edge without making an indentation. When it comes to actually painting, my biggest mistake is lack of patience (like any aspect of building right?), but very light coats of paint and several coats work best for me. Too much paint on the brush or over thinned paint are deadly. This is why I prefer an airbrush when I can - I can adjust the flow for really, really light coverage which prevents running. Then I just go over the same spot several times with a little bit of drying time in between. A couple random extra notes: When I'm laying down the tape, if I don't get it in the exact right spot, I don't try to pull it up and re-lay it - I use a new piece of tape. It NEVER seems to stick as well on the second attempt no matter what kind of tape I use. When I'm painting with a brush, I paint across the tape edge instead of along it whenever possible. I start the brush on the tape and stroke down across it. Overall - and once again, this is just my experience - but trying different techniques on scrap wood (depending upon the application) and patience. Here's how the edge along the main wales turned out close up.

- 419 replies
-
- 7
-
-

-
- Victory Models
- Pegasus
- (and 2 more)
-
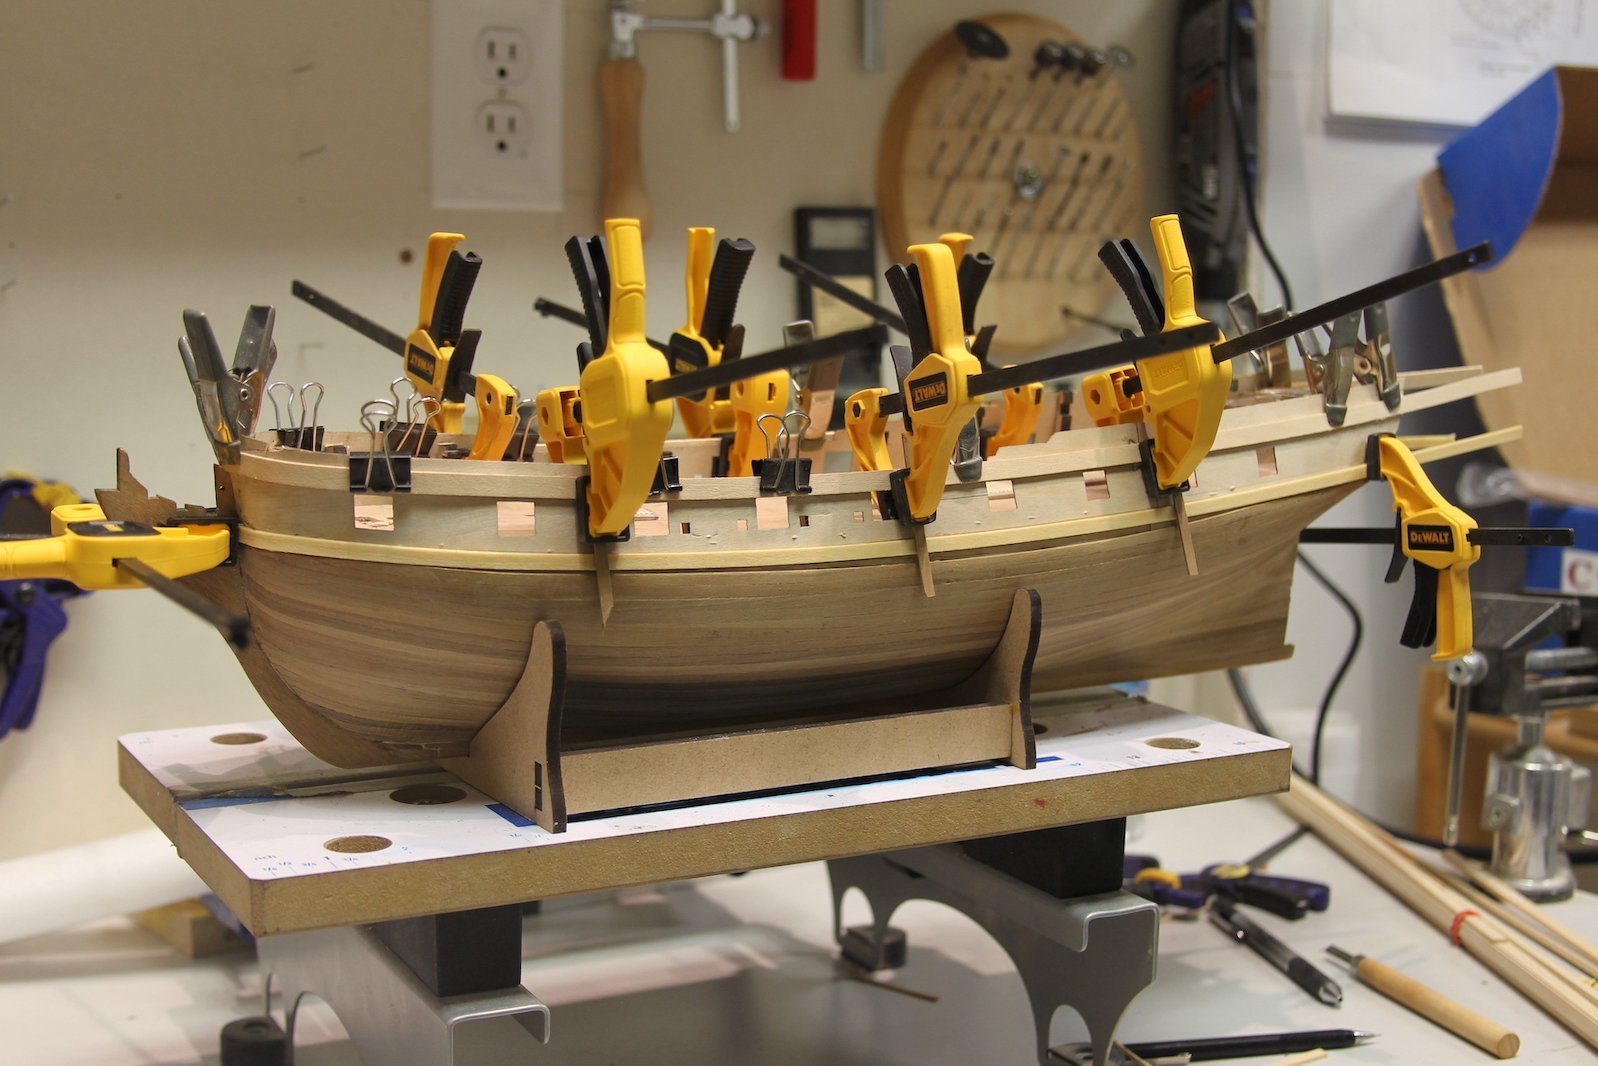
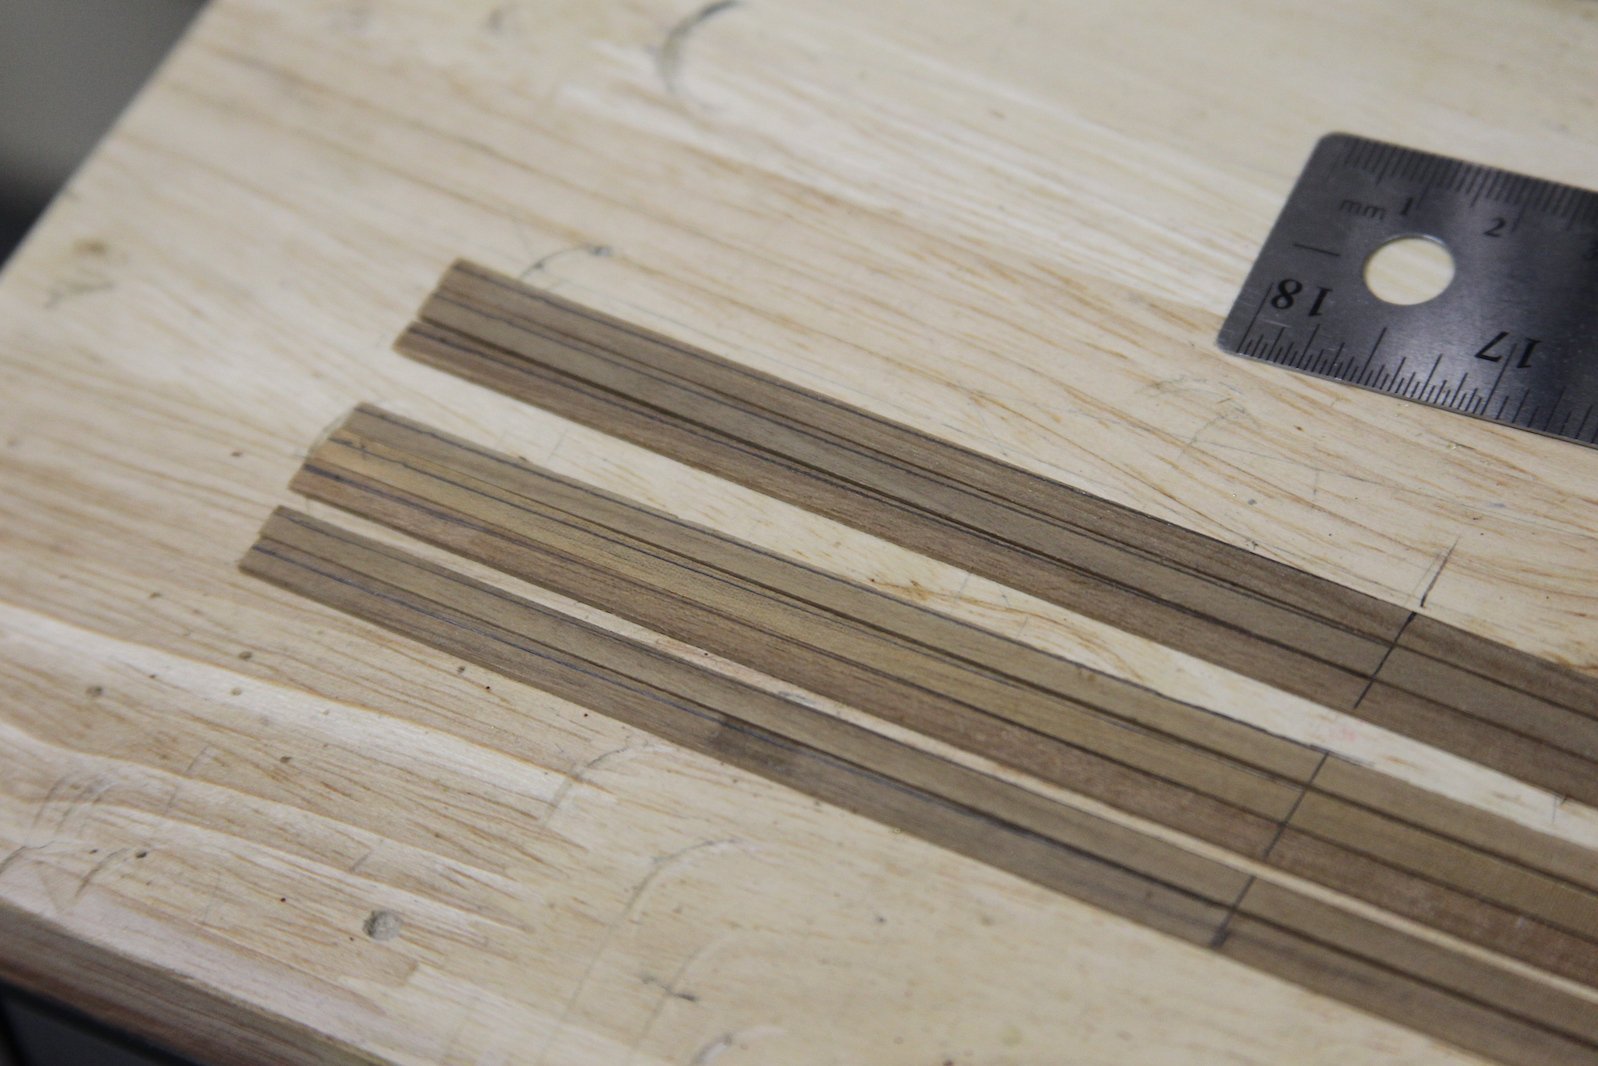
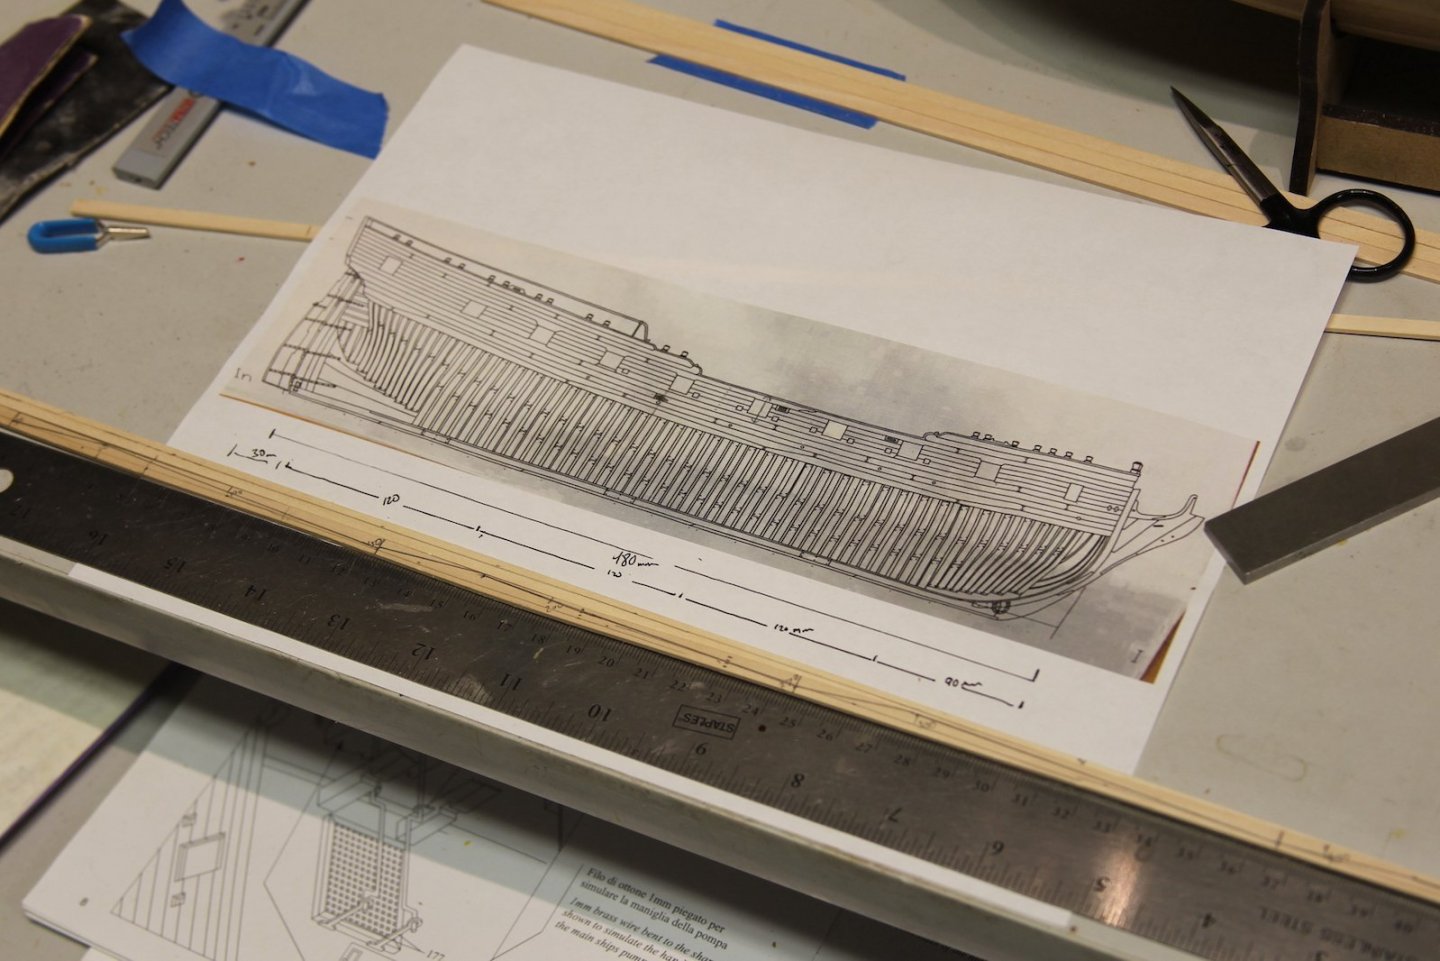
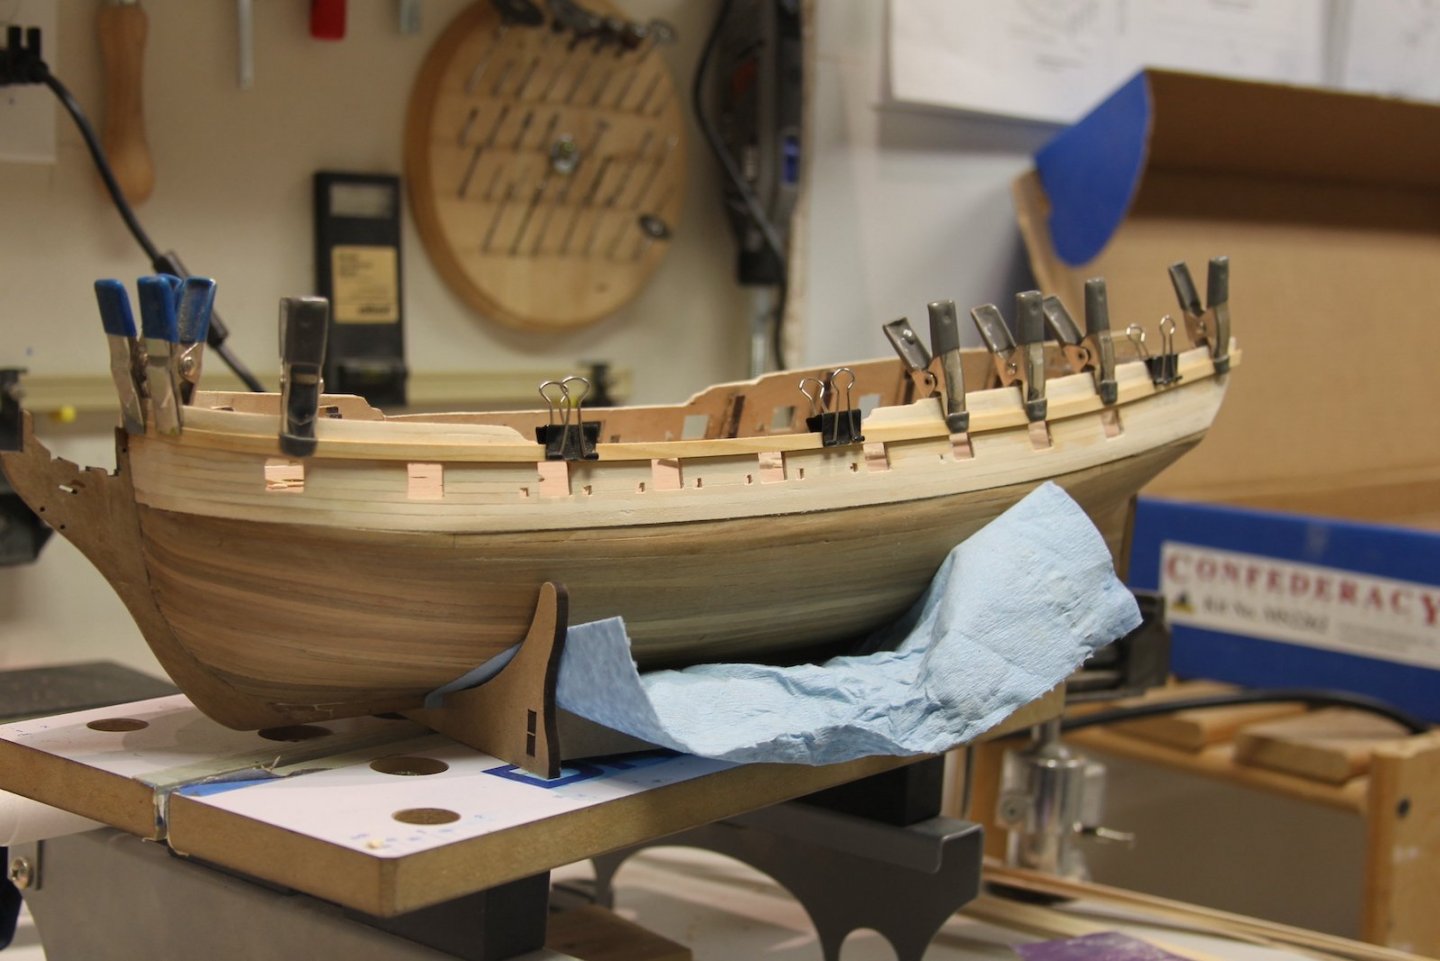
I was bound and determined to use the top and butt method for the main wales since it adds such a sense of authenticity to the overall look of the build. Once again - I'm not cutting my own planks, I'm using various sizes that I have in stock in my stash. So - I measured out about a 12 mm total with the wales, 4 mm for the top and a combined 8mm for the bottom two varying in widths from 5mm at the widest point to 3mm at the narrowest point. To achieve this, I measured out one plank and lined out the shifts, cut the plank, then overlapped it on top of the second plank to essentially create the opposite shift pattern so they could then be married together. I figured this offered me the best shot at the patterns fitting together smoothly. In the interest of full disclosure; at the end of the day (or a couple days as the case may be), this method was only moderately successful. There were still some sketchy and inconsistent gaps and I was ultimately glad that these wales are painted black so the variances are less obvious. I like hand painting for the most part, but I was having difficulty getting the crisp lines I usually get. I blame this on my laser eye surgery. Before the surgery I was basically blind with anything past about 18 inches from my face. I had like - point me in the direction of the eye chart cuz I can't see it - kinda vision. But - anything close was perfectly in focus. Great for ship / model building - not so great for... well, life. Now - I have 20/15 distance vision, which is awesome. Except, I can't see crap up close. So, I now have varying degrees of reading glasses, magnifying head gear, etc. But, I'm still getting used to it and it has indeed affected things like painting and small carving. Anyway - not to make this some kind of "woe is me" story - but I opted for taping off the ship and airbrushing the paint on the wales instead. I new I could get the tape much more precise than a brush by hand.


- 419 replies
-
- 11
-
-
- Victory Models
- Pegasus
- (and 2 more)
-
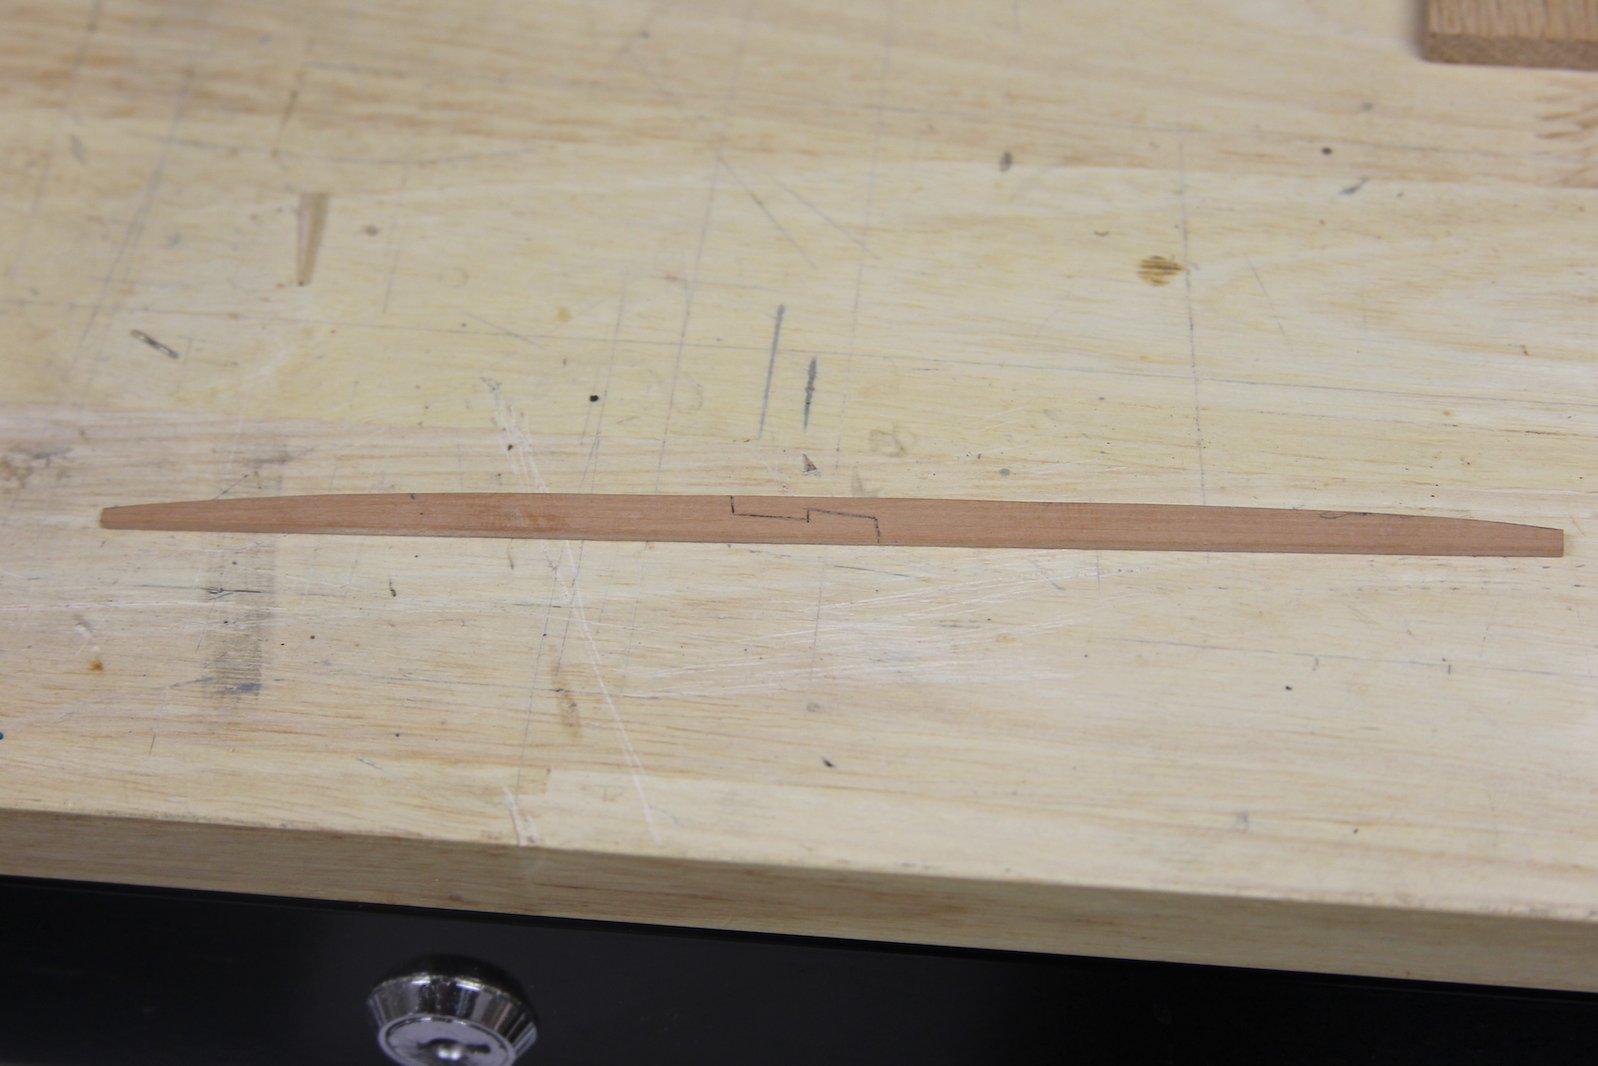
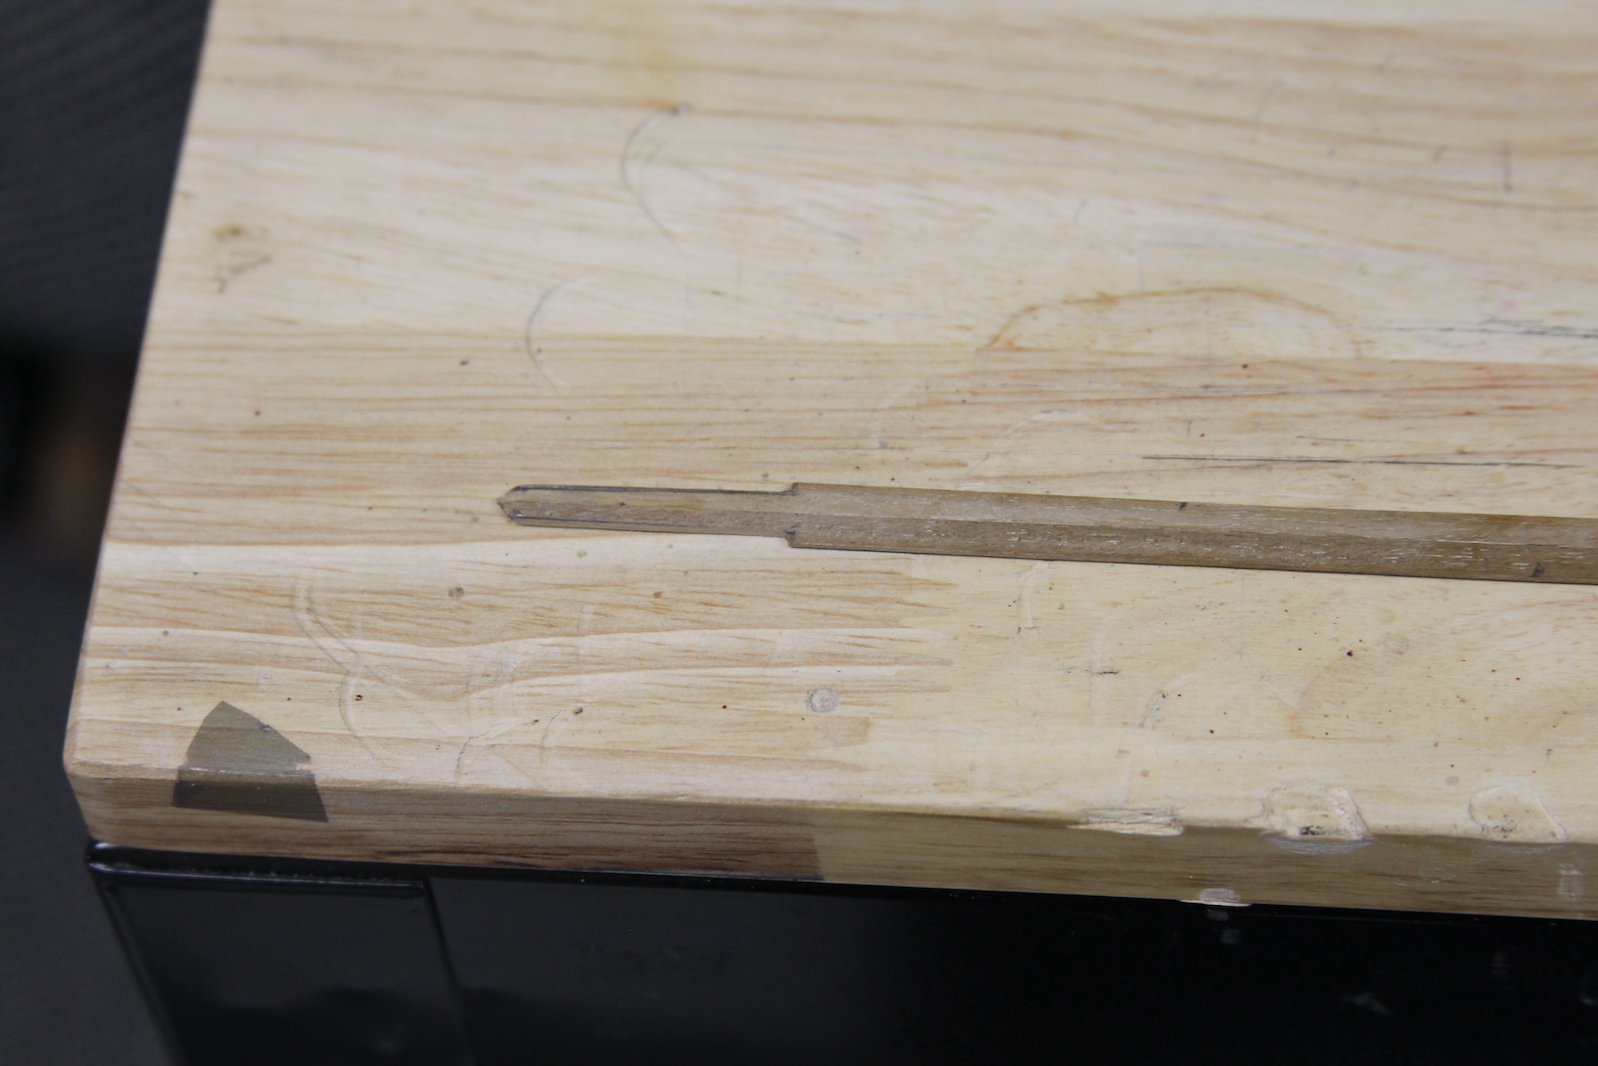
Adding the outside planking to the gun ports gave them (in my opinion) enough additional support and strength to allow me to hack off the side posts on the main deck. So - here's the thing: completely not sure what I was thinking planking the main deck all the way to the outsides before this part of the build. If I had to guess, I'd say that I was just a little excited to see how the Swiss Pear was going to look and just rolled on through the planking. Any - I DO recommend this to anyone else. Heh Completely violates @SpyGlass's policy of trying not to remove wood that you've already added. Anyway - what's done is done - so I cut off the posts, pulled up the planks, and replaced them by forming some card stock and cutting out the planks from wider pieces of Pear and adding a scarph joint. Since I have some trouble lining things up perfectly, my scarph joint is carved into the plank rather than actually adjoining two separate pieces.


- 419 replies
-
- 9
-
-
- Victory Models
- Pegasus
- (and 2 more)
-
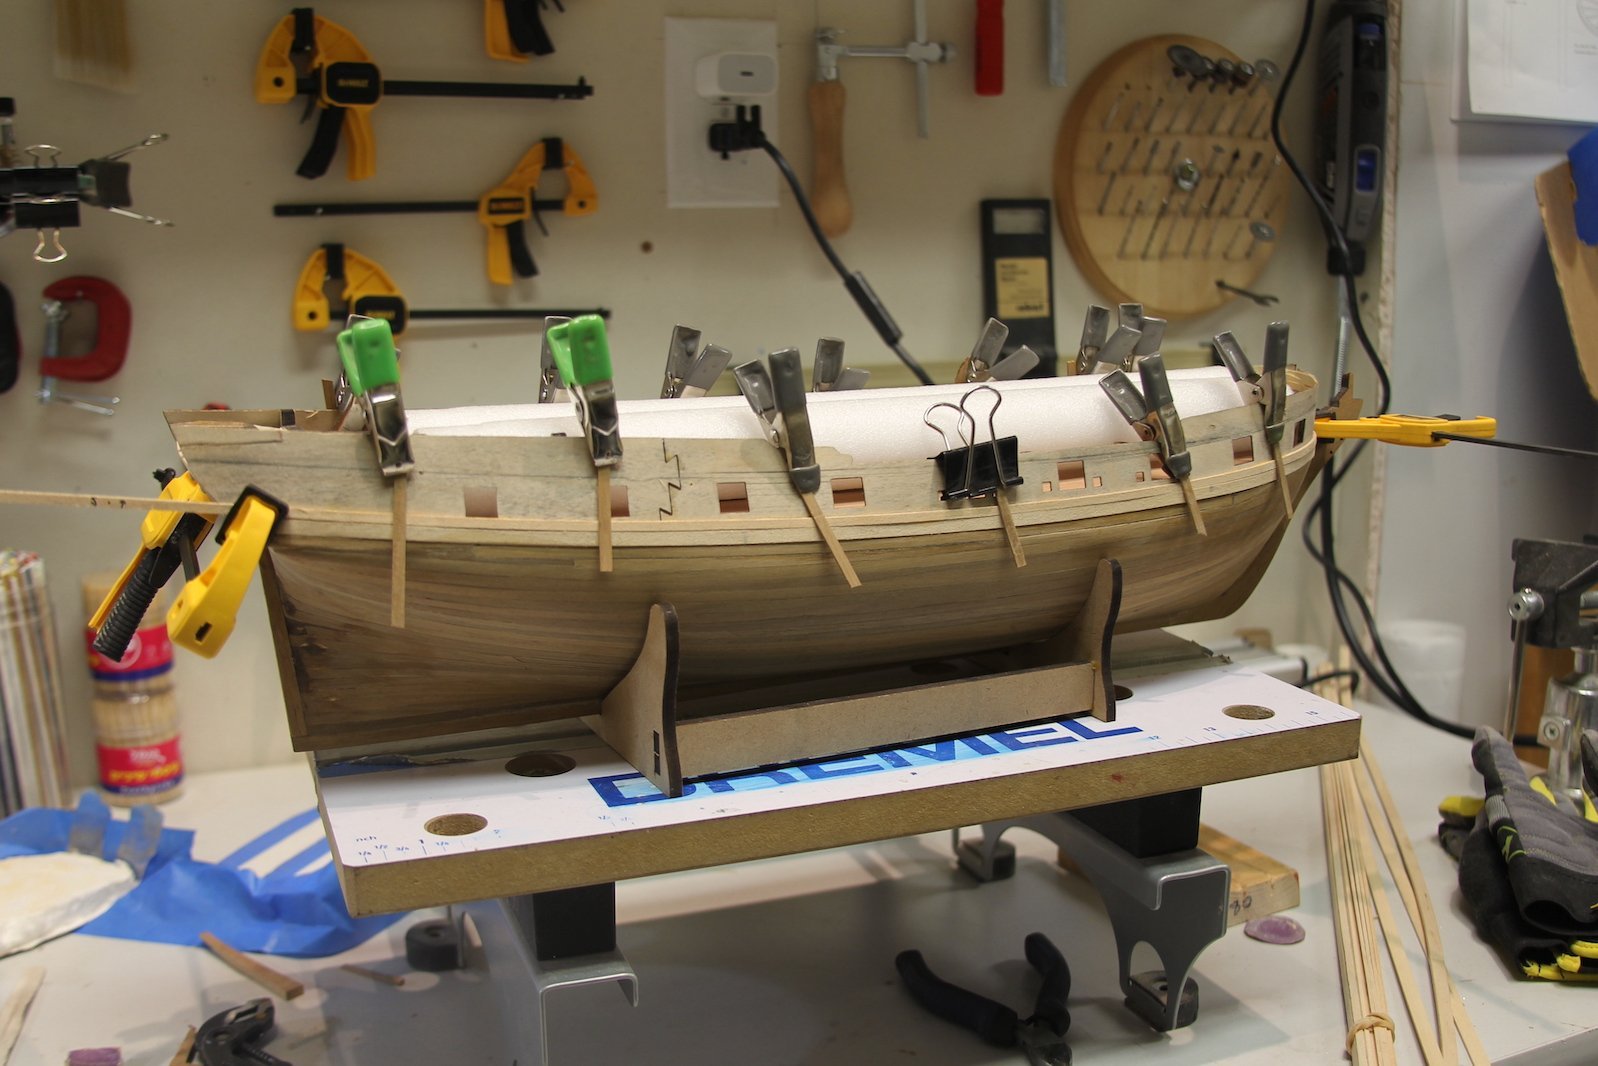
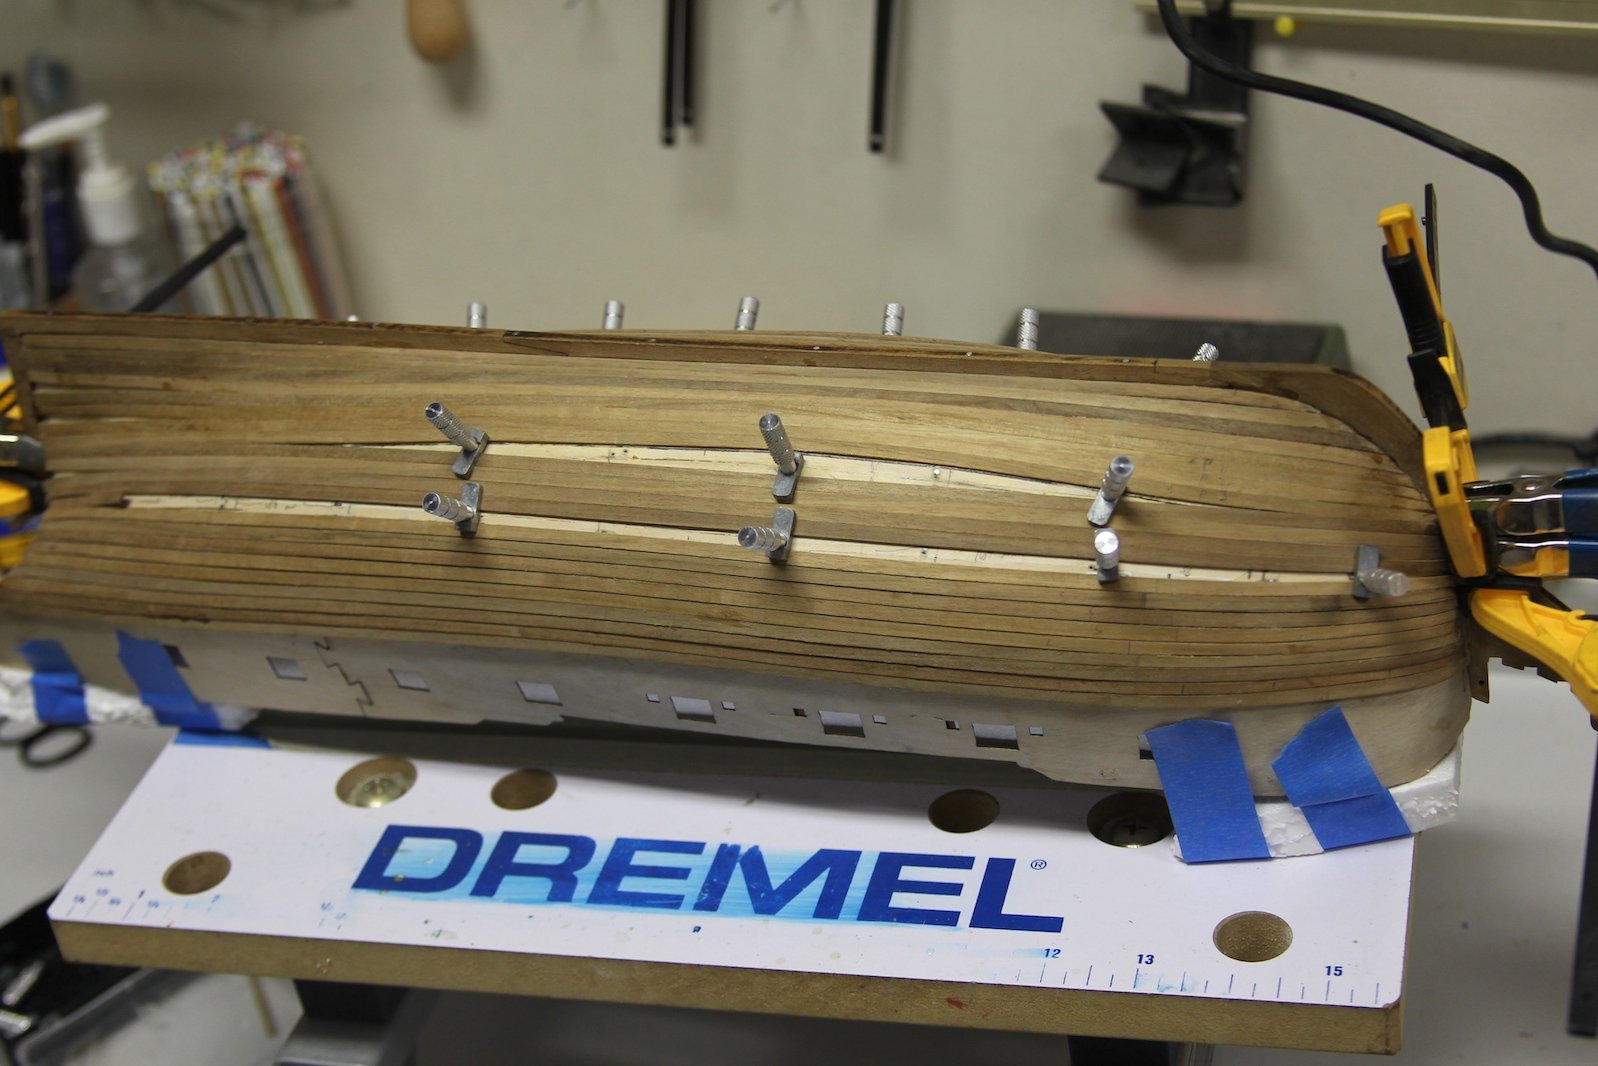
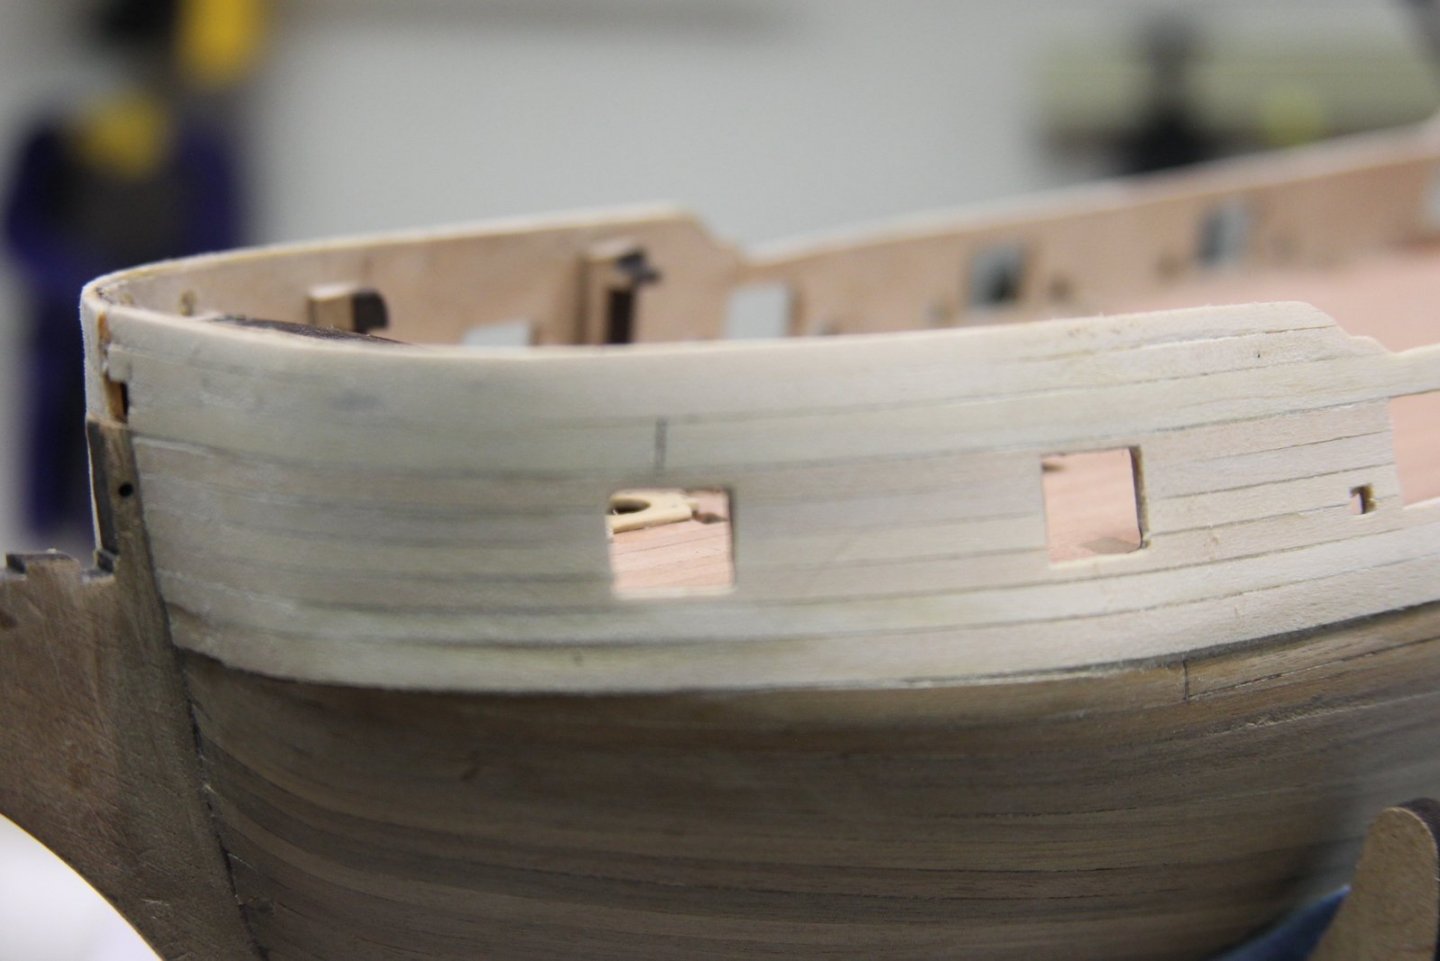
Gunport planking continues. After getting the black strake sorted and mounted, I worked my way up mostly following examples from @Trussben and Dan's work - to some degree. Since I'm not cutting my own planking strips I couldn't necessarily scale them exactly to the planking plans from the NMM, instead I adjusted the math to work with the sized planking strips that I was using - 5mm for the sheer strake and 3mm for the 'tweeners' along the gunports. Perhaps not the easiest or preferred method, but I did one (sometimes two) strips all the way across before I carved out the gun and sweep ports. To me, this is jut easier than planking from port to port and ensures evenness across the whole thing. To get the sheer strake to protrude out from the rest and then fall into and blend into the rest of the planking, I cut out a section near the bow, doubled up on it, then blended it in. Finally, I sanded the thickness way down so it didn't jut out too far and look awkward.

- 419 replies
-
- 7
-
-
- Victory Models
- Pegasus
- (and 2 more)
-
Interestingly - this is also how I cook bacon. Coincidence...? I think not.
-
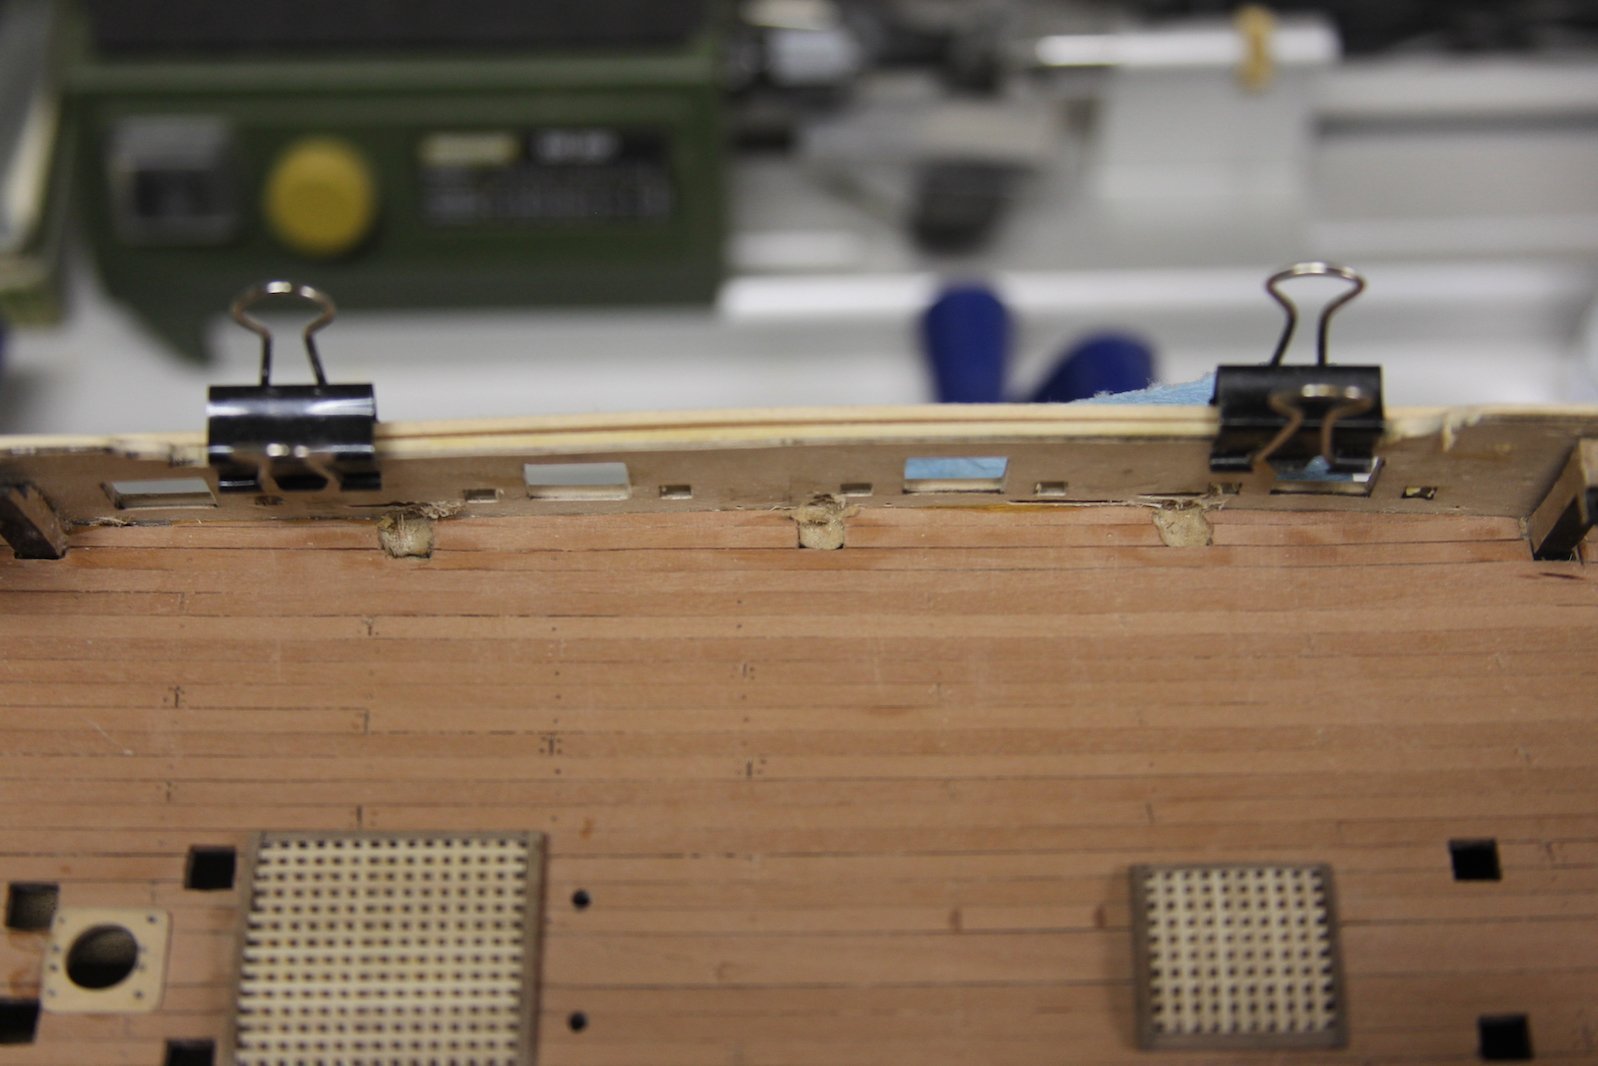
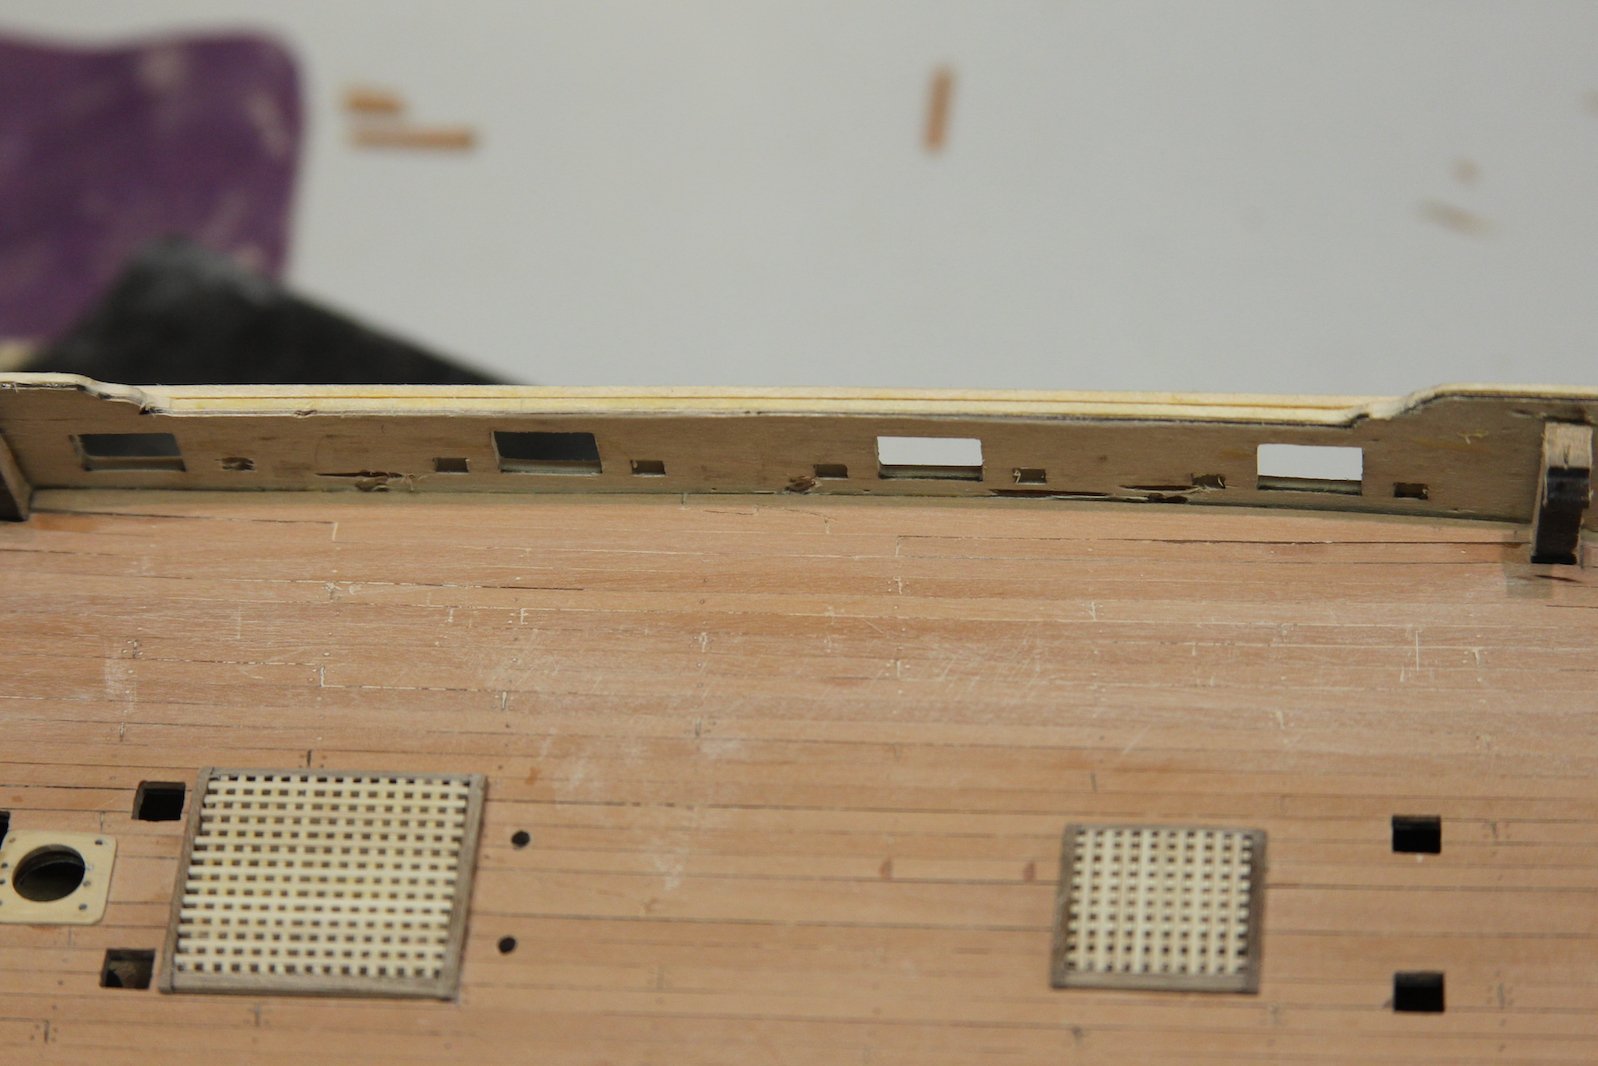
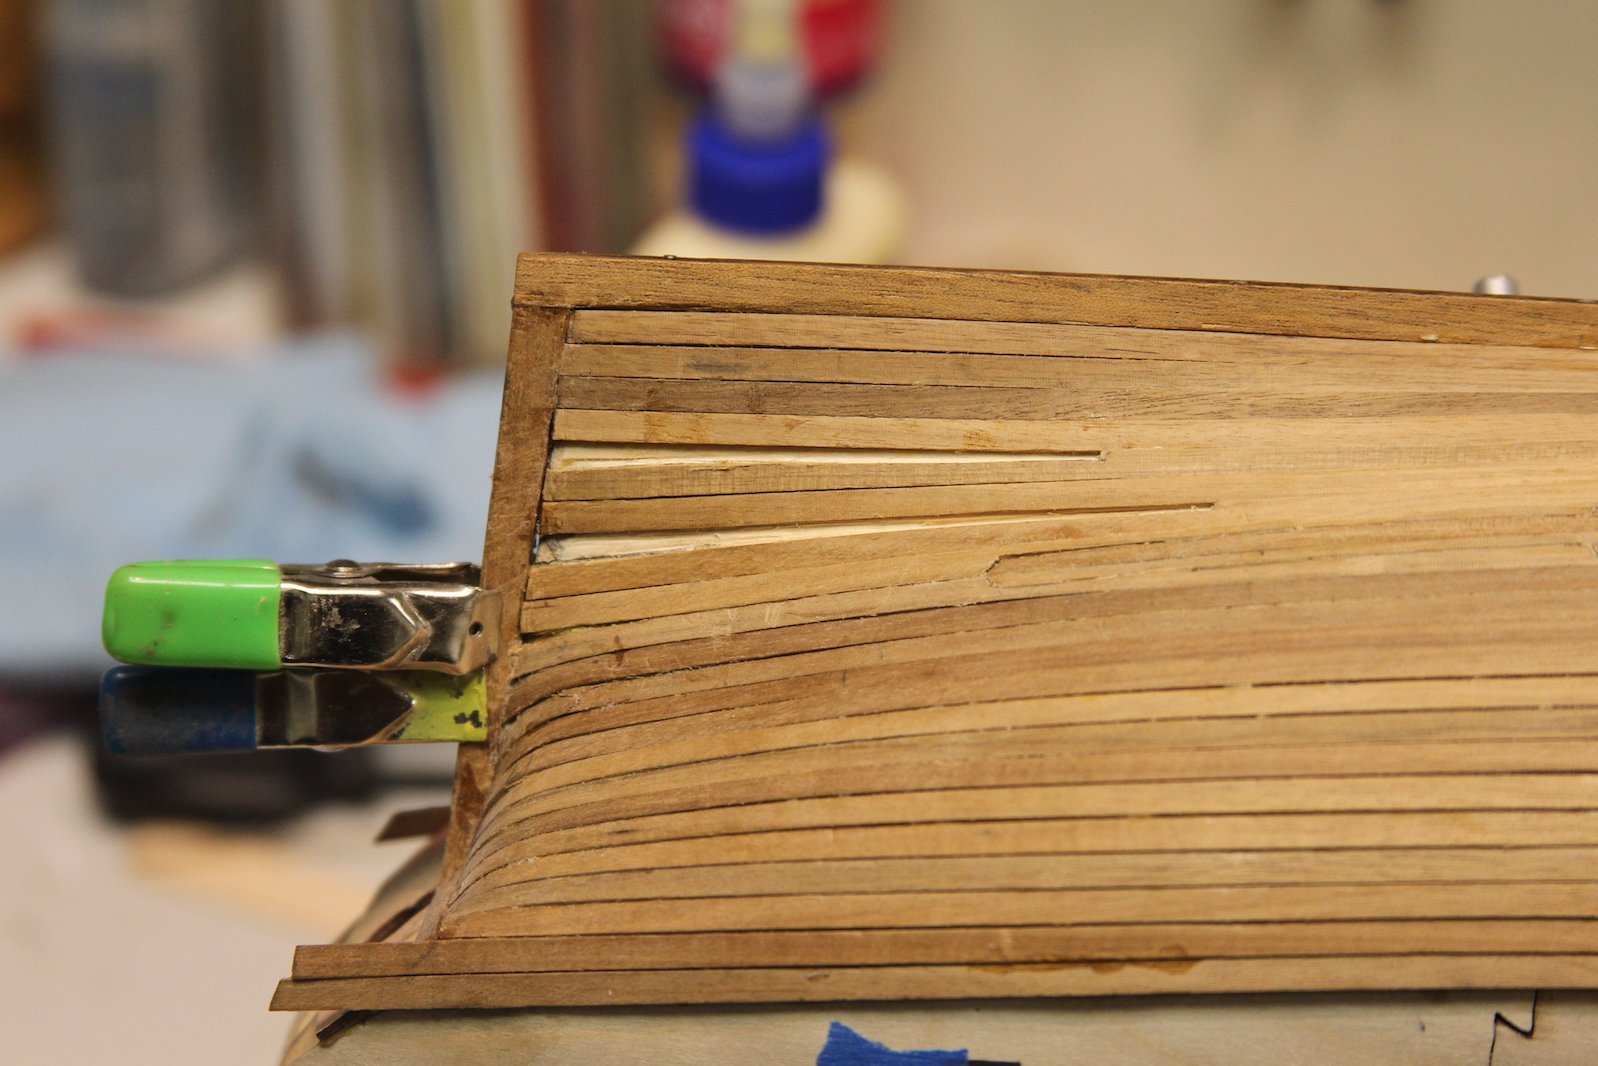
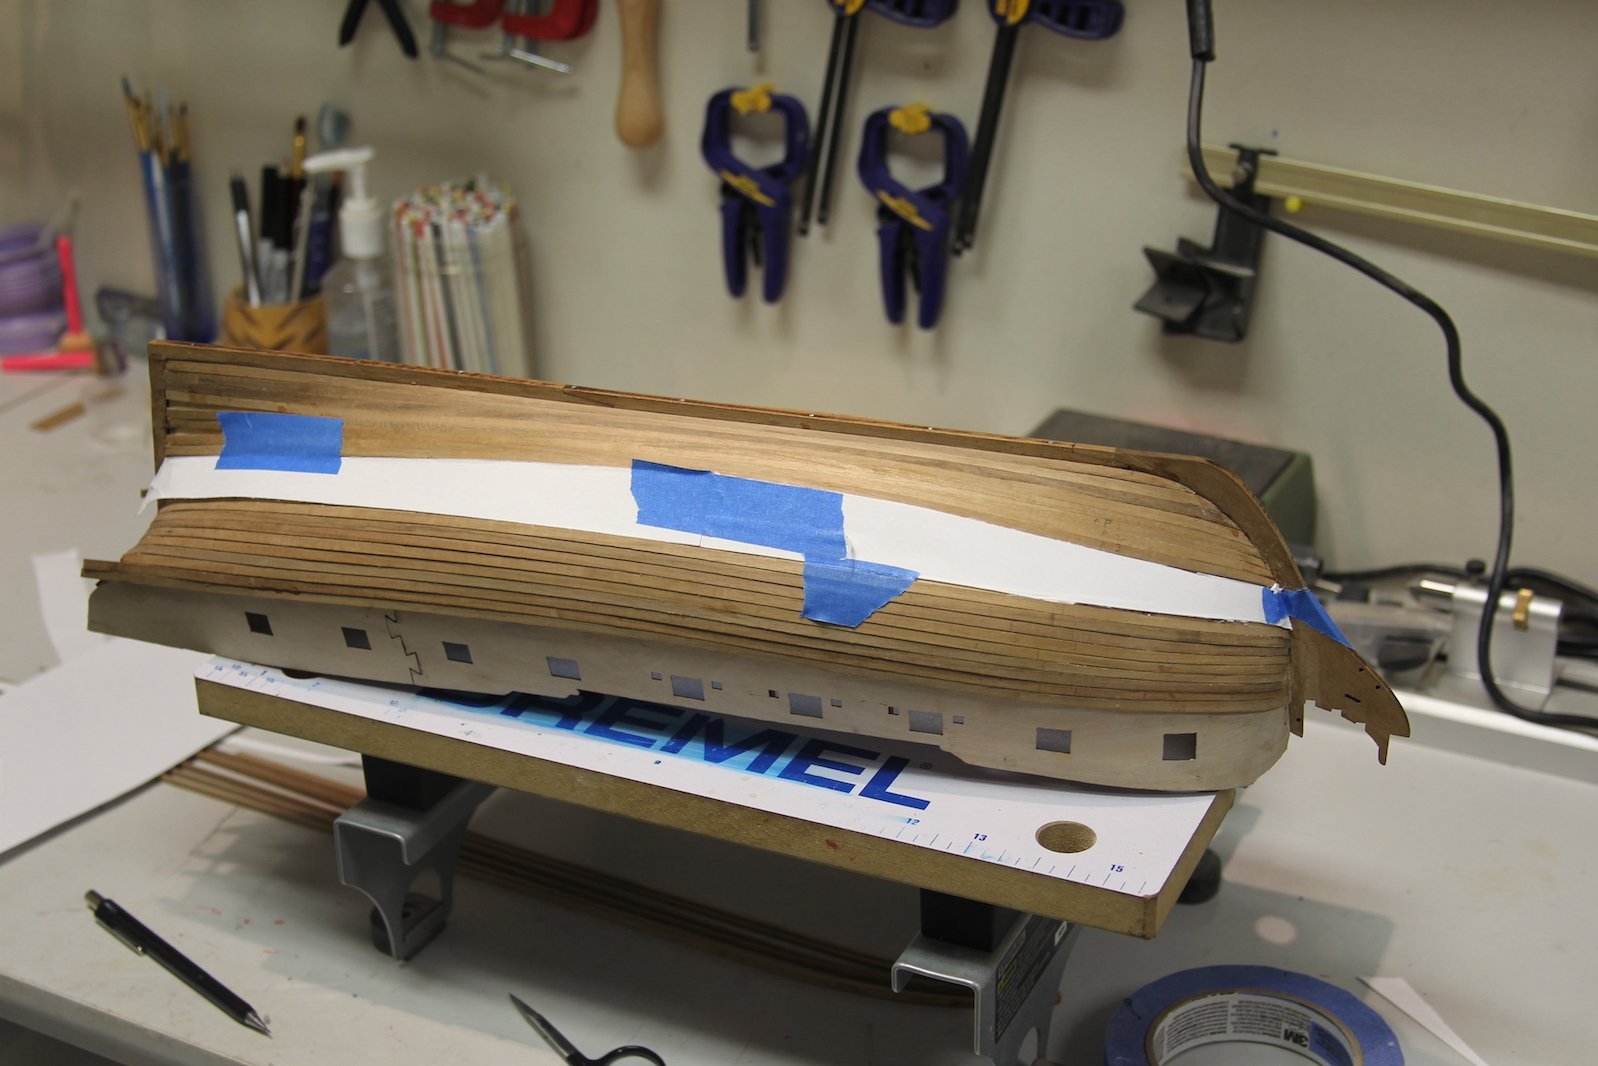
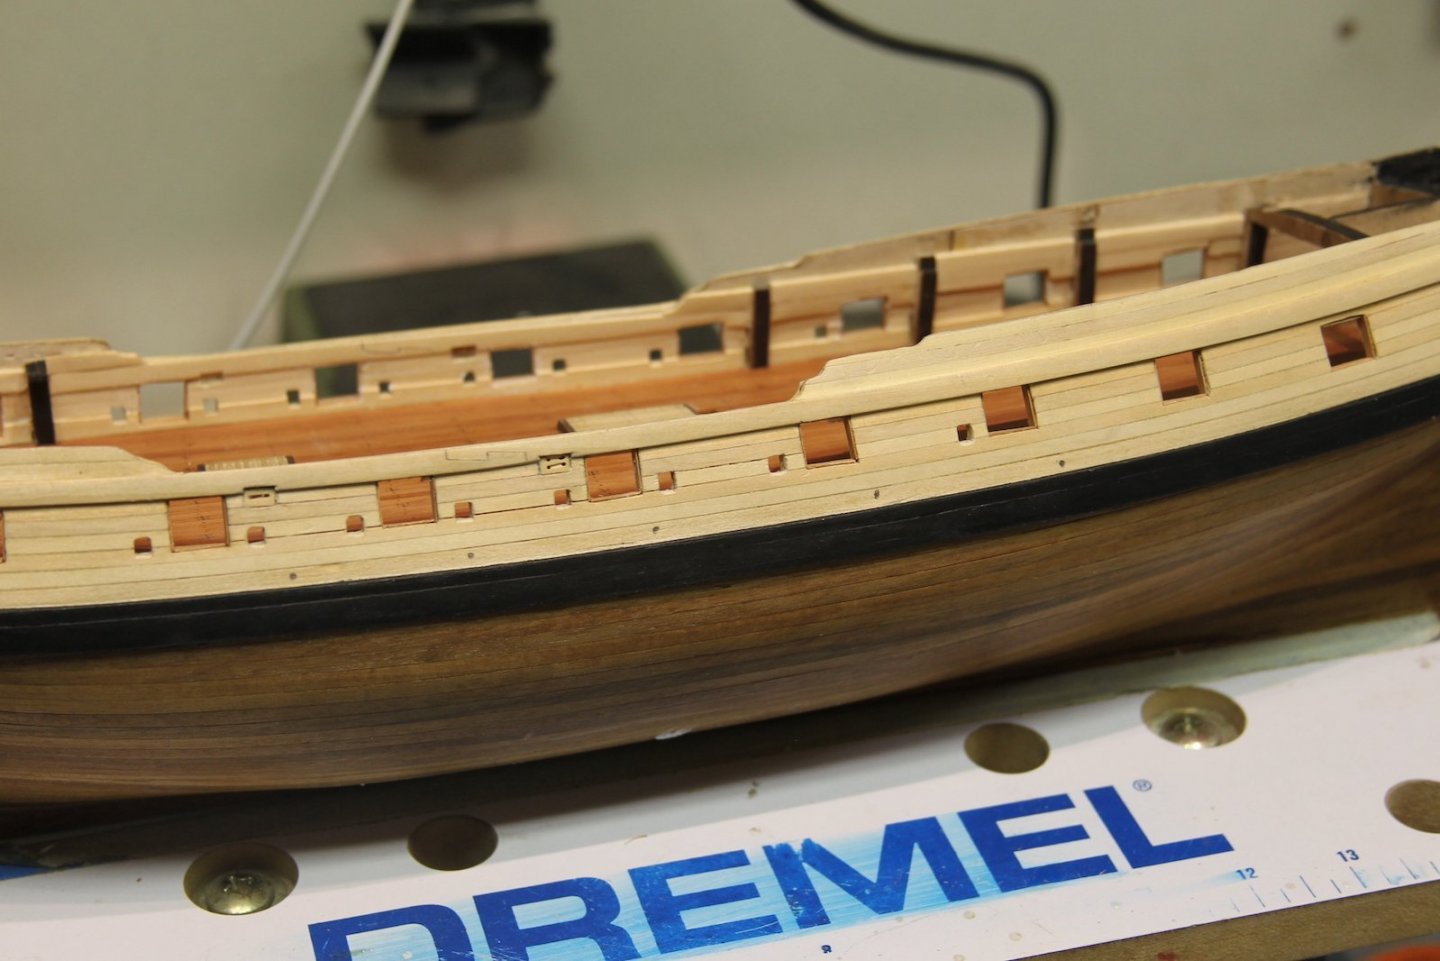
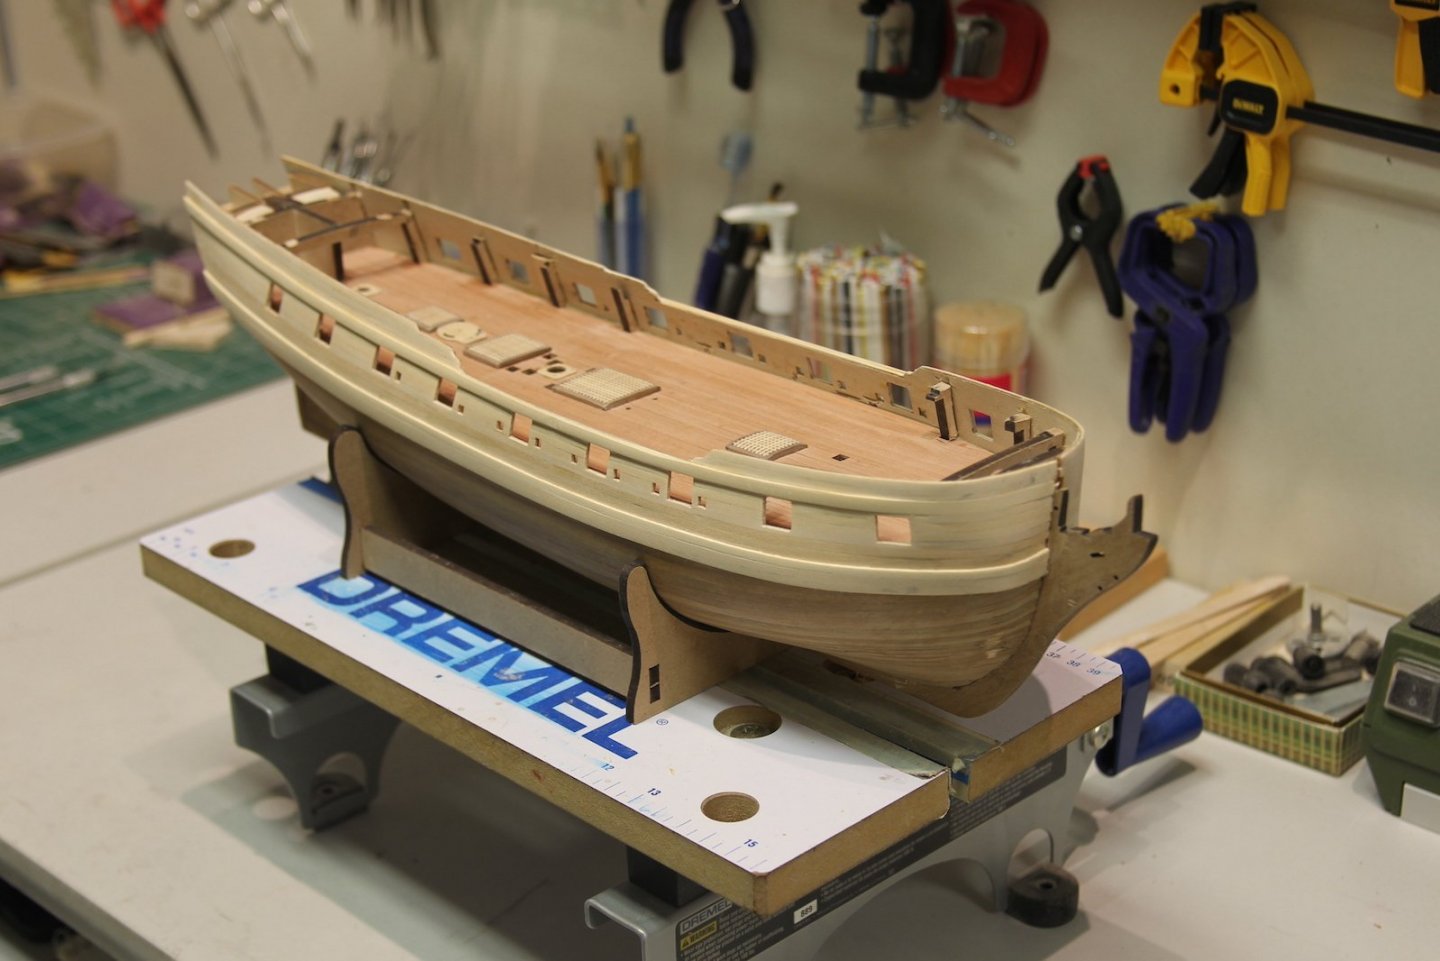
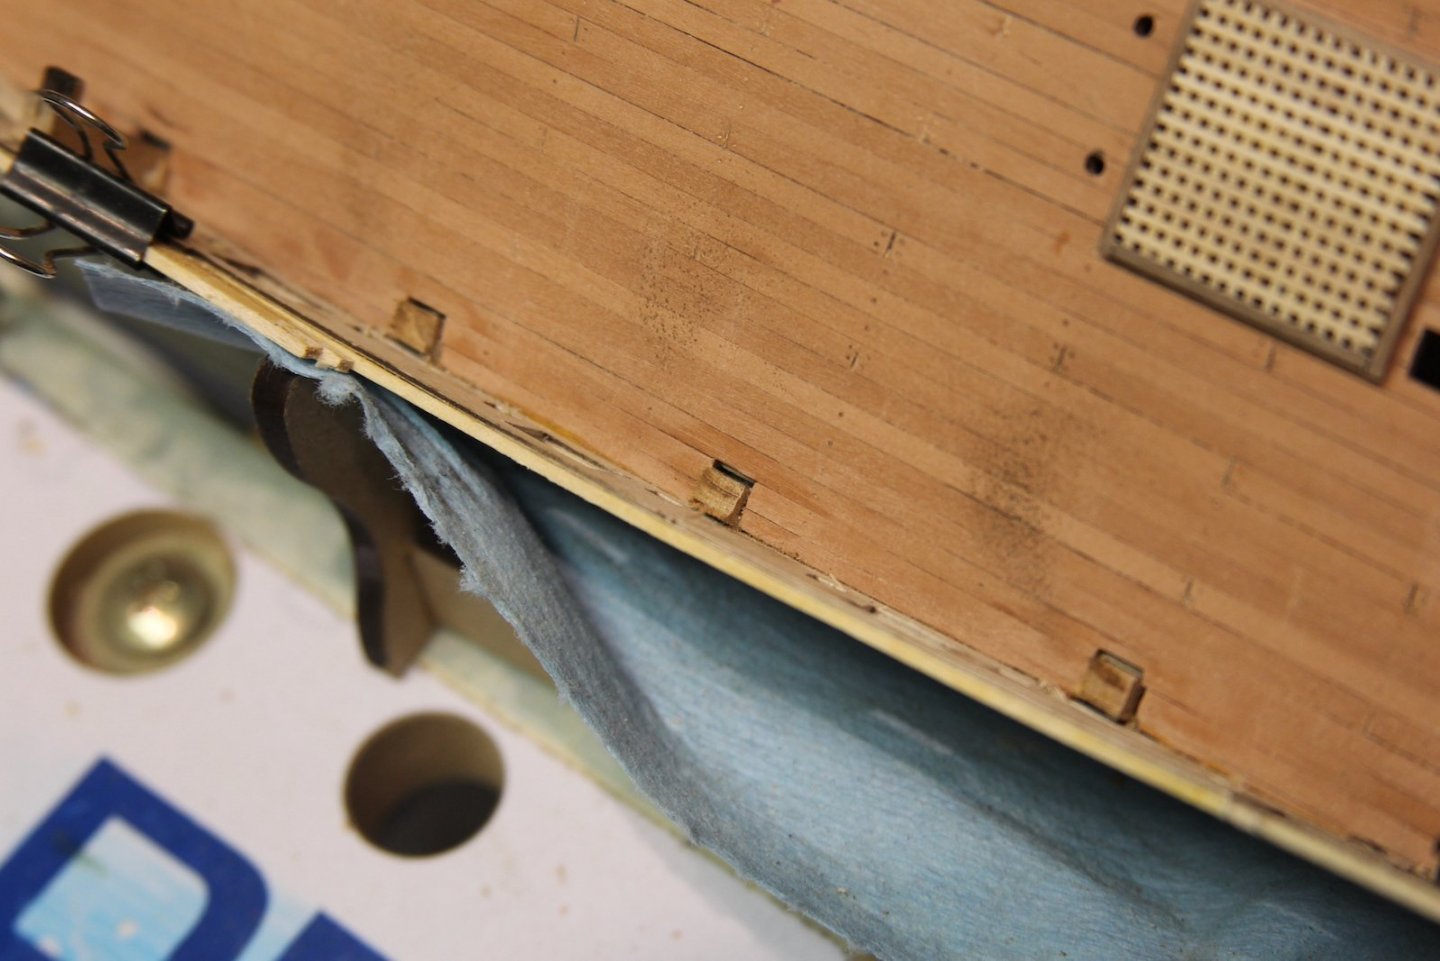
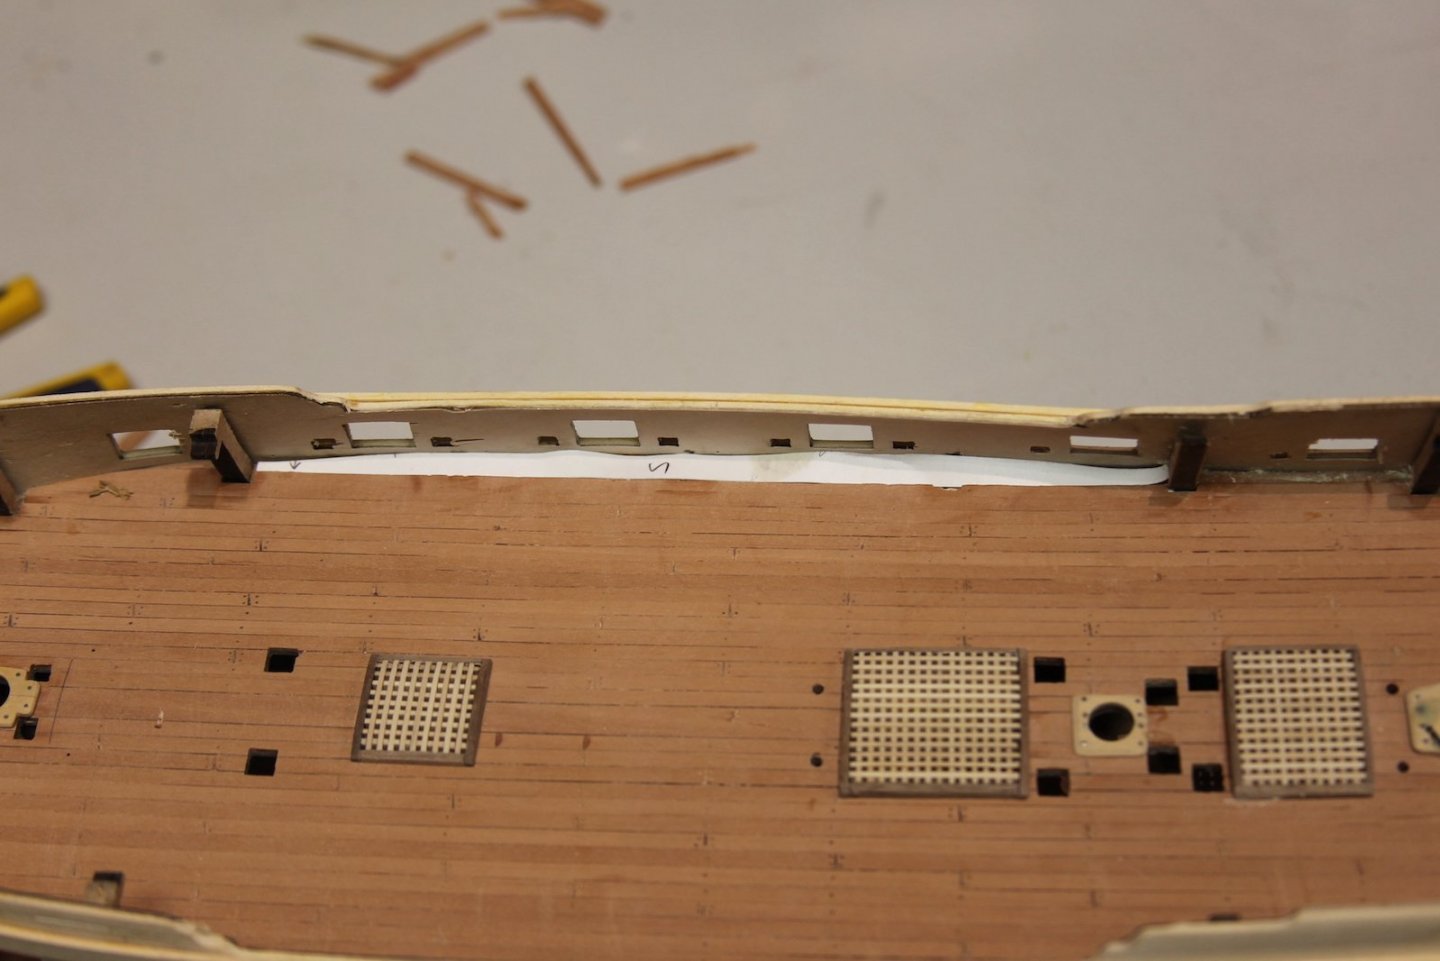
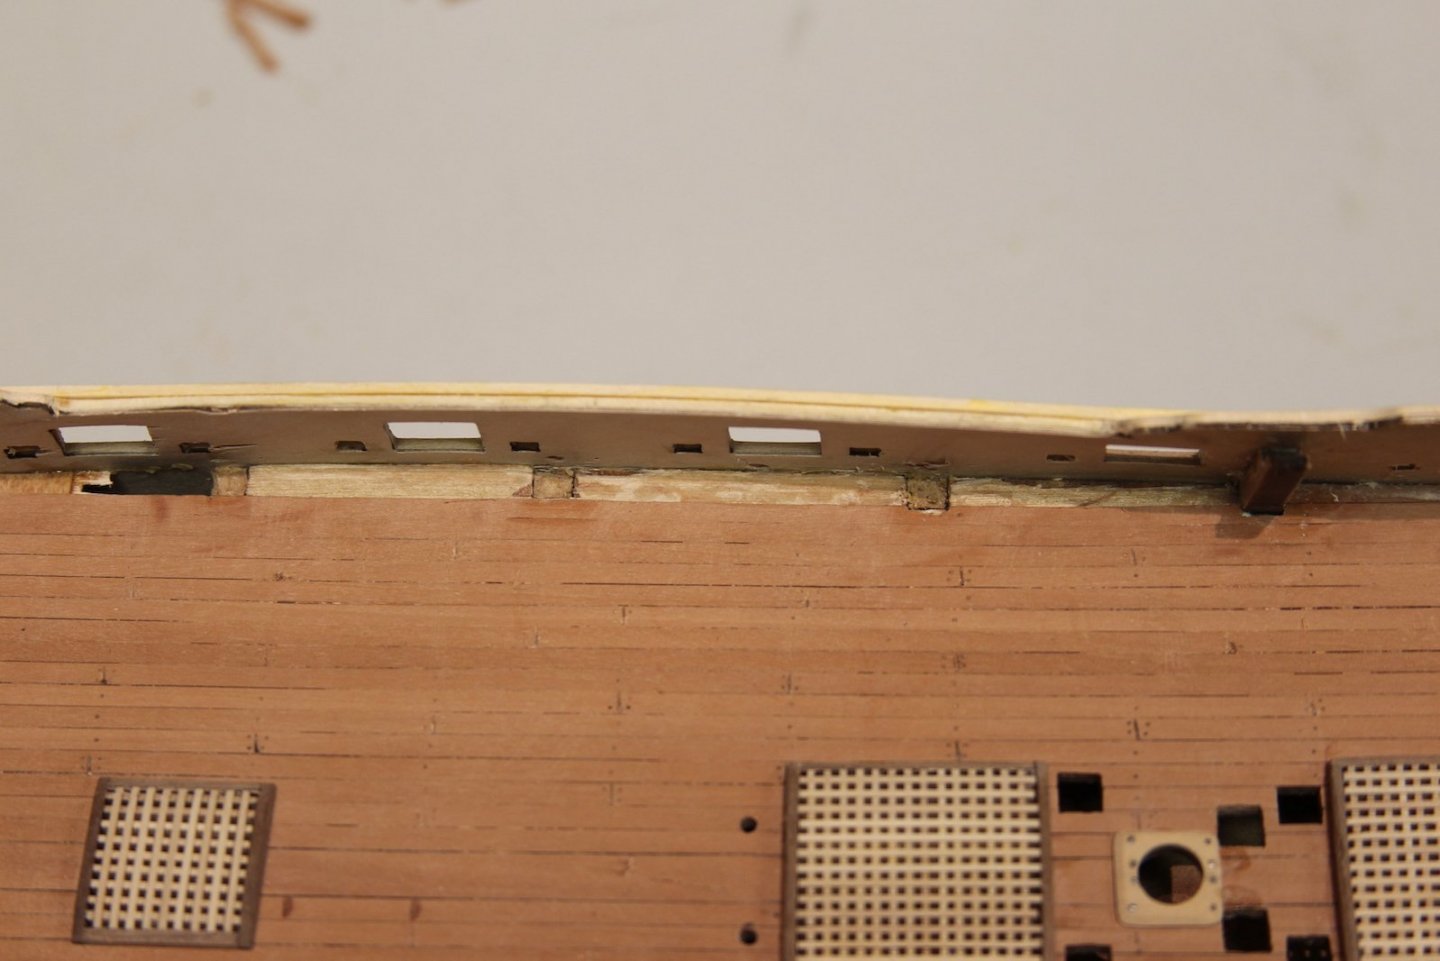
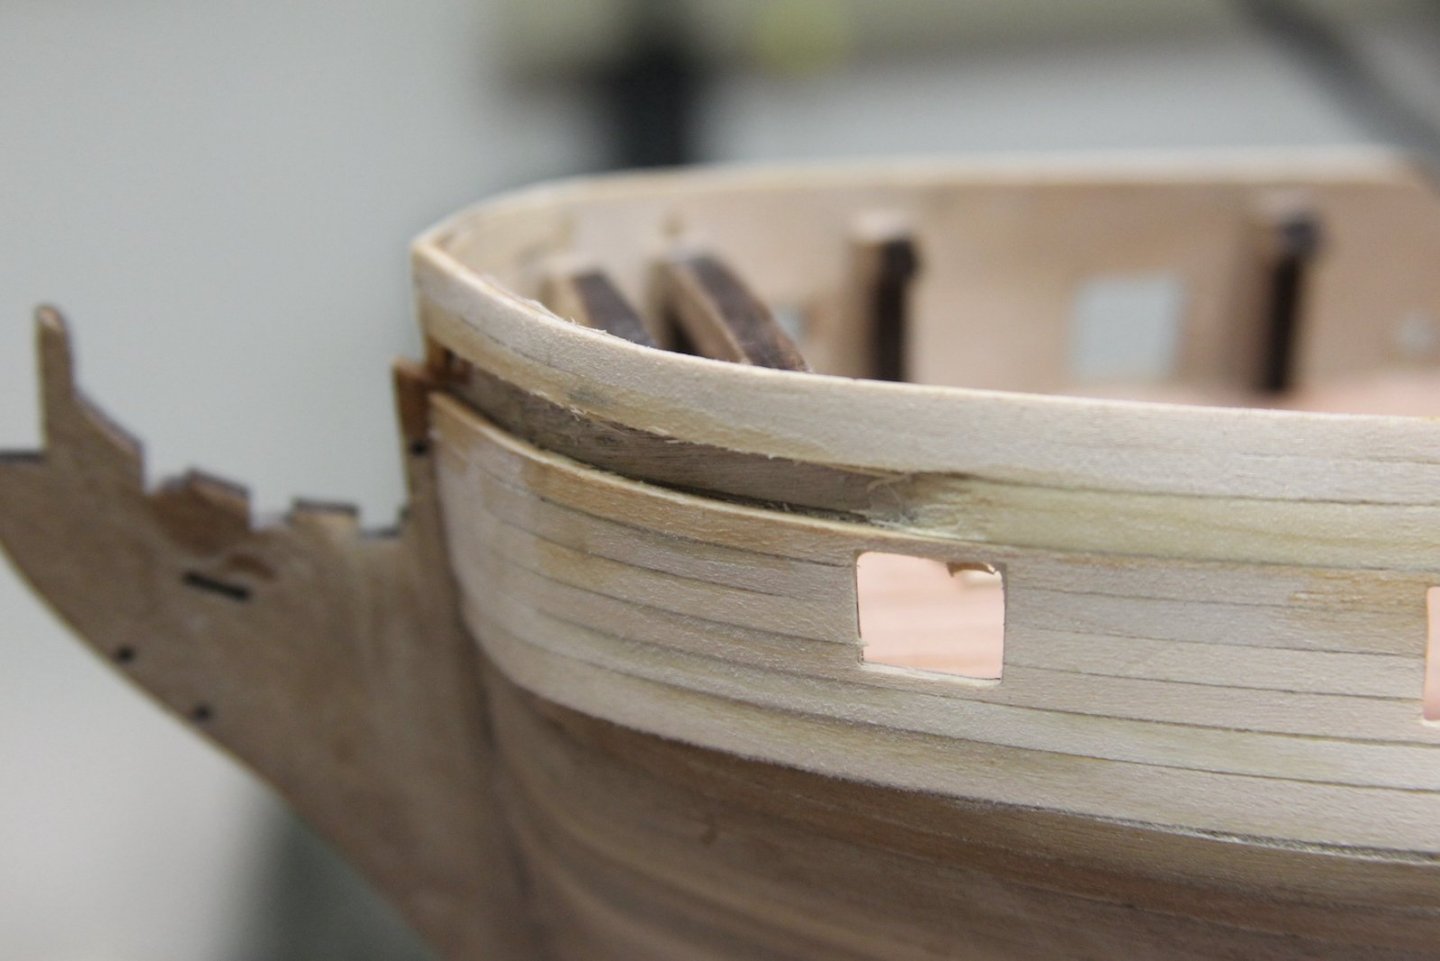
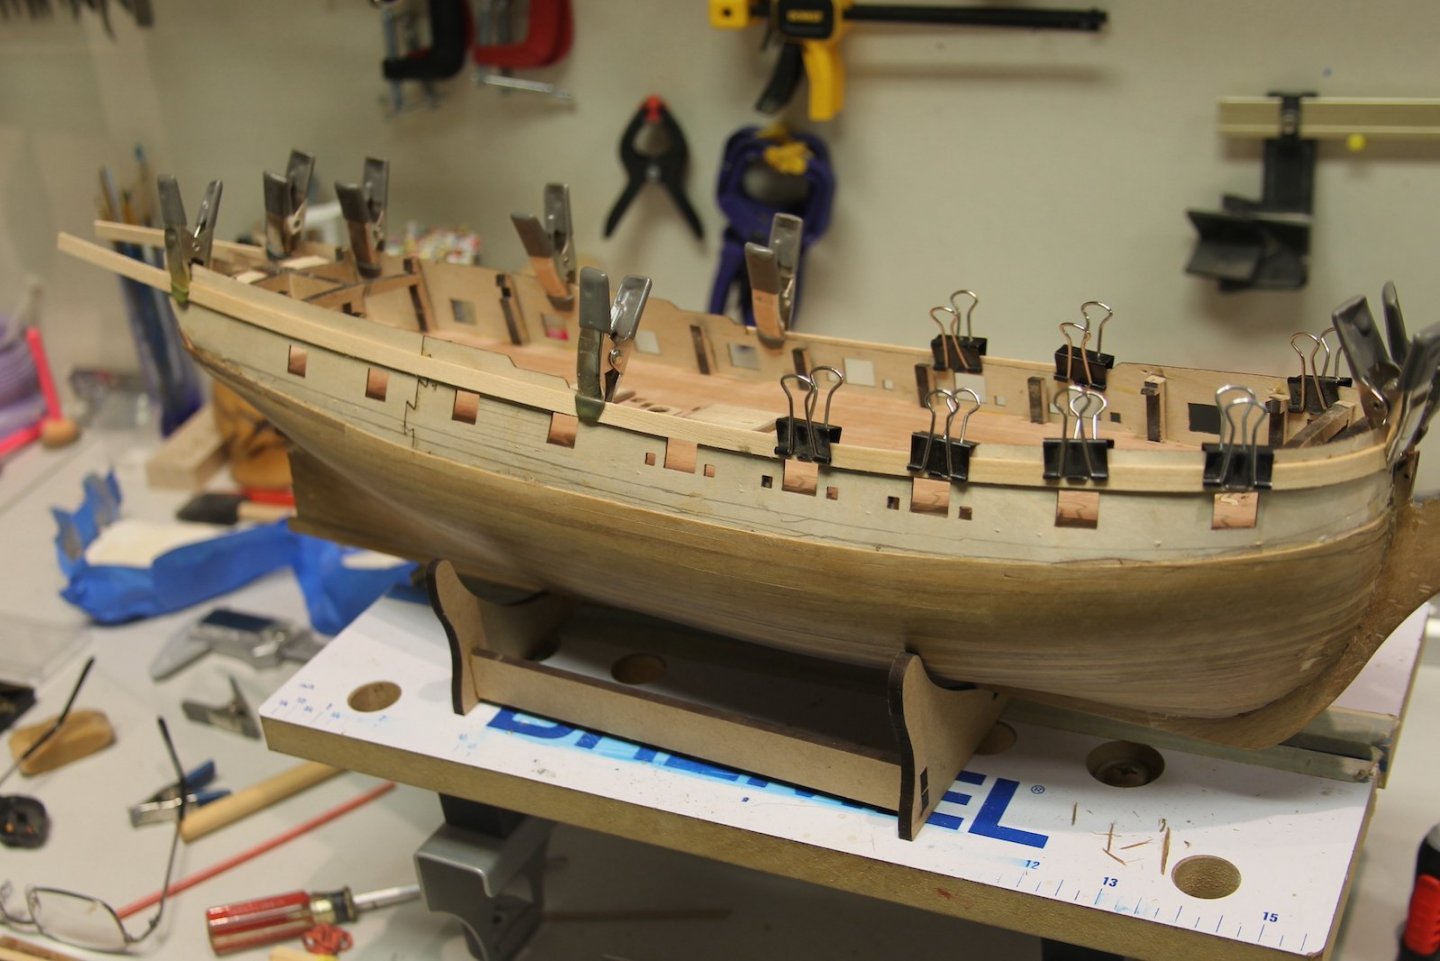
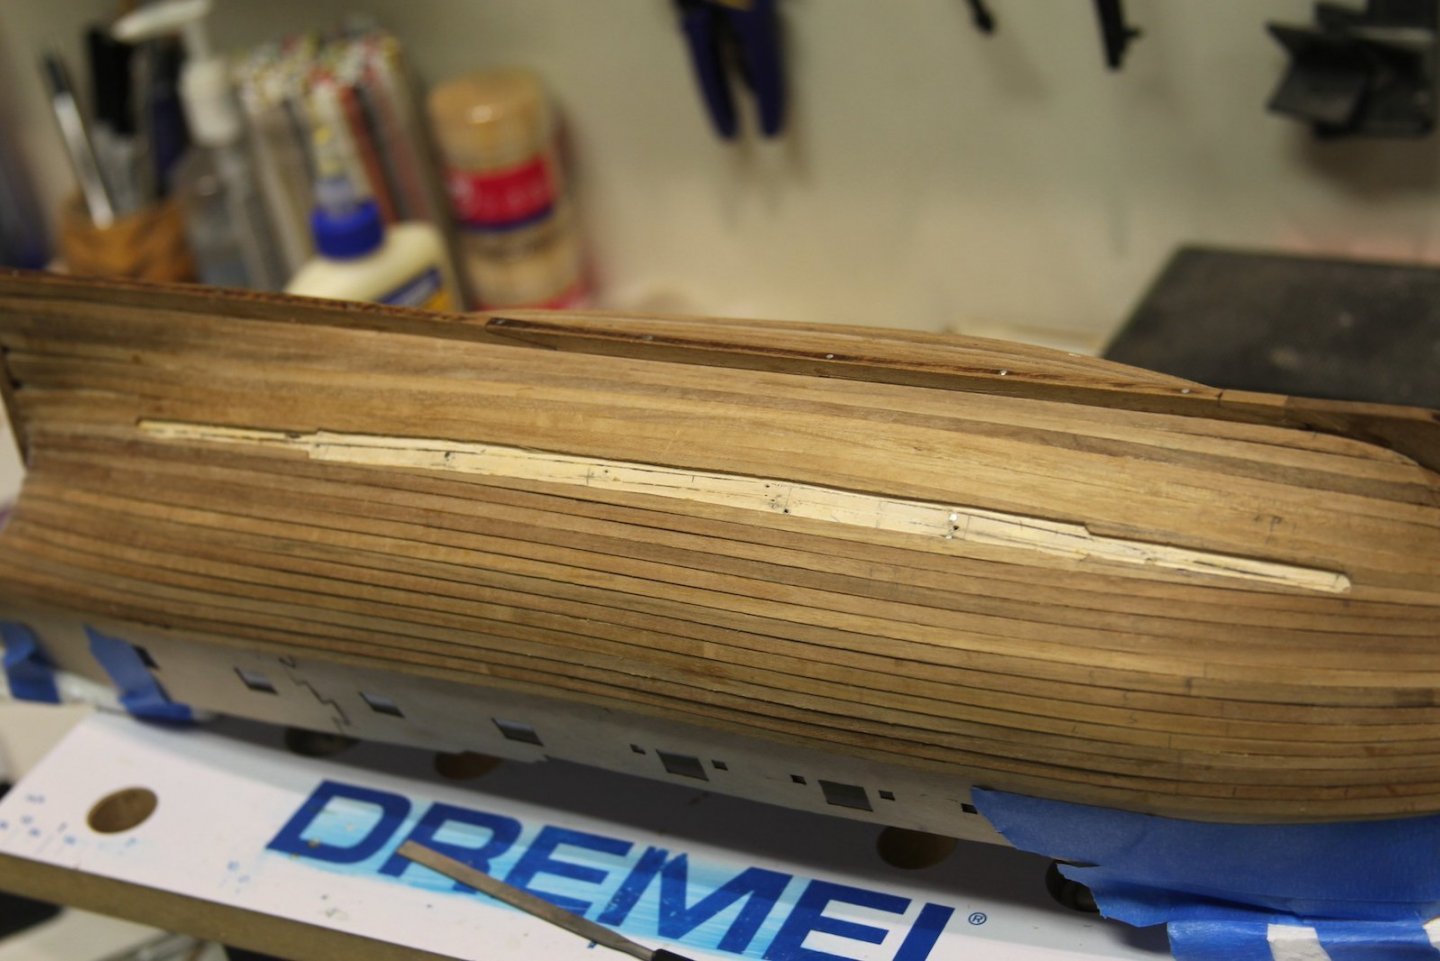
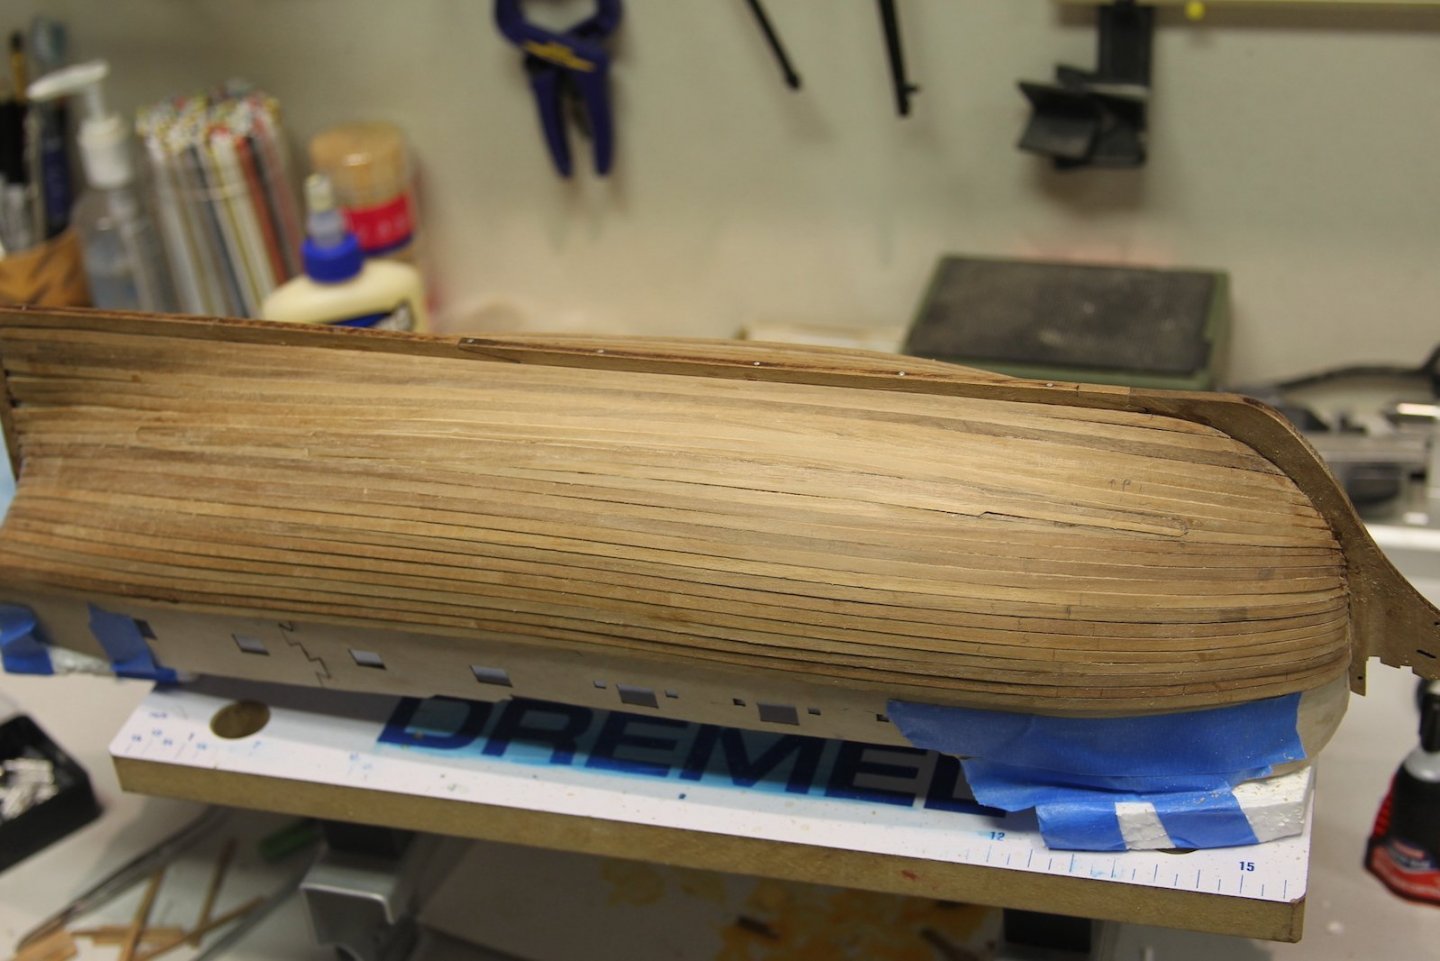
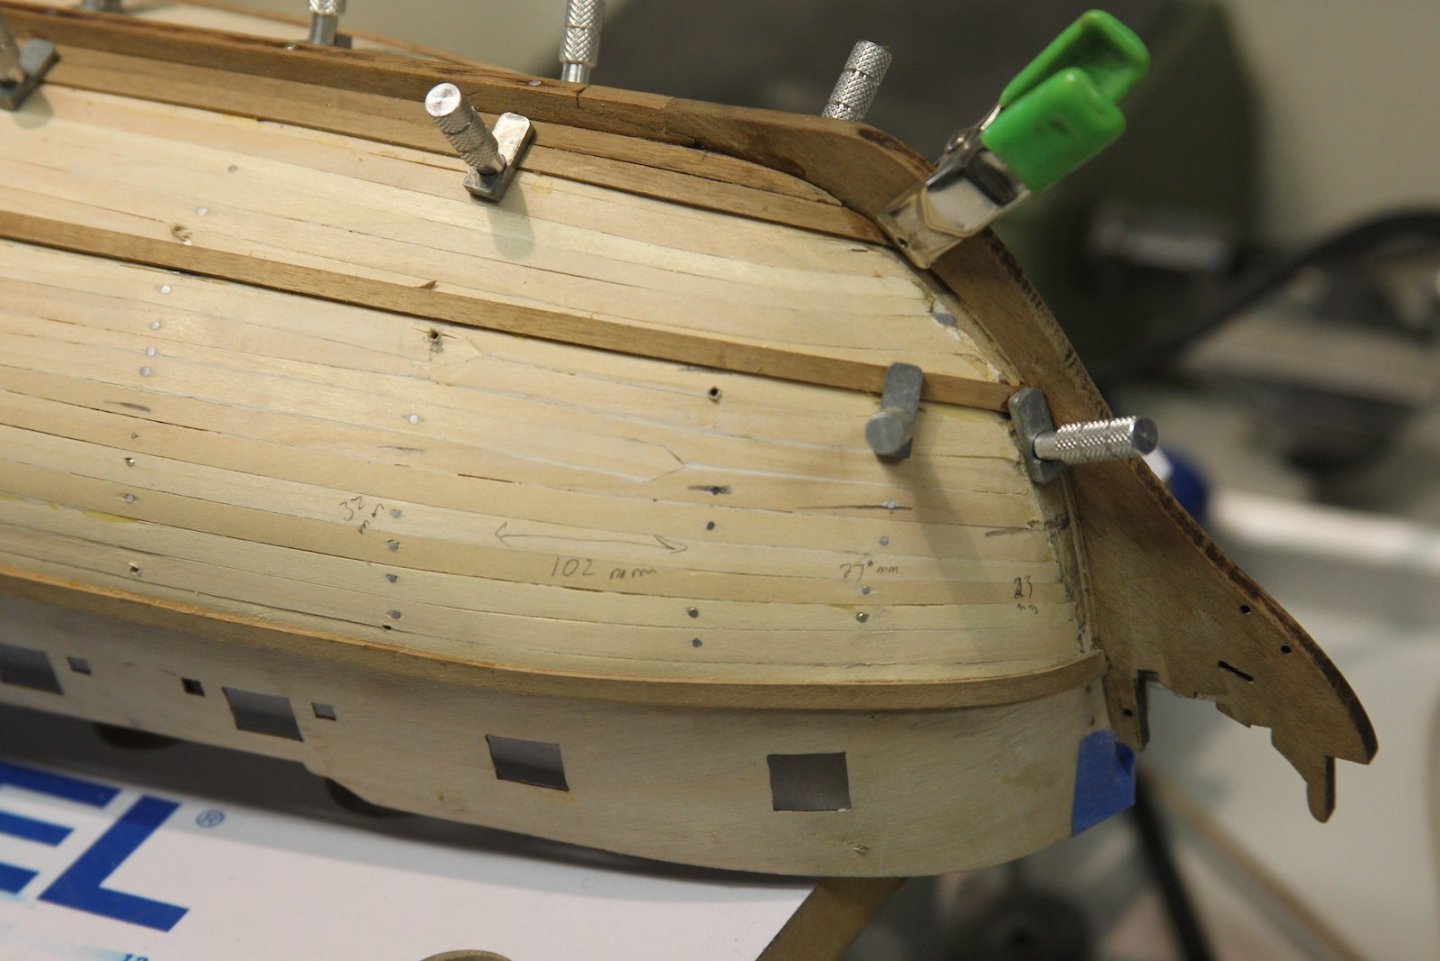
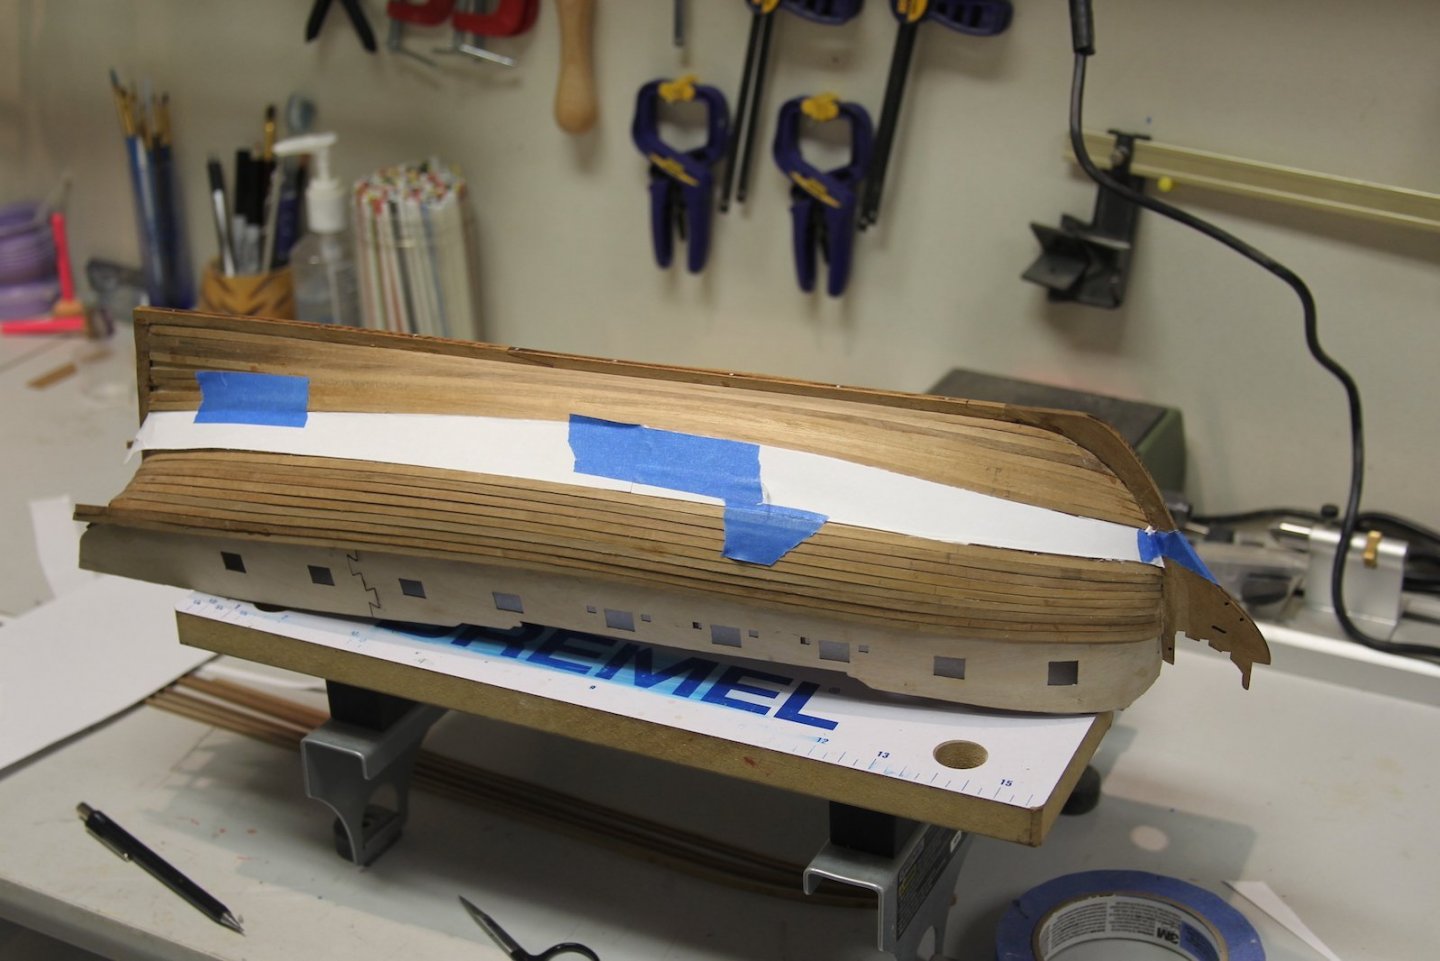
After I got the second planking laid down and I adjusted the stern parts, I started laying out what the gunport planking would look like. I wanted something lighter than the walnut so I'd have more painting (or not painting) options, so I'm using basswood. It's not my favorite of course, since it's soft and difficult to get precise around the gunports and sweep ports, but it's what I have and It'll end up getting painted anyway. My intention is to paint some key parts (main wales, inner gunports, outer gunports, masts etc) but leave a lot of the deck fixtures and other parts more natural wood colors. Once again, a bit of artistic license being used here. At any rate - laying out the gunport planking made me quickly realize that my lines were off. Following the prefab gunport parts gave me a much more significant dip along the main wales than makes sense. I soaked and shaped the sheer strake and held that in place so I could sort out how many planks I'd need and where'd they'd go - you can see the nasty gap there. Yikes. Thanks what I get for blinding following the gunport and forgetting to look ahead far enough. Normally I'd start with lining up the main wales and work my way up, but I decided I would instead start with the black strake (not actually black) and work from there since it's critical that the black strake line up to the deck so the scuppers make sense. I wasn't too worried about trimming and filling in the second layer walnut in the areas that needed it because that will ultimately be covered up by the main wales. As you can see in the last photo - much smoother lines and more consistent with the NMM plans.

- 419 replies
-
- 7
-
-
- Victory Models
- Pegasus
- (and 2 more)
-
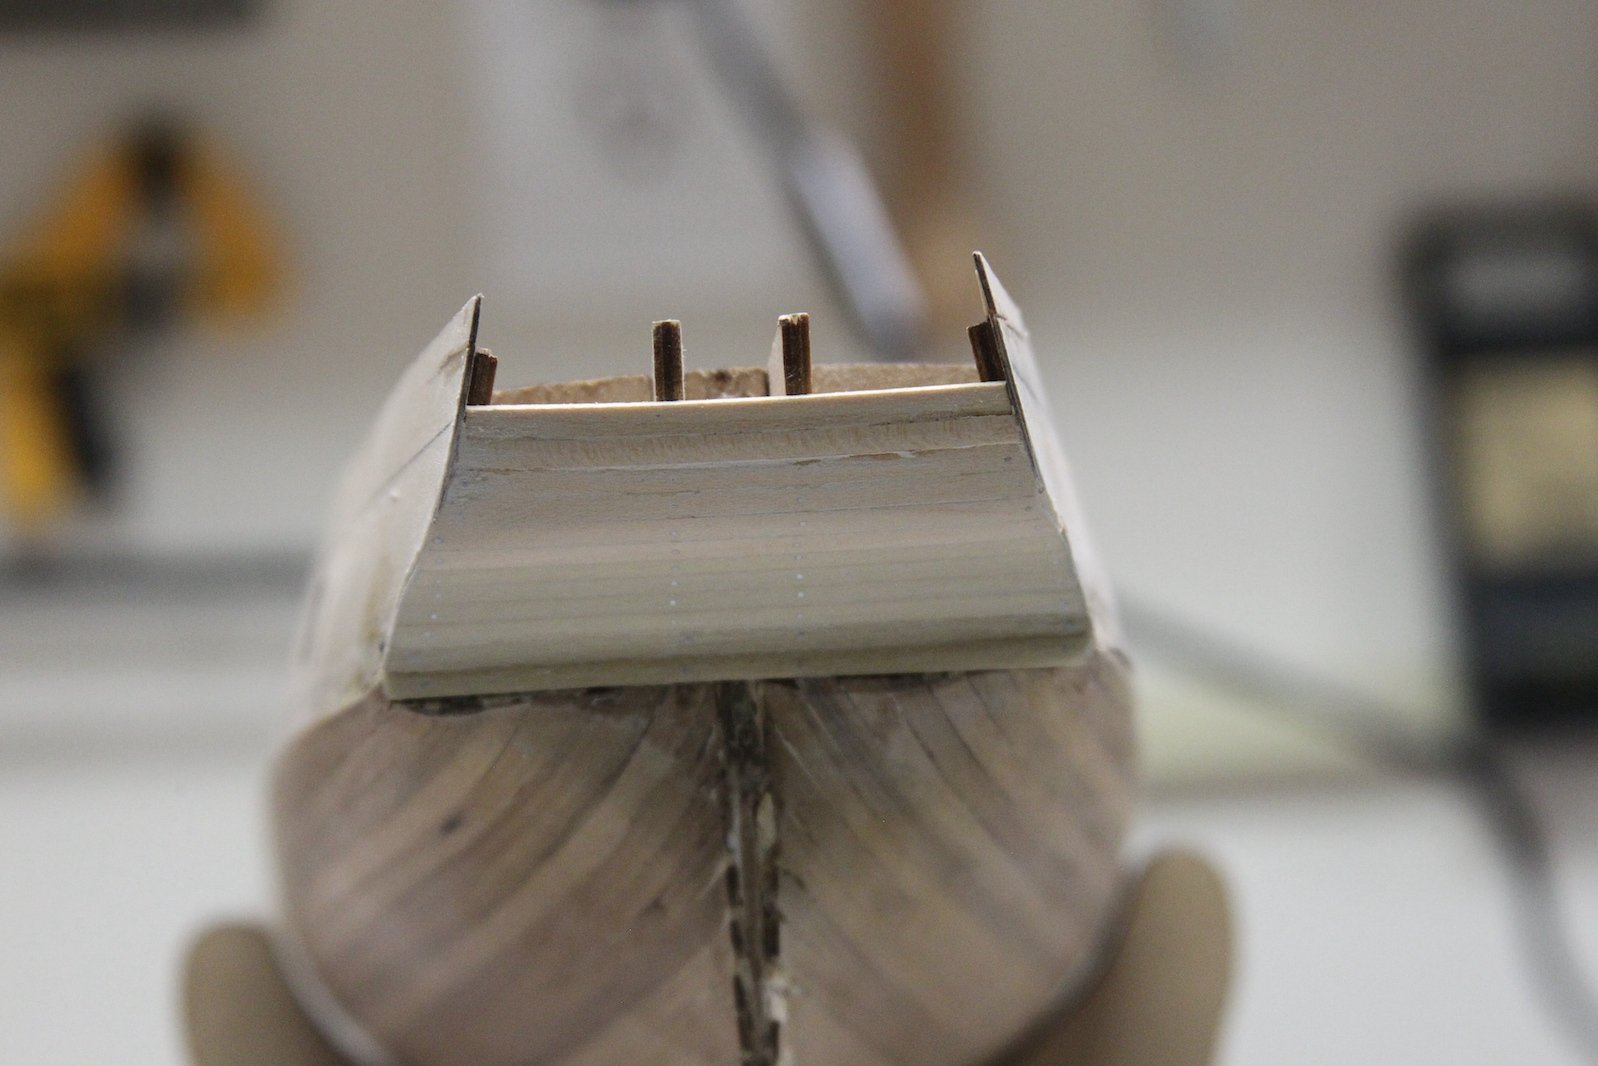
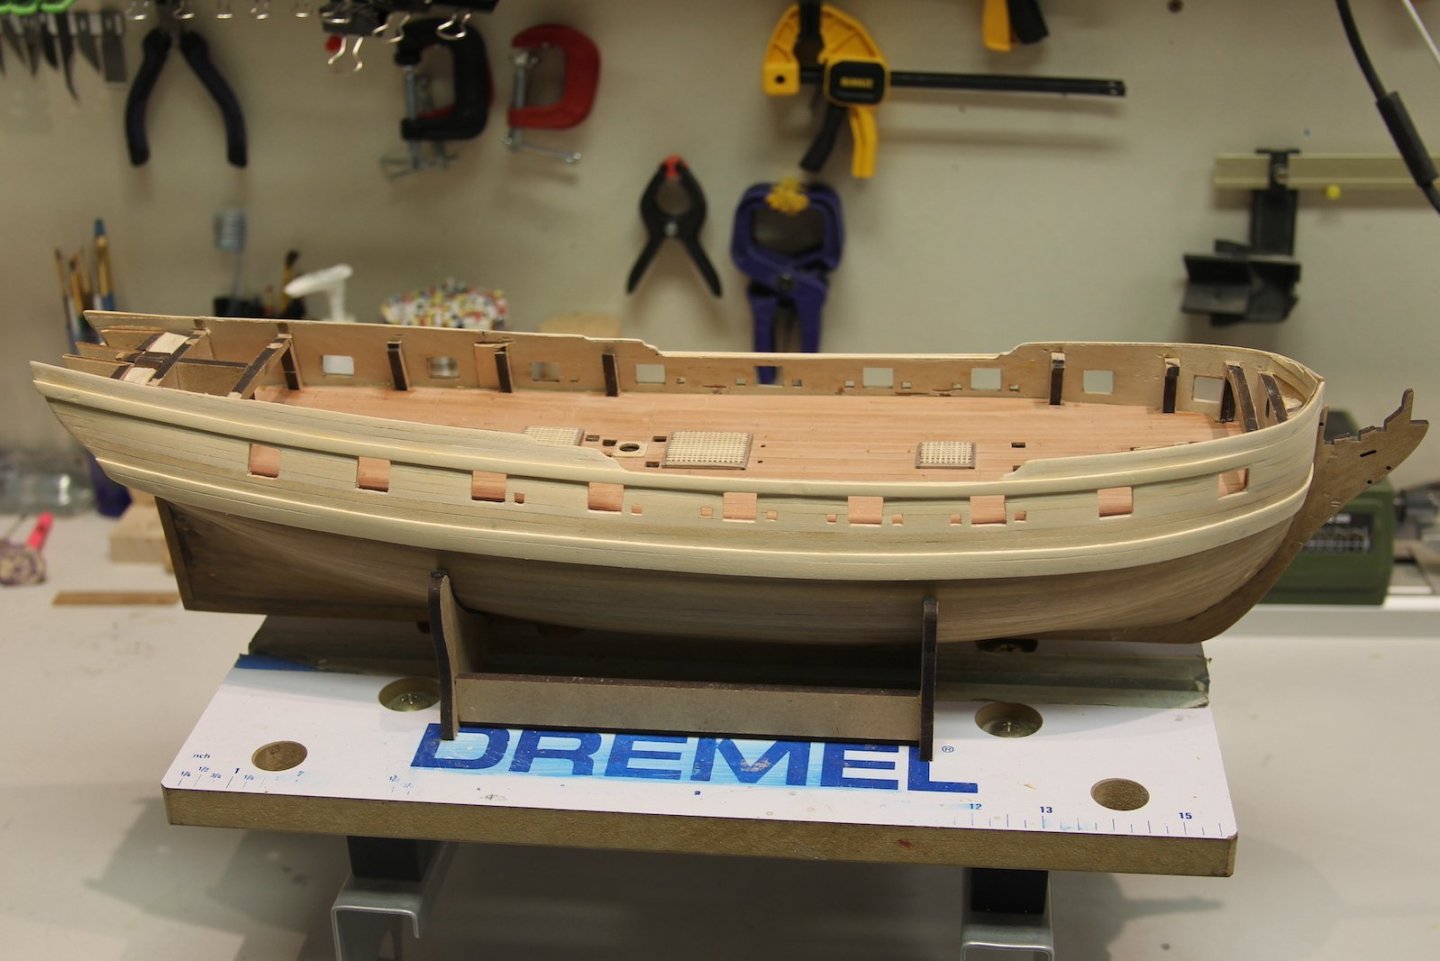
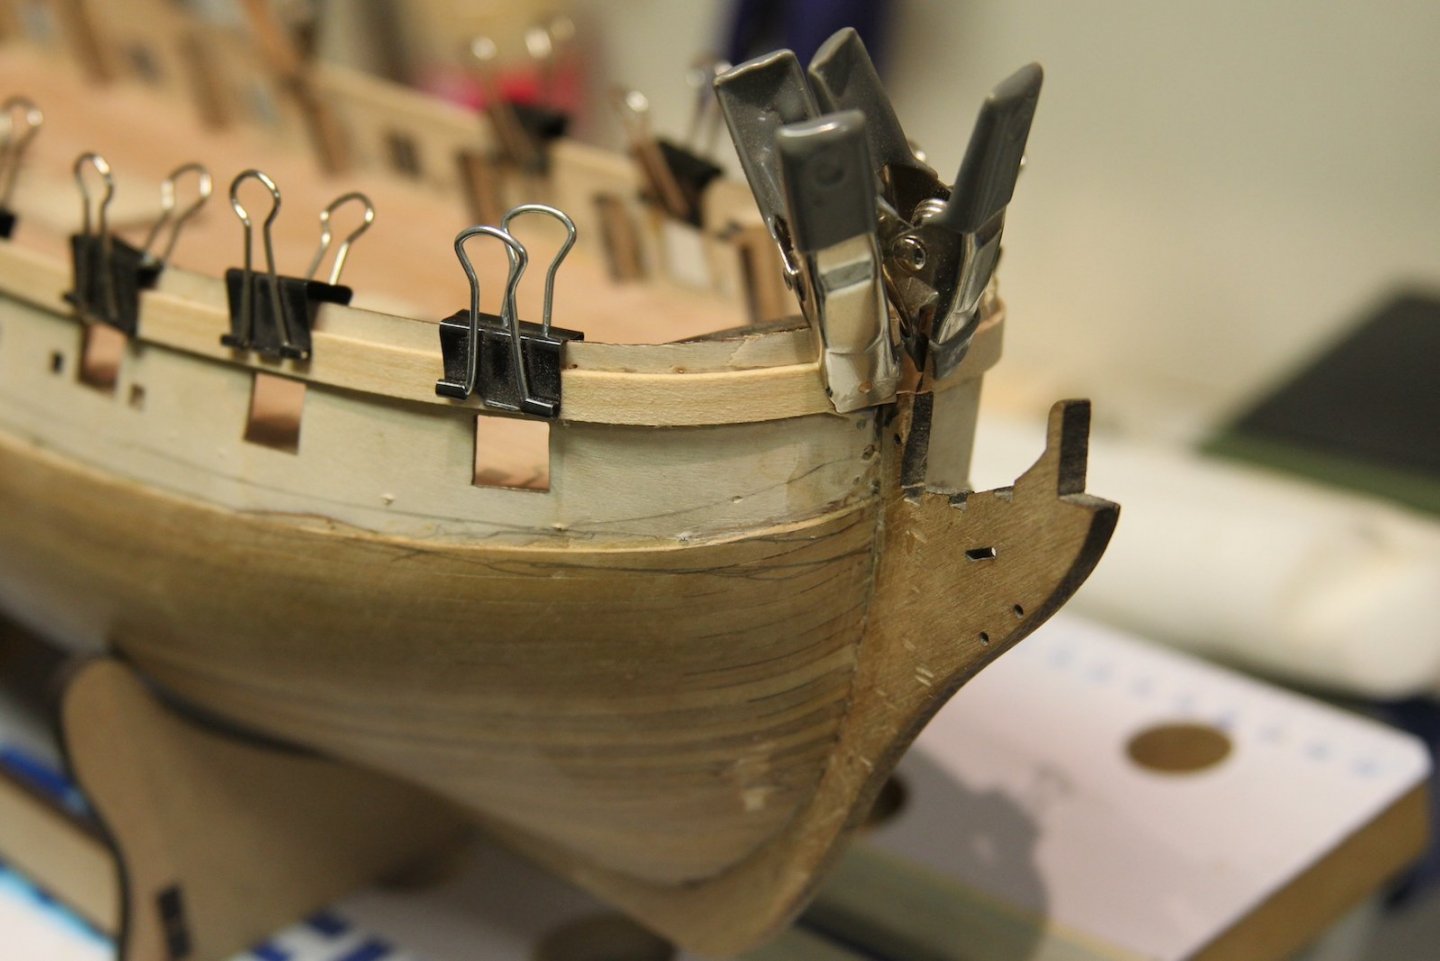
Exactly how to plank the gunports and fit the main wale has been giving me fits. I've been looking through books and logs and and have been agonizing over what to do here until I realized that the stern / transom area on the kit is a little bit of a debacle. Not only does it not really line up very well, but it doesn't appear to create the proper shape based on the NMM plans or really any of the other top-notch logs/builds. Not to mention there are some weird gaps and an oversized hole for the helm port. Since I re-created the stern post and needed to remount that anyway, I abandoned the kit parts and re-planked the counter. This gave me the chance to carve out a much more size-appropriate helm port and also get a better view of how my main wale and bulwark planking would line up.


- 419 replies
-
- 5
-
-
- Victory Models
- Pegasus
- (and 2 more)
-
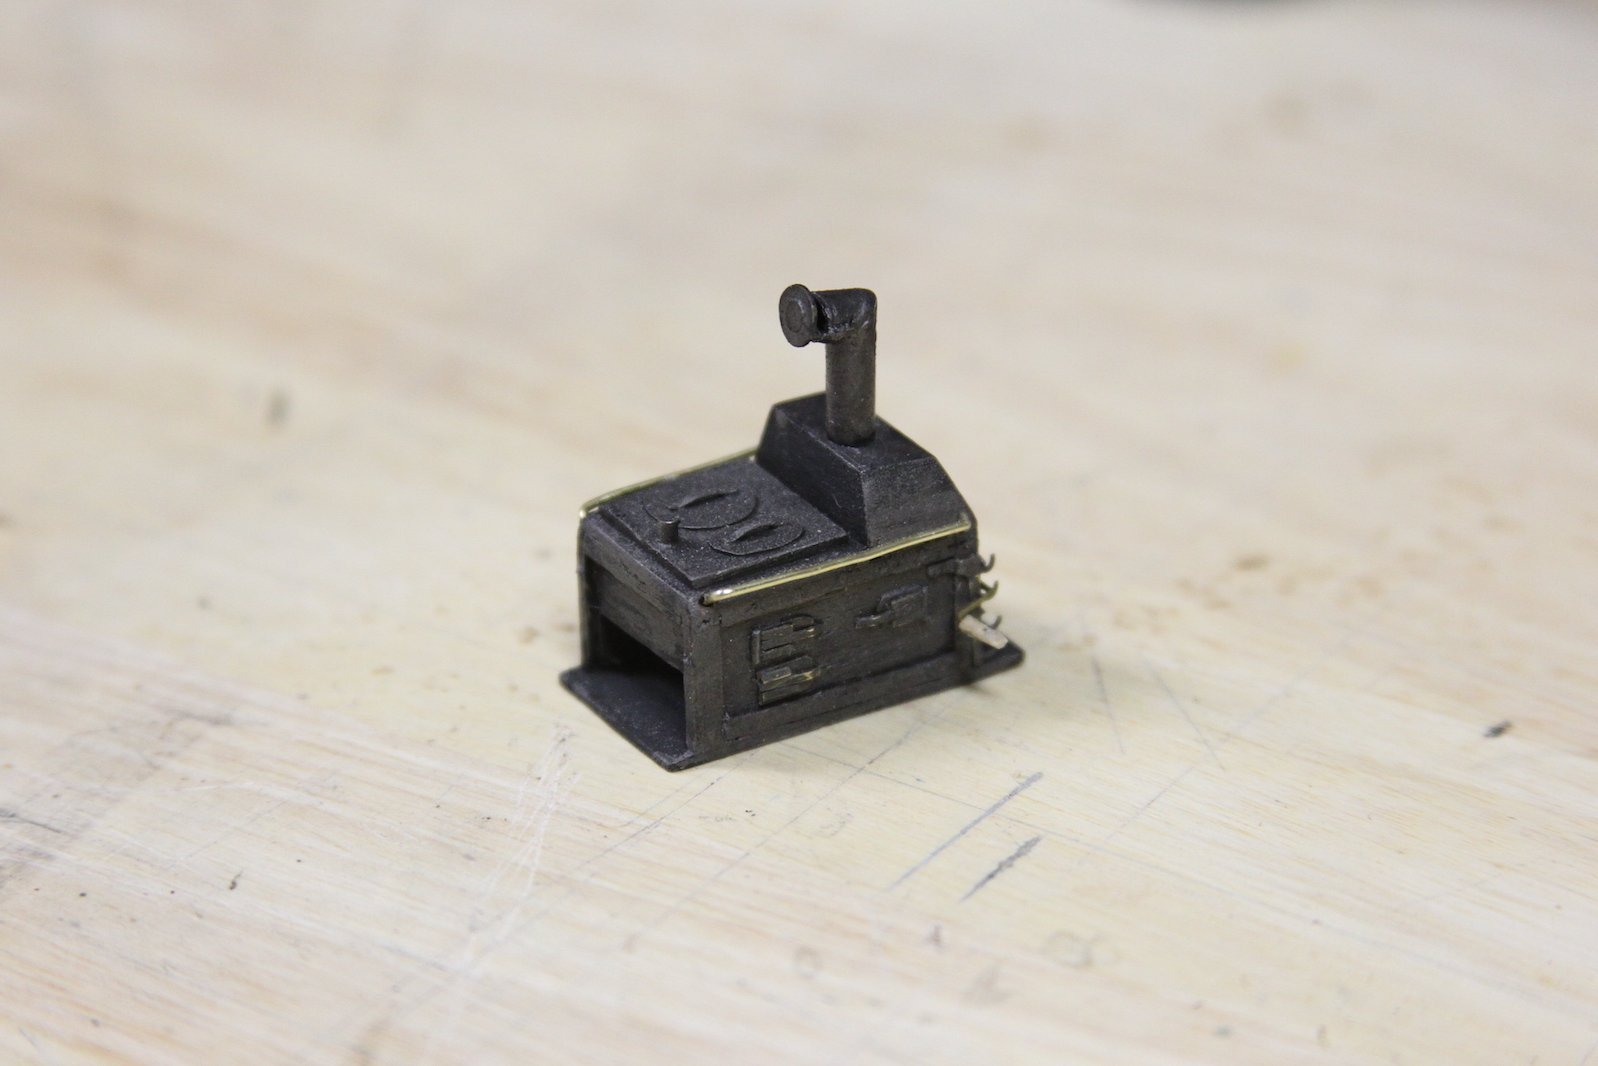
My first go-round on the stove vent was both pre-drill press and pre-silver solder - so I gave it another attempt and I'm much more pleased with the result. Same basic process, but able to dial in a little more detail. The vent itself is a small brass washer with the hole filled in with a smaller disc. The entire thing is blackened, then dry-brushed with the same metalizer used in the previous attempt.


- 419 replies
-
- 9
-
-
- Victory Models
- Pegasus
- (and 2 more)
-
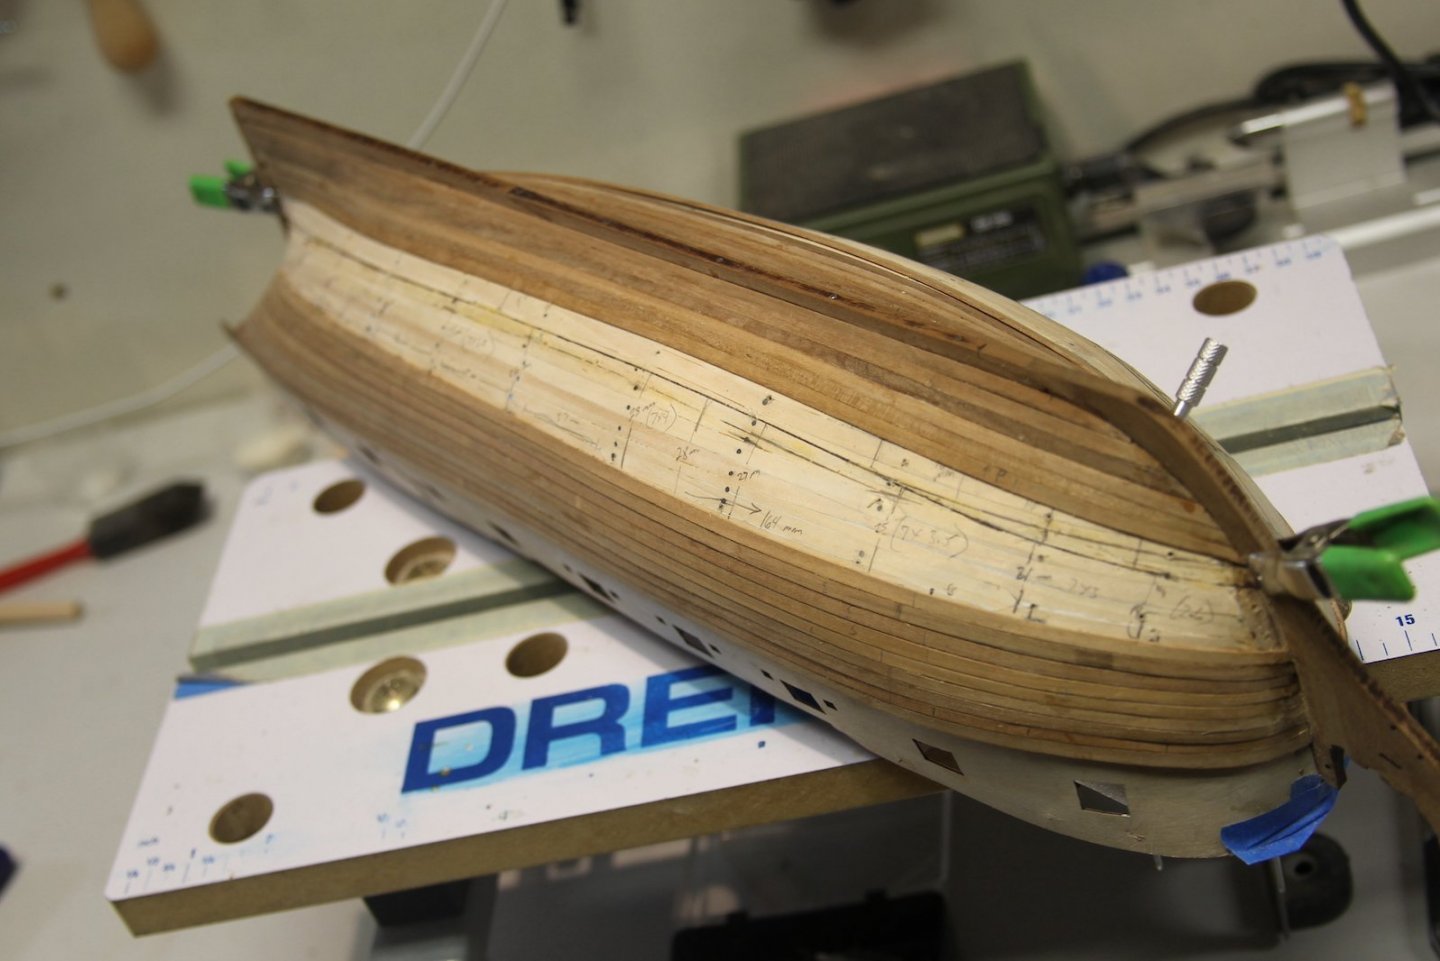
Thanks Cisco, Mark and B.E. Mark and B.E. - you’re both exactly right. I also don’t have the equipment to get the tapers perfectly consistent. I had a good sized eraser and I was erasing, remeasuring and remarking along the way - hence all the fun pencil marks like a university chalkboard. What an art from it is to get it nailed down like some of the great work we see on here! I’m going to make a couple of repairs and touch ups still - but when I started my goal was to have the option of coppering or not coppering. Internally - I’m a little disappointed that the flaws have essentially removed that option, but I’m still happy with it. At least I won’t have to stain the hell out of it to get it to look good like my first build the San Juan. 😛
- 419 replies
-
- 5
-
-
- Victory Models
- Pegasus
- (and 2 more)
-
She’s looking good Mark - I feel your pain of ad nauseam.
- 505 replies
-
- 3
-
-
- vanguard models
- Sphinx
- (and 1 more)
-
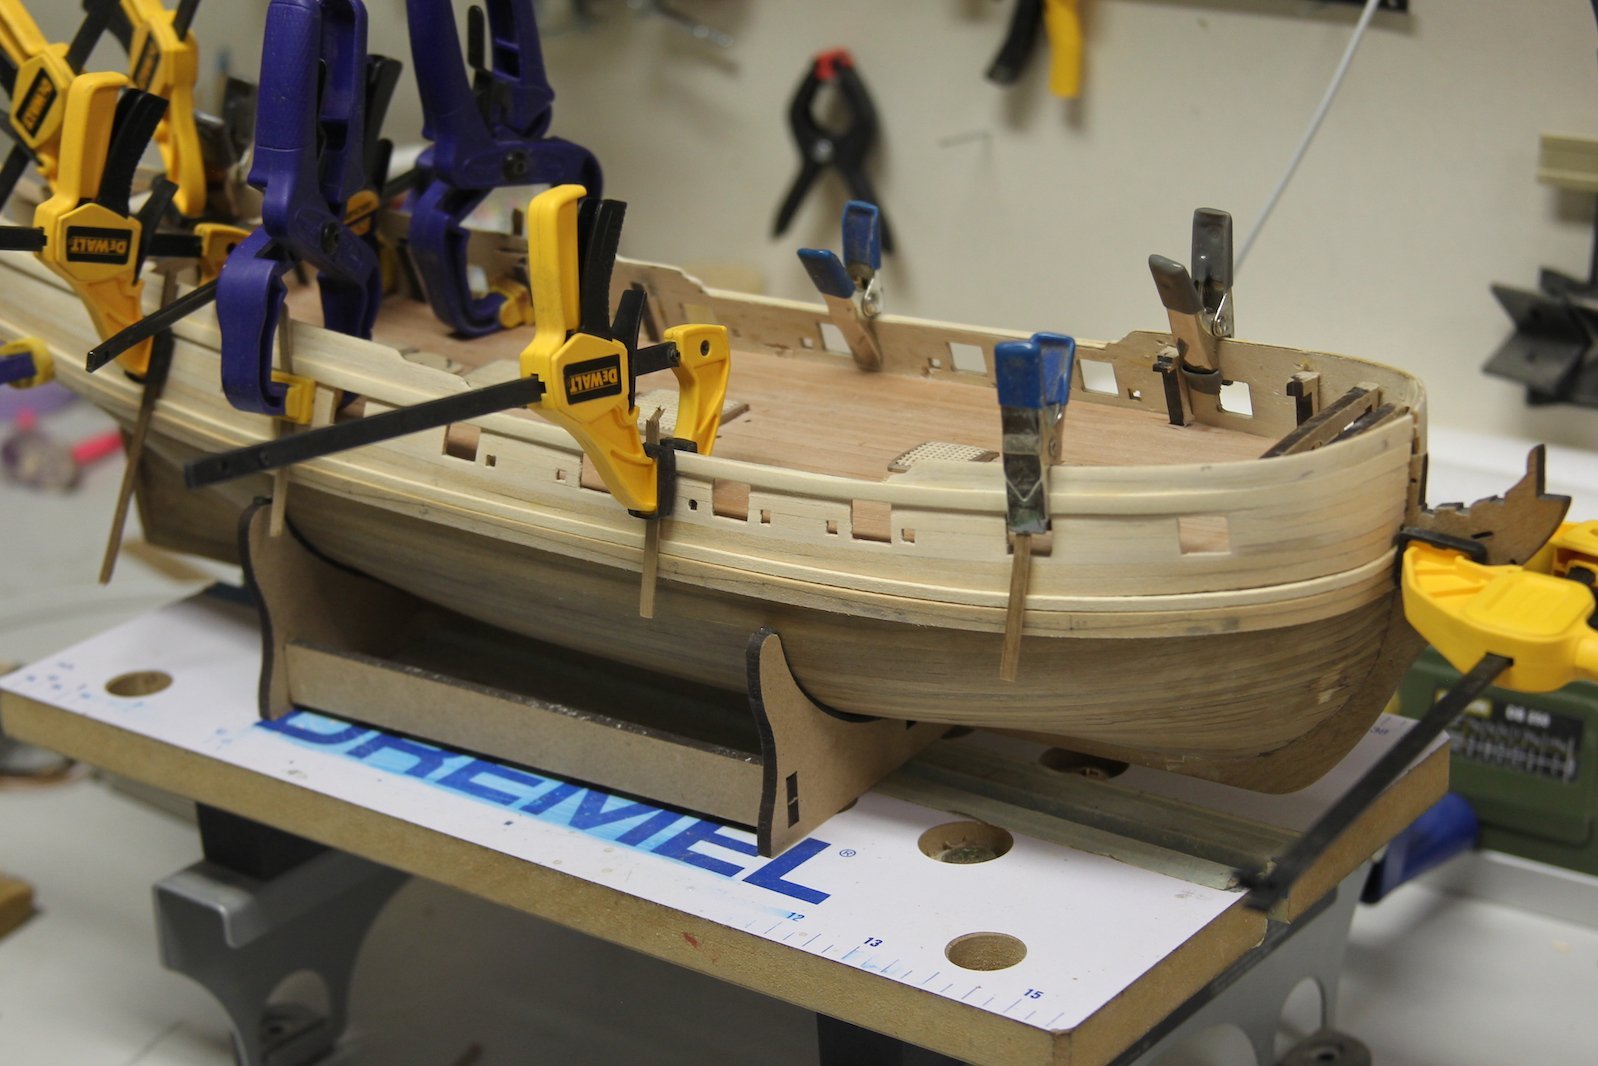
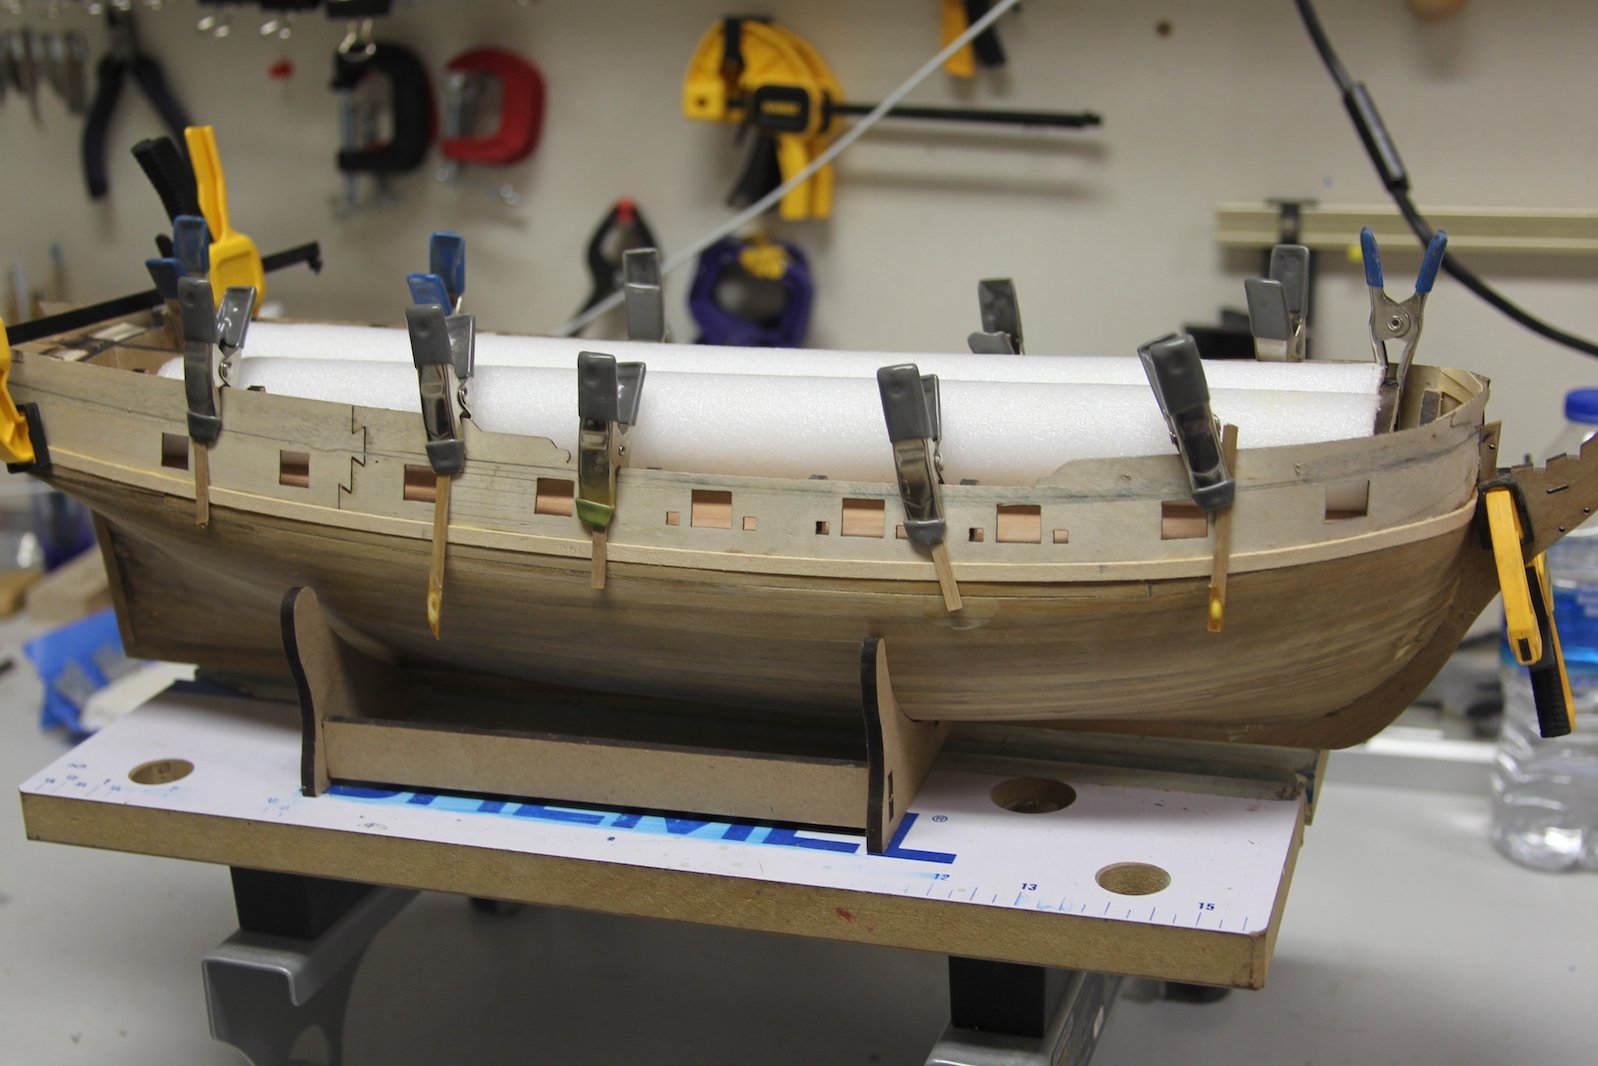
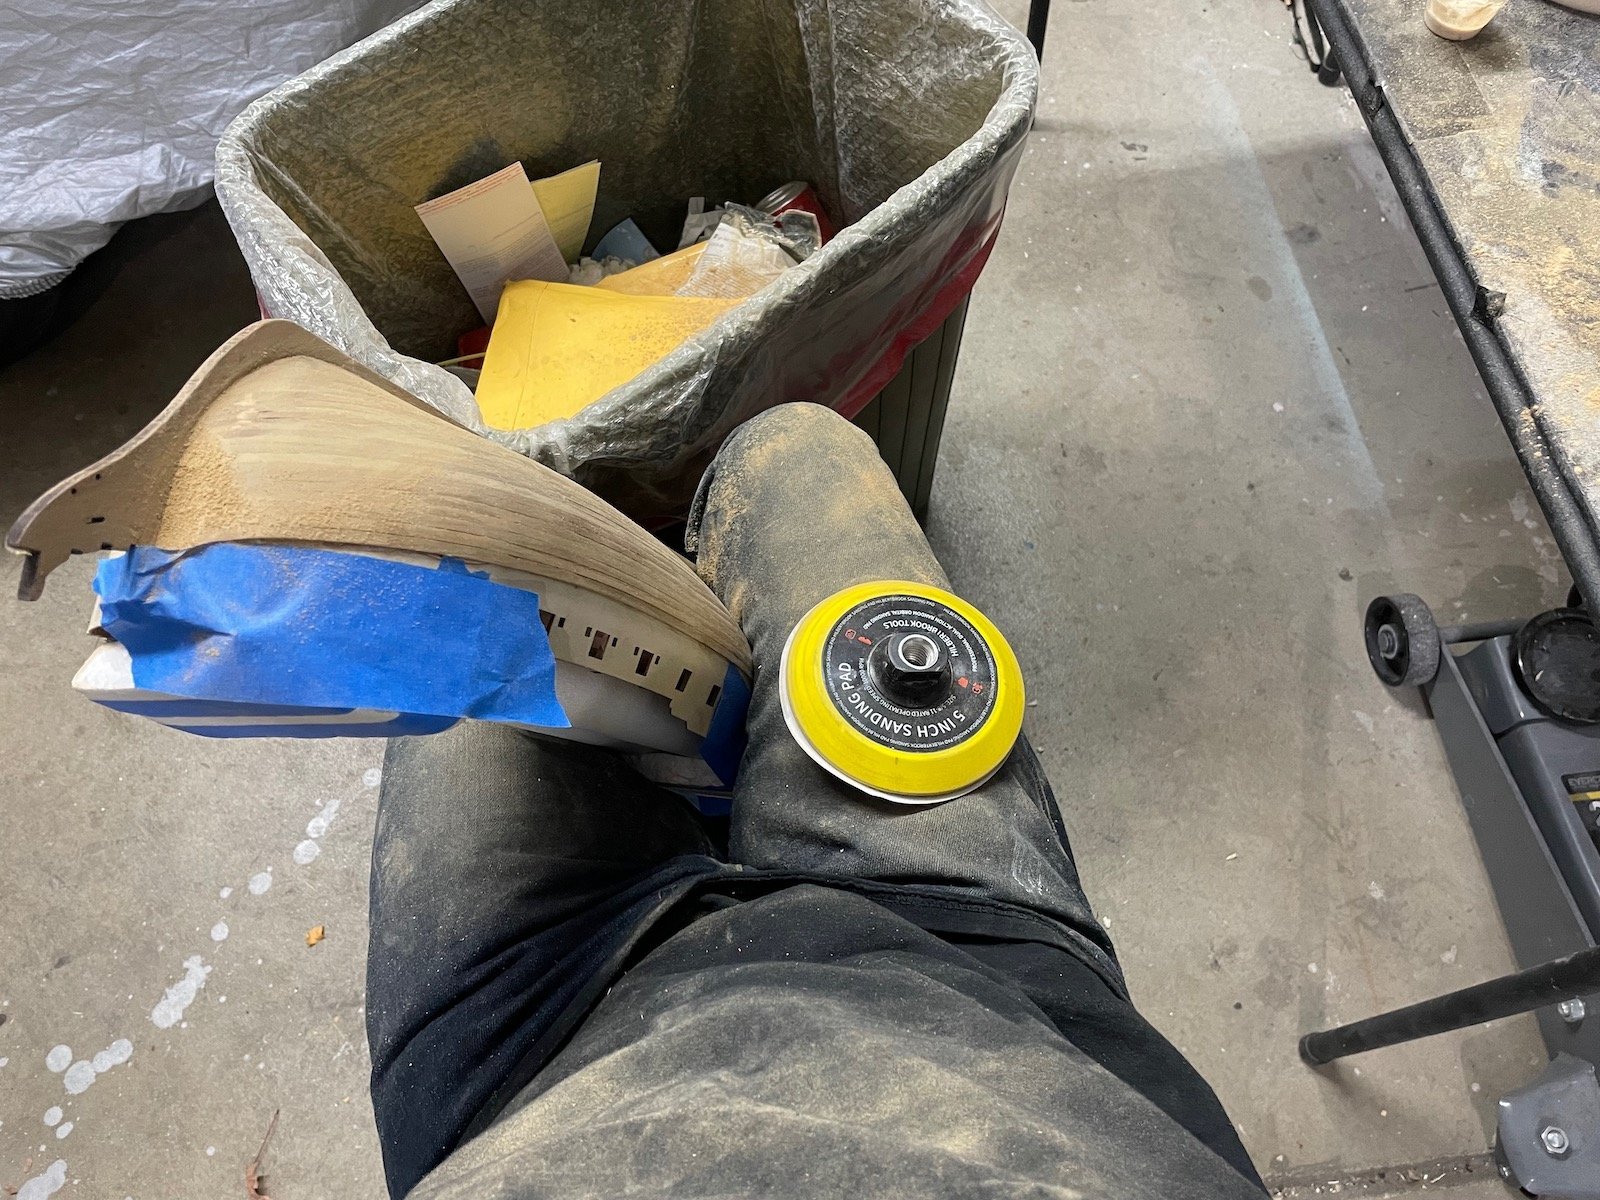
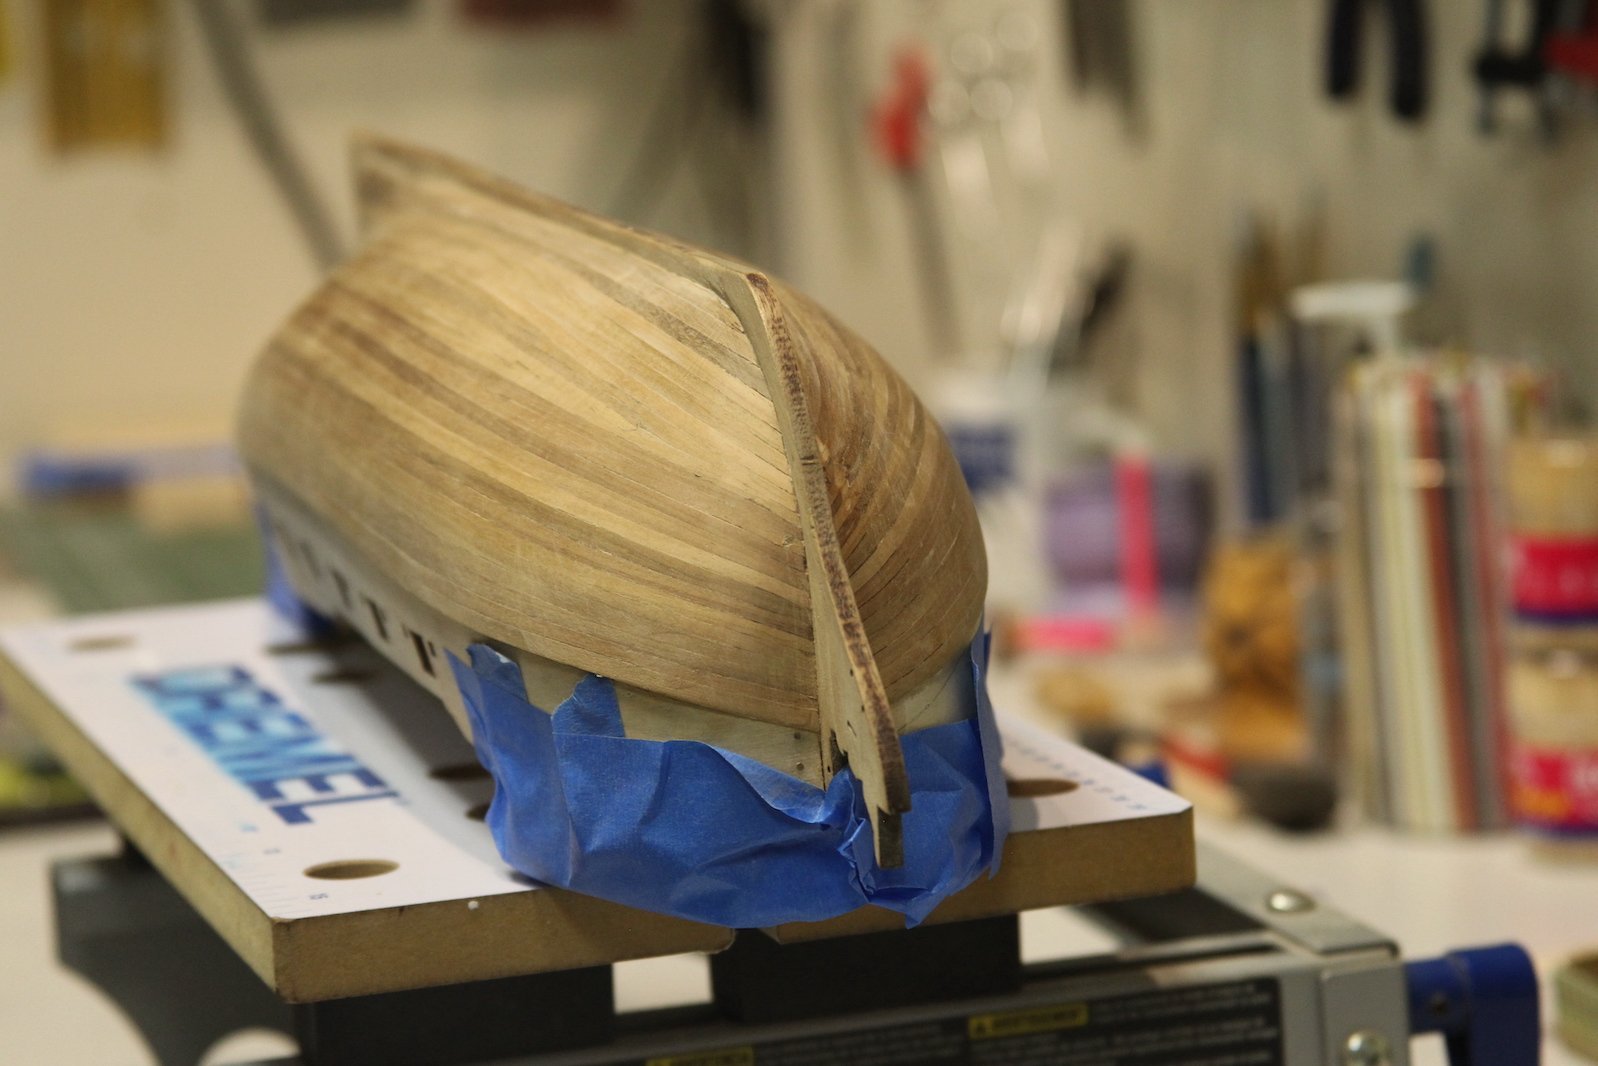
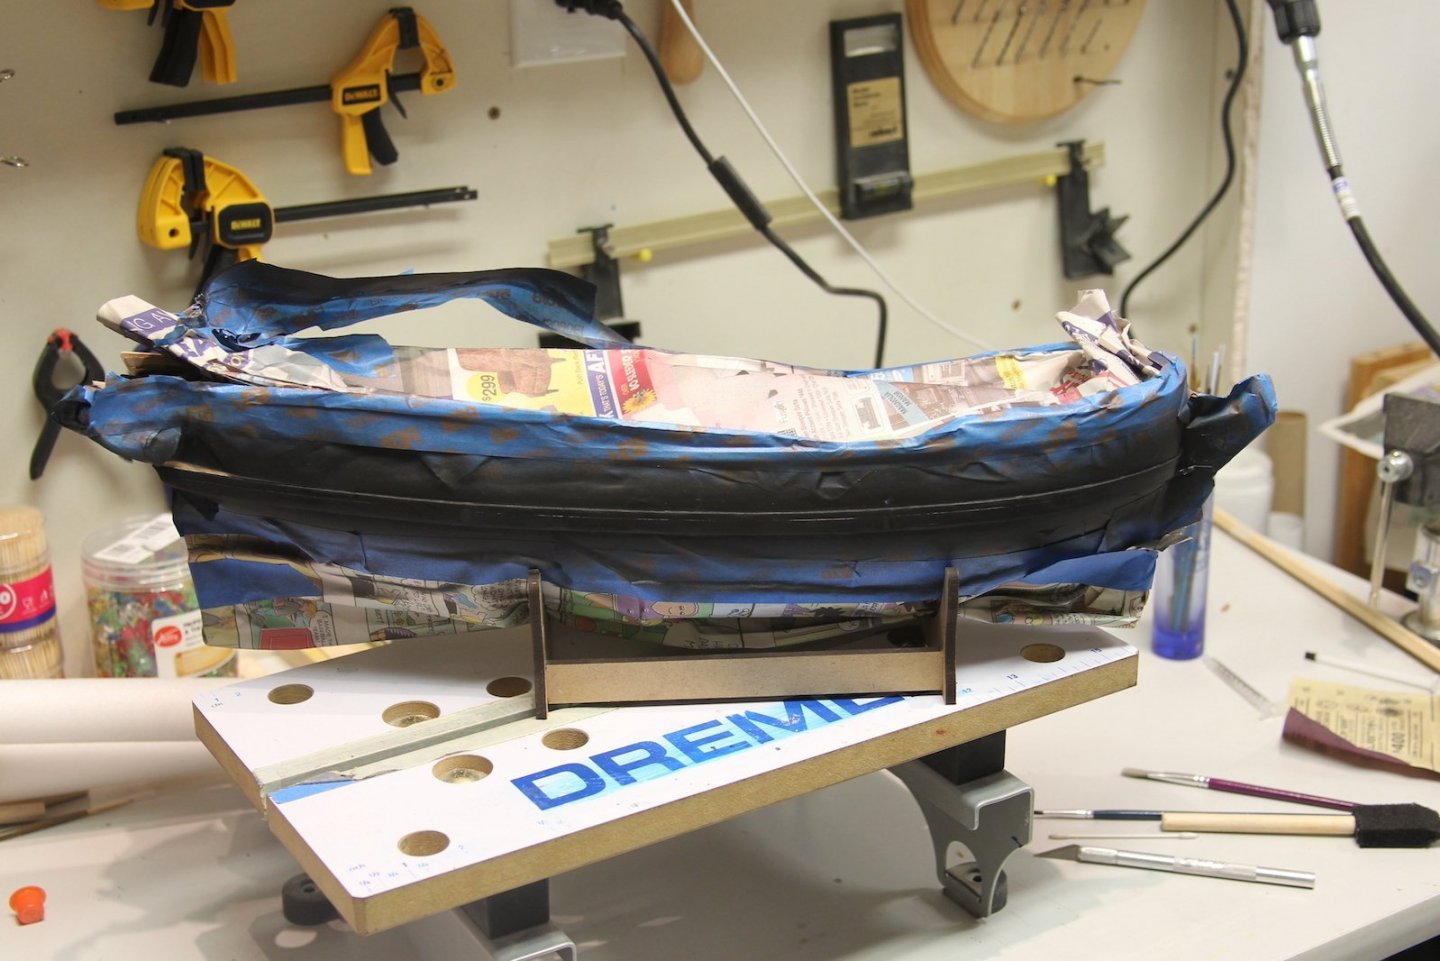
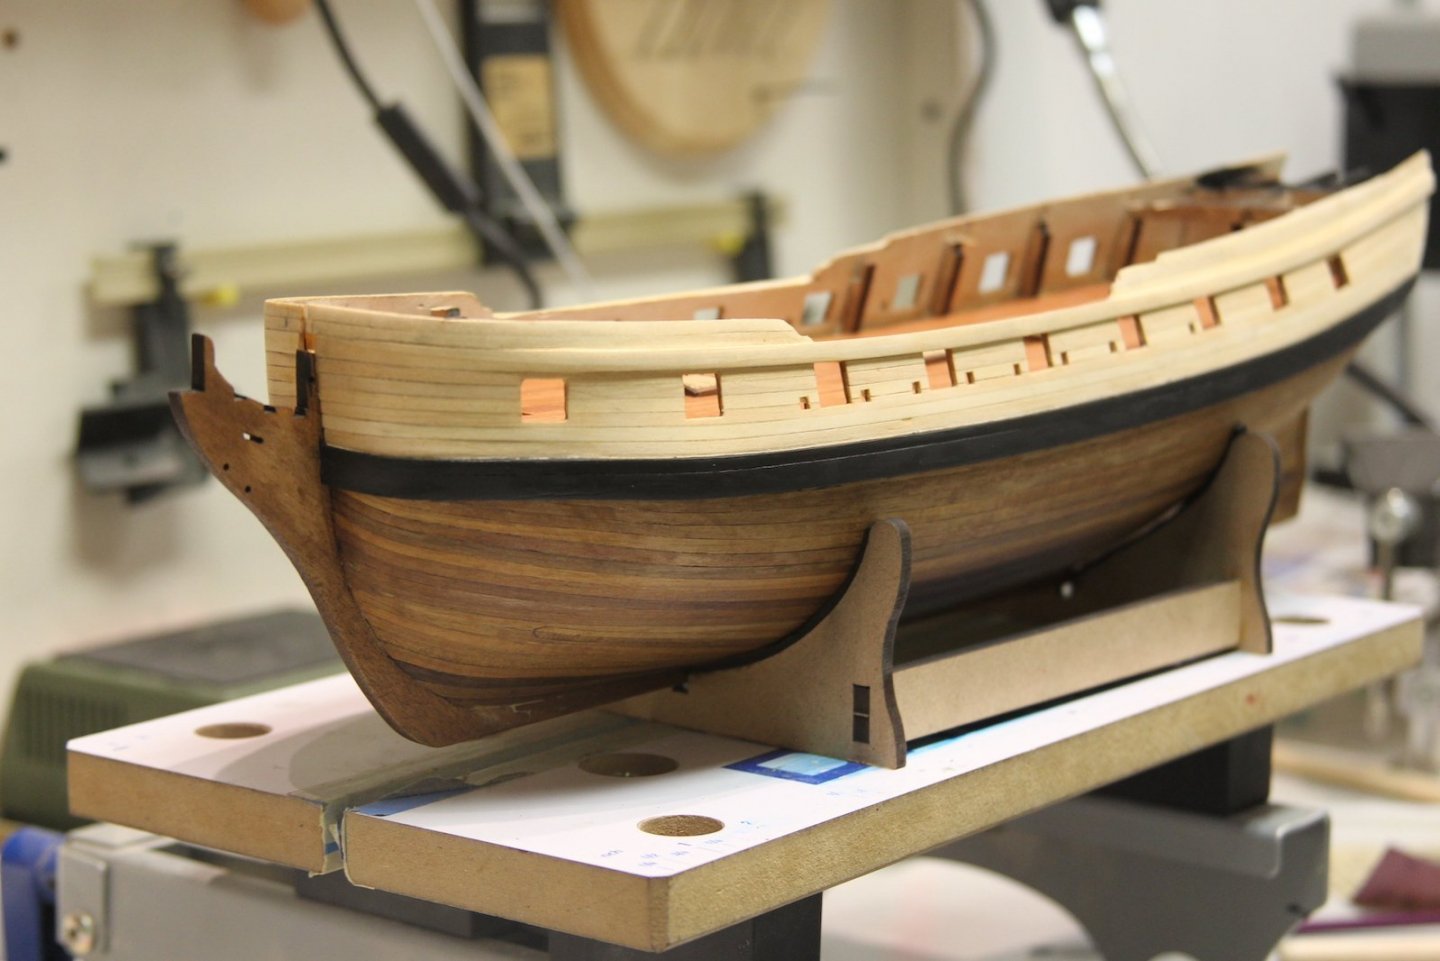
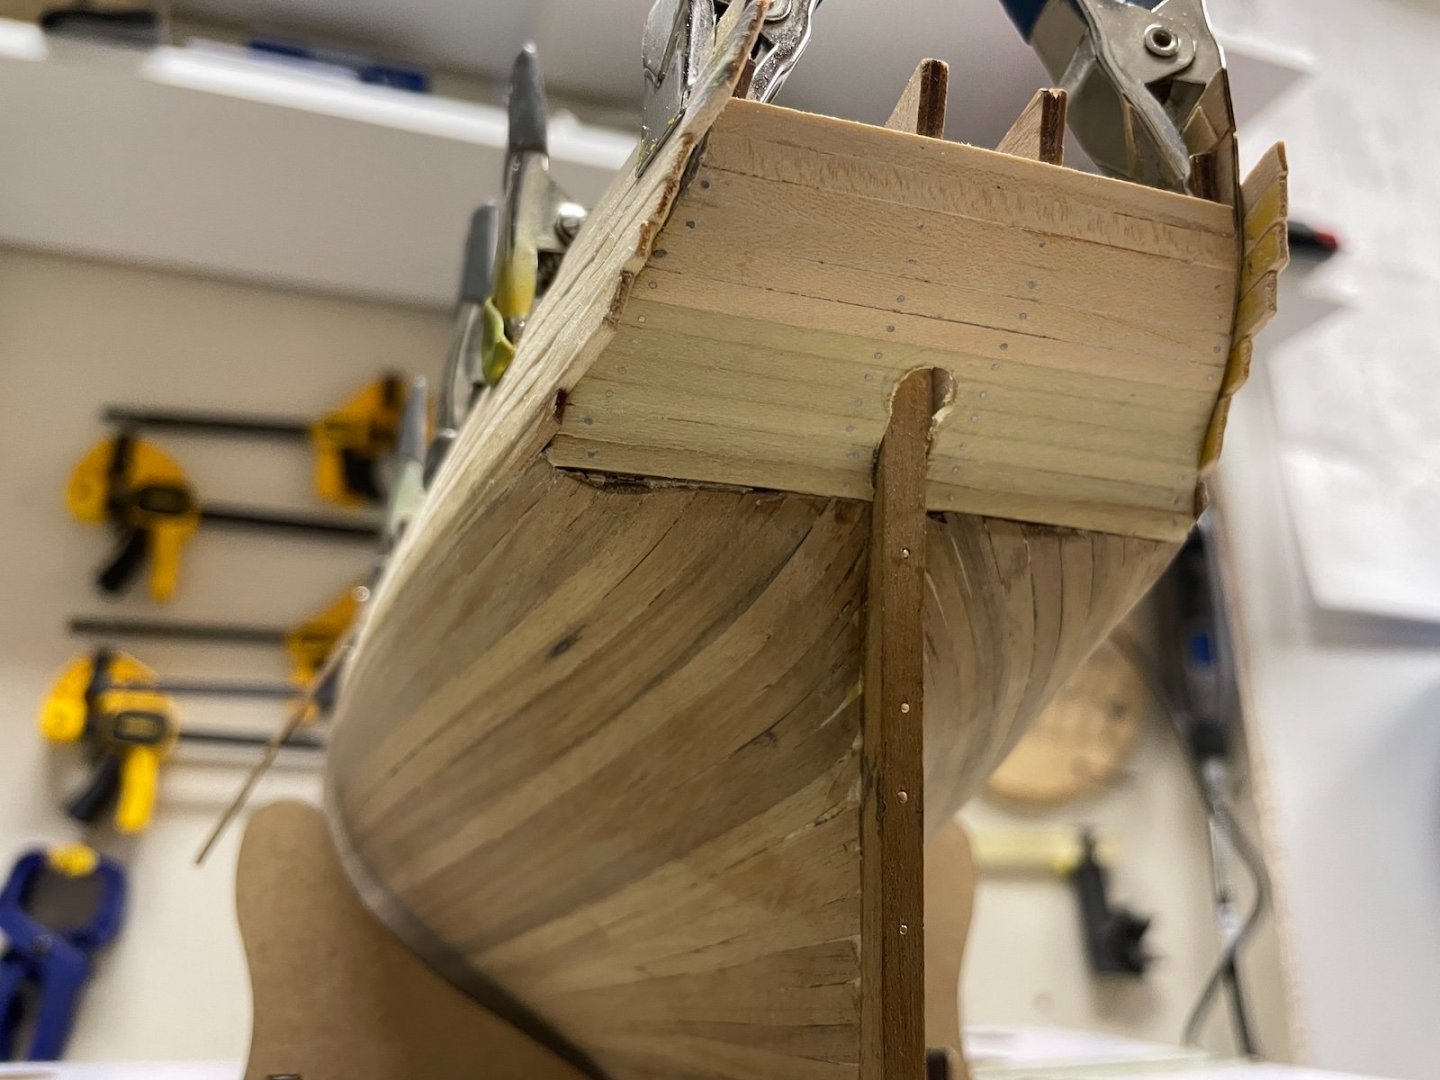
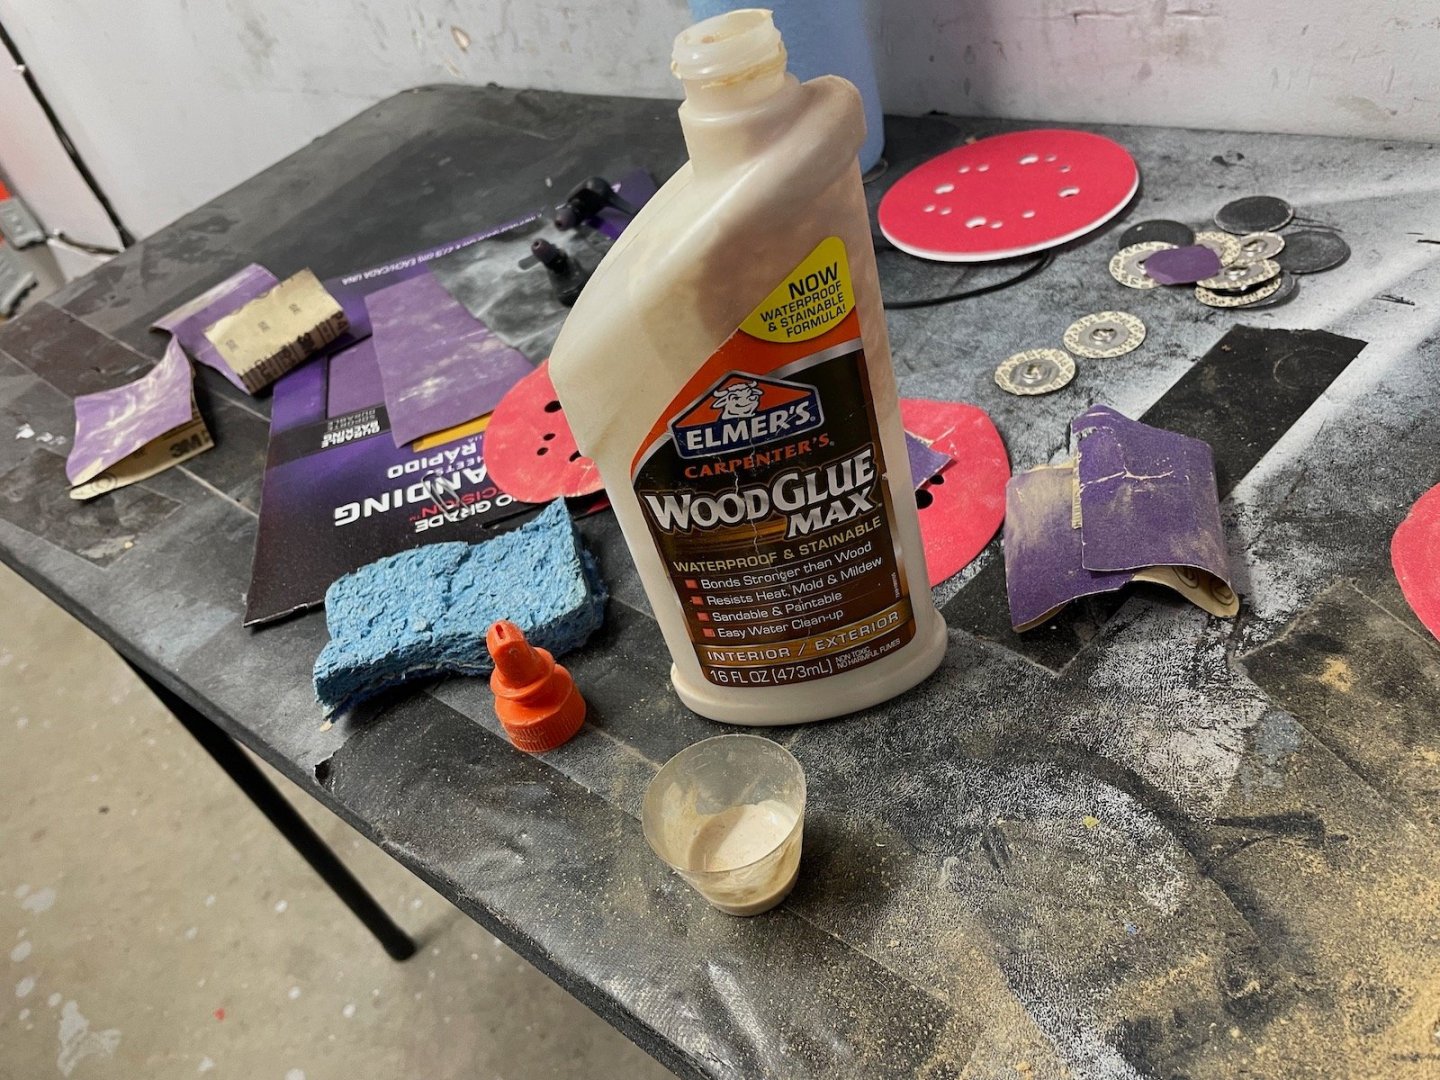
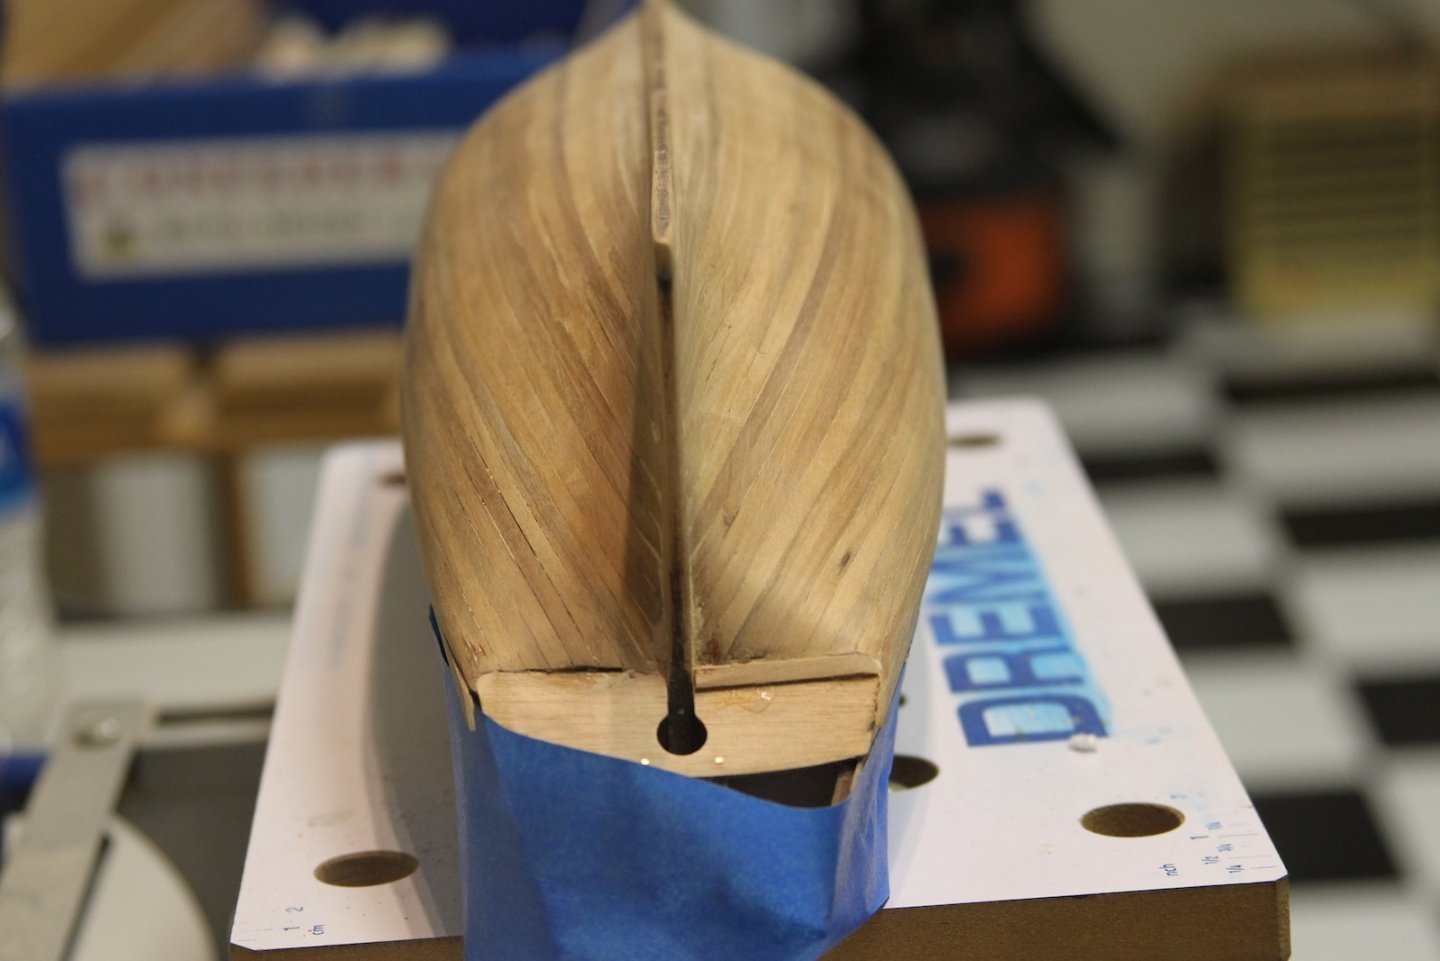
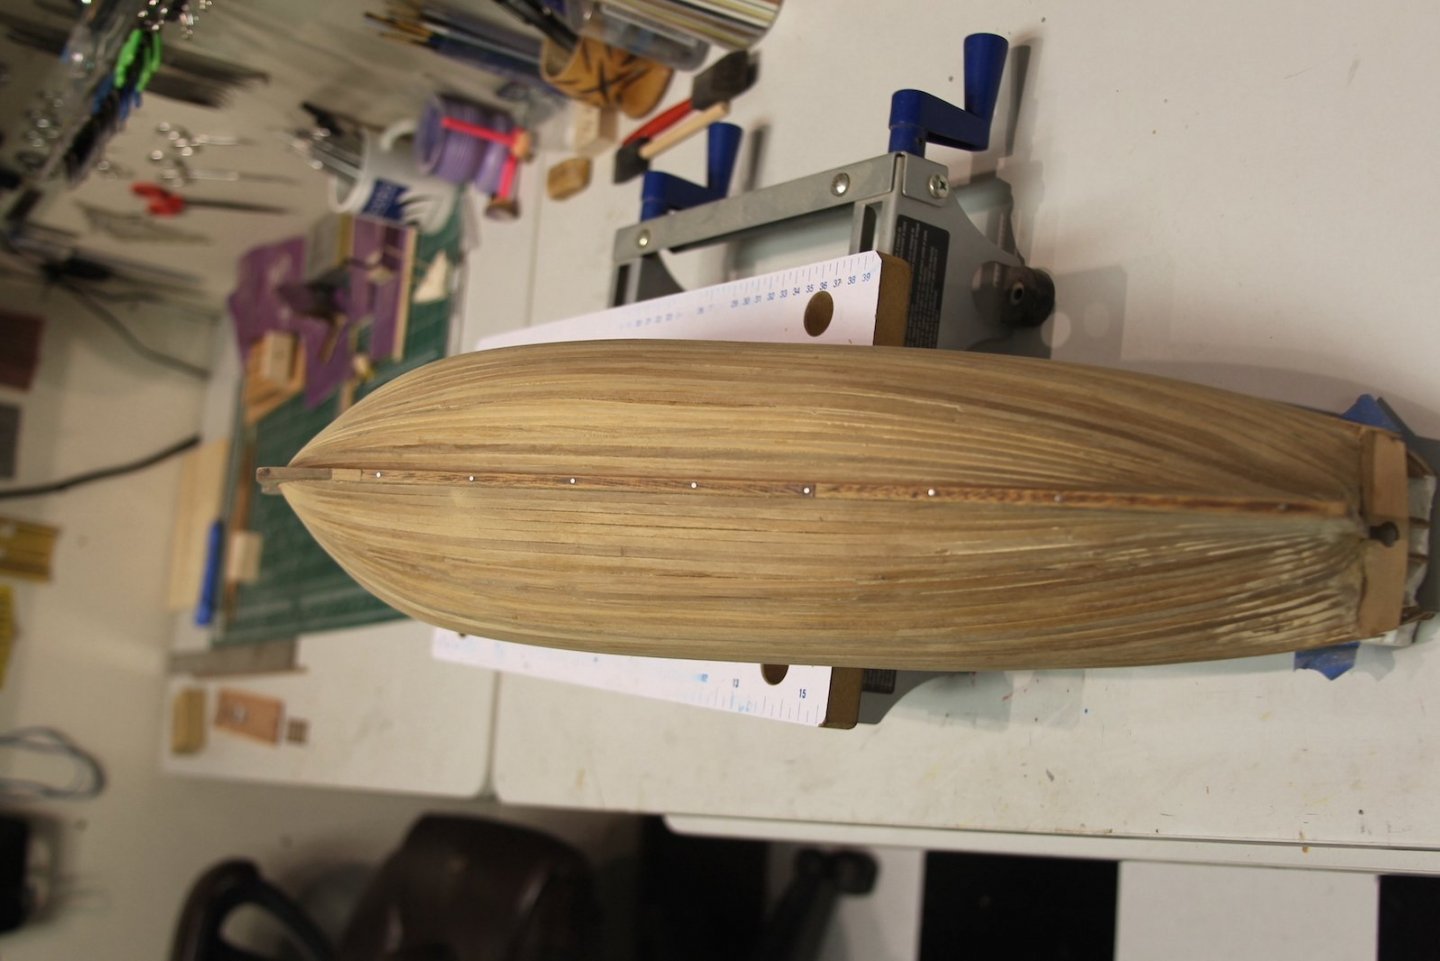
Here are a few fun shots of sanding out the hull in the garage. I have a thinner version of wood glue standing by to fill in any gaps that show up. I slap some glue into the gap, wipe off the excess and then sand over it so the gap is filled with the glue and sawdust. Works pretty well for me. In the second shot - other than the mess - you'll see a 5 in rotary sander attachment. I love to use this to sand by hand because it's easy to hold, easy to switch out the velcro sandpaper, soft enough to have some 'give' over the hull, and still precise enough to get into the spots I need to get to - like along the keel. Not quite @Chuck-worthy, but at the end of the day it was one of my better planking jobs. Going into this I'd briefly flirted with the idea of not coppering the hull - but there ended up being a few too many flaws so I'm going to go ahead with the copper. You may have also noticed in the stern shot that I got a little carried away in that area and thinned out the stern post so I'll be replacing that.


- 419 replies
-
- 12
-
-
- Victory Models
- Pegasus
- (and 2 more)
-
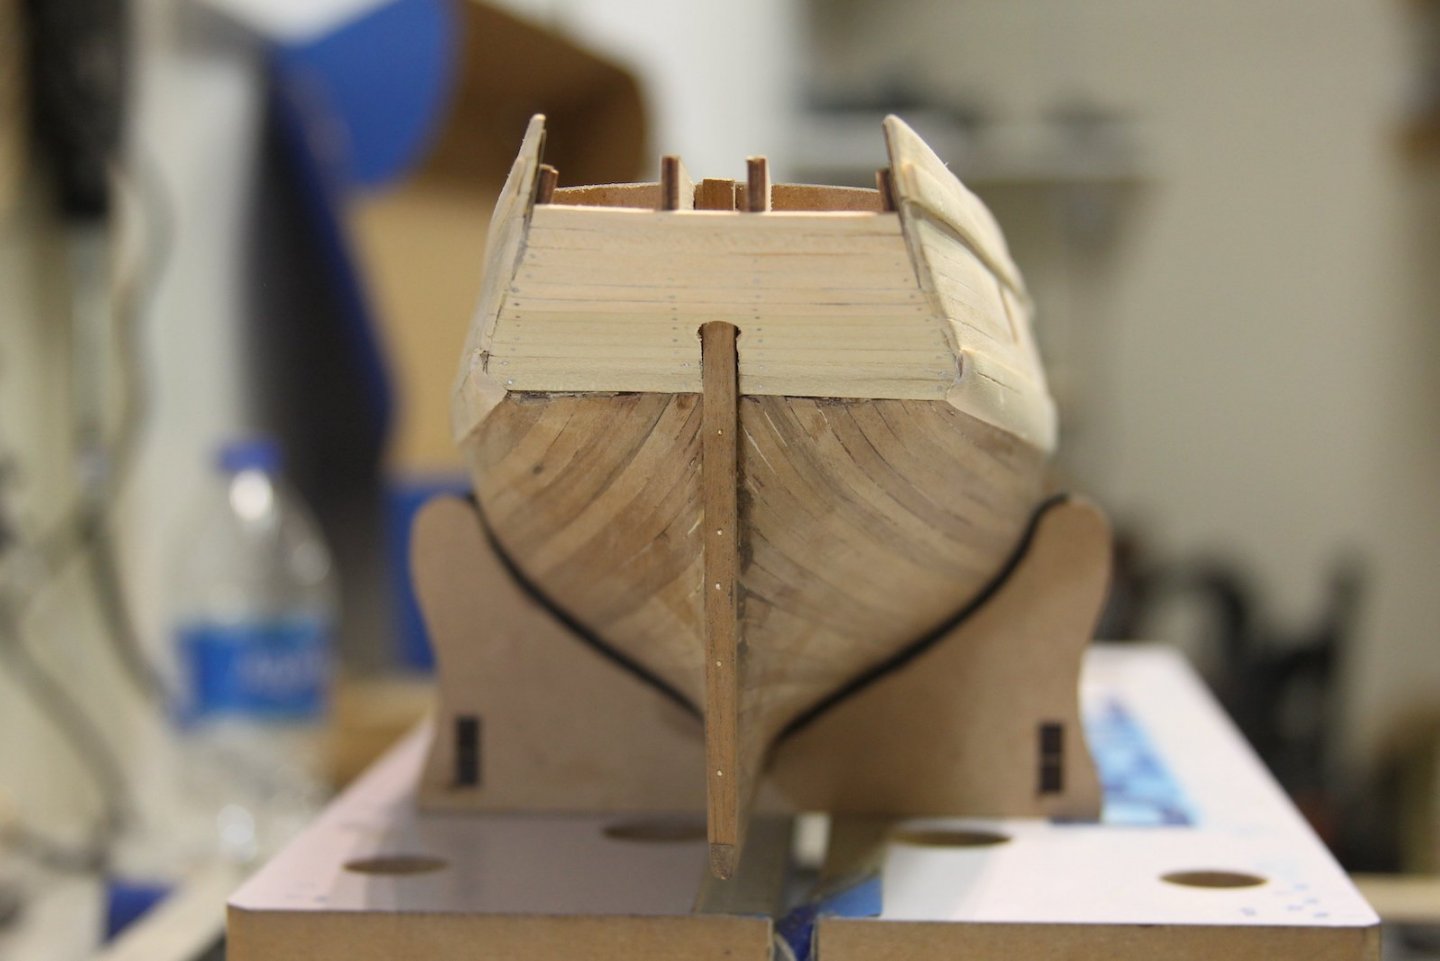
My method for the stealer isn't really historically accurate, but I still think is a pretty functional way of handling my botched math. I ensured that planks didn't come to a sharp taper, and basically did a combo - split stealer - kinda deal to fill the remaining section. I started by gluing two of the planks together to create a wider double plank. Then I cut off the ends to create the same kind of butt that I use in a more 'traditional' stealer in the stern section. I traced out what needed to be filled then put a brand new blade in the x-acto to cut out and match the section to piece I created. Filling in the stern stealers rounded out the second layer. These pictures are all before any sanding of course.


- 419 replies
-
- 9
-
-
- Victory Models
- Pegasus
- (and 2 more)
-
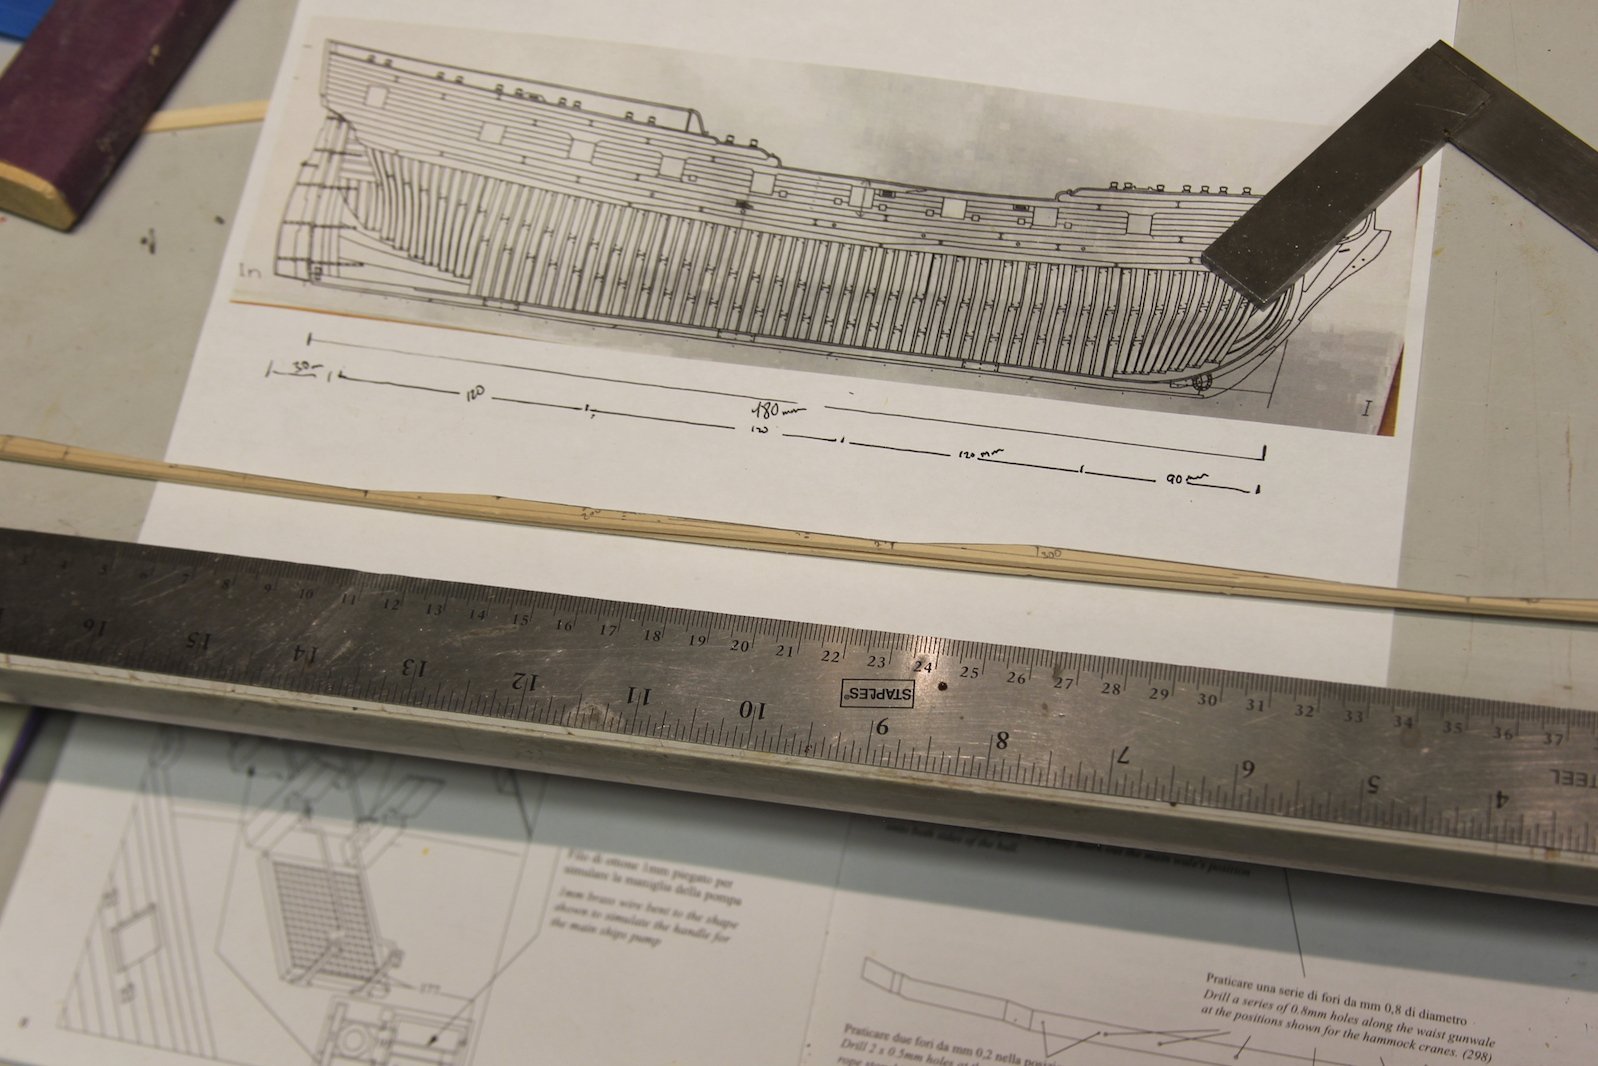
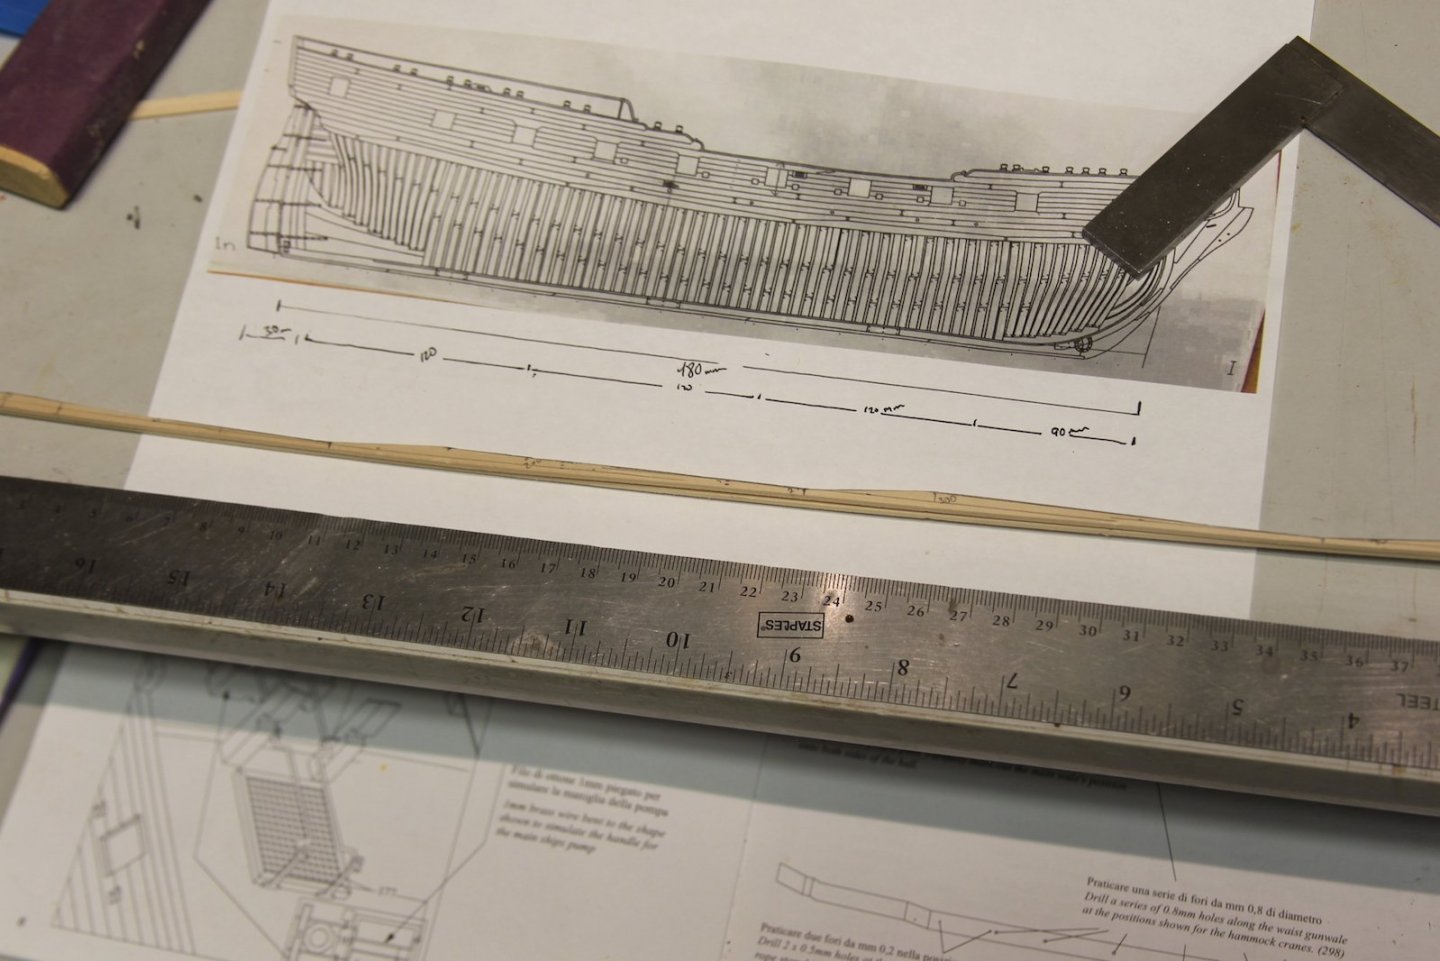
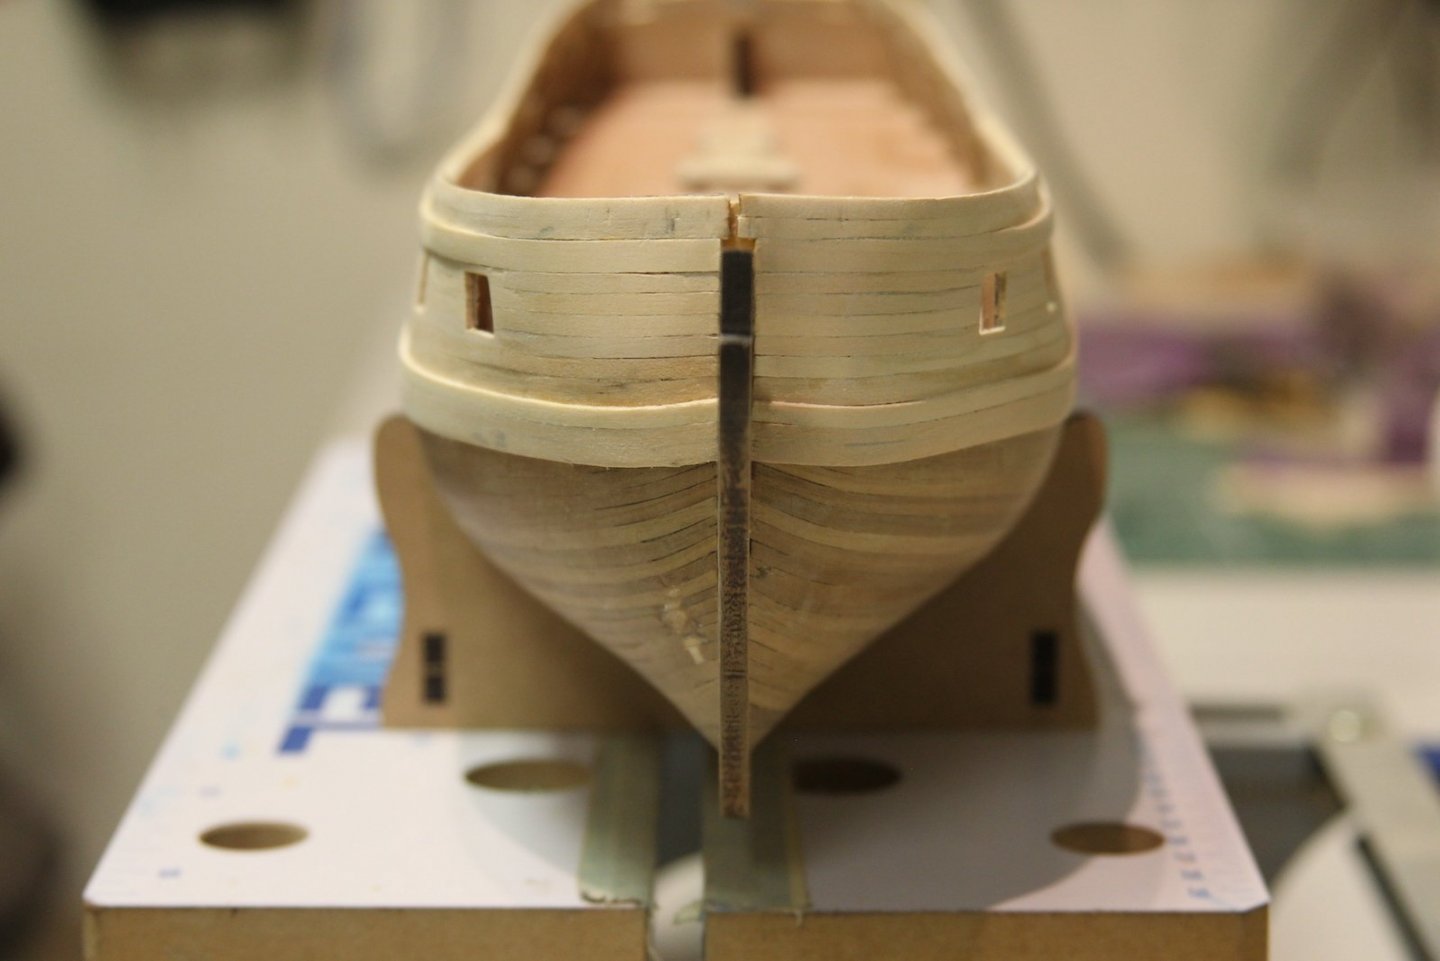
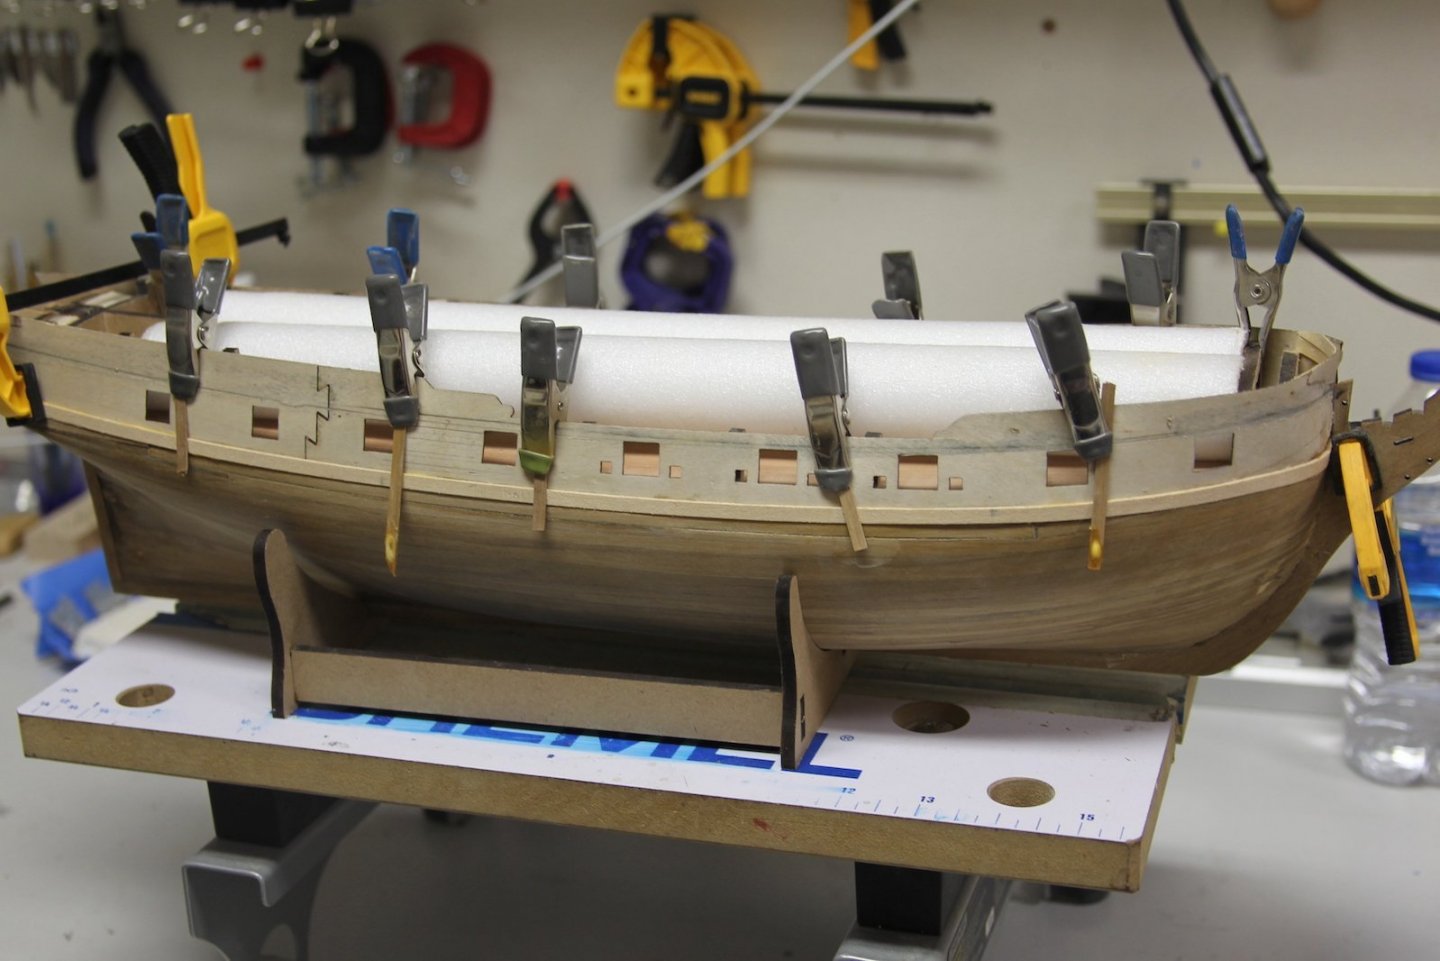
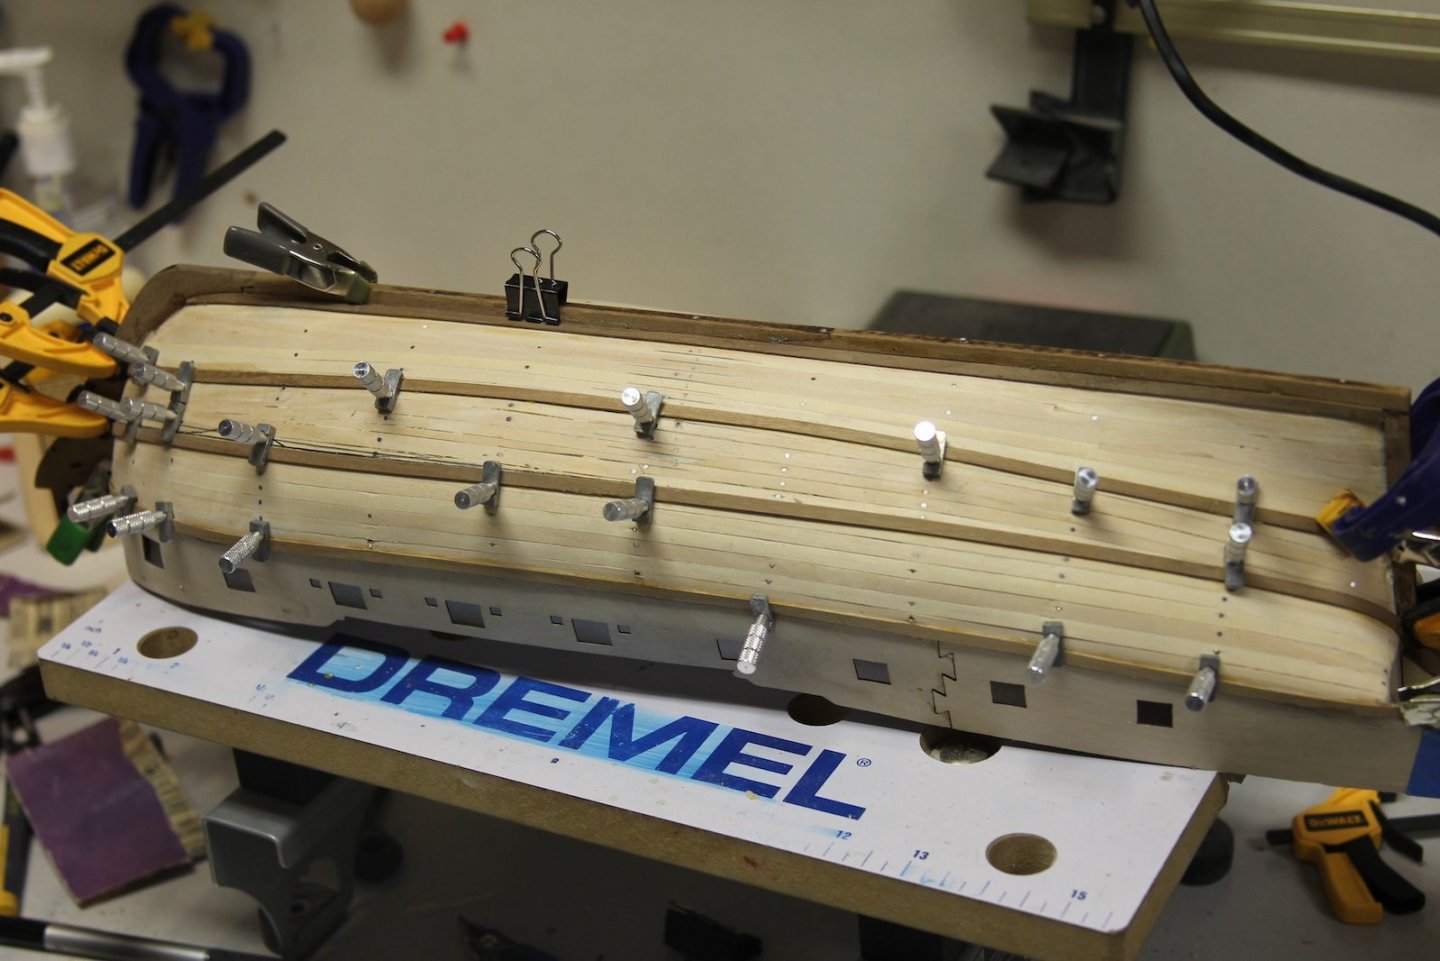
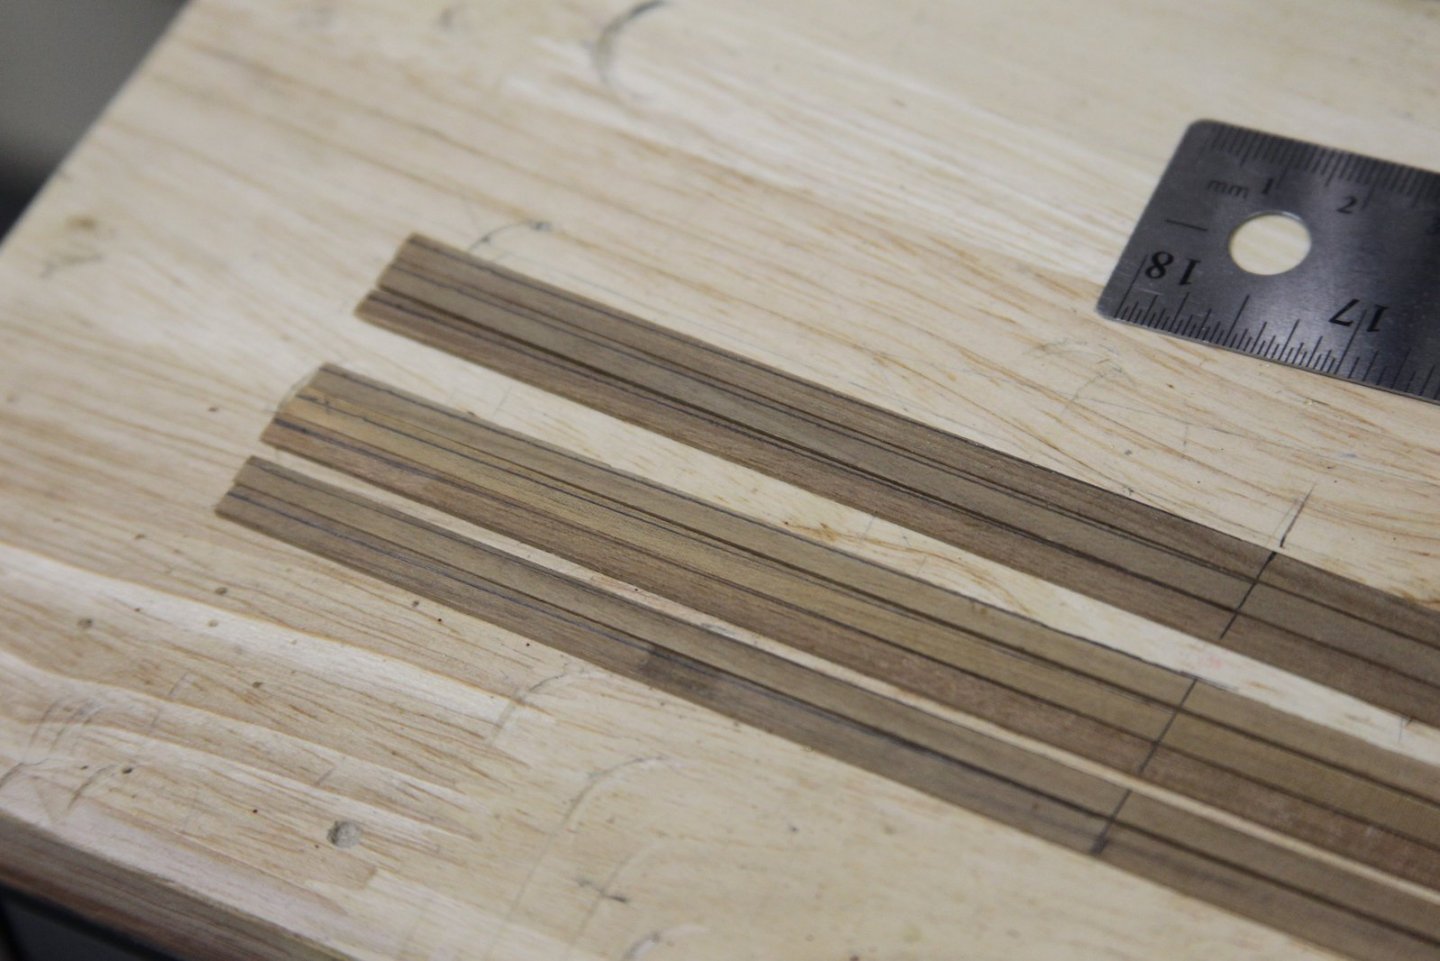
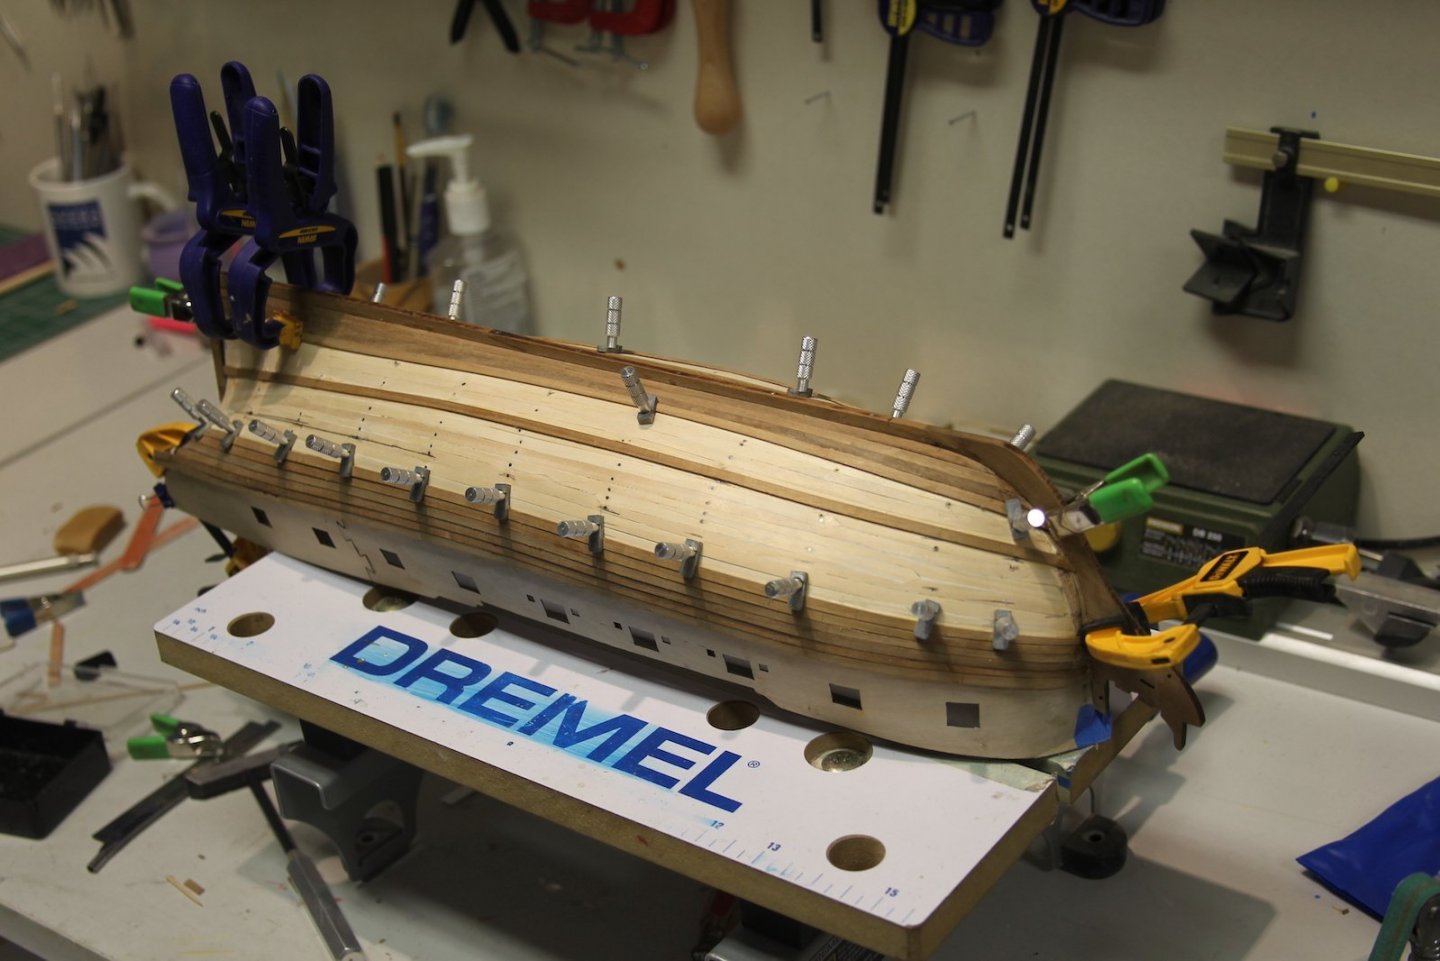
Second layer of planking has been ongoing. Probably should've made a few posts as I went - so don't think this post represents the second layer all done at once or any of that kind of madness. All my planking is done simultaneous to things like grates and deck fixtures. As @SpyGlass mentioned above, I needed to do a fair amount of trimming prior to the second layer, so that's where I start. Curbing the stern and crating a new rabbet for the walnut planks. After that, I split the hull into three sections instead of the four I used for the initial layer. These 'divider' planks are just tacked there to help me count out the planks. I then started planking from the bottom up and top down to meet in the middle. The kit provides walnut planks for the second layer, but there's some pretty significant inconsistency in terms of color - so I did my best to separate the planks to get some coloring that was at least in the same ballpark. As you'll see later - I was only partially successful. We'll see how the bulwarks end up and then I'll decide whether or not to do any staining - even though most of the planking is painted in some fashion. I took the lessons I learned from the first planking and did a whole bunch of measuring and math to try and figure out how much to taper the planks for each section of the hull. If you take a look at some of the pictures you'll see lots of little notes and marks along the way. Here's the thing - while I definitely think this all benefitted me - it still ended up basically being 'best guess' with me measuring out the last section one bit at a time. After soaking and bending wood - it never seems to return to the same size, or I'm off by a fraction of a millimeter or something. Honestly, I think I'd have had more success with a harder wood like box or pear - but I didn't really want to fork over the extra cash. I've already invested quite a bit into the deck wood as well as ropes, canons and other miscellaneous stuff. Besides - I was pretty sure I was going to end up coppering the hull. From there it's pretty much what we've all seen before. Measure, soak, mount, dry, glue. When I got to the final middle section I realized a couple of things - I botched the measurements at the stern and didn't taper correctly. I was thrown off by the "L shape" and didn't get the math right. This lead to a pretty wonky looking section that needed to be filled. So I used cardstock to take a template and try and measure out what needed to be done. In the end, it was pretty clear I was going to need a stealer regardless.

- 419 replies
-
- 7
-
-
- Victory Models
- Pegasus
- (and 2 more)
-
This is a must in nearly every occasion...
-
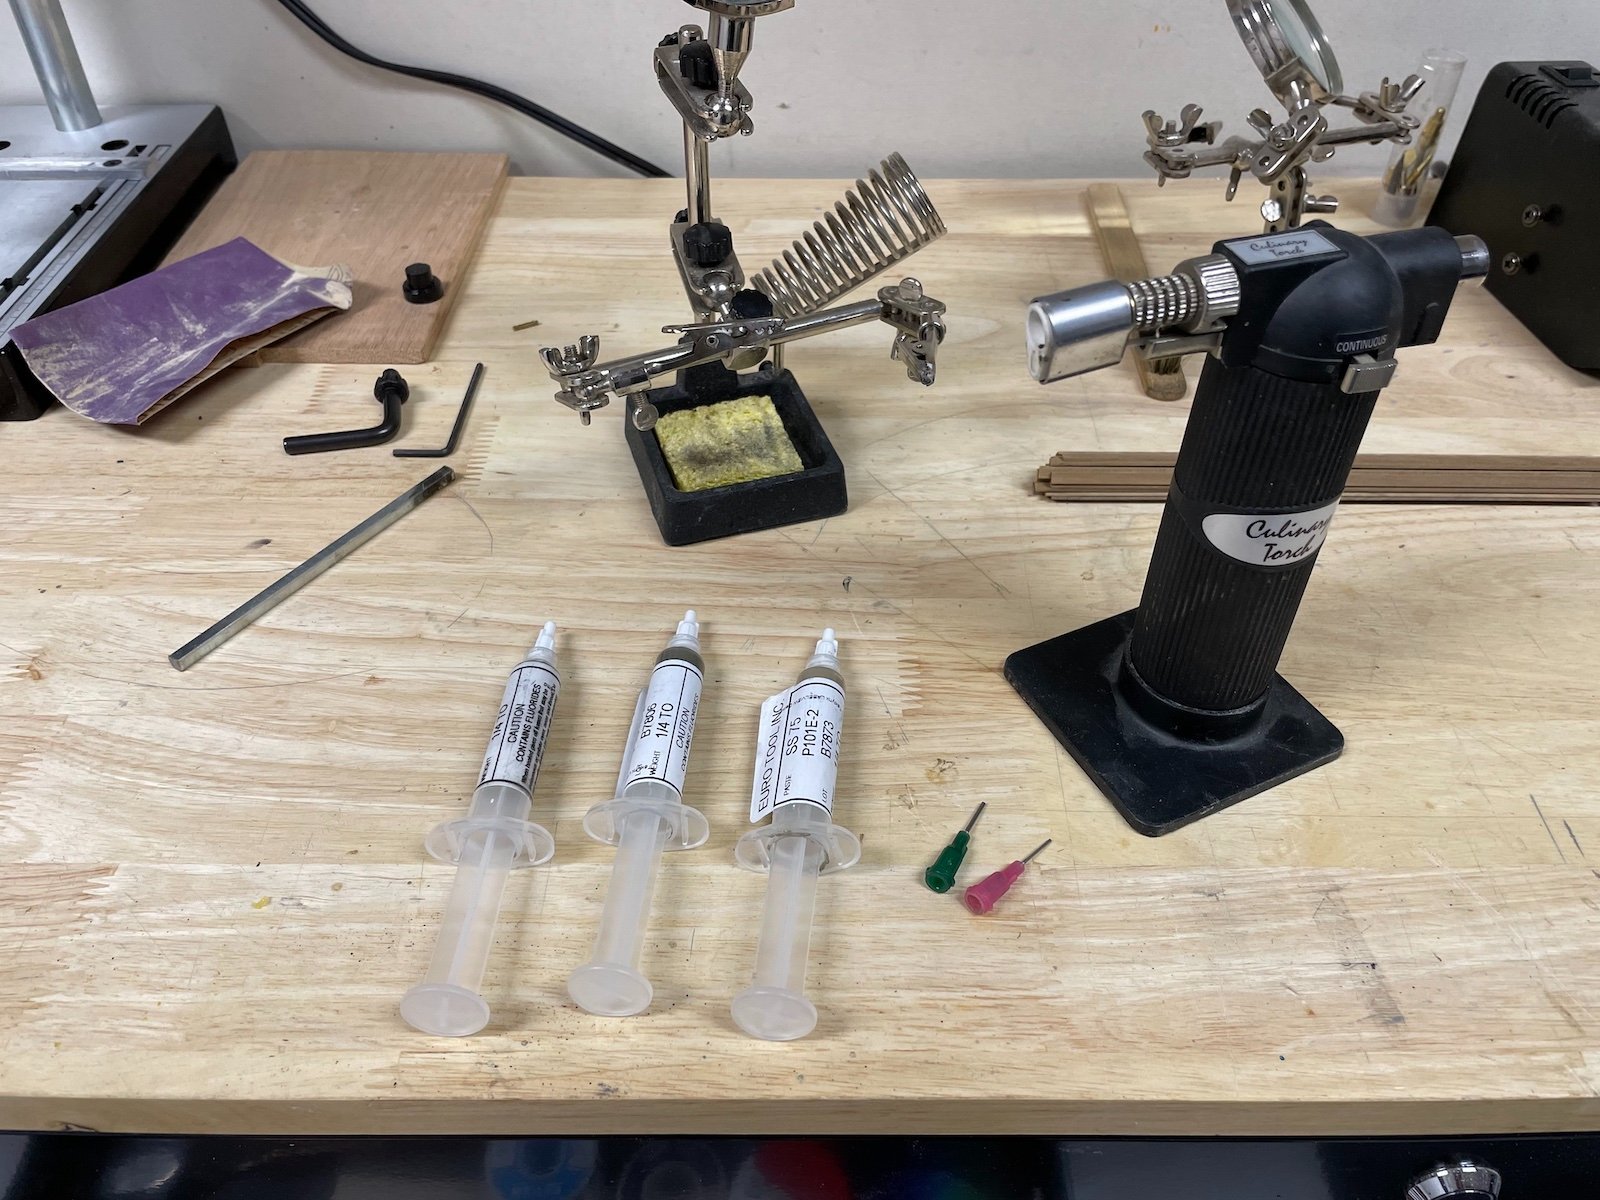
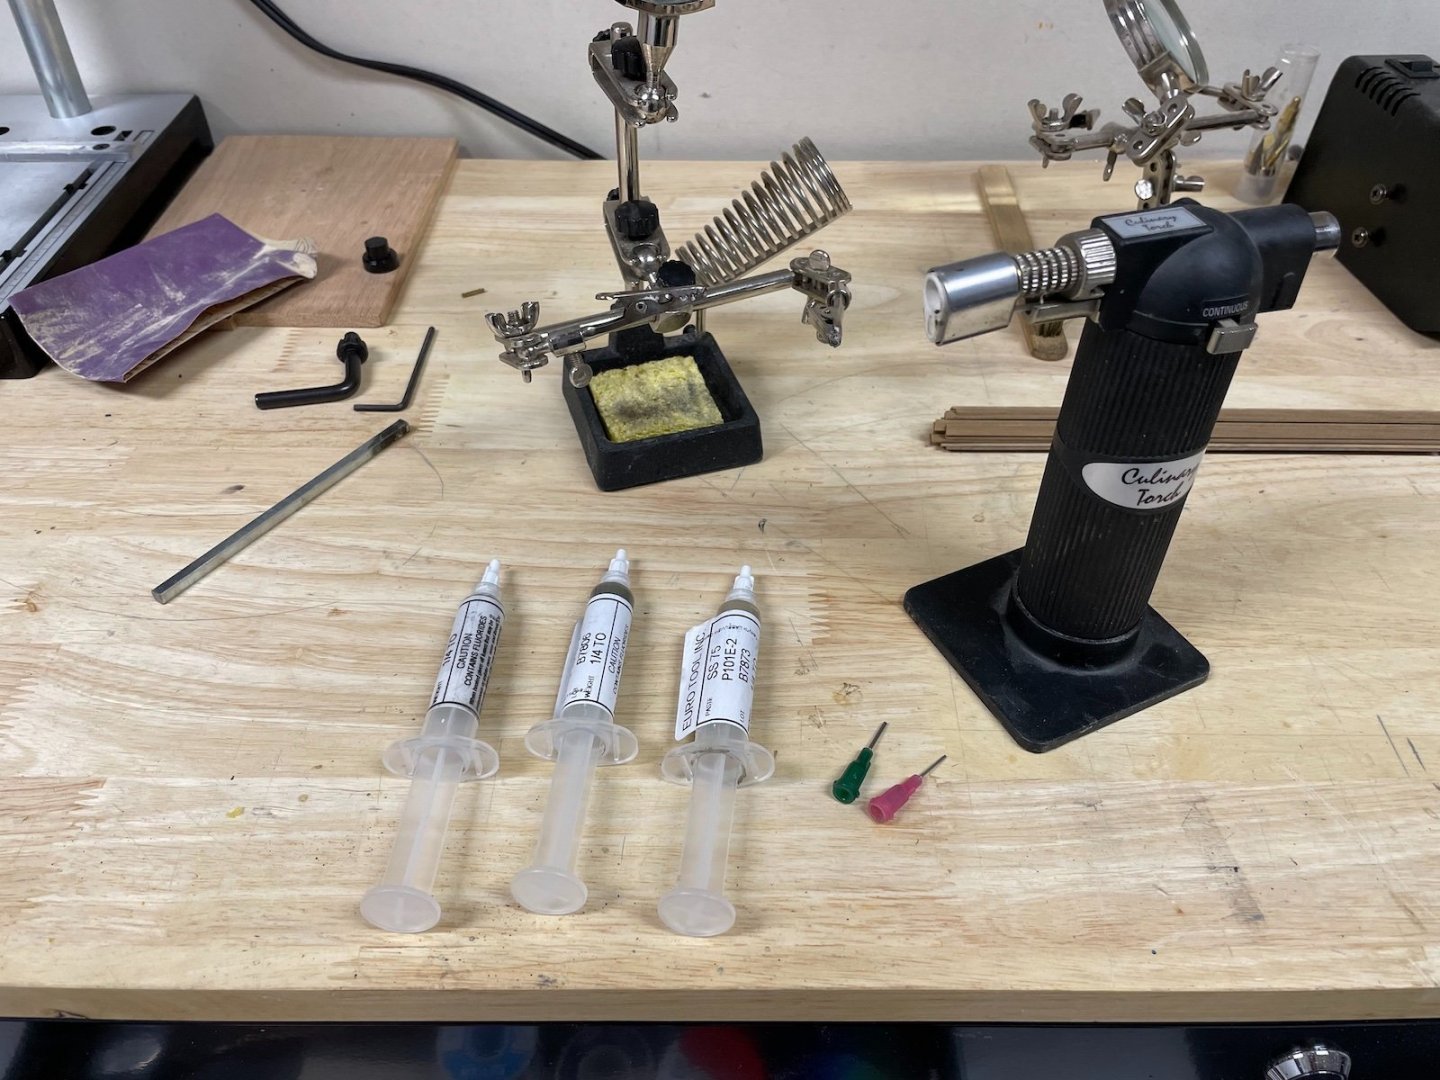
Hey Bob - I ordered the soldering paste from a website called wirejewelry.com. They were pretty prompt with the order, so I was happy with them. Not knowing the metal requirements, I ordered one each of soft, medium, and hard as well as some spray flux. I already had the torch - it's basically just a culinary torch I bought years ago from a department store. I watched a handful of silver soldering videos on YouTube, then It took a little getting used to.
- 419 replies
-
- 3
-
-
-
- Victory Models
- Pegasus
- (and 2 more)
-
I will totally be blaming the tool.
-
I've done more damage and used more profanity trying to use a pin pusher... I either end up using a tool similar to the one Jaager has shown, or when possible I find a way to 'squeeze' the pin into place.
-
Man - that's a nice looking one @druxey! Thanks @Blue Ensign - I was a little cautious of it being too elaborate; as you also noted in your build. I wanted a nice touch, but not necessarily something that looked out of place for the rest of the ship. Seriously - thanks to you two and everyone else. Hopefully this thread will serve as a good reference for others look for binnacle options and research.
-
Really nicely done - and, the combination of workmanship and photography skills make it a good source of reference for others.
-
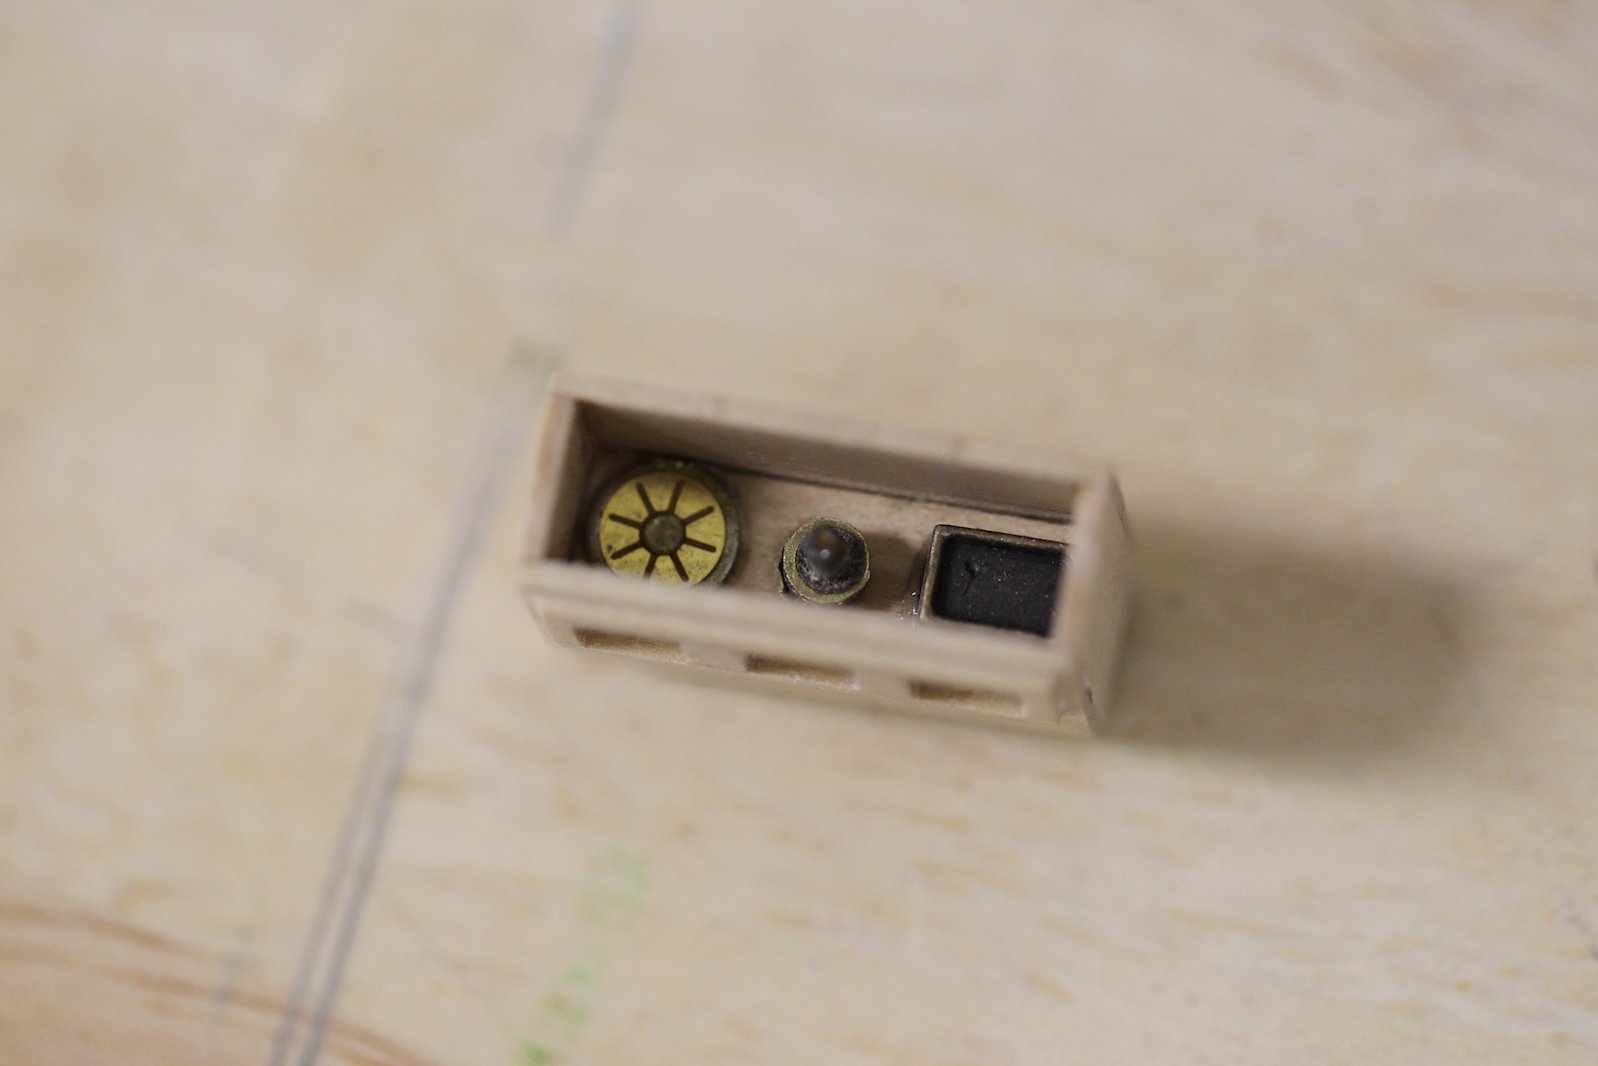
Thanks @Gregory and @druxey - really appreciate the input. I have Mondfeld's book also and I looked through his info as well as "The Sailing Frigate" by Robert Gardiner and the pretty popular shot of the binnacle from the Victory that's floating around. I finally decided on a lamp in the middle, a compass on the left, and a 'boxed' compass on the right. Here's what I ended up with - posted over in my build: https://modelshipworld.com/topic/30091-hms-pegasus-1776-by-moonbug-victory-models-164/page/2/#comment-863975
-
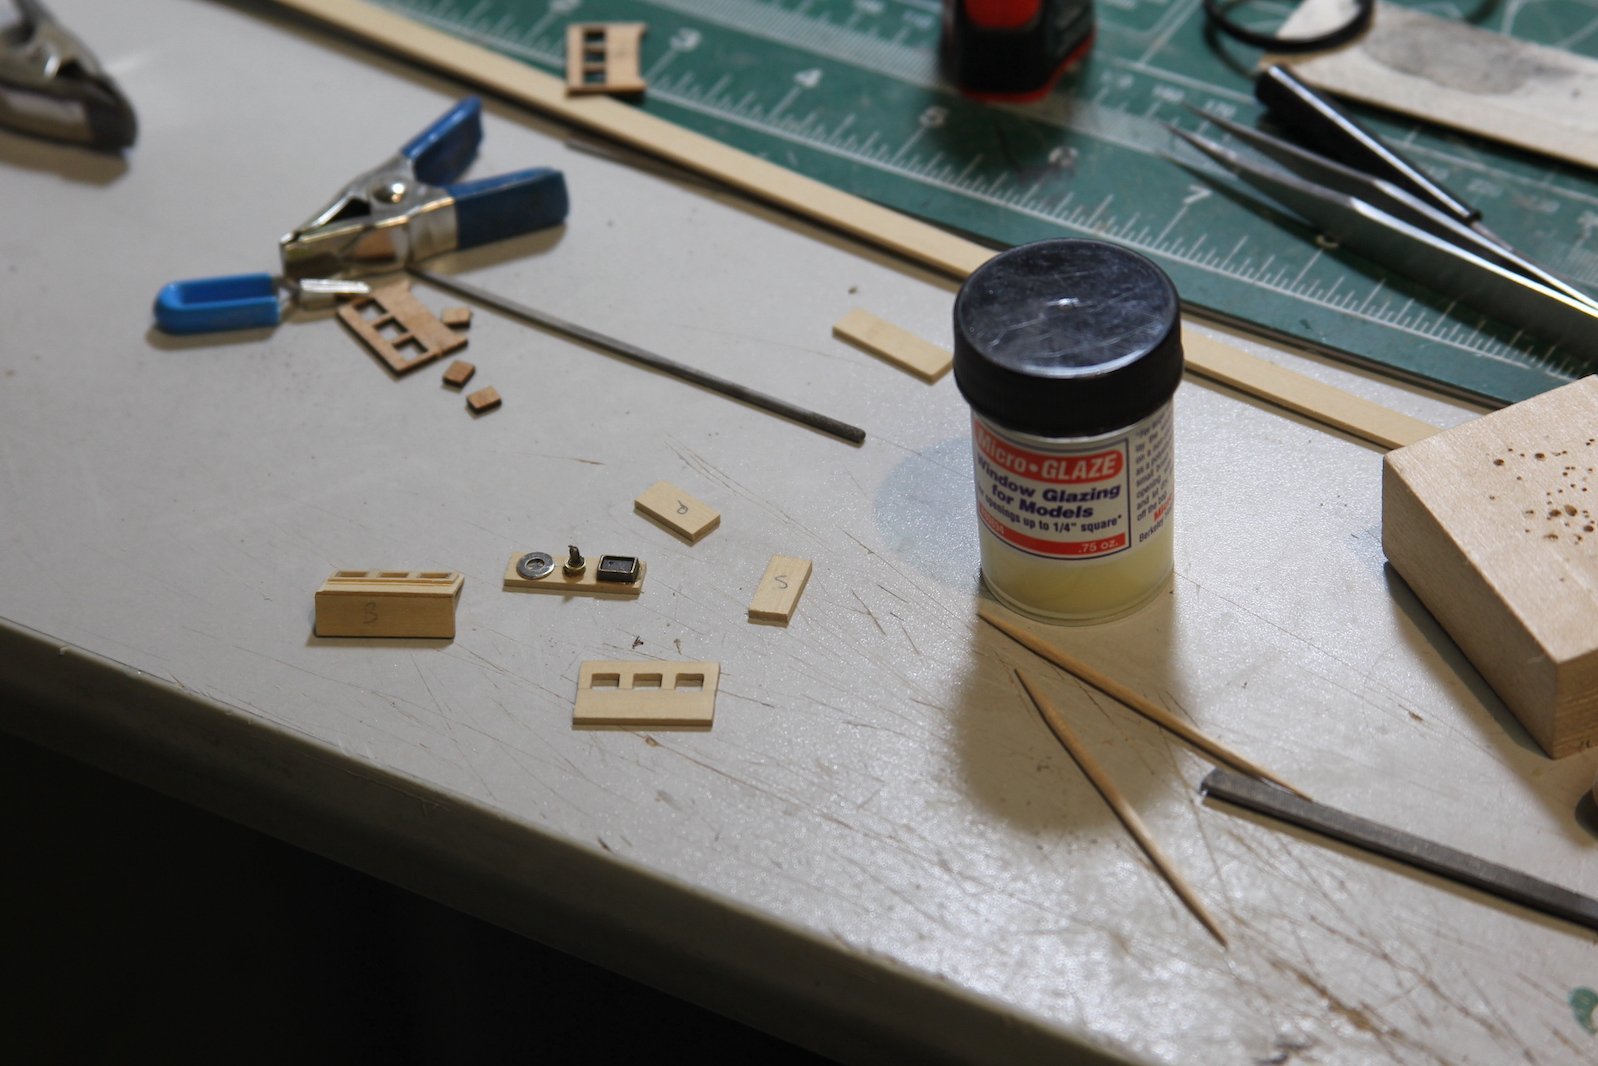
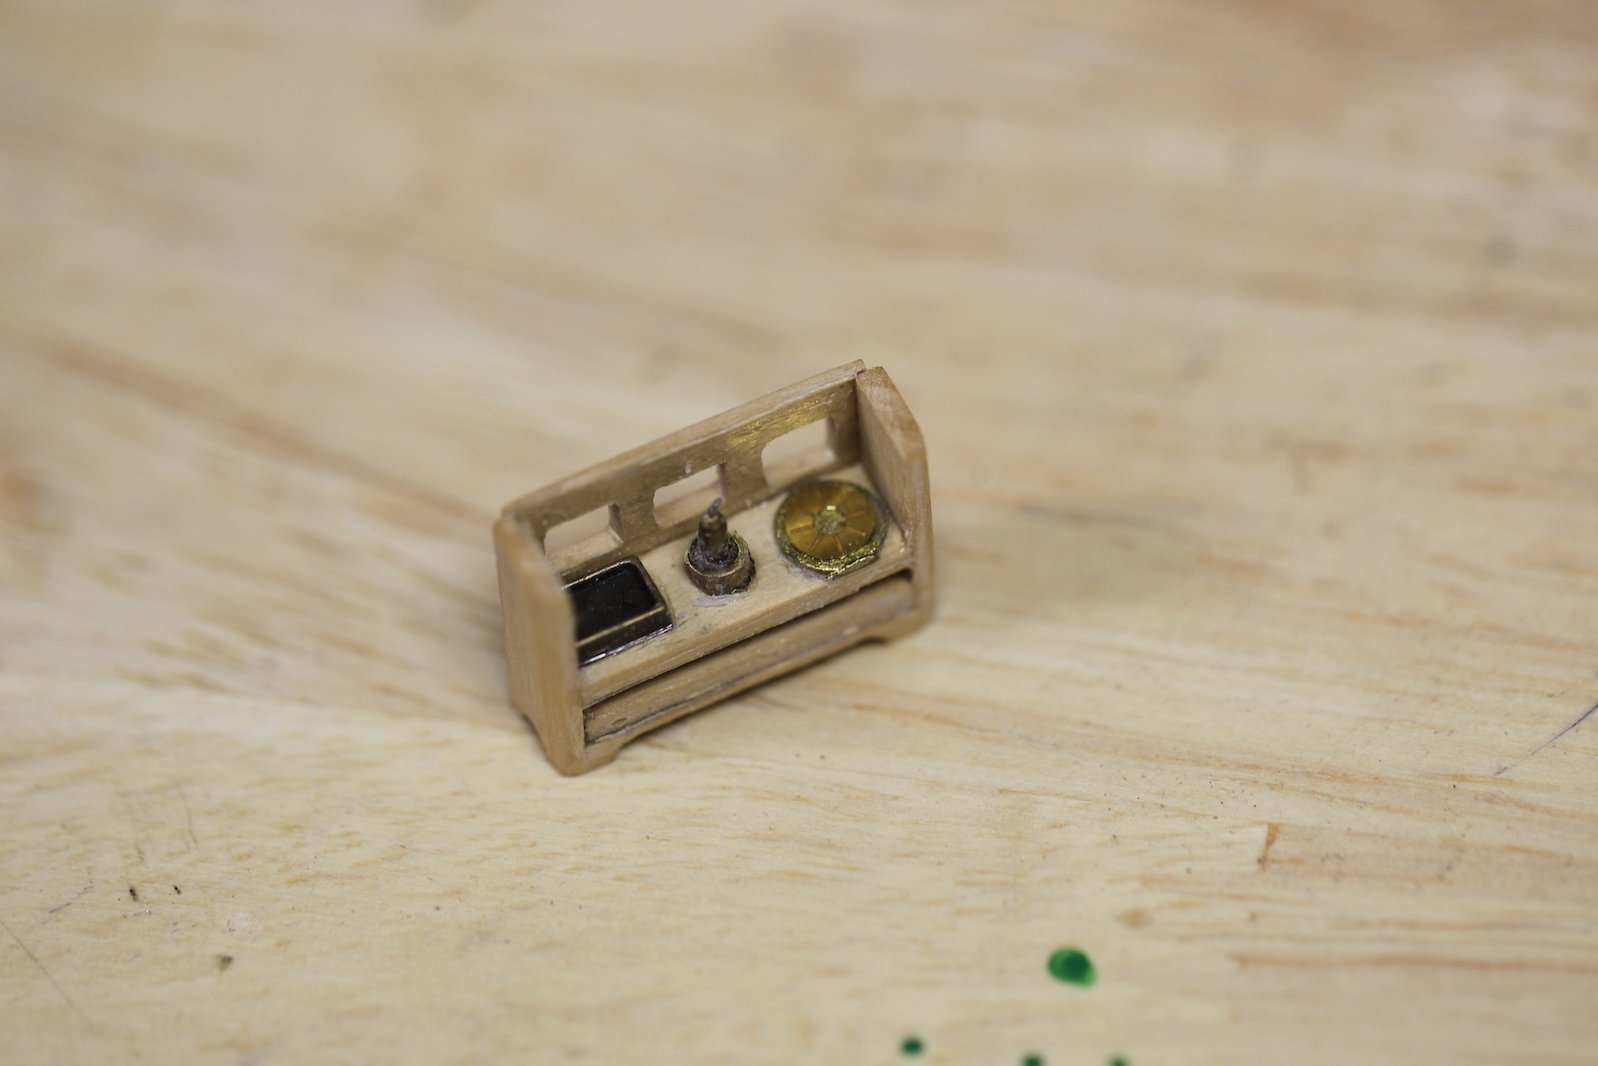
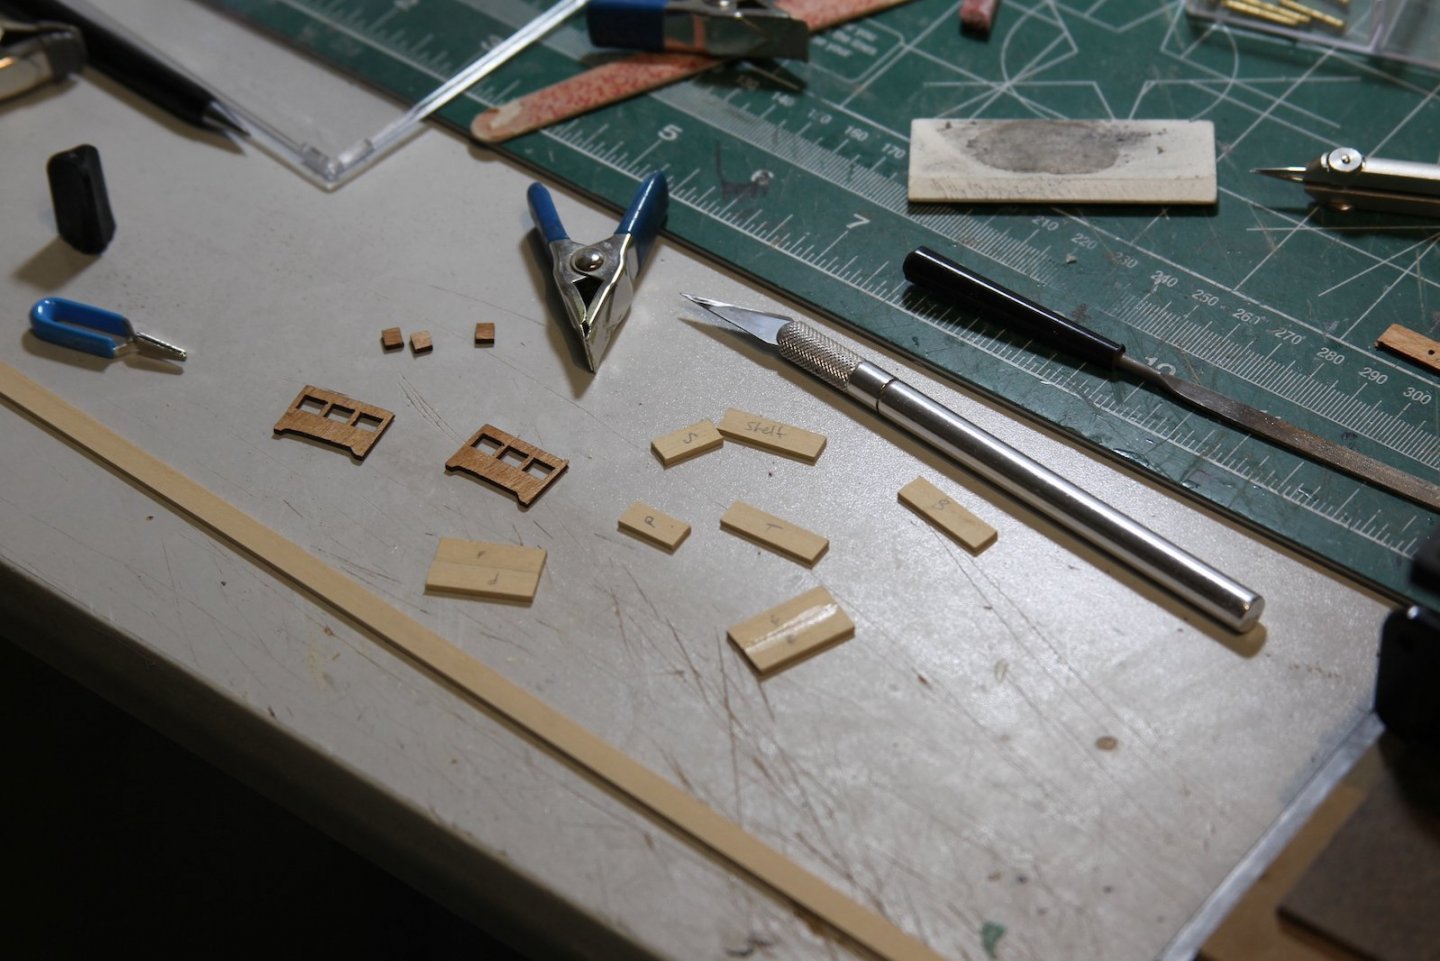
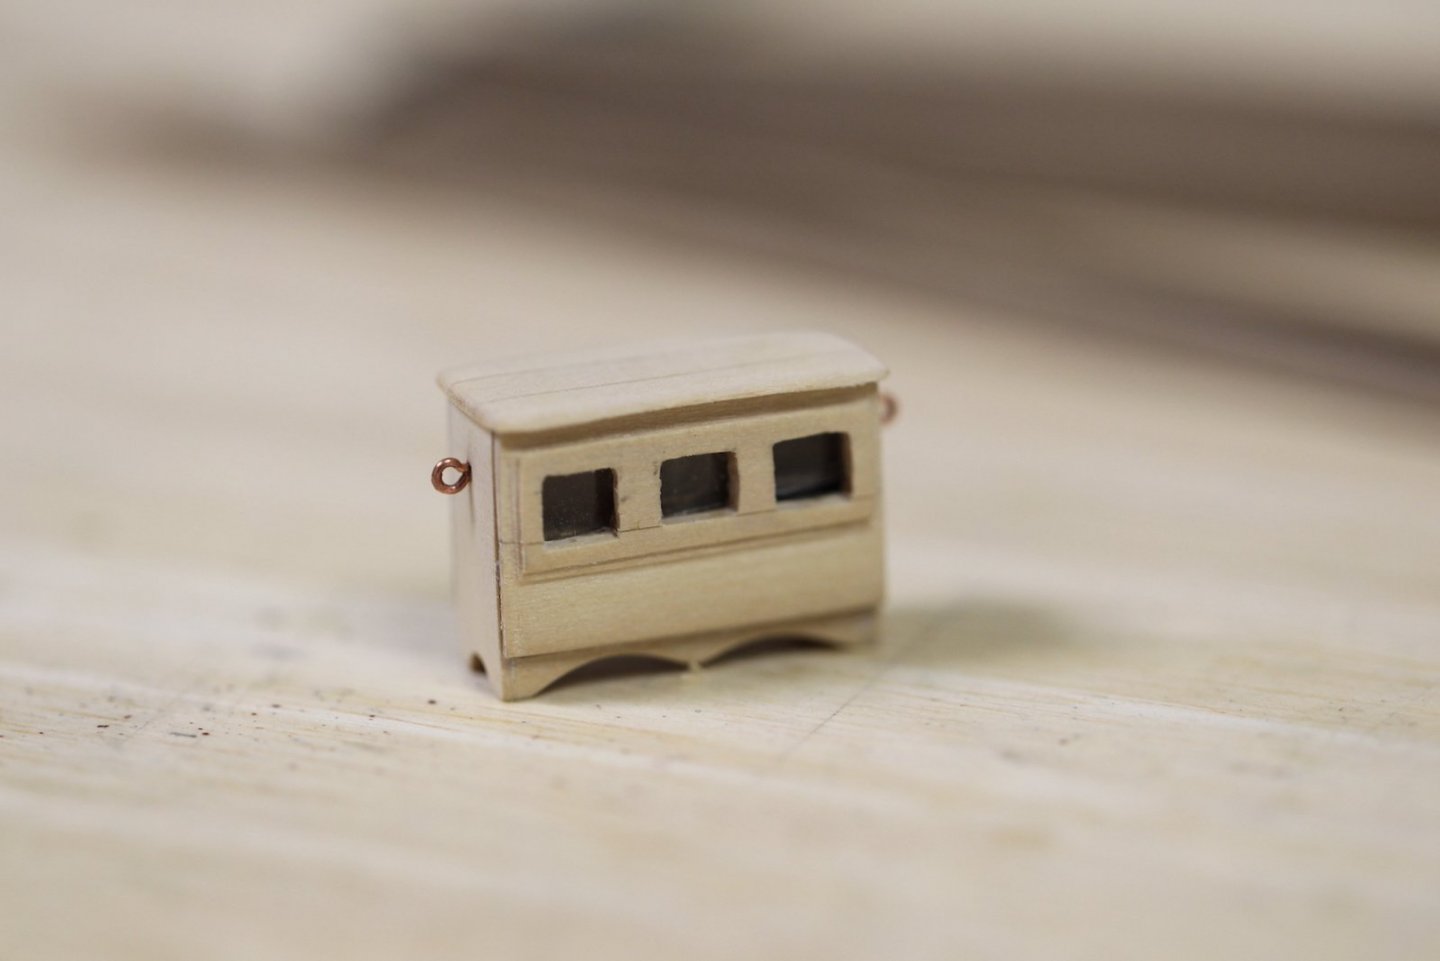
As evidenced by my post in the "deck furniture" section of the forum, I've also been working on the binnacle. This is a super prominent pieced of deck furniture and undoubtedlyl draws attention from viewers. After looking at a variety of sources consistent with not only Swan class ships, but also other ships at the time - I decided that my binnacle was an opportunity for a little artistic license. I didn't want to "over-do" it in terms of adornment, because I don't think that's consistent with either the Pegasus (a humble vessel in her own right) or other sloops. I ended up with a combination of Mondfeld's notes, some research from "The Sailing Frigate" by Robert Gardiner (which coincidentally has the same model to which @druxey referred me), the binnacle aboard the Victory, and other folks' build logs. Putting it together was pretty basic using boxwood and added a little bit of 'flair' to the feet and edges. I went with two compasses (one open on the left and the other still in the 'box' on the right) and a lamp in the middle and the vent holes for the lamp in the rear. I used the kit's pre-fab binnacle parts as a sale gauge. The "compass" on the left - that you'll sorta-but-not-really see inside was part of some leftover brass photo-etched pieces from one of the Tamiya WWII planes I've put together. The "boxed" compass on the right is some random leftover piece from the San Juan Nepomuceno kit. The Lamp is a combination of a brass tube cut off and topped with some random piece I had lying around that kinda looked like a lamp with a wick. I literally have no idea where it came from. Contrary to the picture above, I didn't actually use glaze for the windows because that jar was rock hard. Instead I used a little piece of plastic from a random container. You can't tell in the picture, you can actually see the lamp and other bits inside when a little light is shined through.


- 419 replies
-
- 12
-
-
- Victory Models
- Pegasus
- (and 2 more)
-
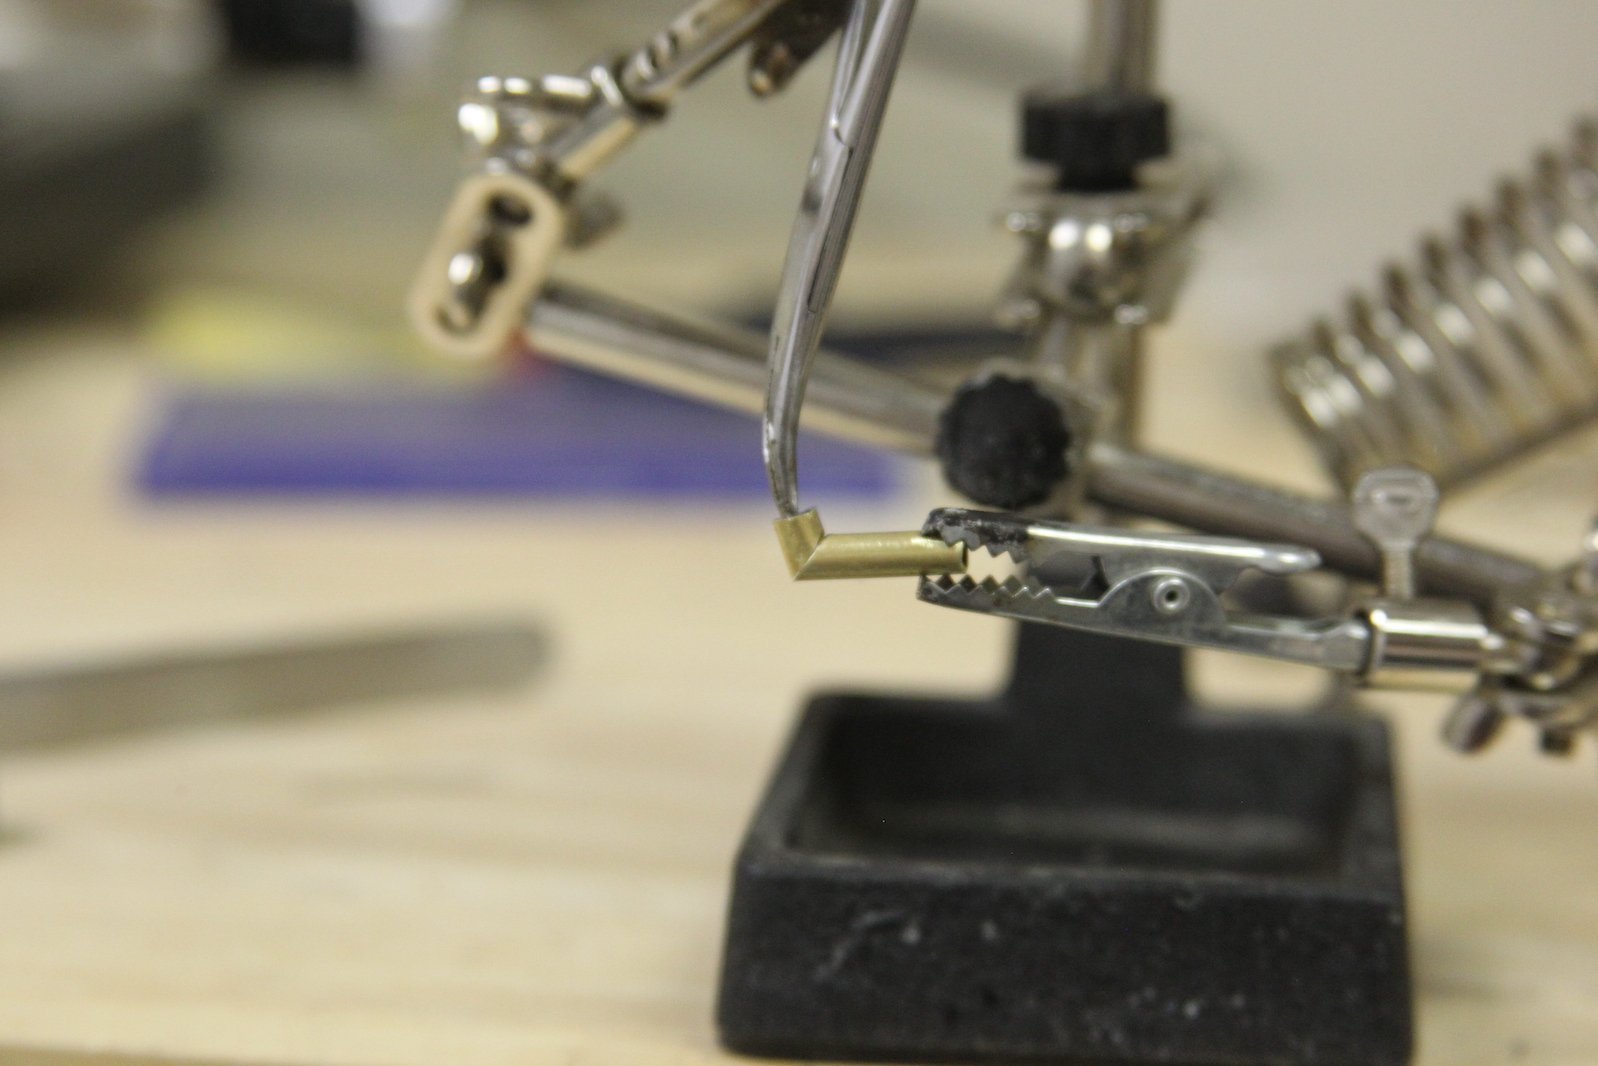
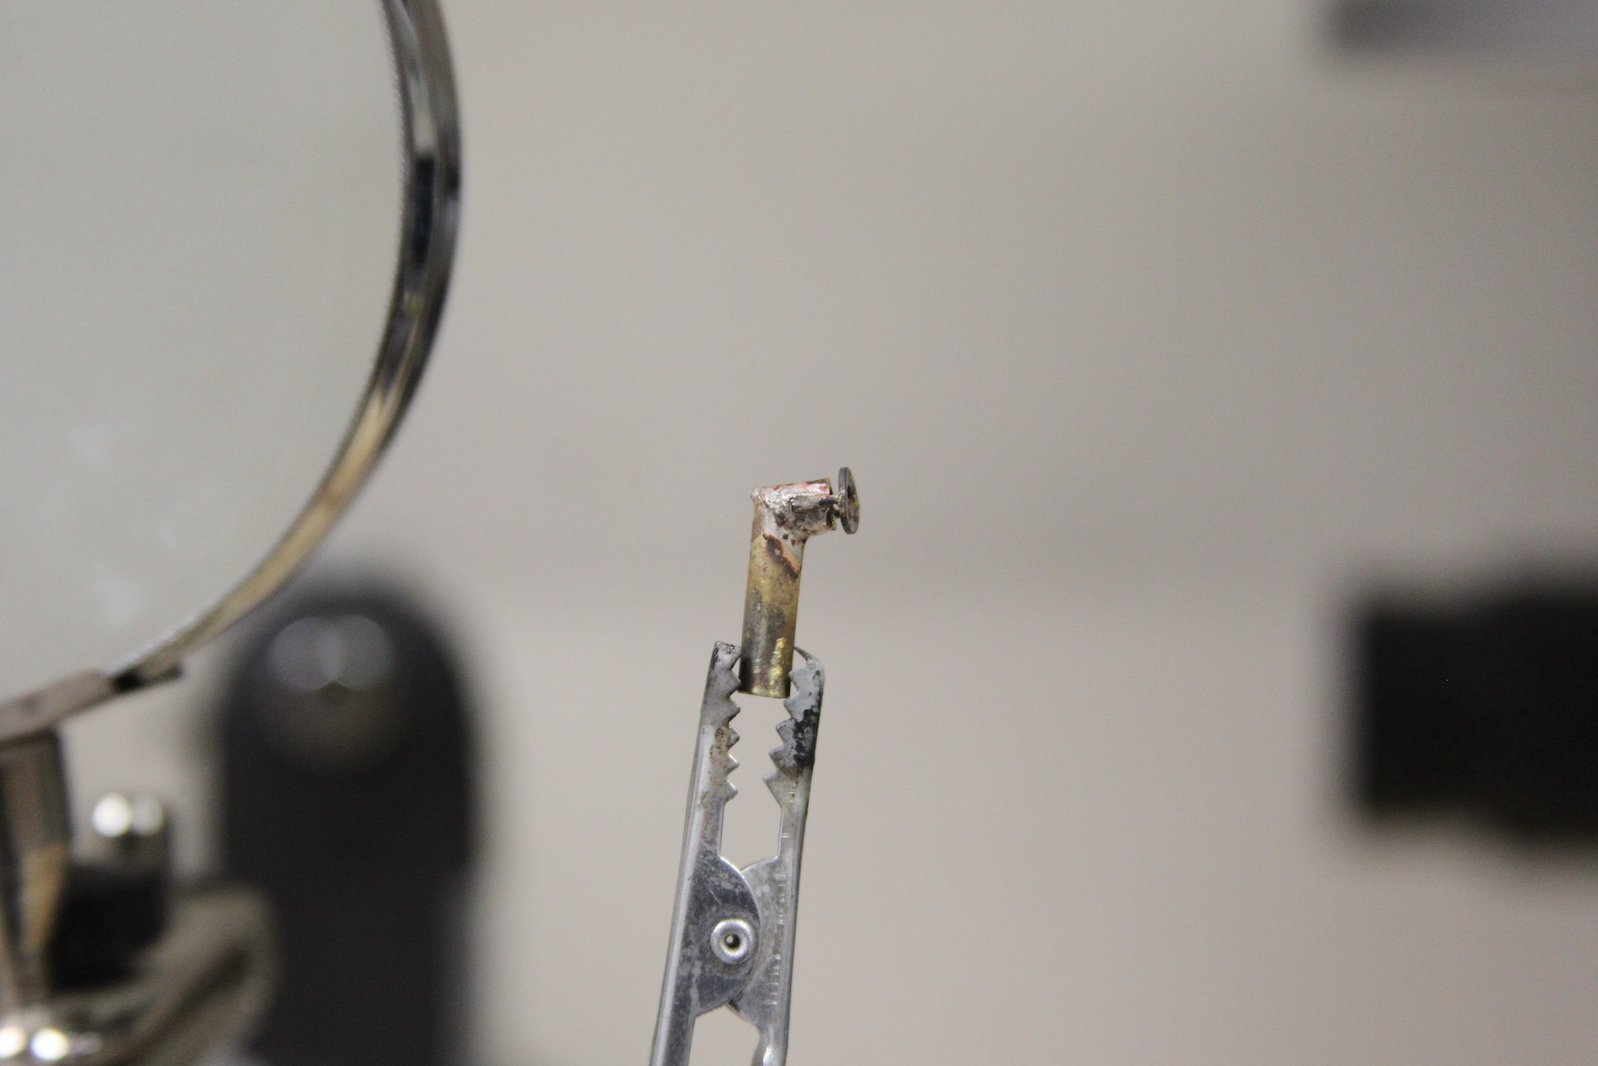
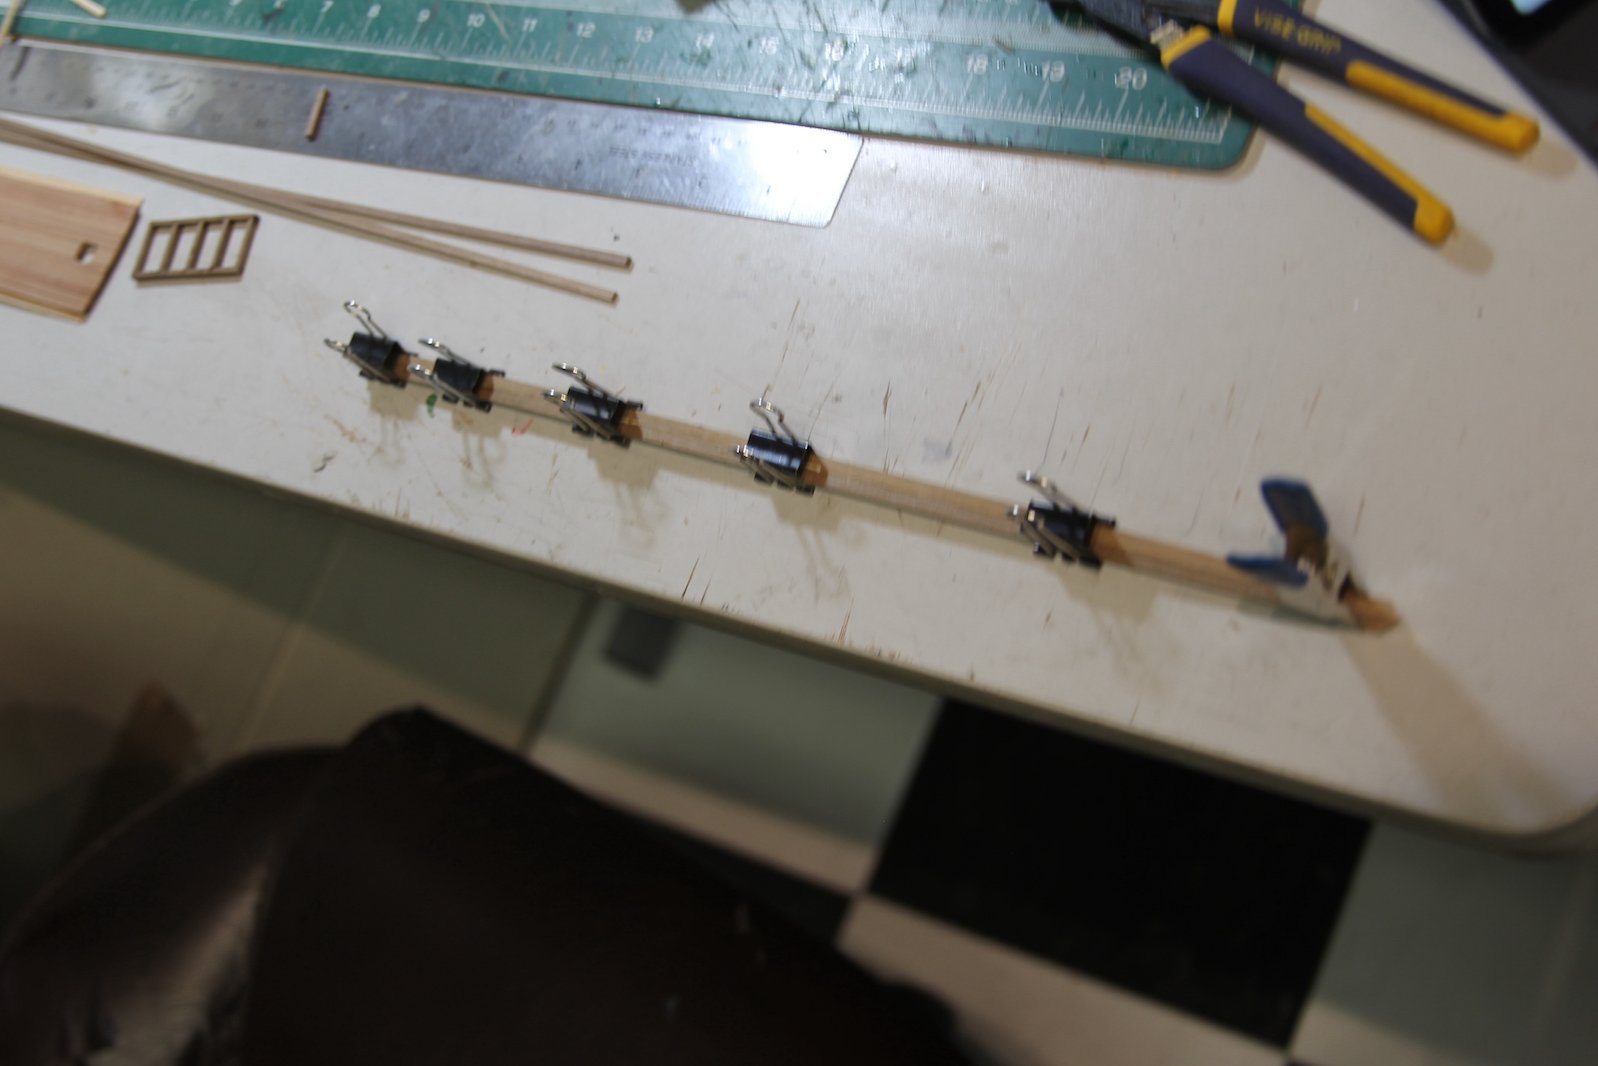
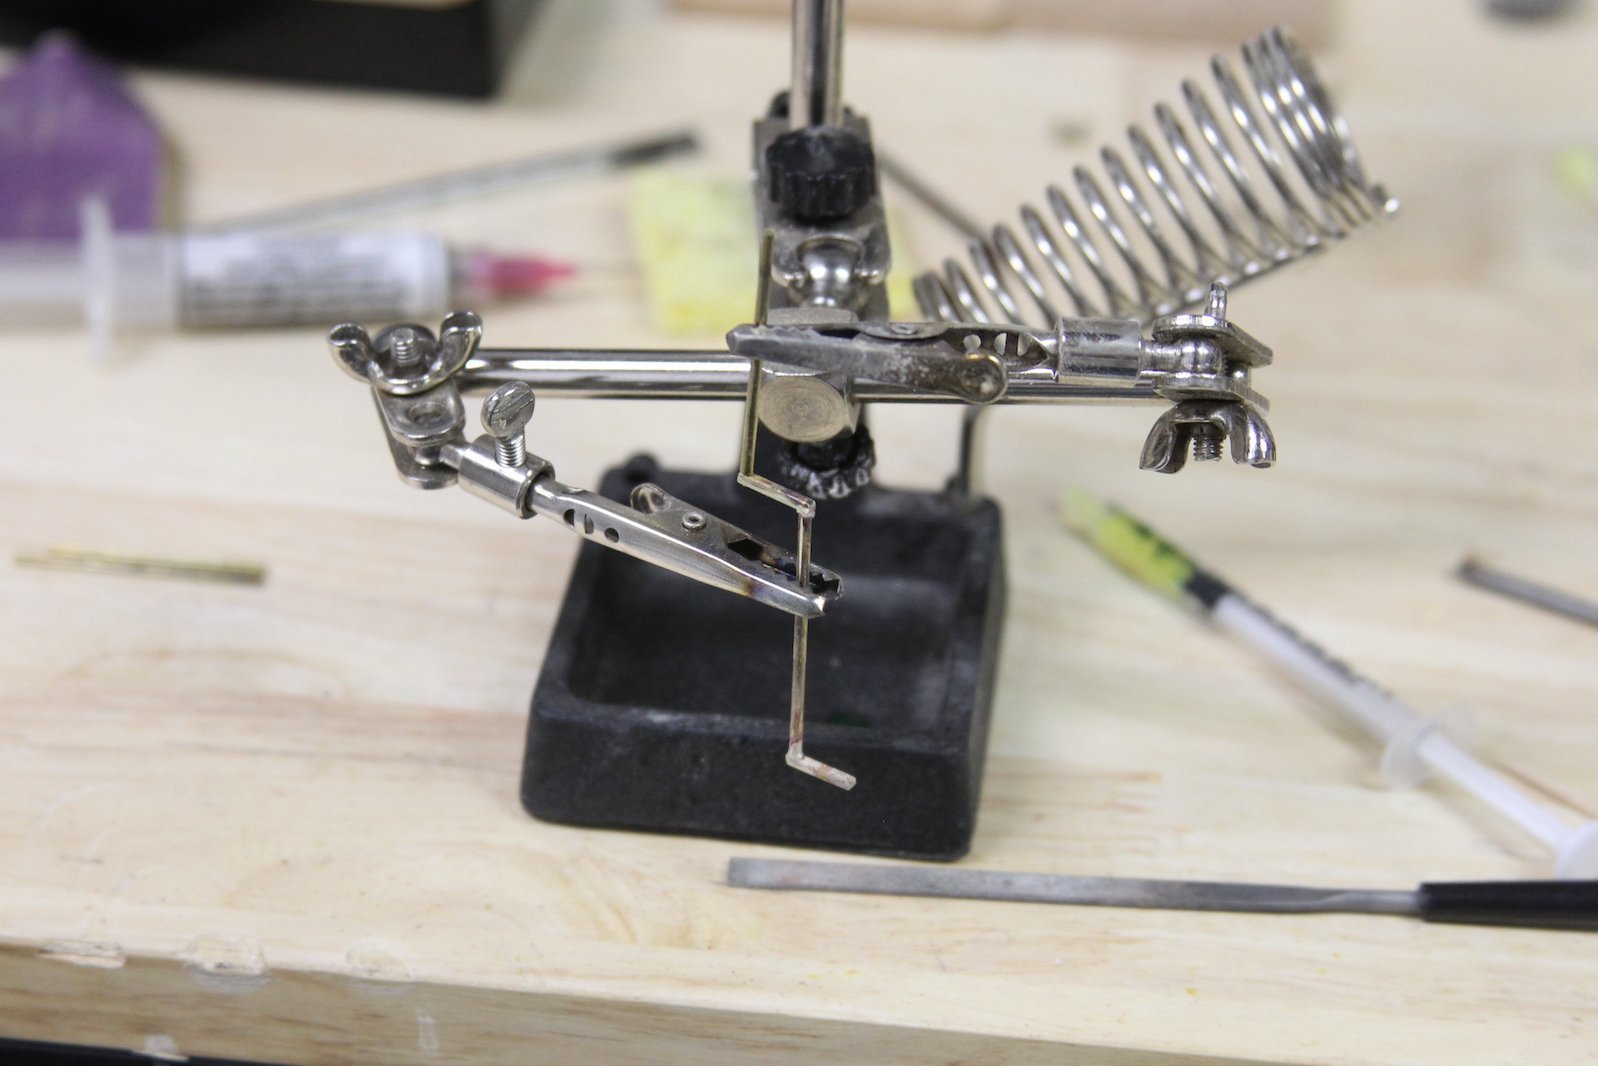
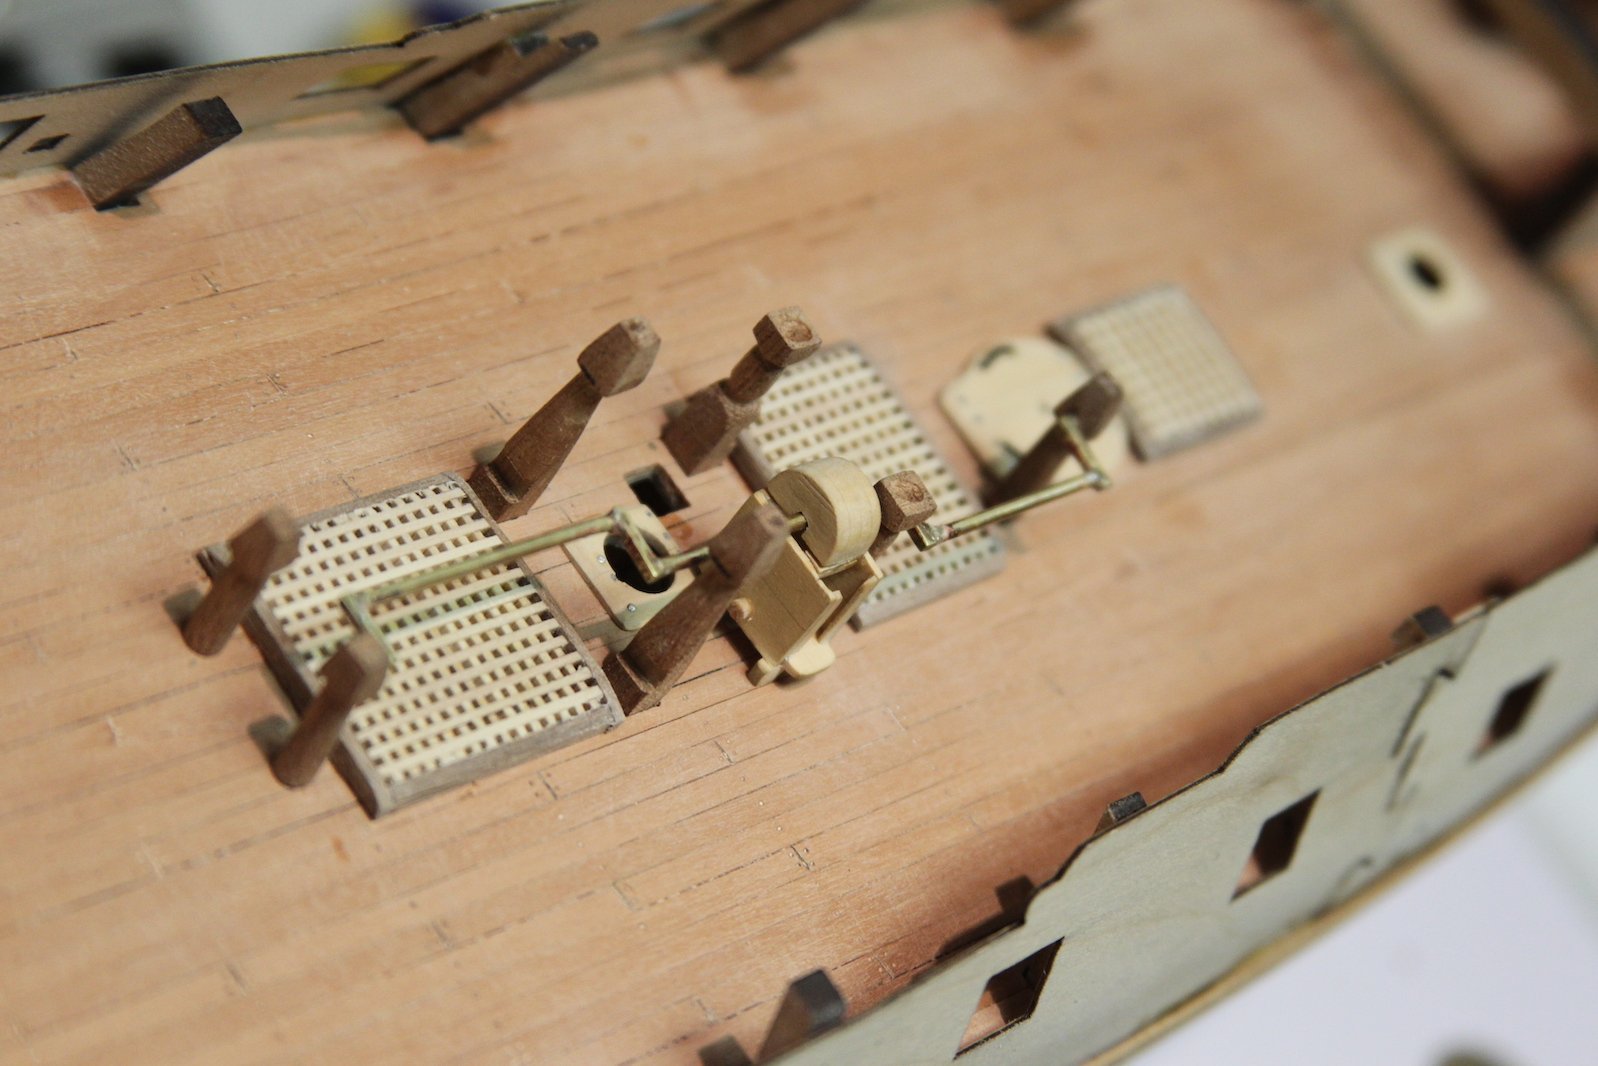
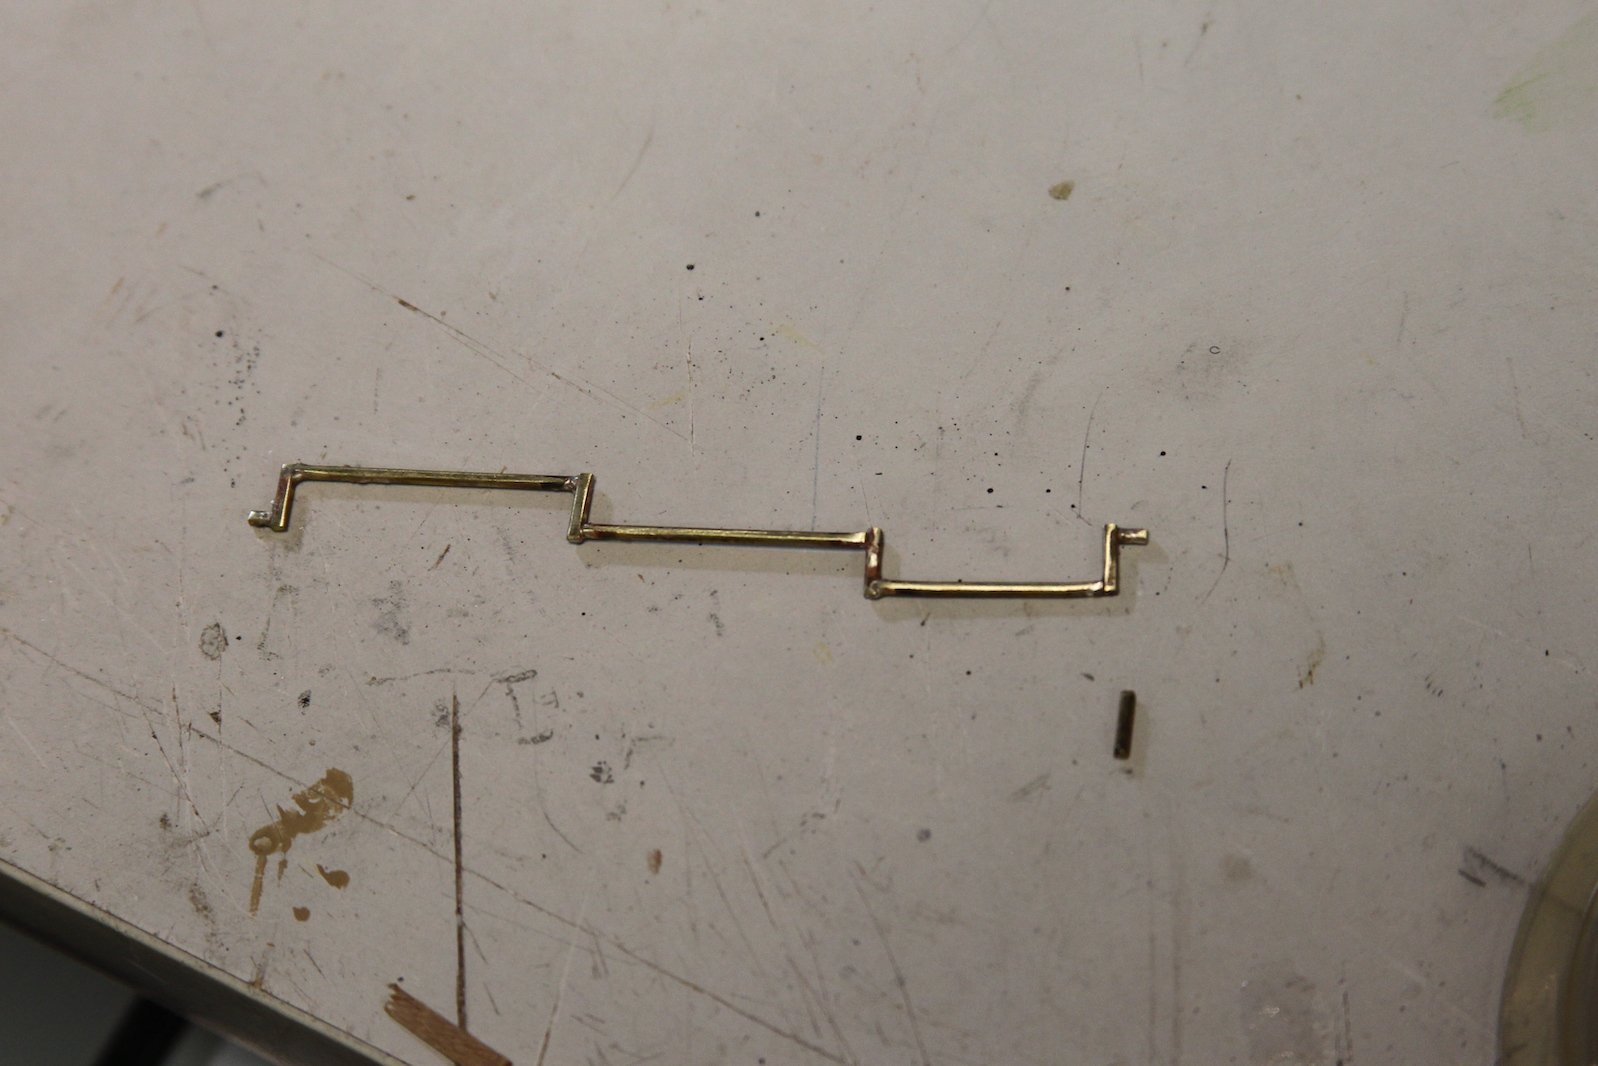
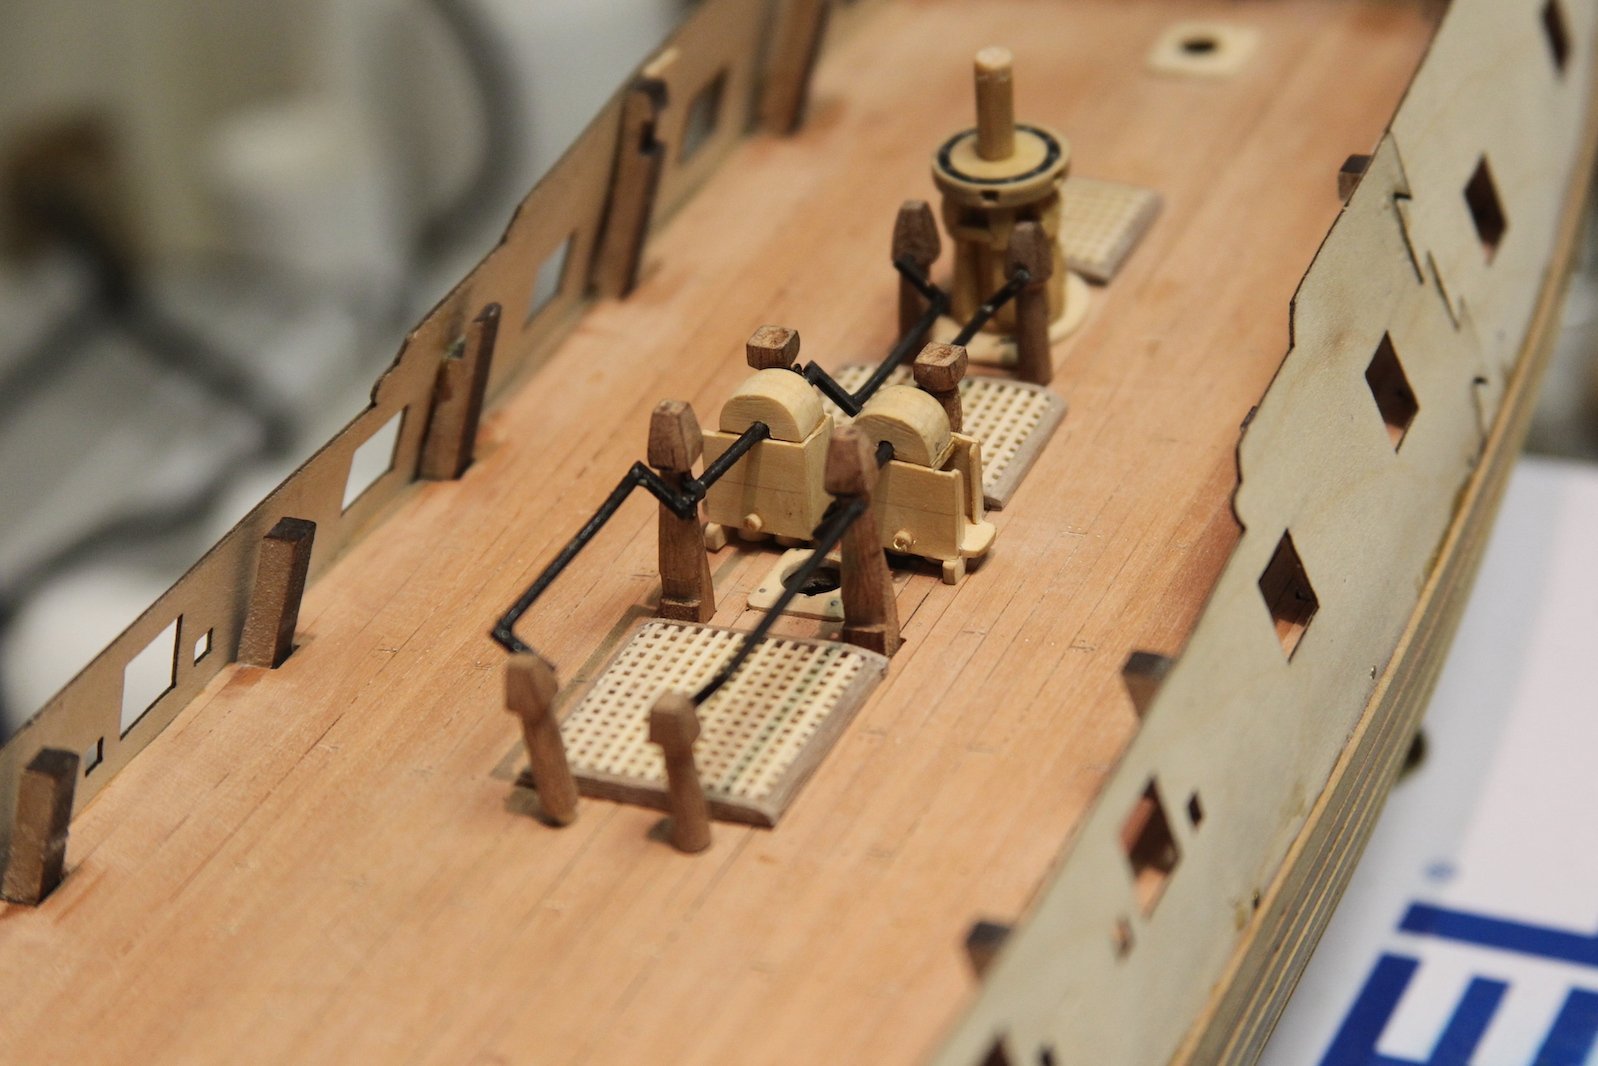
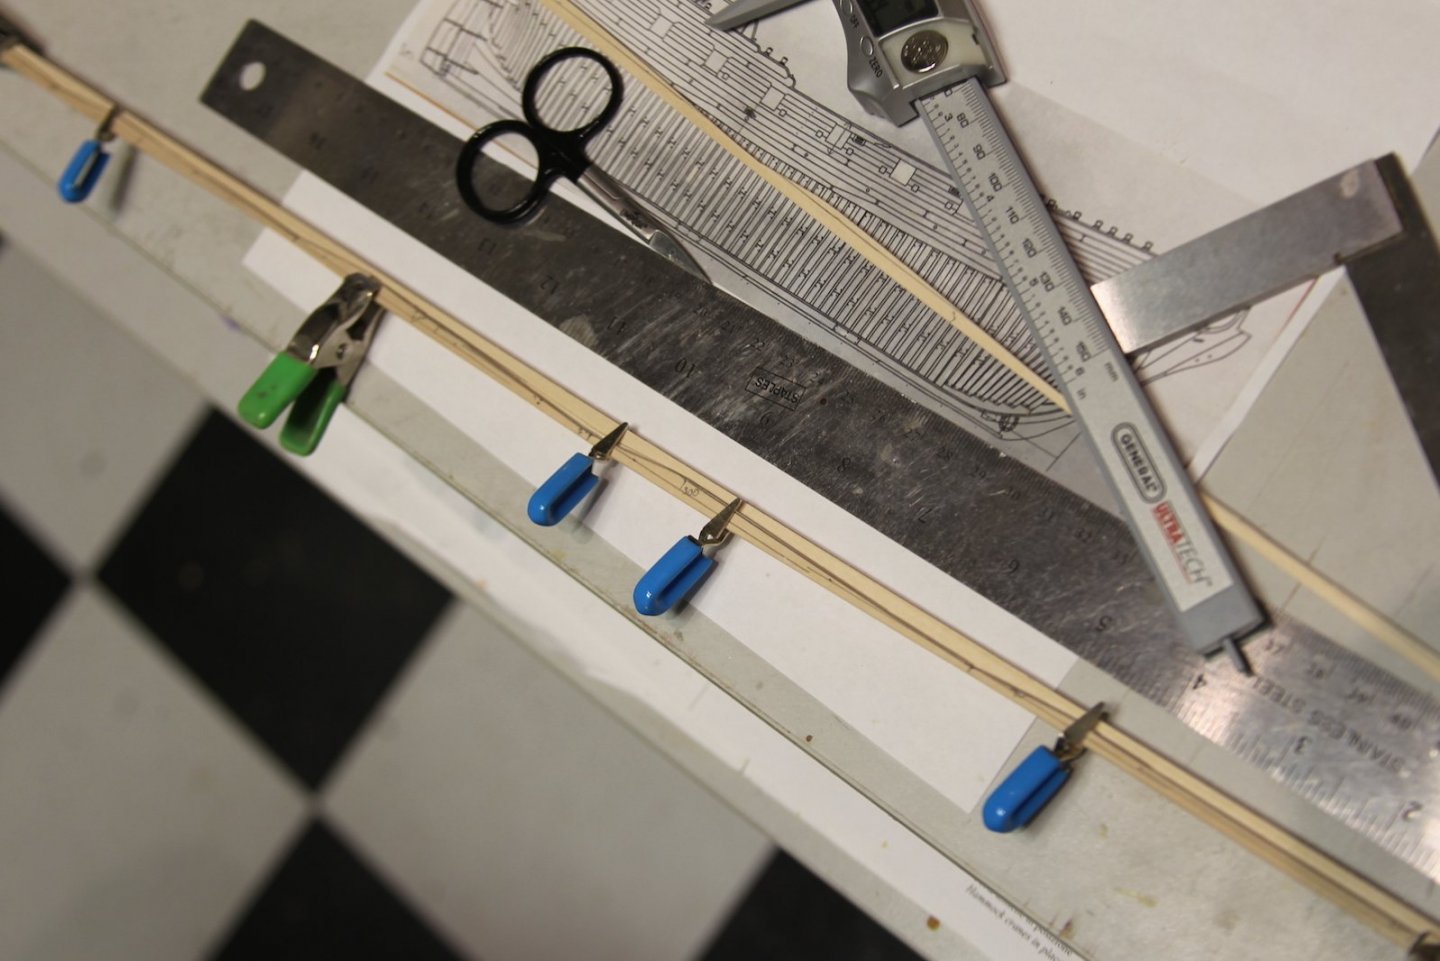
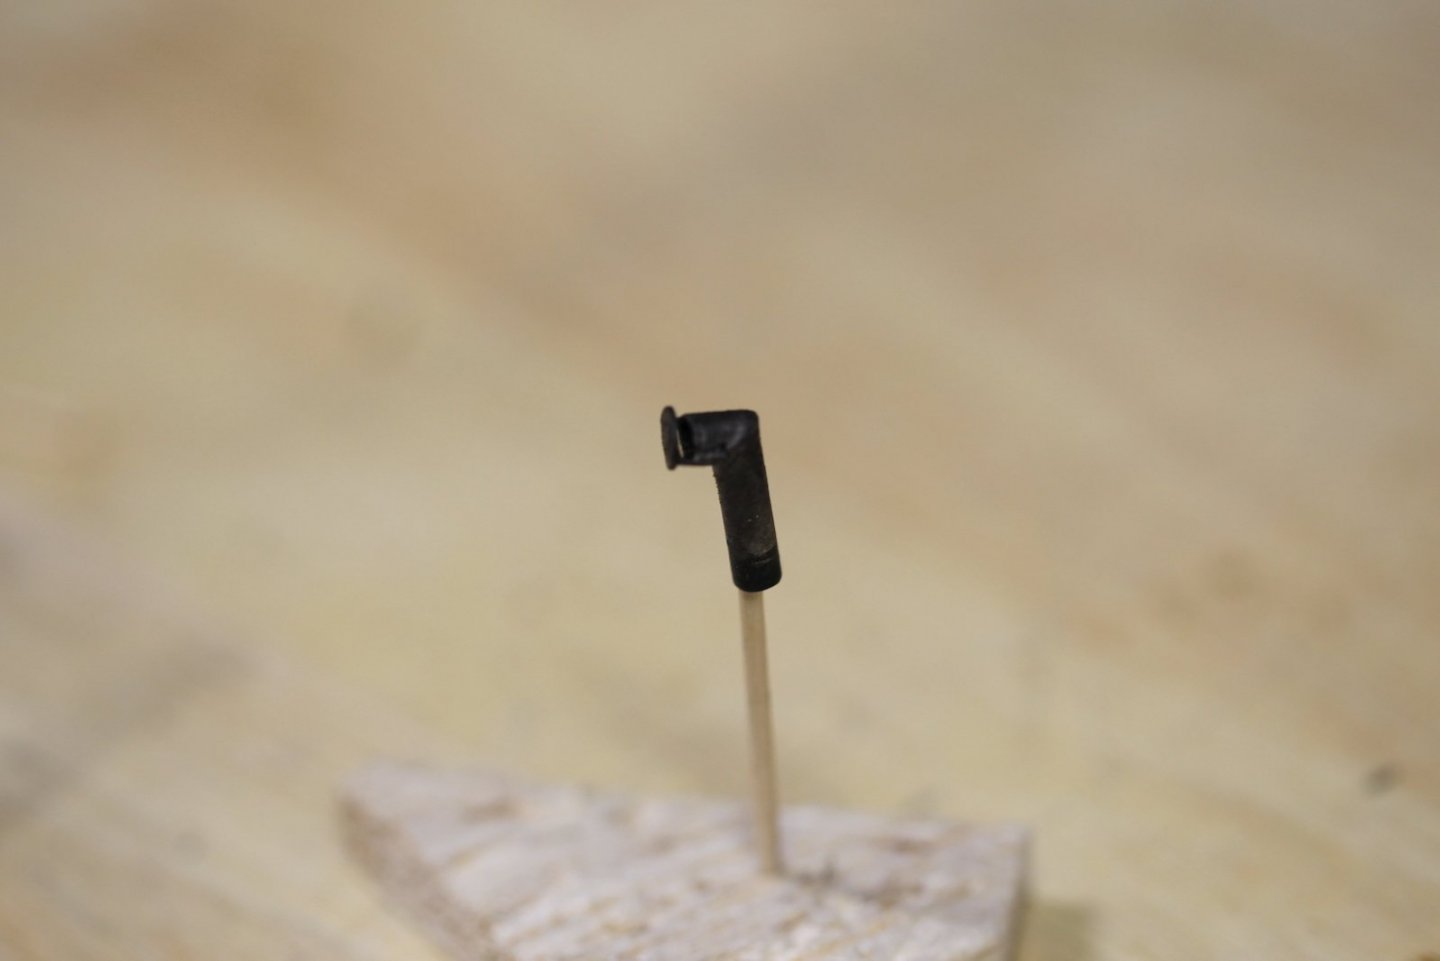
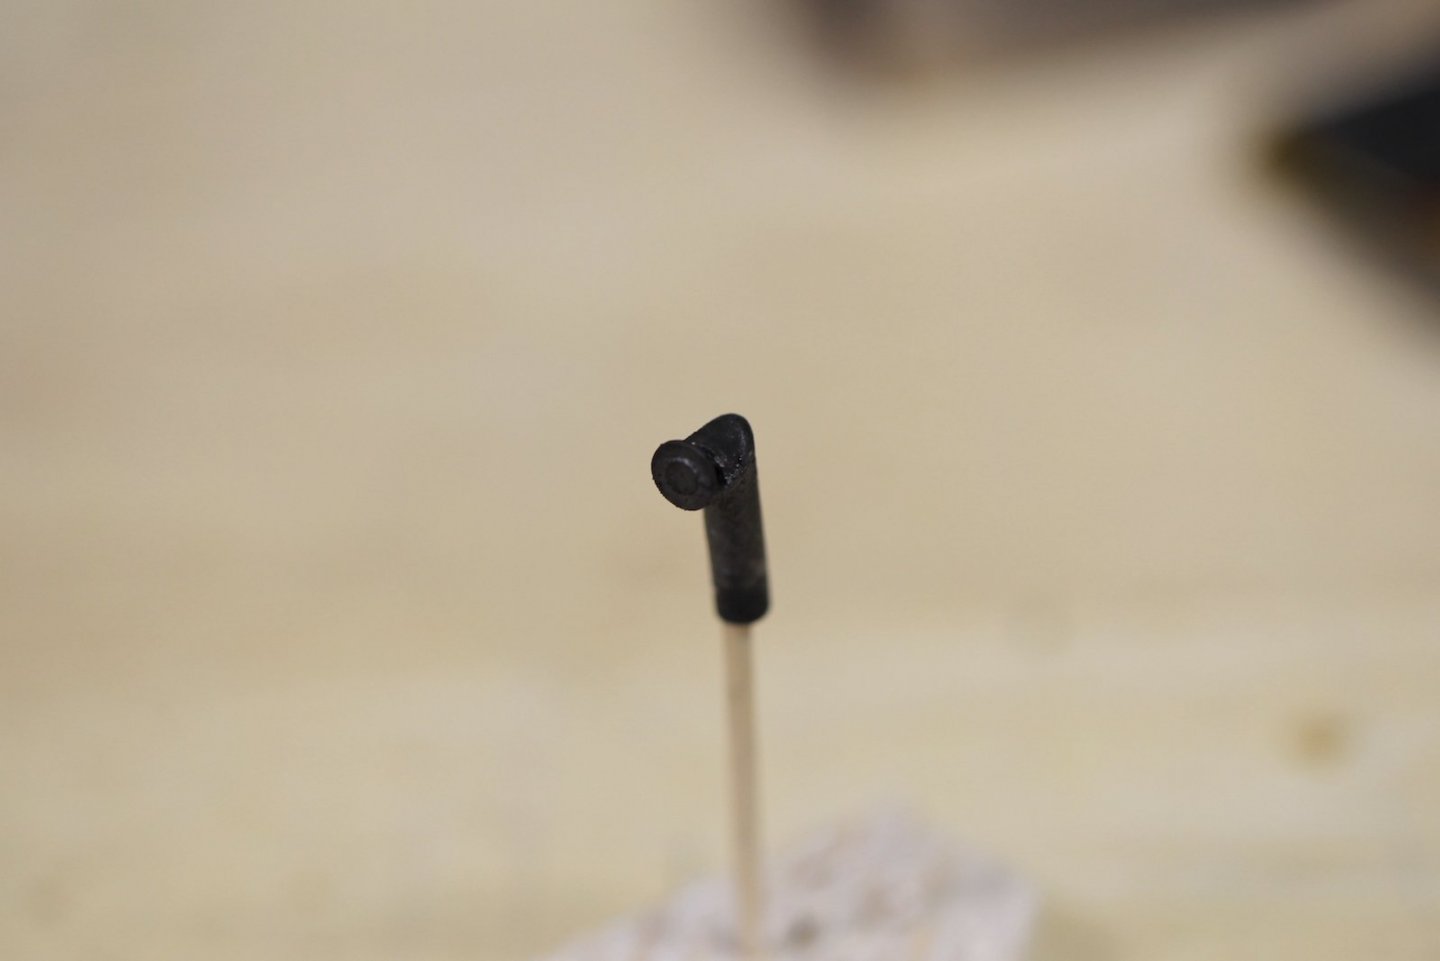
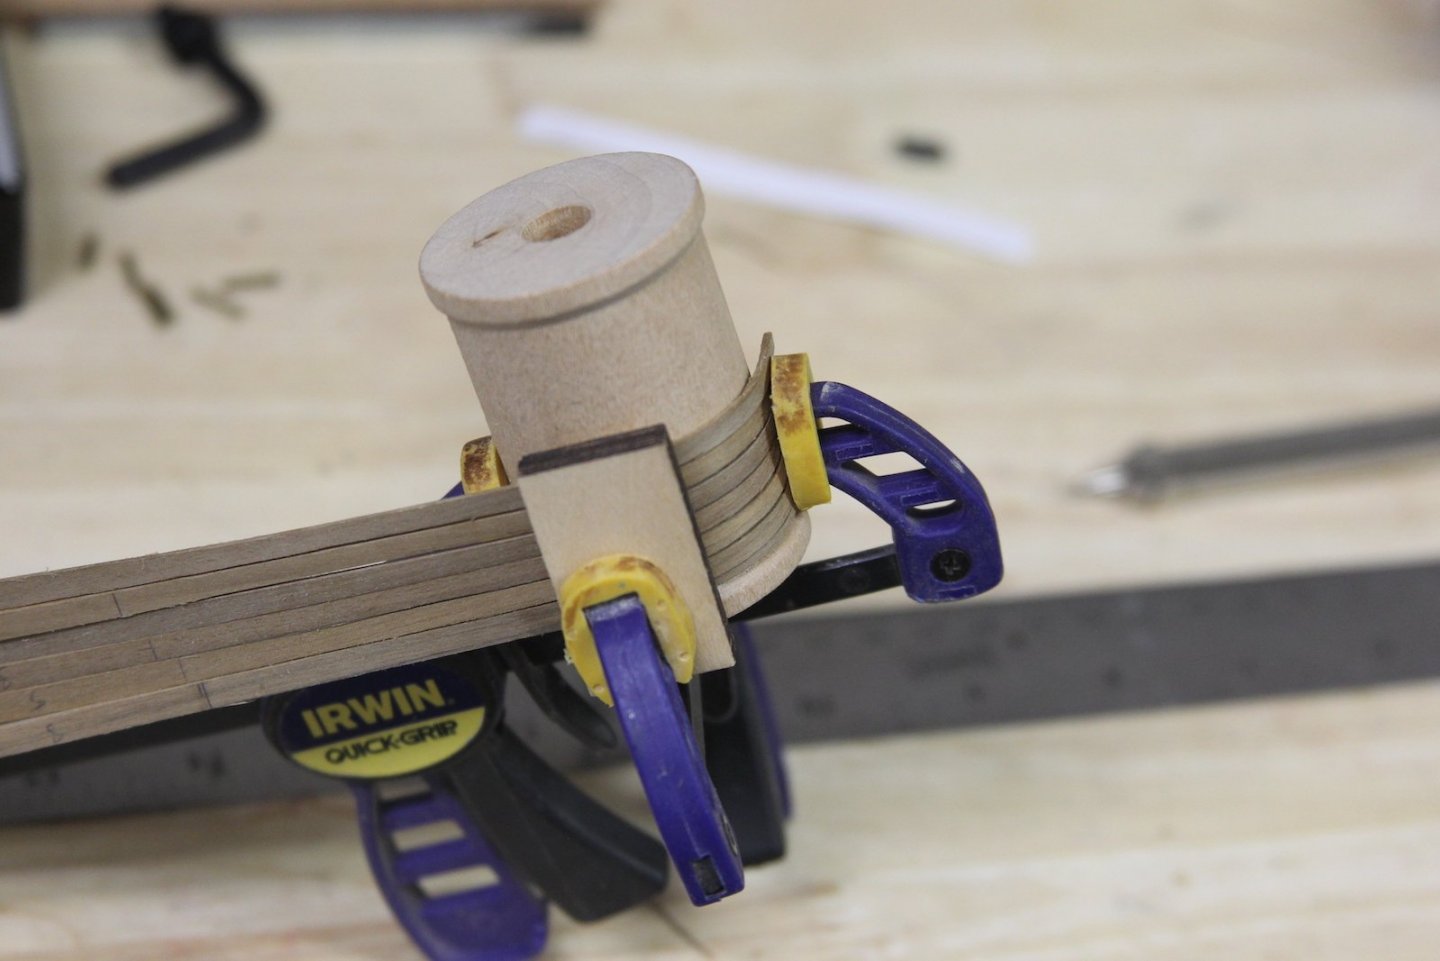
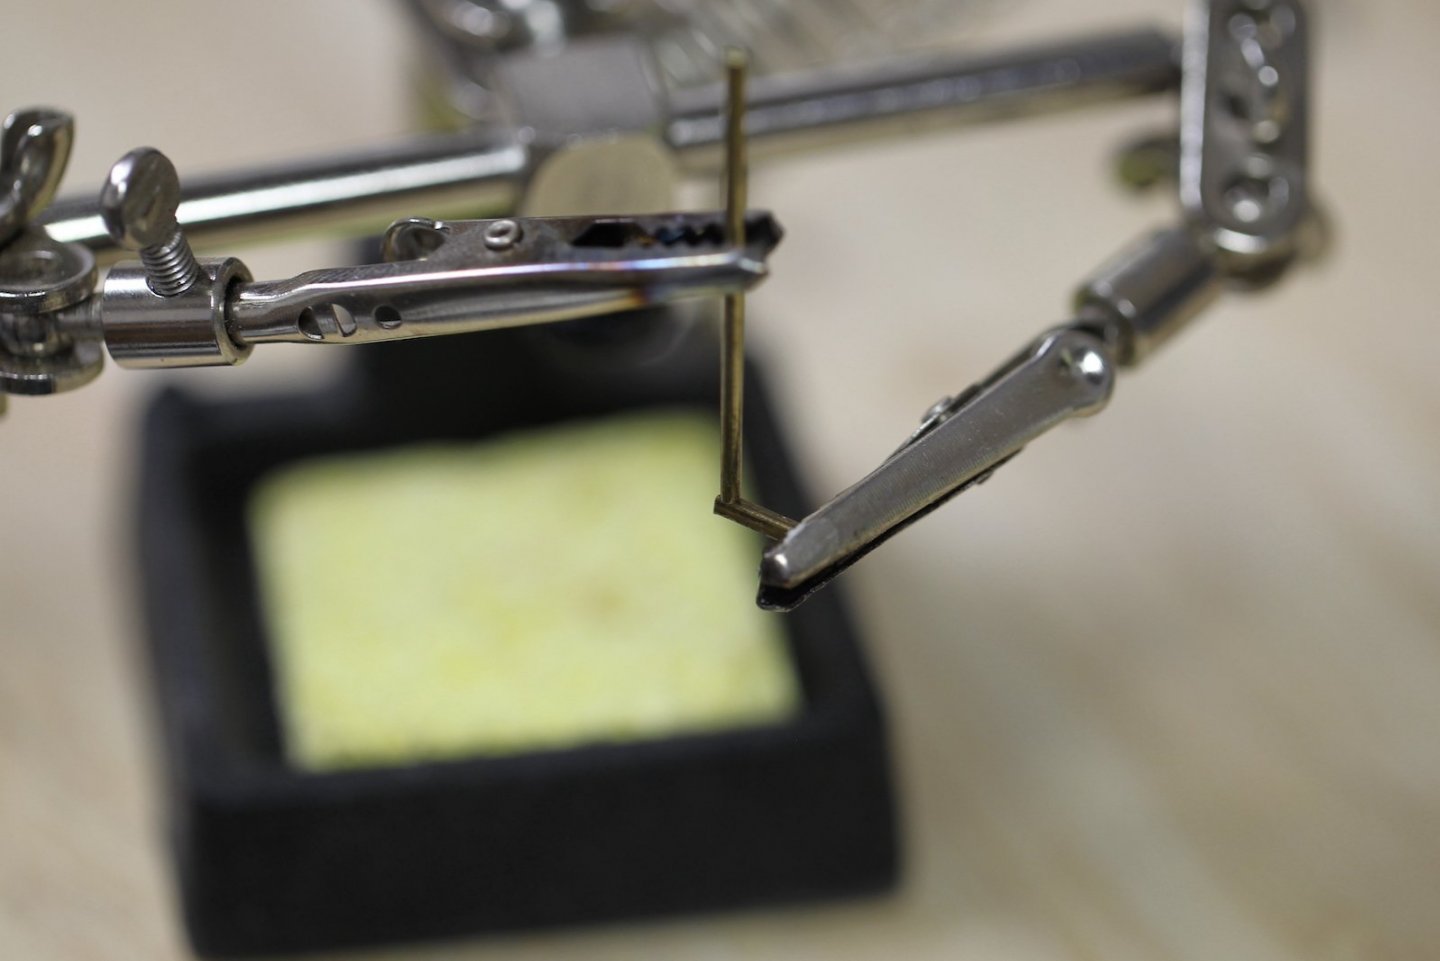
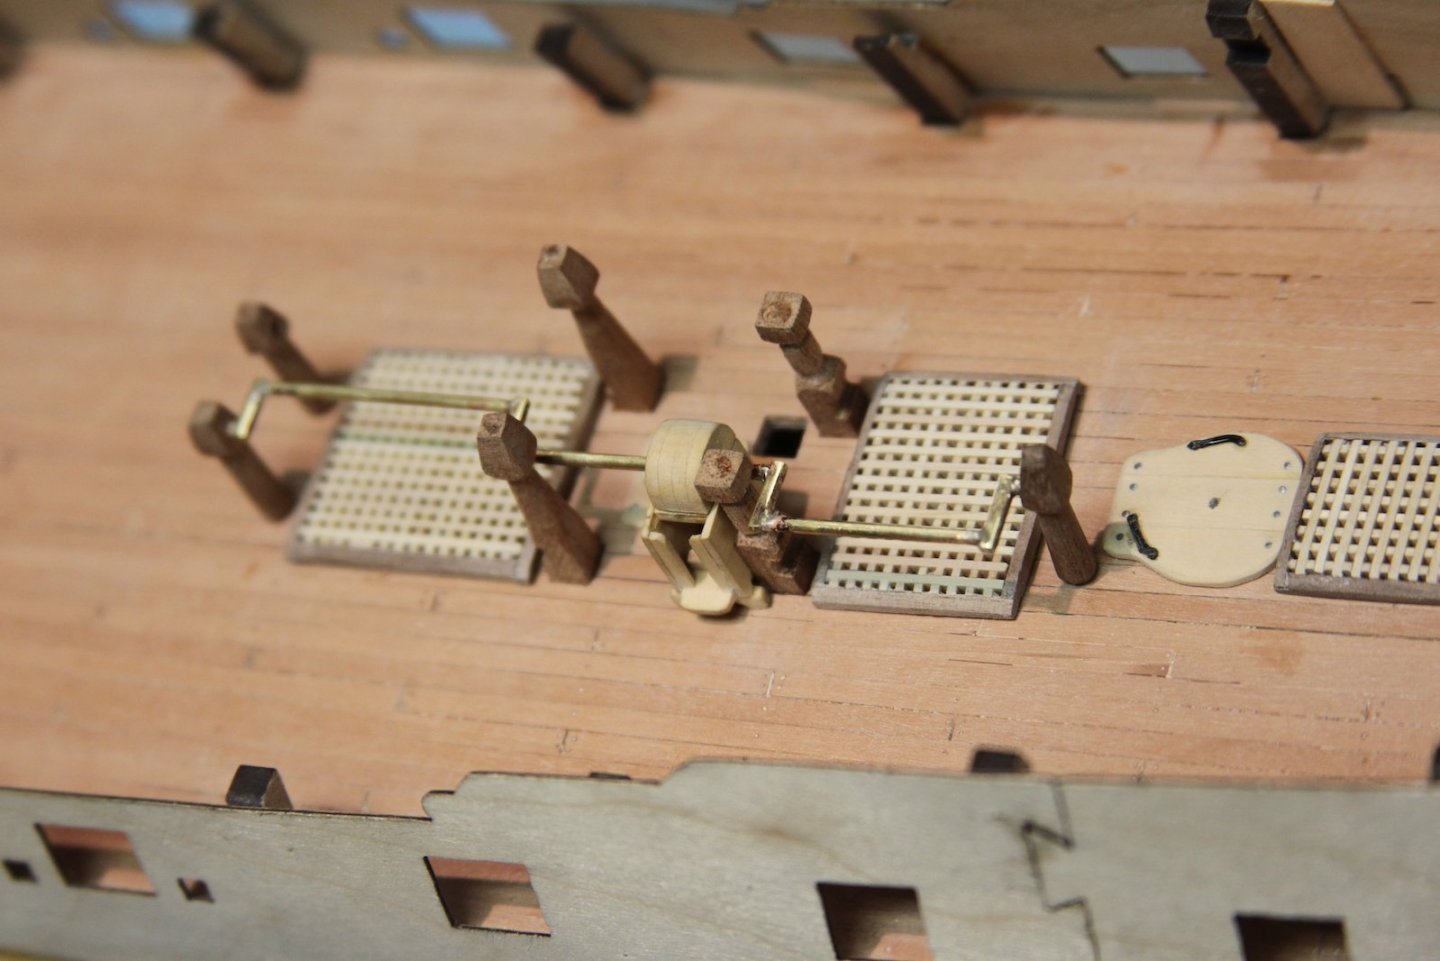
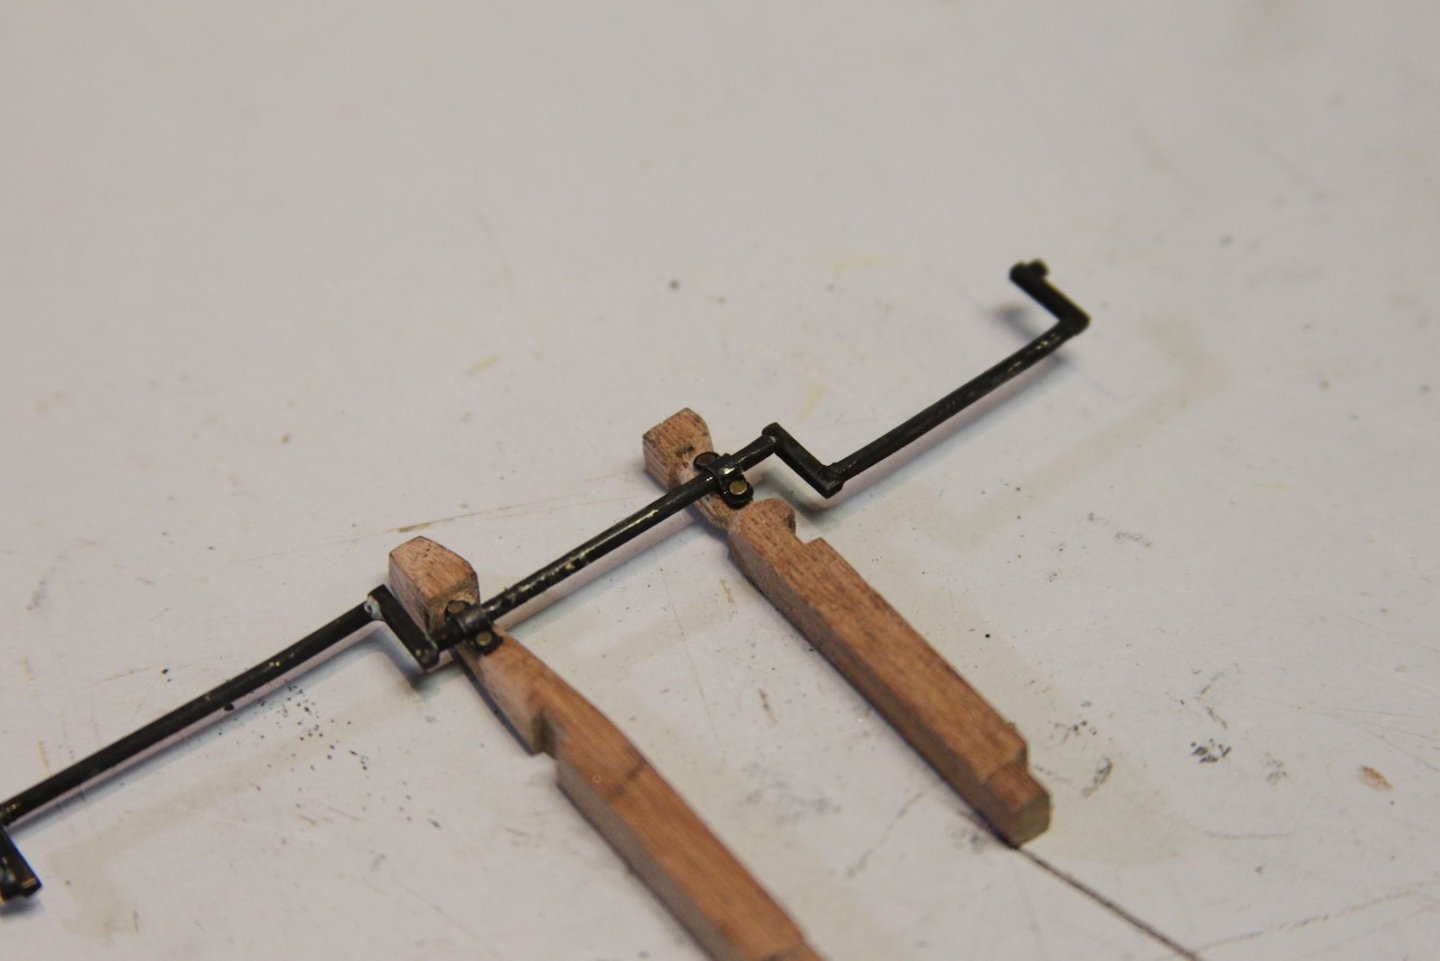
My supplies from a jewelry supply place came in - thanks @Blue Ensign for the tips on silver soldering! After some playing around a learning the ropes - I made my first attempts at it to create the pump cranks! As B.E. mentioned, the trickiest part (at least for me) was getting everything held in place and held still for soldering. I blackened the pieces subsequently. All of the posts and pumps (and capstan) are temporarily placed and will get some touching up prior to final placement.


- 419 replies
-
- 12
-
-

-
- Victory Models
- Pegasus
- (and 2 more)