


Ainars
-
Posts
13 -
Joined
-
Last visited
Content Type
Profiles
Forums
Gallery
Events
Posts posted by Ainars
-
-
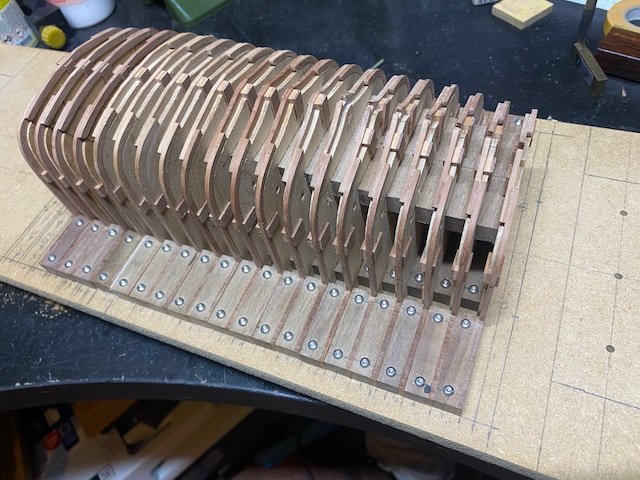
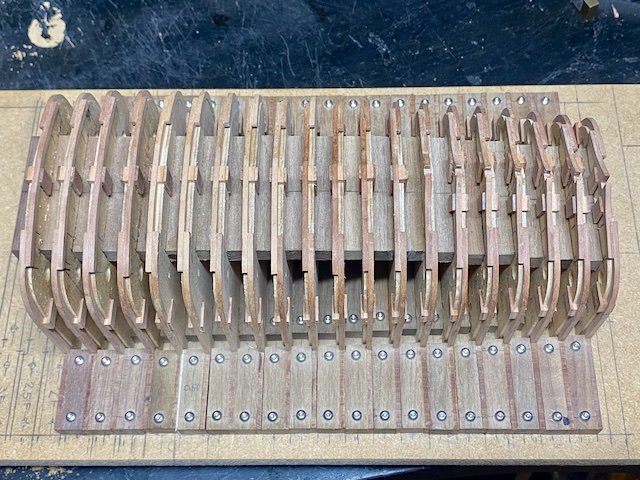
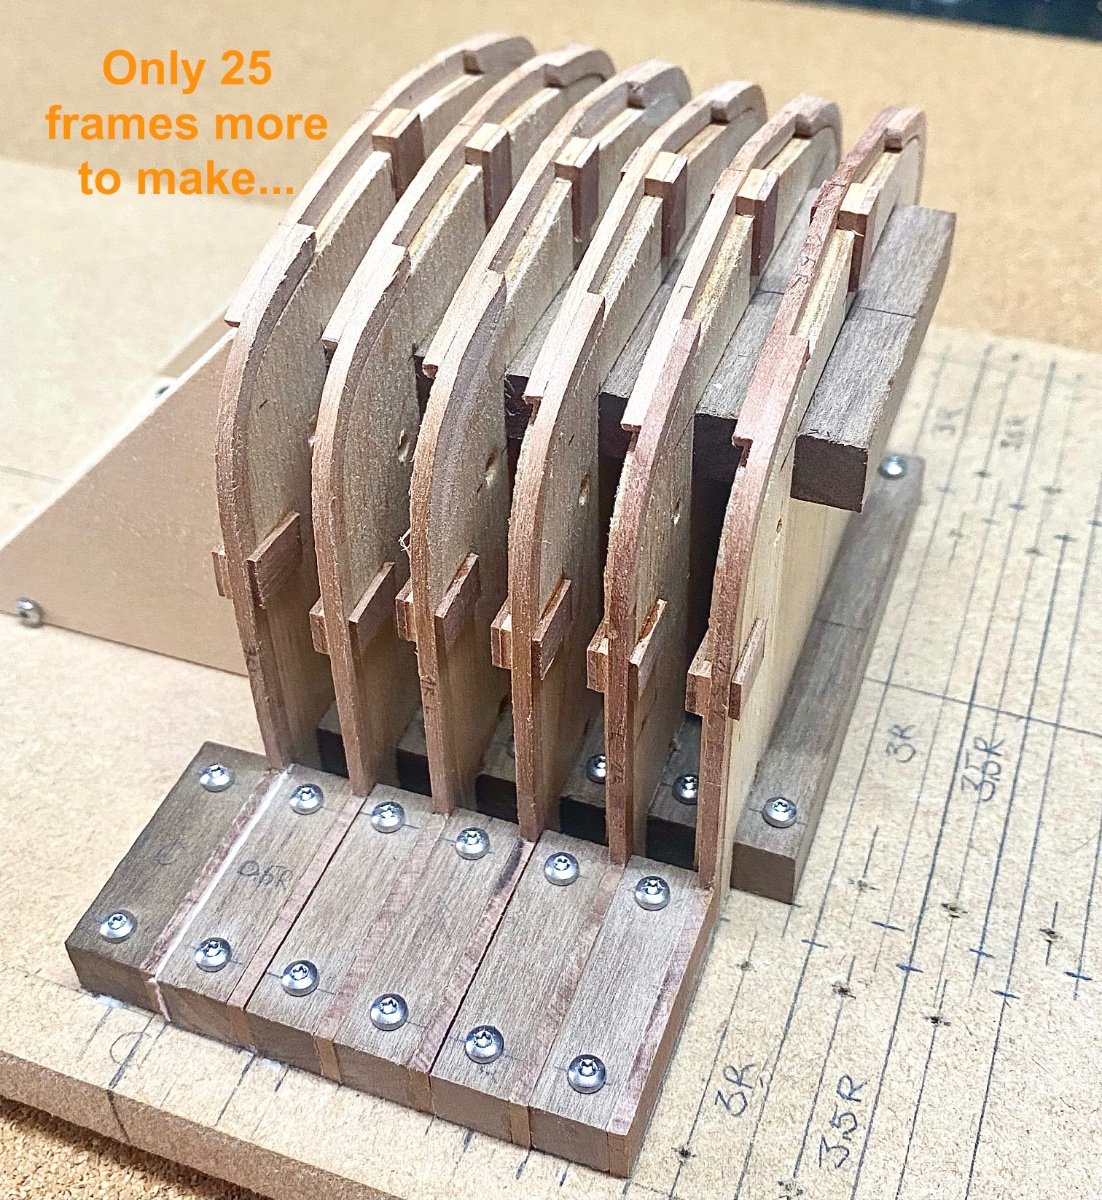
A few more steps forward.
Honestly, I get this a bit boring, because I have to repeat the same works of the same principle all the time.
But that's definitely doesn't stop me and I just enjoy to keep building frames.
Rear end frames is nearly done, and now in meantime I try to figure out how to add transom and sternpost.
I have some ideas in mind, but more about that next time.
That's all for a moment,
to be continued.
Ainars.
- GrandpaPhil, ccoyle, John Cheevers and 9 others
-
 12
12
-
-
-
On 3/19/2023 at 2:13 PM, Snug Harbor Johnny said:
OUTSTANDING method, mate ... and VERY well shown pictorially ! It is step-by-step and easy to understand what you did. This will definitely influence me on a future build, so I'll be sure to watch further developments on your build.
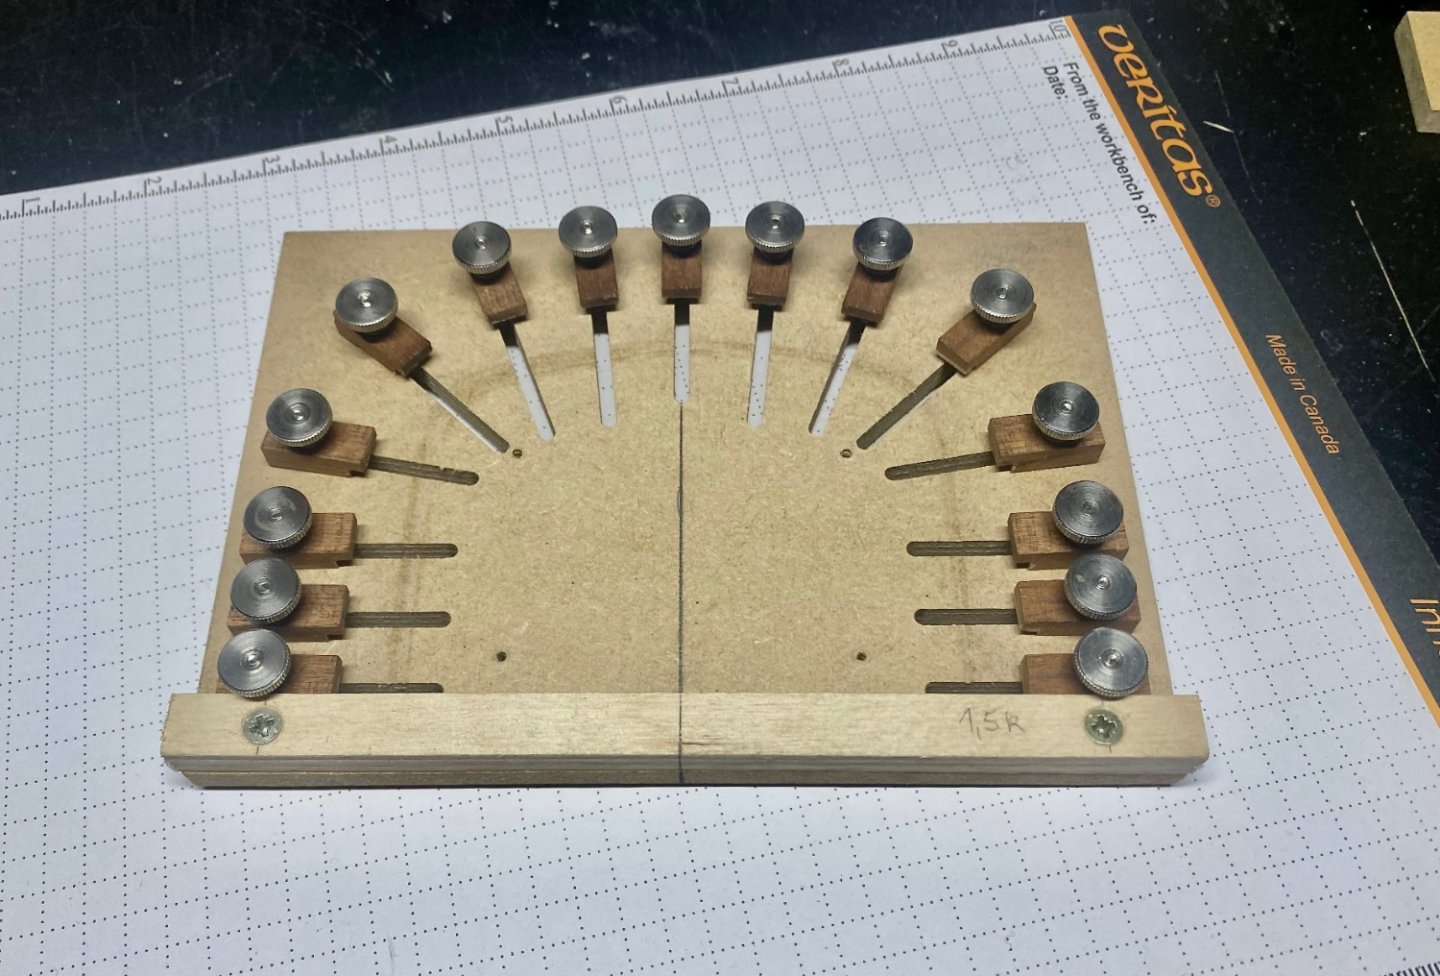
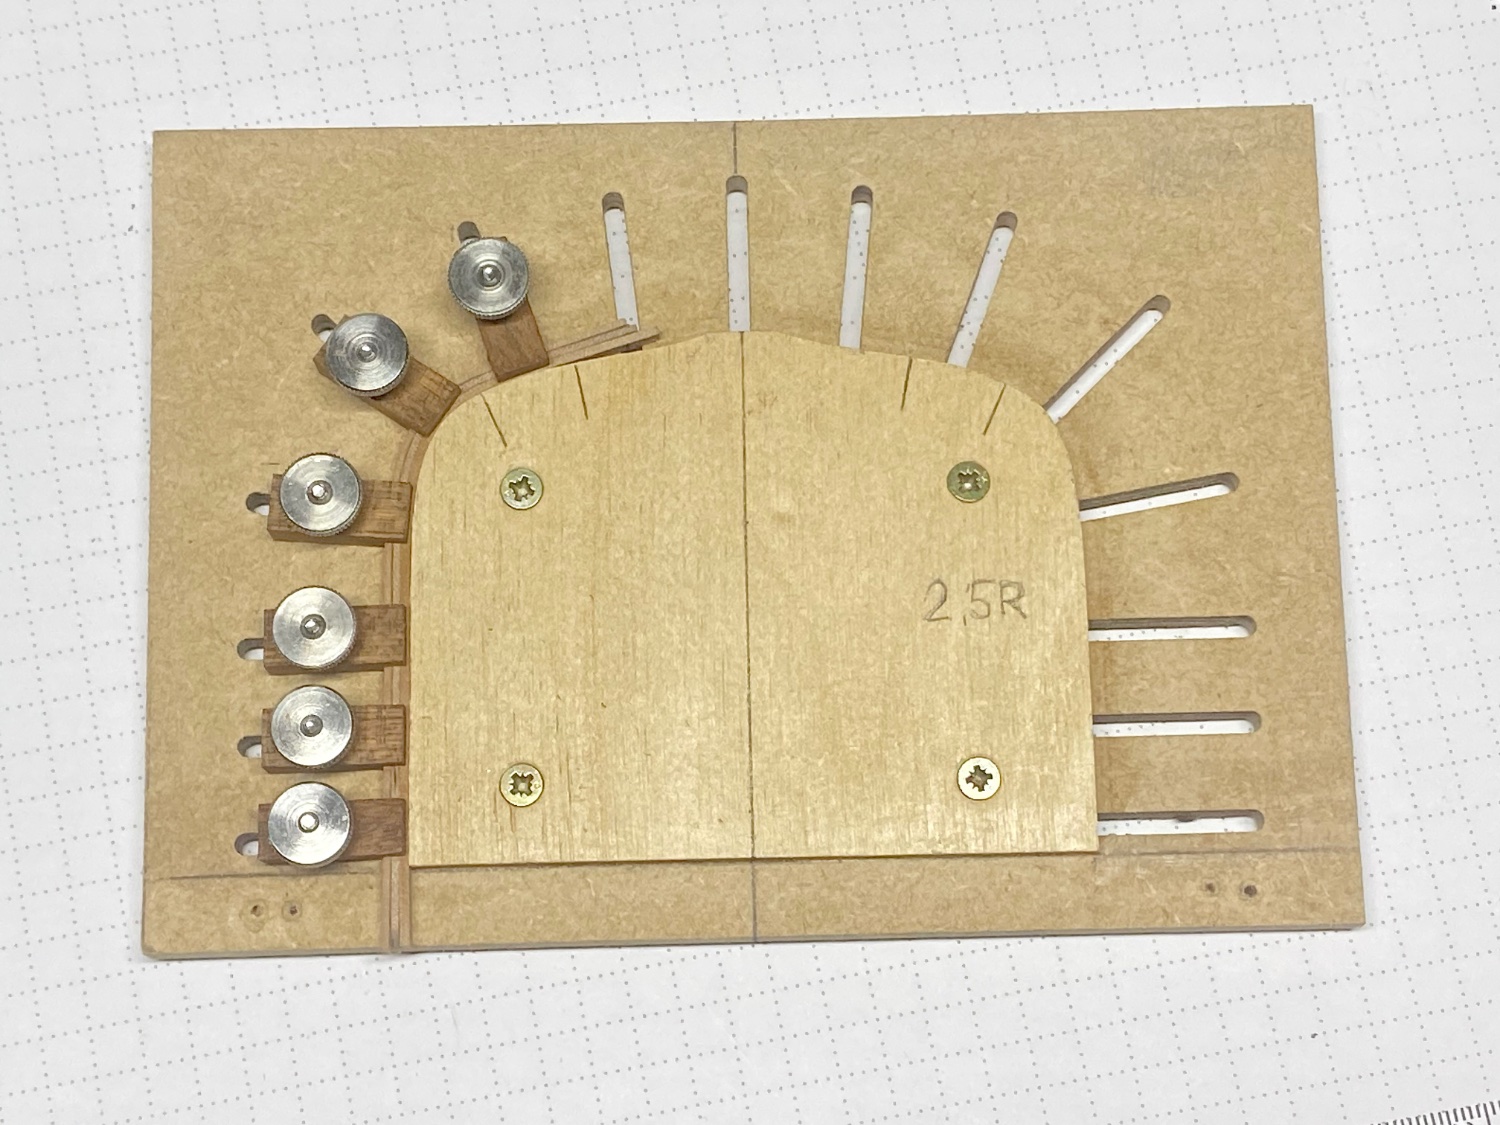
This is effectively 'caul bending' (or veneering), in which several thin pieces are formed around a bending caul (I may have the spelling wrong) after some glue is put between the elements to be formed. I did exactly this when building a bent-side Spinet Harpsichord (a large project). The side of the instrument's 'bent side' meant that I only needed a curved piece to bend against, and used a number of wood blocks held by clamps to keep the outside of the work-piece itself against the form (that had a small amount of 'spring back' allowance due to the 1/4" or 6.35mm thickness of the components).
You have made a nifty jig to allow the exterior clamps to hold the bent pieces together while the glue dries, due to the small size of your application. The thinness of your component pieces means that there is little need to worry about spring-back. The method you show may take planning and jig design, but it is WAY better than drafting outlines on plank stock, then jig sawing frames out.
Hand sawing frames makes for too much variation that is hard to sand to uniformity and still have them symmetrical. dealing with the grain of the wood can also be a challenge ... thin ribs are prone to breakage at the weak spots, and end-grain in places on the edges makes fairing and planking more difficult. By forming frames as demonstrated, there is great strength all along each rib. Once all the ribs are in place, a stable planking jig exists. Once planked, the attachment points along the sides are released and the ends can be trimmed where they should be.
Fair sailing ! Johnny
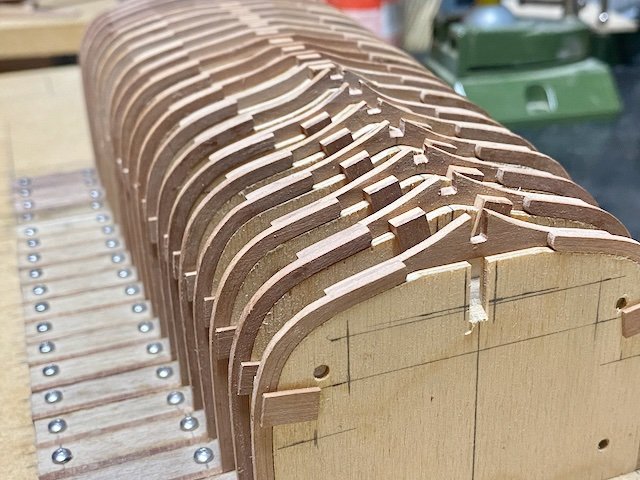
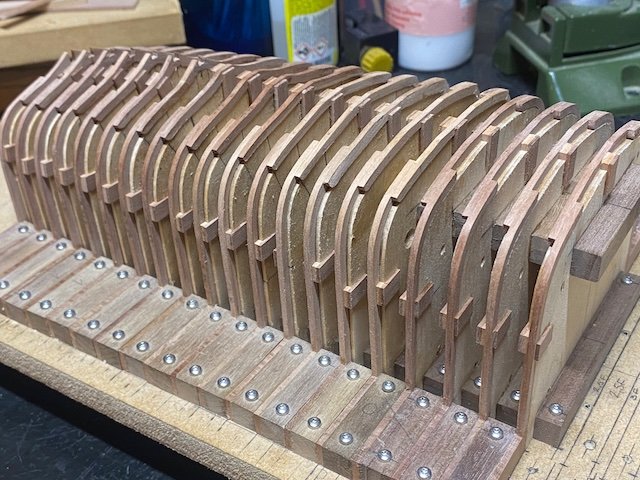
Thanks to Johnny for the comments.
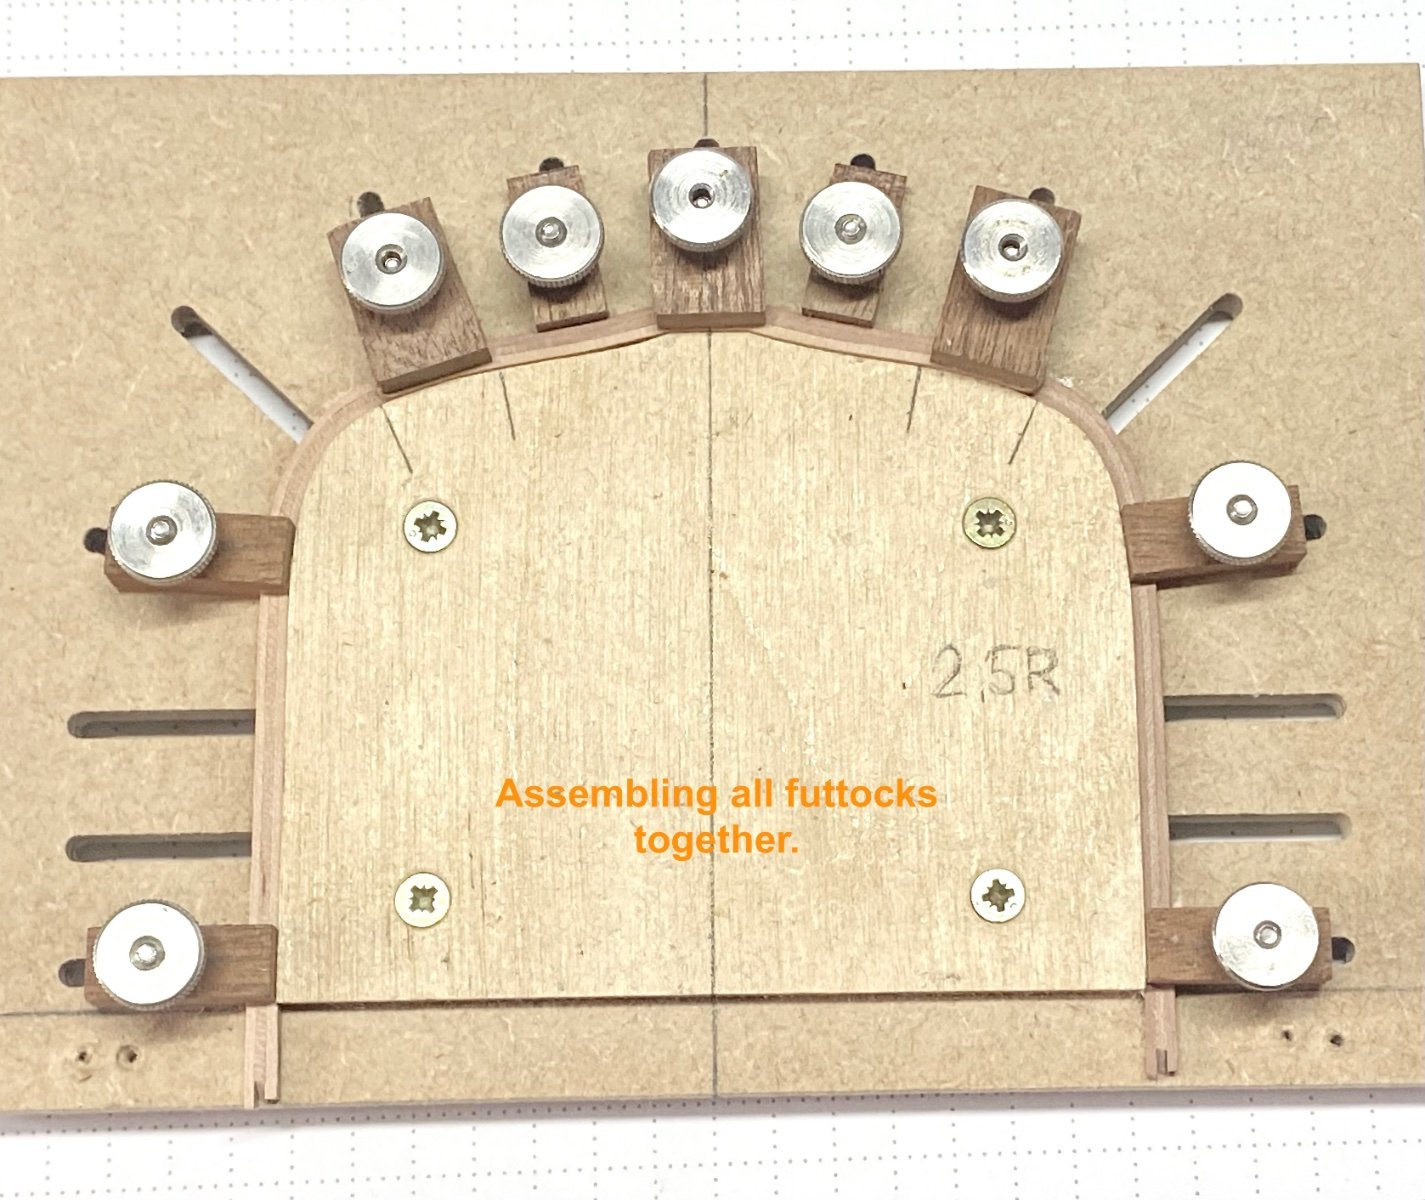
So far “lamination “ technique ihas worked well enough for me.
Just next as I get more to boath ends, botom futtocks shape next to the keelson are in more sharp angle .
And there I will have to think about other solutions. I have some ideas from other member models. But that's for next time.
Ainars.
- CiscoH, mtaylor and Snug Harbor Johnny
-
3
-
On 3/16/2023 at 10:38 PM, VTHokiEE said:
I enjoyed your cross section build very much - I can’t wait to watch this as well. I have the plans on my shelf as well.
Hi VTHokiEE,
Great to hear from you. I hope to be able to make something as nice as my previous model, but there is a long way to go.
-
Passion for perfection!!!
- Keith Black and mtaylor
-
2
-
-
I have to agree with the others, looks amazing.
- mtaylor, Greg Davis and Keith Black
-
2
-
 1
1
-
Hi all,
Few more steps forward.

That's all for a moment,
to be continued.
- GioMun, Prowler901, garyshipwright and 8 others
-
11
-
Thanks to all for likes
")
And small update from my side.
That's all for a moment,
to be continued.
- Prowler901, mtaylor, archjofo and 4 others
-
7
-
On 3/2/2023 at 11:40 AM, allanyed said:
Ainars
Thanks for sharing, and welcome to MSW!! Are you from Latvia? Maybe post a little introduction in the new member section. 😀
Very interesting technique that you show. Is there a reason you did not cut the futtocks and floors out from a solid sheet rather than bend laminations?
Allan
Hi Allan,
Yes, I come from Latvia, but at moment live in Uk already for some long time. Did you guess where I'm from by my name?
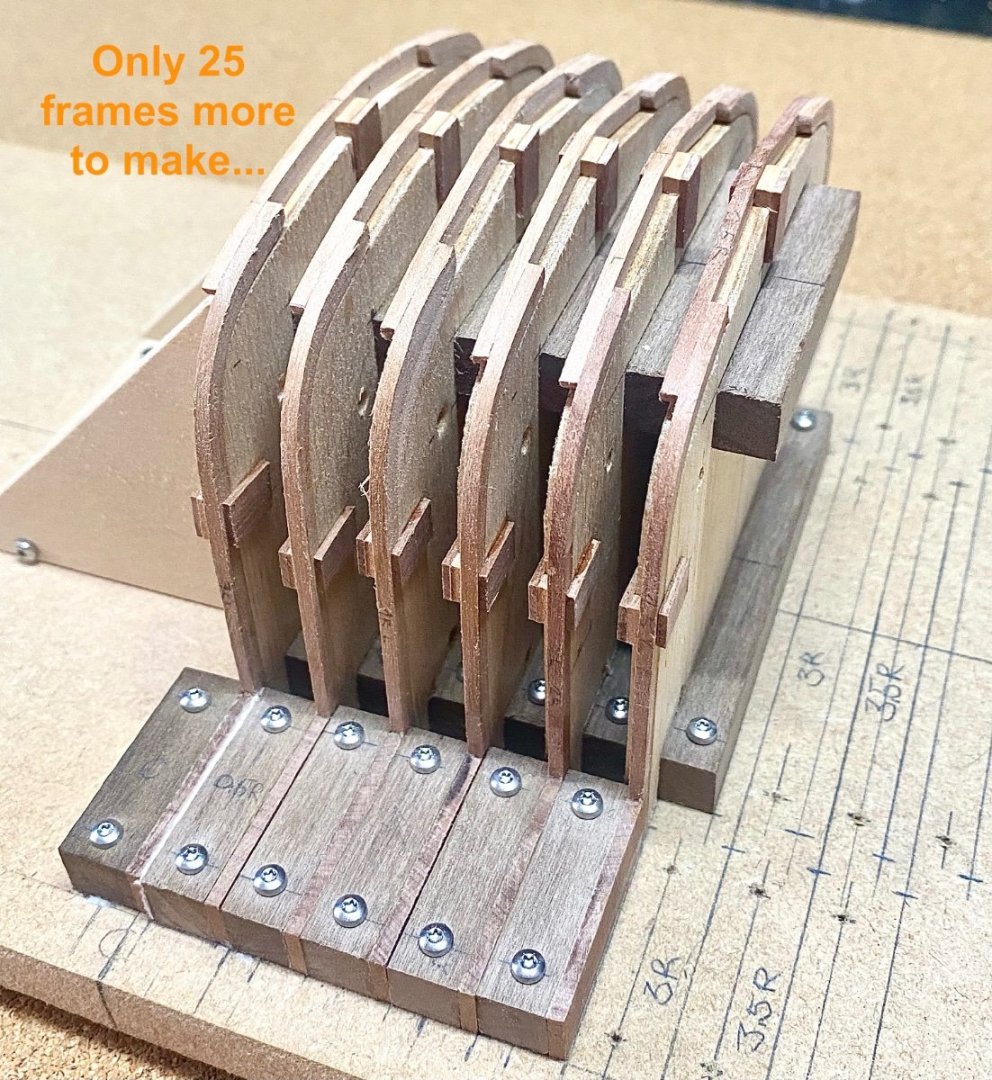
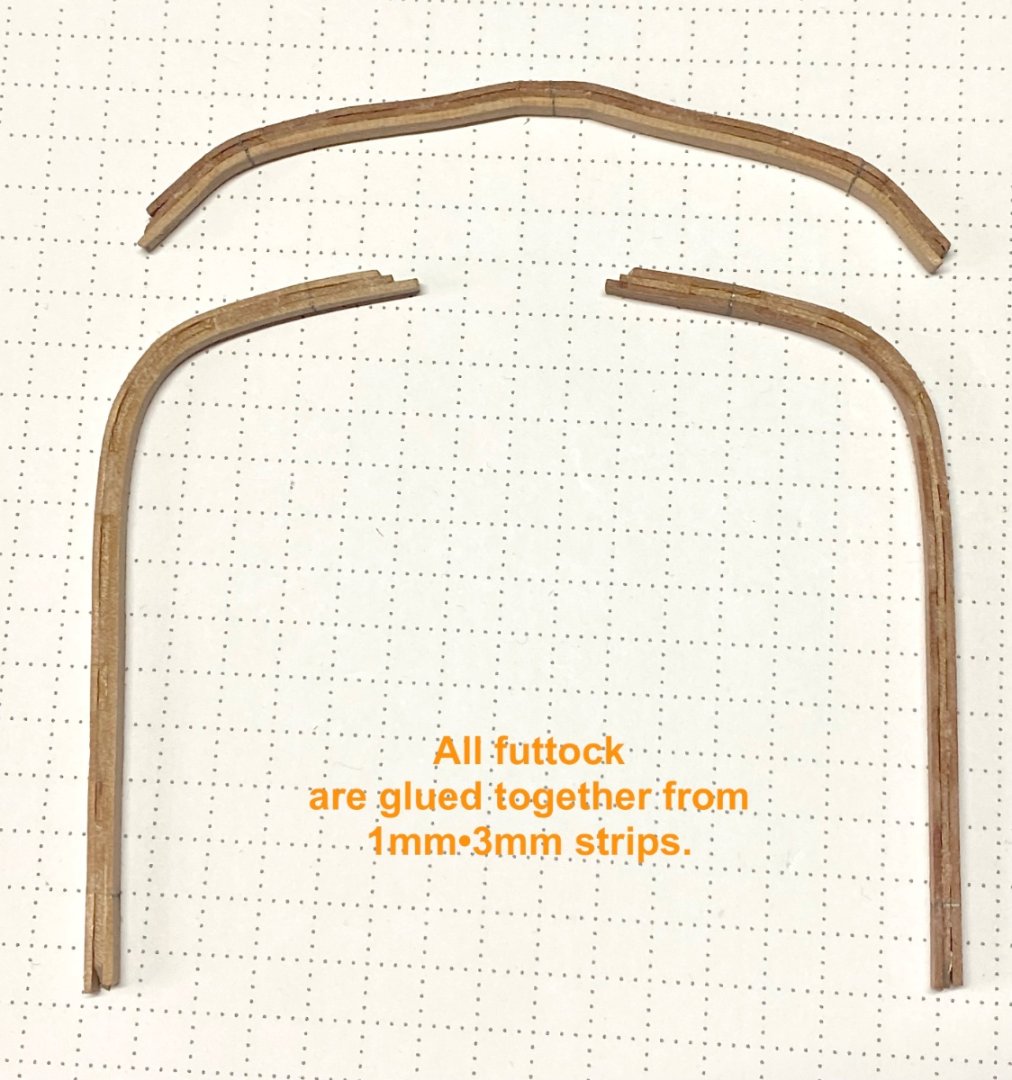
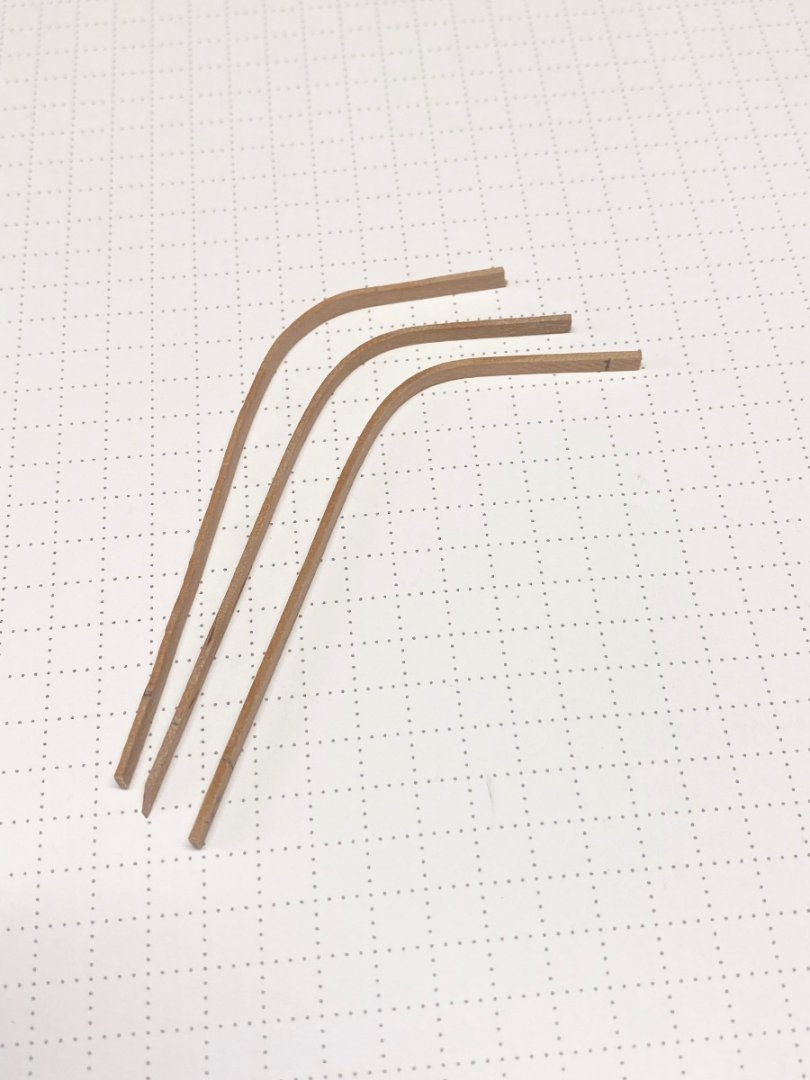
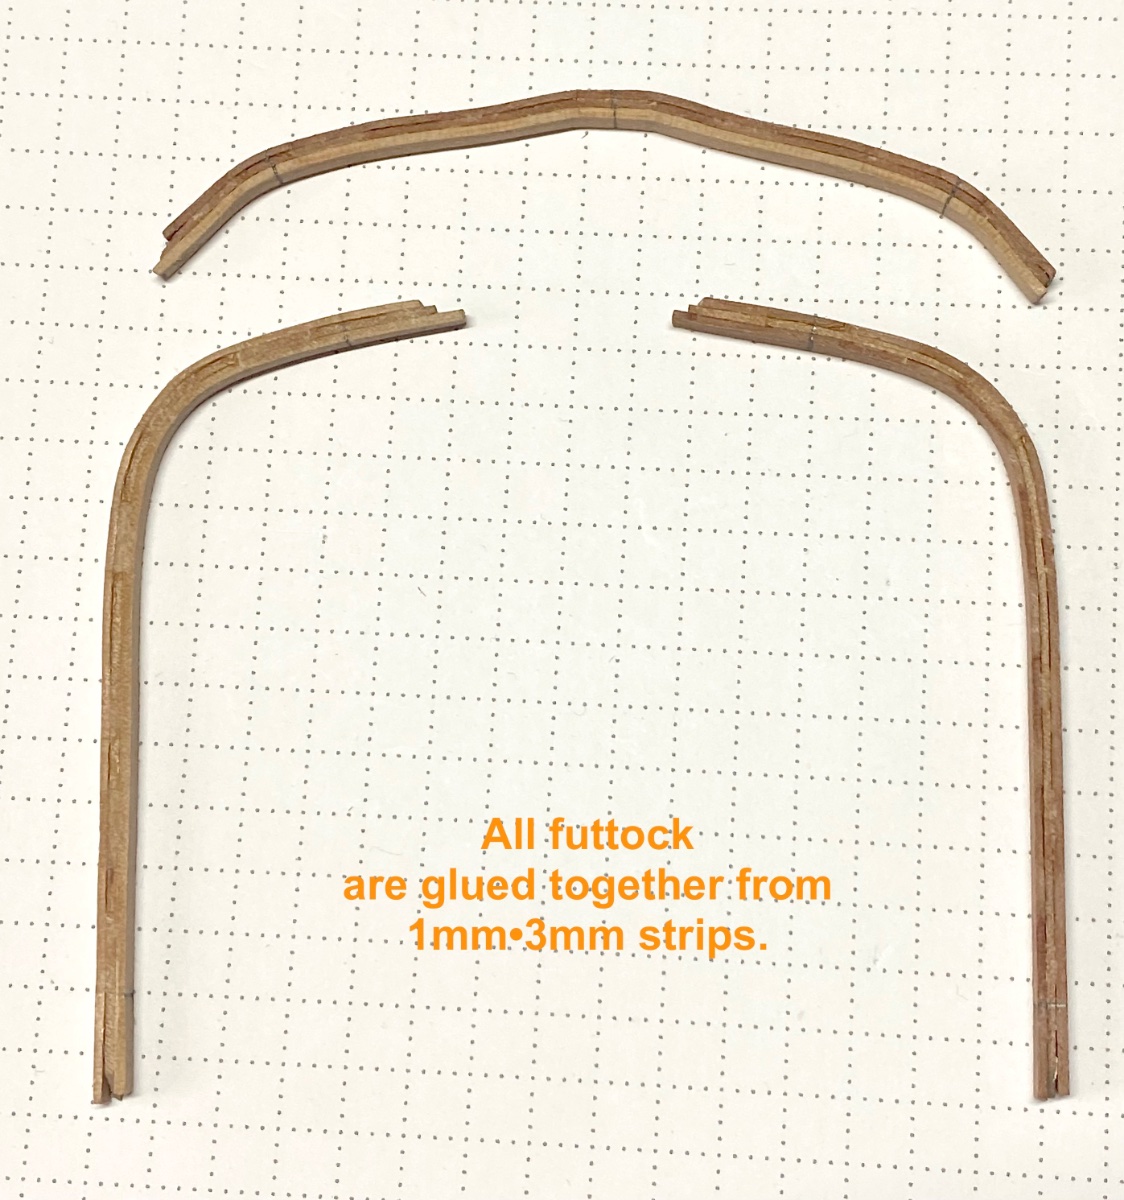
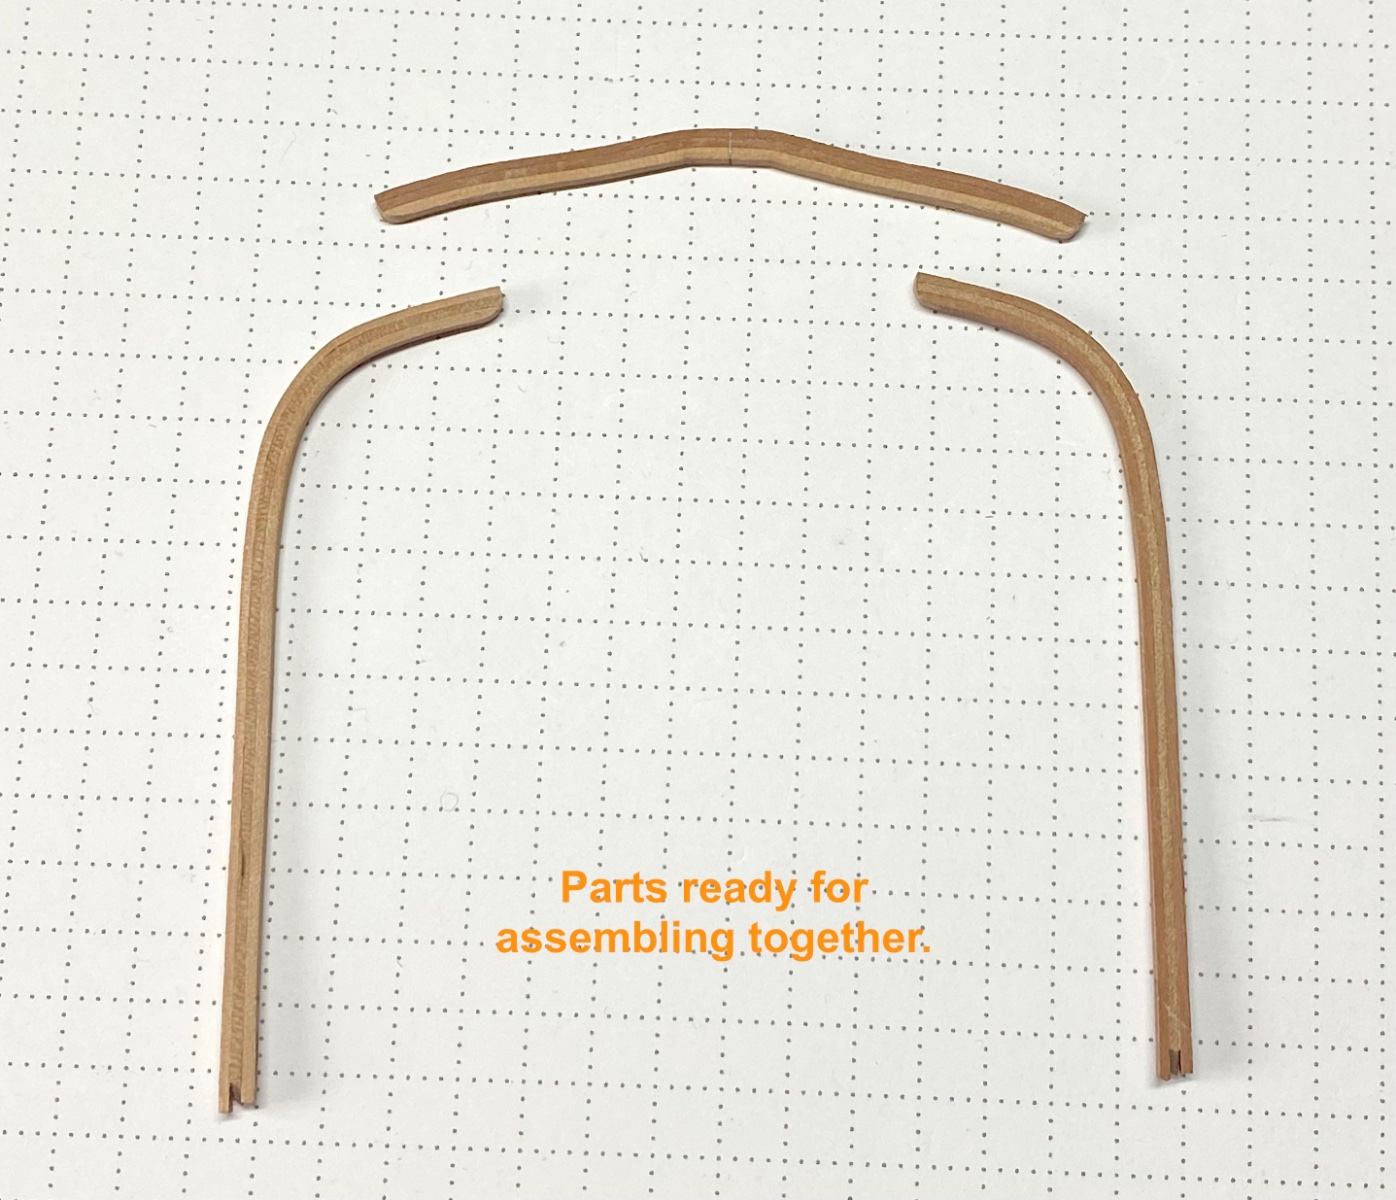
Regarding futtocks - In the beginning, I started folding them from solid piece, but quite unsuccessfully, because in many attempts they simply split into pieces.
So I decided to make them from 1 mm thick strips. It will take more time, but I am sure they are not will broken in parts when i bend them.
-
Hi all shipmates.
Short story about laziness.
It took a very long time before I finally decided to start a new model.
I really enjoyed the time I spent on the previous build - HMS Triton cross section.
After that tried to start something new for a while but unfortunately I failed because of my laziness
Folowing the MSW site for many years,
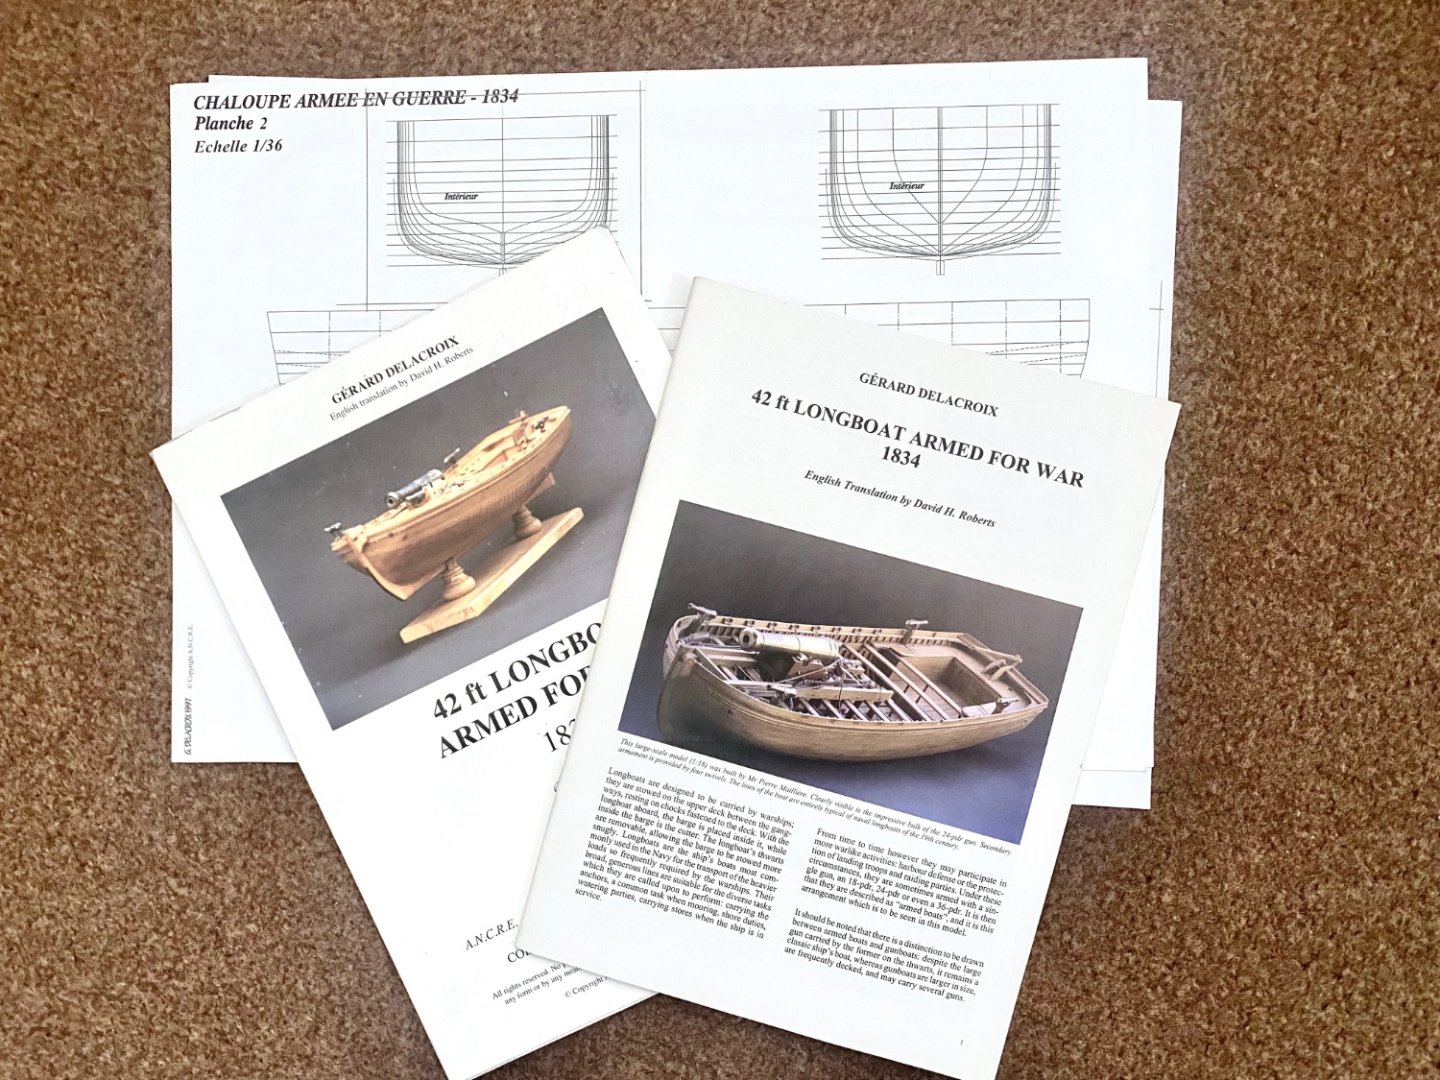
I had seen Armed Longboat -1834 by Ancre monograph model that I really liked.
There are several really nice boat model builds on the site, that for me personally gave inspiration./tkay11 build is my favourite/
I bought a monograph from Acre store, but the book remained untouched on the shelf for some time afterwards. Again my laziness.
Don't really know how, but I got rid of my sluggishness and decided to finally proceed to the start of the build. And I not even imagined that I could be so happy to return to drawings and saw dust.
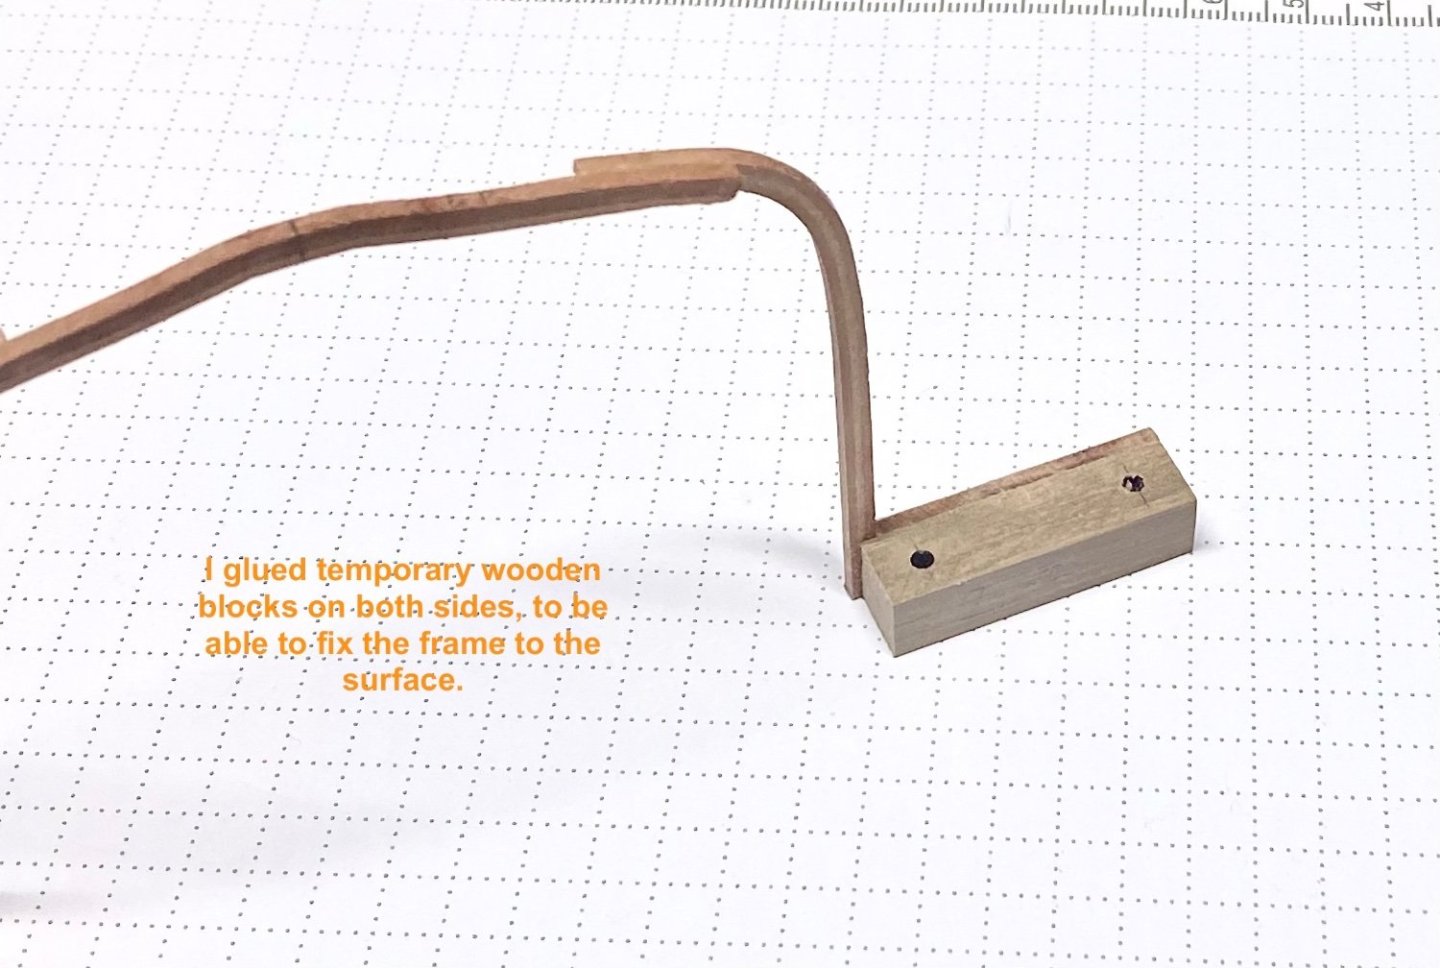
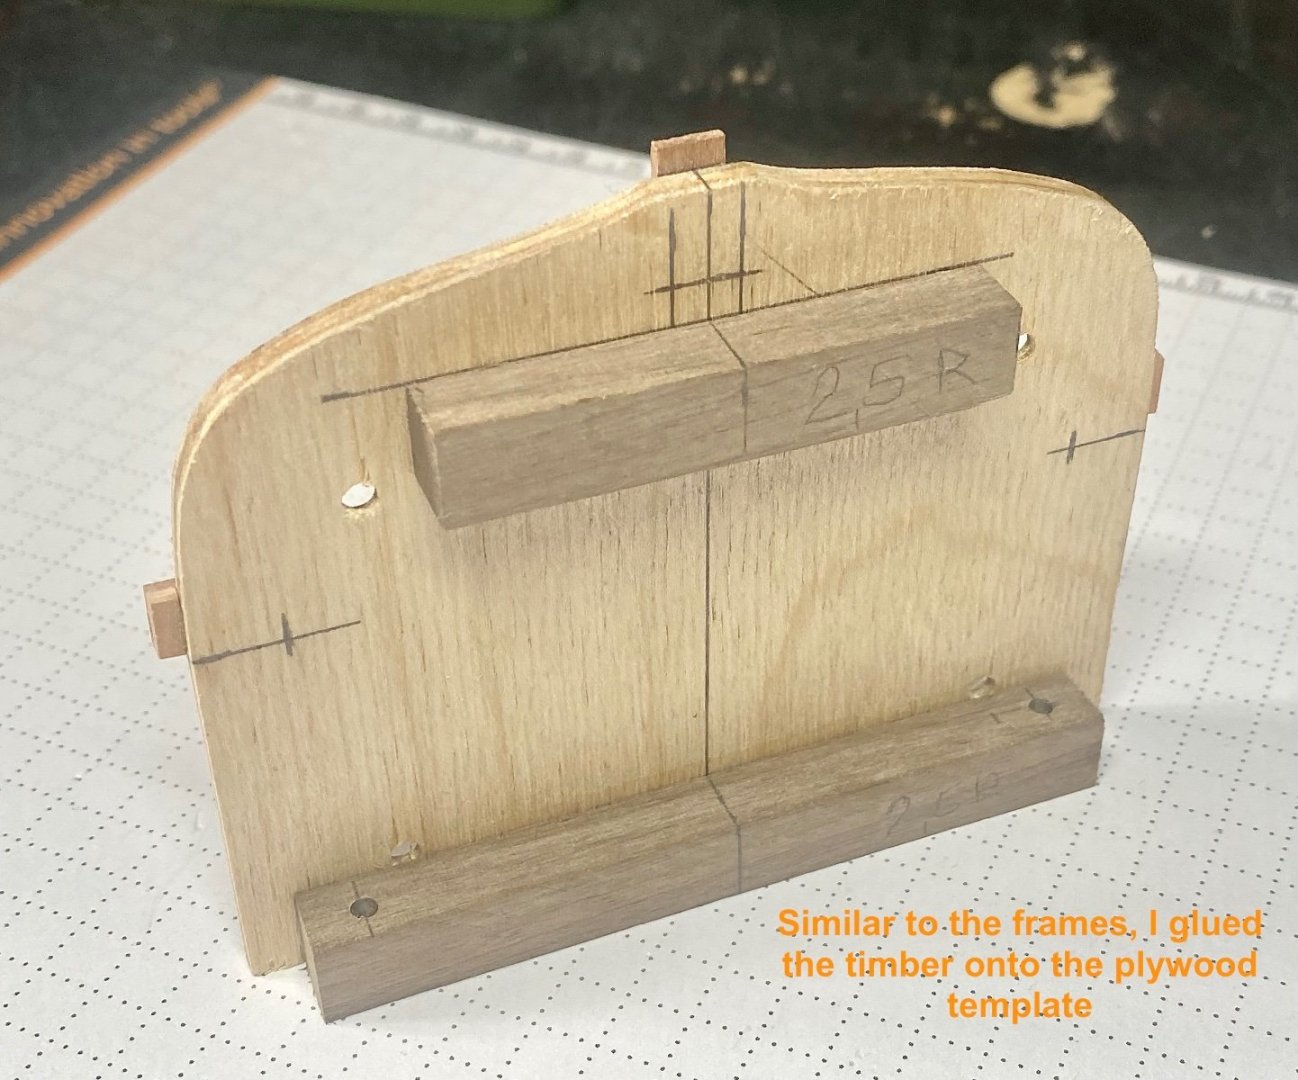
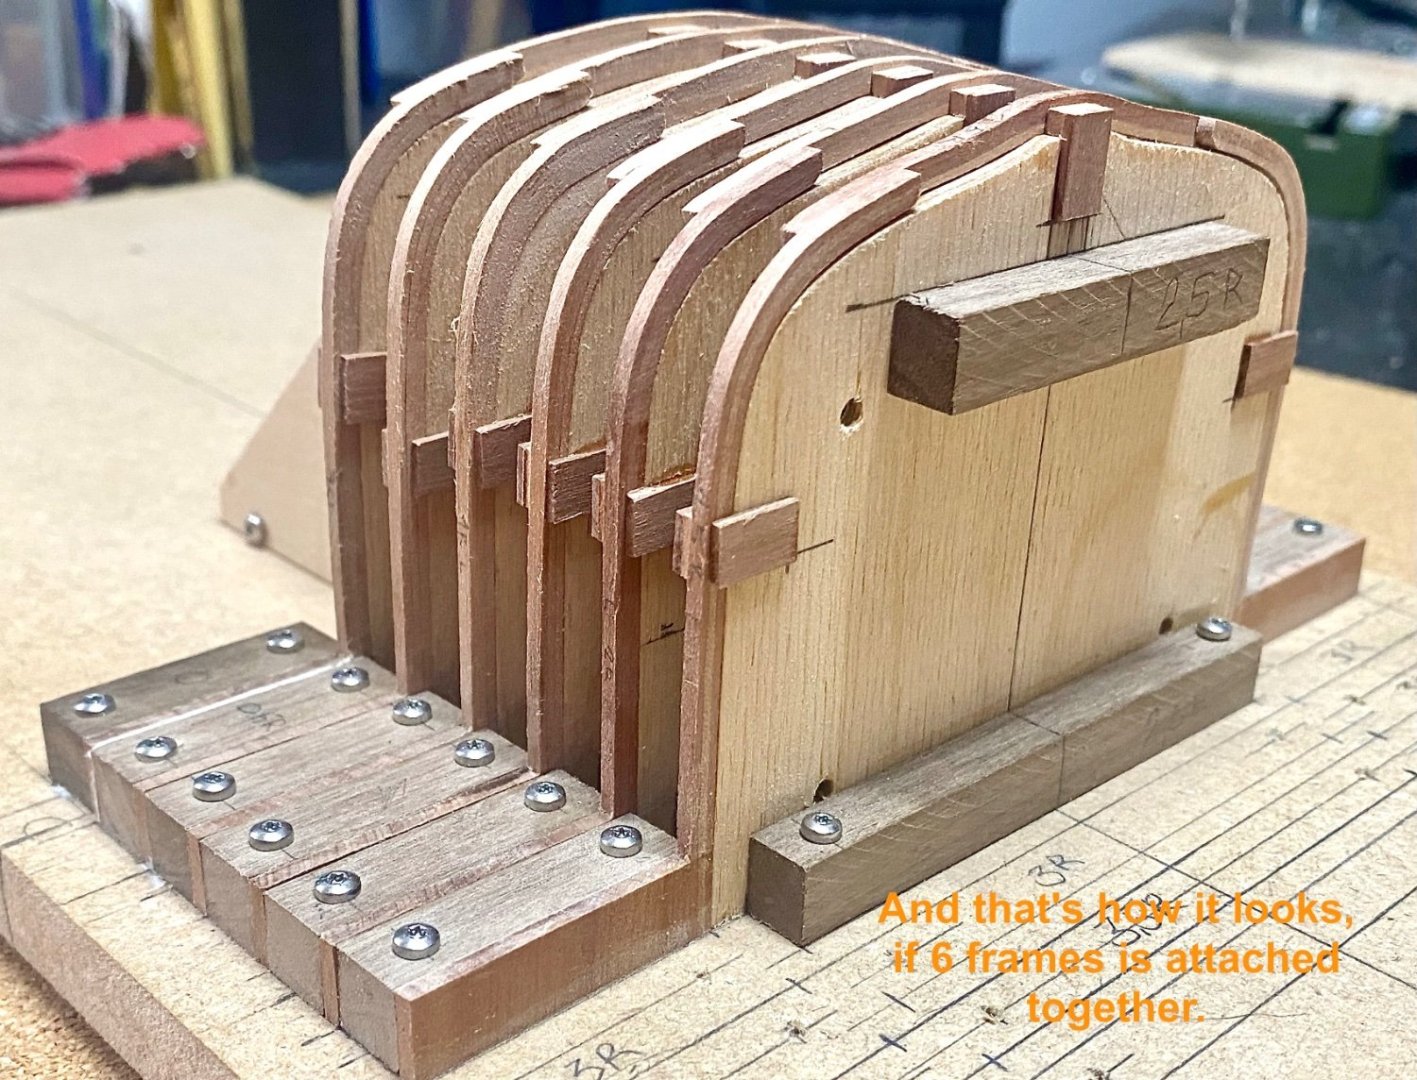
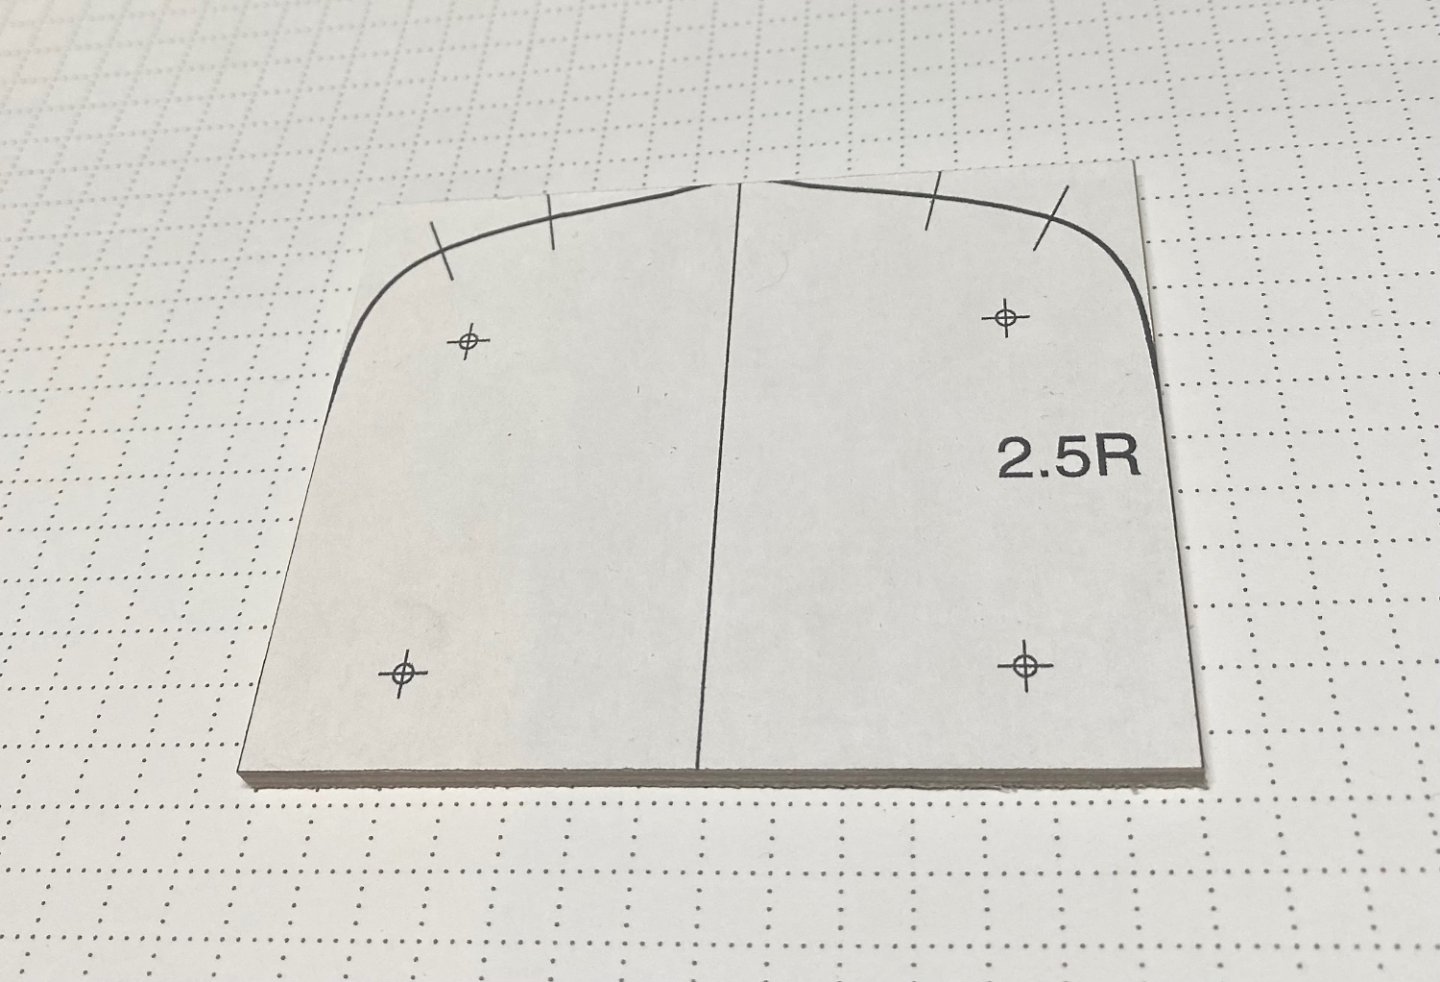
In first place as I like to make everything over complicated I decided go to different way how to create the mould.
Not don’t know how i get that idea and definitely not sure is it will works.
However, in the end, I have decided to take a risk and hope that everything will works.
I have already moved a little forwards, but I had not took any pictures of process.
Therefore my topic start with tiny delay. End of the, hopefully everything will work out and laziness will not return🙂
Few pictures for the start.


That's all for a moment,
to be continued.
- VTHokiEE, thibaultron, Paul Le Wol and 5 others
-
8


Le Gros Ventre by marsalv - FINISHED - 1:48 - POF
in - Build logs for subjects built 1751 - 1800
Posted
I can only agree with anyone.
That you have done an amazing job and model looks marvellous.
Ainars