HOLIDAY DONATION DRIVE - SUPPORT MSW - DO YOUR PART TO KEEP THIS GREAT FORUM GOING! (Only 13 donations so far - C'mon guys!)
×


SawdustDave
-
Posts
1,770 -
Joined
-
Last visited
Content Type
Profiles
Forums
Gallery
Events
Everything posted by SawdustDave
-
 Trying to figure out what I'm going to do with all the Heiniken I purchased for your visit. I know.... I can drink it tonight at the poker table. Yahoooo! Nice job old guy! You are just too Kool for school.
 -
Thanks everyone for all the nice comments. We all need encouragement from friends. When you consider, from what I see, there are no two versions of this ship that have ever been built the same. Unlike the Victory, Confederacy, Syren, etc., (all being ships that I have built that are well defined in their detail)), the SOS leaves an awful lot of leeway for artist interpretation. And since I have never been a pure technician of historical accuracy, I guess I can just have fun coming up with whatever satisfies my own personal fancy. "Final product".... Might take a while Cap Steve
- 962 replies
-
- 8
-

-
- sovereign of the seas
- ship of the line
- (and 1 more)
-
Still developing the port side sculptures..... A lot of experimenting going on right now with shaping the gilded figures decorating the panels between the upper gun ports. I must admit, the scale is very difficult to work with. So far, I have removed more of the pieces I have attempted to add than I have kept. But I am beginning to get a little more feel for the scale than when I started. Also, decided that it only makes sense to create silicone rubber molds of each figure I create for the port side since the same figures will be required for the starboard side. I just may be a "mold master" by the time I'm done with this build. I guess I faced the reality that carving each and every single figure that will go into decorating this ship would likely, in my case, require more time than I might be around. Also discovered that the plastic parts, once removed from the mold, are very receptive to adding fine details that do not show up well. With that, I will primarily cast the fairly rough shapes of the figures and then add fine details after I remove the castings from the molds. Here's a mold I created for the very tiny pieces directly below each gun port.... Here's a little shield I just finished and guilded.... A few sketches cut from the plan sheet that I will begin laying out for carvings.... they will keep me busy for a while I'm sure.


- 962 replies
-
- 10
-
-
- sovereign of the seas
- ship of the line
- (and 1 more)
-
Time to play "catch up" on some of my favorite builds Patrick. My goodness! It is hard to imagine the scale of your racing yacht until you showed the photo of it in your hand. Amazingly fine job..... Crazy detail at that scale. Way to go mate. Dave
-
Yep.... $30.00 U.S. if interested.

- 962 replies
-
- 7
-
-
- sovereign of the seas
- ship of the line
- (and 1 more)
-
I hope not to give any impression that I consider myself any level of "expert" as a carver. In fact, my point here is to the contrary. That is, you don't have to be an expert. For really good tips on carving, I highly recommend going to Bill Short's SOS right here on MSW. Now THERE'S a true carving artist. You can also simply Google "sovereign of the seas by Bill Short" and find his amazing work.
- 962 replies
-
- 4
-
-
- sovereign of the seas
- ship of the line
- (and 1 more)
-
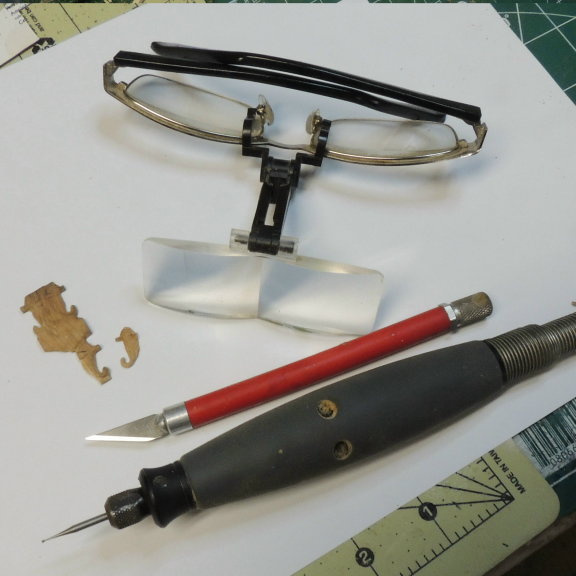
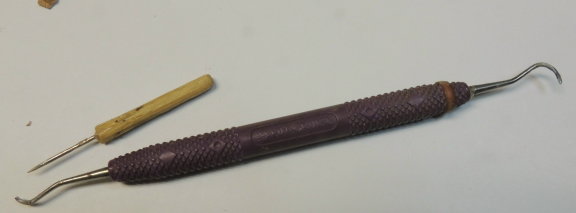
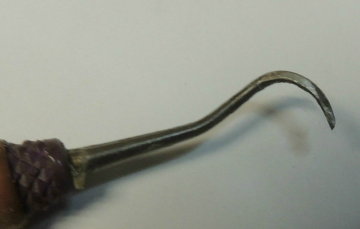
You're right about carving tools available George.... and they are quite expensive. Personally, I do not think you need a lot of expensive specialty tools, unless you intend to do a lot of carving far beyond the type of figures used for modeling. Other than the basic tools shown above, here is my personal favorite two tools. Note the tip of this curved pick has been filed to a sharp cutting edge. The needle tool is handy for creating really fine lines. I just don't recommend you go out and invest a lot of money in a bunch of carving tools you will never use.
- 962 replies
-
- 7
-
-
- sovereign of the seas
- ship of the line
- (and 1 more)
-
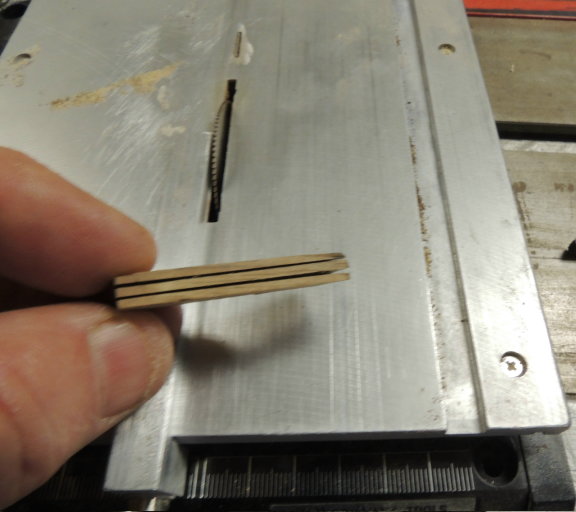
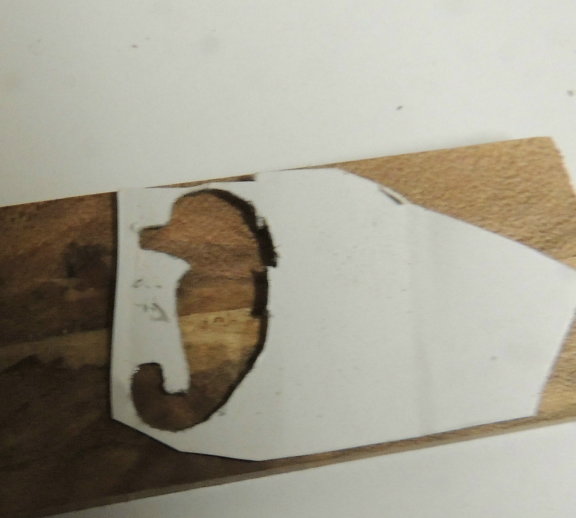
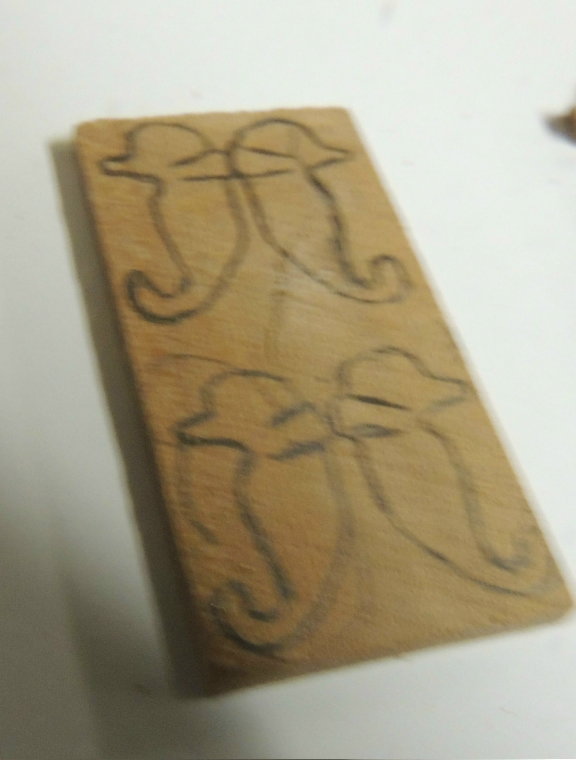
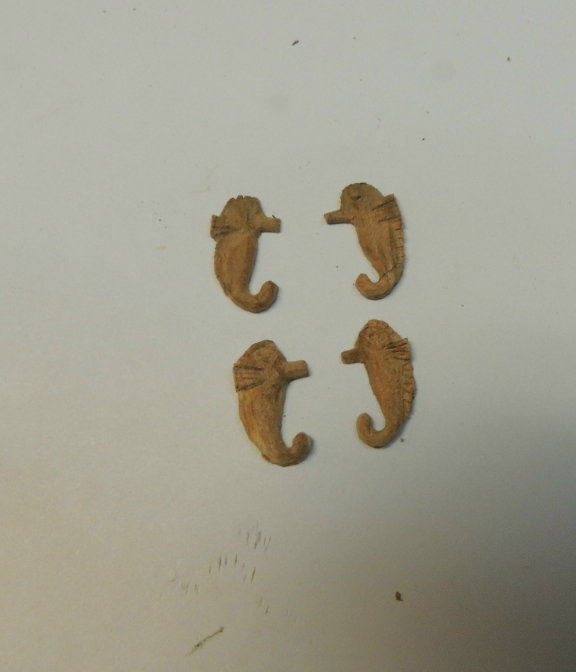
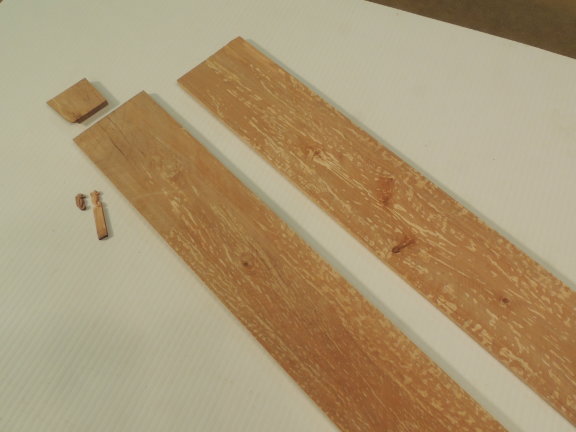
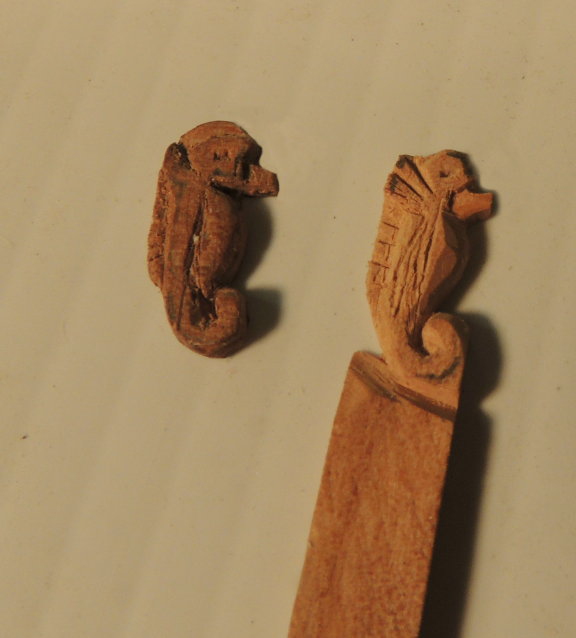
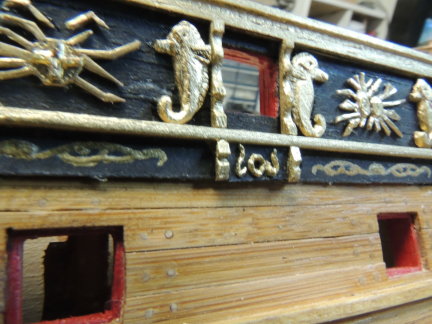
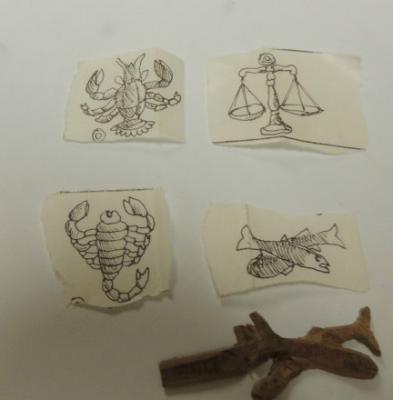
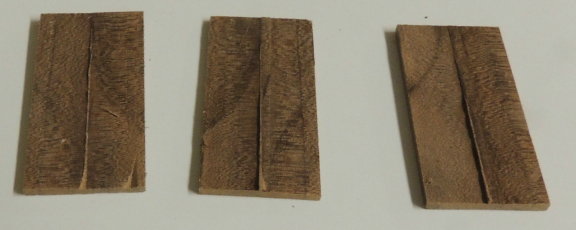
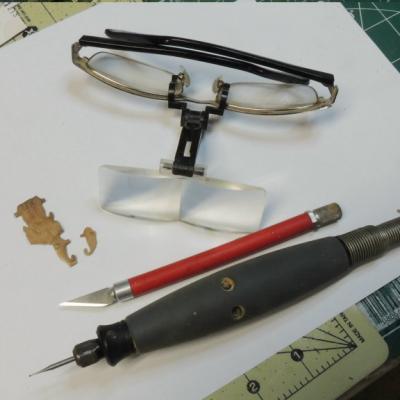
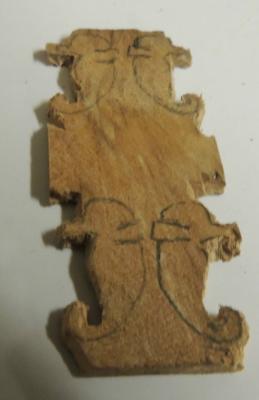
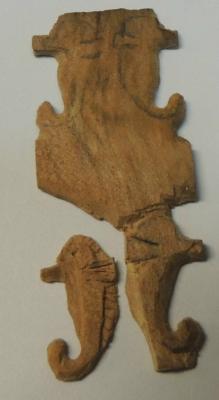
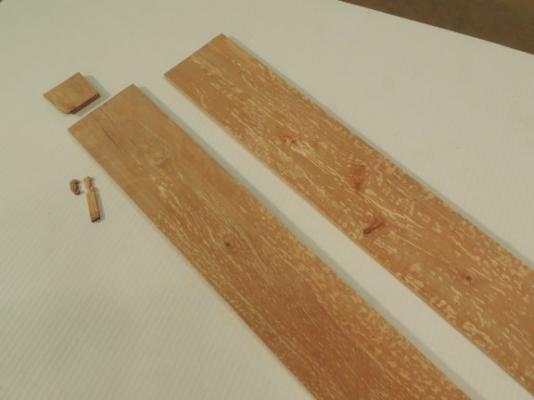
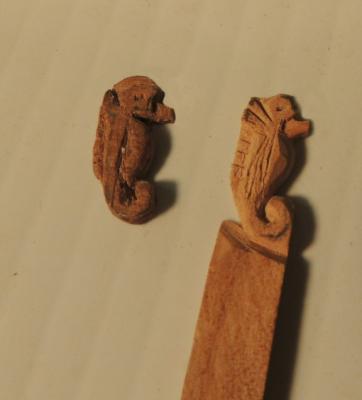
Surprising, the number of emails I'm receiving from modelers with questions about carving. I think it appears much tougher than it really is. For those who have not tried basic carving, I took a few sequence shots this morning as I continue to work on the little sea horse figures. There will be 40 of these little creatures, and I considered creating a mold and casting them. Not at all happy with the detail results, so I decided to carve them all with the Bradford Pear I picked up at the show. Beginning with slicing a piece of material to the thickness needed. The 1/4th" board is too thick, so the rip fence of the mini-table saw is set at 1/16th". As seen here, I get three pieces from one block. Before showing the carving, I should note, for carving, the use of a cable drive Dremel tool is much better than holding any of the cumbersome, heavy, battery powered units. Also, the most valuable tool of all is some sort of powerful magnification. The finer details should be done with a new X-acto blade with a perfect tip. Whenever possible, a cardstock template should be used to keep the outer shape of each piece uniform and in scale. In this case, I am able to get 4 layouts onto each of the planks created above.... Using the Dremel with a fine bur tip, made a rough cut of the outer edges of all four carvings. Note....Very careful not to attempt too much removal around areas like the curled tail and the "beak". Those delicate areas have to be worked down with a blade. The finished edges and finer details are done with a sharp blade and needle pick tool, and light sanding. And there you are.... net carving time, about 30 minutes per piece. Point is....This "carving thing" just isn't all that tough mates.... give it a try. I think most modelers will be surprised at how well they will do.


- 962 replies
-
- 6
-
-
- sovereign of the seas
- ship of the line
- (and 1 more)
-
Thanks guys.... It really was a surprise to me, since I was expecting the story to be completely about the show on Saturday. They didn't air this piece until Tuesday evening following the event. Not much help' huh? George.... I am disappointed that they selected my joking response using the term "Because I'm insane".... That interview lasted almost an hour and a half. The more serious explanation following that comment was about how I was inspired to build the SOS by all the great artists around the world who have built this magnificent historic ship, and that I considered it to be the ultimate challenge as a ship modeler because of all the beautiful gilded ornamentation from stem to stern. BTW....The friend with the model cars is Ken Johnson. He was invited to join me in the interview as a fellow member representing the Lafayette Scale Modelers club in Fayetteville. They are primarily a IPMSUSA group, and I wanted to make sure we extended a clear invitation to all plastic Modelers to join us at the show. Ken is quite a character and it showed. I think he did a swell job. OK.... The fun's over....back to work. No.... It's almost 11:00 pm! Nite all.
- 962 replies
-
- 5
-
-
- sovereign of the seas
- ship of the line
- (and 1 more)
-
For anyone interested, here's a link to the little feature story aired yesterday out of the Raleigh TV station...WRAL. And yes, that is the SOS I am seen working on.... WRAL.com: http://www.wral.com/14597248
- 962 replies
-
- 6
-
-
- sovereign of the seas
- ship of the line
- (and 1 more)
-
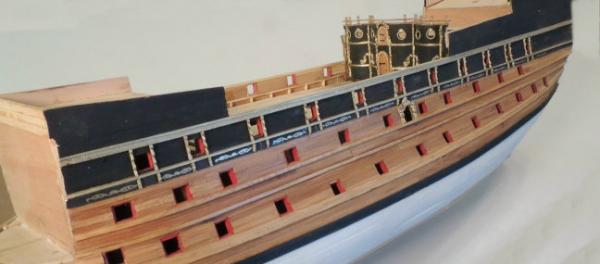
Progress on the port side. Added gilded moldings and trim pieces on each side of the upper gun ports. The panels below the gun ports are hand painted with metallic gold.
- 962 replies
-
- 17
-
-
- sovereign of the seas
- ship of the line
- (and 1 more)
-
Finally getting back to work.... Had a nice couple of days back in the shop (golf and poker yesterday).... One of the many things I got personally from the show on Saturday....these two planks of cured Bradford Pear from Hal Burger. I couldn't wait to put a blade to it and test it's carving qualities. Figured these tiny seahorses would be a good test. Looks like I'll need about two dozen of these little creatures. The pear performed wonderfully. I'm looking forward to taking it further with the many larger carvings.
- 962 replies
-
- 8
-
-
- sovereign of the seas
- ship of the line
- (and 1 more)
-
Well said Piet - We all love you mate. OK guys.... Dry your eyeballs and let's get back to building beautiful ships. See you once in a while at SOS.
-
Standing ovation for the beautiful job by our friend Piet.... Here's the link I just received.... http://www.wral.com/hobbyists-show-off-handiwork-raise-money-for-a-cuase/14590973/
-
Try this link posted by Mike Kloppenburg....President of Lafayette Scale Modelers.... All of these shots were taken as we were setting up this morning. https://www.facebook.com/groups/419067198178592/permalink/808527725899202/
-
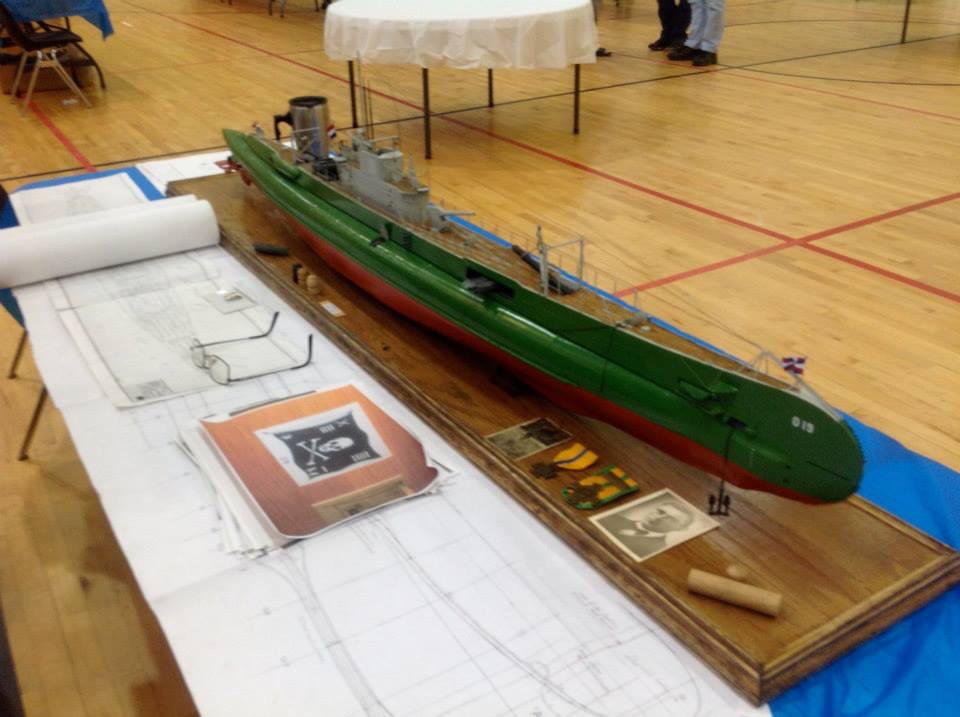
And heeeeeres Piet.... The handsome gentleman on the right of course. And, the O 19 was a real hit at the show.


-
Guess who the very first face I see in the parking lot as I begin unloading my ships at the Exhibition this evening.... None other. I knew him as soon as we made eye contact. What an amazing evening we had....and this was just the set up party. I can hardly wait for tomorrow. Wish you were all here with us.
-
Weather is looking good for the week end pal.... see ya here.... drive carefully. Dave
-
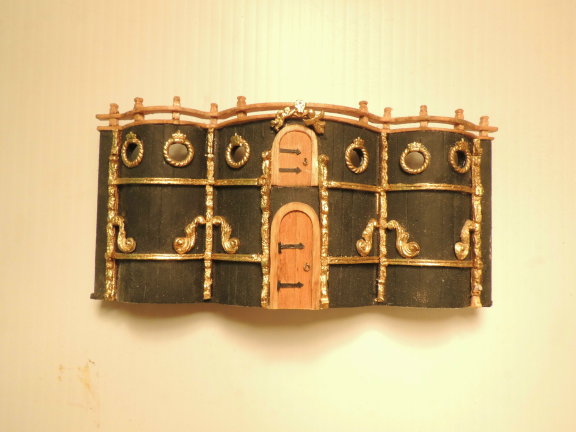
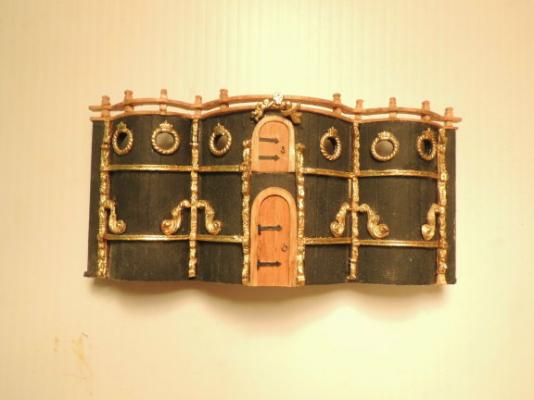
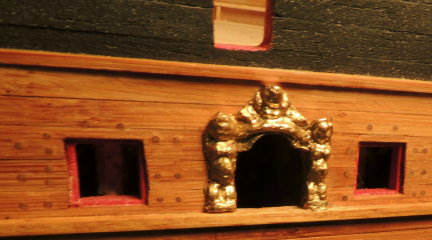
Here's what the new gold did for the bulkhead. Compare it to the earlier posting. Also....Note, I have ripped out the lower door and replaced it with a considerably taller one. The height of the first door was much too short....another one of my scale goofs. Here is the last shot before the revision. Note the difference in the brightness of the gold.
- 962 replies
-
- 7
-
-
- sovereign of the seas
- ship of the line
- (and 1 more)
-
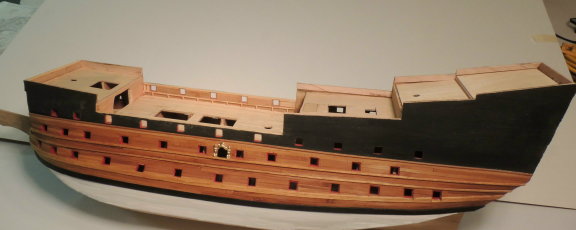
And here's the port side after the big rip-out/re-do train wreck. I really am not looking forward to, now having to go to the starboard side and begin ripping off half the finished planking.
- 962 replies
-
- 6
-
-
- sovereign of the seas
- ship of the line
- (and 1 more)
-
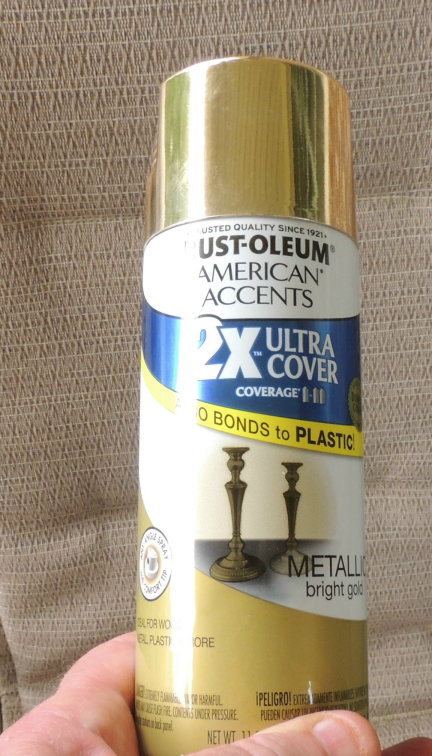
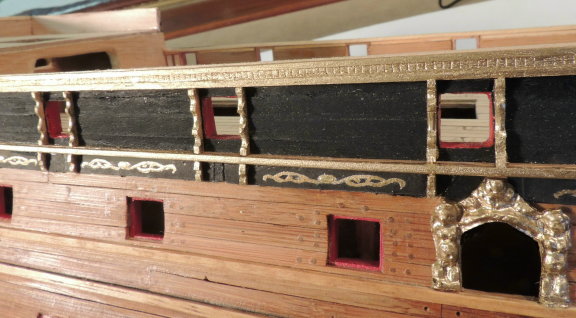
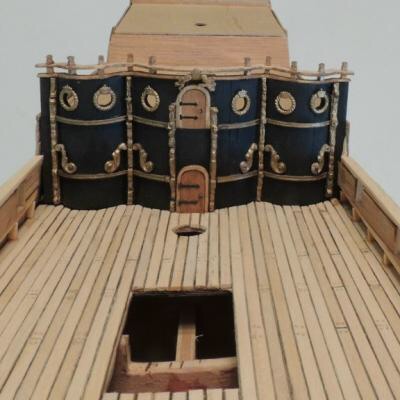
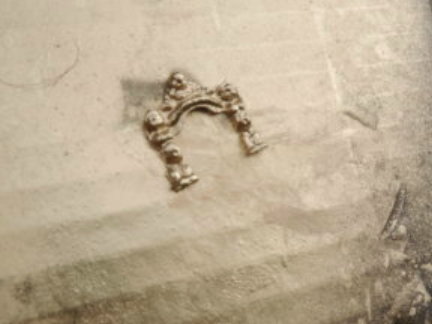
A couple of updates..... First, I'll share this discovery with everyone. After going through several other products, I have found the brightest metallic gold on the market. Measurably brighter than anything I have ever tried.....Found it at Lowe's. Here it is on the entry sculpting.... And here's the entry fitted to the ship....

- 962 replies
-
- 7
-
-
- sovereign of the seas
- ship of the line
- (and 1 more)
-
Angie... She's just fine. Really fine! Beautiful job.
- 2,191 replies
-
- 2
-
-
- confederacy
- Model Shipways
- (and 1 more)
-
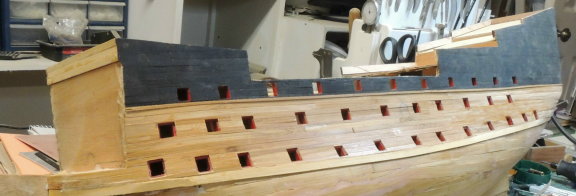
Finished the port side gun port alignment disaster.... ready for some sanding and fitting the wales. I'm not going to try to tackle the rip-out of the starboard side yet. Just needing a break from that train wreck for now. Sculpted the port entry....ready for the oven. No attempt has been made to get extreme details to the figures at this scale as I know that most fine details will be lost in the process of painting with metallic gold.

- 962 replies
-
- 6
-
-
- sovereign of the seas
- ship of the line
- (and 1 more)