HOLIDAY DONATION DRIVE - SUPPORT MSW - DO YOUR PART TO KEEP THIS GREAT FORUM GOING! (Only 13 donations so far - C'mon guys!)
×


SawdustDave
-
Posts
1,770 -
Joined
-
Last visited
Content Type
Profiles
Forums
Gallery
Events
Everything posted by SawdustDave
-
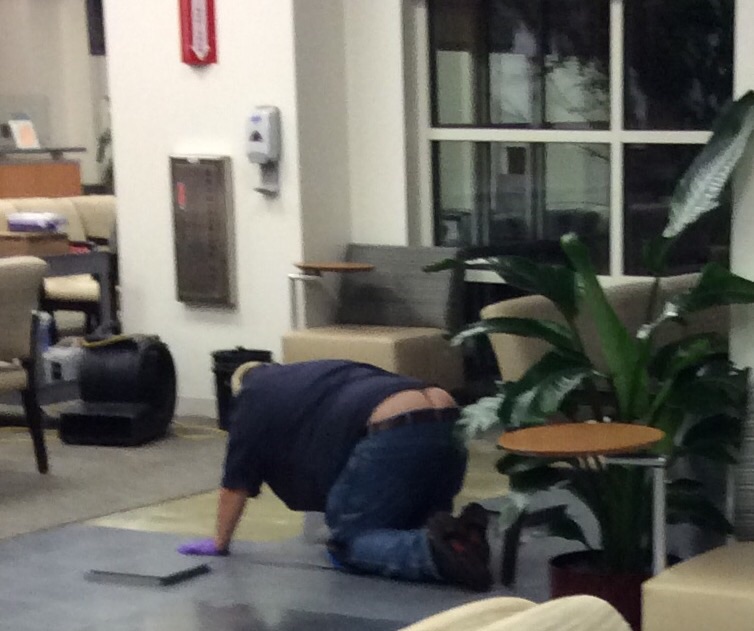
 Pretty bad George.... Not sure it could have been much worse. Believe it or not, this shot did not catch his most extreme exposure. Let that feed your imagination. Hahaha
- 962 replies
-
- 7
-

-
- sovereign of the seas
- ship of the line
- (and 1 more)
-
Looks like you're off and running....always exciting to begin a new build. I look forward to seeing your Cheerful come together Mick.
- 504 replies
-
- 3
-
-
- washington
- galley
- (and 1 more)
-
Now, after all that bad experience Tom, you can consider yourself a real veteran modeler. Ro-do's make us stronger. Do-do's usually turn out to be much better than the original. I think going back to scratch and starting all over again shows character and determination. Trust me, you will look back and say that unfortunate accident was actually a good thing. Or maybe not.... Lol
-
Back home.... Pain free....Hope to do some updates on SOS pretty soon. Considerable progress made over the last couple of weeks, just didn't feel up to the posting routine. Thank you one and all for all the best wishes. This has been quite an ordeal. BTW.... Here's the last thing I saw in the waiting room lobby.... Thought I should share it with my MSW friends.

- 962 replies
-
- 12
-
-

-
- sovereign of the seas
- ship of the line
- (and 1 more)
-
Ear surgery this morning.... Wish me luck.
- 962 replies
-
- 5
-
-
- sovereign of the seas
- ship of the line
- (and 1 more)
-
Of all your previous builds Danny, would you consider the Vulture to be your finest work ever? Just curious. If you tell us you consider another build to be finer, I must see it to believe it..... Lol Dave
-
Thanks again Danny, for this extremely detailed study guide. Many of us will continue to use it as a reference for a long time. Dave
-
Danny.... Having spent the last hour going through your latest pics, I am caught without words to express my admiration for the excellence of your work. A humble fan.... Dave
-
Augie.... My rule is, any wound that does not require the application of a tourniquet, or a trip to the emergency room for stitches, is nothing more than scratch that, after a few cold beverages, becomes much less painful....
- 2,191 replies
-
- 9
-
-
- confederacy
- Model Shipways
- (and 1 more)
-
Just noticed my last comment.... Angie? Sorry bout that sweety....
- 2,191 replies
-
- 1
-
-
- confederacy
- Model Shipways
- (and 1 more)
-
Augie.... I just cannot imagine anyone doing a finer job of my personal favorite model. What a pleasure every detail is. Makes me want to build her again using your log as my guide. Way to go mate!
- 2,191 replies
-
- 3
-
-
- confederacy
- Model Shipways
- (and 1 more)
-
This is the kind of detail that separates the true masters from the rest of us. Thanks for the wonderful lessons Danny.
-
Think I'm now ready to pop the top on that cold beverage. The finishing up of a ships hull planking has always been one of my favorite celebration mile stones.

- 962 replies
-
- 8
-
-
- sovereign of the seas
- ship of the line
- (and 1 more)
-
Thank you Nenad, Mark, and Patrick. I can report that, using the masking tape technique, the starboard side planking is moving along much better. Mostly because every one of the curved bow planks only required a single fitting. Each one has been absolutely perfect. I'm quite sure I'm not the first modeler to use the technique. It's simply the first time I've used it, and thought I would share it for all who have not tried it.
- 962 replies
-
- 6
-
-
- sovereign of the seas
- ship of the line
- (and 1 more)
-
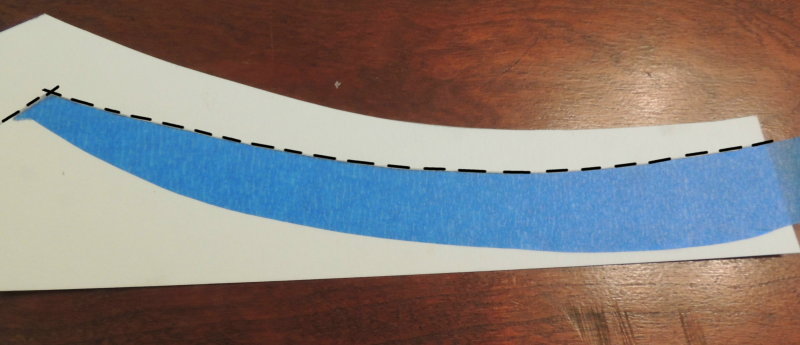
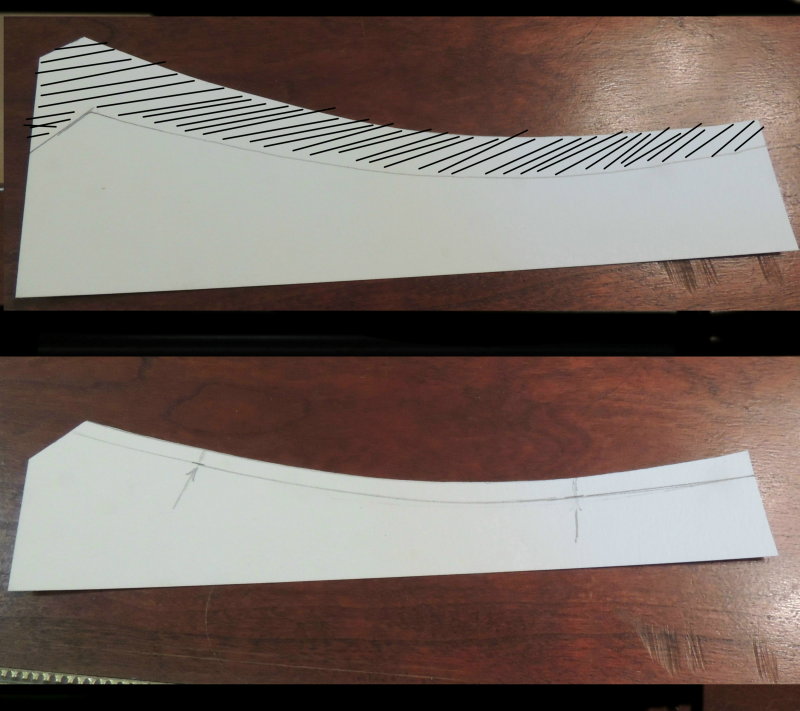
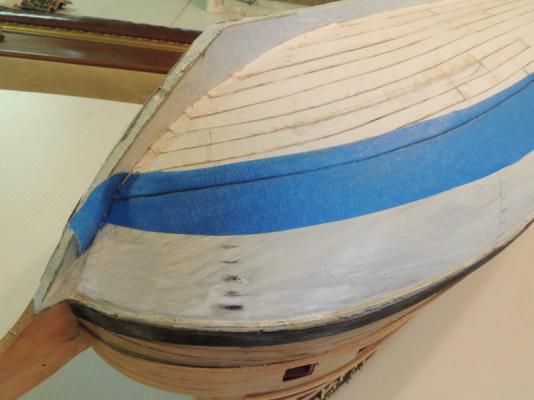
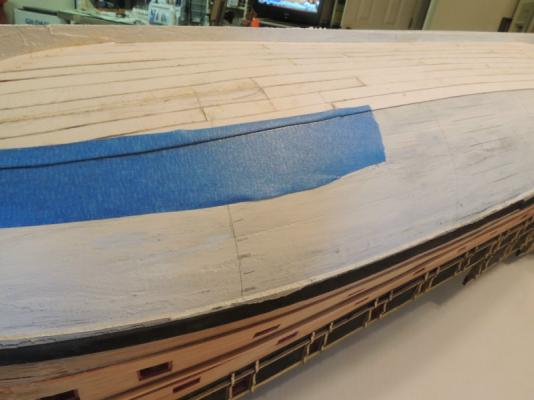
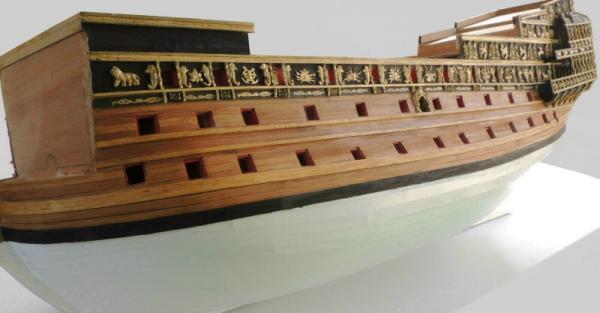
Change of plans.... I decided to press on with completing the re-planking of the starboard side and be done with it. Also decided to pass on this technique I'm using to cut the shape of the bow planks. I found that the use of tracing paper to mark the shape proved to be very tricky because the paper tends to move around and doesn't like to lay flat for marking the edge. This wide painters masking tape works great! Note the markings on the hull indicating the measured width of the planks at several points along the strake. Mid hull markings indicate the full width of each plank for the twenty strakes. The marked masking tape is carefully trimmed along the traced line and then transferred to the paper planking material. The marked planking strip is carefully trimmed along the traced edge (top).... Then, after marking the exact width points, use a curve template to create the smooth contour of the outside edge (bottom). Finally, cut the plank along the outside edge marking. Perfect fit....


- 962 replies
-
- 13
-
-
- sovereign of the seas
- ship of the line
- (and 1 more)
-
Thanks guys. Fairly pleased with the fix. I hope the starboard side goes a little smoother. The only real difficulty with using the paper stock is that, the shape of each strake has to be custom fitted around the bow and stern.... used a lot of stealers to avoid sharp "daggers". I'll probably go back to creating the ornamentation for the starboard side for a while just to take a break from hull planking.
- 962 replies
-
- 5
-
-
- sovereign of the seas
- ship of the line
- (and 1 more)
-
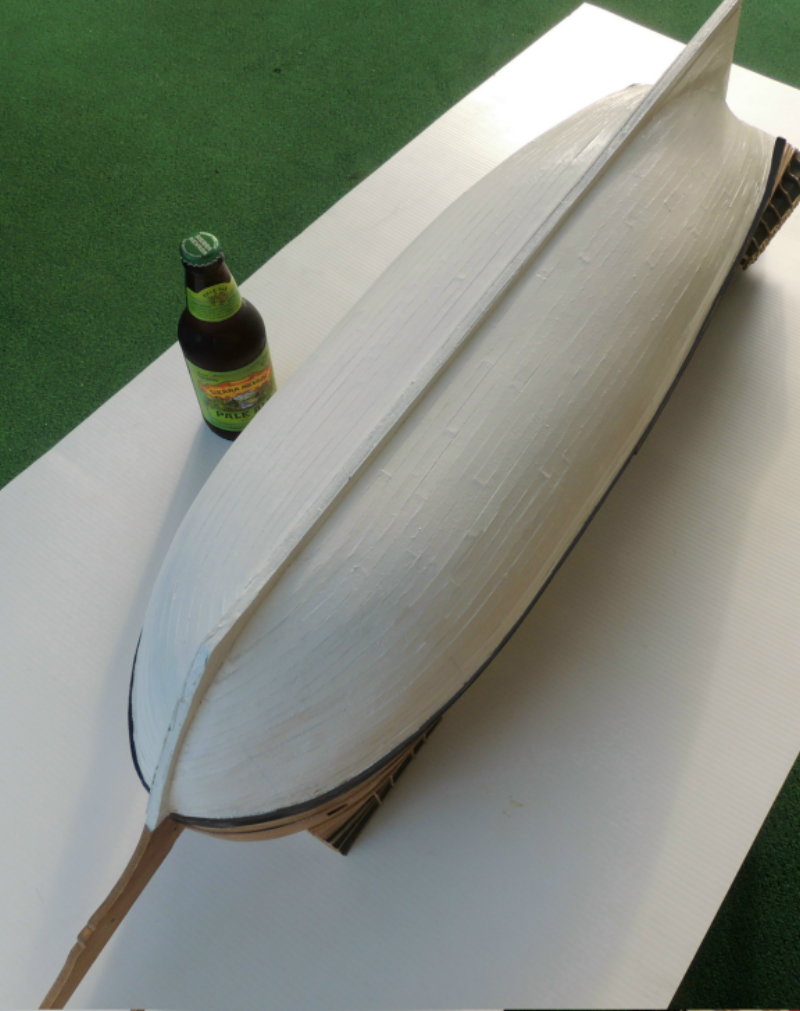
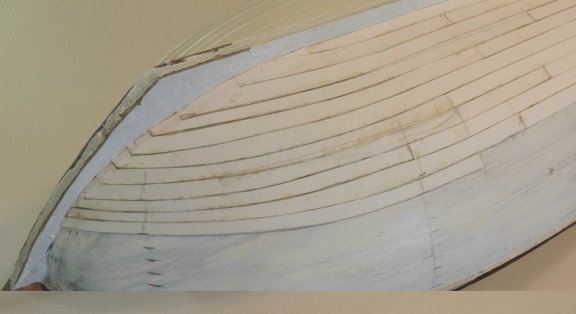
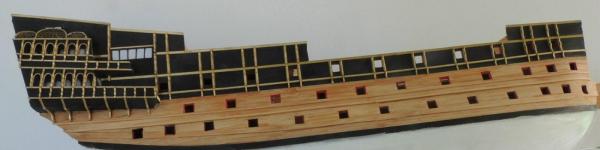
Finished re-planking port side hull below the main gun wale. I used strips of 140 lb. water color paper.... Sprayed with gray primer and brushed three coats of white acrylic.... light sanding between each coat. That's much more better....

- 962 replies
-
- 17
-
-
- sovereign of the seas
- ship of the line
- (and 1 more)
-
OK Alex..... The stove is a whole new level of making the rest of us feel completely inadequate as modelers. What a beautiful job. Loving it.
-
Good suggestion Nigel. I've got a little experiment going.... thus far, looks promising. Keep your fingers and toes crossed.
- 962 replies
-
- 4
-
-
- sovereign of the seas
- ship of the line
- (and 1 more)
-
Thanks Patrick. Not posting, but quietly sitting in the corner for a while. Ken.... You got it mate. Thanks all.
- 962 replies
-
- 4
-
-
- sovereign of the seas
- ship of the line
- (and 1 more)
-
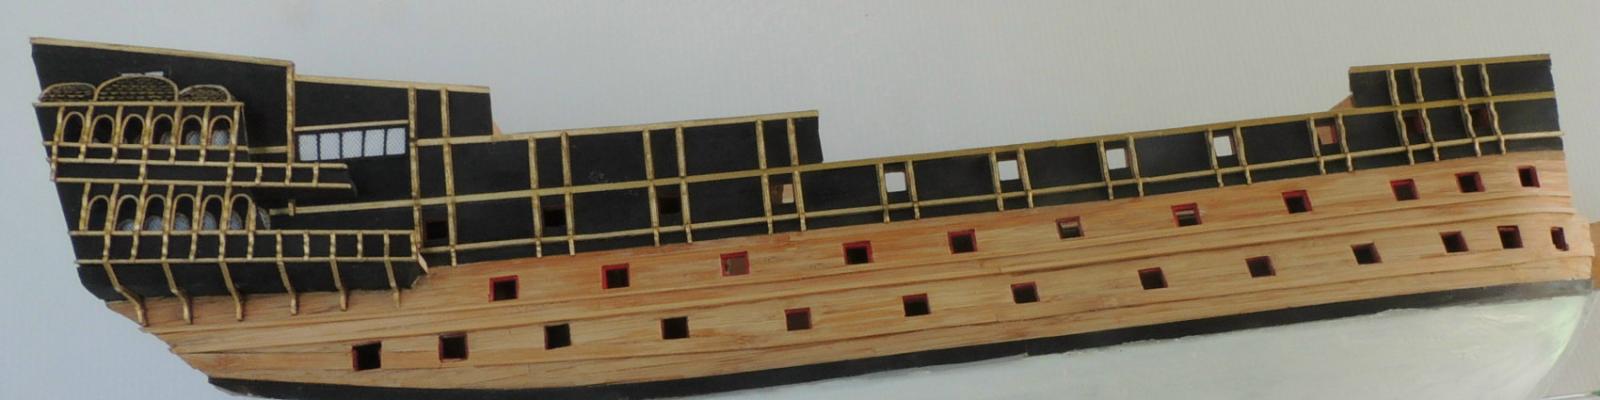
"PS, don't replank ear, and send model to surgery " Got to love that one Nenad. Ear thing's going to be just fine. Powerful anti-biotic drops every day until surgery.... keep moisture out.... no sweat (literally). As for re-planking the hull.... got to be done. I simply believe the planking strakes of a 15th century war ship, even though painted, should be seen. The SOS may be my last major project, and because she's a pretty special ship, I just feel like I've got to get her as "right" as I can.
- 962 replies
-
- 6
-
-
- sovereign of the seas
- ship of the line
- (and 1 more)
-
The hull problem..... Guess I should explain. Overall, the shape of the hull turned out fine. After a little filling here and there, and two coats of white acrylic, she looks great from five feet. Closer inspection, not so good. I did so much sanding and filling in the bow area, the finish turned out to be much too smooth.... to the point that it looks more like the hull of a solid plastic ship instead of a wooden planked ship. Even when painted, the hull should appear to be painted planks. Working on a solution..... very thin third layer.
- 962 replies
-
- 6
-
-
- sovereign of the seas
- ship of the line
- (and 1 more)
-
Progress report.... (kinda?) Where shall I begin? The good news first.... Finally managed to get the mess I created with the starboard side gun ports cleaned up.... More good news.... Finally finished the second planking of the hull.... Which leads to the bad news. I concluded that the second planking of the hull below the gun wales has got to be the worst job of planking I have ever done. So bad, in fact, I shall not show it here on MSW. REALLY BAD! My biggest mistake was in thinking that, since the entire area was to be painted, I didn't need to be all that careful. A little filler and white paint would completely cover my sins. NOT! So, as usual, I will now set about fixing the problem.... just another day in the old shipyard.... Right mates? More bad news to report.... personal. Developed a very serious inner ear infection several weeks ago, which led to severe vertigo issues along with periods of double vision. So, pretty much every thing I have done in the shop over the last month has been rather challenging. Then the good news.... Lot's of really powerful meds have cleaned up the infection to the point I am able to function pretty normal again. And finally.... We found a surgeon in Chapel Hill who is confident he can repair the large hole in my left ear drum that has been the cause of the recurring infections. Surgery is scheduled in five weeks.
- 962 replies
-
- 14
-
-
- sovereign of the seas
- ship of the line
- (and 1 more)