HOLIDAY DONATION DRIVE - SUPPORT MSW - DO YOUR PART TO KEEP THIS GREAT FORUM GOING! (Only 13 donations so far - C'mon guys!)
×


SawdustDave
-
Posts
1,770 -
Joined
-
Last visited
Content Type
Profiles
Forums
Gallery
Events
Everything posted by SawdustDave
-
 Spoken with the true "bulldog" spirit Piet.
- 962 replies
-
- 3
-

-
- sovereign of the seas
- ship of the line
- (and 1 more)
-
Thanks for the sentiments guys. Re-do's and rip-outs are not uncommon for me. I think it might have something to do with my "bull-in-a-China-shop" modeling style. I'm sure I could avoid some of these little blips if I would make myself slow down and think ahead a little more. Too old to change now....LOL
- 962 replies
-
- 6
-
-
- sovereign of the seas
- ship of the line
- (and 1 more)
-
George.... The plan sheets I have are POB, and there is no indication given of the level of the decks below the topside decks. All I have is the broadside profile drawing which shows the incorrect measurements leading to this issue. This little setback shall be fixed in a few days and then we shall press on.... life of a scratch builder.
- 962 replies
-
- 2
-
-
- sovereign of the seas
- ship of the line
- (and 1 more)
-
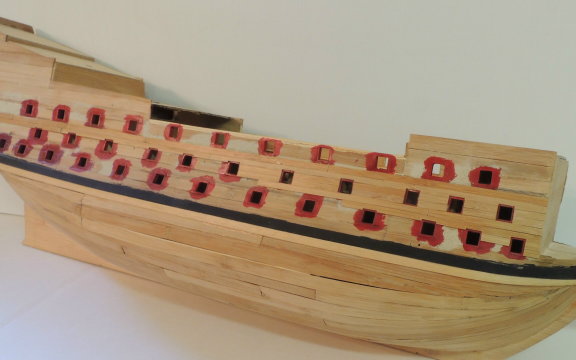
Following a really bad set of plan sheets has got me in trouble again. Referencing the Arthur Molle photo above, I realized the space between the middle and bottom rows of gun ports is too narrow, and will not allow the two wales between them. Not that big a deal for the port side, seen here, since I had not finished the second planking when I discovered the issue. I am simply cutting each one of the bottom ports out and move them down 7/16th inch. This will be a much bigger issue going back to the starboard side, where I have completed the second planking. To make matters even worse, The fix will also involve ripping the main wale off and lowering it as well. Real bummer!

- 962 replies
-
- 6
-
-
- sovereign of the seas
- ship of the line
- (and 1 more)
-
Thanks Giorgio.... I do have the link to the SOS by Arthur Molle and will be using it among others as a reference.

- 962 replies
-
- 7
-
-
- sovereign of the seas
- ship of the line
- (and 1 more)
-
Thanks for that information Nigel. Now I have to think about it. I'm reluctant to cover all the beautiful detail within the main deck area. I assume that has been the decision of most other builders as well. Maybe doing a cutaway approach. Hmmmm
- 962 replies
-
- 3
-
-
- sovereign of the seas
- ship of the line
- (and 1 more)
-
If I know you, it will be perfect when done. Almost "Show Time" pal. Can't wait to see the O 19 up close and personal. Mass media coverage has lined up real nicely. Wish you were around to take care of the talking.... TV cameras make me a little nervous.
-
Visited the photos of that magnificent ship Nigel....made me think "What the hell am I doing, trying to build something like that?" I am still amazed at how each SOS is completely unique by comparison.... Even among the best. This example of covering the entire main deck with grating just blows my mind. Is this documented somewhere? I've never seen such on any ship.
- 962 replies
-
- 1
-
-
- sovereign of the seas
- ship of the line
- (and 1 more)
-
I am so thankful, since my retirement, I shall never have to move again in my lifetime. Unfortunate to have your buyer let you down.... That's a beal bummer for sure.
-
As I continue to work on just getting her hull and skin built, I am looking forward to seeing your continued development Nigel. Although I could never dream of matching the excellence of your work, it does serve as an inspiration to me in my efforts. Without your build, along with a few others, as a visual guide, I am hopelessly lost. Thanks again Dave
-
First, I've got to comment on Jerome's clever posting on the previous page. That facial expression is priceless. It also does a perfect job of expressing my own words regarding your work Danny. We don't often have the opportunity to see total perfection in craftsmanship.
-
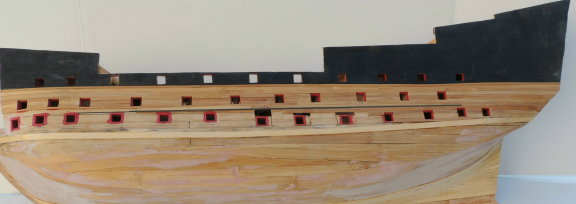
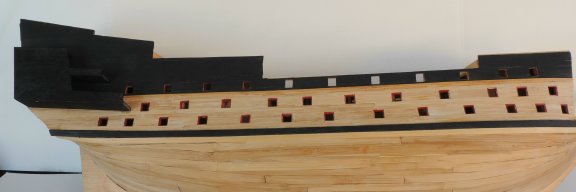
Back to work.... Starboard side.... Gun ports cut in, framed, and painted red.... Bamboo skin planks added up to top wale, and planking above the wale painted black. Still must complete the second planking below the main wale. Since those planks will be painted white, I will not be using bamboo for that area. Sideboards have been added above the decks to form the bulwarks....will be planked and painted red. The rough framing for the starboard galleries is temporarily tacked on, but will be removed to add the arched windows and extremely heavy ornamentation.
- 962 replies
-
- 12
-
-
- sovereign of the seas
- ship of the line
- (and 1 more)
-
Piet....Before you give up on it, just give it a good sanding with a medium grit to open up the grain a little. Then apply your stain with a cloth....wiping with the grain. Then use a fine sandpaper to sand lightly. Steel wool to get really fine finish.
-
This is a pure clinic in extreme craftsmanship performed by a true master. Thank you sir.
-
Marsalv.... You are among the list of extremely fine artists whose beautiful work makes me feel like a complete beginner. We are your students sir, and I thank you for showing us the way.
-
Cutty Sark by NenadM
SawdustDave replied to NenadM's topic in - Build logs for subjects built 1851 - 1900
I second Mark's WOW. THAT MAKES IT A "double-WOW".- 4,152 replies
-
- 3
-
-
- cutty sark
- tehnodidakta
- (and 1 more)
-
Ok.... I'll go with a Pelican (LOUISIANA state bird). They make some really big poop.
- 962 replies
-
- 5
-
-
- sovereign of the seas
- ship of the line
- (and 1 more)
-
Oh, he THINKS he's a big bad eagle.... kinda spoiled. Here's his little two story mansion I created from shelving. I don't even know why he would want to get out....talk about "having it made!"

- 962 replies
-
- 7
-
-
- sovereign of the seas
- ship of the line
- (and 1 more)
-
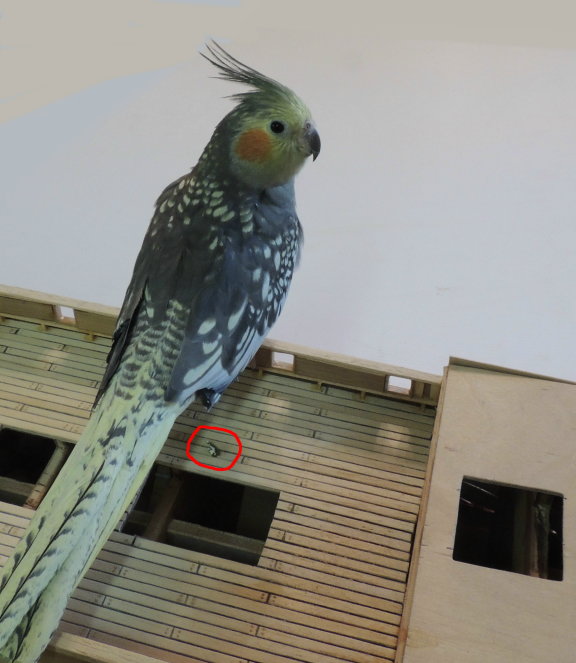
My little shop pal "Smokey" spends most of the time roaming around the shop floor looking for something wood to tear up. So I leave the ship yard to do a quick run to the grocery store for the Admiral.... forgot to put him in his mansion.... and here's what I find upon my return. Little thanks for allowing him to hang out with me, huh?

- 962 replies
-
- 13
-
-
- sovereign of the seas
- ship of the line
- (and 1 more)
-
Enjoyed going through this entire build Patrick.... amazing work indeed.... particularly considering the tiny scale. WOW! Dave
-
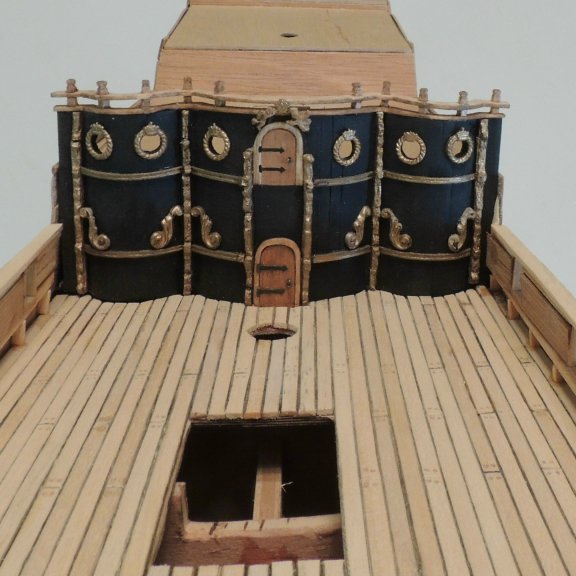
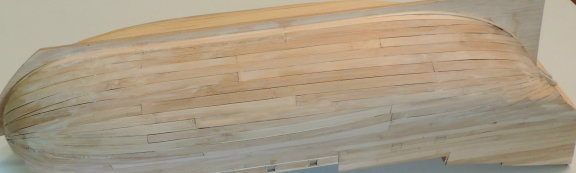
Hi George, Piet, and Patrick. Many thanks for dropping in. Of course, like everyone, I'm plum tickled to see that first layer of planking done....always gives us our first visual of the overall size and shape of our model. The outer skin planks can be done over a period of time as I continue to work on any number of other processes, like the sixty some gun port frames that still must be fitted; gun port lids, cannons and cannon trucks, etc.... not to mention the hundreds of individual carvings. That bulkhead I posted yesterday isn't nearly finished.... still need to add a few more ornaments, re-paint the gold with a brighter metallic gold I found, stain the upper door, clean up the rail stanchions, then there will be a base molding to conceal the gap where the deck planks butt against the bulkhead. Speaking of upper door.... Why in heck would that door be there anywho? What purpose does it serve? Thinking about removing it.... not decided yet.
- 962 replies
-
- 3
-
-
- sovereign of the seas
- ship of the line
- (and 1 more)
-
Put some wheels on that puppy and you can tow it behind your truck.... Just one thought....
-
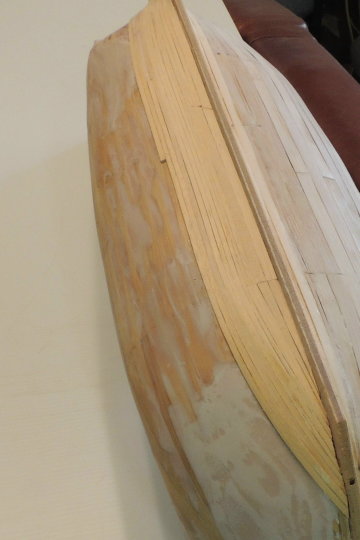
The sanding is done with a combination of an orbital disk with very course grit, and a vibrator sander using a medium grit. The bamboo strips stand up real well to heavy sanding pressure of both tools.
- 962 replies
-
- 3
-
-
- sovereign of the seas
- ship of the line
- (and 1 more)
-
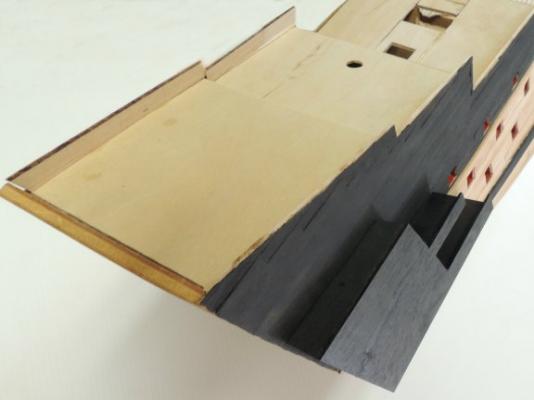
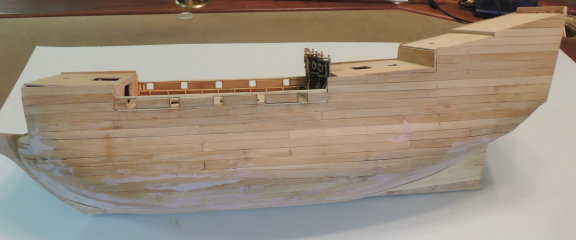
Completed the first planking this morning, and began with several strakes of outer planking And here's a dry fitting of the bulkhead I've been working on.... Not done with this yet.... Back to outer planking.... Note the use of Bondo (auto repair filler) to level and smooth out the surface of the first planking layer.


- 962 replies
-
- 16
-
-
- sovereign of the seas
- ship of the line
- (and 1 more)
-
Been working with power tools for over 50 years Lextin....plenty of scars to show for it. Fortunately, as in your case, they were all flesh wounds. So far, still able to count to ten before pulling my shoes off.