Paul0367
-
Posts
512 -
Joined
-
Last visited
Content Type
Profiles
Forums
Gallery
Events
Everything posted by Paul0367
-
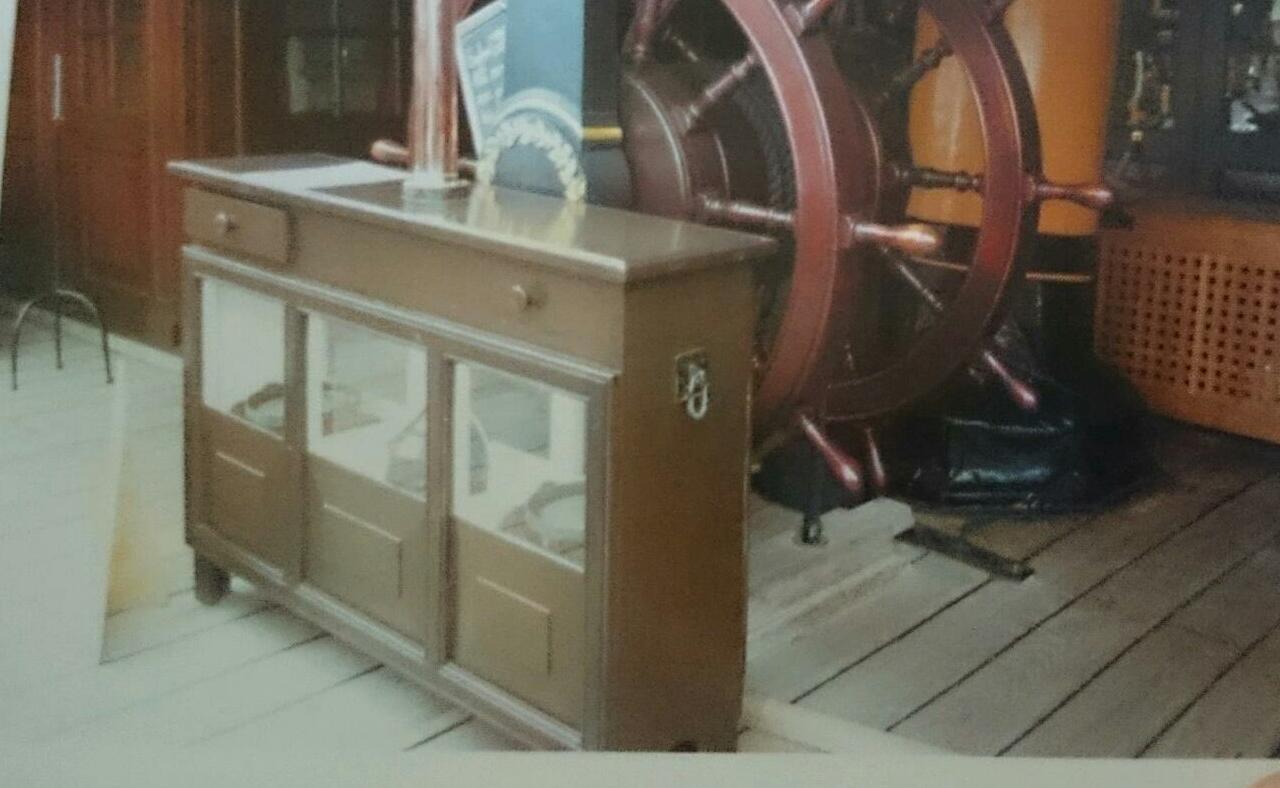
 Well we have to re create that chest of drawers, looks out of place there
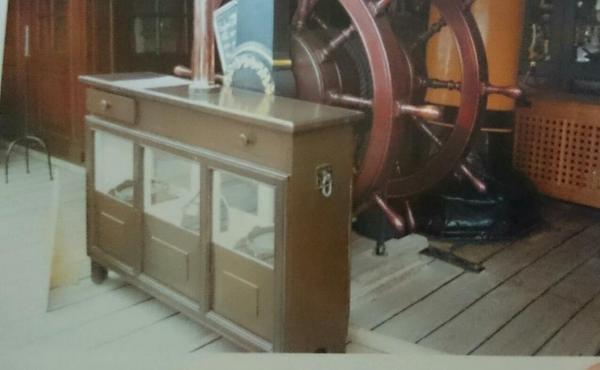
- 708 replies
-
- 1
-

-
- victory
- constructo
- (and 1 more)
-
Well we have to re create that chest of drawers, looks out of place there
-
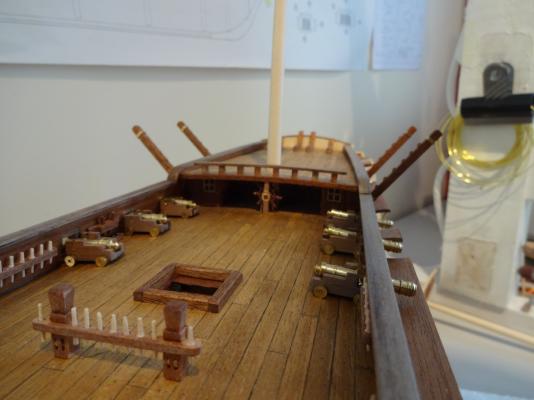
Steering wheels fitted only the navigation cabinet next to build and hide them even more than the poop deck already does. Shame the kit cuts corners here. That said the navigation table with the all important compass is also forgotten. Come on Contructo we payed for a model here and we're forced to scratch build key component.

- 708 replies
-
- 3
-
-
- victory
- constructo
- (and 1 more)
-
Wow, I must confess I've haven't been for a wonder through the MSW pages for a while but my world your moving on at some pace. Looking very nice mate.
- 230 replies
-
- 1
-
-
- victory
- artesania latina
- (and 1 more)
-
I had to go to the Caldercraft yarn as the Contructo is green, after cutting my teeth on this kit that's on my wish list, the Caldercraft Victory. I'm sure you've seen the parts in the kit, beautifully made. That said I may do the Cutty Sark next for a change and come back to the Caldercraft Vic, I'm fitting the wheels I have and as im building her in full sail and they will be difficult to see anyway hidden under the poop with a binnacle cabinet in front. Have you started her yet.?
-
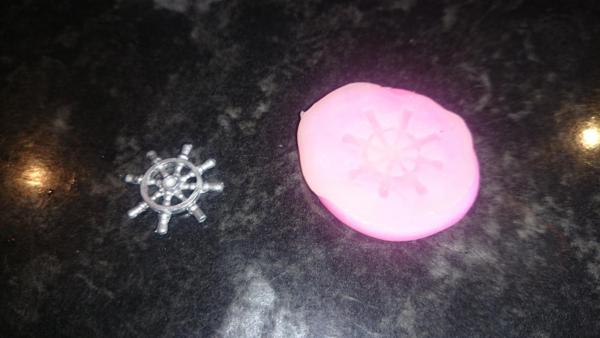
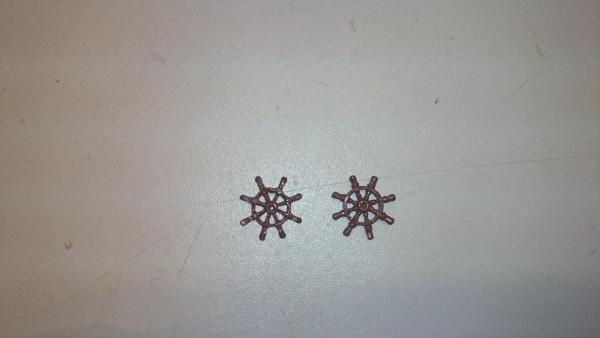
Well, I tried at making my own and considering its going to flank the original under the poop deck relatively hidden I am happy enough to save the £8 from Cornwall. Thank you for the heads up though they are beautifully made, I almost ordered two but thought do I really need to. My spend has gone mad lately with the mill, lathe and now the circular saw so im raining in cost. I simply pushed the original in plasticine, removed it, put the plasticine in the freezer for half hour, mixed two part epoxy, smoothed it in and pressed it with my finger Making the overspill very thin to prevent more work removing it. When dry, boil the kettle and pout it over the mold, the plasticine vanishes leaving your cast to clean up. If not Cornwall model boats is the aanswer.
- 708 replies
-
- 3
-
-
- victory
- constructo
- (and 1 more)
-
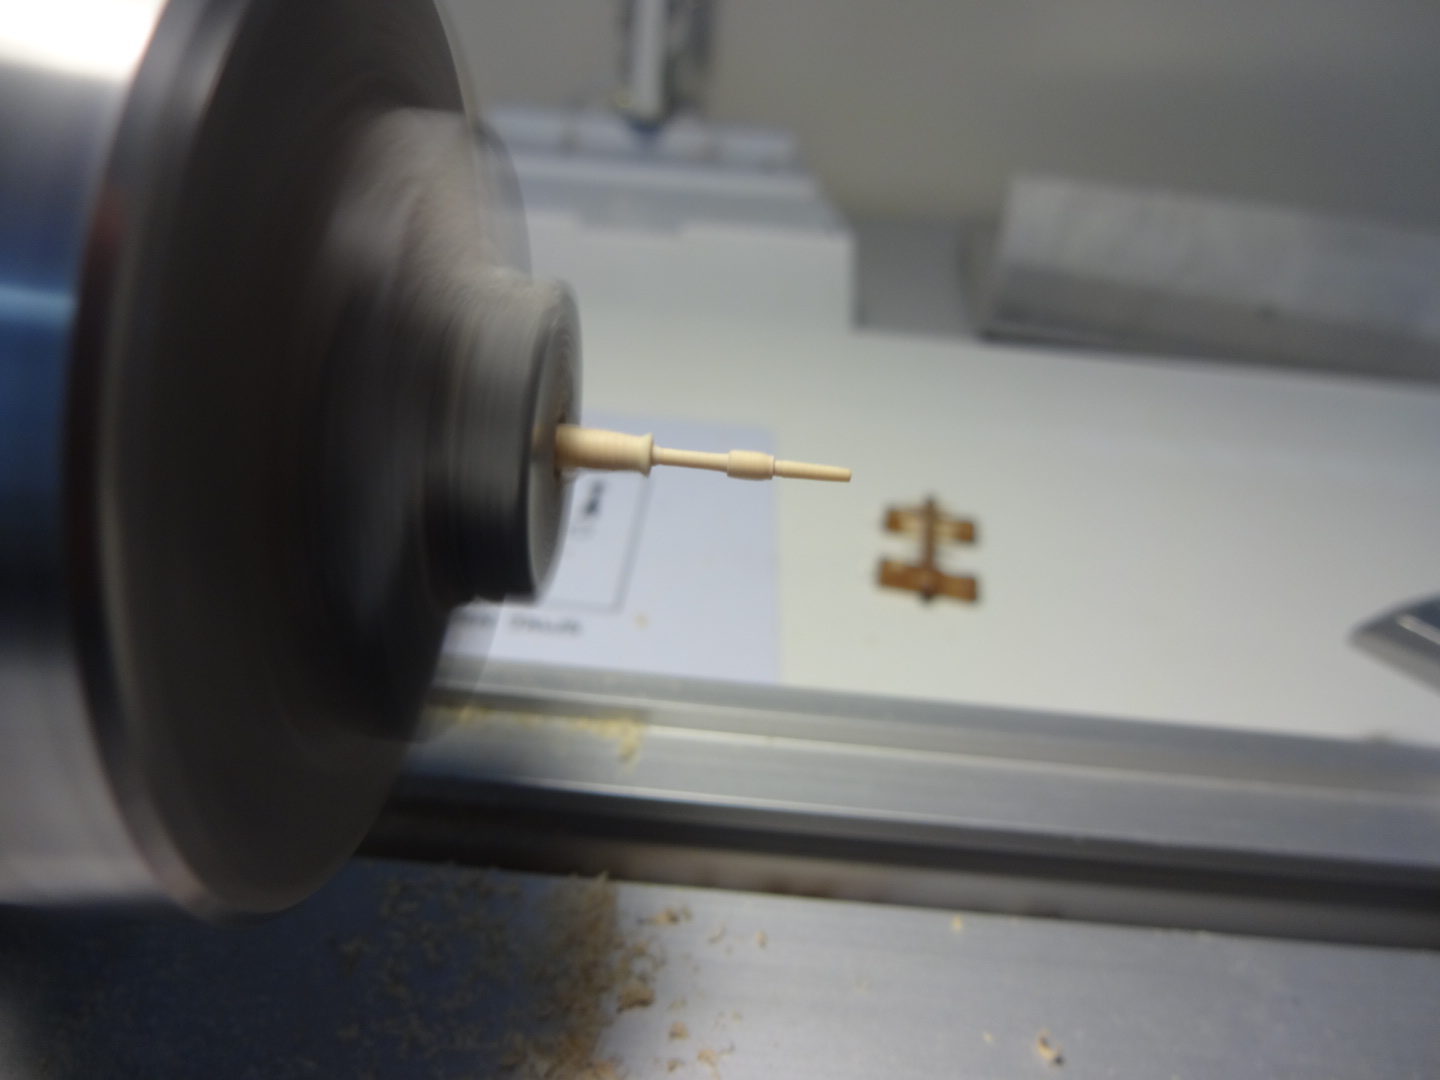
I've got to the point where the ships wheel is to be fitted, why oh why is there only one supplied in a kit where vessels of this size sport two. Surely this tiny casting would have cost peanuts to supply for us. Well im struggling to find a wheel only 16mm in diameter and casting may be the only option as it's quite intricate.
-
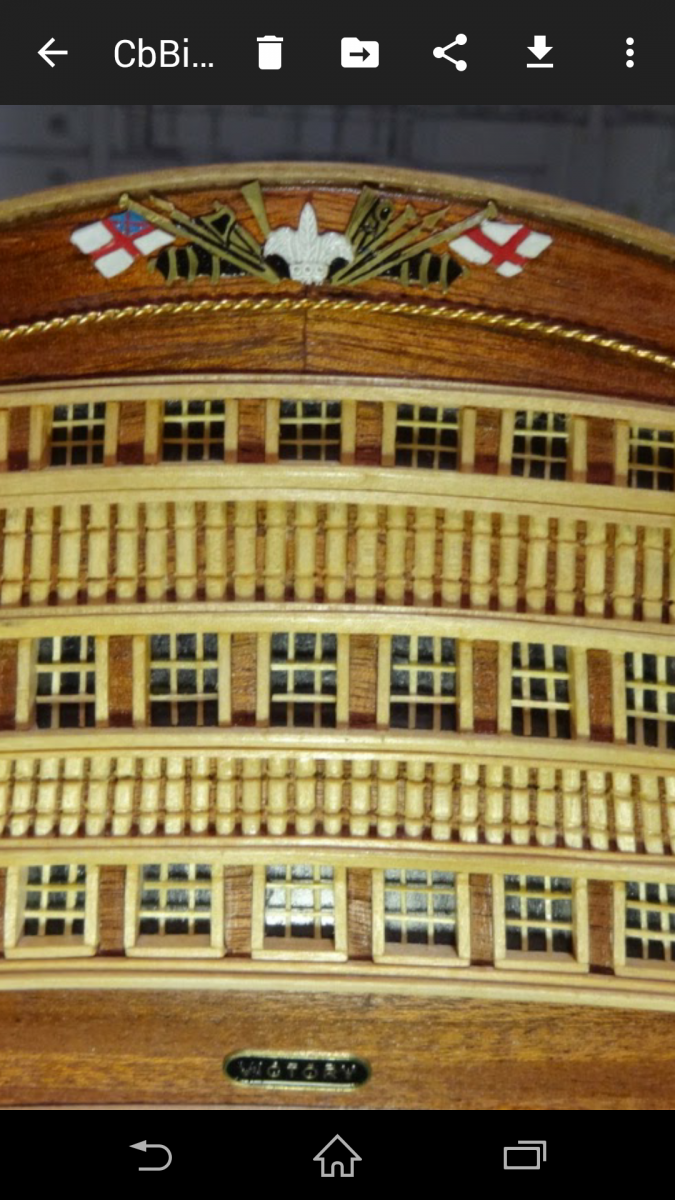
What you like, am sure it doesn't, that said a lot of mine is reaching its anniversary on April 1st, time flies and there is still a lot to do. Persevere with the window frames, no rush but rewarding in the end. It is nice to see quite a few Contructo Victory builds starting up now on MSW, I got the Haynes manual on the Vic today and it's got some great close ups, one thing that strikes me is how beautifully built she was, meaning the work in making post ornate/ gothic even and the trims not to mention the general stuff was so beautifully carved I just wouldn't want to see it carry out the job intended.
- 708 replies
-
- 1
-
-
- victory
- constructo
- (and 1 more)
-
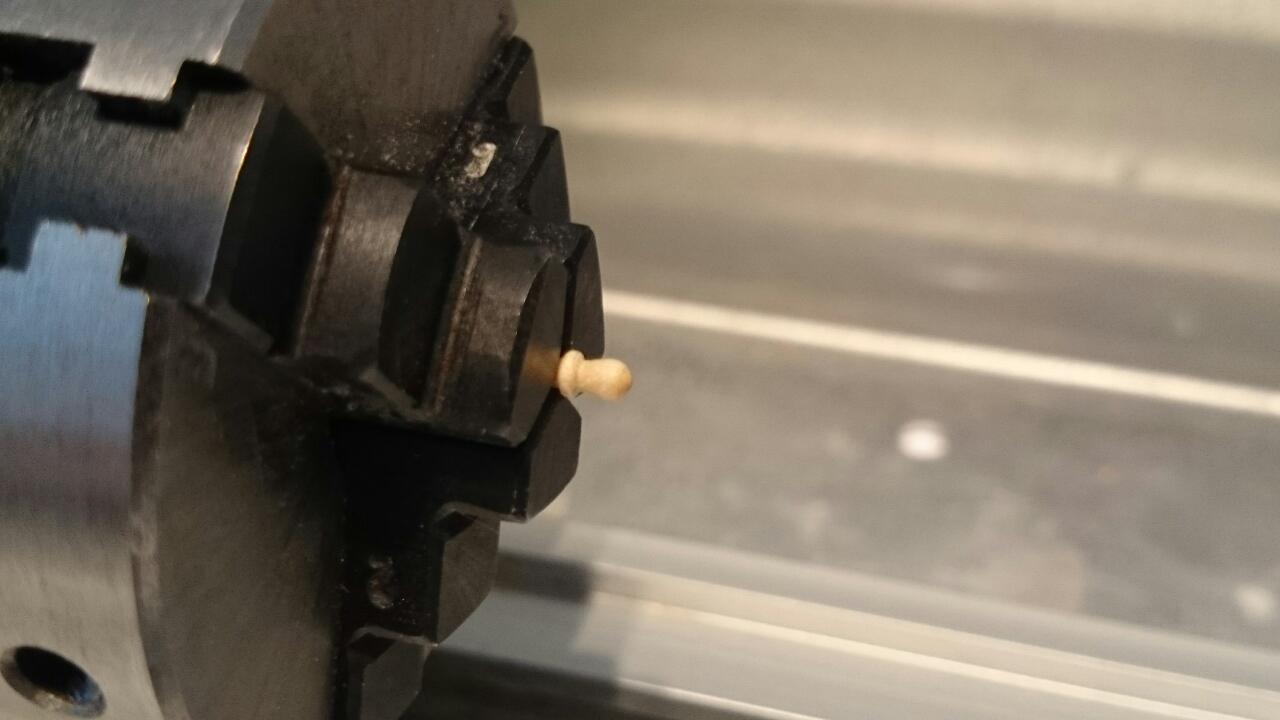
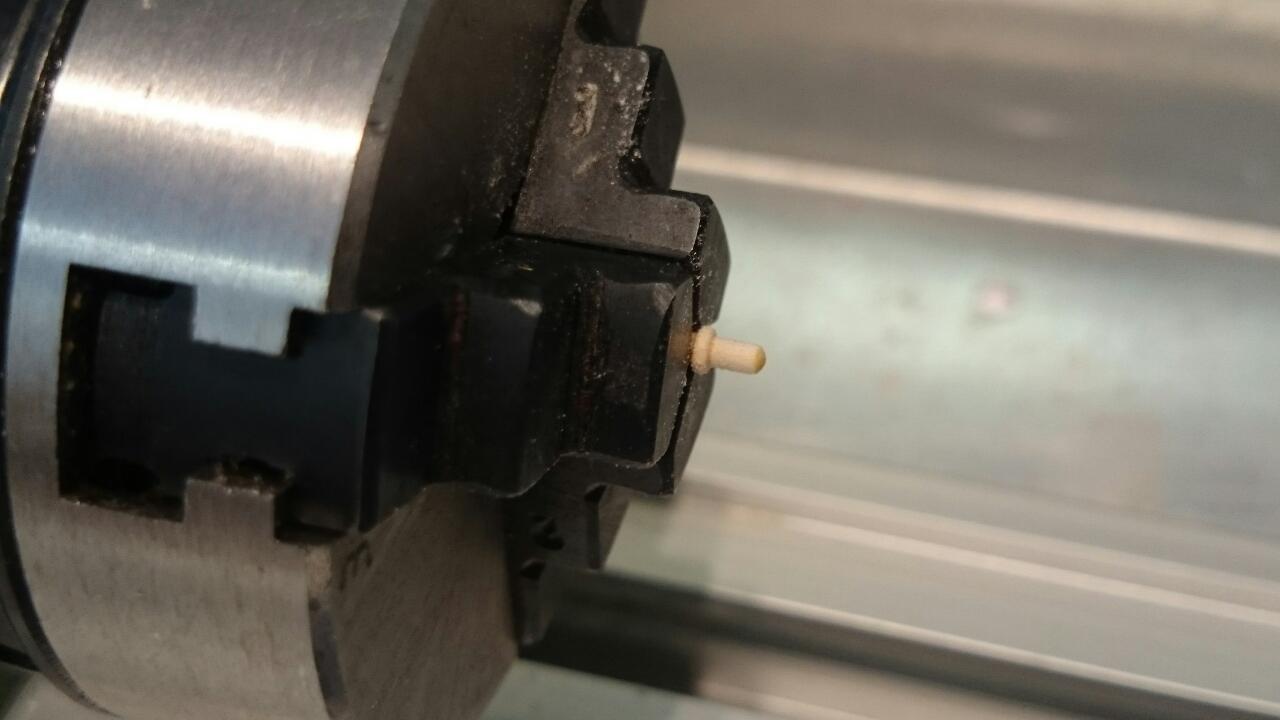
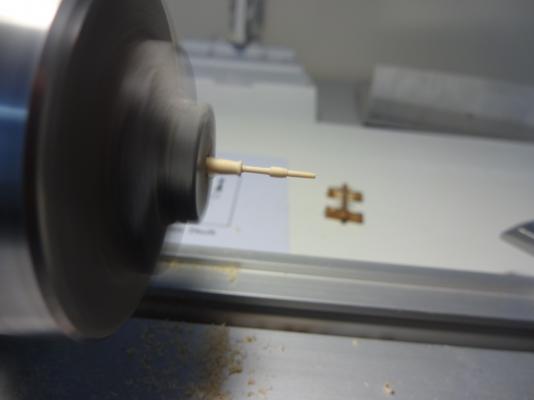
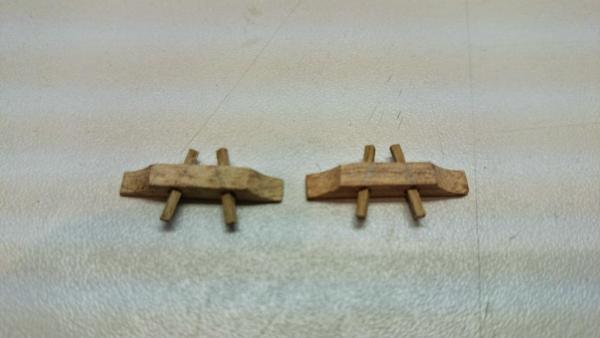
Been turning the pins today and it's a long job, with many nearly done only to snap n scrap. I've also been doing the ones around the outer walls. Progress looks very slow at this point as you would expect the pins to be a quick fit.
- 708 replies
-
- 5
-
-
- victory
- constructo
- (and 1 more)
-
Stuck with the figurehead I have as im fitting sails eventually and it will be buried in them , stern, remind me?
-
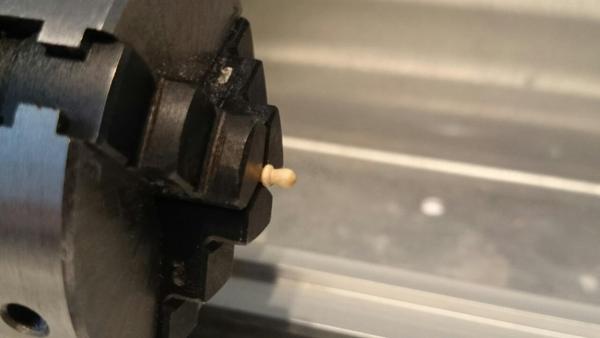
Well as soon as I read this I got to work on making them thinner. (Well just the One) I must add all the pins were never glued until I was happy with them so I popped one in the lathe and thinned it further, before I went down the wire route. The wood is quite hard and lends to being very thin without breaking.
- 708 replies
-
- 4
-
-
- victory
- constructo
- (and 1 more)
-
Regards the pins, you have read my mind, I've been on holiday and was looking back over my recent work and I fully agree the pins are still huge and there is actually many more on the full size rail. Yes they do get covered in rope but I will re address them and the wire route is a great idea, one I never considered but will be using for all my pins, I could paint them as I have to paint the canon hatches anyway. Oh the life boats are actually metal on the Contructo kit
-
Thanks for the comments, I think I've been lucky regards the varnish as no nasties have formed, I have to use the ? Based, think oil as it needs thinners to clean the brush but the tin does not state. I initially used satin but this was far to shiney so the matt went over to dull it down but struggled to get anything but water base matt. Now I have to use the satins deep absorption rate to match the colour and matt over. My plates are 6mm x 19mm, to be honest I went off images to get her to look close also asked other builders there sizes, I didn't do the maths, especially as the kit didn't even have them on. I did research how / the actual way they were installed to ensure they had the right look. If you go the coppering route buy the dearer coil, it's not much but makes a difference. If you like I could look up my ebay seller and send you his link.
- 708 replies
-
- 1
-
-
- victory
- constructo
- (and 1 more)
-
Well that's your lot from me until mid March, I'm off to Goa tommorow to catch some sun. Take care
-
Yes that's the same, look.at page A33 -70 for example item 292 10X750 Anatolia that's one of the dowls used to make the bowspit, by matching the two books you can sus out what dowls are needed and there sizes. Also and probably easier use the plans.
-
Thanks Bob, the kit only supplies a few dowel diameters, nothing special, I'm assuming that You have the blocks to which there joined. I will message you lengths \ diameters later, that said if you go to the back of the white parts book ( if you have it ) the stock and quantities are all there, I only found this by mistake really as I thought it was for all the foreign languages. Also the lengths and dia are also stated in the bulild lists.
-
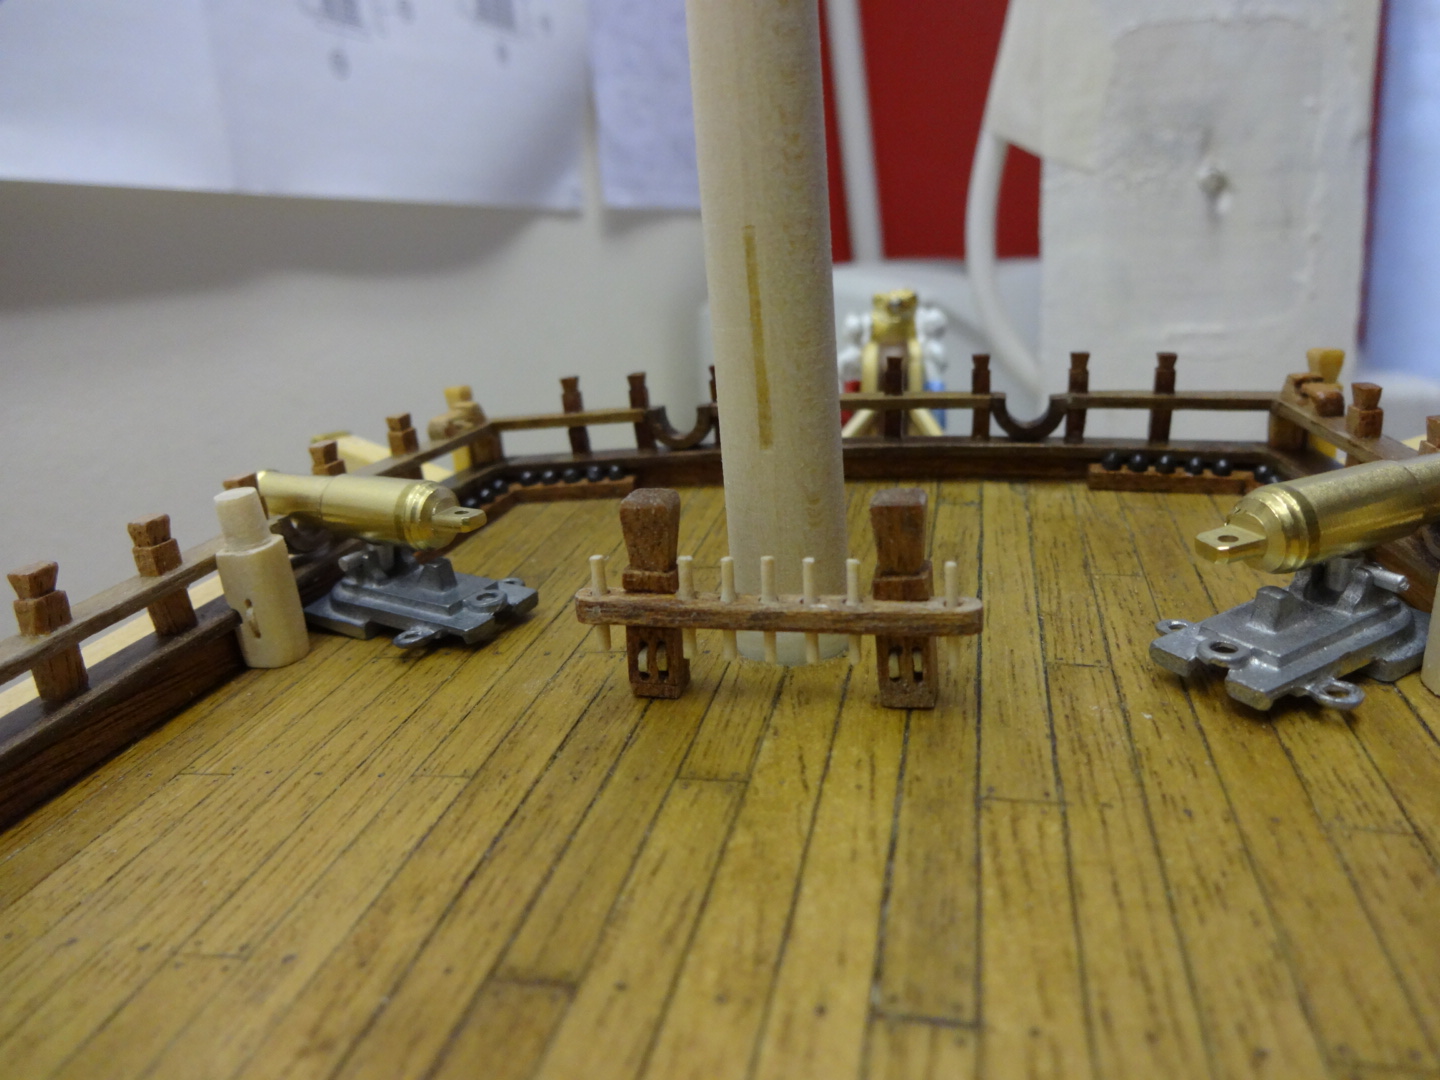
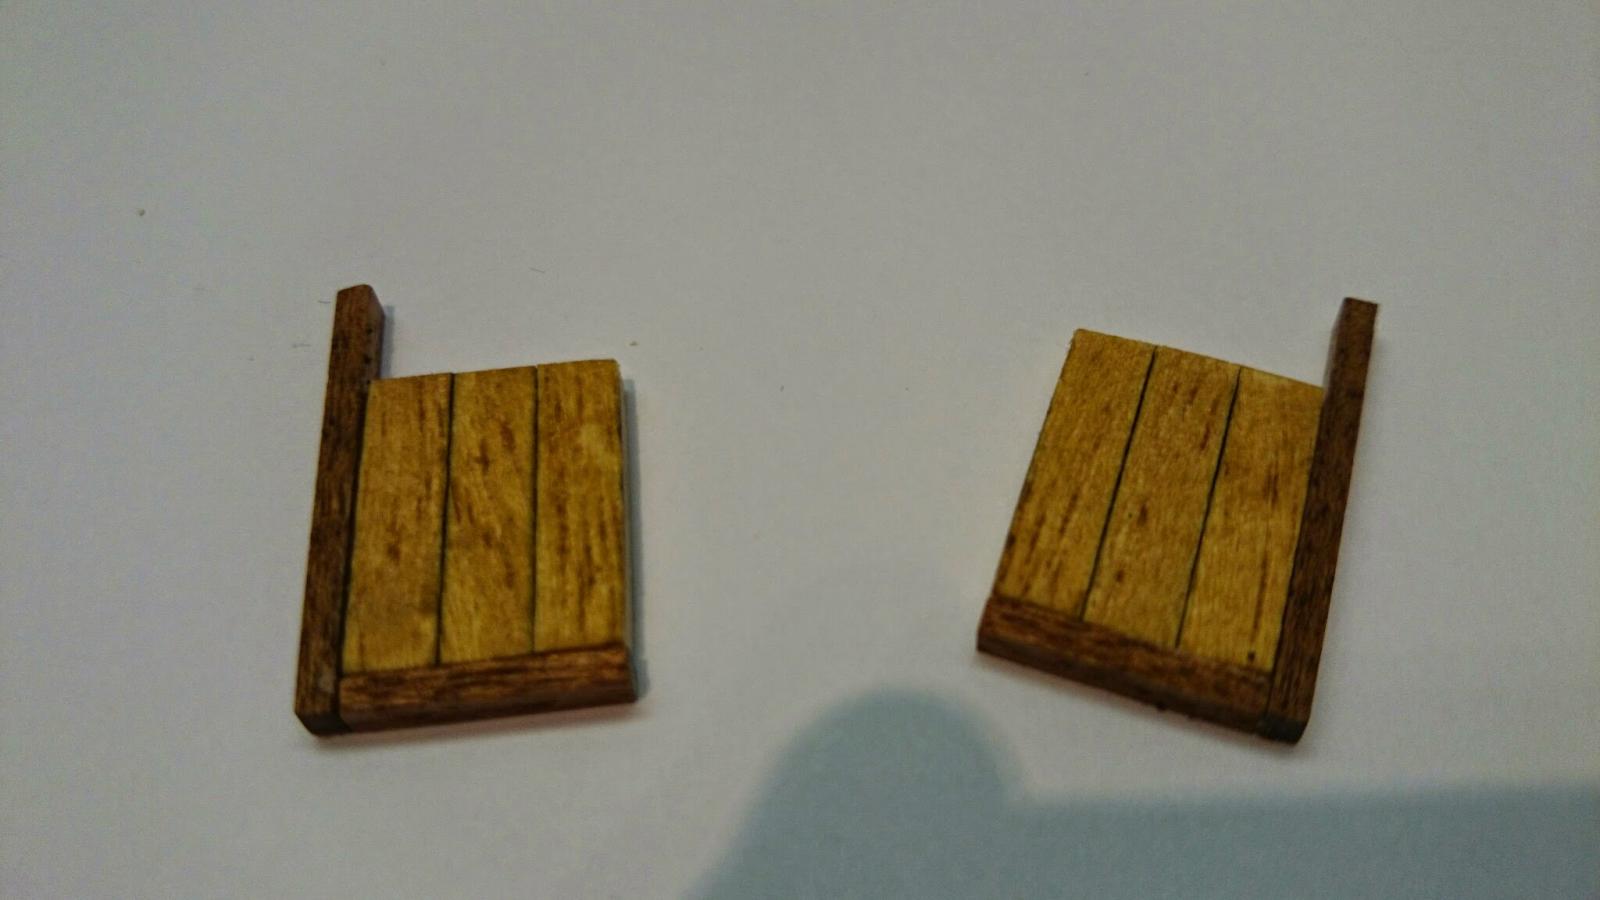
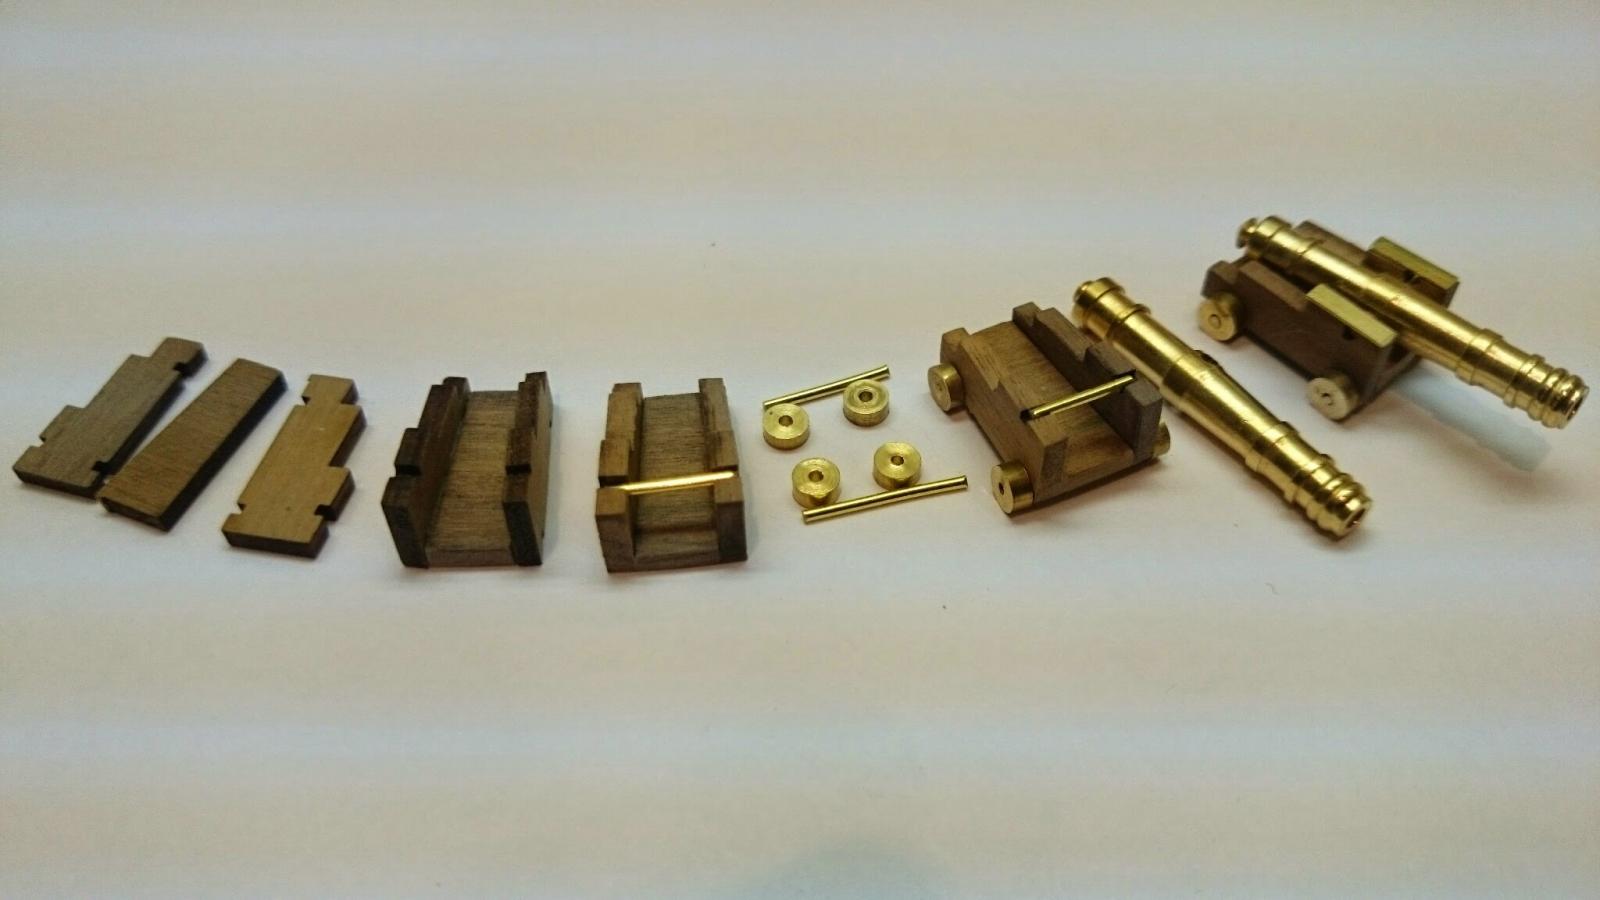
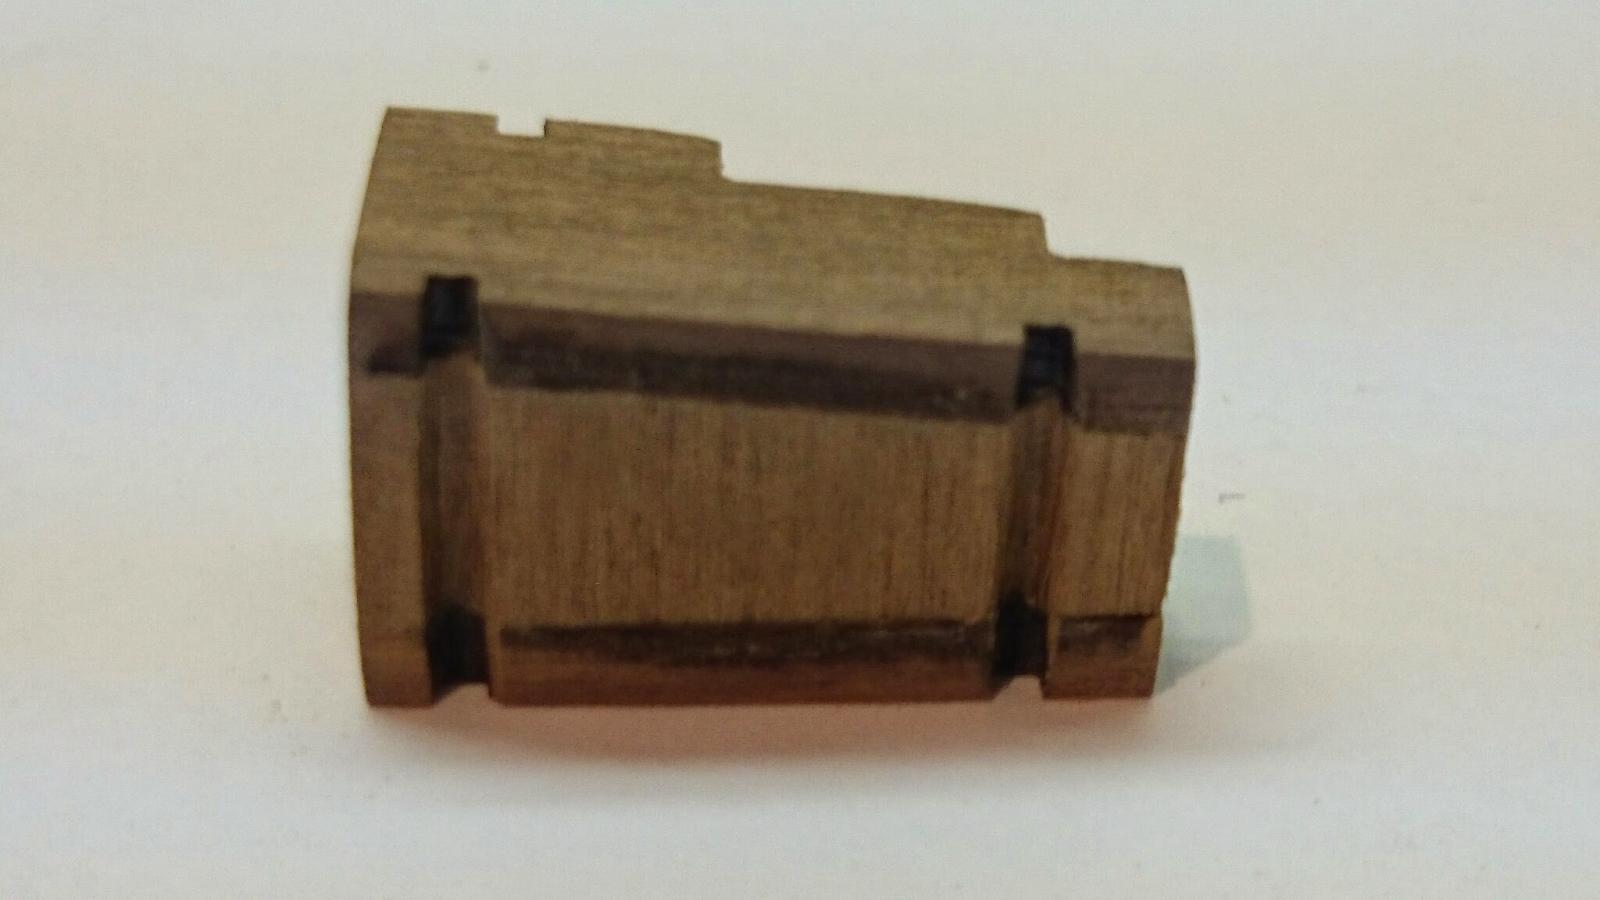
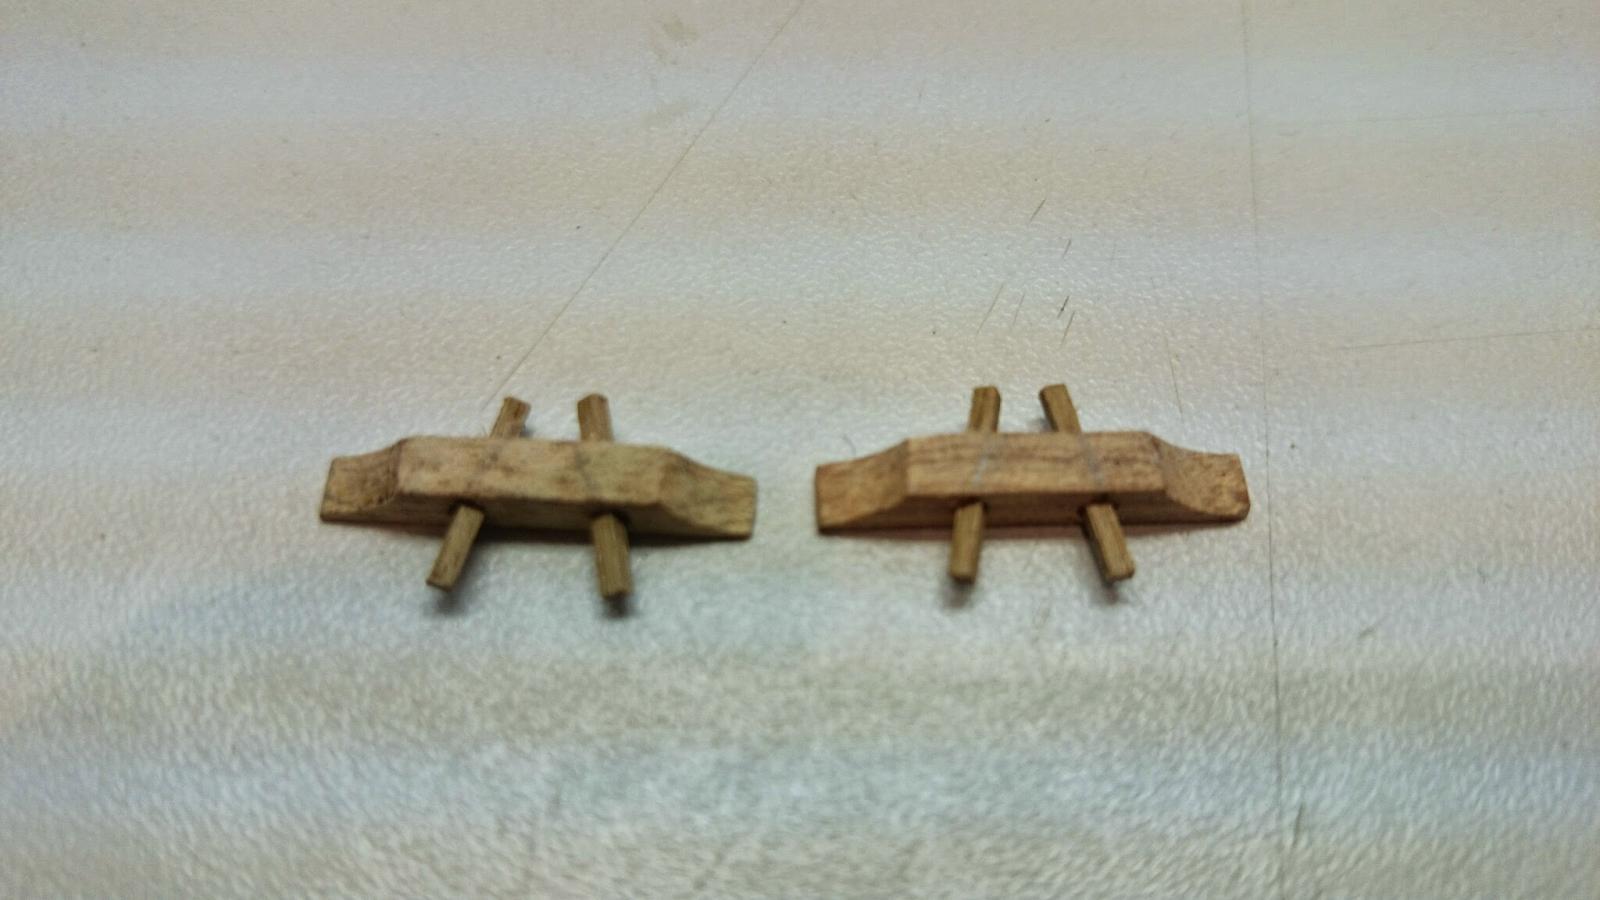
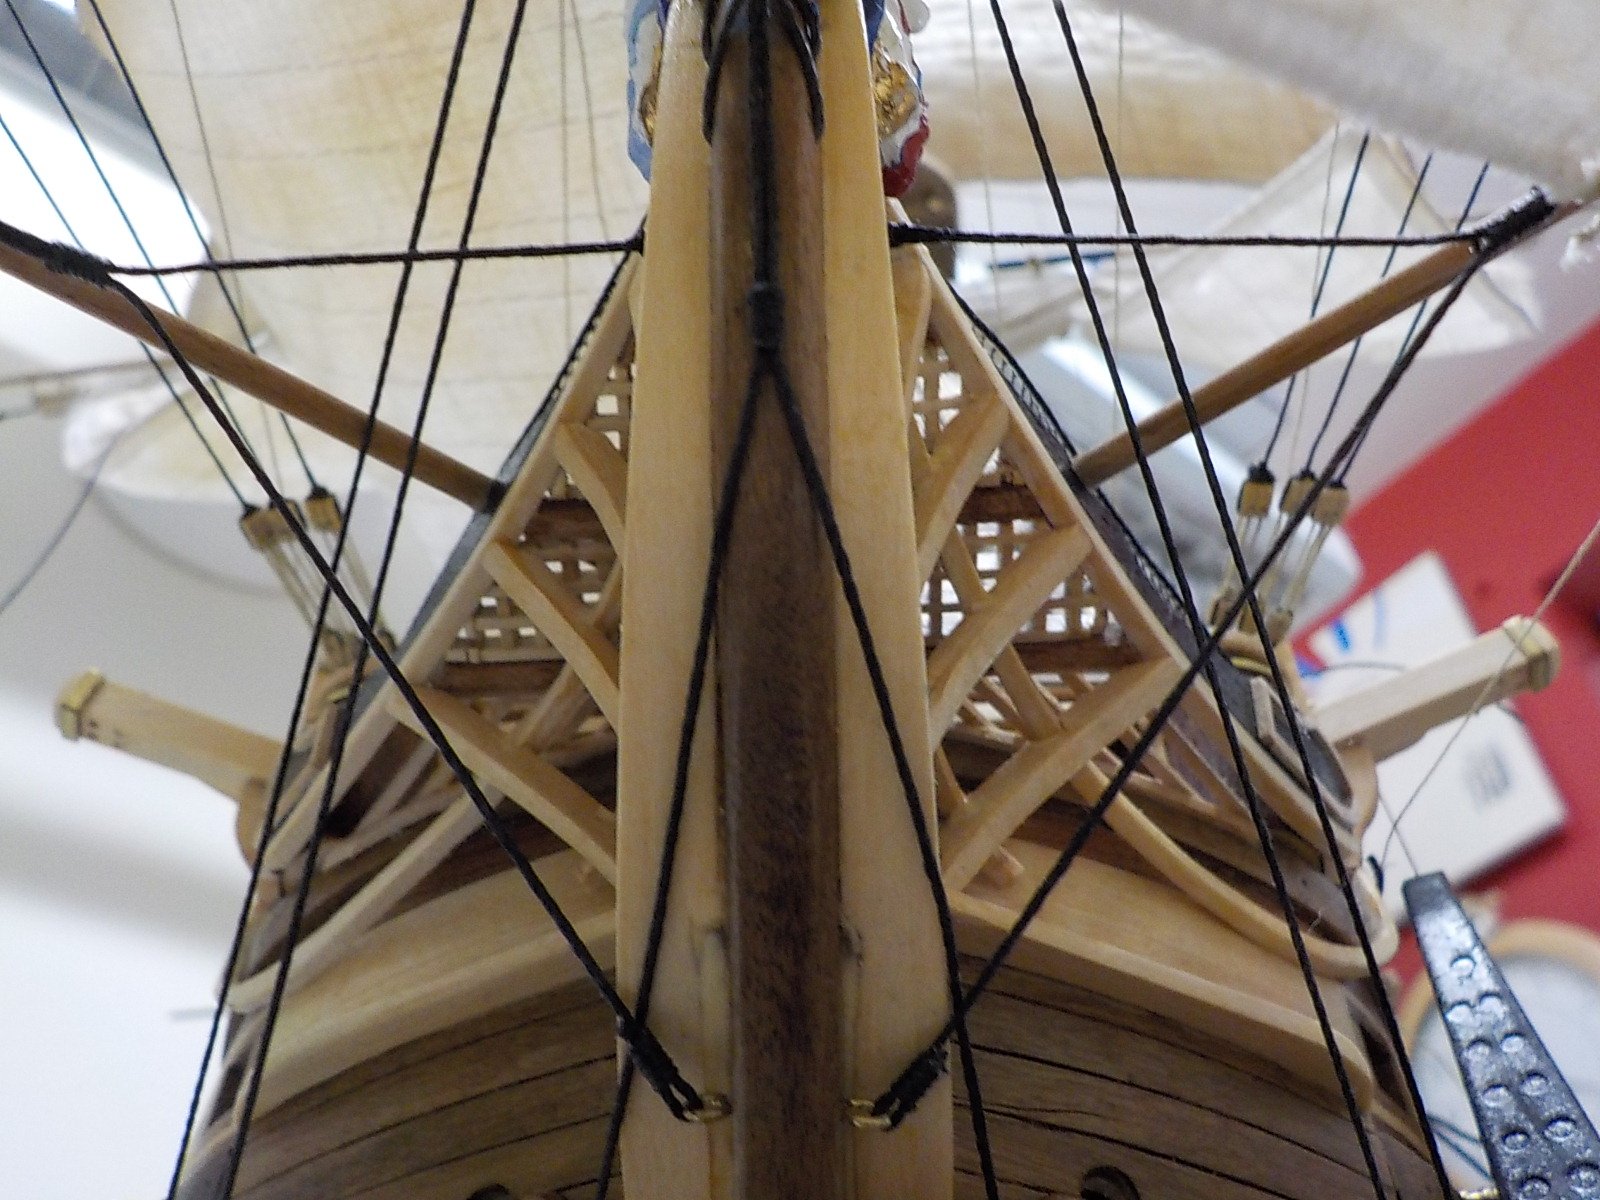
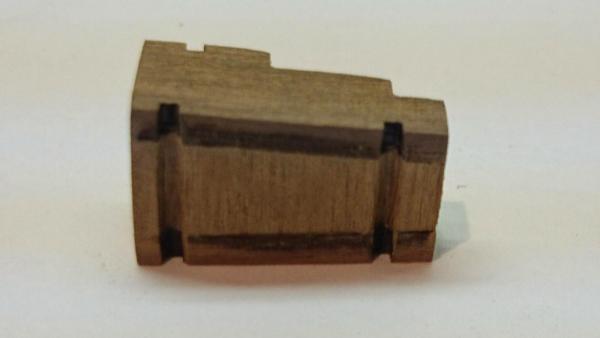
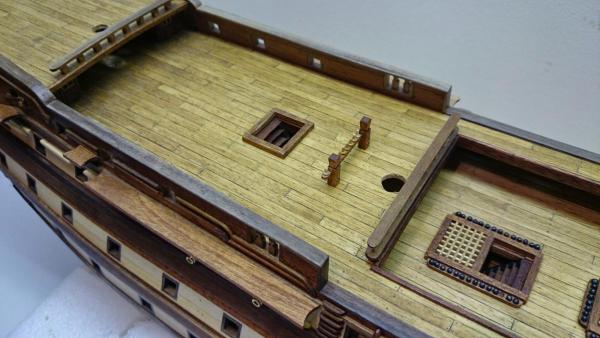
Been moving along and built the platforms to which the stairs to the poop deck are attached, these are 29mm in the contruction notes we work from but the plans and supplied 2mm board are only 22mm, stick with the plans as these are visual and fit with the cannon placements. Due to the platforms being made a few cannons on tressles were required to check and double check they all married up Oh! these tressles are laser cut and have the usual and cosiderable amount of burnt egdes to sand prior to glueing, I found I could clean the base, instal the sides and after its set I then sanded the whole tressle to clean it, this felt easier than cleaning all the parts individually then building.


- 708 replies
-
- 4
-
-
- victory
- constructo
- (and 1 more)
-
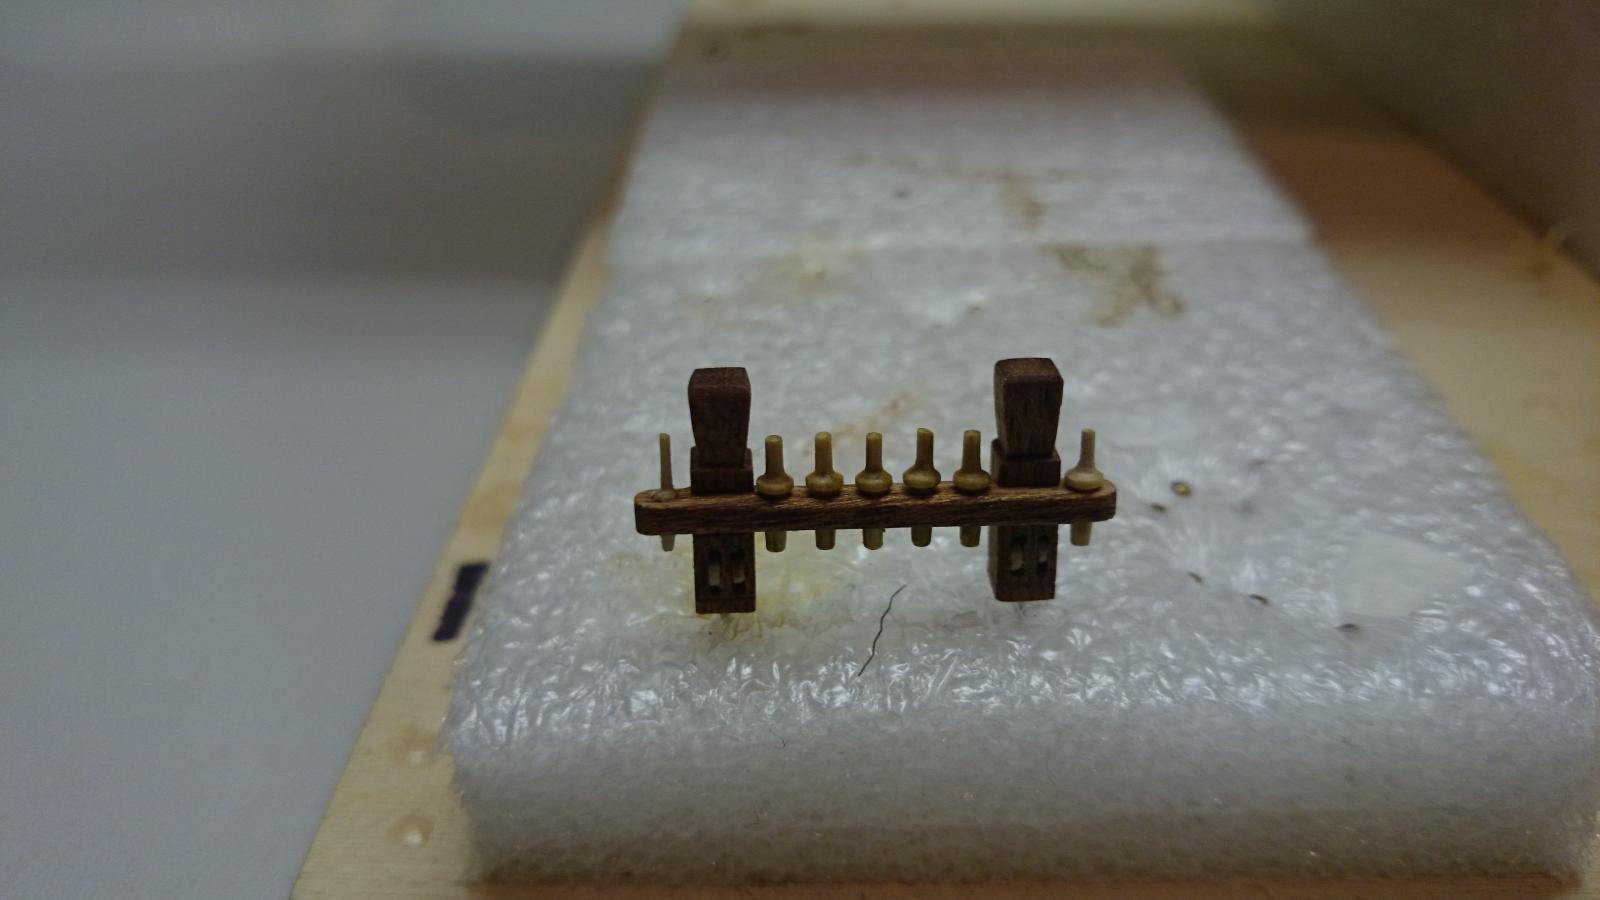
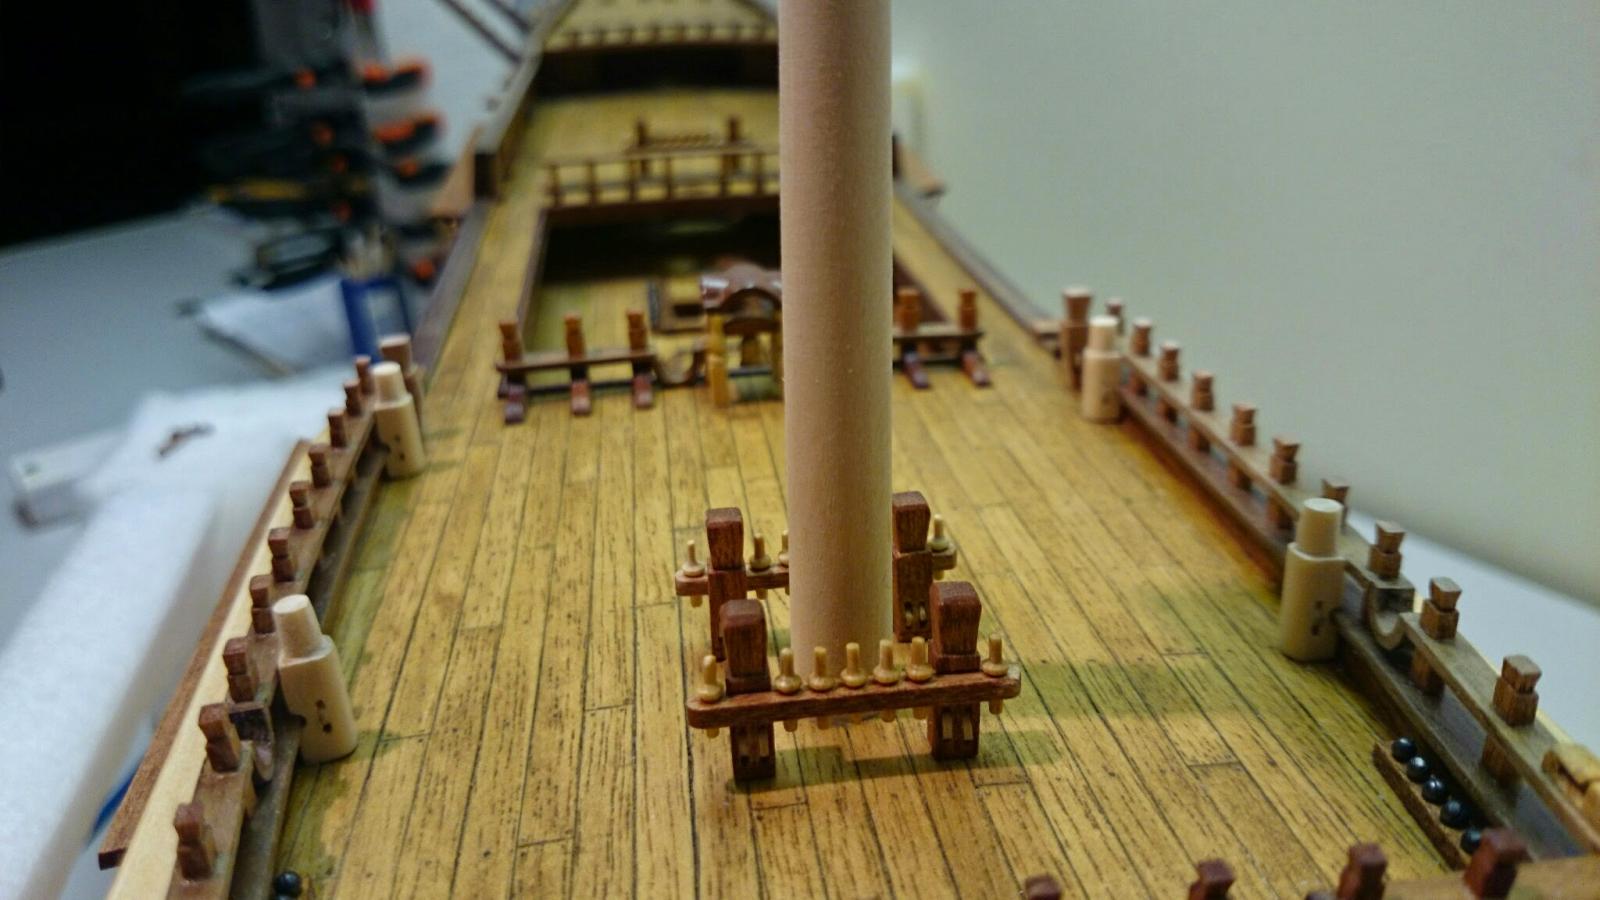
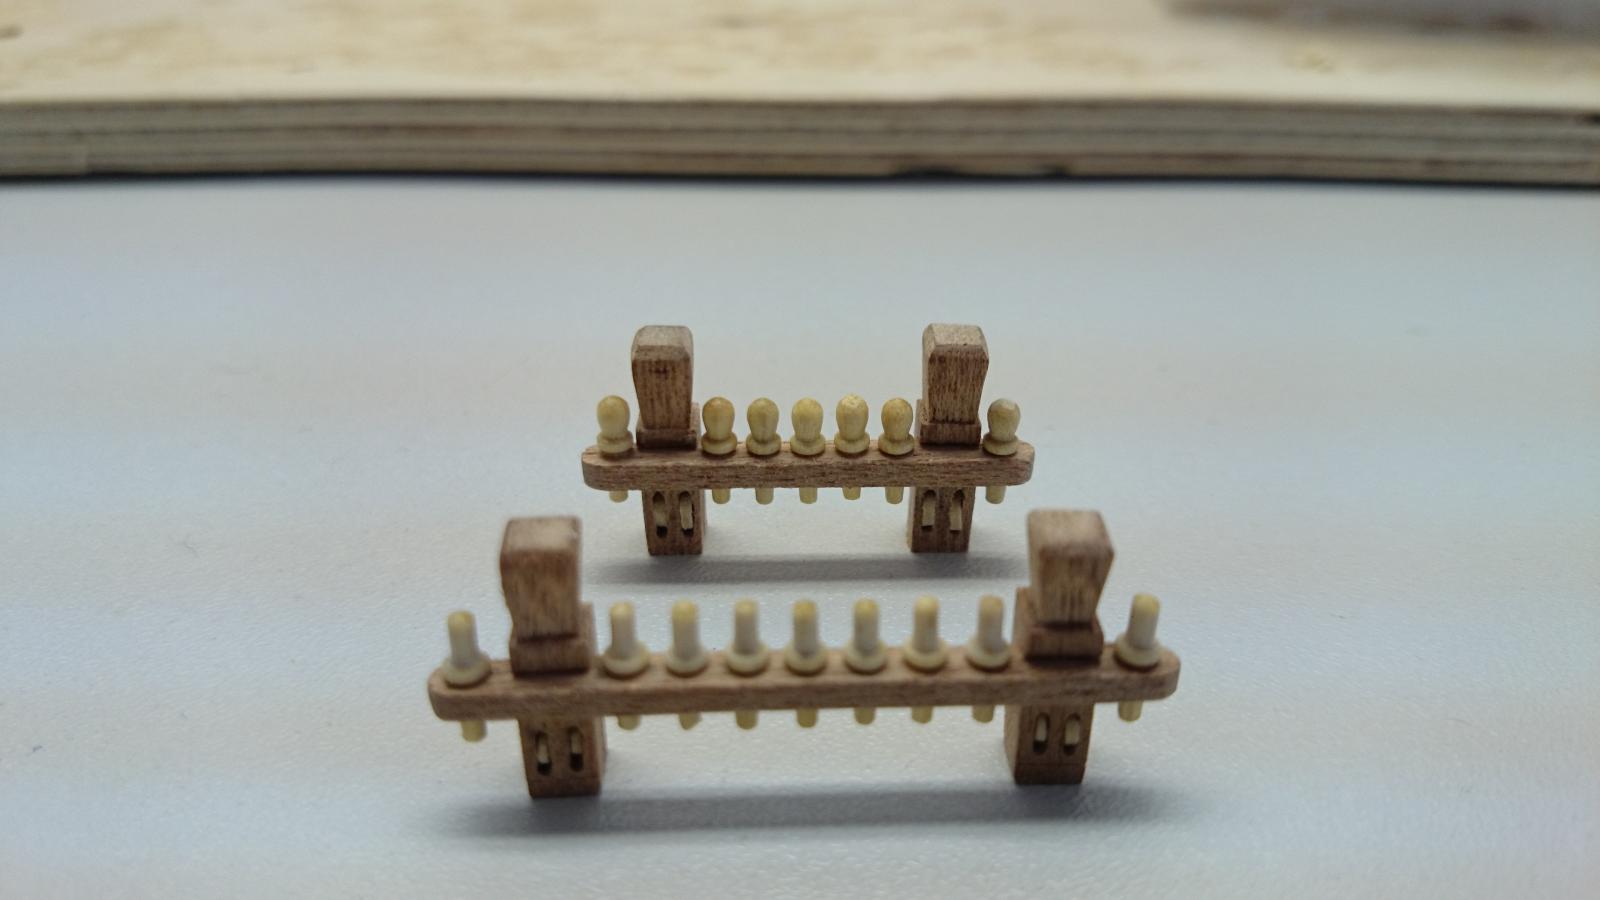
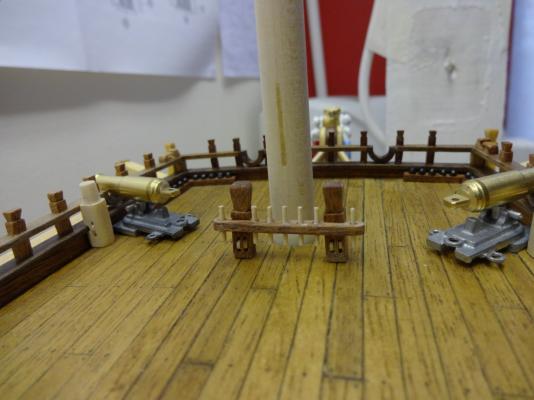
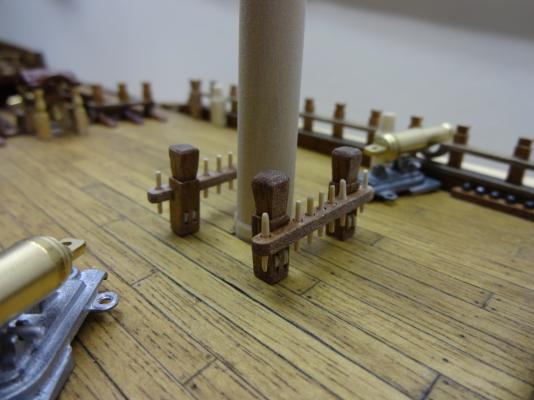
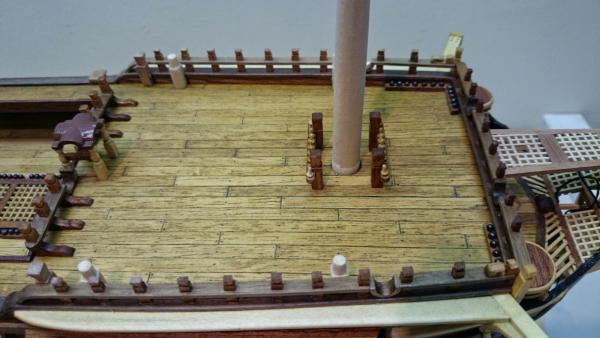
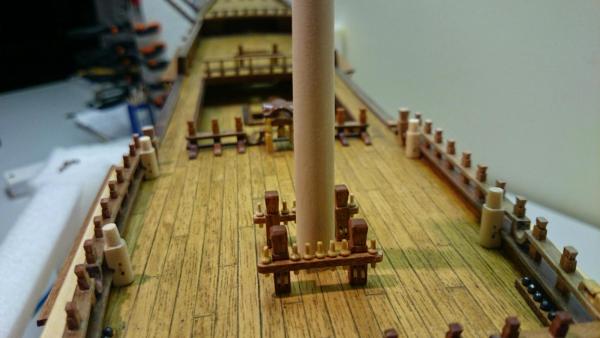
I have been busy again today making more belay pin racks for the inside of the hull walls, along with quite a few ammunition racks loaded with ammo, also I have made the two Belaying cleats. Just for effect I have pinned the earlier racks I made then put on a diet, on the decks (not glued yet), John the pinning method works perfect, thanks for the tip. Any one whom is building this kit will notice there are skipped stages, some ive prepaired and some ive just skipped for now, lanterns are all ready but would be vunerable sticking proud of the capatains quarters basically screaming to be knocked off. Gunport flaps ( as there named ) again all need painting and fitting and no doubt the ropes to open and close them, missing on the kits box art, along with the canons and carronades. All these can be fitted later and poise no problem with me ploughing on. Wheeled Cannons will also require strapping to the decks with the required ropes and made blocks.

- 708 replies
-
- 3
-
-
- victory
- constructo
- (and 1 more)
-
I've logged over 450 images in cloud, painting does have its benefits ( filla ) if I'm OK to use that word on this site, ha ha also you can use any wood you like. Matching the wood is a pain. You say I'm getting work done so quick, its the equipment, its so easy to do things, like pin and cannon racks, I can drill them precise distances apart and plum centre as the mill has guages on for measuring the beds movement. Makes light work of jobs I normally found a pain
- 708 replies
-
- 1
-
-
- victory
- constructo
- (and 1 more)
-
I read this after my own issues. I searched to see what other modellers do. Yes mine initially looked like bulbs as you described and obviously far to big. Not sure why the kit manufacturers would make them so big, I turned mine and took off the bulb, I appreciate there is a lot more per rack, not sure if I will live with the comprise or replace the racks. Pondering this change
-
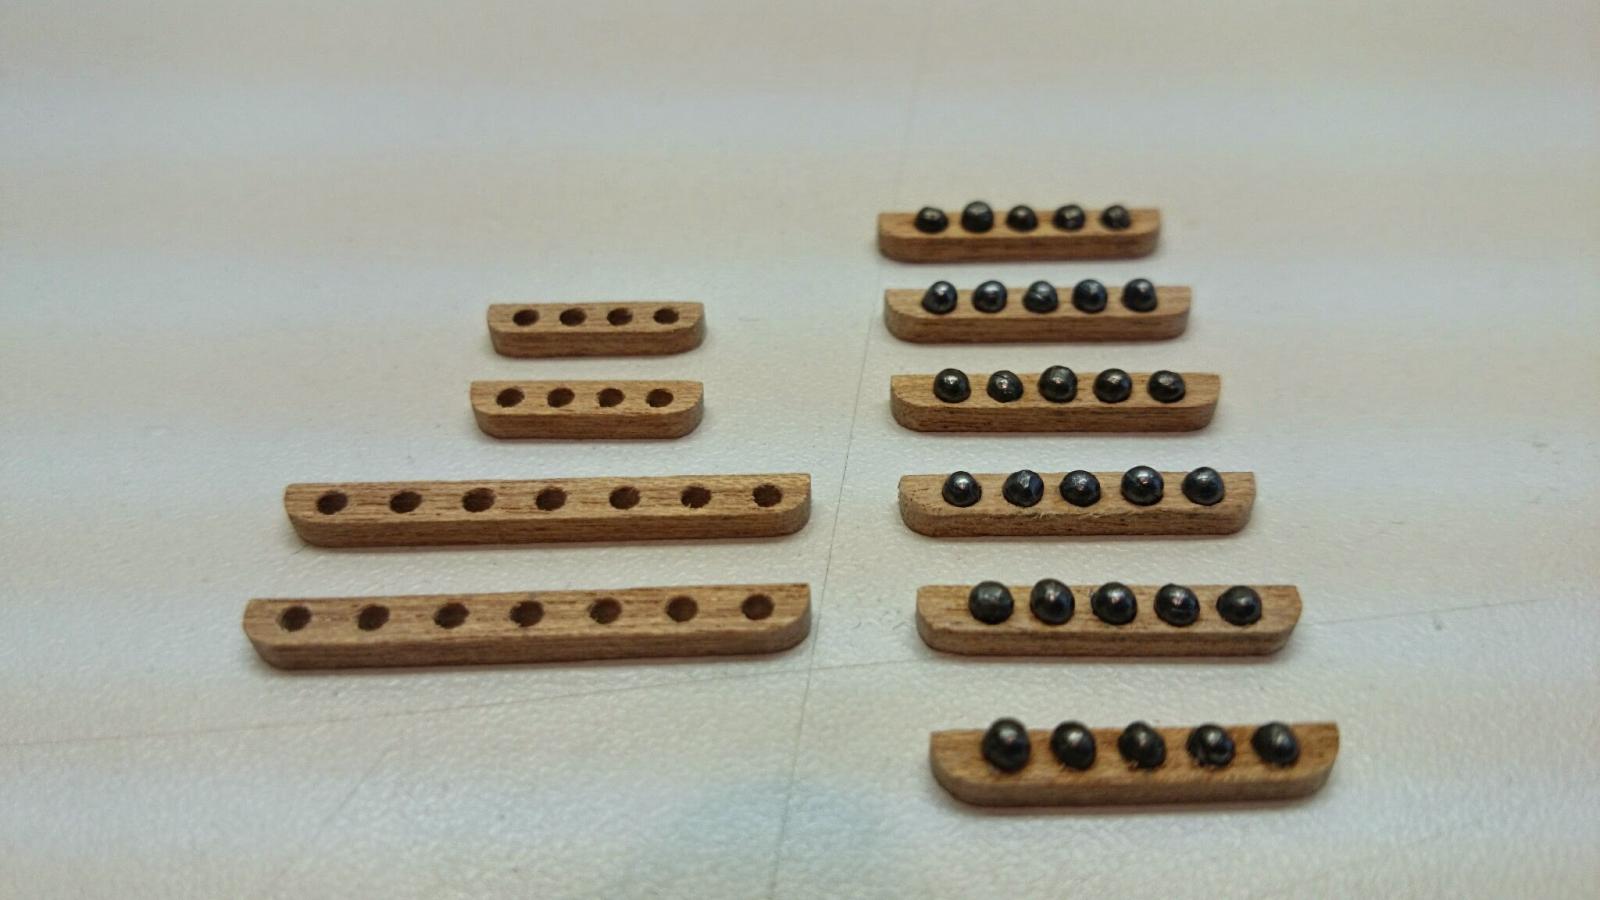
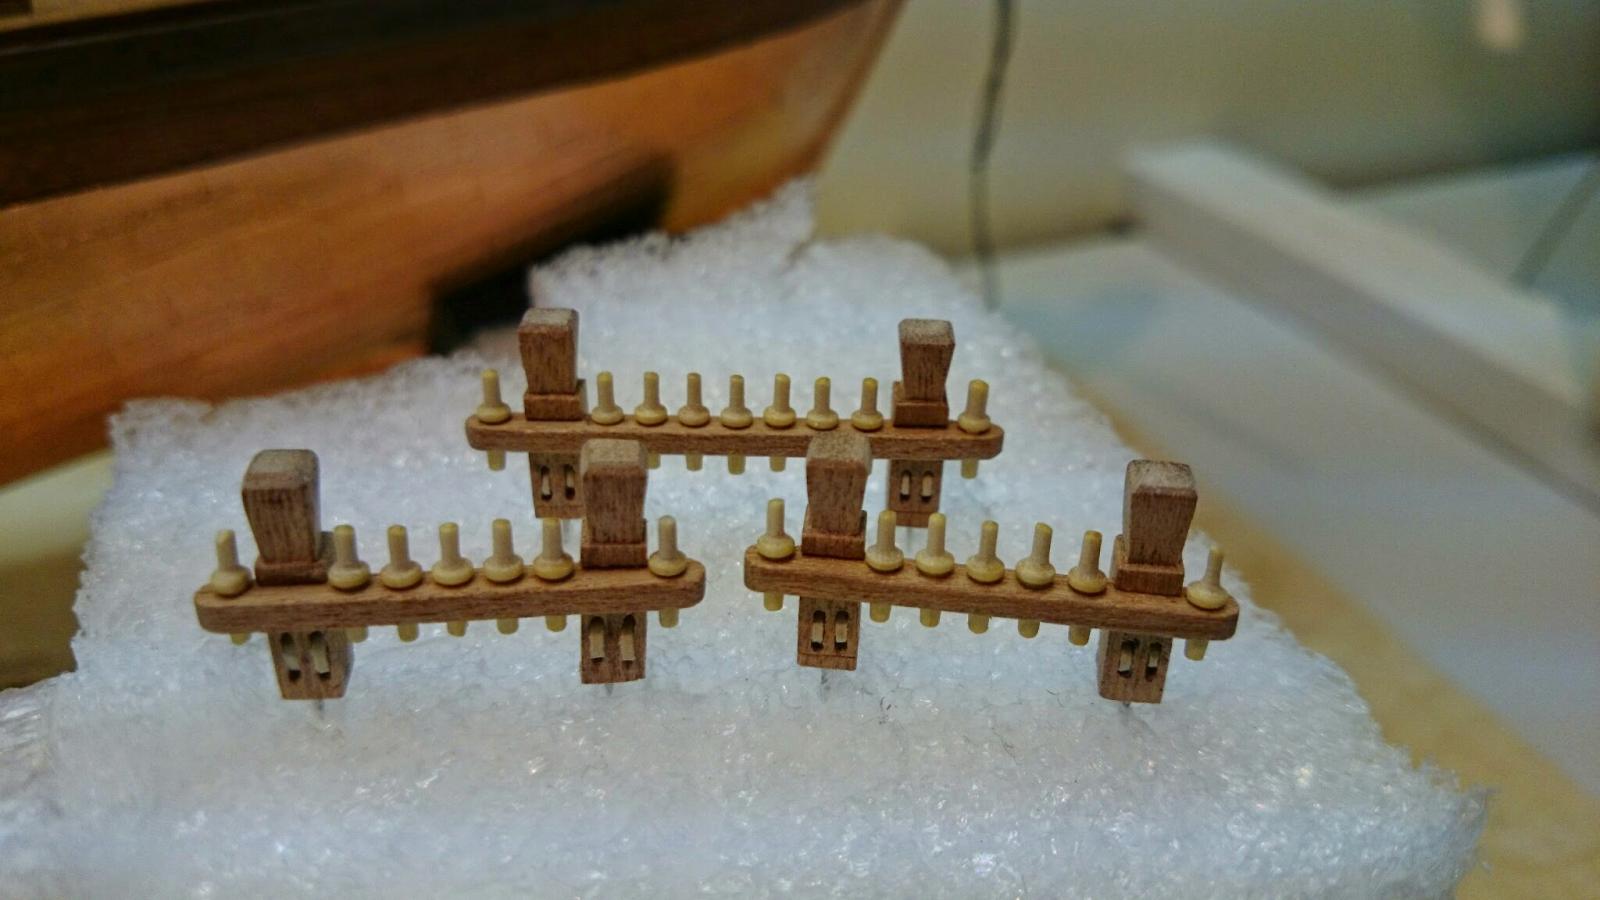
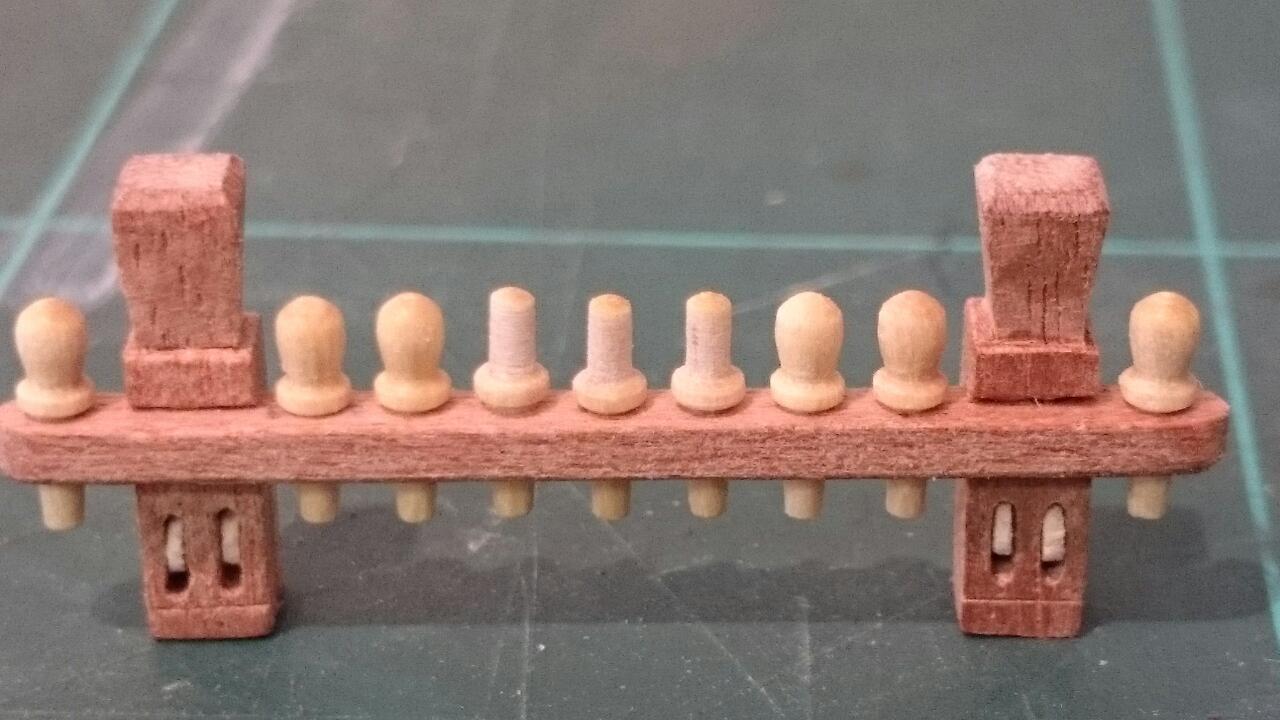
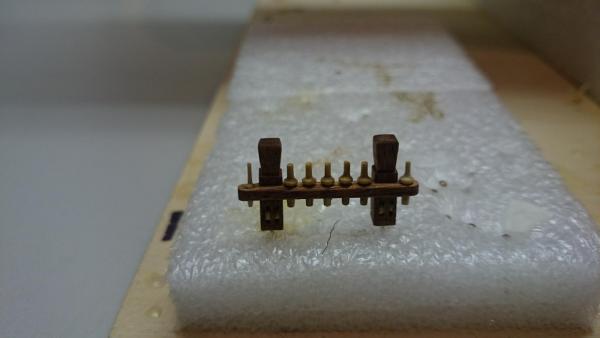
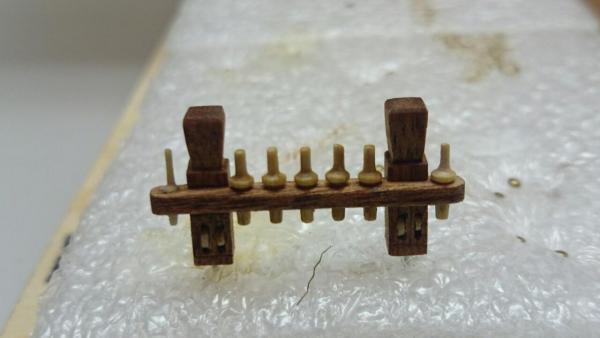
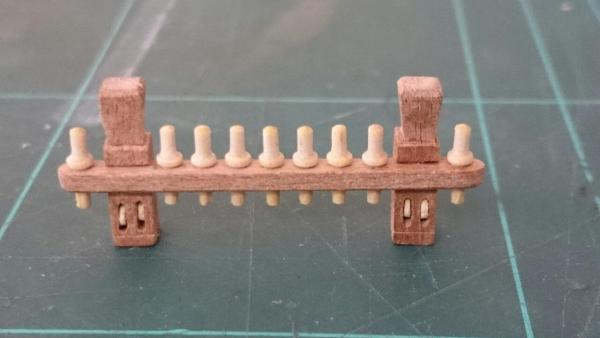
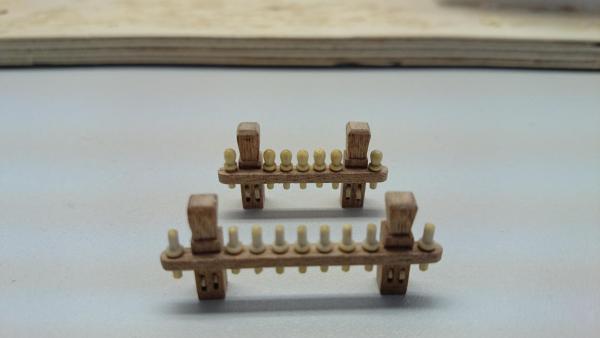
Diet of one rail completed, glad they had not been glued, as you know this would not have been possible But I never glue my parts until a trial fit and ponder.Just a few others to do and I'm done. Sorry if I post a lot but there's very little constructo Victorys out there and people like myself, new to this need more than just the vague instructions. All three slimmed down a little further. Pinned ready for deck fitting.

- 708 replies
-
- 4
-
-
- victory
- constructo
- (and 1 more)
-
hope you got sorted with the mast issues
-
Well my pins have been put on a diet to drop a few dress sizes, result, from a thumb thick 2.5mm to now a finger slim 1.3mm


- 708 replies
-
- 2
-
-
- victory
- constructo
- (and 1 more)
-
I'll stick with wood, there colour disputes now, but she is suffering rot from the inside due to so much rain water entering from the top deck, there is post saying there to make her water tight. Really though it's time she got the Mary rose treatment and put her in purpose built hangar with the relevant atmosphere to prevent her drying out, she's open to elements there, rain, wind, snow, ice, warm ish sun. ( remember UK) I've read the survey alone was £575.000 and new caulking a cool 1 million. That's before they tackle the rot, it's said she could collapse under her own weight and that's with dummy cannons she wears today. Well Ive deviated from models to show the plight of the real girl whom is almost 250 years old and suffering.


- 708 replies
-
- 1
-
-
- victory
- constructo
- (and 1 more)