Paul0367
-
Posts
512 -
Joined
-
Last visited
Content Type
Profiles
Forums
Gallery
Events
Everything posted by Paul0367
-
 Submarinemen. Thankyou for the kind comments, Rich, Oh yes, mast and spars were already fabricated months ago despite going all out on detail I know will be hiden but only for those whom don't look, she will also carry full sails.
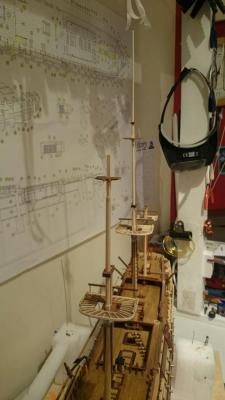
- 708 replies
-
- 4
-

-
- victory
- constructo
- (and 1 more)
-
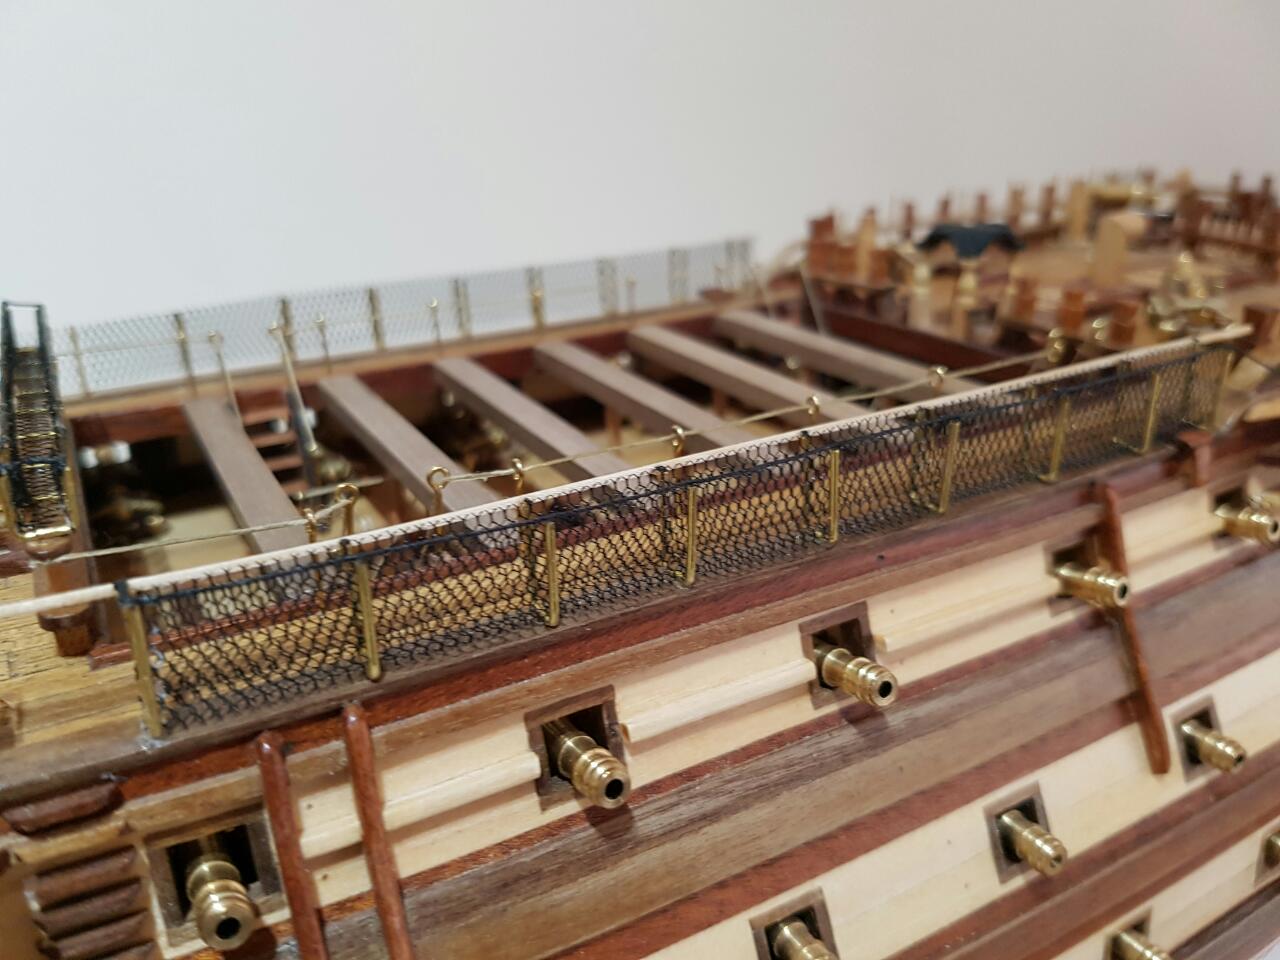
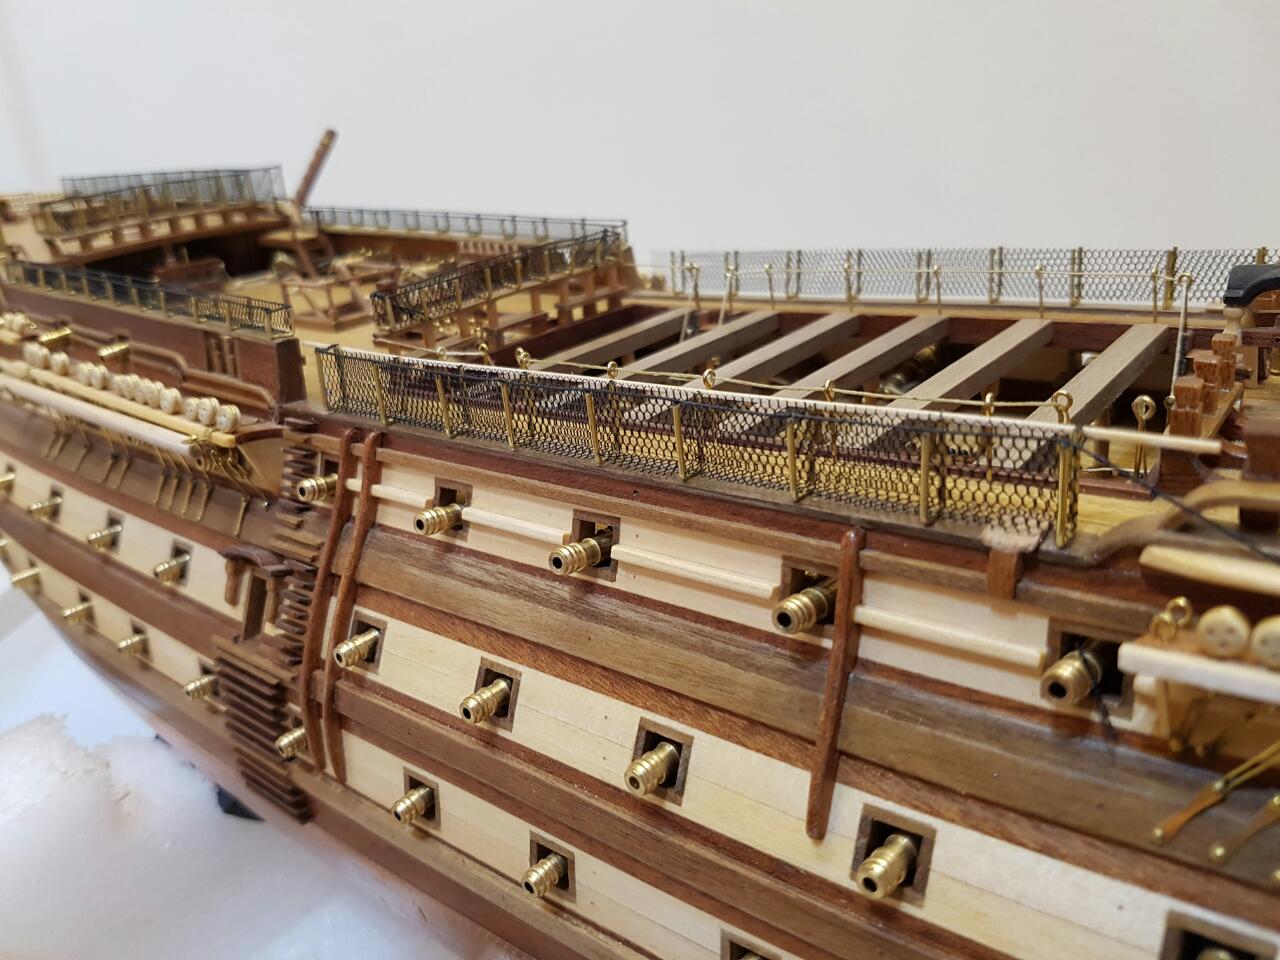
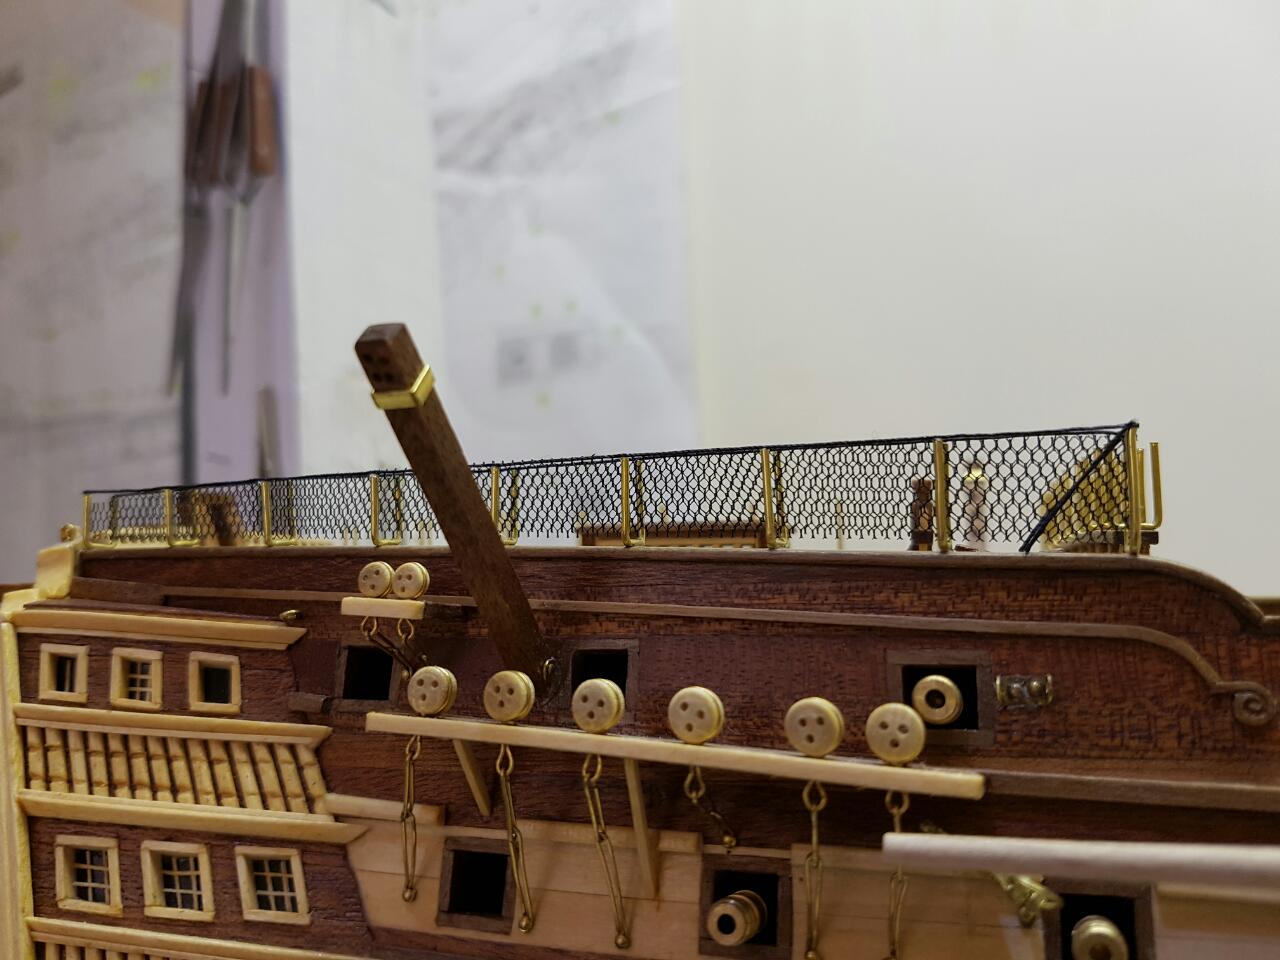
2017 update on where I'm at, should be my completion year. Oh noticed the handrail surround has an upper and lower rail, lower added. I know the real ship had a fawn coloured netting but on this occassion I was running with what I had been supplied by our guys at Constructo, black. Finding the correct colour let alone scale proved quite difficult. I have been looking at my future no 2 ship build and so far it's the Swedish Vasa, for no reason other than its different.


- 708 replies
-
- 3
-
-
- victory
- constructo
- (and 1 more)
-
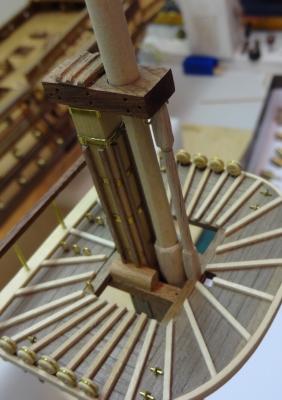
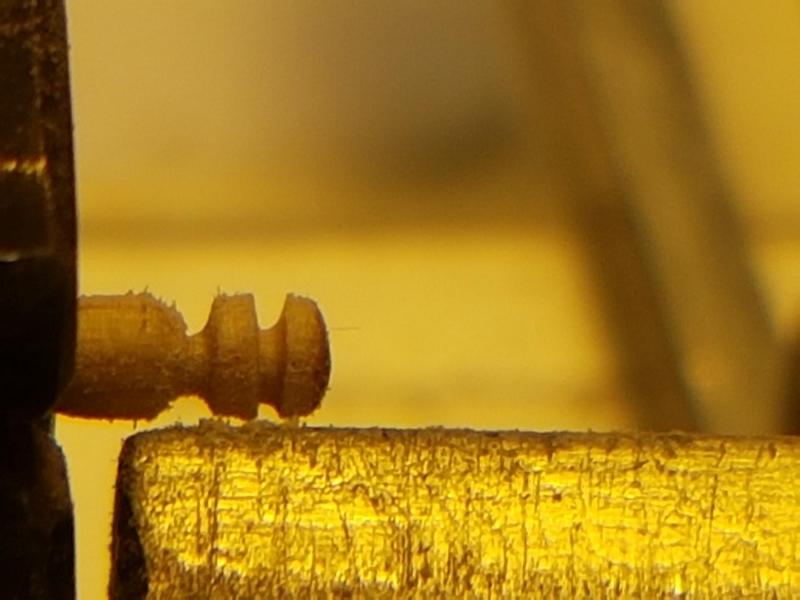
Turning the newel post for the hand rails on the upper stairs that the kit omitted. Still fitting the netting on the rails too....


- 708 replies
-
- 3
-
-
- victory
- constructo
- (and 1 more)
-
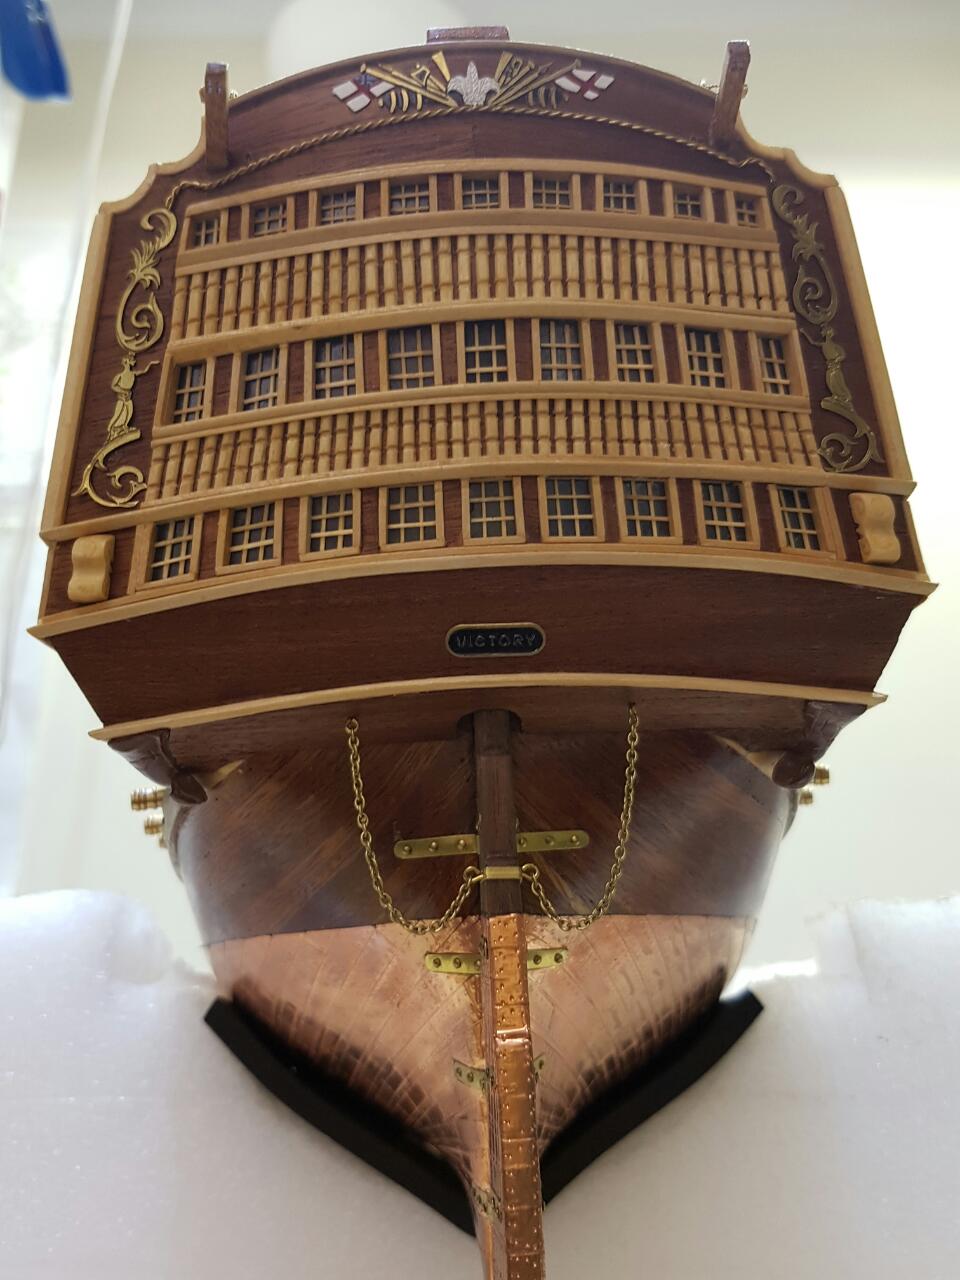
Thank you Rich... mmmm Pictures, maybe but knowledge, im just scratching along copying off an image in a book. I have noticed my compass cabinet is too far forward and have since repositioned it 5mm back. I hope your Christmas went well and Happy New Year.
-
Oh my the press go involved,,,,so they should really, not every day that someone hands over a model like that with all the hours put in to build her. Lovely gesture Mike
- 230 replies
-
- 1
-
-
- victory
- artesania latina
- (and 1 more)
-
Wow looking really good... you are well ahead of me now, great to see another natural wood looking Victory...
- 47 replies
-
- 1
-
-
- victory
- constructo
- (and 1 more)
-
Thankyou Steve To all that venture on my build have a fantastic Christmas & New year Take care
- 708 replies
-
- 1
-
-
- victory
- constructo
- (and 1 more)
-
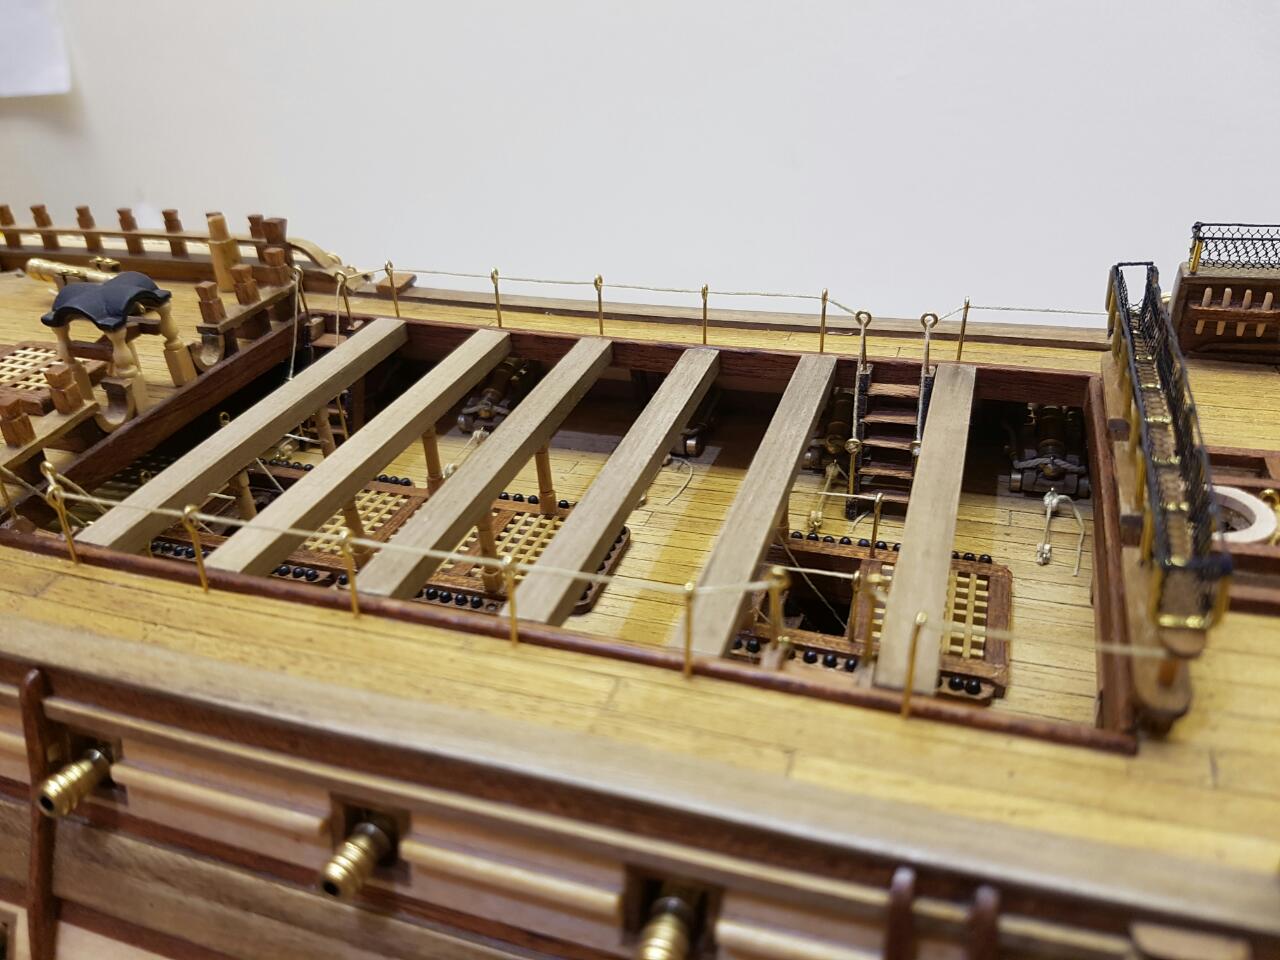
Last stairs fitted in the ammended position from kits plus rope rail, then is carry on with netting.

- 708 replies
-
- 5
-
-
- victory
- constructo
- (and 1 more)
-
Stairs, with additional handrails and newels upto the poop deck

- 708 replies
-
- 6
-
-
- victory
- constructo
- (and 1 more)
-
Yes, I make my own usually 4mm glass but this would be too heavy in 4mm so I am looking at 2mm for this one. Just not sure where it will reside in the end
- 708 replies
-
- 2
-
-
- victory
- constructo
- (and 1 more)
-
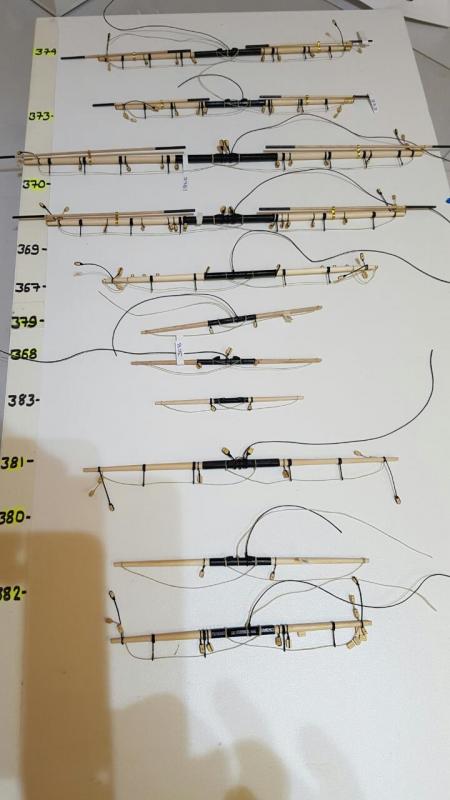
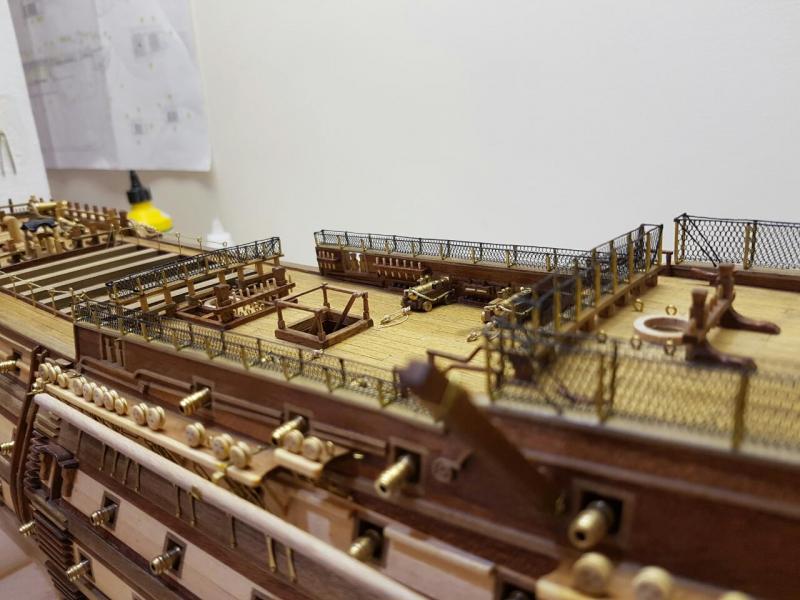
More Netting made up and fitted. just the base net to add to complete, Oh plus all the other nets to make

- 708 replies
-
- 3
-
-
- victory
- constructo
- (and 1 more)
-
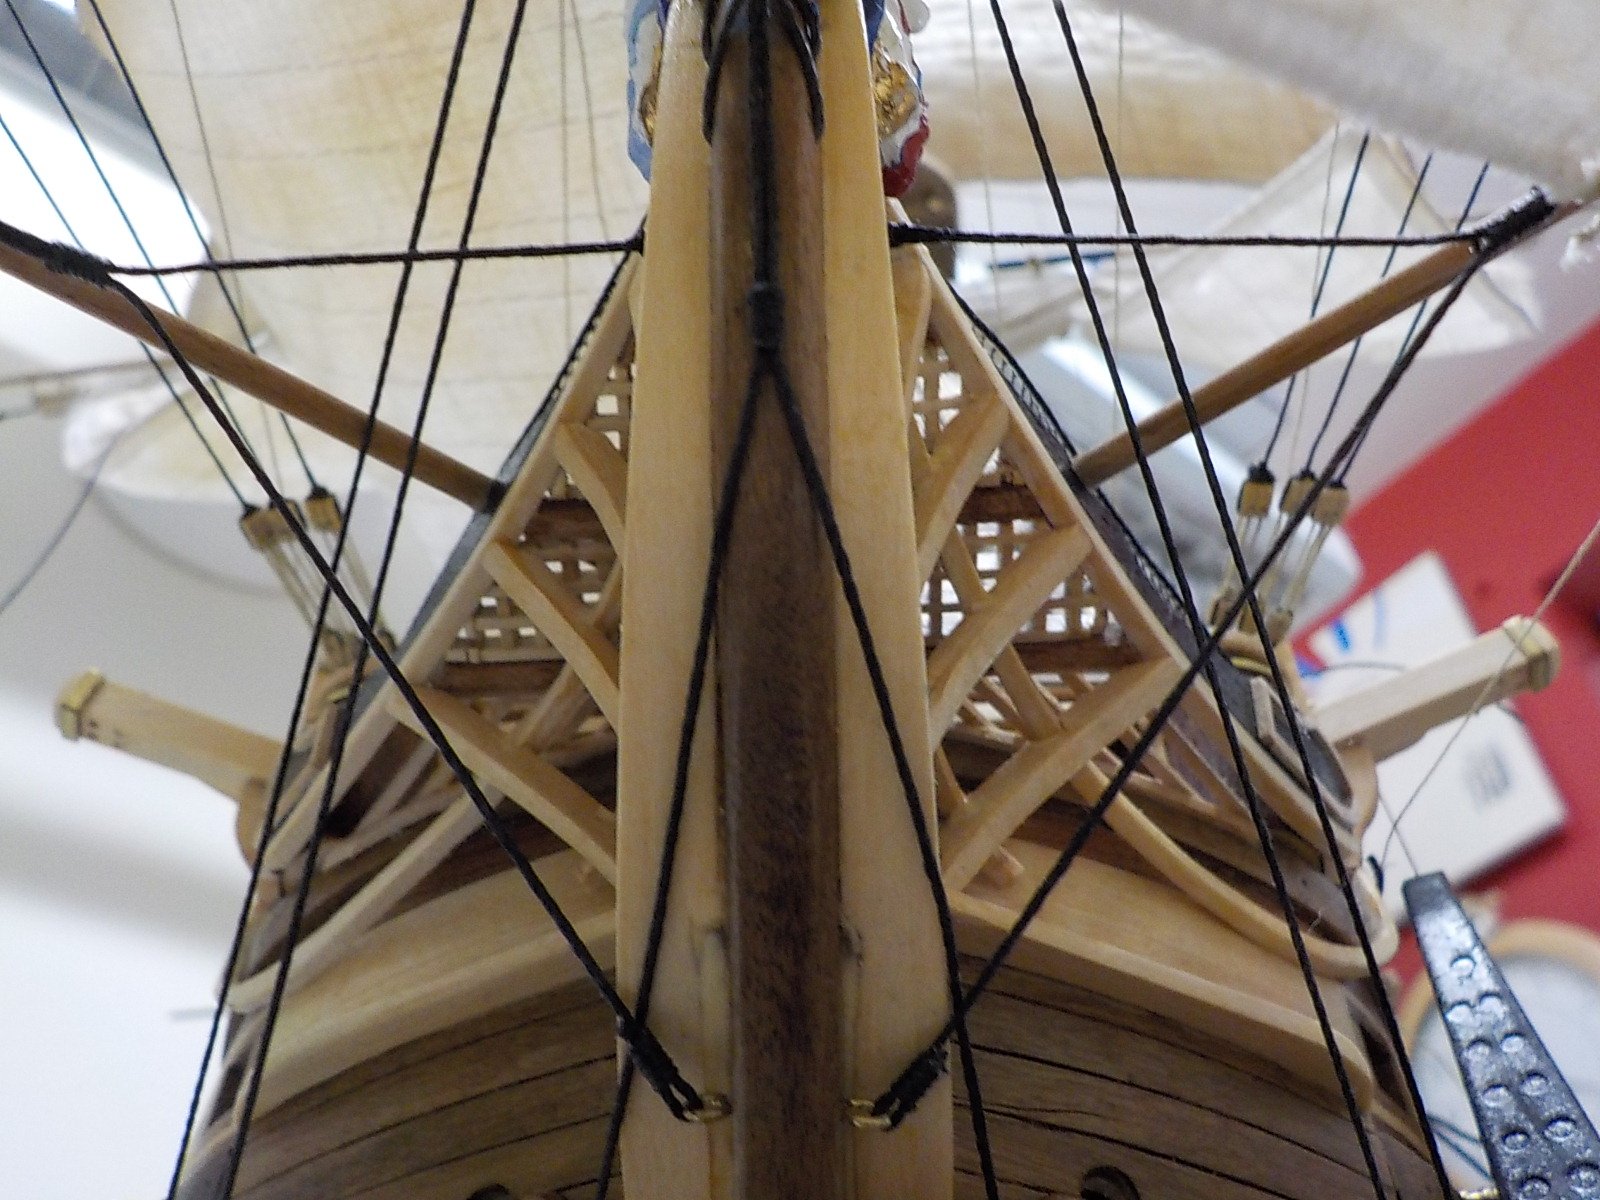
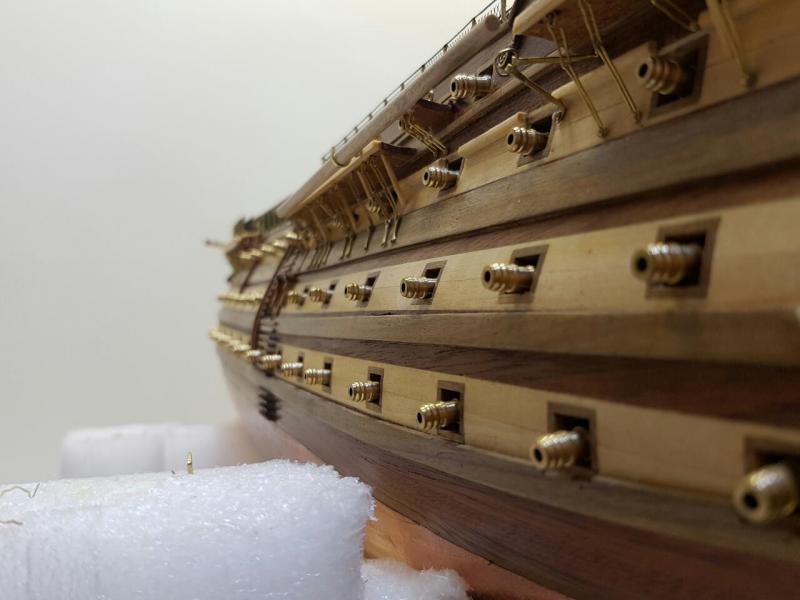
Thank you Rich.... I recomend two things. 1 very sharp scalpel blades, which you will use a lot as they need to be sharp. 2, Magnifying glases. The rest is measure twice and cut once affair. I am adding the diagonal sections that were as the real ship but not all of them have them for some reason not known.
-
Hi Rich OMG thats beautifully done, hey its big too, very big. Time has flown... I remember you getting that but didn't think it was so long ago. Salivating over the kit mate its the RR of the Victory kits and looking at this I see why... Great job
-
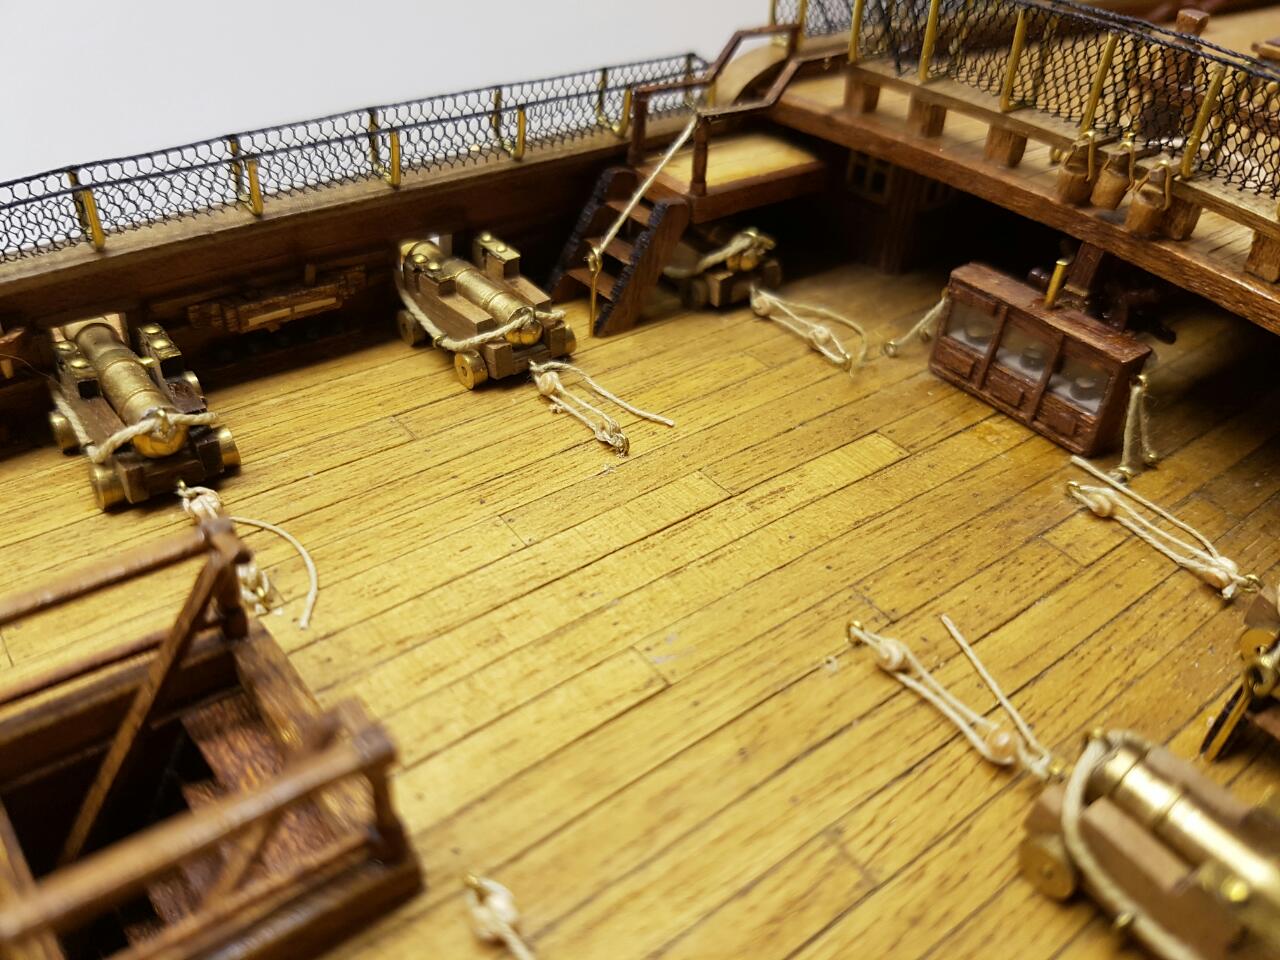
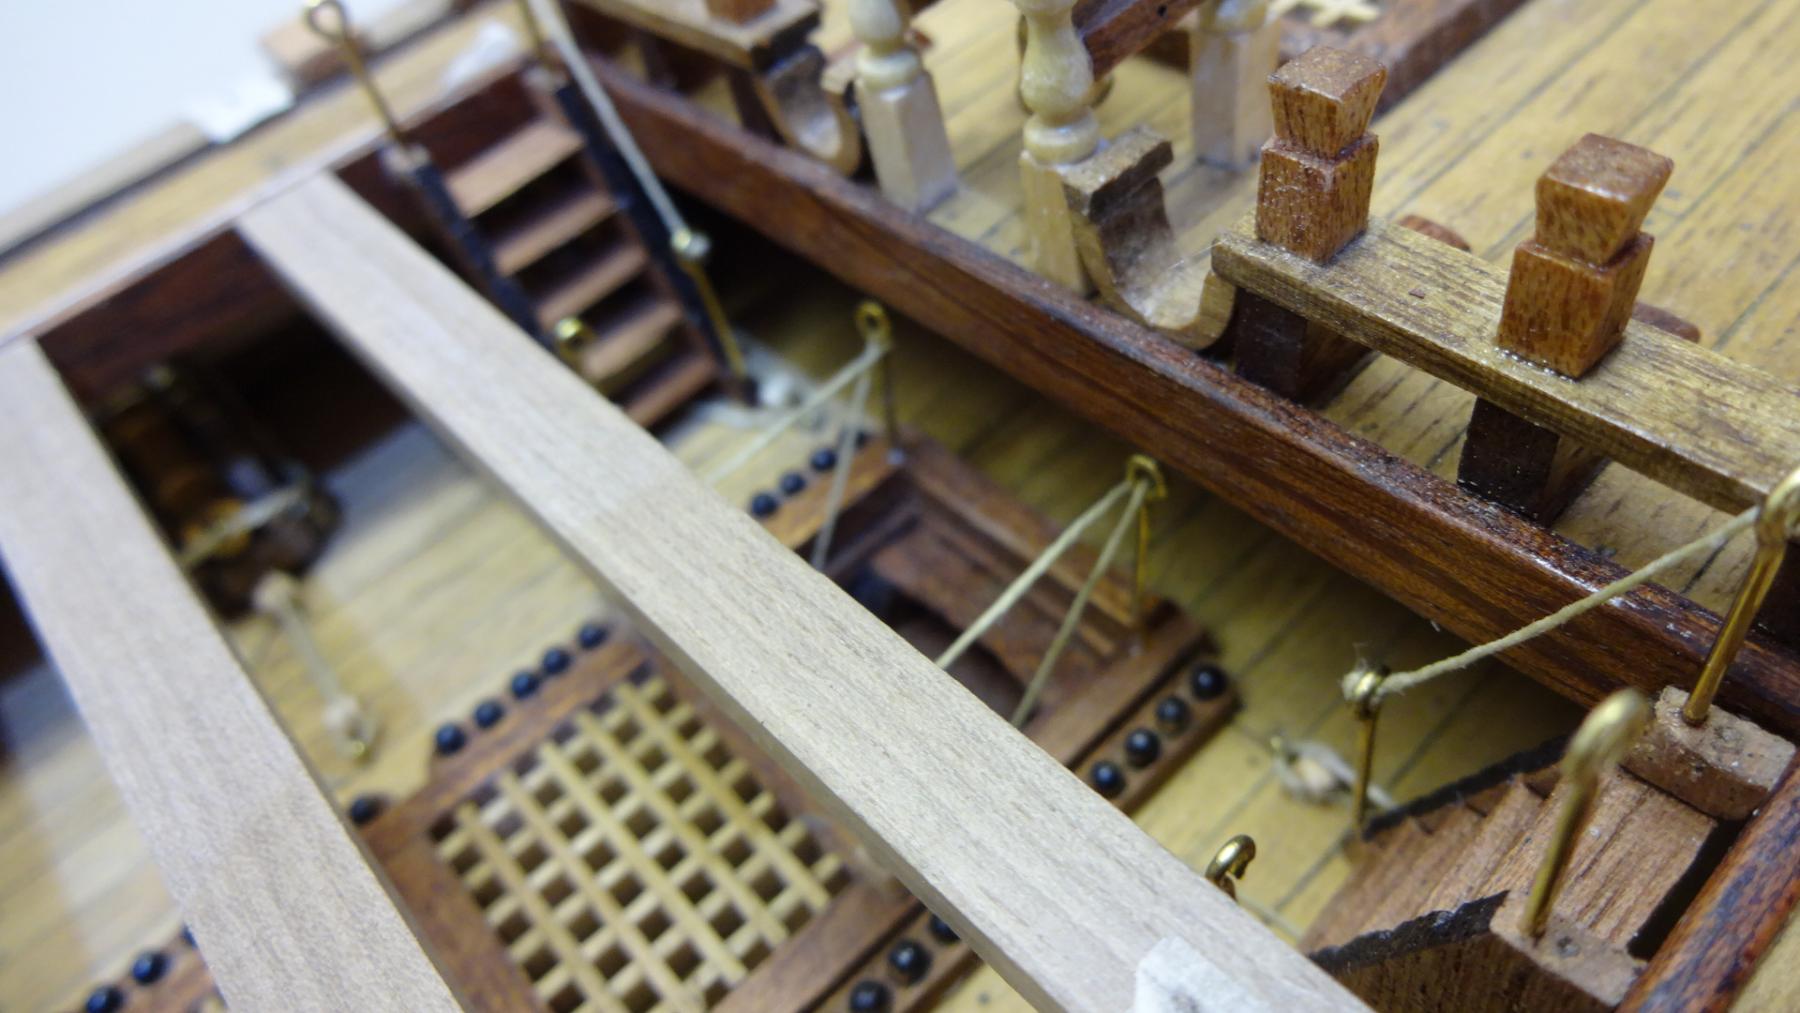
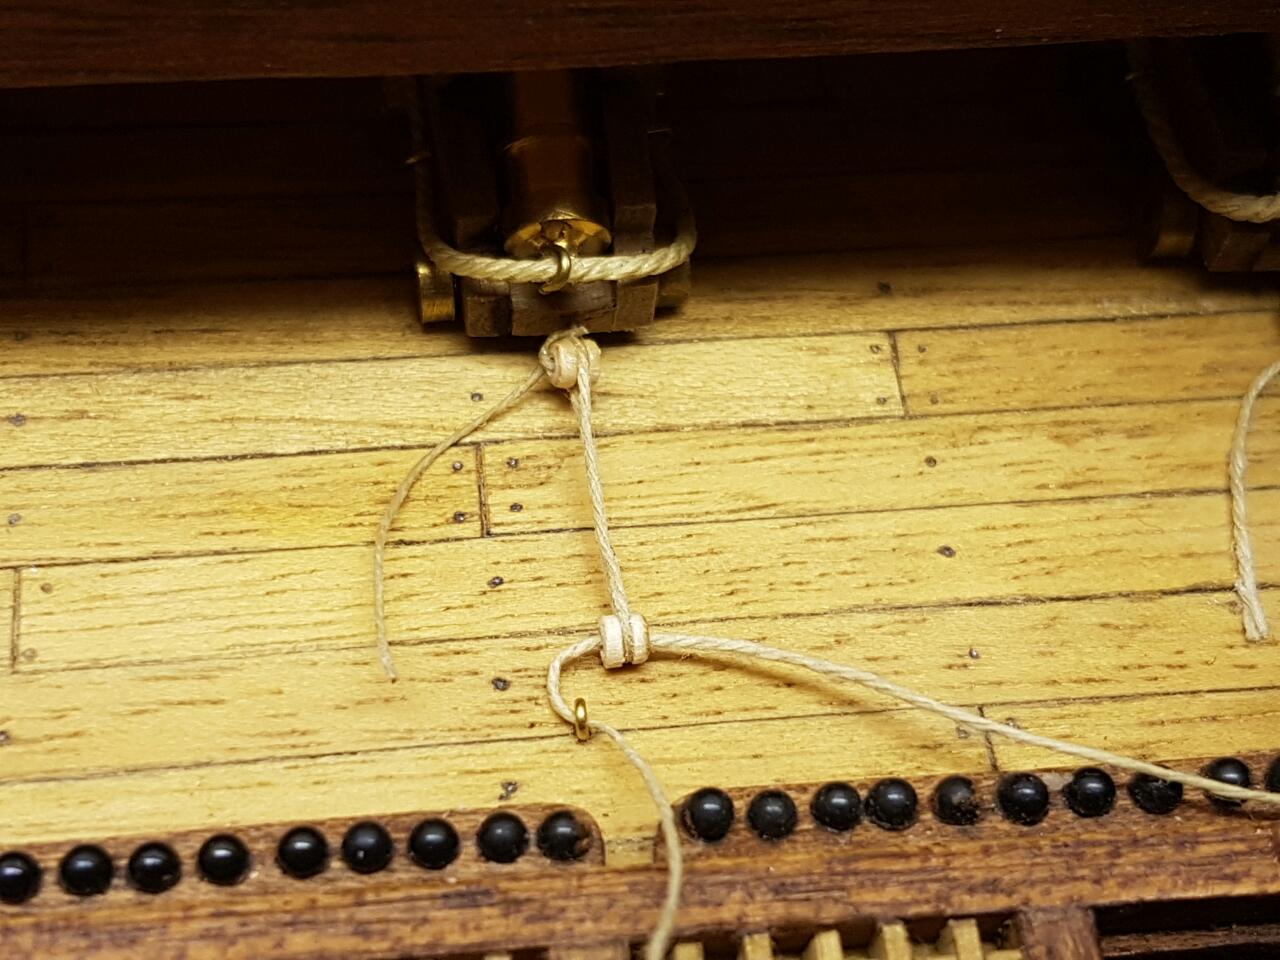
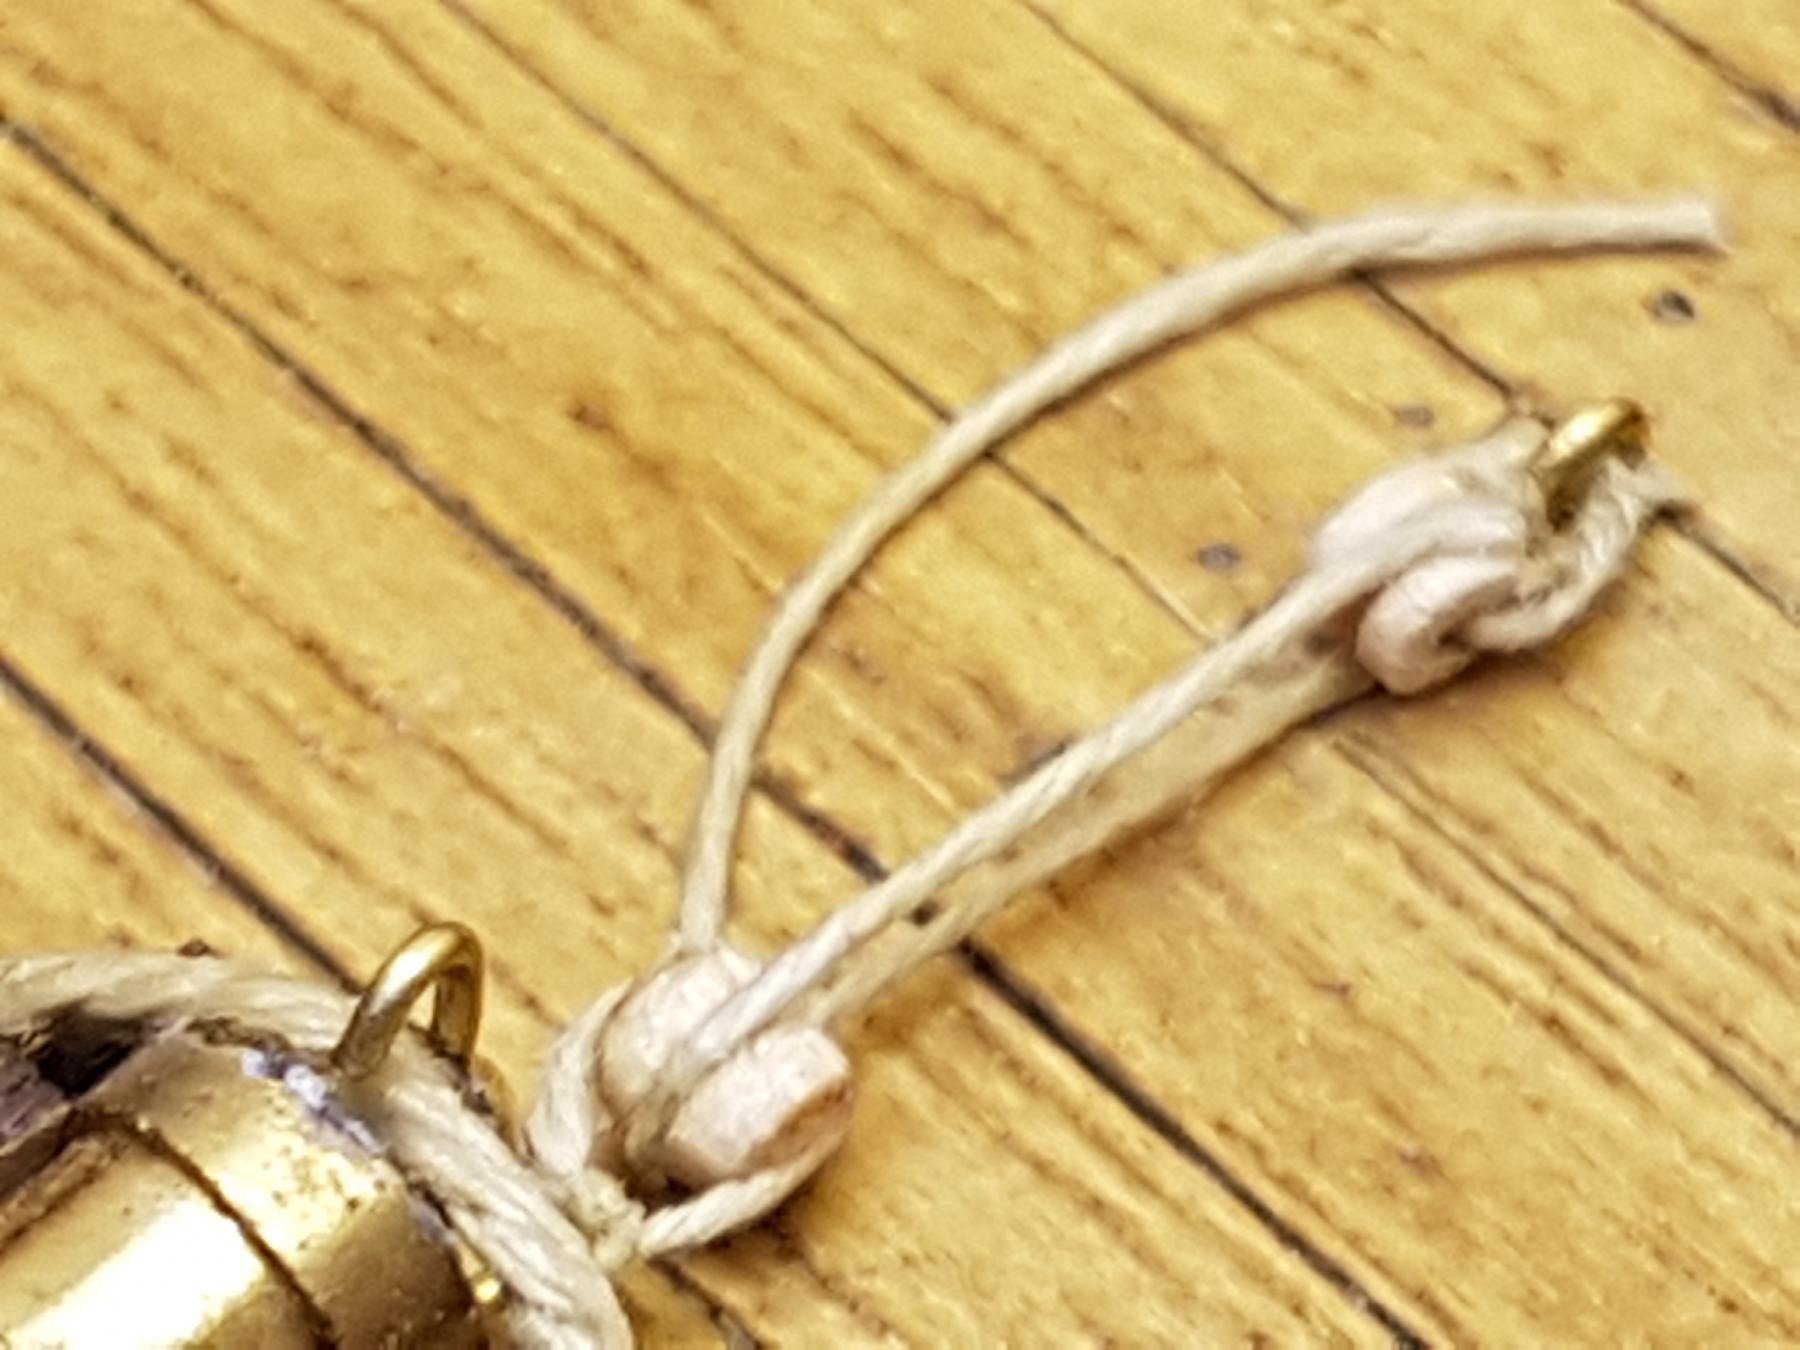
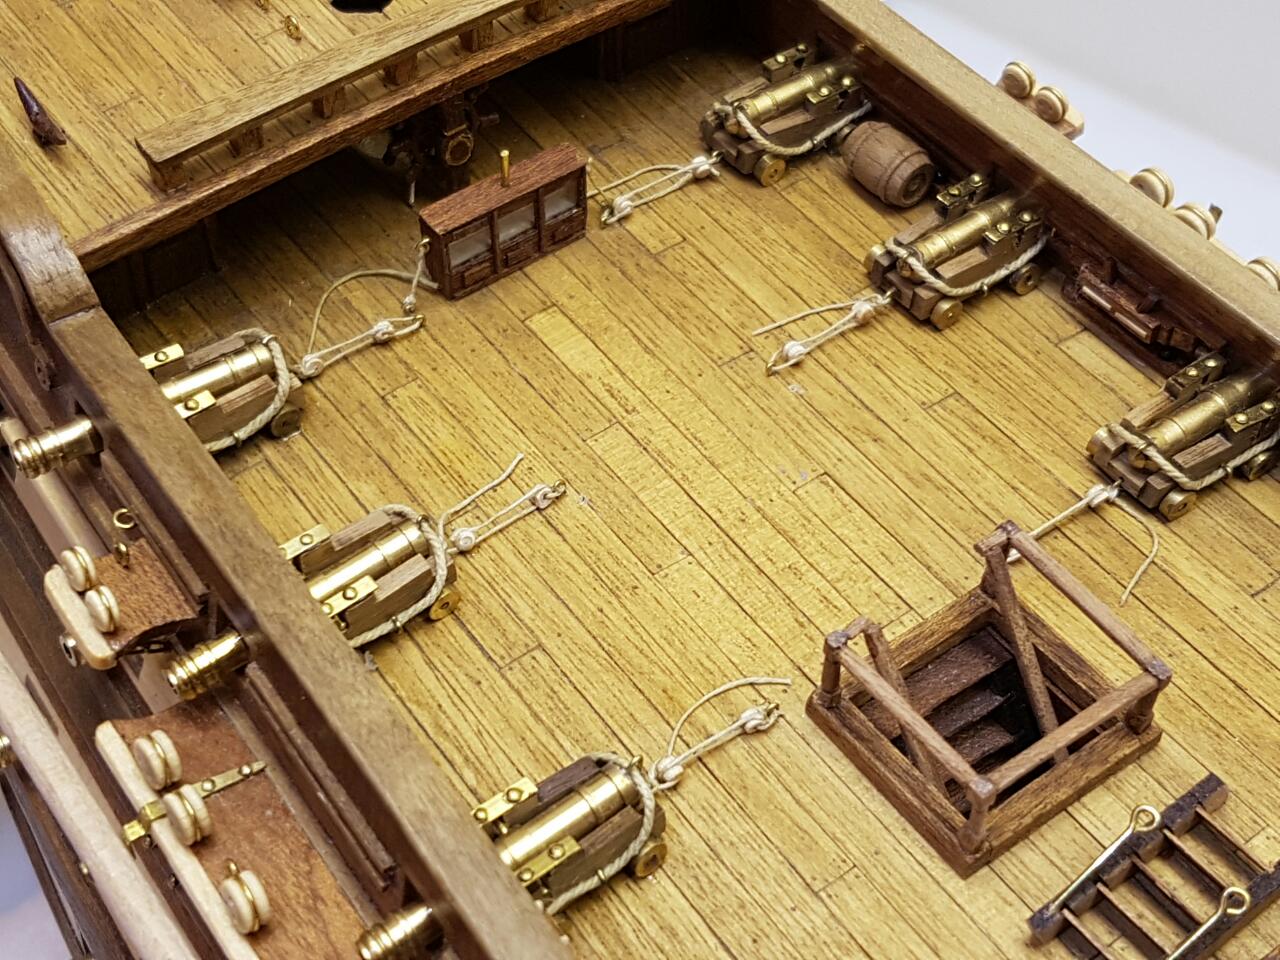
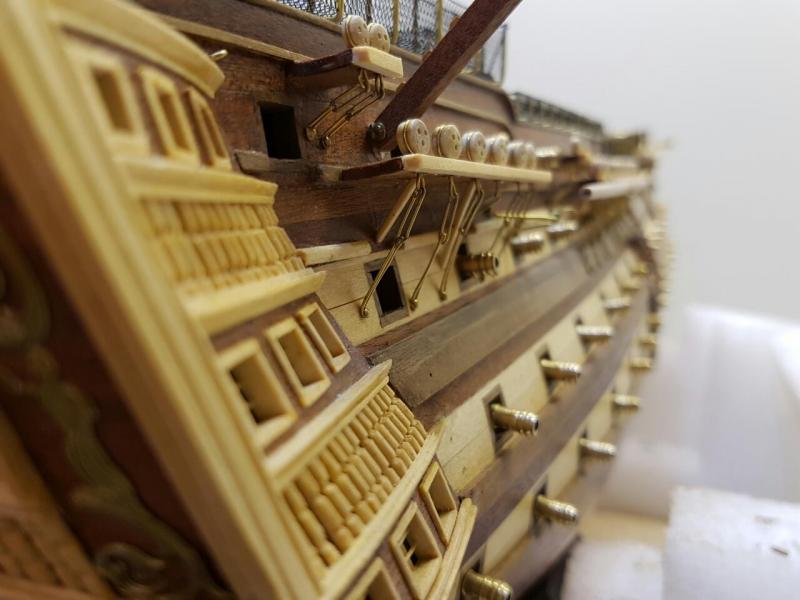
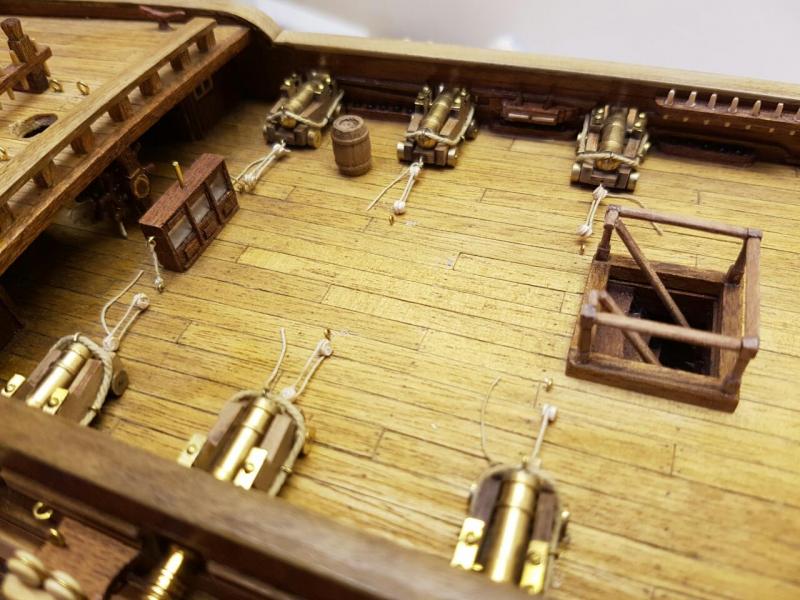
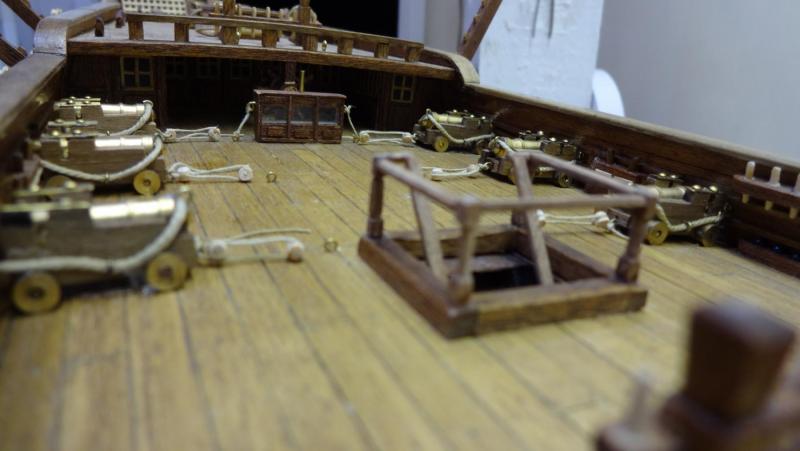
I have finally rigged my last canon. That's right and anyone reading my build log will know I've passed this of for over 12 months and the lower picture is showing my last tie to make them complete.... I know I have the two upper deck canons to instal after a little reseach to find how they were held in position. I now have my stairs ready and beams cut but need to turn the pillar which will support them.

- 708 replies
-
- 4
-
-
- victory
- constructo
- (and 1 more)
-
Well I have been routing around the site today and to be honest I have been off the hobby a lot this year only popping in now and again but I have done some catch up today on others work and shocked is the word OMG as the youth of today say, Can I just send you this cut from my site :- Thanks for the detailed build log Paul - I'm getting this kit for christmas from the wife and like you, I've never made a wooden ship either so the info in here will help immensely! I don't for a minute believe I'll get mine to your standard but at least I know what is possible from the kit!# You sent this 17th November 2015 and have passed my build stage and I started mine in April 2014 ( Ok a few breaks here and there ) but incredible how much you have done and its looking stunning... glad she is a naked version too. Well what ship is the wife getting you this year when that's completed Well done
-
Mike, behave, rigging another already after the Victory you finished....You fancy a trip to the uk to rig mine... Well I have fixed the first bank of canons to the decks now 16 months after avoiding them, just a few additional ropes to be added. I have also fitted the platforms upto to poop deck and made the stairs to be fitted but not took any pictures yet. I had to make my canon blocks as the stock ones I looked at were just too big

- 708 replies
-
- 2
-
-
- victory
- constructo
- (and 1 more)
-
This is beginning to hit home as the canons draw to completion
- 708 replies
-
- 1
-
-
- victory
- constructo
- (and 1 more)
-
Cheers Mike,,,, To kind. Oh! I hope the ships are still being built by yourself as I do recall the Victory was to be your last, hope there was a change of mind. Nigel, Again, thank you, I'm sure you have been informed by many but get yourself an army of books for reference material, there is only so far a plan and basic instruction book can guide / show you. I know I have beat up on Constructo from time to time in my topic but somethings they messed up on were quite big, if the accuracy is wanted. There is a lot of scope for additional detail on these kits but this is entirely at the builder discretion and bear in mind much of it also gets hidden later on. When I started my wife was shocked when I said I wanted a ship to build, having never touched a model ship, I saw one when I was on school trip and remember thinking how stunning a model a ship was, Well I just think there the nicest looking model sat in any environment. The dream kit for me is the Caldercraft version, larger in scale better by design but its what you pay for and I did not justify the cost of that model to cut my teeth on. So many abandoned kits on that popular selling site. Enjoy it, don't rush it, When it gets on top of you, stop! make a brew and have a break, it will look different after. Well look at the gaps / breaks I have had during my build, It is always going to be there when your ready to pick it back up.... Make sure you keep us updated on here too. Paul Any issues you hit just shout
- 708 replies
-
- 3
-
-
- victory
- constructo
- (and 1 more)
-
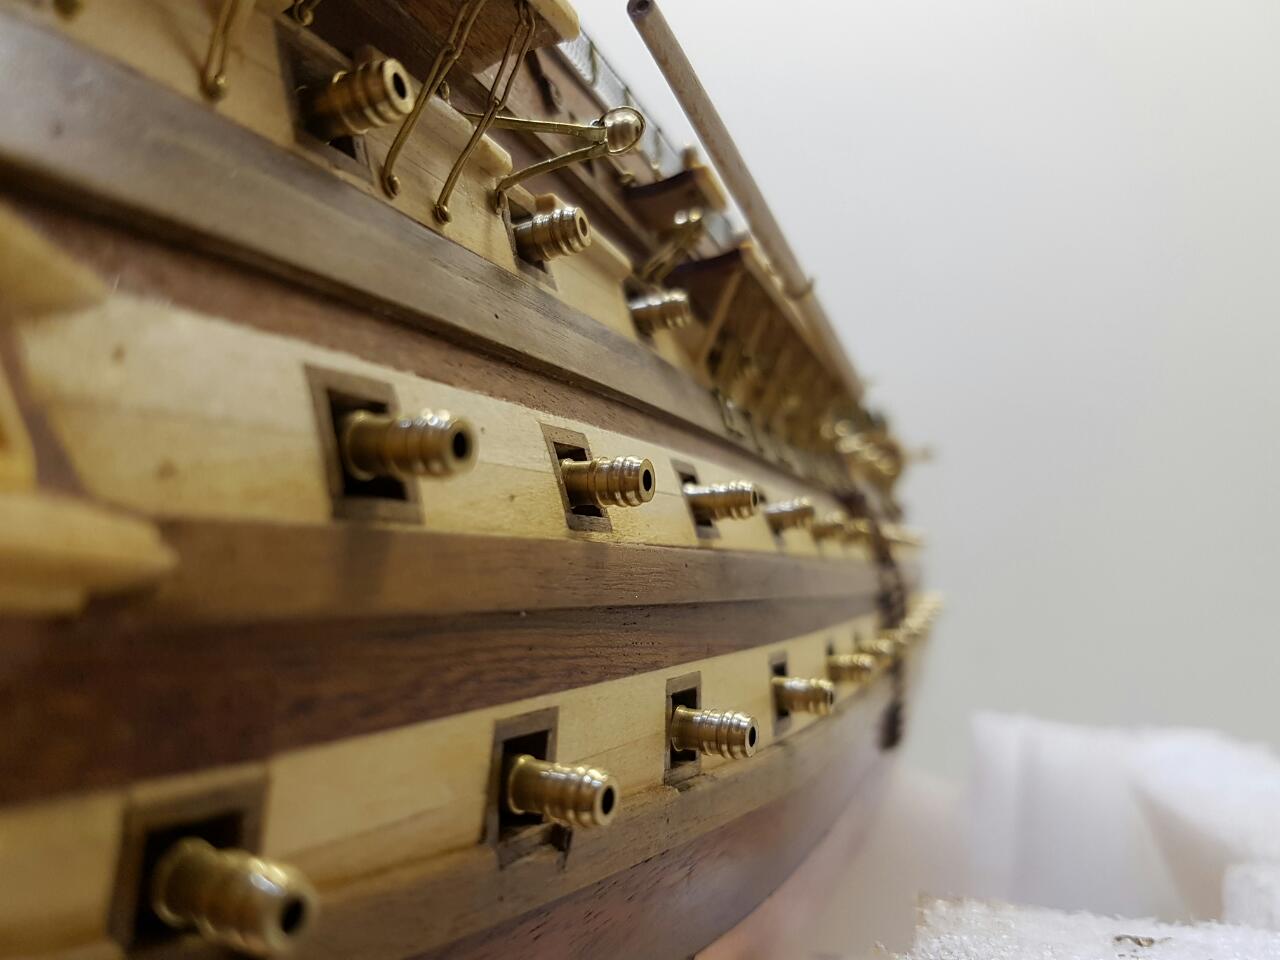
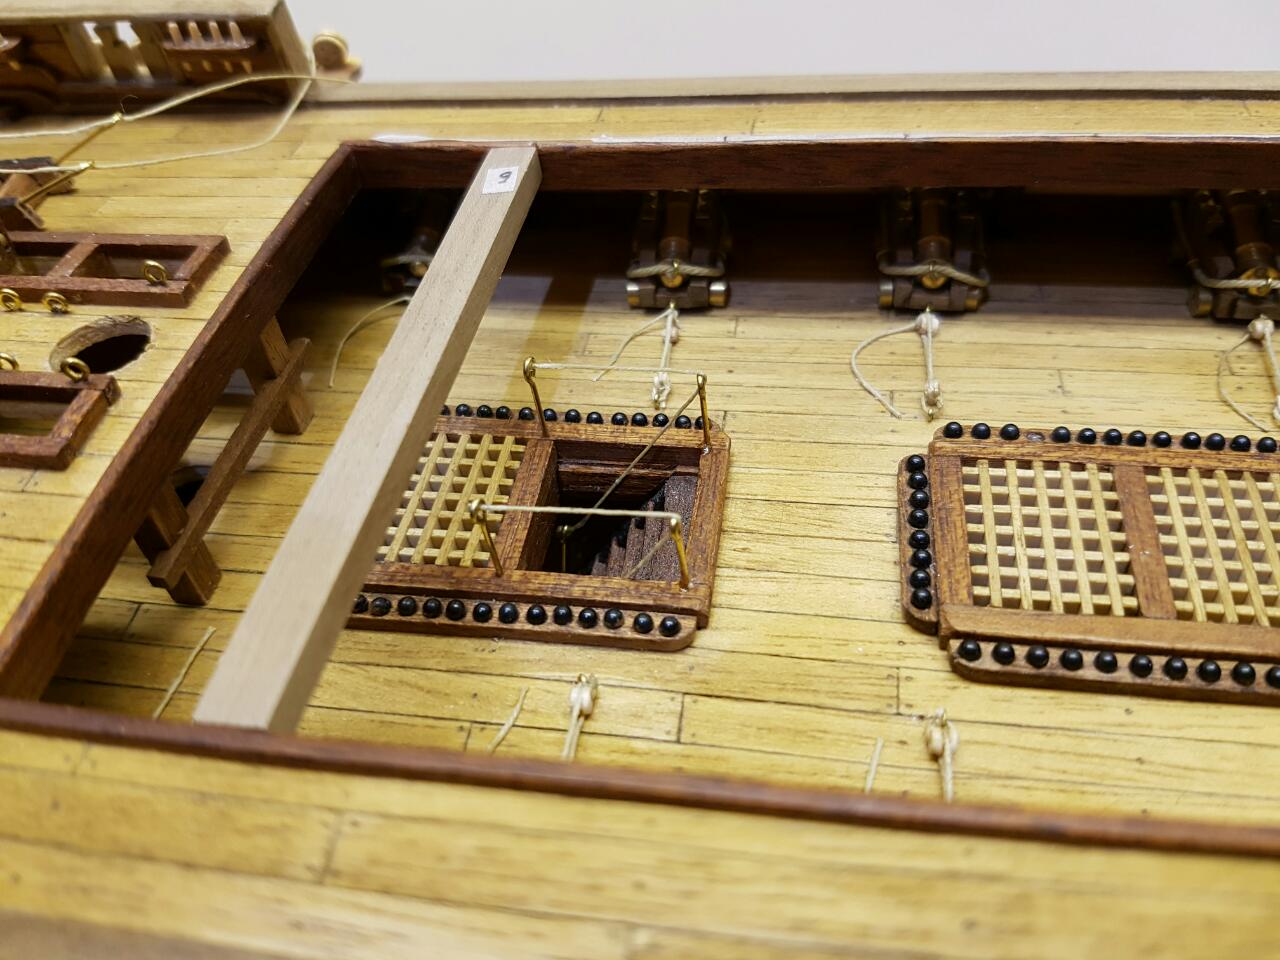
Well I have spent the last 12+ months avoiding this process and I have finally made a start on the canons.... yes rigging the canons... I was doing the stairs and rails but found the Constructo diagram falls short on the brass eye bolts part 242 there are more on the real ship, so I am waiting for more to be delivered...
- 708 replies
-
- 2
-
-
- victory
- constructo
- (and 1 more)
-
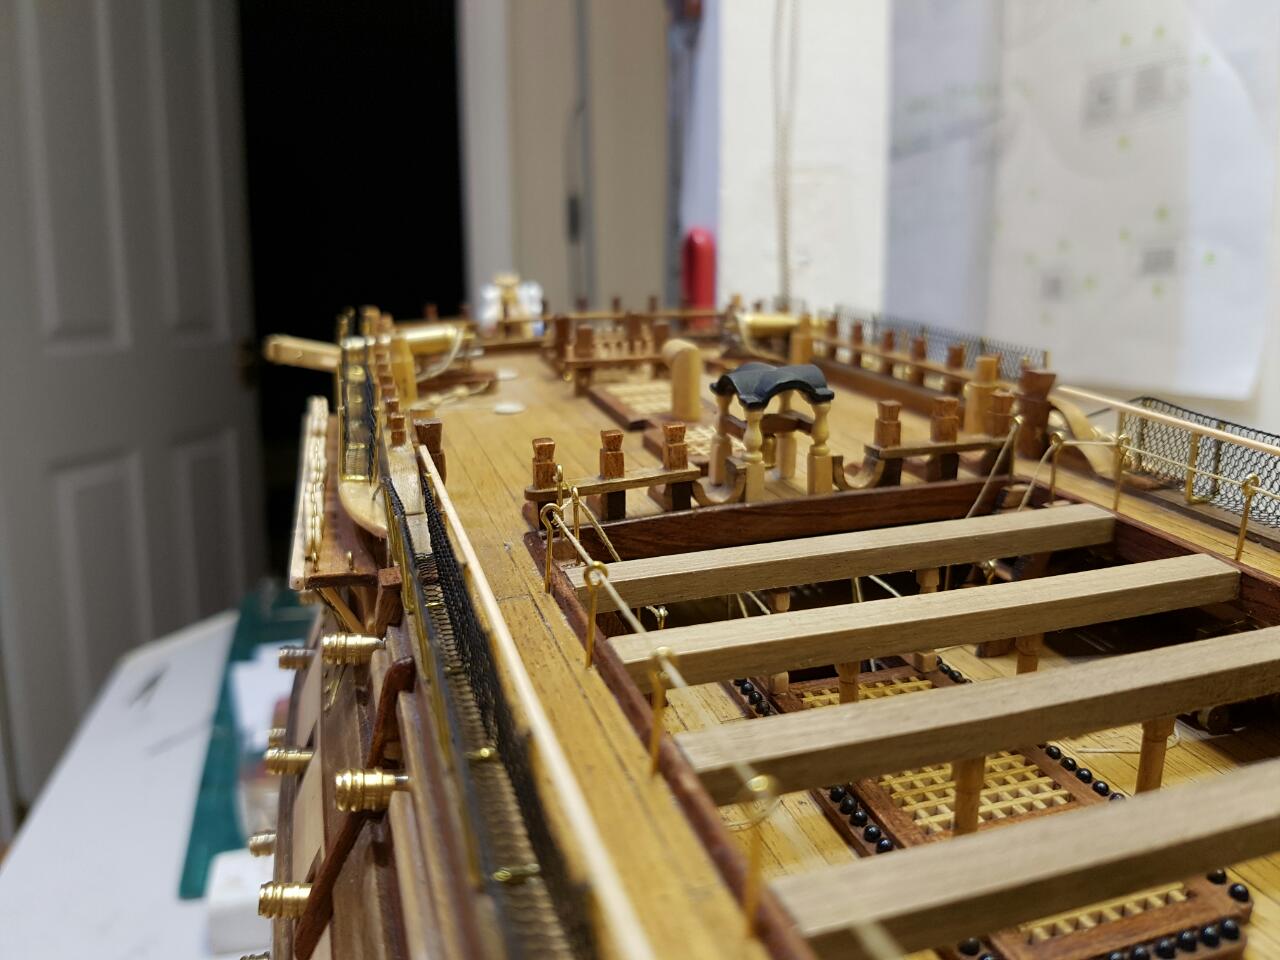
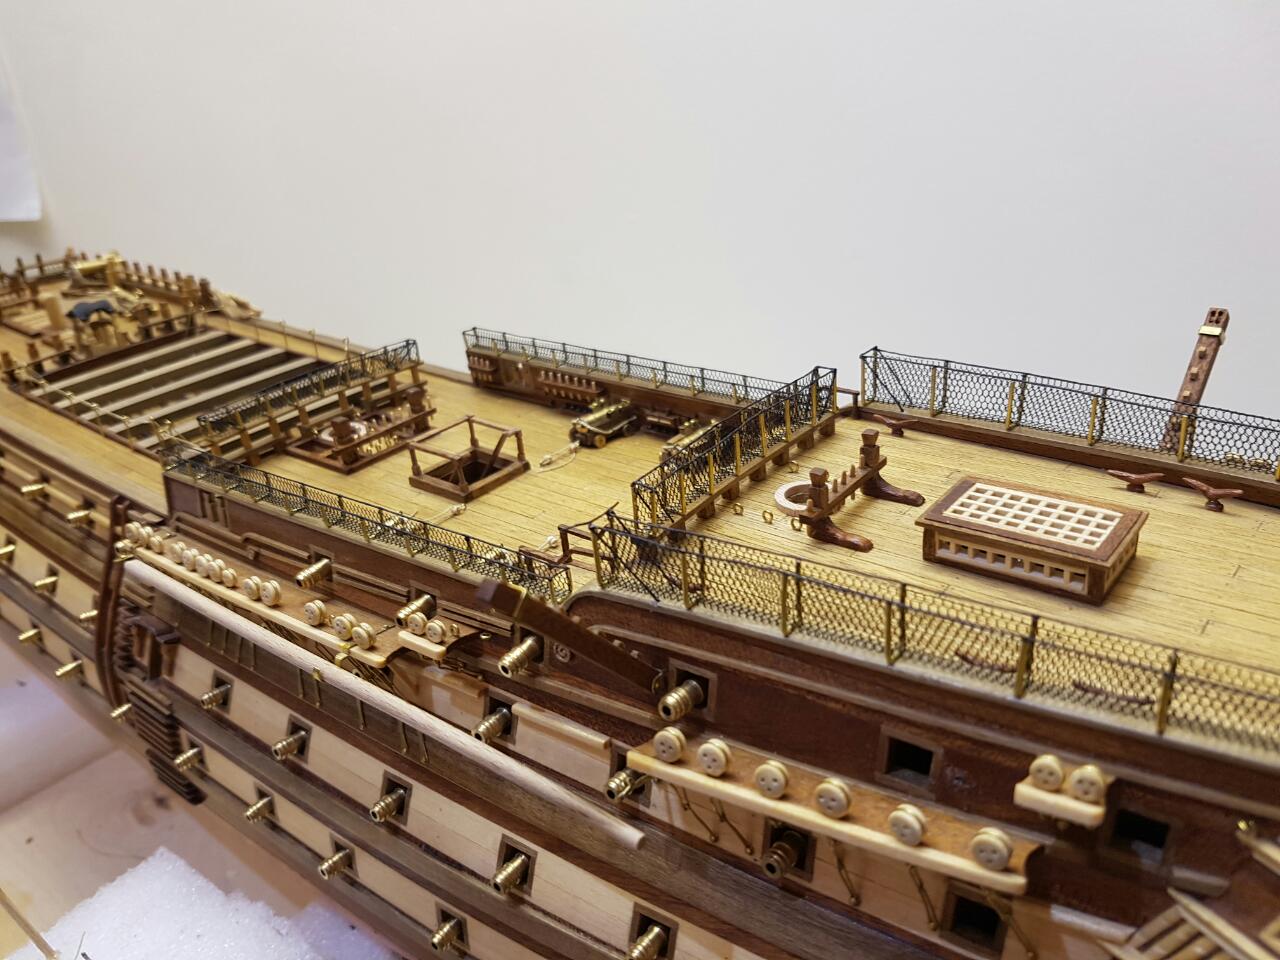
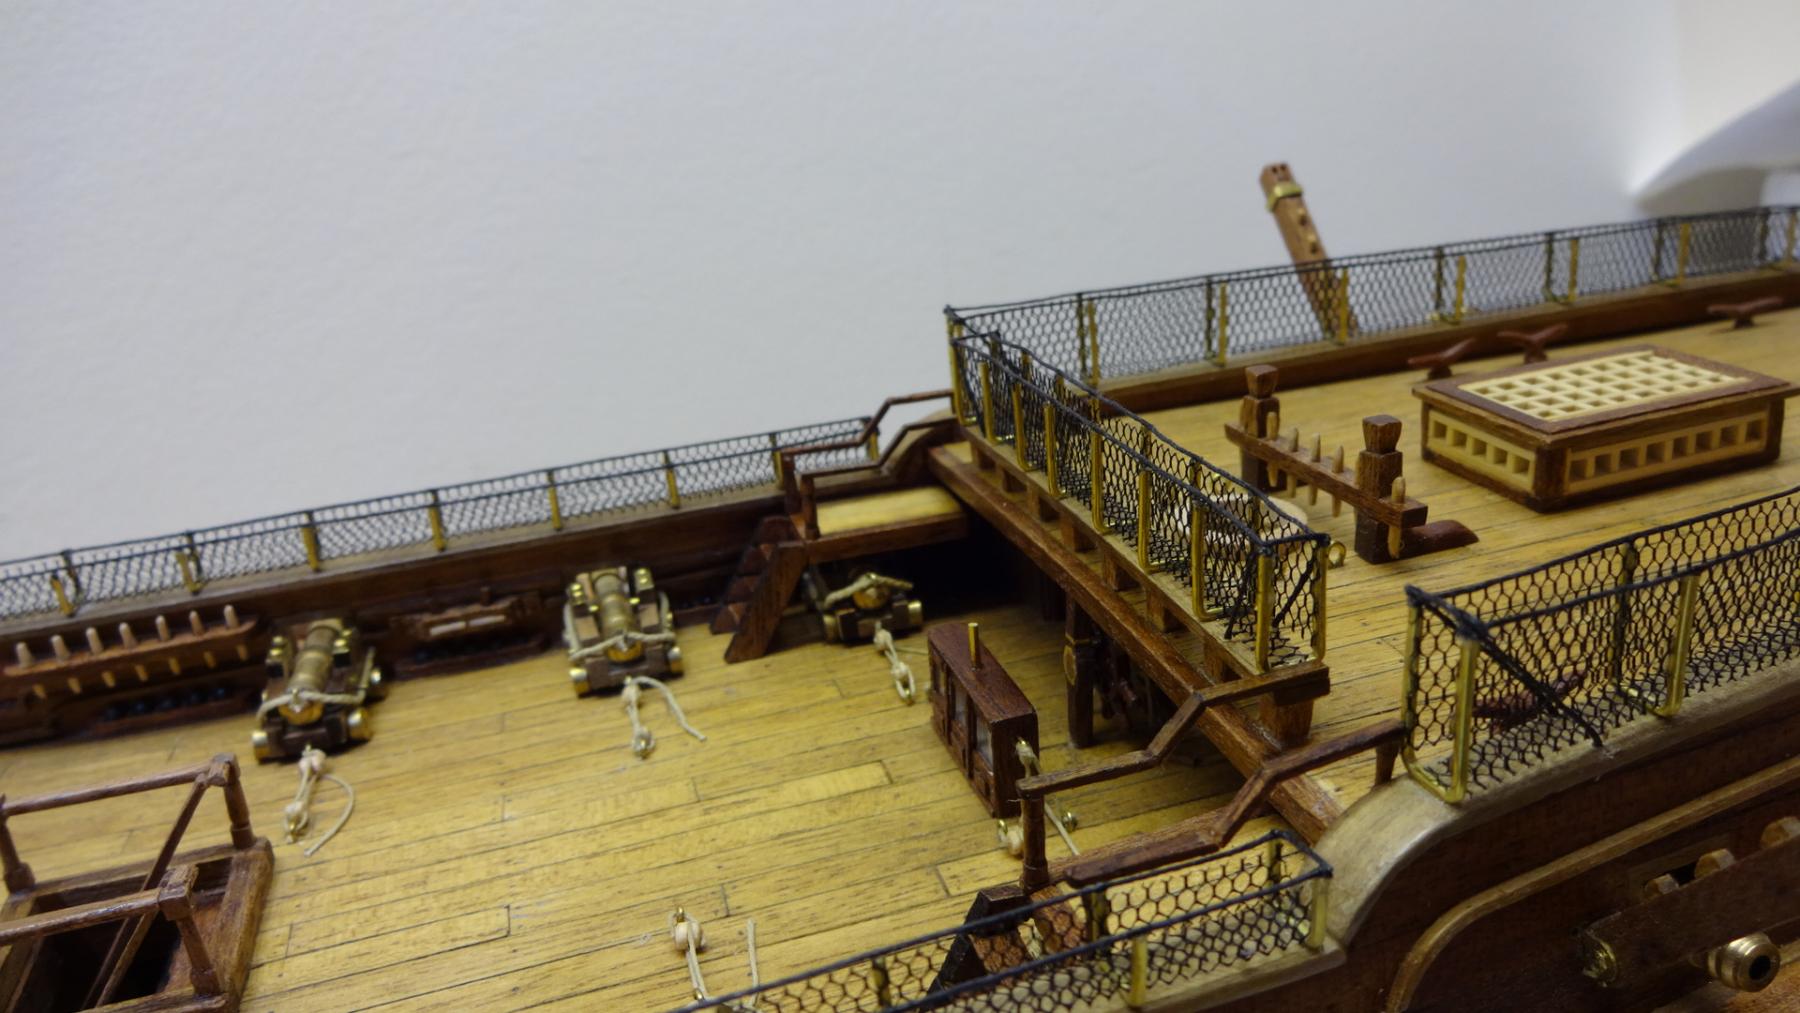
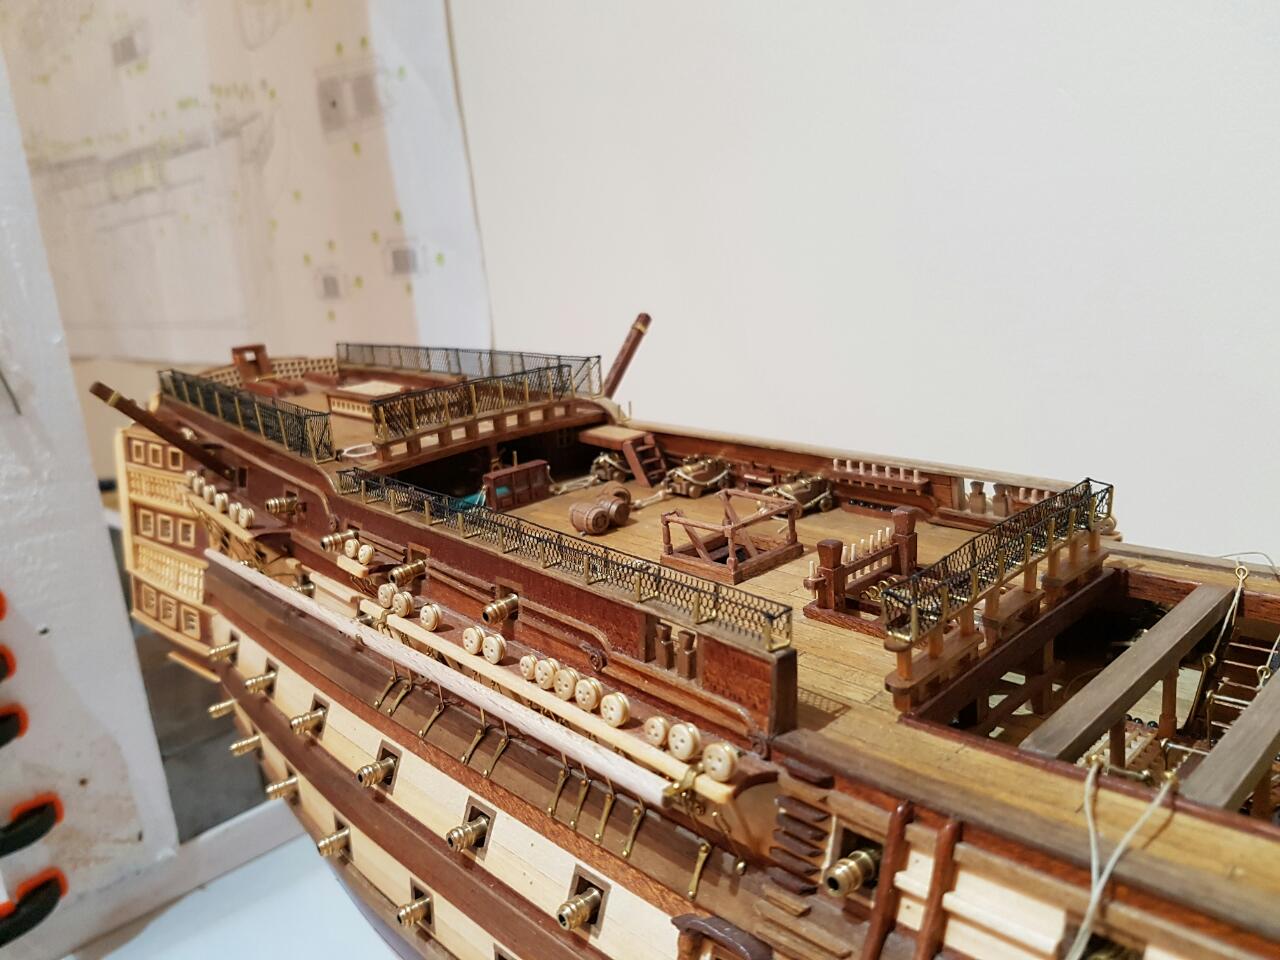
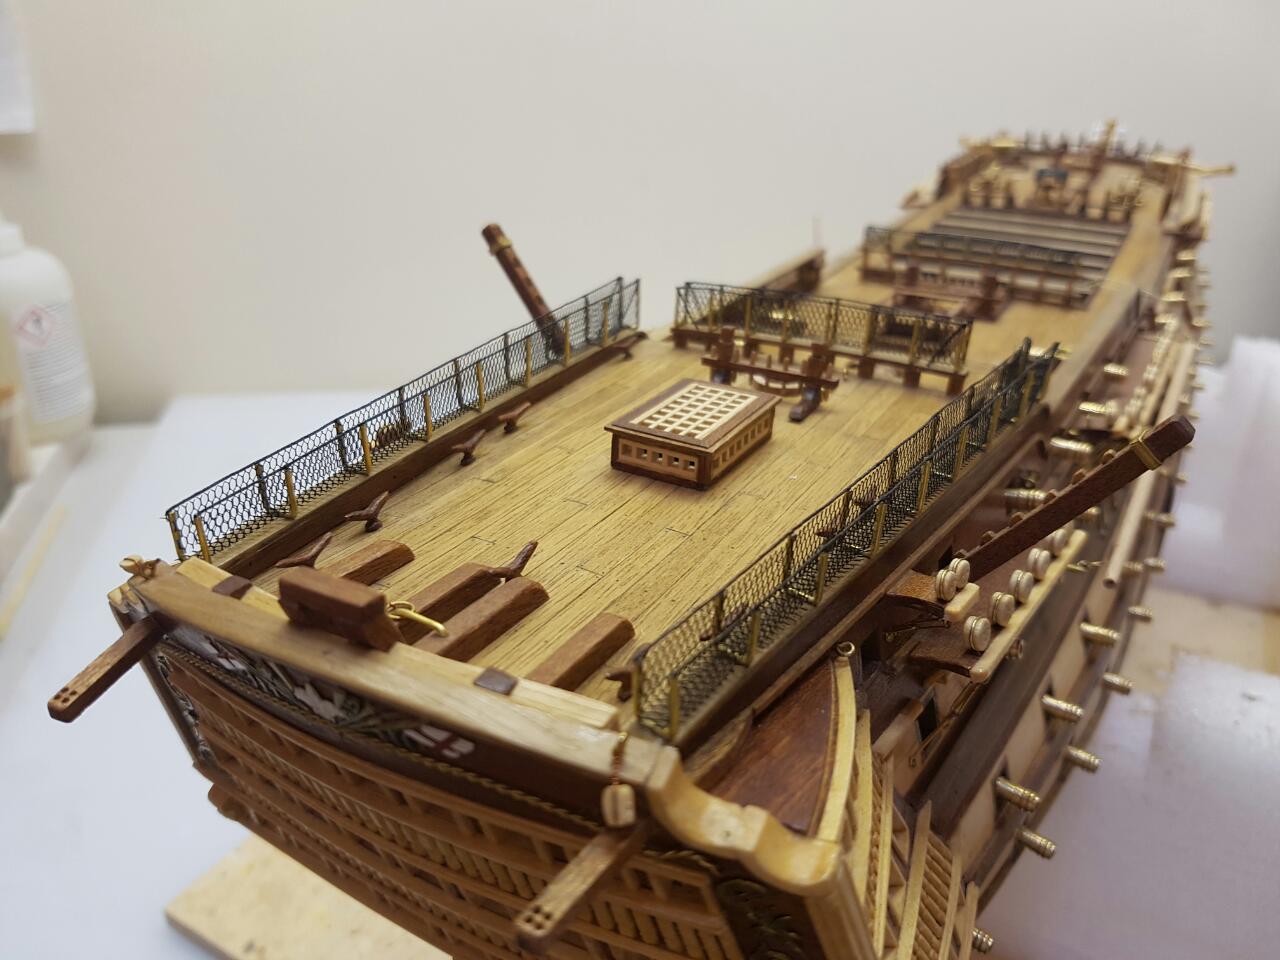
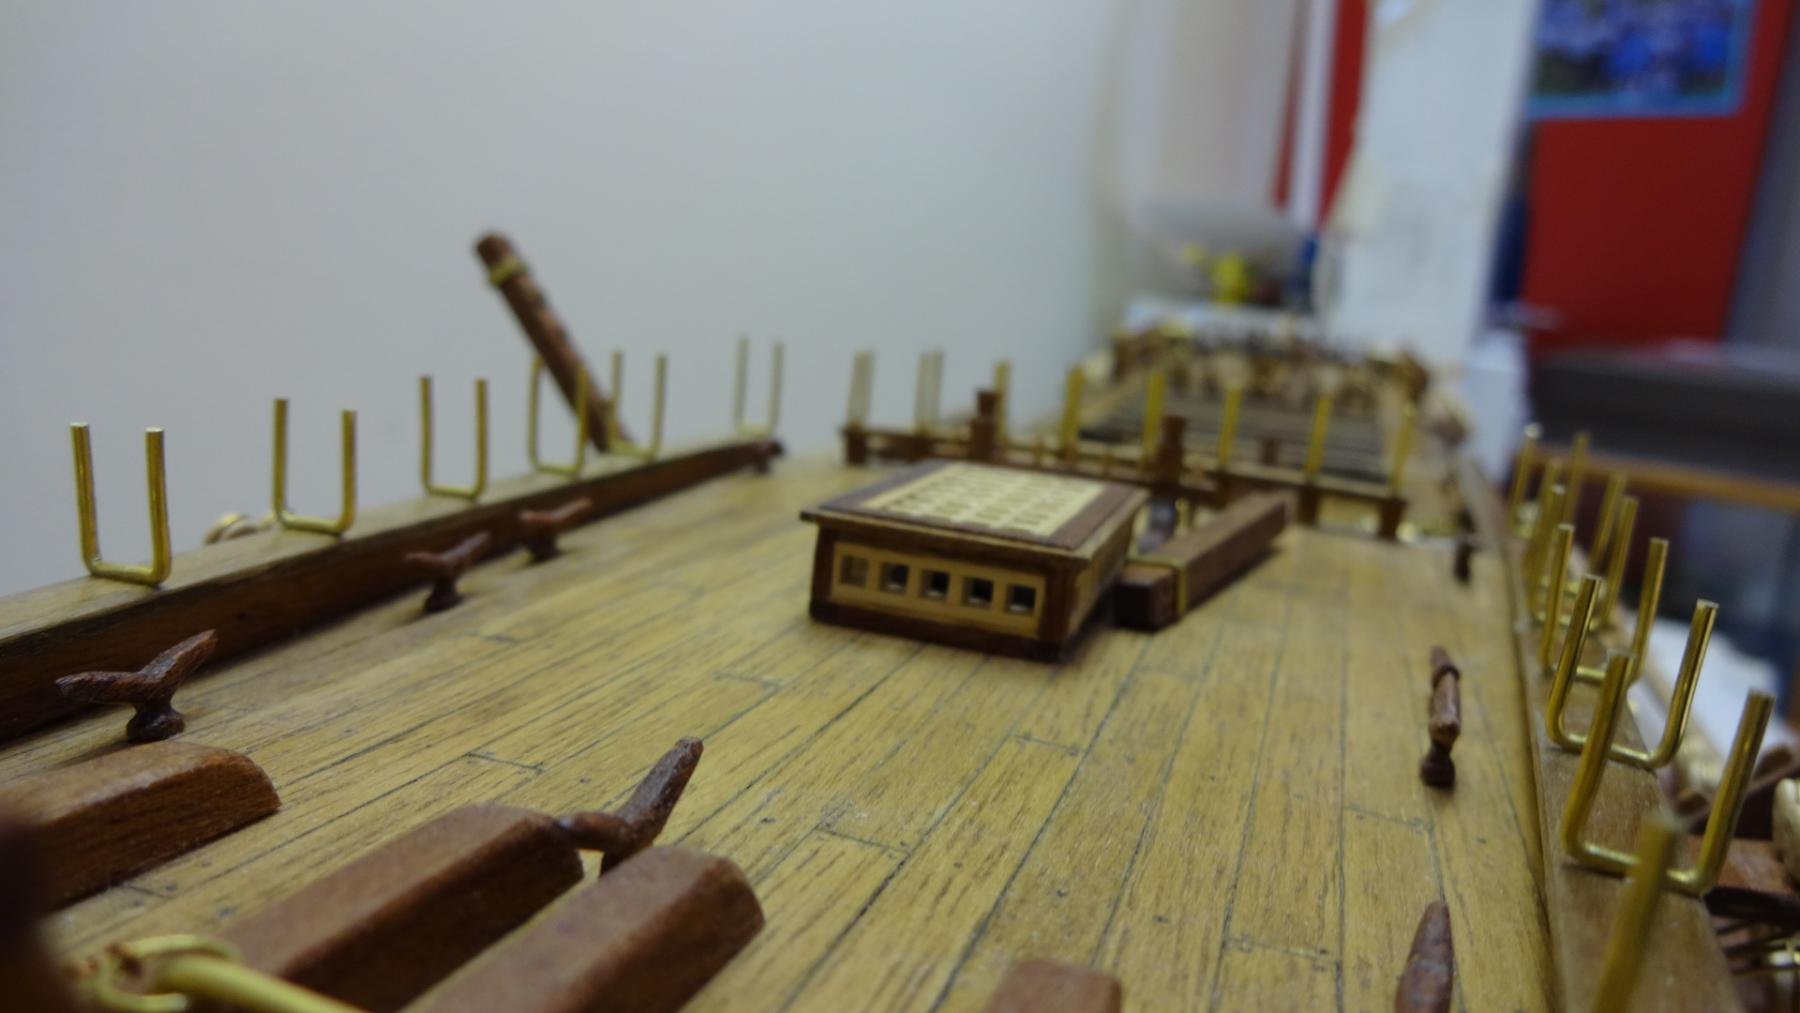
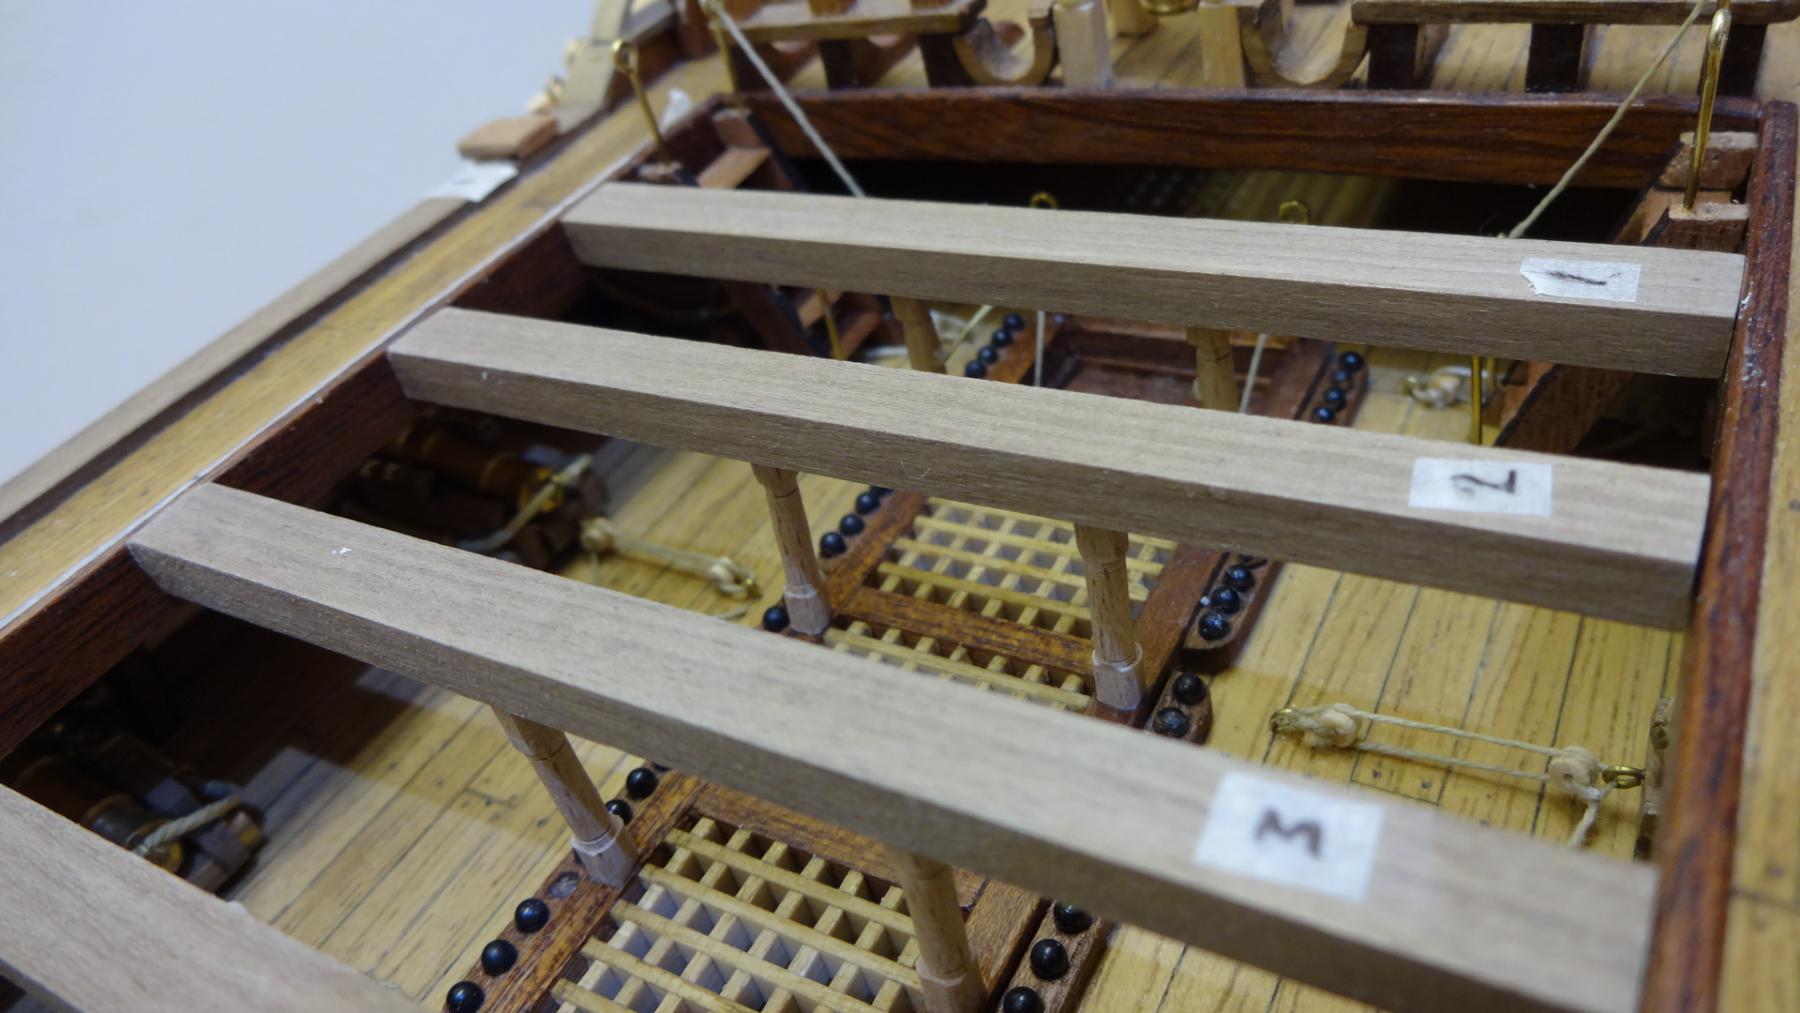
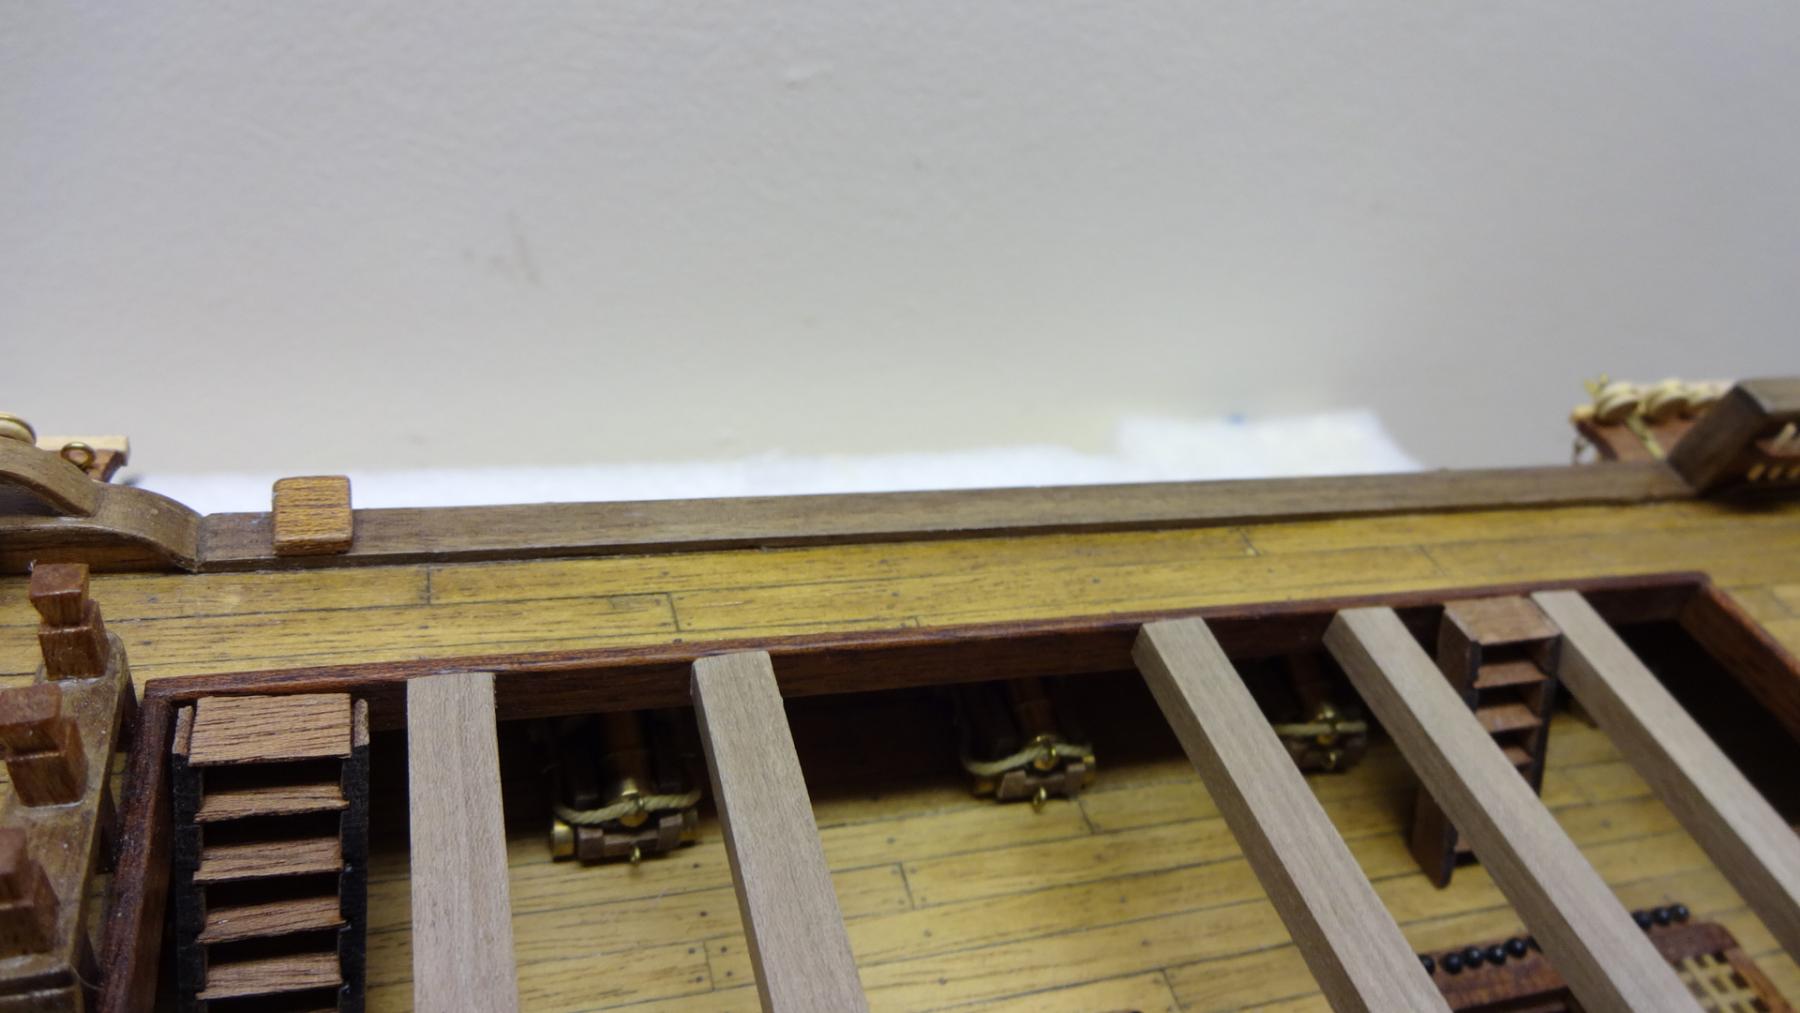
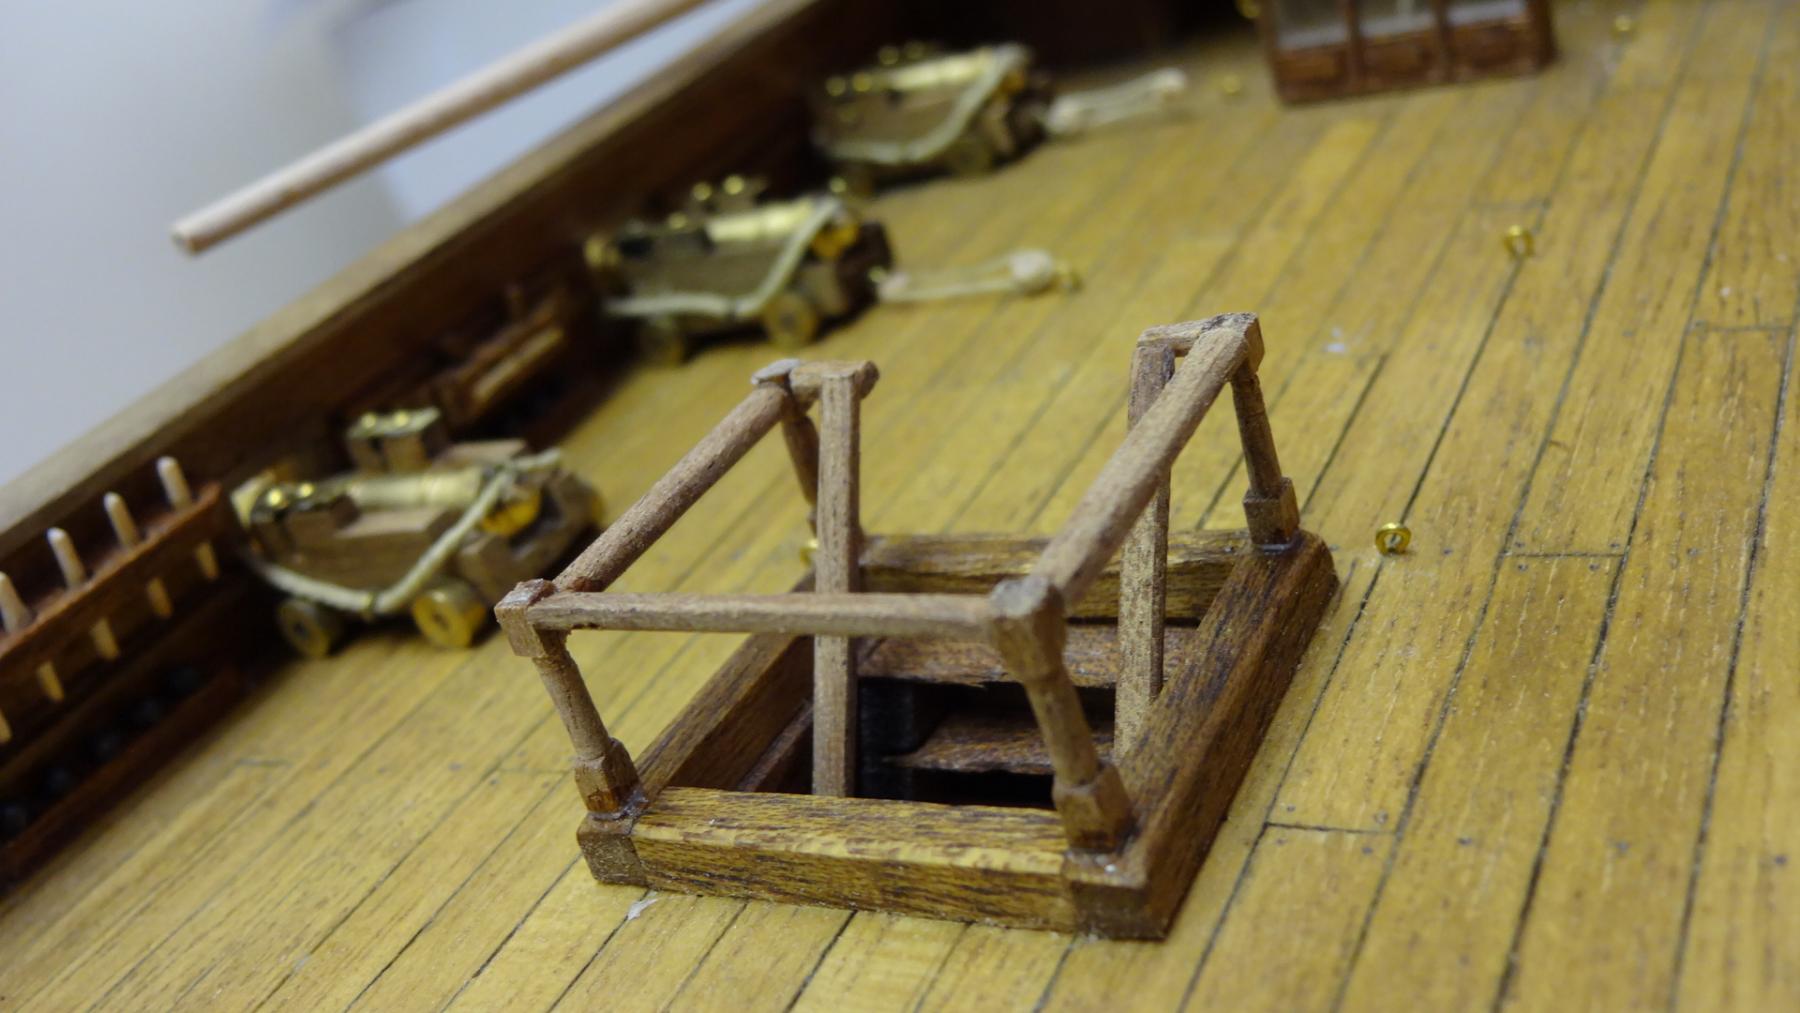
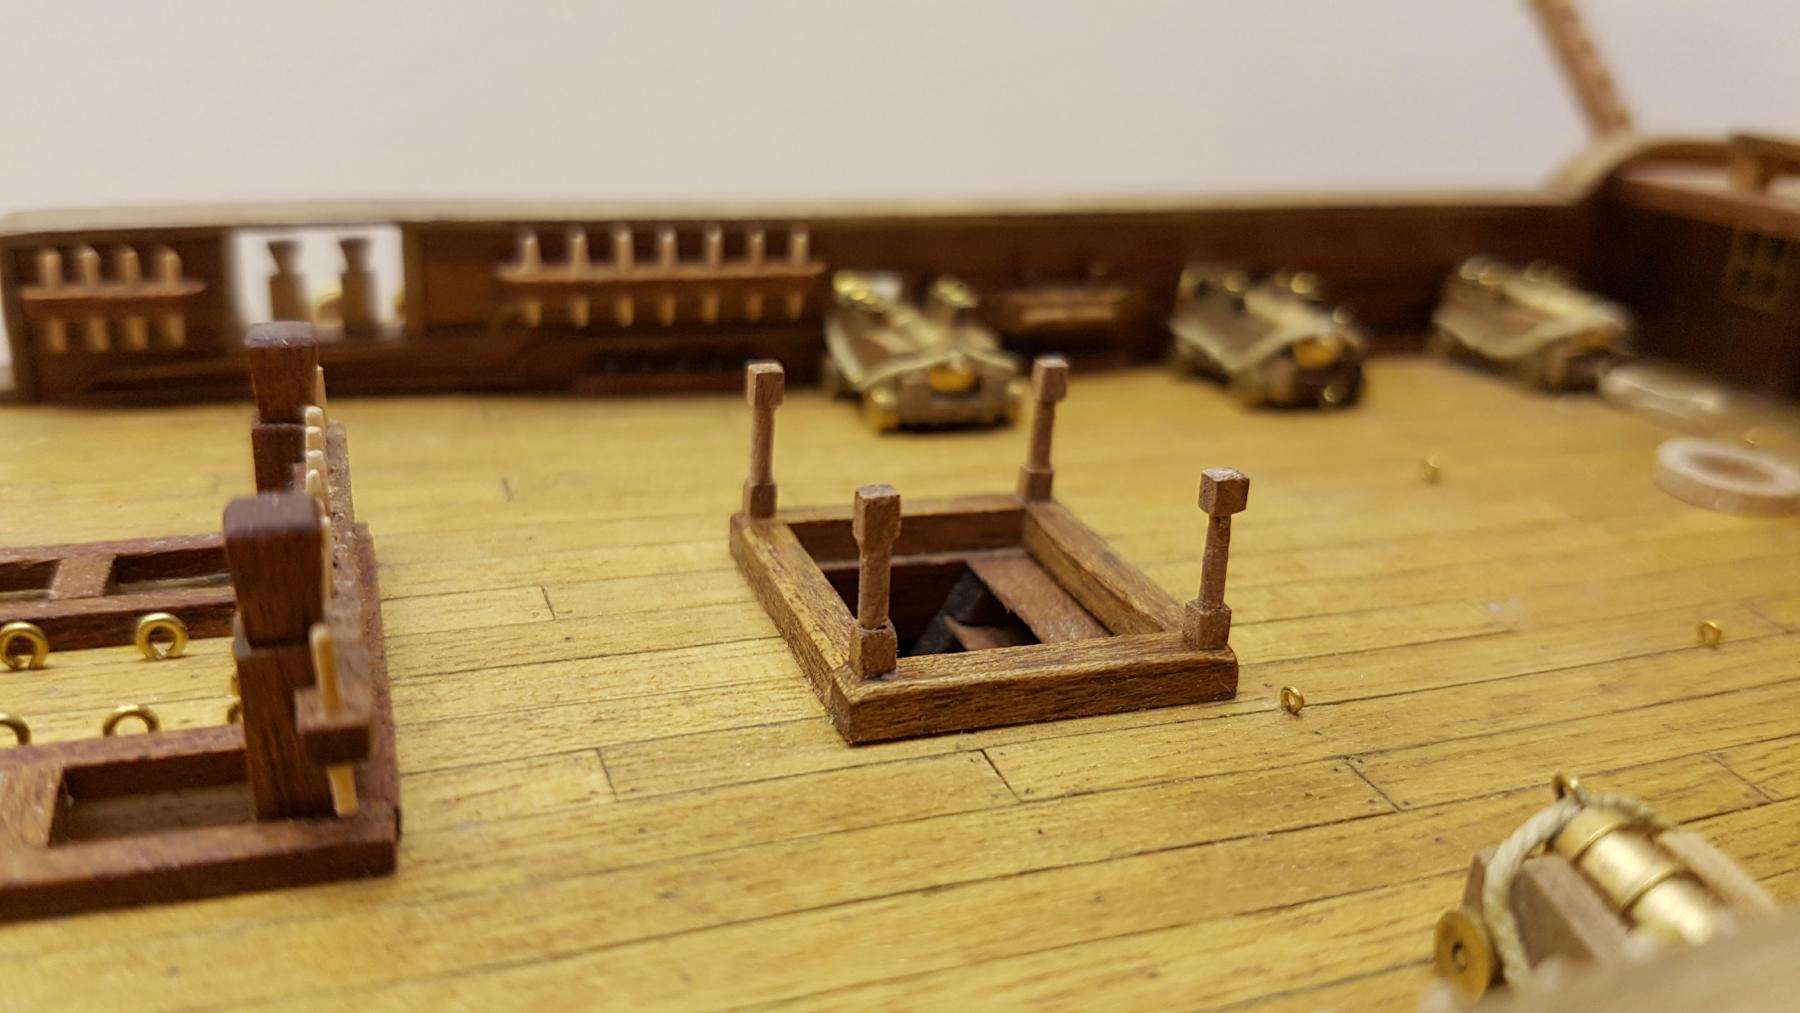
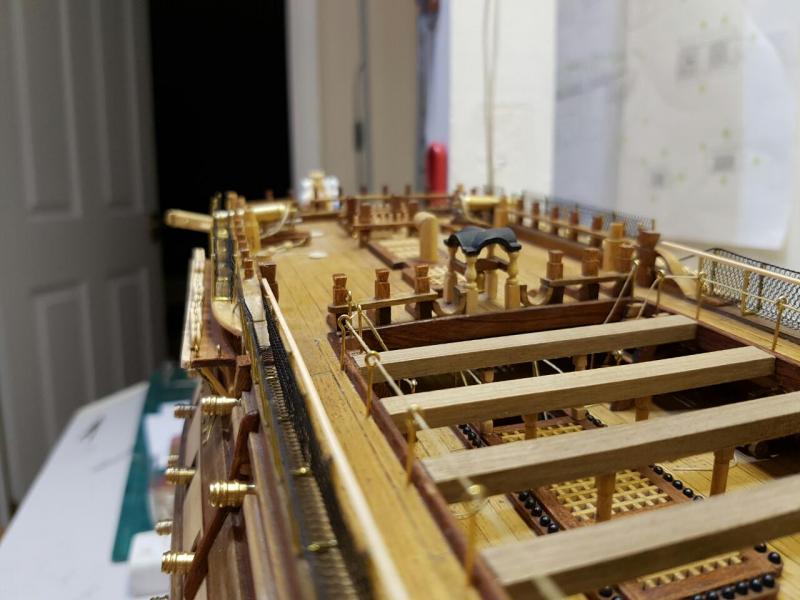
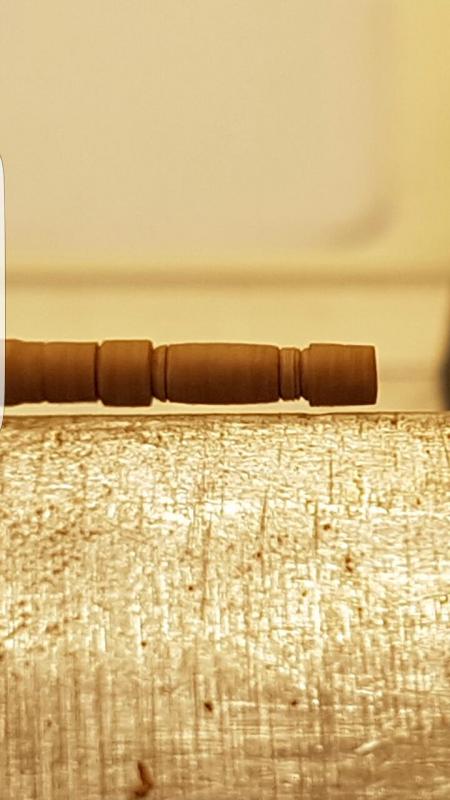
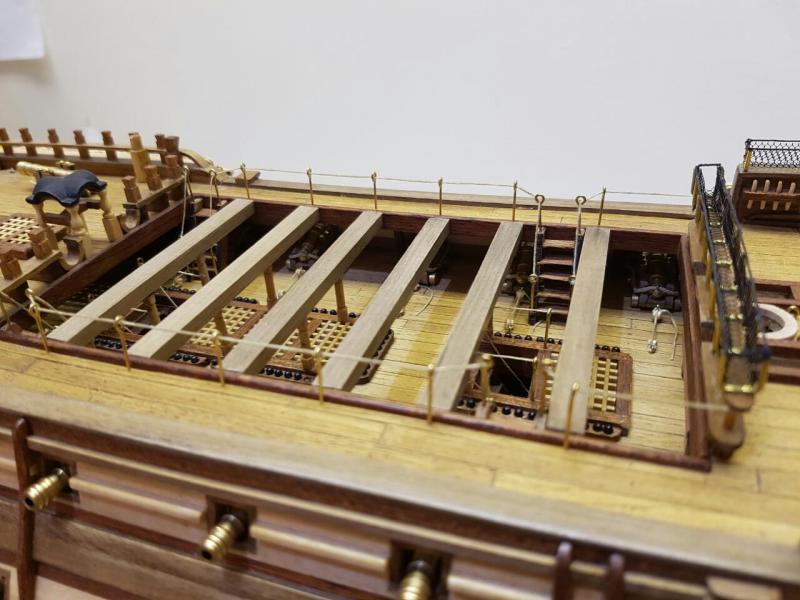
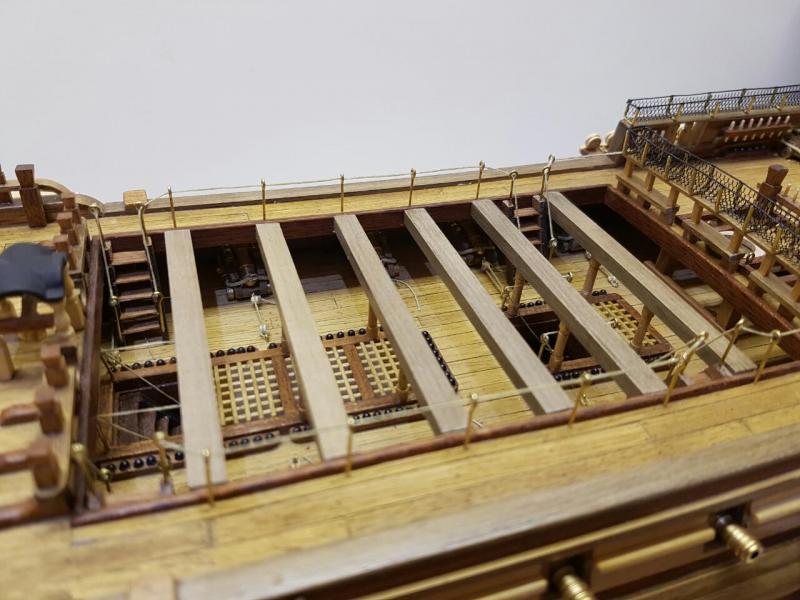
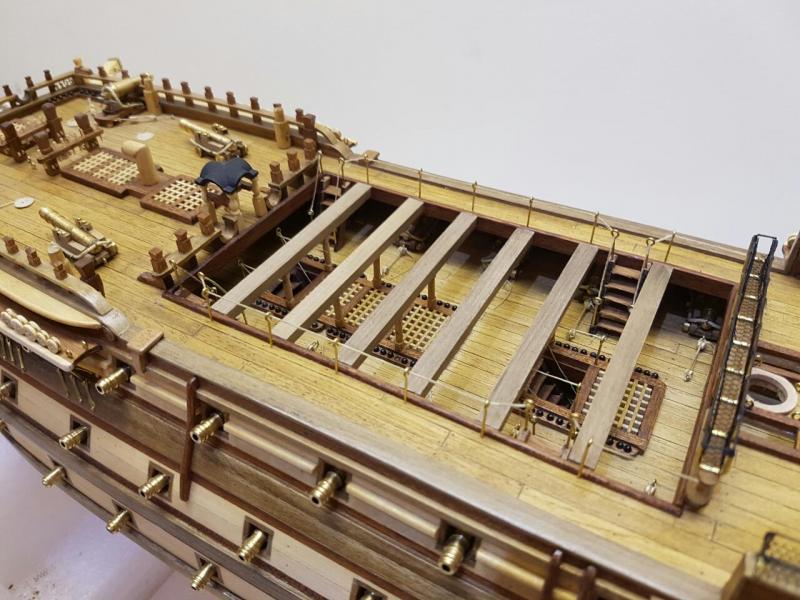
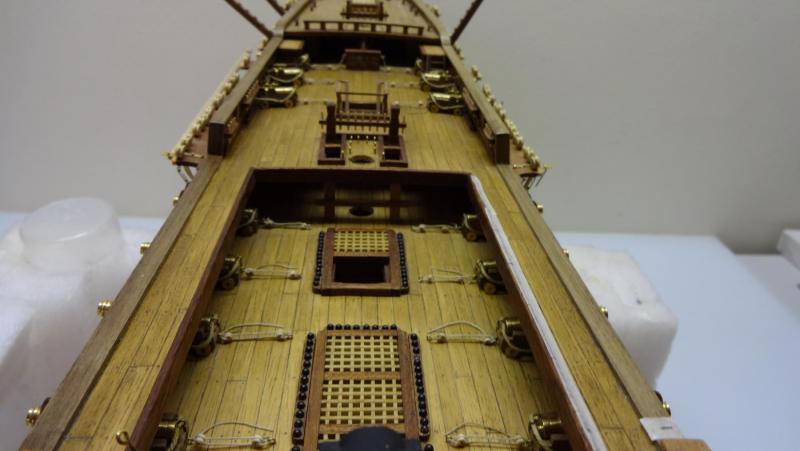
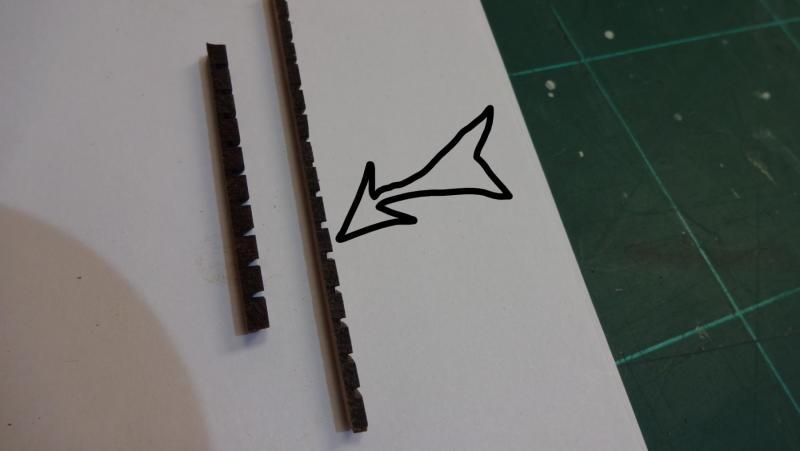
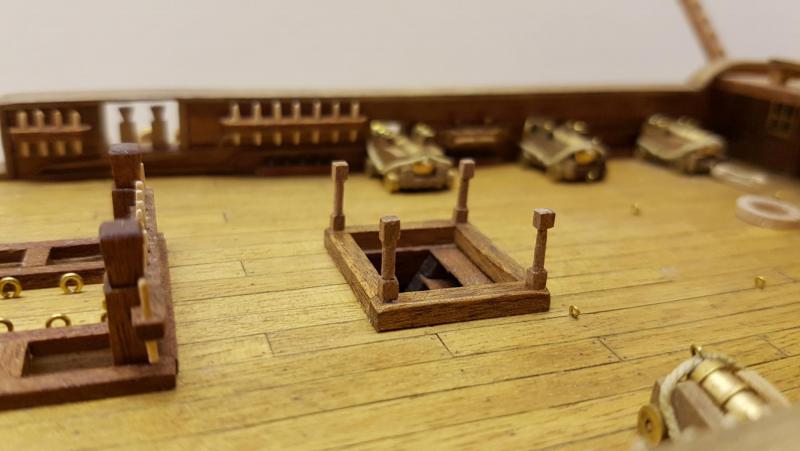
Well its getting cold outside and flying a drone in that weather is proving too chilly so the ship gets some attension.....I am still adding the deck detailing prior to the fitting the spars and tackling the rigging..... Please note if your behind my stage and are building this same kit because the instructions don't bother to do this, when making the stair runners ( see picture ) make them narrower( arrowed thinner one ) than they were for the stairs dropping to the lower decks, These stairs are a lot thinner in total diameter and will be out of scale using the runners at the same thickness as the other stairs and at the kits standard supplied thickness.....Oh and also the stairs in the kit are in the incorrect position. ( Whoops Constructo, not again ) NB, I have not fitted my stairs yet but just positioned for a photo to help explain the below.... The stairs dropping from the upper deck to the middle deck are not in the correct position on the plans, The stairs towards the bow are ok but the sets to the aft of the ship have been put in the same opposite position as the bow but they should be between the fifth and sixth beam, Taking beam one being from the bow end.... see pictures and all will be clear.

- 708 replies
-
- 3
-
-
- victory
- constructo
- (and 1 more)
-
I know, I know slow progress but hey there's no rush. ( blame the drone ) Well I have completed the stair handrails now, well one of them, still to sand and varnish but generally completed, this was supposed to be fitted by constucto using brass loops and a bit of string.... I have to finish all the deck stuff now before I can start the rigging and fitting of my completed spars....

- 708 replies
-
- 3
-
-
- victory
- constructo
- (and 1 more)
-
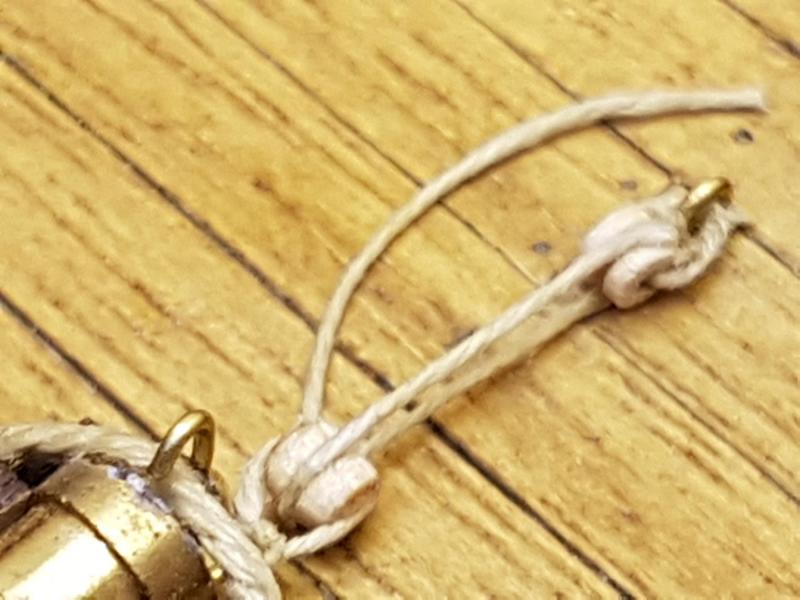
Still here, still visiting the ship room albeit not enough. well I was not happy with the kit using brass eye loops for post and a bit of twine for the hand rail... shame as there is some loveley detail in areas but this was a constructo bad day. Clearly my rails are work in progress.

- 708 replies
-
- 6
-
-
- victory
- constructo
- (and 1 more)